Beginners Guide to Building SQLite GUI Applications Using C# (Csharp) and WinForms
by xanthium-enterprises in Circuits > Microsoft
1380 Views, 0 Favorites, 0 Comments
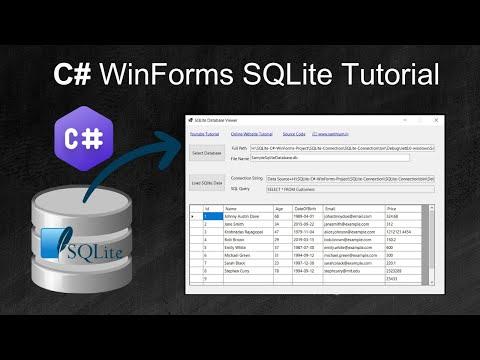
Beginners Guide to Building SQLite GUI Applications Using C# (Csharp) and WinForms
 Tutorial for Absolute Beginner)
In this Instructable ,
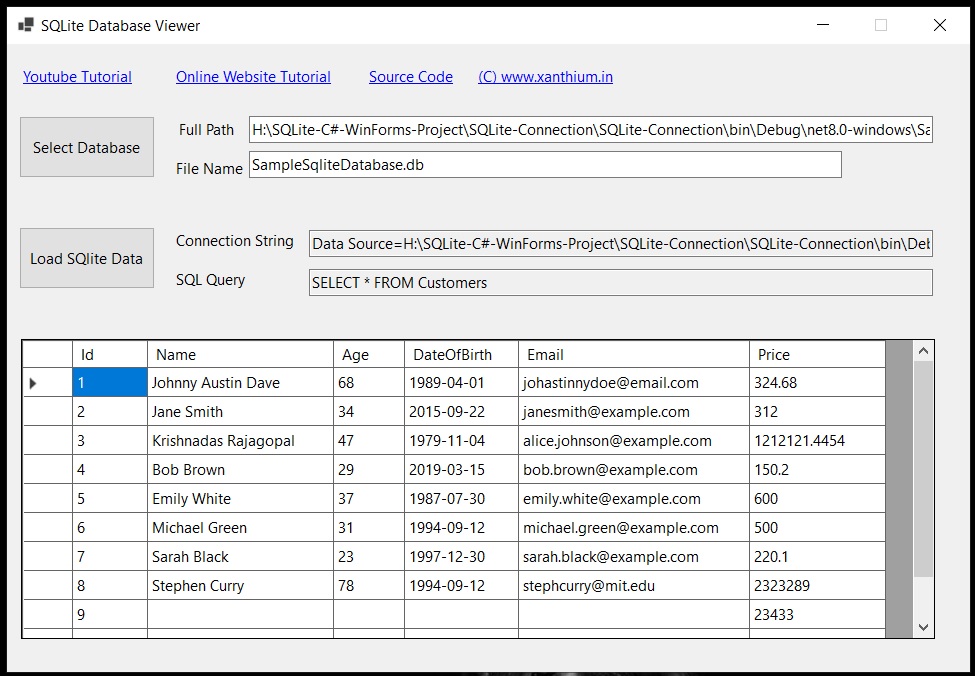
You will learn how to read data from a SQLite database on disk and display it on a Windows WinForms Application in a tabular format. This form of application can be used to visualize or manipulate the data gathered by a sensor system in a human friendly way.
The Original Article along With Source Codes can be downloaded using the below link.
Looking for SQlite 3 Database Tutorials in other Languages like Python or Java. Check the Below Links
Supplies

This is a purely Software based Project. All the things required for our project can be freely downloaded from the Internet.
We will be using Visual Studio Community Edition to develop our Code as it has an easy to use Drag and Drop GUI builder which helps in Rapid Application development.
Download Visual Studio Community Edition from Microsoft Website
Basic knowledge of C# and WinForms API is needed.
Basic knowledge of How to connect with SQLite Database and Read/ Write data to it using C# is required.
You can also use DB Browser for SQLite to Visualize data in your database during debugging purposes.
What Is WinForms ,Pro's / Con's and Future of API

WinForms (Windows Forms) is a graphical user interface (GUI) toolkit for developing desktop applications on the Windows platform. It is part of the .NET Framework and allows developers to create rich, native Windows applications.
Is WinForms Dead?
No, WinForms is not dead, but it is considered "legacy" in many circles, particularly as Microsoft shifts more focus to newer technologies like WPF (Windows Presentation Foundation) and UWP (Universal Windows Platform), and the more modern .NET Core and .NET 5/6/7/8 frameworks.
While it isn't actively being pushed as the future of Windows development, it still has a large installed base and remains widely used. Microsoft continues to support it, especially in .NET 5 and beyond, where WinForms has received updates for modern .NET versions.
Advantages of WinForms
WinForms is a Mature and Stable Technology and has been around since the early 2000s, and it’s a tried-and-tested technology. Many apps are still running on WinForms, and it's a stable choice for building applications.
The drag-and-drop designer in Visual Studio makes it easy to design UI layouts quickly. Developers can focus on the logic while the framework takes care of much of the UI complexity.
The Form Designer also help newer programmers concentrate on application logic rather than being bogged by UI code as in the case with WPF. It is ideal for Rapid Prototyping of Ideas and designs.
Disadvantages of WinForms
WinForms is designed primarily for Windows applications. It doesn’t support cross-platform development, unlike MAUI or WPF, which can be used to target multiple platforms.
Creating a WinForms C# Project in Visual Studio

To create a WinForms C# project in Visual Studio,
Once Visual Studio is installed and opened,
click on the Create a new project button from the start screen.
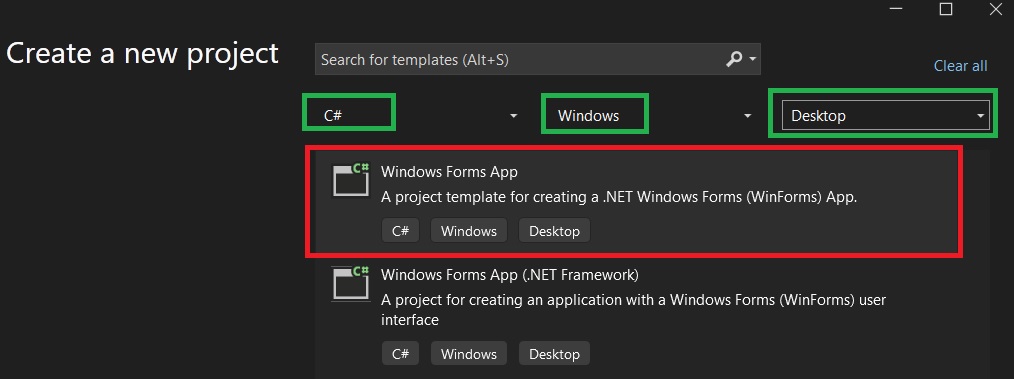
In the Create a New Project window, use the search bar or the filters to find Windows Forms App (.NET Framework) if you are targeting the traditional .NET Framework. If you’re working with newer versions like .NET Core, .NET 5, or .NET 8, you can select Windows Forms App which is designed for these modern frameworks.
Here we will be using .NET LTS version. After selecting the template, click Next.
The next step involves configuring your project. Provide a Project Name, Location, and Solution Name for the project.
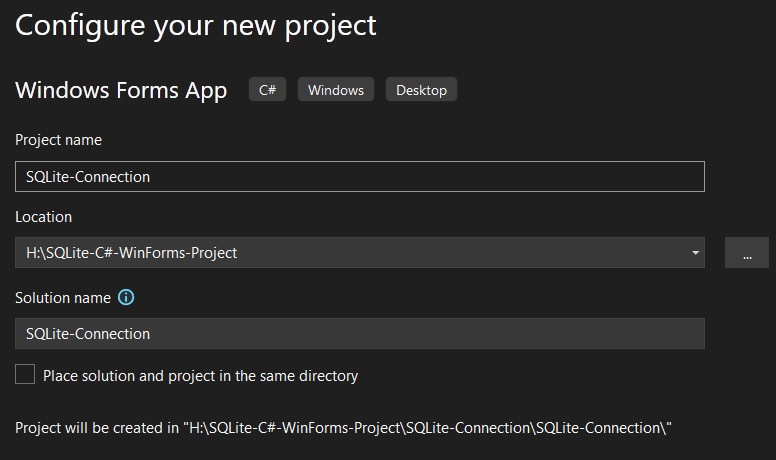
Once this is set up, click Create to proceed.
Visual Studio will then generate your basic WinForms project, which includes a Form1.cs file by default. This file will serve as the main window for your application.
You’ll also see a Form1.Designer.cs file, which automatically manages the UI elements of your form. In this Designer view, you can easily drag and drop various controls, such as buttons, textboxes, and labels, from the Toolbox on the left-hand side of the screen. This allows you to visually design your form without manually writing the layout code.
To add functionality, switch to the Code view of Form1.cs. Here, you can define events for the controls you added. For instance, if you added a button to the form, you can double-click the button in the Designer view, and Visual Studio will generate a button click event handler in your Form1.cs file. This is where you can write the logic for what should happen when the user interacts with the button.
After writing your code, you can run the application by pressing F5 or clicking the Start button in Visual Studio.
Installing Required Namespaces Using NuGet

We need to install the required namespaces to our Visual Studio project before starting the development of our SQLite WinForms Application.
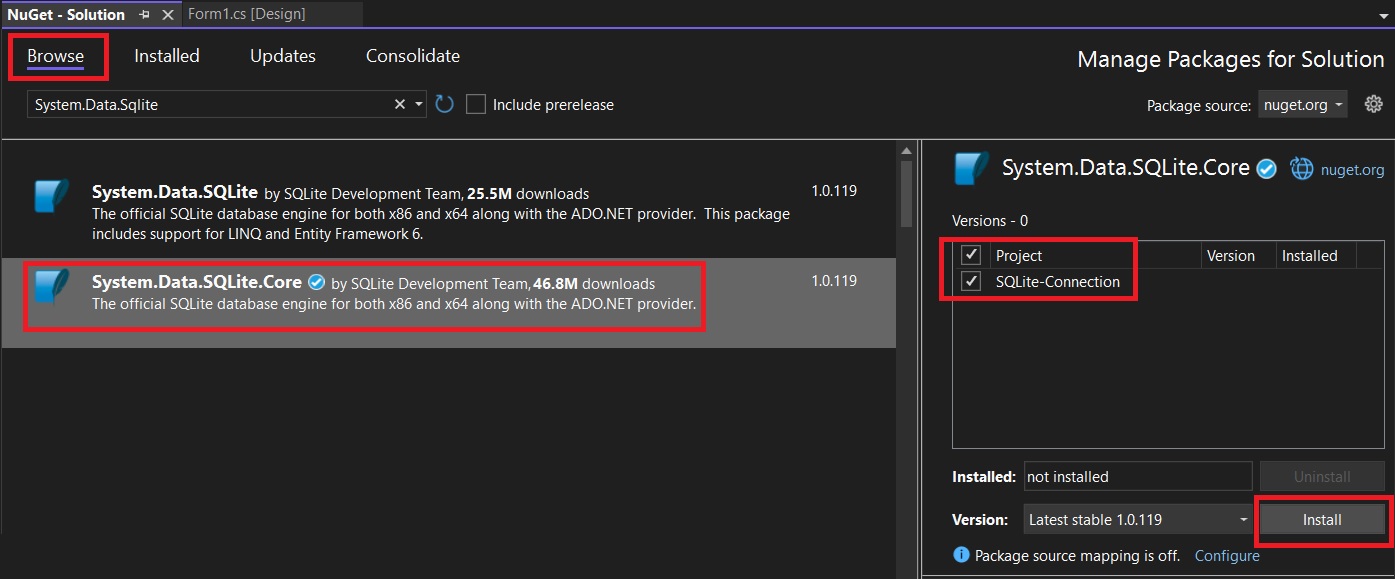
You can use the NuGet Package Manager present in the Visual Studio to install the required namespaces.
For our SQlite development We can use
- System.Data.SQLite
- System.Data.SQLite.Core
Both of the are suitable here
System.Data.SQLite is a .NET library that provides a ADO.NET interface for interacting with SQLite Database, which is a serverless, self-contained database engine. It enables .NET developers to use SQLite databases within their applications by providing a set of classes that allow to interact with SQLite.Provides support for LINQ and EF Core.
System.Data.SQLite.Core is a more minimal version of the System.Data.SQLite package. It provides a core set of functionality for interacting with SQLite databases, but it is designed for use with more modern .NET applications, especially .NET Core and .NET 5+.
We can use either one of them
Here i am using System.Data.SQLite.Core as only minimal API are required.
Opening a SQLite Database Using FileOpenDialog API

Now we will connect to a SQLite database from our WinForms GUI app and open it using the OpenFileDialog Control available in the WinForms GUI framework.
The OpenFileDialog is a common dialog that allows users to open files from their computer. It is part of the System.Windows.Forms namespace and provides an easy way to implement a file selection interface for your application. When using OpenFileDialog, users can navigate their file system, select a file, and return that file’s path to your application
Here we will use OpenFileDialog to navigate through the file system and select the SQLite database on the disk. We will then use .FileName property of OpenFileDialog Object to get the full path to the database.
This Full path is then used to create a connection string to open the SQLite Database using the SQLiteConnection class.

Reading and Writing Into SQLite Using SQLiteDataAdapter Class

Once the connection to the database is open by using the SQLiteConnection class we will use an adapter class called SQLiteDataAdapter to move data back and forth between the database .It is part of the System.Data.SQLite library, .
The SQLiteDataAdapter class is used to interact with SQLite data by retrieving data from a database and populating a DataSet or DataTable. It also allows for updating the data back to the database after modifications are made in the DataSet
Her is a code to retrieve data from a sqlite database and to populate a datatable class which is then used as a data source to the winforms DataGridView Control.
The code
initializes a new instance of a DataTable, which serves as an in-memory representation of a table, containing rows and columns of data. At this point, the DataTable is empty and ready to be filled with data.
the above code ,uses the Fill() method of a DataAdapter to execute a SQL query against the database and load the resulting data into the DataTable.
The Fill() method retrieves the data from the database and stores it within the DataTable, which enables the application to work with the data in the memory, allowing the viewing, and display in a UI control like a DataGridView.
Full code available in Github (link above)
Using DataGridView to Display SQLite Tables on Windows Form
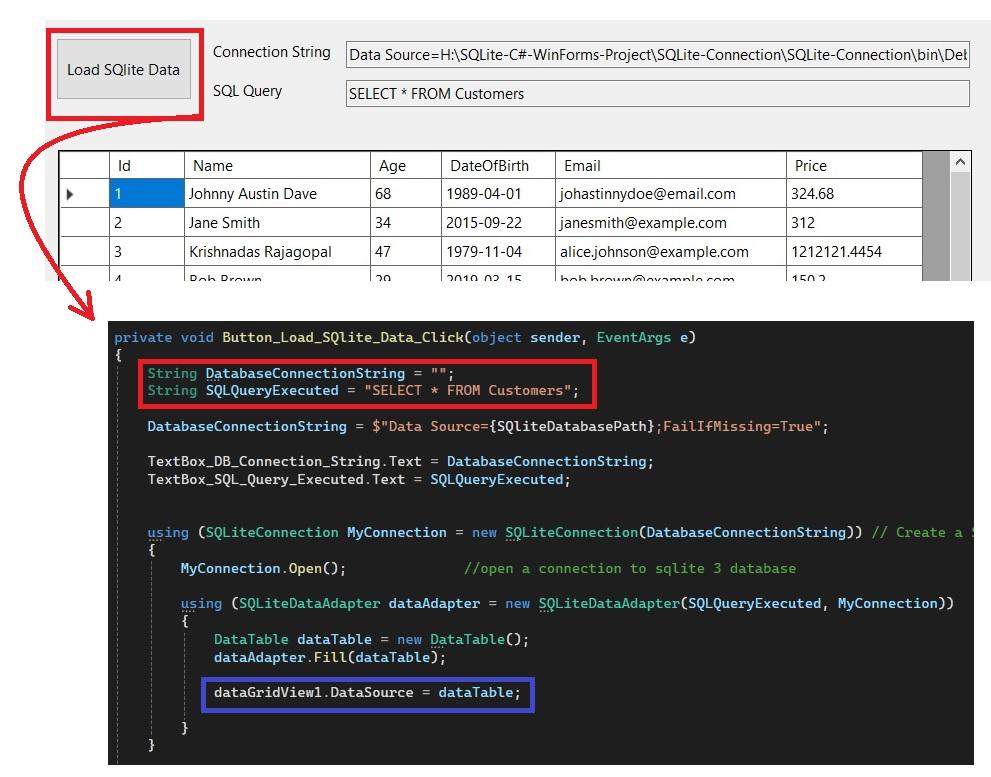
In the next step we will use the datatable to fill the DataGridview.
A DataGridView is a control in WinForms used to display tabular data in a grid format. It allows users to view, edit, and interact with data in rows and columns.
Each column represents a field, and each row represents a record. You can bind a DataGridView to various data sources, like a DataTable or a database, and it automatically populates with the data.
Before using make sure that you add that into your Form1 by dragging from ToolBox
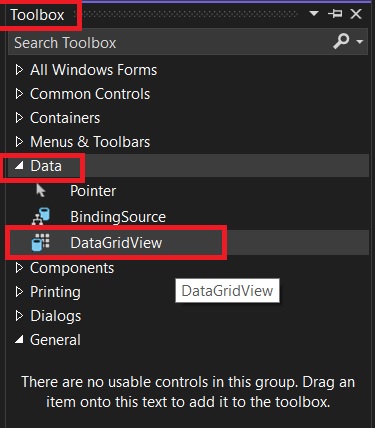
Here we will give datatable dTable as input to the DataSource property of the DataGridview control
Here the contents of the DataGridView control will depend upon the SQL query Executed and the the Contents of the SQLite database table.
All these codes are placed inside a button event handler. So when we press the button ,A connection to the selected SQLite database is created and data is displayed on the DataGridView Control.