Beer Pomp With a Screen
by francoisvanus in Circuits > Raspberry Pi
595 Views, 1 Favorites, 0 Comments
Beer Pomp With a Screen
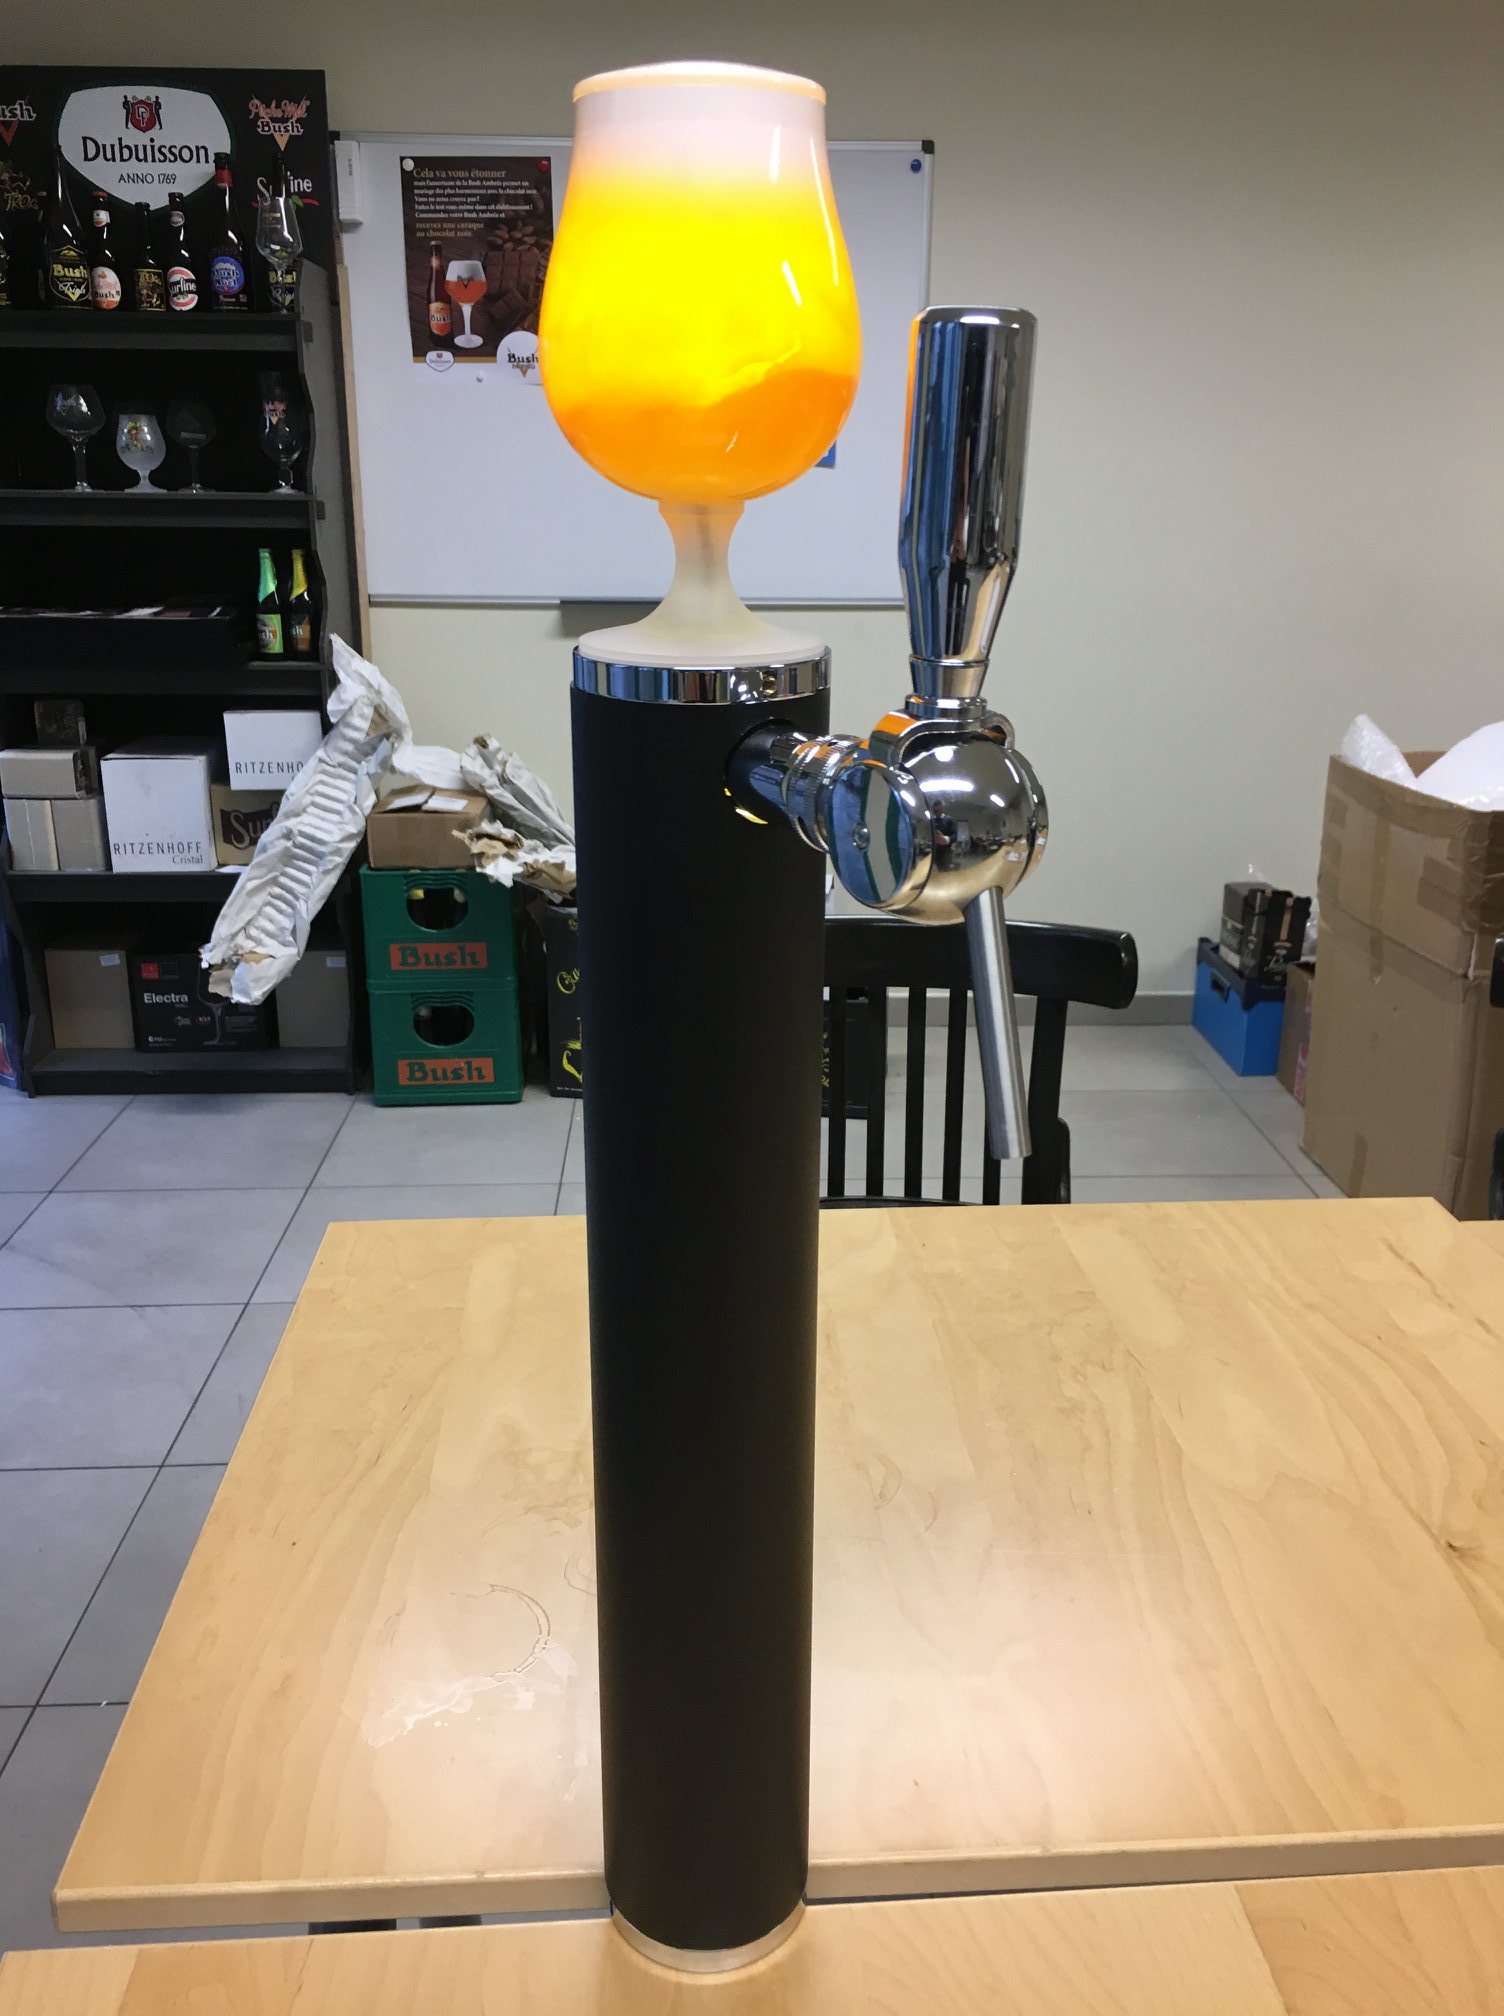
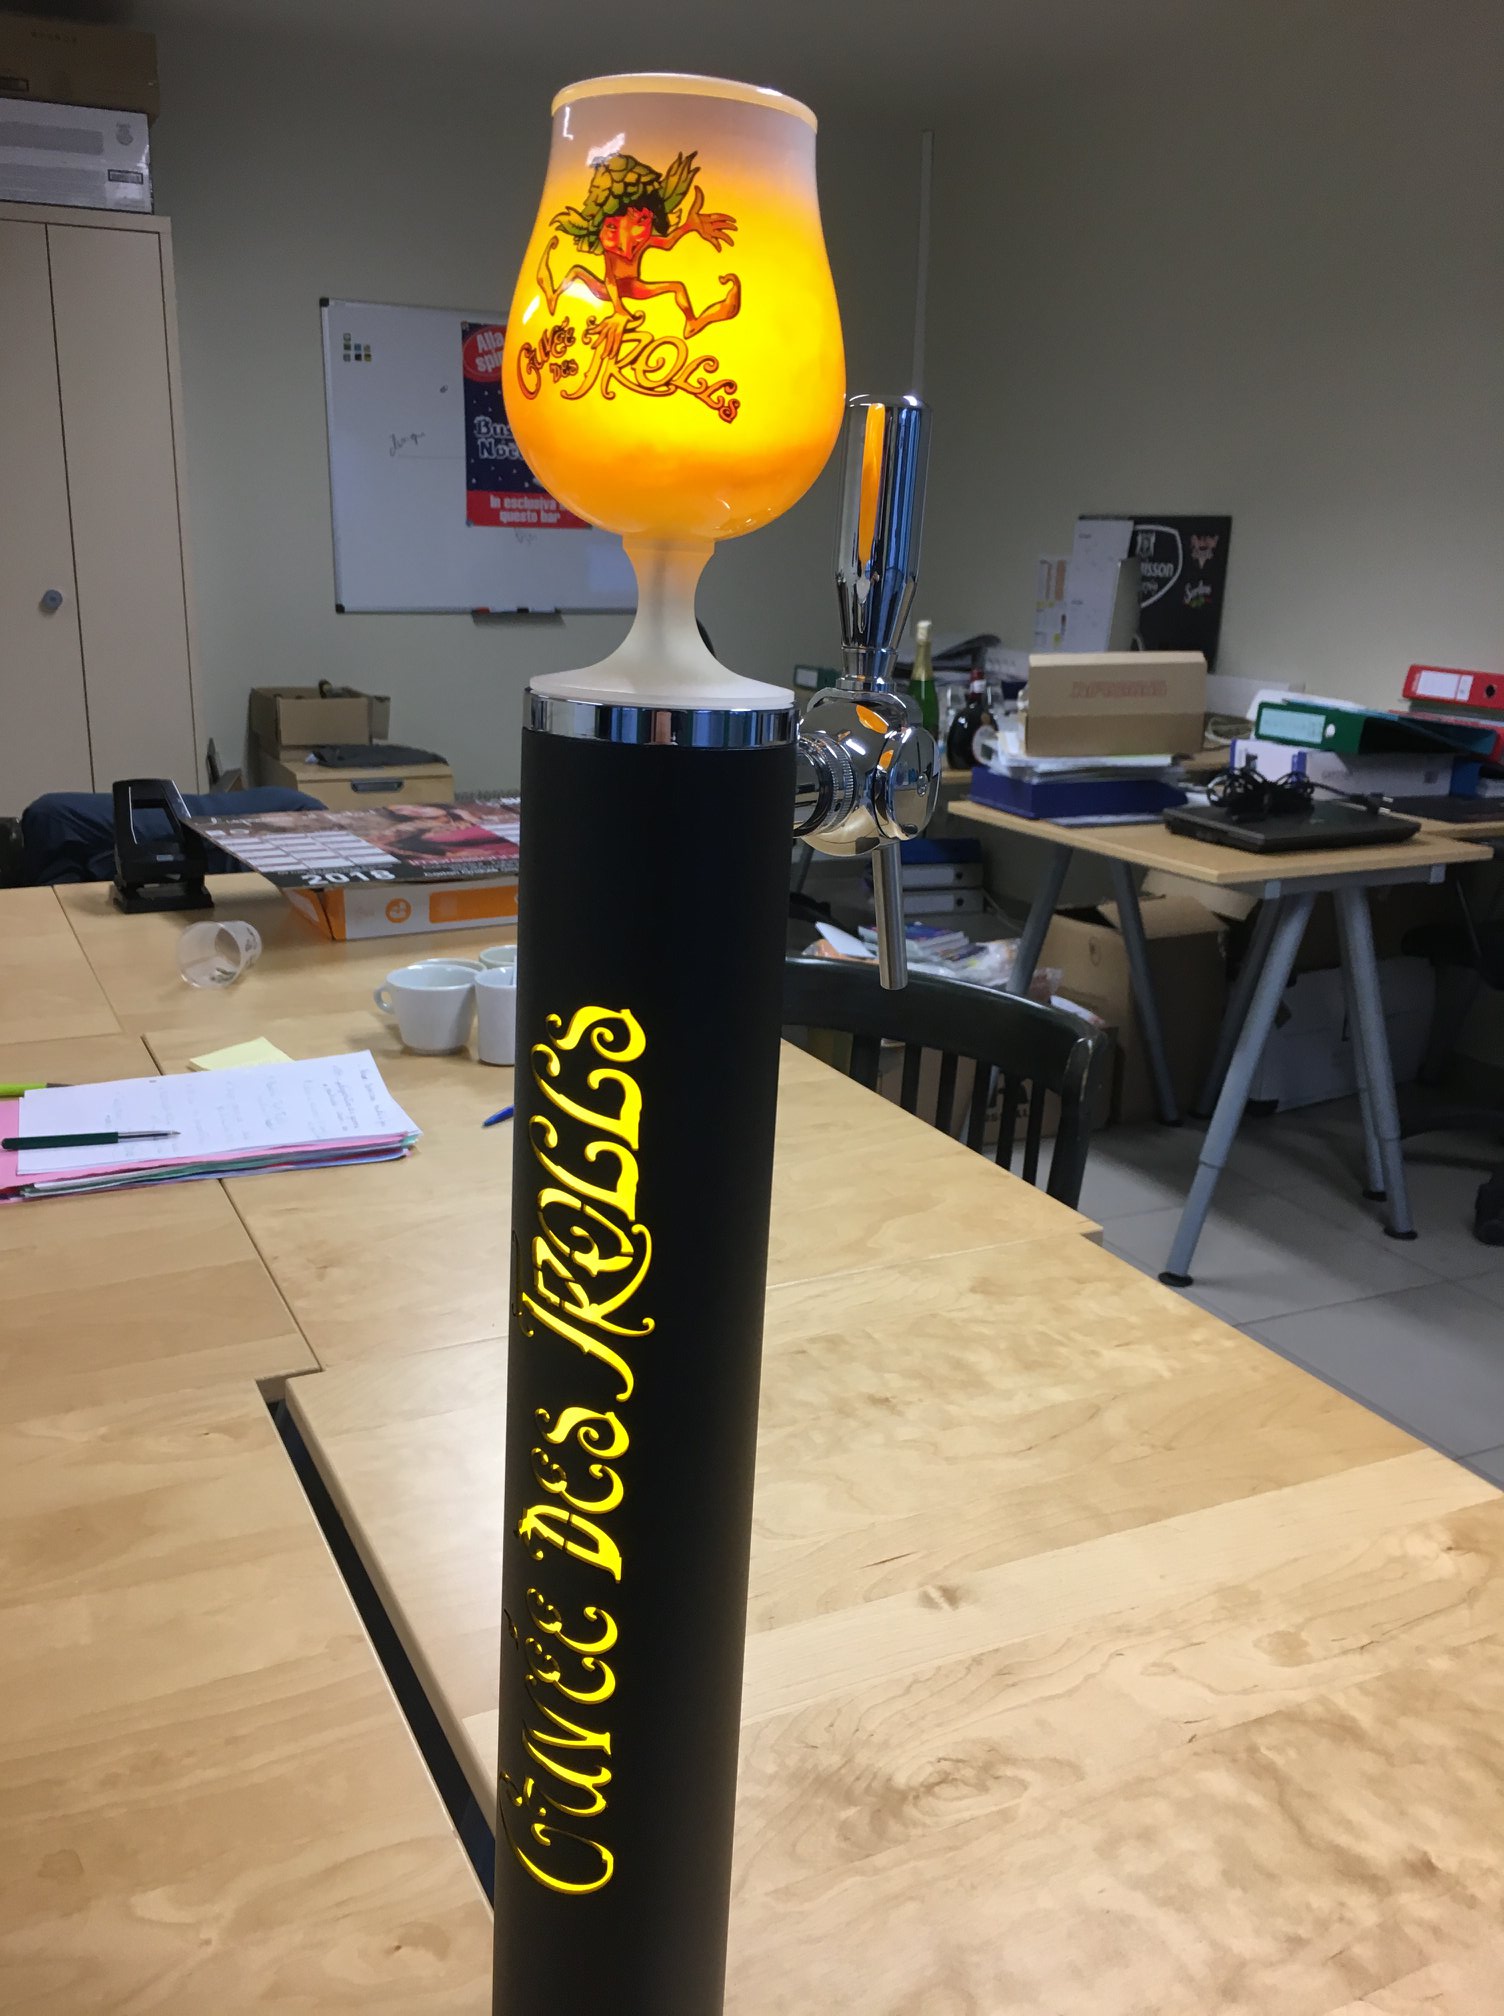
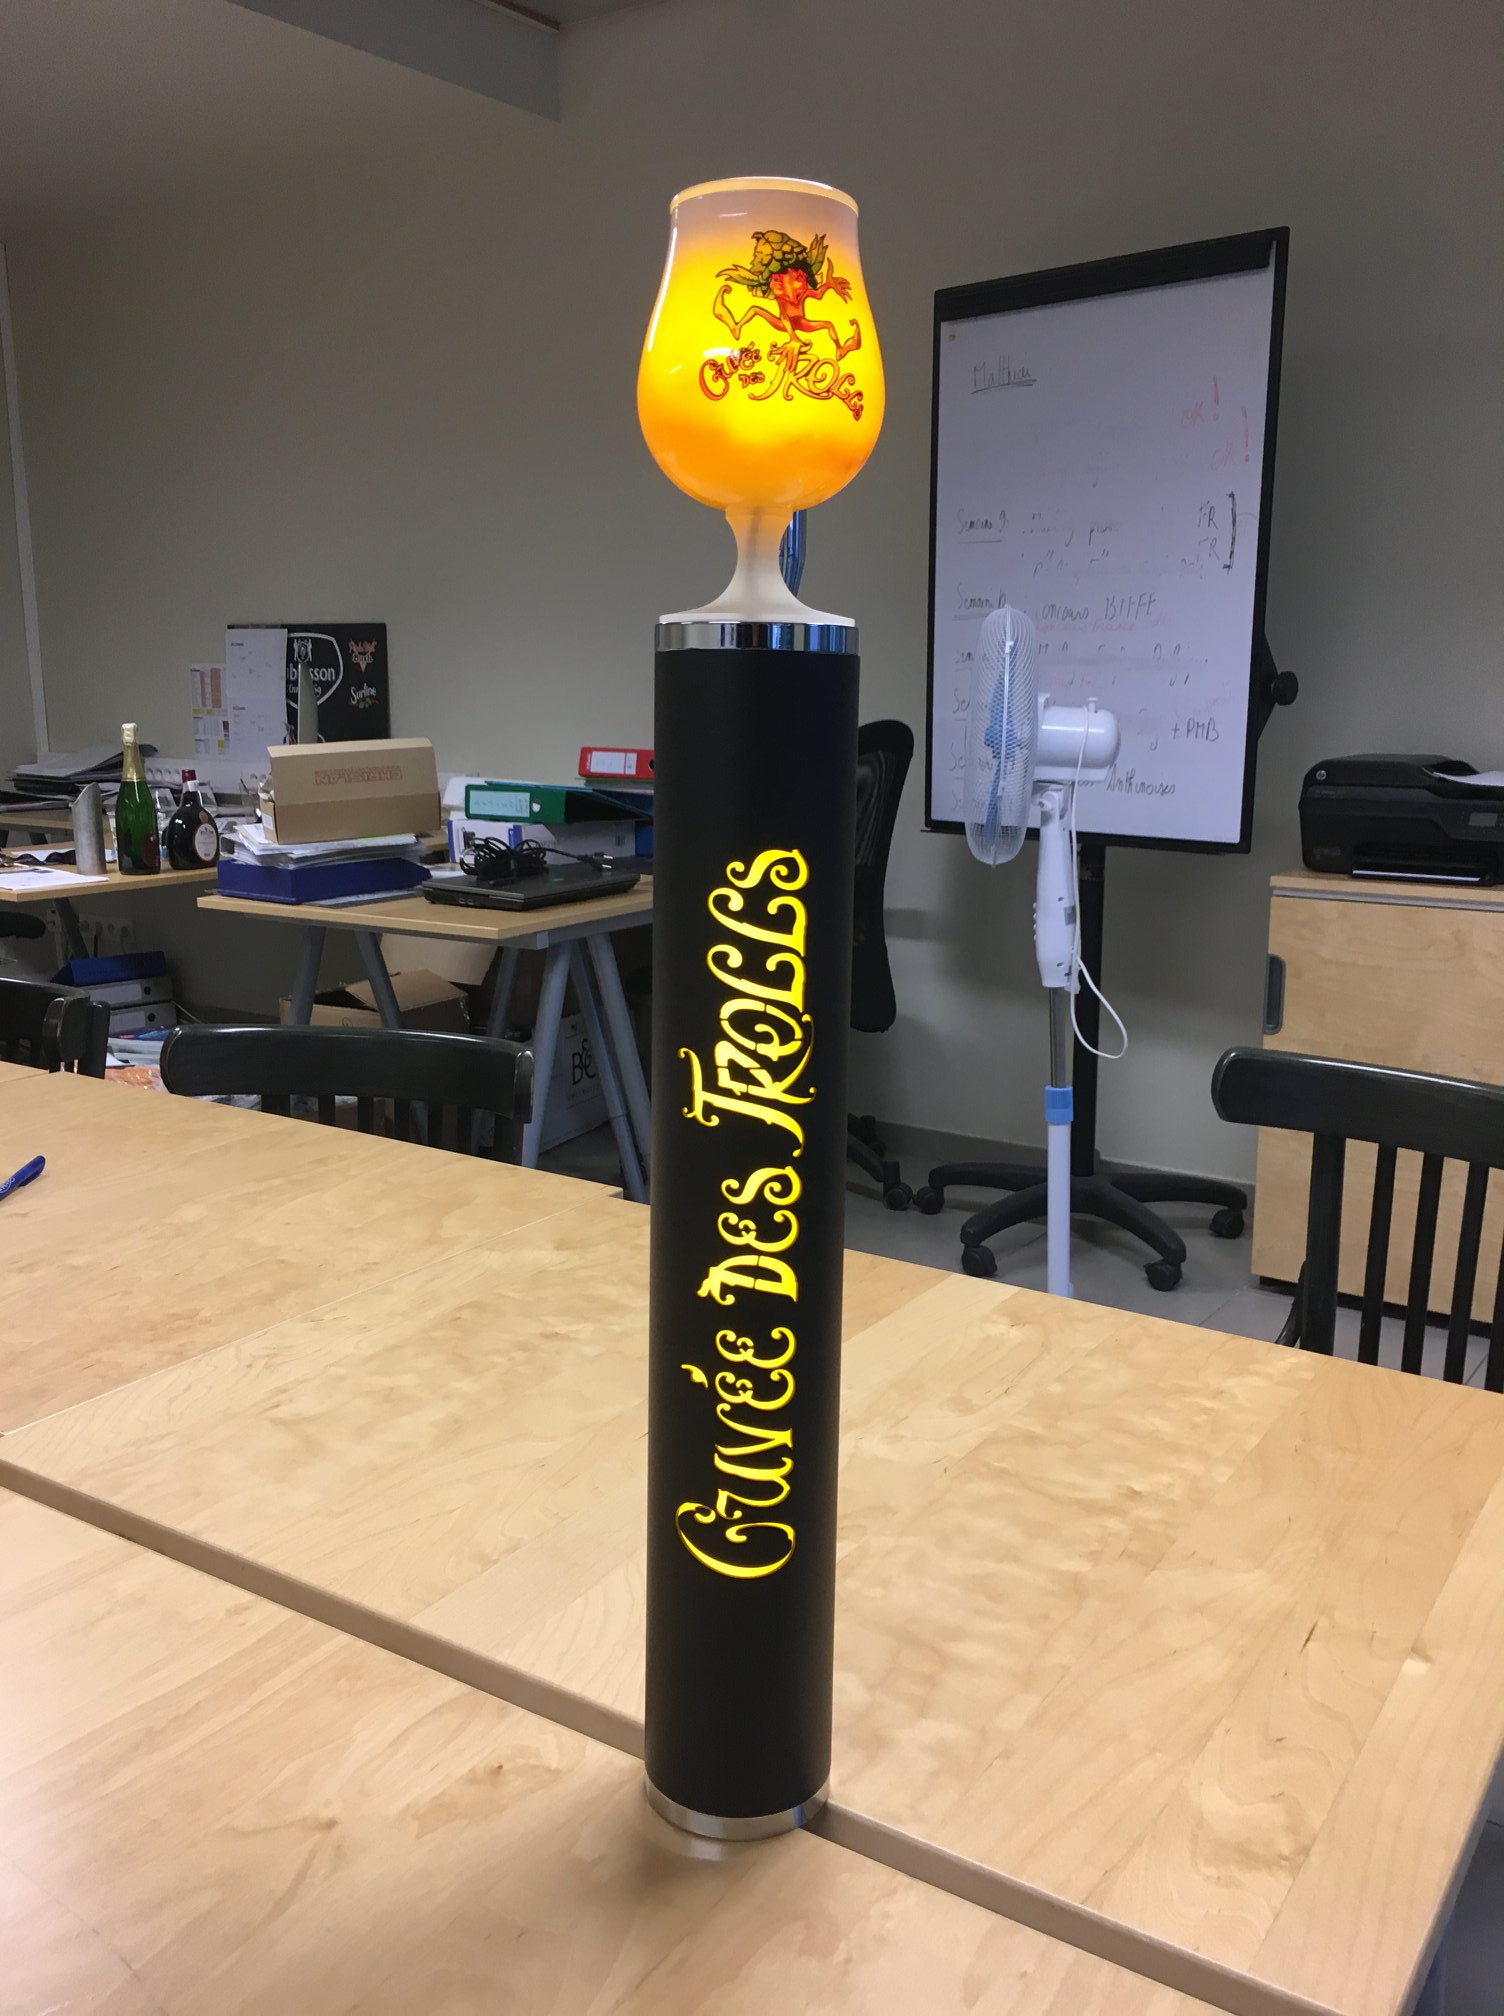
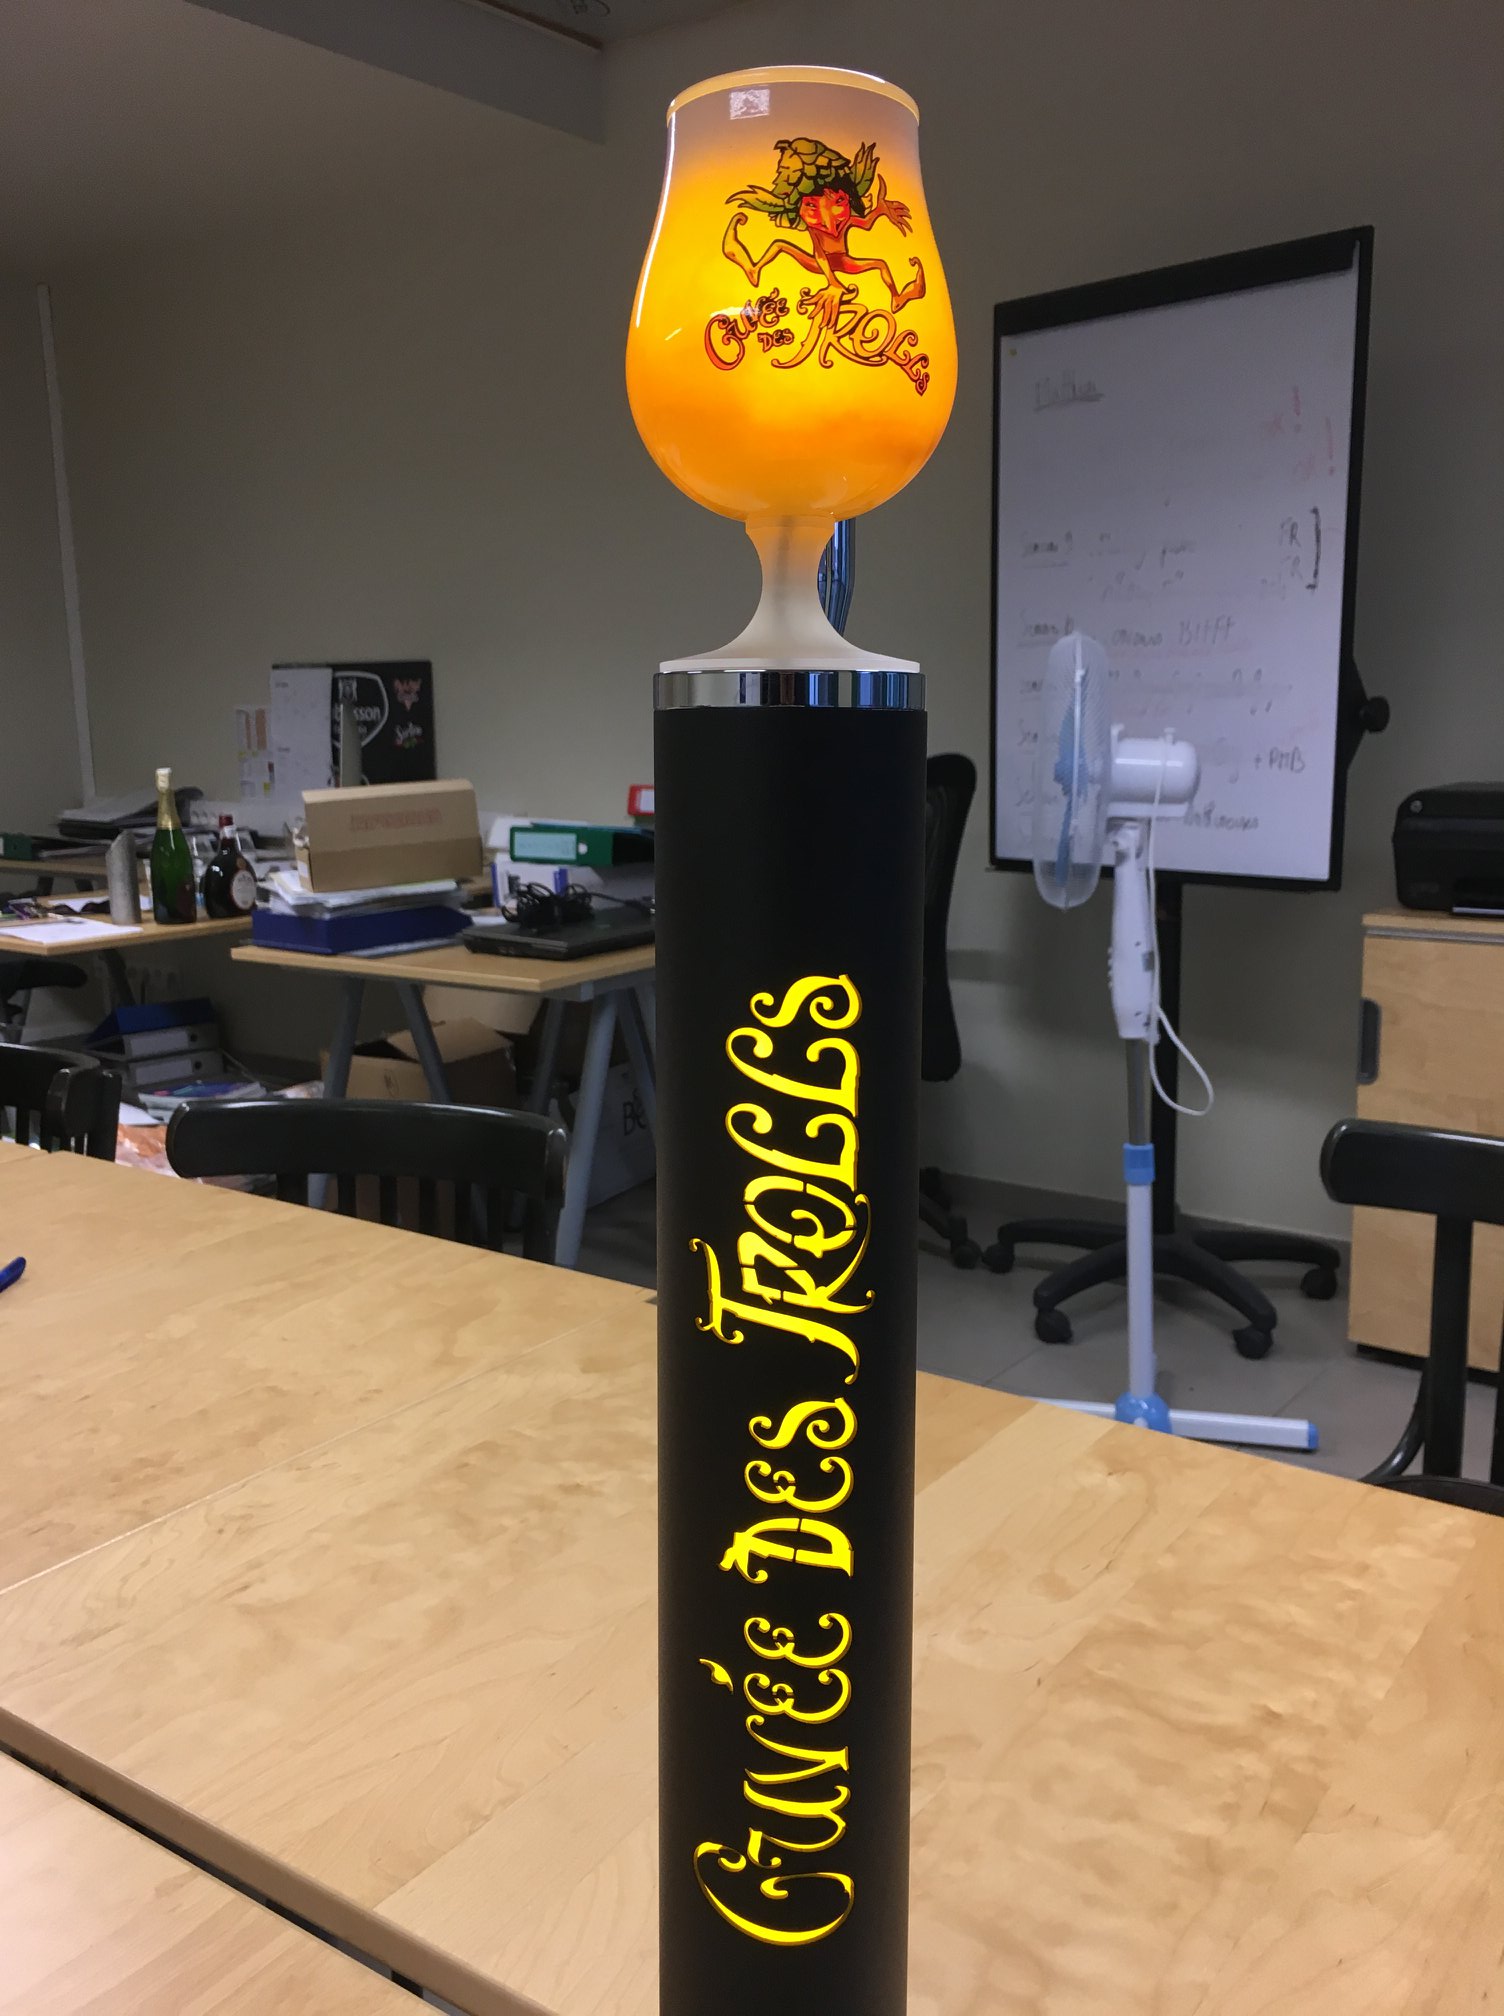

Project made by :
- De Monceau Nicolas
- Depotter Xavier
- Février Thomas
- Moriau Mickel
- Vanus Francois
HELHa Mons – Applied electronics and electrotechnics course – Second year of master degree - 2018
------------------------------------------------------------------------------------------------------------------------------------------
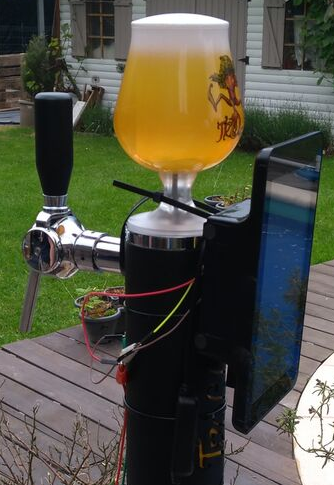
This instructable allows to build and program a display screen placed in front of a beer pomp. This project has been asked by the Dubuisson brewery to promote its beers compared to the other beers served with traditional pomps. With this screen, customers will be attracted by the pomp and by the beer. This project is more focused on the marketing side than the useful side.
The objective is to create an application that displays a video constantly when the pomp is unused. Another video must set up when a beer is served. To detect the usage of the pomp, a flowmeter measures the flow every second.
The brewery had some instructions for this project:
- - The interface must be simple, stylish and easy to use.
- - Any usage of a keyboard or a mouse.
- - Customers of the bar cannot access to the raspberry.
- - It has to have the possibility to change the videos to promote other beers from Dubuisson brewery.
- - The information of volume must be saved.
List of Materials
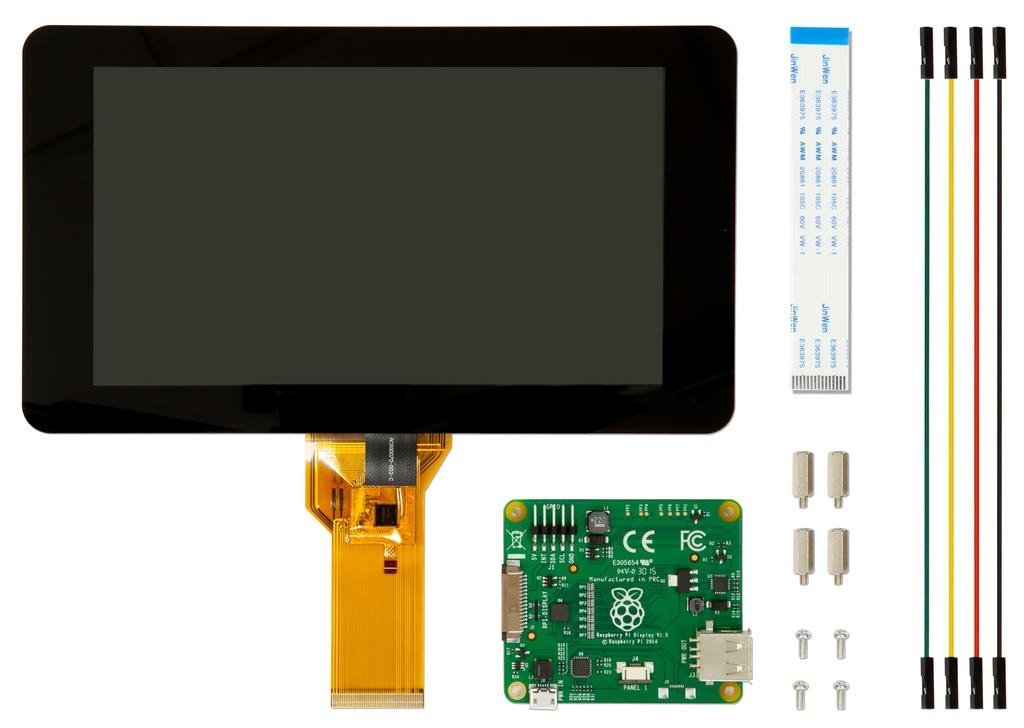
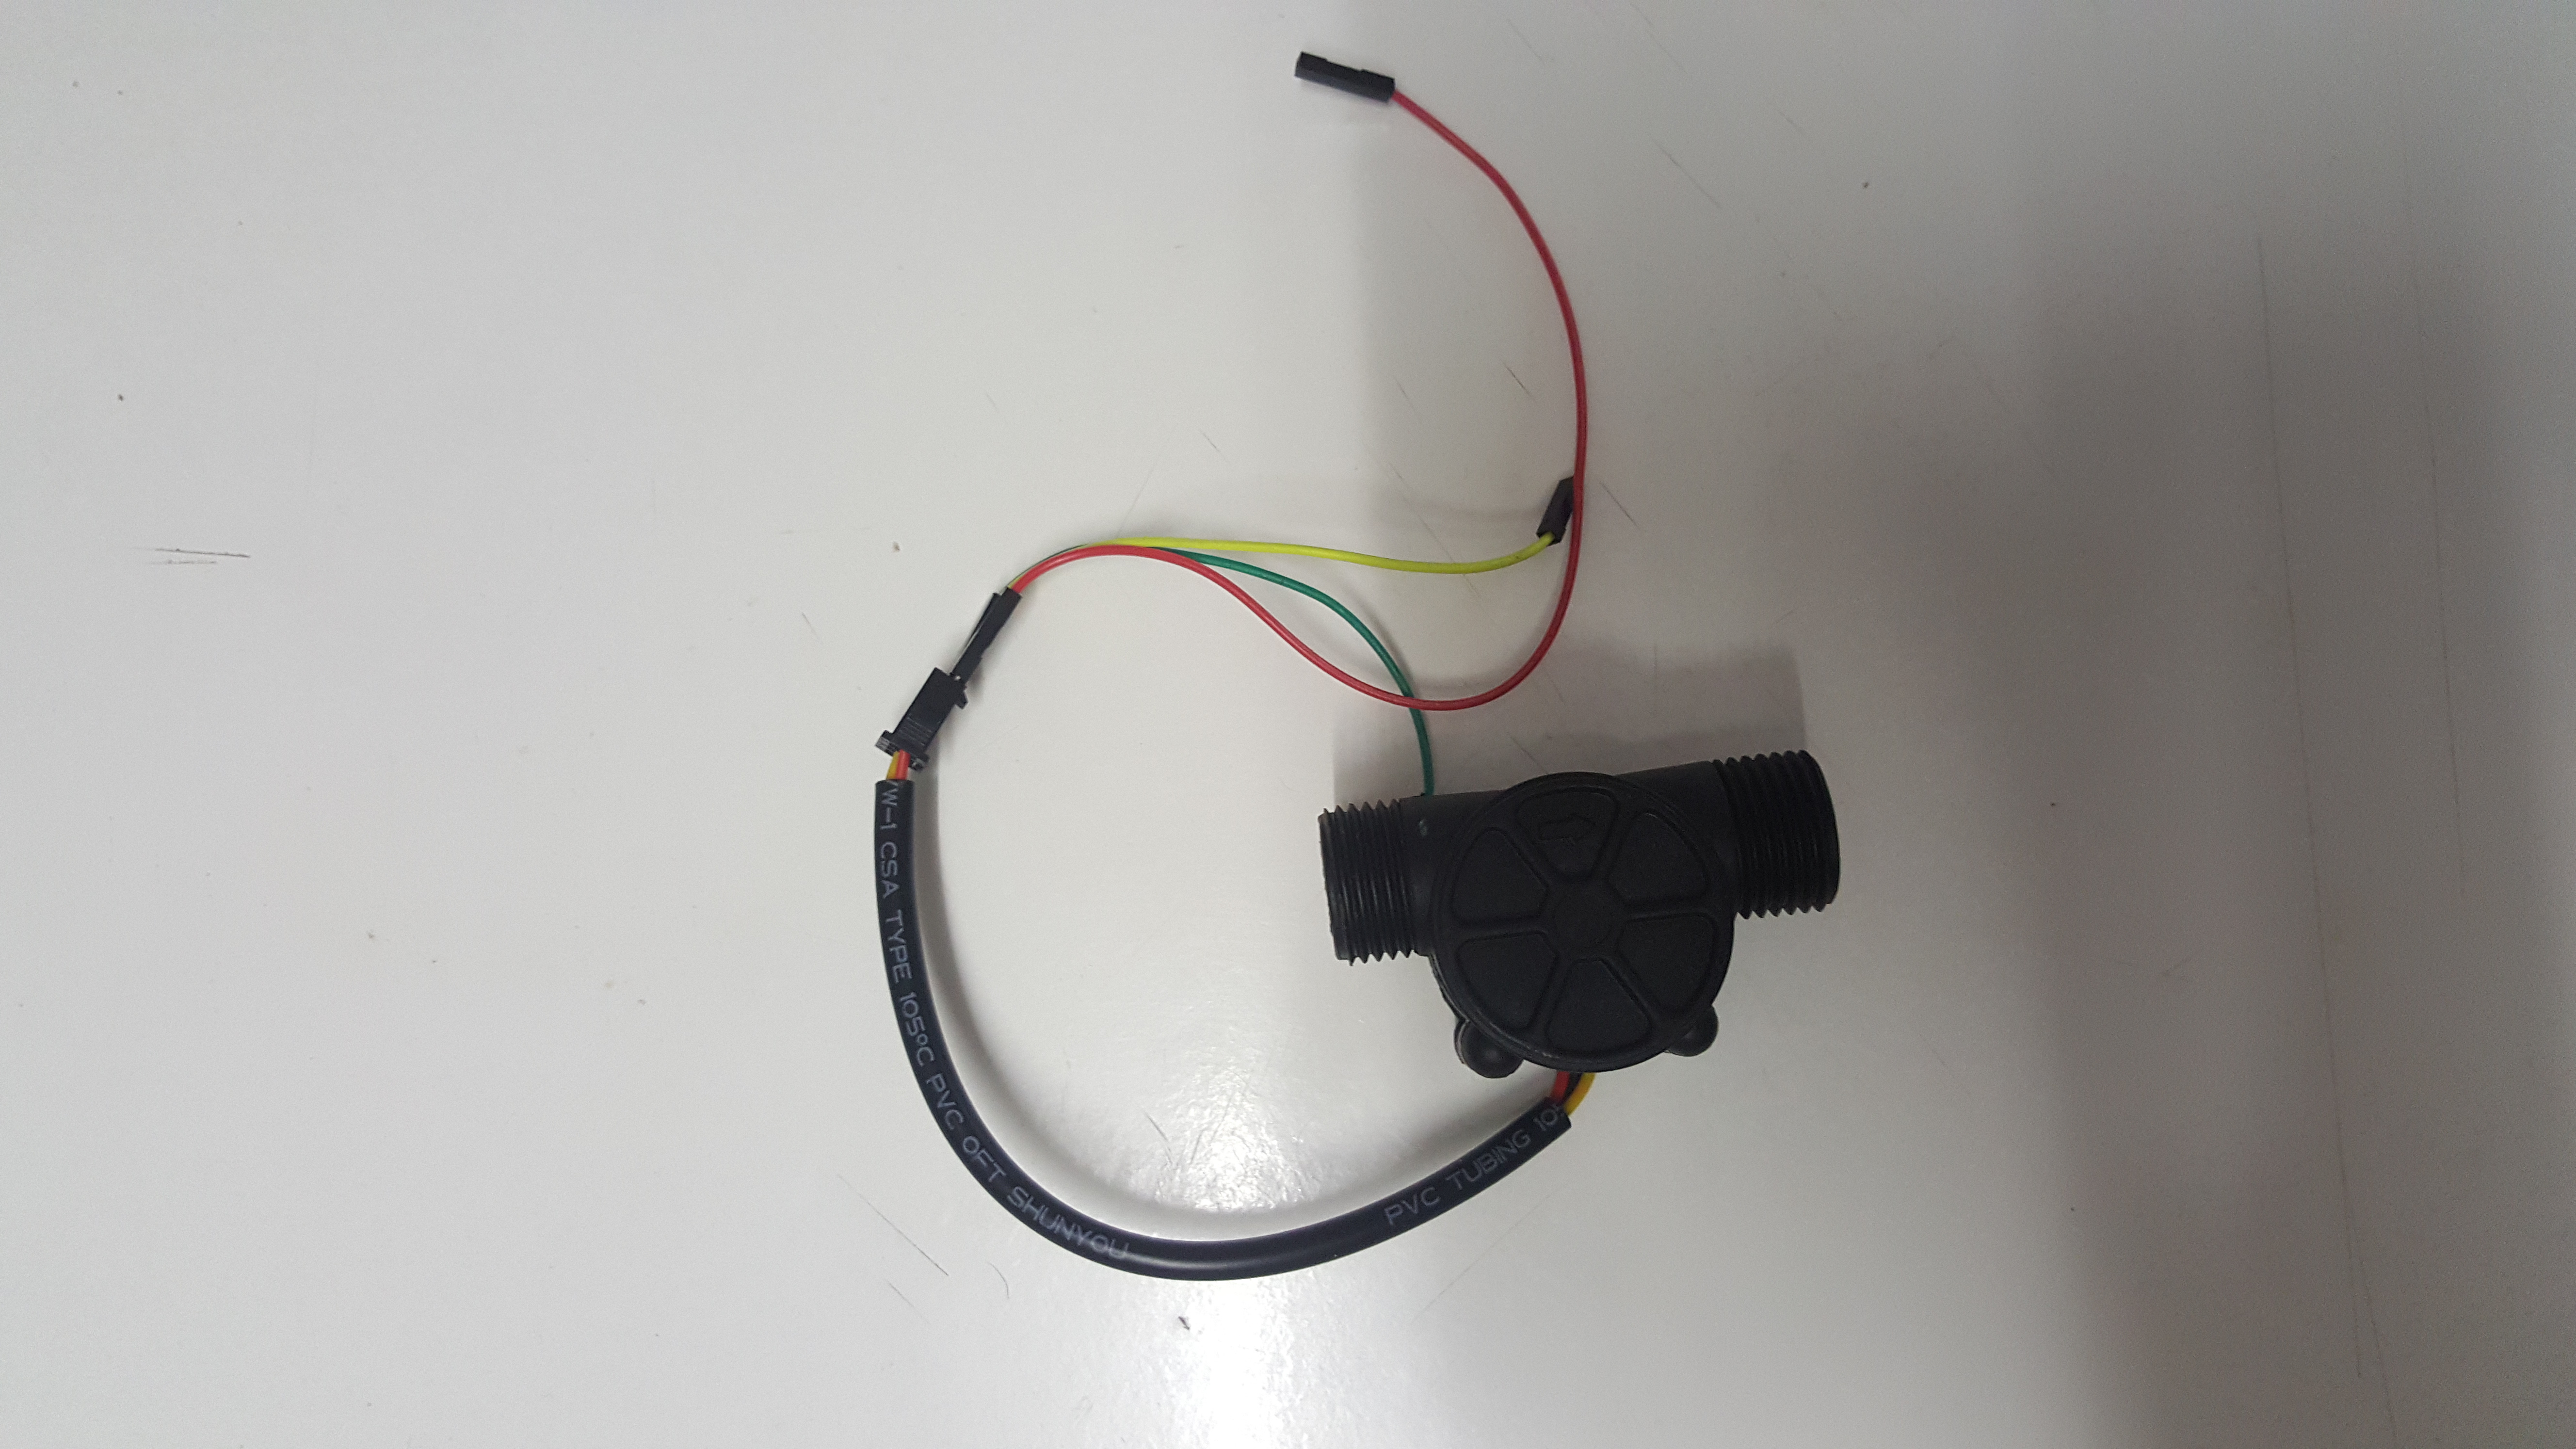
- - Raspberry Pi 3
- - Power supply (Pi B+/2/3)
- - SD card (At least 4GB)
- - Touchscreen → TFT RPI Touchscreen for Pi (Can be found here: https://shop.mchobby.be/pi-tft/691-rpi-touchscreen-800x400px-7-3232100006911.html)
- - Raspberry Pi 7” Touchscreen Display Case
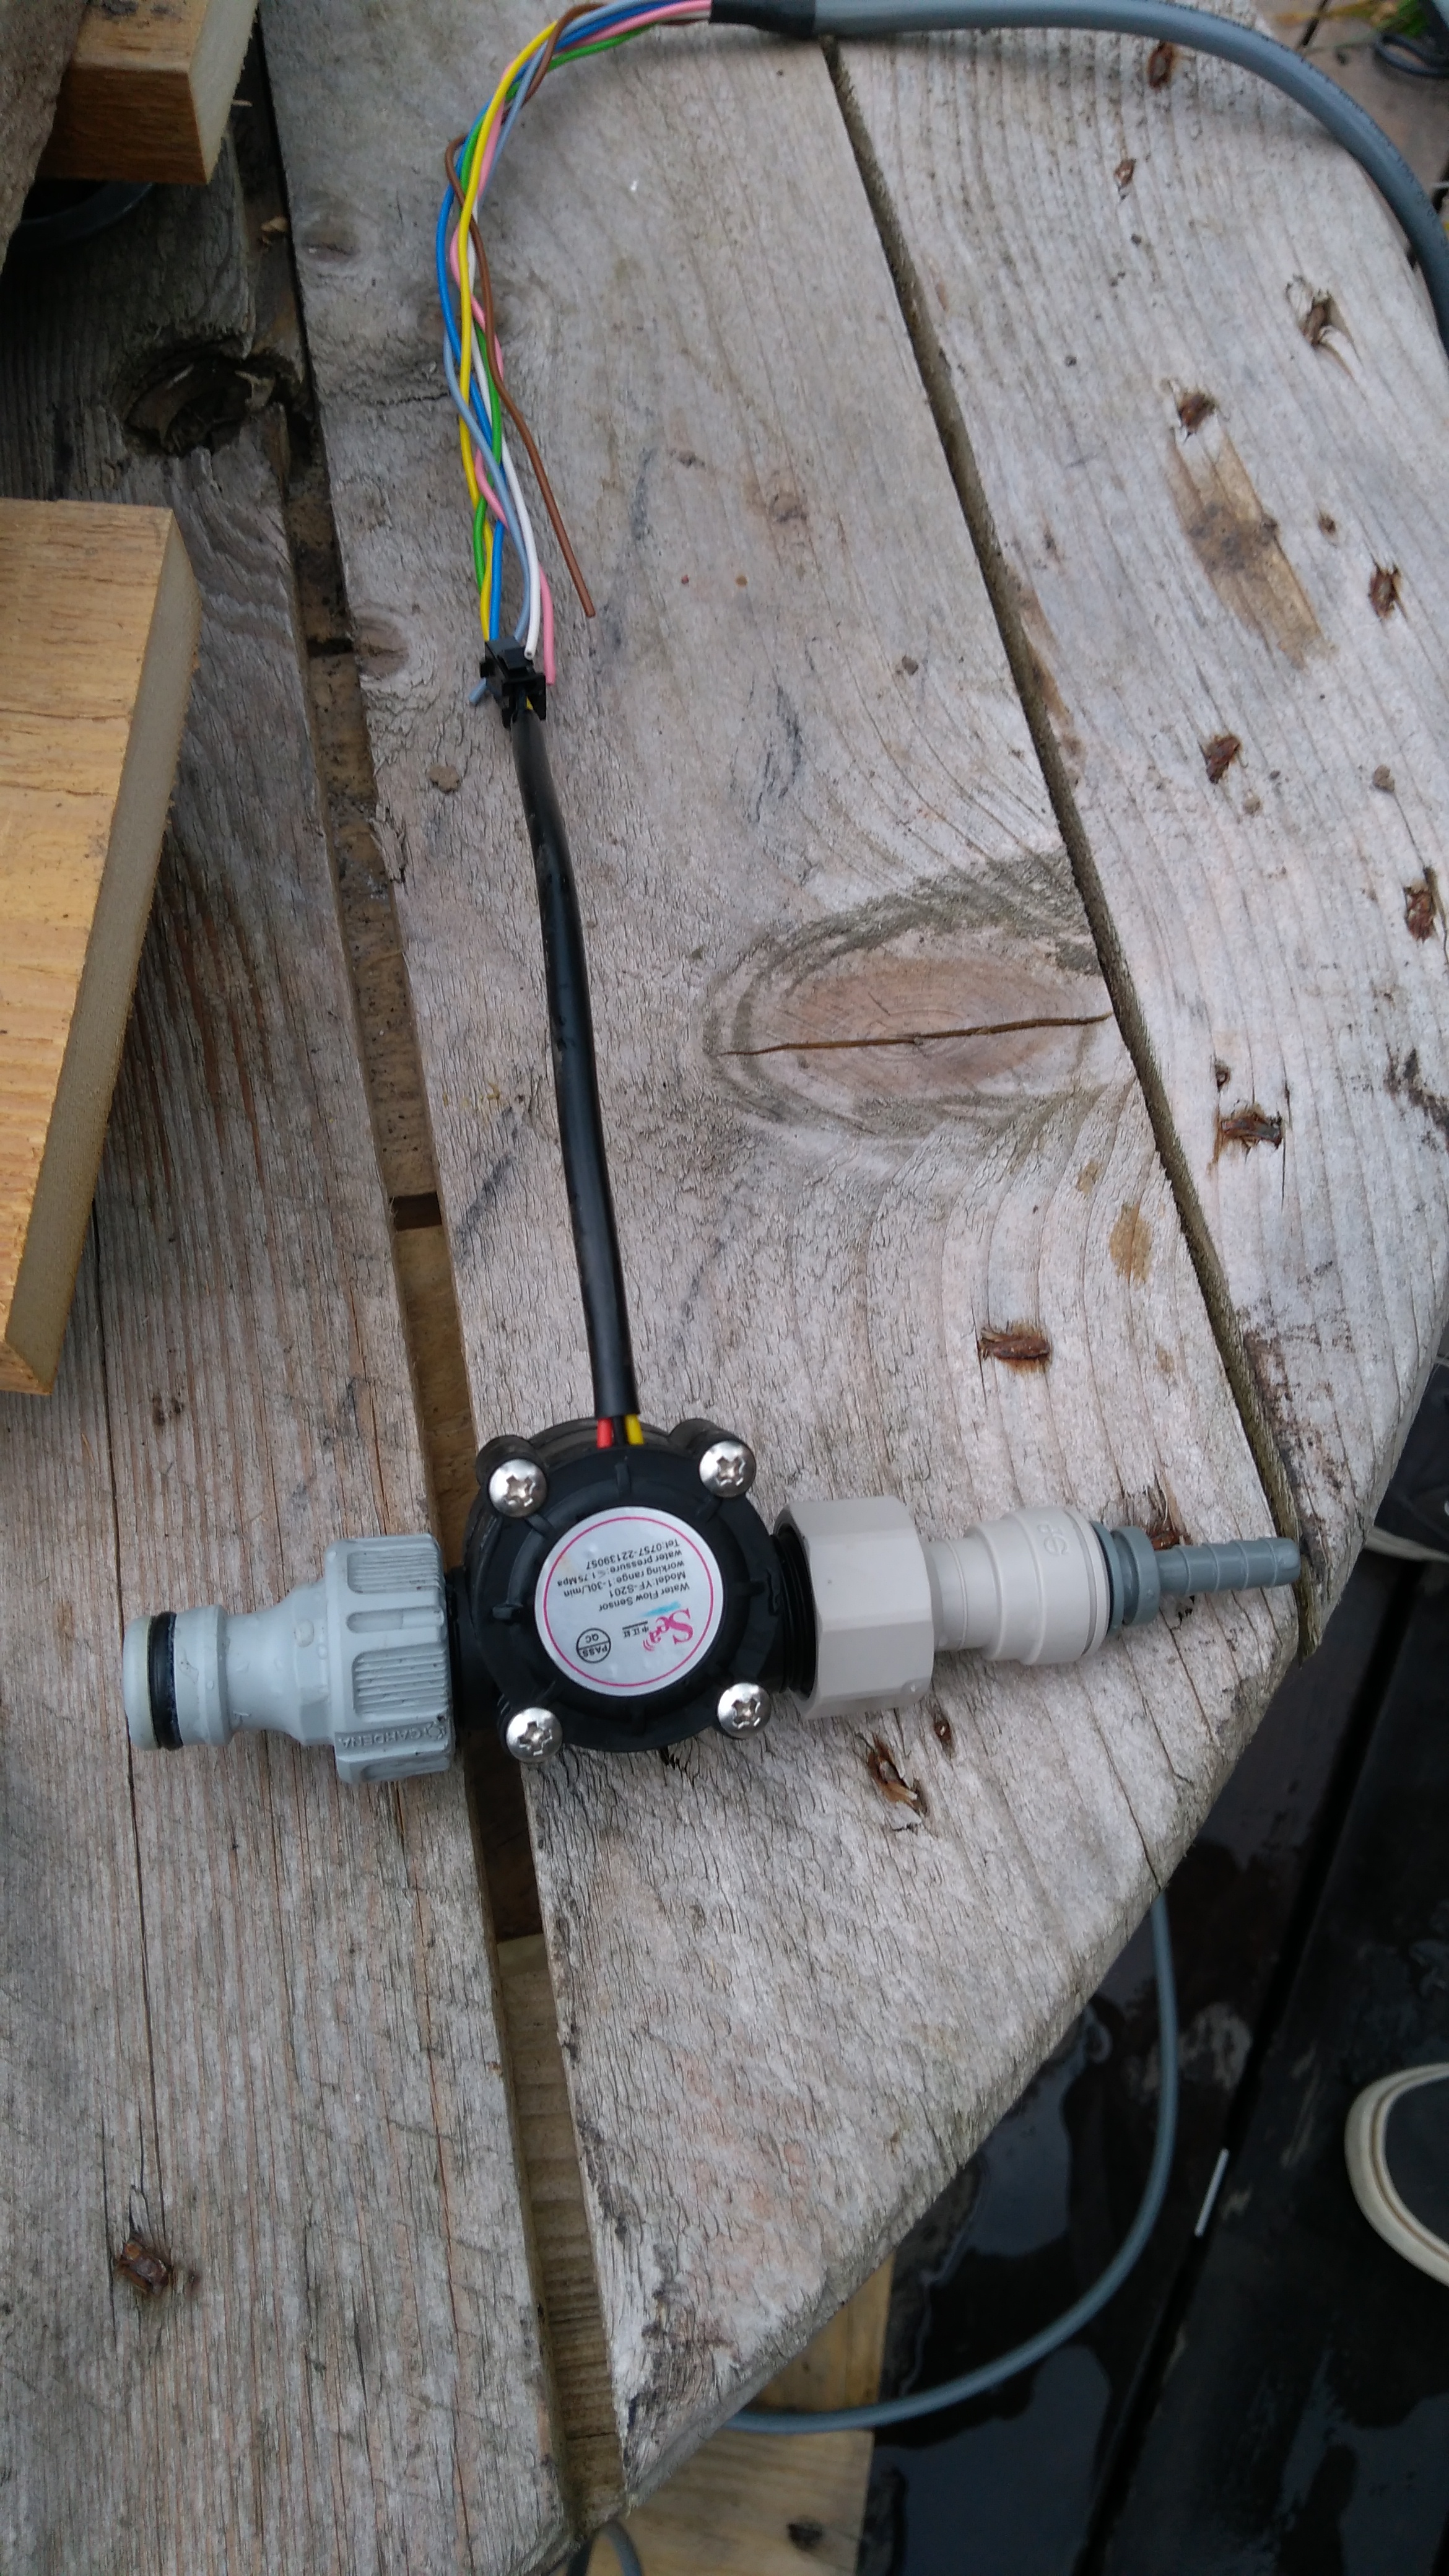
- - Flow meter that generates impulsions → YF-S201 Hall Effect Water Flow Meter / Sensor (Can be found here: http://www.hobbytronics.co.uk/yf-s201-water-flow-meter)
- - Raspbian (software downloadable here : https://www.raspberrypi.org/downloads/ )
Hardware
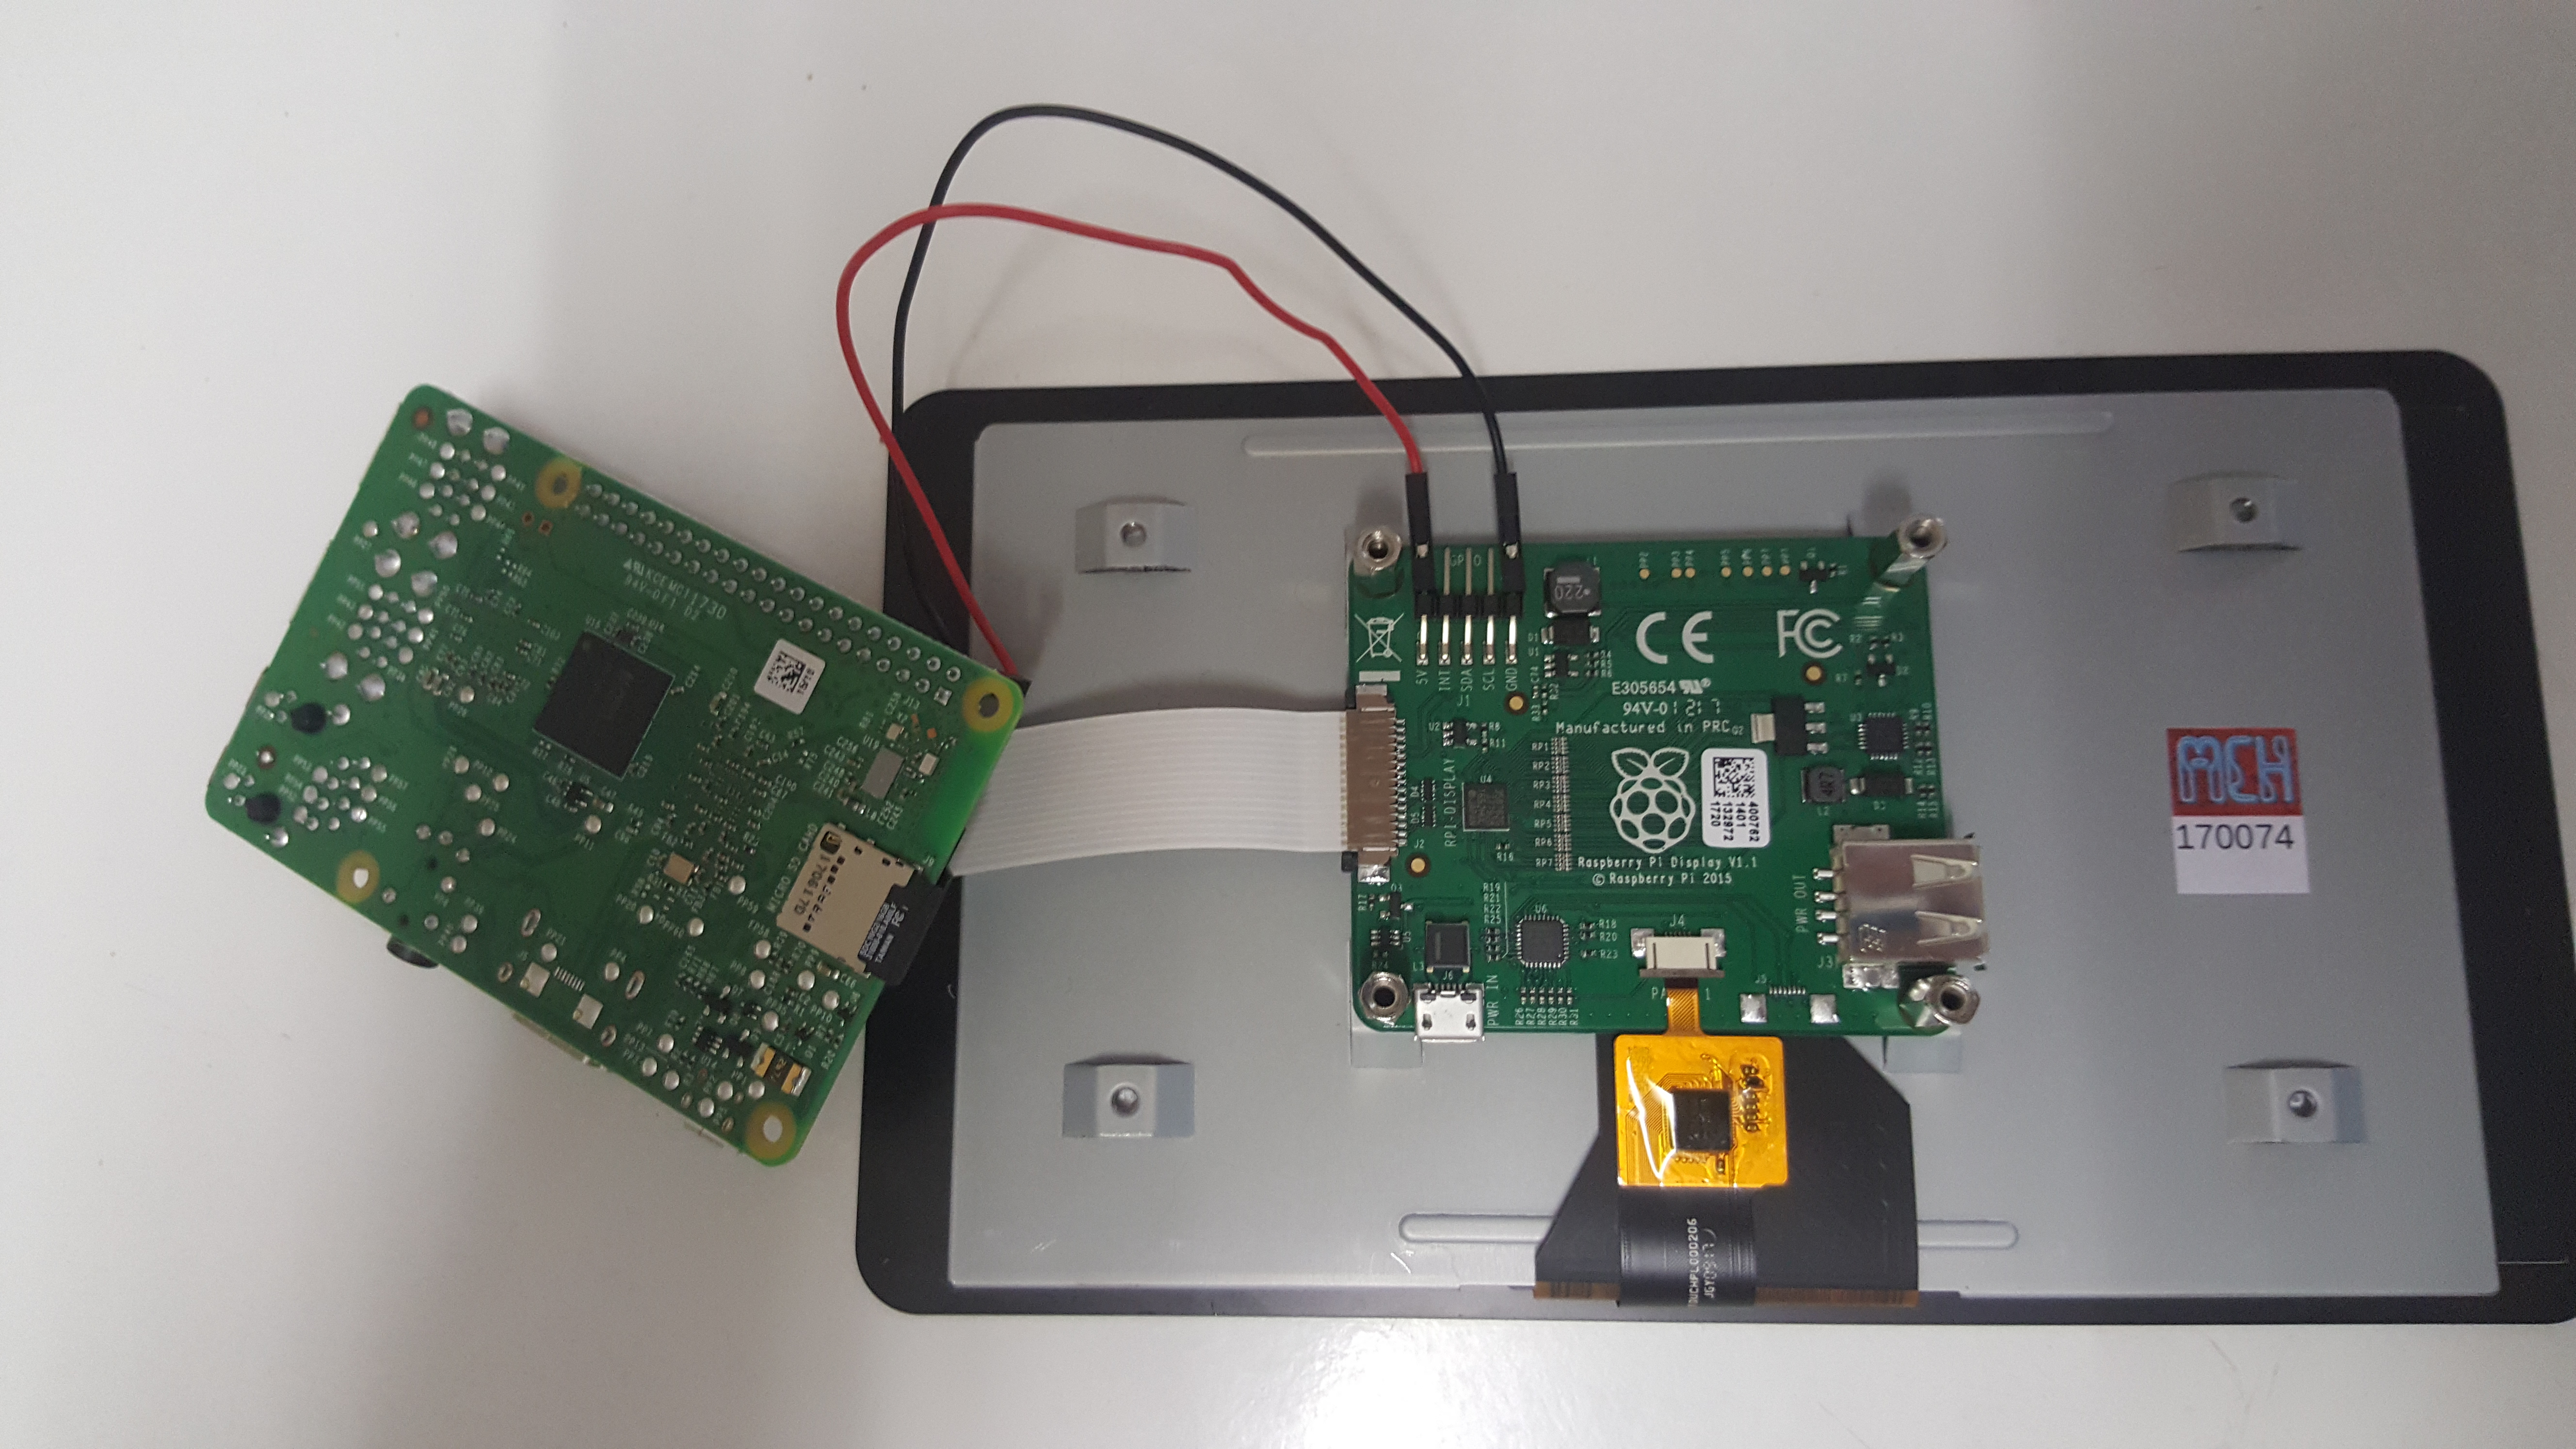
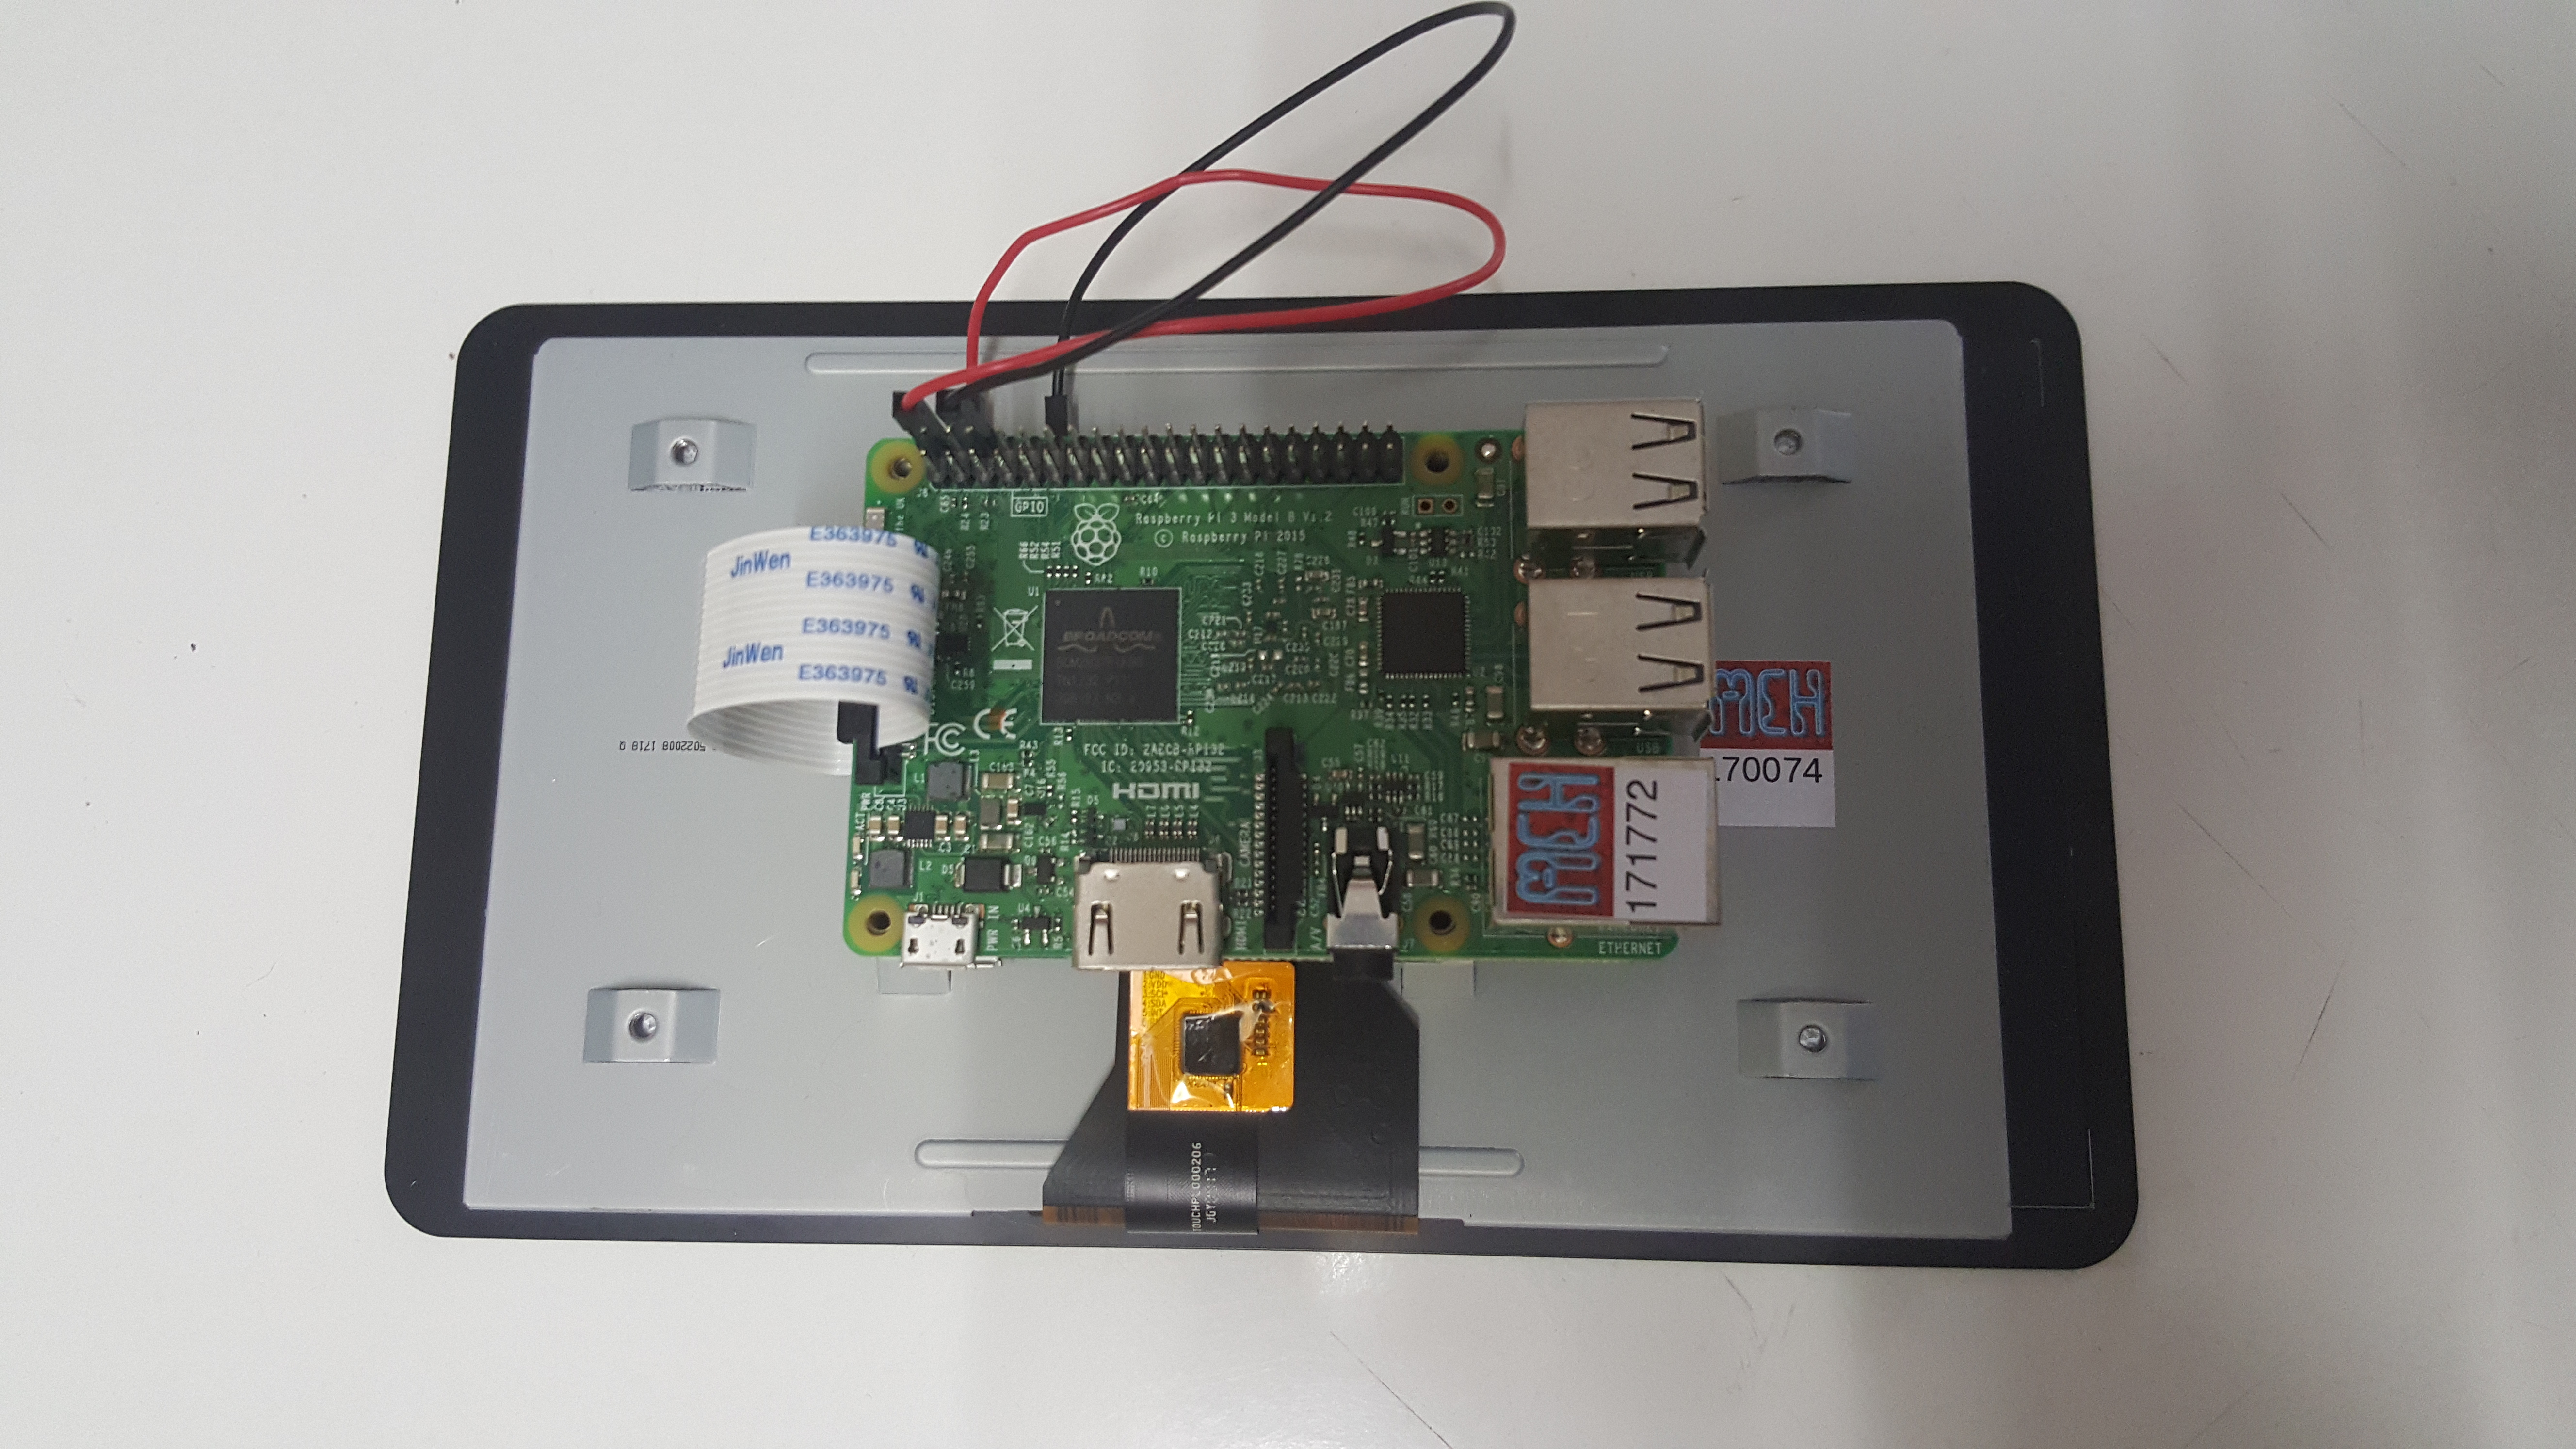
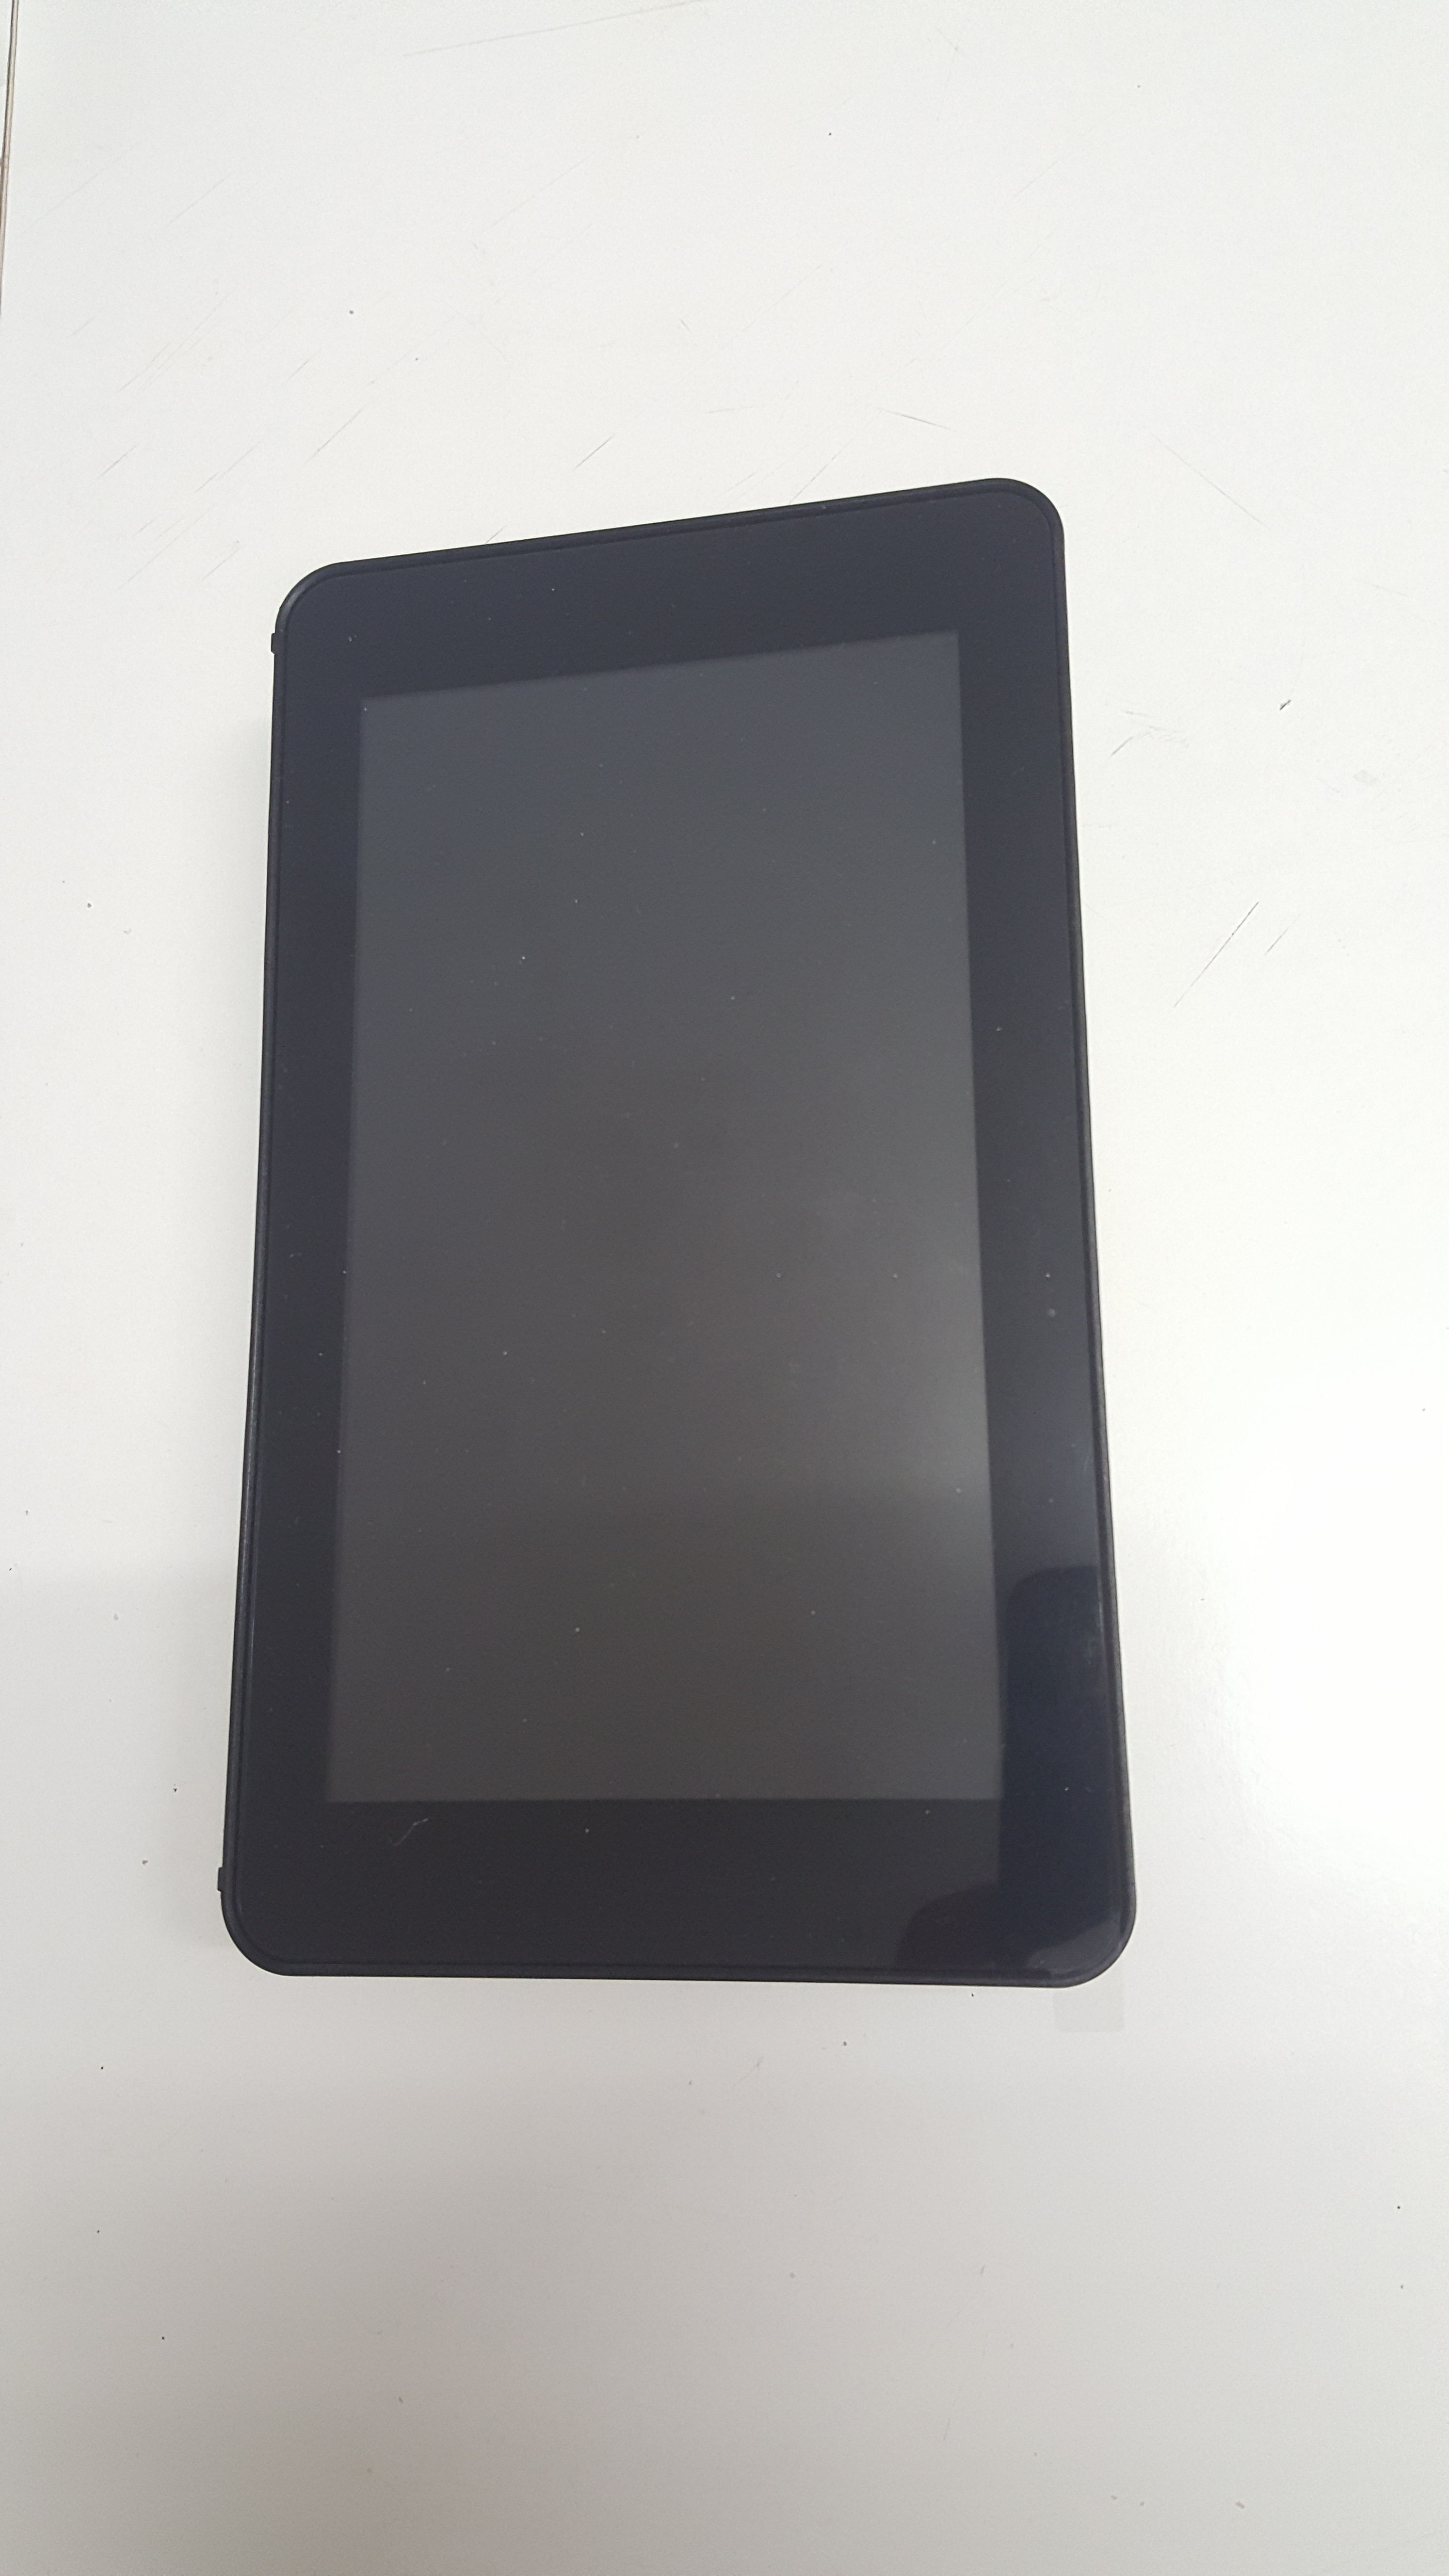
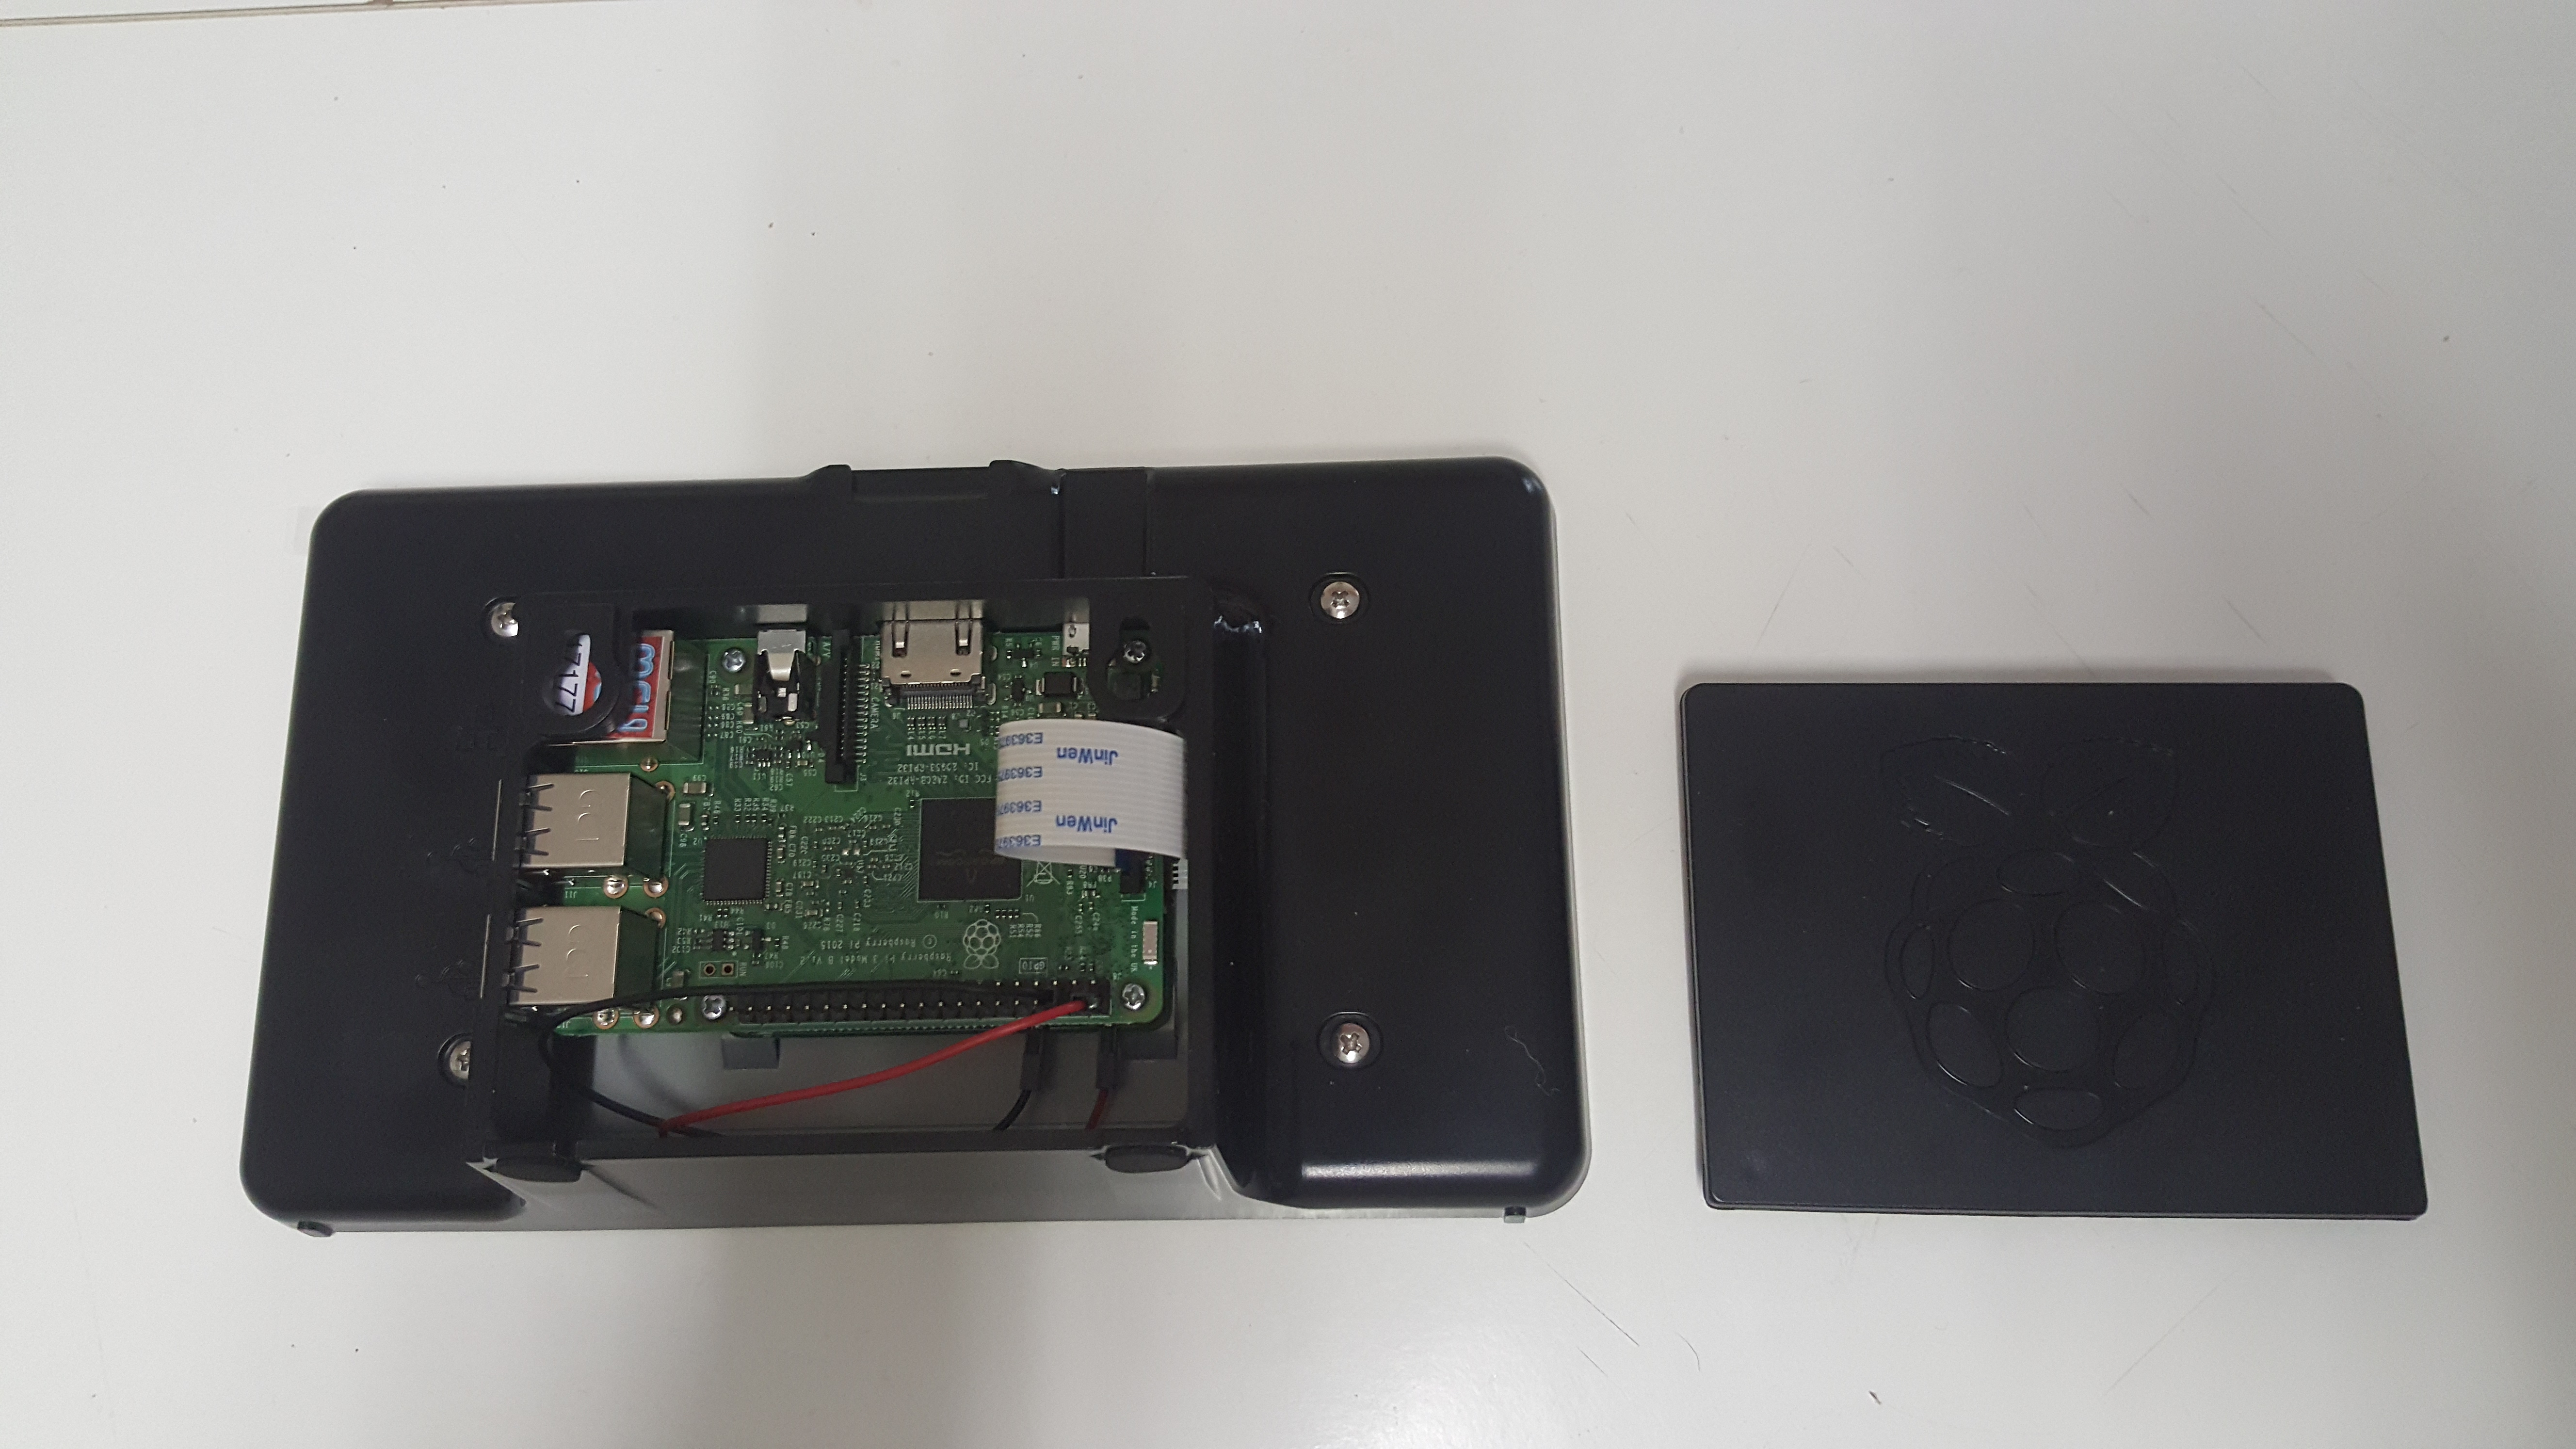
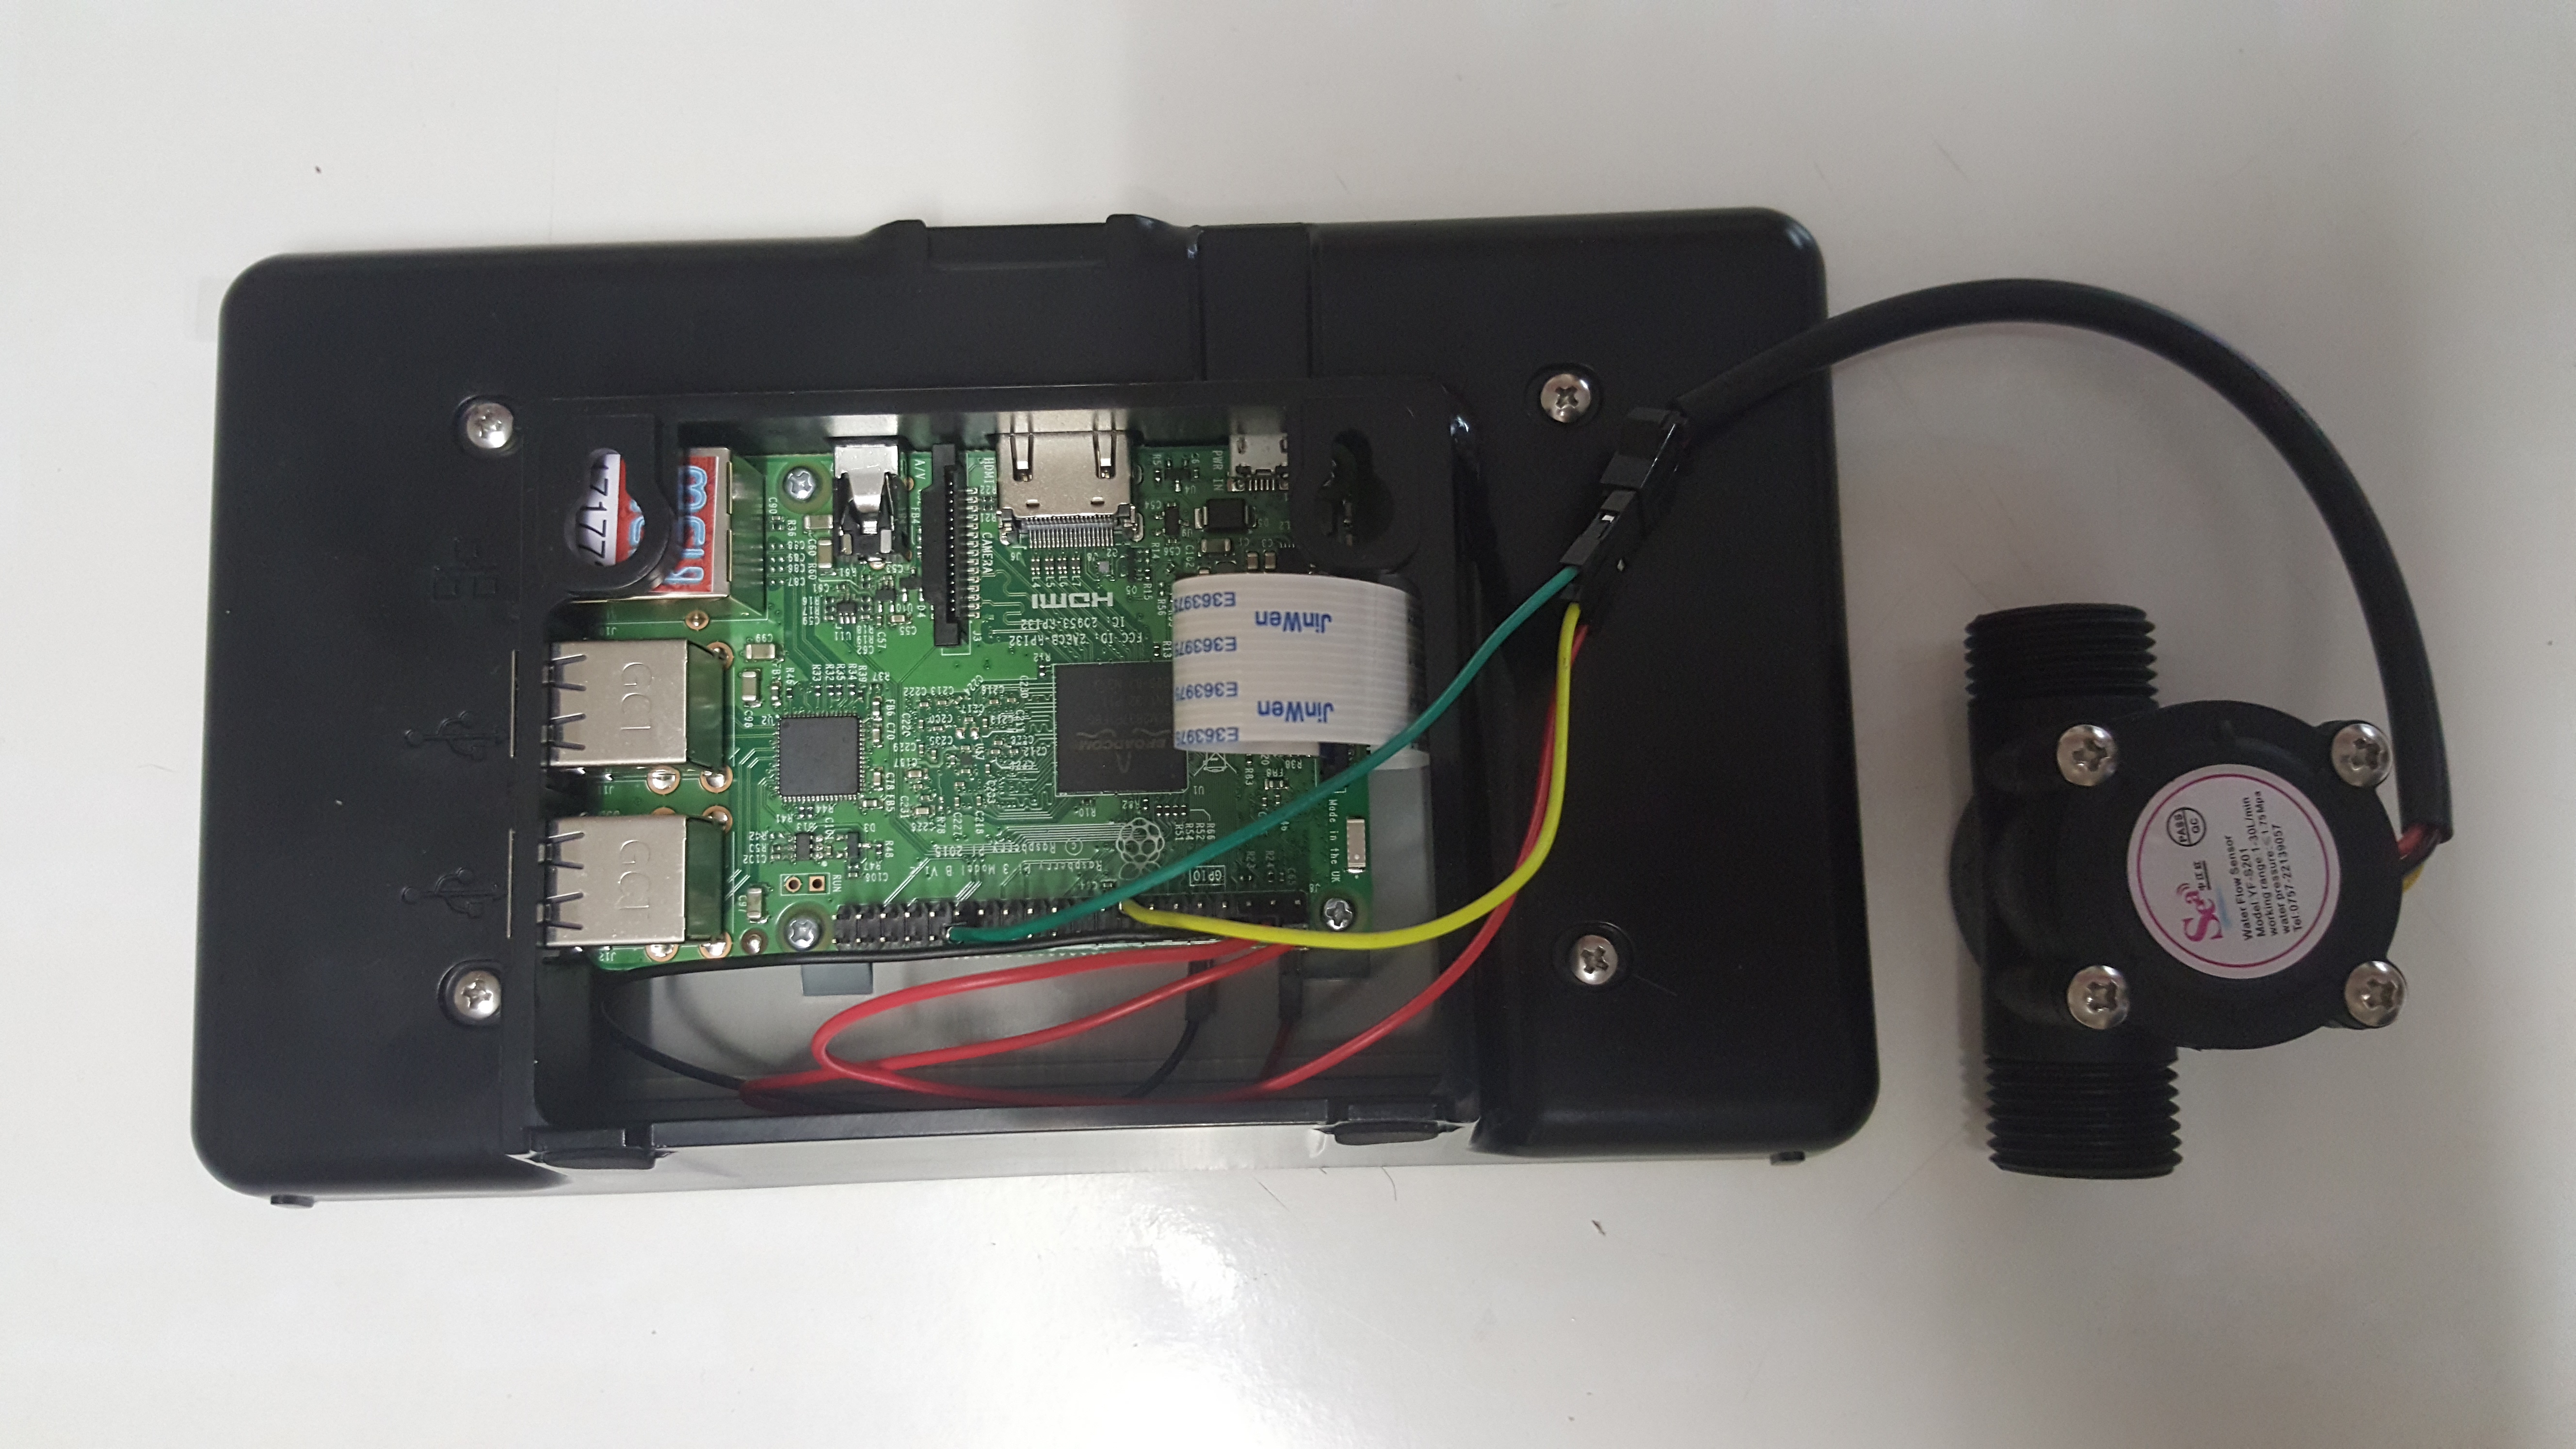
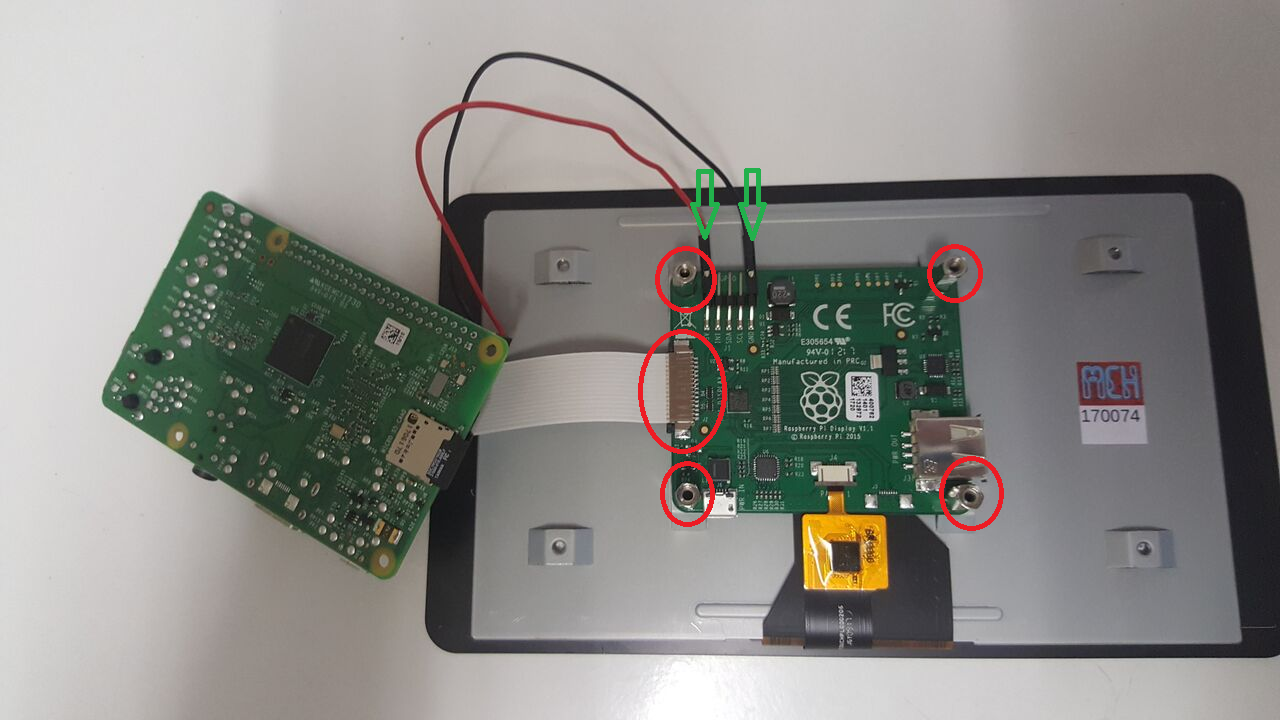
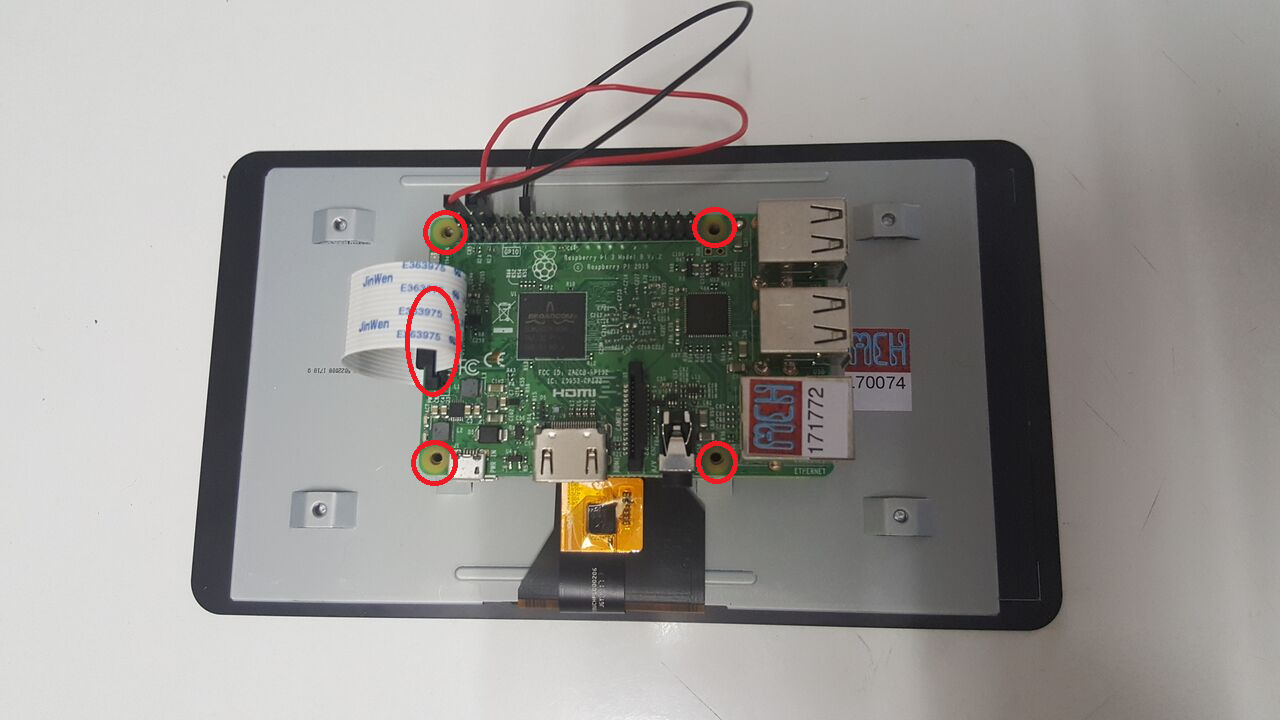
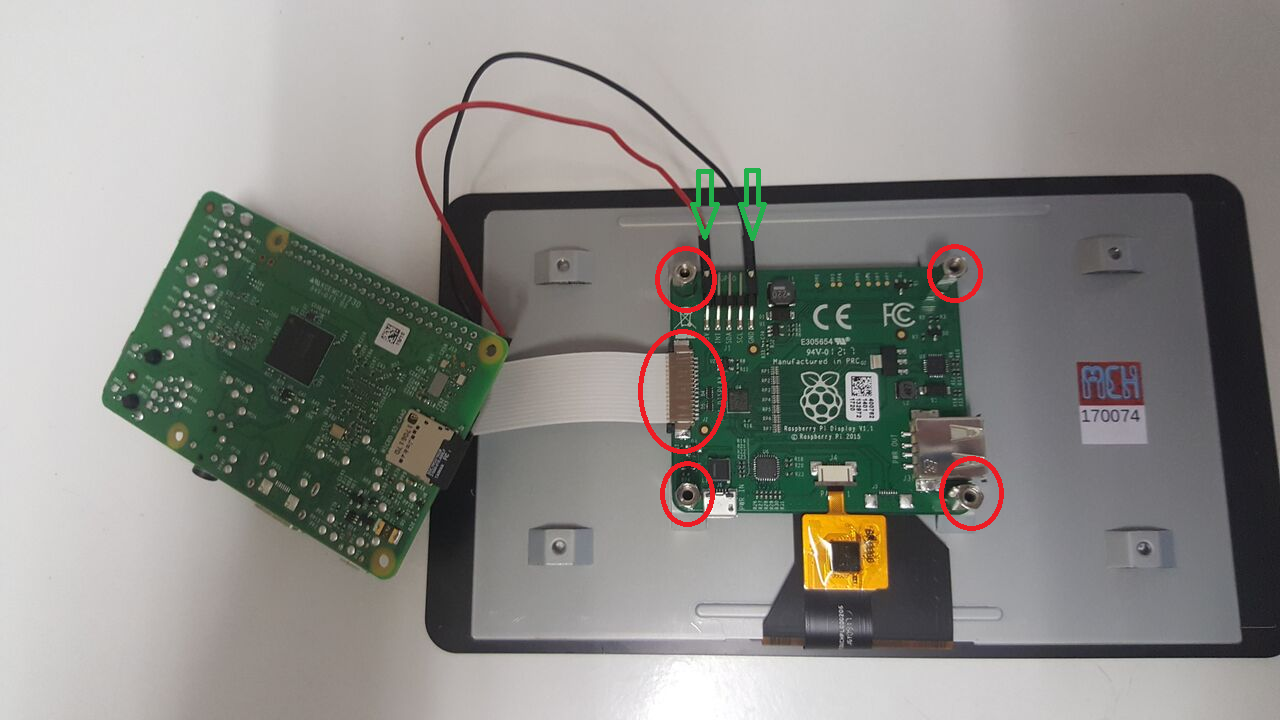
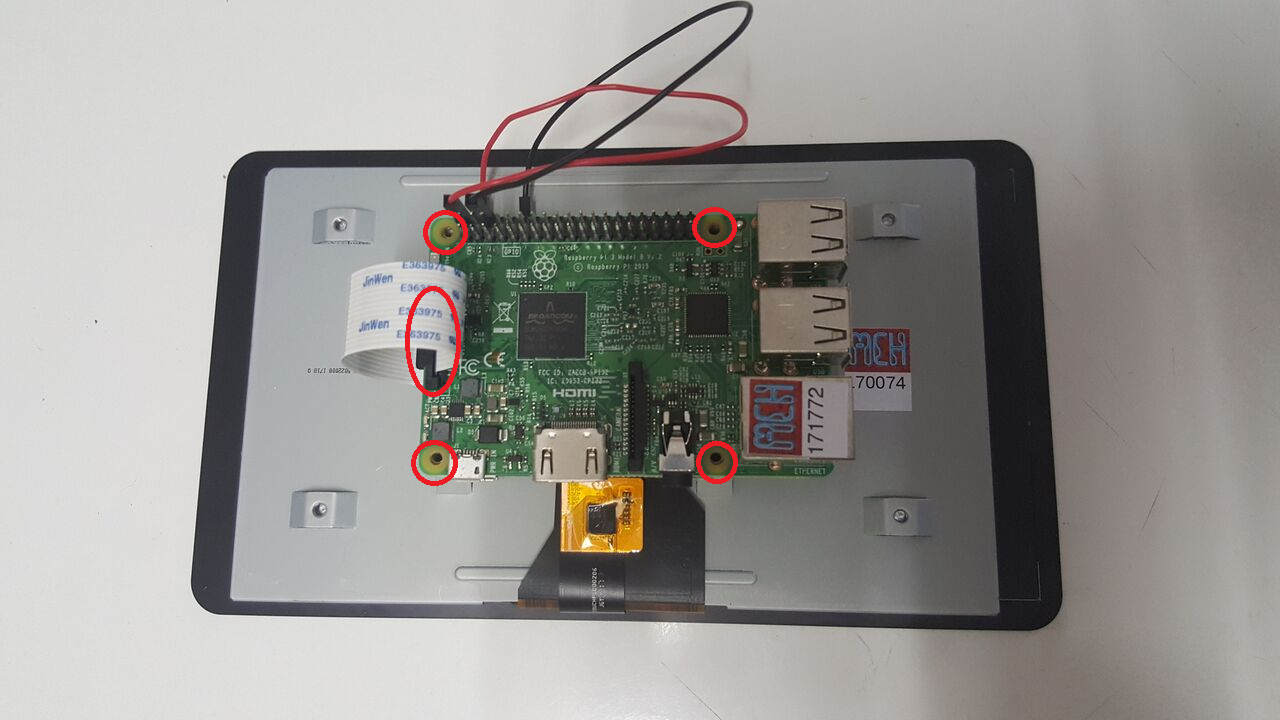
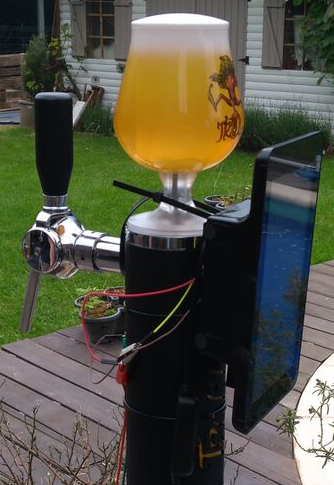
1) Assemble the screen and the Raspberry
First, screw on the screen mountings and connect the mat to the printed board. Pay attention to the mounting direction of the mat. It is also necessary to connect the power supply of the screen via the two cables indicated by the green arrows.
Then place the Raspberry on the screen mountings and screw it on. At the same time, connect the electric mat to the raspberry. It is also necessary to connect the screen power supply on the raspberry on pins 2 and 6.
2) Mounting the screen protector
Simply place the protection so that the holes of the protection are aligned with those of the screen to be able to screw them. Be careful not to crunch the mat.
3) Flow meter connection
For the connection of the flow meter, the black and red wire are the power cables. The black cable (green on the picture) is connected to pin 30 (GND) and the red to pin 4 (5V). The signal passes through the yellow cable connected to pin 15 (GPIO 22).
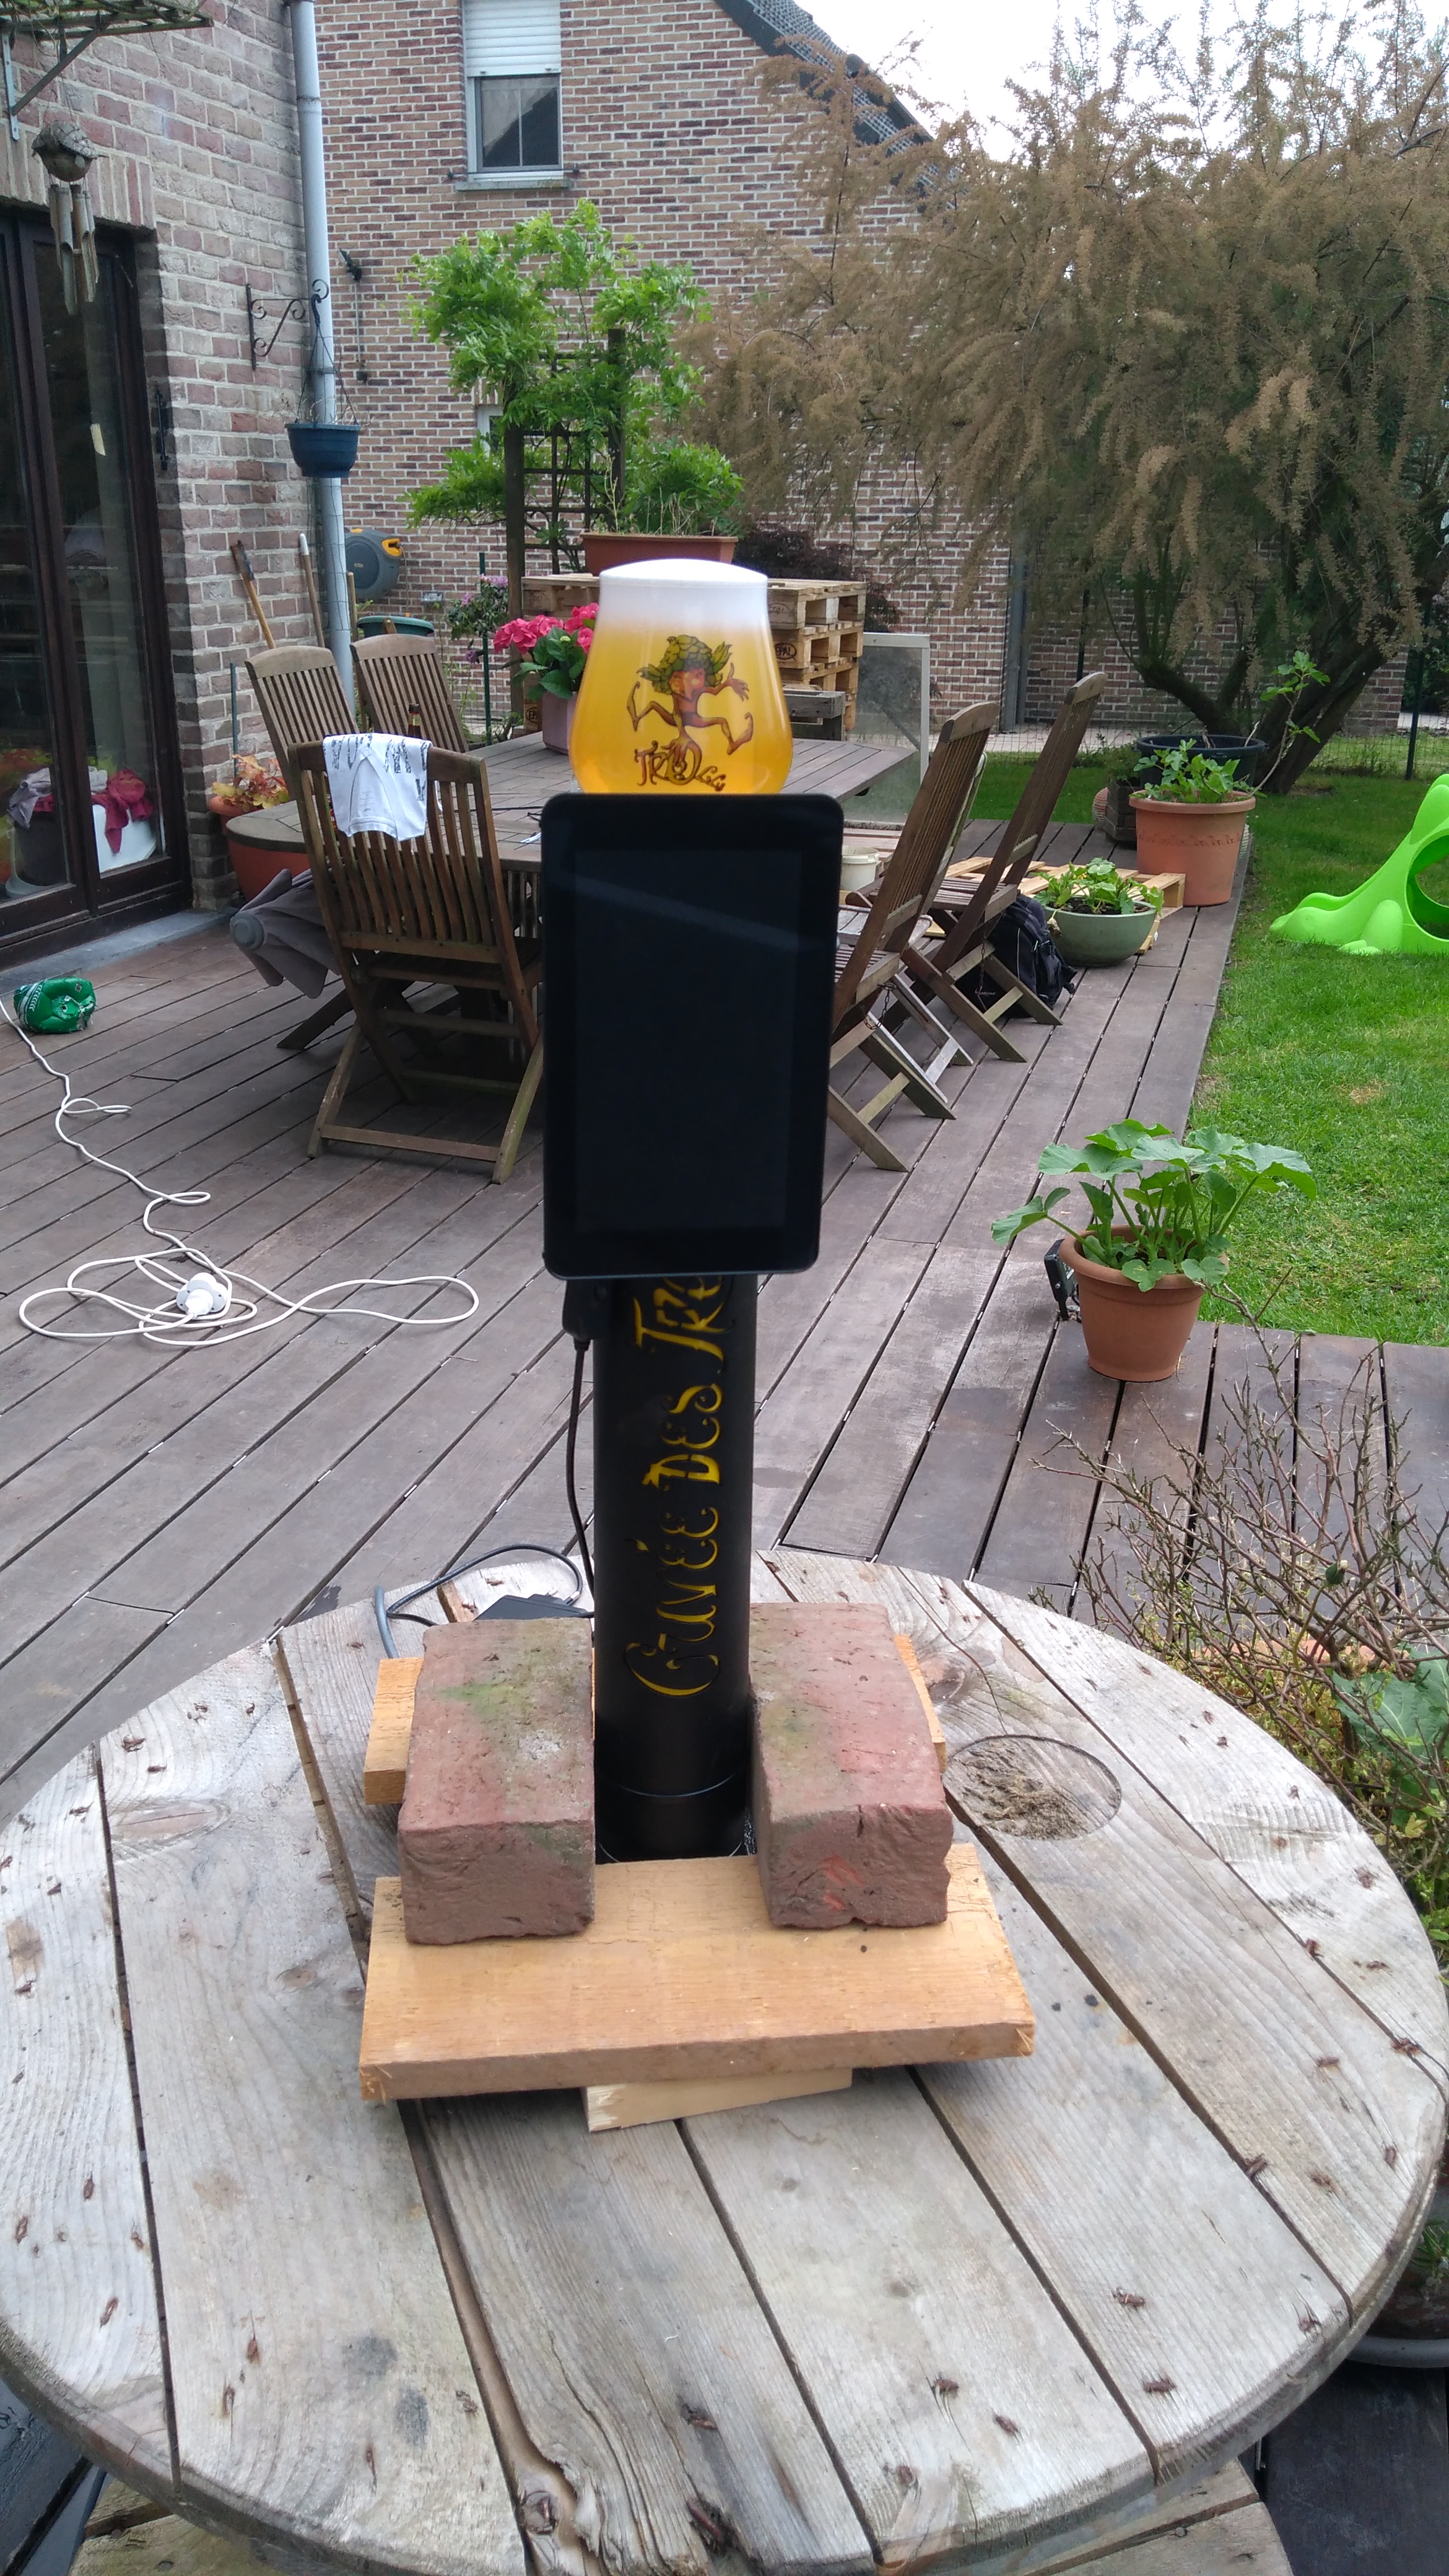
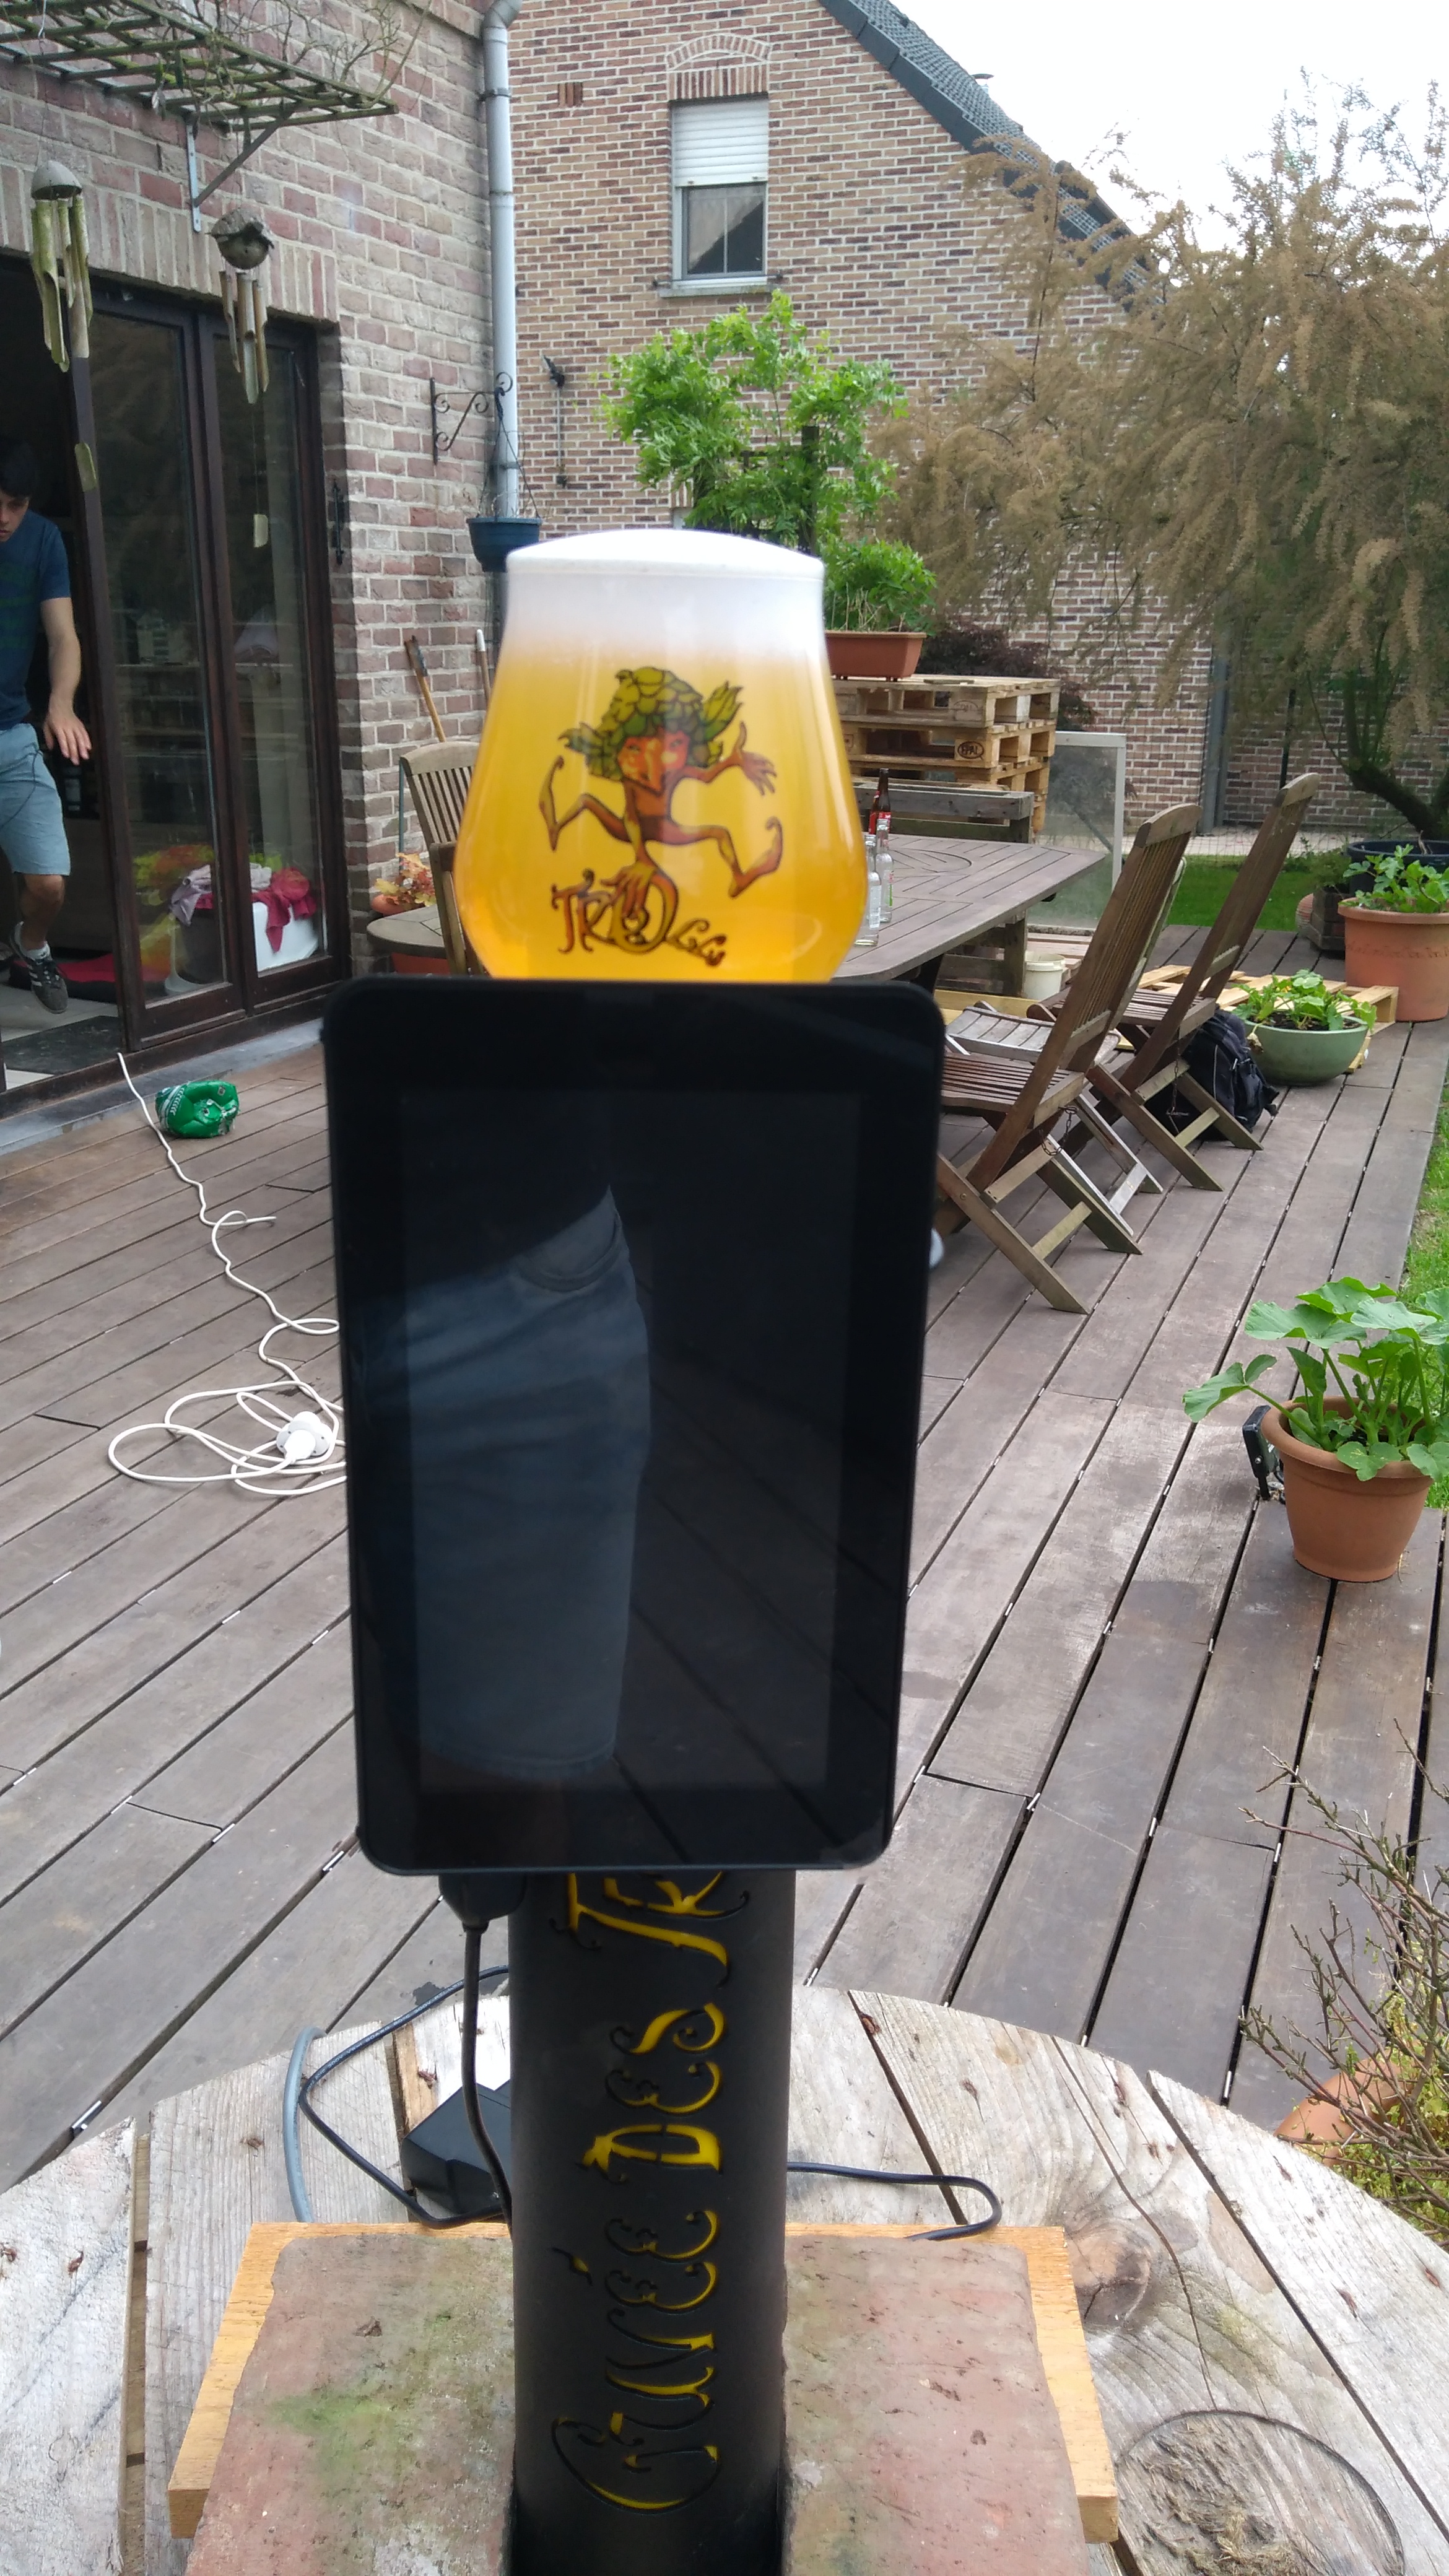
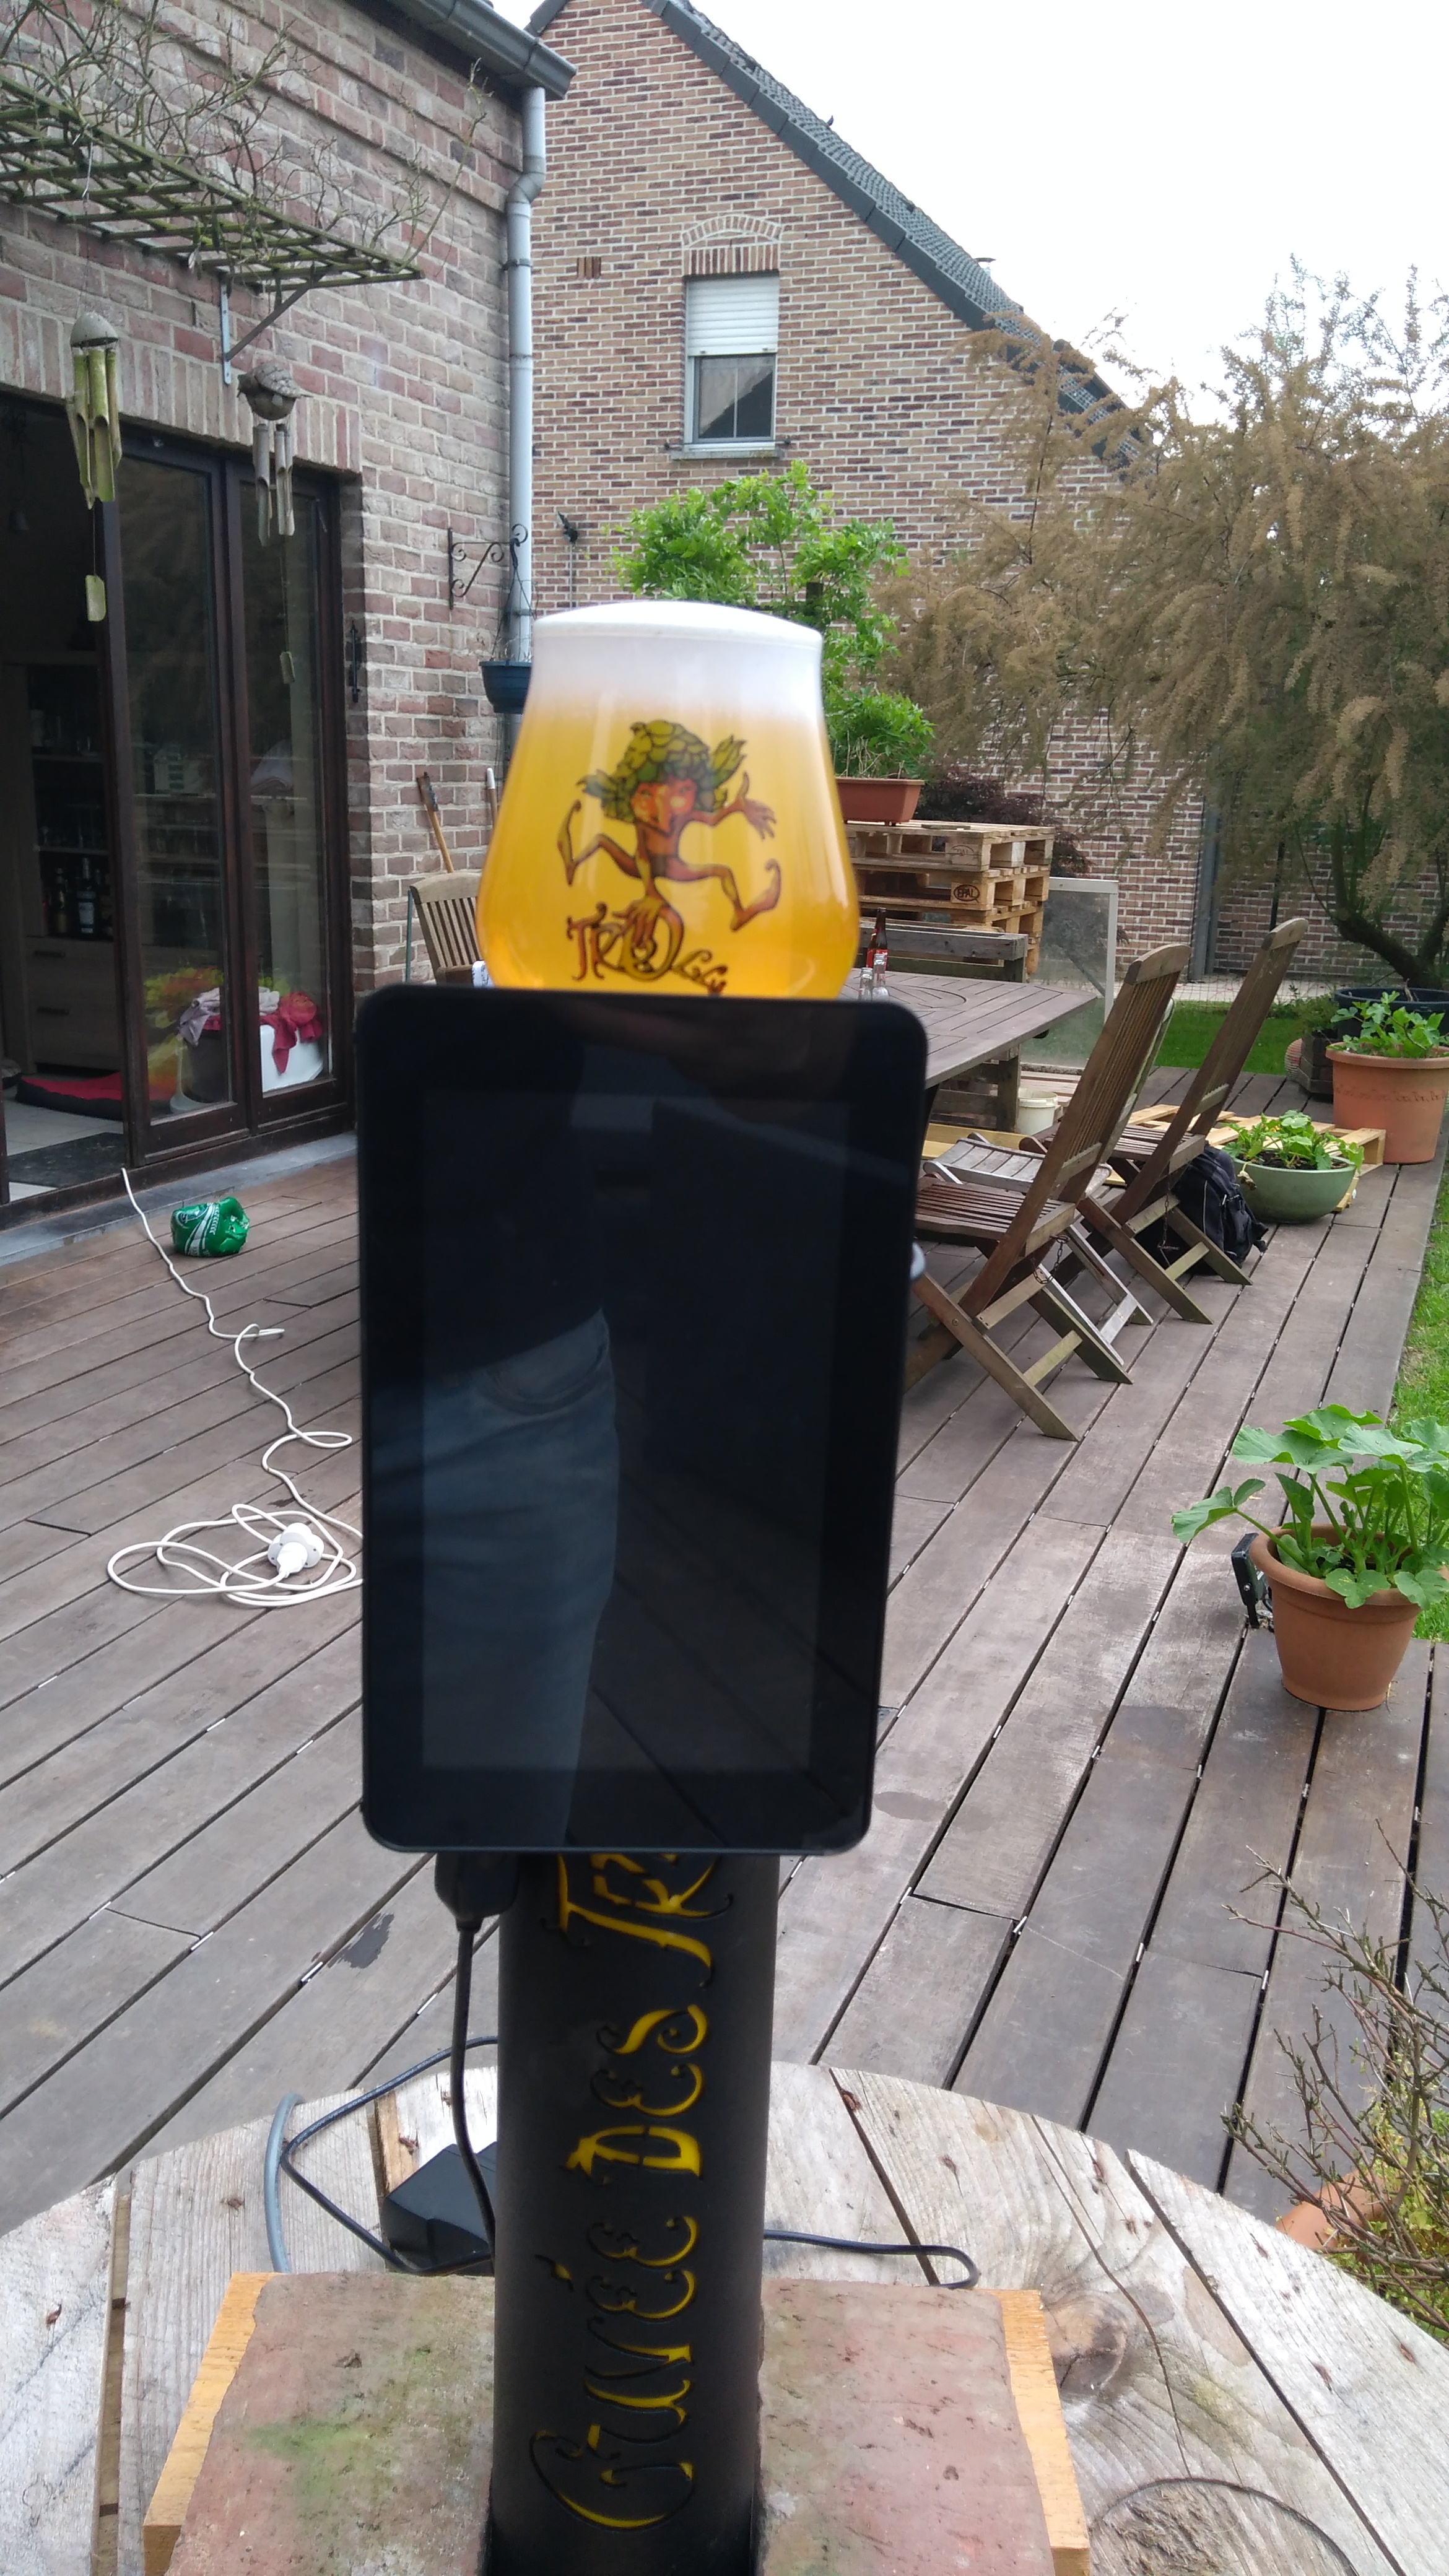
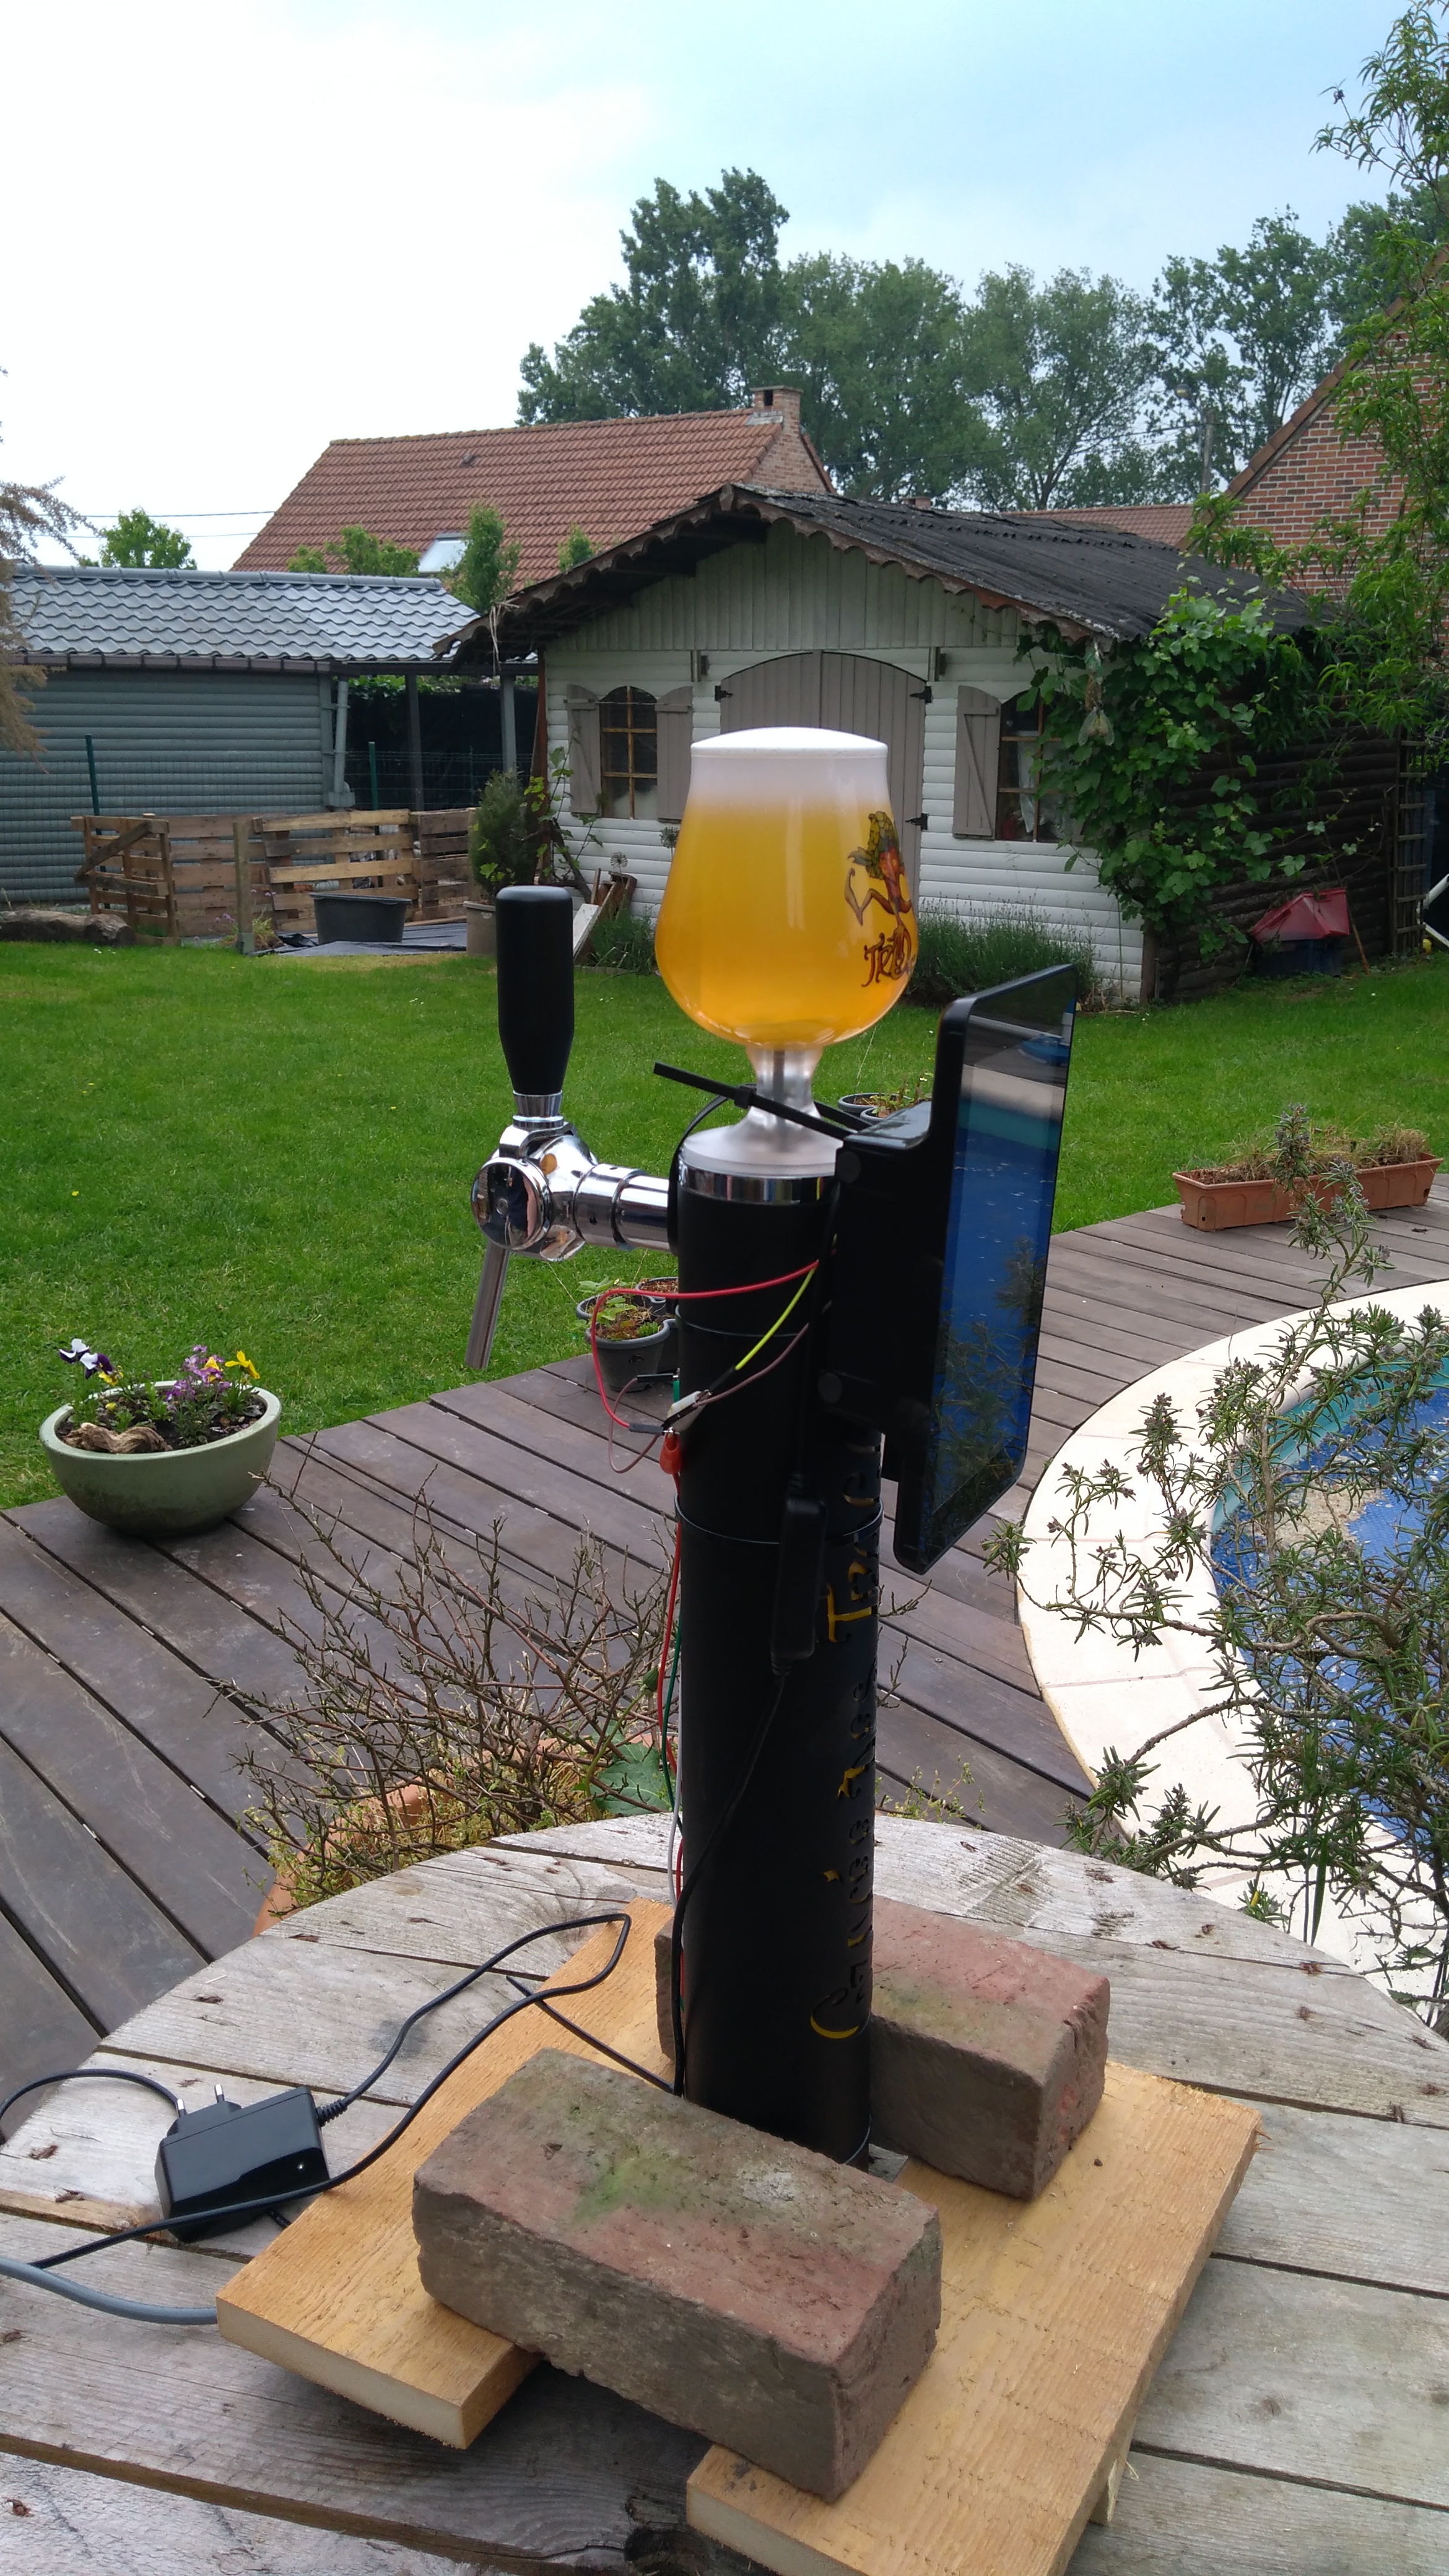
4) Mounting the screen on the pump
The method we used to attach the screen to the pump is not the best one. But a new pump is under development to accommodate the screen just over the brand “Cuvée des Trolls” and under the fake glass.
Software
A) ROTATION OF THE SCREEN
The brewery would a vertical screen. By
default, the screen is a horizontal one, like a computer screen. A rotation of the screen and of the tactile had to be configure.
1) Screen rotation
The first step is to rotate the screen (without a tactile rotation), by editing the config.txt file situated in the “boot” folder of the raspberry.
This line must be added:
display_rotate = 1
2) Tactile rotation
- A new file has to be created in the following path : /etc/xdg/lxsession/LXDE-pi/
The name of this file is “screenflip.sh”
- - Edit this new file and add the following lines:
#!/bin/bash
#script to set correct touchscreen orientation after x start
#this won't rotate the displayed image, only the touchscreen input
#to rotate the displayed image add the following to /boot/config.txt
#"display_rotate=1" to rotate display 90 degrees
#"display_rotate=3" to rotate display 270 degrees
xinput set-prop 'FT5406 memory based driver' 'Evdev Axes Swap' 1
#Uncomment this for 90 rotation
xinput --set-prop 'FT5406 memory based driver' 'Evdev Axis Inversion' 0 1
#Uncomment this for 270 rotation
#xinput --set-prop 'FT5406 memory based driver' 'Evdev Axis Inversion' 1 0
- - Edit the file named “autostart” situated in the following path : home/pi/.config/lxsession.LXDE-pi/
Add this line at the bottom of the file:
@/etc/xdg/lxsession/LXDE-pi/screenflip.sh
Restart the raspberry to confirm the modifications.
------------------------------------------------------------------------------------------------------------------------------------------
B) APPLICATION EXPLANATIONS AND PROGRAMATION
The program is programed with Python 3.6. The standard module "TKinter" is used to build the interface and OMXPlayer is used to display the videos. It is a video player specially made for Raspberry.
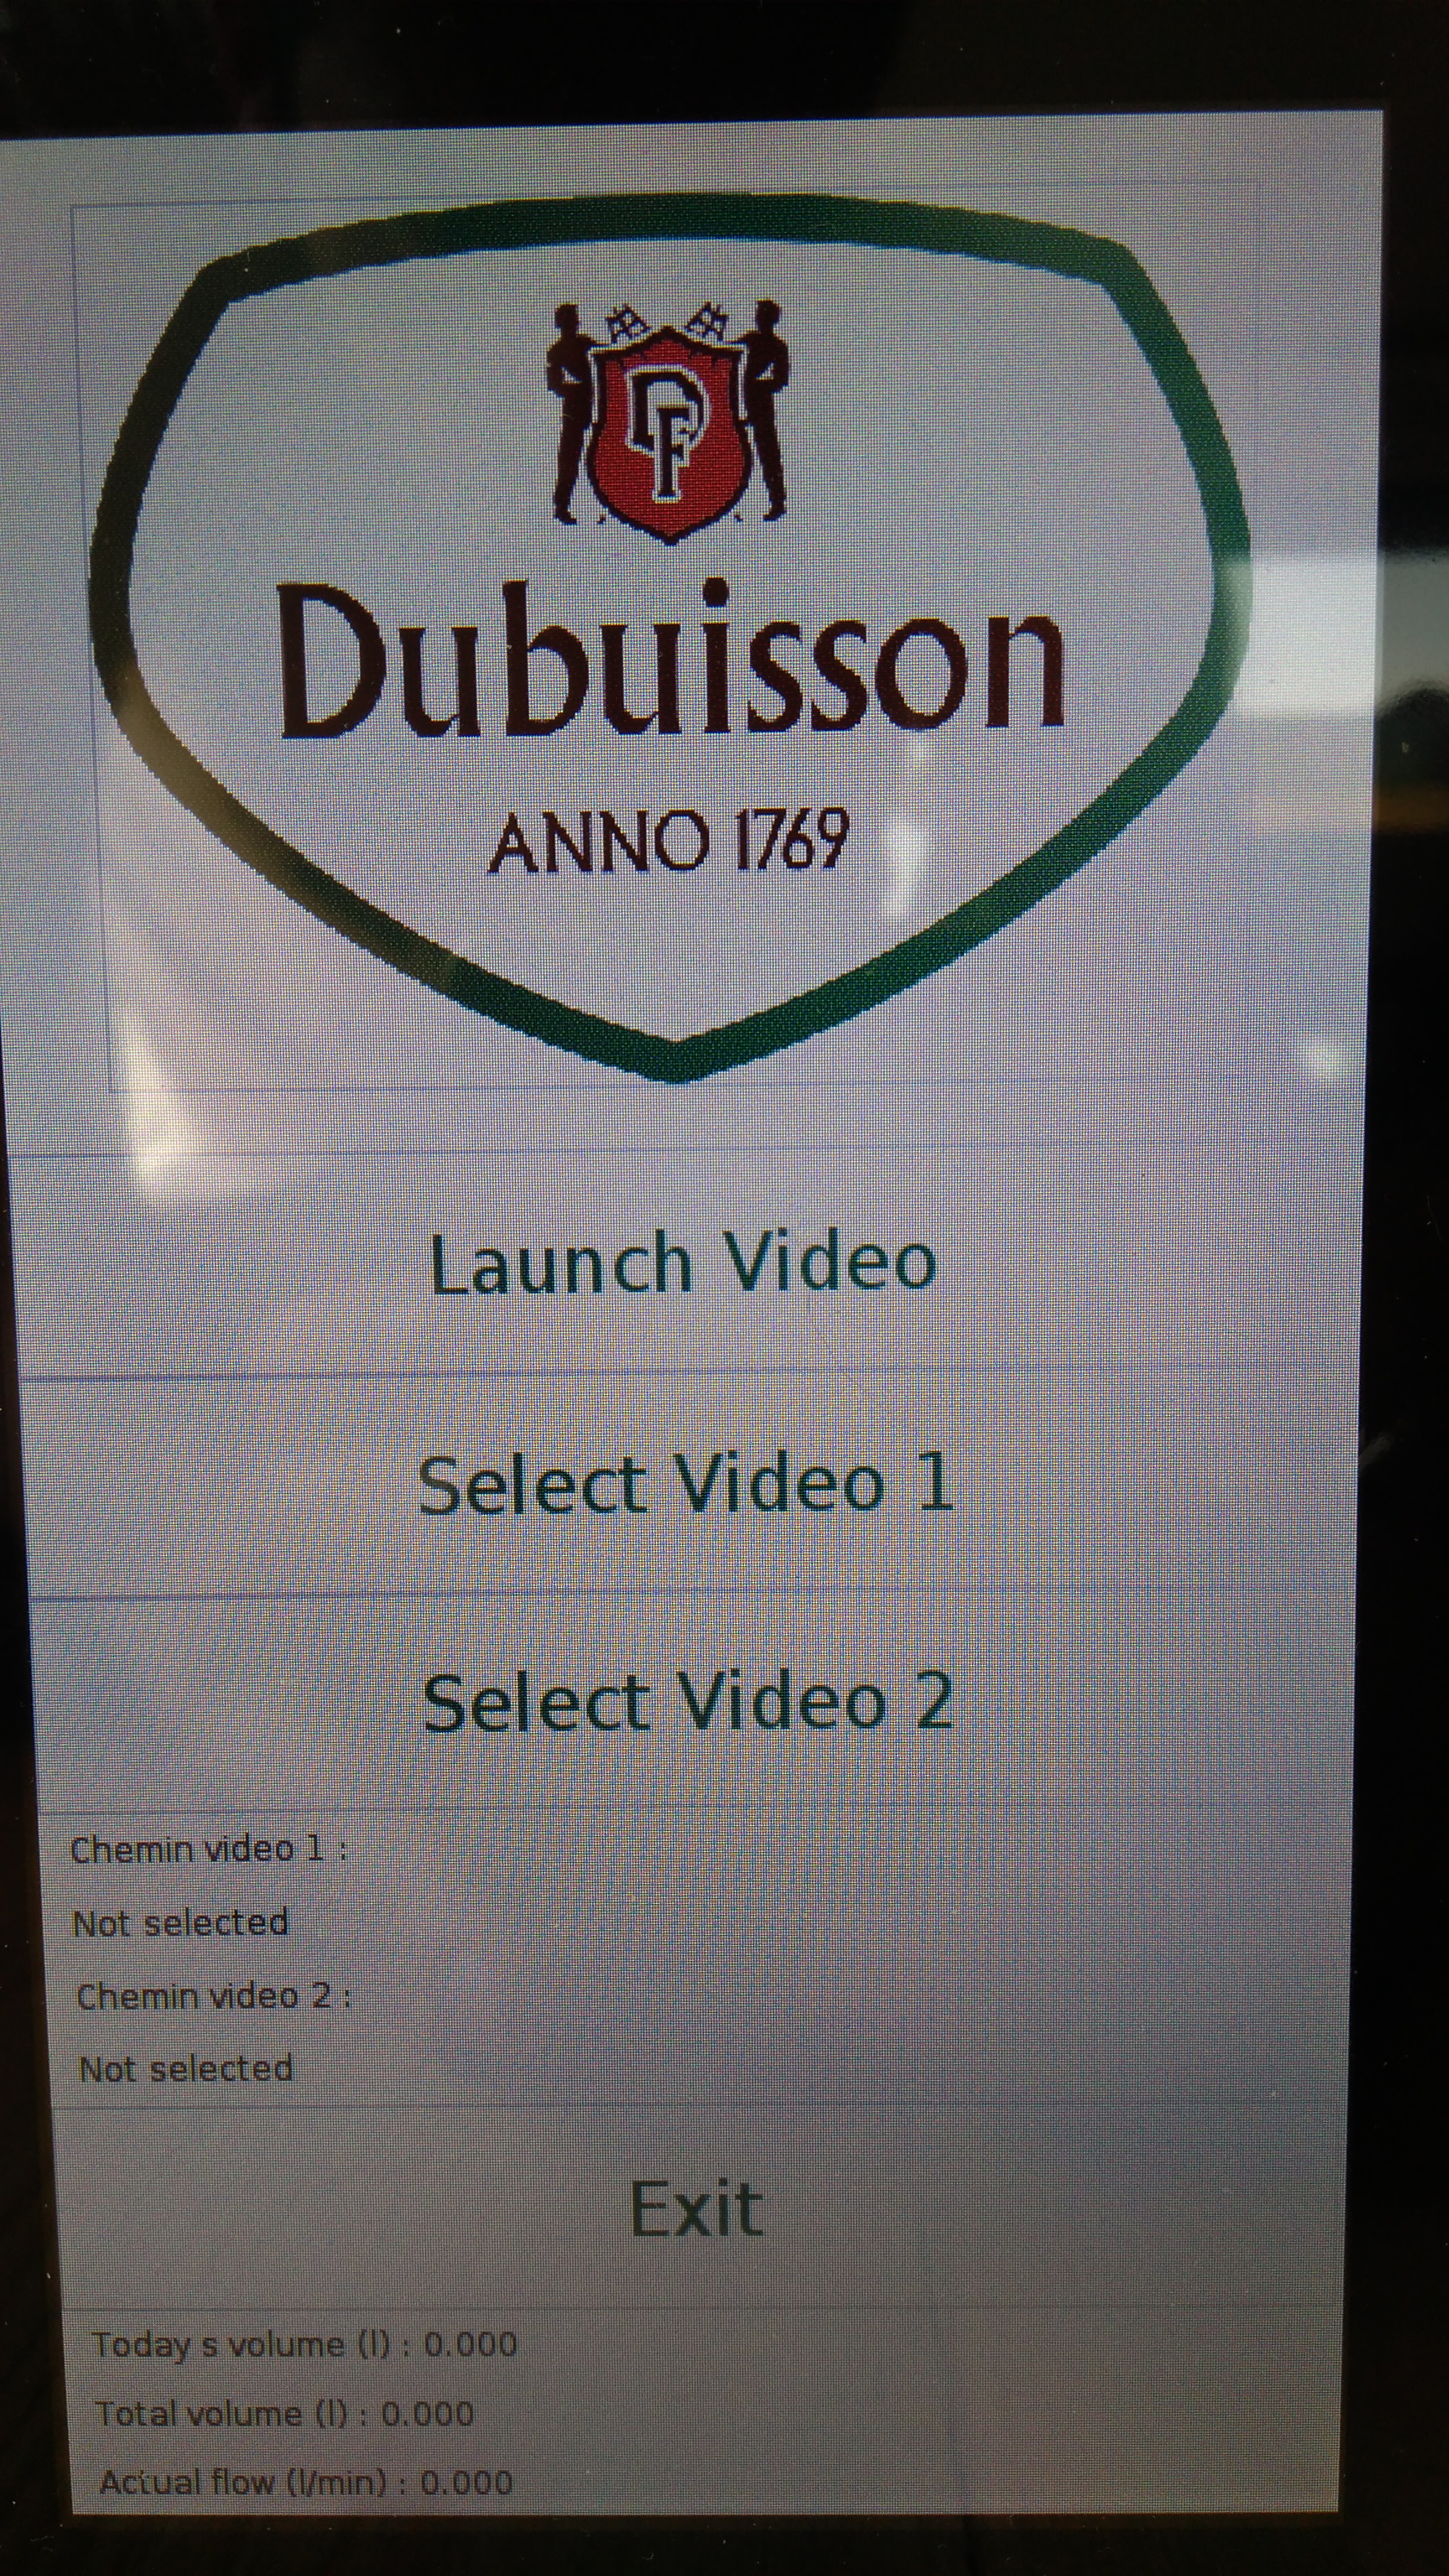
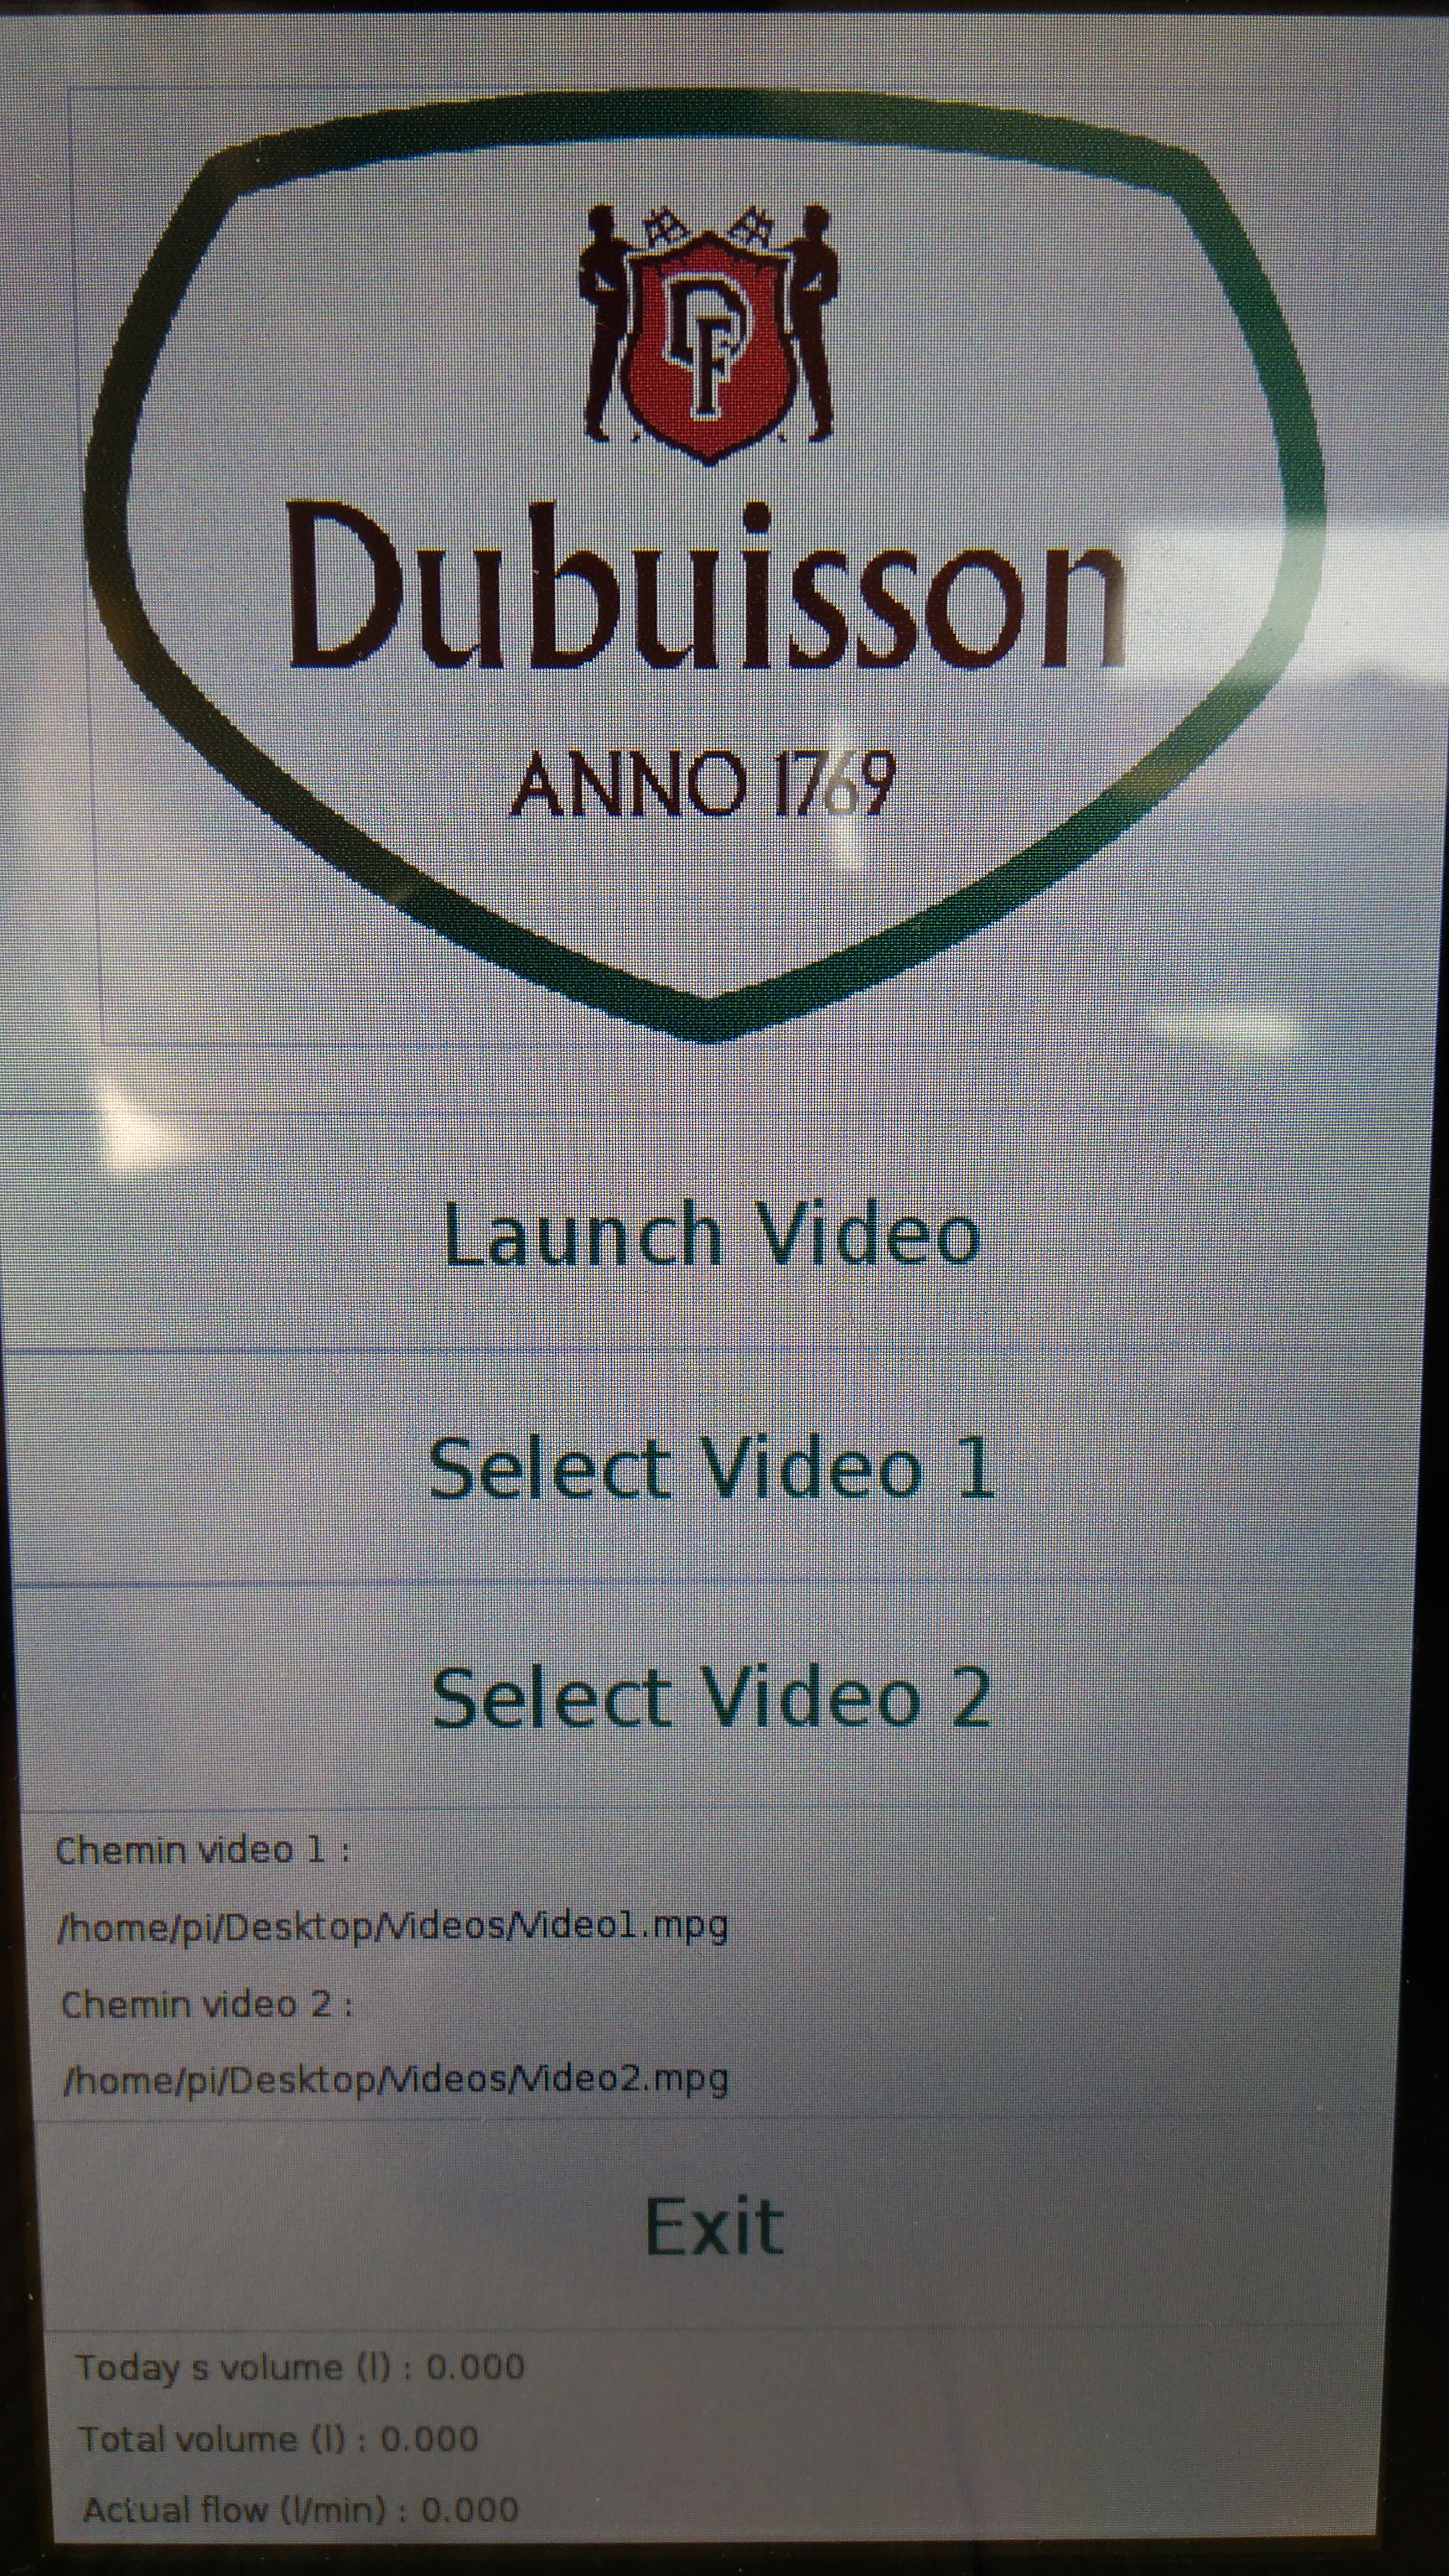
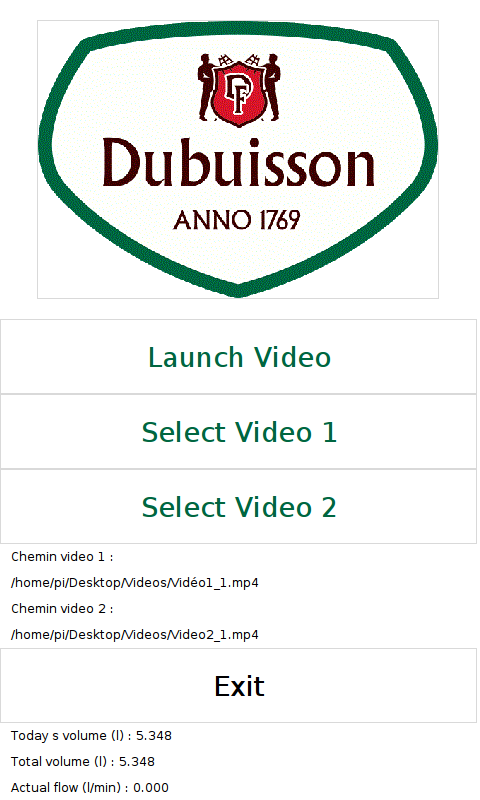
This is our interface. The code used to program it will be presented in this part.
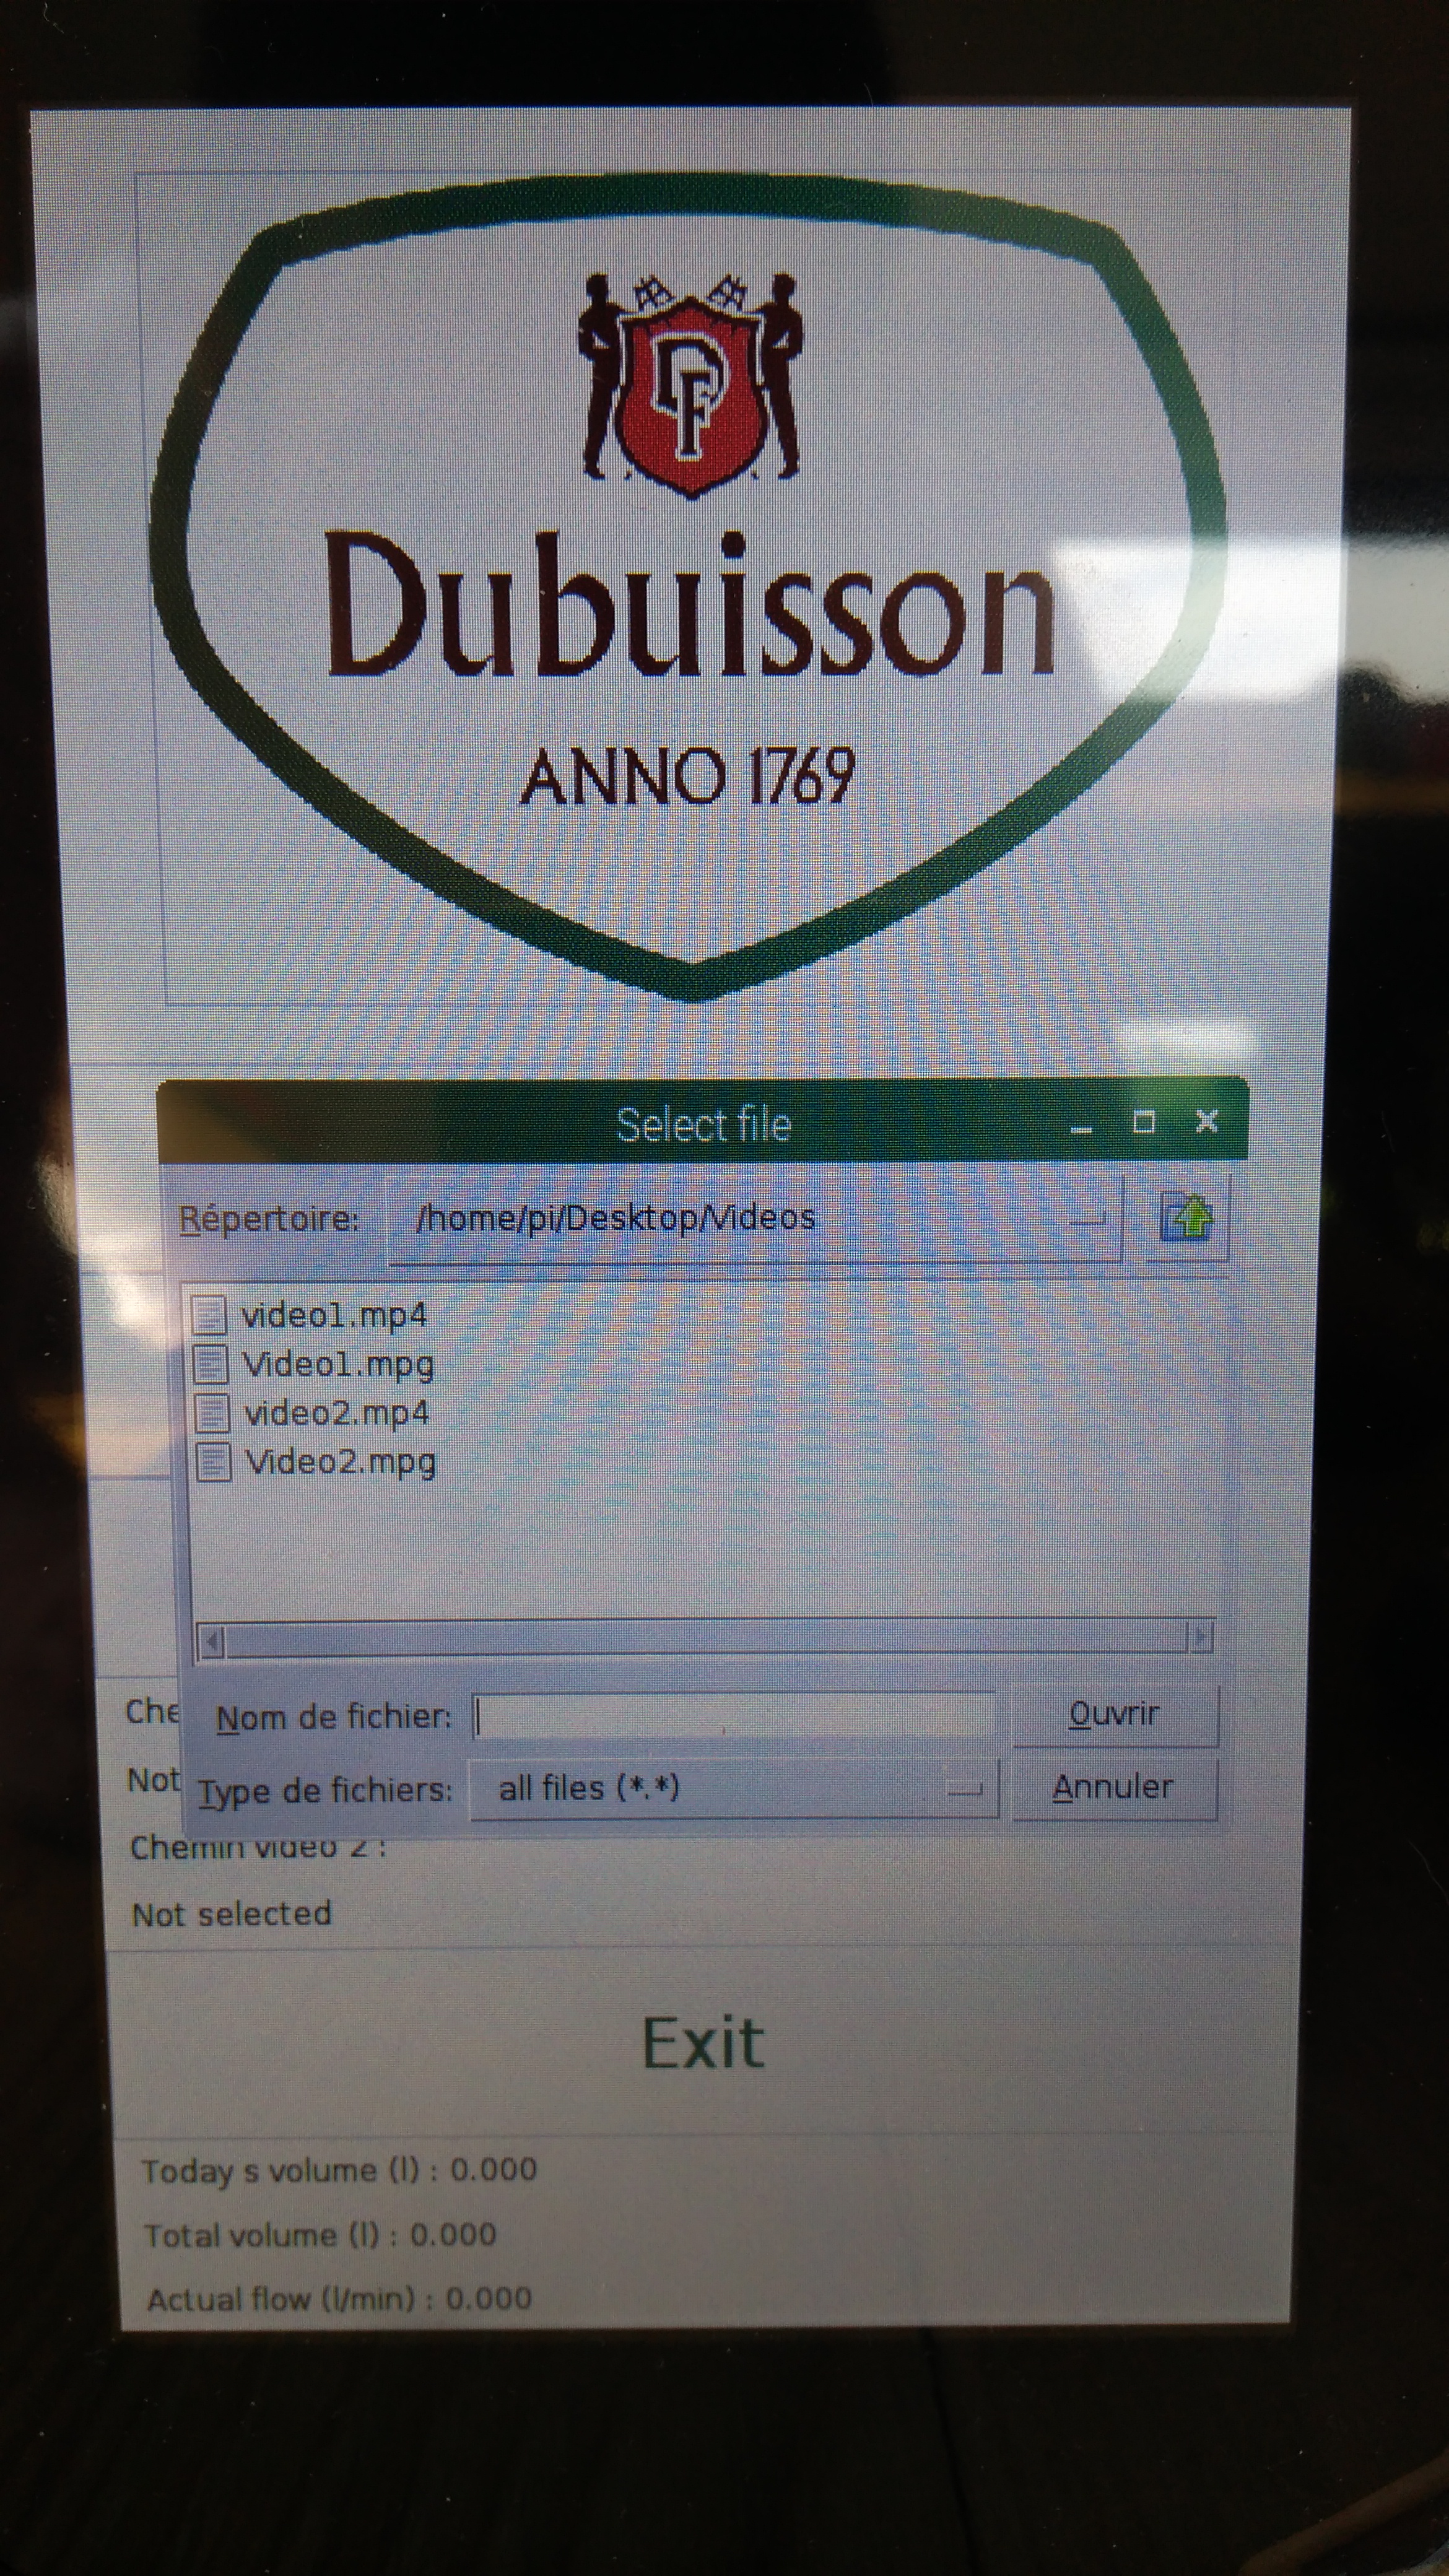
On the interface there are five buttons. The first one is used to launch the videos, the two second are useful to specify which MP4 video will be shown. Just under those buttons, the video paths are displayed. The last button "Exit" is just used to get out of the application.
Below some information about the flow meter are displayed like the actual beer flow, the volume of beer served today and the total amount of beer served on this beer pump. The information can be used for maintenance and to have a historic of measures.
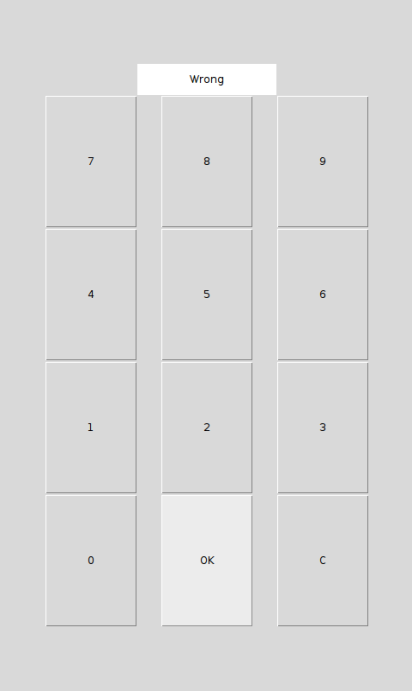
When a video is displayed, the user (barman or qualified person) can access the interface by clicking on the screen and entering the right password. Indeed, the access is not allowed to everyone because the customers of the bar cannot access the application without this code.
Note on the application code :
The python code is 400 lines long so everything will not be explained. There is a lot of French comments in the code, that start with a “#” at the beginning of the line. The parts of the code are : Imports, initialisation, definition of the main interface, definition of the functions related to the buttons, definition of the other functions, definition of the password interface and functions, definition of the pulse counter of the flowmeter, definition of the measure function, definition of the main function.
- Imports
Import of the modules os, tkinter, messagebox, fonts, filedialog, popen (for OMXPlayer), GPIO (for the flowmeter); and initialisation of variables.
# Imports généraux
import os
import tkinter
from subprocess import PIPE
from tkinter import ttk
from tkinter import *
# Import Module de message Popup
from tkinter import messagebox
# Import du module police
from tkinter.font import Font
# Import du module de gestion de fichier
from tkinter import filedialog
# Import du module de lecture video grâce à Popen
from subprocess import Popen
# Imports des pin pour le capteur
import RPi.GPIO as GPIO
import time, sys
# Définition du temps de lecture durant la 2e video (programme en pause durant ce temps !!!)
global temps_video2
temps_video2 = 5
# Definition du pin 22 pour le capteur
FLOW_SENSOR = 22
GPIO.setmode(GPIO.BCM)
GPIO.setup(FLOW_SENSOR, GPIO.IN, pull_up_down = GPIO.PUD_UP)
# Variable qui définit la video jouée (0 = pas de vidéos jouées, 1 = vidéo 1, 2 = vidéeo2)
PlayedVideo = 0
- Initialisation
Definition of the class used on this project and initialisation of the variables like the password, the colour of the screen, the font, import of the Dubuisson logo, and initialisation of the grid that is useful for the positioning of the buttons and label on the main interface.
#-----------------------------------------------------------------------------------------
# Classe générale contenant toutes les fonctions
class simpleapp_tk(tkinter.Tk):
# Fonction d'initialisation globales
def __init__(self,parent):
tkinter.Tk.__init__(self,parent)
self.parent = parent
self.initialize()
# Fonction d'initialisation de la fenetre
def initialize(self):
# Variables fenetre
# Definition du mot de passe permettant le dévérouillage du système
Password = "7904"
# Définition de la couleur 'vert Dubuisson' en hexadécimal
DubGreen = '#006640'
# Définition de la taille d'écran
SizeScreen = "480x900"
# Definition de la police Helvetica 20
helv20 = Font(family='Helvetica', size=20)
# Définition du logo de l'application (l'image doit toujours etre dans le meme dossier que le programme)
LogoDubuisson = PhotoImage(file = 'LogoDubuisson.gif')
# Définition de la variable d'arret des vidéos
self.stop = 0
# Code fenetre
# Création de la grille (gestionnaire de layout)
self.grid()
# Contrainte pour empècher de modifier la taille de la fenêtre
self.resizable(False,False)
# Redimentionnement de la fenetre
self.geometry(SizeScreen)
# Attribution de la couleur blanche en arrière-plan
self.config(bg='white')
- Definition of the main interface
Definition of the labels, the buttons and the logo the grid. The attributions of the parameters (width, height, colour, font,…) are also defined in this part of the code.
#-----------------------------------------------------------------------------------------
# Programmation de l'interface principale
# Paramètres utilisés
# padx = Decallage horizontal par rapport aux éléments situés sur la droite
# pady = Decallage vertical par rapport aux éléments supérieurs
# width = Largeur
# heigth = Hauteur
# relief = Relief
# bd = Taille de la bordure
# bg = Couleur du fond au repos
# fg = Couleur de la police au repos
# activebackground = Couleur du fond lors de l'activation
# activeforeground = Couleur de la police lors de l'activation
# font = police appliquée
# text = texte
# sticky = Position du texte dans l'élement(n=nord, w=west,...)
# Label Vide au dessus du logo:
# Création du label
LblVide1 = tkinter.Label(self, padx=10, pady=2, bg="white", fg="black")
# Placement du label dans la grille
LblVide1.grid(column=5, row=0, sticky = 'w')
# Logo Dubuisson :
# Definition du logo du bloc image sous forme de label
Logo = Label(self, image=LogoDubuisson)
# Definition de l'image
Logo.image = LogoDubuisson
# Placement de l'image dans la grille
Logo.grid(row = 1, column = 5, columnspan = 2, padx = 0, pady = 0 )
# Label Vide en dessous du logo:
# Création du label
LblVide2 = tkinter.Label(self, padx=10, pady=2, bg="white", fg="black")
# Placement du label dans la grille
LblVide2.grid(column=5, row=2, sticky = 'w')
# Bouton 'Lauch Videos' :
# Création du bouton et attribution de ses paramètres
BtnLV = tkinter.Button(self, padx=109, pady=20, width=15, height=1, relief ="flat", bd=0, bg='white', fg=DubGreen, activebackground='white', activeforeground='black', font=helv20, text="Launch Video", command = launch_video1)
# Placement du btn dans la grille
BtnLV.grid(column=5,row=3)
# Defintiion des variables Chemin video
self.CheminVideo1 = "Not selected"
self.CheminVideo2 = "Not selected"
# Bouton 'Select Video 1' :
# Création du bouton et attribution de ses paramètres
BtnV1 = tkinter.Button(self, padx=109, pady=20, width=15, height=1, relief ="flat", bd=0, bg='white', fg=DubGreen, activebackground='white', activeforeground='black', font=helv20, text="Select Video 1", command = select_video1)
# Placement du btn dans la grille
BtnV1.grid(column=5,row=5)
# Bouton 'Select Video 2' :
# Création du bouton et attribution de ses paramètres
BtnV2 = tkinter.Button(self, padx=109, pady=20, width=15, height=1, relief ="flat", bd=0, bg='white', fg=DubGreen, activebackground='white', activeforeground='black', font=helv20, text="Select Video 2", command = select_video2)
# Placement du btn dans la grille
BtnV2.grid(column=5,row=6)
# Label Video 1 Texte :
# Création du label
LblVideo1Texte = tkinter.Label(self, padx=10, pady=5, bg="white", fg="black", text="Chemin video 1 : ")
# Placement du label dans la grille
LblVideo1Texte.grid(column=5, row=7, sticky = 'w')
# Label Video 1 Chemin :
# Création du label
LblVideo1Path = tkinter.Label(self, padx=10, pady=5, bg="white", fg="black", text="Not selected")
# Placement du label dans la grille
LblVideo1Path.grid(column=5, row=8, sticky = 'w')
# Label Video 2 Texte :
# Création du label
LblVideo2Texte = tkinter.Label(self, padx=10, pady=5, bg="white", fg="black", text="Chemin video 2 : ")
# Placement du label dans la grille
LblVideo2Texte.grid(column=5, row=9, sticky = 'w')
# Label Video 2 Chemin :
# Création du label
LblVideo2Path = tkinter.Label(self, padx=10, pady=5, bg="white", fg="black", text="Not selected")
# Placement du label dans la grille
LblVideo2Path.grid(column=5, row=10, sticky = 'w')
# Bouton 'Exit' :
# Création du bouton et attribution de ses paramètres
BtnExt = tkinter.Button(self, padx=109, pady=20, width=15, height=1, relief ="flat", bd=0, bg='white', fg=DubGreen, activebackground='white', activeforeground='black', font=helv20, text="Exit", command = close_window)
# Placement du btn dans la grille
BtnExt.grid(column=5,row=11)
# Label Volume du jour :
# Création du label en variable globale afin de pouvoir l'éditer grâce à la fonction de mesure (hors de la classe)
global LblVolumeJour
LblVolumeJour = tkinter.Label(self, padx=10, pady=5, bg="white", fg="black", text="Today's volume (l) : ")
# Placement du label dans la grille
LblVolumeJour.grid(column=5, row=12, sticky = 'w')
# Label Volume total :
# Création du label en variable globale afin de pouvoir l'éditer grâce à la fonction de mesure (hors de la classe)
global LblVolumeTotal
LblVolumeTotal = tkinter.Label(self, padx=10, pady=5, bg="white", fg="black", text="Total volume (l) : ")
# Placement du label dans la grille
LblVolumeTotal.grid(column=5, row=13, sticky = 'w')
# Label Debit actuel :
# Création du label en variable globale afin de pouvoir l'éditer grâce à la fonction de mesure (hors de la classe)
global LblDebit
LblDebit= tkinter.Label(self, padx=10, pady=5, bg="white", fg="black", text="Actual flow (l/min) : ")
# Placement du label dans la grille
LblDebit.grid(column=5, row=14, sticky = 'w')
- Definition of the functions related to the buttons
The function related to the buttons “Select video”, “Launch videos” and “Exit” are defined in this part.
#-----------------------------------------------------------------------------------------
# Programmation des fonctions liées aux boutons
# Bouton "Select Video1" (Fonction d'ouverture de la boite de dialogue pour la selection de la video 1):
def select_video1():
# Definition du chemin de fichier par ouverture d'une boite de dialogue d'exploateur de fichier
FilenameVideo1 = filedialog.askopenfilename(initialdir = "/home/pi/Desktop/Videos",title = "Select file",filetypes = (("all files","*.*"),("Video files", "*.mp4;*.flv;*.avi;*.mkv;*.MPEG-4")))
# Copie du chemin du fichier dans l'interface principale
LblVideo1Path.config(text=FilenameVideo1)
# Condition de verification du chemin d'accès à la vidéo
if FilenameVideo1 == "" or FilenameVideo1 == () :
FilenameVideo1="Not selected"
LblVideo1Path.config(text=FilenameVideo1)
else:
self.CheminVideo1 = FilenameVideo1
# Bouton "Select Video2" (Fonction d'ouverture de la boite de dialogue pour la selection de la video 2):
def select_video2():
# Definition du chemin de fichier par ouverture d'une boite de dialogue d'exploateur de fichier
FilenameVideo2 = filedialog.askopenfilename(initialdir = "/home/pi/Desktop/Videos",title = "Select file",filetypes = (("all files","*.*"),("Video files", "*.mp4;*.flv;*.avi;*.mkv;*.MPEG-4")))
# Copie du chemin du fichier dans l'interface principale
LblVideo2Path.config(text=FilenameVideo2)
# Condition de verification du chemin d'accès à la vidéo
if FilenameVideo2 == "" or FilenameVideo2 == ():
self.CheminVideo2="Not slected"
LblVideo2TPath.config(text=FilenameVideo2)
else:
self.CheminVideo2 = FilenameVideo2
# Bouton "Lauch_Video" (Fonction de lecture de la vidéo 1):
# Fonction globale afin de pouvoir l'appeler dans la fonction de mesure
global launch_video1
def launch_video1():
# Definition globale de la variable qui définit la video jouée afin de pouvoir l'éditer dans la fonction de mesure
global PlayedVideo
# Message d'erreur si le chemin d'accès à la vidéo n'a pas été correctement sélectionné
if self.CheminVideo1 == "Not selected" or self.CheminVideo2 == "Not selected" :
messagebox.showerror("Error", "Path of both videos not selected")
else :
# Condition de lancement de la fonction contenant la fenêtre d'arret de vidéo si elle n'a pas encore été lancée
if self.stop == 0:
self.stop = 1
# Lancement de la fenetre qui attend le clic pour fermer la video
DisableVideo()
# Variable qui définit la video jouée (1 = vidéo 1)
PlayedVideo=1
# Lancement de la vidéo en plein écran grâce au lecteur OMXPlayer
omxc = Popen(['omxplayer', '-b', '--loop',self.CheminVideo1])
# Bouton "Lauch Video2" (Fonction de lecture de la vidéo 2):
# Fonction globale afin de pouvoir l'appeler dans la fonction de mesure
global launch_video2
def launch_video2():
# Definition globale de la variable qui définit la video jouée afin de pouvoir l'éditer dans la fonction de mesure
global PlayedVideo
# Message d'erreur si le chemin d'accès à la vidéo n'a pas été correctement sélectionné
if self.CheminVideo2 == "Not selected" :
messagebox.showerror("Error", "Path not selected")
else :
# Variable qui définit la video jouée (2 = vidéo 2)
PlayedVideo = 2
# Lancement de la vidéo en plein écran grâce au lecteur OMXPlayer
omxc = Popen(['omxplayer', '-b', self.CheminVideo2])
# Attente que la video soit jouée entièrement avant toute autre opération (pas de fonction permettant de définir l'évennement de fin de vidéo)
time.sleep(temps_video2)
# Fermeture de tous les procédés OMXPlayer
os.system('killall omxplayer.bin')
# Relecture de la video 1 grâce à la fonction launch_video1
launch_video1()
# Bouton "Exit" (Fonction de fermeture de la fenetre):
def close_window():
# Destruction de la fenetre principale
self.destroy()
- Definition of the other functions
There are two functions here. The first is useful to exit the played video but creating a window under the video with a unique great button. When the user clicks on the screen, it activates this button and allows to access to the password interface. The second is the function to exit the played video.
#-----------------------------------------------------------------------------------------
# Programmation des autres fonctions
# Création de la fenetre de fermeture video (Fonction qui crée une fenetre en dessous de la video. Si on clique sur le bouton de la fenetre, la video se coupe)
def DisableVideo():
# Definition de la fenetre 'top' et affichage de cette fenetre au dessus de la fenetre principale (et en dessous de la video)
self.top=Toplevel(self)
# Création du seul bouton de la fenetre qui occupe tout l'écran et qui lance la fonction stop_video
BtnFfv=tkinter.Button(self.top, width=480, height=900, command = stop_video)
BtnFfv.pack()
# Bouton invisible "stop video"
def stop_video():
# Fermeture de tous les procédés OMXPlayer
os.system('killall omxplayer.bin')
# Destruction de la fenetre 'top'
self.top.destroy()
# Lancement de l'interface de mot de passe
passwordinterface()
- Definition of the password interface and functions
Definition of the buttons, the parameters and the functions linked to the buttons of the password interface.
#----------------------------------------------------------------------------------------
# Programmation de la partie mot de passe
# Interface pour la demande de mot de passe
def passwordinterface():
# Definition de la fenetre 'psw' et affichage de cette fenetre au dessus de la fenetre principale
self.psw=Toplevel(self)
# Ajustement de la taille de la fenetre a la taille de l'écran
self.psw.geometry(SizeScreen)
# Affichage de la fenetre en plein écran
self.psw.overrideredirect(True)
# Remise à 0 de la variable qui définit la video jouée (0 = pas de vidéo jouée)
self.stop=0
# Définition de la variable qui contiendra les lettres tappées par l'utilisateur
self.password = ""
# Définition de la variable qui affichera des * à la place du mot de passe
self.hiddenpassword=""
# Création d'un espace au dessus de l'affichage du mot de passe
LblVidePsw = Label(self.psw,width=6, height=5)
# Placement du label dans la grille
LblVidePsw.grid(row=0, column=0)
# Création du label en variable globale qui affiche le mot de passe sous forme de *
global lblpsw
lblpsw=tkinter.Label(self.psw,padx=40,pady=10,bg="white",fg="black",width=10)
# Placement du label dans la grille
lblpsw.grid(row=1, column=2)
# Création du bouton 7
nbr7=Button(self.psw, text='7',width=10, height=10, command=MDP7)
# Placement du label dans la grille
nbr7.grid(row=2, column=1)
# Création du bouton 8
nbr8=Button(self.psw, text='8',width=10, height=10, command=MDP8)
# Placement du label dans la grille
nbr8.grid(row=2, column=2)
# Création du bouton 9
nbr9=Button(self.psw, text='9',width=10, height=10, command=MDP9)
# Placement du label dans la grille
nbr9.grid(row=2, column=3)
# Création du bouton 4
nbr4=Button(self.psw, text='4',width=10, height=10, command=MDP4)
# Placement du label dans la grille
nbr4.grid(row=3, column=1)
# Création du bouton 5
nbr5=Button(self.psw, text='5',width=10, height=10, command=MDP5)
# Placement du label dans la grille
nbr5.grid(row=3, column=2)
# Création du bouton 6
nbr6=Button(self.psw, text='6',width=10, height=10, command=MDP6)
# Placement du label dans la grille
nbr6.grid(row=3, column=3)
# Création du bouton 1
nbr1=Button(self.psw, text='1',width=10, height=10, command=MDP1)
# Placement du label dans la grille
nbr1.grid(row=4, column=1)
# Création du bouton 2
nbr2=Button(self.psw, text='2',width=10, height=10, command=MDP2)
# Placement du label dans la grille
nbr2.grid(row=4, column=2)
# Création du bouton 3
nbr3=Button(self.psw, text='3',width=10, height=10, command=MDP3)
# Placement du label dans la grille
nbr3.grid(row=4, column=3)
# Création du bouton 0
nbr0=Button(self.psw, text='0',width=10, height=10, command=MDP0)
# Placement du label dans la grille
nbr0.grid(row=5, column=1)
# Création du bouton OK
enter=Button(self.psw, text='OK',width=10, height=10, command=MDPEnter)
# Placement du label dans la grille
enter.grid(row=5, column=2)
# Création du bouton Cancel
cancel=Button(self.psw, text='C',width=10, height=10, command=MDPCancel)
# Placement du label dans la grille
cancel.grid(row=5, column=3)
# Fonctions pour chaque bouton de l'interface mot de passe
# Fonction pour le bouton 0
def MDP0():
print('0')
# Ajout du chiffre 0 au mot de passe et du caractère * au mot de passe caché et affichage dans l'interface du mot de passe
self.password = (self.password) + "0"
self.hiddenpassword = (self.hiddenpassword) + "*"
lblpsw.config(text=self.hiddenpassword)
# Fonction pour le bouton 1
def MDP1():
print('1')
# Ajout du chiffre 1 au mot de passe et du caractère * au mot de passe caché et affichage dans l'interface du mot de passe
self.password = (self.password) + "1"
self.hiddenpassword = (self.hiddenpassword) + "*"
lblpsw.config(text=self.hiddenpassword)
# Fonction pour le bouton 2
def MDP2():
print('2')
# Ajout du chiffre 2 au mot de passe et du caractère * au mot de passe caché et affichage dans l'interface du mot de passe
self.password = (self.password) + "2"
self.hiddenpassword = (self.hiddenpassword) + "*"
lblpsw.config(text=self.hiddenpassword)
# Fonction pour le bouton 3
def MDP3():
print('3')
# Ajout du chiffre 3 au mot de passe et du caractère * au mot de passe caché et affichage dans l'interface du mot de passe
self.password = (self.password) + "3"
self.hiddenpassword = (self.hiddenpassword) + "*"
lblpsw.config(text=self.hiddenpassword)
# Fonction pour le bouton 4
def MDP4():
print('4')
# Ajout du chiffre 4 au mot de passe et du caractère * au mot de passe caché et affichage dans l'interface du mot de passe
self.password = (self.password) + "4"
self.hiddenpassword = (self.hiddenpassword) + "*"
lblpsw.config(text=self.hiddenpassword)
# Fonction pour le bouton 5
def MDP5():
print('5')
# Ajout du chiffre 5 au mot de passe et du caractère * au mot de passe caché et affichage dans l'interface du mot de passe
self.password = (self.password) + "5"
self.hiddenpassword = (self.hiddenpassword) + "*"
lblpsw.config(text=self.hiddenpassword)
# Fonction pour le bouton 6
def MDP6():
print('6')
# Ajout du chiffre 6 au mot de passe et du caractère * au mot de passe caché et affichage dans l'interface du mot de passe
self.password = (self.password) + "6"
self.hiddenpassword = (self.hiddenpassword) + "*"
lblpsw.config(text=self.hiddenpassword)
# Fonction pour le bouton 7
def MDP7():
print('7')
# Ajout du chiffre 7 au mot de passe et du caractère * au mot de passe caché et affichage dans l'interface du mot de passe
self.password = (self.password) + "7"
self.hiddenpassword = (self.hiddenpassword) + "*"
lblpsw.config(text=self.hiddenpassword)
# Fonction pour le bouton 8
def MDP8():
print('8')
# Ajout du chiffre 8 au mot de passe et du caractère * au mot de passe caché et affichage dans l'interface du mot de passe
self.password = (self.password) + "8"
self.hiddenpassword = (self.hiddenpassword) + "*"
lblpsw.config(text=self.hiddenpassword)
# Fonction pour le bouton 9
def MDP9():
print('9')
# Ajout du chiffre 9 au mot de passe et du caractère * au mot de passe caché et affichage dans l'interface du mot de passe
self.password = (self.password) + "9"
self.hiddenpassword = (self.hiddenpassword) + "*"
lblpsw.config(text=self.hiddenpassword)
# Fonction pour le bouton OK
def MDPEnter():
print('Enter')
# Affichage du mot de passe tappé dans la console
print(self.password)
# Si le mot de passe correspond à la variable Password définit en début de code
if (self.password == Password):
# Destruction de la fenetre psw
self.psw.destroy()
else:
# Sinon, affichage de "Wrong" dans le label du mot de passe
lblpsw.config(text="Wrong")
# Remise à zero (vide) des variables liées au mot de passe tappé
self.password=""
self.hiddenpassword=""
# Fonction pour le bouton Cancel
def MDPCancel():
# Destruction de la fenetre psw
self.psw.destroy()
# Relancement de la viéo 1
launch_video1()
- Definition of the pulse counter of the flowmeter
This function is used to increment the number of impulsion when the raspberry detects one.
#-----------------------------------------------------------------------------------------
# Initialisation de la fonction de mesure
#Fonctions de comptage des impulsions du capteur de débit
def countPulse(channel):
# Définition en variables globales des impulsions pour le volume, le volume du jour et le volume total débité par la pompe
global count_flow
global count_volumejour
global count_volumetotal
# Incrément des variables lorsque le start a été détecté
if start_counter == 1:
count_flow = count_flow +1
count_volumejour = count_volumejour +1
count_volumetotal = count_volumetotal +1
# Rappel de la fonction à chaque impulsion
GPIO.add_event_detect(FLOW_SENSOR, GPIO.FALLING, callback=countPulse)
- Definition of the measure function
This is the part of the code that concern the flow meter:
- Flow calculation
- Initialisation of the "total amount of beer served today" at 5 o clock in de morning
- Condition to start the second animation
This function is auto-called back every second.
#-----------------------------------------------------------------------------------------
# Programmation de la fonction de mesure
def measure():
# Definition variables de comptage, de débit, de volume et la variable de début de comptage
global count_flow
global count_volumejour
global count_volumetotal
global flow
global volume_jour
global volume_total
global start_counter
# Si il est 5h00'00, alors la variable count_volumejour se remet à 0
if((time.strftime('%H') == '5') and (time.strftime('%M') == '00') and (time.strftime('%S') == '00')):
count_volumejour = 0
# Affichage de l'heure dans la console
print(time.asctime())
# Lancement du comptage
start_counter = 1
# Calcul et affichage dans la console du débit en fonction des impulsions
flow = (count_flow * 60 * 2.25 / 1000)
print ("The flow is: %.3f Liter/min" % (flow))
# Calcul et affichage dans la console des volumes en fonction des impulsions
volume_jour = (2.25 * count_volumejour /1000)
volume_total = (2.25 * count_volumetotal /1000)
print ("The volume of today is: %.3f l" % (volume_jour))
print ("The volume total is: %.3f l" % (volume_total))
# Affichage d'un espace dans la console
print ("")
# Affichage du débit et des volumes dans l'interface principale
LblVolumeJour.config(text="Today s volume (l) : %.3f" % (volume_jour))
LblVolumeTotal.config(text="Total volume (l) : %.3f" % (volume_total))
LblDebit.config(text="Actual flow (l/min) : %.3f" % (flow))
# Condition de lancement de la vidéo 2 (si on a dépassé un certain débit et que la vidéo 1 est en cours)
if (flow > 5 and PlayedVideo==1):
# Fermeture de tous les procédés OMXPlayer
os.system('killall omxplayer.bin')
# Appel de la fonction permettant le lancement de la vidéo2
launch_video2()
#Remise à 0 de la variable de comptage des impulsions pour le débit
count_flow = 0
# Rappel de la fonction après 1 seconde
app.after(1000, measure)
- Definition of the main function
This main function uses the main class and call the measure function for the first time. The app.mainloop line creates an infinite loop to run the program constantly.
#-----------------------------------------------------------------------------------------
# Programmation du main
if __name__ == "__main__":
# Definition de la variable app (correspondant au programme)
app = simpleapp_tk(None)
# Titre de la fenetre
app.title('Application Brasserie')
# Affichage de la fenetre principale en plein écran
app.attributes('-fullscreen',1)
# Initialisation variables de mesure
count_flow = 0
count_volumejour = 0
count_volumetotal = 0
volume_jour = 0
# Premier appel de la fonction de mesure
measure()
# Lancement du programme et bouclage de celui-ci
app.mainloop()
Let's Try It
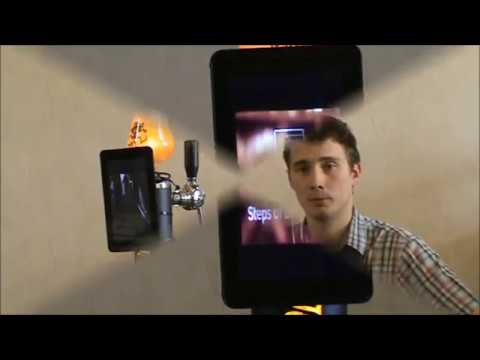

Please look at our videos:
Project and Software :
Project in its daily use :
You can find the code in the attached files.