Jewelry Class: Beads

Class table of contents:
- Tools, Materials, and What You'll Learn
- Beads (you are here)
- Wire
- Piercing Sheet Metal
- Torch Soldering & Going Further
This lesson kicks off your jewelry journey by guiding you through the steps to create a beaded wrap bracelet.
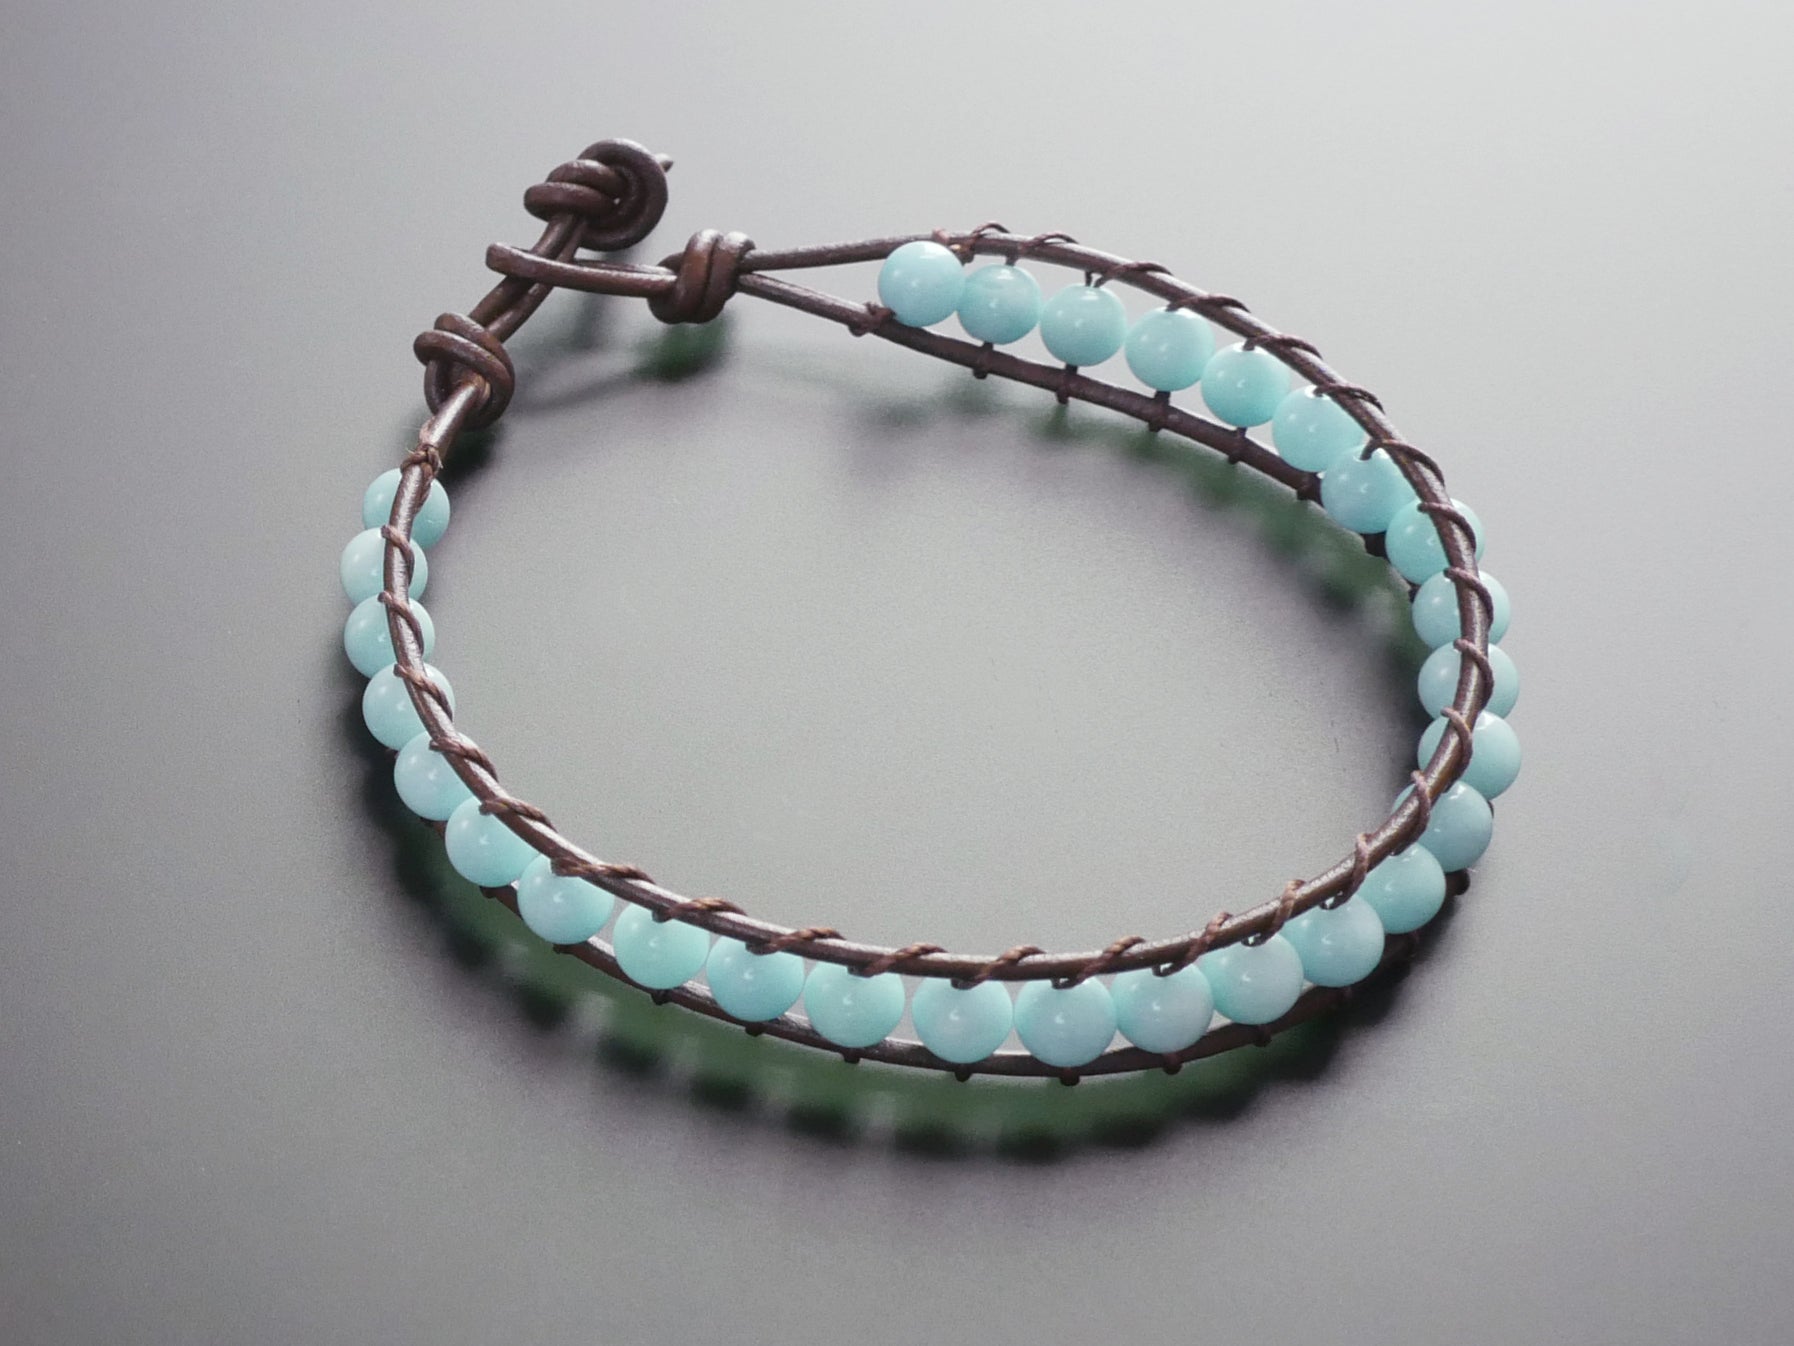
You're welcome to experiment with your materials! The colors, shapes, and sizes are all matters of personal taste. Here is a list of the supplies used to create the bracelet shown throughout this lesson:
- Round leather cord (1.8mm brown)
- Silk bead cord size F
- Beading needle
- Beads (round 6mm Amazonite, jade, etc.)
- Tape or clipboard for securing project
- Scissors

Leather cord and coordinating silk beading cord are available in a wide variety of colors, shapes, finishes, and sizes. Beading needles are especially long, flexible, and have large eyes to easily accommodate the beading cord.
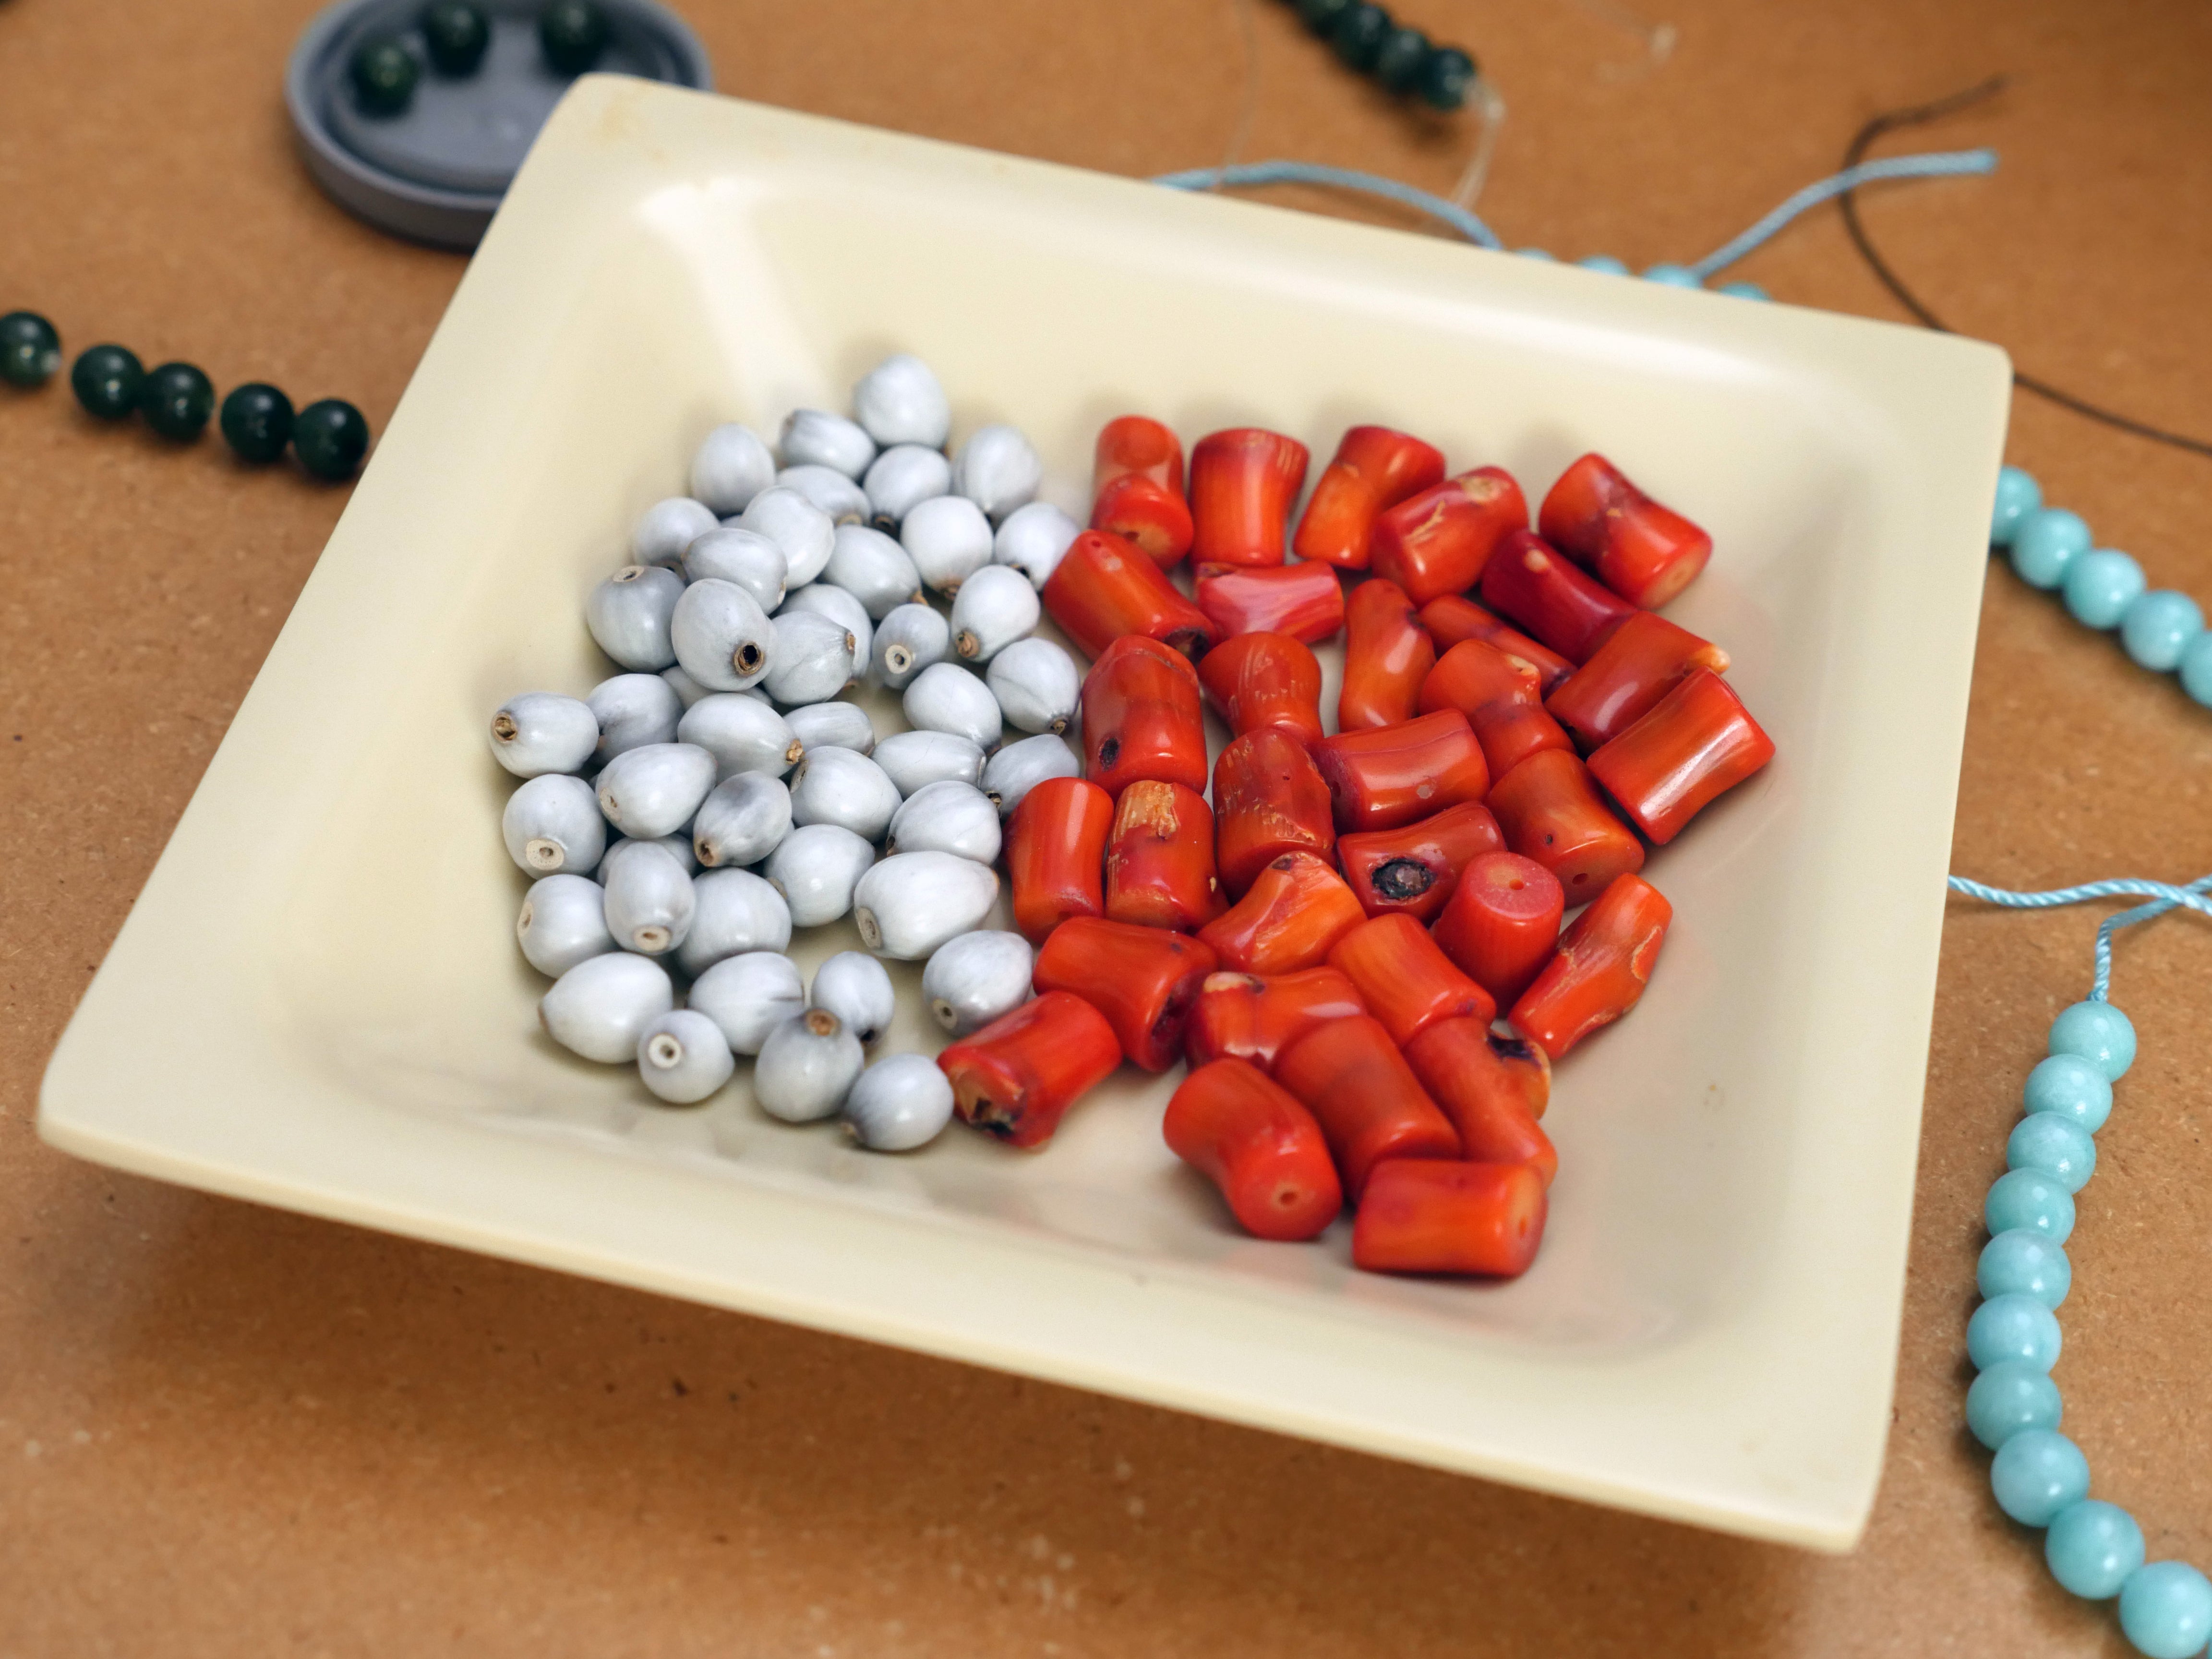
Beads can be made from almost any material. This project uses round blue beads made from Amazonite stone, but you're welcome to use beads in the material of your choice, whether it's stone, crystal, or something else entirely, like seed pods and (non-endangered) coral pictured above.
Cut and Prepare Cord

Cut a piece of leather cord about 30 inches (75cm), and fold it in half. At the midpoint, tie an overhand knot to create a small loop and two tails. Secure the loop to your work surface with tape. You can also use a clipboard to secure the cord, or a piece of scrap wood and a nail.

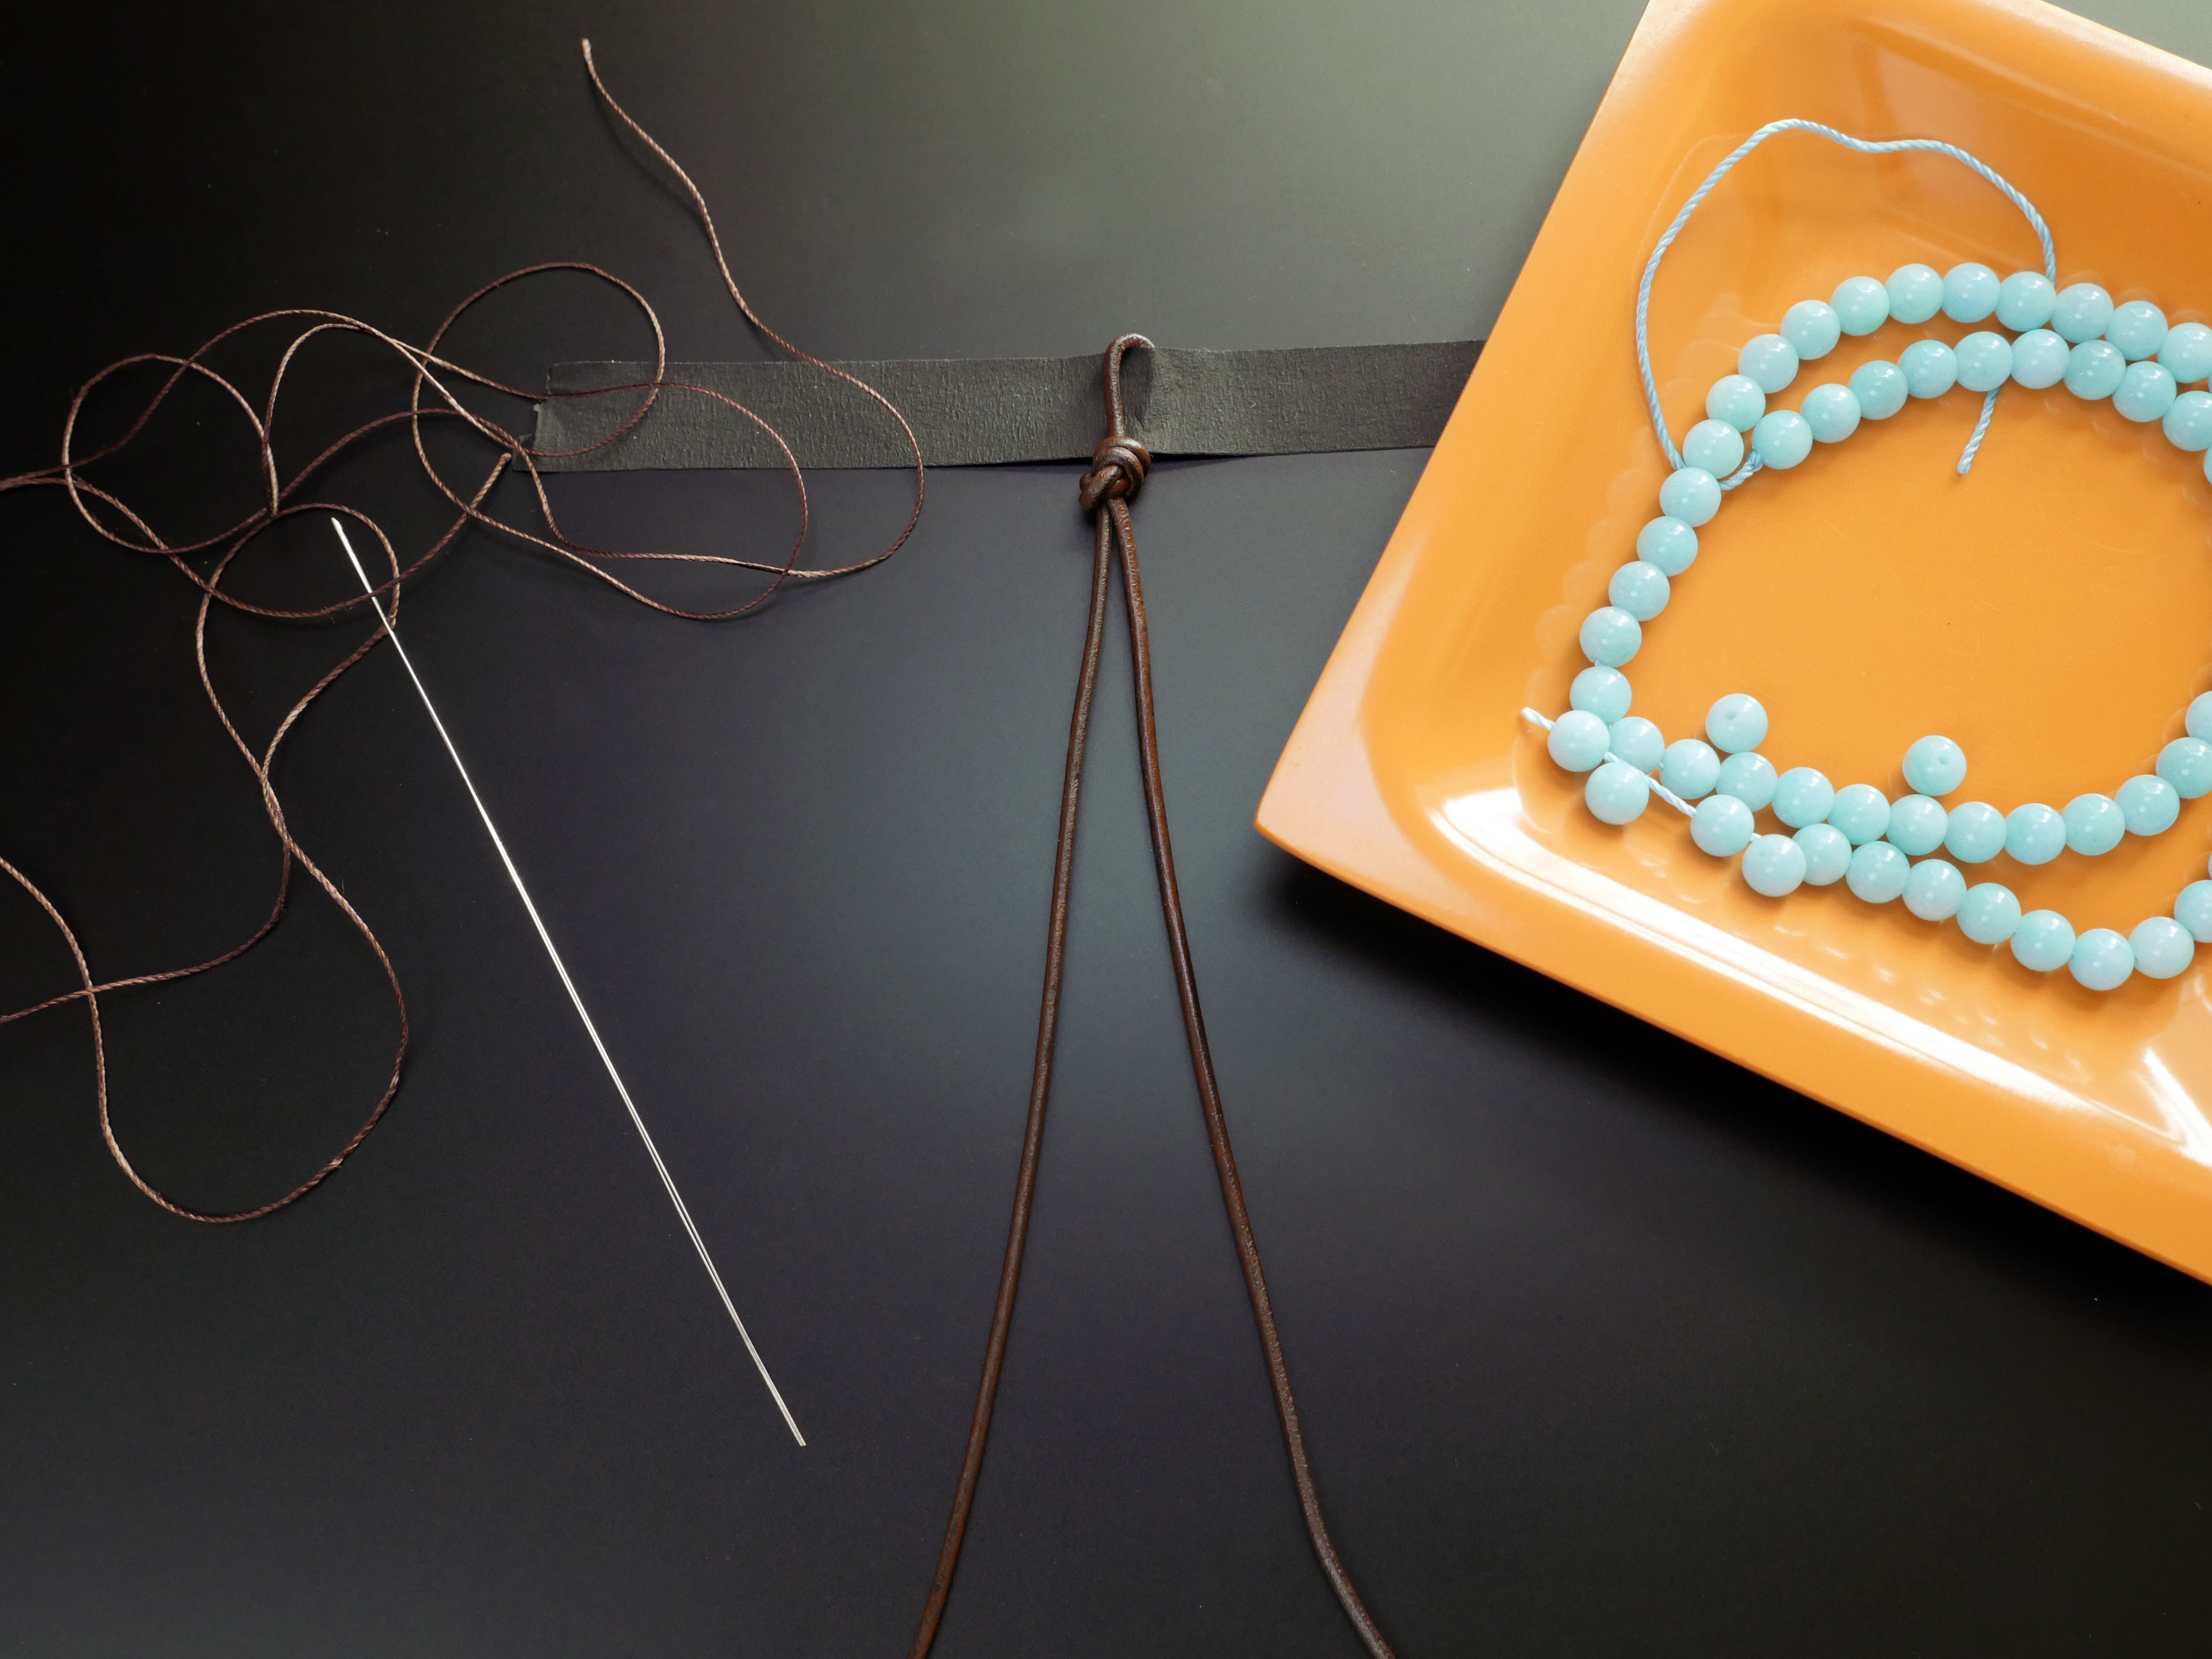
Cut a piece of breading cord about 30 inches (75cm) and thread it through the eye of a beading needle. If your beads came on a string, free them into a small container nearby.

Wrap the tail of your beading cord around the left leather cord and secure it with two overhand knots (or a square knot, if you prefer), leaving a tail about 4 inches (10cm) long.
Add First Bead

Thread your needle through a bead, then slide the bead all the way to the knotted tail of the beading cord.
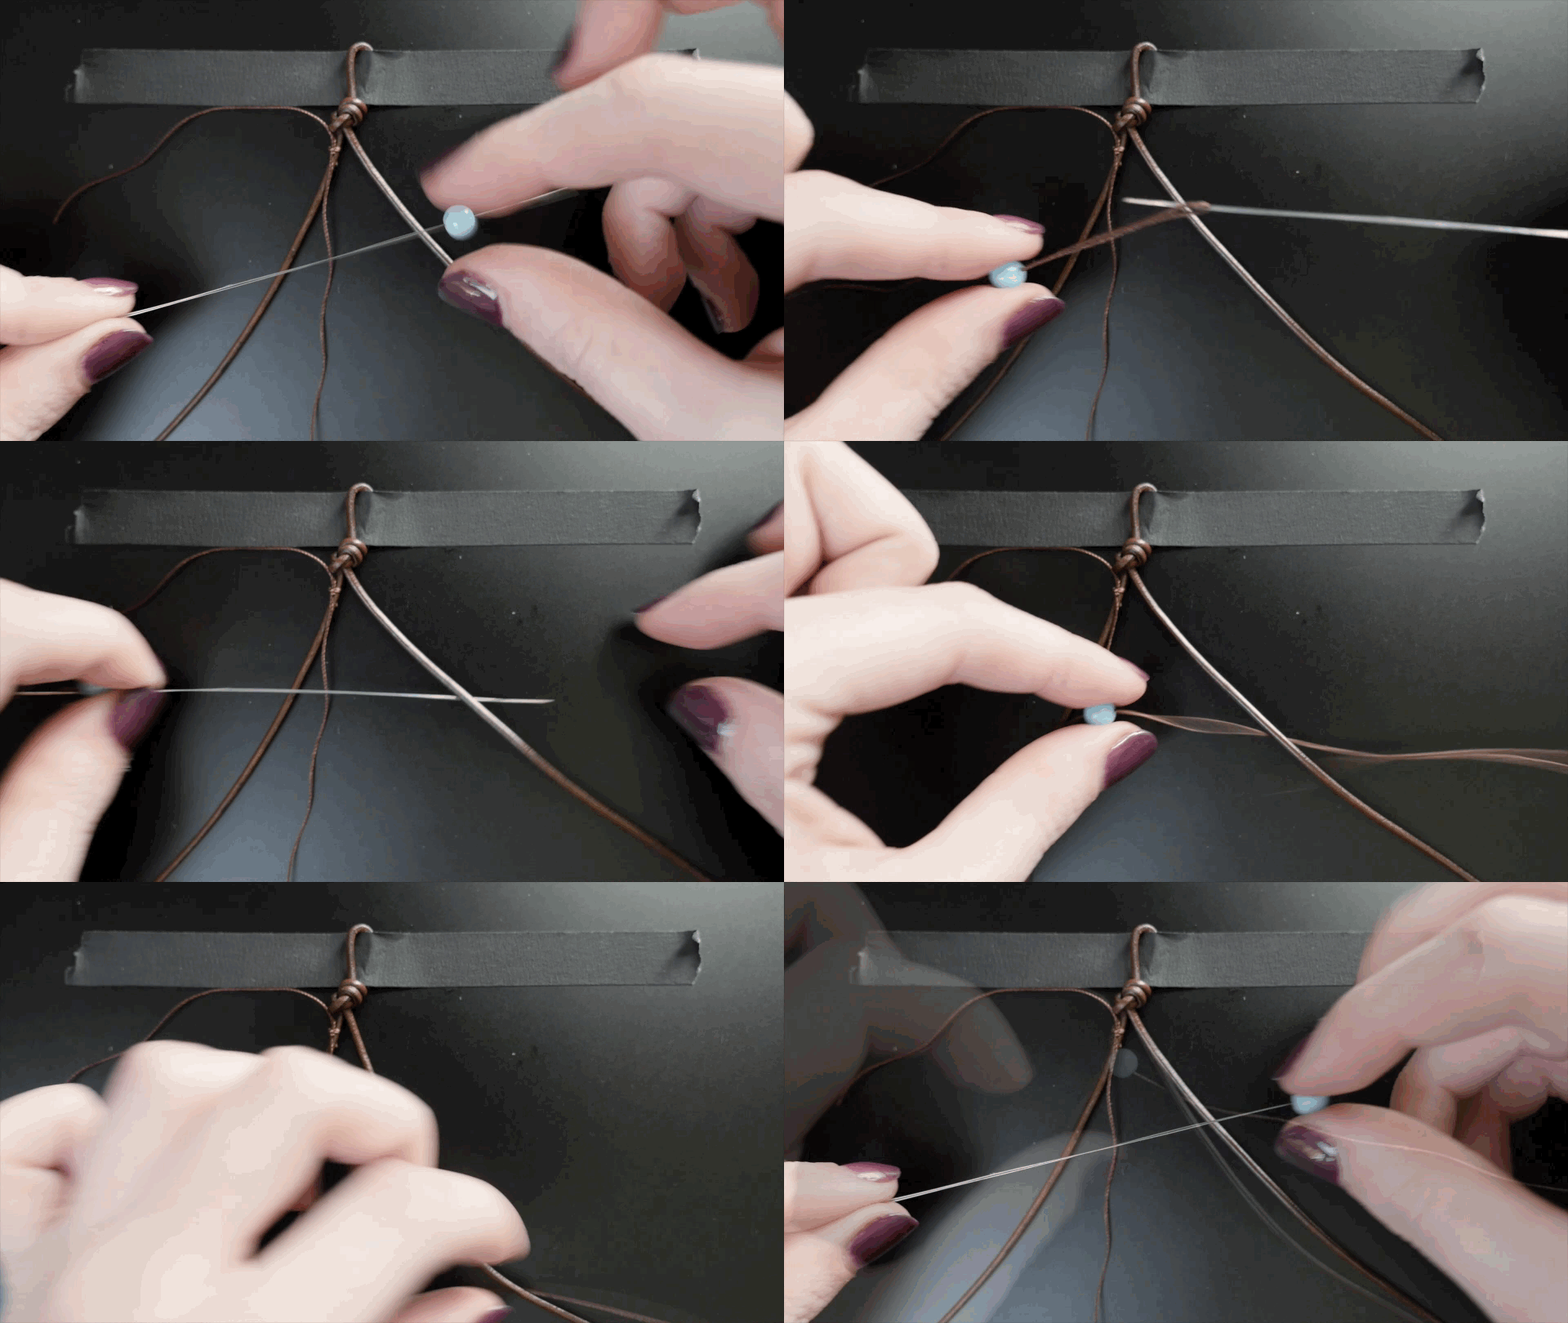
Then thread the needle underneath the right leather cord, and pull the cord to the right side of the work while keeping the bead between the two leather cords.

Next, reverse the direction of the needle and thread it through the bead again, this time above the right leather cord.

Thread the needle underneath the left cord and pull the beading cord all the way through until the bead is snugly secured between the two leather cords.

Add Second Bead
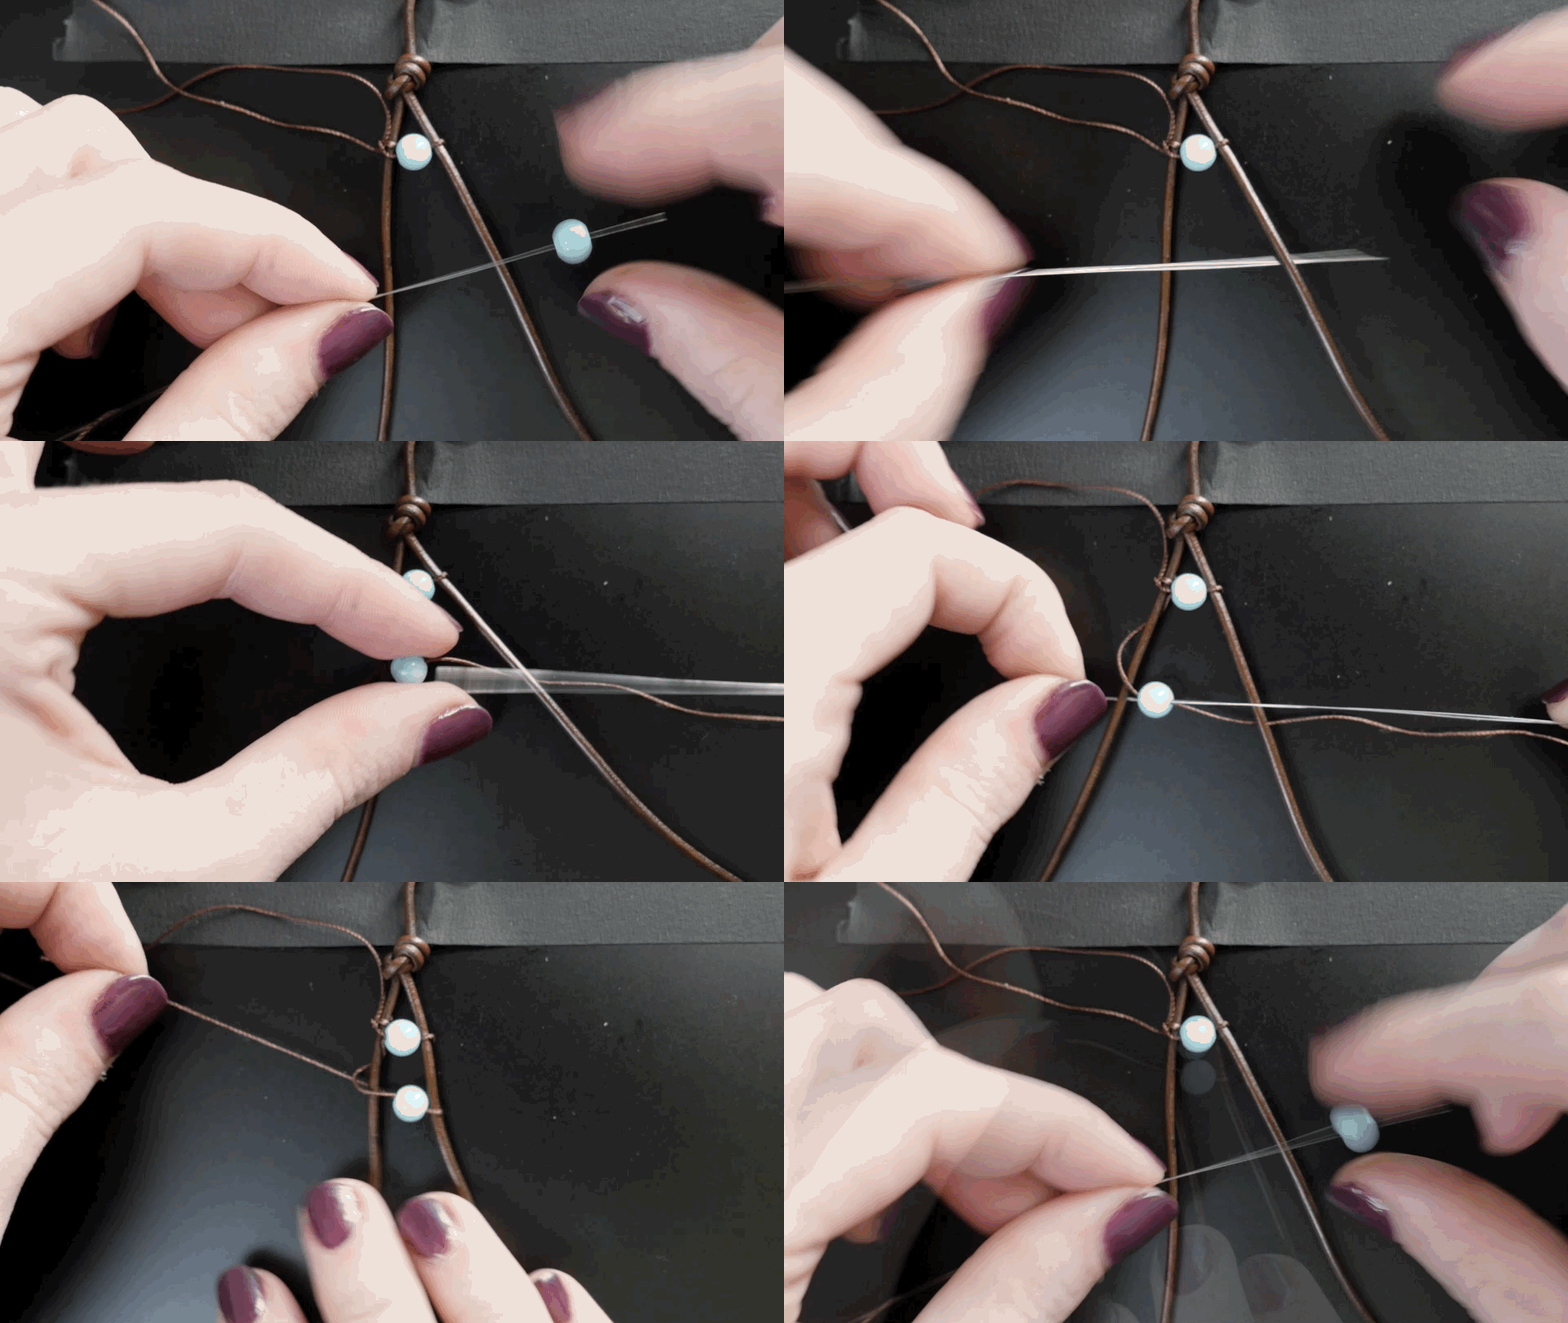
The second bead goes on just like the first! You can switch up the technique a bit by threading the needle through a bead and under the right cord first, then holding the bead in place as you pull the needle and beading cord all the way through.


Switch the direction of the needle and thread it through the bead again, catching the right leather cord in the process. As the needle pops out the left side of the bead, thread it underneath the left leather cord before pulling it through.


Snug the two beads up close to one another and adjust the cord loops as needed to pull tight.
Continue Beading


Add more beads just like you did in the last step. You're essentially creating a figure-eight pattern with your needle around the two leather cords, capturing a bead in the process.

Continue adding beads until the bracelet reaches your desired length. This design looks great as a single wrap, or make it extra long and wrap it around your wrist twice or three times!


It's smart to try to keep your beading cord tight as you go, but don't worry if things are looking a little loose. You can snug up your beading cord by using your needle to catch each loop and pull the string tight, starting at the earlier beads and working your way down.
If you run out of beading cord, leave a long tail and tie a knot, then tie a new piece of cord to the left leather cord as you did at the beginning of the project. We'll weave in the loose ends later on.
Tie Off

To secure the tail of beading cord, thread it around the leather cord in a figure-eight pattern twice, but without any beads this time. Pull it tight while keeping the leather cords symmetrical, then thread the needle through the newly created triangle-shaped opening to cinch down the figure-eights.


Tie all three tails (two leather and one beading cord) in an overhand knot and tighten it close to the last bead. You may wish to reinforce your beading cord knot with a dab of glue (fabric or super). Trim the tail of the beading cord only.

Finishing Touches


Tie a second knot in the leather cords a short distance from the first. This can be used to secure the bracelet at a larger size, or wrapped around the loop again for additional security. Some folks like to add a button at this location to function as a hasp closure, but I find the two knots work too.


Pick up the tail of beading cord from the beginning of the project, and thread it onto your needle. Thread it through the first bead and trim the tail short.

Congratulations, you've made it! Please share a photo of your creation in the Class Project module below, and let us know what kind of beads you used. Try layering a few of them together, and varying the number of wraps.

Class table of contents: