Battery Monitoring

Creating a Battery Control App
We will demonstrate an application that sends data from a battery to the cloud, somebatteries, such as radio antennas because they are in remote places, an IOT project was carried out, where the battery itself could usethe data to a server in the cloud, such as charging situation and battery level. In this way it is possible to use a Dashboard in real time with all situations of all batteries.
To illustrate this project we will use an application on an Android phone, developed in XAMARIN.
Tools and settings useds.
· Visual Studio 2019 - Tool for development
· POWER BI - Cloud environment to receive the collected data and make dashboards available.
· Required for emulator to enable Hyper-V from the machine
Gitbhub:
https://github.com/dvdmelo/PUC.IOT.BATTERY
Creating Project in XAMARIN
Creating project in XAMARIN
Visual Studio 2019
1. Create a new project
a. Select Mobile App(Xamarin.Forms) by click NEXT
1. Configure your new Project
a. Project name: Enter your project name
b. Location: Enter the location where your project will be created
c. Solution name: Enter solution name
d. Click Create
1. New Mobile App
a. Select a template for you app: Selecione Blank
b. I plan to develop for: Marque as opções Android e IOS
c. Click Create
Starting Project Coding
Starting project coding
Add project dependencies
· Xam.Plugin.Battery
· Newtonsoft.Json
· NETStandard.Library
· RestSharp
Installing dependency
Repeat these steps for all dependencies
· Select all projects and click Install
In Preview
Changes click OK
Add Parameterization File "appsettings.json"

Add parameterization file "appsettings.json"
· This file will have 3 parameters
o Service: Power BI cloud address
o DeviceName: Name of the battery to be viewed in Power BI
o Delay: How long (Milliseconds) the information will be sent to the cloud.
Add Appsettings.json Reading Class "AppSettingsManager"
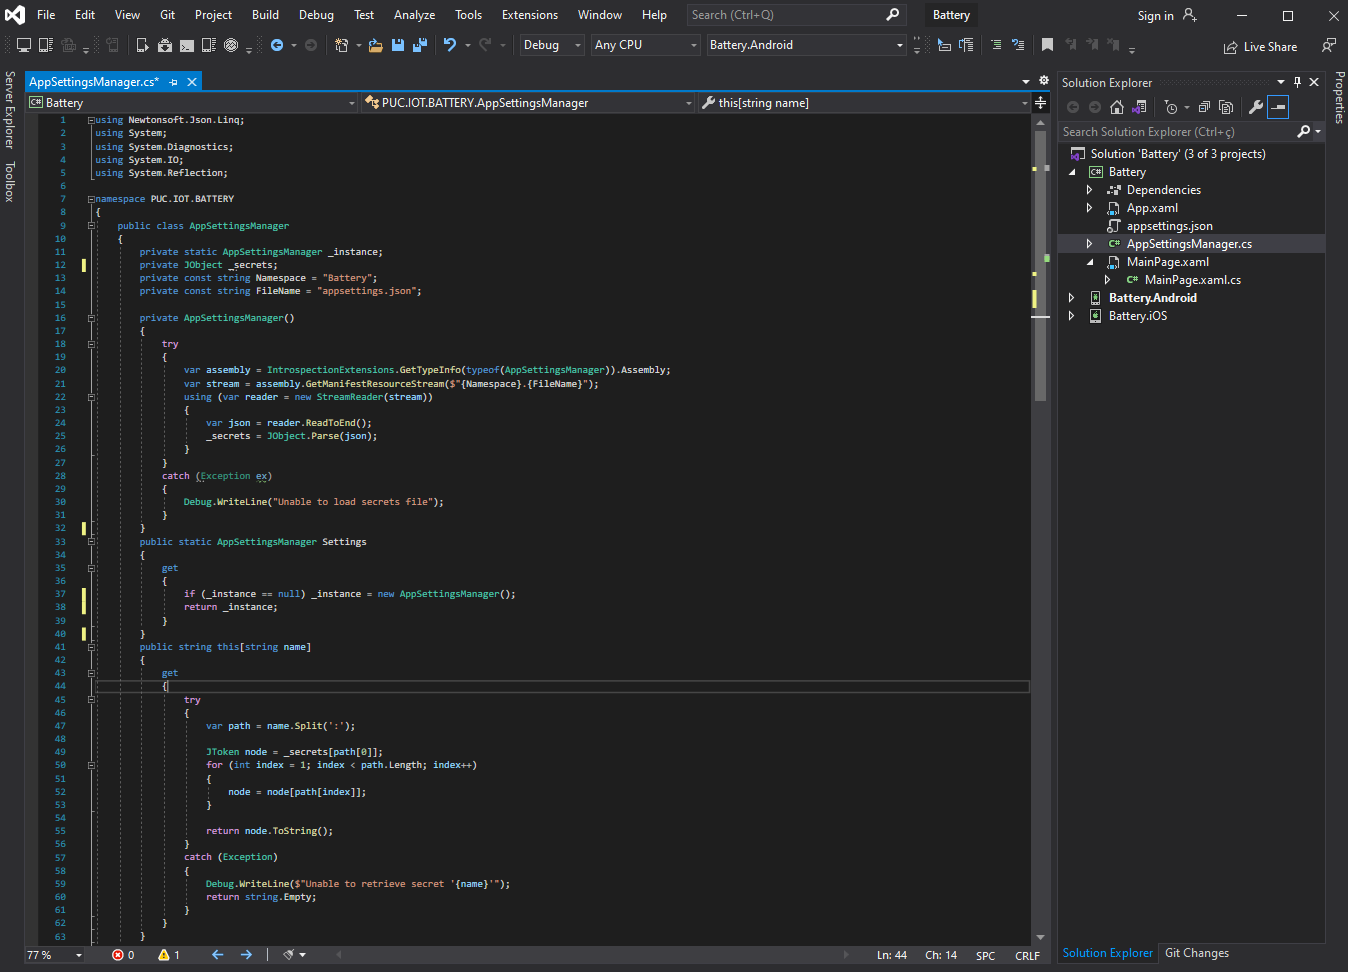
Appsetings.json configuration
o Build Action para Embedded Resource o Copy to Outuput Directory para Copy always Add appsettings.json reading class "AppSettingsManager"
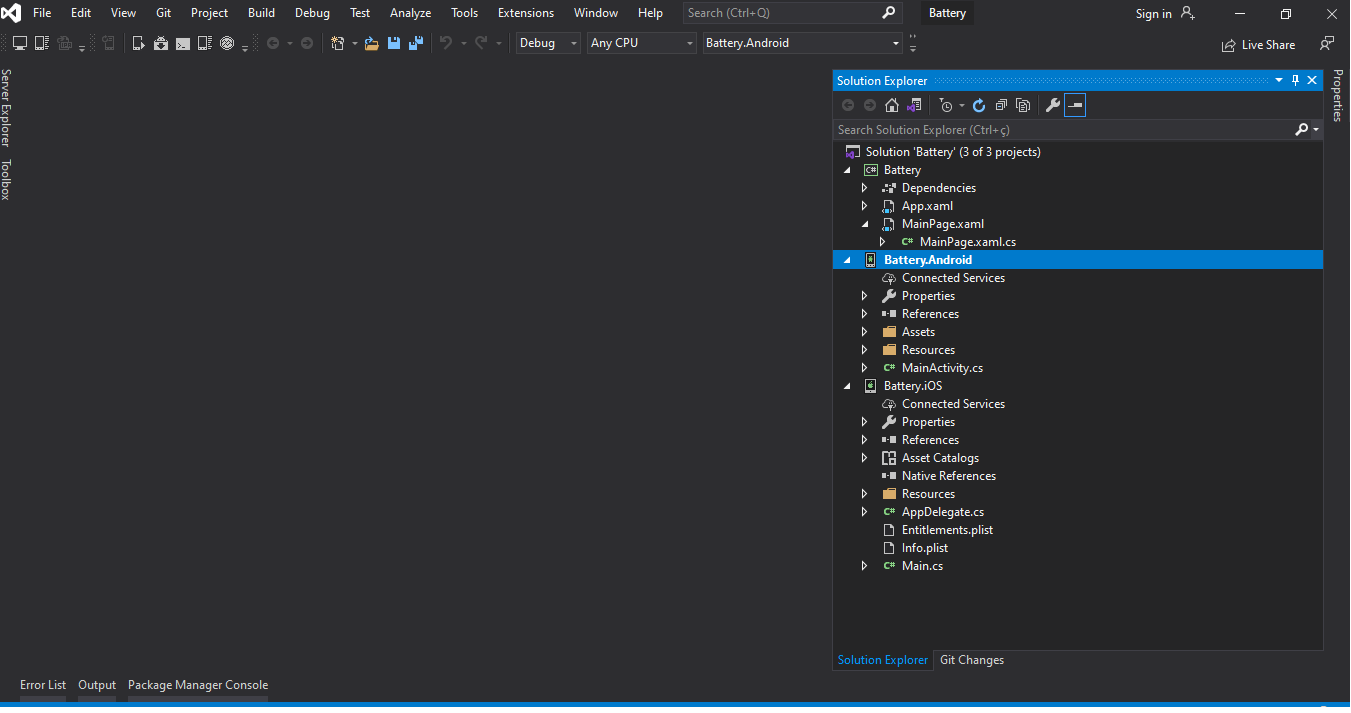
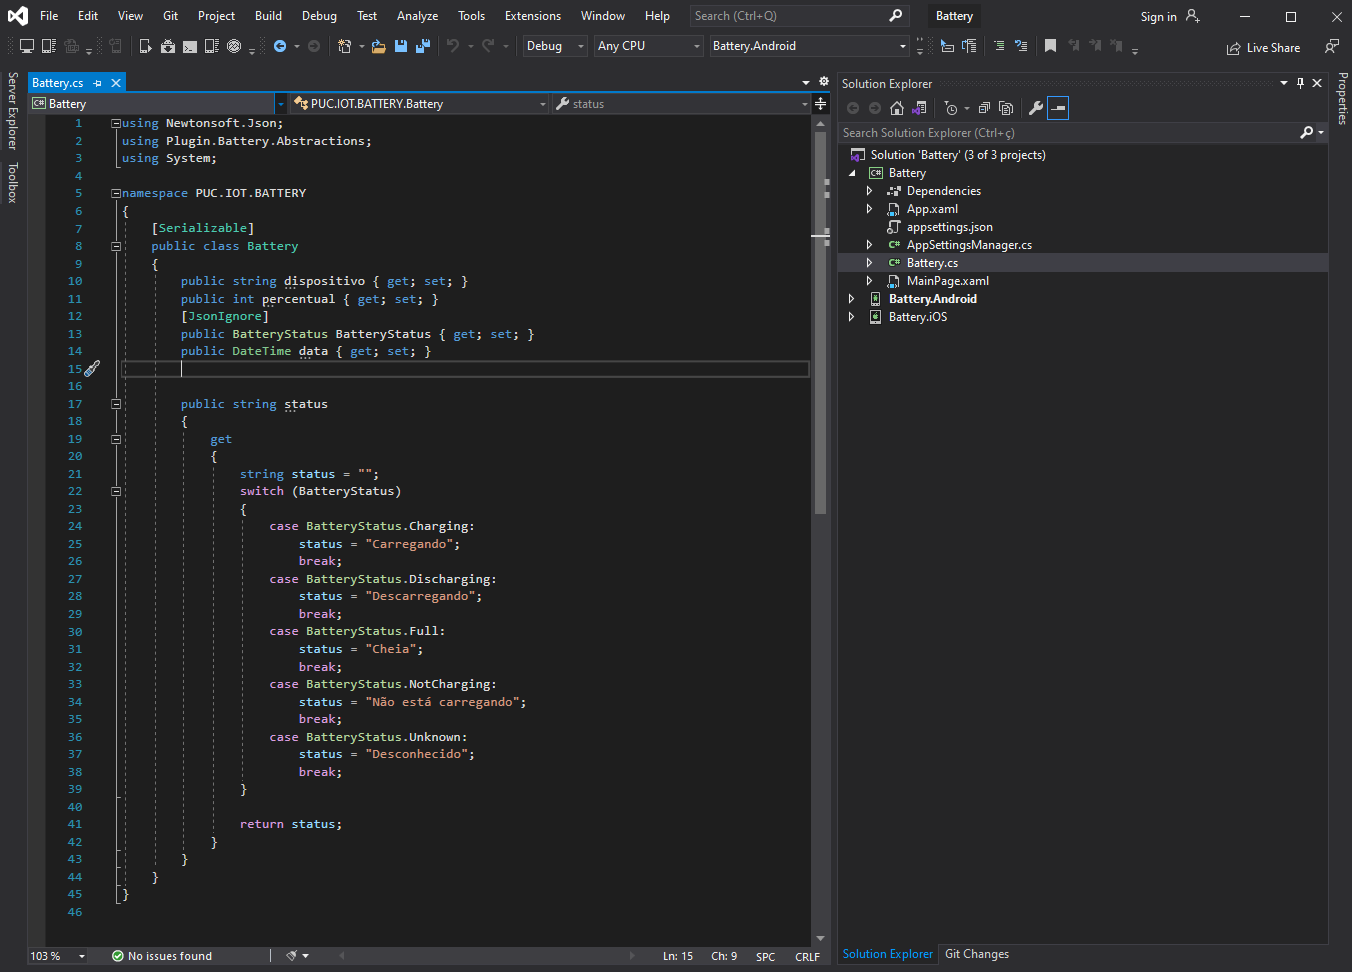
Add Battery Class
Add BatteryService Class
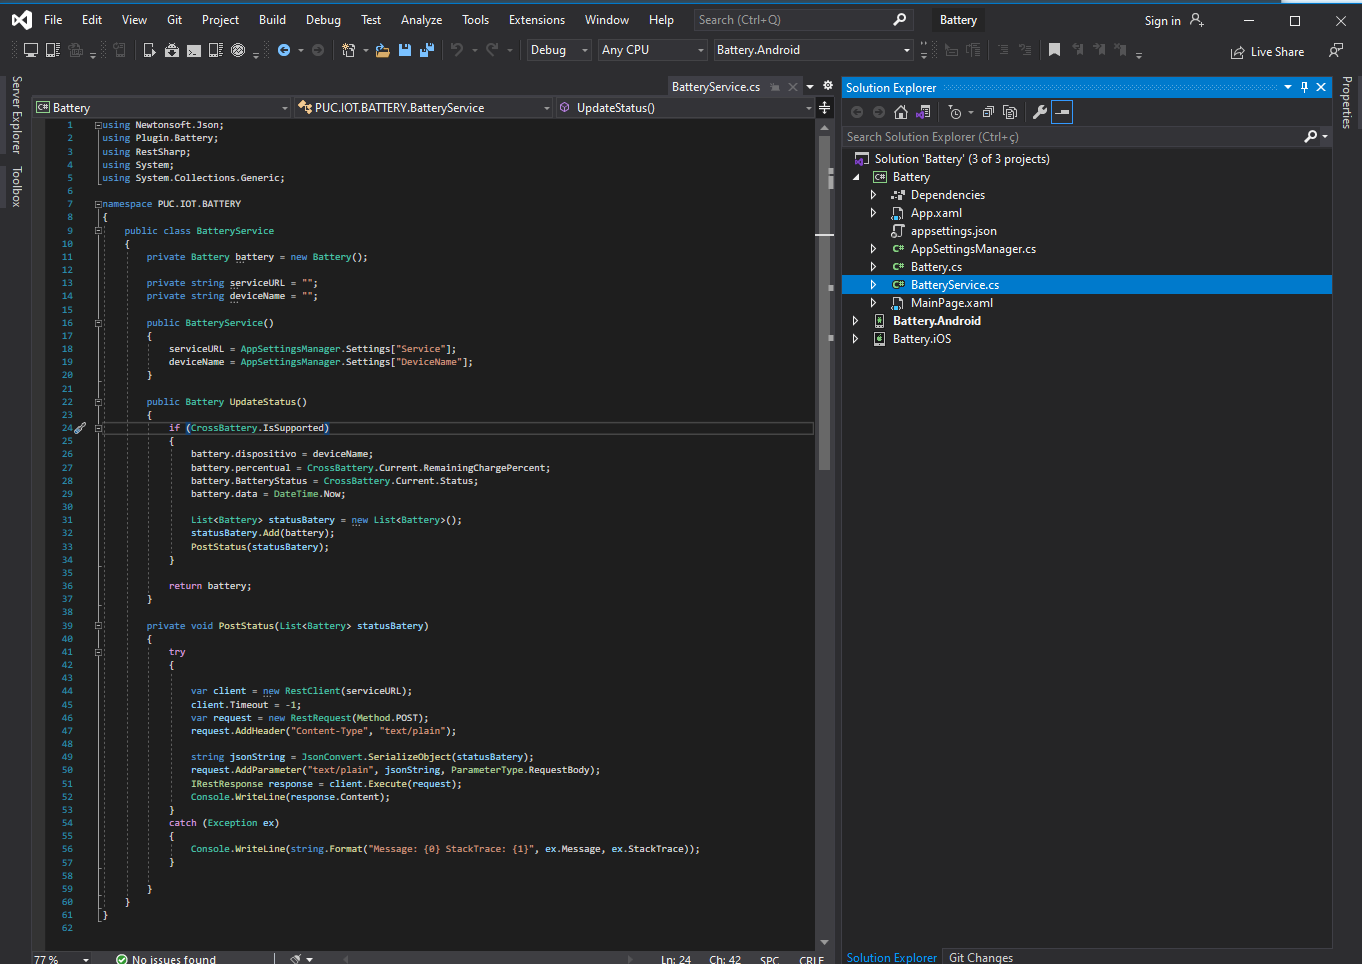
Class responsible for sending data to the cloud
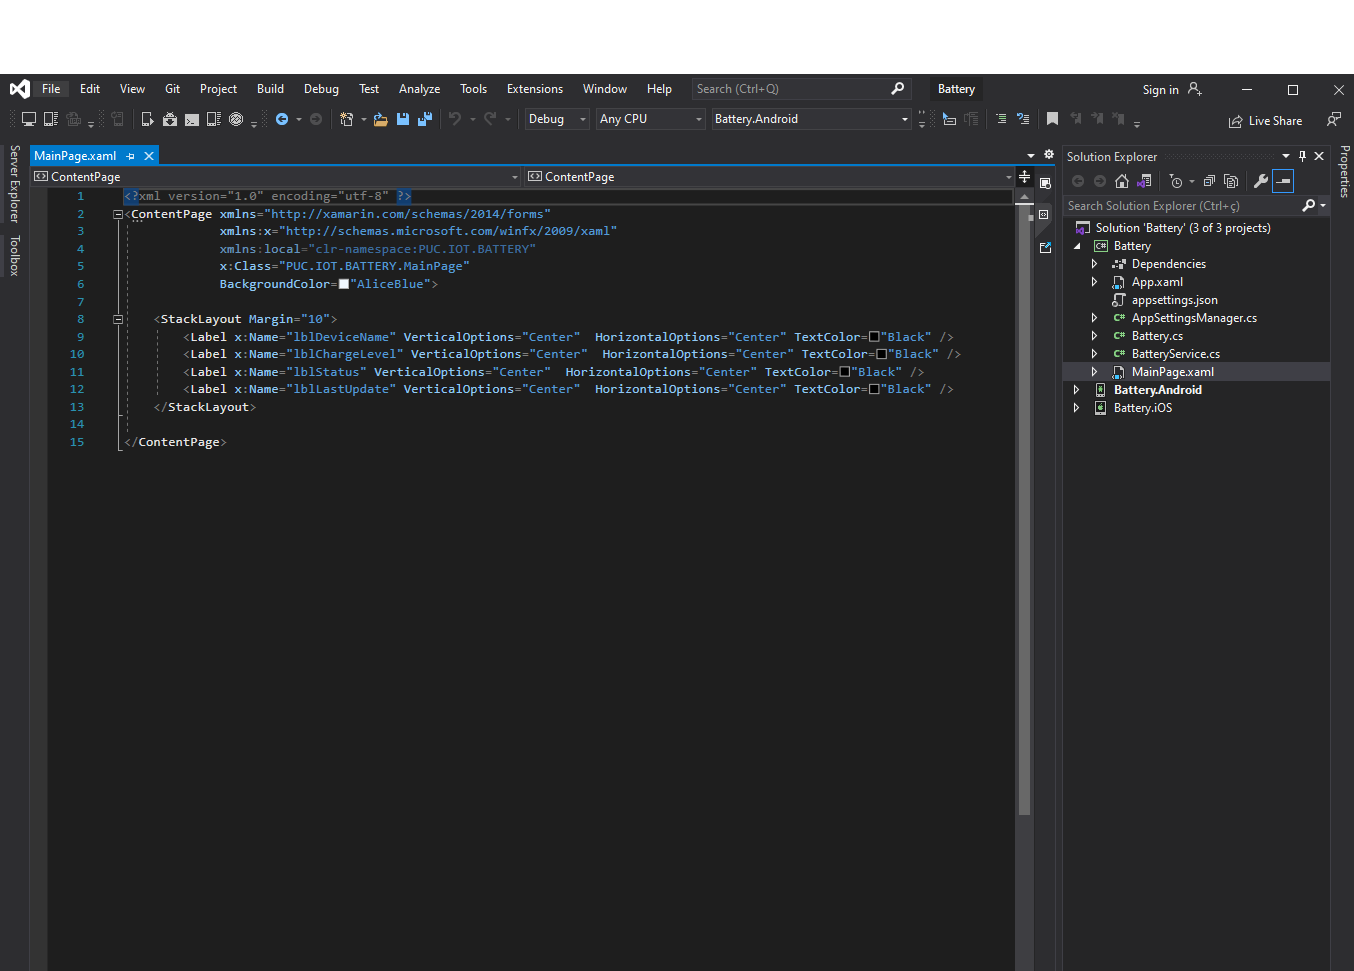
Setting Up MainPage.xaml
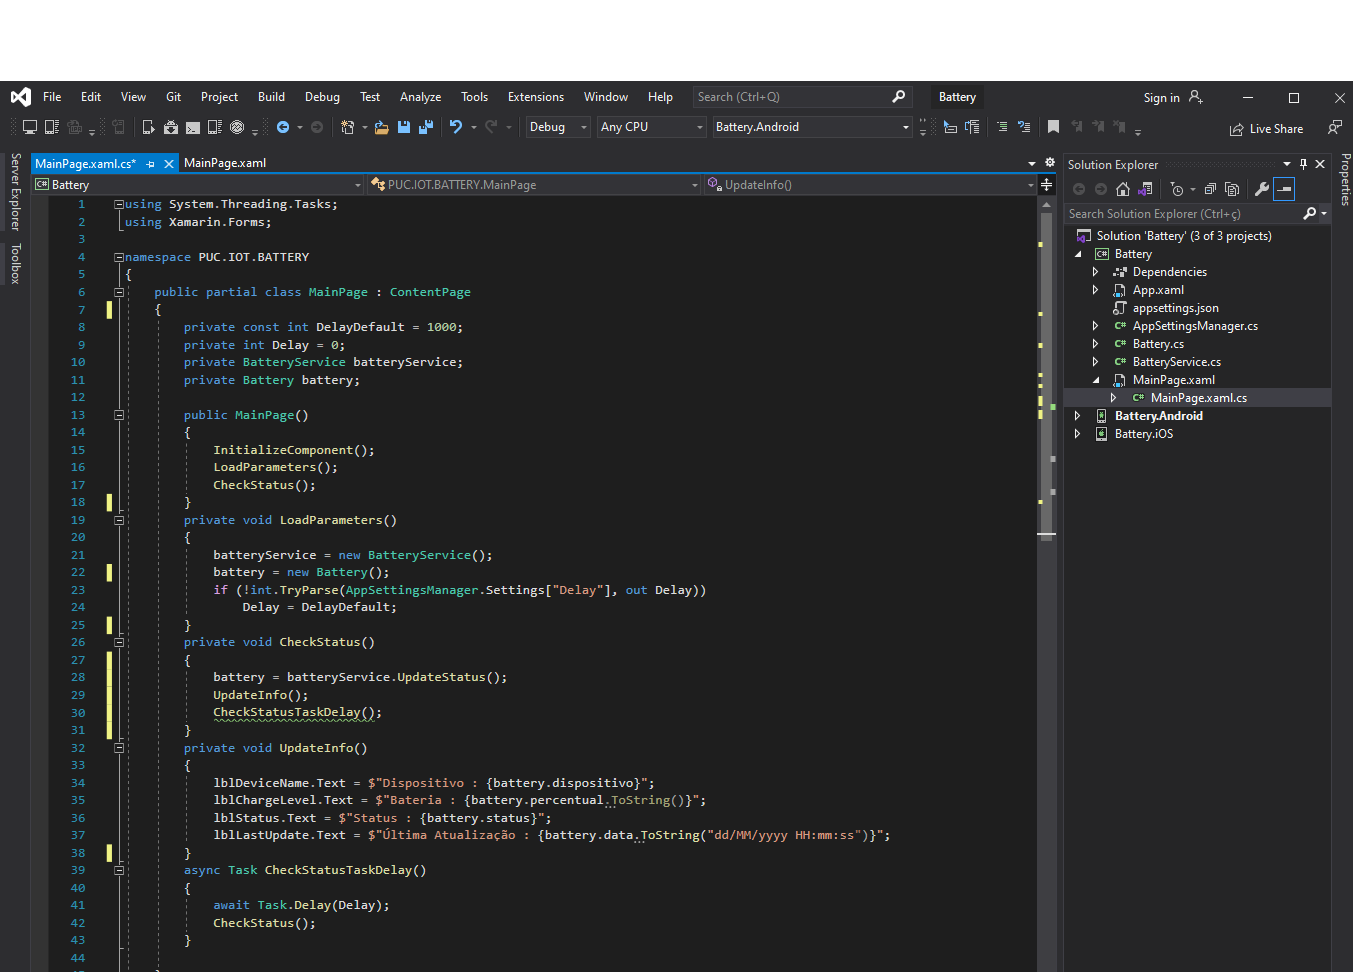
Setting Up MainPage.xaml.cs
Emulating the App
Click Android Emulator
Under Android Device Manager click New
1. Under New Device select the data below and click Create
2. Under Device Manager click Start
3. Click to deploy in the emulator
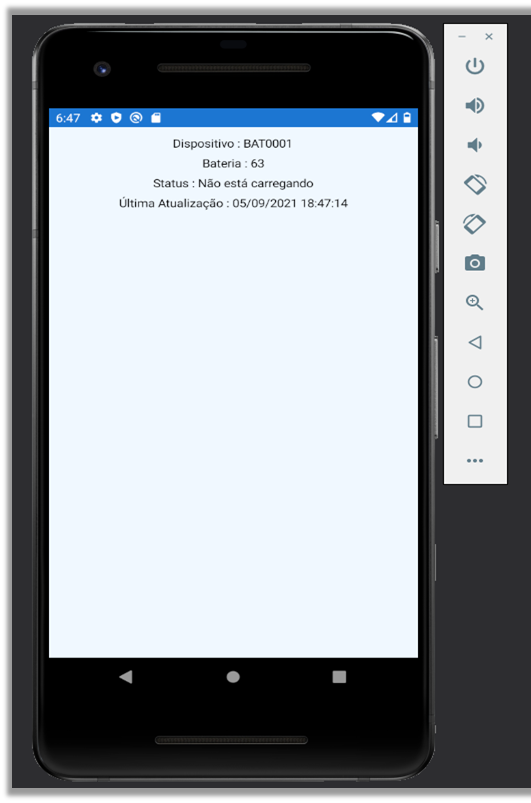
4. Initialized Application
Create the Dashboard in Power BI
1. Access the website: https://powerbi.microsoft.com/pt-br/
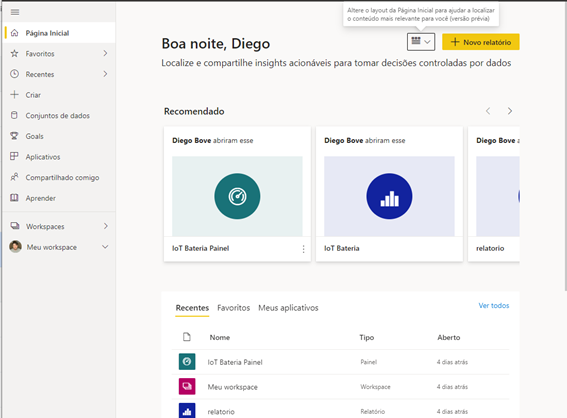
2. Click the "Enter" button and enter the credências. It will open the panel below:
Create the Dataset:
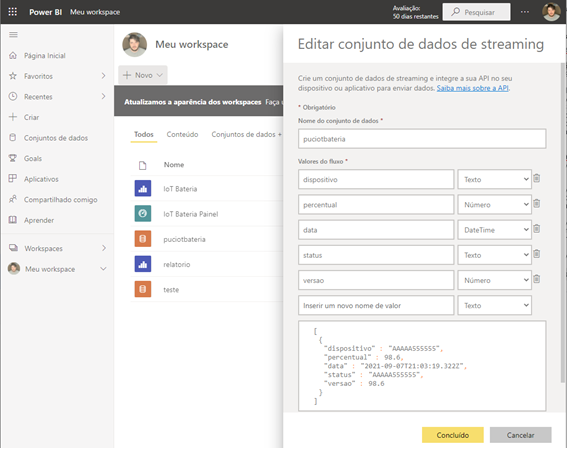
1. Click "My workspace",then "New" and "Streaming Dataset":
2. Create the dataset as shown in the image:
3. Keep "Historical Data Analysis" turned on;
Set Up the Console
1. Open Visual Studio 2019, with the application project, click "Create a project", select the option "Console Application";
2. Insert the project "PUC. IOT. BATTERY" as a reference, class "Program" enter the code below:
static void Main(string[] args)
{
int bateria1 = 90;
int bateria2 = 70;
int bateria3 = 60;
int bateria4 = 20;
Plugin.Battery.Abstractions.BatteryStatus stbateria = Plugin.Battery.Abstractions.BatteryStatus.NotCharging;
Plugin.Battery.Abstractions.BatteryStatus stbateria2 = Plugin.Battery.Abstractions.BatteryStatus.NotCharging;
Plugin.Battery.Abstractions.BatteryStatus stbateria3 = Plugin.Battery.Abstractions.BatteryStatus.NotCharging;
Plugin.Battery.Abstractions.BatteryStatus stbateria4 = Plugin.Battery.Abstractions.BatteryStatus.Charging;
BatteryService service = new BatteryService();
List statusBatery = new List();
for (int i = 0; i < 20; i++)
{
bateria1 -= 5;
bateria2 -= 5;
bateria3 -= 5;
bateria4 += 5;
statusBatery.Add(new Battery()
{
BatteryStatus = stbateria,
data = DateTime.Now,
device = "001",
percentage = battery1,
versa = i
});
statusBatery.Add(new Battery()
{
BatteryStatus = stbateria2,
data = DateTime.Now,
device = "002",
percentage = battery2,
versa = i
});
statusBatery.Add(new Battery()
{
BatteryStatus = stbateria3,
data = DateTime.Now,
device = "003",
percentage = battery3,
versa = i
});
statusBatery.Add(new Battery()
{
BatteryStatus = stbateria4,
data = DateTime.Now,
device = "004",
percentage = battery4,
versa = i
});
service. PostStatus(statusBatery);
Thread.Sleep(90000);
}
Console.WriteLine("Completed");
}
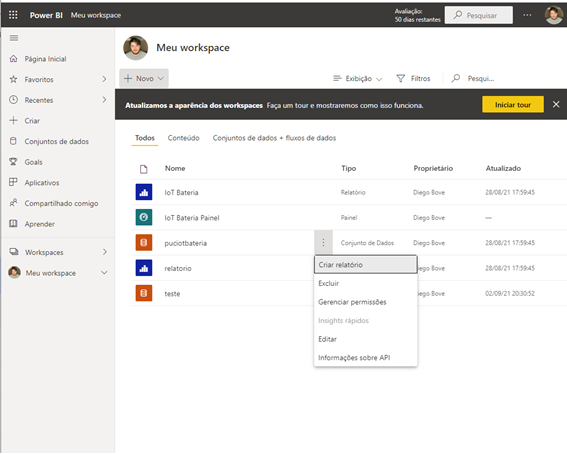
3. After creation, click "..." in the new dataset and then click "API Information";
4. Copy the Push URL to the appsettings file;
5. Run the console to generate test data;
Create the Report
1. Click again on "..." in the new dataset and then click "Create report";
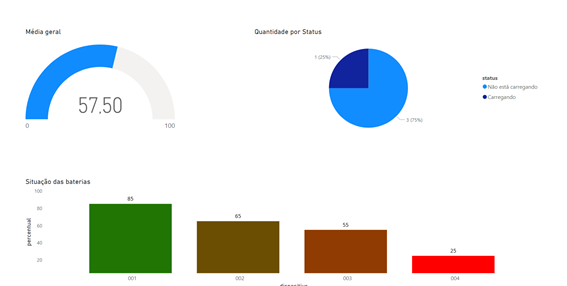
2. Insert the charts "Indicator", "Pizza" and "Stacked Column Chart":
3. In the "Indicator" chart, enter the percentage as the value and in the visual filter put to show the last 5 minutes;
4. In the "Pizza" chart, enter the "status" as the legend, "status count" as "Values" and in the visual filter put to show the last 5 minutes;
5. In the "Stacked Column Chart" chart, enter the device column as "Axis," "percentage" as "Values," and in the visual filter, place to show the last 5 minutes;
6. Change the layout as you wish;
Real-time Display
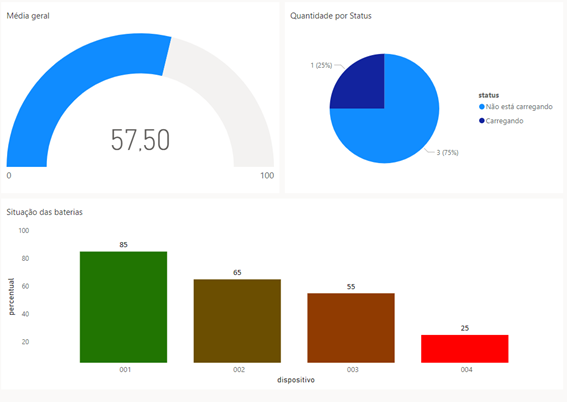
1. To display the data in real time, you must
insert the components into a dashboard;
2. Hover over one of the charts and click on the pin icon ();
3. Choose an existing dashboard or create a new one;
4. Repeat the process for all components;
5. Access the dashboard and keep the console running, the data will be sent every 5 minutes and displayed in real time;