Basic Use of Roland Direct to Film Printer and Heat Press
by Made Studio in Craft > Printmaking
959 Views, 7 Favorites, 0 Comments
Basic Use of Roland Direct to Film Printer and Heat Press
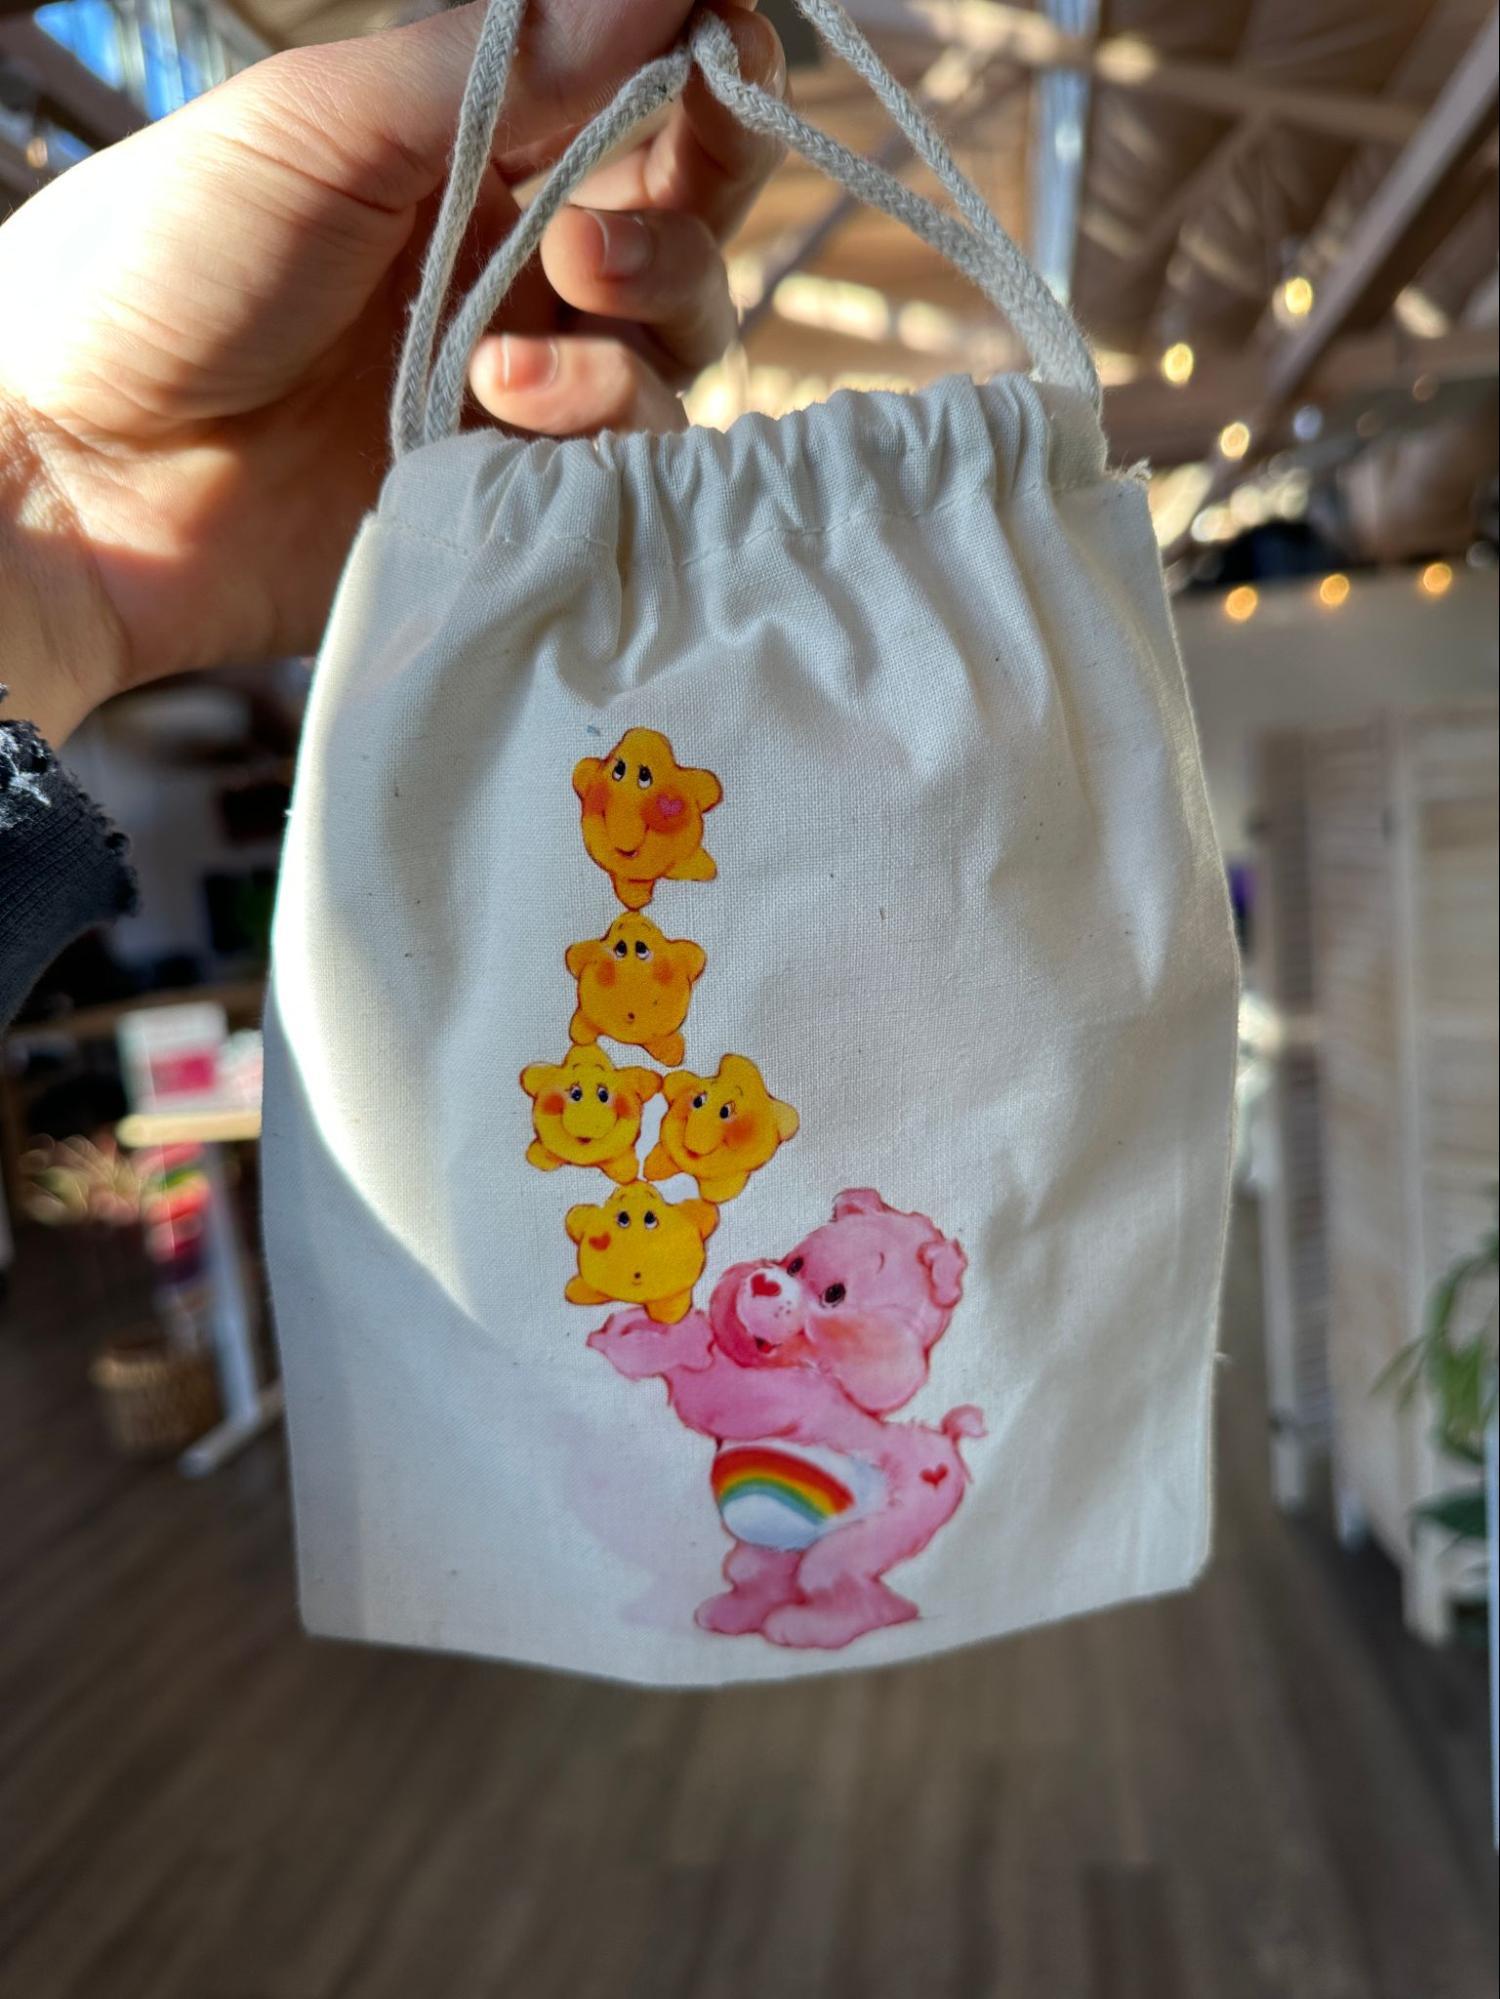
A small cotton bag with a dtf print on it.
Supplies
Roland Direct to Film printer and supplies
Heat Press
Powder Oven
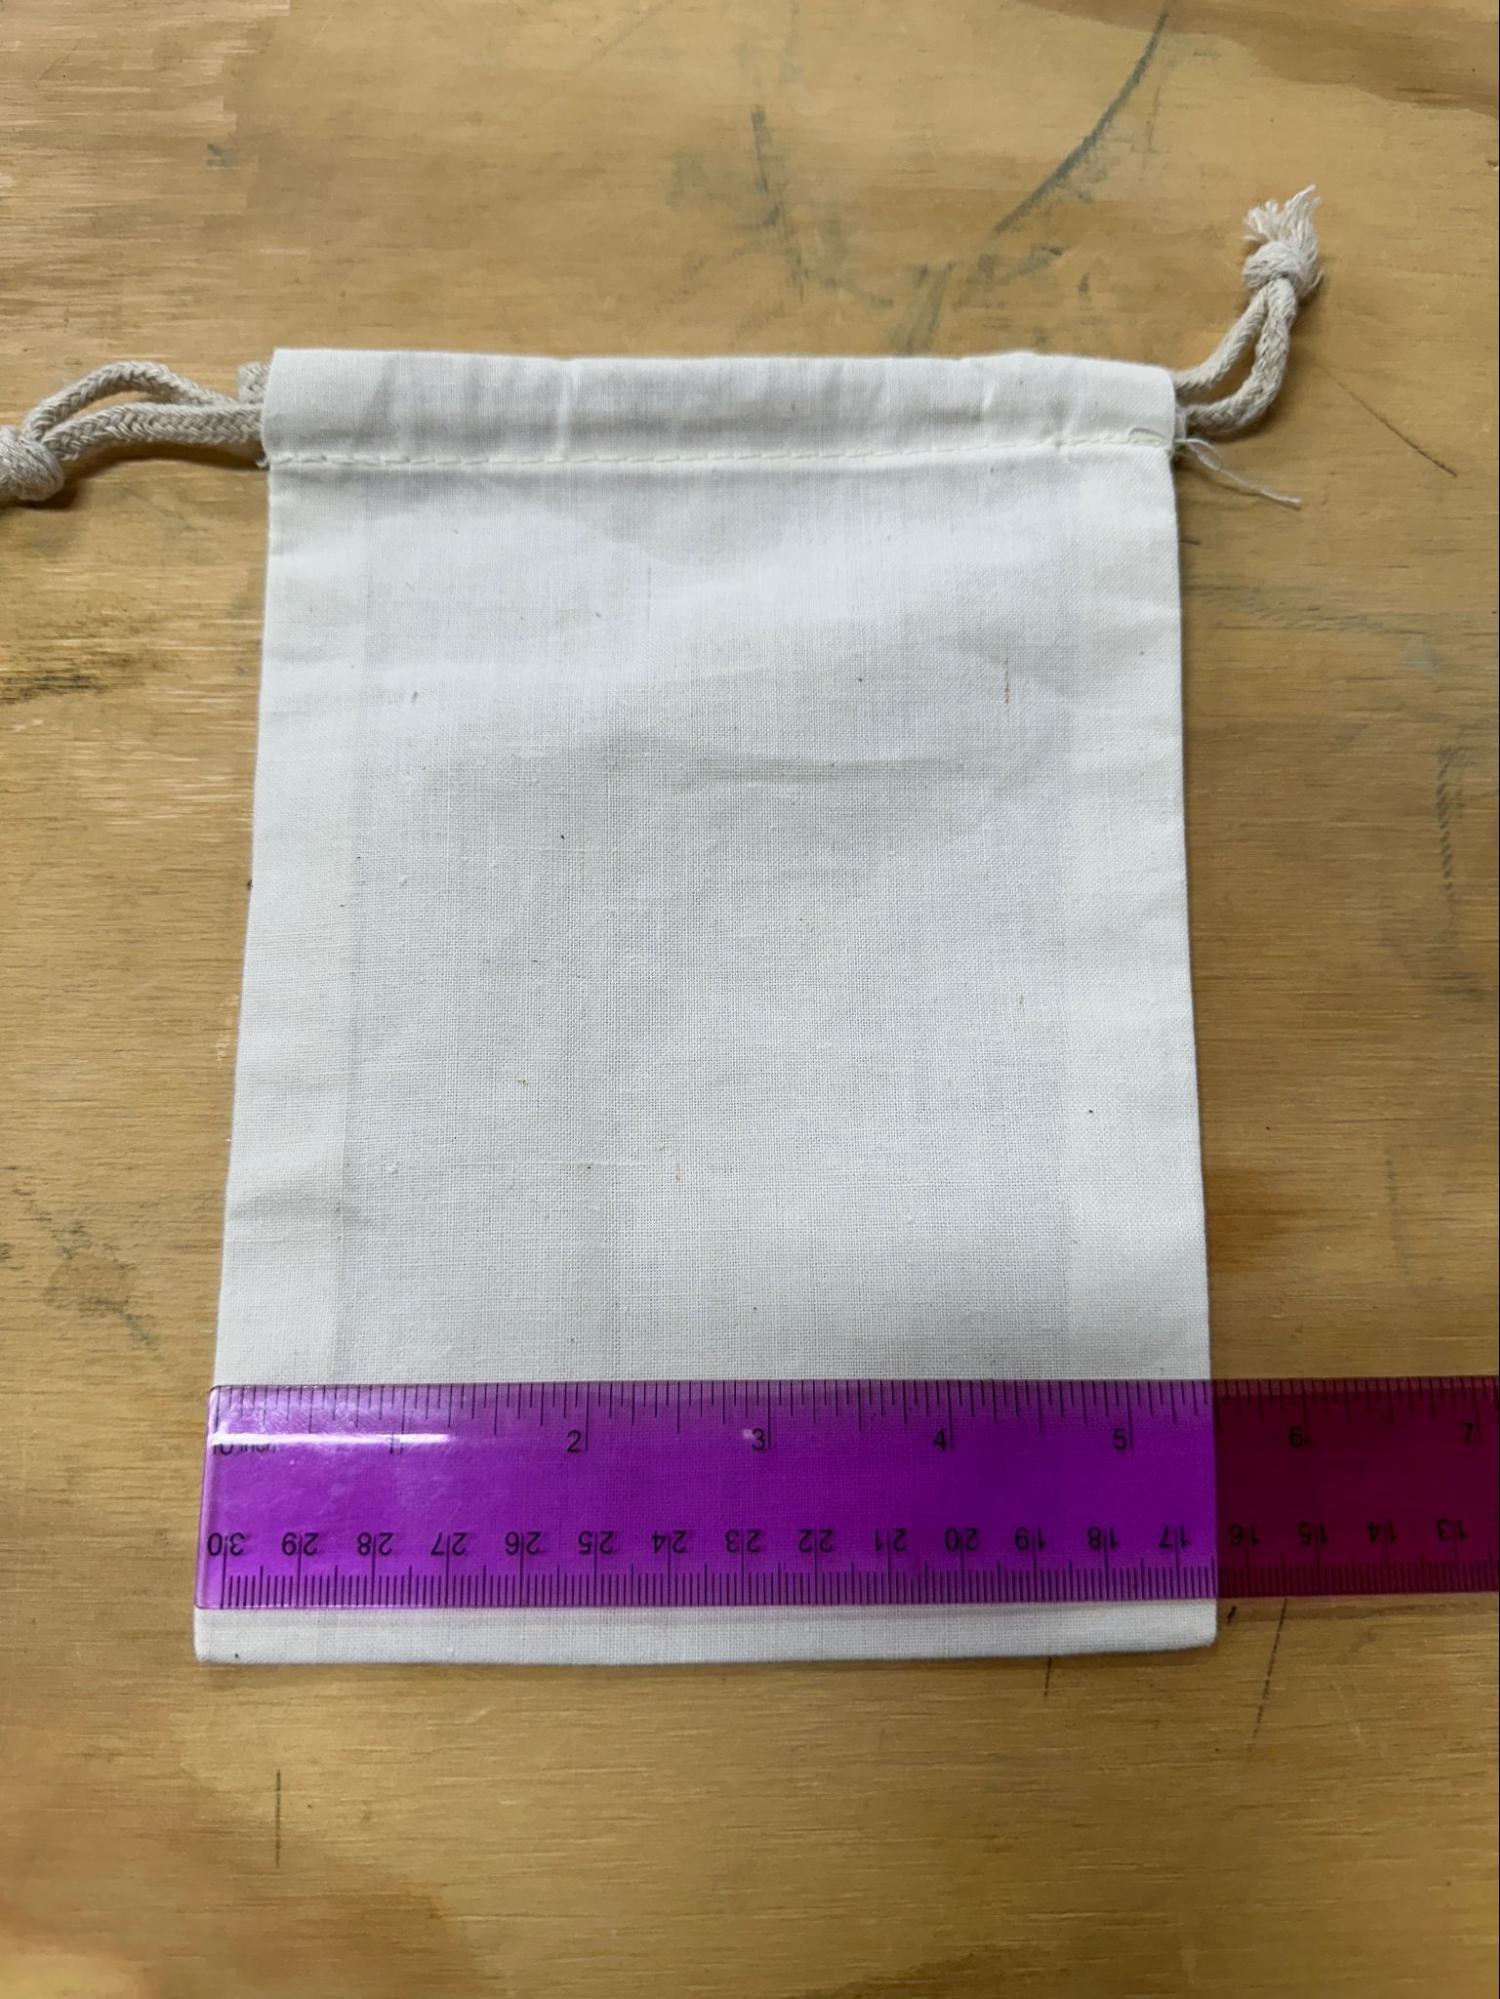
Small bag
New File
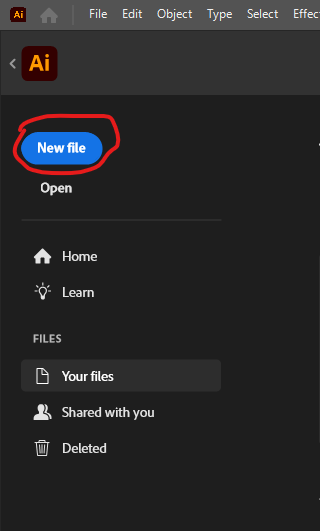
In Adobe Illustrator, create a new file.
Measure Up
Measure your fabric and determine what size you would like your artwork to be.
Canvas Size

Set your canvas width and height to be slightly larger than your desired artwork. Then, press Create.
Place Image
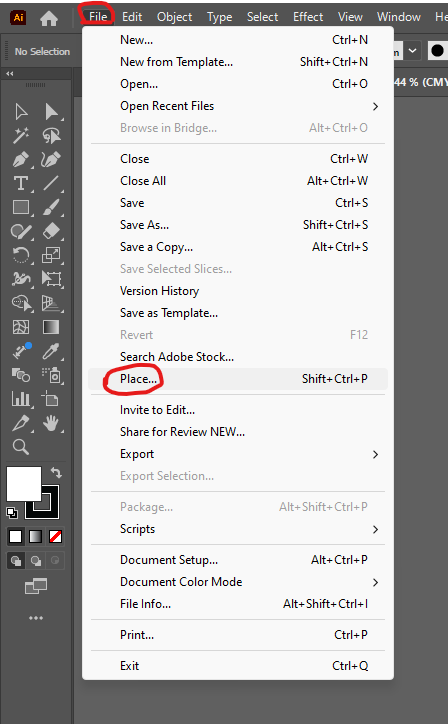
Click File>Place to insert your image onto the canvas. Select your image file and then click anywhere to place the image.
Adjust Image
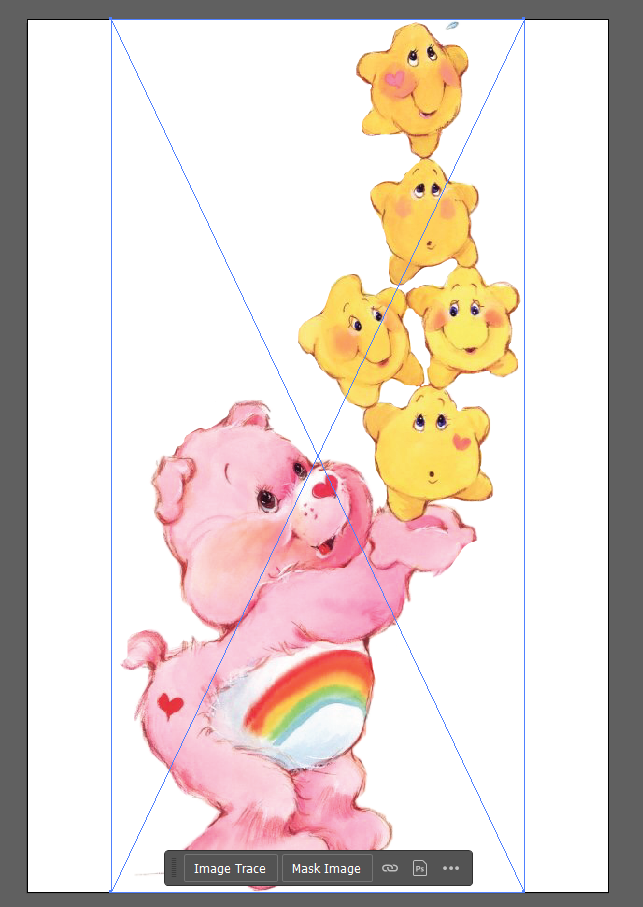
Set your width the height of your artwork here. Use the alignment tools to center your artwork onto the canvas.
White Layer
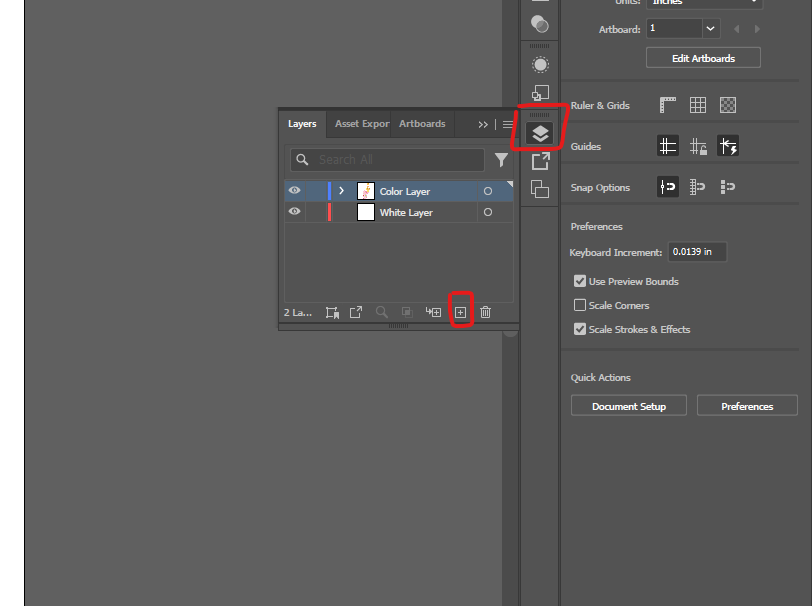
Steps 6-20 deal with creating a ‘white layer’ for the DTF printer to print. If your artwork requires white in it, go ahead and create a new layer. Double click on the layer names to rename them. The layer with your image on it should be called something like ‘Color Layer’. Drag the new layer underneath the color layer and rename that new layer to ‘White Layer’.
Copy
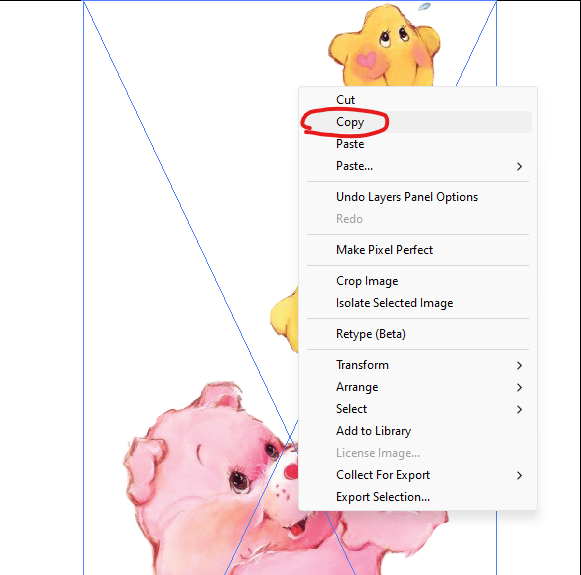
Right click on your artwork and Copy it.
Change Layers
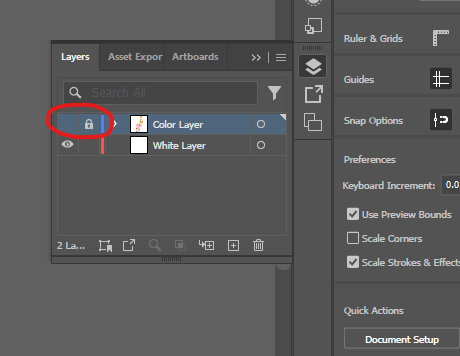
In the layers panel, disable the Visibility of the color layer by clicking the eyeball, and in the empty box next to it, enable the Lock on that color layer. This just prevents you from accidentally moving it throughout the process.
Paste
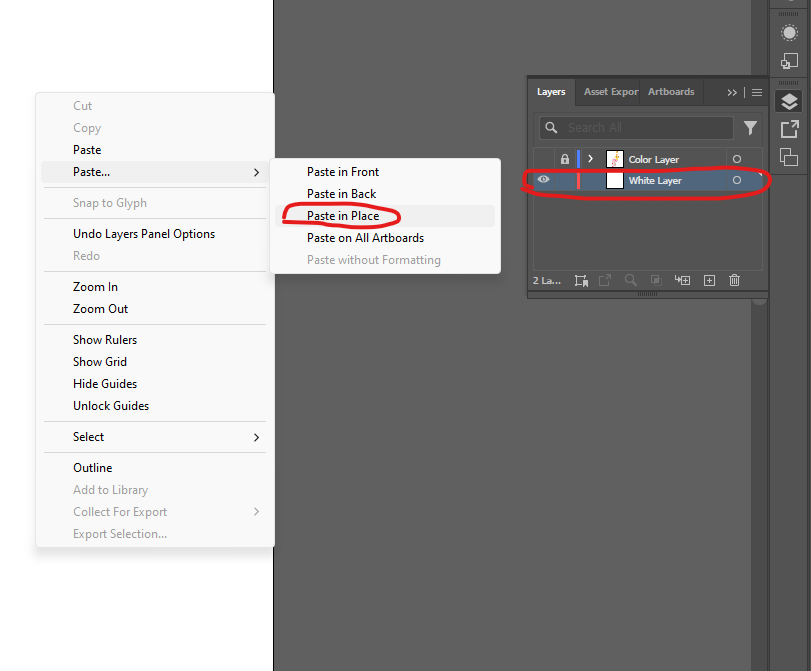
Select your ‘White Layer’. Then, right click onto the canvas and use Paste>Paste in Place.
Trace
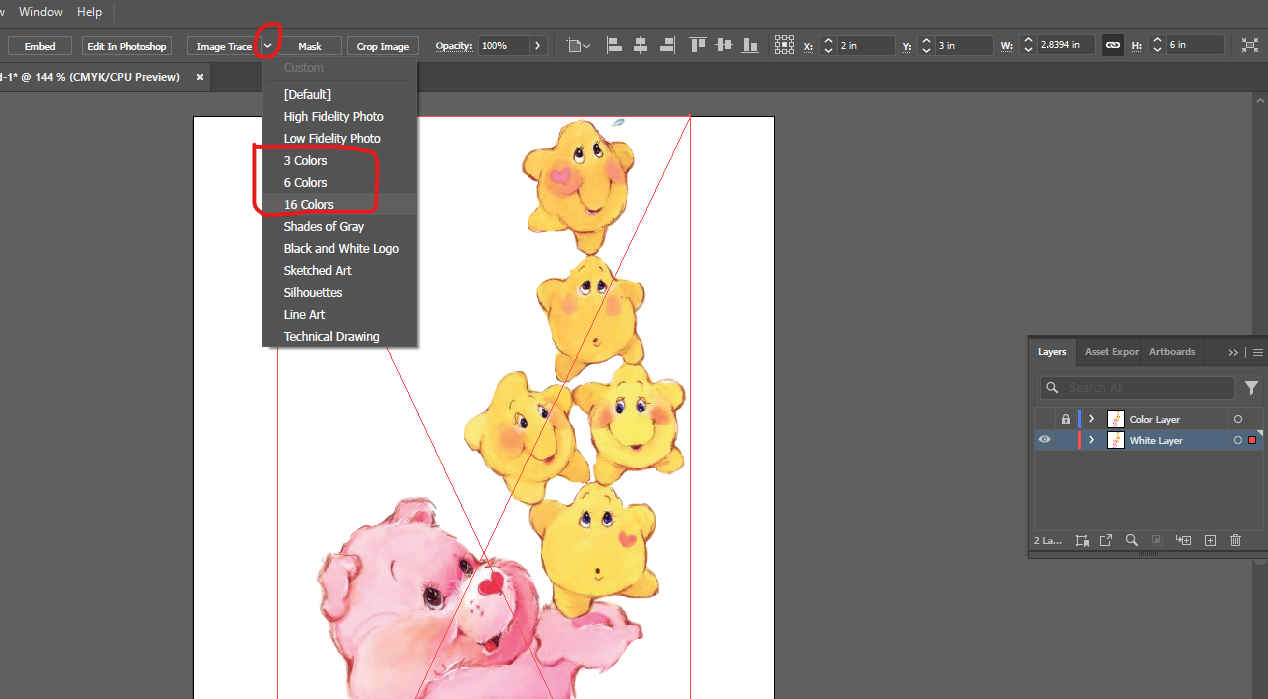
With your copied artwork selected, use the Image Trace drop down arrow to convert your image into a solid, vector shape. Depending on how many colors are present in your artwork, use either 3, 6 or 16 color image traces to get the best result.
Expand
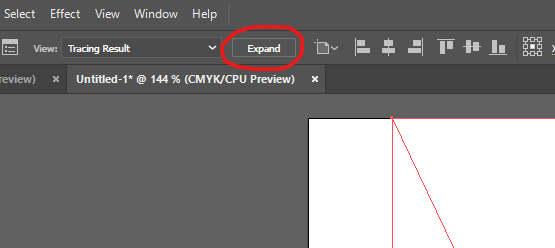
Now, Expand the traced image. This will simply finalize the vector shape.
Ungroup
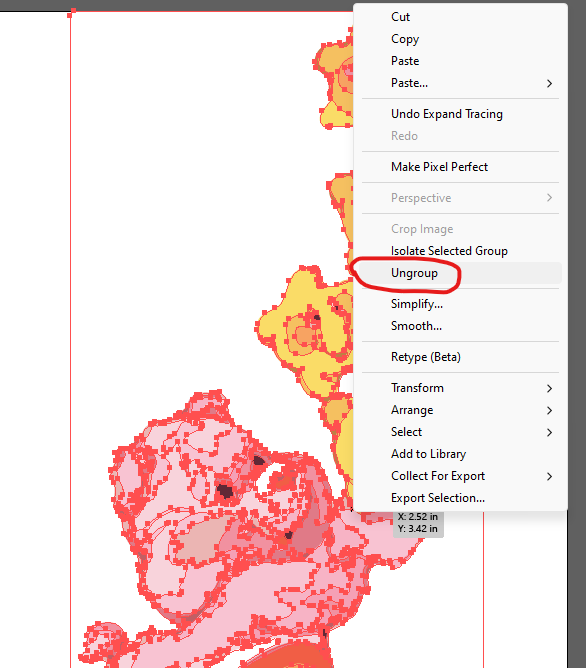
Right click on your canvas and Ungroup your traced artwork.
Tip: Sometimes you must ungroup multiple times, if your artwork somehow was split into subgroups.
Color Set
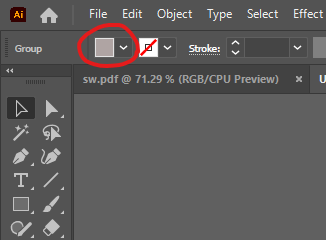
Set the appearance for your white layer. You can pick any Fill color that is visible on your white canvas. Ensure the Stroke is disabled as seen here.
Delete Unwanted
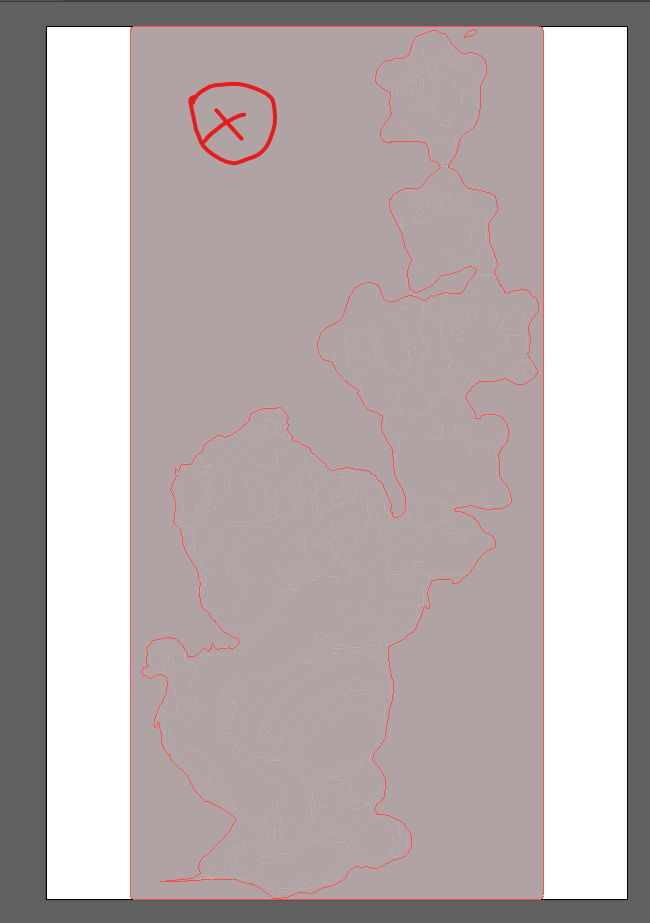
Deselect your traced artwork by clicking somewhere blank on the canvas or screen area. Then you can select the border shape the trace had created and remove it if desired. This will leave only the solid shape of your artwork to be printed as a white layer down the line in this process.
Union
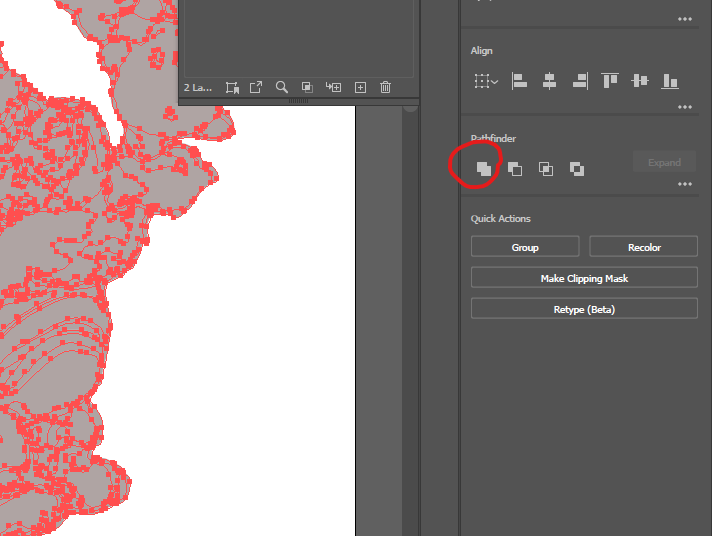
A Lot of the time, there will be tiny gaps between the shapes that were generated during the tracing process. You can clean this white layer shape up by simply using the Pathfinder tool ‘Union’ to unite all the mini shapes into one single shape.
Clarity
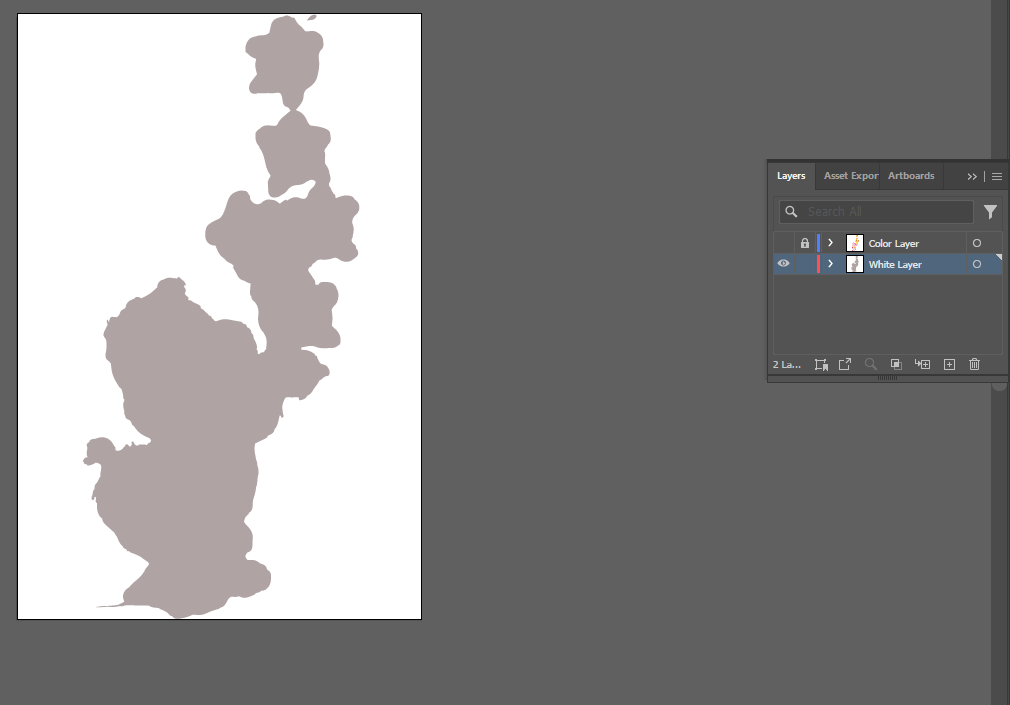
Just to clarify, your shape representing the white layer of print, should be on its own layer as shown here, underneath the color layer. You can turn the visibility of your color layer on and off to ensure the position and size of the white layer match your color layer.
Erase
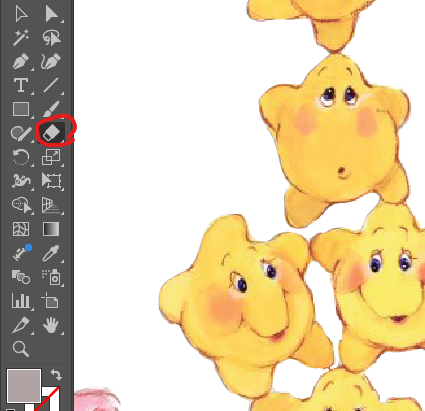
You may have sections of your white layer that should not be present, usually in isolated areas within your artwork. Simply use the Eraser tool to remove those sections of your white layer. You can easily change the size of the Eraser tool with the square bracket hotkeys ‘ [ ‘ ‘ ] ’
New Swatch
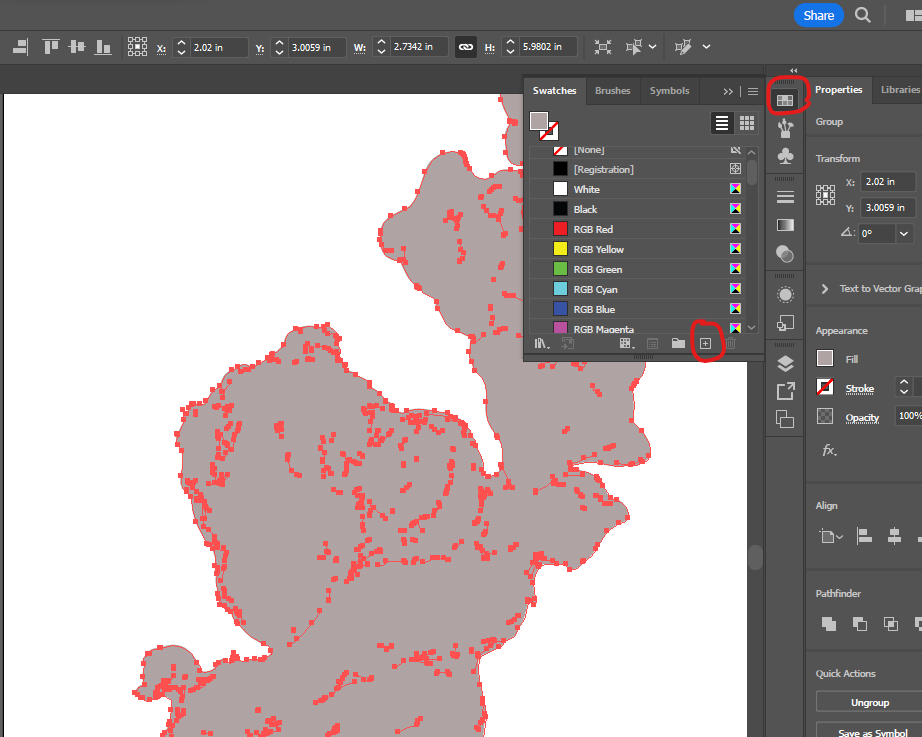
In this next step we will be creating a Swatch for the white layer shape. With your shape selected, open the Swatches panel and click the + icon to create a new swatch.
RDG_WHITE
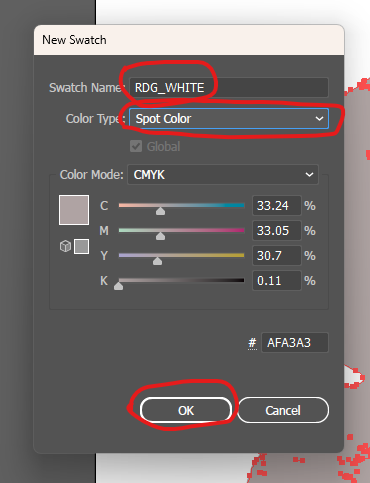
Type RDG_WHITE into the swatch name field and change the color type to Spot Color. Then, press Ok.
Hide White Layer
Lastly, before we save our file, turn the visibility on for your color layer. This will hide your white layer, but it is still there and will be read by the DTF printer software as a white layer to be printed.
Save As
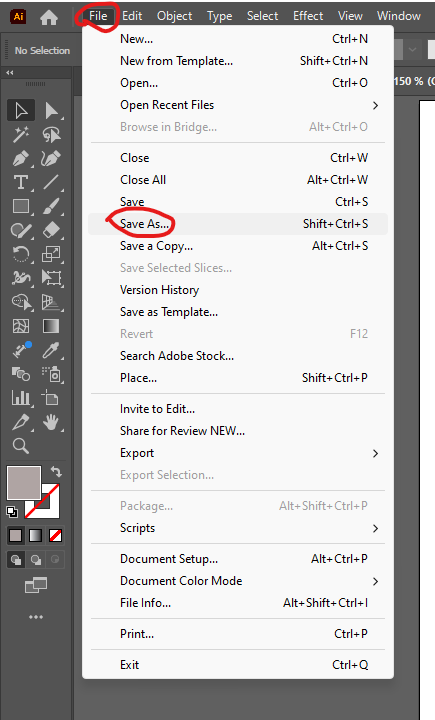
Click File>Save As to save your file.

Name your file and change the file type to PDF and press Save.
Uncheck All
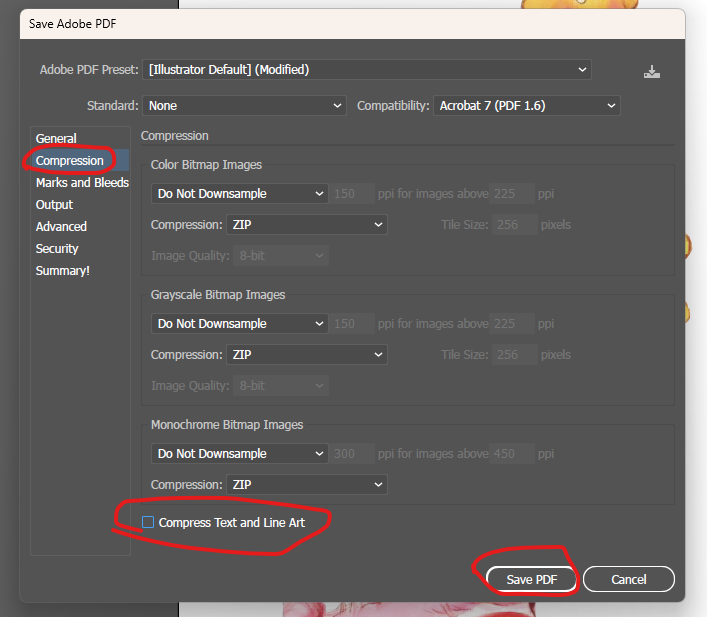
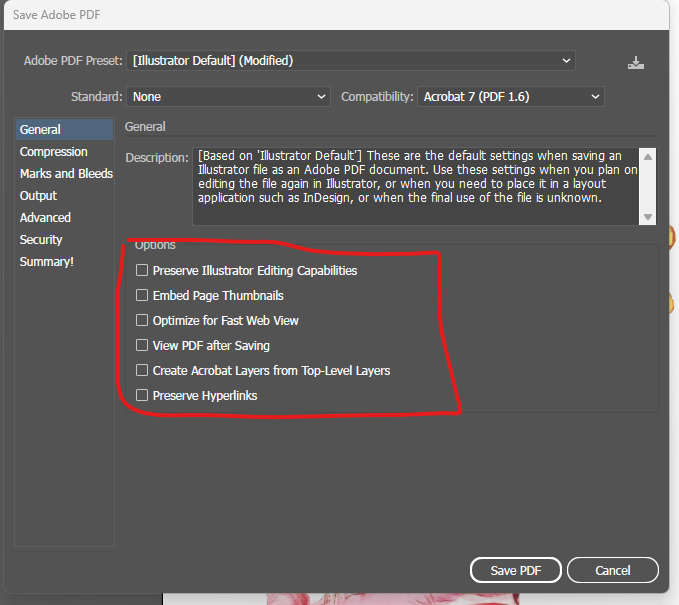
Uncheck all the boxes in the General and Compression tabs before pressing Save PDF.
Heat Press
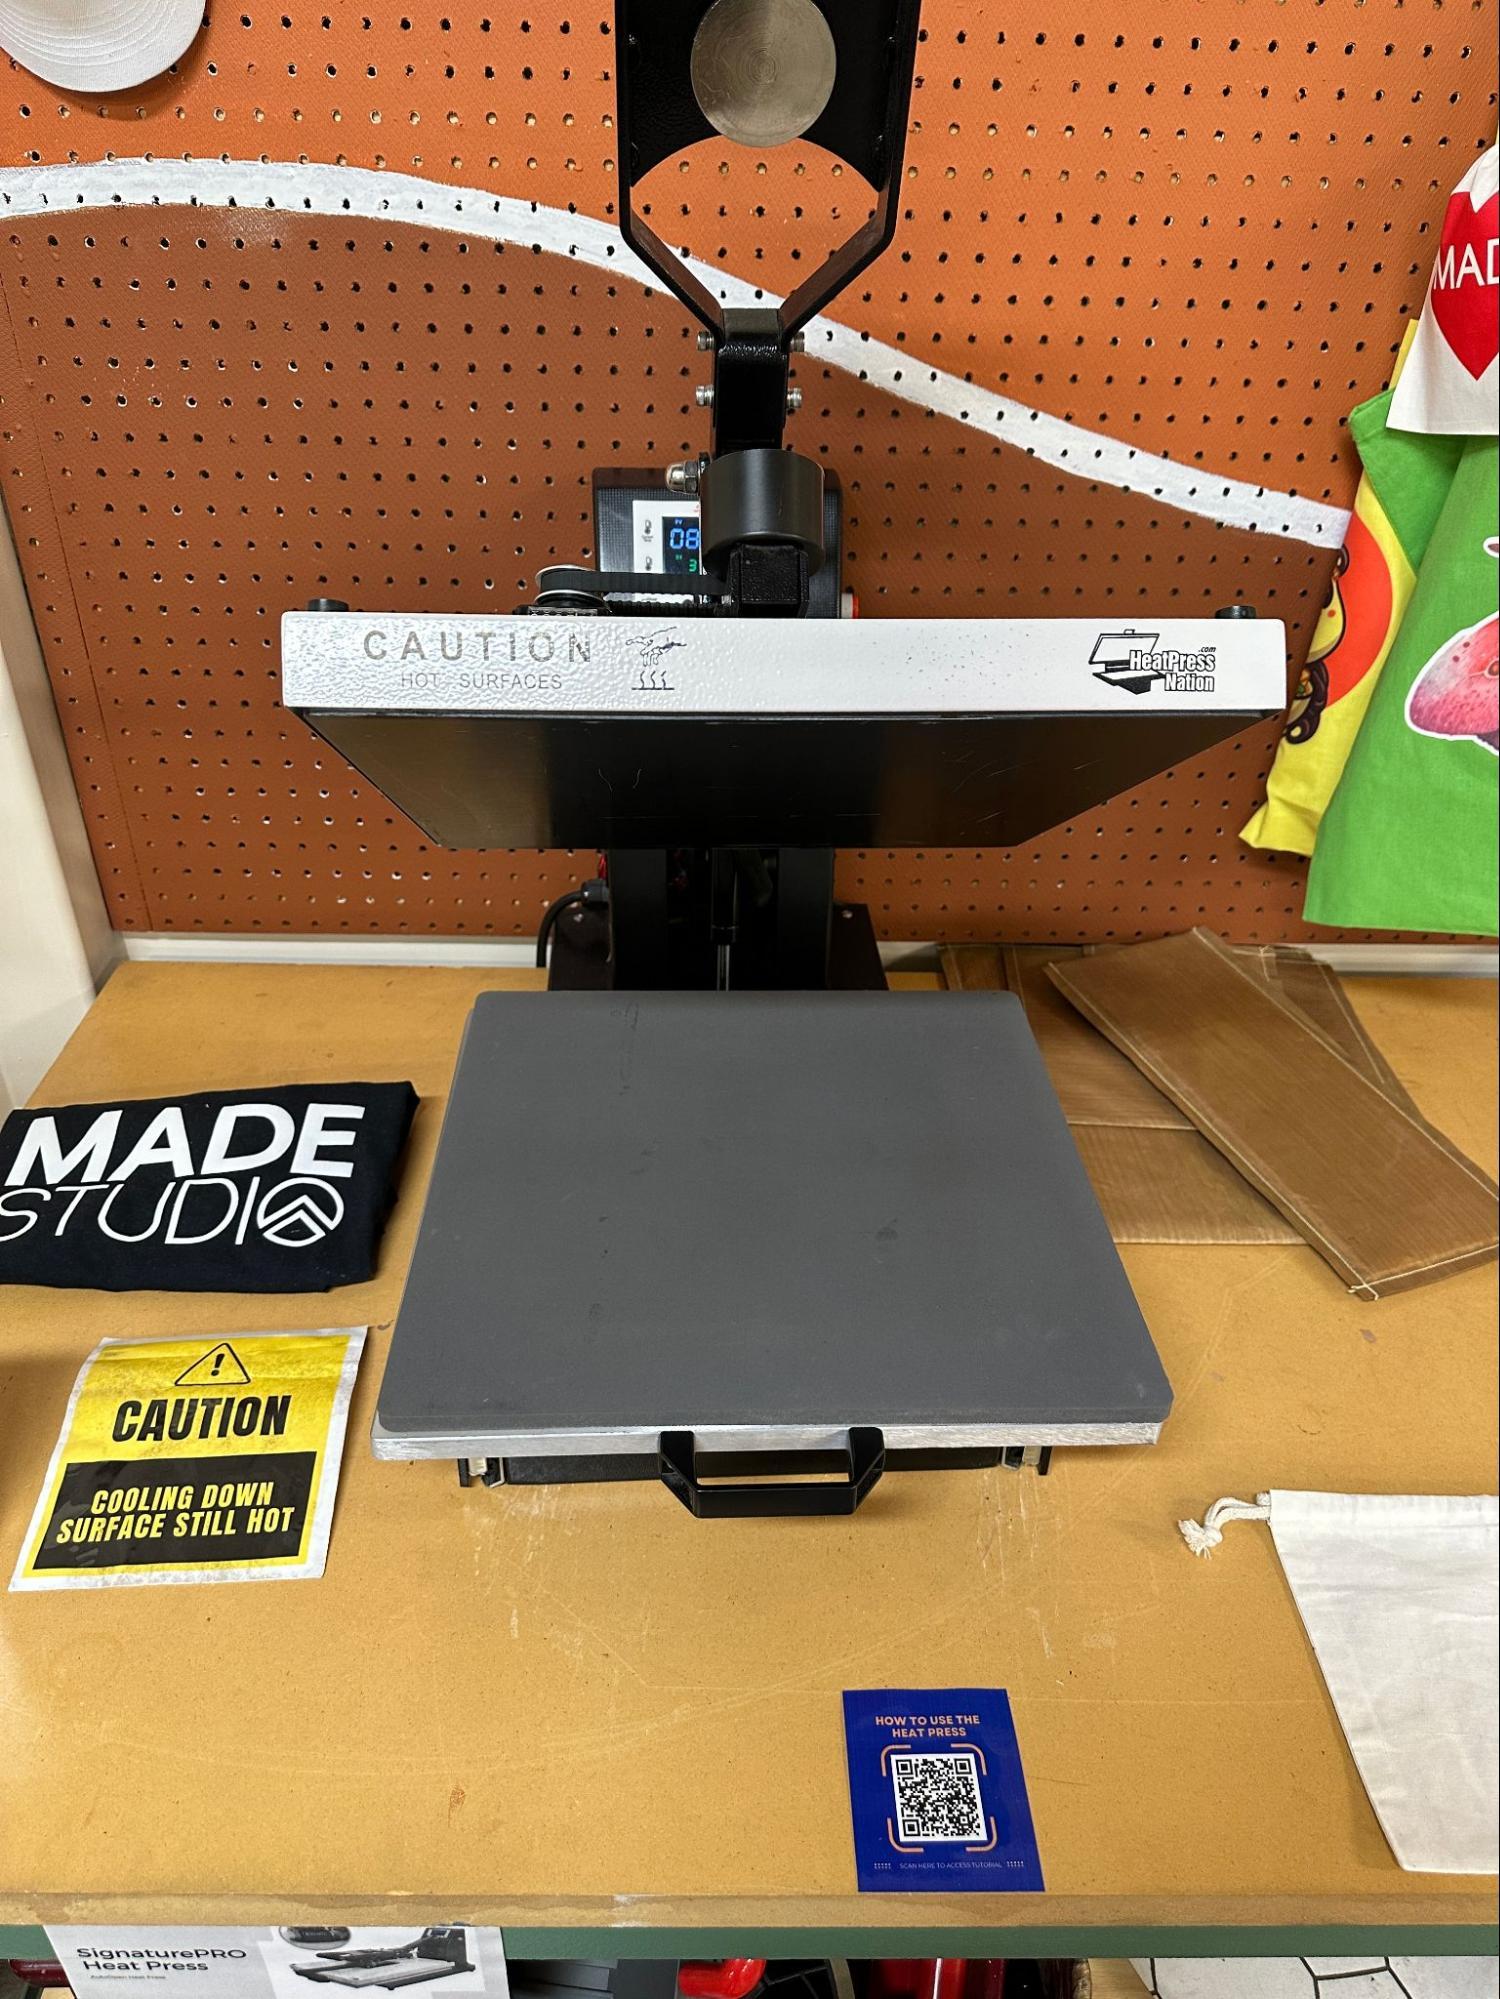
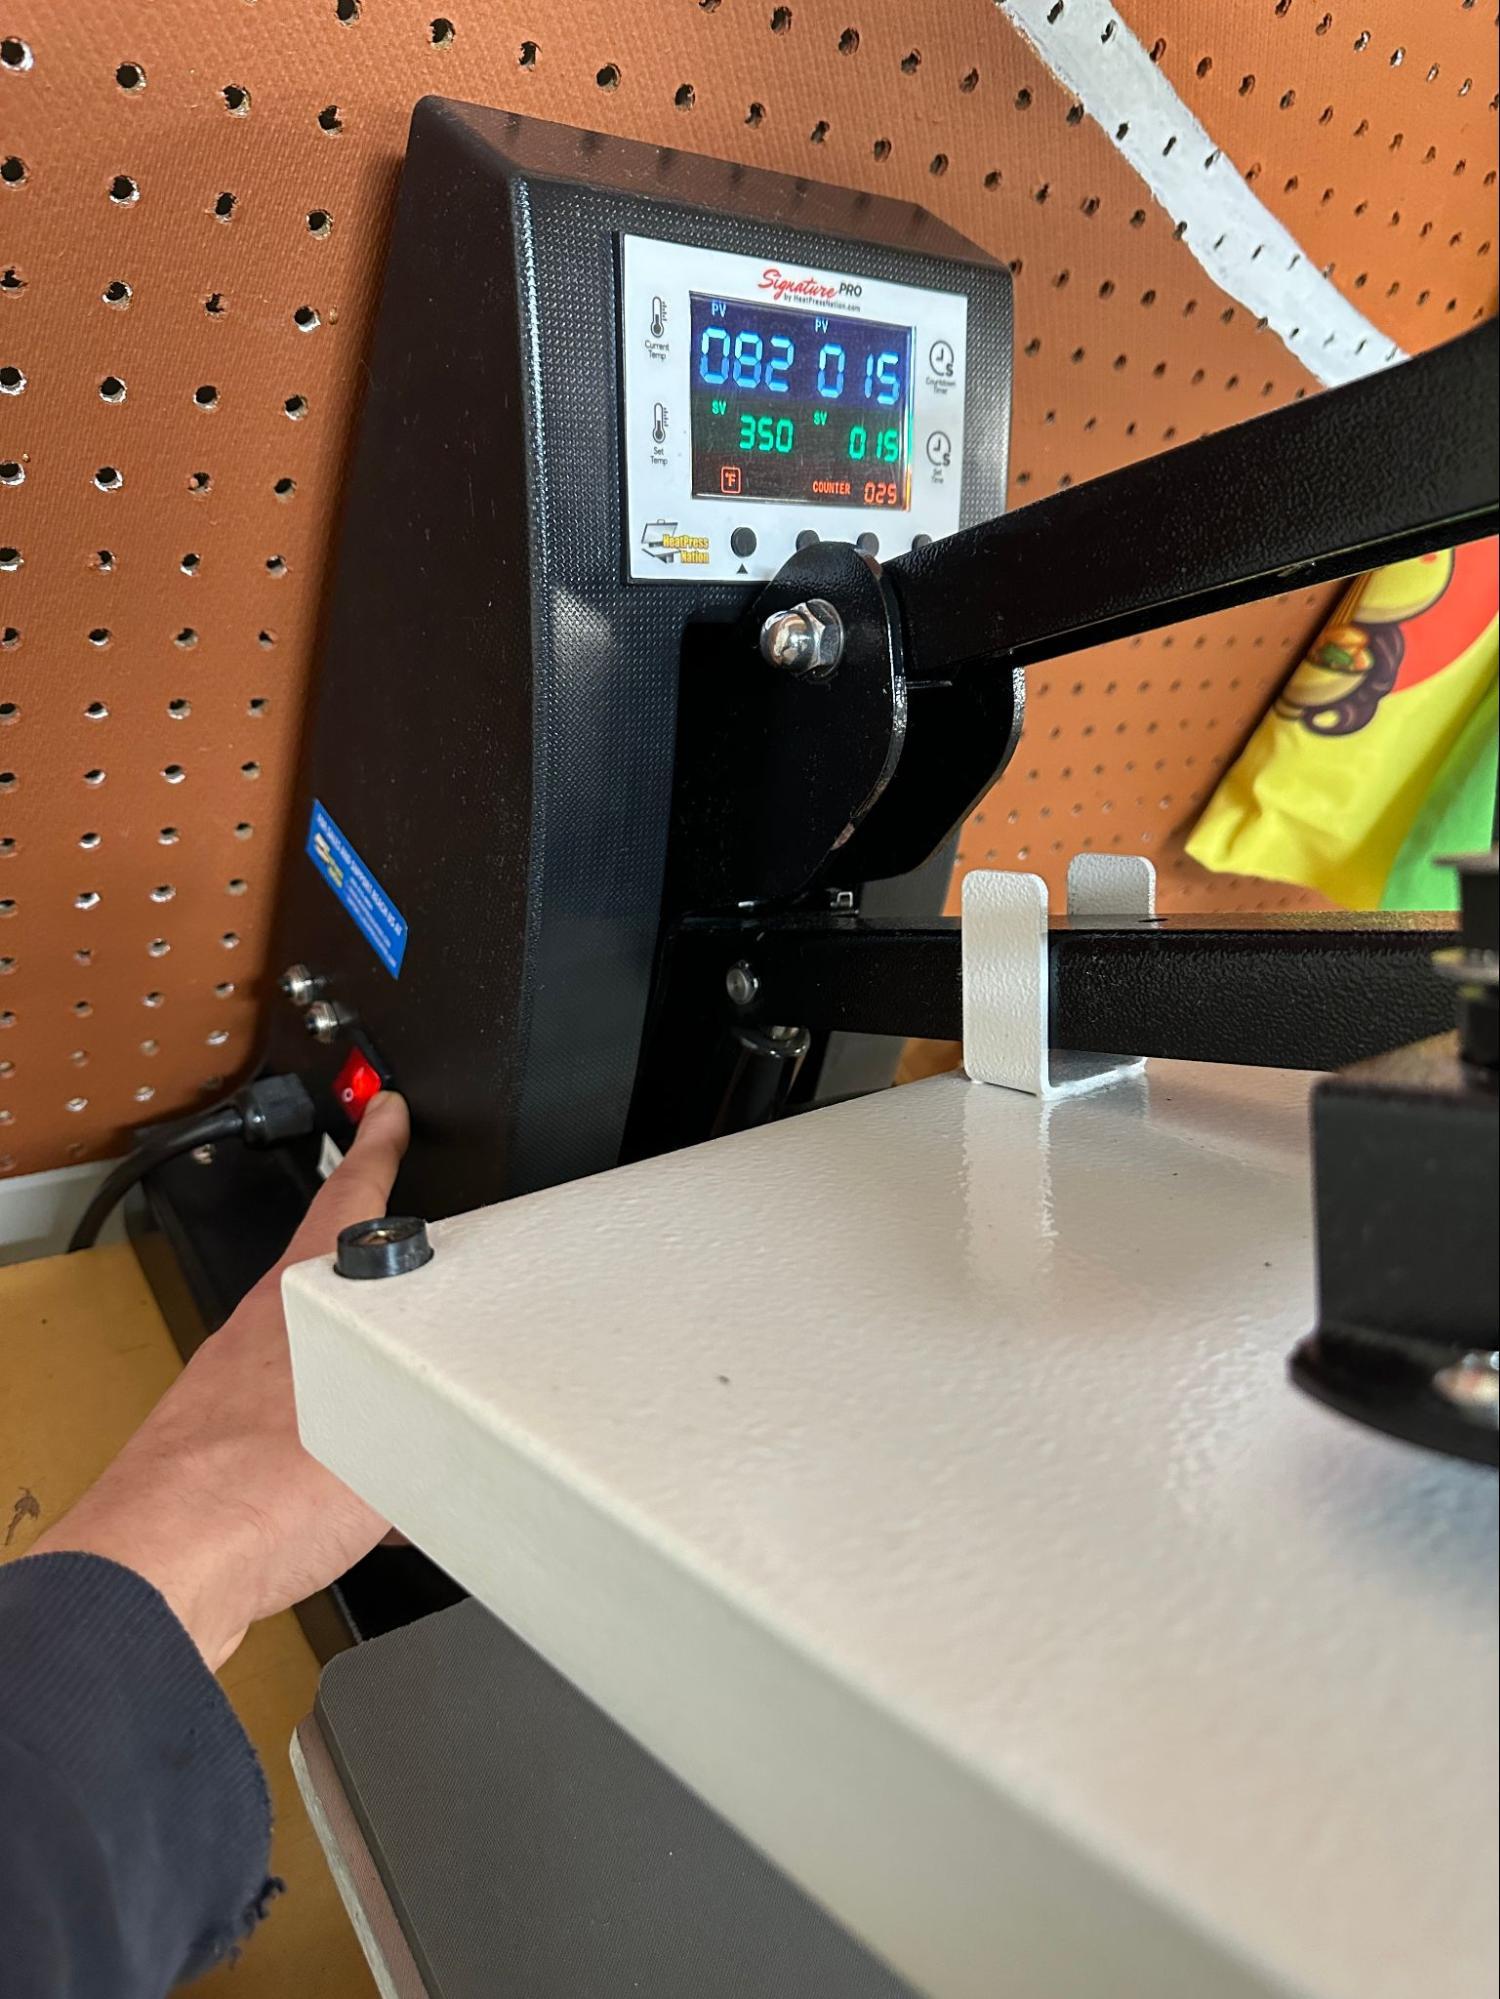
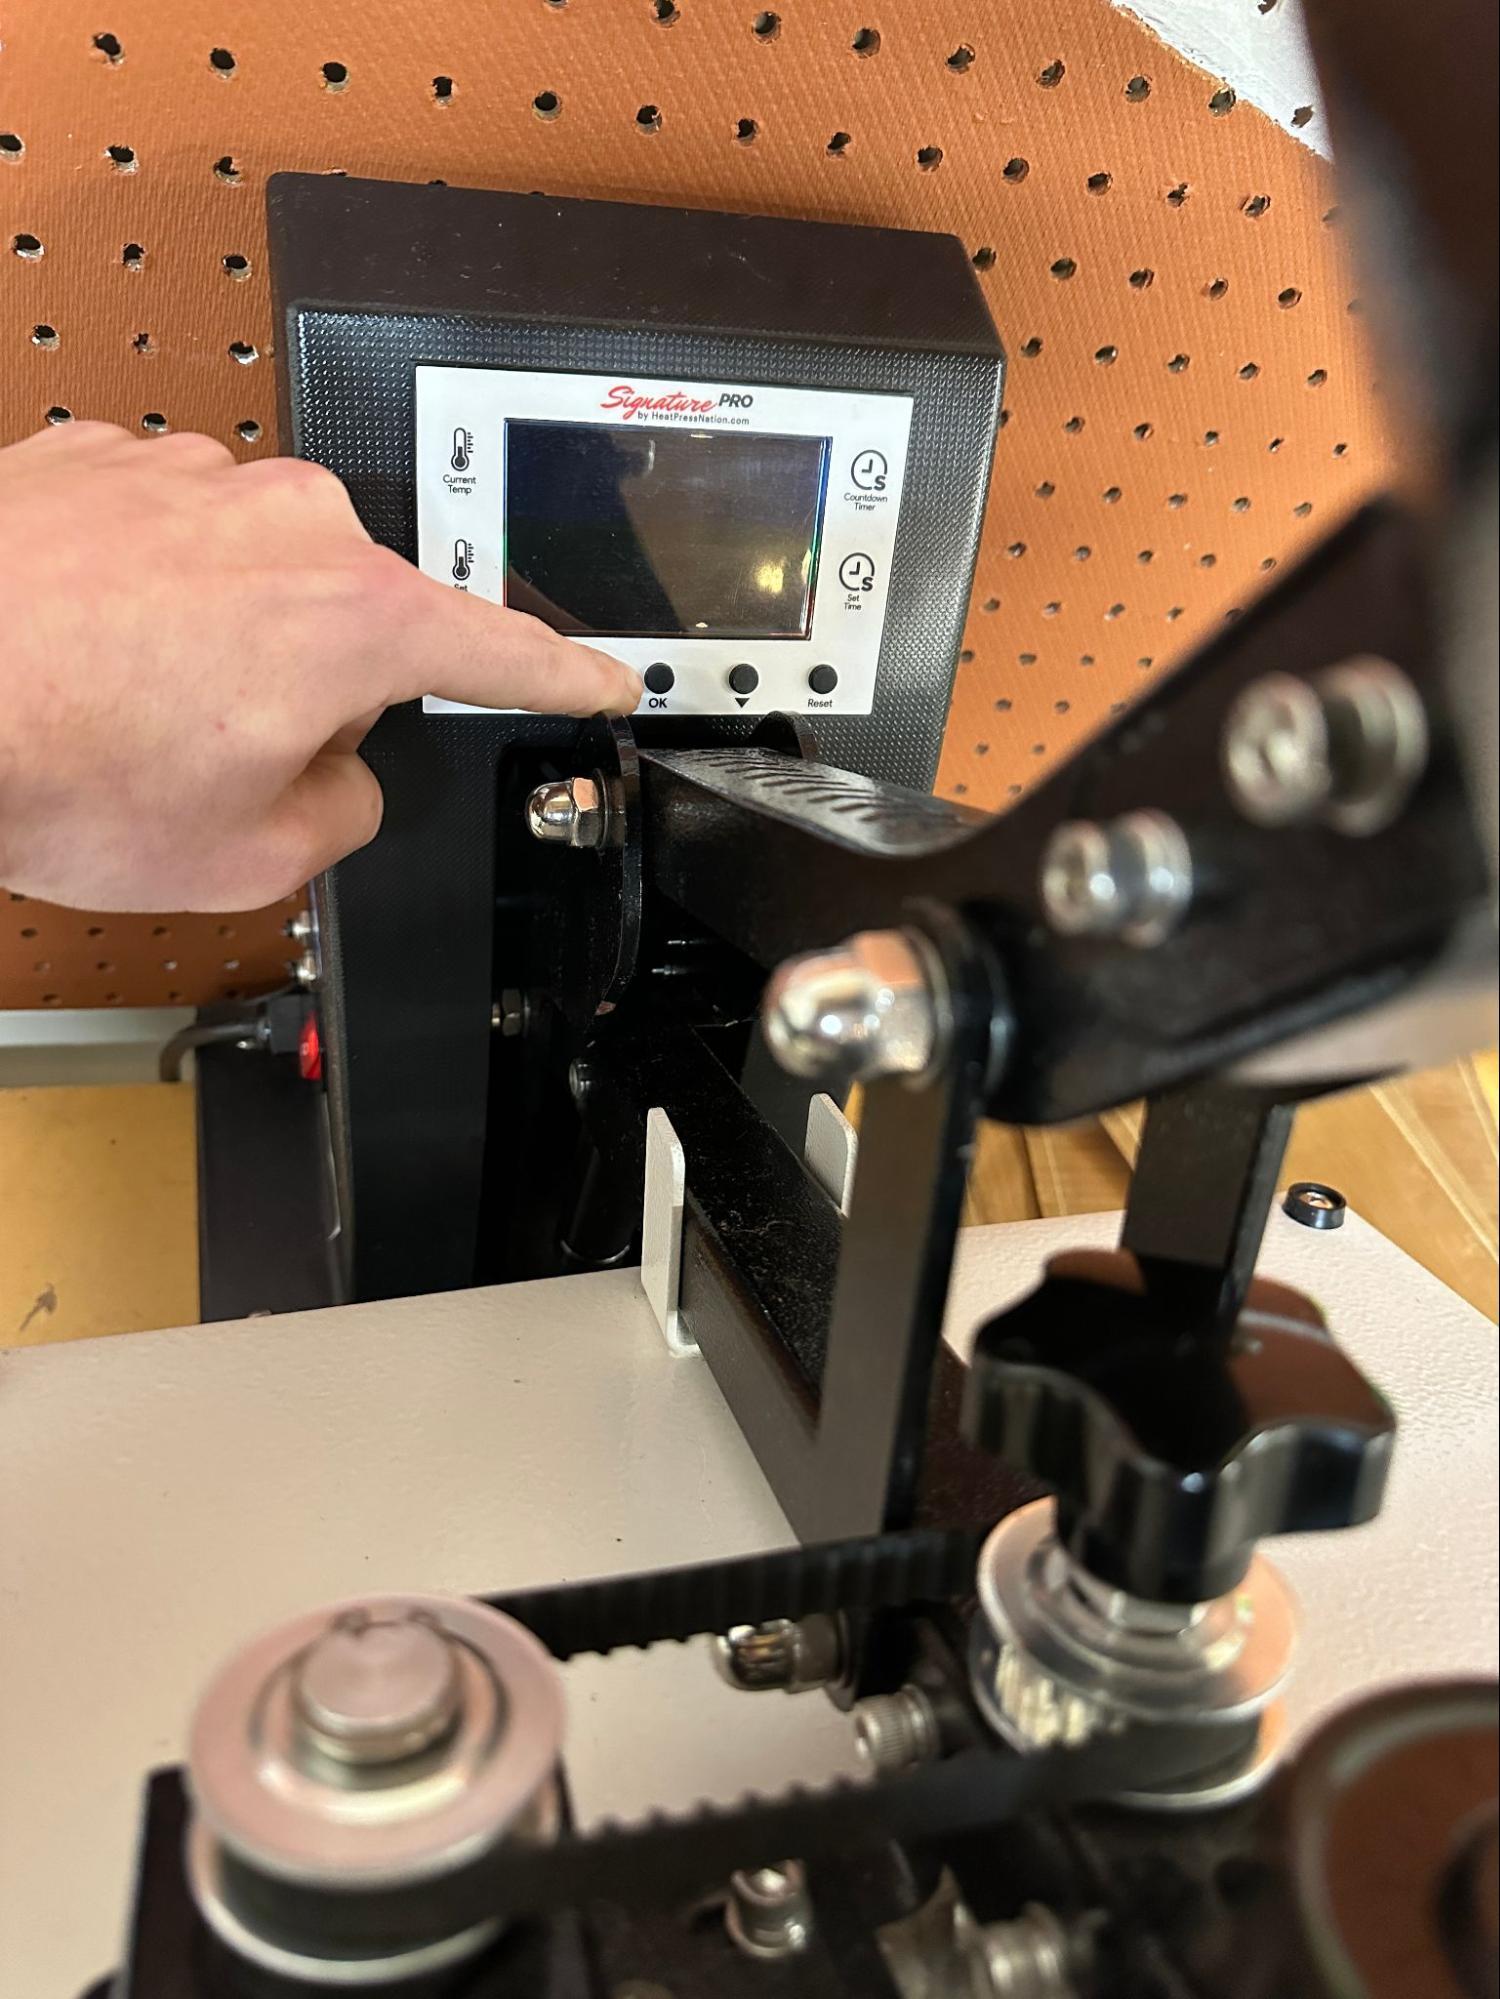
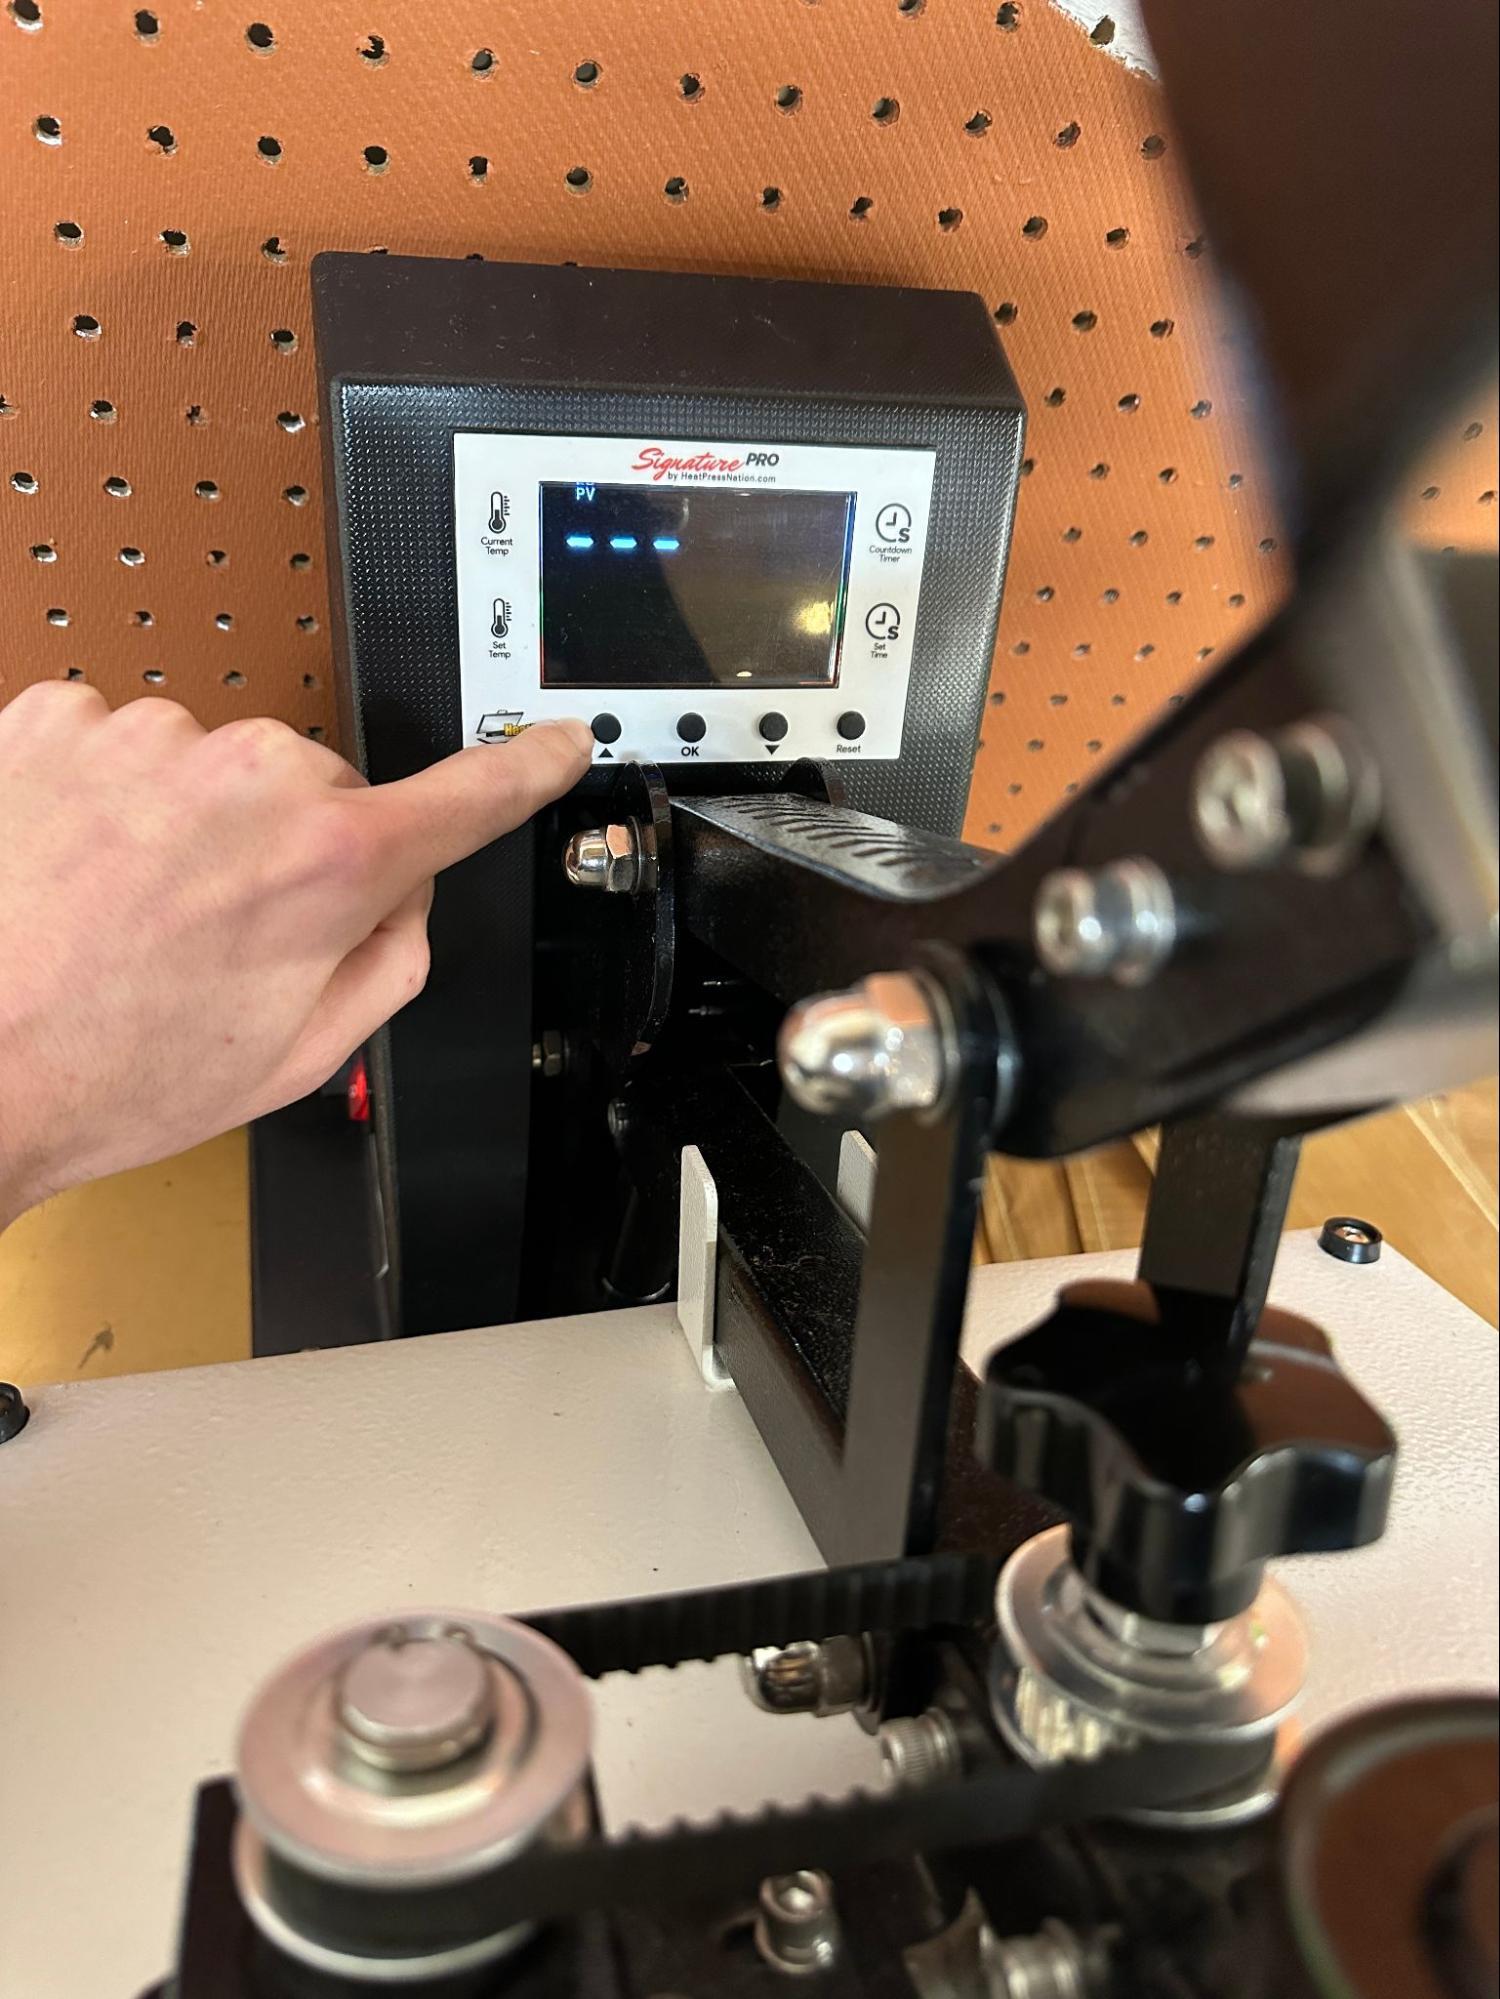
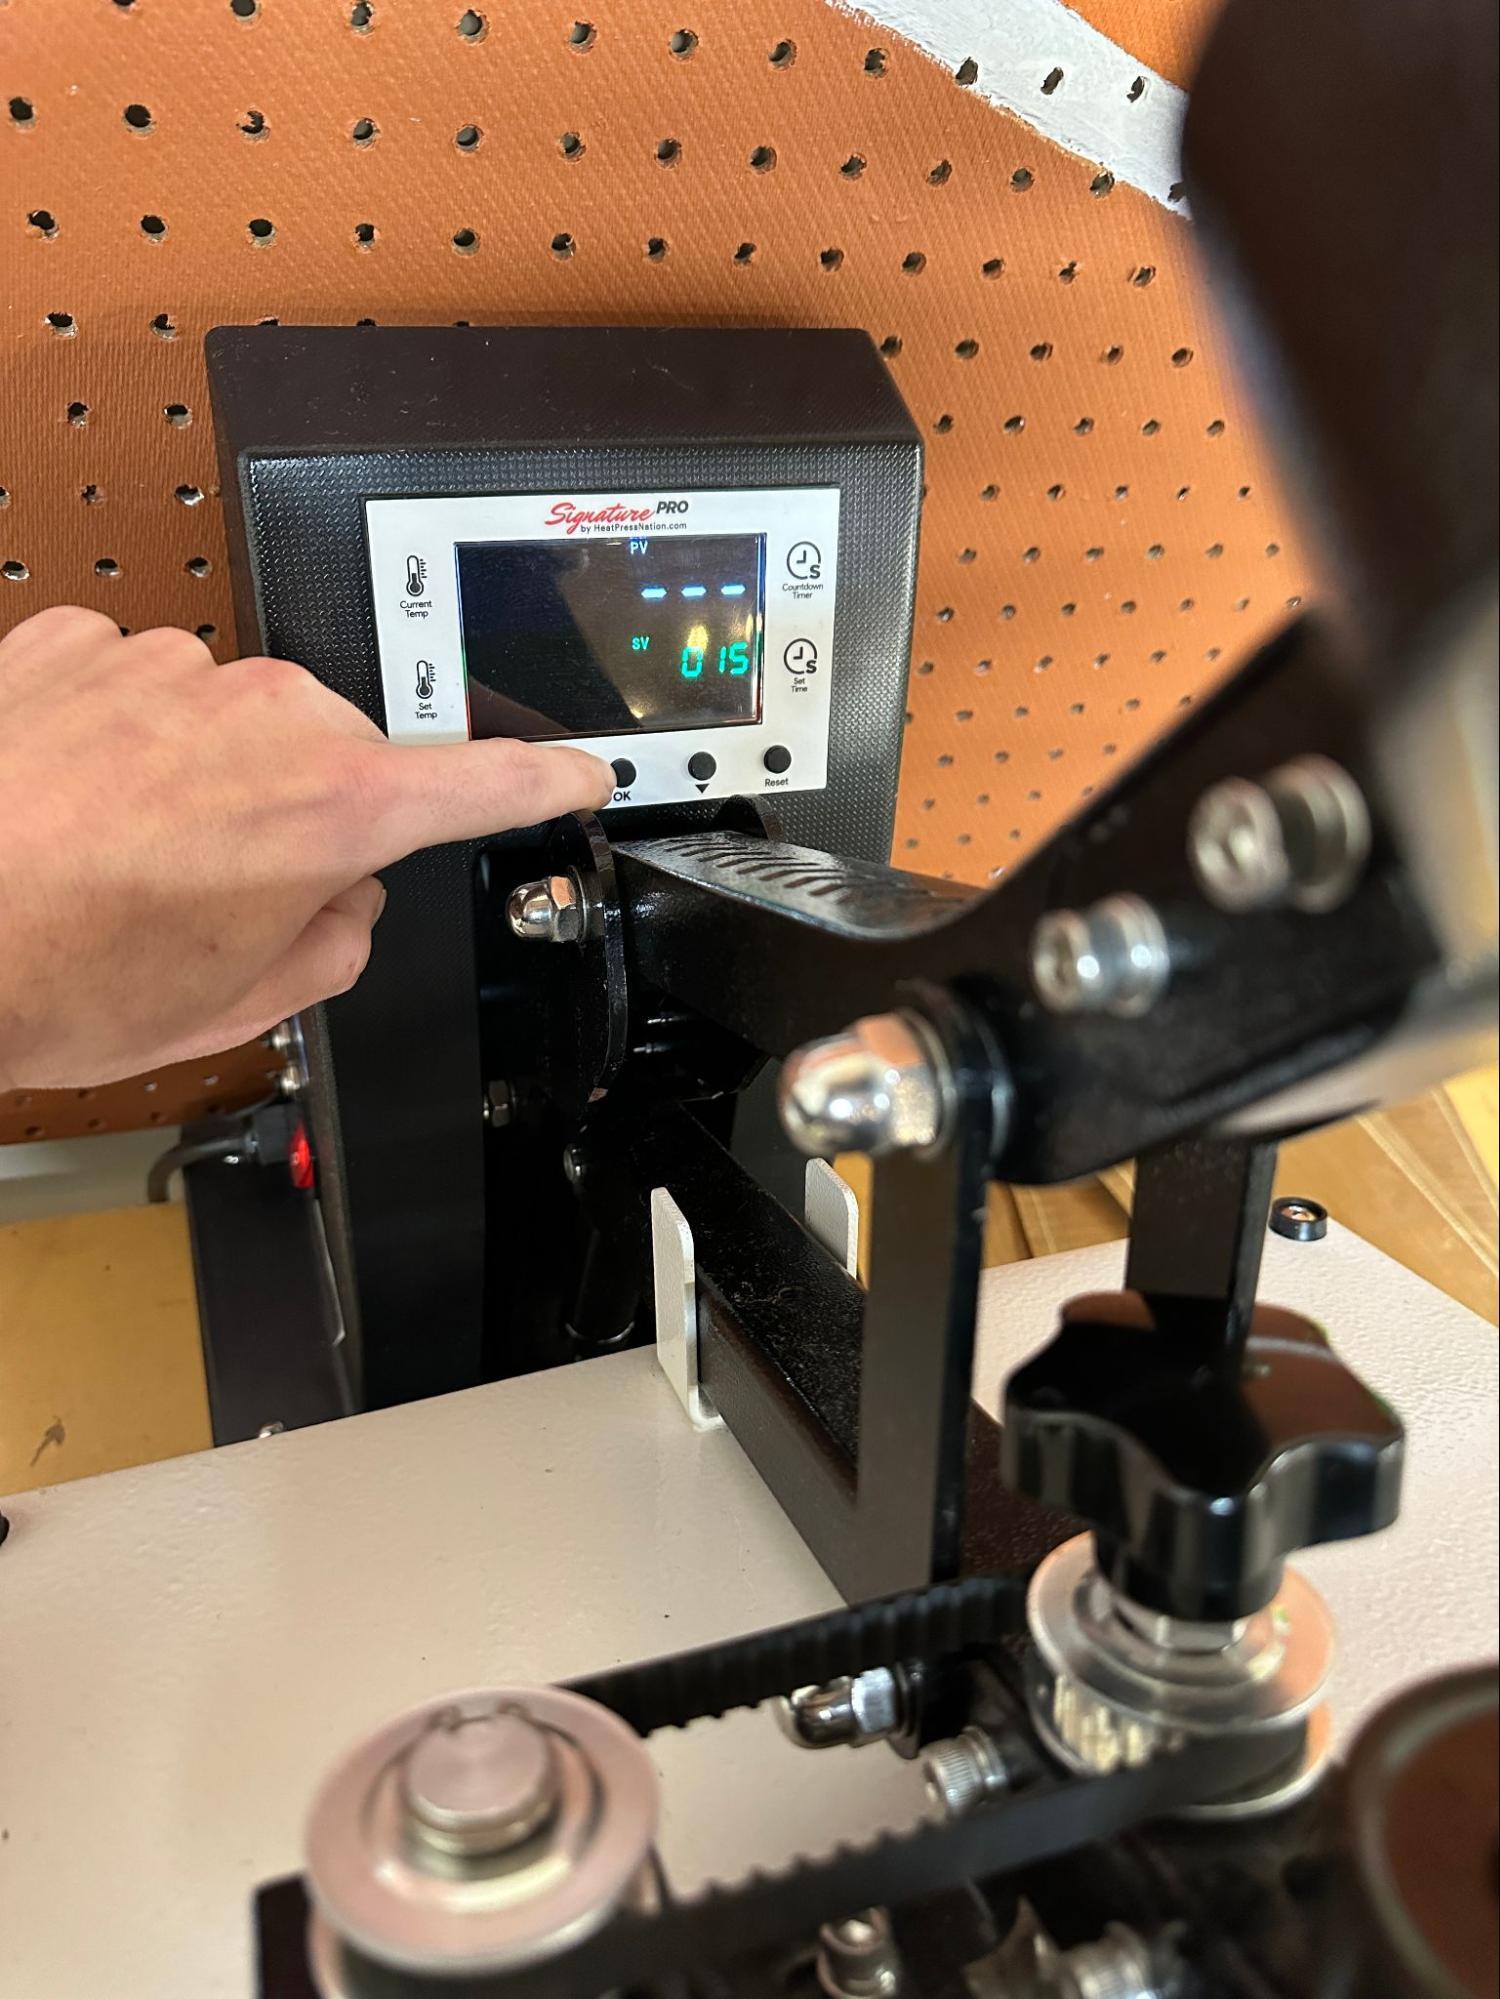
This is a heat press, Locate the power button. Use the Ok button to enter setup so that we can set the Temperature and Duration of the press. Pressing the Ok button cycles through the settings, the up and down arrows allow you to raise and lower temp or duration in seconds. For cotton, use 375 F and 15 seconds. For poly-blends use 350 F and for polyester use 325 F with the same 15 sec duration for all.
Iron
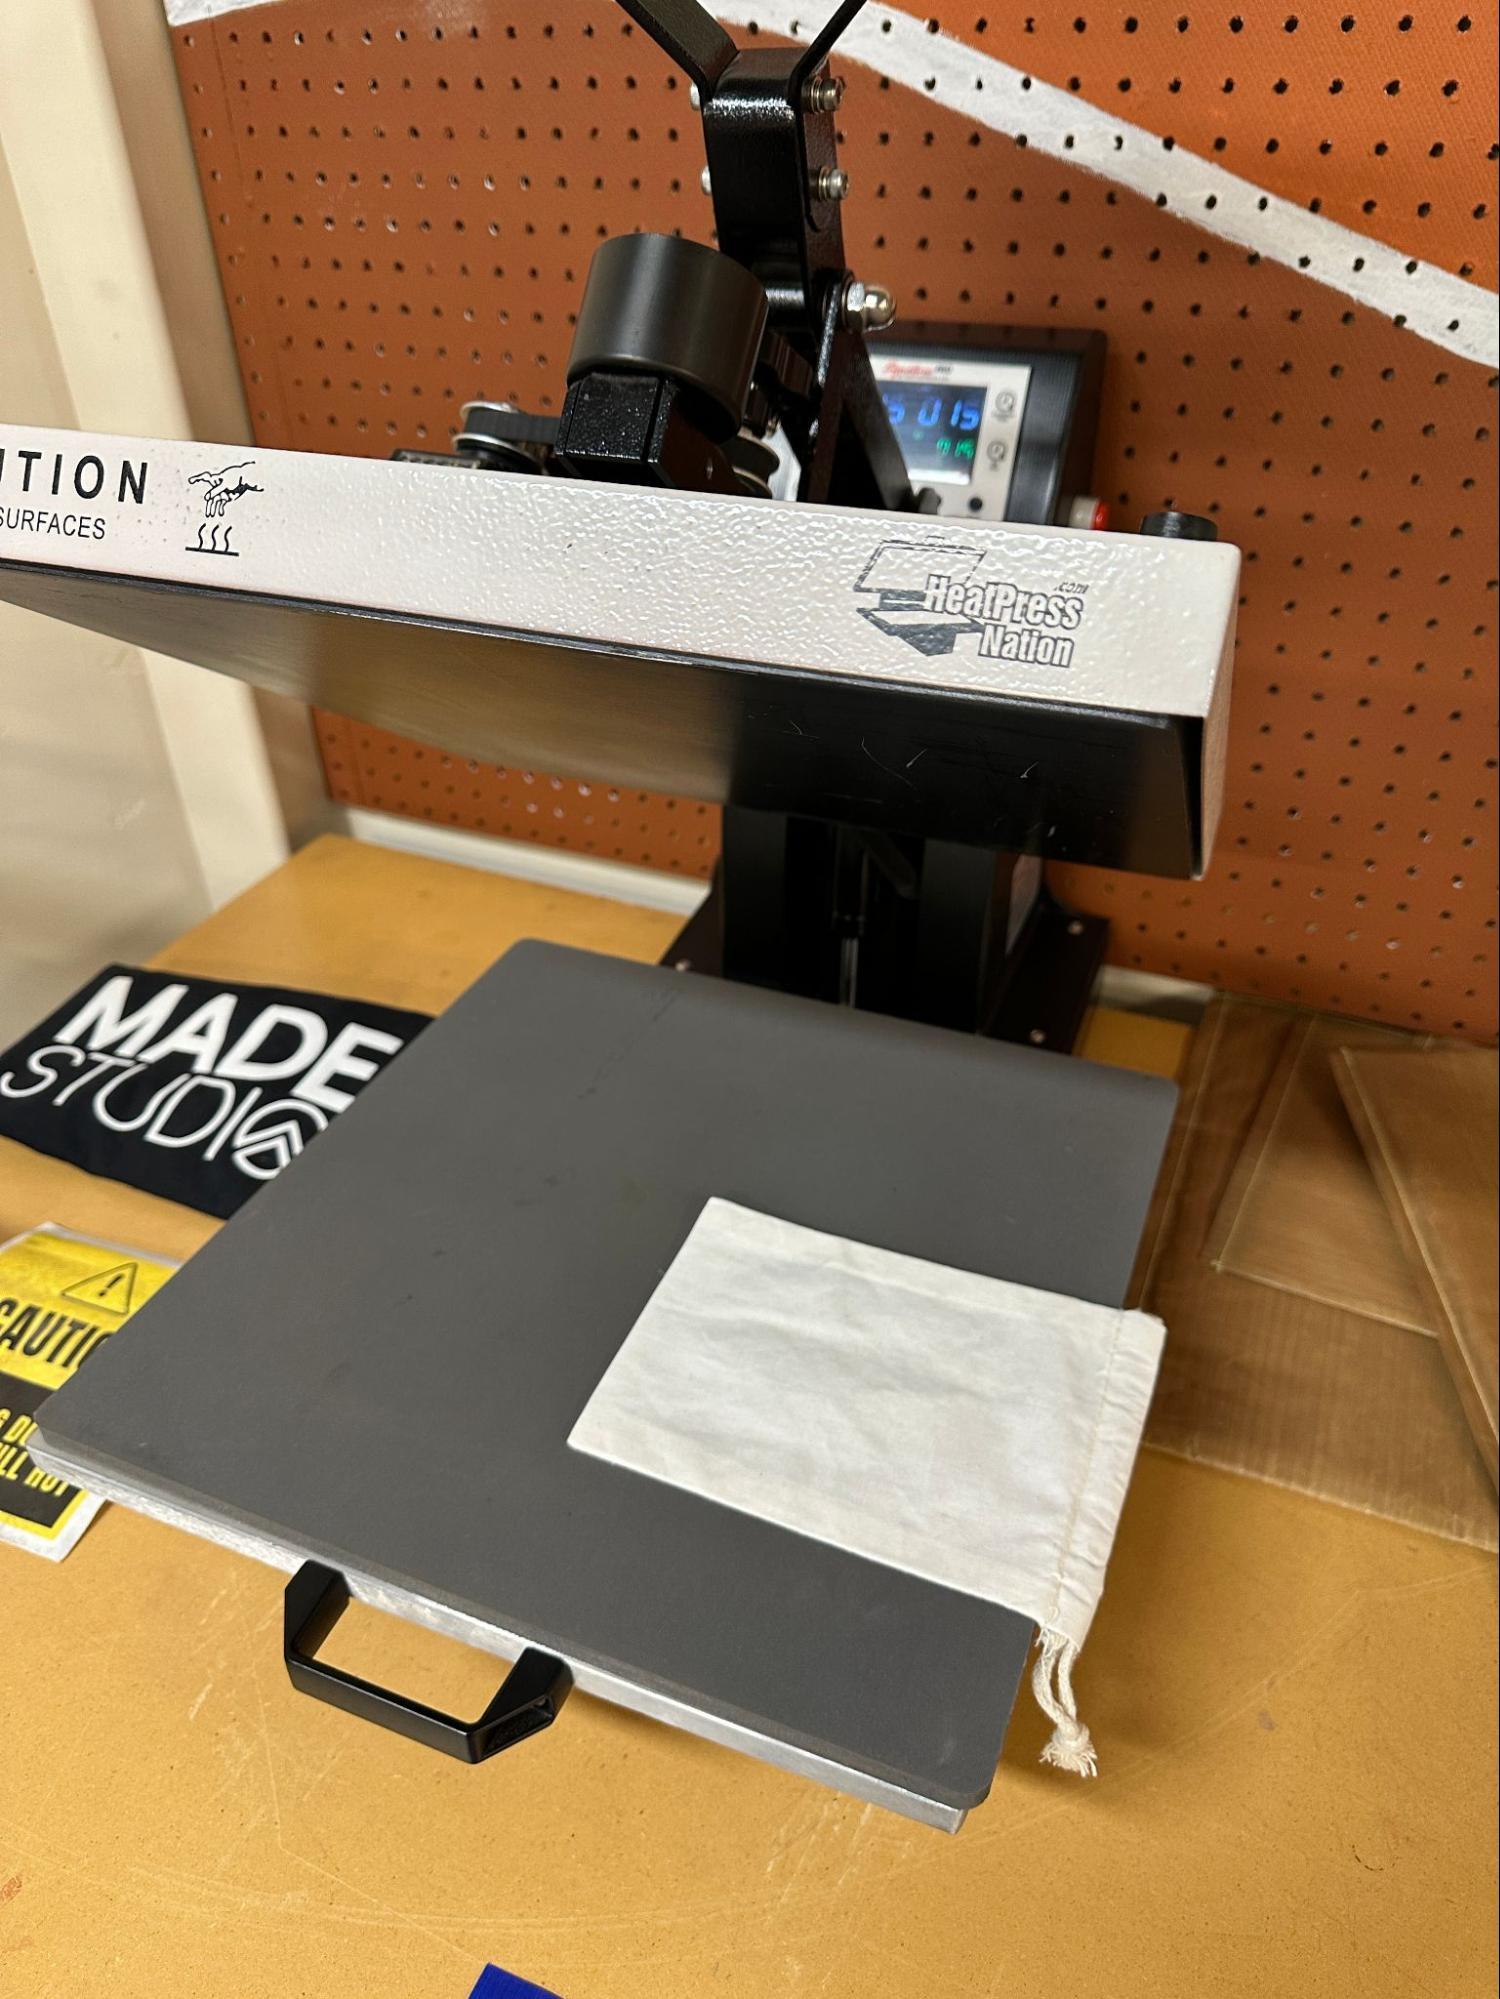
Once the heat press reaches the target temperature, it will beep until you go and move the handle down slightly. When the heat press is fully heated up, it is good to iron the fabric before pressing artwork into it.
Oven Temp
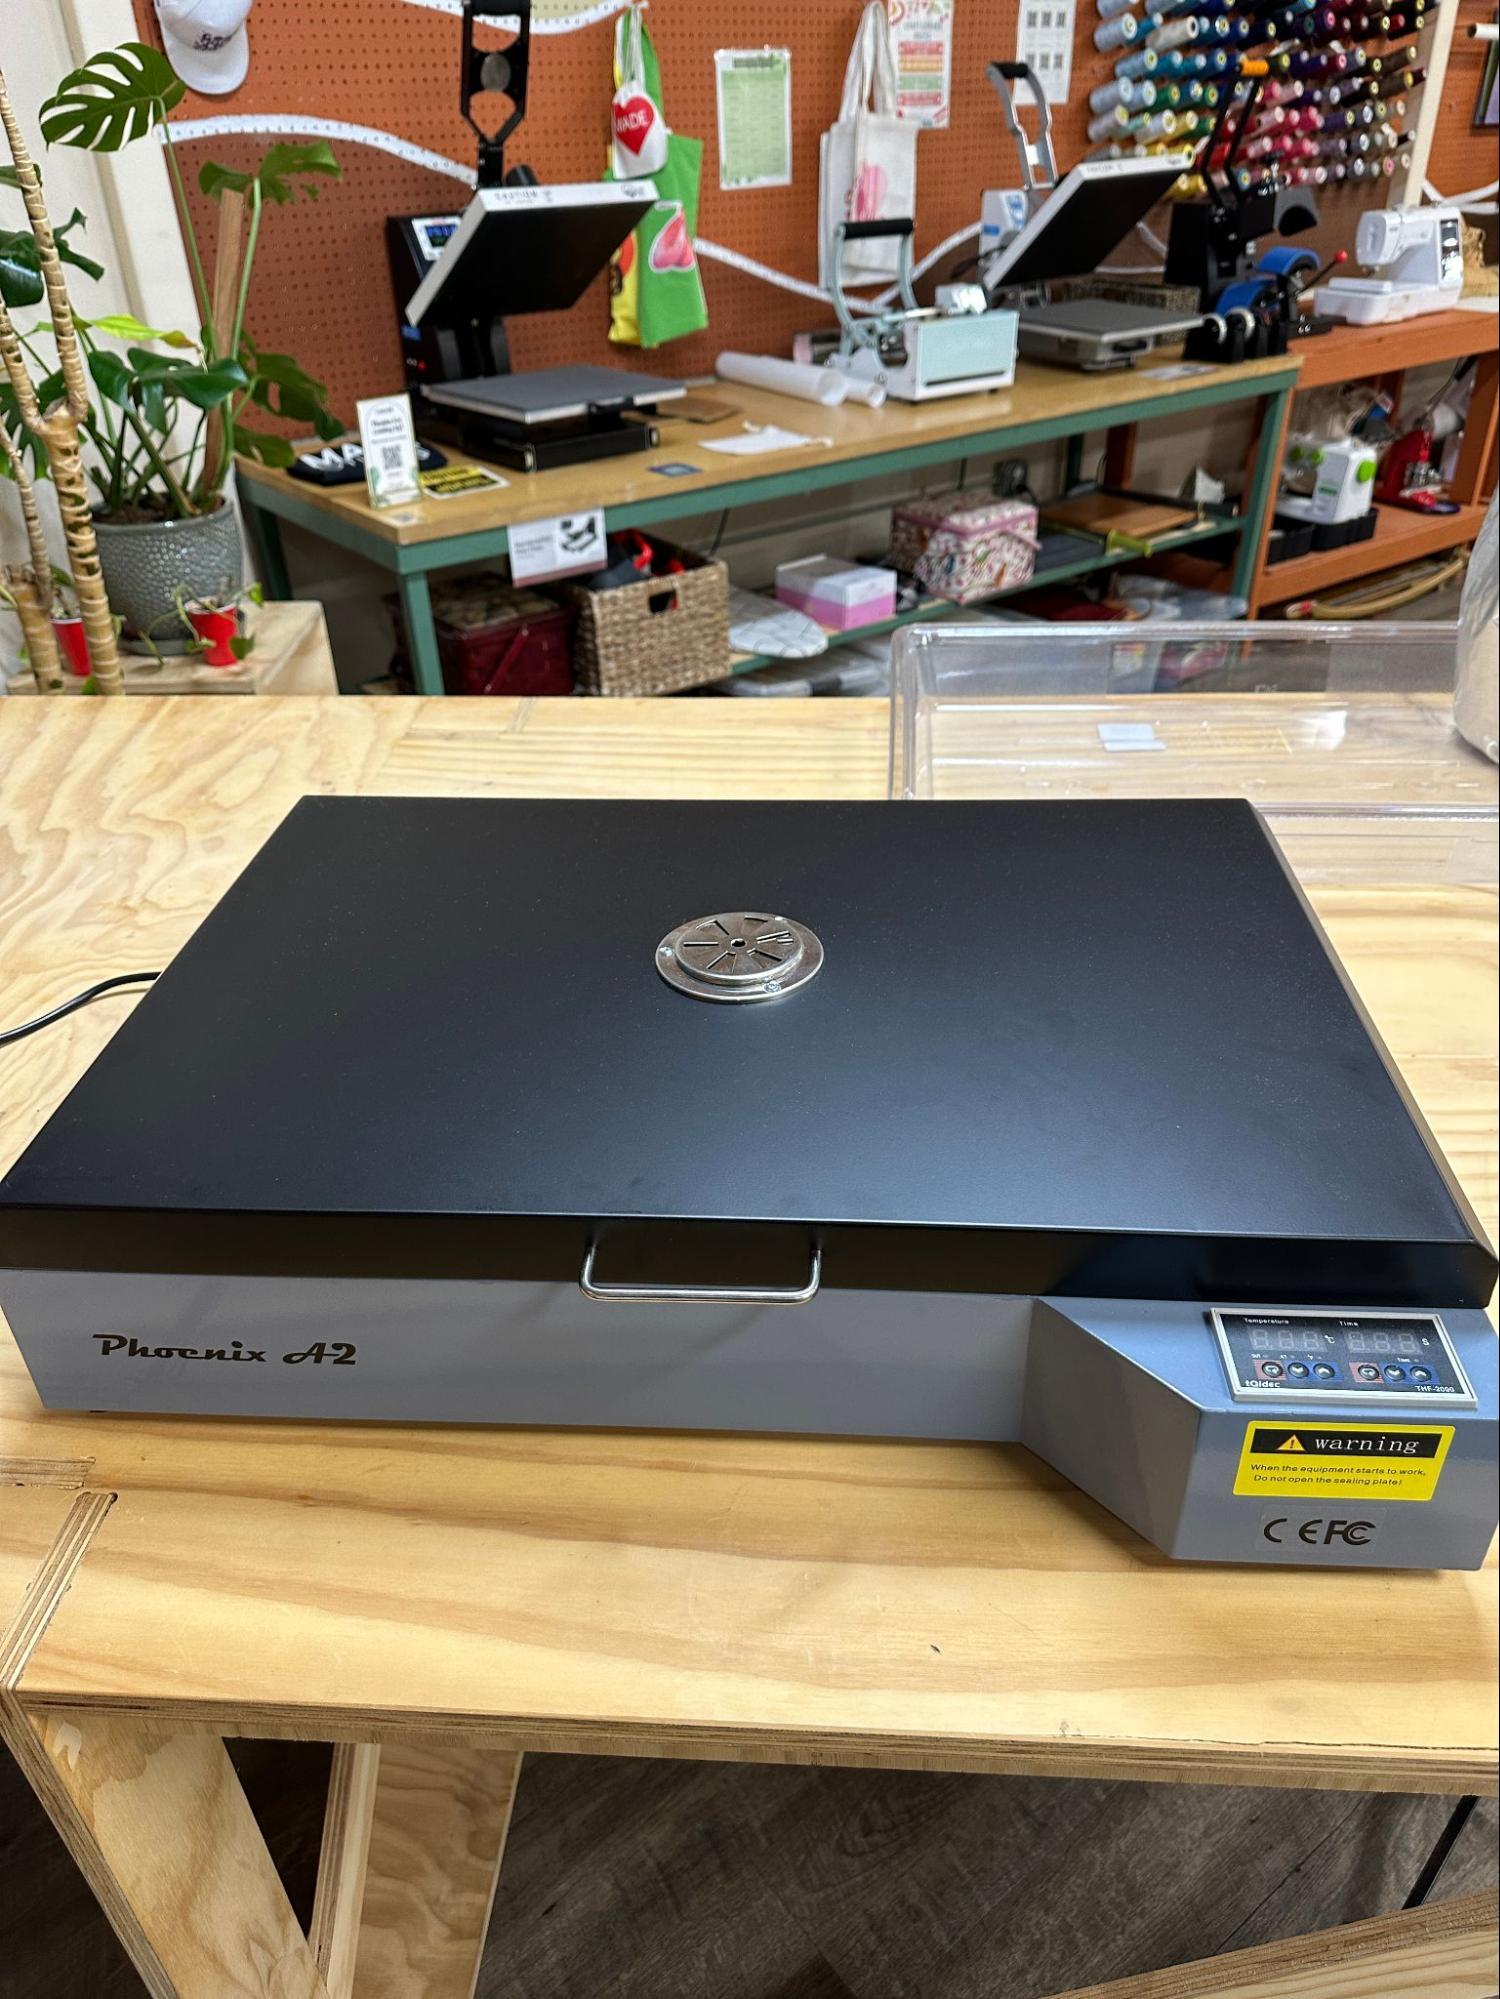

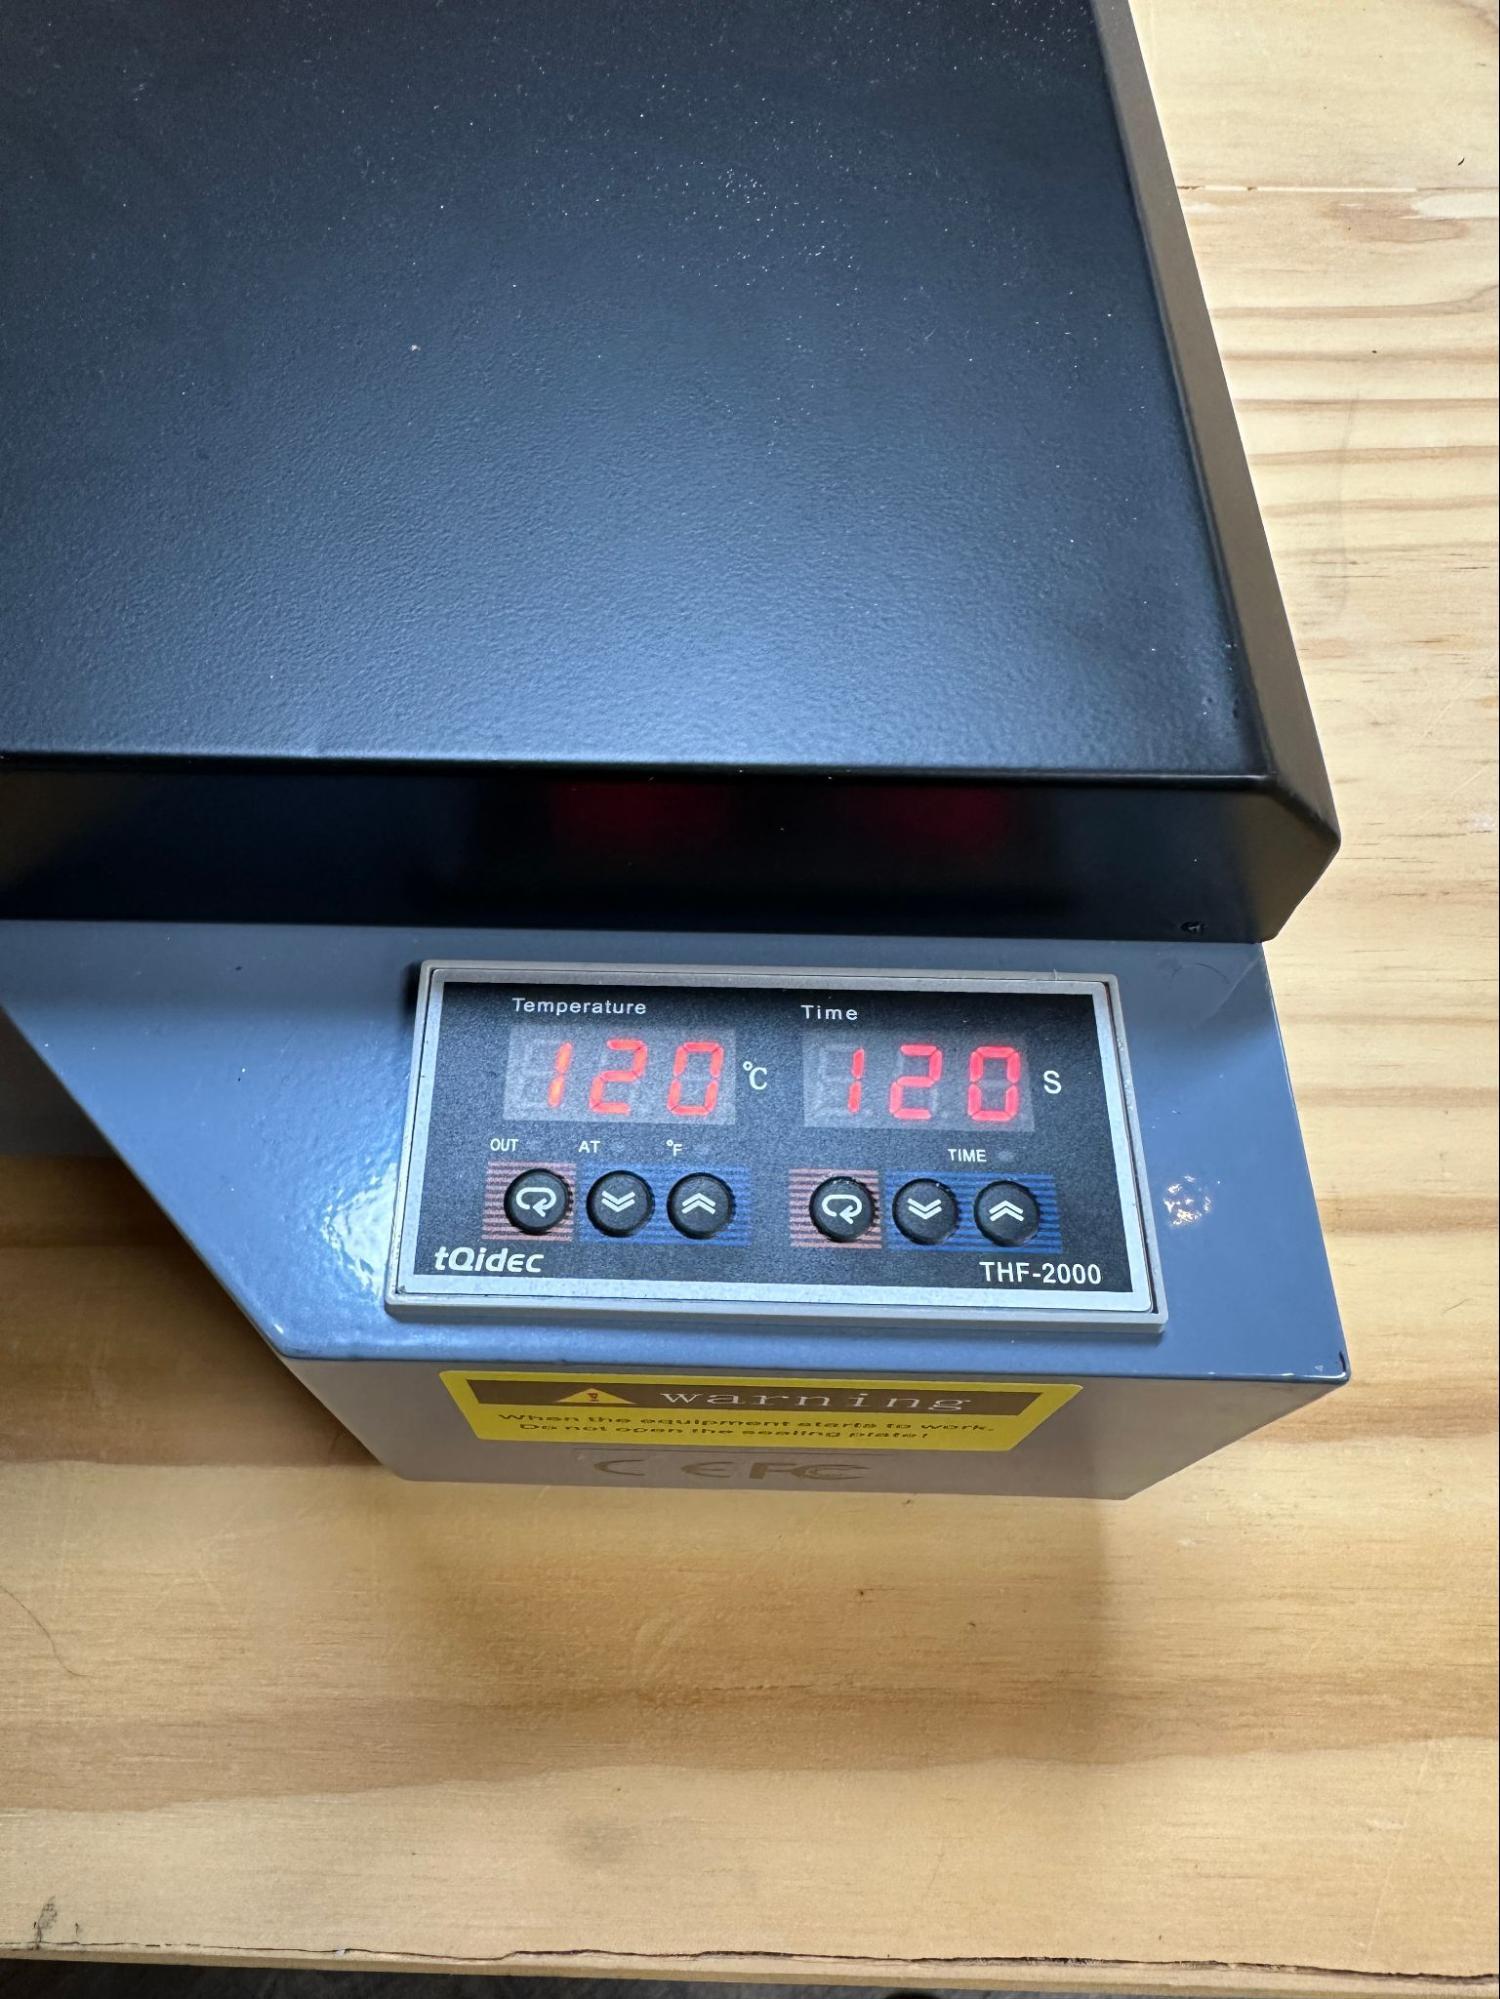
This is the oven we use to bake a powder into our DTF prints before they can be pressed into fabric. Locate the power button and turn the oven on to begin heating it up. Ensure nothing was left in the oven, and observe that the screen on the front is on. It is already setup to go to 120 C and at a 120 second duration.
Versa Works
Open VersaWorks
Add to Queue
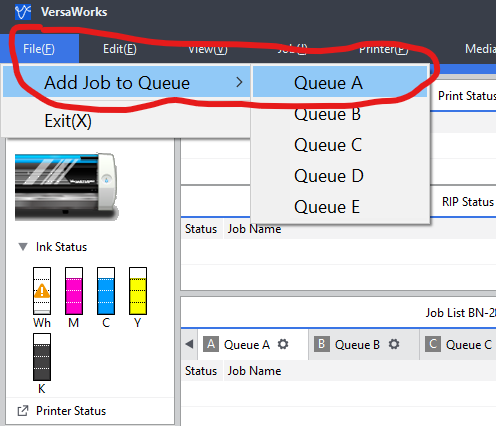
Add your PDF File into Queue
Tip: It doesn't matter which queue you choose
Check White Layer

For prints that have a white layer, look at the image properties and observe “Special Characters”
Cut Controls
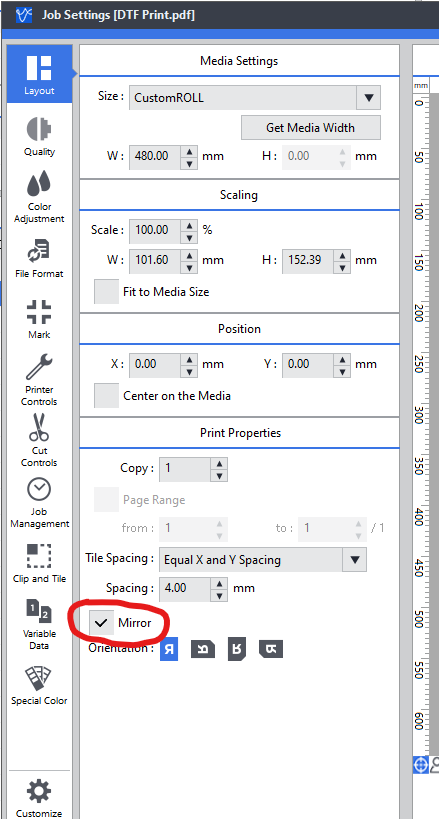
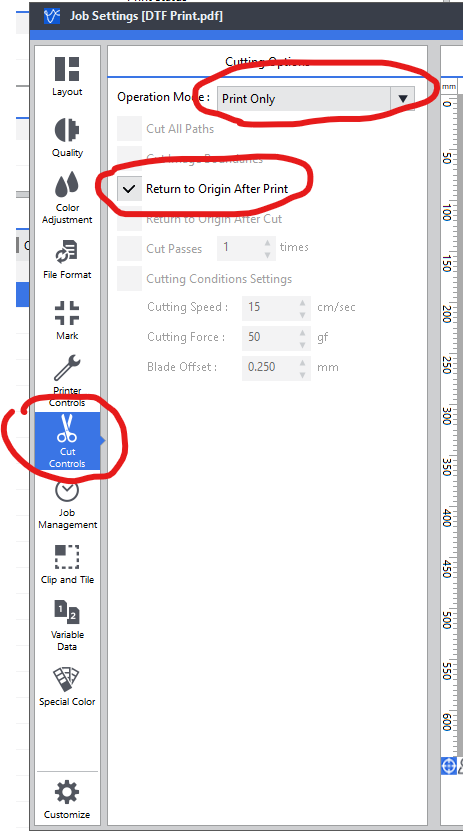
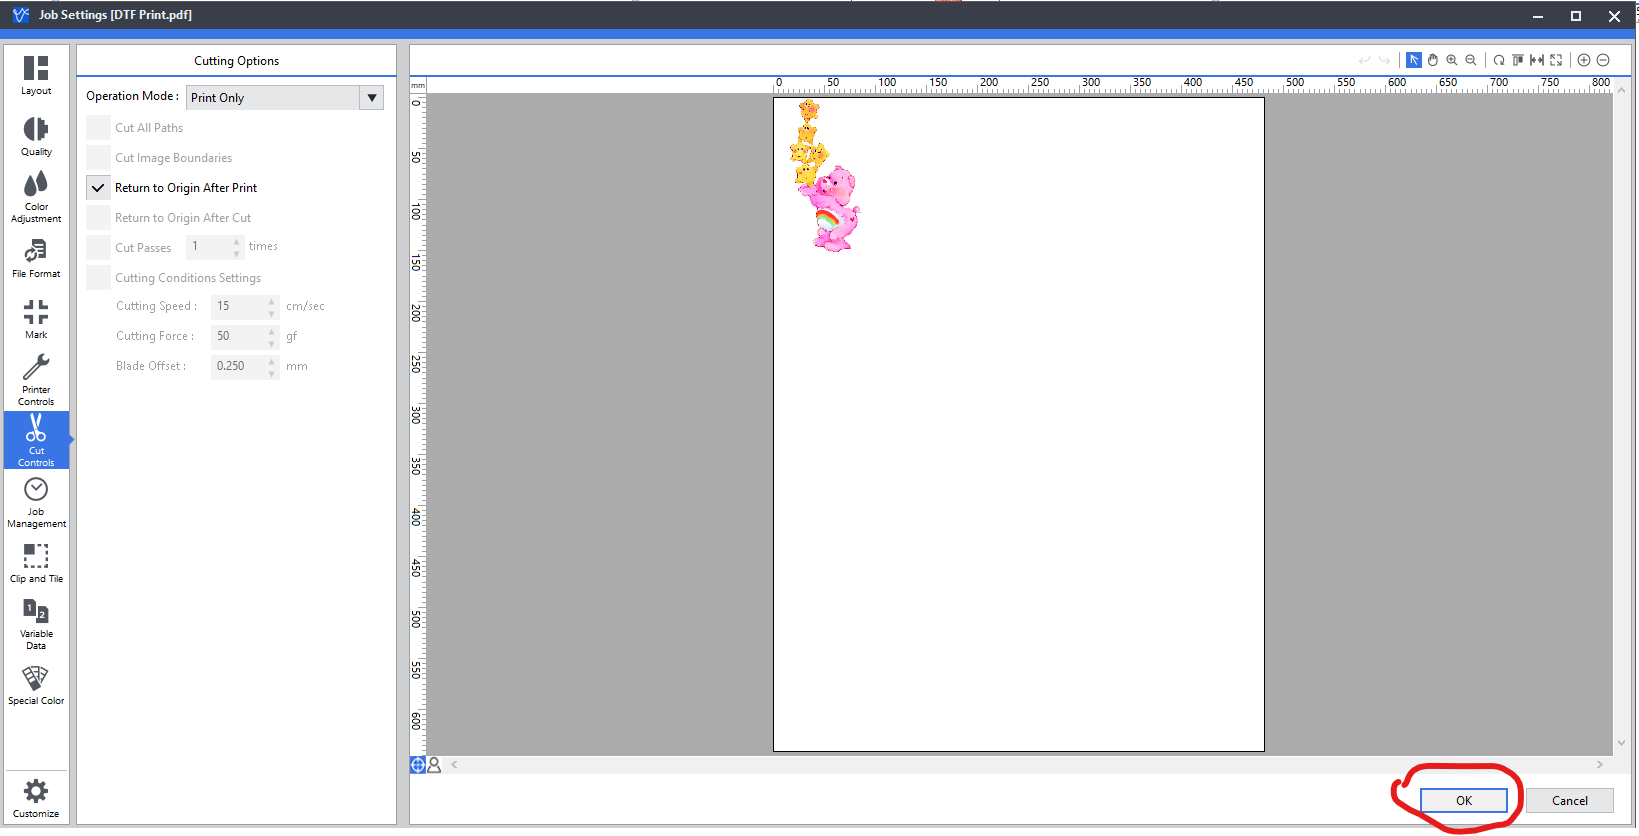
Double click on the job in the queue to open settings. First check the box to Mirror the artwork. You can add as many copies as desired here as well. Then, click on ‘Cut Controls’ and set the job to Print Only and Return to Origin after Print. This setting allows for you to print the color layer and white layer in the same position. Then click OK.
Duplicate
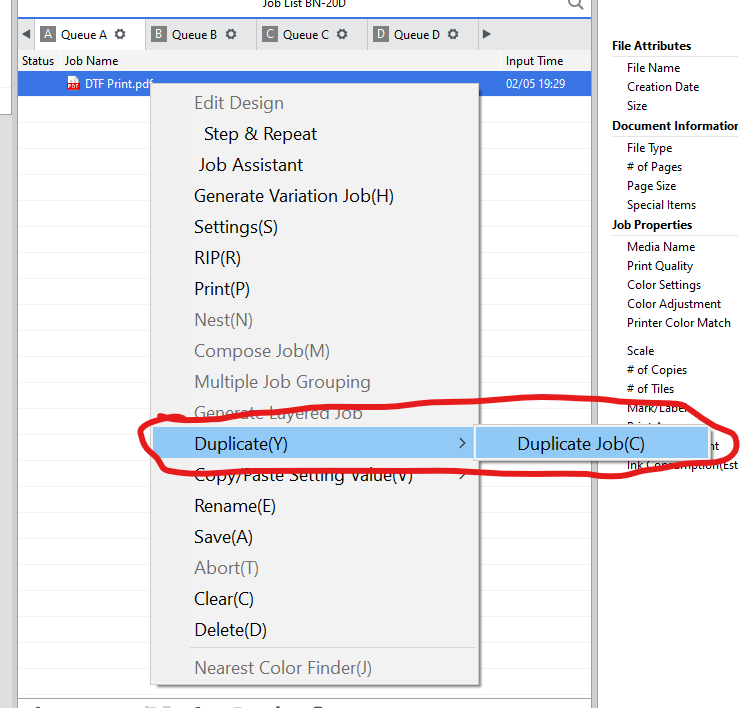
Steps 6-10 are only for printing a white layer. Simply right click on the job in the queue and use the Duplicate>Duplicate Job function. The name of this copy can be changed to white layer if desired.
Media Type
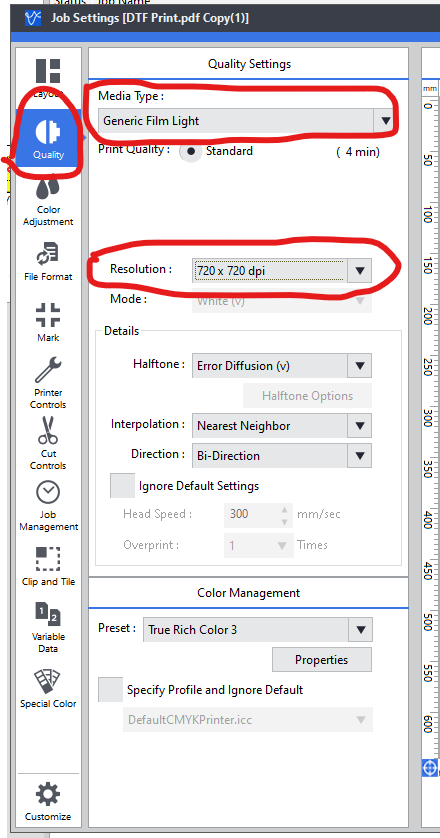
For white layers, you need to double click on the duplicated job and click Quality to set the Media Type and Resolution. The Media Type is either light or dark depending on the fabric you are going to be using. The Resolution will be set to 720x720 to activate the white layer printing.
Size Correction
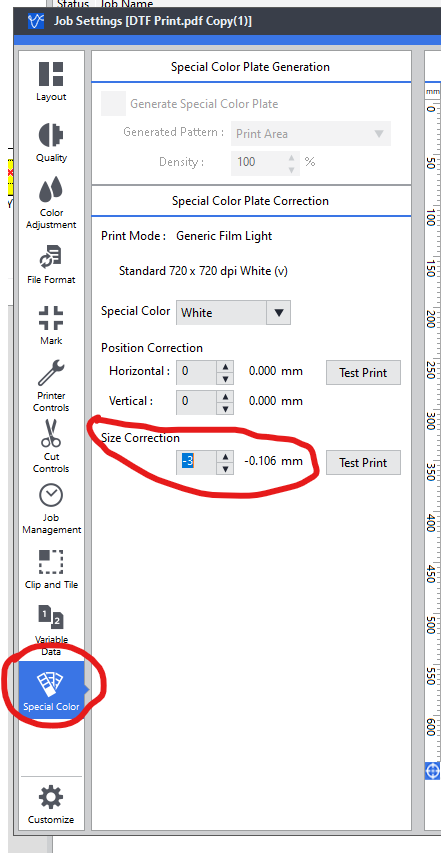
Now click on Special Color. We will set Size Correction to -3 in order to offset the white layer inwards so that it doesn't bleed or show up around the brim of our design. Press Ok
Group Up
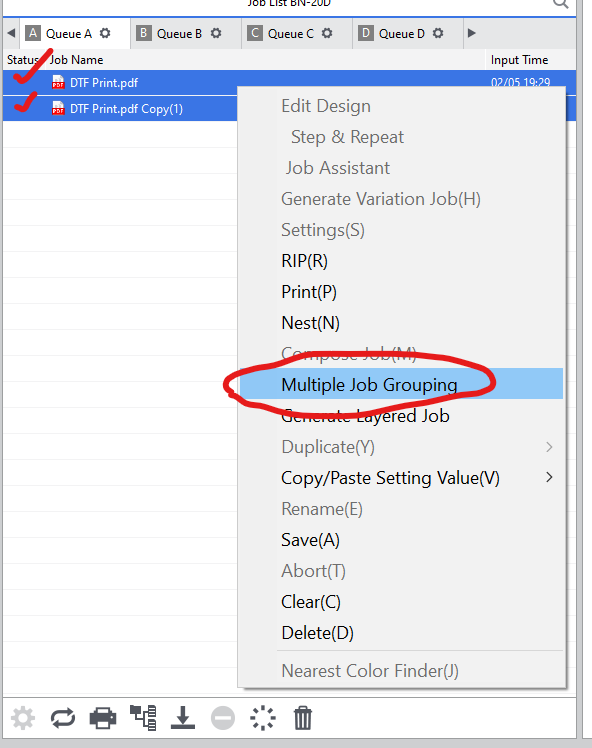
Now we must group the two jobs so that they run in sequence. Select both jobs by clicking them and holding down Shift. Right click on either of them and use the Multiple Job Grouping function. The order of the jobs should be color layer and then white layer.
Sequencing
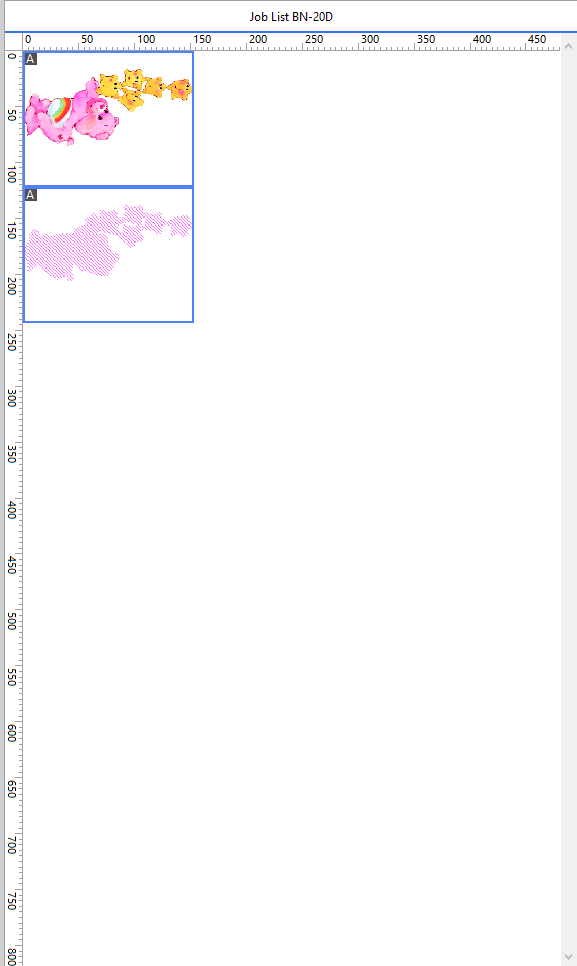
Your job preview should look like this with the color layer and white layer showing up in sequence.
Setup

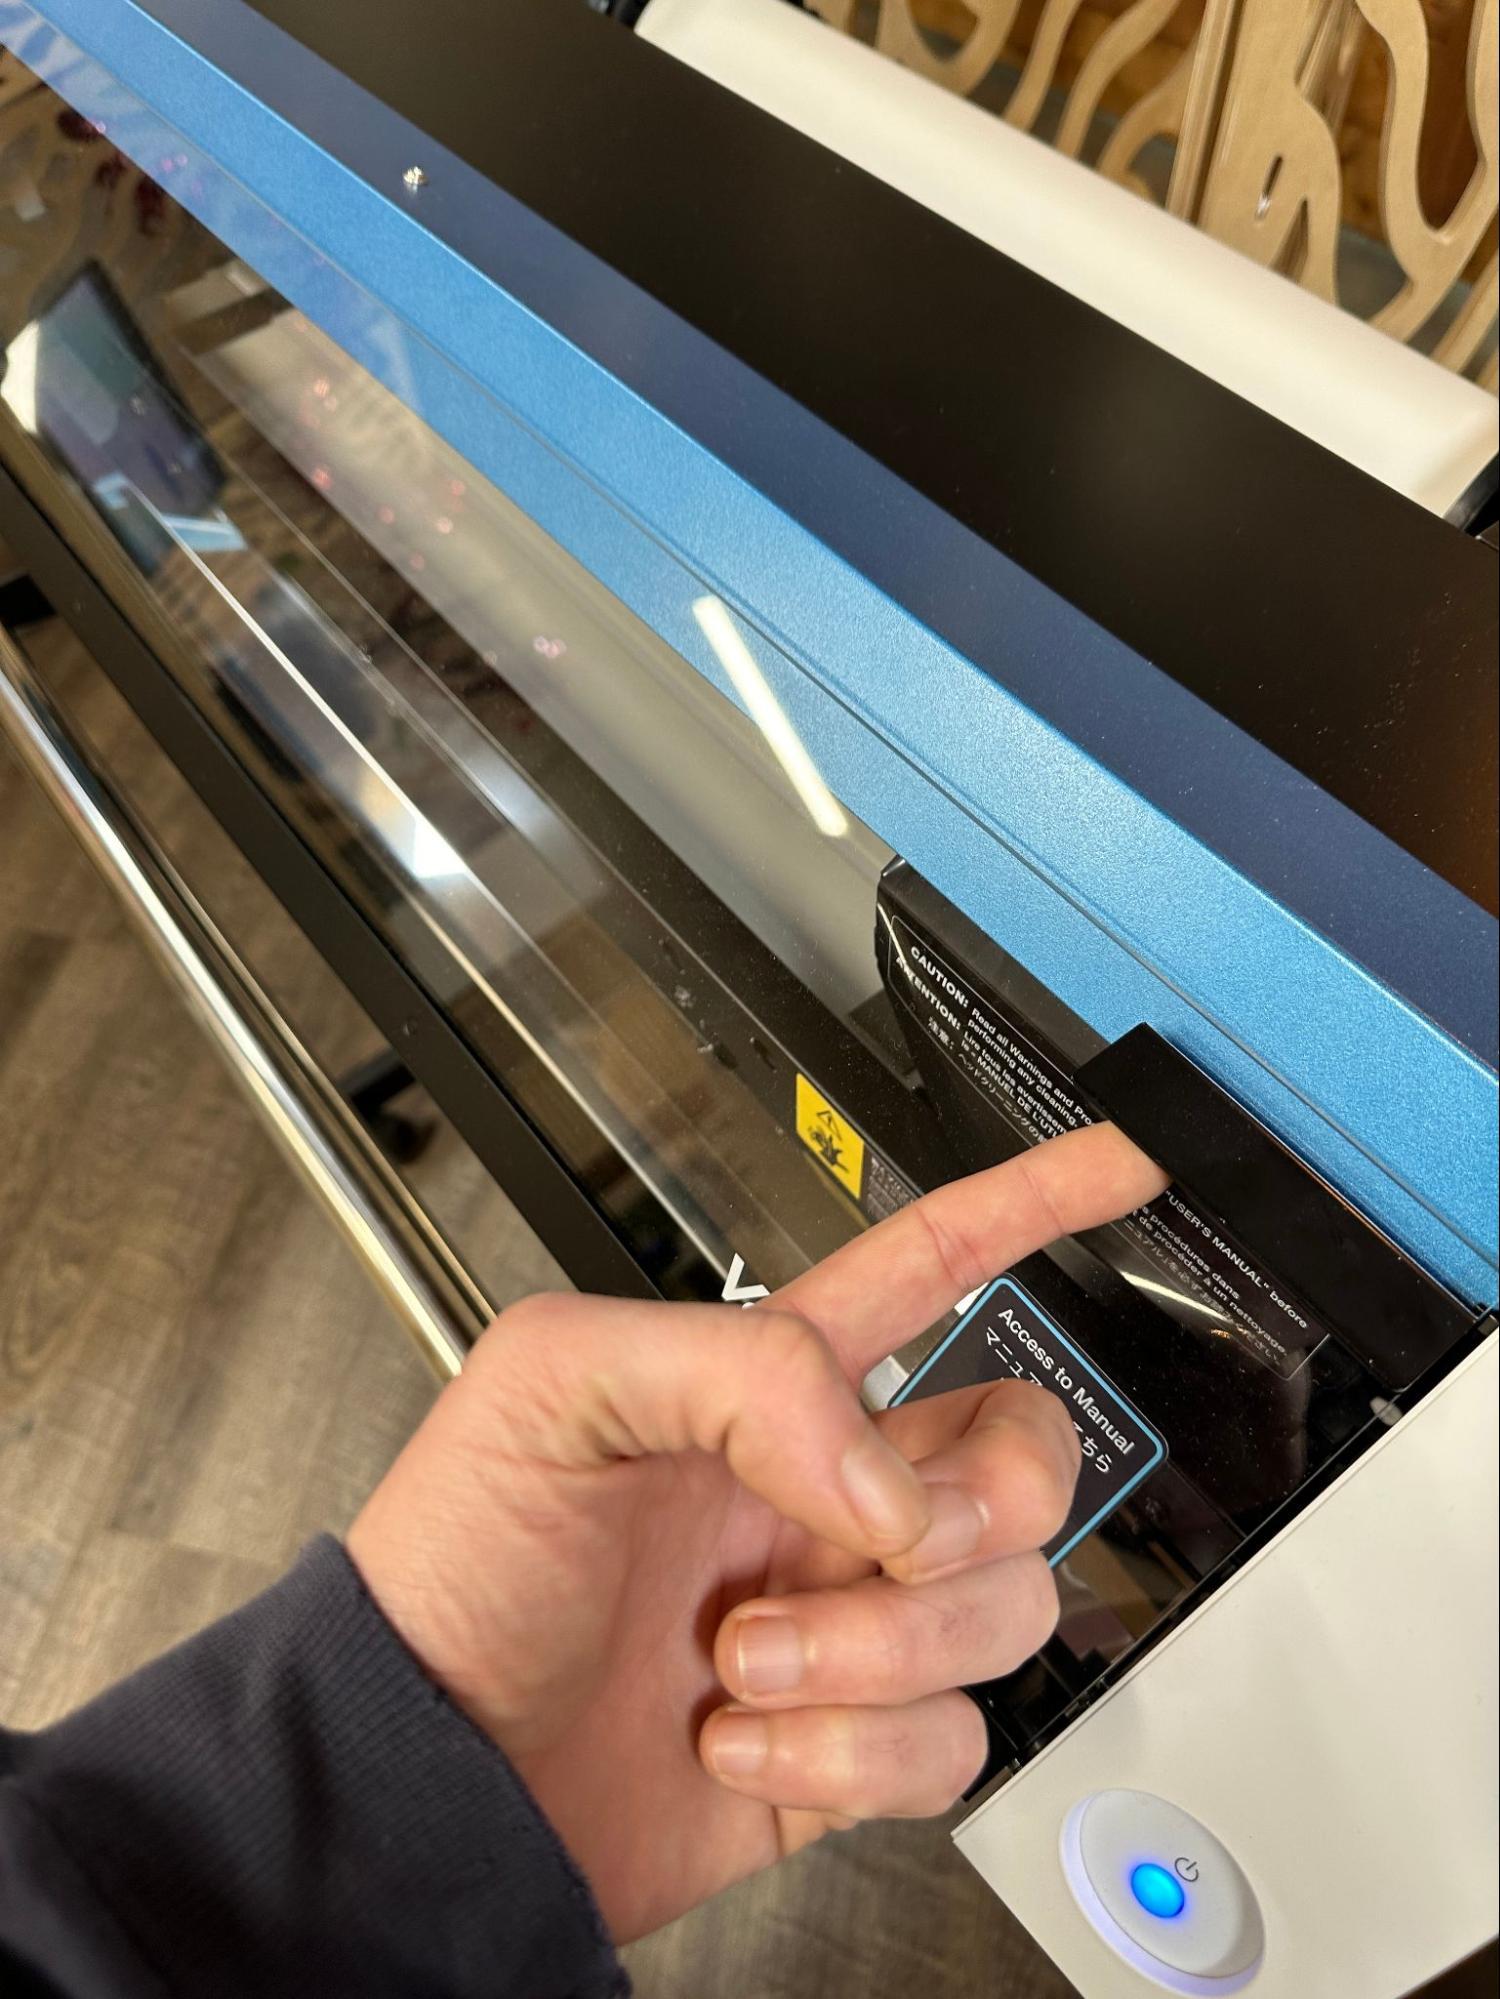

Before pressing print, make sure the roll of vinyl is inserted and aligned as you see in the image. There is a lever on the back left hand side of the machine that locks the roll into place, labeled with an arrow and ‘Load’. The end of the roll should be just past the red markings on the metal guide tabs. Also, ensure the left hand side roller and metal tab, which can be slid left and right for various roll sizes, are pushed against the roll so that the roll will feed properly.
Tip: If the roll is already aligned and inserted, you still need to push the lever back and re-engage it. If you don't do this between prints, the roll will retract beyond the rollers and the print will start onto the metal plate, requiring you to stop the print, by pushing the lever back and cleaning the metal plate before starting again.
Tip #2: Opening the front window or pushing the lever back will pause the job.
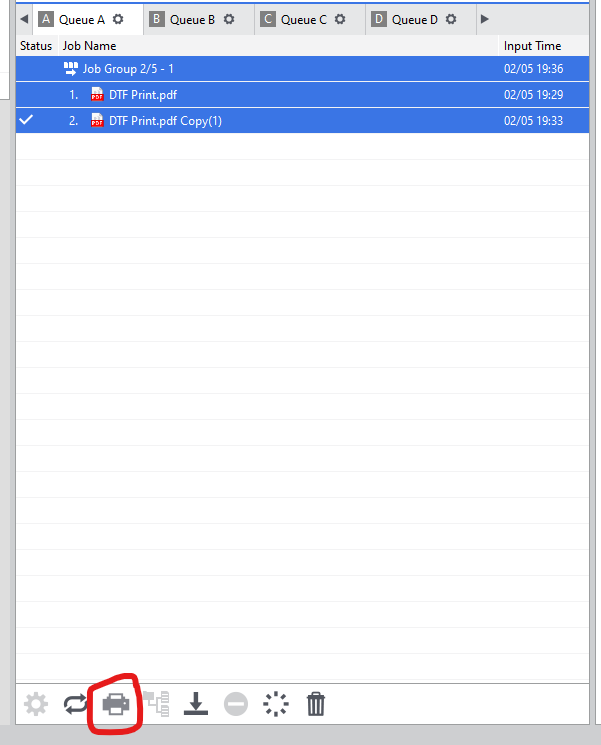
The job is ready to be printed. Click the print icon and leave it at 1 copy.
Cut
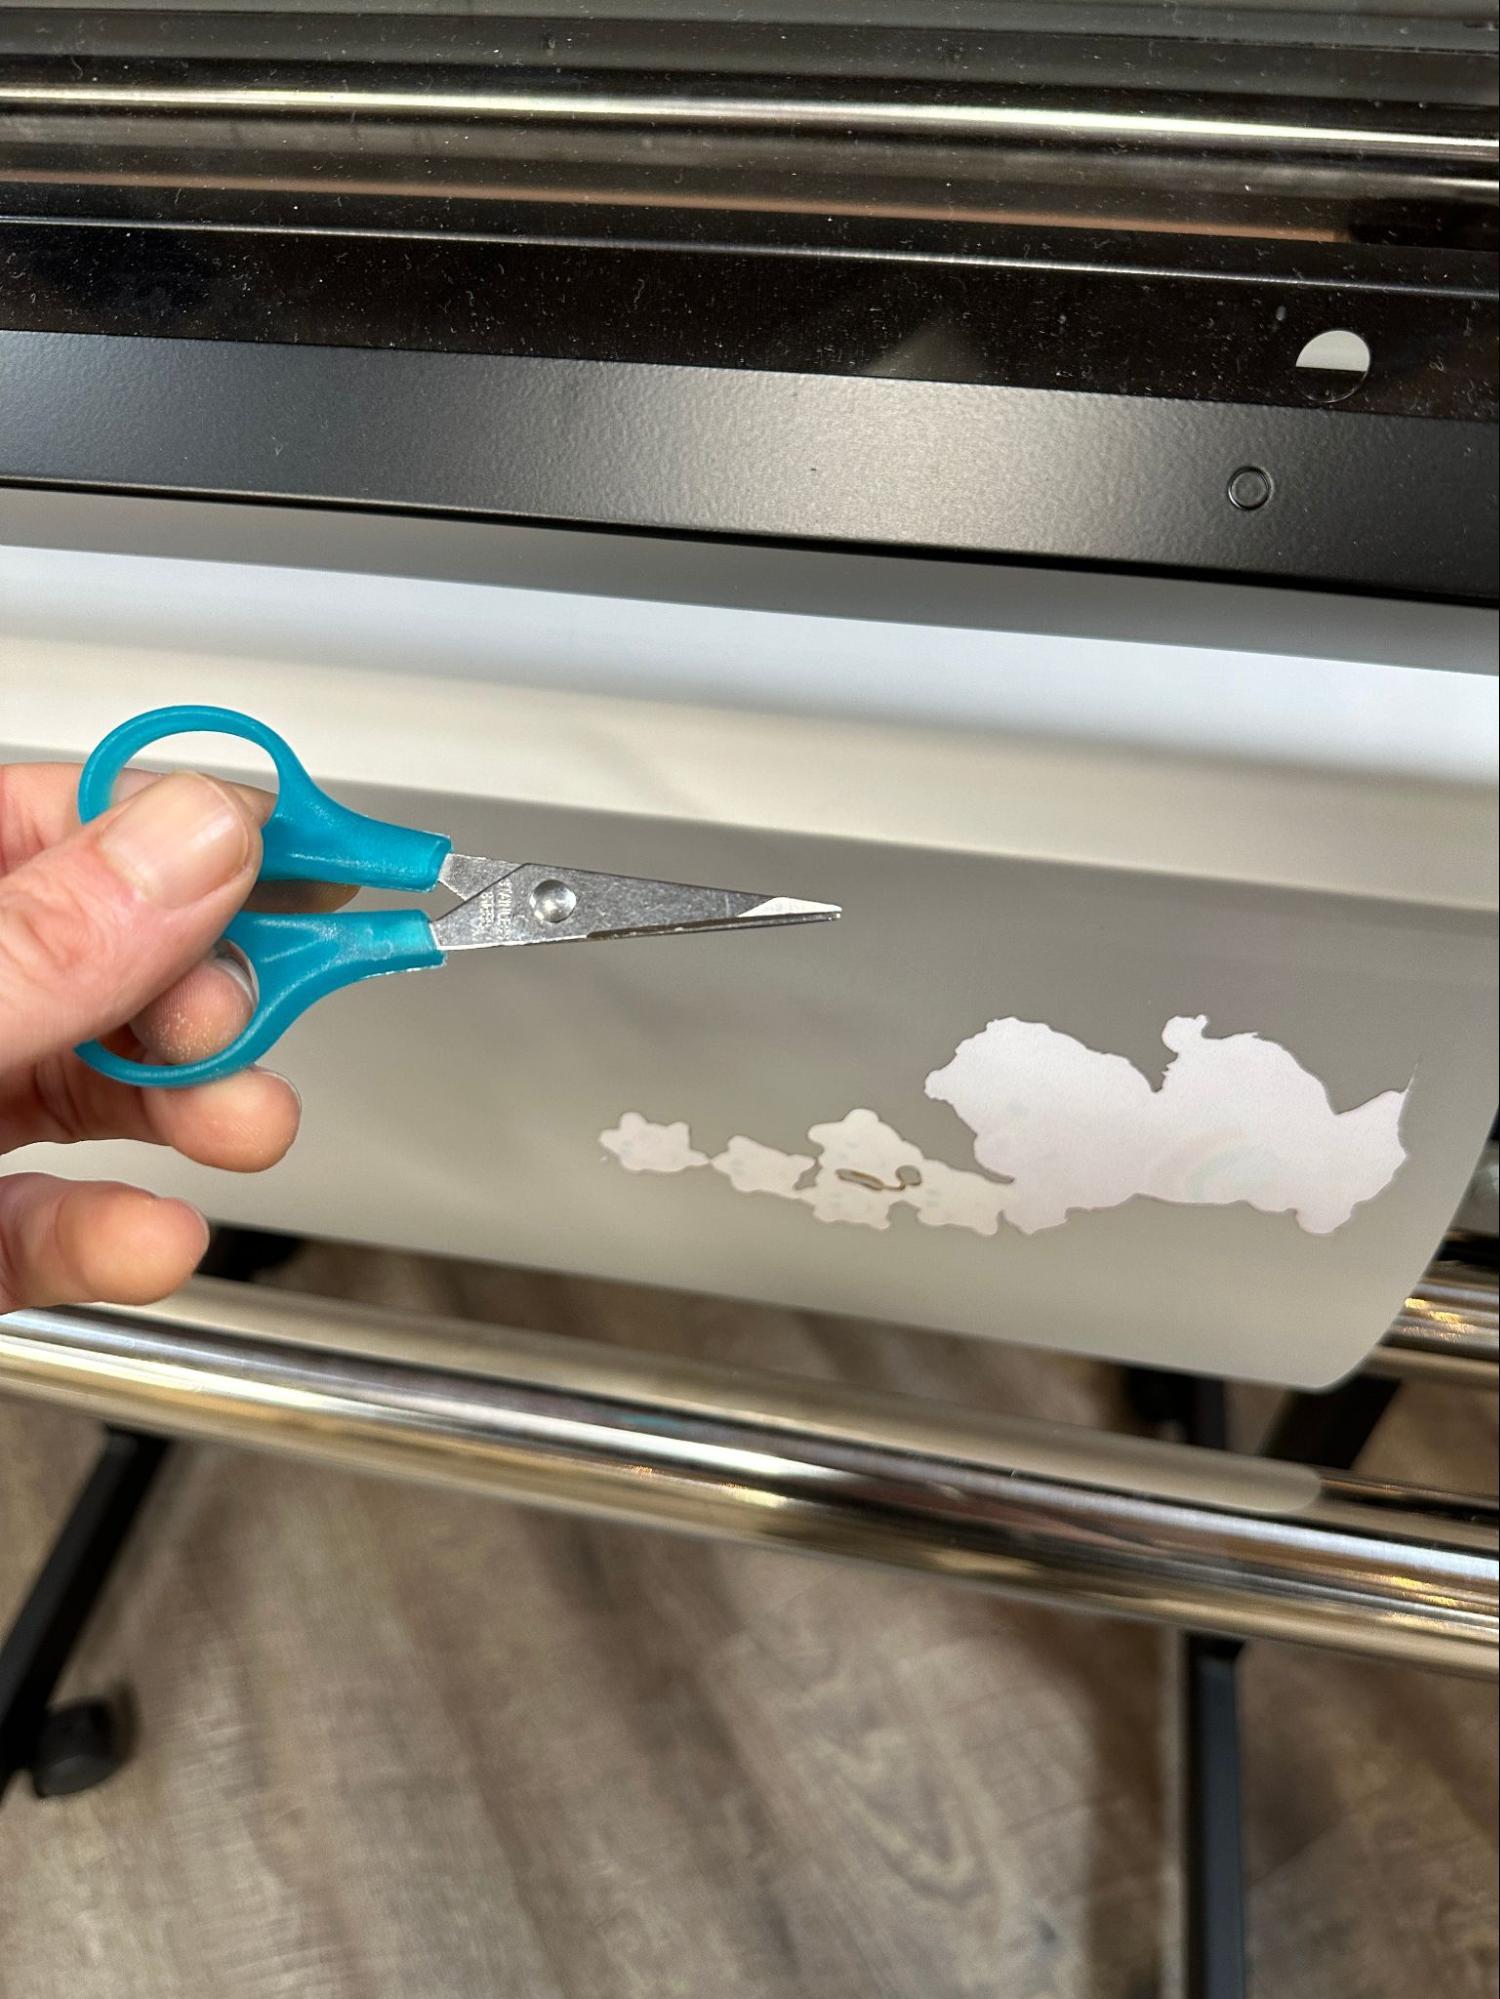
When the print and cut finish, simply slice off your print from the roll. Then push the lever back in order to unlock the roll. Roll it back into the correct starting position, just beyond the the metal tabs.
Shake
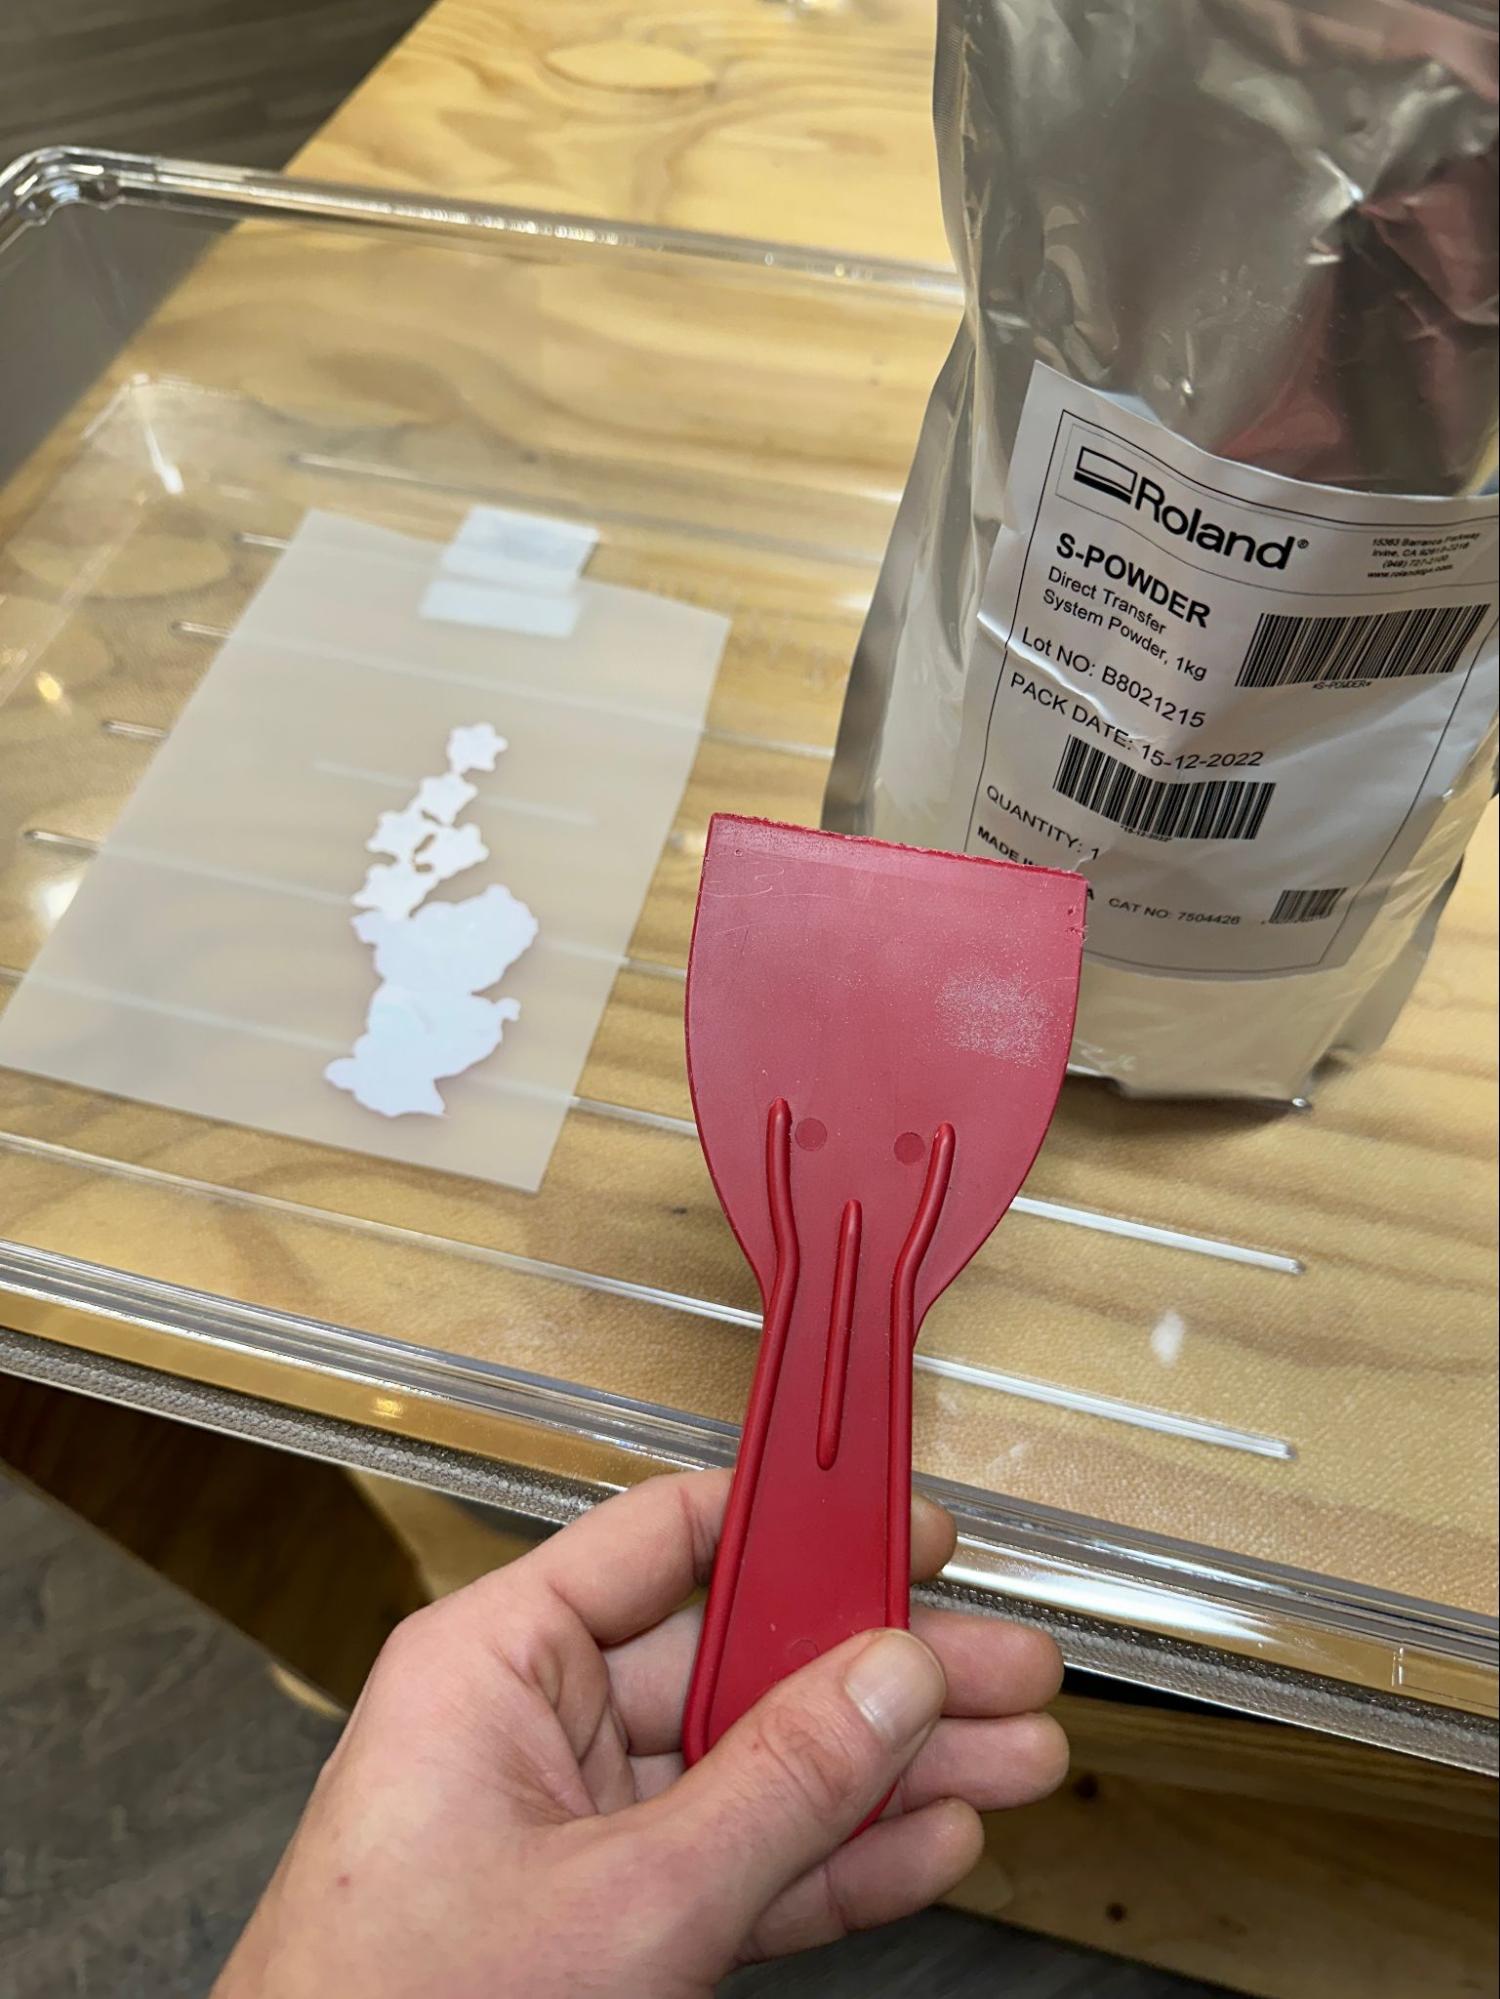
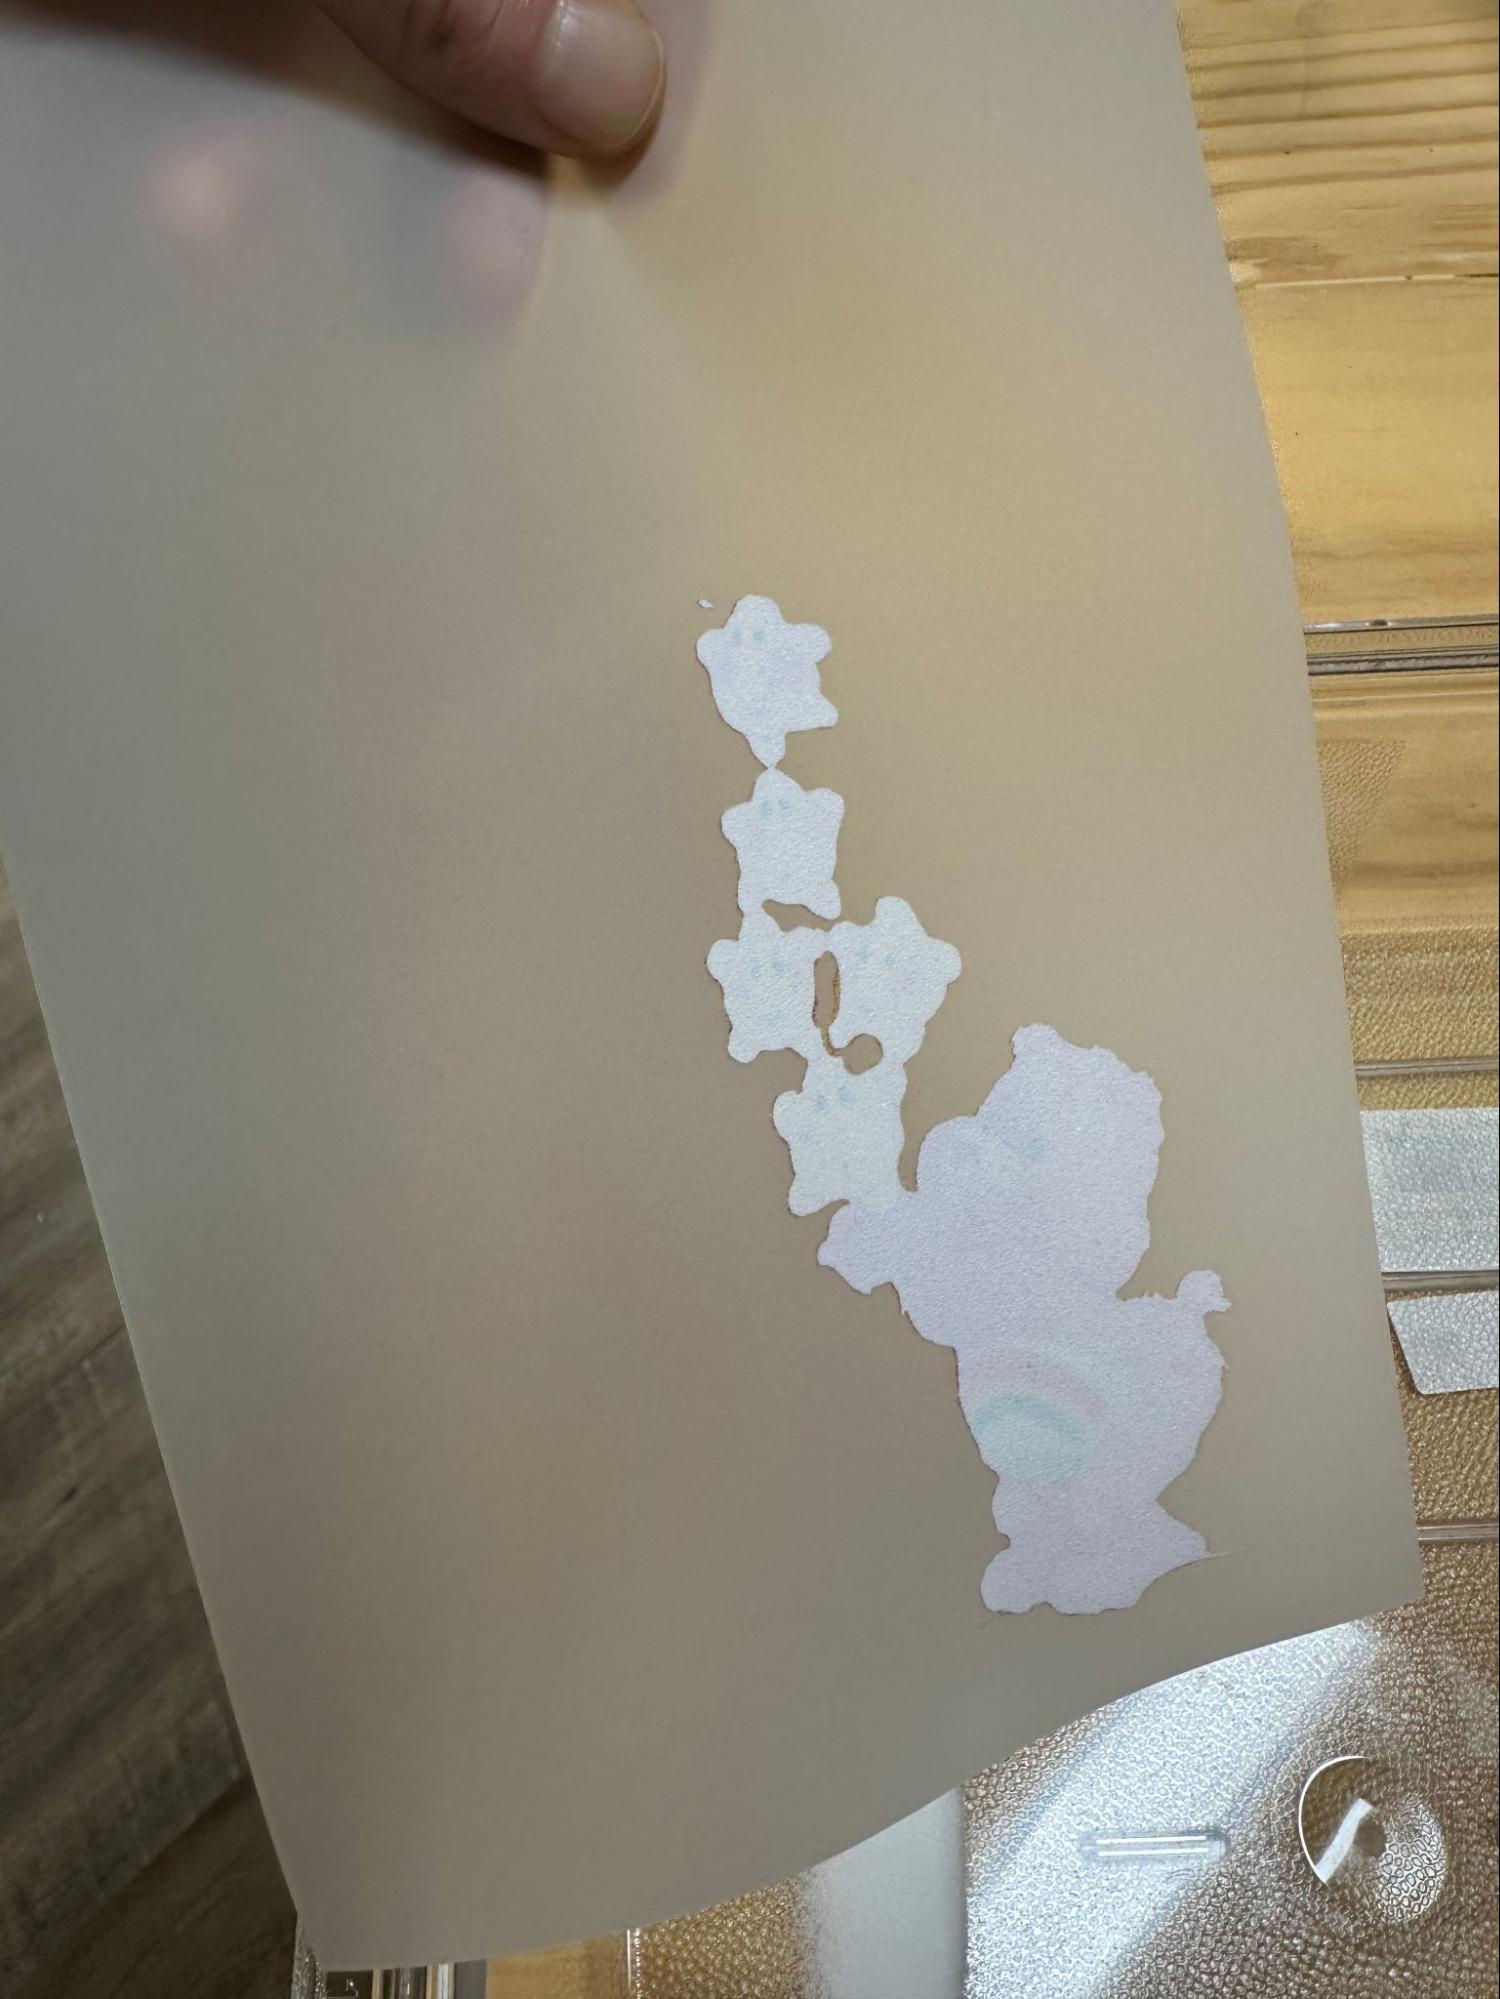
Locate the powder bin and powder and scooper. The step here involves scooping powder and pouring it over your print. You must get full coverage and shake off any excess powder before baking it.
Bake
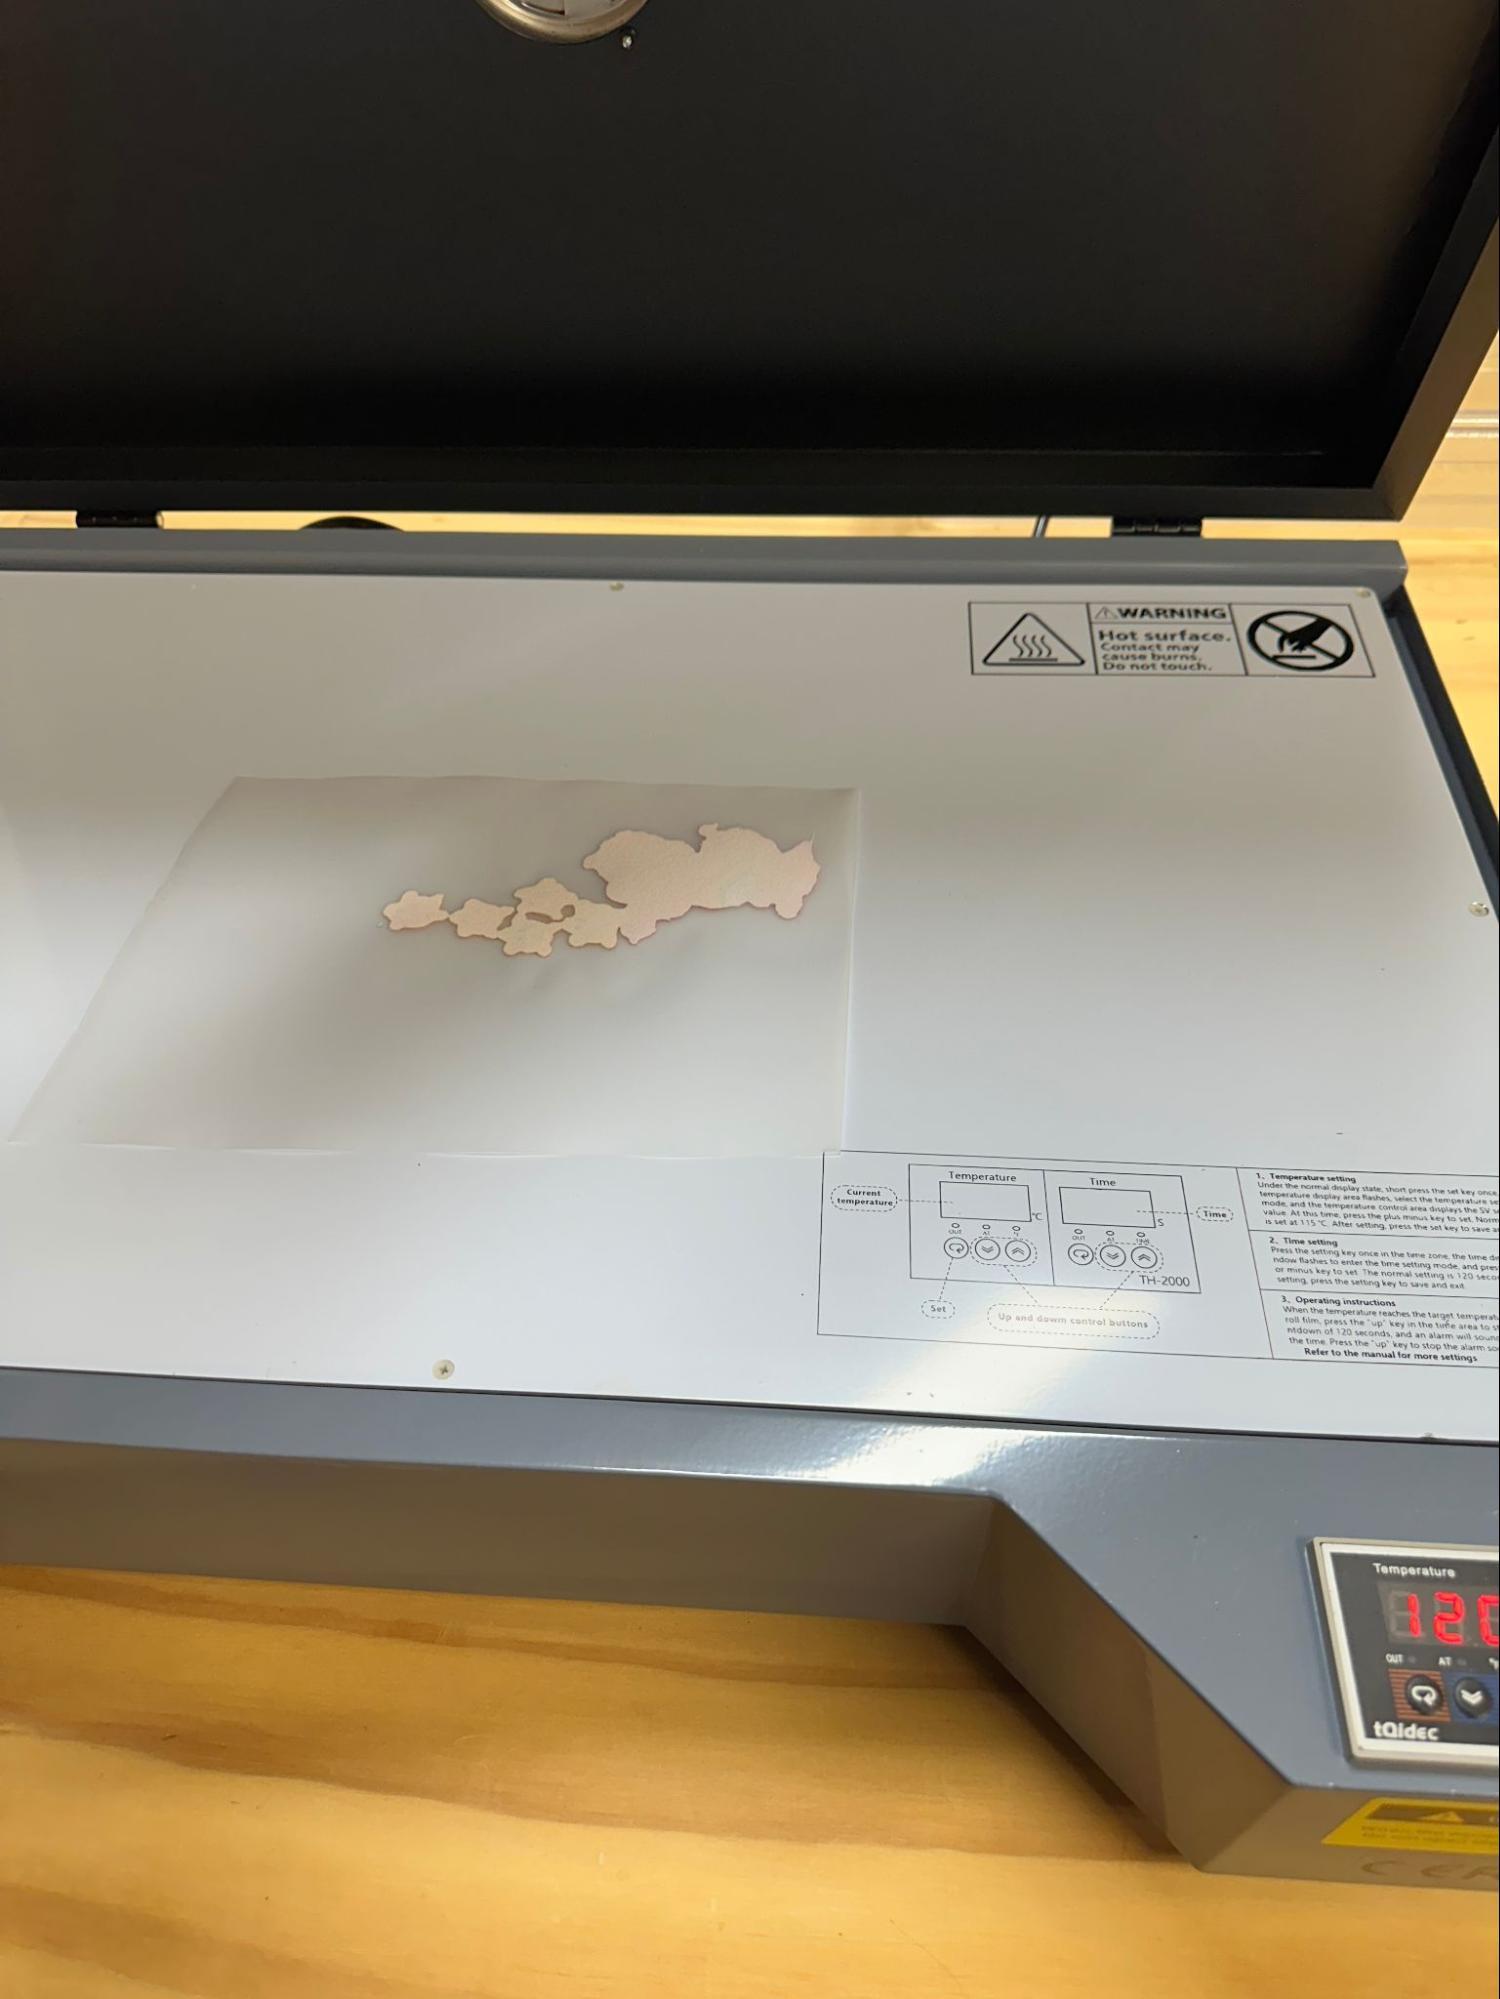
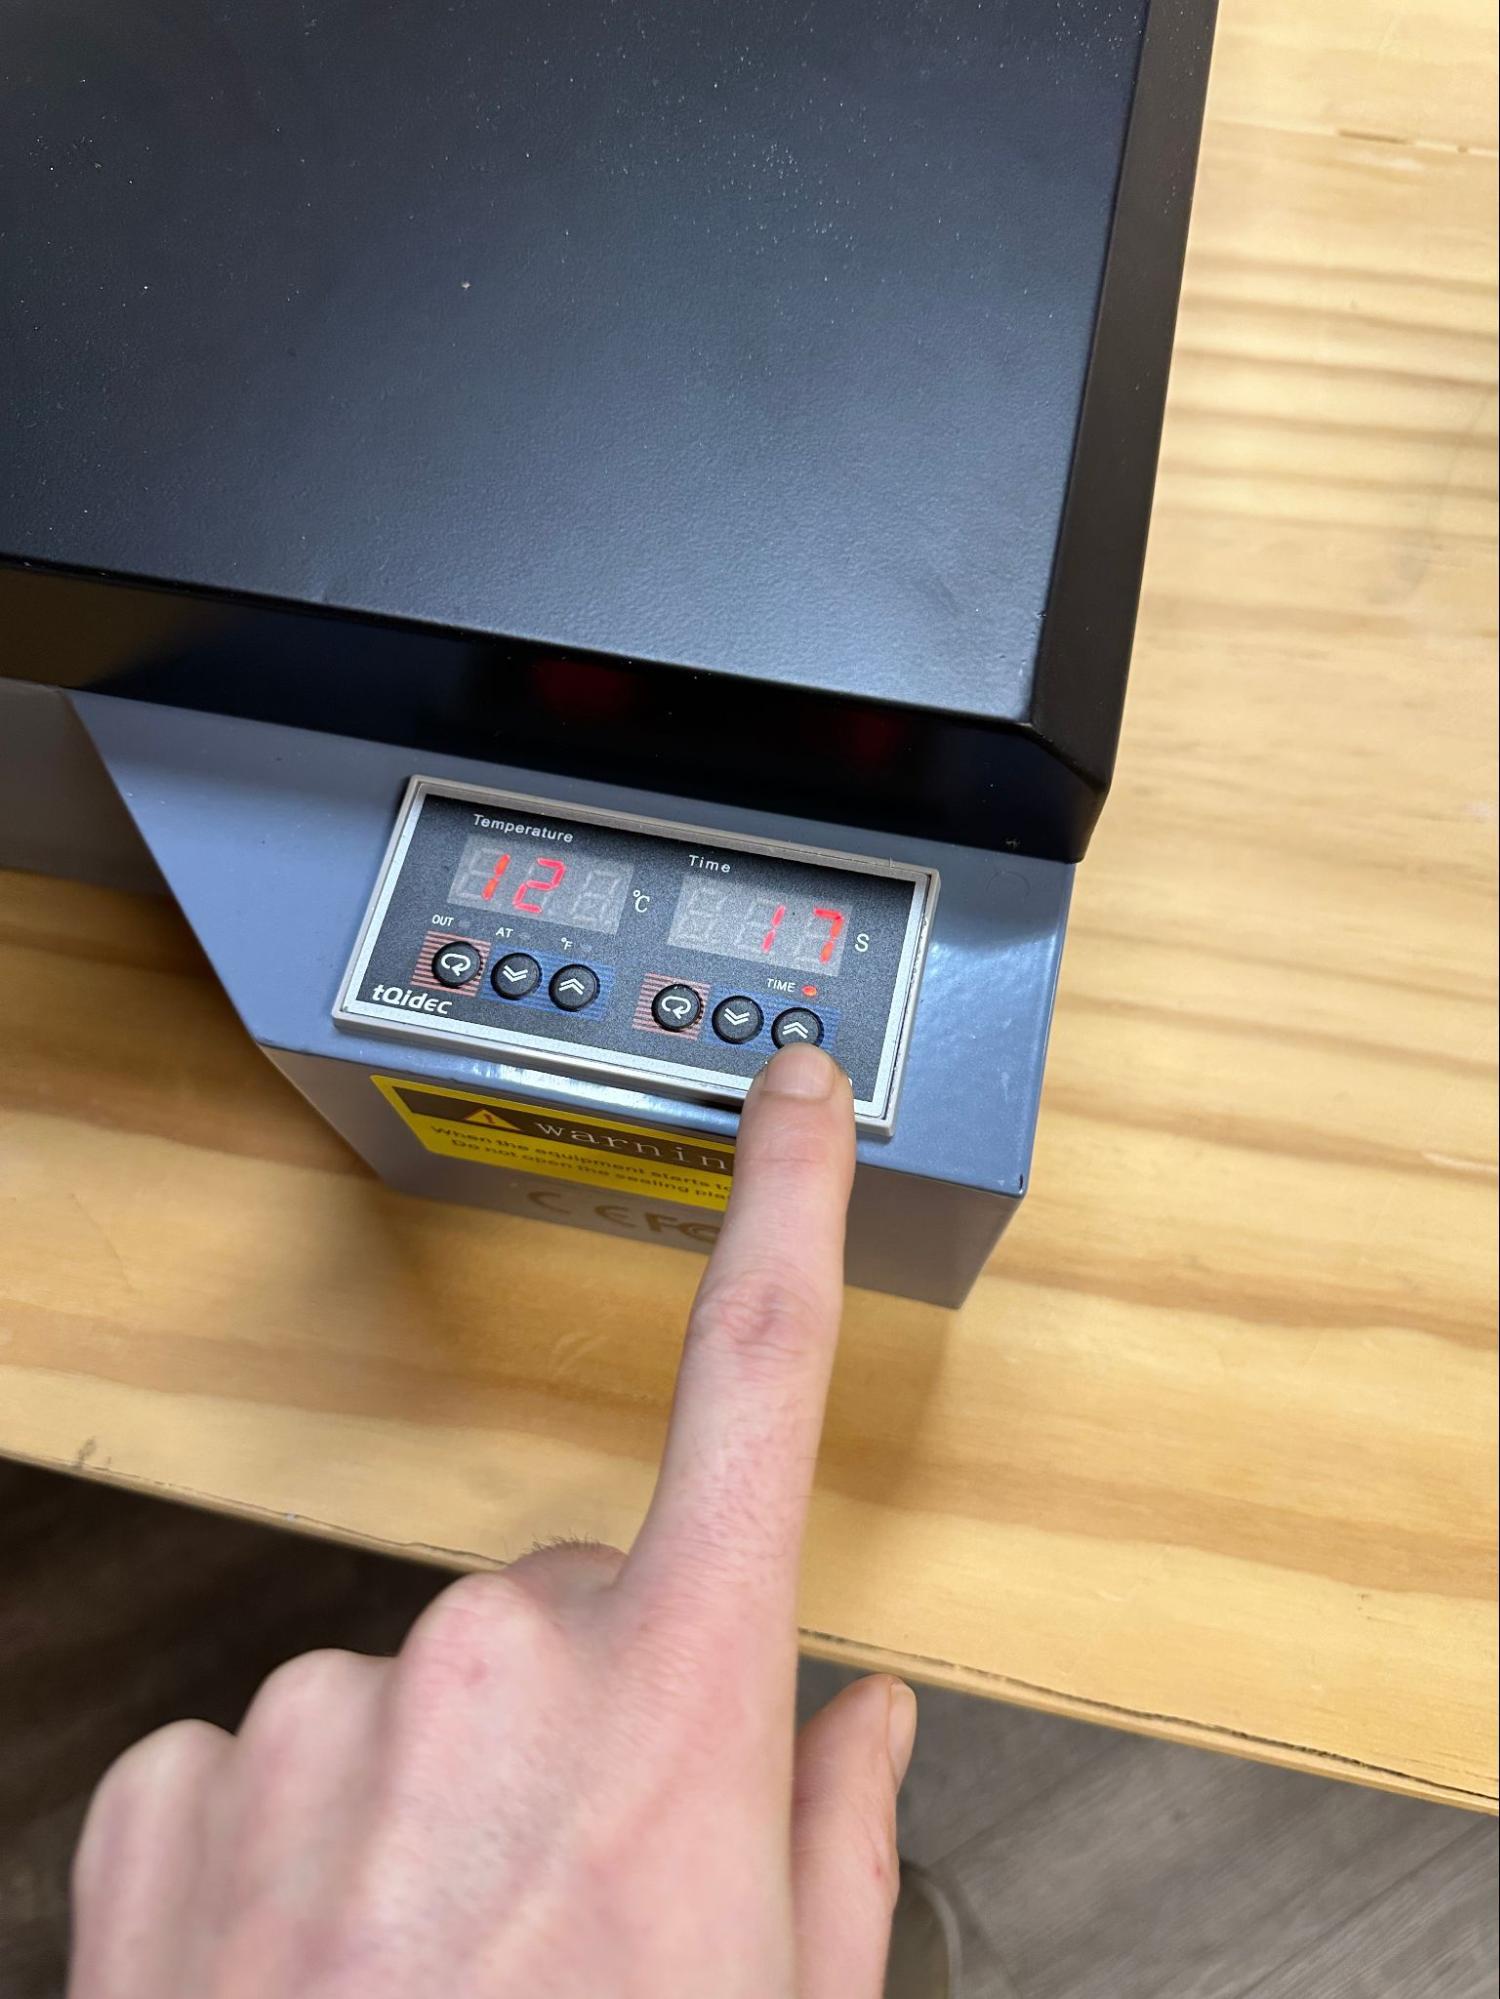
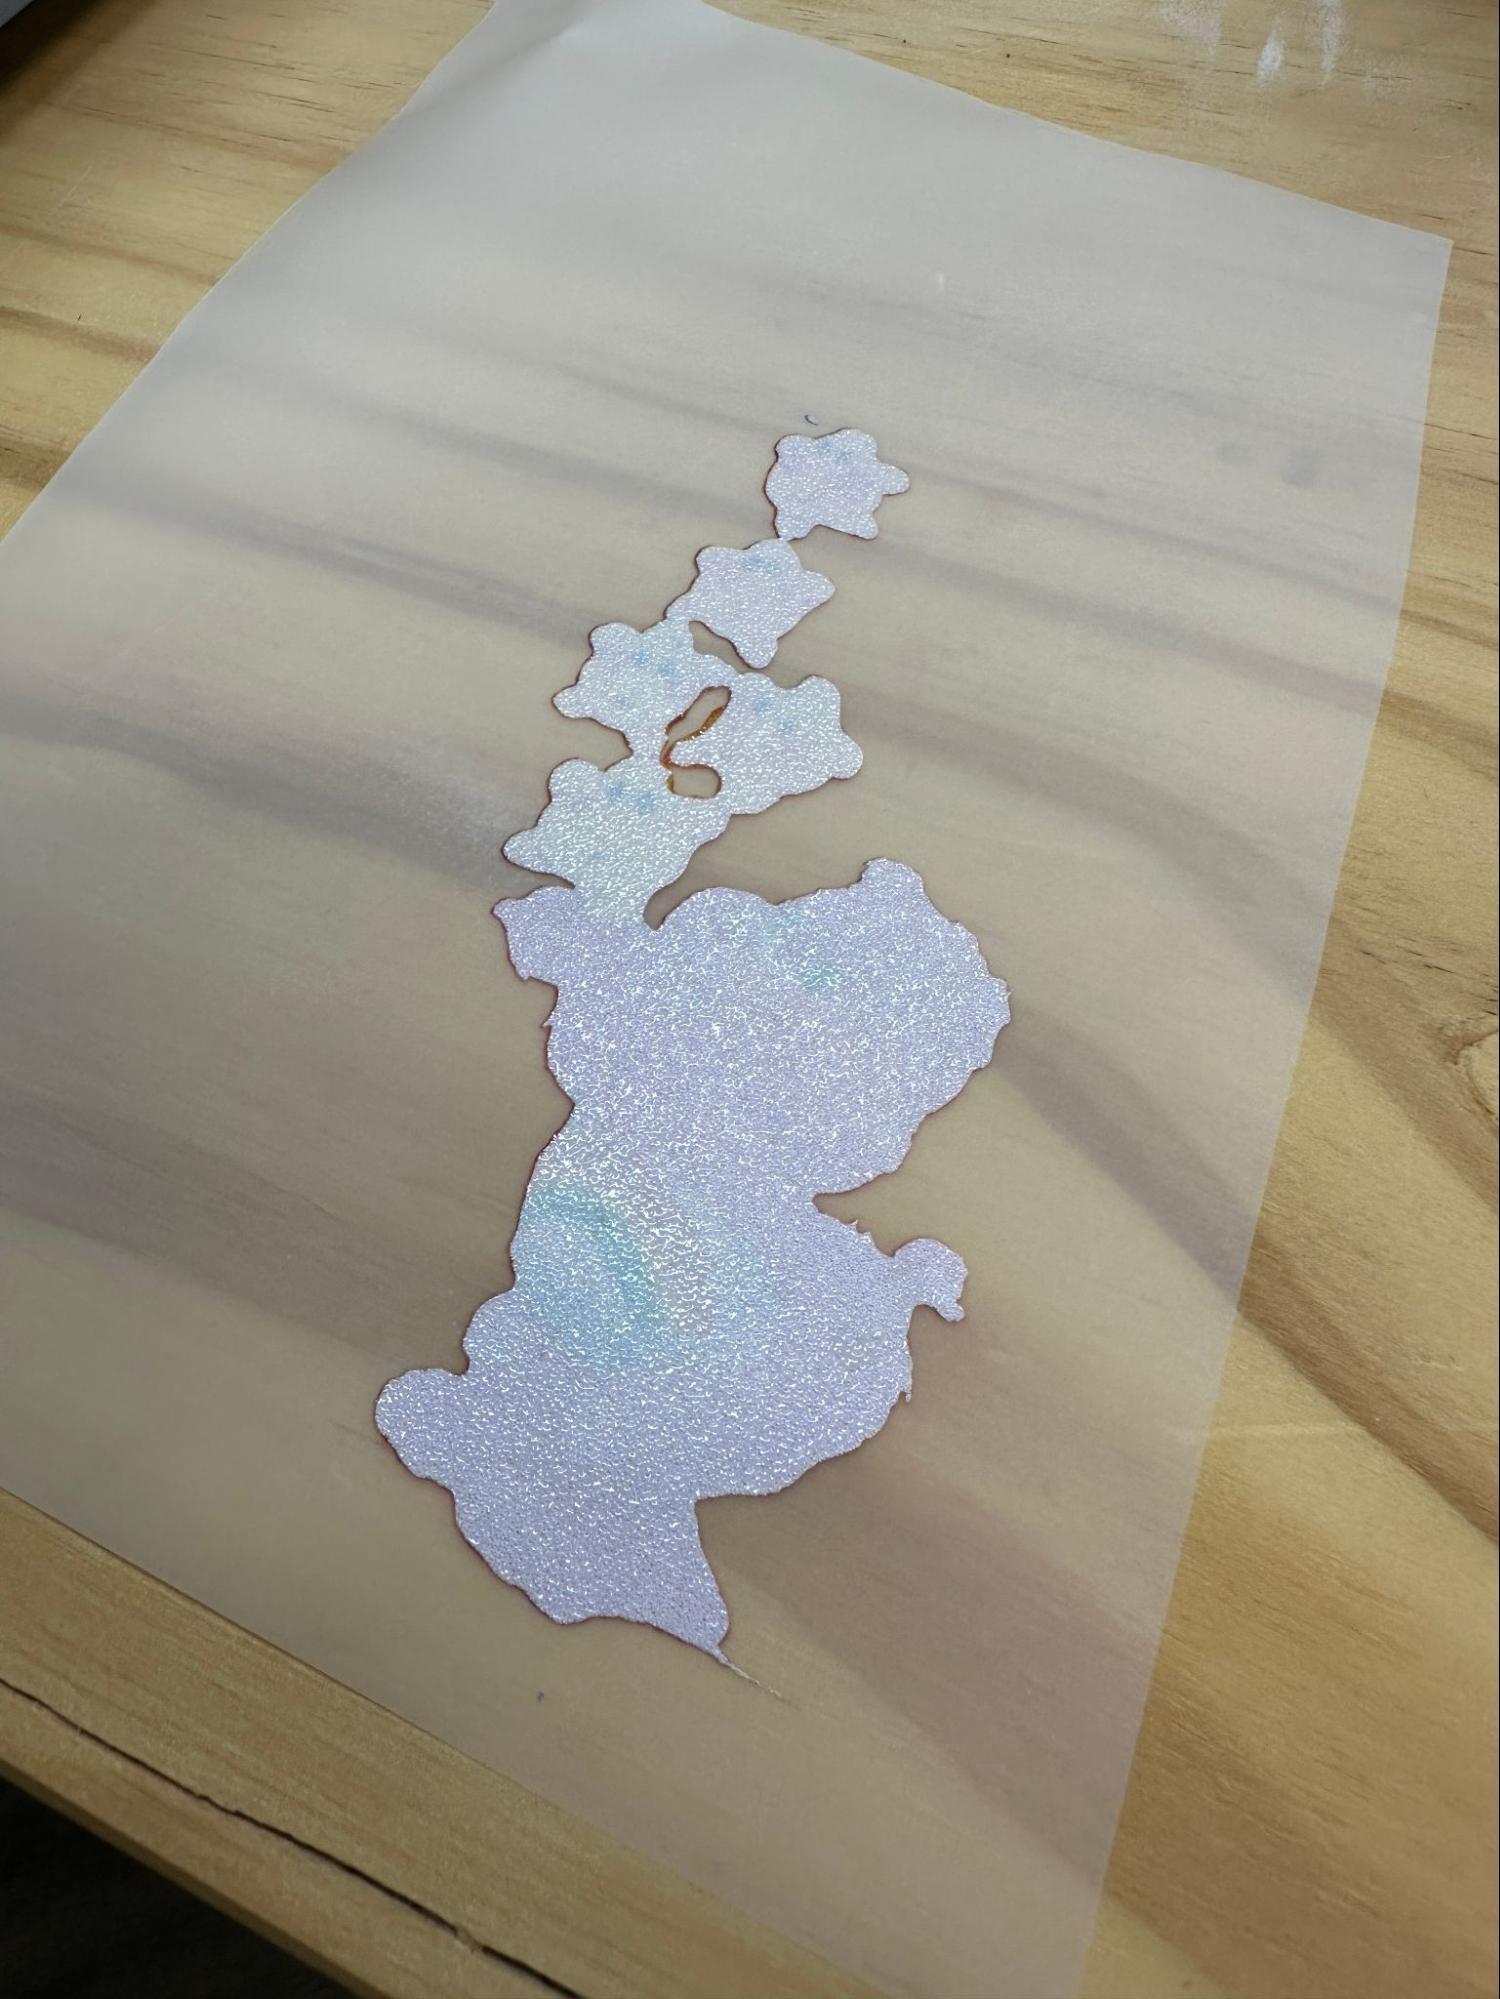
Put the print with the inkside facing up into the oven and close it. To start the timer, press the up arrow button on the front of the oven. When the timer is over, it will beep. Carefully take out your print, close the lid and press the up arrow to reset the timer. The powder on the print should look textured and glossy.
Squish
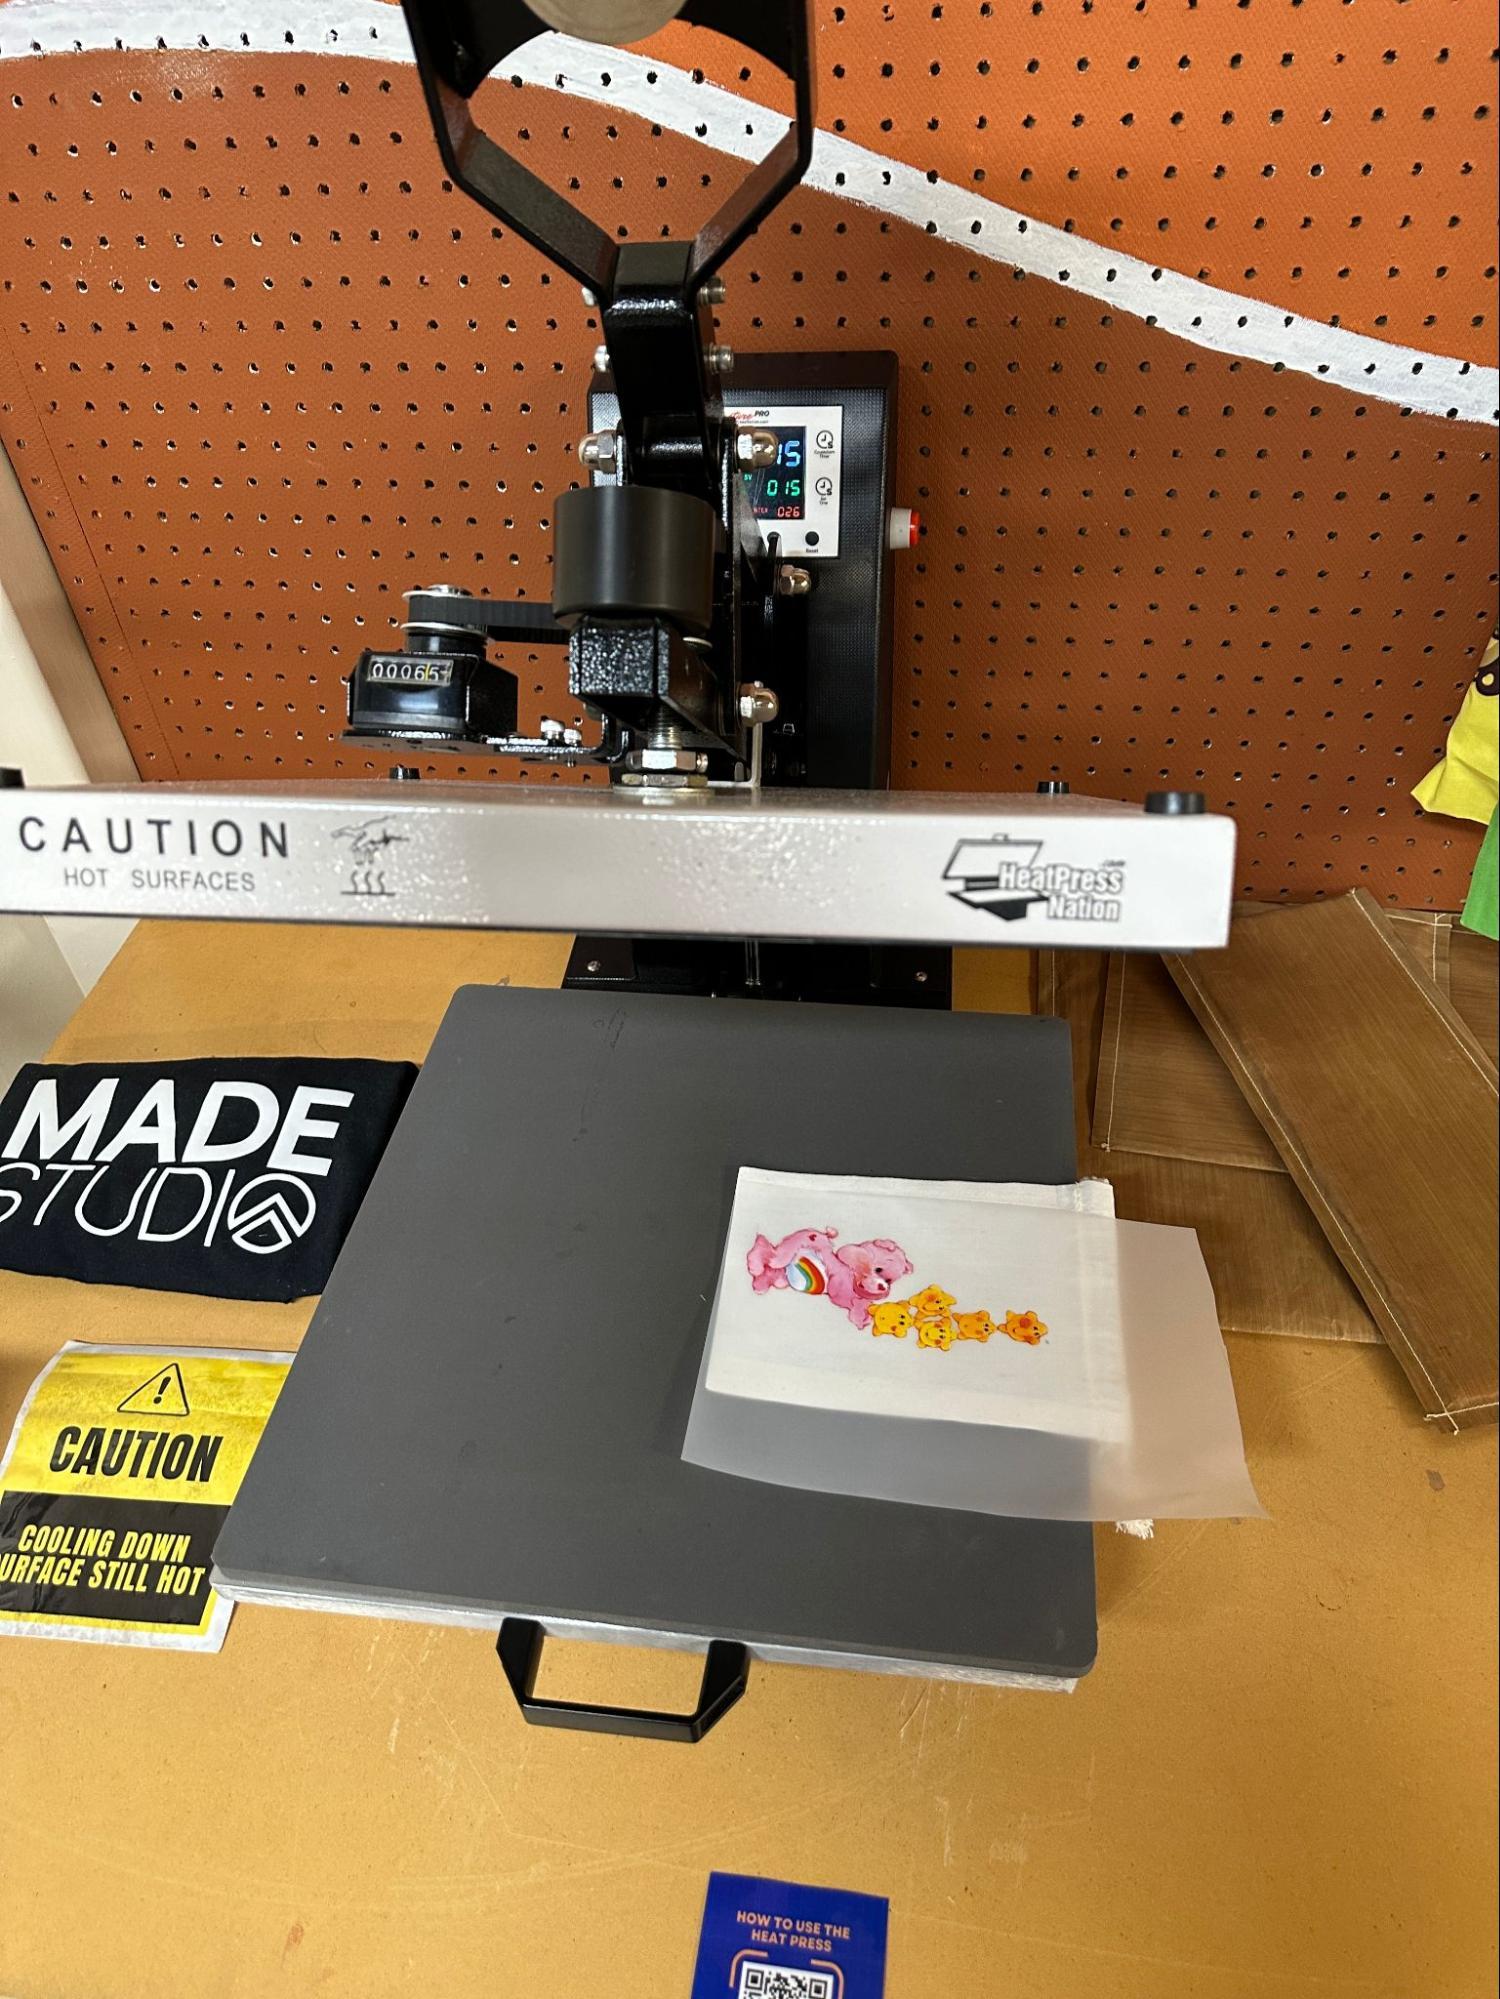
Allow the print/film to become cool before setting up your print onto the fabric on the heat press. We had set the temperature and duration earlier for this fabric, so we are good to press it now.
Cool and Peel
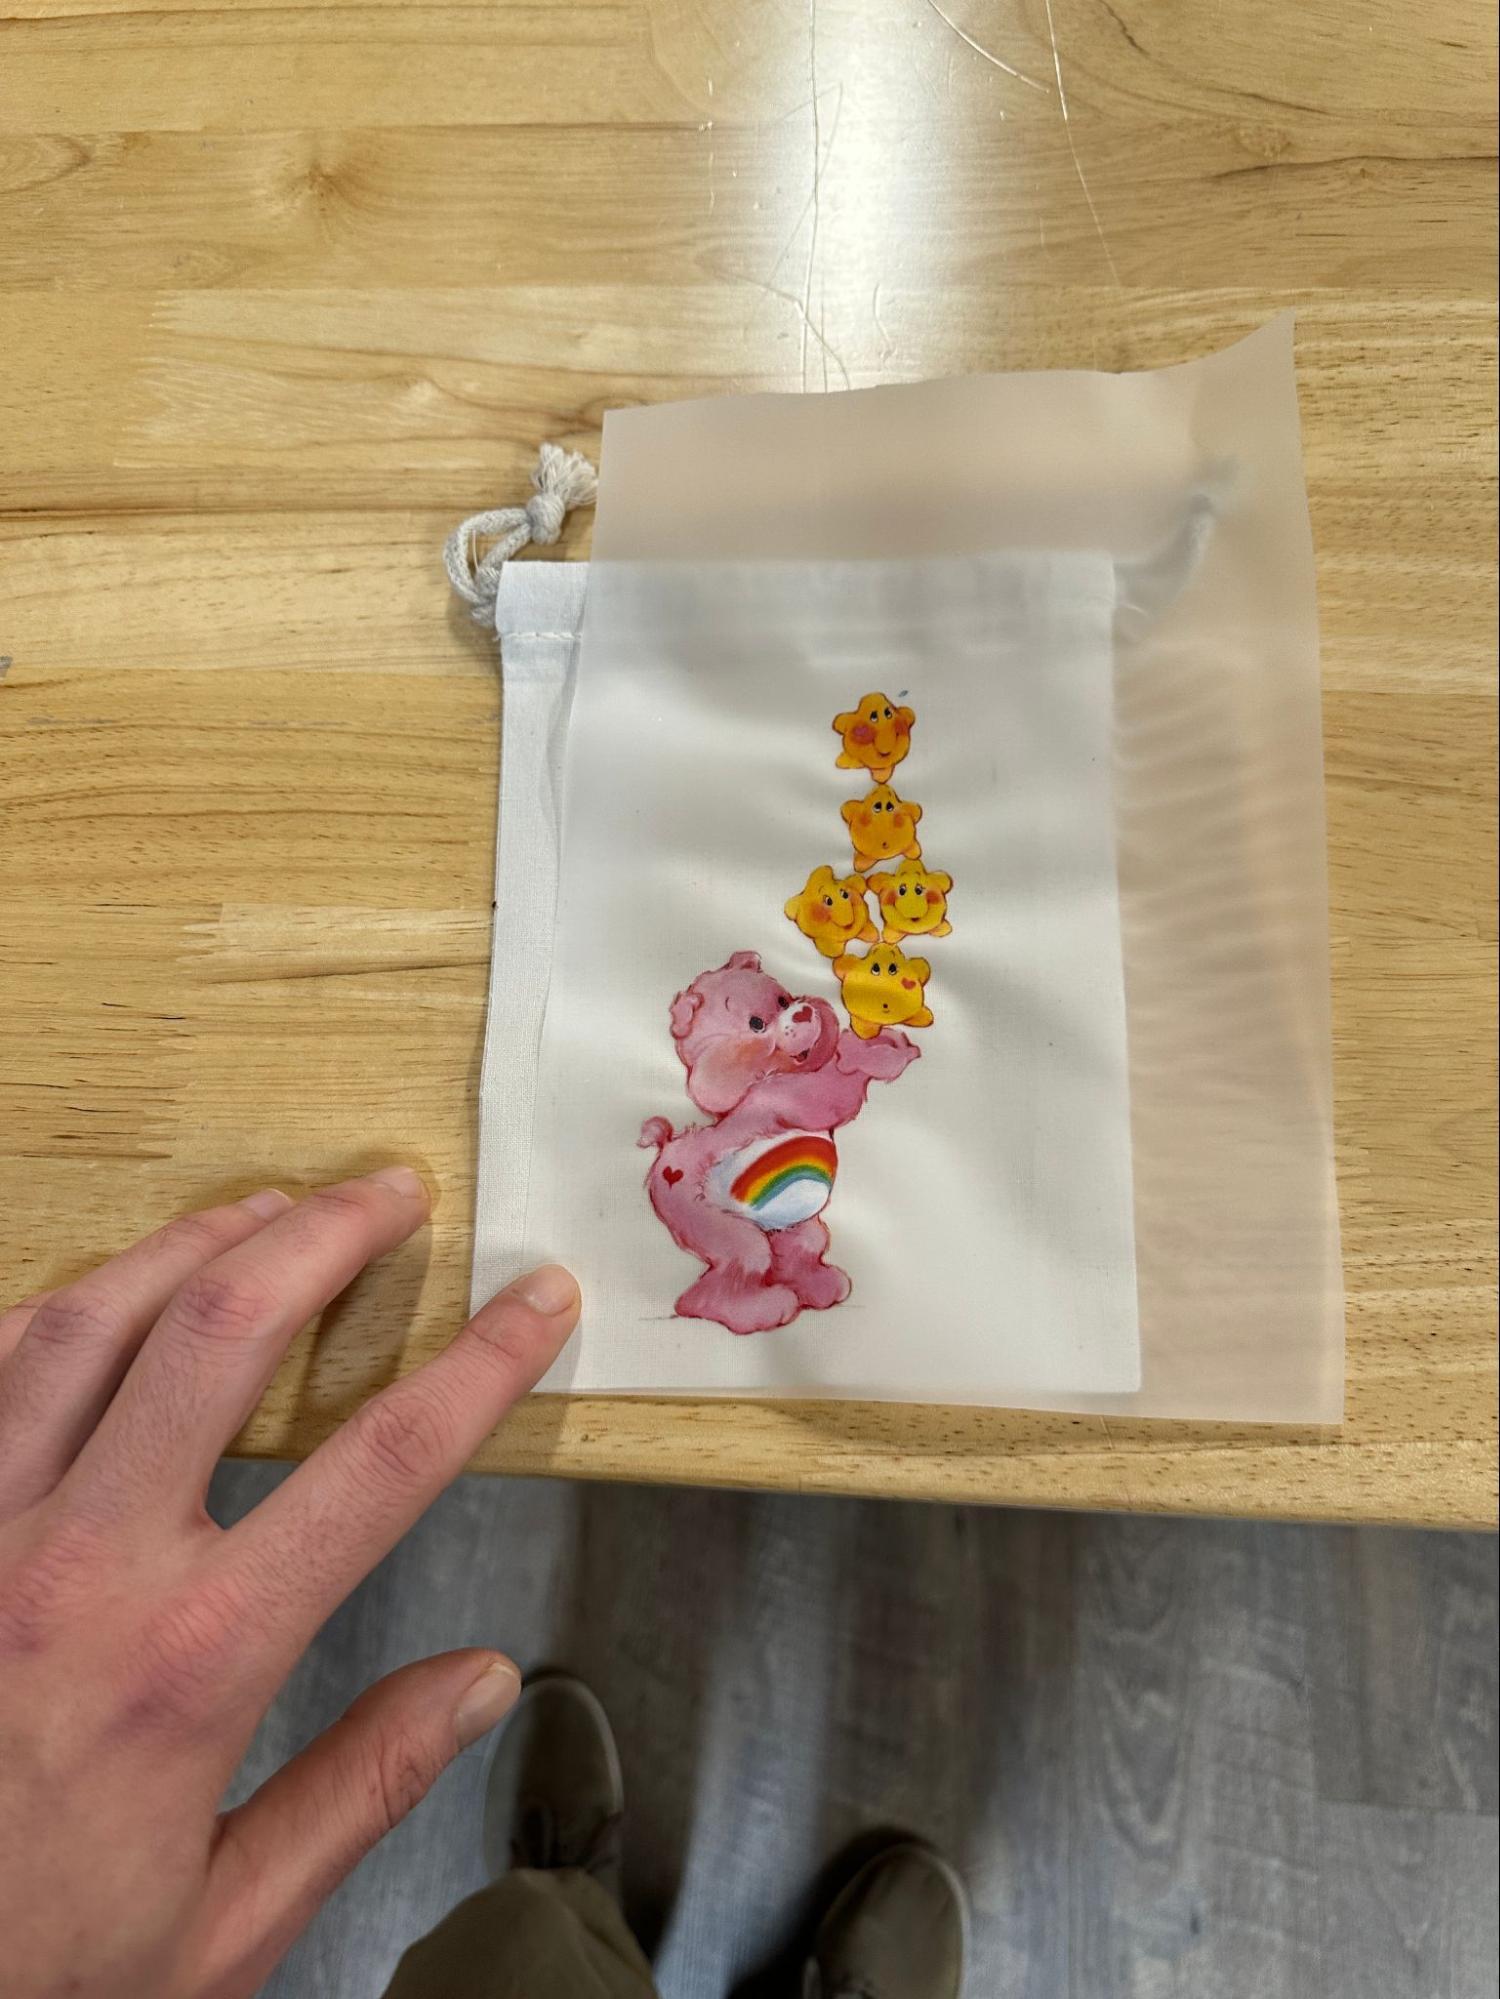
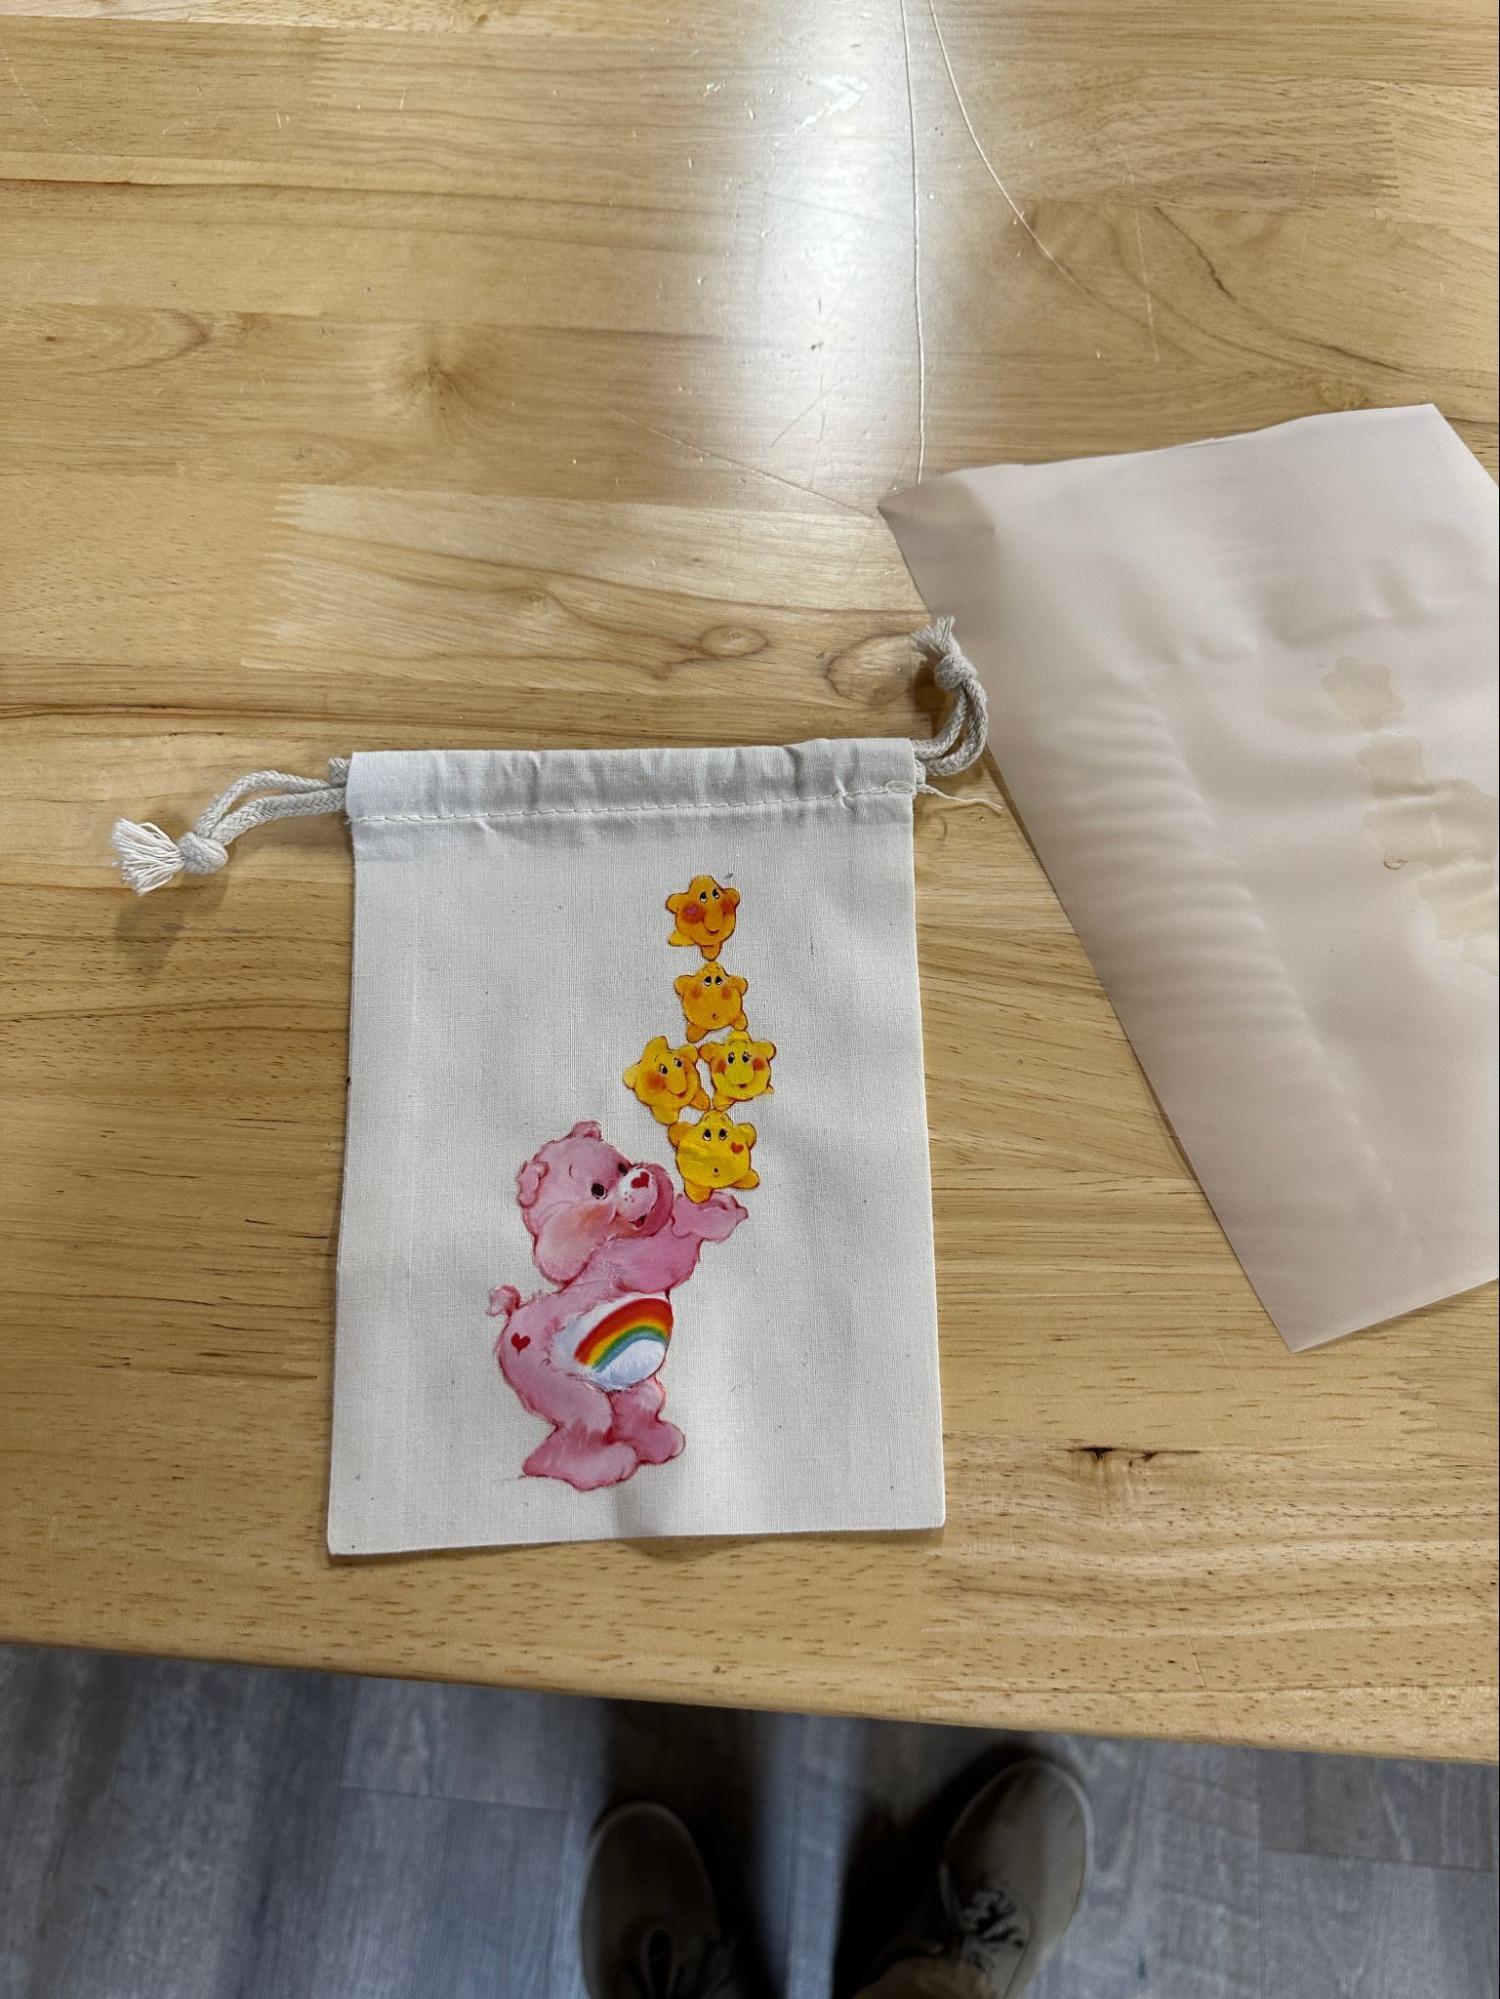
After carefully removing the pressed fabric, allow the adhered print to become cool to the touch before attempting to peel the fabric. If the print is peeling up with the film, it is suggested to heat press it again and/or assess the fabric type and research whether it is suggested for DTF presses.
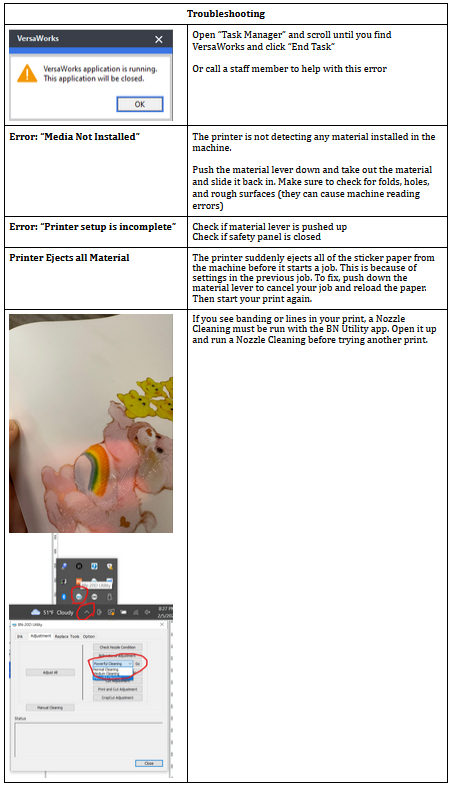
Trouble Shooting
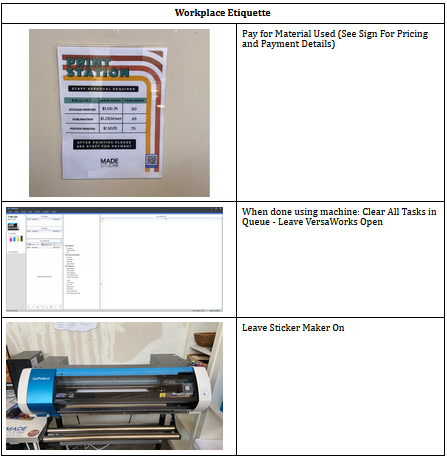
Etiquette