Basic Tinkercad Workshop
Of all the 3D modeling software that I've used, I've found that Tinkercad is the best software for basic modeling. Even though its a simpler 3D modeling software, it can still result in great creations. In this instructable, I will go over what the software is and the functions that it has.
To start things off, you'll want to head to this link: https://www.tinkercad.com/
Creating an Account
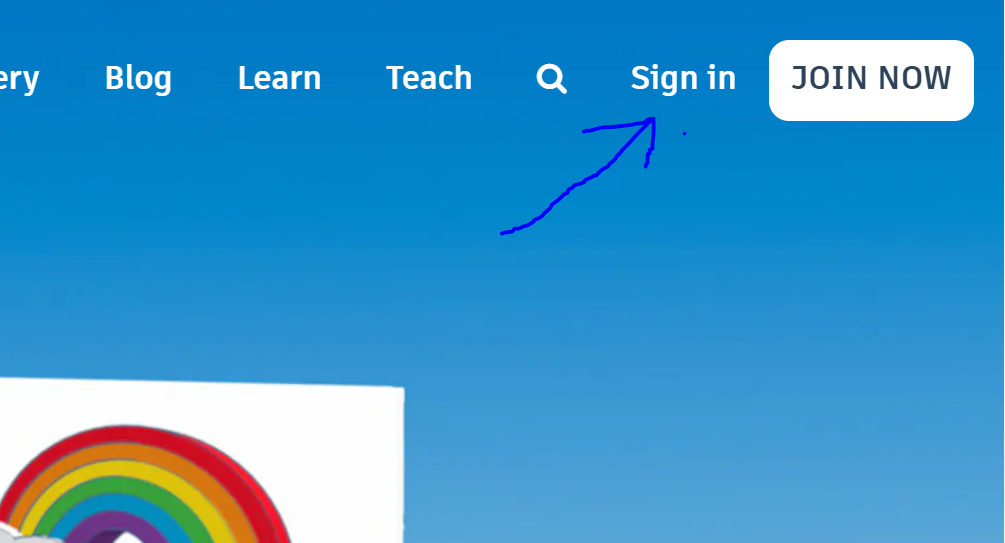
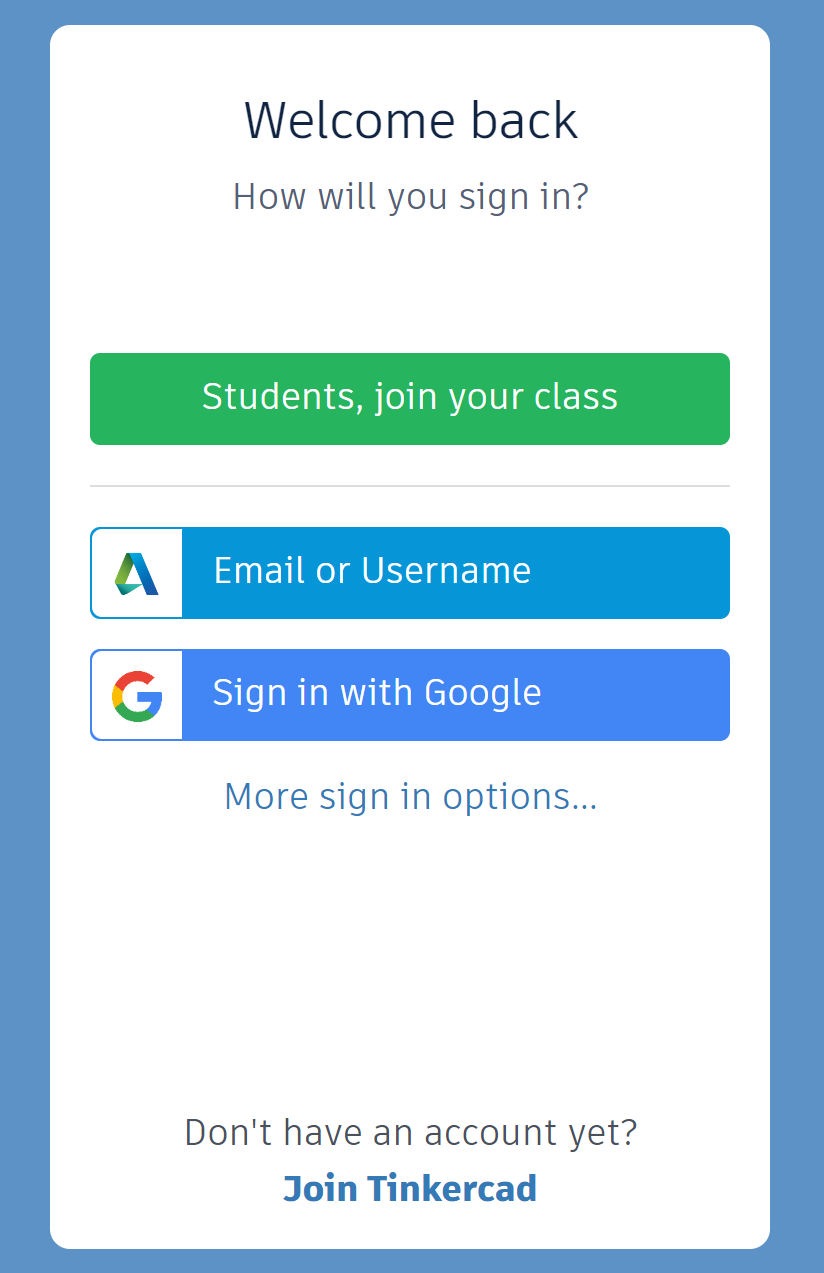
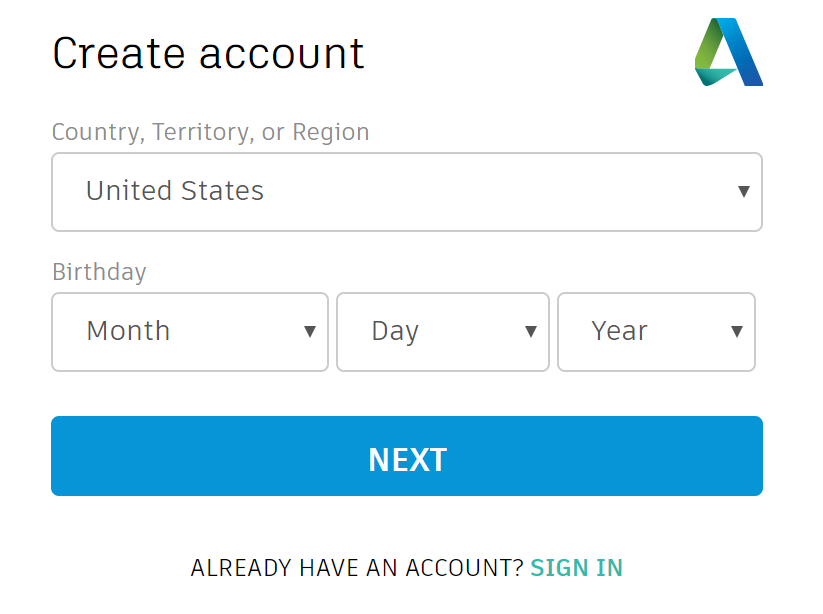
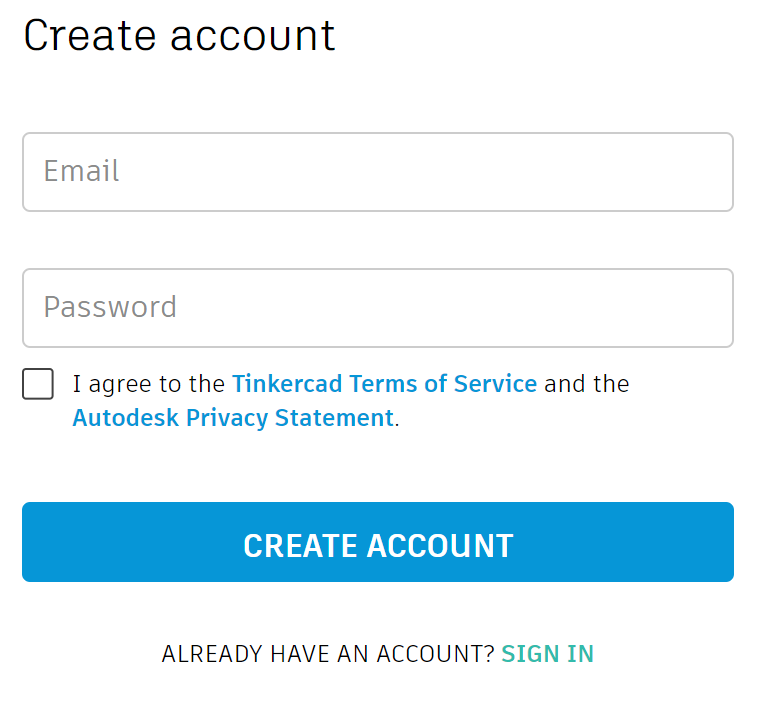
First thing you'll want to do is create an account if you don't already have one. If you already have an account, you can go ahead and skip to the next step. For those who don't already have an account, we will go ahead and make one. In the top right of the page, select join now. Tinkercad allows you to create an account using multiple options. Those accounts are google, facebook, and microsoft or you could join with an email. Once you've selected how you'd like to link your account, you'll be prompted to input your Country/Territory/Region and your birthday. After you input that, select next and you'll be prompted to input your email and create a password. Make sure your password has at least 1 letter, 1 number, a minimum of 8 characters, and at least 3 unique characters. Once done, create the account.
Creating a New Design
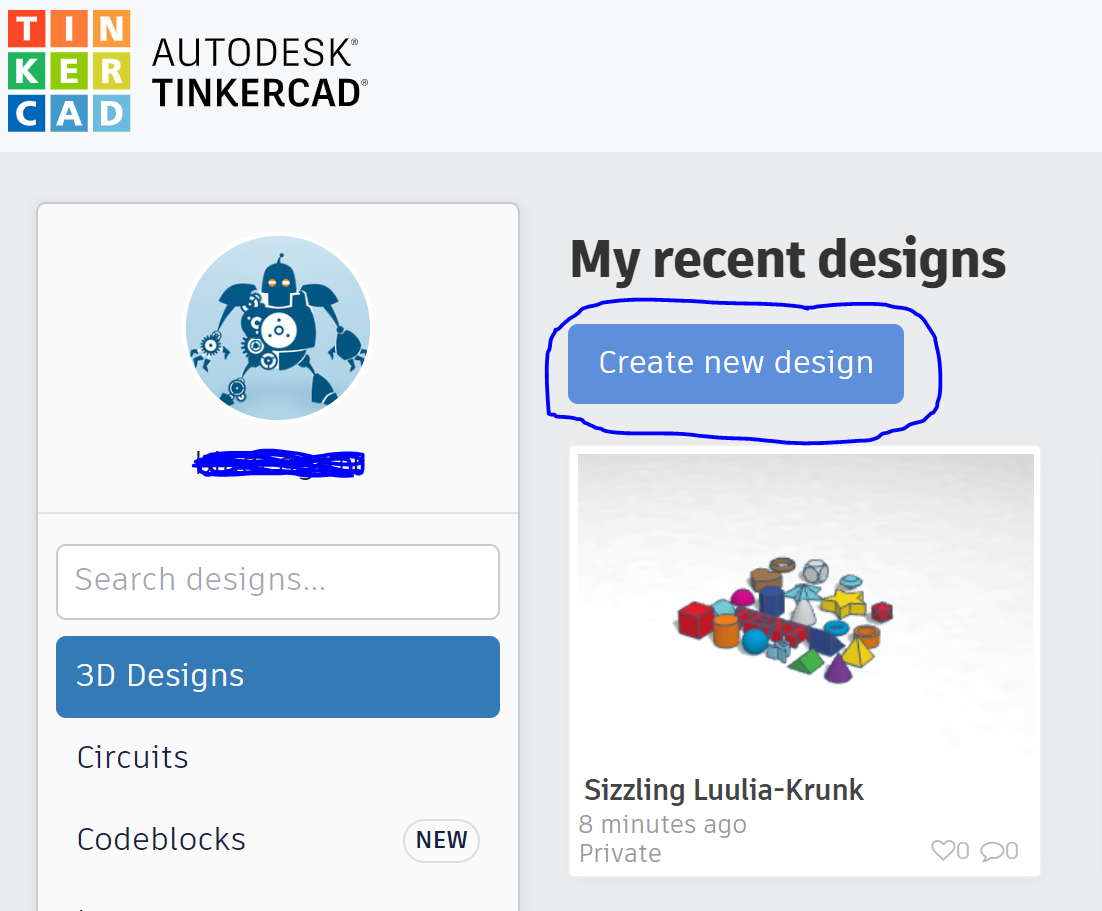
In order to start modeling, you'll need to create a new design. From your dashboard, select create new design on the left side of the page.
Features
Now there are many features in this software but not as many as there are in other 3D modeling software.
Mouse Features
The mouse is the main tool that you will use to create and destroy in this software. In order to move around on screen. To rotate around the model, you'll need to either right click and drag the direction you want to move or use the cube on the left side of the page to move around the model. In order to select an object, you'll need to left click it. If you want to select multiple objects, you can either left click and drag while holding down left mouse to highlight what you want to select or you can left click each shape while holding shift down.
Left Side Buttons
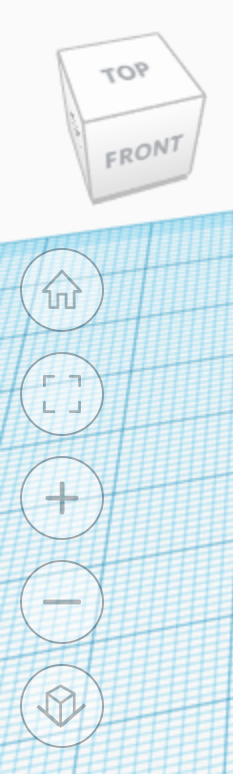
On the left side of the screen are 5 buttons under the rotate cube. The first button is the home button which simple moves the camera to its home position. The next button down is the fit all in view button which moves the camera to fit all the model into view. The next two buttons are the zoom increase and decrease buttons that will either zoom in or out. This can also be done by using the scroll on the mouse. The last button is the flat vs perspective button which changes the view from a more 3D view to a flatter view and vise versa.
Top Bar

At the top of the page is a bar with 14 buttons on it. Starting from left to right we have the copy button which creates a copy of any selected models. It has a shortcut of ctrl + c. Next we have paste button which will paste any model that has been copied. It has a shortcut of ctrl + v. Next we have the duplicate and repeat button which creates two copies of the selected models. It has a shortcut of ctrl + d. Next we have the delete button which removes any selected model. It has a shortcut of the delete key. Next we have the undo button which will undo any move, delete, or any thing else that you do to the model. It has a shortcut of ctrl + z. Next we have the redo button which is like undo but does the reverse. It has a shortcut of ctrl + y. Next we have the show all button which reveals any hidden models hidden by the hide shortcut ctrl + h or by the light bulb under the shape settings. It has a shortcut of ctrl + shift + h. Next we have the group button which groups two or more models into one model. It has a shortcut of ctrl + g. Next we have the ungroup button which separates two grouped shapes back into separate models. It has a short cut of ctrl + shift + g. Next we have the align button which moves two or more models onto the same axis that is selected. It has a shortcut of L. Lastly we have the mirror button which will mirror a model across the chosen axis. It has a shortcut of M.
Import, Export, and Send To
At the end of the top bar are 3 buttons. Import, Export, and Send To.
Import
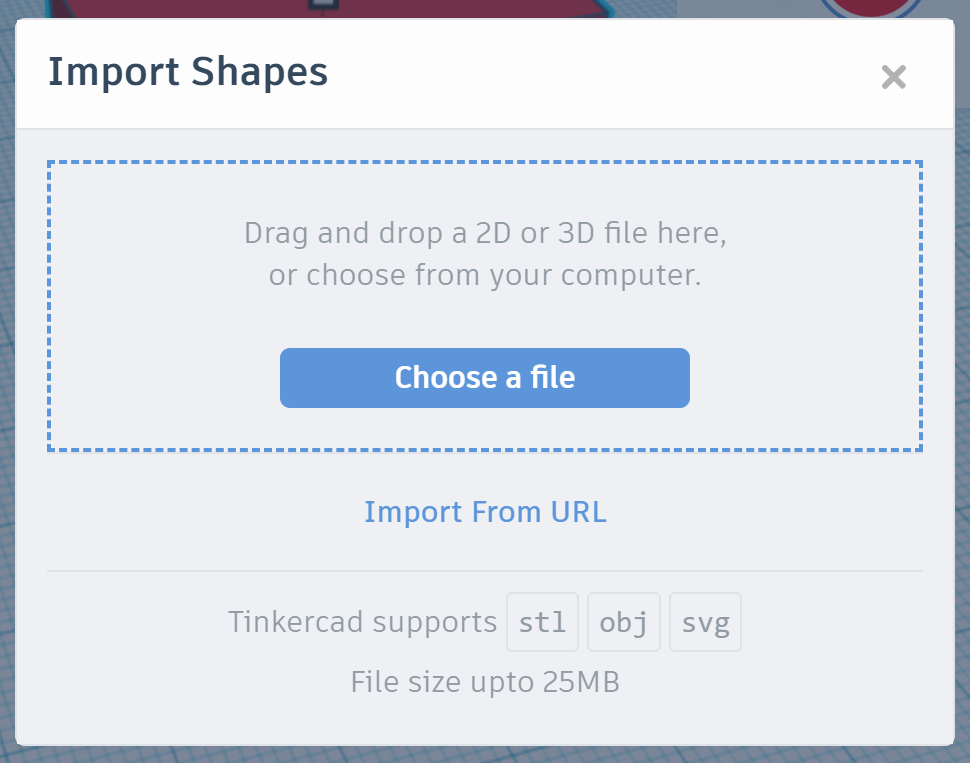
Import will take in any stl, obj, or svg and create a model in tinkercad. There are two ways to import a model. You can either drag and drop or file browser for a file or import from a url.
Export
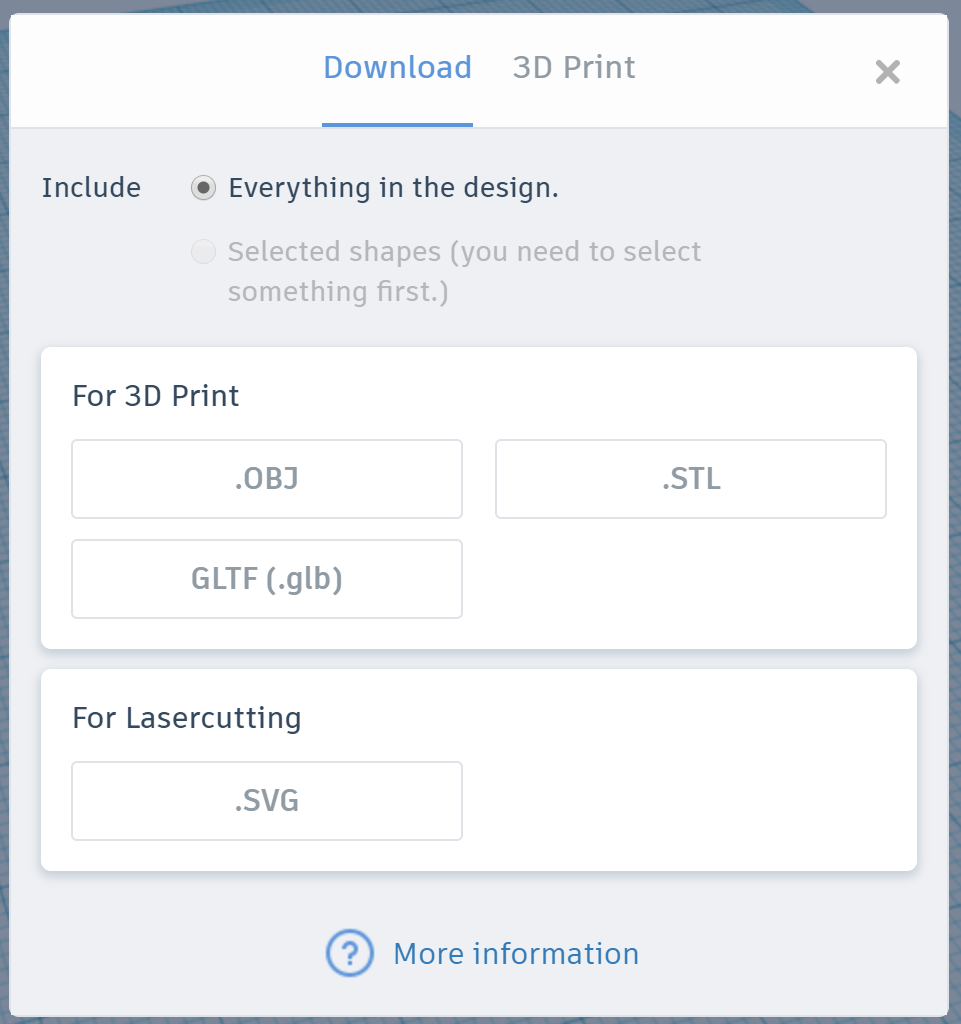
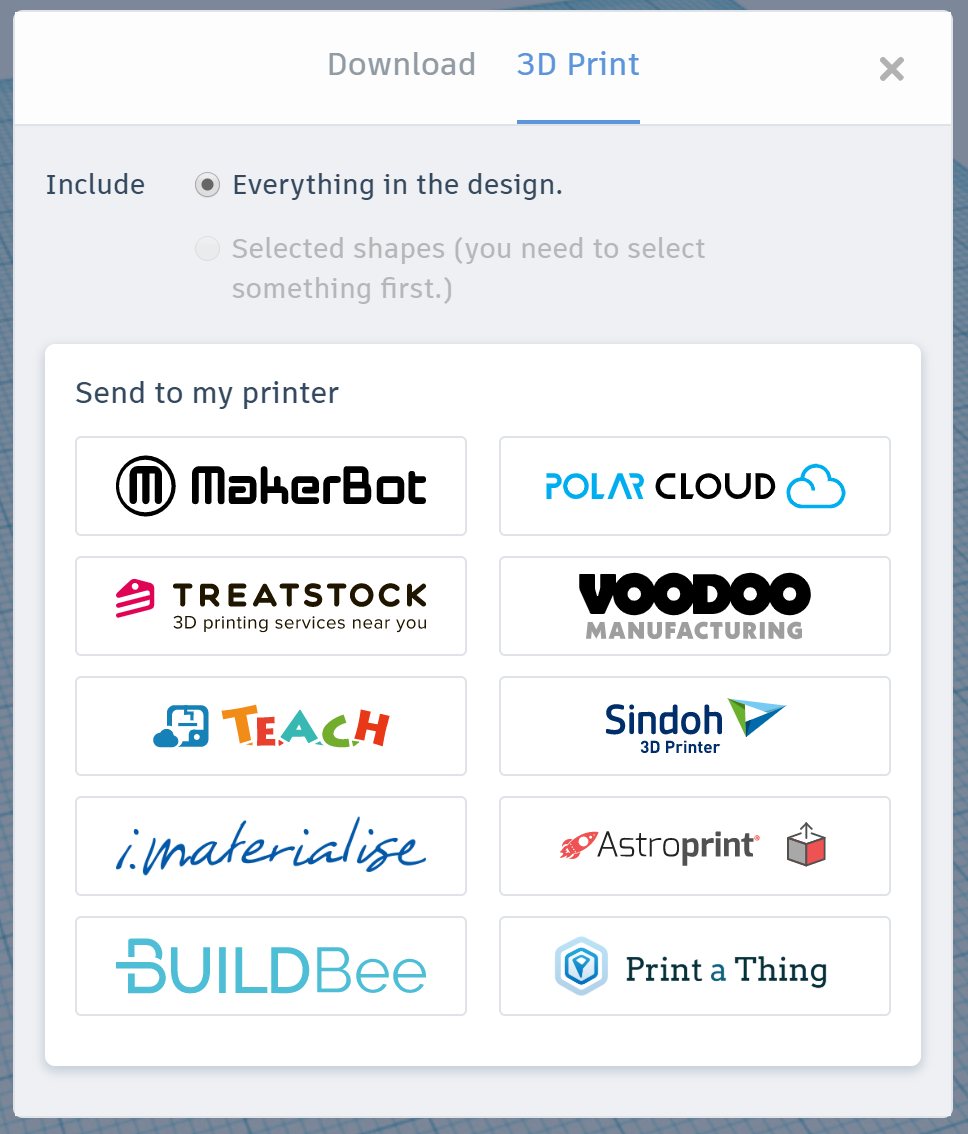
Export create a file that you can download for your model. There are two formats for you to choose from, For 3D printing or lasercutting. For 3D printing will give you the option to download as an obj, stl, or glb file while lasercutting will give you the option to download as a svg file. What else it allows you to do is send the file out to be 3D printed by a professional company.
Send To
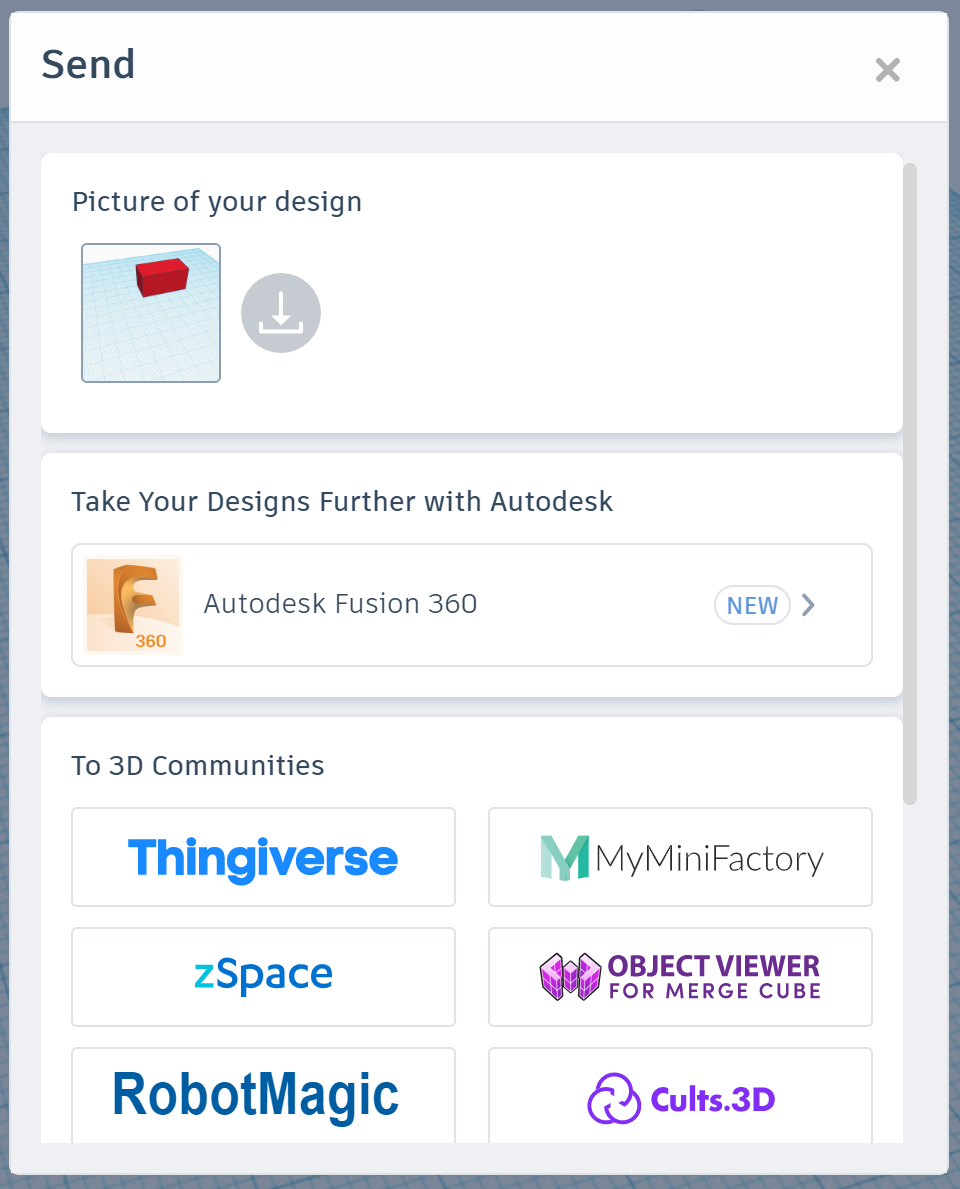
Send to will allow you to take a picture of your model, take it further in another one of autodesk's more advanced 3D modeling software, send it to a 3D model communites, or send the model through IM or Email.
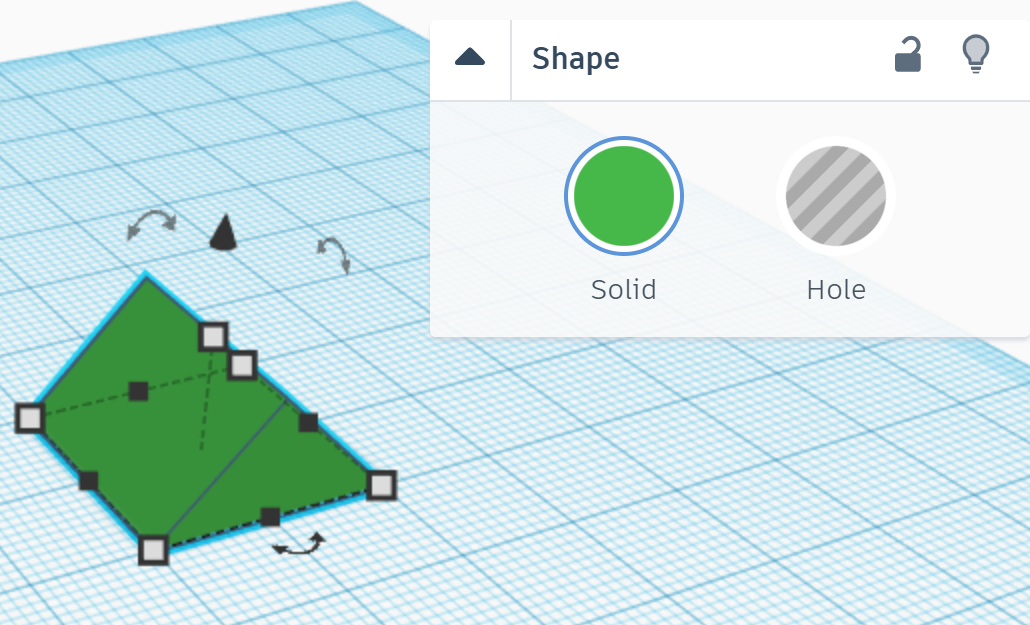
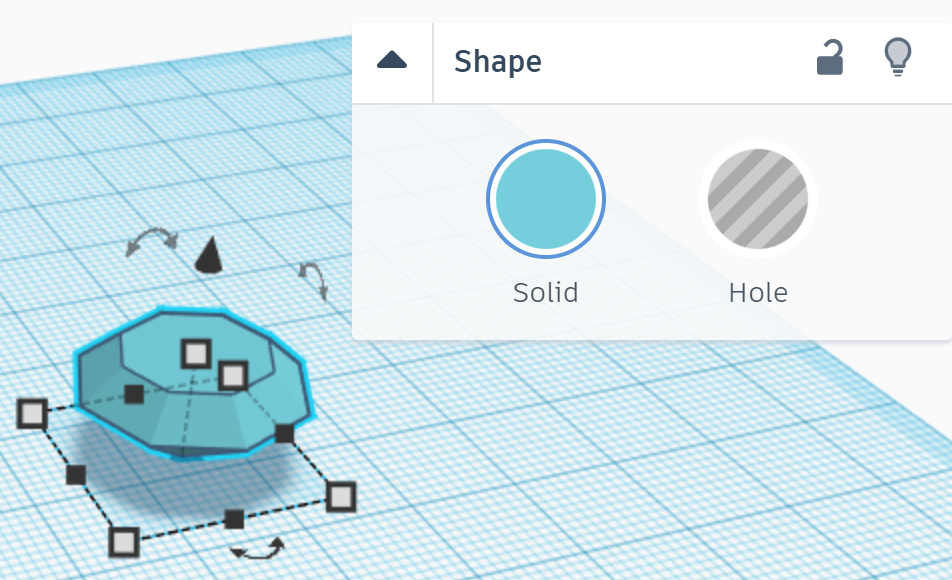
Shapes
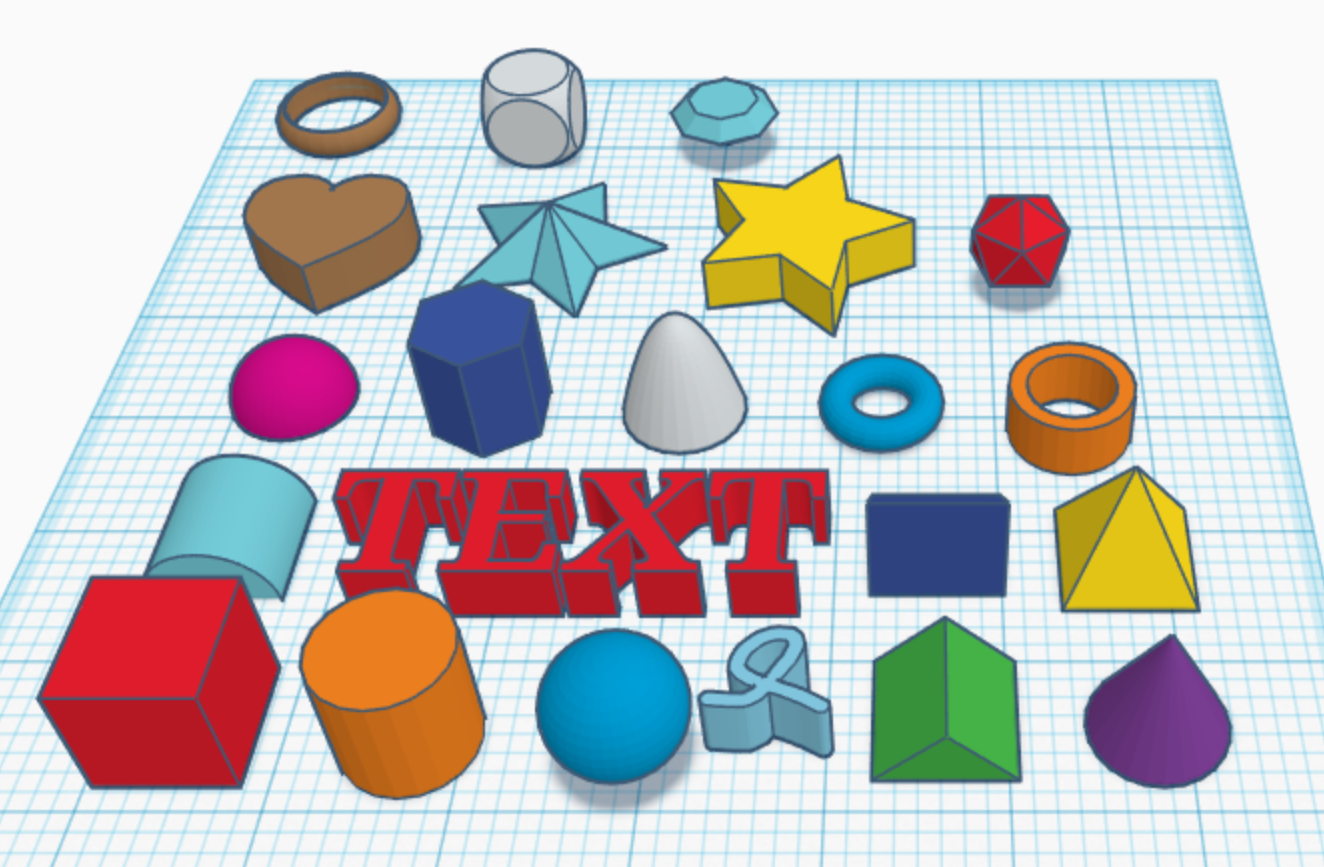
Next we will go over the shapes there are to use. There are two types of shapes, solids and holes. Solids are your basic shapes that you use to build and holes are your shapes to remove.
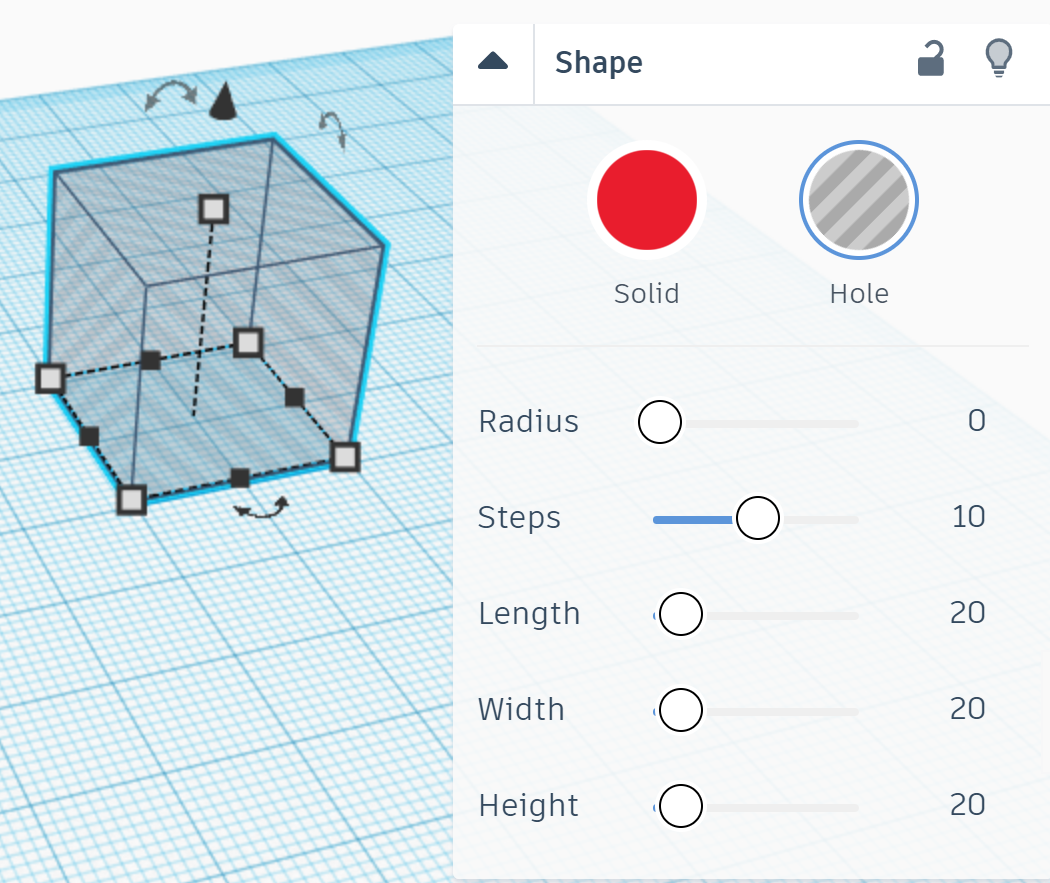
Box
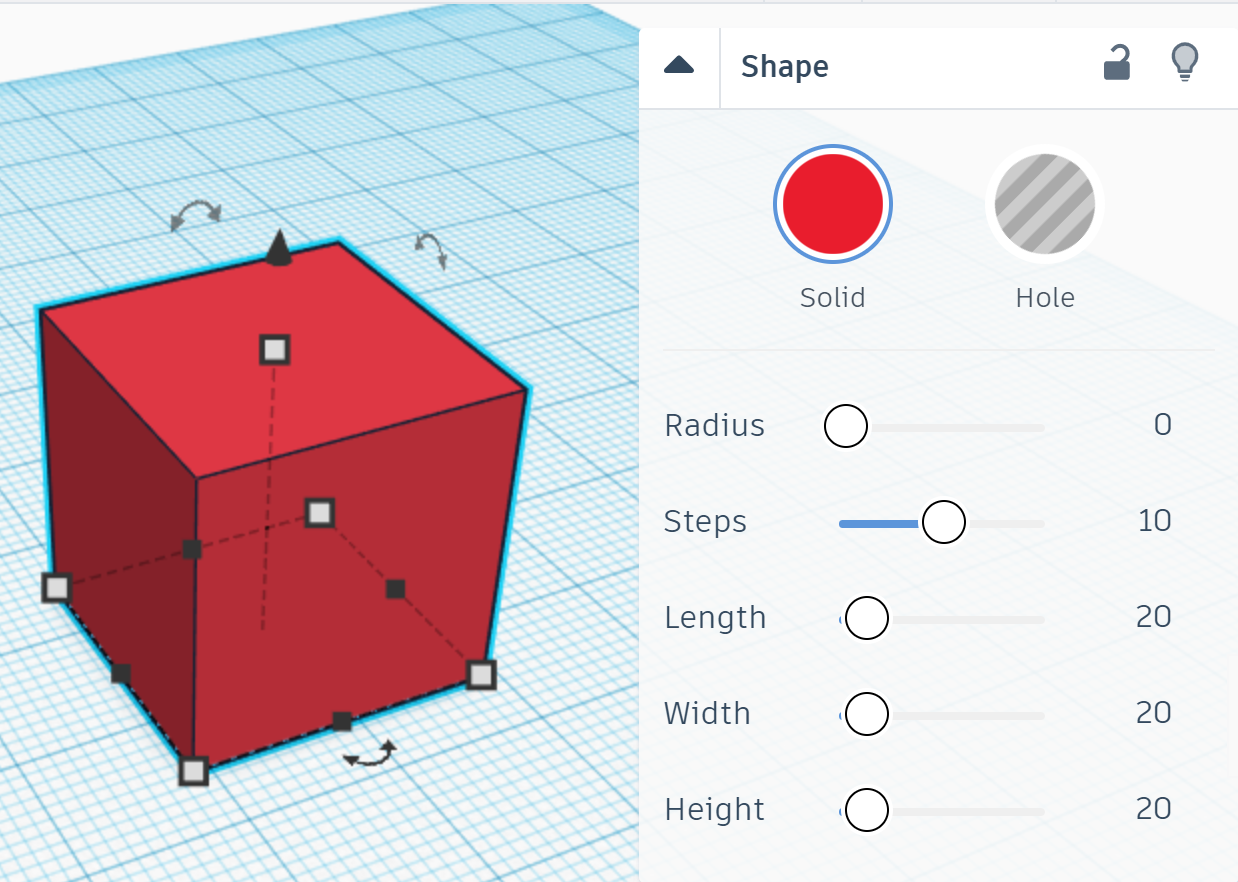
The box will create a box that you can edit. There are 5 settings for the box. Radius which will round out the box. Steps which will give it more faces to make it more or less complex. Length which changes the length of the box. Width which changes the width of the box. And height which changes the height of the box.
Cylinder
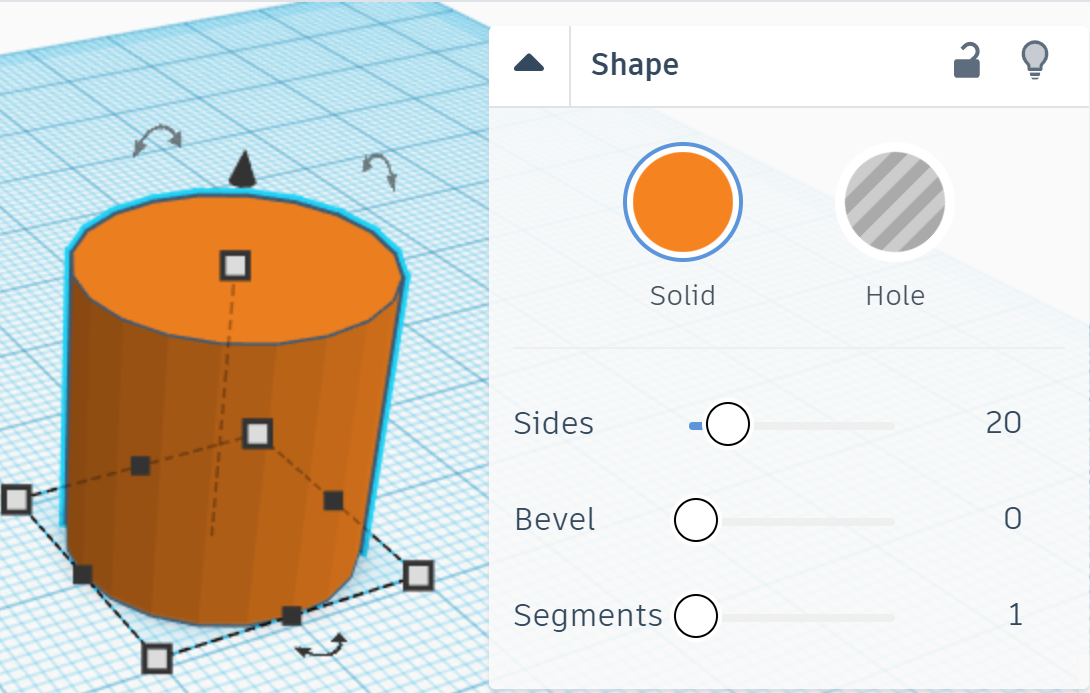
The cylinder will create a cylinder that you can edit. There are 3 settings for the cylinder. Sides which gives it more or less faces on its side. Bevel which will round out the edges. And segments which will give it more faces overall.
Sphere
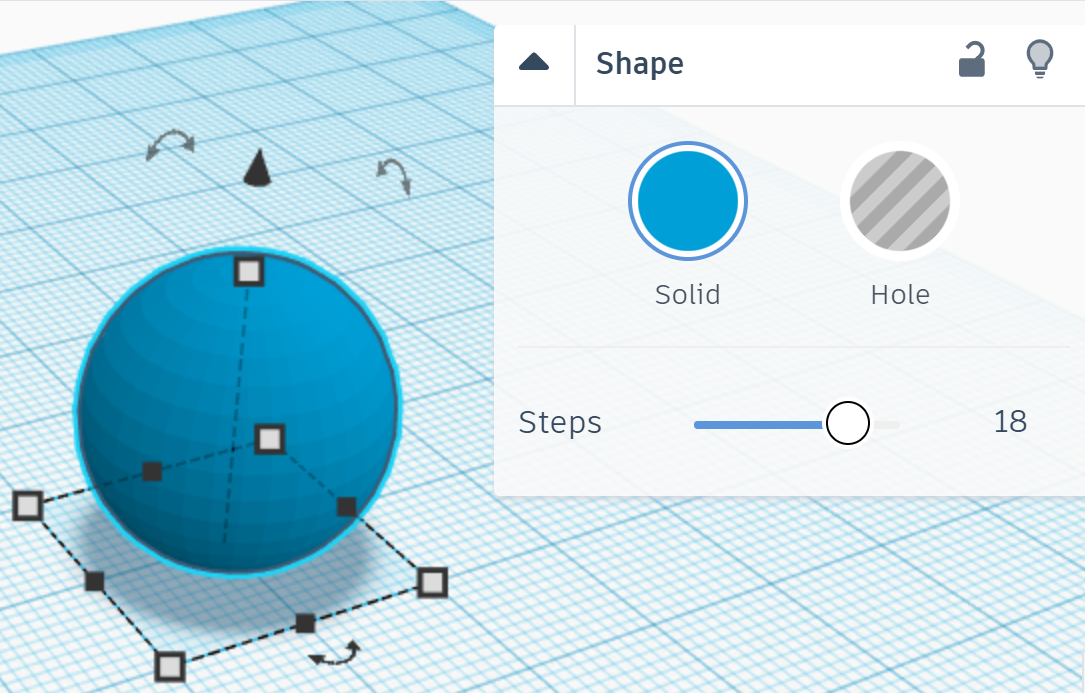
The sphere will create a sphere that you can edit. There is 1 setting for the sphere. Steps which will change the number of faces on the shape.
Scribble
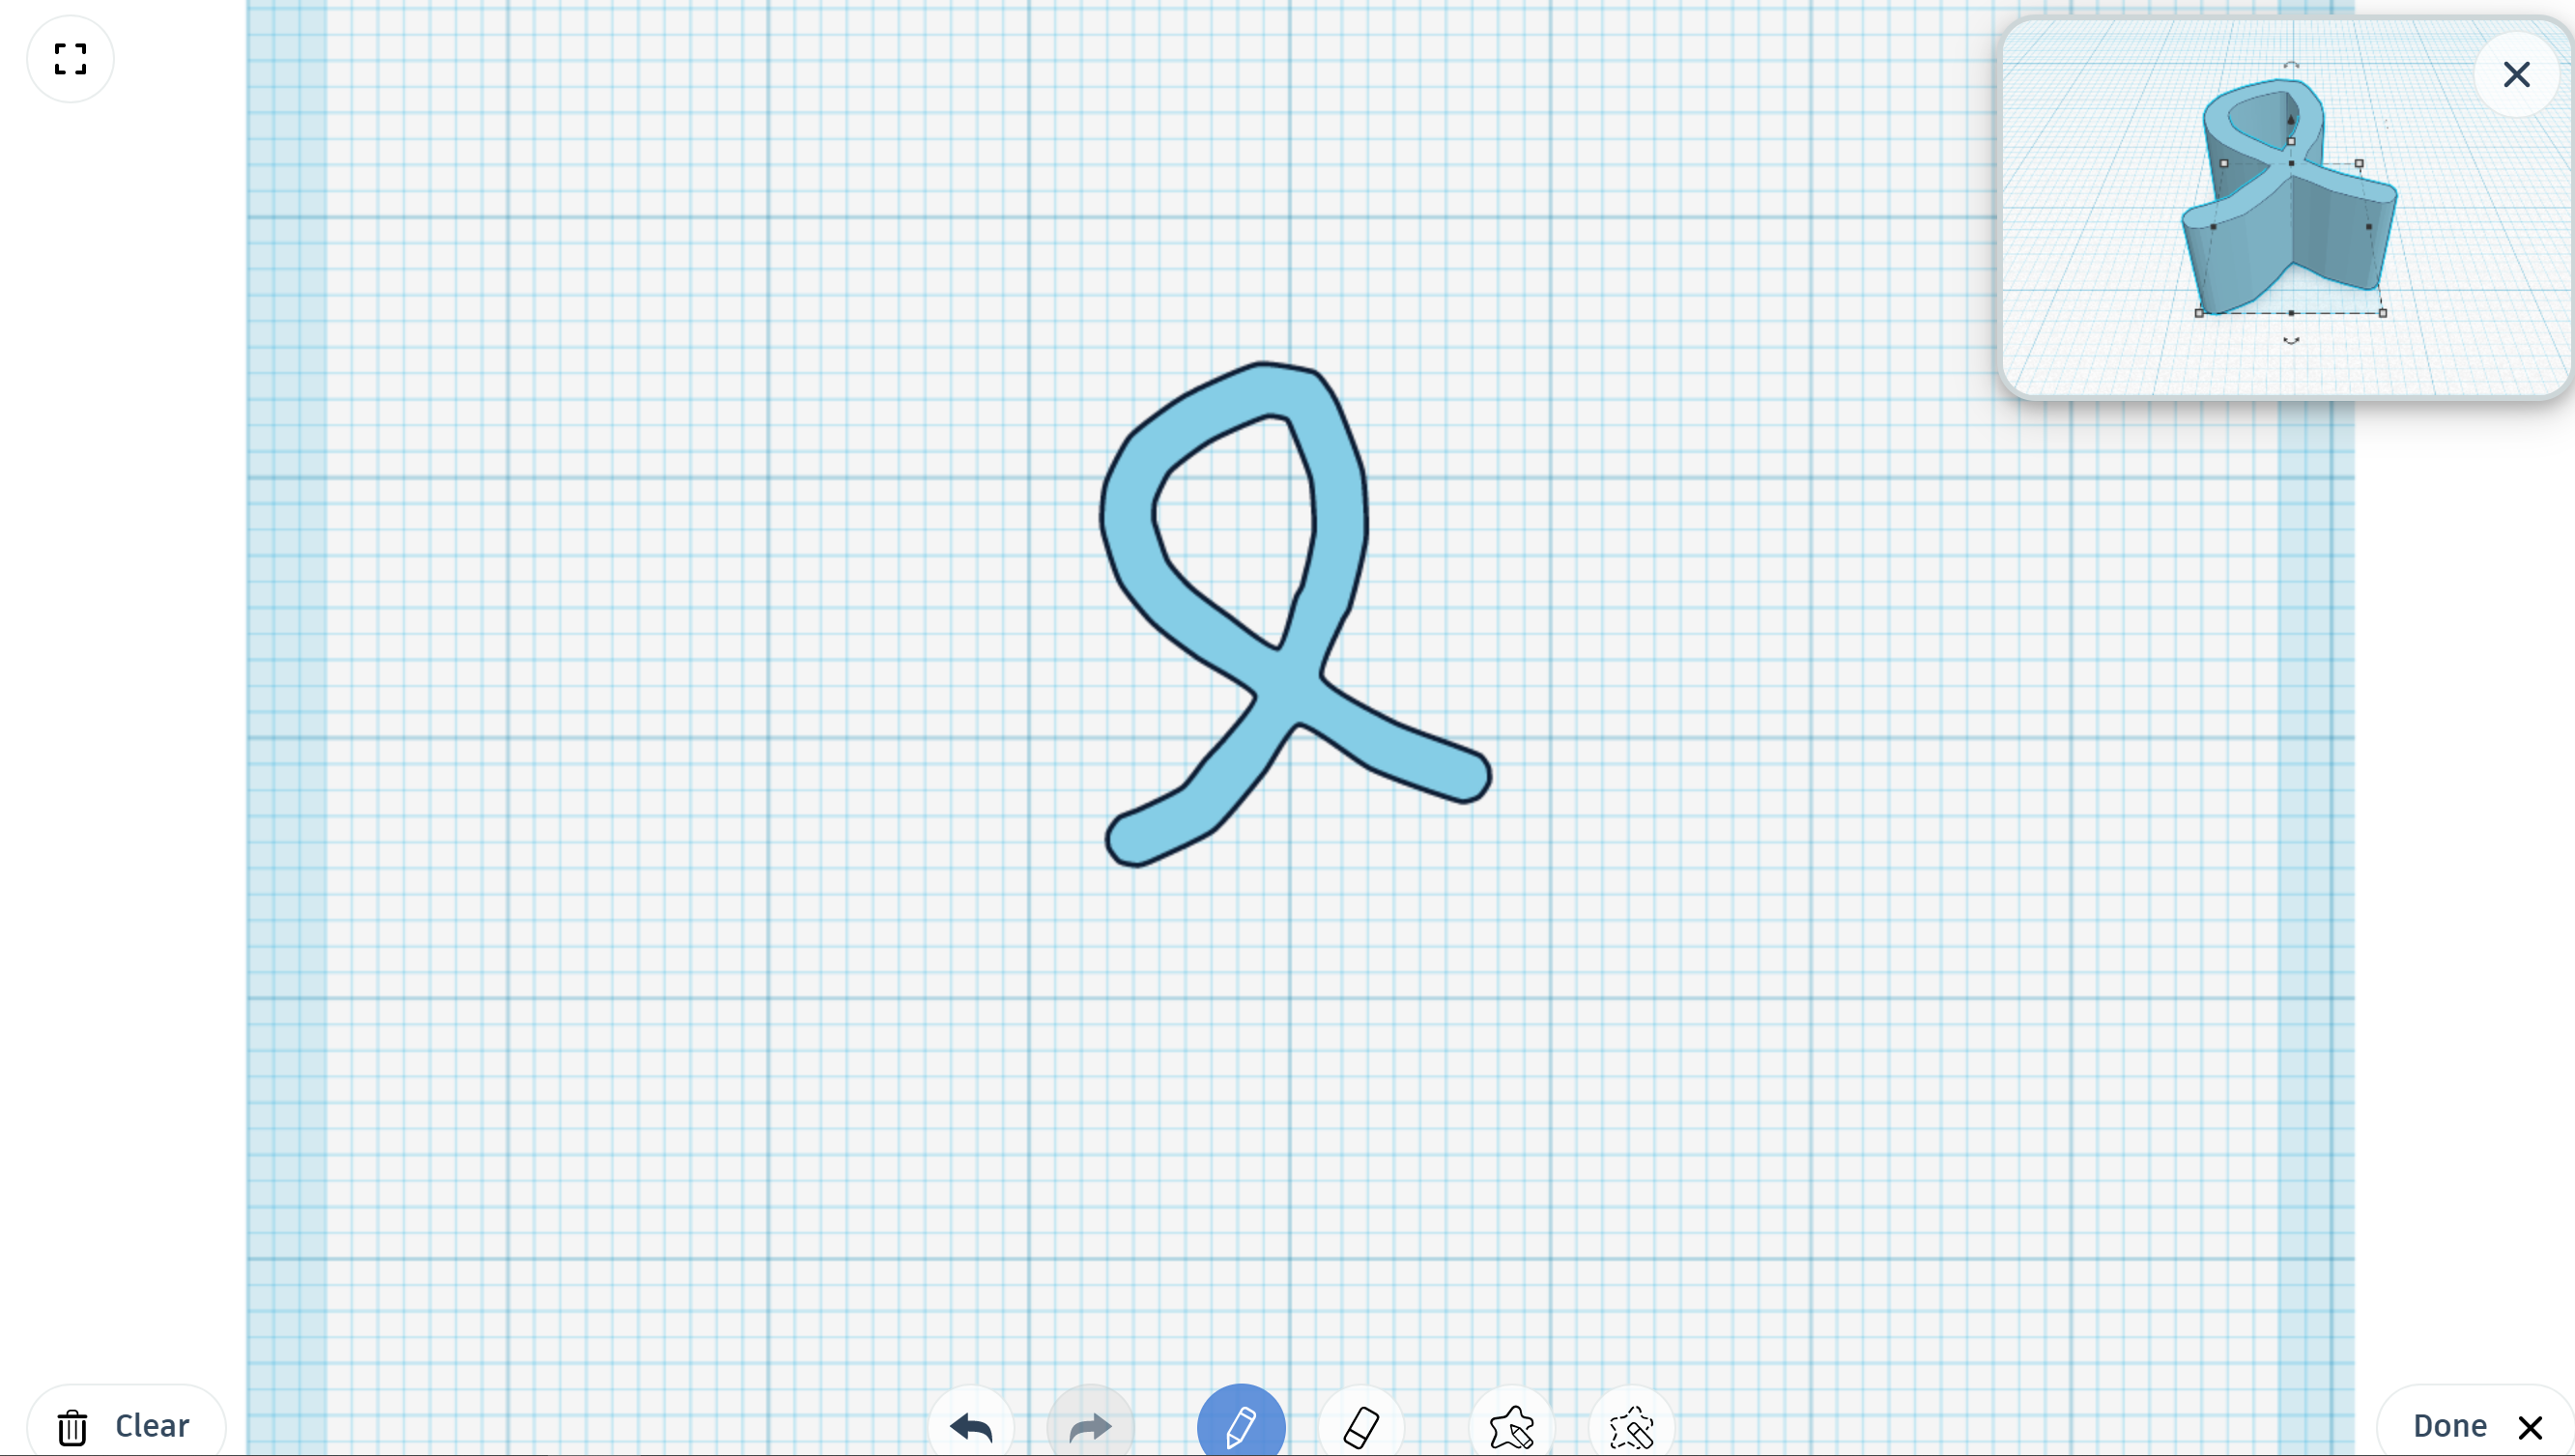
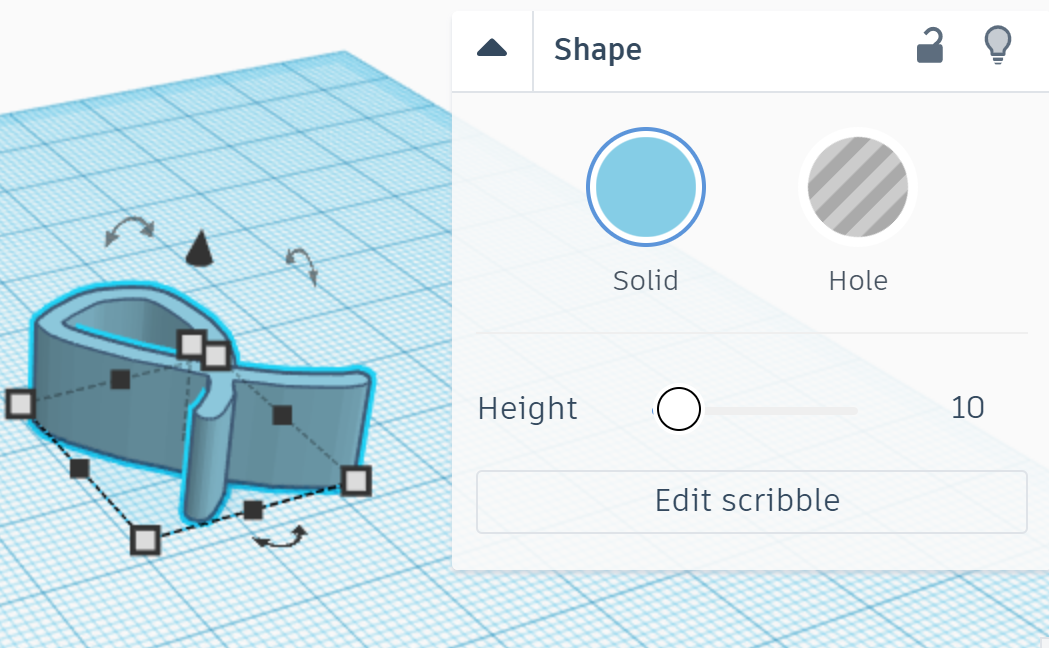
Scribble is the free draw shape. It will prompt you with a space to draw any 2D design and it will create a 3D shape of it. There is 1 setting for the scribble. Height which will change the height of the shape.
Roof
The roof will create a roof that you can edit. There are no settings for the roof.
Cone
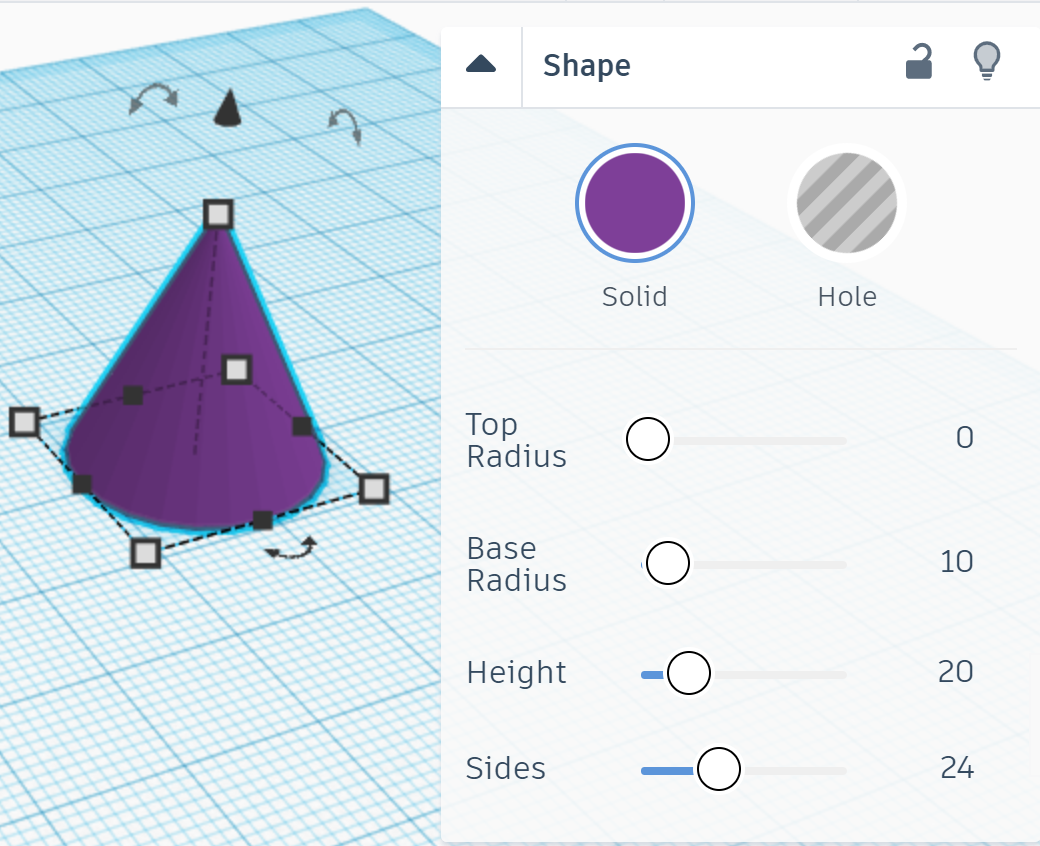
The cone will create a cone that you can edit. There are 4 settings for the cone. Top radius which will change the top radius of the shape. Base radius which will change the base radius of the shape. Height which will change how tall the shape is. And sides which will change how many faces the sides have.
Round Roof
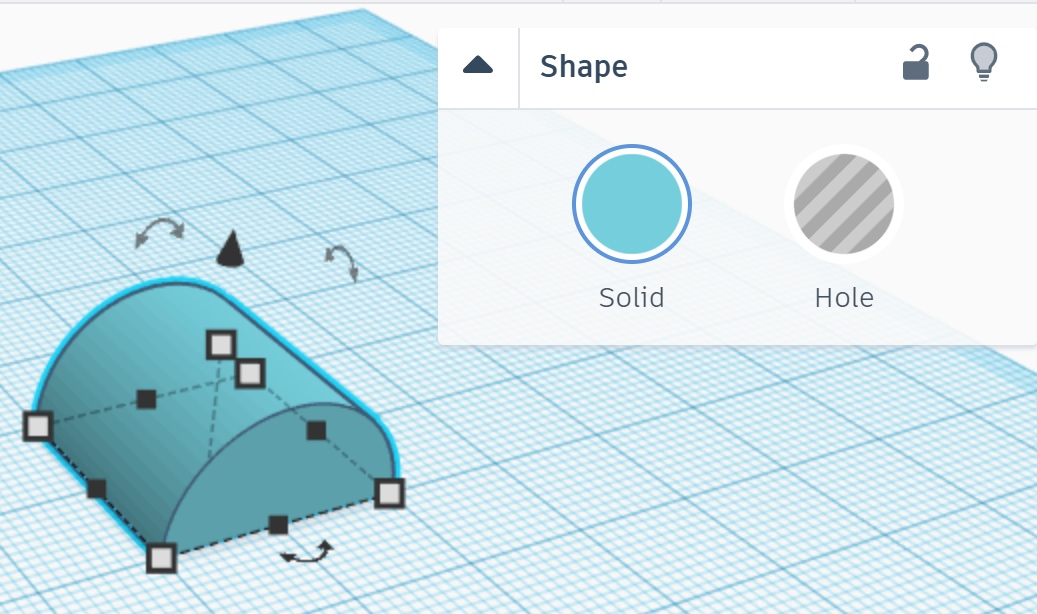
The round roof will create a round roof that you can edit. There are no settings for the round roof.
Text

The text will create a shape of text. There are 5 settings for the text. Text which will change what the shape says. Font which will change the font of the shape. Height which will change how tall the shape is. Bevel which will round out the edges. And segments which will change how many faces there are on the shape.
Wedge
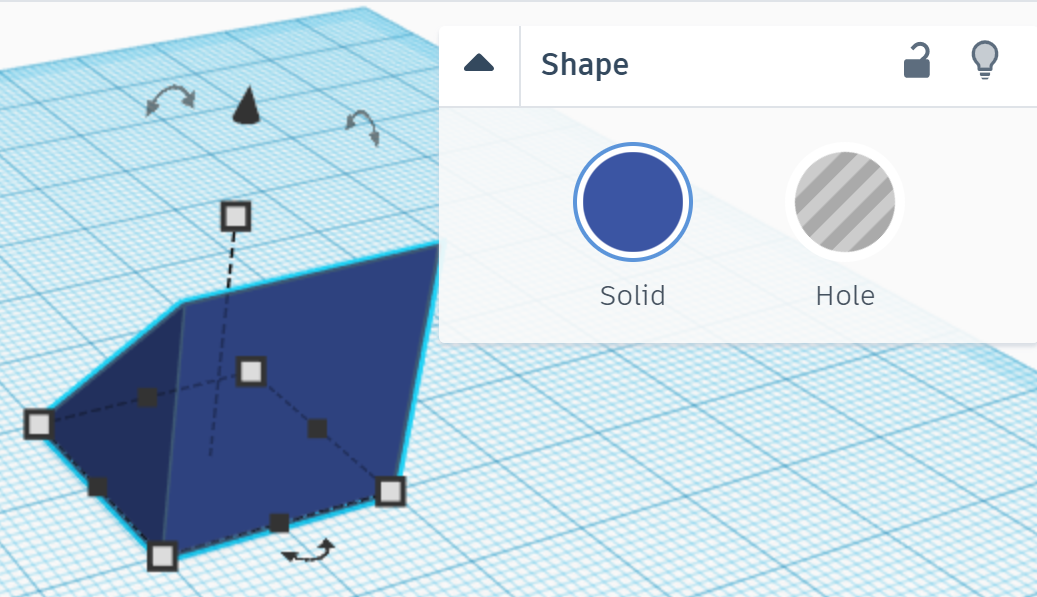
The wedge will create a wedge that you can edit. There are no settings for the wedge.
Pyramid
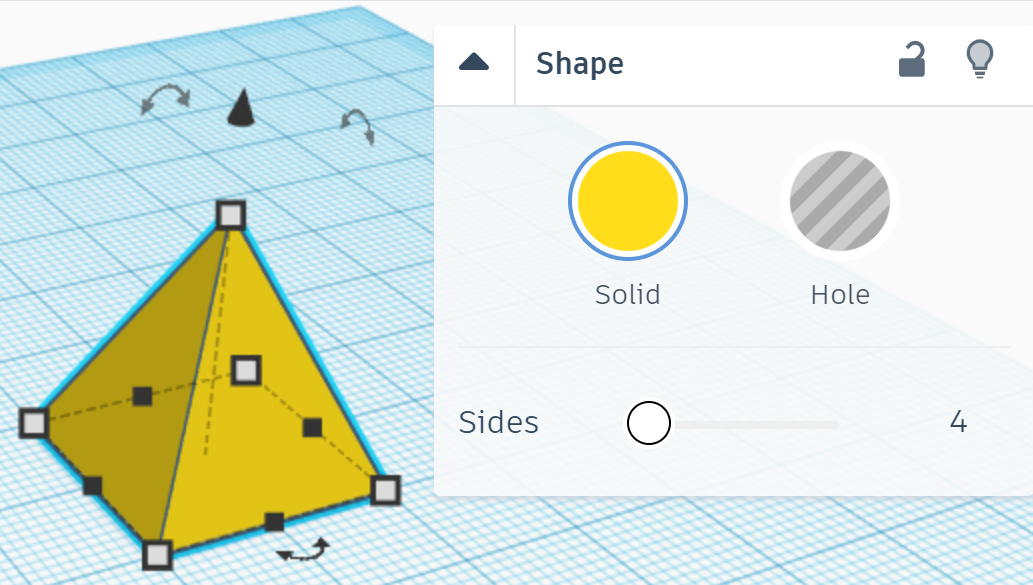
The pyramid will create a pyramid that you can edit. There is 1 setting for the pyramid. Sides which will change how many sides are on the shape.
Half Sphere
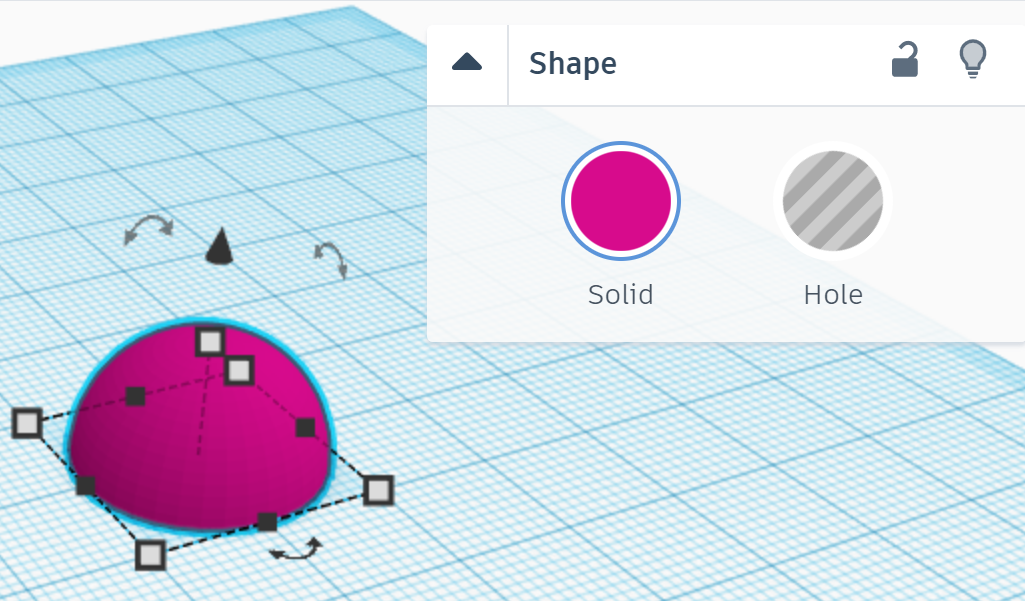
The half sphere will create a half sphere that you can edit. There are no settings for the half sphere.
Polygon
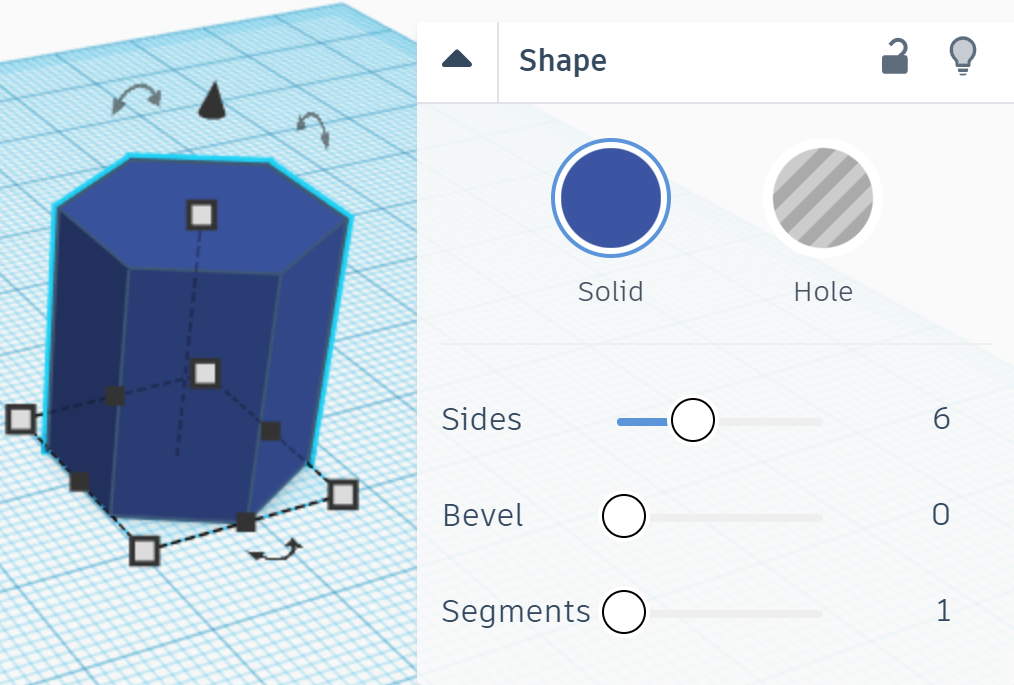
The polygon will create a polygon that you can edit. There are 3 settings for the polygon. Sides which will change how many sides are on the shape. Bevel which will round out the edges. And segments which will change how many faces are on the shape.
Paraboloid
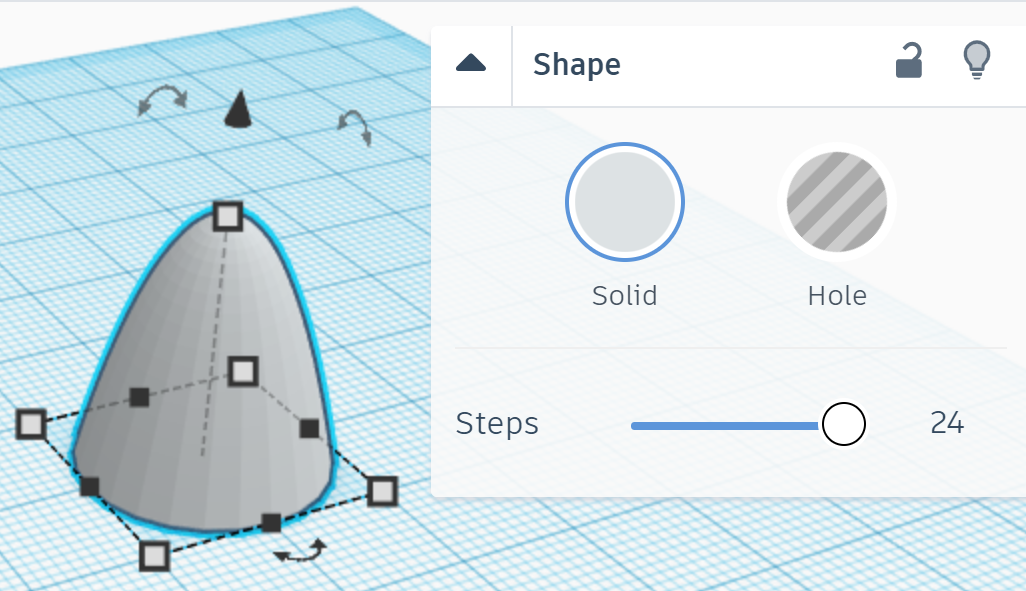
The paraboloid will create a paraboloid that you can edit. There is 1 setting for the paraboloid. Steps which will change how many faces are on the shape.
Torus
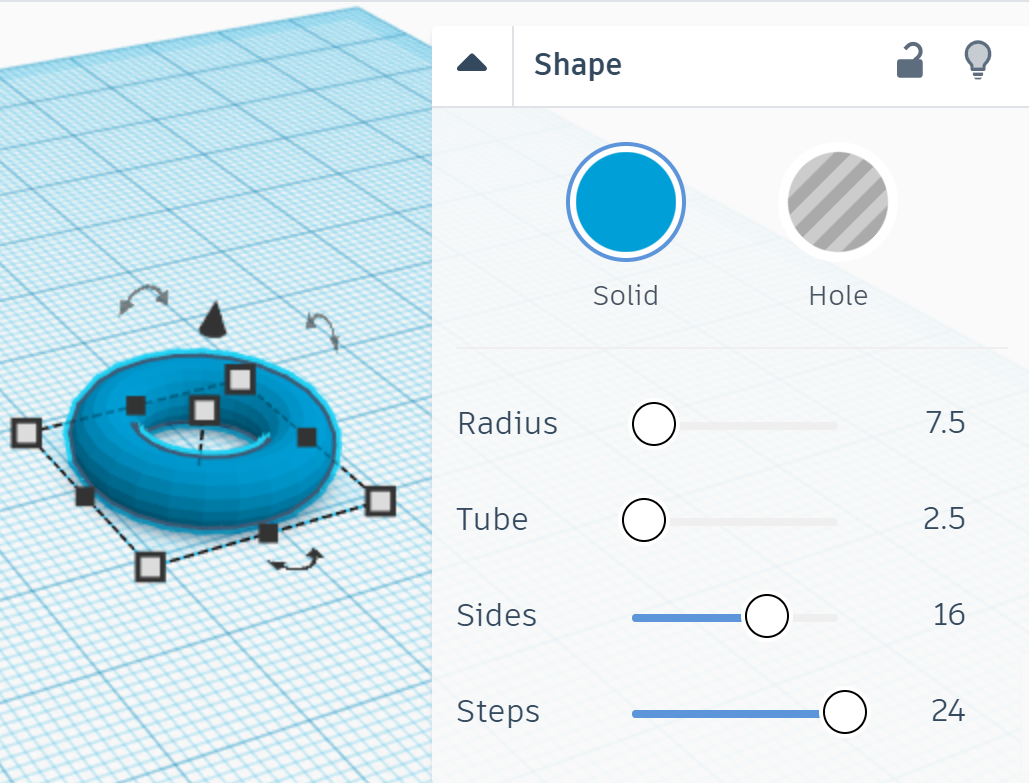
The torus will create a torus that you can edit. There are 4 settings for the torus. Radius which will change the radius of the whole shape. Tube which will change how thick the tube is. Sides which will change how many faces are on the x axis. And steps which change how many faces are on the y axis.
Tube
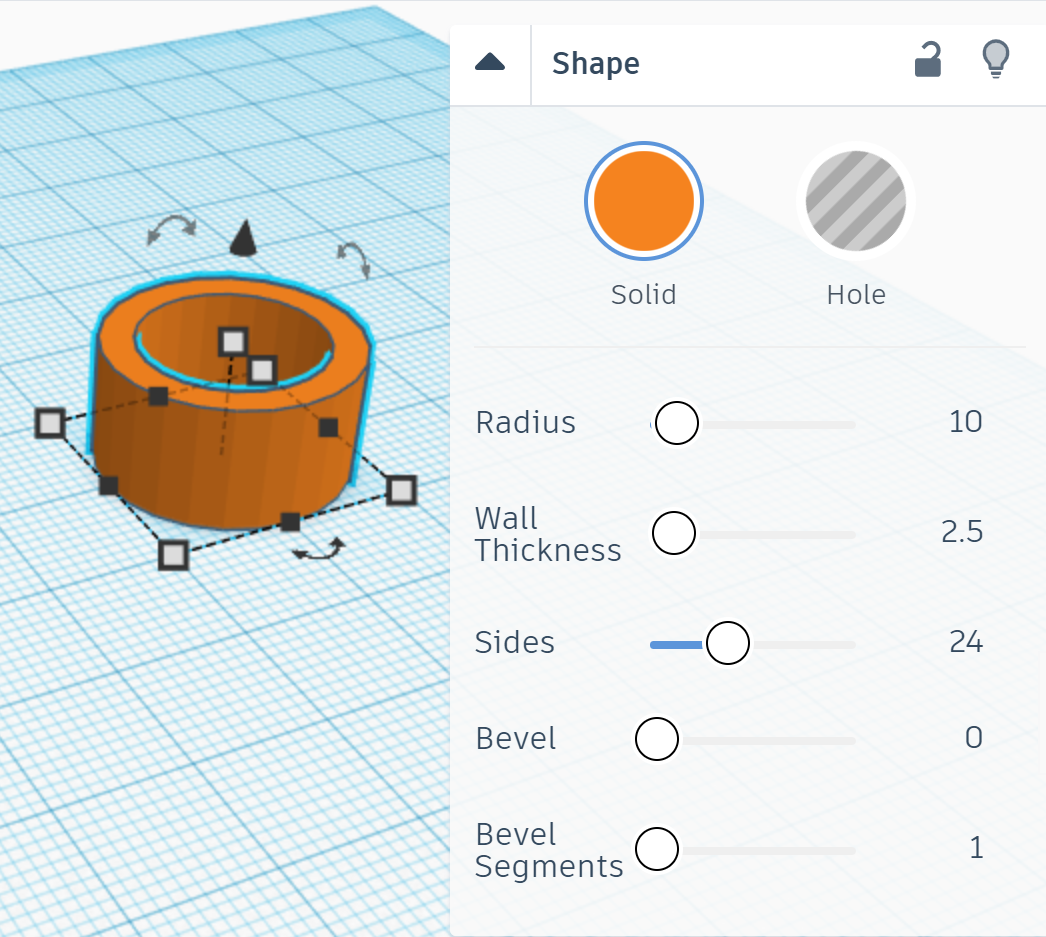
The tube will create a tube that you can edit. There are 5 settings for the tube. Radius which will change the radius of the whole shape. Wall thickness which will change how thick its walls are. Sides which will change how many faces are on its side. Bevel which will round out its edges. And bevel segments which will change how many faces are on its edges.
Heart
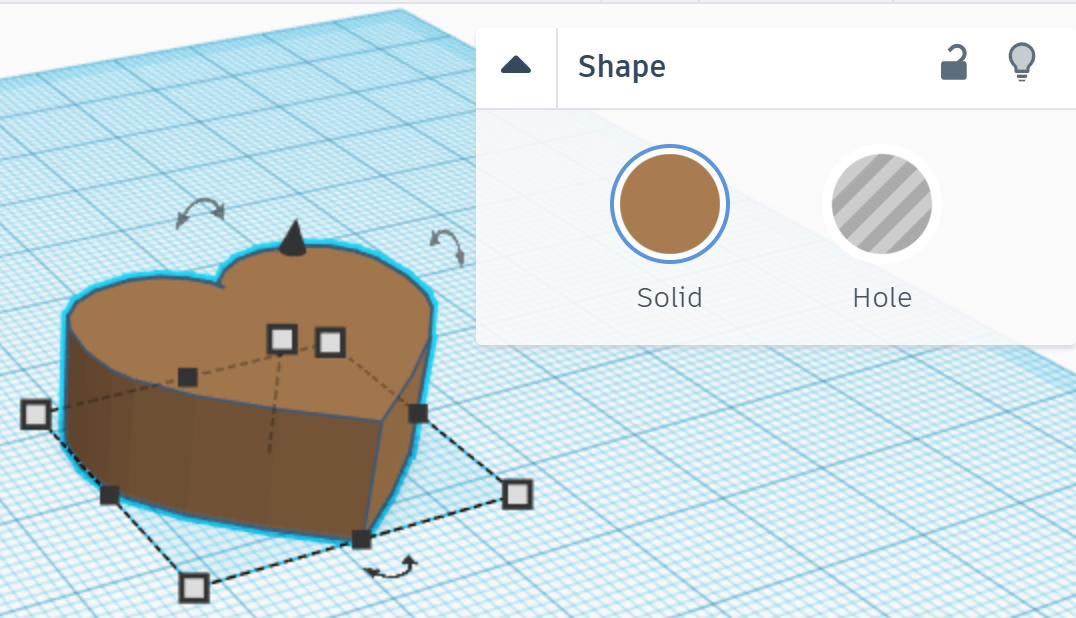
The heart will create a heart that you can edit. There are no settings for the heart.
Star
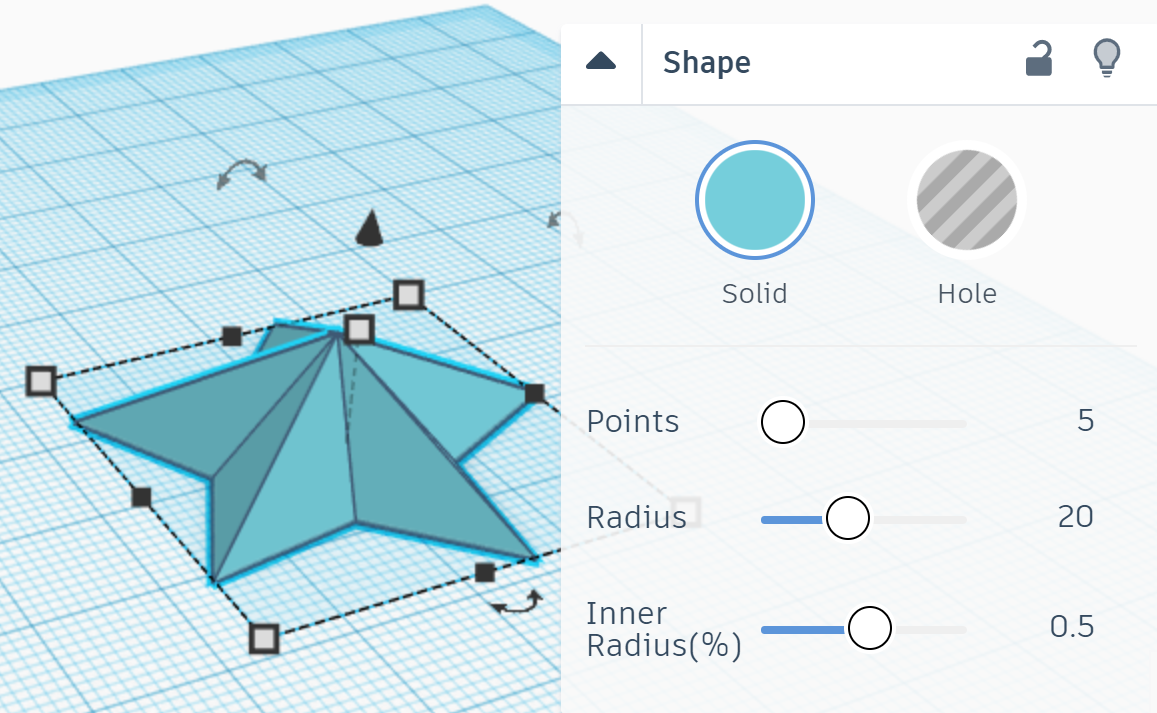
The star will create a star that you can edit. There are 3 settings for the star. Points which will change how many points are on the star. Radius which will change how far out the points go. And inner radius % which will change how far out the in between the points will go.
Star
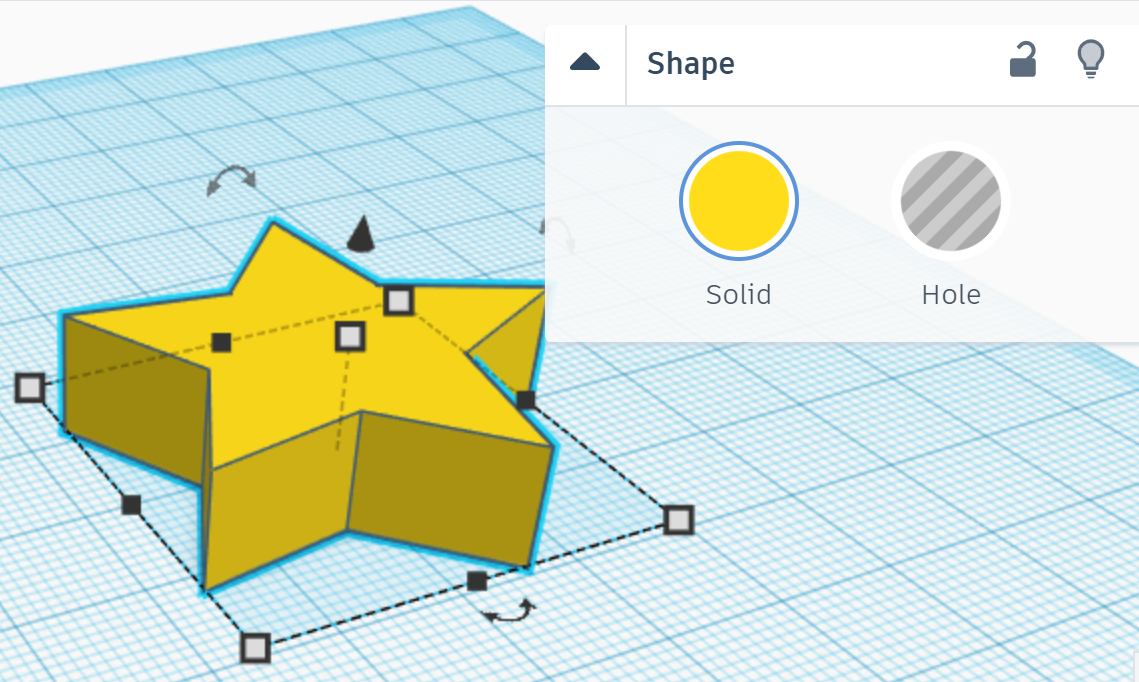
The star will create a star that you can edit. There are no settings for the star.
Icosahedron
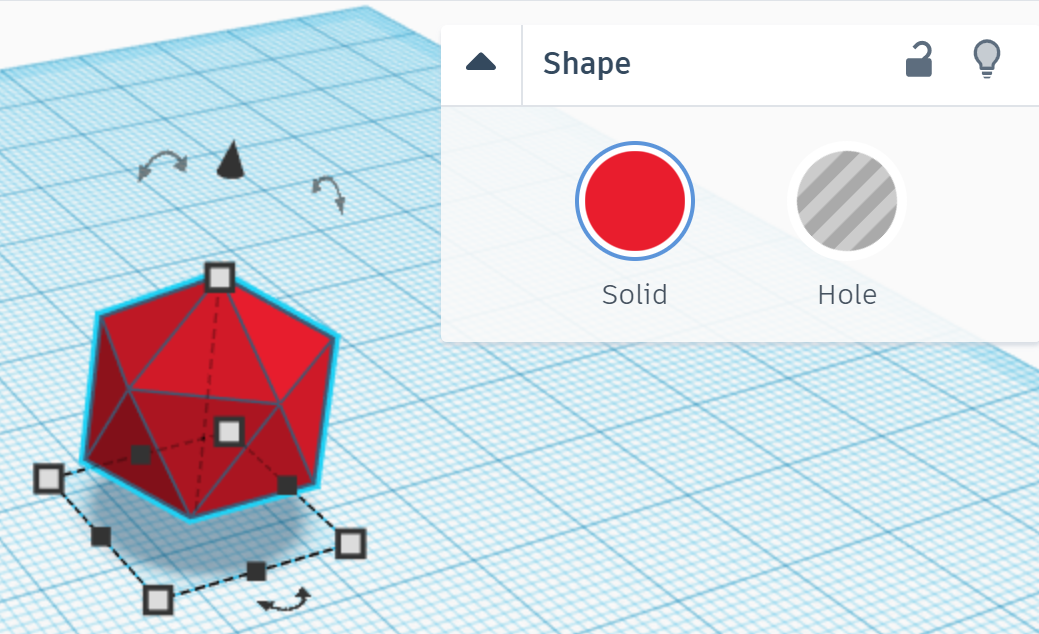
The icosahedron will create a icosahedron that you can edit. There are no settings for the icosahedron.
Ring
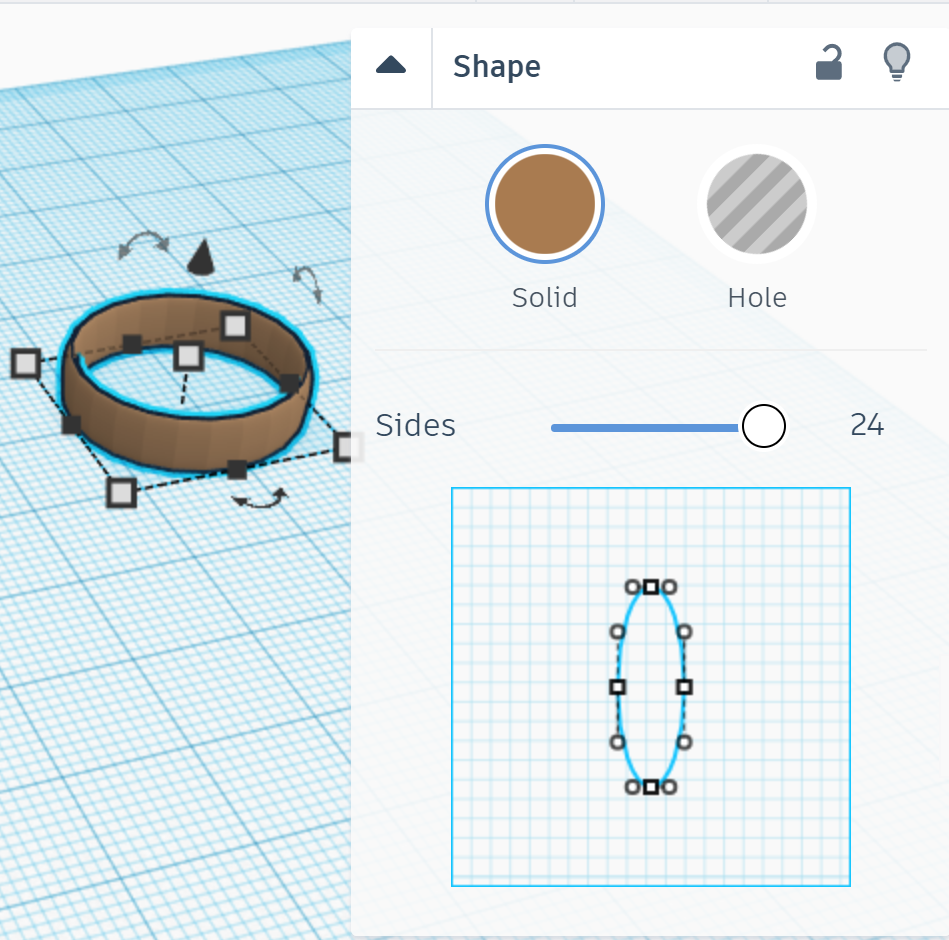
The ring will create a ring that you can edit. There are 2 settings for the ring. Sides which will change how many faces are on the side of the shape. You can also change the shape of the ring by moving the points on the given prompt.
Dice
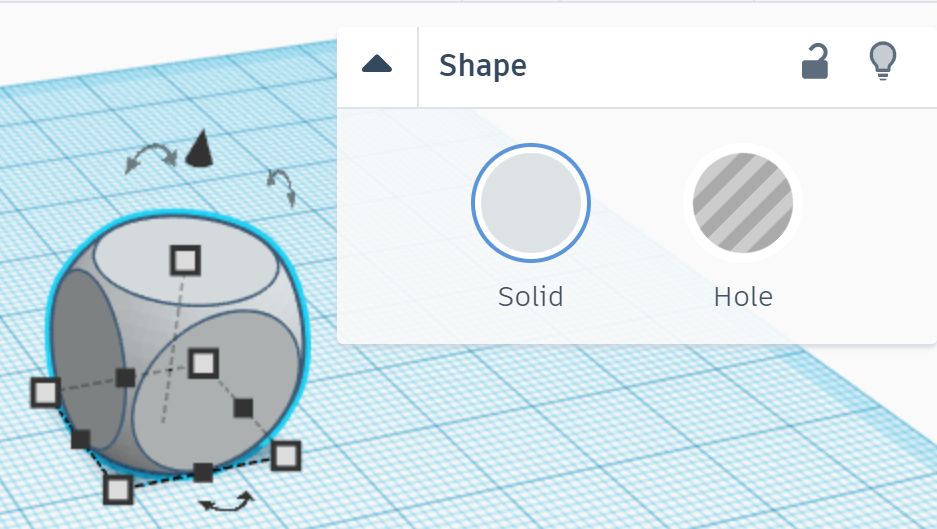
The dice will create a dice that you can edit. There are no settings for the dice.
Diamond
The diamond will create a diamond that you can edit. There are no settings for the diamond.
Holes
Holes are used to remove part of a shape by taking a shape and making it a hole. It will then be grouped with the solid you want to have part removed from. To change a solid to a hole you can select the solid and press H or by changing it to hole in its settings