Basic: How to Draw a Straight Line
by JMacGregor in Workshop > Tools
2414 Views, 7 Favorites, 0 Comments
Basic: How to Draw a Straight Line

Would you like to make good, straight marks to make nice, straight cuts in your projects?
Want to make corners that actually look like proper corners instead of one of those crazy side roads that slew into an intersection at some unfortunately fish-tailing tilt?
A little familiarity with a 'square' is all you need!
SKILL LEVEL: complete beginner :)
Pretty good at crafts? Skip along to the BOLD highlights.
Need more explanation? Take your time and stroll though all the helpful details.
Supplies
A square (any size, but smaller is better for this)
Small piece of wood to play with
pencil
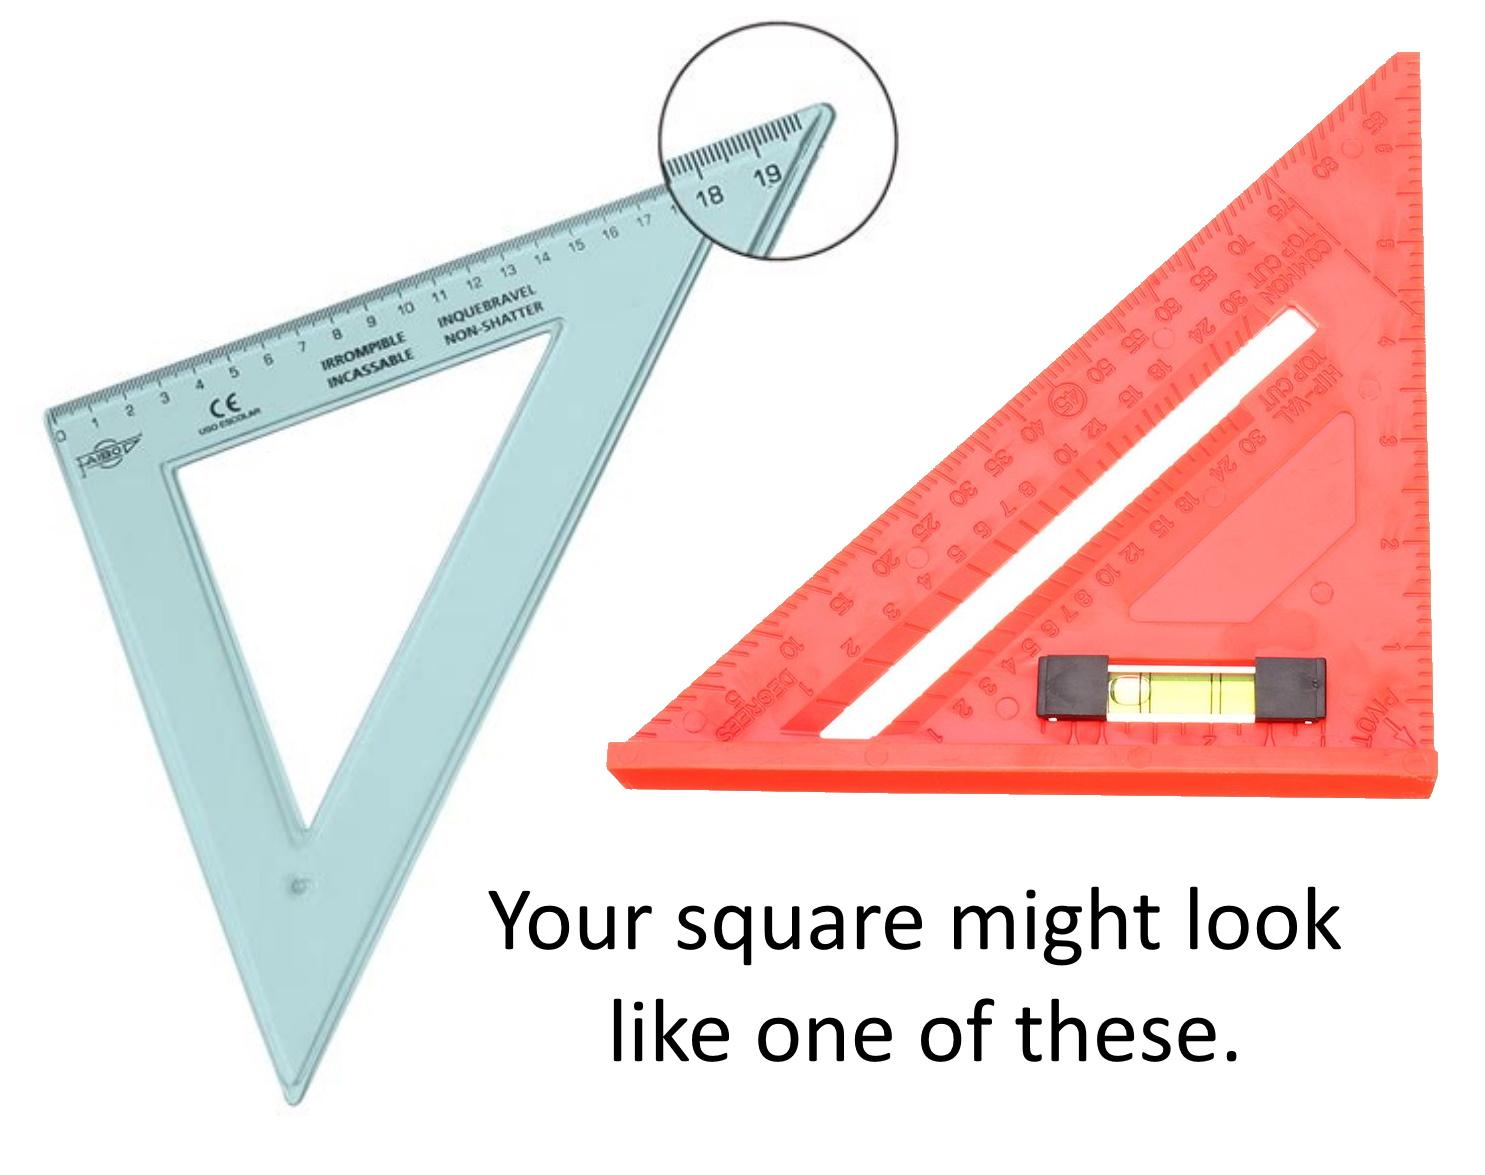
(Your square might be plastic. Mine is a bit fancier. Both will work just fine for this lesson.)
How to Use a WHAT?
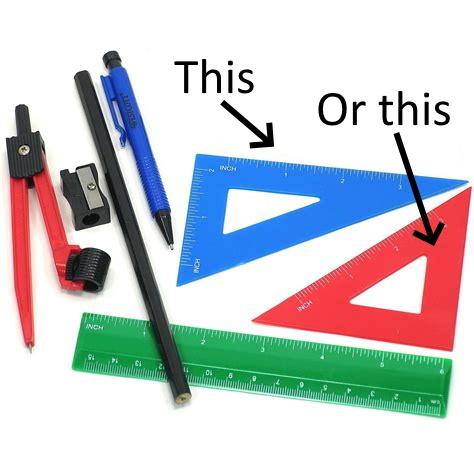
Ever see that triangular plastic thingamajig that comes in a geometry kit? You know, the one included with the mini pencil and the compass? Many of us never learn what that thingamajig is, let alone what it does. We might venture so far as to use it as a ruler, or a straight edge-- or we might just give it a funny look and chuck it in the back of the 'forget me' drawer. Well, go open that drawer, fish around past the gummy glue sticks, the mound of markers, the lost batteries, and that one screwdriver you blamed your roommate for losing. Find the thingamajig?
That triangle is a square.
"What!?" you exclaim in surprise. "It can't be!"
Trust me on this. It's a square.
"No way! I know my shapes. Three sides is a triangle."
Nope. Square.
"Aw! Go feel your head! Are you saying my beloved kindergarten teacher was wrong?"
Whoa! Easy there. That triangle in your hands (yes, the one you are thinking about using on me) is a handy-dandy, truly amazing, and yet refreshingly simple device for MAKING things square. Because of this, we have dubbed it a 'square'. Probably because it is a lot easier than calling it 'that cool triangular thingamajig for making lines and angles'.
- A 90 degree angle is called a 'right' angle.
- A standard box-like 'corner' is a 90 degree angle.
- In the shop, a corner that is a perfect 90 degrees is 'square'.
I'm sure you can now appreciate the efficiency inherent in the name. Yes?
"Sounds great," you say. "But how do I use it?"
Ahhh! Therein lies the fun.
Which Way to Hold It
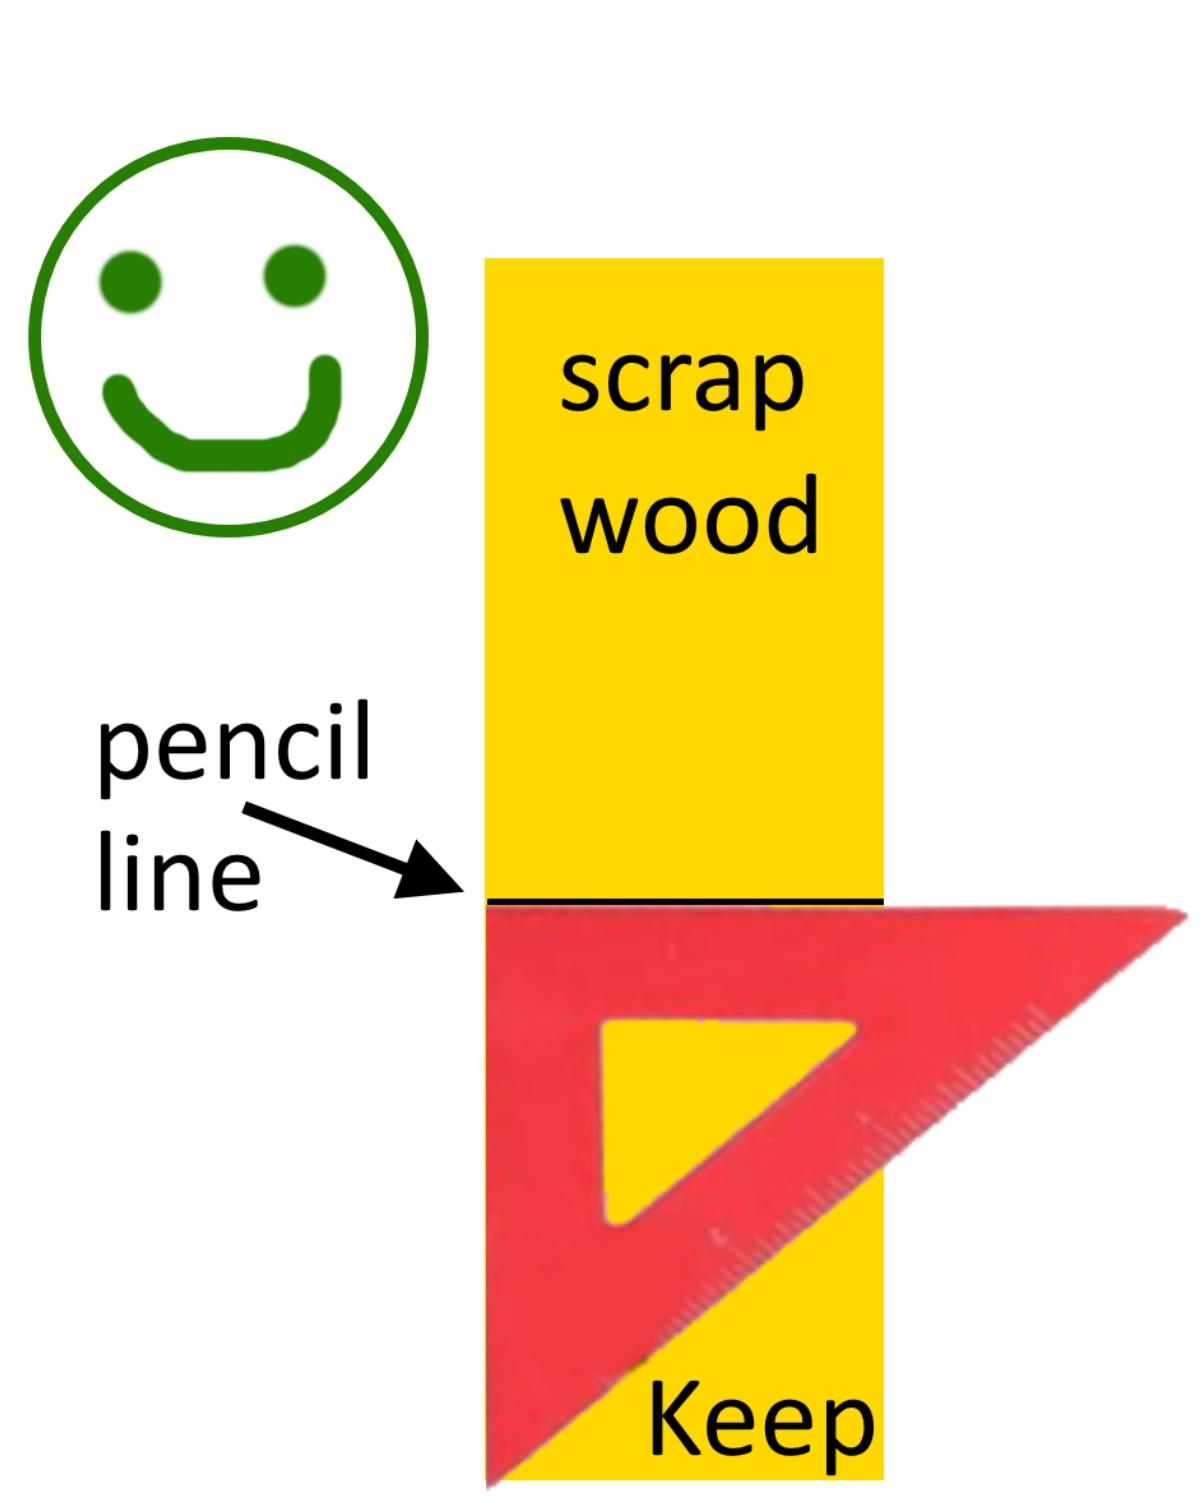
Which way do you hold the square? I was taught to 'work to the good'.
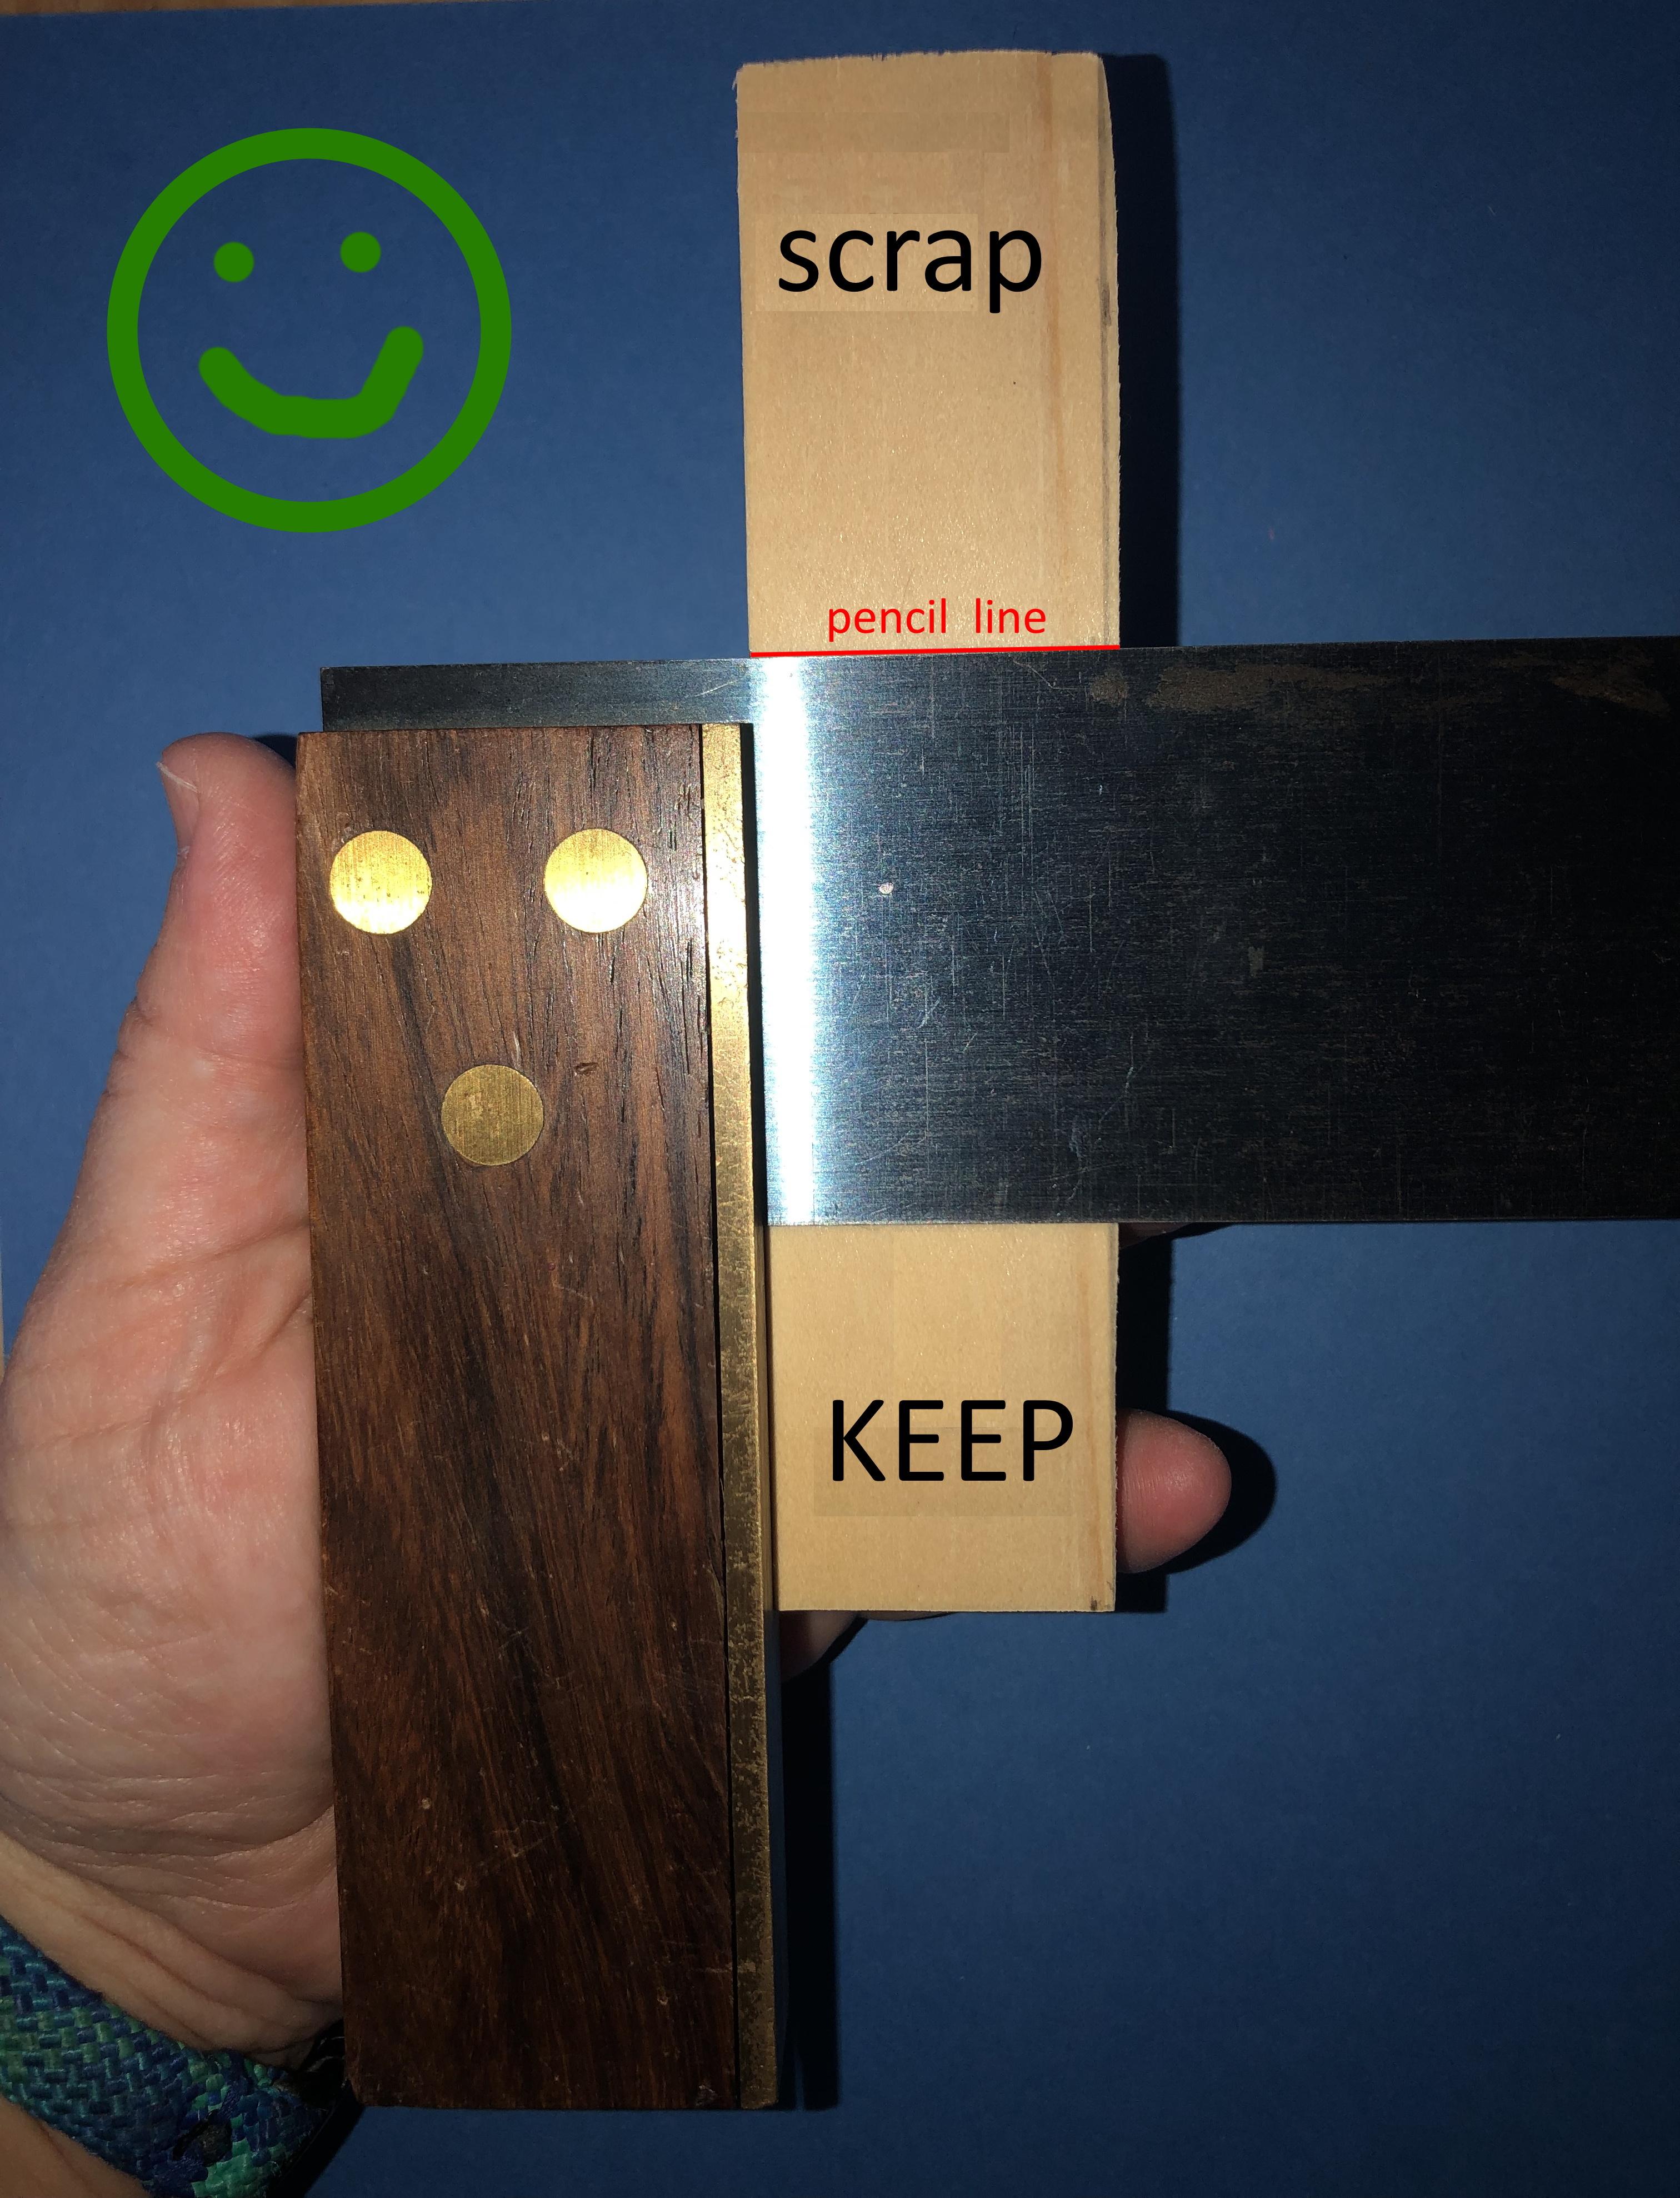
GOOD: (See happy image)
Put the bulk of the square on the same side of the wood that you want to KEEP and use in your project.
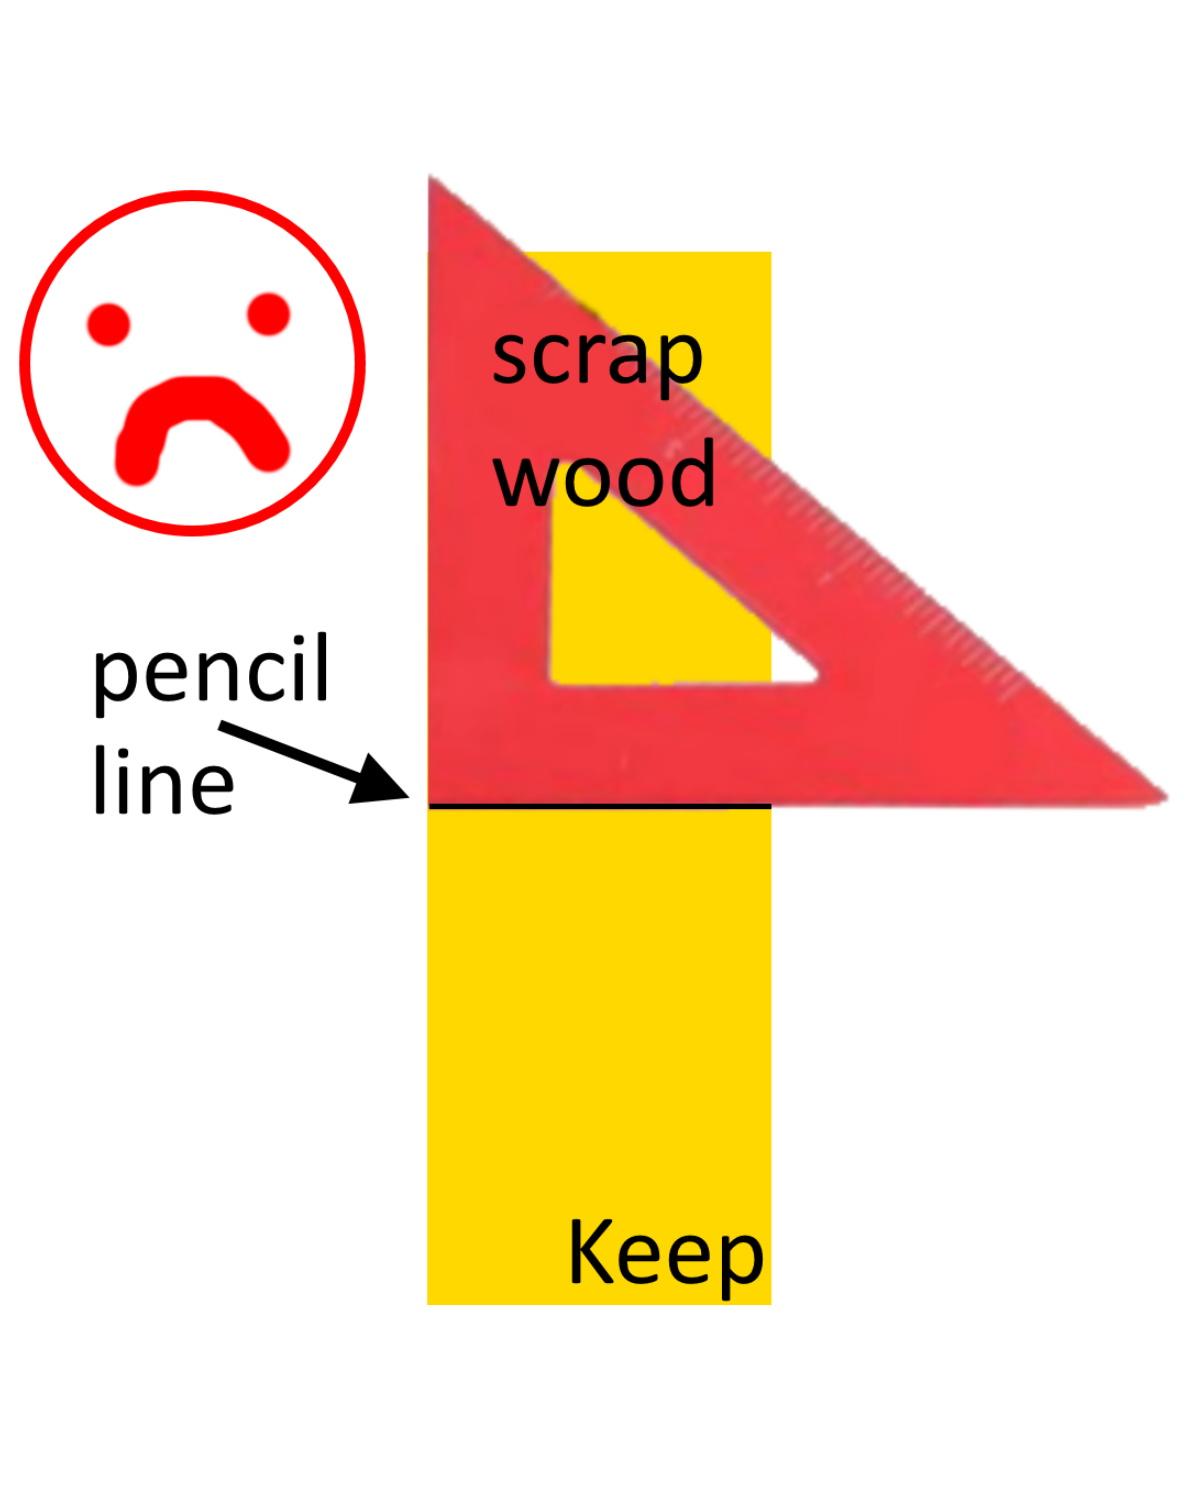
NOT SO GOOD: (See frown image)
The bulk of the square is lined up with the side of the wood that will NOT be used. (It might be used later, but it's not the piece you are currently cutting and wanting.)
What difference does it make? Well, in general terms-- it may not be the most important decision of your life. In terms of precision-- it can make your whole project come together more accurately, more smoothly, with less paring down or sanding off, which also means with less frustration. The smaller the item being marked, the more being a degree or two off can make a huge difference.
When you set the square 'to the good', it does a good job. Why 'square up' to the bit of wood you don't want? It may not be as straight as the side you are keeping and you will, all unknowing, draw a line that is crooked.
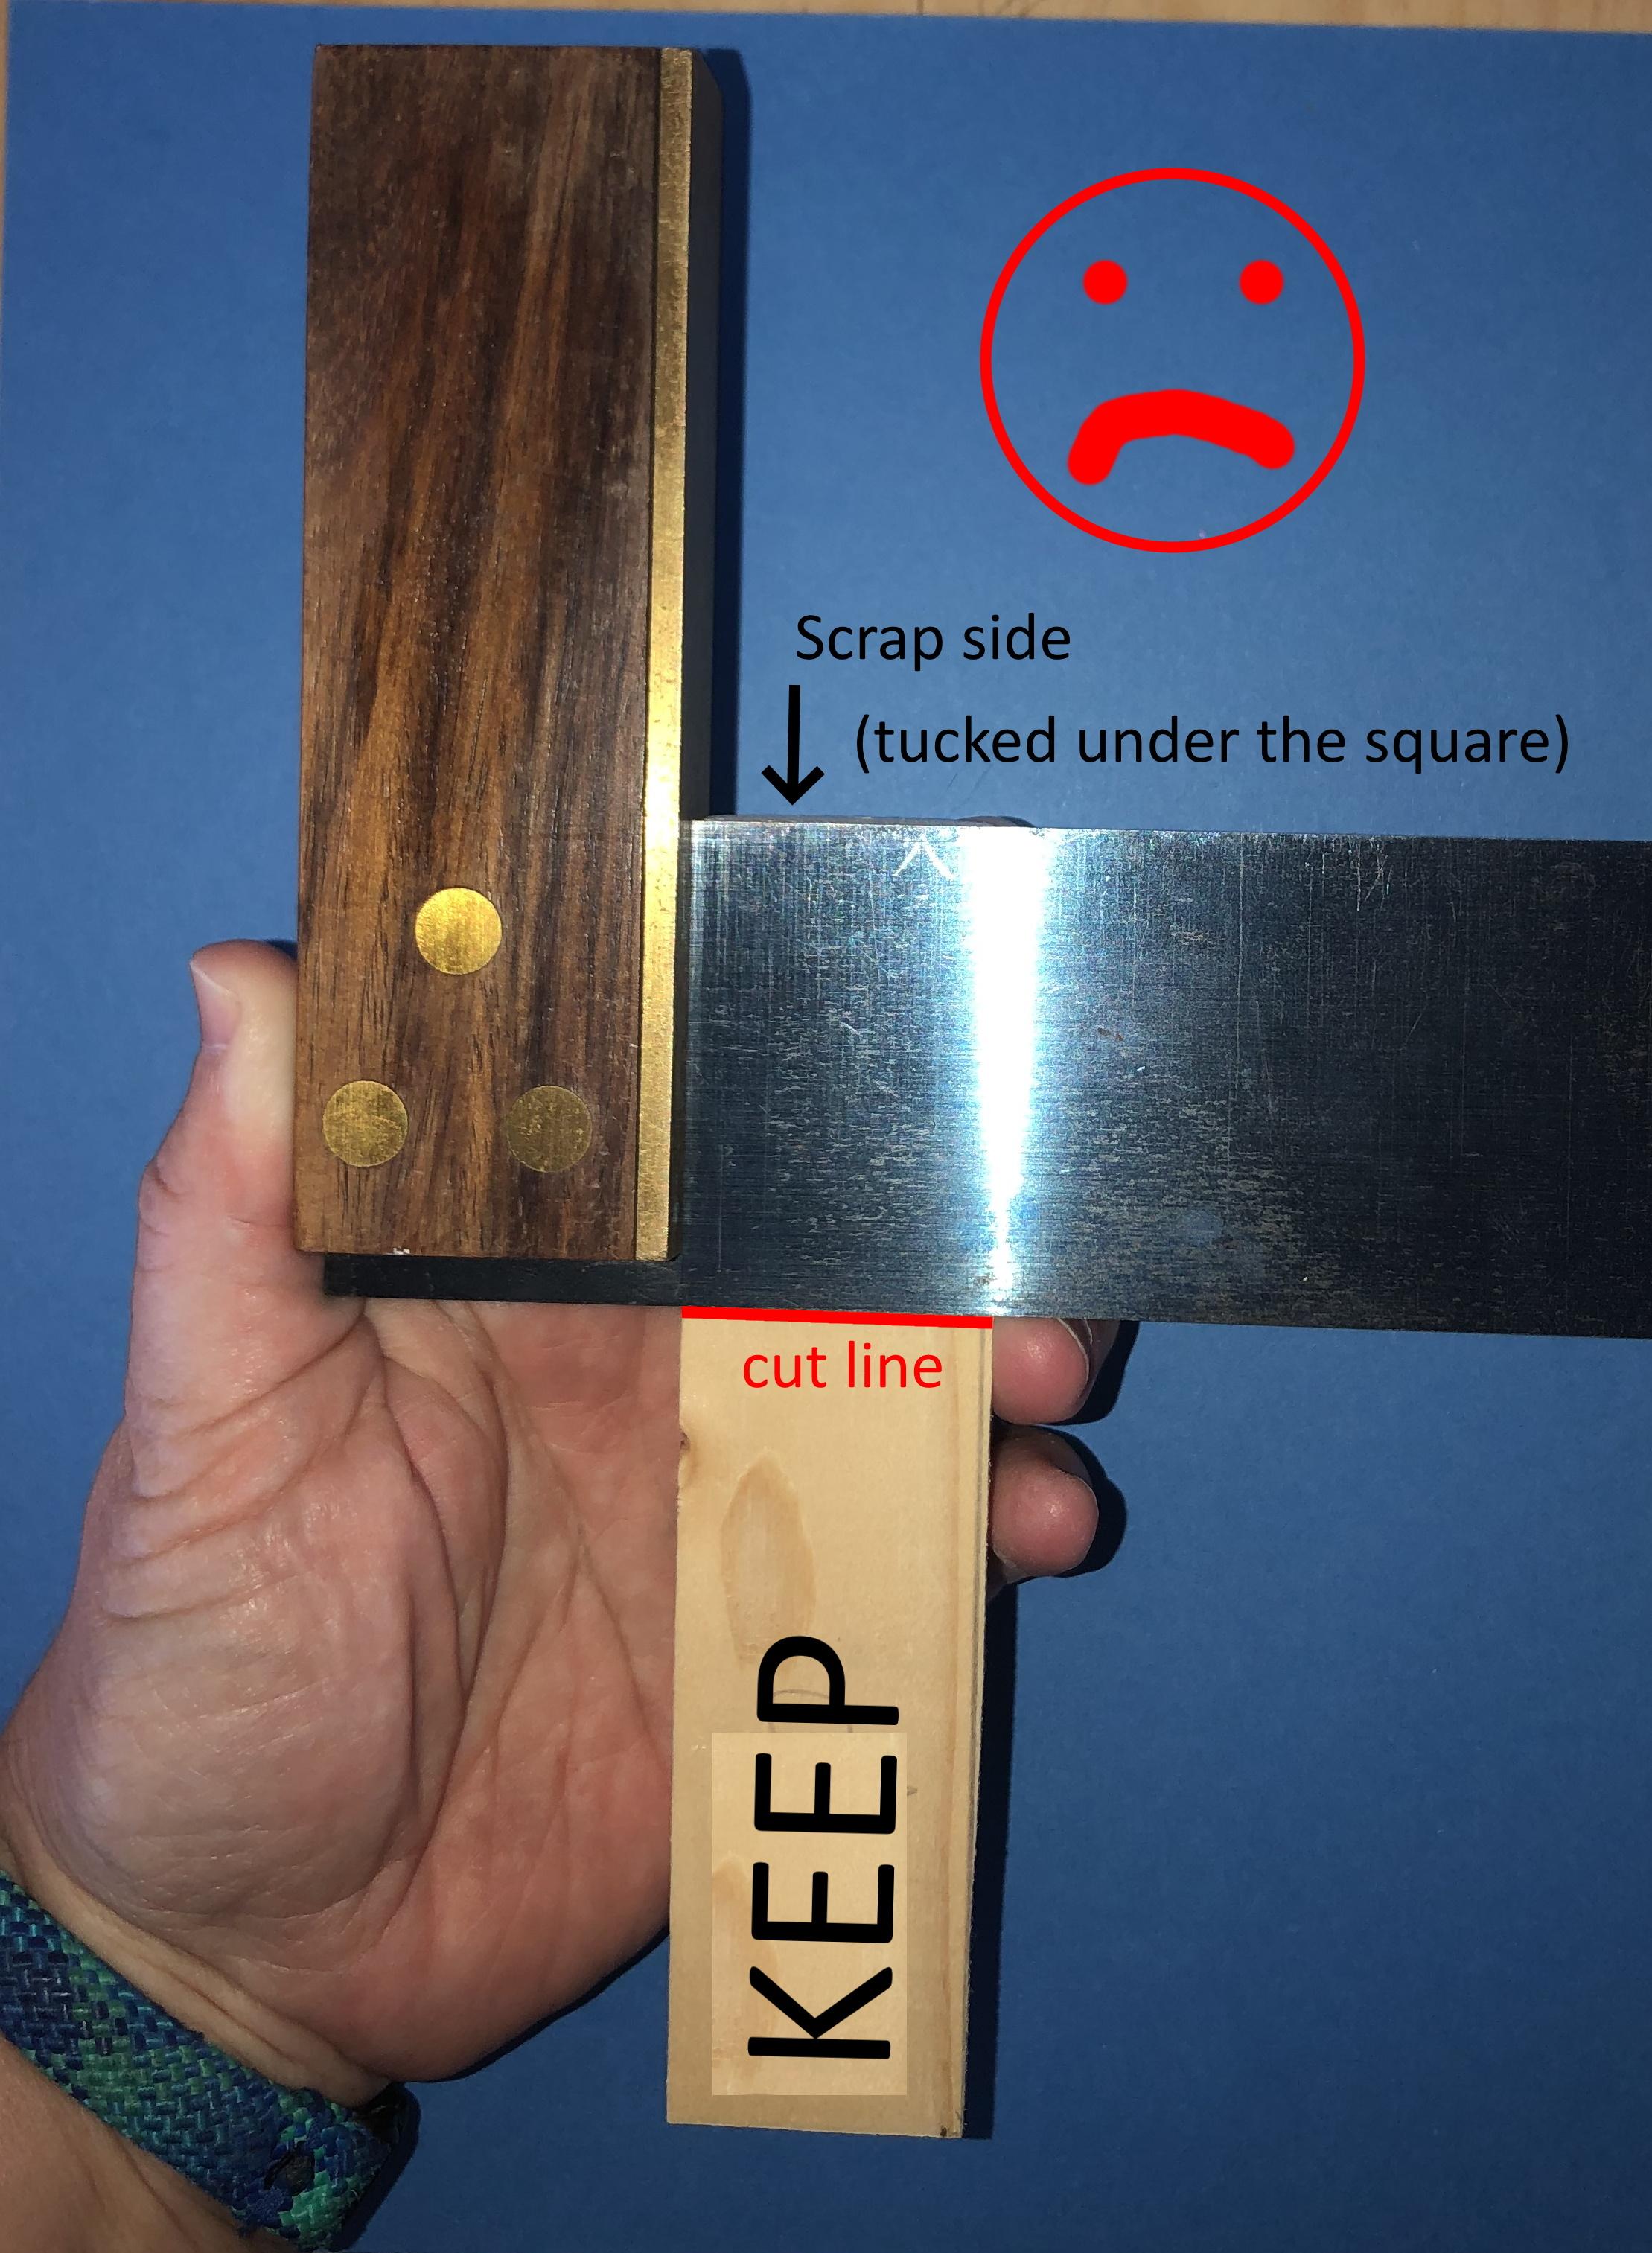
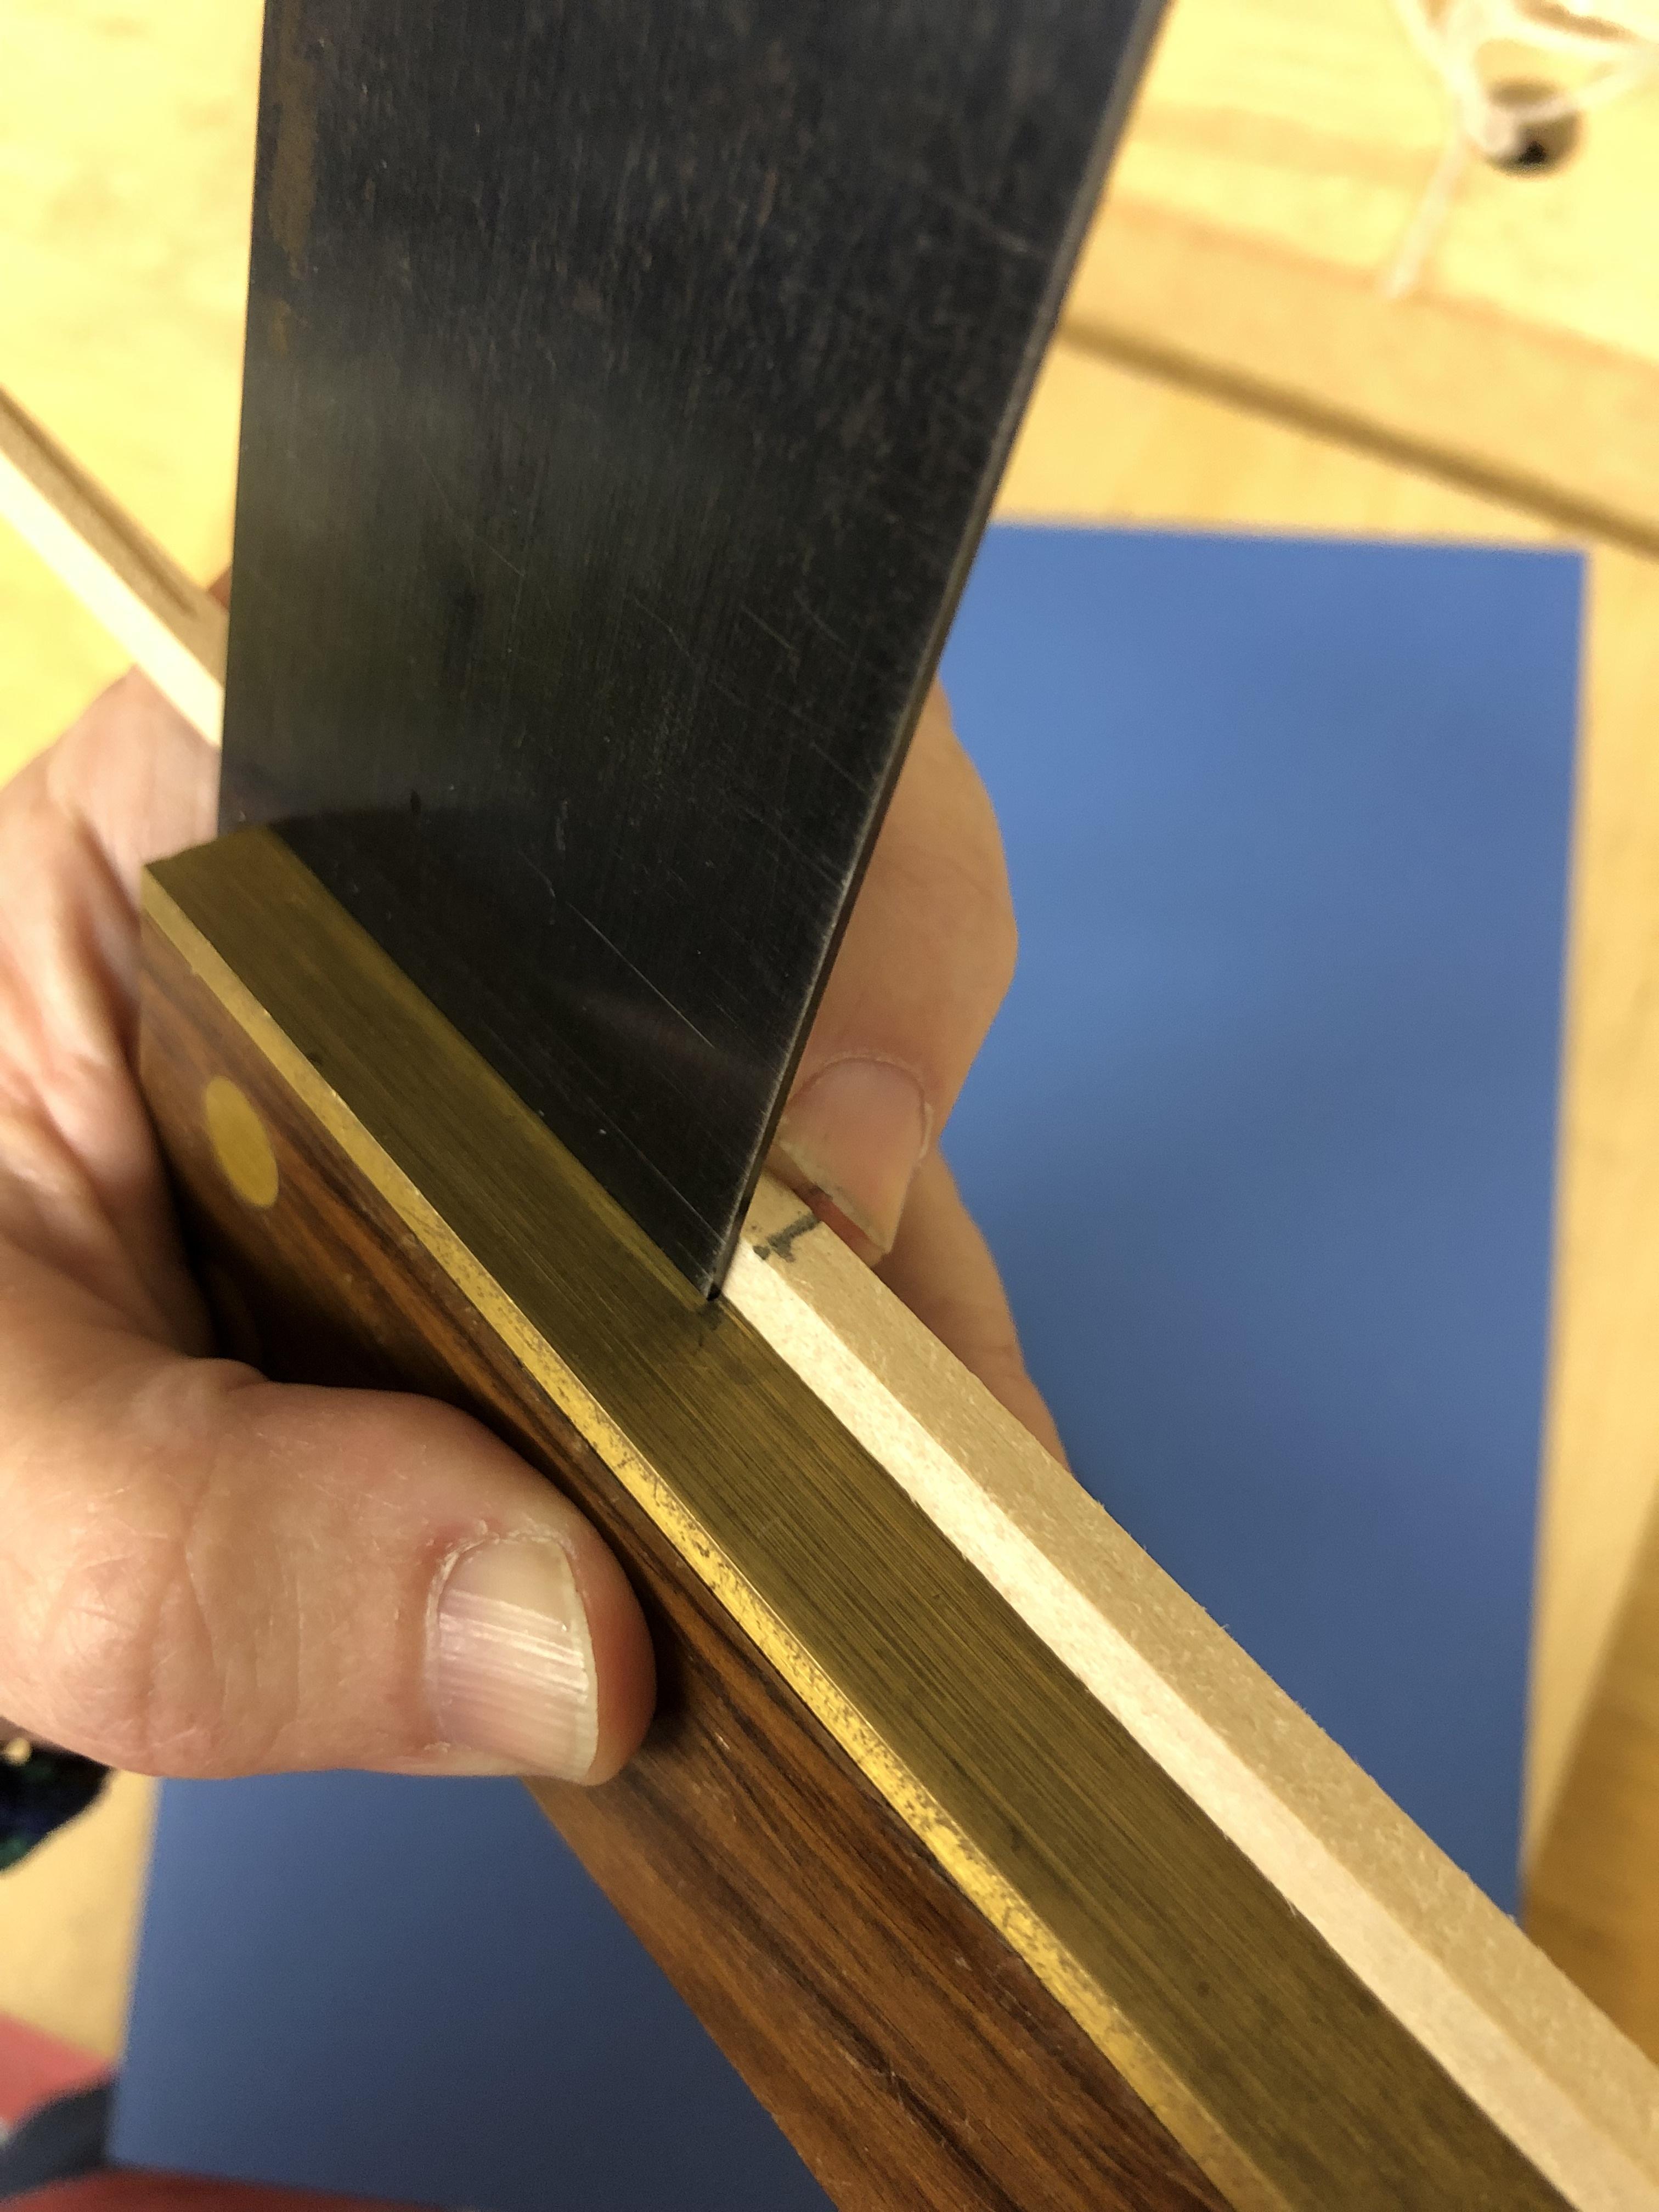
First Mark
So, you're ready to make your mark. Line your material up, making sure it remains flat against the square. Double check that you are marking what you mean to mark and that your square is 'to the good'. (Measure twice, cut once, my friends :)
Now, draw your line! See image.
NOTE: You will notice in the picture that my line is not shoulder-to-shoulder with the square. That is only because my line was grey and my steel square is grey, thus making the line hard to see. Your square and your mark should be neighbors on a first-name basis.
TIP: Don't want pencil lines on your project? Scribe your lines with a sharp awl, a fine tip nail, or a sharp craft knife. Any of these tools will scratch a line instead of leaving an unsightly lead / ink trail.
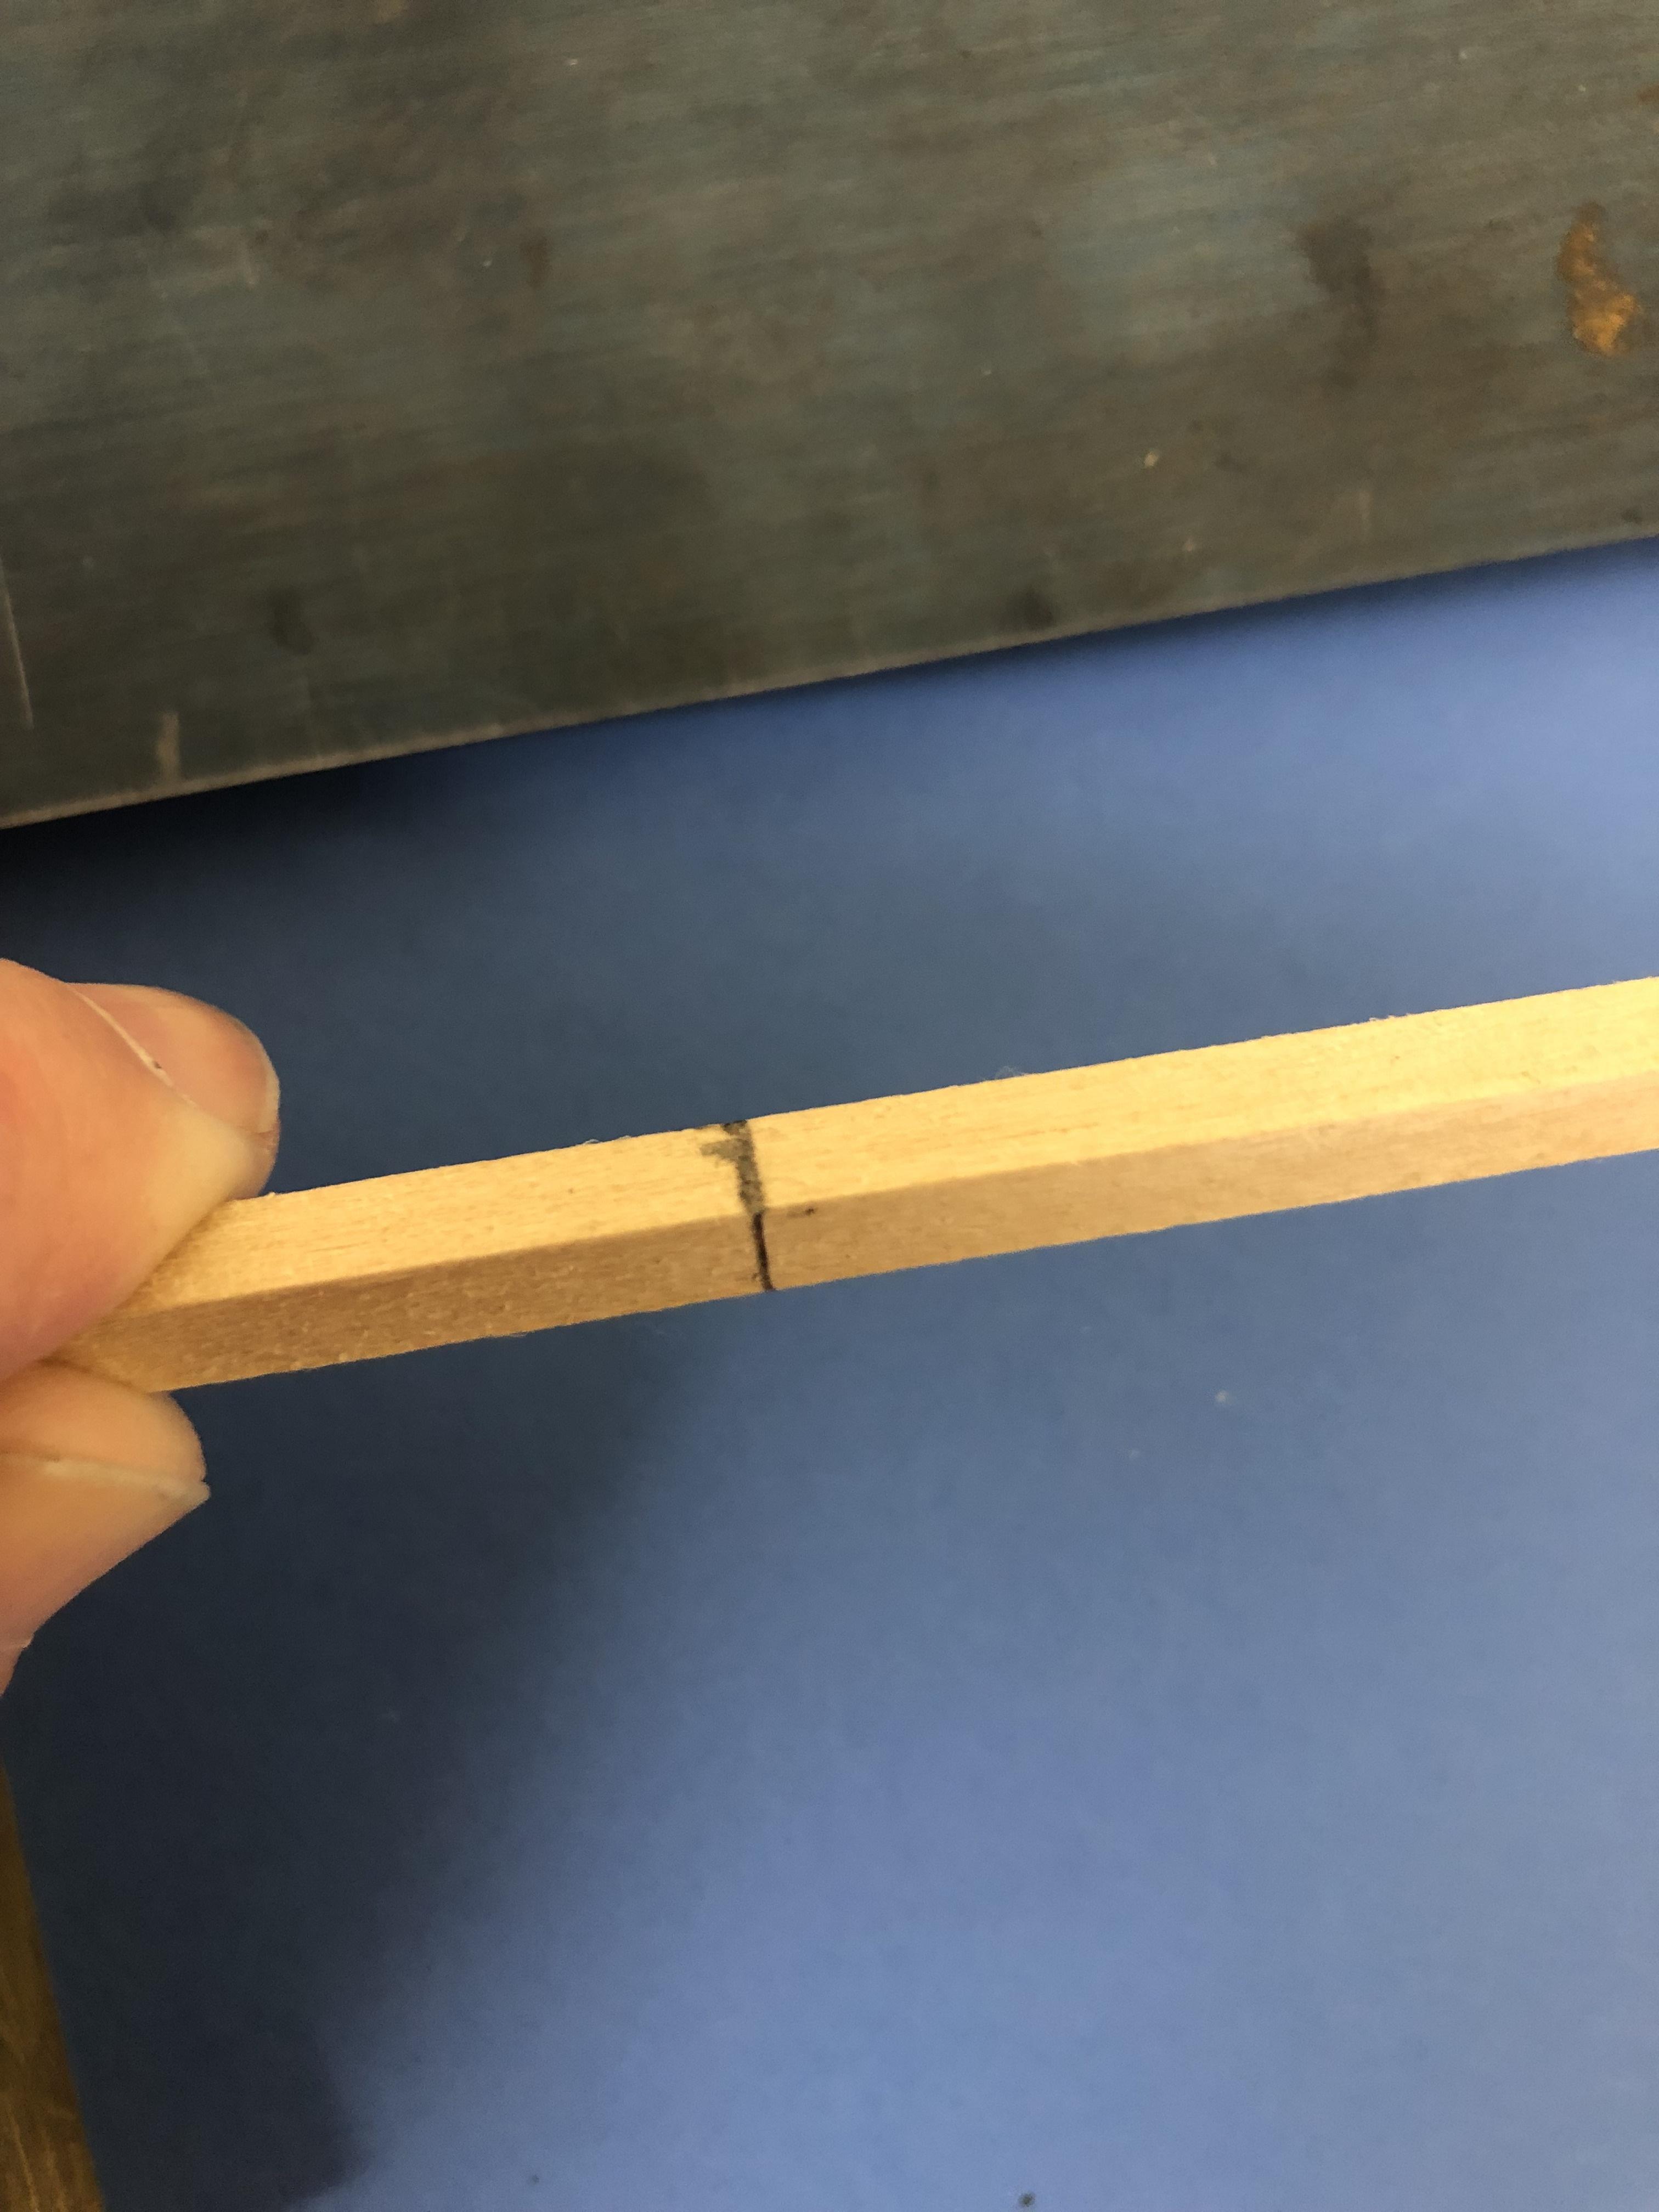
Second Mark
If you only need one line, that's alright.
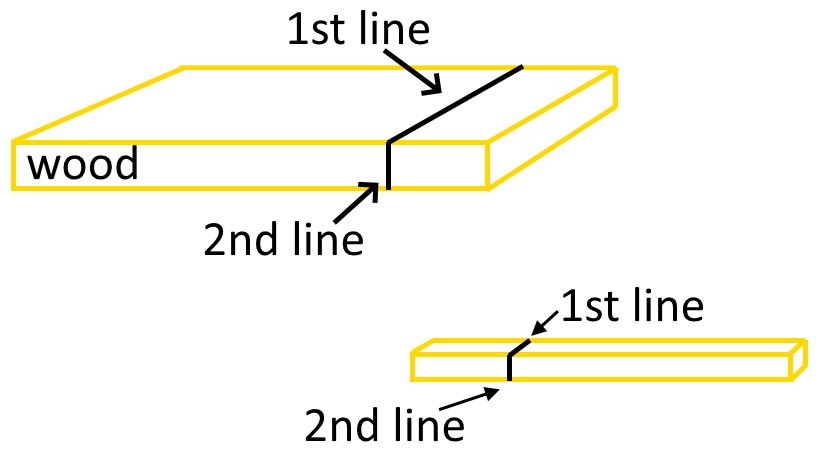
If, however, you are about to pull out a handsaw and cut through a plank, you may want two lines to help you get started off right. In this case, the first mark goes across the wide surface of your board. The second one goes down the skinny thickness of your board. No need to remeasure, just line the square up with your first line.
You can see in the image that I have made one mark, and then turned my tiny bit of wood 1/4 turn. I am just about to scribe the second line.
NOTE: Again, my line is just off of the square so that it can be easily seen.
TIP: Why might you want more than one line? Great question!
- when cutting a wide board, say for a closet shelf, the first line will guide you across the board. The second line will give you a guide to hold your saw at a 90 degree angle to the wood, creating a 'square' edge. Just keep your eye on that second line as you begin your cut. Yes, you will cut that line clean away, but by the time that happens you will also have a nice groove at the correct angle for a 'flat', even cut.
- you may need to work on all 4 sides of your project. In the case of my sample, that little stick is one leg of a base that will turn into a keepsake display stand (Plug for my other instructable? Yep). I won't get a clean cut if I force my craft knife all the way through the wood from just one side. Instead, I make a cut, turn the project, make a cut-- all the way around until the wood is cut through.
All Done
Ta-da! My stick has straight, square lines and is ready to be cut.
You can do this with any size project. If you are going to be building something large, it might be helpful for you to buy a good, long square that will span the width (or at least the better part of the width) of your boards.
You can also use the smaller square to make a line on the left half of the board, then flip it around and draw another line on the right half of the board. This does assume that your board is reasonably square to start with :)
Now About Those Corners
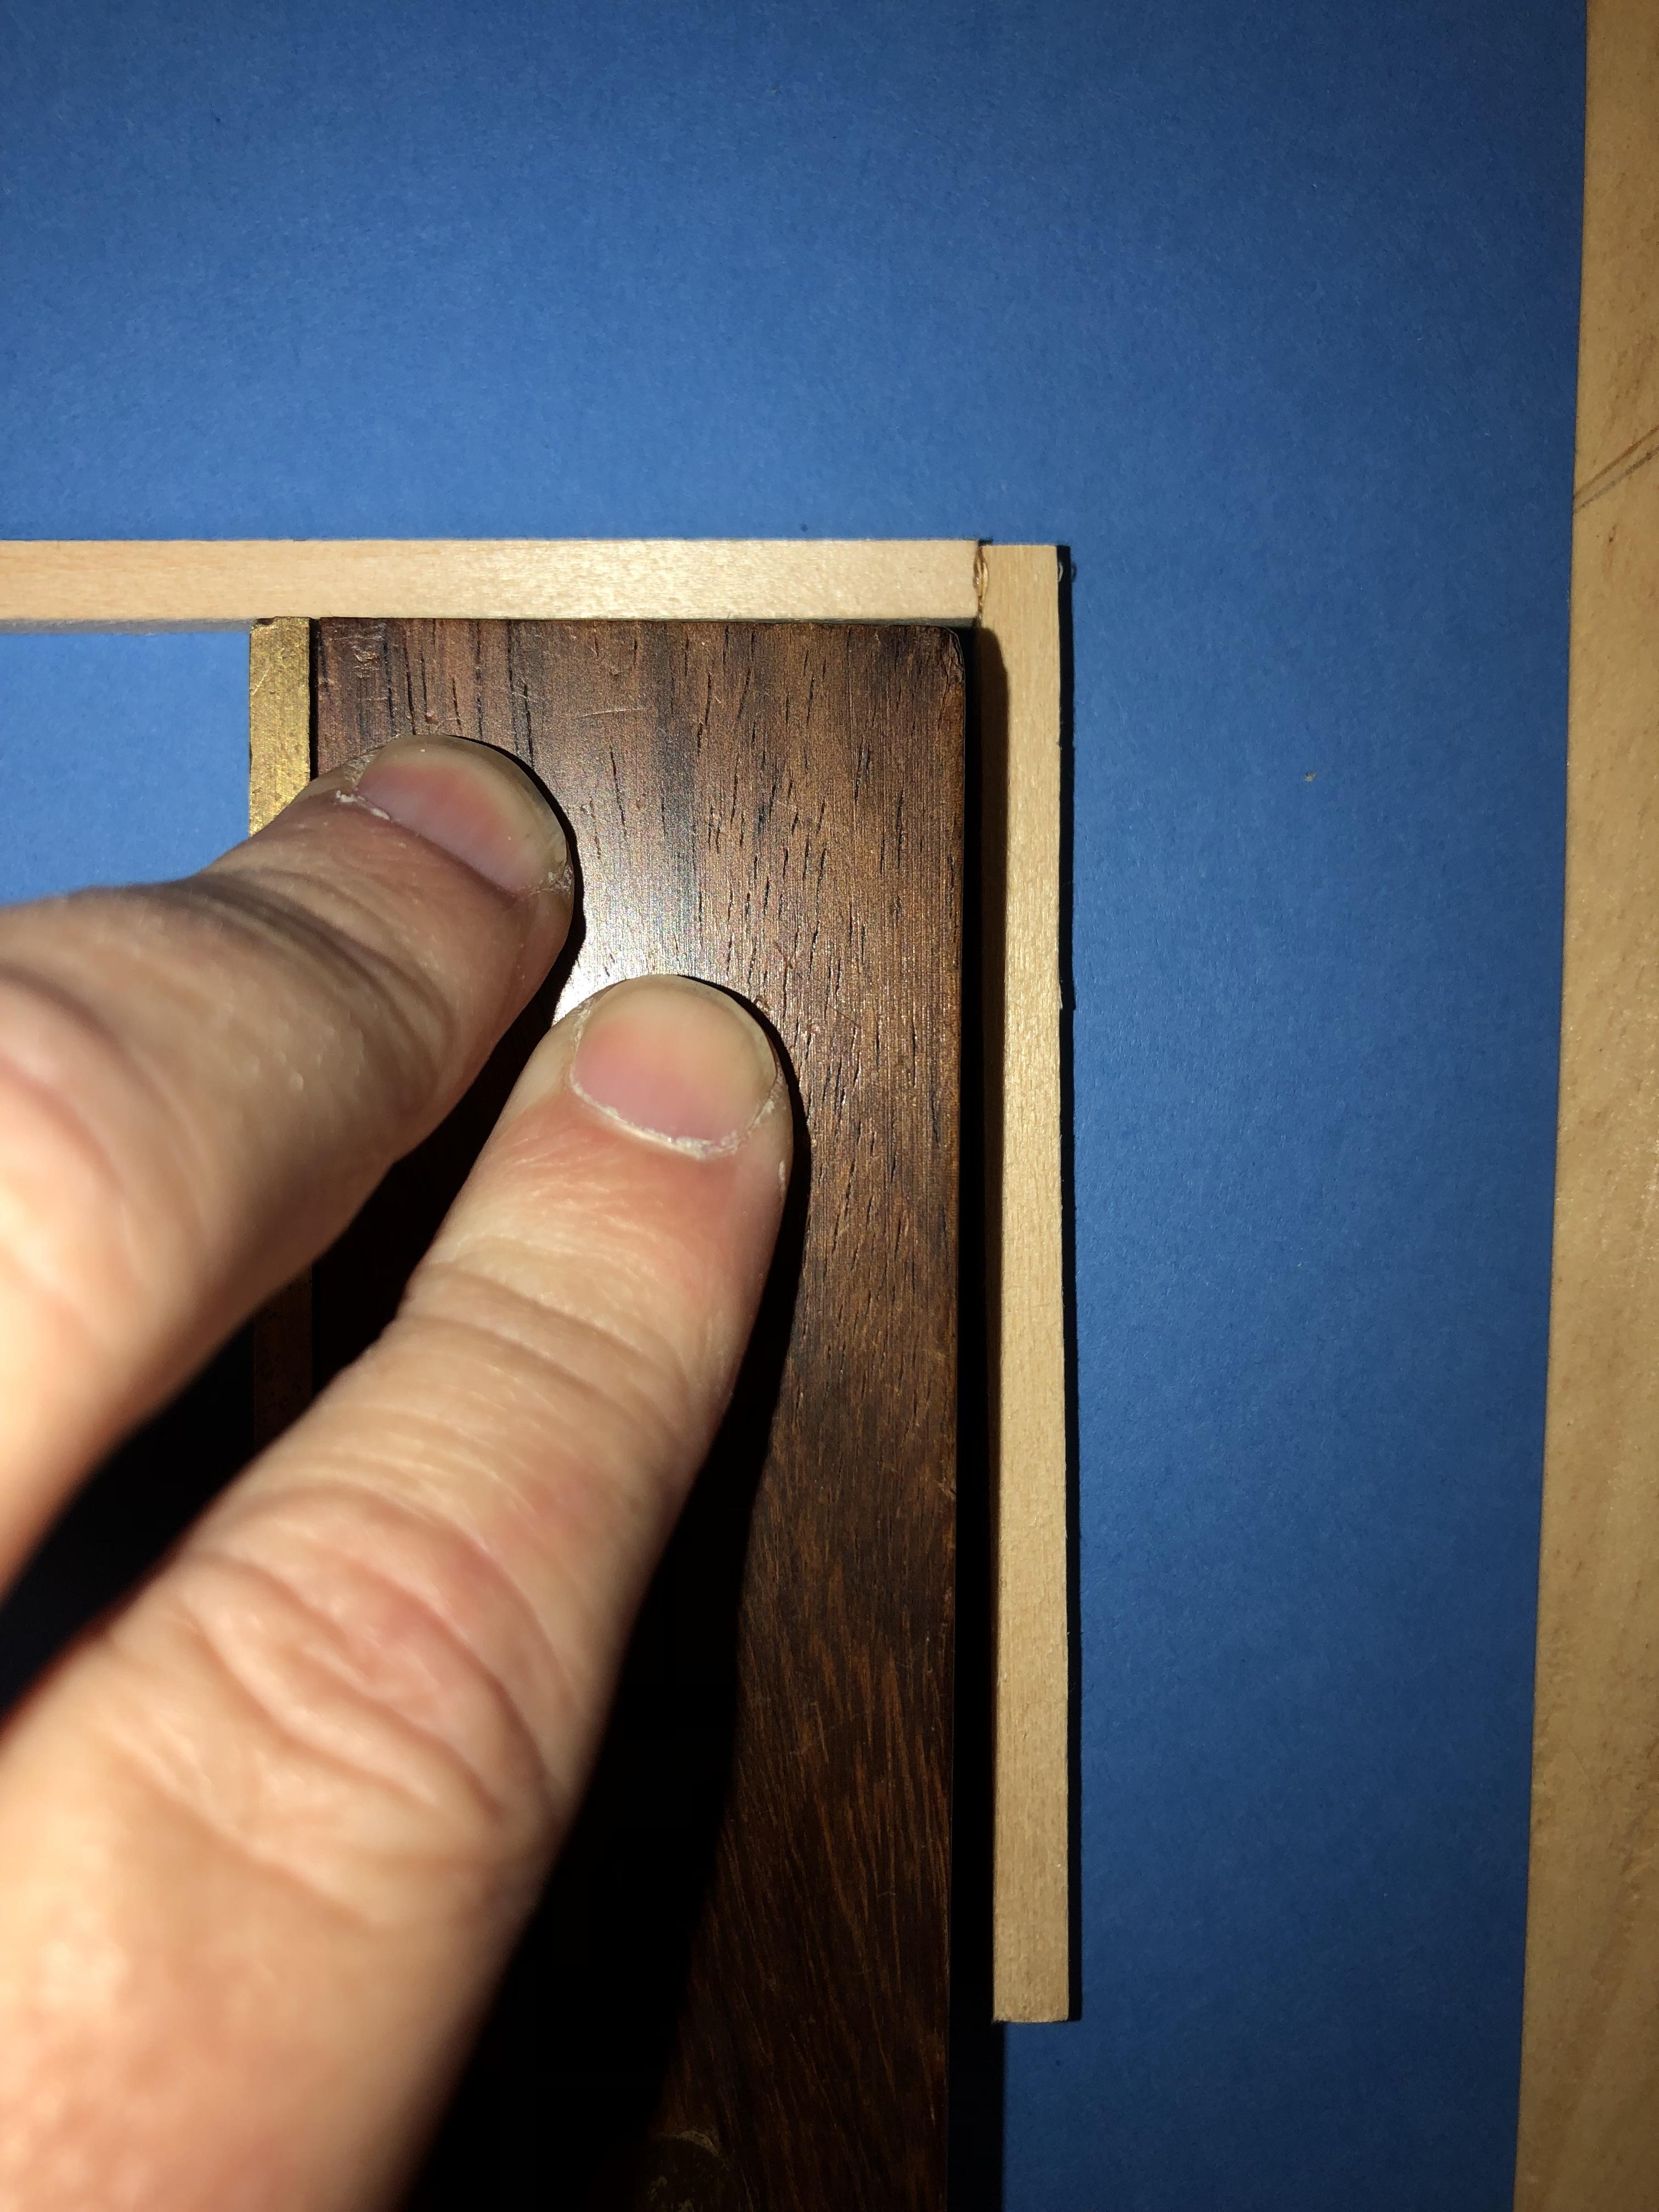
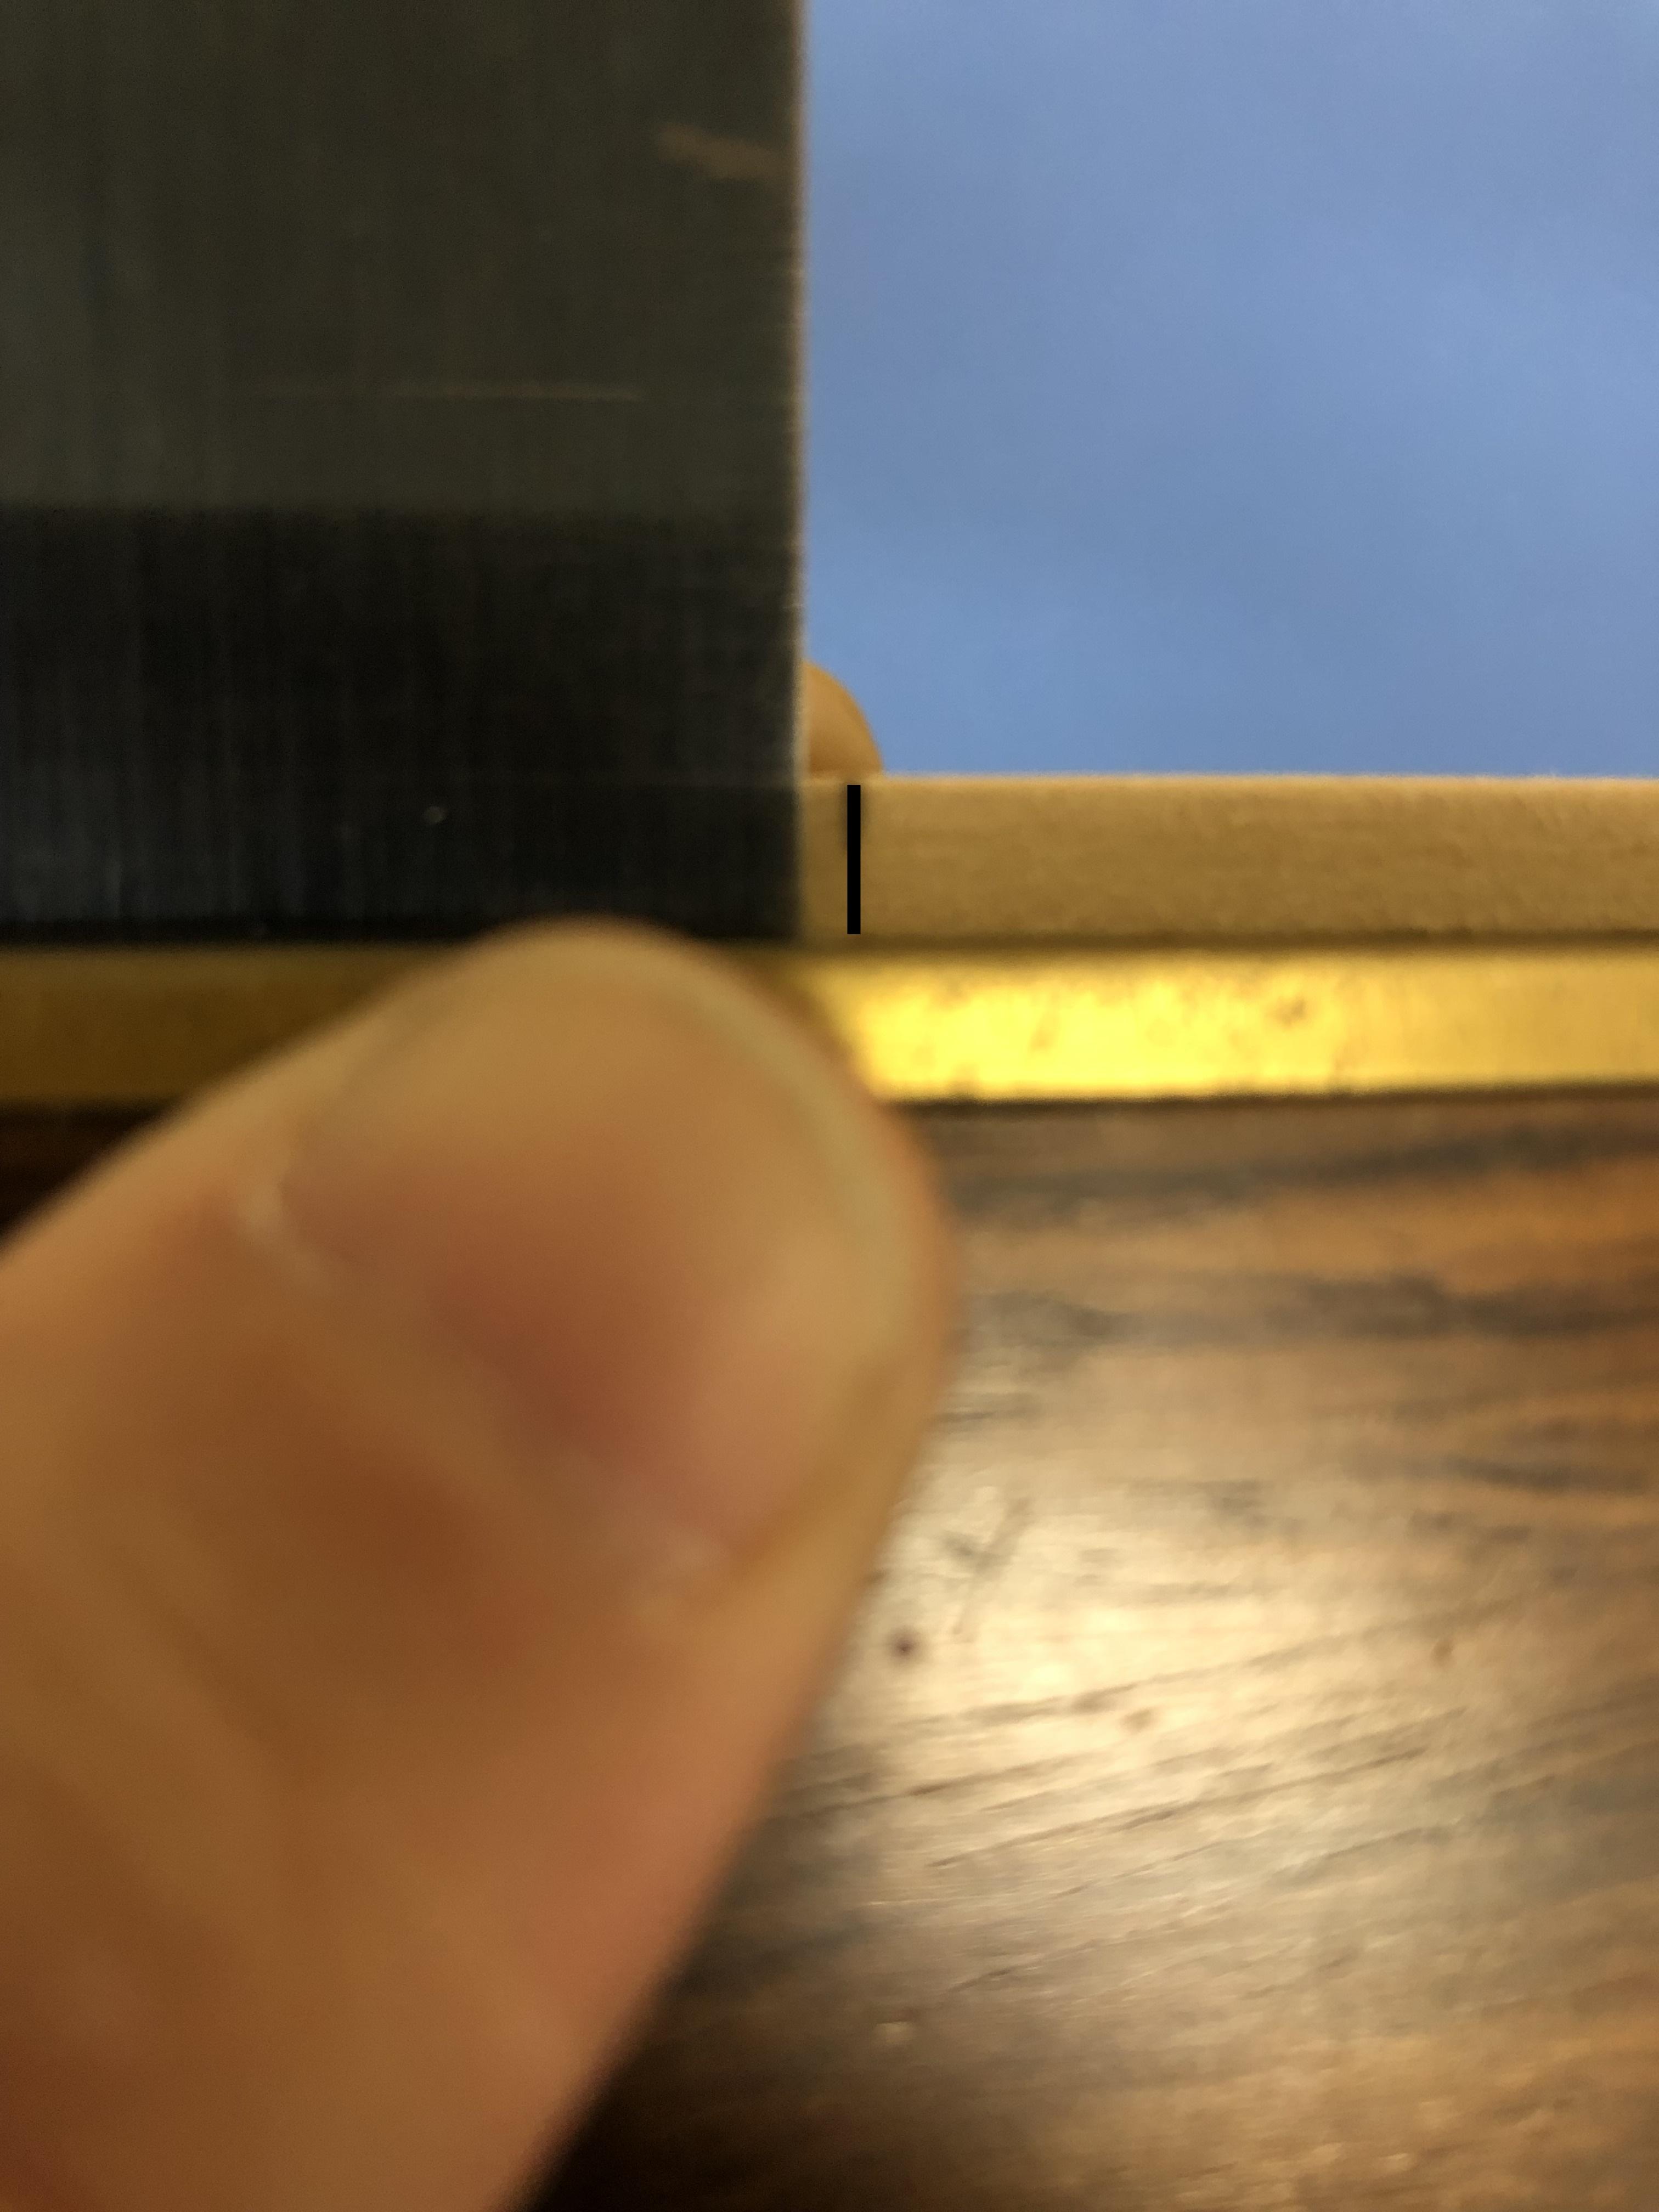
Another useful trick your square can do is test the alignment of a corner. You can see in the image that I have just glued up not one, but two sticks to make an L. (You're amazed, I know.) I need to make sure they form a good 90 degree corner. Before the glue sets, I tuck my square up against the sticks, gently allowing the wood to shift as it fits to the square. Then I hold the sticks there, just to be sure they keep that shape. I'm using a super quick-set glue here, so a few seconds will do it.
NOTE: Yes, I could have also set the square on the outside of that joint, no problem. Only, for me, there was a problem. The steel edge of my square cannot sit flat on the table the way a plastic geometry square can. You can see this in the step 4 image. Fortunately, the wooden side DOES sit flat, and is also designed to be a perfect corner, so I can use this instead for these tiny pieces.
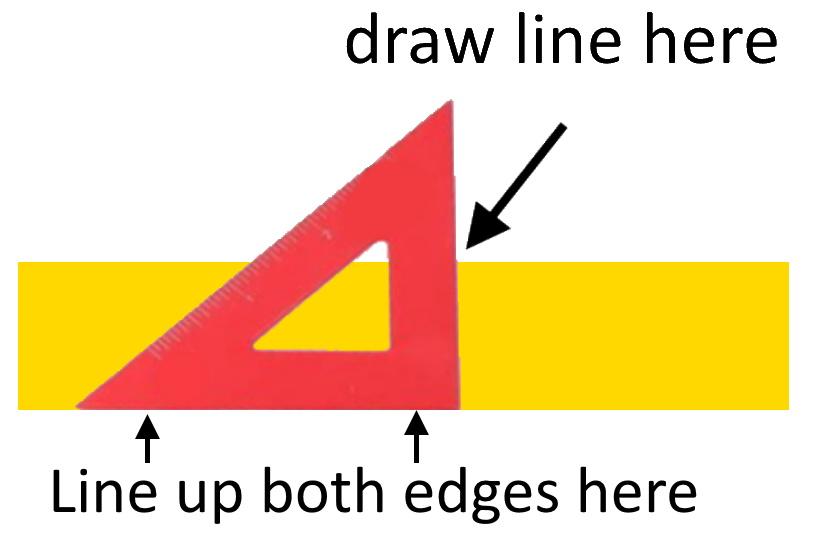
Outside Corners
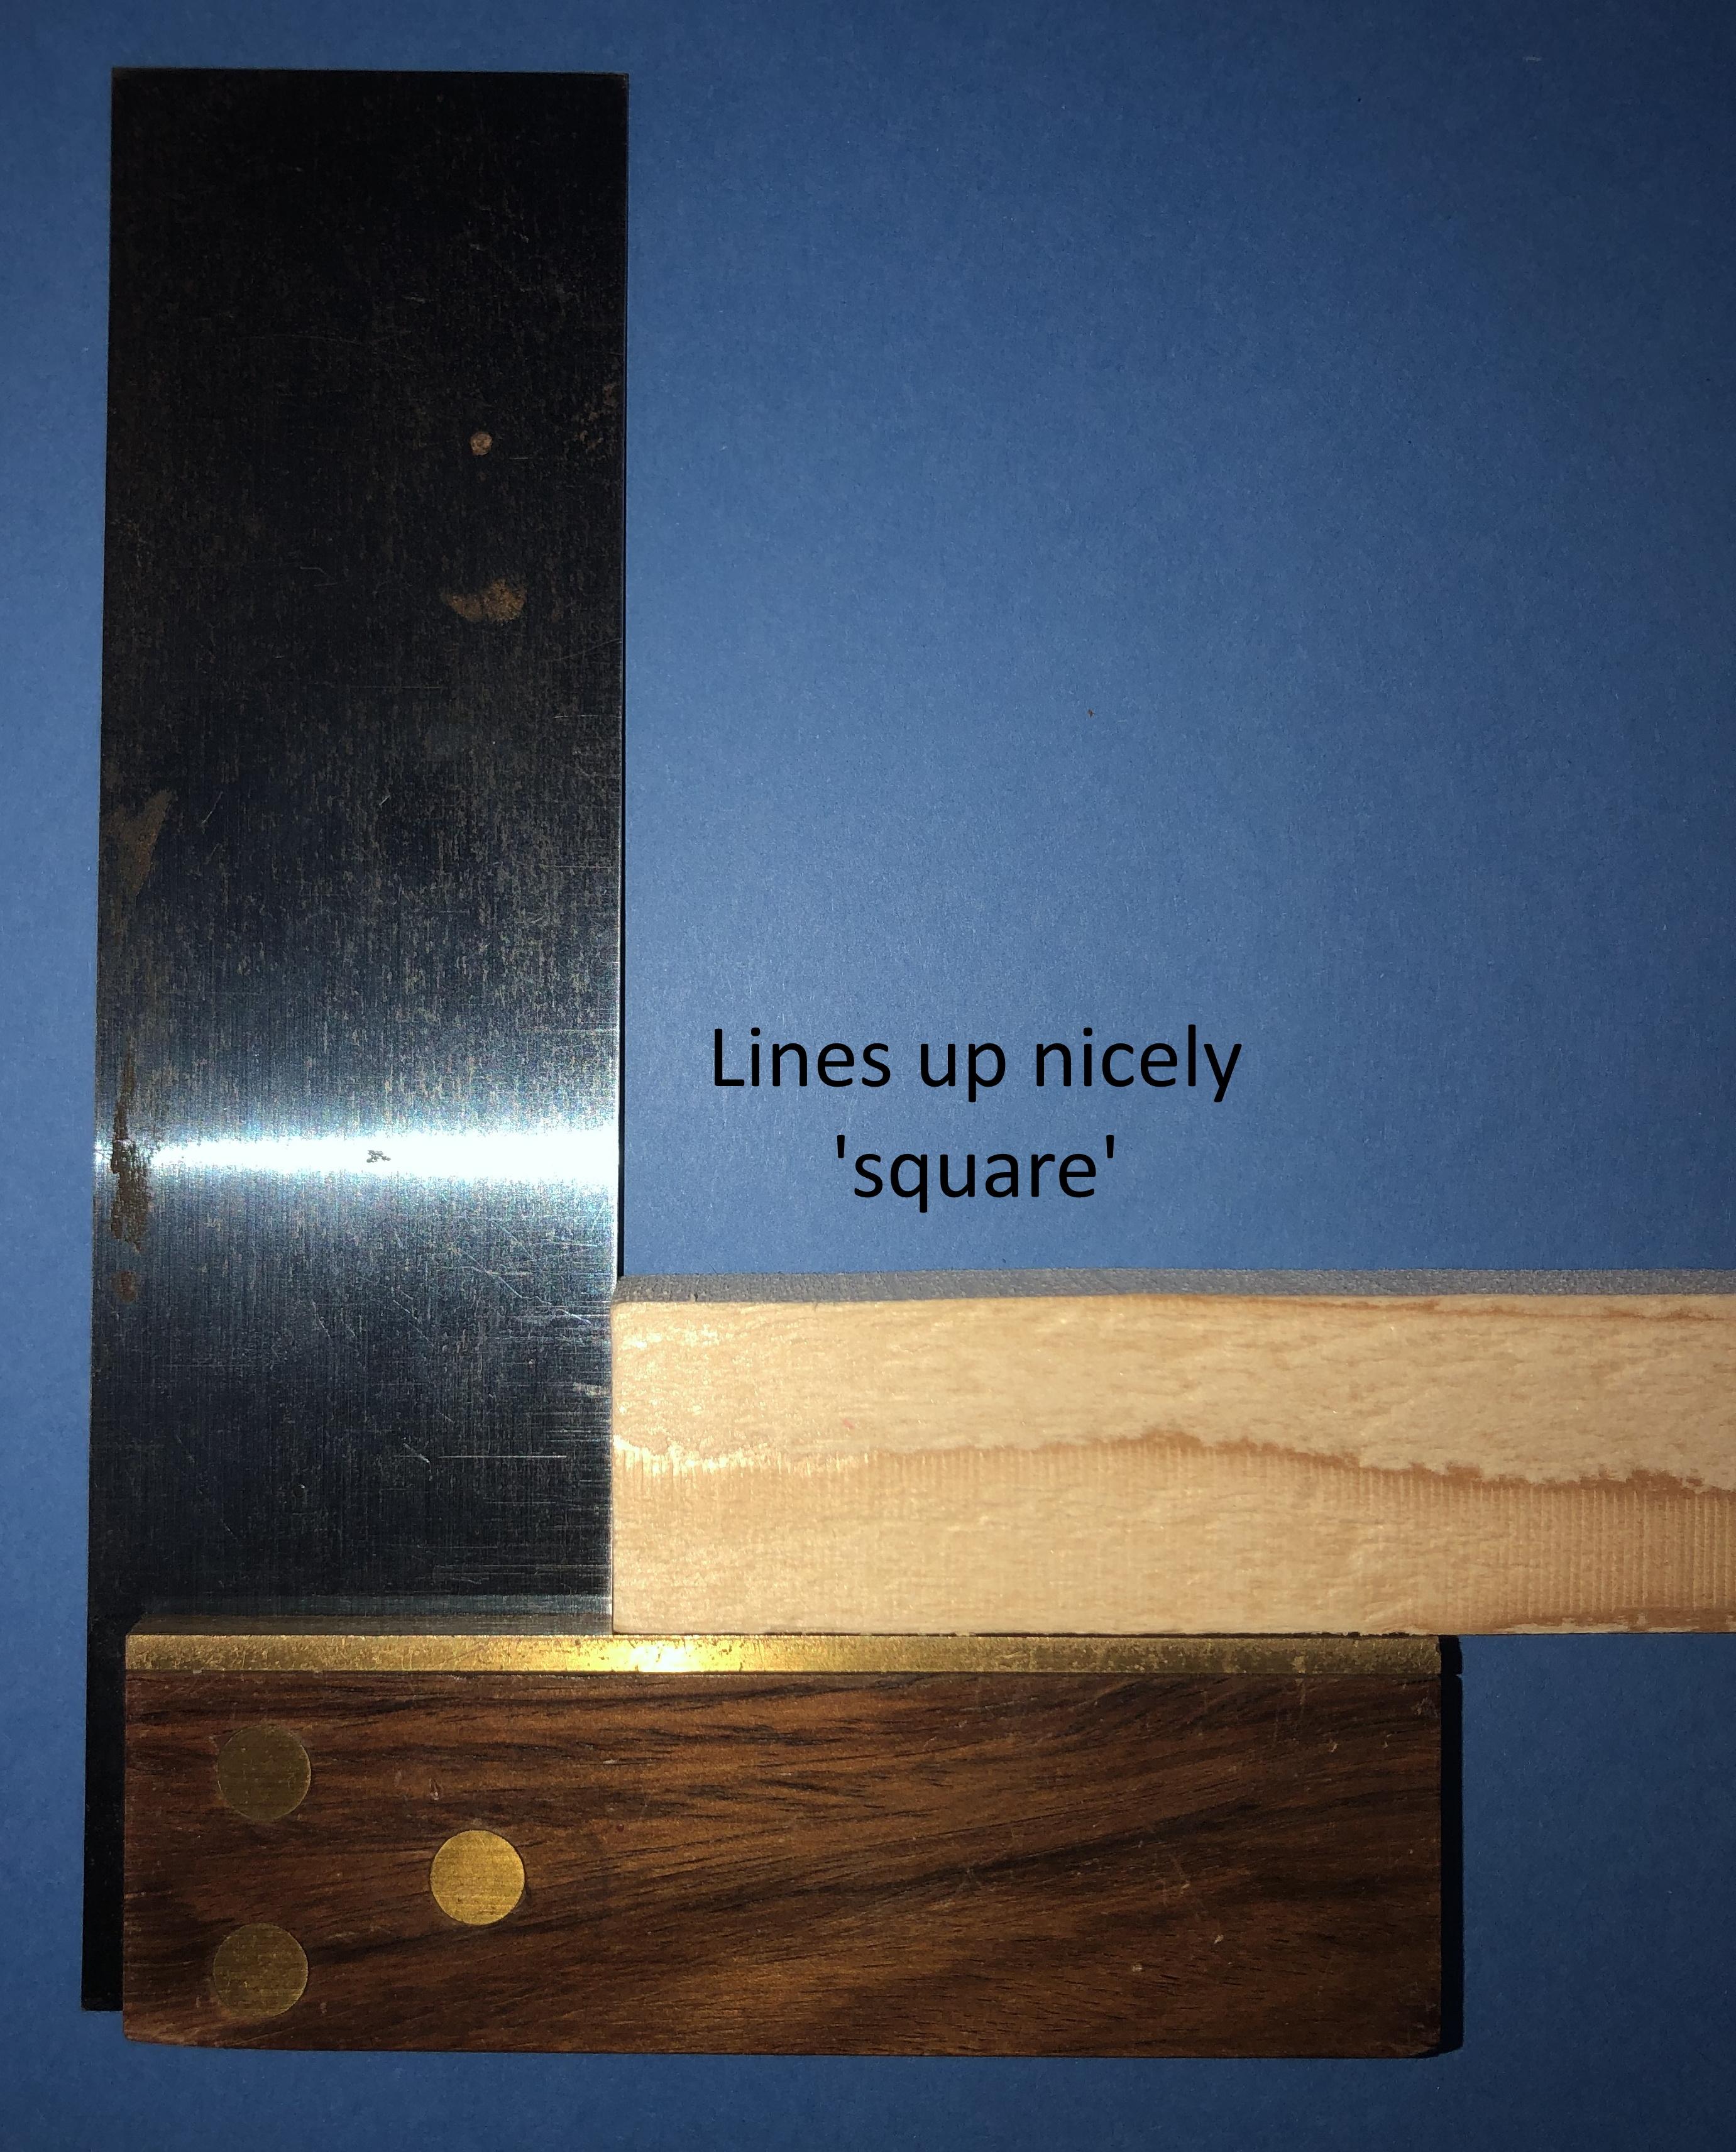
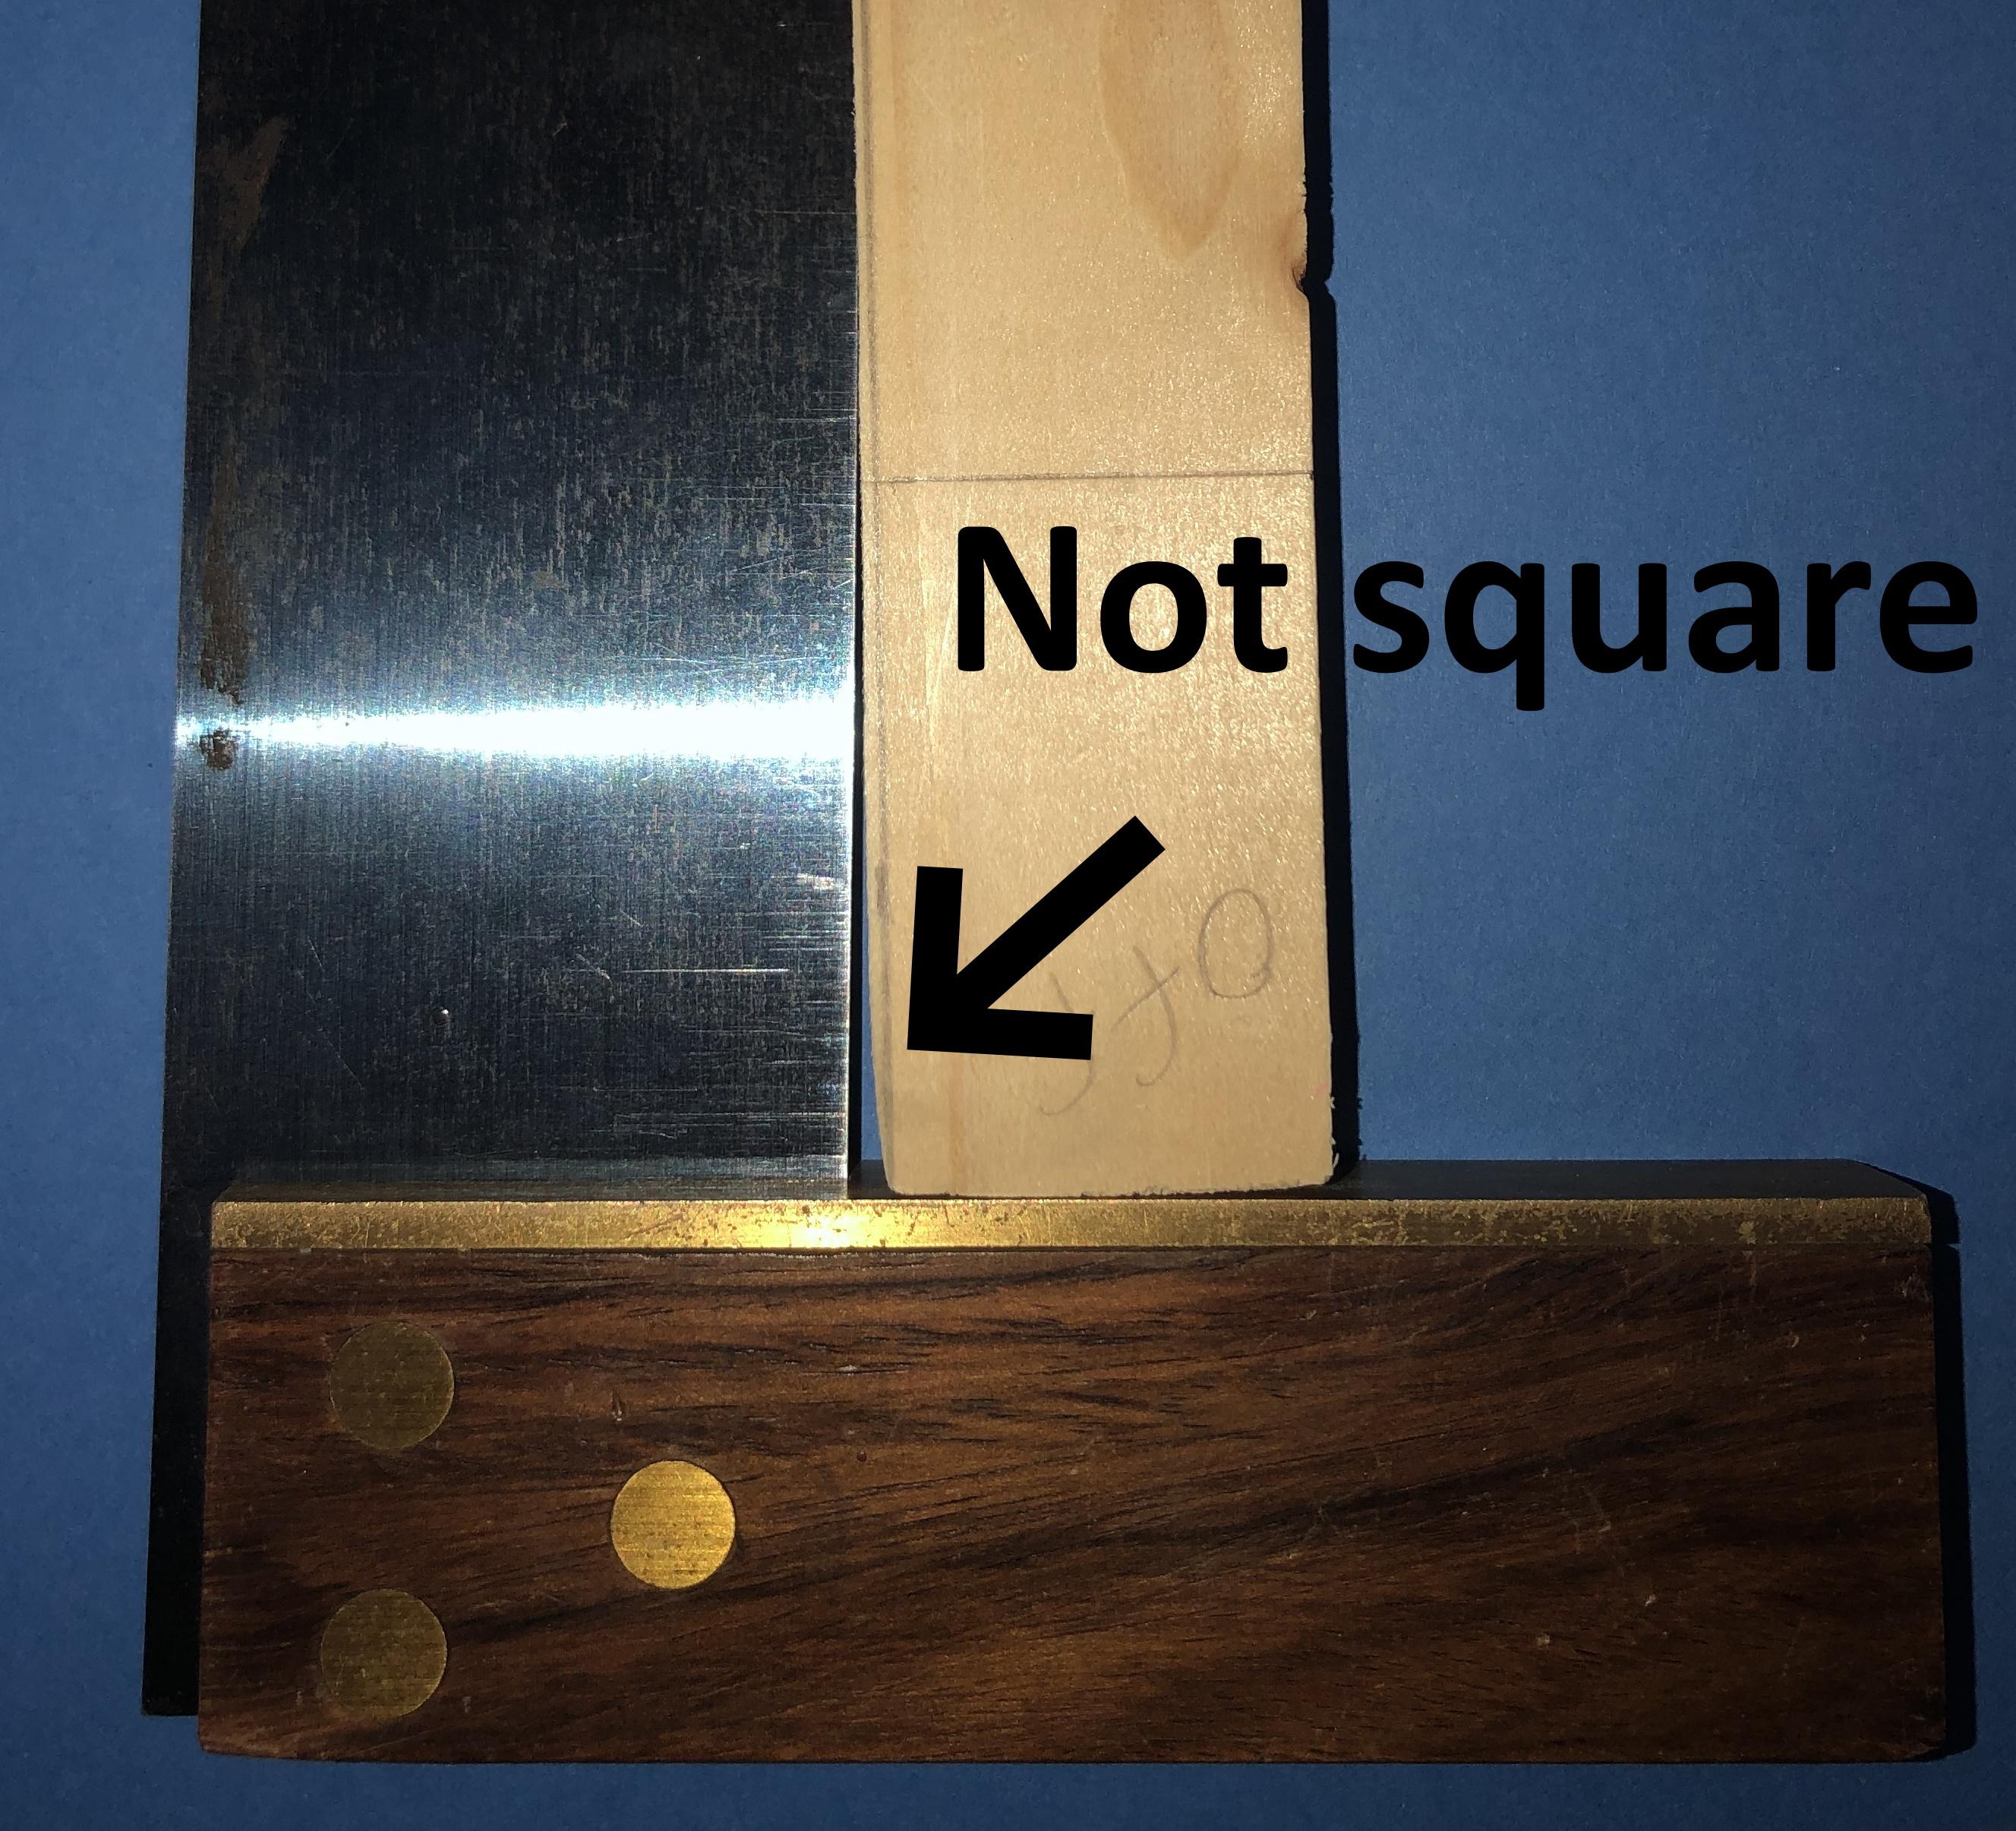

Any object can be checked for square. If two sides BOTH sit flush (flat) against the square-- then you are, indeed, square. If there is a gap between one side and the square, then you are not square. See images.
Some of you may wonder how you fix an imperfect corner. That depends on the project and the tools available to you. Possibly you could re-cut it, or sand it flat. Possibly your project is more along the 'rough and ready' lines and a little wonkiness will not do any great harm. I have known some folks-- who do their best, but still end up with teensy little millimeter gaps here and there-- to reach for the wood filler and pretend nothing ever happened.
NOTE: In the drawn image, the square edge and the wood edge do not touch. This is only for visual clarity. DO line up your edges.
Thank You
Thank you for enjoying this instructable! It's amazing how tricky it is to type this, compared to just showing you in my shop. Should you suddenly find yourself compelled to wander the house at all hours, your new favorite tool in hand, checking every angle in sight-- please do not tell your roommate, sibling, spouse, parent, or upset downstairs neighbor that your new obsession is my fault :) Or, better yet, do! And then loan them your square and invite them to join in the fun!