Barn to House Conversion by Phil Sacchitella
132358 Views, 65 Favorites, 0 Comments
Barn to House Conversion by Phil Sacchitella


This article recounts the long journey of transforming a century-old timber-frame hay barn into a warm and inviting home for my family and friends. The project pushed the limits of our endurance, ingenuity, and resourcefulness, as we navigated a limited budget and minimal experience. Over the course of 26 years, we created custom tools, solved countless problems, and poured our hearts into making this barn a home. Eventually, we decided to pass it on to new owners, who are now enjoying it as much as we did.
The Dream:
I've always had a special place in my heart for old timber-frame barns. Growing up on a farm in upstate New York, some of my best memories are of playing in the hayloft, swinging from ropes tied to beams, and running through the cavernous spaces with my cousins. We could spend hours exploring those massive, creaky old barns, creating adventures in every corner. So perhaps it’s no surprise that I ended up wanting to live in one, even if I didn’t know it at the time.
In June 1993, I came across an article in Architectural Digest about a beautiful barn-to-house conversion. It captured my imagination—the exposed hand-hewn timbers, the vast, open spaces, the rustic feel. It reminded me of my grandfather’s farm and those solid, ancient timbers that made his barn such a lasting memory. I began researching timber-framing and new timber-frame construction, hoping to someday find a barn that I could restore and turn into a home.
I was fortunate to find just such an opportunity: a group of old barns for sale on a one-acre lot. For $5,000, I bought the barns and the land they sat on. Everyone thought I was crazy. Friends drove by and said, “They don’t need work, they need a match.” But I saw potential. Two of the barns had solid structures—most of the problems were cosmetic, and with some repairs, I could save the frame and start rebuilding.
Jacking the Building


Step 1: Jacking Up the Building
The barns had been used for years to store junk from a nearby trailer park, along with hay from a local farmer. It took four 40-yard dumpsters to clear out the debris, but after all that, we had a good look at the structure. The first order of business was to fix the crumbling stone foundation. I needed to jack up the building to replace it, but I couldn’t afford to hire professionals or rent expensive equipment.
Luckily, the previous owner had left behind several solid railroad ties. Using short lengths of chain, blocking, and some creative engineering, I rigged a system to carefully lift the barn while providing clear access for the new foundation work. It was sturdy, adjustable, and most importantly, affordable.
Designing and Pouring the New Foundation


My original plan was to remove all the old stone and pour new four-foot-deep concrete walls and footers. But, as often happens in projects like this, things didn’t go as planned. Once the building was in the air and we started excavating, we ran into a massive problem—literally. Beneath about two feet of small stones, we found boulders, one of which was six feet in diameter. Moving them was impossible without relocating the entire barn frame.
After consulting with the town engineer, we agreed that since the boulders were below the frost line, they could act as part of the foundation if we tied the new concrete into them. So, we quickly adapted the design. Using insulation as the outside form, rough-cut 2x10s for support, and rebar drilled into the boulders, we poured what I call a “Floating Ladder” foundation. It was a combination of concrete rungs and leftover materials from the barn’s flooring. We even poured a small center floor for easier crawling during future work.
Removing the Old Roof and Repairing the Frame.

Once the foundation was complete and the concrete had set, we moved on to repairing the frame. Using heavy-duty come-alongs, we straightened the structure as much as possible, though some of the twisted posts could never be perfectly aligned. Then came the roof—a mix of old shingles and heavy-gauge steel.
To safely remove the old materials, I bolted arms onto a 40-foot wooden ladder and hung it over the peak of the roof. The pitch was too steep to walk on, and the old shingles would have given way beneath me. Once that was done, it was time to install the new roofing.
New Roofing and Insulation.


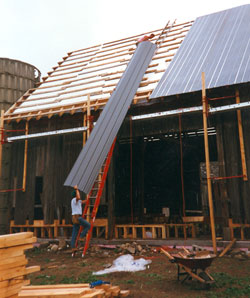
The insulation goes on the outside of the frame. This way there is a continuous “bag” of insulation surrounding the building. Once I had the perimeter frame up we laid sheets of luan plywood over the original purlins and then a 6 mil poly vapor barrier then laid up the 4x8 8 ¾” sheets. All 77 of them, up a ladder, by hand. To fill in the gaps we used spray foam cans. Once a row of panels was up we then took the 1x6 oak boards and drove 12” fluted garden spikes through predrilled holes, down through the foam and tried to hit the unevenly spaced original roof rafters. When a neighbor asked how I could hit them, I replied “it’s a Zen thing”. Out of the 770+ spikes I drove, I only missed about a dozen times.
Once all of the panels and strapping boards were up I actually hired someone to help put up the 25’ long sheets of steel roofing, they messed it up. Once I fixed it, I started on replacing the missing and damaged original siding with siding from one of the other barns that would eventually have to be torn down.
Interior Levels and Rooms.


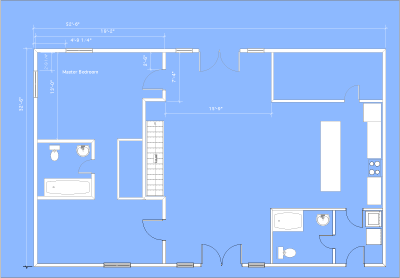
With the roof in place, we turned our attention to the interior. Floors and walls were built and bolted to the frame, and windows were framed in. Much of the wood came from local sawmills, including the 22-foot-long floor joists we sourced from an Amish sawyer. His lumber was so rough-cut that we jokingly called him the “Thick and Thin Lumber Company,” but the price was right.
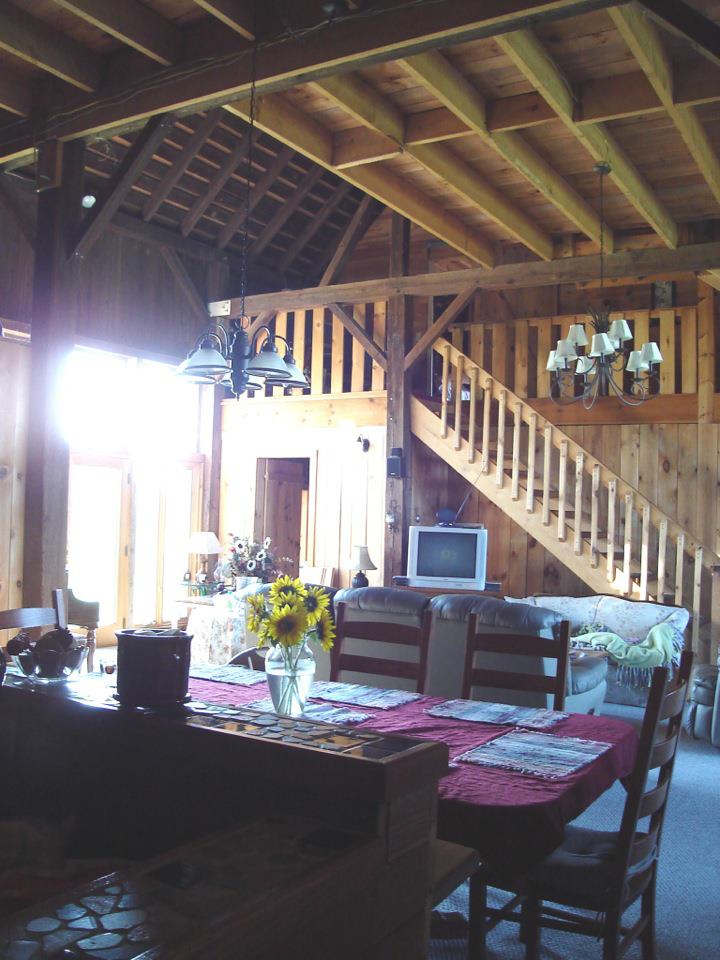
Because of the unique nature of the interior—exposed beams, irregular framing—almost everything had to be custom-built. The kitchen island, for example, was made from reclaimed wood from the grain room walls. The upper cabinets were built from old windows we found in the barn.
Wall Insulation and Siding.


The process for insulating the walls was similar to the roof. We installed EPS foam panels over a vapor barrier, securing them with white oak boards and 8” pole barn nails. Heat-treated nails were necessary to avoid bending them when driving into the dense old-growth wood.
If I could do it over again, I’d have planned the electrical wiring for exterior lighting better, as it was difficult to run conduit later.
Interior Work and Updates.


Once the place was sealed up from the weather, we quickly installed the heating and plumbing needed to move in, even though the house wasn’t fully finished. Everything had to be custom-built, as it was nearly impossible to use off-the-shelf cabinetry. The interior’s exposed beams and natural wood made it far more complicated to fit or wrap store-bought cabinets around the horizontal girts and vertical posts, so building everything from scratch was often the easier solution. Nearly all the cabinetry was built to fit its exact location. We also made an effort to recycle as much wood from the barns as possible. For example, the kitchen island is made from the grain room walls, which were crafted from southern yellow pine.
The upper cabinets were built from old windows we found in the barn (after a good cleaning, of course).
I’ll try to post more updates as I find the time. We’ve completed some great upgrades, like installing new solid hardwood floors. I’m also hard at work trying to finish and insulate my 1,800-square-foot shop, which includes a ceramics room overlooking the fields.
Like many home projects, this one never truly ends. I often find myself redoing things that I either didn’t do well the first time or that didn’t turn out exactly as I wanted due to time or budget constraints. This project has been a 26-year journey, with my spouse, children, and friends pitching in to help along the way. It’s become a unique tribute to an age-old style of construction, one big recycling project, and, most importantly, the home where we’ve instilled a strong work ethic and valuable life skills in our children.
I like to joke with my friends that I’ll never be done with this house. Someday, my wife will find me at the bottom of a ladder, tools still in hand, and she’ll kick me and say, “I don’t remember your name, but get up—you’ve got work to do.” People often ask me how I managed to take on such a huge project, and I always reply, “How does an ant eat an elephant?” After the inevitable confused look, I add, “One bite at a time—and he brings friends.”
Letting It Go


.JPG)

Well, after 26 years it was time to let go. My spouse was having trouble with the stairs of the 4 levels and I had taken a job where I was going to be traveling a lot. We sold our home. I miss my 1800 square foot shop, soon to be another article. Do we miss it? Yes, nearly every day. Life moves on, that place was a lot of work.
We found a new home, a ranch we love almost as much.