Backing Up Your SQL Database Using XAMPP and PhpMyAdmin
by bunglesmate in Design > Software
105235 Views, 3 Favorites, 0 Comments
Backing Up Your SQL Database Using XAMPP and PhpMyAdmin

I have just started to play with Joomla 1.5 content management system, to run a charity website, on a local host. One of the most important things to do is to work out how to back up the database so that I have something to fall back on just in case I mess it up.
These instructions are based on my own setup where the database is on a localhost on my own computer. Situations may be slightly different if the database is hosted elsewhere.
For this example we're looking at backing up a database named 'joomla15'.
IMPORTANT NOTE : Within the SQL structure it is possible to select databases, tables, or individual fields for editing, backup, deletion etc. These work instructions however are only concerned with backing up the WHOLE database. Unless you know what you're doing I would suggest you don't deviate from them as you can really screw things royally.
Step 1 - XAMPP Control Panel
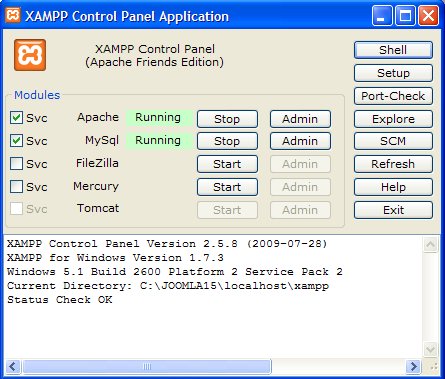
Open the XAMPP control panel. If they are not already running you need to start the Apache and MySql modules.
Login into phpMyAdmin. There are two ways to do this.
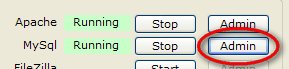
i.Click on the Admin button from XAMPP control panel.
ii.Type 'http://localhost/phpmyadmin' into the URL bar of a web browser.
You might need to enter a password for the root user.
Once in, the interface should look like this
i.Click on the Admin button from XAMPP control panel.
ii.Type 'http://localhost/phpmyadmin' into the URL bar of a web browser.
You might need to enter a password for the root user.
Once in, the interface should look like this
PhpMyAdmin Interface
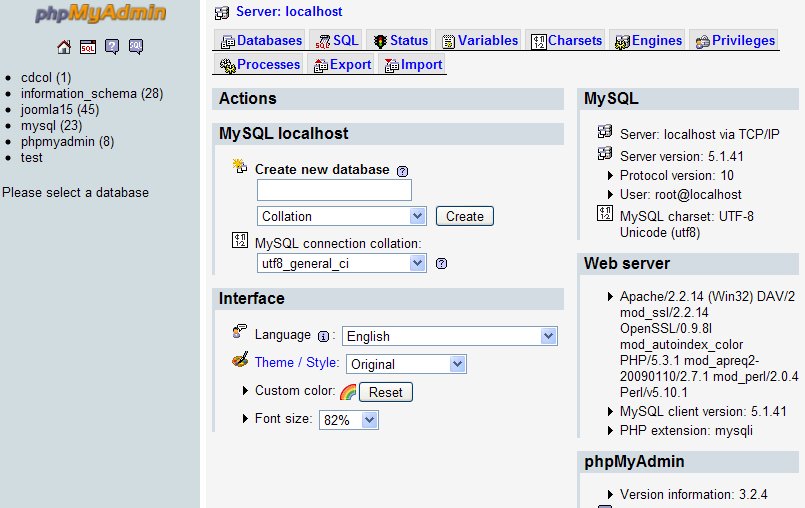
Once in, the interface should look like this
Database Selection
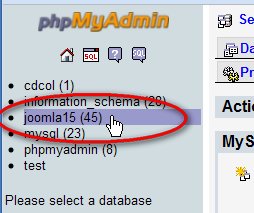
Now we need to select the database which needs backing up. This should be listed on the left side menu.
Take note of the number in ( ). In this case it is 45 which means that there are 45 tables contained within the database.
Take note of the number in ( ). In this case it is 45 which means that there are 45 tables contained within the database.
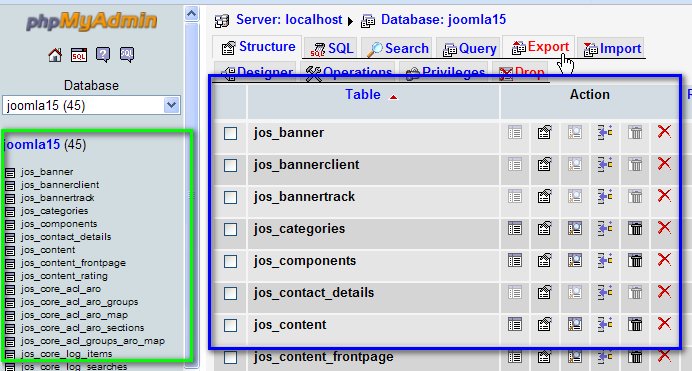
Database Tables
The interface should should change to be similar to this
On the left there is a list of all the tables contained within the database (green). On the right (main) part of the screen the tables are listed again with a set of possible actions for each one (blue).
WARNING: Unless you're really sure you know what you're doing, don't fiddle with anything here.
At the top of the screen are a set of tabs. Select the one marked 'Export'.
Export Main
The main part of the interface will bring up another screen which should look something like
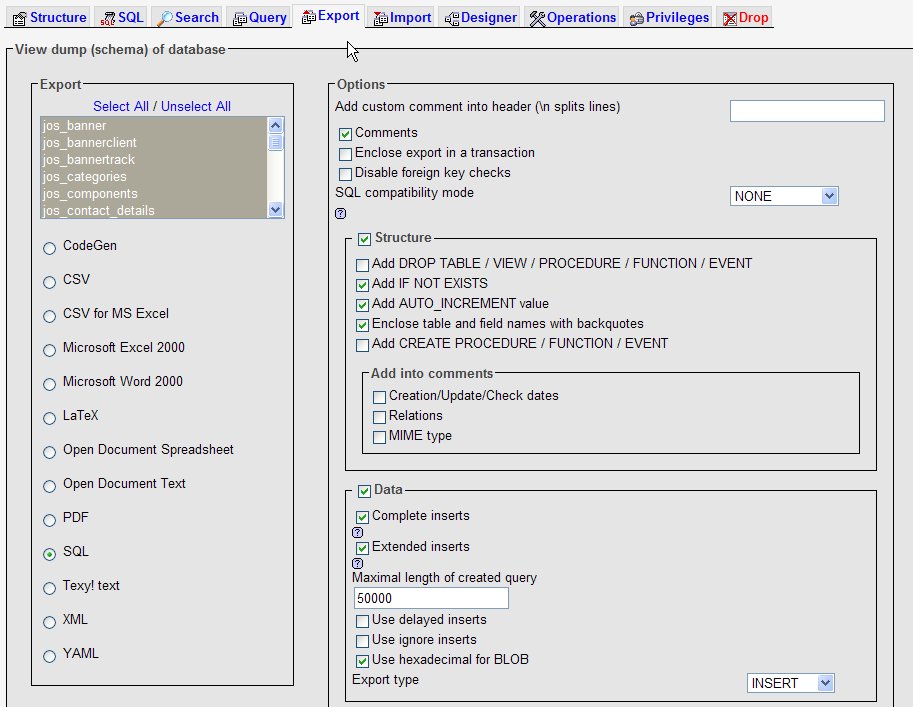
Export 1
The main part of the screen is now divided into a number of sections.
i.Export
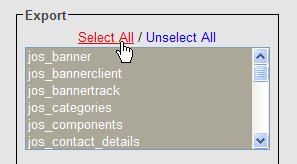
In this section you can specify which tables you'd like to backup. The default is for all of the tables but it doesn't hurt to select the 'Select All' link again.
i.Export
In this section you can specify which tables you'd like to backup. The default is for all of the tables but it doesn't hurt to select the 'Select All' link again.
Export 2
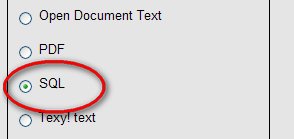
Further down this section, it is possible to specify which type of file we'd like to create. Check that 'SQL' is selected. This means we're able to use this file for later restoring of the data is required.
Export Options
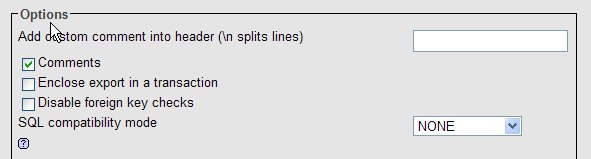
ii.Options
Leave as default settings.
Leave as default settings.
File Structure
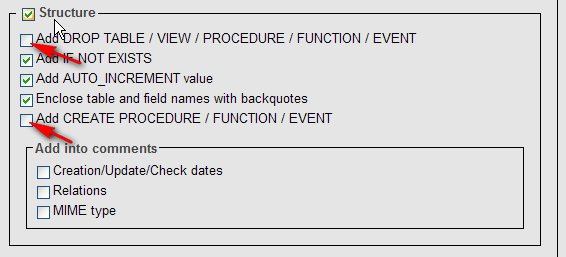
iii.Structure
We will select two extra check boxes, over and above the default.
We will select two extra check boxes, over and above the default.
'Add DROP TABLE / VIEW / PROCEDURE / FUNCTION / EVENT' – this options adds extra entries in the SQL file. If the backup file is used to restore a database, these entries mean that tables etc. will be overwritten if they exist already, which means that you don't have to delete the tables beforehand.
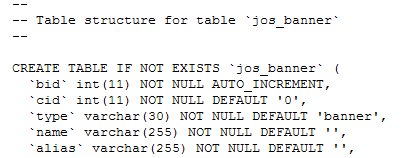
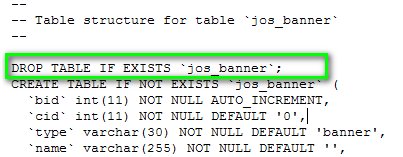
The two images here show a before and after in the sql file, when using this option.
The two images here show a before and after in the sql file, when using this option.
Add Into Comments

You can select any of these options if you wish as they shouldn't make any difference to the data from the database. They are simply used to put extra text into the file which maybe of use later.
Save As File
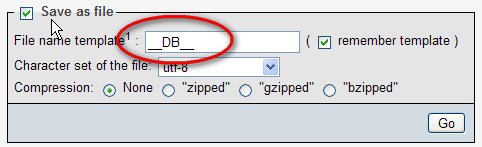
File name template is where you specify what the filename format should be. The default __DB__ will result in joomla15.sql (which is the name of the dbase in this work instruction).
Should you wish to include a date stamp to your backups you can use the following:
%Y%m%d%H%M%S-__DB__
which would result in something like
20100114144843-joomla15.sql
Should you wish to include a date stamp to your backups you can use the following:
%Y%m%d%H%M%S-__DB__
which would result in something like
20100114144843-joomla15.sql
Download !
When you click on the <GO> button in the bottom right of the screen, the browser should act as though it is downloading a file.
If you get a choice select where you want to save the file. If you don't get the chance you will need to select your default download location.
With WINDOWS this could be either the desktop or a directory under the 'My Documents'
If you get a choice select where you want to save the file. If you don't get the chance you will need to select your default download location.
With WINDOWS this could be either the desktop or a directory under the 'My Documents'