Baby Proof IOT


The need and source of idea:
Over the past 10 years, close to a thousand kids have been forgotten in the vehicle.
That number should never exist, thus we created:
The Idea: Baby Proof
Baby Proof is a Smart car baby monitor that keeps your child safe and entertained .
Baby Proof is the way to go with your child security, it keeps an eye on your child during the drive and after , so that no one will never forget their kid in the car again.
Who we are:
We are Shira Shafir, Roman Blumovich, Ido Teperson. ThreeComputer Scince students in IDC, Israel, who attend an IOT class in our third year.
Supplies
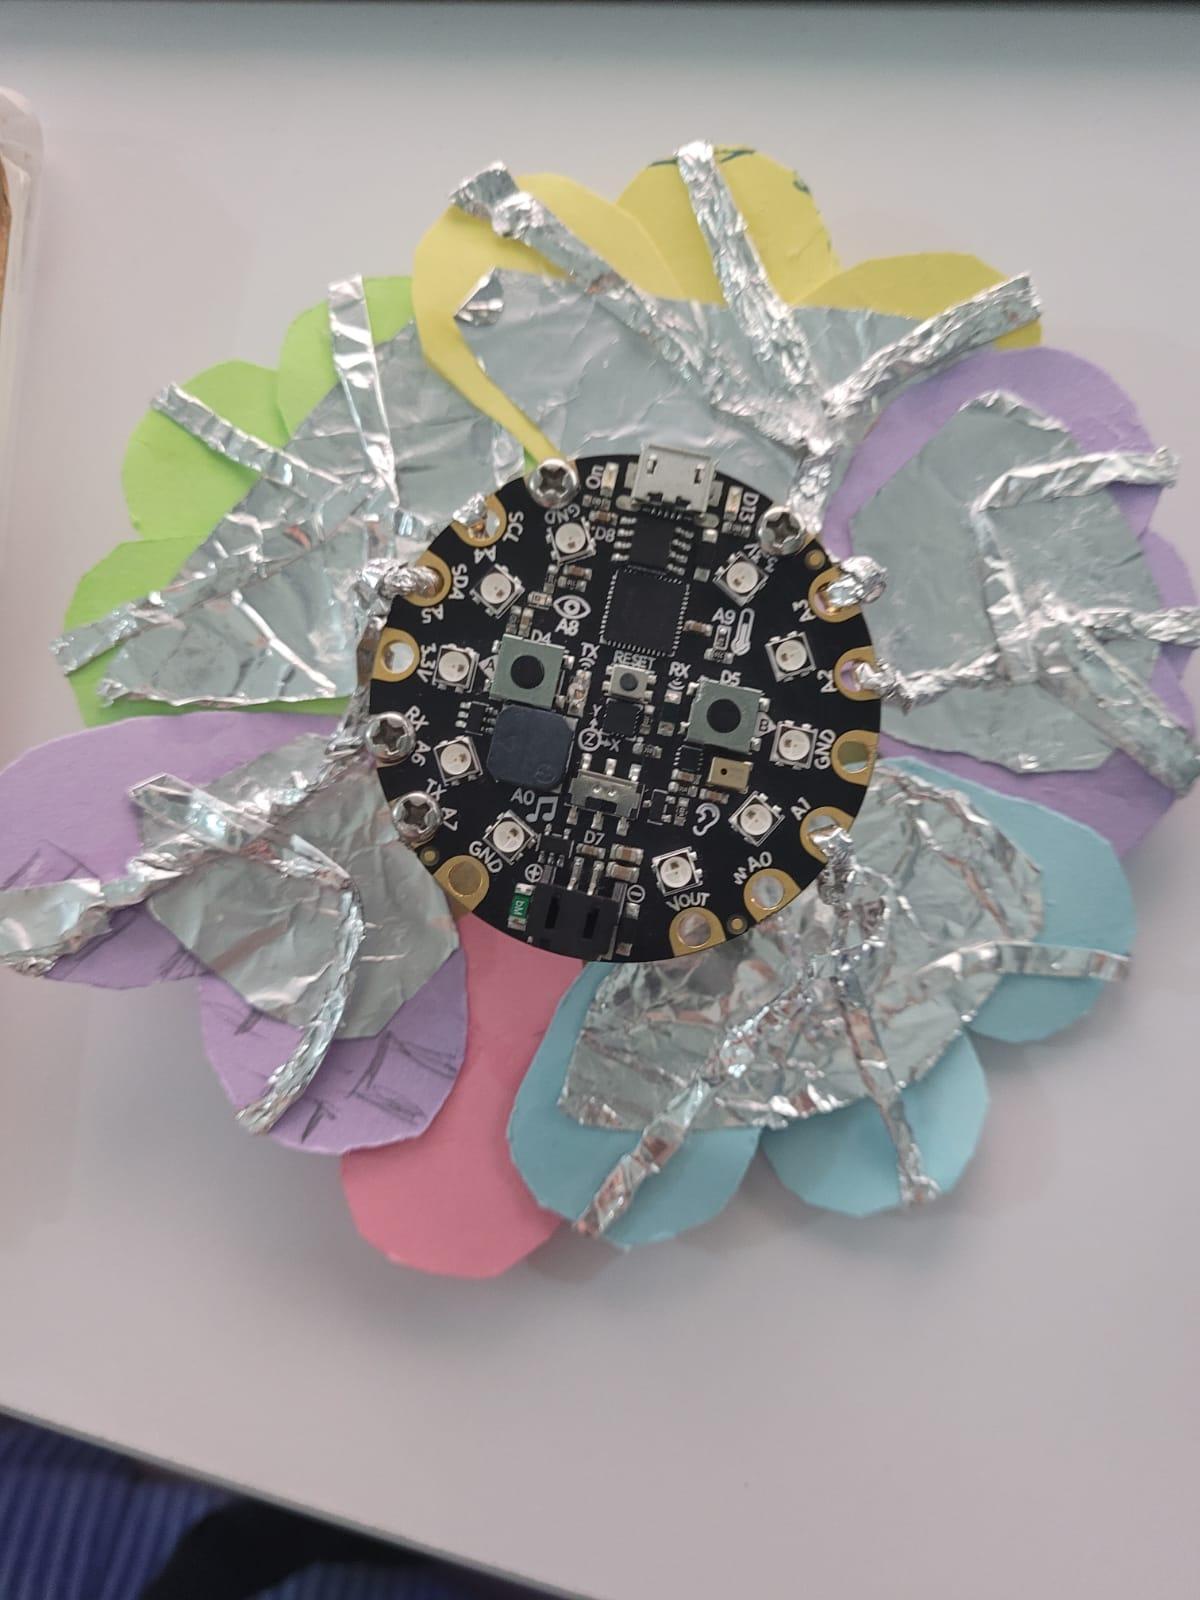
Circuit Playground Express:
-
Light sensor: checks that the baby is sitting in its seat
-
Temperature sensor: to check that the car isn’t too hot
-
Sound pressure: checks if the baby is crying
-
GPS location (Blynk): check that the drive has left the location of the car
-
Touch capacity: for the Teaching Game
Martials for Game:
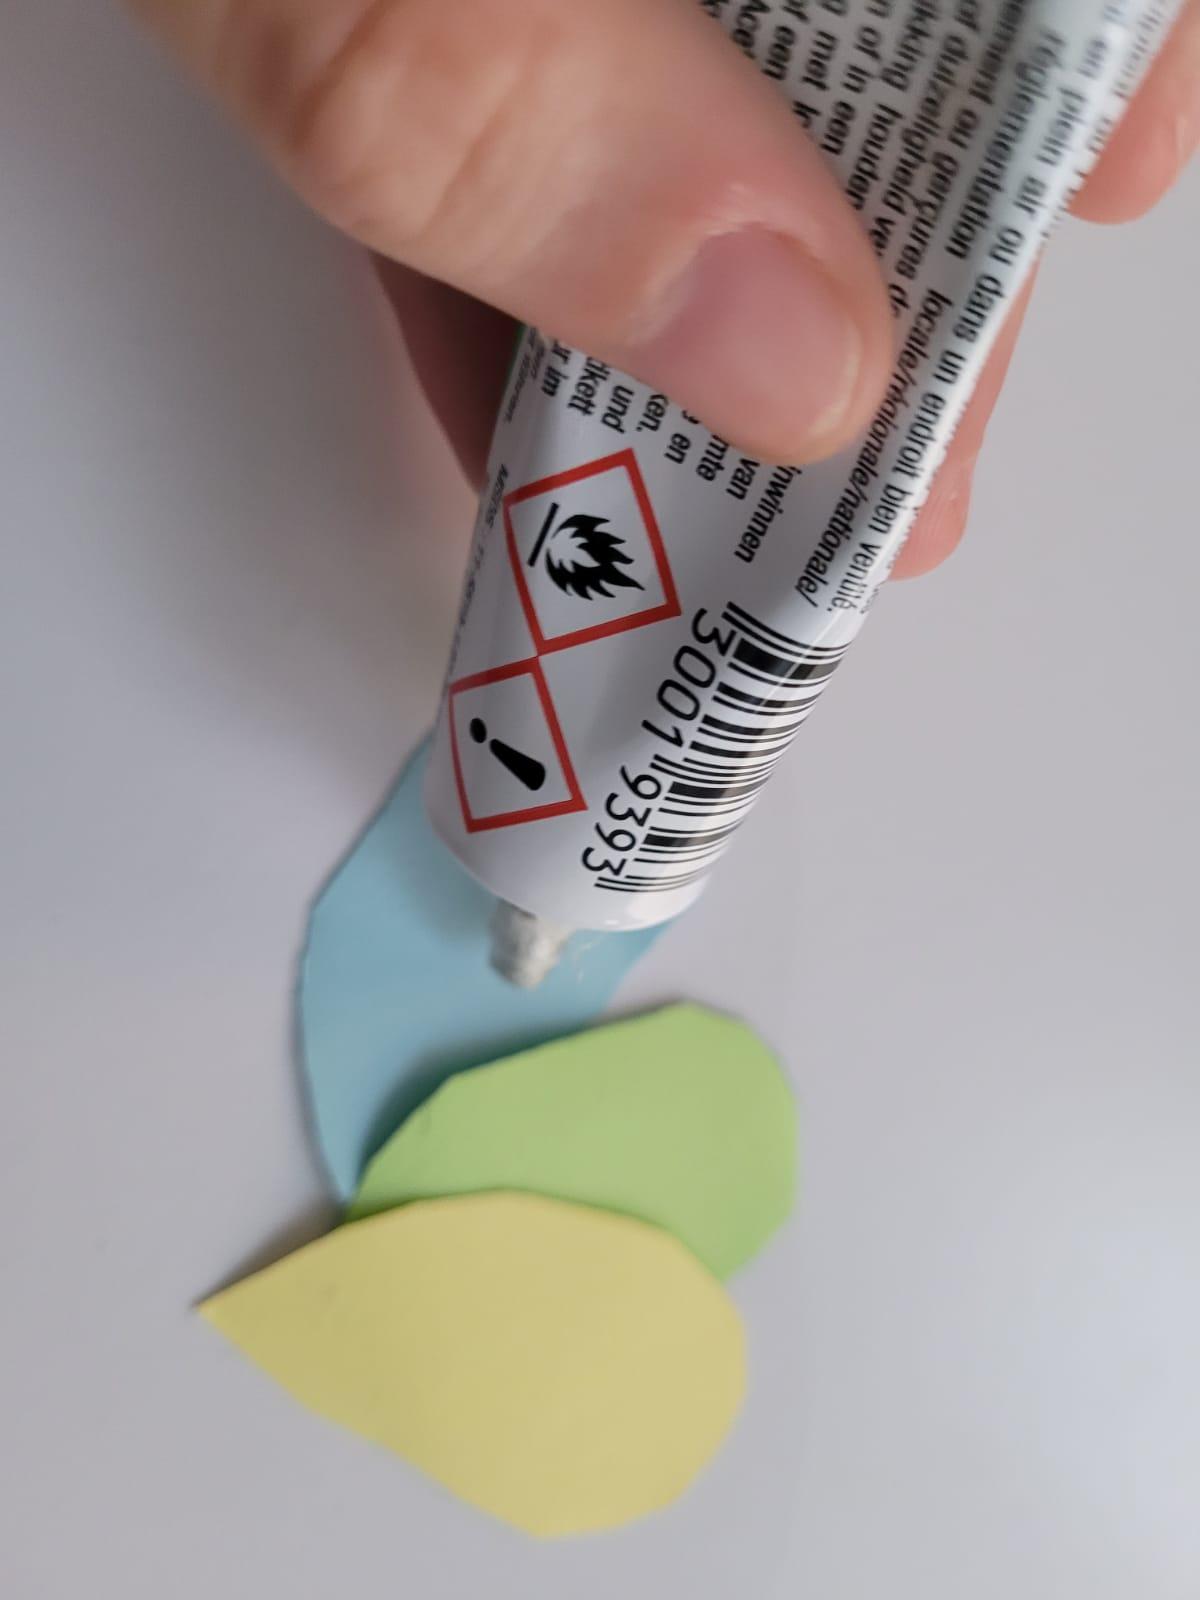
- Tin foil
- Cardboard
- Glue
- Pencil
- Si
And of course, a baby car seat and maybe a baby
Make the Petals

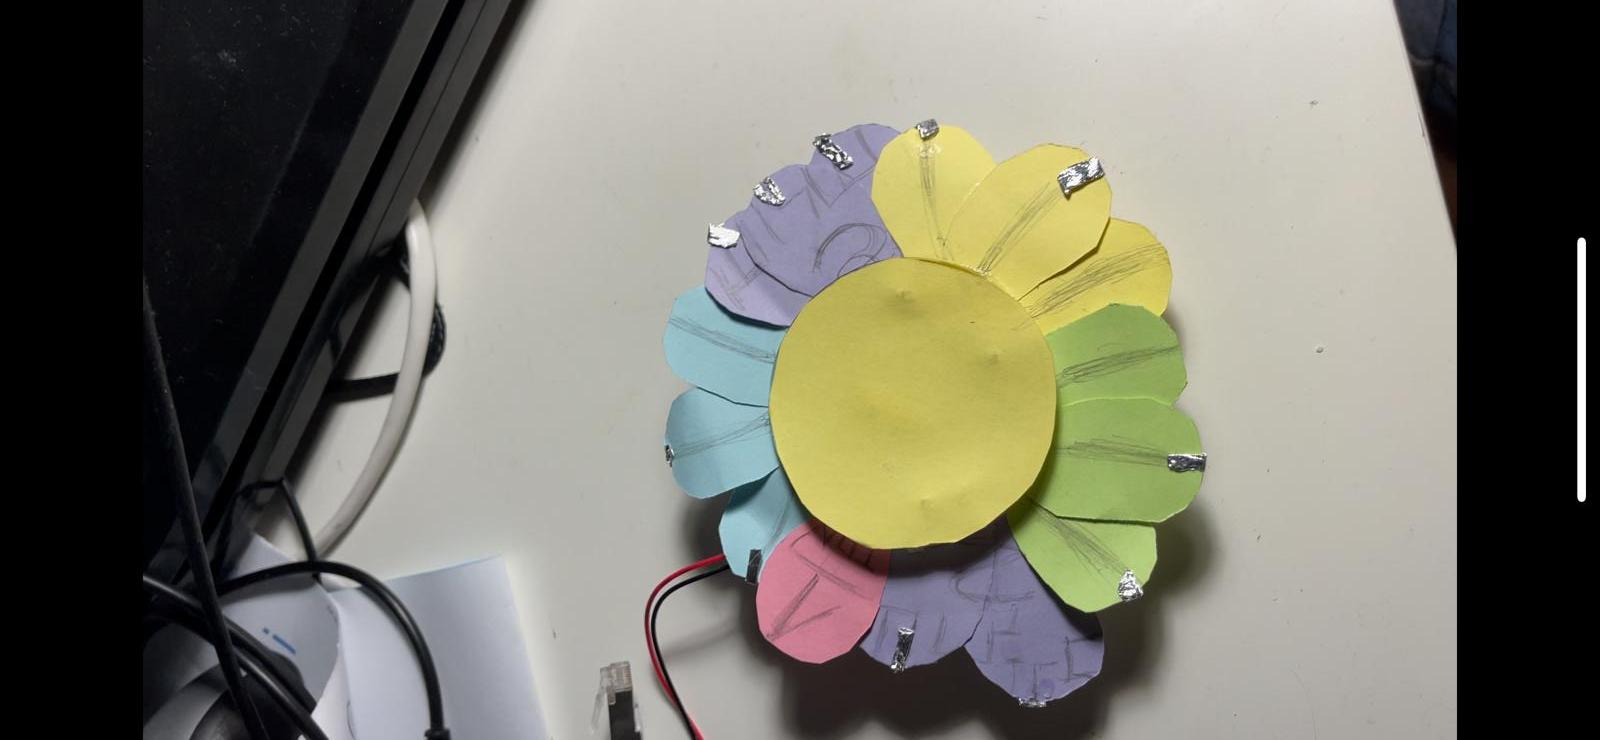
Since the playground is round and lovely, we decided to go with a flower design.
- Draw the petal size you want
-
Cut the cardboard into petal shape
-
Glue 2-3 petals together at a time
-
Measure the circuit playground on the cardboard
-
Cut a circle according to that
-
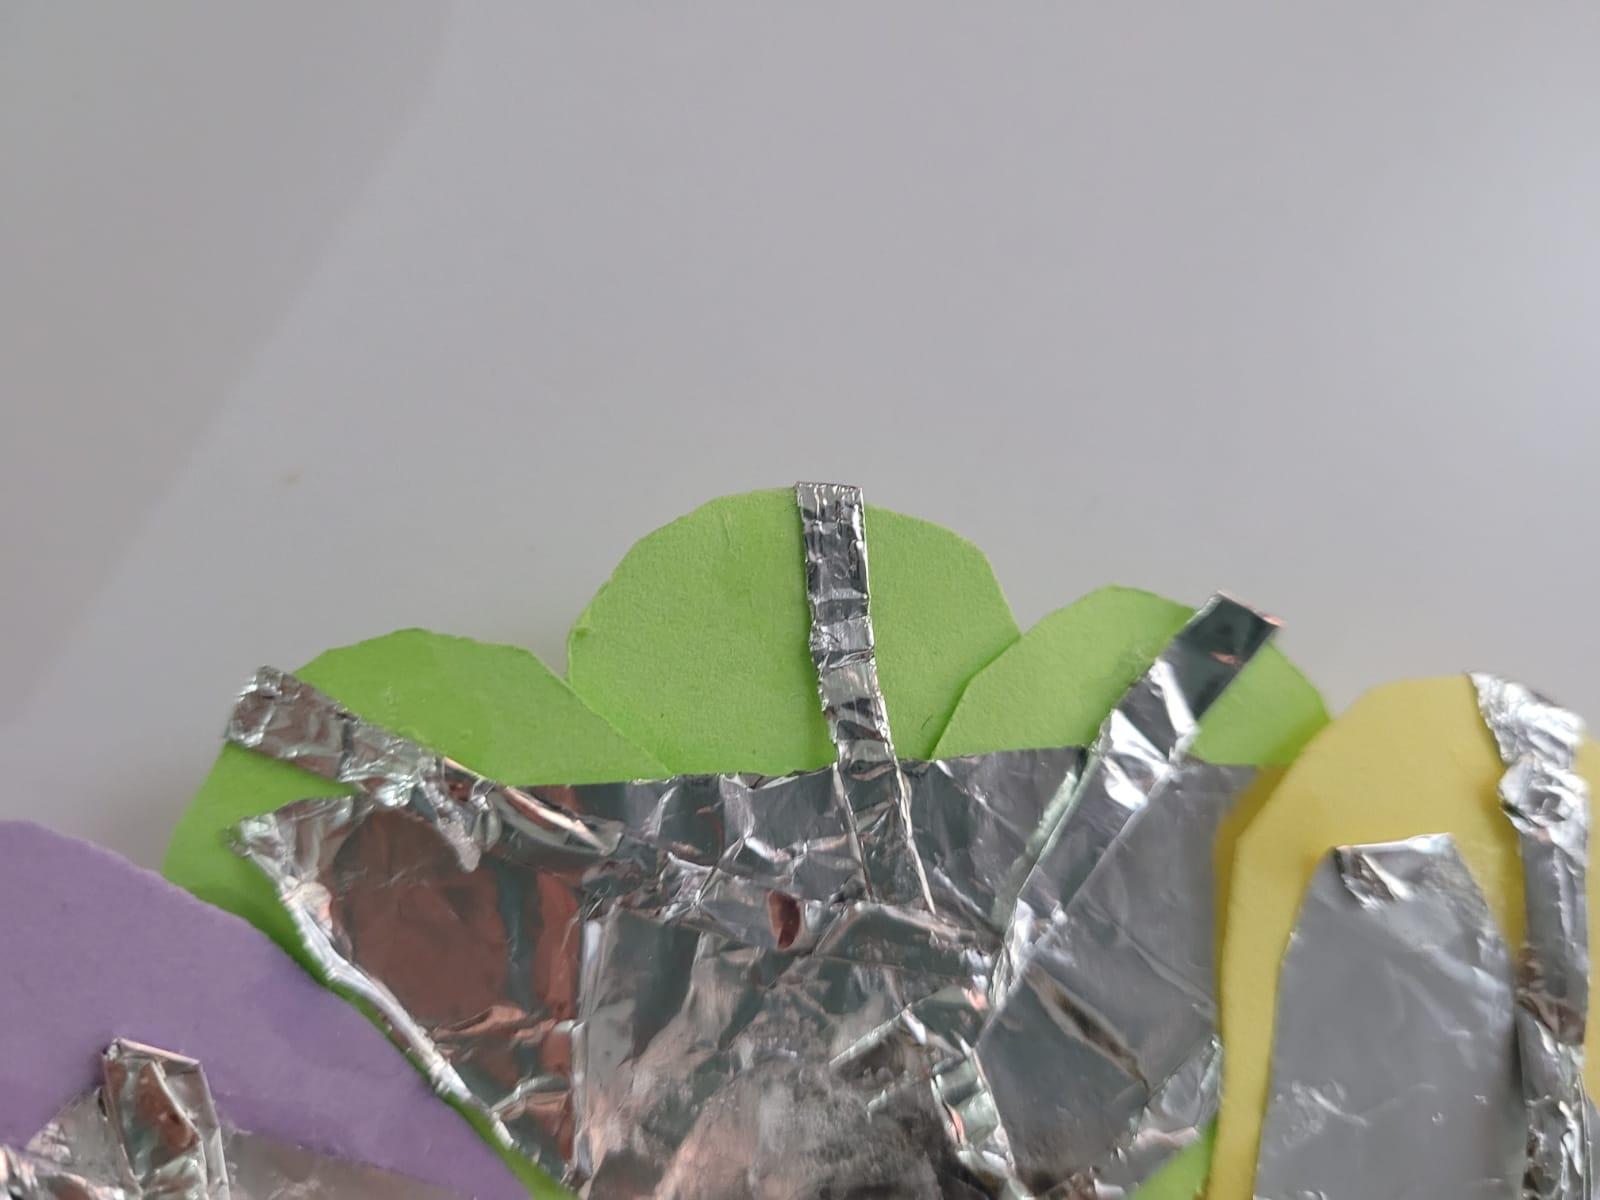
Glue tinfoil to the back of the petals combined
-
Glue that to that plastic side of the playground
Make a Tinfoil Wire
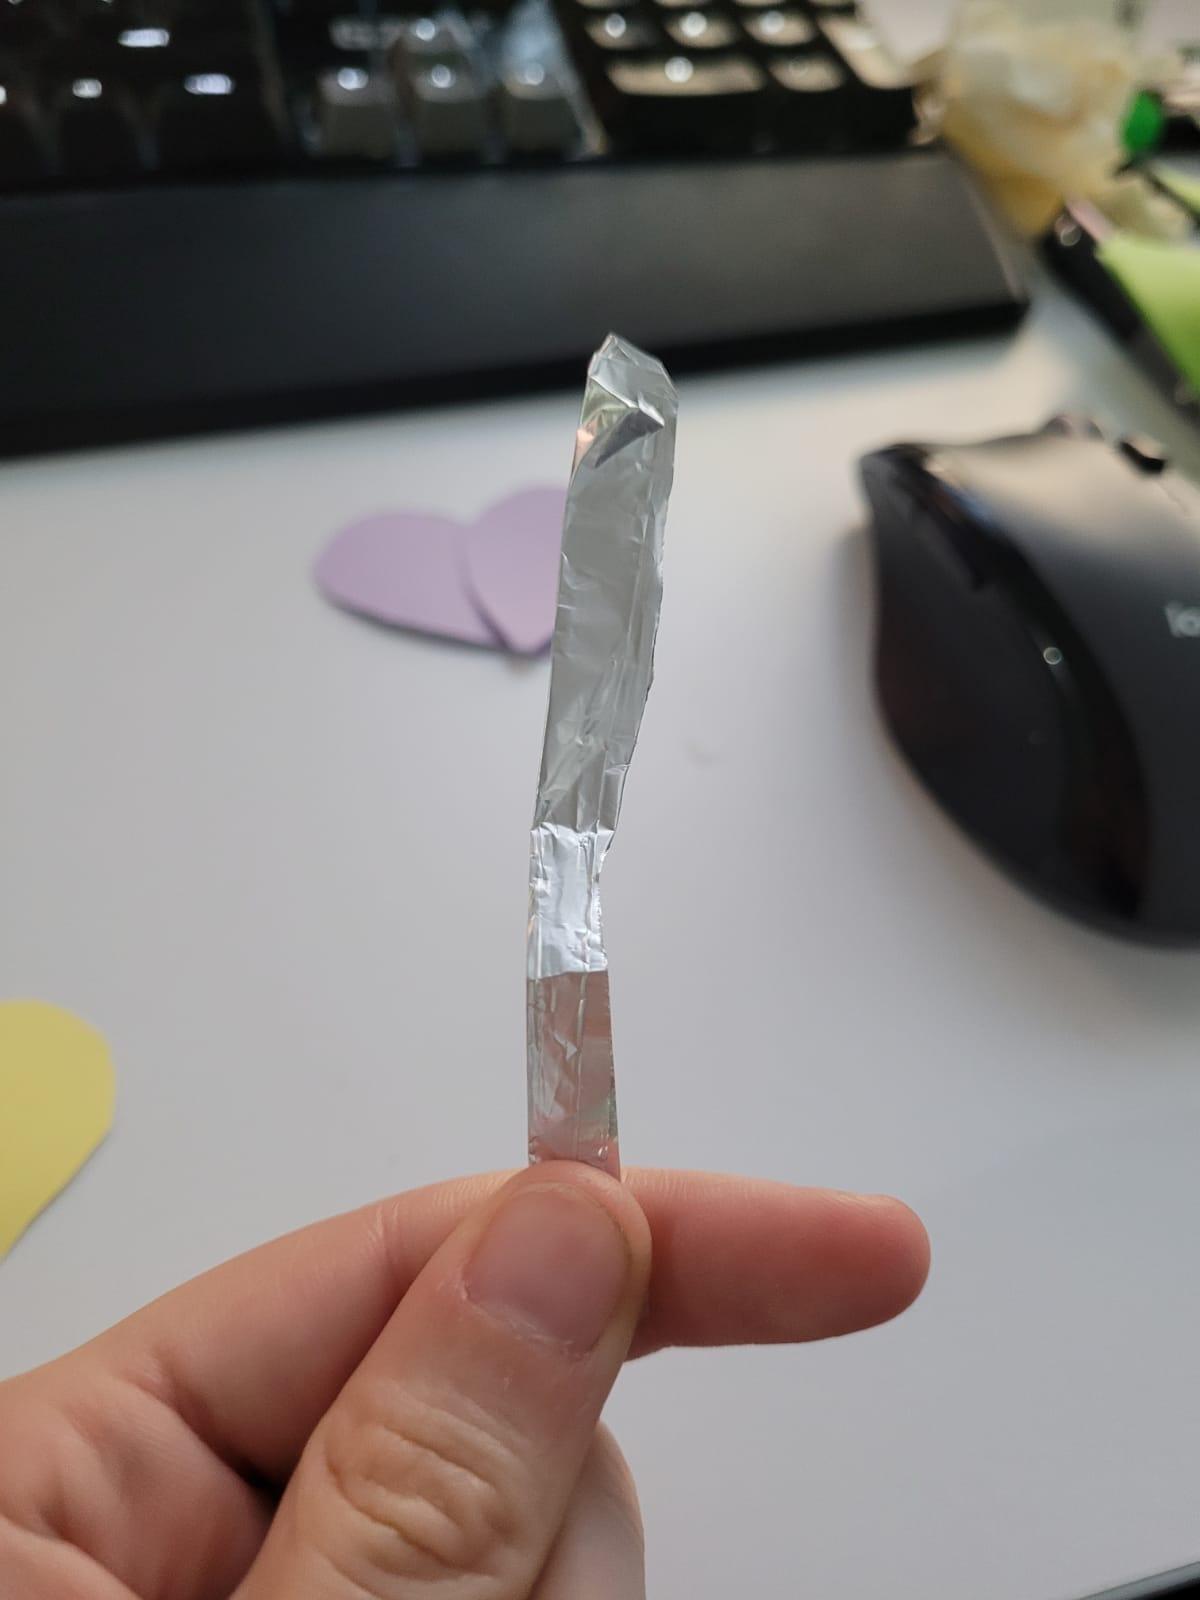
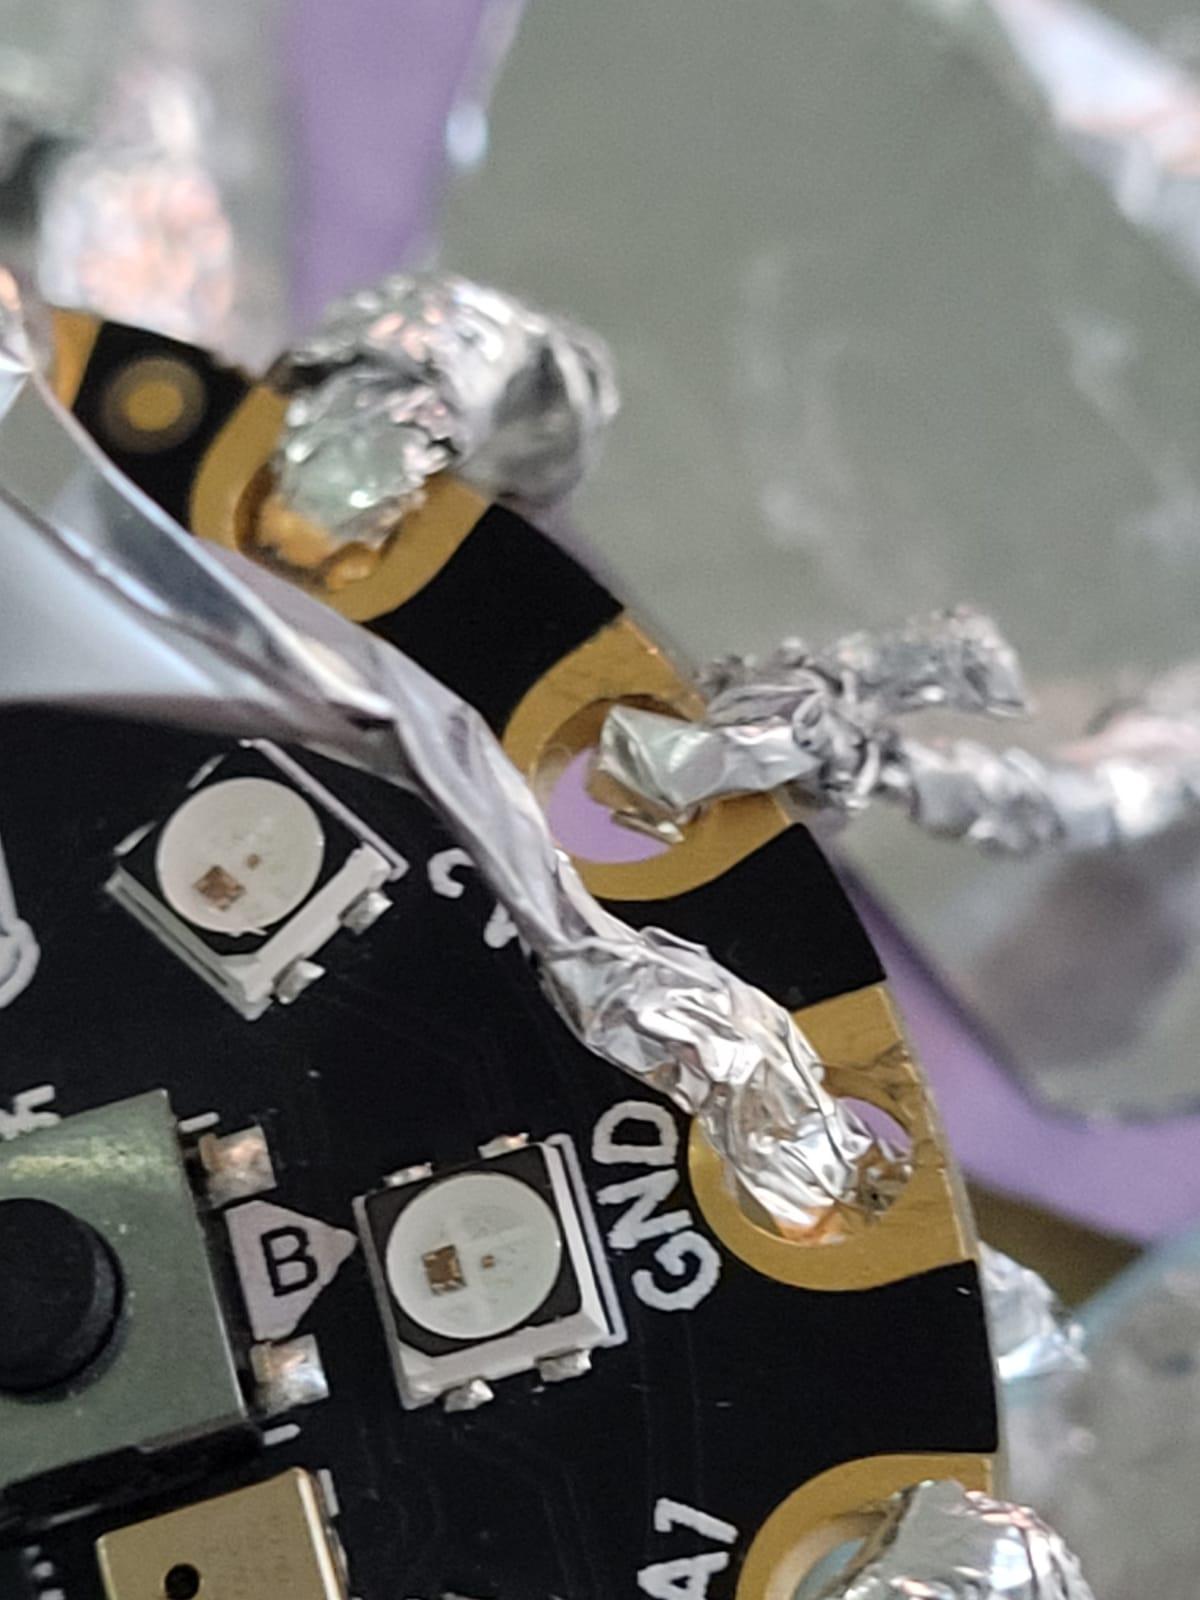
- With some scissor cut a long stripe of the tinfoil
- Fold the stripe in half on length and maybe repeat until it's the desired length
- Fold in the side of width in half until thick enough to be a wire
- Slide and tie through hole A1-A5 of the Circuit playground
- Glue to the edge of the petals
- Connect another stripe to the main, and do the same for each petal of the same kind
Adriano Code
Download the 3 files attached and name then "babyproject.ino", "pitches.h", "soundsAndmusin.h"
Initializing code :
1. Enter your wifi under the variable ‘ssid’ (line)
2. Enter your wifi’s password under the variable ‘pass’ (line )
3. Enter your Blynk authentication code under variable ‘auth’ (line )
4. Run your Blynk project
5. Upload sketch to Circuit Playground Express (Note: keep the CPX connected to computer)
6. Run Integromat scenarios
Blynk
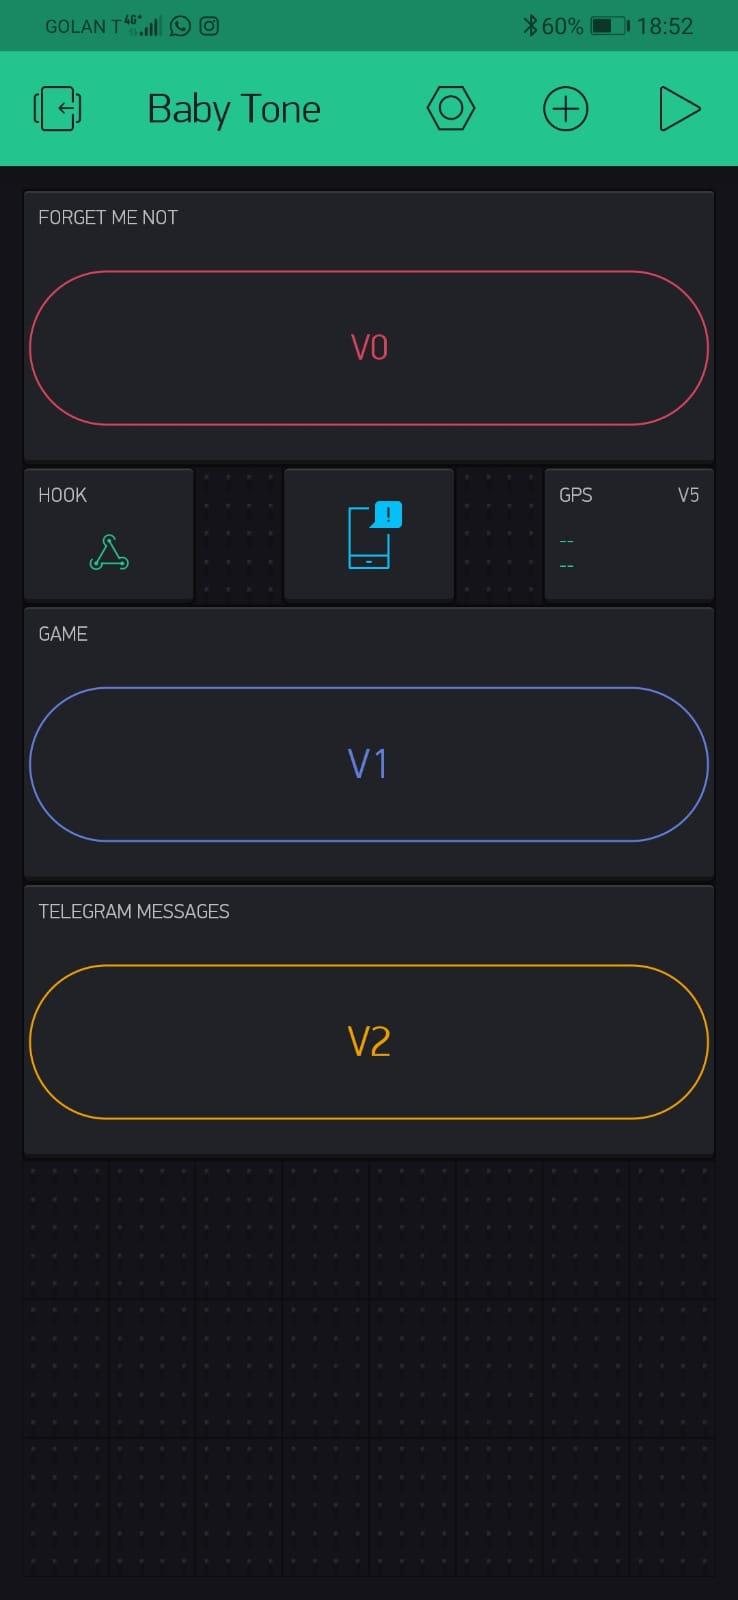
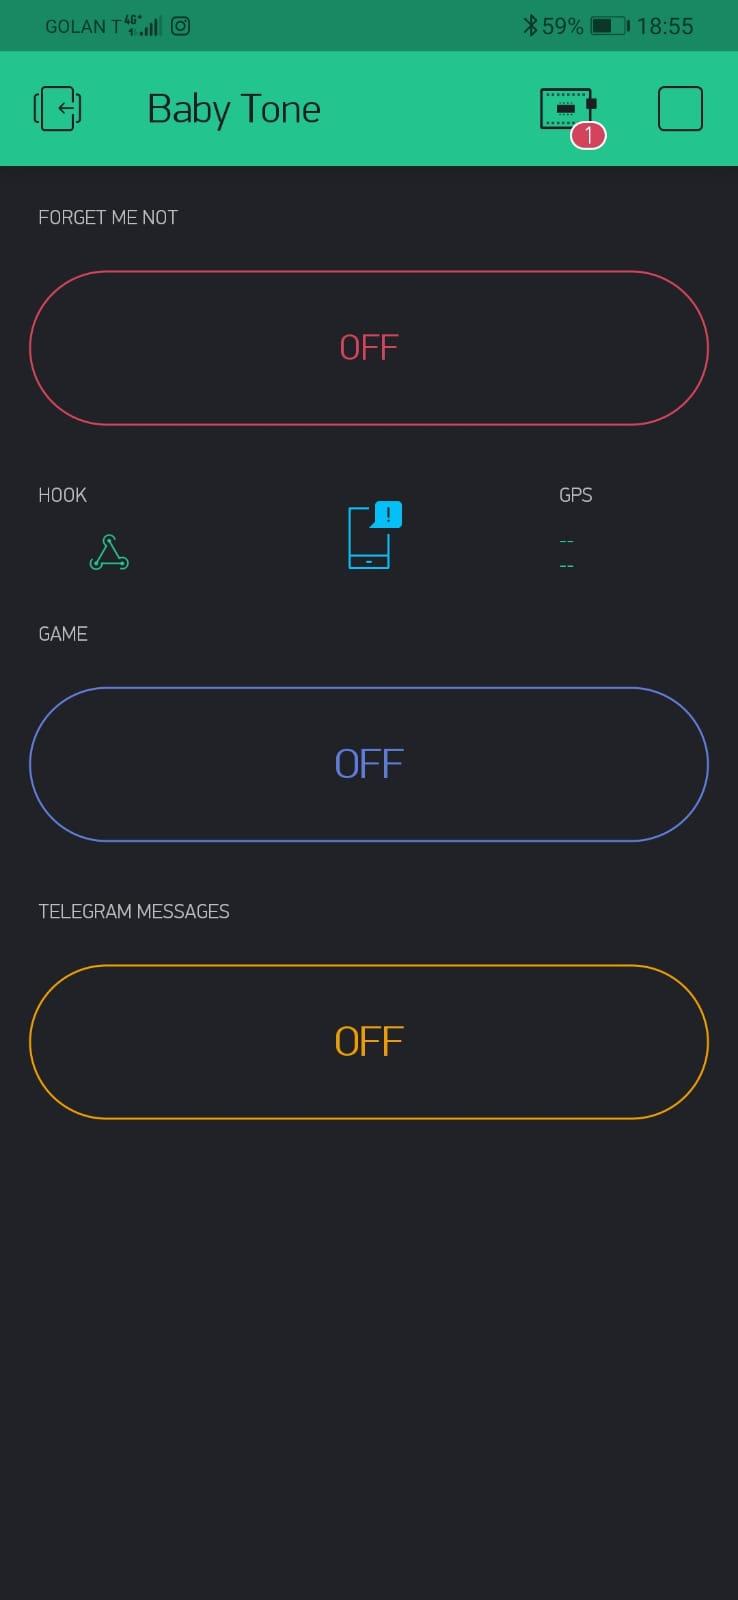
- Download Blynk app from AppStore/GooglePlay
- Go to the Blynk app
- Touch the QR-code icon and point the camera to the QR code
after that send yourself the authentication code (we will use it in the next step)
If this was successful go to next step , else continue to read , - Create a new project
- An authentication key will be sent to your email address - keep that key somewhere close
- Follow the following steps:
-
Click the small (+) button, and add the following widgets to your dashboard:
-
1 x Styled Button or Button. (300/200 energy pts)
2X Button. (200 energy pts )
1x GPS stream (500 energy pts)
1x Notification(300 energy pts)
1x Web Hooks (300 energy pts)
-
Set the following:
Styled button to V0
Button called Game to V1
Web Hooks to V3:
https://hook.integromat.com/xxxxxxxxxxxxxxxxxxxxxx...The xxx part of the URL should be replaced with the URL you get from Integromat in the Integromat 2 step
Telegram Bot Button to V2
GPS to v5
-
Integromat
Integromat lets you connect apps and automate workflows in a few clicks. Move data between apps without effort. It allows you to glue together different apps and programs and gives you the option to create creative and interesting projects.
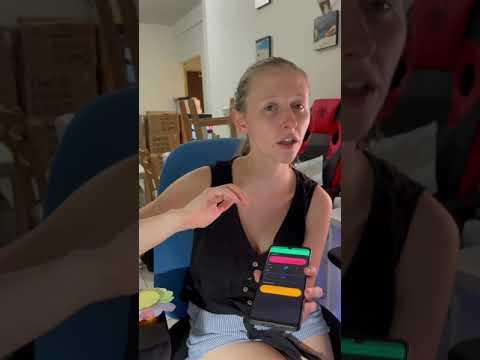
In this project we used it to send warnings to the parent's smartphone. It sends a message to a bot in telegram.
1. First you need to open an account in integromat.com
2. In the right side of the screen click on Create a new scenario:
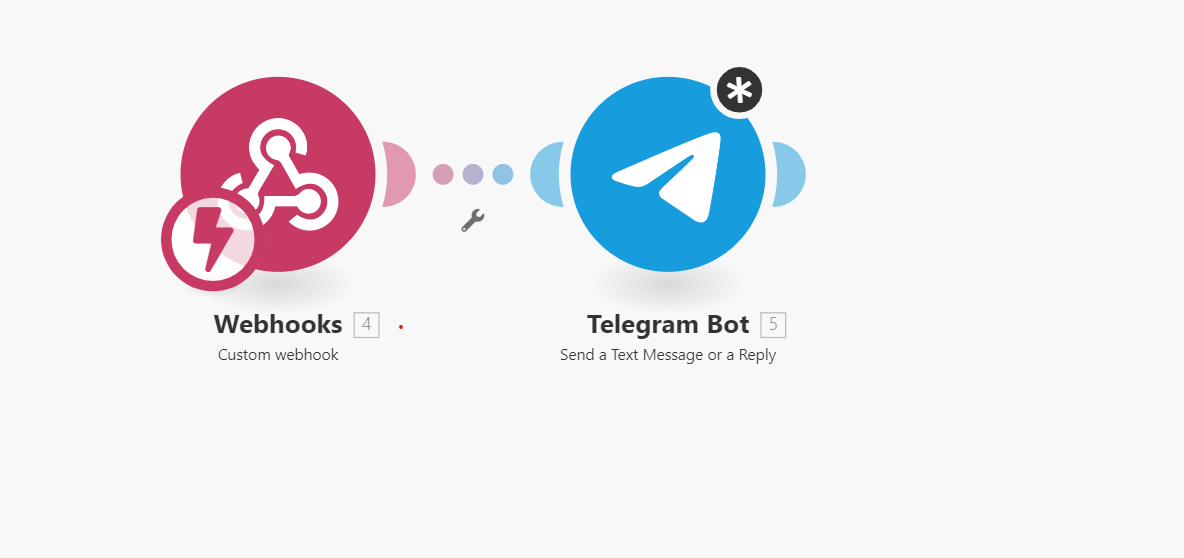
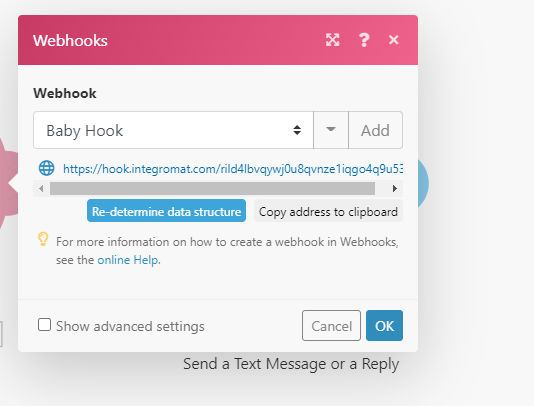
2.1 Click on the + sign and choose Webhooks component, which allows us to trigger a response
2.2 Take the URL from the blynk app, and paste it in the URL in the web
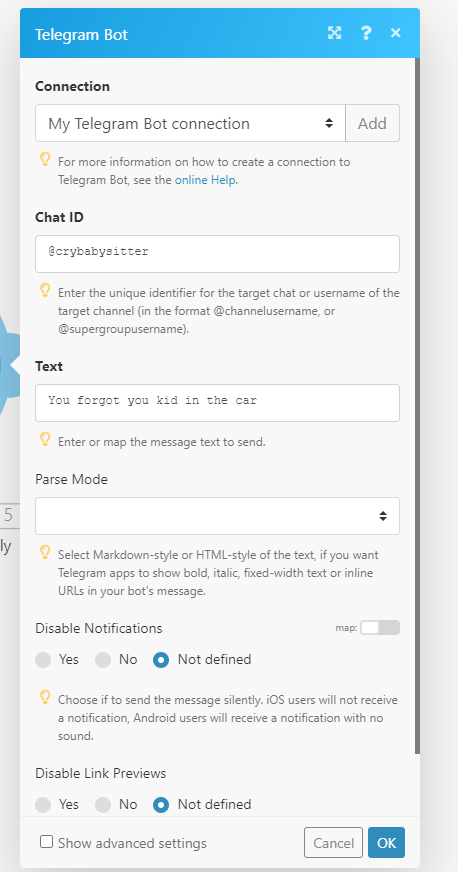
3. Add another module and choose Telegram bot
3.1 In the settings, under Chat ID insert your telegram bot user ID
3.2 Under text insert the message you wish to send. This message will be sent automatically once triggered
4. Connect the webhooks component to the telegram bot component