BECOME a MAD CYBORG... Part Human, Part Dead Computers (UPDATED!!!)
by M.C. Langer in Craft > Costumes & Cosplay
38078 Views, 148 Favorites, 0 Comments
BECOME a MAD CYBORG... Part Human, Part Dead Computers (UPDATED!!!)


.jpg)


.jpg)
.jpg)
M.C. Langer was an ordinary DIY artist until a bizarre accident (papercut printing an instructable) crippled him physically and mentally. Now, he had to rebuild his damaged body with dead computers pieces for the only target in his twisted mind: REVENGE AGAINST INSTRUCTABLES.COM!!
(What?? It was a big papercut. And It hurt so much. And the instructable was the Bacon Cheesecake Brownies recipe. I'm barely alive...)
If you want to join me in this insane quest, you will need your own cyborg attachments, so I will teach you how to make props of a mechanical arm (the clamp can be activated by spring action or motorized action, I will show both possibilities), a face plate (the eye lights) and the battle vest (the chest plate lights too).
And the best part? The props are made 90% of dead computers pieces. You will find here plastic cases of almost any kind of computer parts or accessories related with computers, PC and MAC. (Curiously, the only thing you will not find here is a mouse).
Well my minions, ready to take over the world?
www.youtube.com/watch
www.youtube.com/watch
A Lot of Useful and Important Blablabla Before Starting...
.jpg)
.jpg)
.jpg)
.jpg)
.jpg)
.jpg)
.jpg)
.jpg)
.jpg)
.jpg)
1. Junkyards
2. Computers technical service sites
3. Trash cans, specially when they are located in front of computers technical service sites and computers stores.
Exactly, what are we looking for? Everything computer related: printers, keyboards, CPUs, screens (and, specially, screens bases), joysticks, speakers, scanners... everything!!
Try to always have an important amount of raw material (plastic junk, computer pieces, damaged toys) in your workshop. It will save you of travel for all de city looking for materials.
Starting every step, I will tell you what materials are equired for the prop. But remember: loose engineering. It's improbable you can make an identical prop, because you'll find different pieces than mine. For the same reason, I can't tell you exactly where to drill and put screws and nuts (and you will have to put a lot). So, use your creativity!
For the moment, you will need this:
MATERIALS:
- A lot of computer pieces
- A lot of screws, nuts and metallic rings
- iron angles
- Instant glue
- tin soldering
- wire
- electric screwdiver
TOOLS:
- rotary tool (VERY IMPORTANT!!)
- soldering iron
- tweezers
- screwdivers (if they are electric, better!)
- pliers
- heat gun
Along this project, you will need to do these actions:
- Disassemble printers, speakers, scanners and everything assembled.
- Drill and join plastic pieces using screws, nuts, metallic rings and angles.
- Cut, drill, burnish and work the plastic pieces using the rotary tool.
- Cut the spare parts of screws.
- Mold, bend and melt the plastic using the heat gun.
- Tear down plastic pieces using the pliers.
- Stick foamy or another padded material at those prop sites in contact with your body.
- Solder wires.
- Use the instant glue to fix the nuts on the screws, specially in the screws than acts as axis.
SAFETY PRECAUTIONS:
1. Always use personal protective equipment (goggles, dust mask, gloves and others), specially when you use rotary tools.
2. Work in an area with good ventilation
3. The things warmed by a heat gun or worked with a rotary tool could be very hot. Be careful when manipulate!
4. Getting computer pieces, don't dig deeply in public trash cans (only use the shallow pieces), and be careful when you dig in a junkyard. Use protective gloves. Don't use pieces found with hospitalary waste or in contact with another biological or chemical source of risk.
Well, as the great Tallahassee says, TIME TO NUT UP, OR SHUT UP!
MECHANICAL ARM (option A: Spring Action)
.jpg)
.jpg)
.jpg)
.jpg)
.jpg)
.jpg)
.jpg)
.jpg)
.jpg)
.jpg)
.jpg)
.jpg)
.jpg)
.jpg)
.jpg)
.jpg)
.jpg)
.jpg)
.jpg)
.jpg)
.jpg)
.jpg)
.jpg)
.jpg)
.jpg)
.jpg)
.jpg)
.jpg)
.jpg)
.jpg)
.jpg)
.jpg)
.jpg)
.jpg)
.jpg)
.jpg)
.jpg)
.jpg)
.jpg)
.jpg)
.jpg)
.jpg)
.jpg)
.jpg)
.jpg)
.jpg)
.jpg)
.jpg)
.jpg)
.jpg)
.jpg)
.jpg)
.jpg)
.jpg)
.jpg)
.jpg)
MATERIALS:
- Damaged printer (the main piece of the arm)
- Other printers pieces and cases
- Three screen round bases (two with entries for the elbow, one perfectly round for the clamp base)
- CPU frontal piece
- Aluminum pipe
- Five speakers (four for the clamp fingers, one for the base of the clamp)
- Springs
- Plastic handles (I use a plastic spool of thread and the handle of a toy shovel)
Downloads
MECHANICAL ARM (option B: Motorized Action)
.jpg)
.jpg)
.jpg)
.jpg)
.jpg)
.jpg)
.jpg)
.jpg)
.jpg)
.jpg)
.jpg)
.jpg)
.jpg)
.jpg)
.jpg)
.jpg)
.jpg)
.jpg)
.jpg)
.jpg)
.jpg)
.jpg)
.jpg)
.jpg)
.jpg)
.jpg)
.jpg)
.jpg)
.jpg)
.jpg)
.jpg)
.jpg)
Well; generally, the spring clamp is not a bad thing, but It was for this project. I start with the spring option because the feeling of grab the things, and the concept of "simple solutions are the best". And it's not a bad idea, but I forgot something: the total weight of the arm. It's very hard to lift a heavy arm and squeeze springs at the same time. Well... back to the workshop!
EXTRA MATERIALS:
- Electric screwdiver (it has all you need: reduction box, a good motor and a reversible switch. You only have to hack it and extend the wires).
- Printers adaptator.
- Joystick (it will be the new handle)
- Metallic angles
- Speaker (with battery box for 4 AA batteries)
- Switch
- Wires
- Electric isolator
- Plastic pieces
Downloads
CYBORG'S BATTLE VEST
.jpg)

.jpg)
.jpg)
.jpg)
.jpg)
.jpg)
.jpg)
.jpg)
.jpg)
.jpg)
.jpg)
.jpg)
.jpg)
.jpg)
.jpg)
.jpg)
.jpg)
.jpg)
.jpg)
.jpg)
.jpg)
.jpg)
.jpg)
.jpg)
.jpg)
.jpg)
.jpg)
.jpg)
.jpg)
.jpg)
.jpg)
- A scanner
- Two old PC speakers
- LCD DELL screen back section
- PC screen base
- MAC screen base
- Printer piece
- Thermo top
- Battery box (for 4 AA batteries)
- Switch
- Wires
- Three green LEDs
- Metallic case of an old alarm clock (with de glass)
- Deodorant cap
- Plastic bottle cap with nozzle
- Metallic angles
FACE PLATE
.jpg)
.jpg)
.jpg)
.jpg)
.jpg)
.jpg)
.jpg)
.jpg)
.jpg)
.jpg)
.jpg)
.jpg)
.jpg)
.jpg)
.jpg)
.jpg)
.jpg)
.jpg)
.jpg)
.jpg)
.jpg)
.jpg)
.jpg)
.jpg)
.jpg)
.jpg)
MATERIALS:
- Printer piece
- Web cam
- One red LED
- Wires
- Elastic band
- Duct tape
Fully Armored!!! Now, Time to Paint And... REVENGE!!!
.jpg)
.jpg)
.jpg)
.jpg)
.jpg)
.jpg)
.jpg)
.jpg)
.jpg)
.jpg)


I take pictures of the armour unpainted and painted. The choice is yours!!
Well... what are we waiting for??? LET'S GET DANGEROUS!!!!!!
UPGRADE: New Mechanical Arm (Power Clamp 2.0)


.jpg)
.jpg)
.jpg)
.jpg)


And what about the Plasma Gun? Wait for my next instructable!!!!!
UPGRADE 2: WEAPONS SYSTEM (And Halloween Fun!!)
.jpg)
.jpg)

.jpg)
.jpg)
.jpg)

https://www.instructables.com/id/Transform-a-damaged-heat-gun-into-a-light-gun/
And I insert it in a PVC pipe with pc bases, like the arm. The machine gun and missile launcher are from my SPD battlizer.
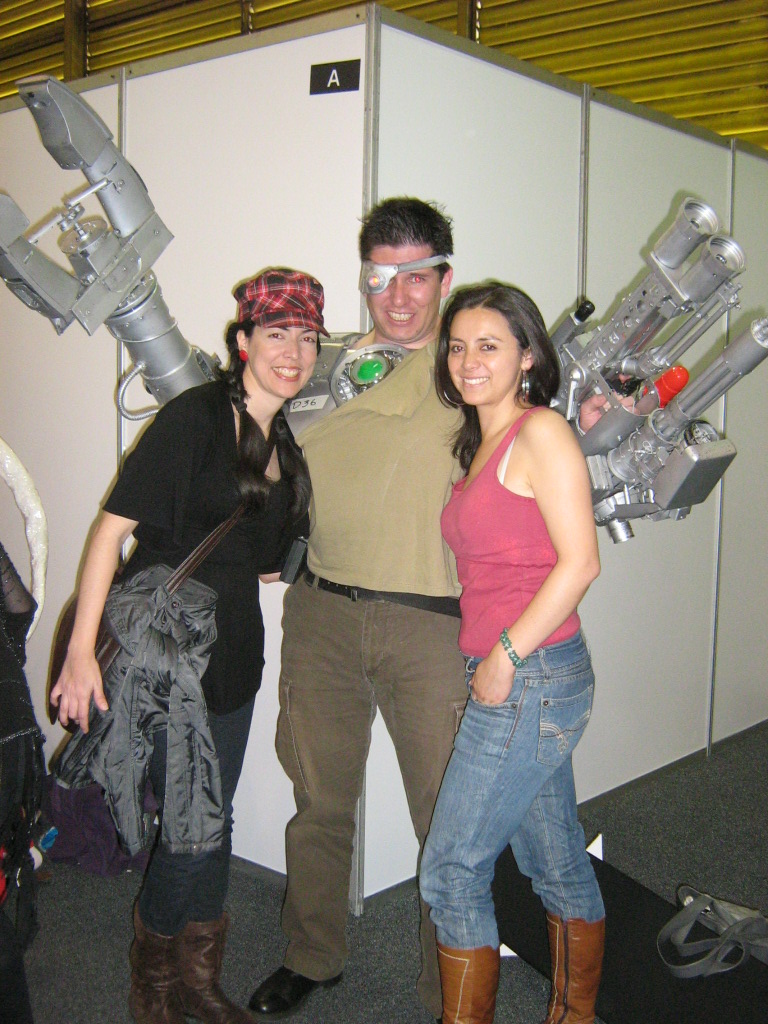
I put some pictures from Halloween events. It was a great time (and girls love the cyborgs!).