BC Eagle's Nest
If you are a true Boston College fan, this instructable is just for you. By incorporating some 3D printing, a solo cups, and an LED strip that reacts to sound, it is a piece of work that can spice up any BC gathering or game.
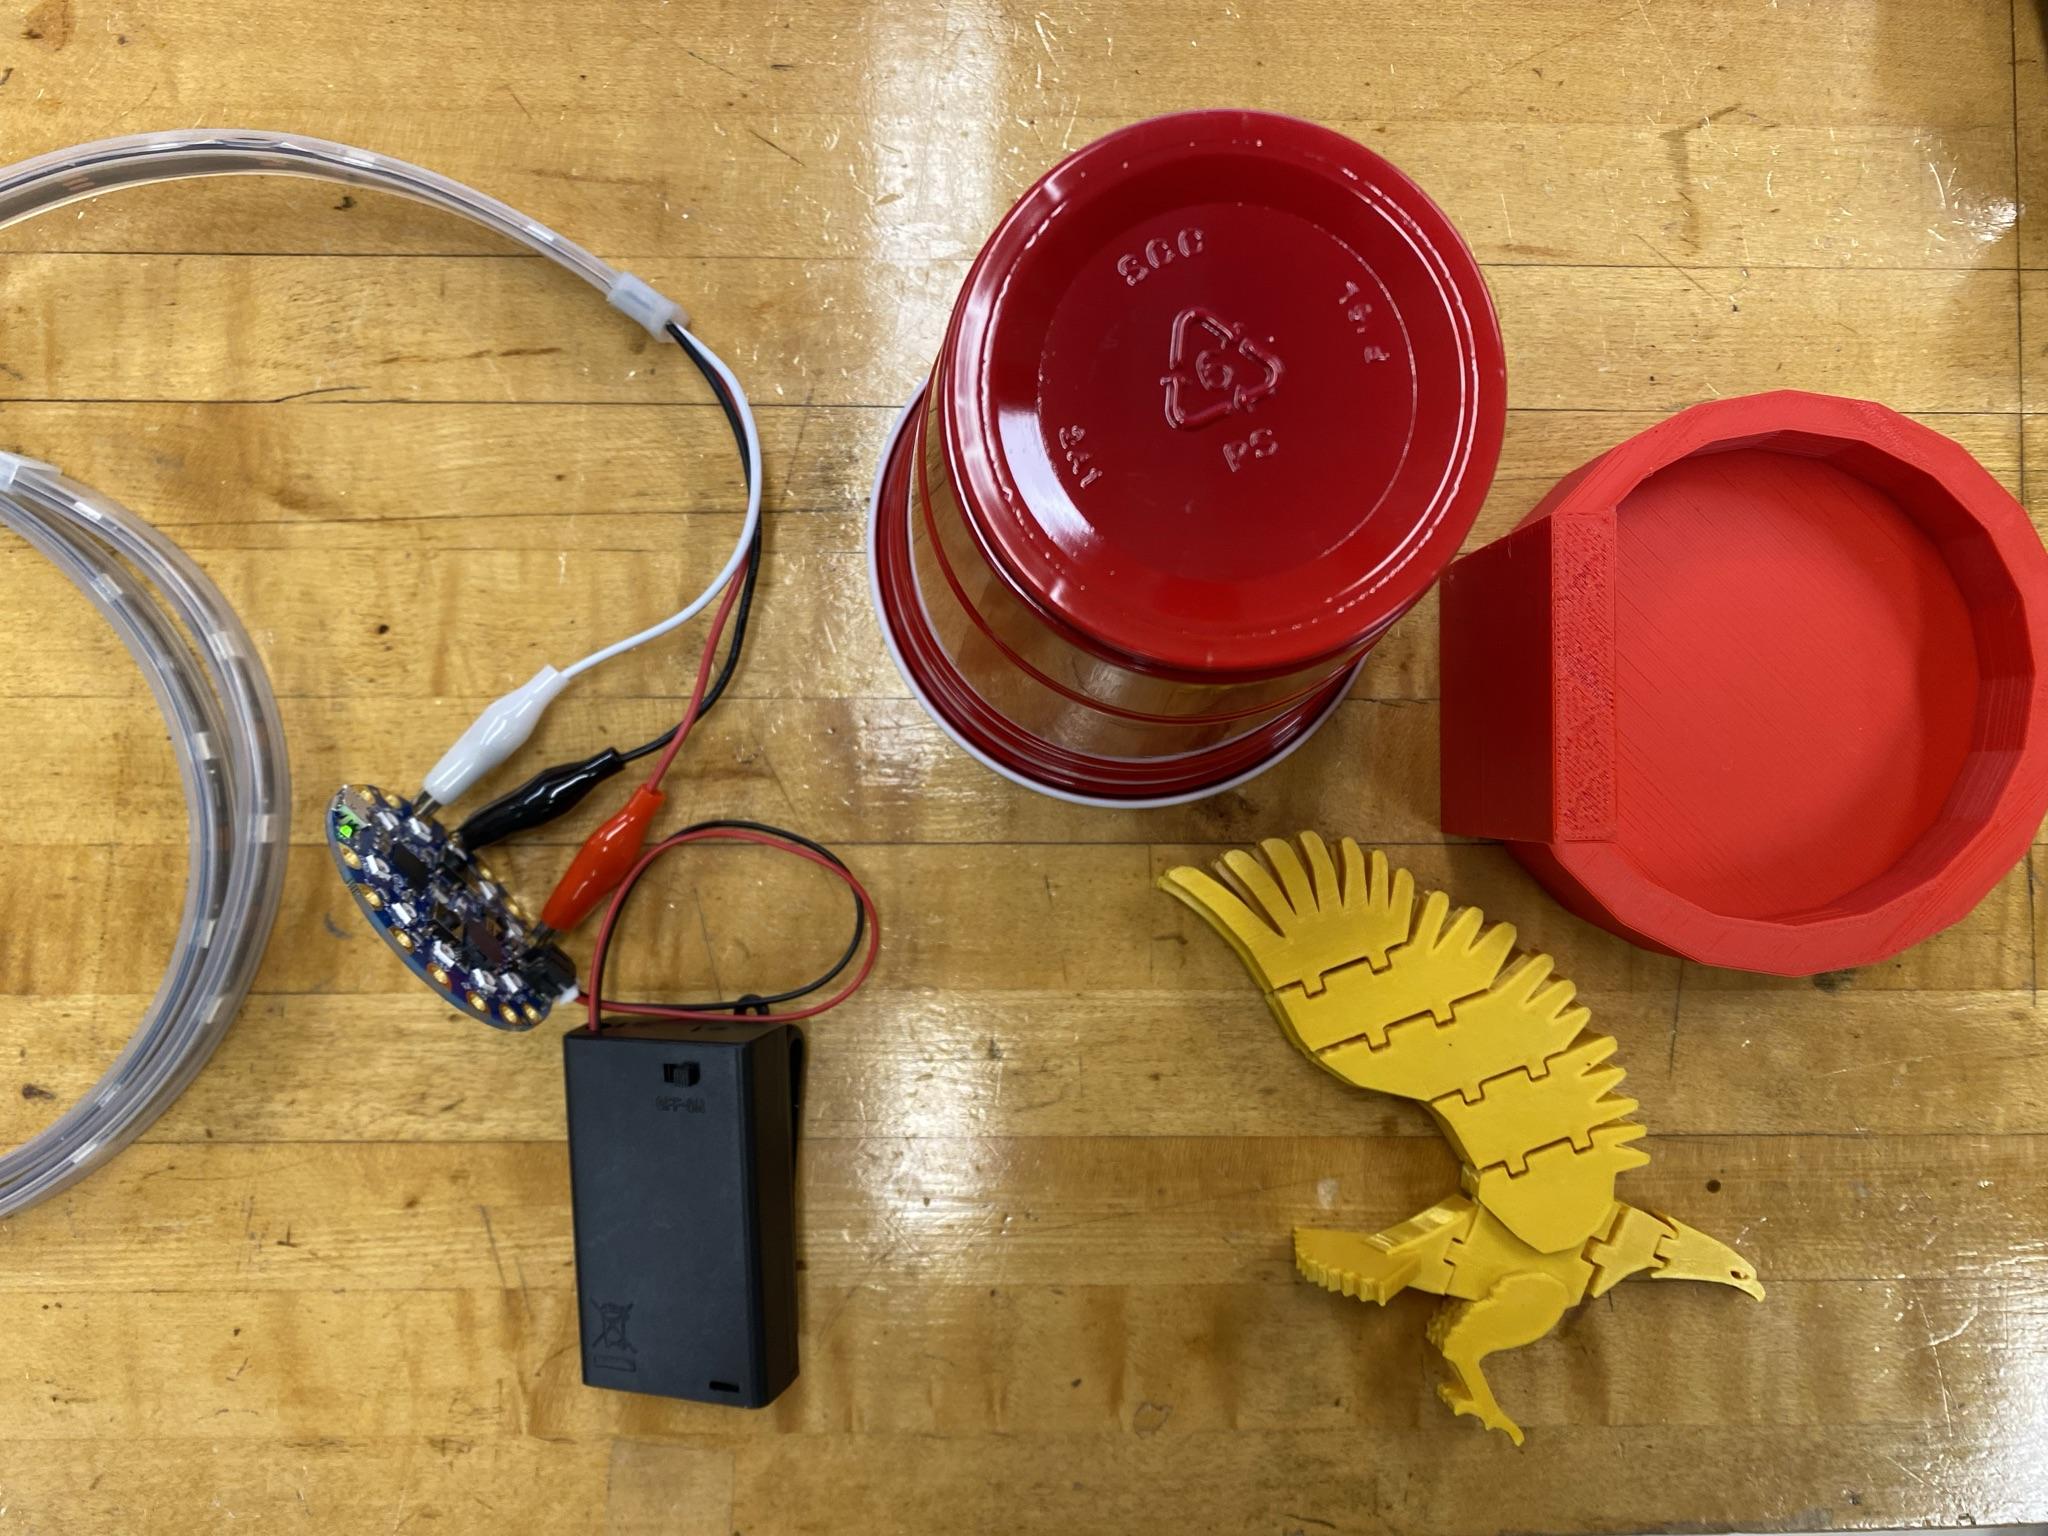
Supplies
- Red Solo Cup
- TinkerCad link
- 3D Print File for Eagle
- Boston College Sticker
- LED lightstrip
- Circuit Python
- Battery Pack with 3 AAA
- Laptop
- Scissors
- Duct Tape
- Circuit Playgound Board
Code for LED Lights
Here is the attached file for the Circuit Python code that programs the LED lights to react to sound. The color can be changed to whatever the user desires, but it is currently set on gold.
Downloads
Assemble
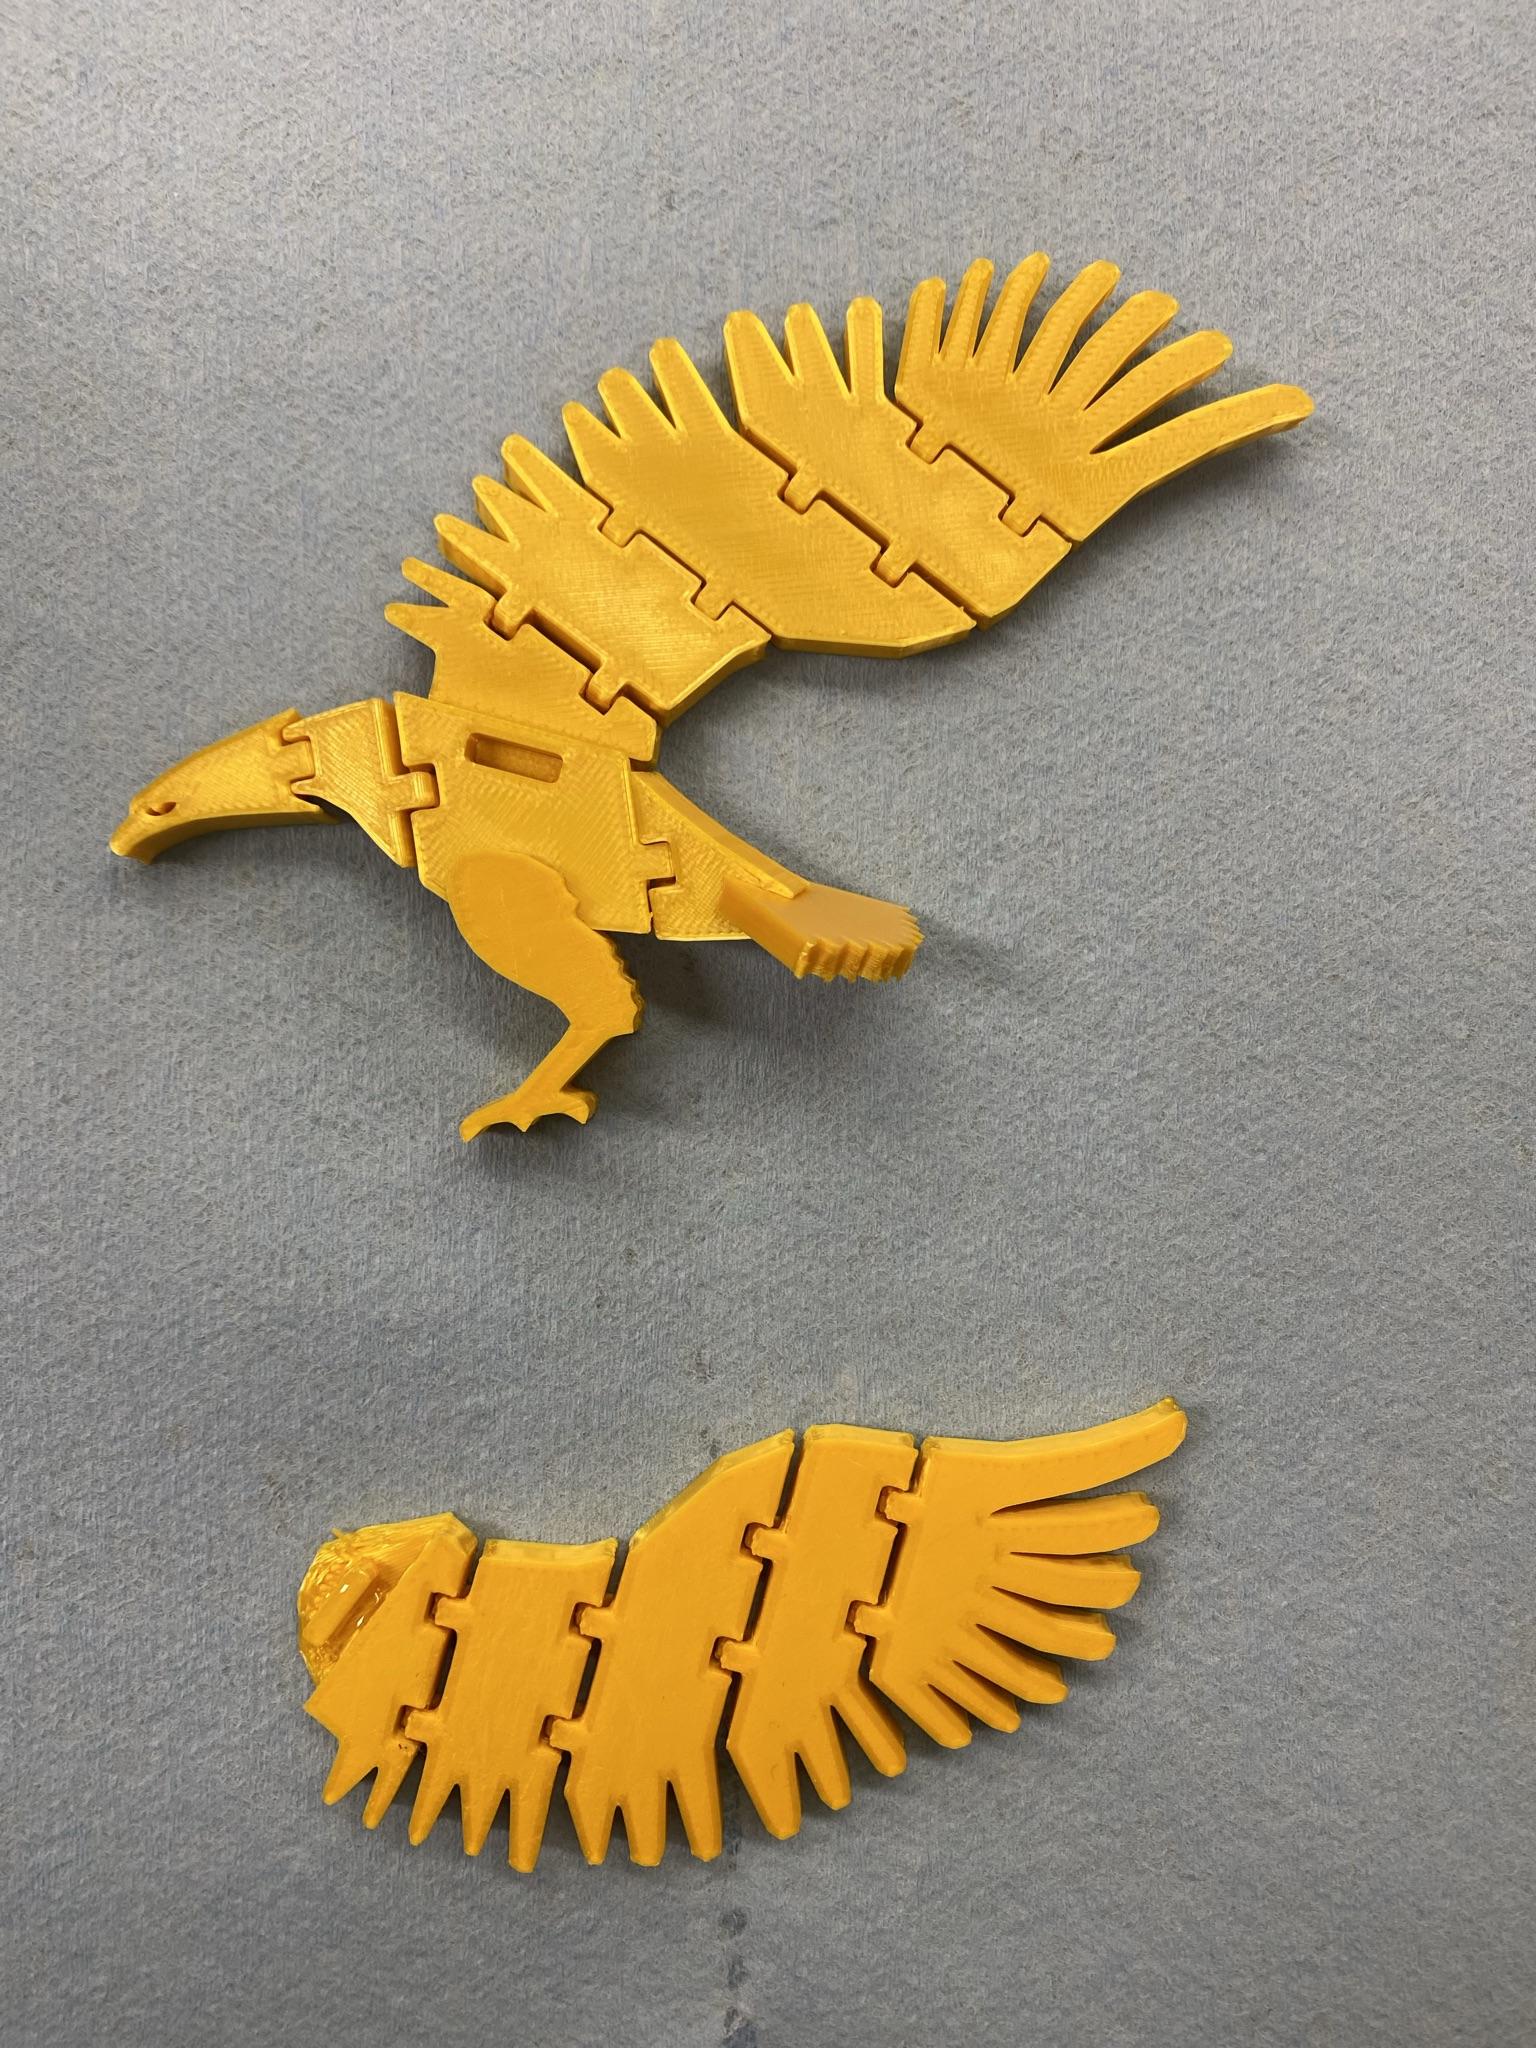
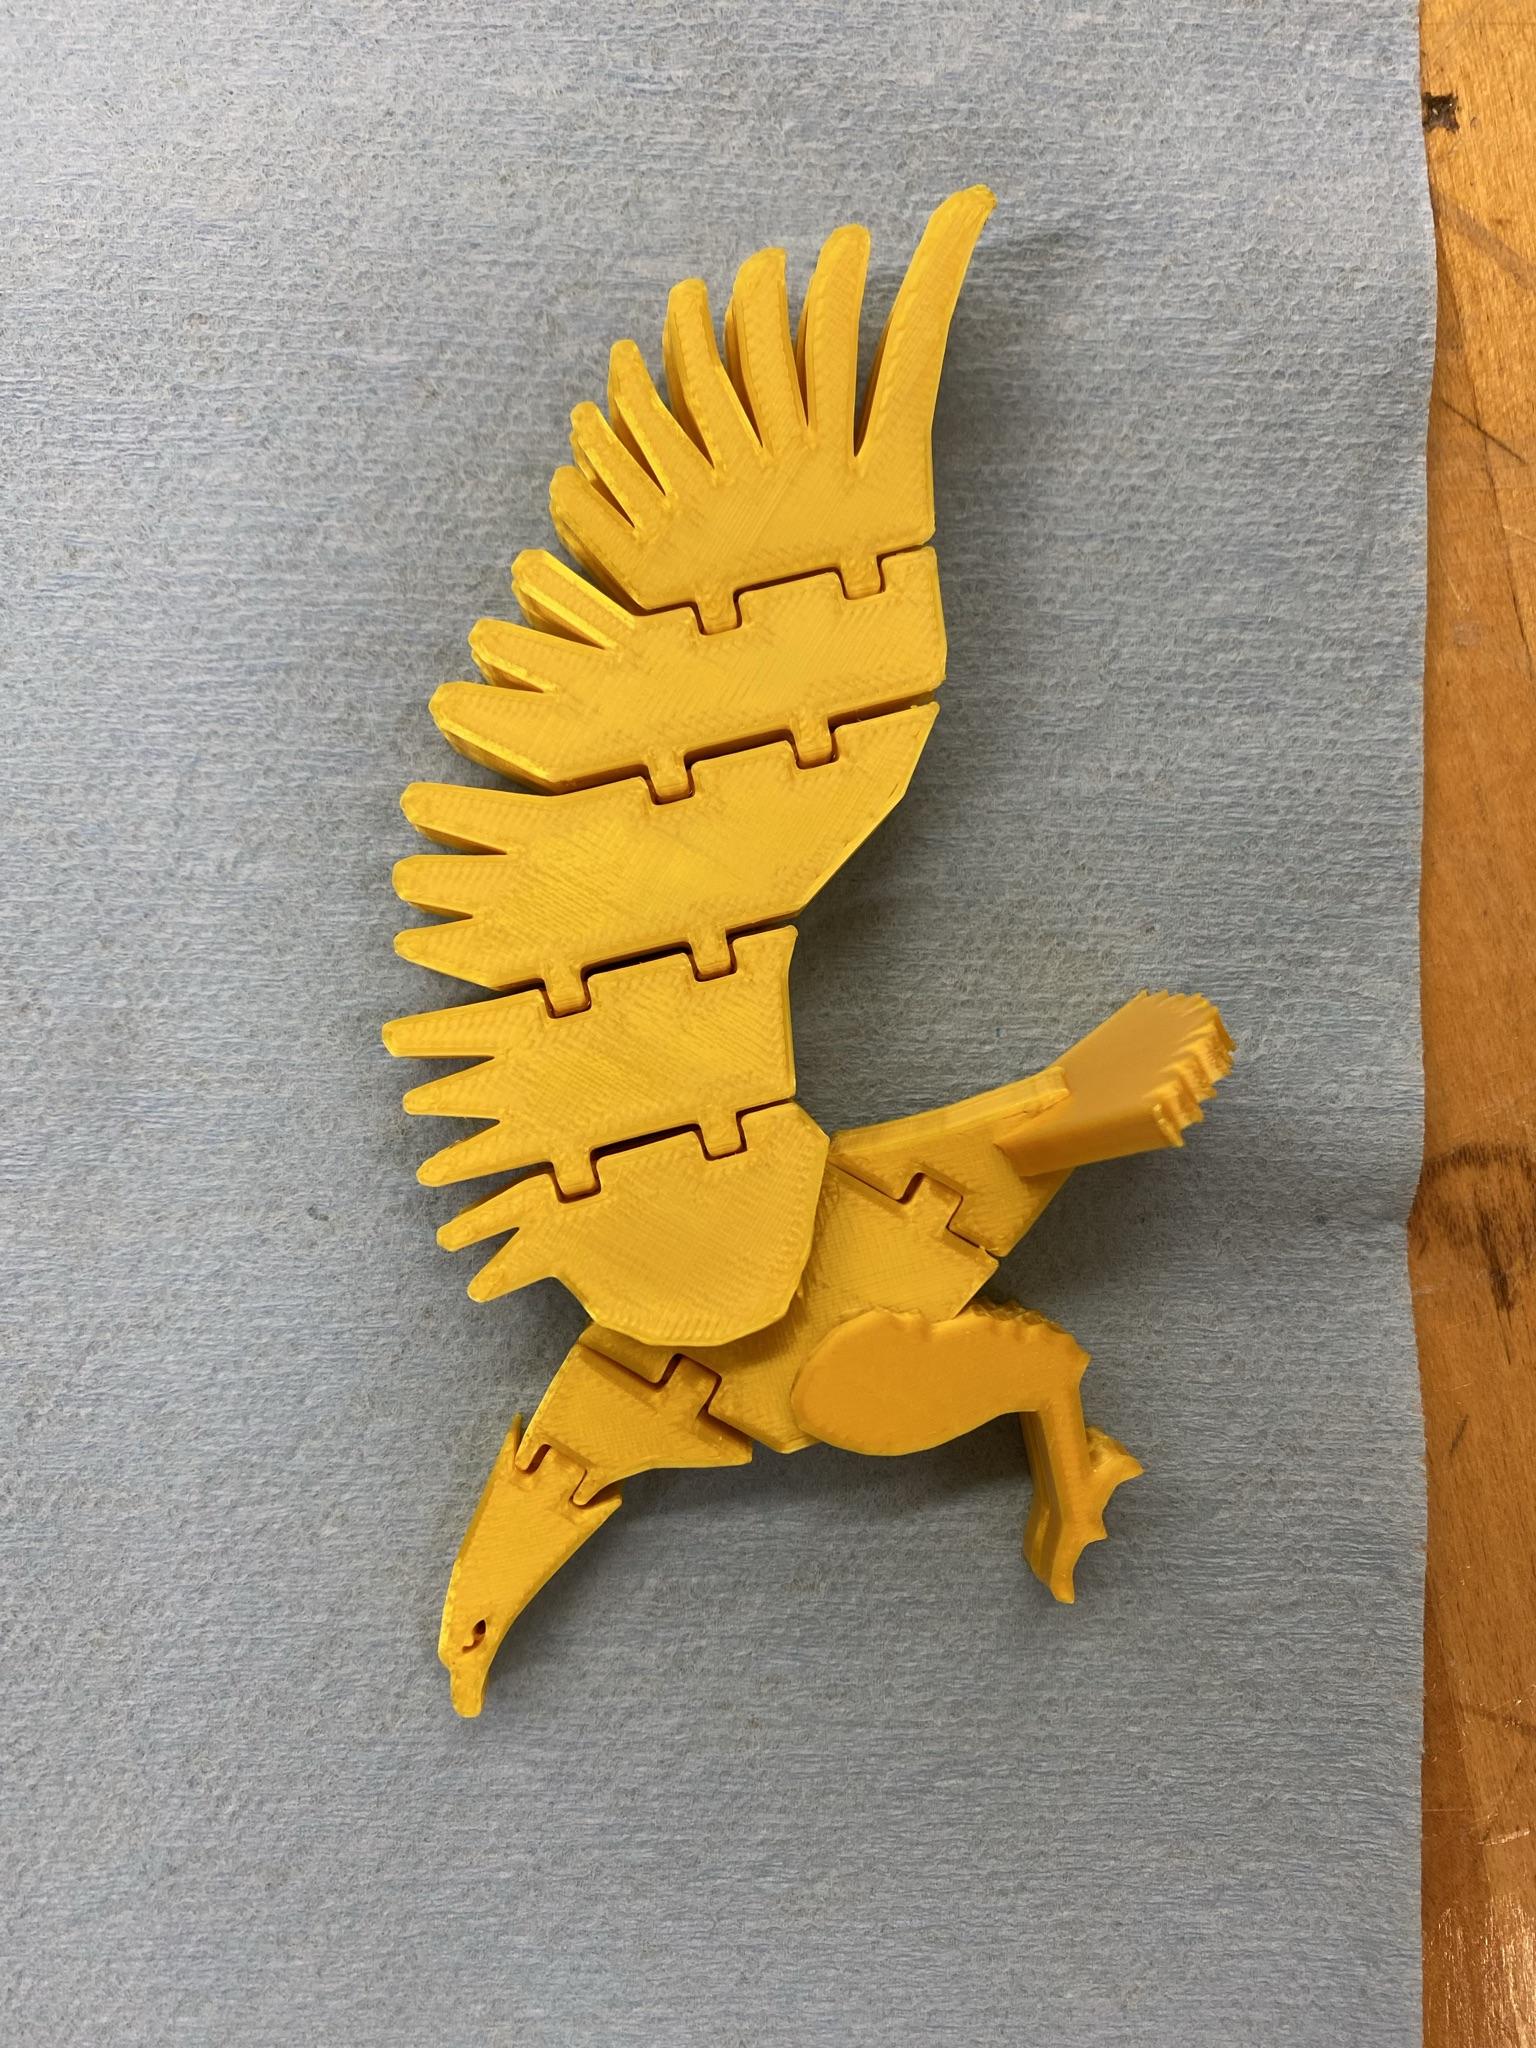
1. Download eagle file and print. Create cyclinder and rectangle on Tinkercad large enough to fit on top of the cup. Print with 3D printer.
2. Assemble eagle wearing gloves and apply a generous amount of super glue
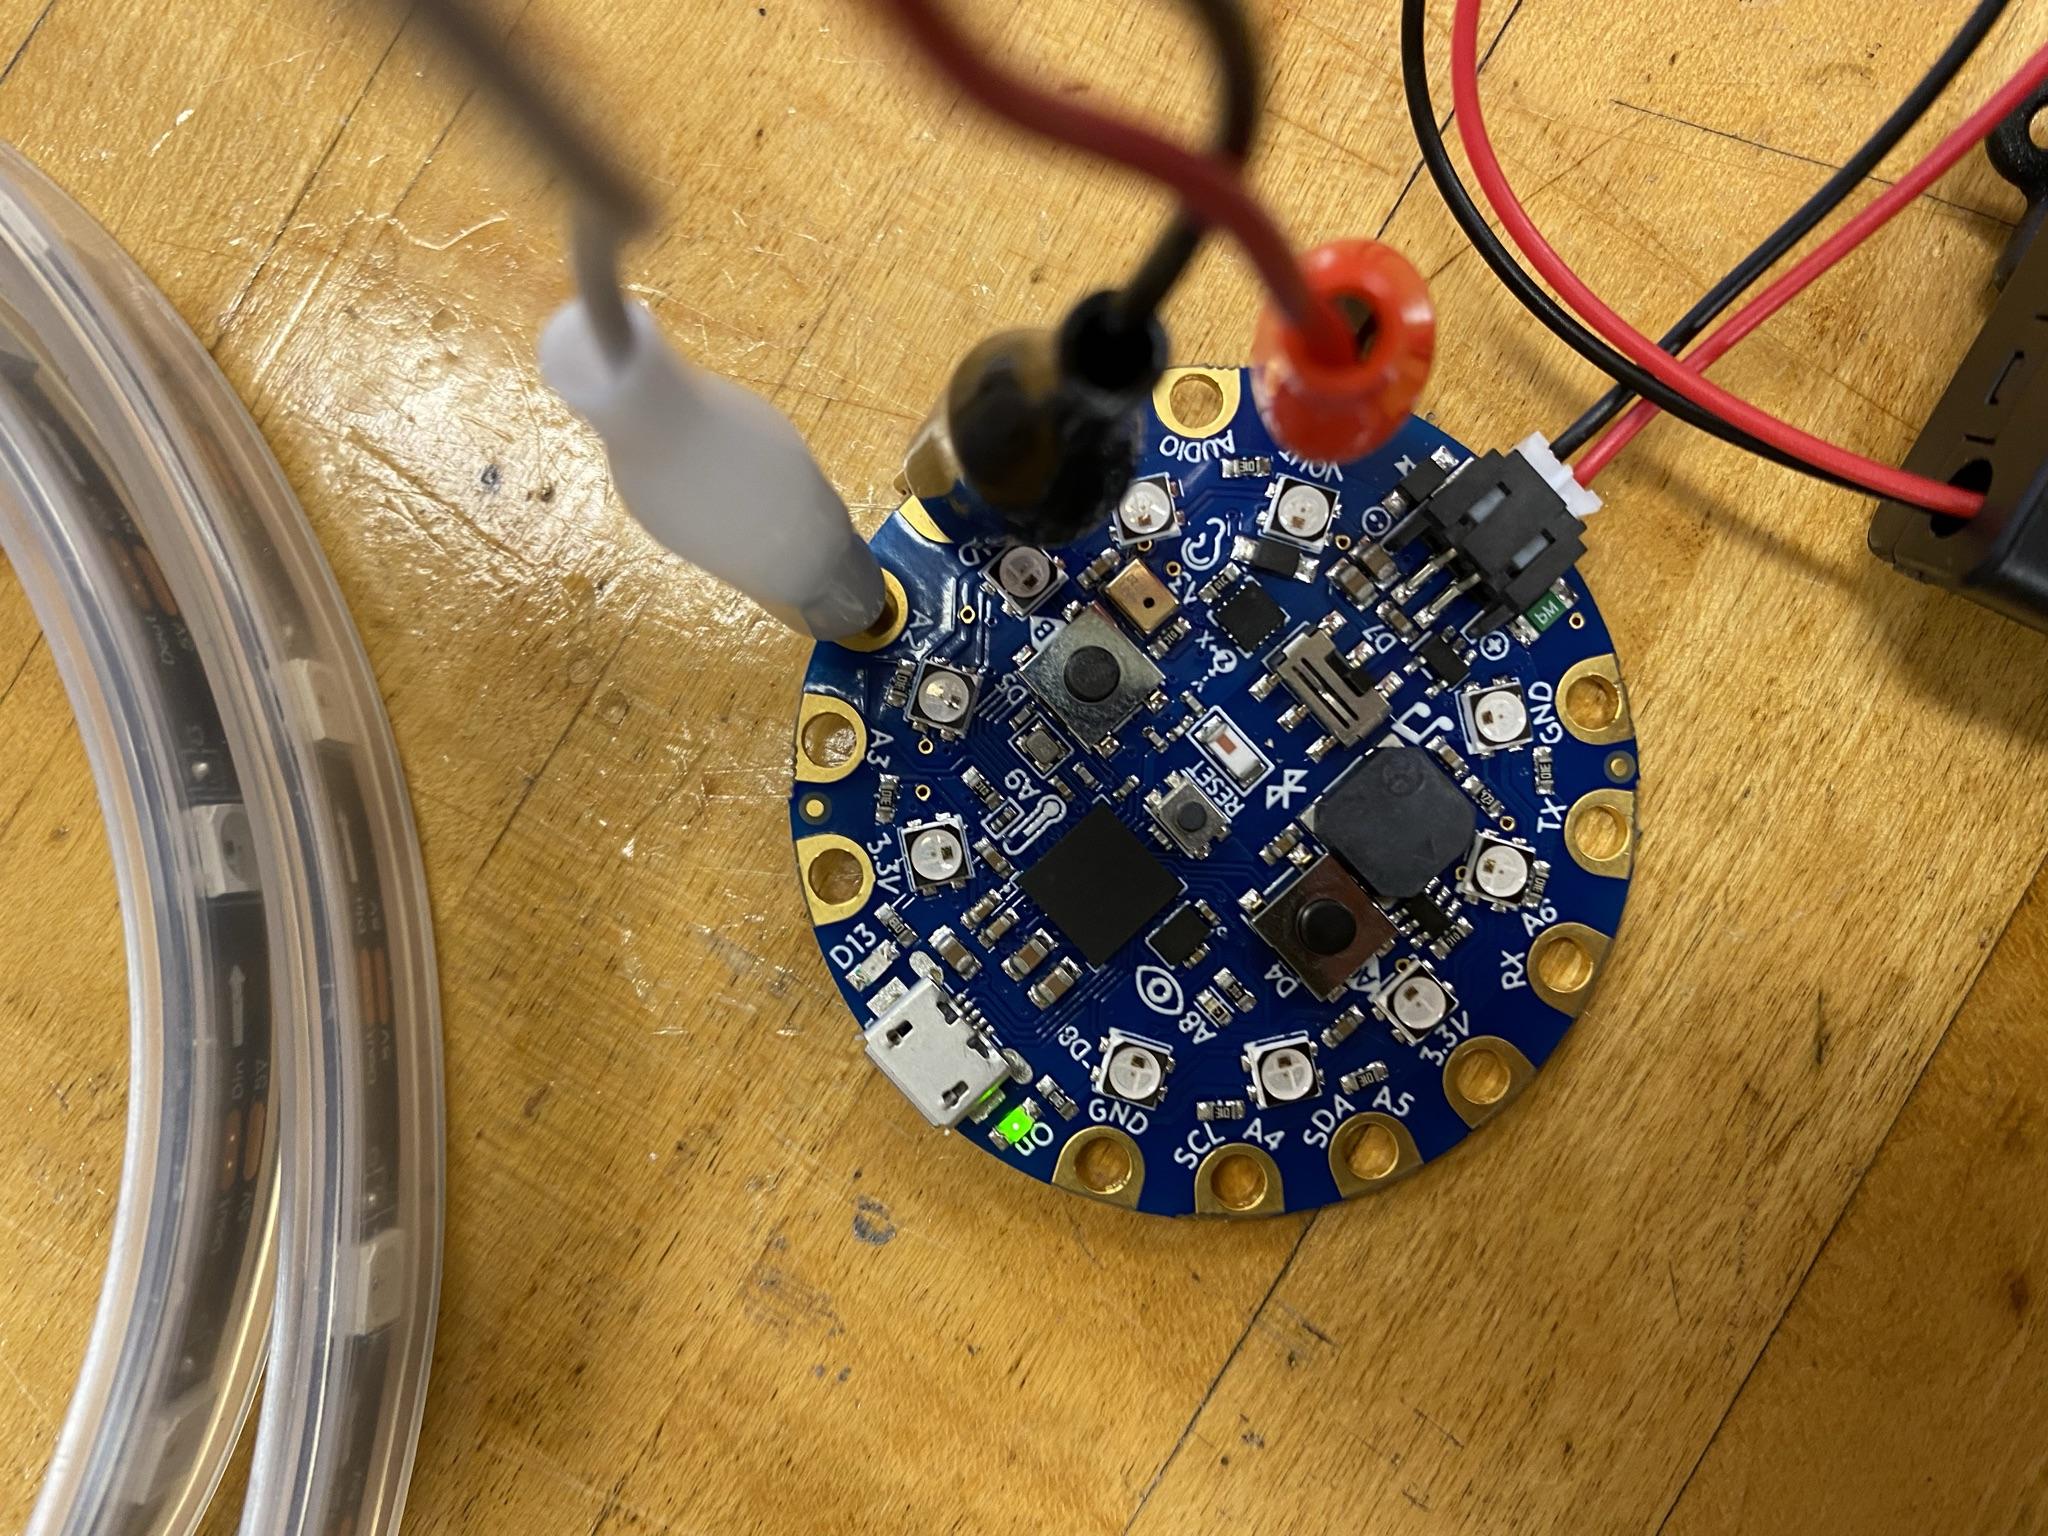
3. Connect the CPB to the LED strip as shown on the picture (Black - GND, Red - VOUT, White - A3)
4. Attach battery pack to CPB, and hook it to the brim of the cup
5. Using scissors, cut 1/2 in. down the brim to make room for the LED cables. Make the slot about 1/4. in wide.
6. Place CPB inside cup and keep the LED lights outside of the cup.
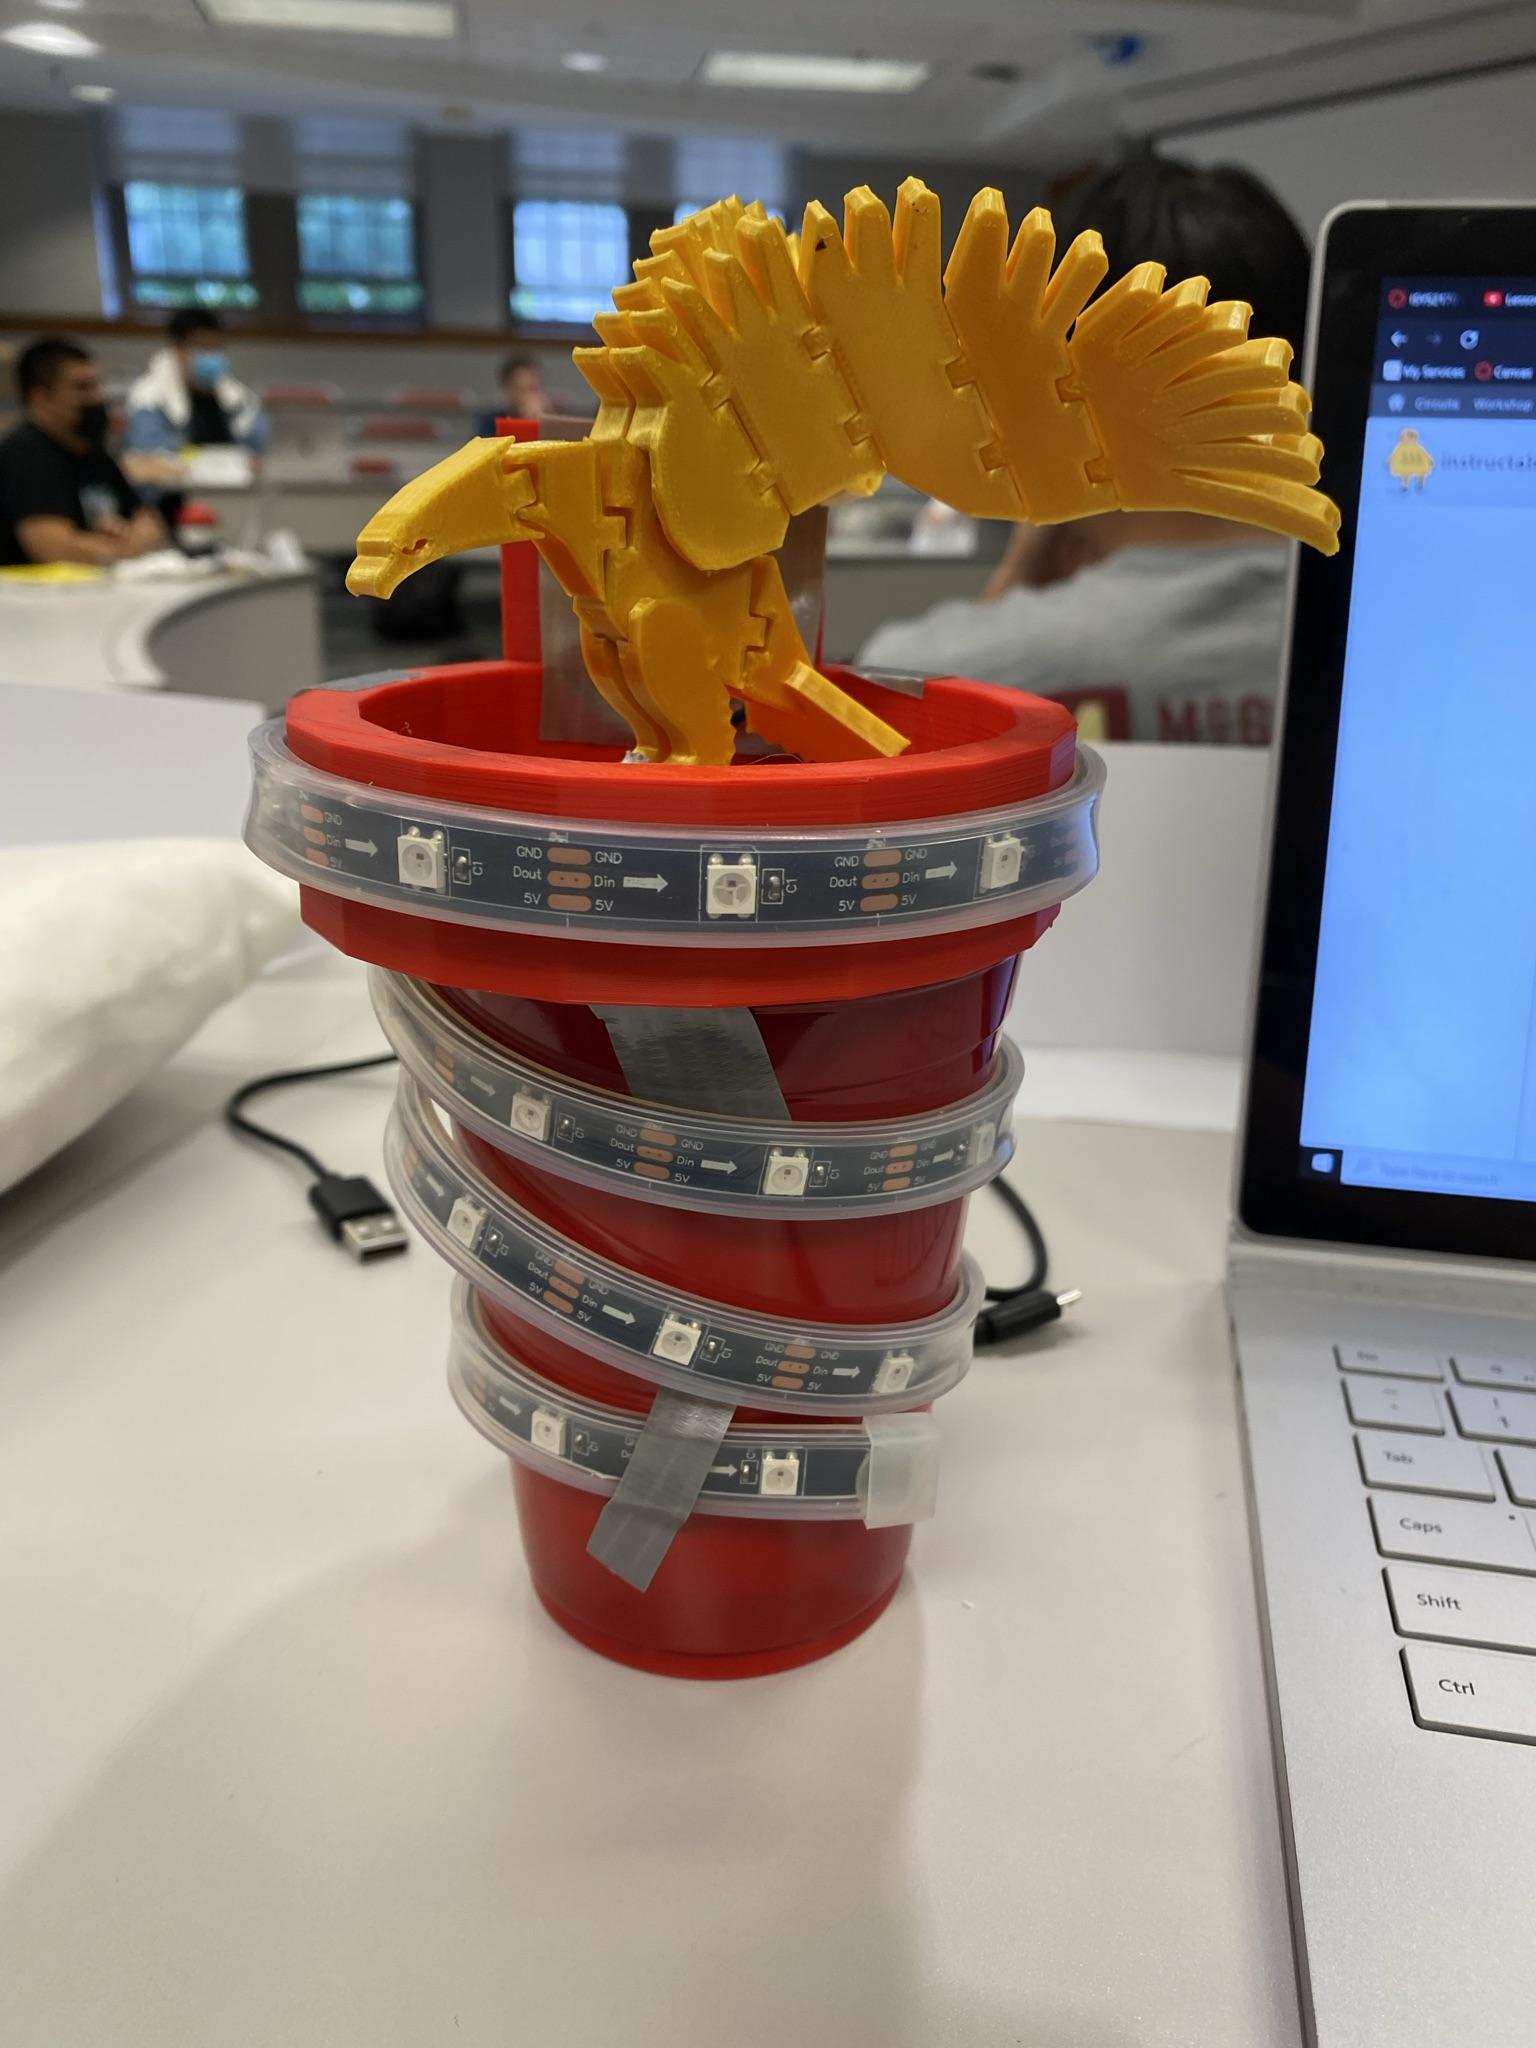
7. Place nest on top of cup with rectangle facing the battery.
8. Using duct tape strips, Loop around the nest once, then wrap it around the cup going down. Place strips of duct tape over the strip, but not over an LED light. Hook one piece under the best and cup, creating a lid.
9. Use duct tape or adhesive to mount the eagle in the middle of the nest.
10. Attach sticker or design to the rectangle sign on the nest.
11. Turn on the battery pack to activate the eagle's nest.
Demonstration
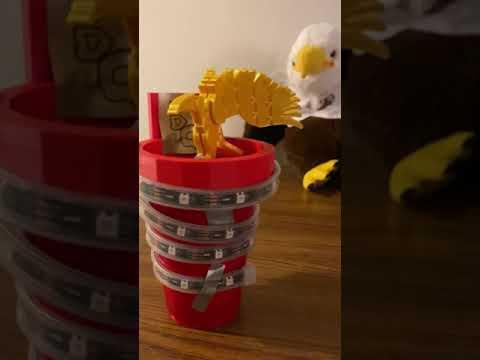
Here we have a fully functional Eagle's Nest with the lights responding to sound.