Avatarium
![Diy Avatarium](/proxy/?url=https://content.instructables.com/FPZ/40MI/J8F5RRDU/FPZ40MIJ8F5RRDU.jpg&filename=Diy Avatarium)
![IMG20170614000821.jpg](/proxy/?url=https://content.instructables.com/FR2/5YYN/J8F5RRDZ/FR25YYNJ8F5RRDZ.jpg&filename=IMG20170614000821.jpg)
![IMG20170614004413.jpg](/proxy/?url=https://content.instructables.com/FV8/WS2Y/J8F5RRE3/FV8WS2YJ8F5RRE3.jpg&filename=IMG20170614004413.jpg)
![StandartstarterKit.png](/proxy/?url=https://content.instructables.com/FQD/28YE/J8F5RRX8/FQD28YEJ8F5RRX8.png&filename=StandartstarterKit.png)
![colorpicker.png](/proxy/?url=https://content.instructables.com/FGR/RK1V/J8F5RQEA/FGRRK1VJ8F5RQEA.png&filename=colorpicker.png)
Avatarium is just aquarium jar combined with Pixella - Android smart led controller, make regular aquarium looks like in avatar world. For information about pixella please read the tutorial here : Meet Pixella!
What You Will Need :
Hardware :
- FTDI USB-To-TTL cable
- Bluetooth LE
- Arduino Pro Mini
- Jumper wire
- ws2812b led (Neopixel)
- Wall adapter or phone charger
- Breadboard
You can buy the parts wherever you want. Ex : Aliexpress, adafruit, ebay or on electronic local store.
Software :
DOWNLOAD Arduino code and Android app controller.
Installation
![Standar Circuit.png](/proxy/?url=https://content.instructables.com/FD9/XEKF/J8F5RS7K/FD9XEKFJ8F5RS7K.png&filename=Standar Circuit.png)
![IMG20170613233509.jpg](/proxy/?url=https://content.instructables.com/FQ7/ZWNY/J8F5RSBK/FQ7ZWNYJ8F5RSBK.jpg&filename=IMG20170613233509.jpg)
![IMG20170610182903.jpg](/proxy/?url=https://content.instructables.com/FLV/Z3TS/J8F5RR1O/FLVZ3TSJ8F5RR1O.jpg&filename=IMG20170610182903.jpg)
![IMG20170613234806.jpg](/proxy/?url=https://content.instructables.com/FZX/PXQ8/J8F5RSBL/FZXPXQ8J8F5RSBL.jpg&filename=IMG20170613234806.jpg)
- Open the file you have been downloaded and you will get full instruction about the hardware wiring and uploading sketch to arduino.
- Attach the tape on both ends of the led and then attach the led under the outer aquarium.
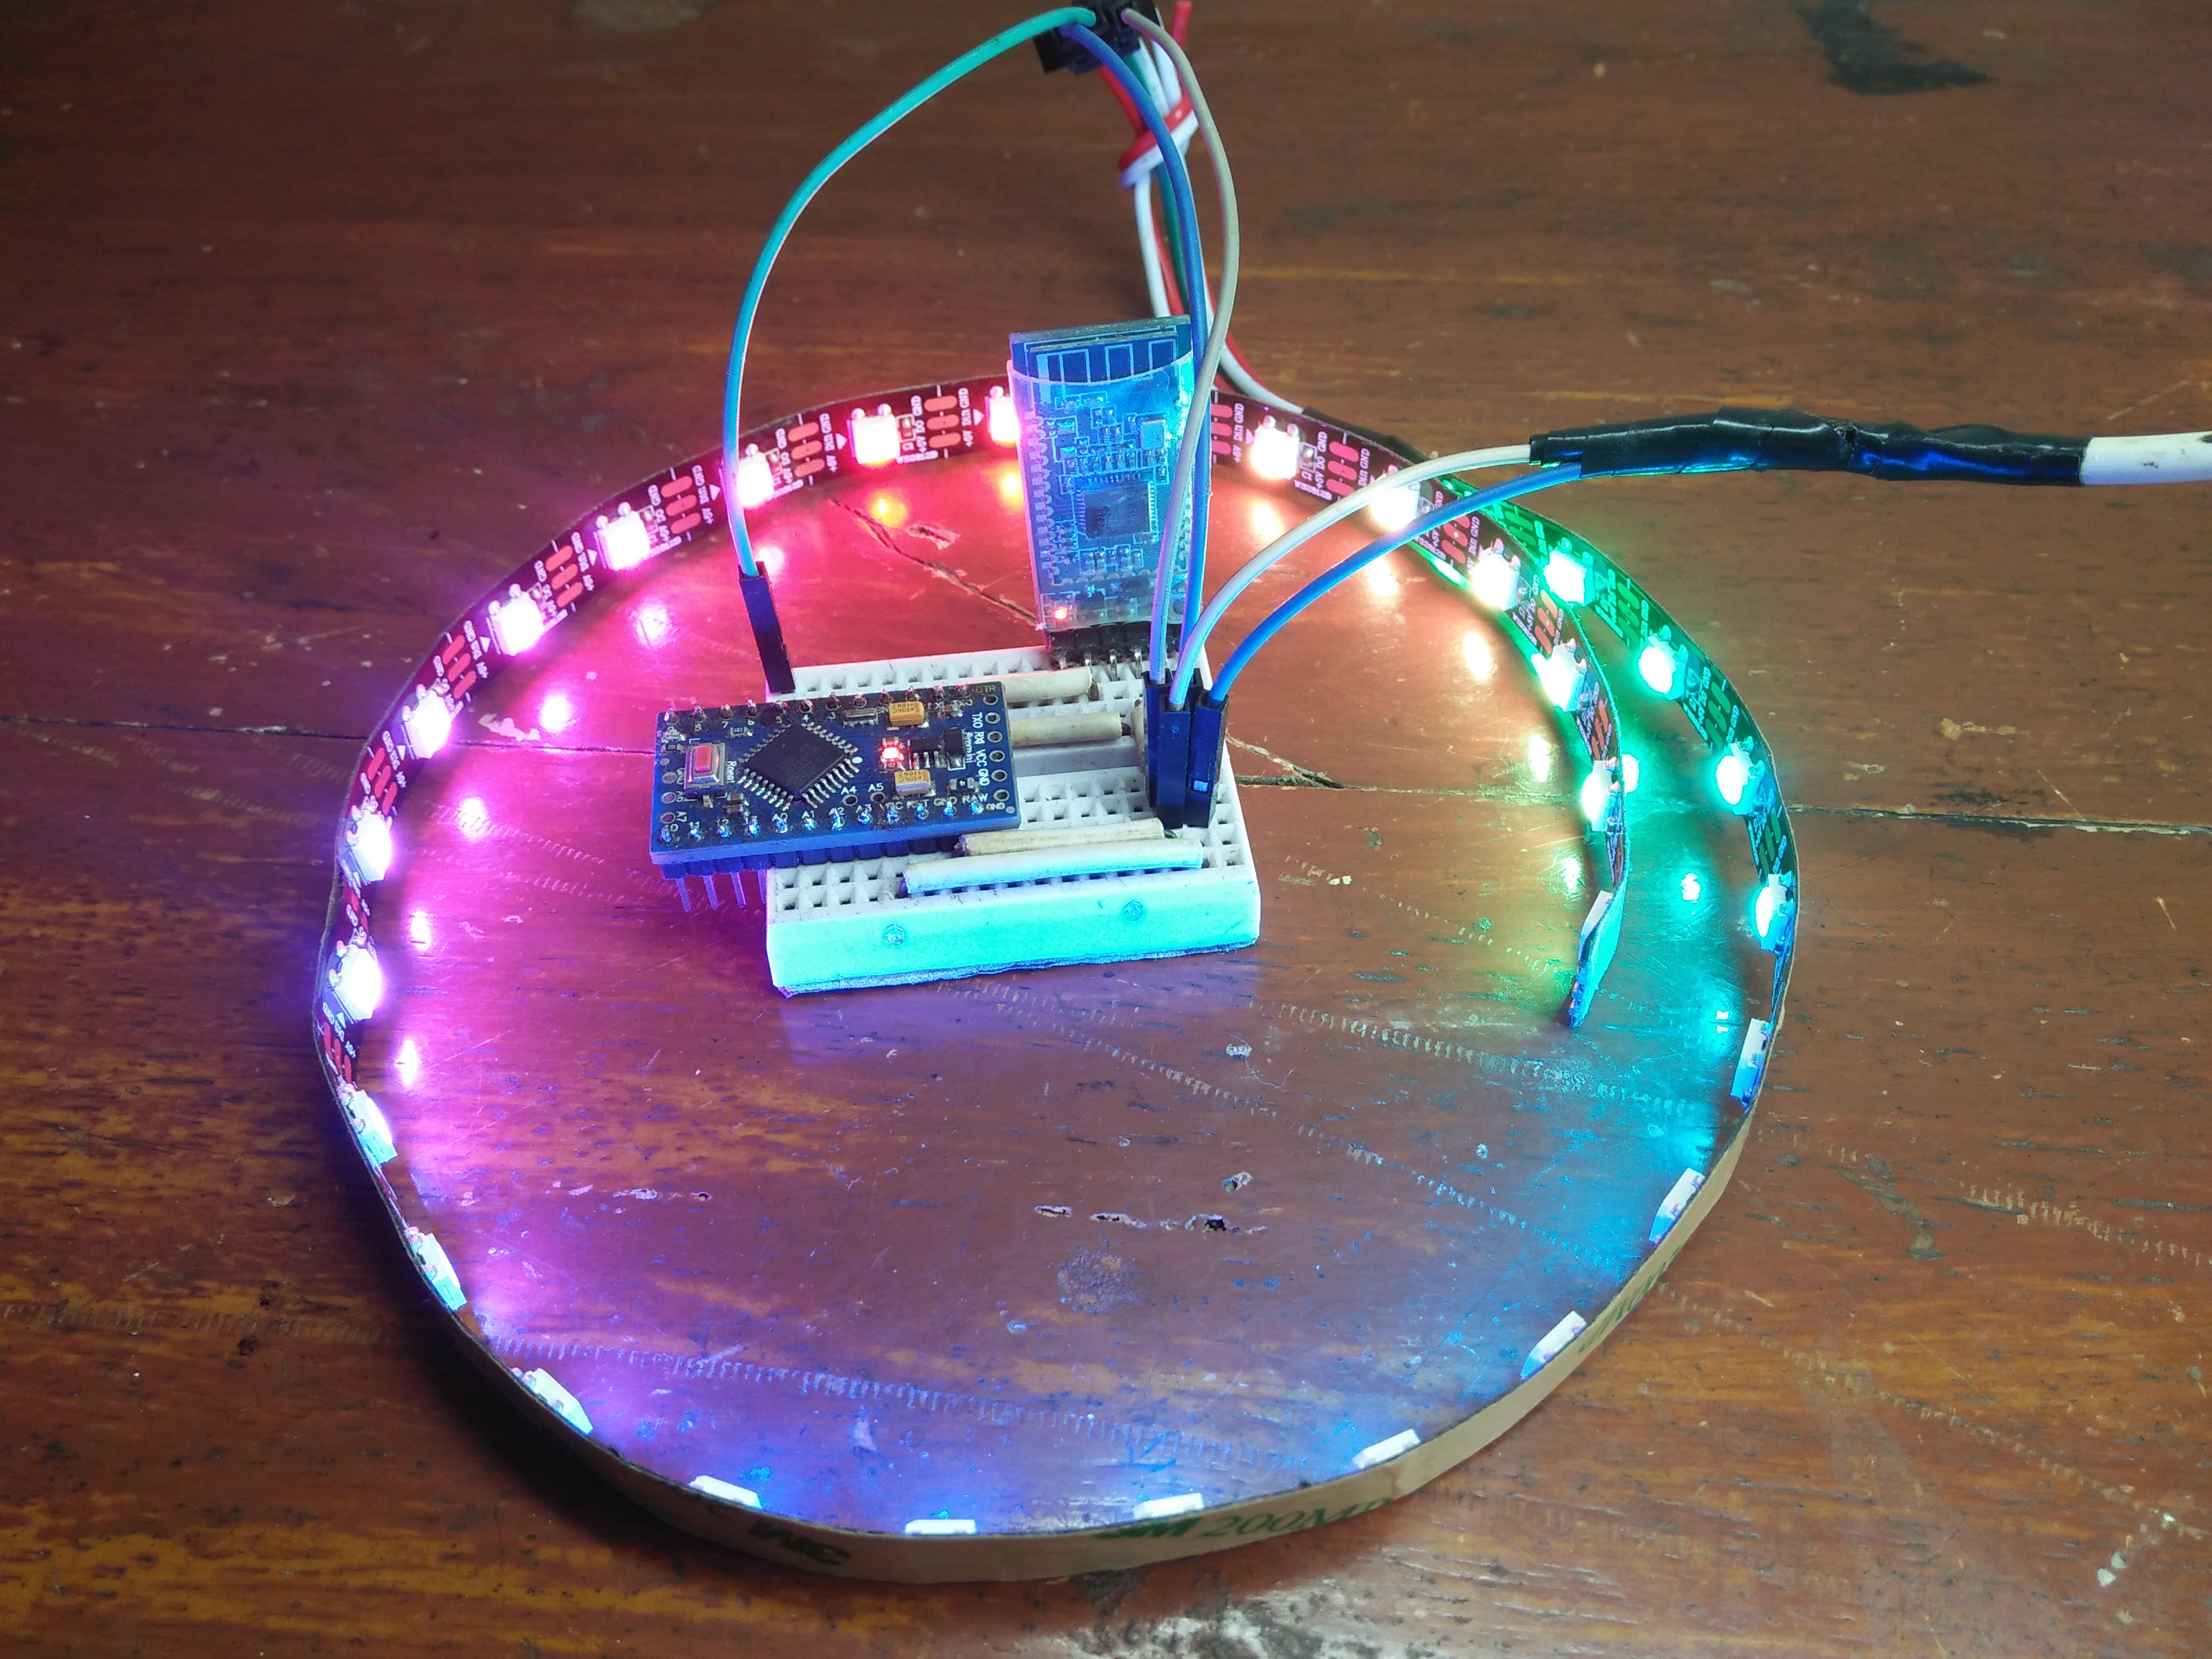
- Connect led to controller
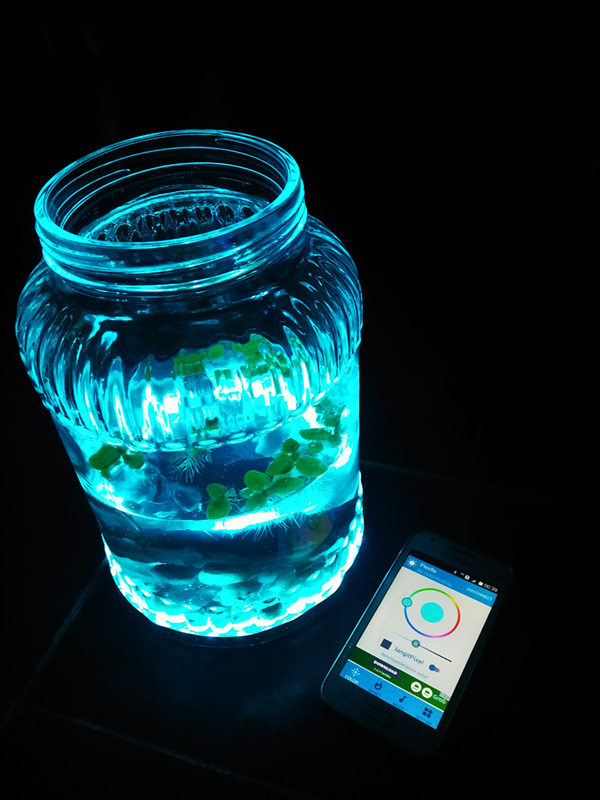
The Result
![IMG20170614002037.jpg](/proxy/?url=https://content.instructables.com/FW1/0ABV/J8F5RQXA/FW10ABVJ8F5RQXA.jpg&filename=IMG20170614002037.jpg)
![IMG20170614000957.jpg](/proxy/?url=https://content.instructables.com/FF4/Z4CJ/J8F5RT11/FF4Z4CJJ8F5RT11.jpg&filename=IMG20170614000957.jpg)
![IMG20170614002226.jpg](/proxy/?url=https://content.instructables.com/FVH/4GOZ/J8F5RT12/FVH4GOZJ8F5RT12.jpg&filename=IMG20170614002226.jpg)
![IMG20170614002835.jpg](/proxy/?url=https://content.instructables.com/FXL/LEPE/J8F5RT2V/FXLLEPEJ8F5RT2V.jpg&filename=IMG20170614002835.jpg)
![IMG20170614005051.jpg](/proxy/?url=https://content.instructables.com/F2Y/6V1J/J8F5RT2W/F2Y6V1JJ8F5RT2W.jpg&filename=IMG20170614005051.jpg)
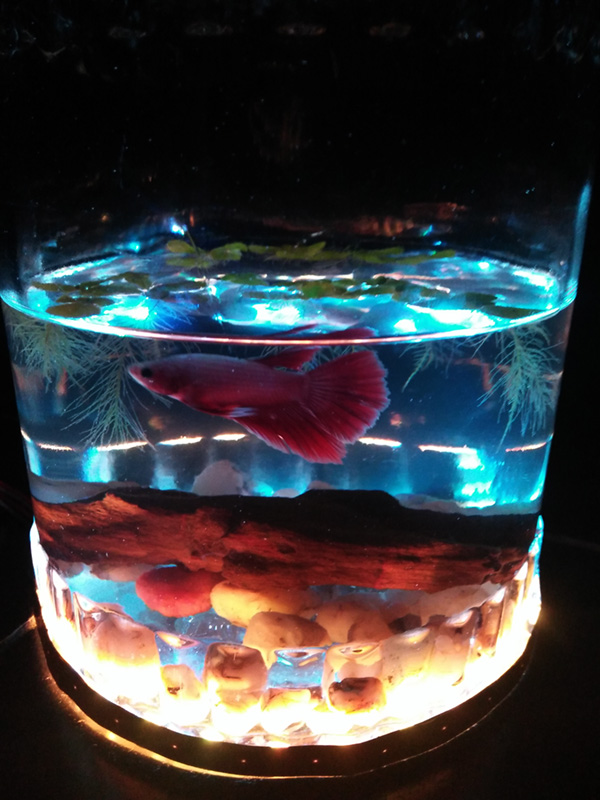
Now you can control the led color using android app, simple but with awesome features
For more information and help please add comment or contact me at
Email : vhajar.hida@gmail.com
I like to create things with fun, open minded people. Feel free to say hello! Thanks