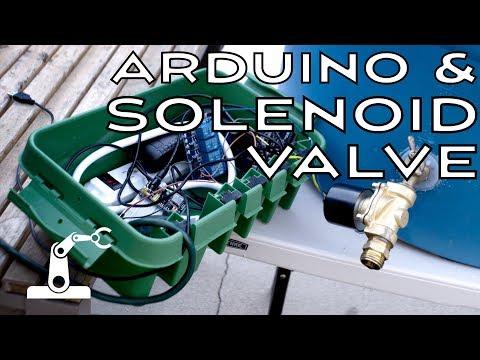
Automatic Watering System


This is an assignment submitted to Deakin University, School of IT, Unit SIT210 -Embedded Systems Development.
This is my version of a smart watering system. My project is an automated watering/sprinkler system for people who have plants in their garden but don't have enough time to water them. The system shown has a moisture sensor attached but can be modified to read the weather or another data you want to active the valve.
Supplies
Software:
Particle.io
ThingSpeak
IFTTT
Integromat
Google Sheets
Python 2.7 or higher
Hardware:
Particle argon or boron
Jumper wires male to male
Jumper wires male to female
Raspberry Pi 4 Model B
24v Mos driver module
Kinetic 25 x 20mm Male / Female Threaded Reducing Adaptor
Elbow Male & Female 25mm
poly irrigation micro pope or any sprinkler of your choice
poly director 25mm
13mm x 25m Black Poly Pipe or any of your choice
Hose Connector Set
Solenoid Valve with Flow Control (25mm or smaller)
Attach the Threaded Reducing Adaptor

find the tap you want to use
Connect Your Fit Elbow

fit elbow
Connect the Solenoid Valve

Connect the Thread Hex

Add a Hose Connector to the End

Screw Off the End and Connect a Hose

Begin Seting Up Your Particle Device

Connect Your Moisture Sensor


Connect Your Particle Device to the Driver Module


Plug in Your Device and Flash the Code Provided


// This #include statement was automatically added by the Particle IDE.

#include "Particle.h"
#include <JsonParserGeneratorRK.h>
// First, we're going to make some variables.
// This is our "shorthand" that we'll use throughout the program:

int valve = D3; // Instead of writing D3 over and over again, we'll write valve

int sensor1= A1;

int waterState = LOW;             // ledState used to set the LED
unsigned long previousMillis = 0;        // will store last time LED was updated
long OnTime = 60000;           // milliseconds of on-time
long OffTime = 60000;
unsigned long currentMillis;
int Moisture;
String Current = "12:10";
String setTime = "0";
// Having declared these variables, let's move on to the setup function.
// The setup function is a standard part of any microcontroller program.
// It runs only once when the device boots up or is reset.

void setup() {


  pinMode(valve, OUTPUT);
  pinMode(sensor1, INPUT);


  Particle.subscribe("Water", waterHandler, MY_DEVICES);
  Particle.subscribe("set time", timeHandler, MY_DEVICES);
  Particle.subscribe("Current Time", currentHandler, MY_DEVICES);


}


void loop() {
    currentMillis = millis();
      Moisture =  analogRead(sensor1);
      createEventPayload(Moisture);

    if(setTime == Current)
  {
     createEventPayload(Moisture);
    waterState = HIGH;  // turn it on
    previousMillis = currentMillis;   // Remember the time
    digitalWrite(valve, waterState);
  }


    if((waterState == HIGH) && (currentMillis - previousMillis >= OnTime))
  {
      createEventPayload(Moisture);
    waterState = LOW;  // Turn it off
    previousMillis = currentMillis;  // Remember the time
    digitalWrite(valve, waterState);  // Update the actual LED
  }
  else if ((waterState == LOW) && (currentMillis - previousMillis >= OffTime))
  {
      createEventPayload(Moisture);
    waterState = HIGH;  // turn it on
    previousMillis = currentMillis;   // Remember the time
    digitalWrite(valve, waterState);	  // Update the actual LED
  }
}


void createEventPayload(int humid)
{
    JsonWriterStatic<256> jw;
    {
        JsonWriterAutoObject obj(&jw);
        jw.insertKeyValue("Moisture",Moisture);
    }
    Particle.publish("Moisture_Vals", jw.getBuffer(), PRIVATE);

}


void waterHandler(const char *event, const char *data)
{
     Moisture =  analogRead(sensor1);
    String val = String(data);
    if(val== "off")
    {
      createEventPayload(Moisture);
    waterState = LOW;  // Turn it off
    previousMillis = currentMillis;  // Remember the time
    digitalWrite(valve, waterState);
    }


    if(val == "on")
    {
     createEventPayload(Moisture);
    waterState = HIGH;  // turn it on
    previousMillis = currentMillis;   // Remember the time
    digitalWrite(valve, waterState);
    }

}


void timeHandler(const char *event, const char *data)
{
   setTime = String(data);

}

void currentHandler(const char *event, const char *data)
{
   Current = String(data);

}
Go to Particle.io/integrations and Create a Webhook


Go to Thingspeak.com and Create a Channel With Field 2 Enabled

Go to Ifttt and Create an Particle Event to Google Docs


Connect Your Raspi to Integromat and Google Sheets

A link to the tutorial i used
https://business-automated.medium.com/sending-rasp...
code:
import datetime
import psutil
import requests

data_to_send = {}

x= datetime.datetime.now()
data_to_send["date"] = x.strftime("%X")


print(data_to_send)

r = requests.post("https://hook.integromat.com/yhyjrgmj768l58uubb2rohgdunpql6jl", json = data_to_send)

print(r.status_code)
Finally Connect You Valve and Power Source to the Module


