Automatic Night Light
Welcome to this Instructables guide on building an Automated Night Lamp using Arduino! If you've ever wished for a light that intuitively responds to its surroundings, this project is perfect for you. The Automated Night Lamp is designed to switch on when it detects low light conditions, providing gentle illumination without the need for manual control.
In this tutorial, you'll learn how to create a simple yet effective night lamp using an Arduino board, a light-dependent resistor (LDR), and an LED. We'll walk you through the steps to assemble the components, write the necessary code, and customize your lamp to suit your needs. Whether you're a beginner looking to expand your Arduino skills or an experienced maker in need of a smart lighting solution, this project offers something for everyone. Let's get started!
Supplies
Following is the list of materials I used to create this project.
- Arduino Uno (you may use any compatible Arduino board)
- Light Dependent Resistor (LDR)
- LED (I used red and green, you may use any colour of your choice)
- Breadboard
- Jumper Wires
- USB Cable (for programming the Arduino that connects with your computer)
The software I used was Arduino IDE (installed on your computer for programming)
Write the Code
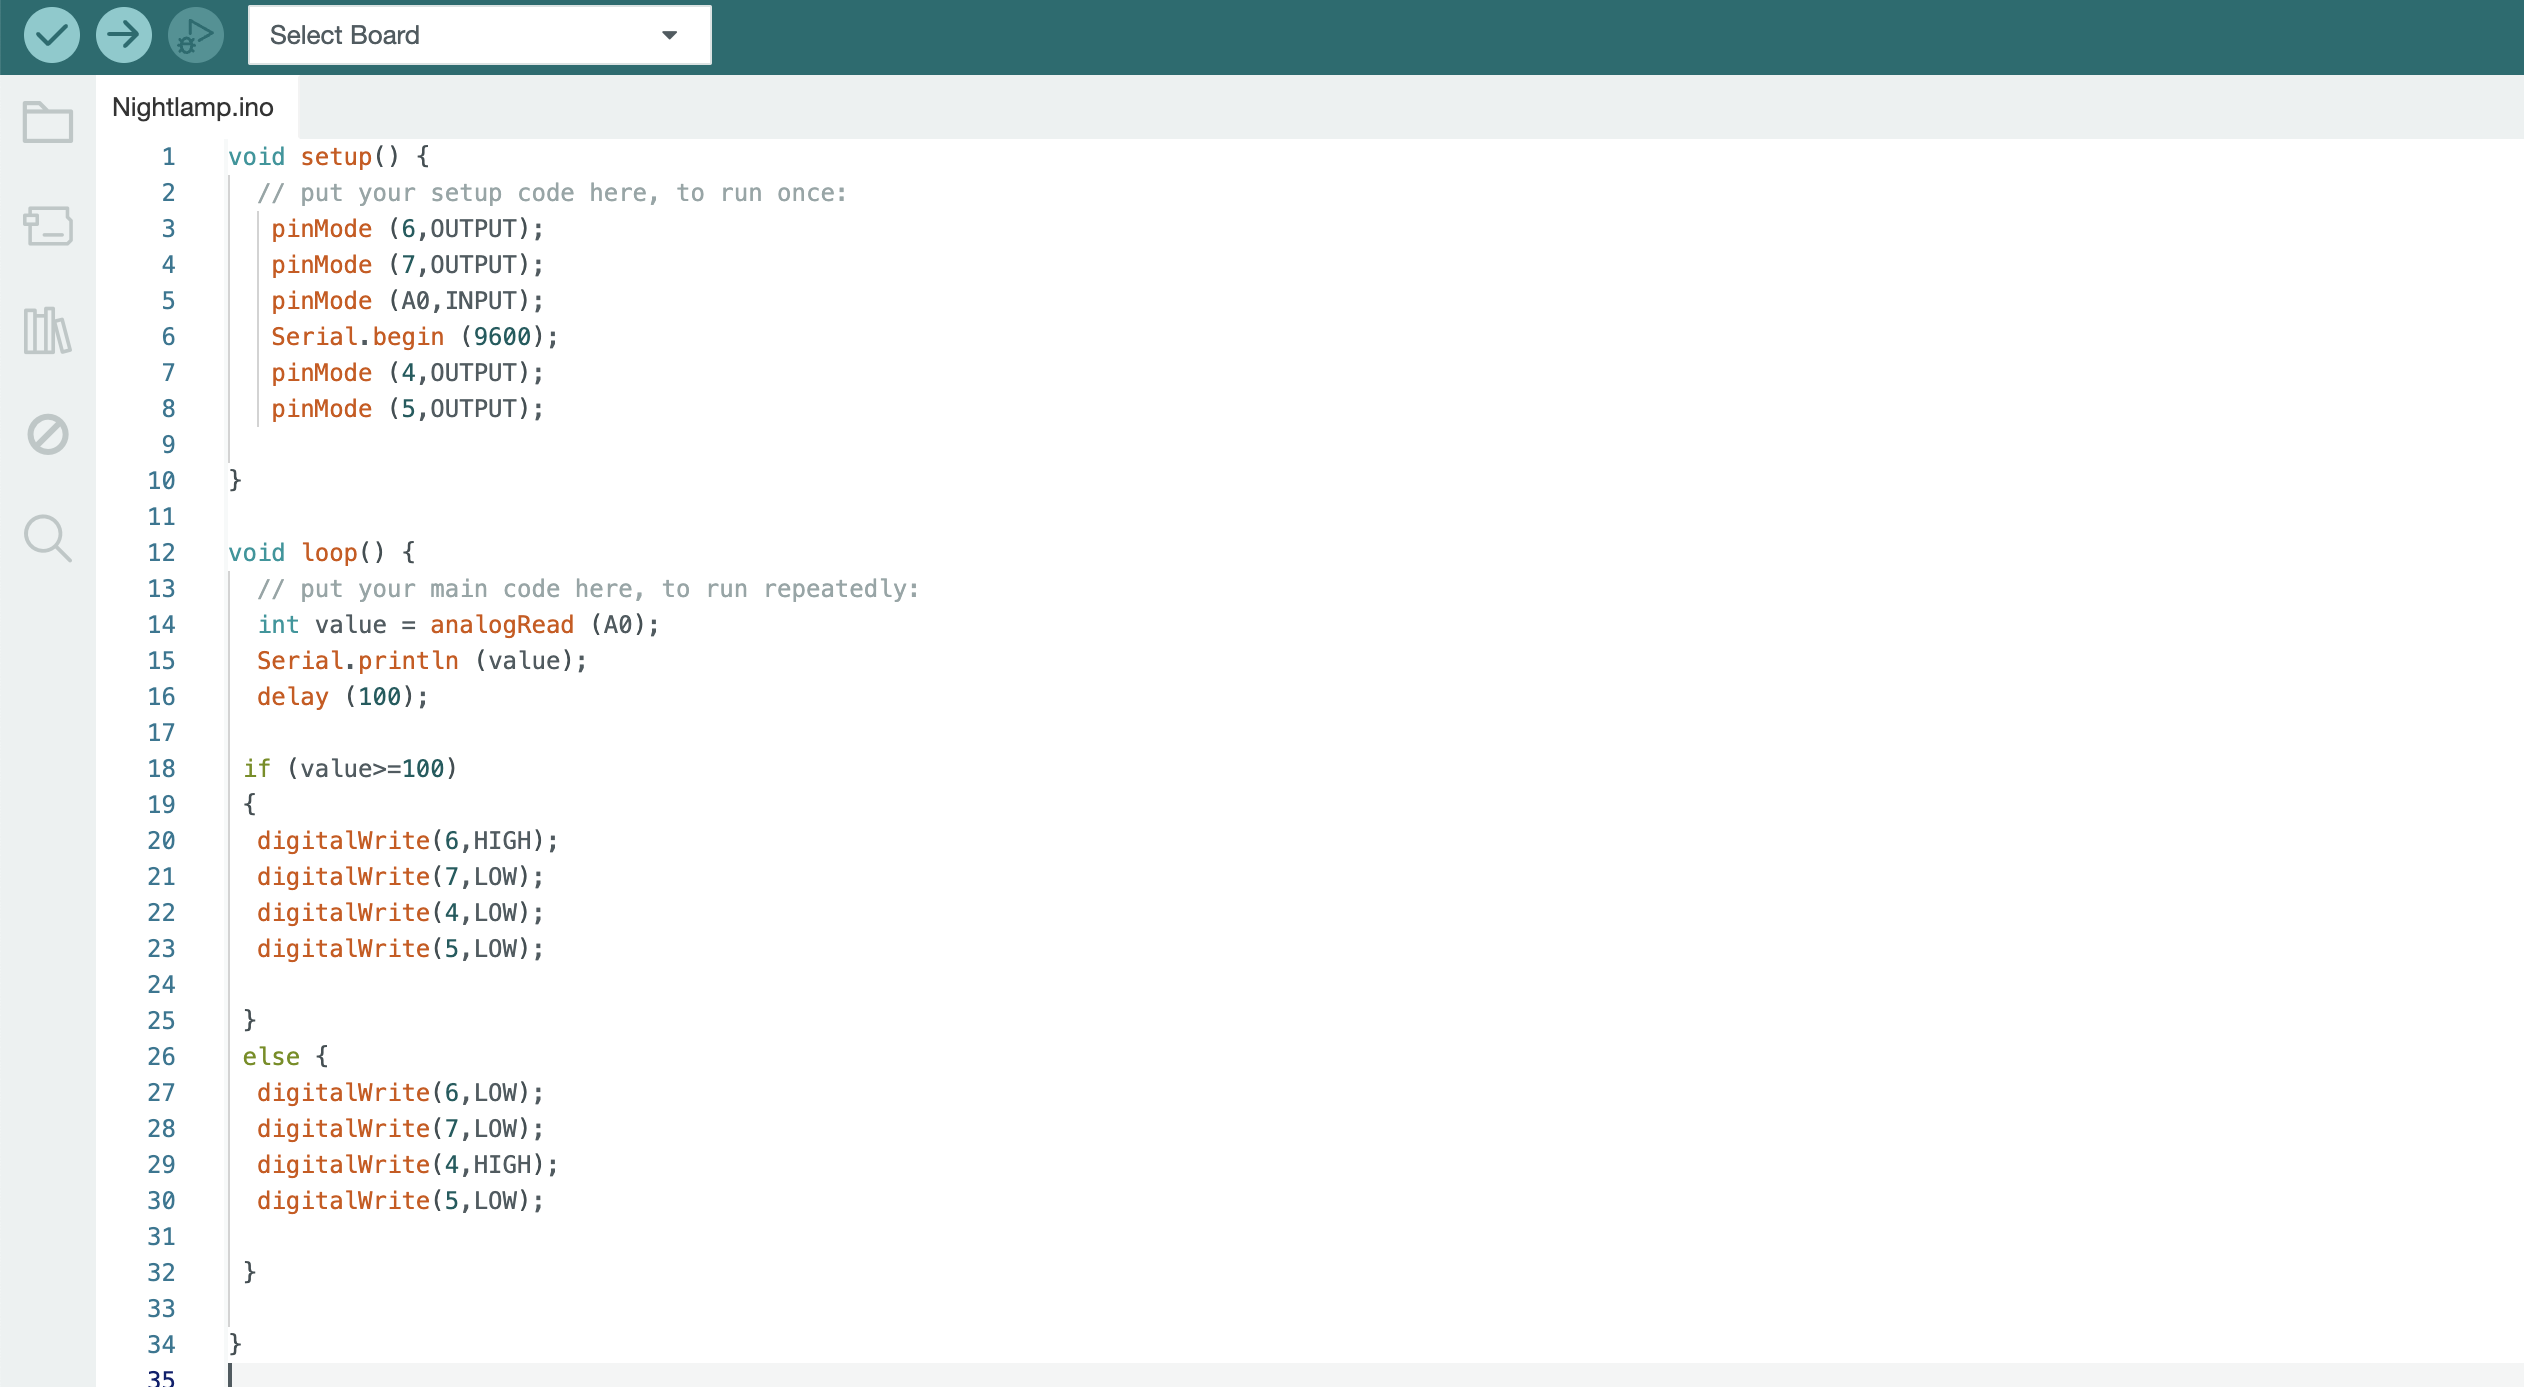
Start the Arduino IDE on your computer.
Copy the following code into the Arduino IDE, or create your own on similar grounds.
Connect your Arduino to your computer using the USB cable and upload the code to the Arduino board.
Set Up the Circuit
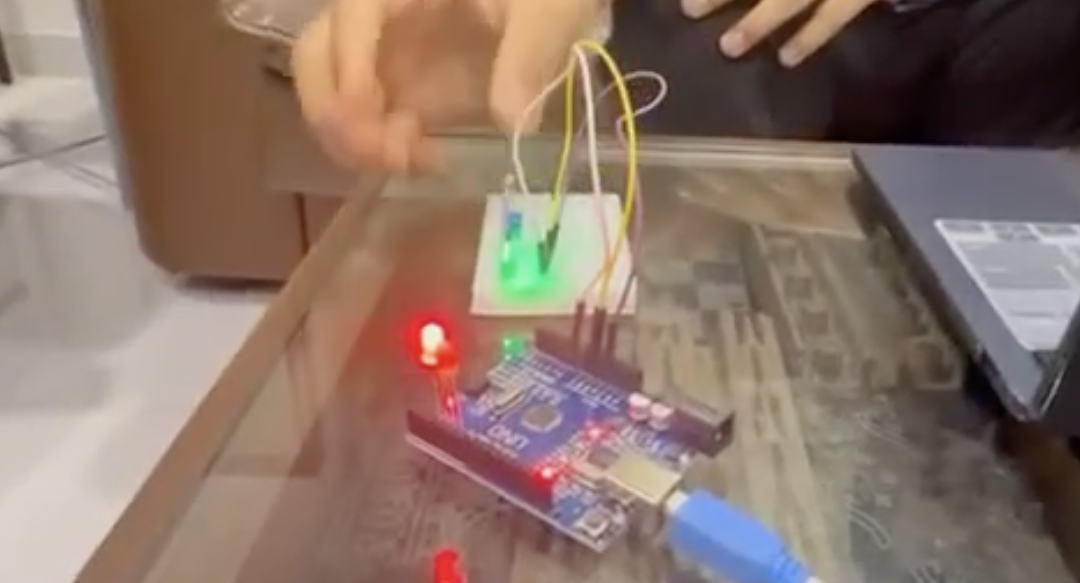
Place the Arduino on the Breadboard: Position your Arduino board on the breadboard or on a flat surface for easy access.
Connect the LDR:
- Insert the LDR into the breadboard.
- Connect one leg of the LDR to the 5V pin on the Arduino.
- Connect the other leg of the LDR to both the A0 analog input pin on the Arduino and one end of the 10k ohm resistor.
Connect the RED LED:
- Place the red LED on the breadboard.
- Connect the shorter leg (cathode) of the LED to digital pin 6 (or any digital output pin) on the Arduino.
- Connect the longer leg (anode) of the LED to digital pin 7 (or any digital output pin) on the Arduino.
Connect the GREEN LED:
- Place the green LED on the breadboard.
- Connect the shorter leg (cathode) of the LED to digital pin 4 (or any digital output pin) on the Arduino.
- Connect the longer leg (anode) of the LED to digital pin 5 (or any digital output pin) on the Arduino.
Test Your Circuit
Power On: Once the code is uploaded, your Arduino will begin running the program.
Adjust the Lighting: Place your hand over the LDR to simulate darkness. The LED should light up. When you remove your hand or expose the LDR to bright light, the LED should turn off.
Test in Different Lighting Conditions: Place the lamp in various environments to test its responsiveness to light changes.
Enjoy Your Automated Night Lamp! Your lamp is now ready to use. It will automatically light up in dark conditions, providing you with a smart and efficient lighting solution.