Automatic Hotspot for Your Raspberry Pi Using IoT Bit
by AltitudeTech in Circuits > Raspberry Pi
1717 Views, 7 Favorites, 0 Comments
Automatic Hotspot for Your Raspberry Pi Using IoT Bit
 copy.jpg)
For this instructable, we will set up an automatic hotspot using the Raspberry Pi and other minicomputers.
Heres a list of the computers which are compatible:
- Raspberry Pi 1-2-3,
- Raspberry Pi Zero,
- Asus Tinkerboard
- Rock 64,
- Orange P
- Samsung Artiks Eagleye
This means you can start it with no need for a screen, keyboard or mouse (after the first time use of course) and since you are using the IoT Bit this means you will have an automatic mobile hotspot to have with you for all your devices wherever you are.
Applications:
- Home Internet
- Work Internet
- Remote Connections i.e remote surveillance & remote gaming.
- Sensor networks
- In car hotspot
- Boat hotspot
- Remote workstation
Firstly we will start by downloading the necessary packages to make the bash script work properly, and setup the IoT Bit as a mobile network, then we will download the bash script and modify it to suit our needs, and lastly, we will set the script to run on every boot, therefore, eliminating the need to initialise the hotspot manually.
Materials Needed & Previous Requirements
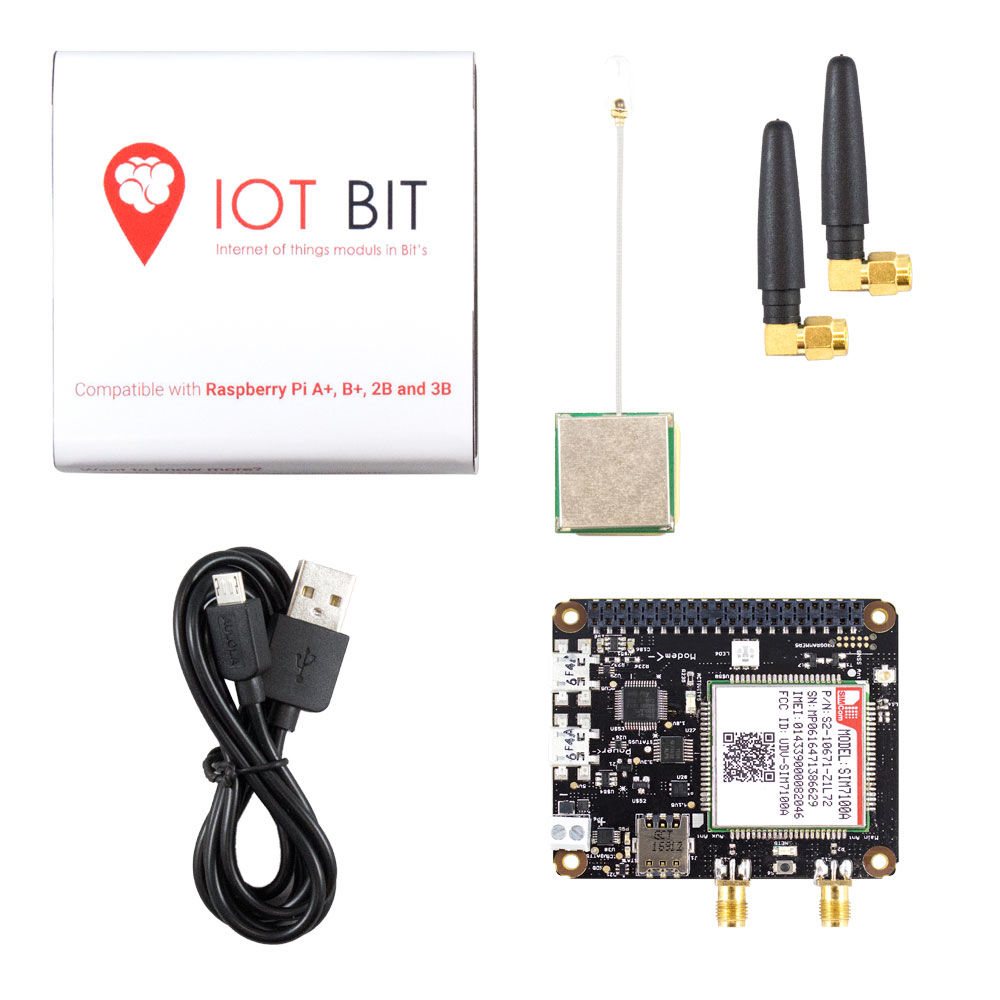
1 x IoT Bit package
1 x Raspberry Pi
1 x SD card
1 x Screen Keyboard & Mouse (only for setup)
Before starting the setup it's imperative to have installed the appropriate packages for the IoT Bit board and setup a network using the IoT Bit. when starting the setup you should be using raspbian and have the IoT Bit with a mobile data SIM card to access the internet. To check if you are at this stage just type "ifconfig", the following will show up: "et0" will mean your Ethernet port, "wlan0" refers to the WiFi network, and "wwan" will refer to your IoT Bit network.
If you can see both the "wlan0" and "wwan" you are ready to start the setup.
Setup of Hotspot
First, we will start by updating our system using the terminal command:
- $ sudo apt-get update && sudo apt-get upgrade
Next to be able to use the bash script we need to install the "dnsmasq" package and "hostapd" package, in terminal do:
- $ sudo apt-get install dnsmasq
- $ sudo apt-get install hostapd
The next step is to install the network manager gnome version to have an interface to be able to set up the network that will later be used by the bash script to use the IoT Bit internet, to do this type in the terminal:
- $ sudo apt-get install network-manager-gnome
To set up the mobile network you can follow the instructable for Ubuntu Mate that we have made since the network manager works similarly to the one in Ubuntu. After setting up the network reboot your pi and set the date and time you can do it in many ways for example:
- $ sudo date -s"Wed Apr 26 17:42:00 UTC 2018"
It's really important to set the exact date and time for your device to enable the internet to work. Also, remember if you don't shut down the raspberry pi properly it won't remember the date and time you entered.
Once the above steps are done all you need to do is download the bash script below. All credit for the script to make the pi into a hotspot goes to:
http://forum.iiot.co.za/discussion/15/free-bash-sc...
Save it to "/home/pi", make sure to save it as a .sh file, after downloading it open the script and modify the file to suit your preferences, like for example network id, password, etc.
Then to make it executable simply run in the terminal:
- $ chmod +x /home/pi/(name of your file).sh
The next step will be to make the bash script run every time the system boots. To do this you need to :
To modify the file type in the terminal:
- $ sudo nano /home/pi/.config/lxsession/LXDE-pi/autostart
Then at the end of the file under "@point-rpi" type:
- sudo bash /home/pi/(name of your bash script)
After this steps reboot your pi and you will have a working automatic mobile hotspot.