Launch Your Holiday Pictures Slideshow With a Touch of Magic !
by jessyjones in Circuits > Electronics
1441 Views, 5 Favorites, 0 Comments
Launch Your Holiday Pictures Slideshow With a Touch of Magic !
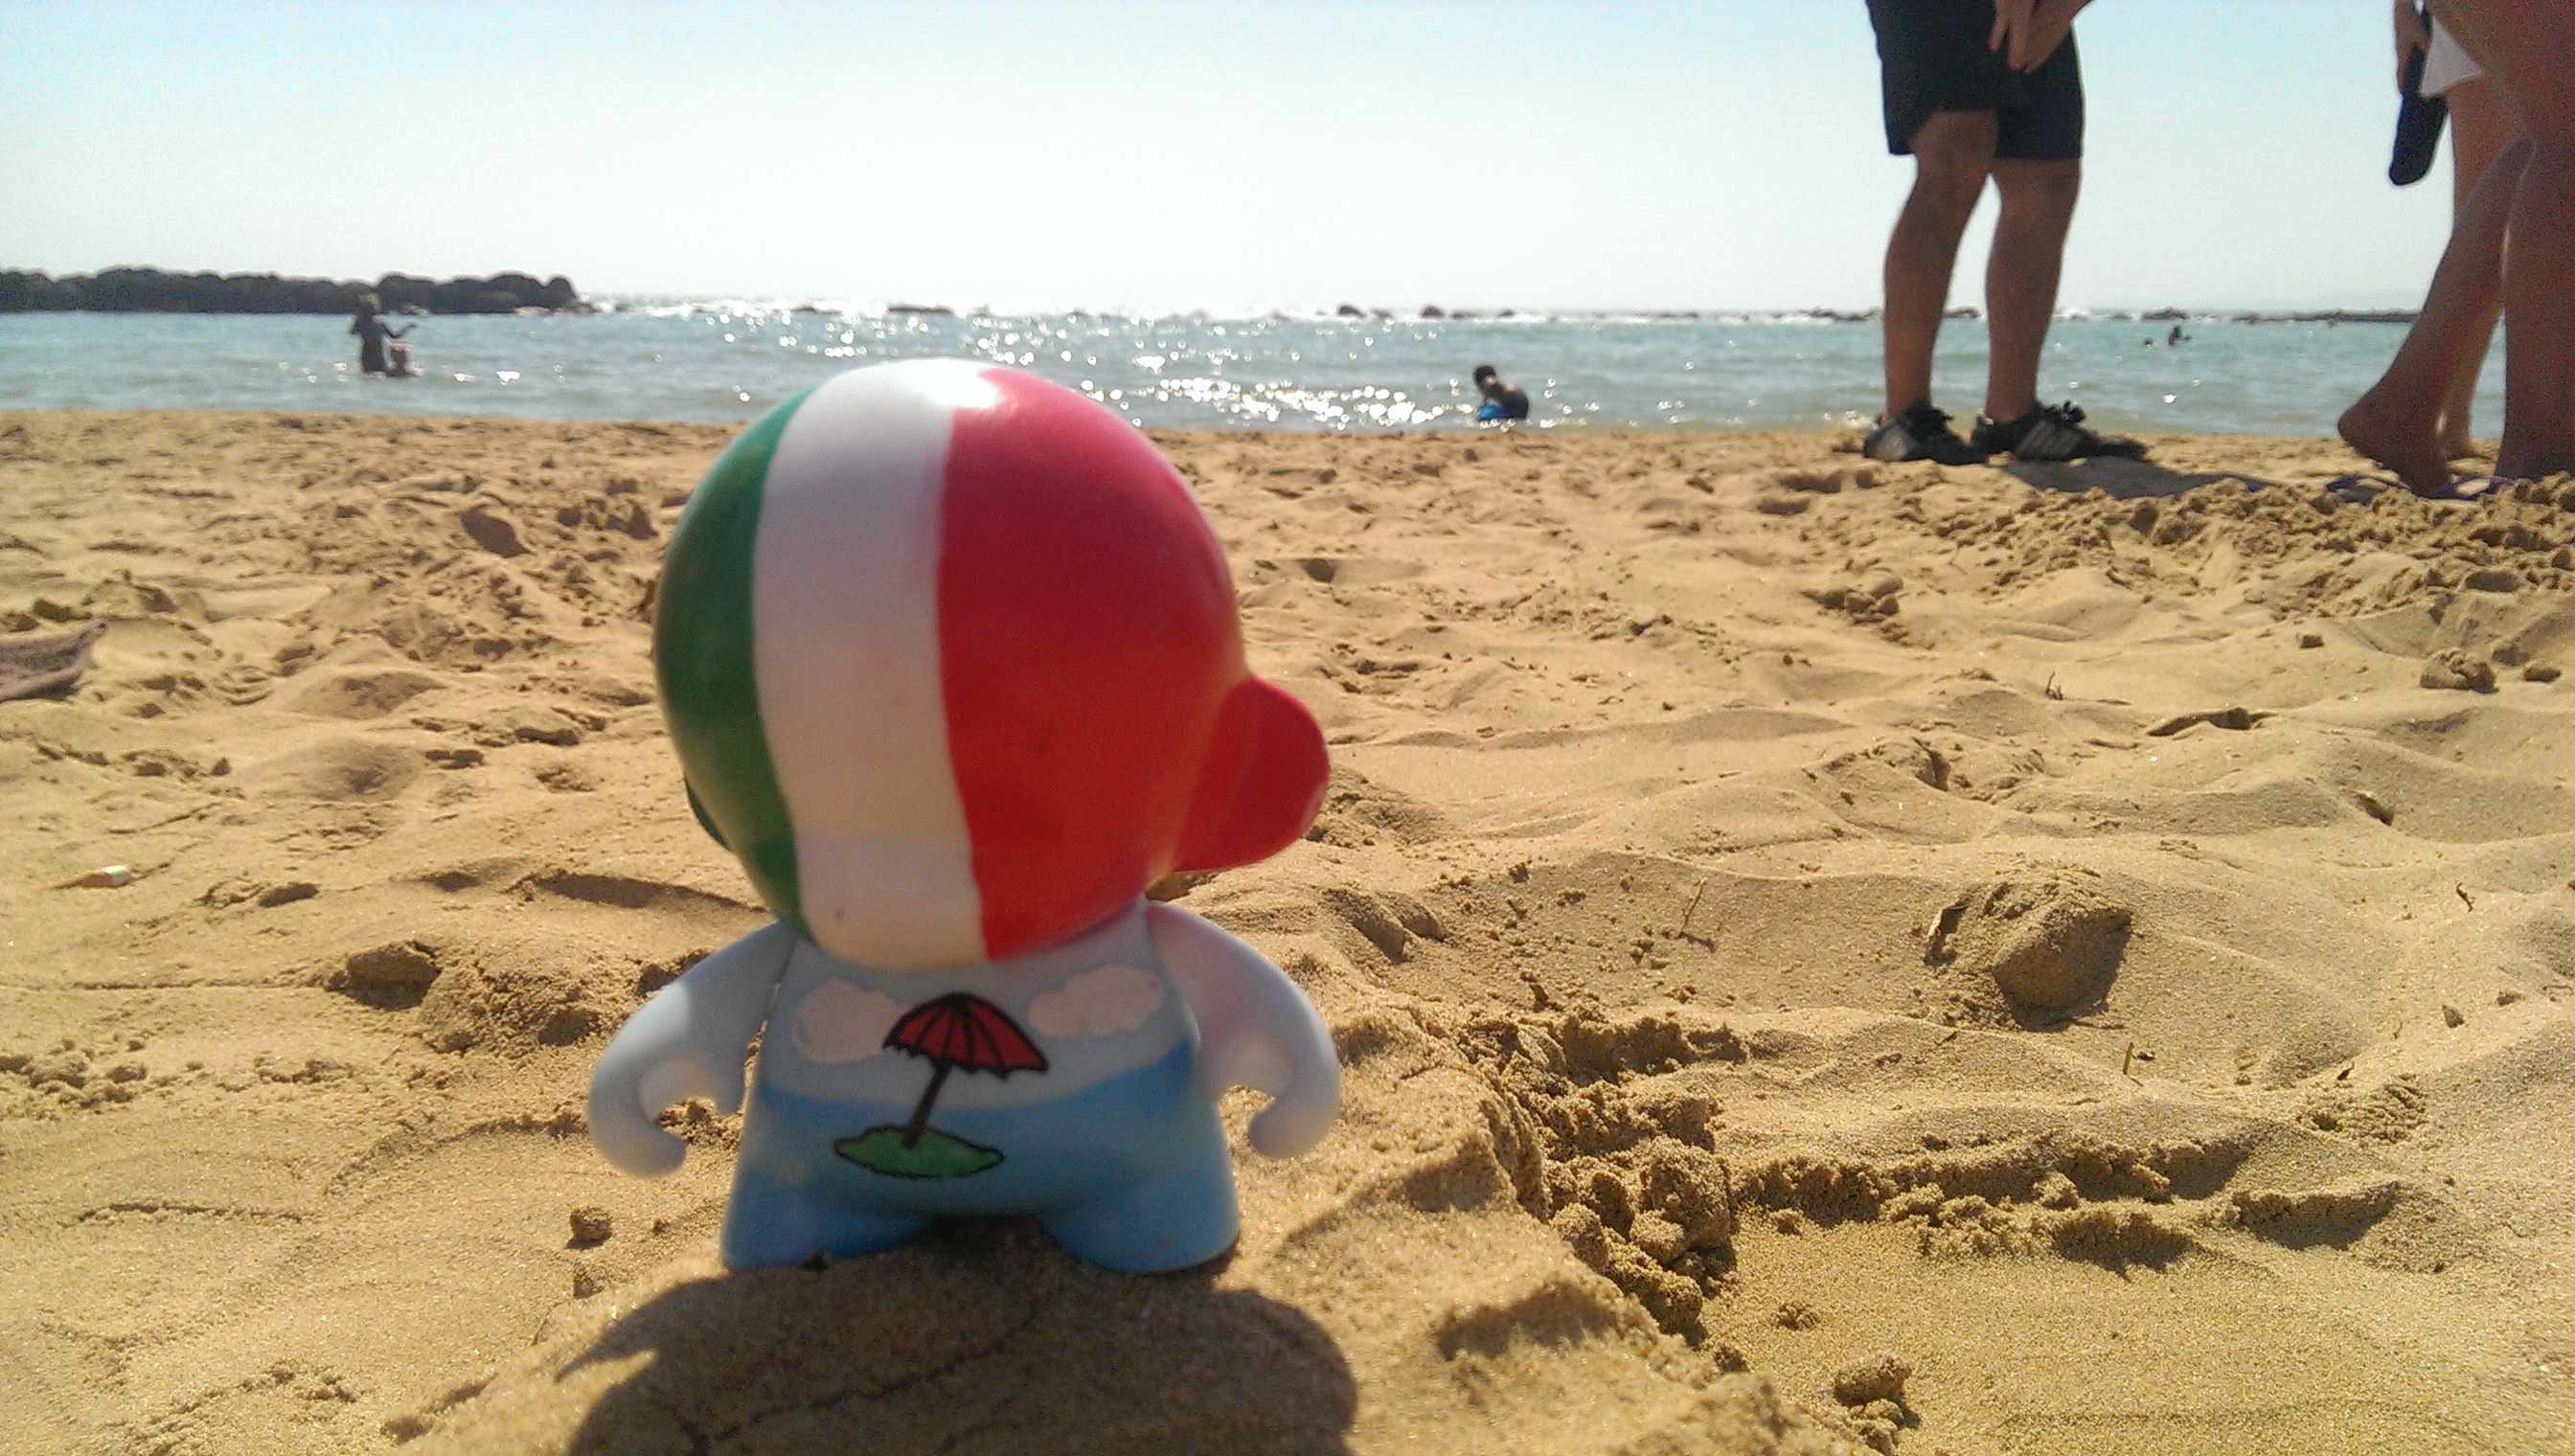

Over the years, I've developed a habit of taking a small figurine with me when travelling : I often buy a small, blank artoy (like the one in the picture) and paint it to match the flag and theme of the country I'm visiting (in this case, Sicily).
The idea is then to take pictures of the figurine in front of scenes or famous monuments from the said country : I find it much funnier than having pictures with only the monument itself (there's Google for that and it's much cheaper) but still easier than having to be on every picture myself (not a fan, to be honest)
As it's always fun to gather the people you went on holidays with a few days after getting back to watch the pictures, I thought it'd be nice if each figurine could somehow automatically launch a slideshow of the pictures from the trip they were made for.
This instructable will explain how I did it, using NFC, a raspberry pi, nodejs and osmc
Overview of the Solution
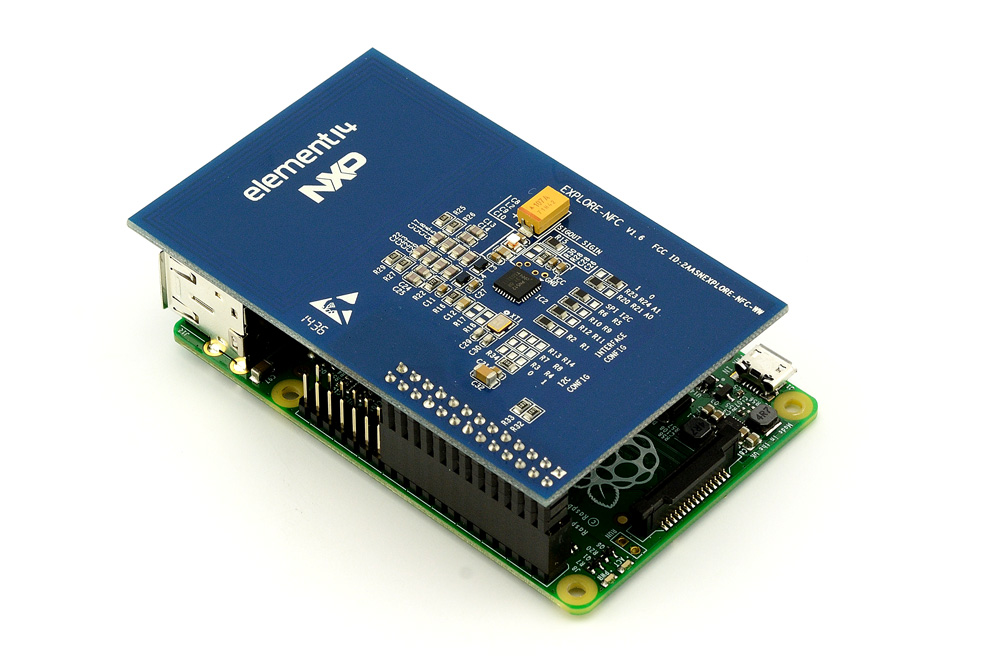
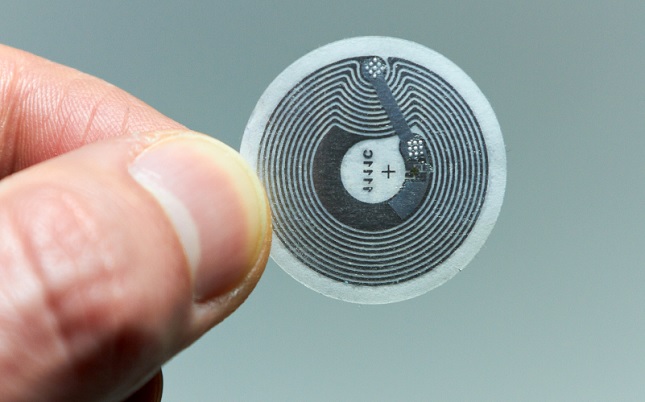
Since the whole setup includes a few things, here's a general overview of what's involved to help you understand everything that follows :
Hardware
- the figurine is homemade : since I'm writing this instructables right in the middle of a week-long trip in Copenhagen/Oslo/Stockholm/Helsinki, I will include a few shots of the figurine being made for this trip
- under each figurine is a NFC chip : I'm using round stickers that I can fit under each figurine but you can use any other form factor - just make sure that the chip that you use is compatible with your reader
- to display the pictures, I will use a raspberry pi with OSMC installed : it's my media player of choice for TV shows and Movies so it's already connected to my TV
- in order for the raspberry pi to read NFC tags, I added a NFC reader - the one I used is the Explore-NFC from NXP, available on many websites : it plugs onto the Pi and acts as a shield
Software
On the Raspberry Pi, a NodeJS script waits for a NFC tag to be read : once that's done, the script checks for its ID against a value/pair list with every folder from the pictures source on OSMC and the corresponding NFC ID as configured by the user.
When the tag is read, if the ID is in the list, the Node script tells OSMC to launch the slideshow for this specific folder.
In order to build/configure that list, the same NodeJS script launches a scanning function every 5 minutes : it scans for every directory inside the "Pictures" source on OSMC (using the JSON-RPC API that Kodi offers) and adds it to a list that is then saved on disk. By editing this text file directly, the user is then able to add the corresponding NFC ID for every album.
Creating the Figurine
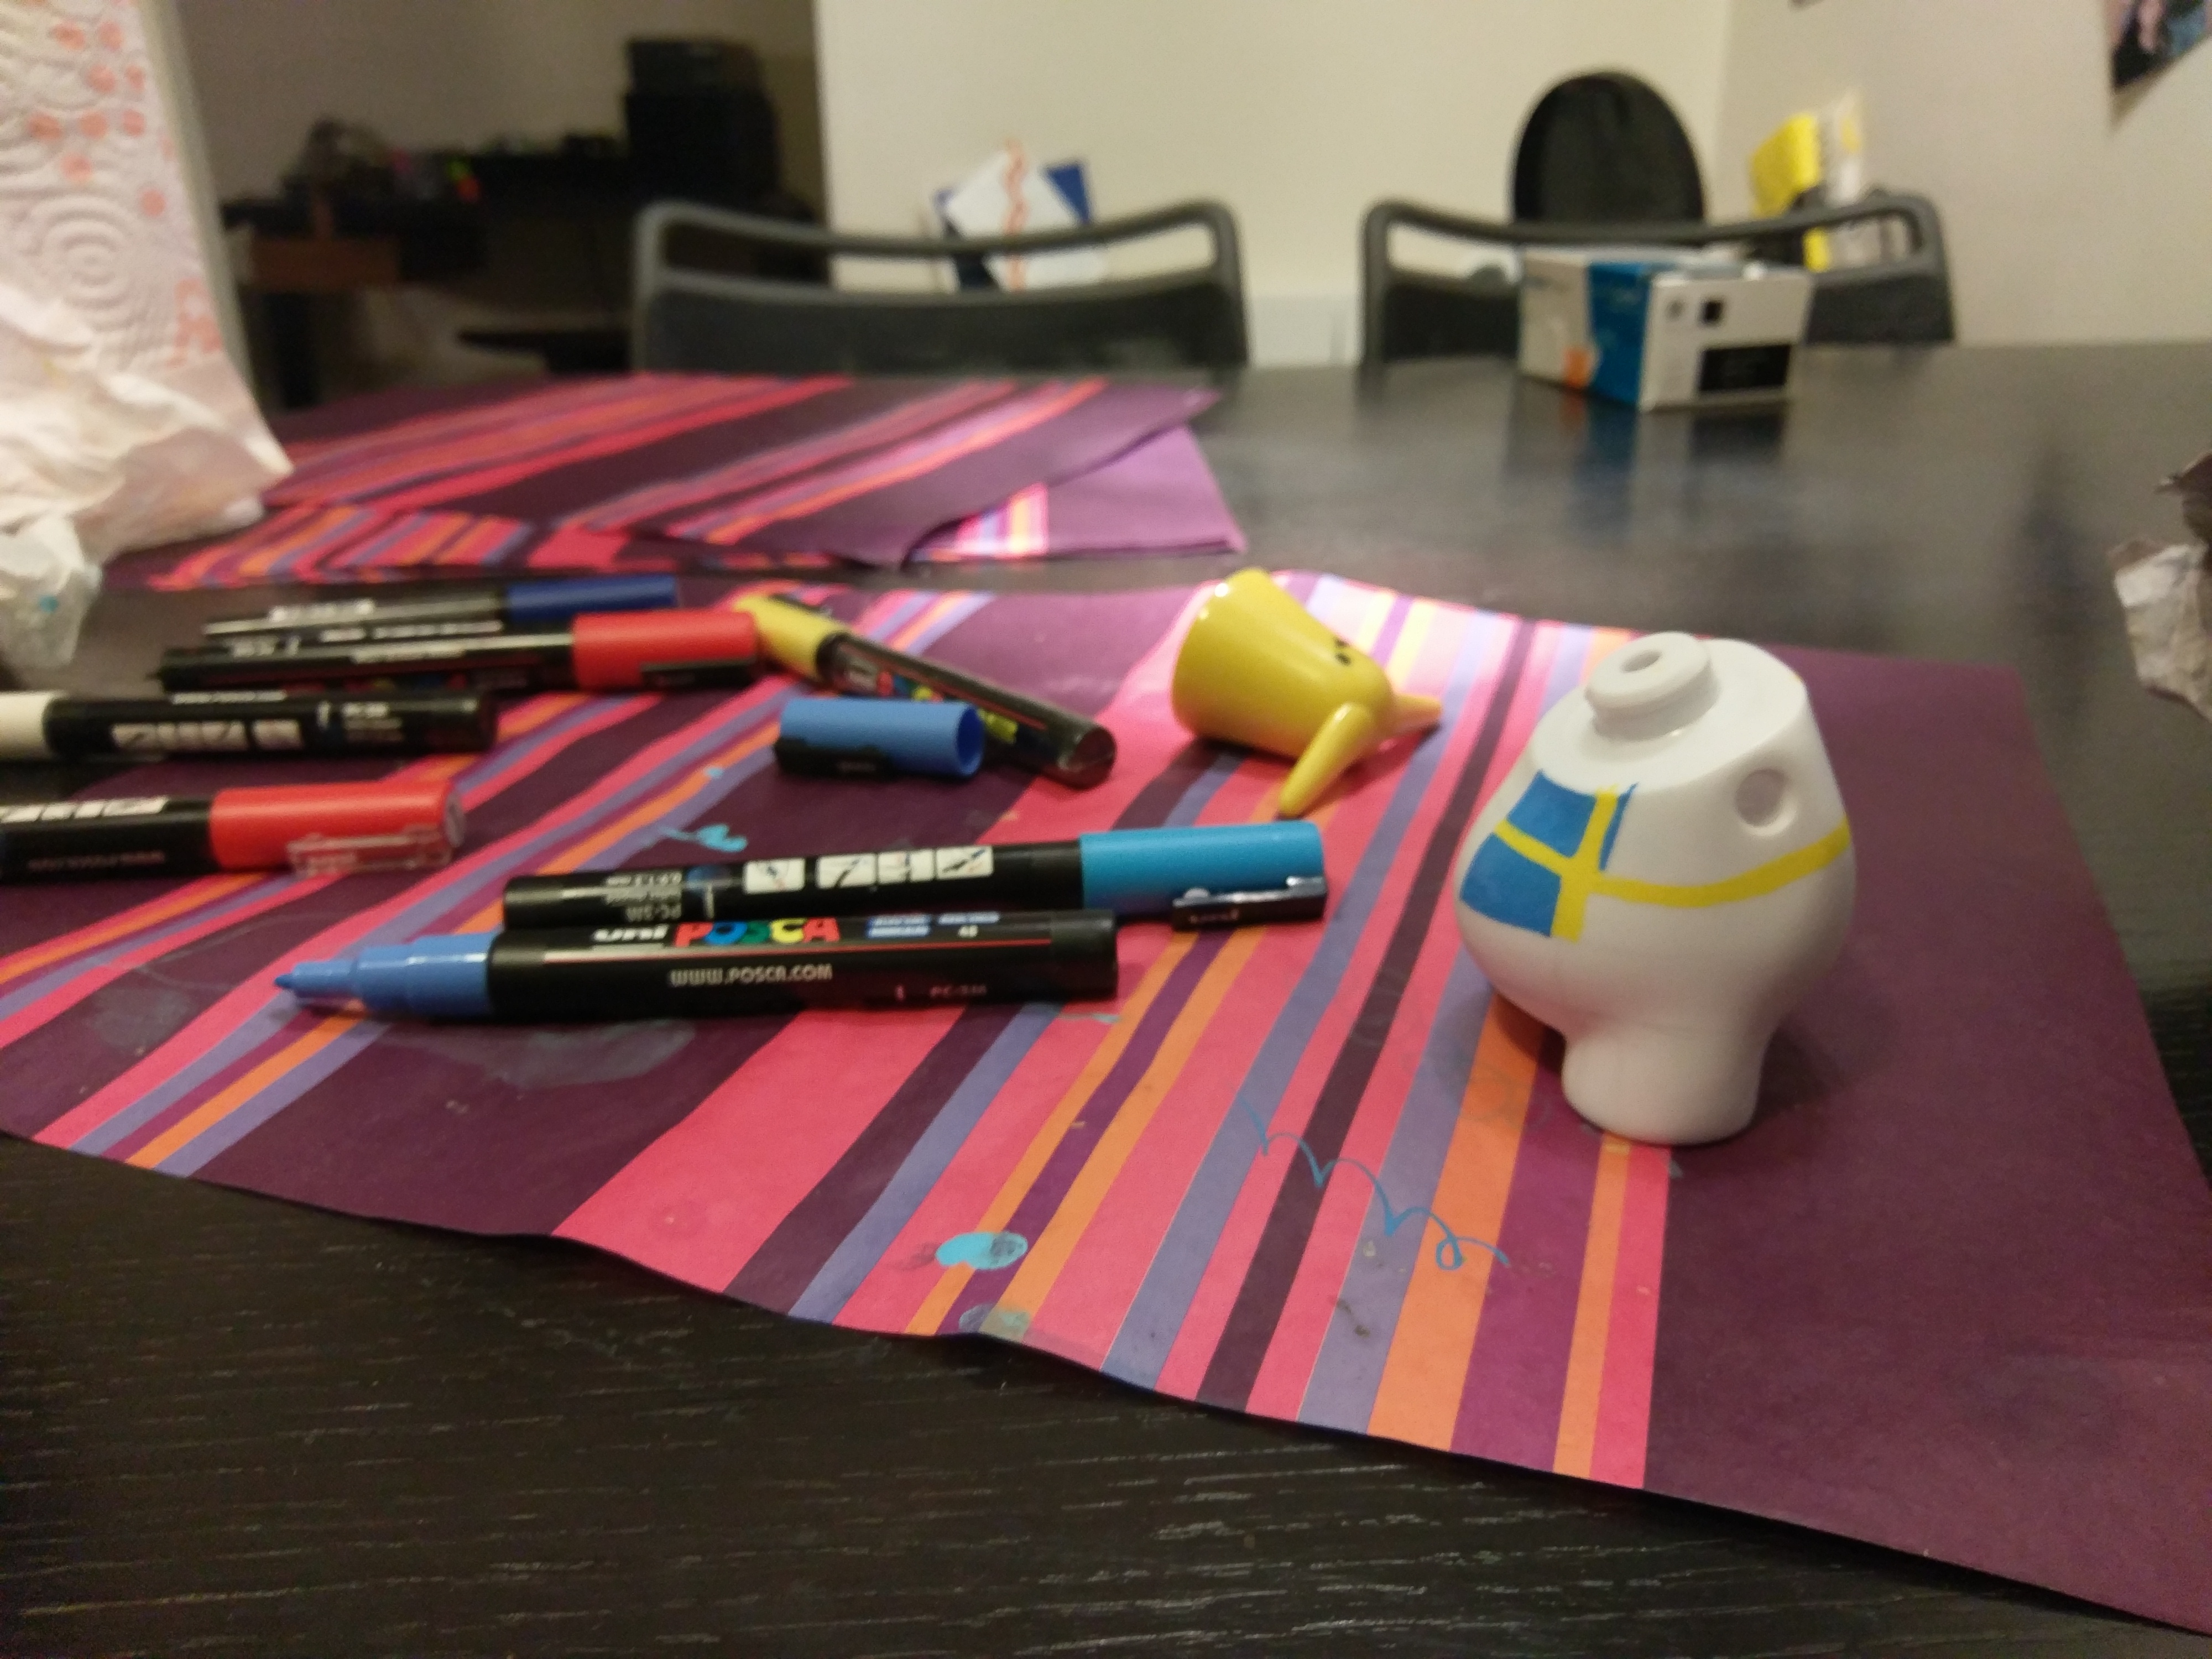
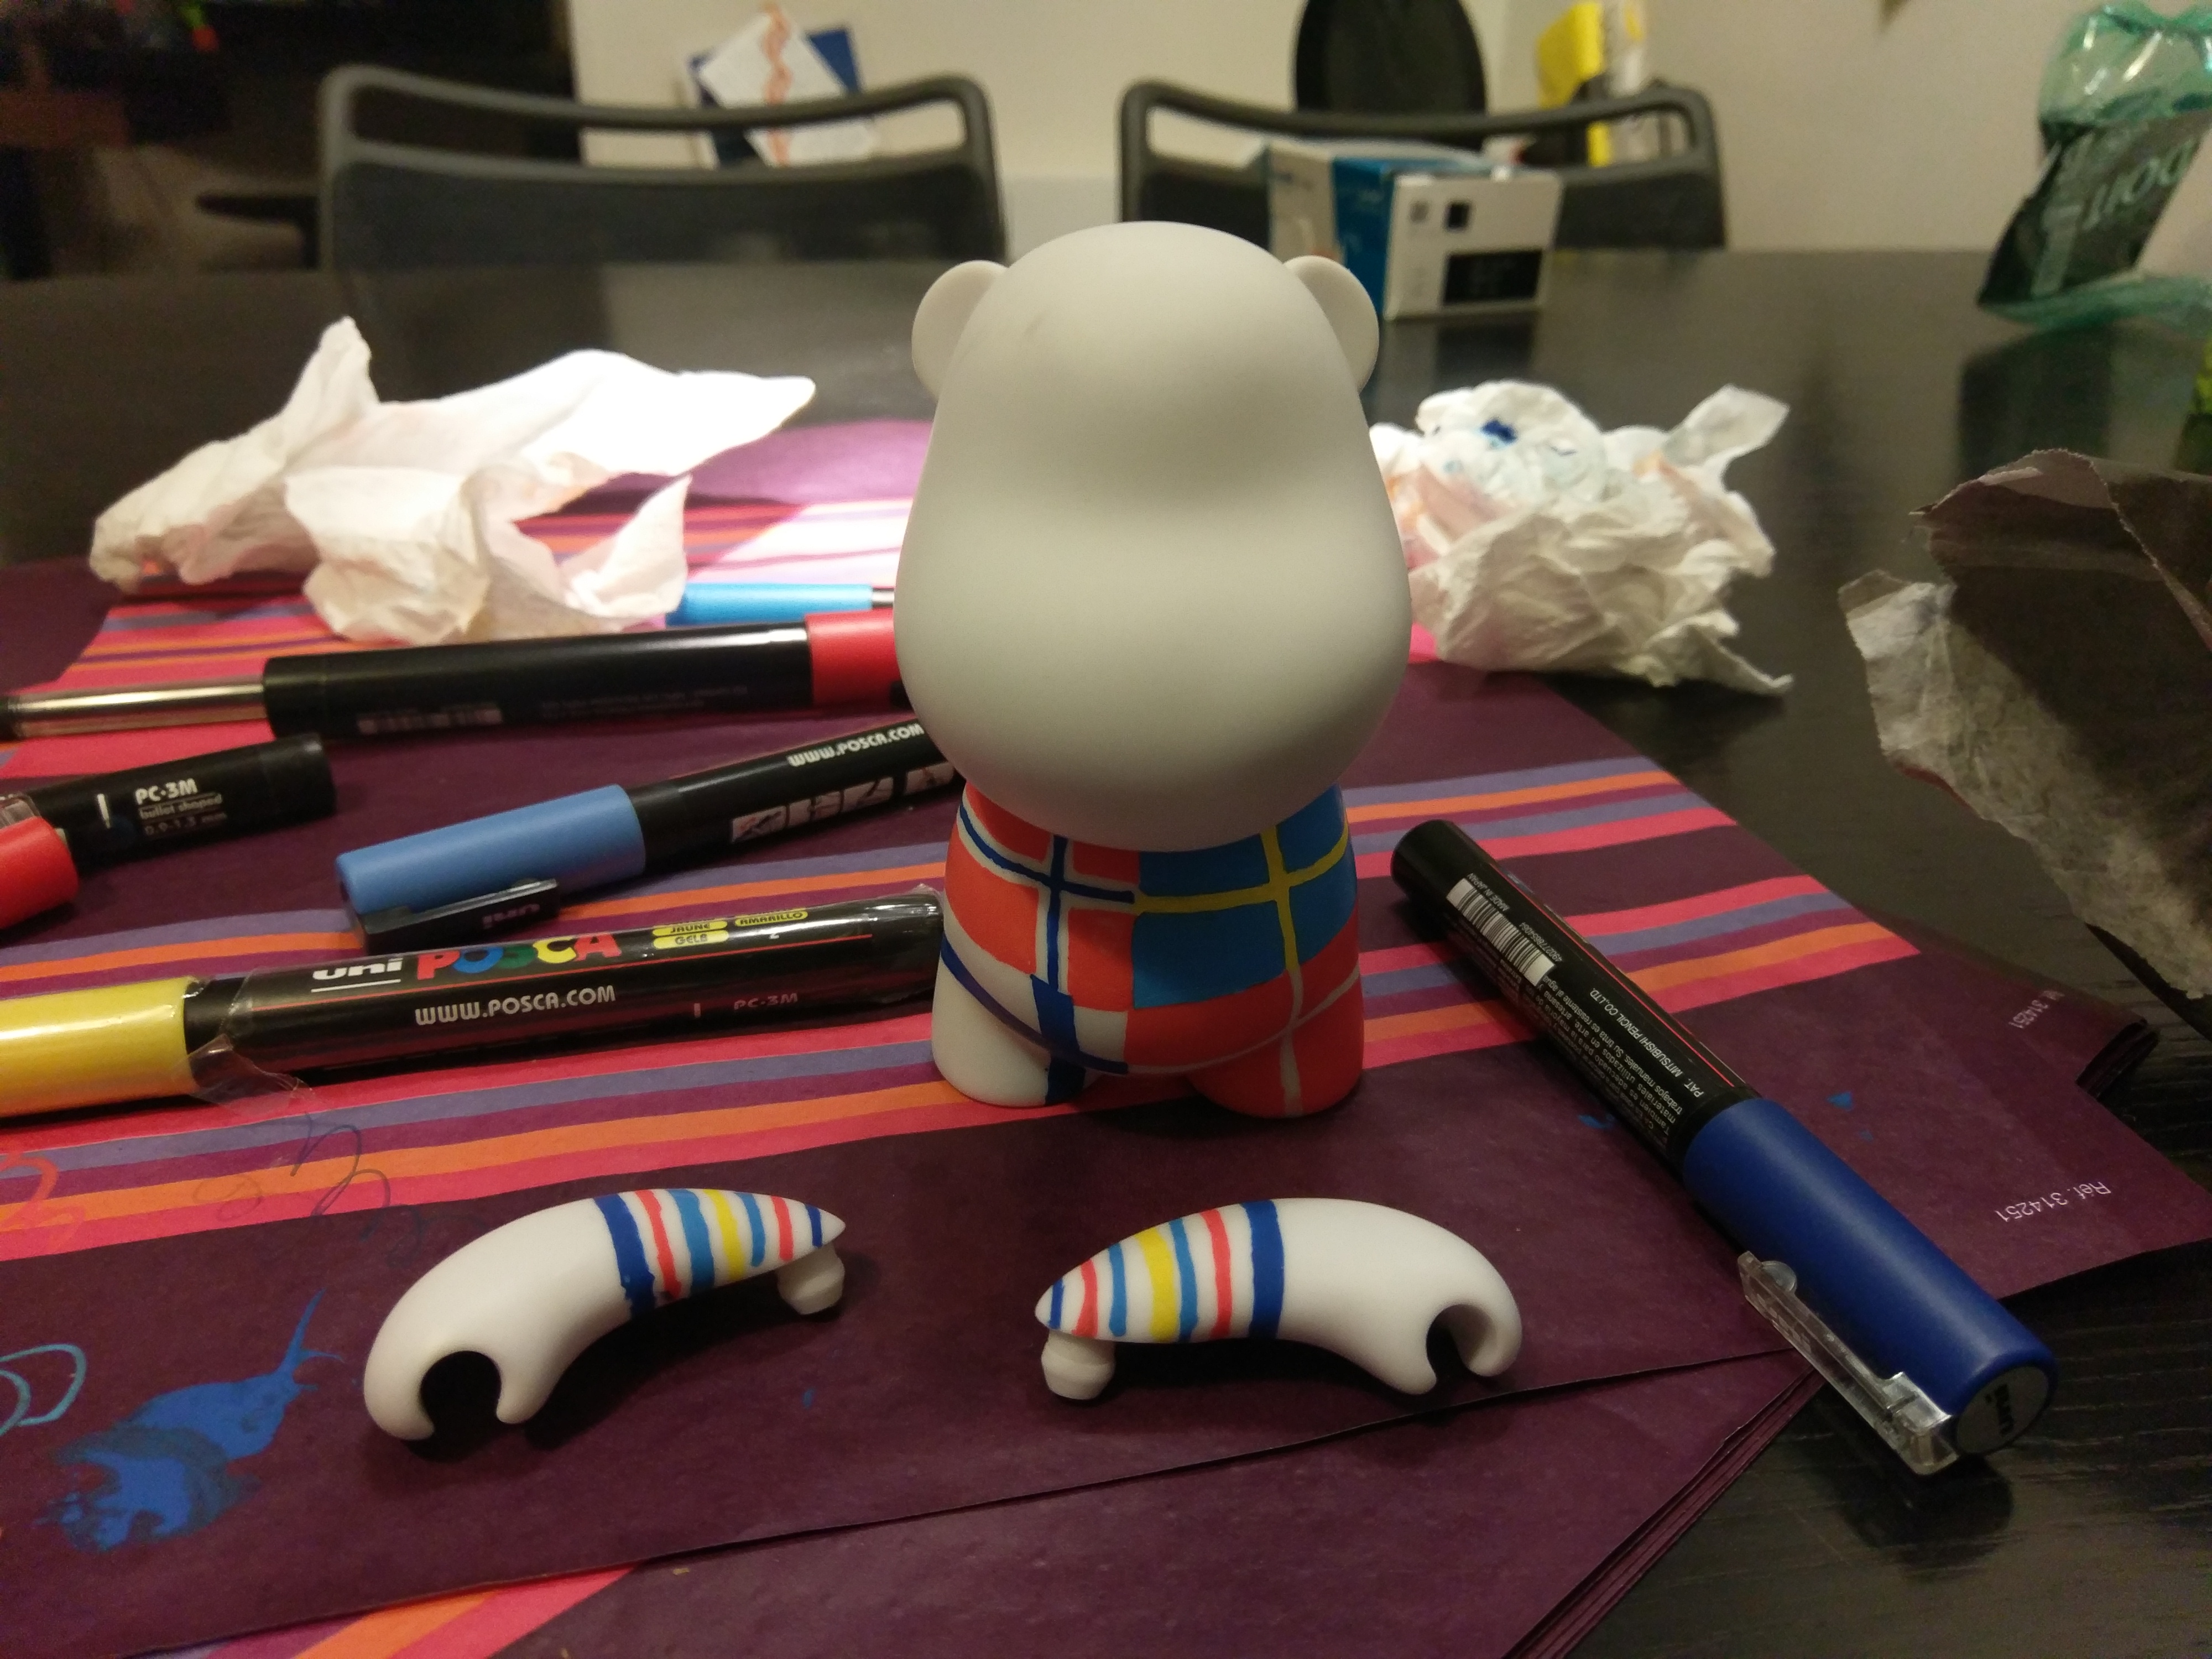


You can use pretty much anything you like for your figurine : I love using those vinyl art toys because they're - relatively - easy to draw on even for someone like me who doesn't like to draw, and fairly easy to carry around. I order them in their blank, DIY version, in the smallest size they come it, and draw on them using Posca markers. Here you can see the one I've made for this trip, with the flags of the four countries that we visited - they happened to be similar enough for me to combine them side to side. You can use several coats of paint as long as you really let each one dry before painting the next one.
After I'm done painting, I like to use a heat gun on the paint for a few minutes, as I've read that it's actually heat that helps the Posca paint set.
In the last picture you can see Sven - I always give them names - having a break in Oslo after a rather long morning. He doesn't have the head from the original toy, since I managed to mess up that one minutes before leaving : I had to dismantle a previous toy to use its head instead. I can't say that never happened before...
Install OSMC

The first thing that I did was to install OSMC on a micro SD card for the Raspberry Pi : in our setup, it will serve as the media player to watch your pictures. I won't go into much detail on this aspect since it's fairly well documented (there are a few Instructables available if you need help). Just download the installer on your computer and follow the instructions. Once I was done, I just plugged in a keyboard and a mouse and plugged the HDMI to the TV and followed the setup wizard to set up the timezone etc.
Finally, I added the directory where I store my pictures to the sources : in my case they are stored on a NAS with a fixed IP on the same network, but you can also store them on a USB drive or on the home folder itself, provided that your micro SD is large enough.
When adding the source, you will asked to enter a name for it : you can leave the default or change it but be sure to write it down because we'll be needing it later. In my case I called it "MyPictures"
You should now see the contents of the directory you added and browse your pictures : in my case, I have a sub-directory for each travel.
Congratulations, you now have a media center with your pictures on it and can launch a slideshow for a specific folder (as a bonus, you can also use it to play your videos or music)
Configure the Reader
For the rest of the instructable, we will be connecting to the Pi using the command line over SSH. To do that, just connect the Pi to your network using an Ethernet cable and use the terminal or a dedicated sotware to connect to the Pi. On Mac OS and Linux, the command is
ssh osmc@osmc.local
You will be asked to enter a password, it's osmc again
For the reader to be able to function, SPI has to be enabled : in most distribution such as Raspbian this can be done by using raspi-config, a config tool that allows you to change some configuration values.
OSMC, however, does not include raspi-config, for your own safety when using it. Instead, shut down the Raspberry, eject the micro SD card and just mount it to your computer : the "boot" partition should now be visible. There, at the root of the volume, you will see a file called "config.txt" - just open it and add this line at the end :
"dtparam=spi=on"
You can now save the file, reboot and SPI should be enabled.
After that, you will need to download the attached ZIP file and unzip it on the raspberry - I recommend creating a Projects folder and unzipping it there. To do that, you can either connect to the Raspberry using FTP over SSH (I use CyberDuck to do that) or put the file on a USB Drive and use Kodi's file manager to copy it on the Raspberry Pi.
Either way, once you've copied the zip file to the Pi, you can then navigate to the folder you copied it to and unzip it, move to the resulting folder and install the package :
unzip SW2827.zip
cd SW2827
sudo dpkg -i libneardal0_0.14.3-1_armhf.deb neard-explorenfc_1.2-1_armhf.deb
If all goes well you should be able to plug in the reader, reboot and then enter
explorenfc-basic
If you approach a NFC chip to the reader it should now display a bunch of information from the chip (among other things, its ID)
Downloads
Install Node and Create the Project
Next, we'll install NodeJS on the raspberry to write our app.
We want to install nodejs but the version of the default repository is really old, so you have to go through a first step before : in the command line interface, type
curl -sL https://deb.nodesource.com/setup_8.x | sudo -E bash -
You can then type
sudo apt install nodejs
to install the latest version of nodejs and npm available.
In order to control KODI from within nodejs, we are going to use a npm package called kodi-ws.
Let's start by creating a new project : just type the command
npm init
You will be asked a number of questions : for most of them you can leave the default, just choose a name for your app and enter your own name at the end. When asked for the starting point just leave index.js
This will create a package.json file that will sum up the characteristics of your package, such as its dependencies.
You can now enter
sudo npm install kodi-ws
sudo npm install jsonfile
sudo npm install cron
sudo npm install child_process
If you open package.json after that, you will note that all those packages were added to the dependencies.
The Code, Explained

Attached to this step is the code for the app.
I've left a fair amount of logging that can be uncommented in order to understand the script but et's break it down together.
You'll notice that despite all the functions declared, the code only does a few things at first :
kodi('localhost', 9090).then(function(connection) { The script tries to connect to the OSMC JSON-RPC API. Once it succeeds (and only then), it goes on with the rest of the file.
If for some reason you're not running this from your Raspberry Pi, change localhost to your IP adress. Also make sure that in the service settings inside OSMC (Settings/Services) the checkbox "Allow remote control from applications on other systems" (see picture)
The rest of the file is mostly declarations of functions that we will use later : the two functions that are actually launched from here are (lines 172/173)
scanAndSetCron();
listenForTag();
In scanAndSetCron :
- the scanPictures function is launched. Inside it, we check if the variable "mypicturedirectory", which will hold the path to our pictures, is empty. If it is, we ask OSMC to give us all the sources that it has for picture content (inside the getPictureDirectory function, line 11 ):
var piclist = await connection.Files.GetSources("pictures"); OSMC gives us an array in return : for each item, we check if the source name includes "My" : if that's the case we store it as our picture source (line 16 and following). This is where you will want to change the string from "My" to whatever you entered previously as a name for your pictures source
if(piclist.sources[i].label.includes("My"))
  {   console.log(">>> Found the directory " + piclist.sources[i].file);   mypicturedirectory = piclist.sources[i].file ;   }
Now that we have the path to the source (essentially the root folder to our albums), we ask OSMC to scan it and add the path for every folder to an array called album_directories (if it's not already there). Since this function will be run every X seconds, we check that the directory is not already in the list before adding it, with the NFC ID set to an empty string - that way, every new folder that you add to your pictures will be automatically added - line 46
for (var j = 0 ; j< directories.length;j++)
 {
	if(directories[j].filetype.includes("directory"))
	  {
	   if(searchDirectory(directories[j].file, album_directories))
		{
			console.log(directories[j].file +" already there ");
		}
	   else
		{
			console.log(">> Adding dir " + directories[j].file);    album_directories.push({directory:directories[j].file, nfc:""});
		}
	}
}
At the end, we save the album_directories array to a json file on the Pi, which we try to load everytime the function is executed : this happens at the end of the scanAndSetCron function where we use a cron-like package to ensure our function runs every 15 seconds.
The JSON file that we generate, album_directories.json, can be opened using any notepad app. Once you do so, you will be presented with the list of your photo albums, each of the with a blank "nfc" field :
[{"directory":"/home/osmc/Pictures/Mada 2016/","nfc":""},{"directory":"/home/osmc/Pictures/NewFolder/","nfc":""},{"directory":"/home/osmc/Pictures/Test/","nfc":""}]
In this field, you now have to paste the ID of the tag you want to associate with this album. To get this ID, just navigate to the SW2827 folder, run explorenfc-basic and scan the tag you want to use. In the output that you get, just look for the value next to ISO14443A UID. Copy it to the album you want to configure. In my case, for example,
[{"directory":"/home/osmc/Pictures/Mada 2016/","nfc":"040A12EAFC3881"},{"directory":"/home/osmc/Pictures/NewFolder/","nfc":""},
{"directory":"/home/osmc/Pictures/Test/","nfc":""}]
Save the file and its content will be loaded when you launch the app next time.
In the listenForTag function, we do just that : since there does not seem to be a dedicated port of the reader library for NodeJS, we rely on childprocesses to launch the binary for the reader :
var spawn = require('child_process').spawn,
child = spawn('/usr/bin/explorenfc-basic', []);
We rely on an eventlistener to receive the output from this execution : inside the callback for child.stdout.on('data', function (data), we parse the output of this command using the analyzeOutput function : we're looking for the line that we saw earlier, beginning with "ISO14443A UID:", since that's where the ID for the tag that we scanned is stored. Once we find that line, we trim it down and store the ID to an object (called ID, how original).
Finally, we try to match this ID to the IDs that we entered in the album_directories array of objects (loaded via the album_directories.json file). If a match is found, we instruct OSMC to launch a slideshow for that specific folder :
var nfcid = analyzeOutput(data);
console.log("nfcid is " + nfcid.id);
var correspondingalbum = searchTag(nfcid.id, album_directories);
if(correspondingalbum) {
console.log("Found album " + JSON.stringify(correspondingalbum) + " for this tag");
var args = [{'path': correspondingalbum.directory}] ;
connection.run('Player.Open', args );
}
listenForTag();
You notice how at the end of the function, we launch listenForTag again ? That's the only workaround I've found to make the app work : explorenfc-basic will by default wait for a tag, read it, then exit. The app does have a continuous mode that we can call using explorenfc-basic -k but in this mode, the child_process never outputs the tag content since it never ends (in other words child.stdout.on('data') is never fired). As I haven't found any other way to use this reader, what we're doing here is basically launching explorenfc-basic in single tag mode, and when a tag is read, we launch listenForTag and therefore restart explorenfc-basic.
If I had to go back (and I think I will), I would choose a NFC reader that offers more options : for instance, Adafruit (you might have noticed I'm very fond of them) has this reader https://www.adafruit.com/product/789 that is compatible with libnfc, which I believe means that the reader will be much cleanier to interface with than calling a child process from within node and parsing the stdout !
Downloads
Try It !
To launch the app, just navigate to that folder and type "node index.js" (or npm start since we've configured it earlier in package.json).
In the logs you should see the app connecting to OSMC/Kodi and scanning for the first time. After a few seconds the file album_directories.json will be created inside the project directory; You can then enter the NFC tag IDs as explained earlier and associate them with the albums that you want.
Launch Automatically
To sum up, we've created the Node app which (1) scans for your KODI picture library and tries to find the folder where you store your holiday pictures, (2) listens for NCF tags by relying on explorenfc-basic and then (3) launches the album associated with this NFC ID.
In order to make this whole process run in the background, we will use PM2, a process manager for node.
In the command line, navigate to your projects folder (where your index.js file is located) and type the following lines :
sudo npm install pm2 -g
pm2 start index.js
Your app is now monitored by PM2 and will be restarted automagically ! To make sure it's actually launched, type
pm2 list and you should see it in the list. If you want to see the logs, just type pm2 logs.
As always, let me know if you try this project, I hope you have as much fun as I did and do not hesitate if you have any question, I'll do my best to answer them !