Automated Chicken Coop Door (schoolproject)
by LukDema in Circuits > Raspberry Pi
2296 Views, 17 Favorites, 0 Comments
Automated Chicken Coop Door (schoolproject)
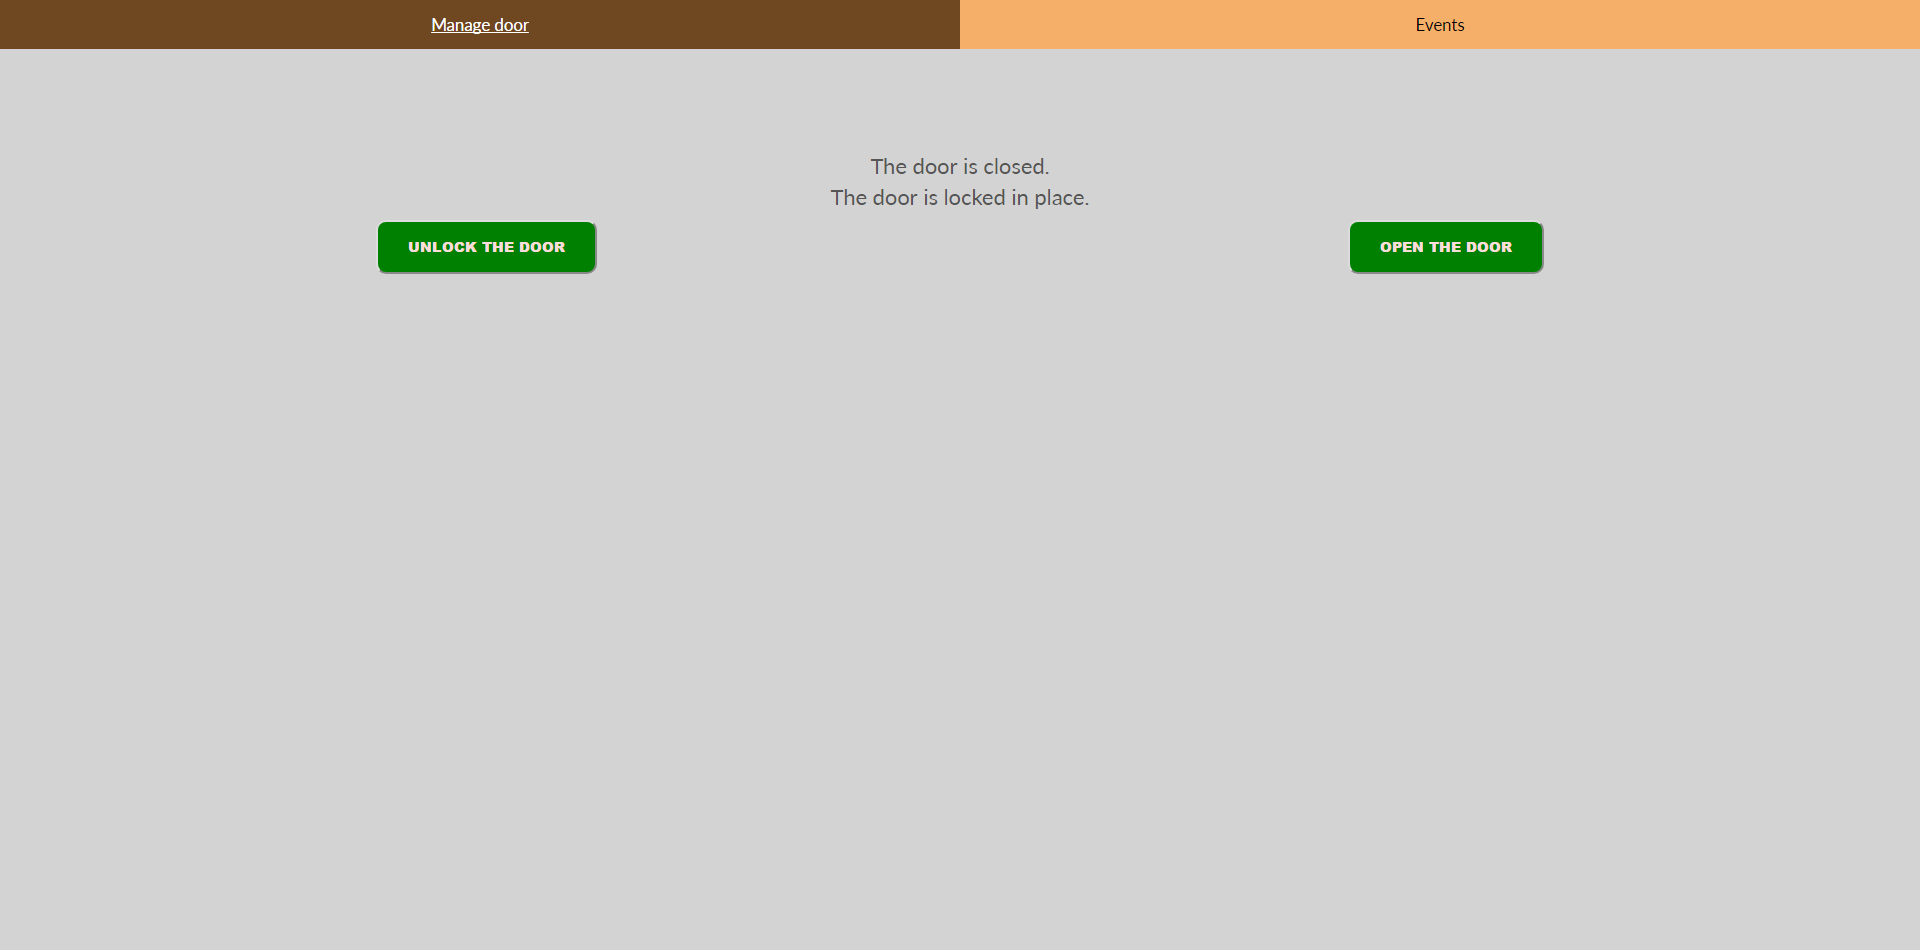
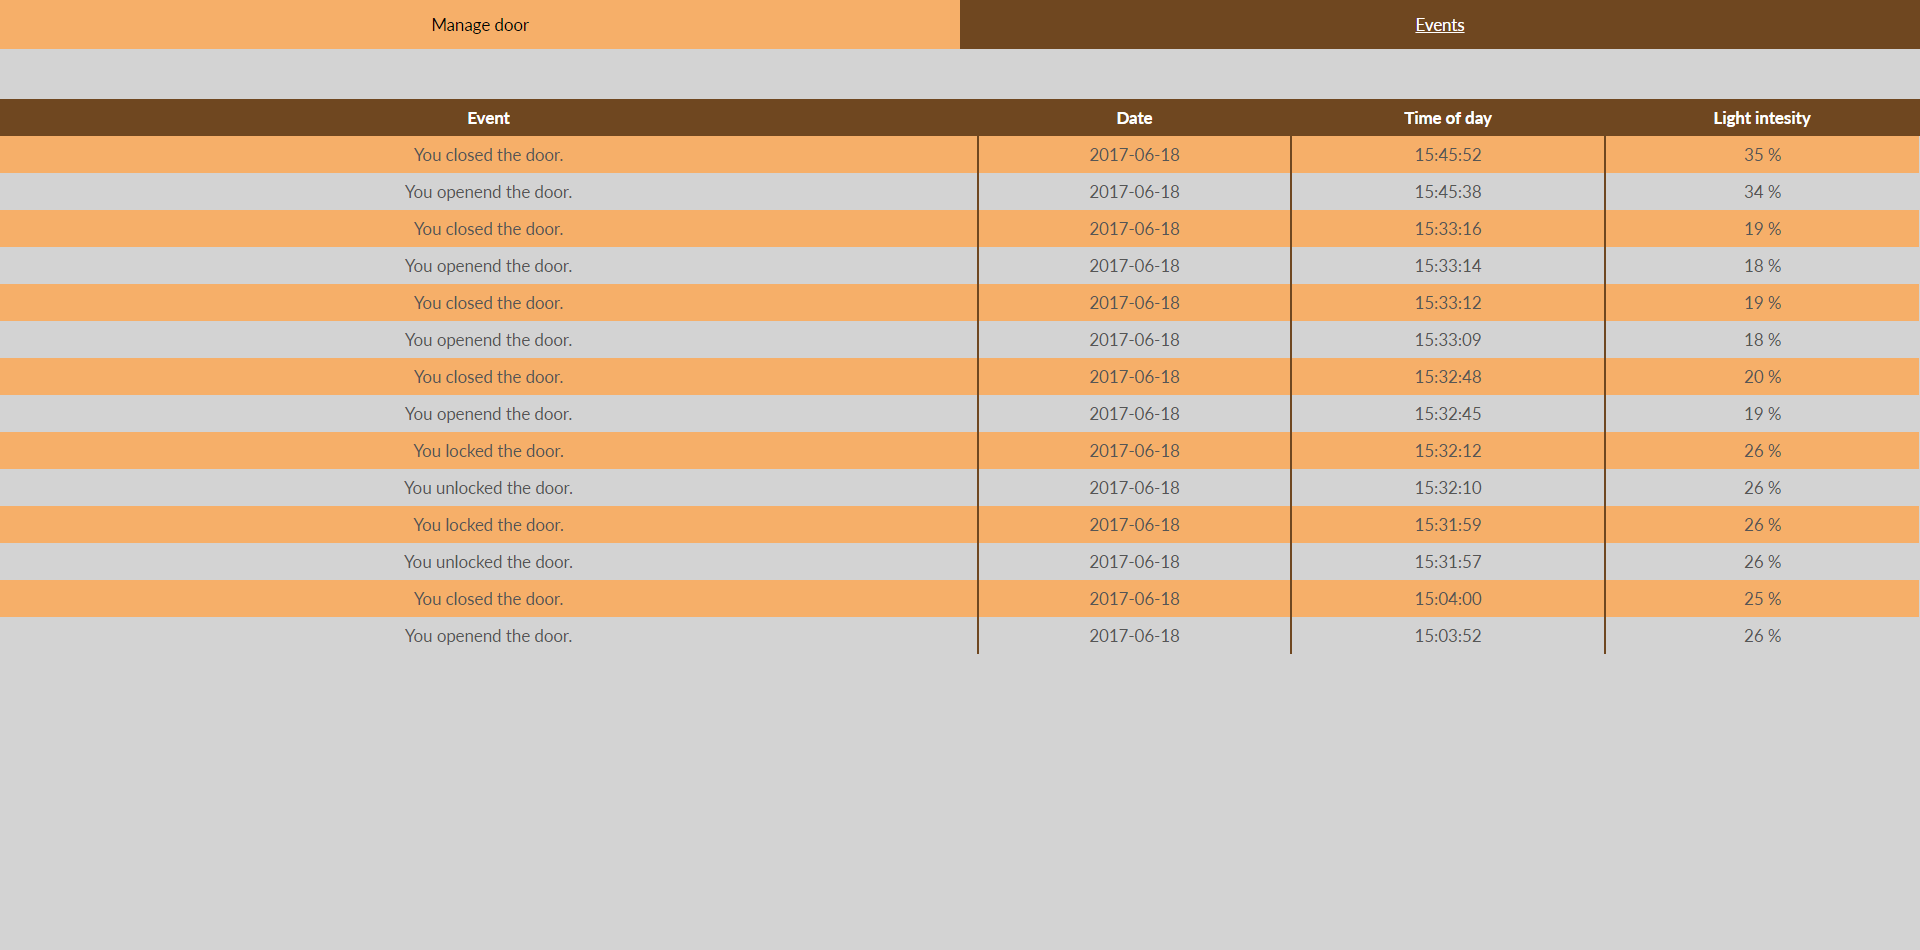
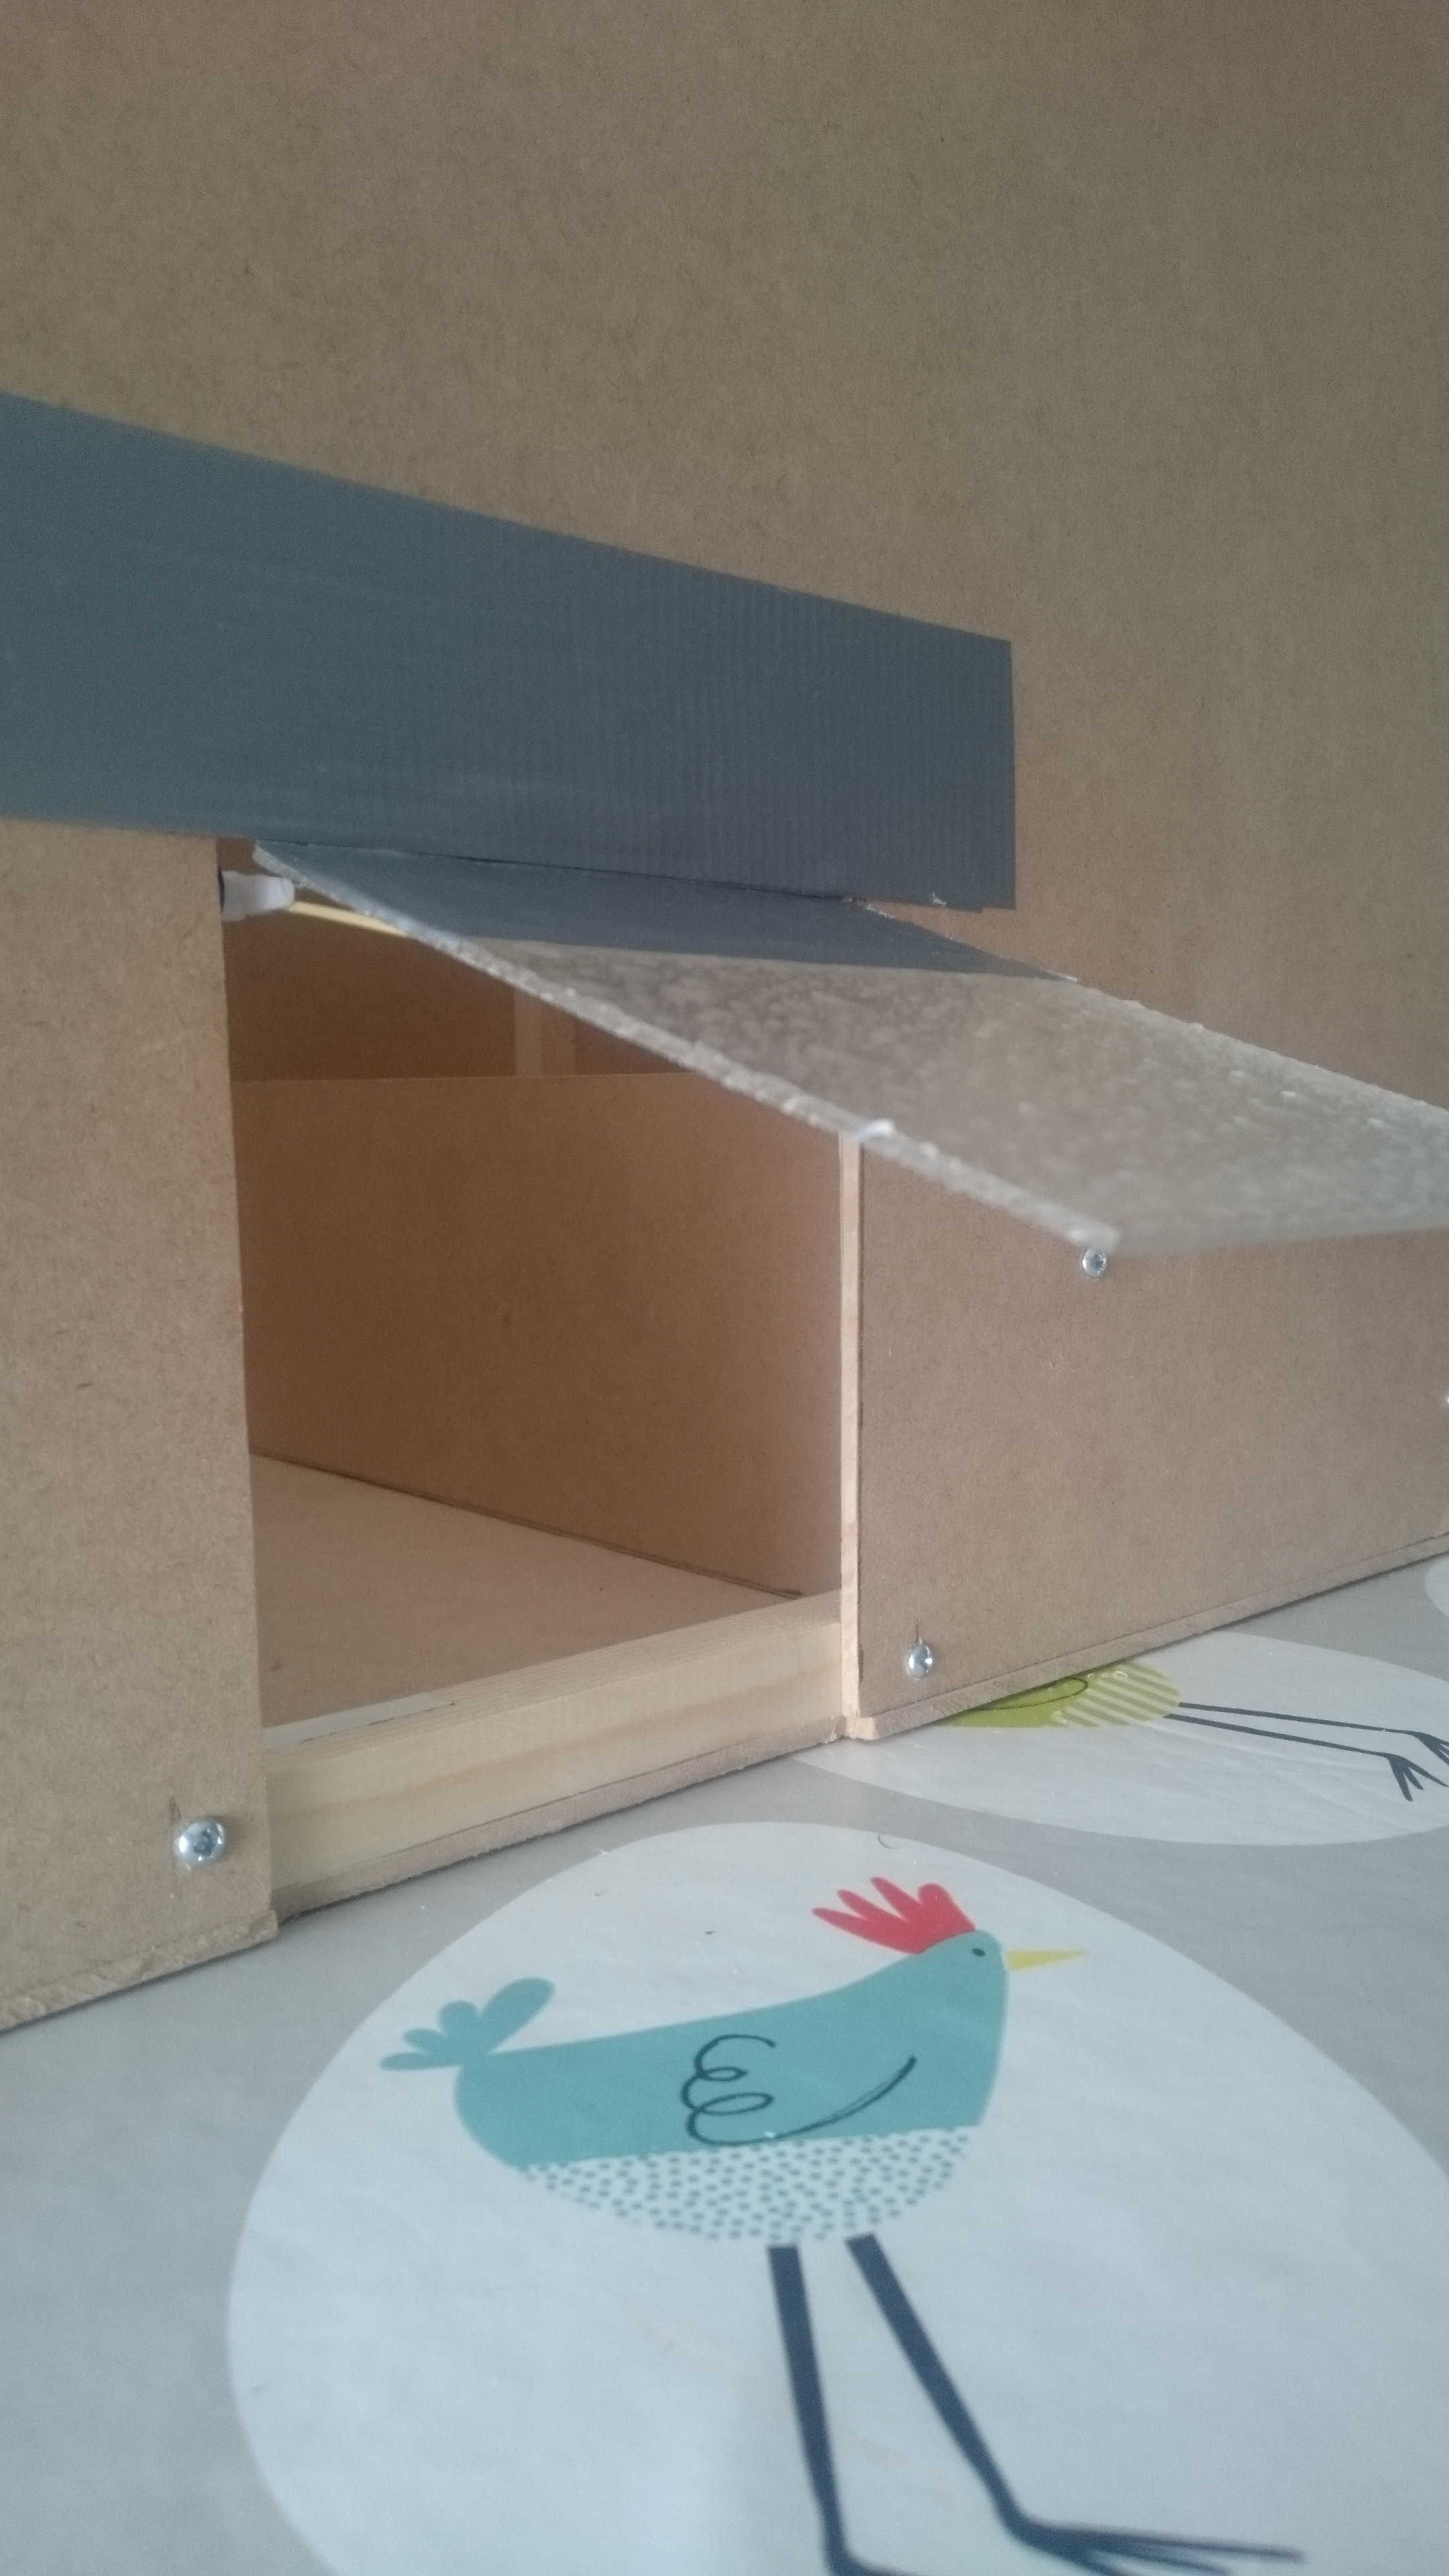
For a schoolproject, I had to automate the door of a chicken coop. We also had to make a database and a webserver where we would be able to see some data about the door.
We also have to explain in detail how we did it, on instructables. So now I will go through the steps to make your automated chicken door. Please keep in mind that my project is just a prototype and isn't meant to be use with real chickens.
List of Components
These are all the components you need:
- 1 x Raspberry Pi 3 Model B
- 1 x Adafruit assembled Pi+ cobbler and breakout cable
- 2 x Breadboard
- 1 x MCP3008
- 1 x ldr (light-dependent resistor) (I used a GL5516)
- 5 x 1kΩ resistor or 10kΩ resistor
- 2 x transistor (2N3904)
- 2 x mini servo (sg90)
I got my Raspberry Pi, the cobbler, the breakout cable and the MCP3008 from SOS Solutions. You could also get them from Amazon if you want to. You can get all the other components from banggood, where they are very cheap.
Downloads
Electric Circuit
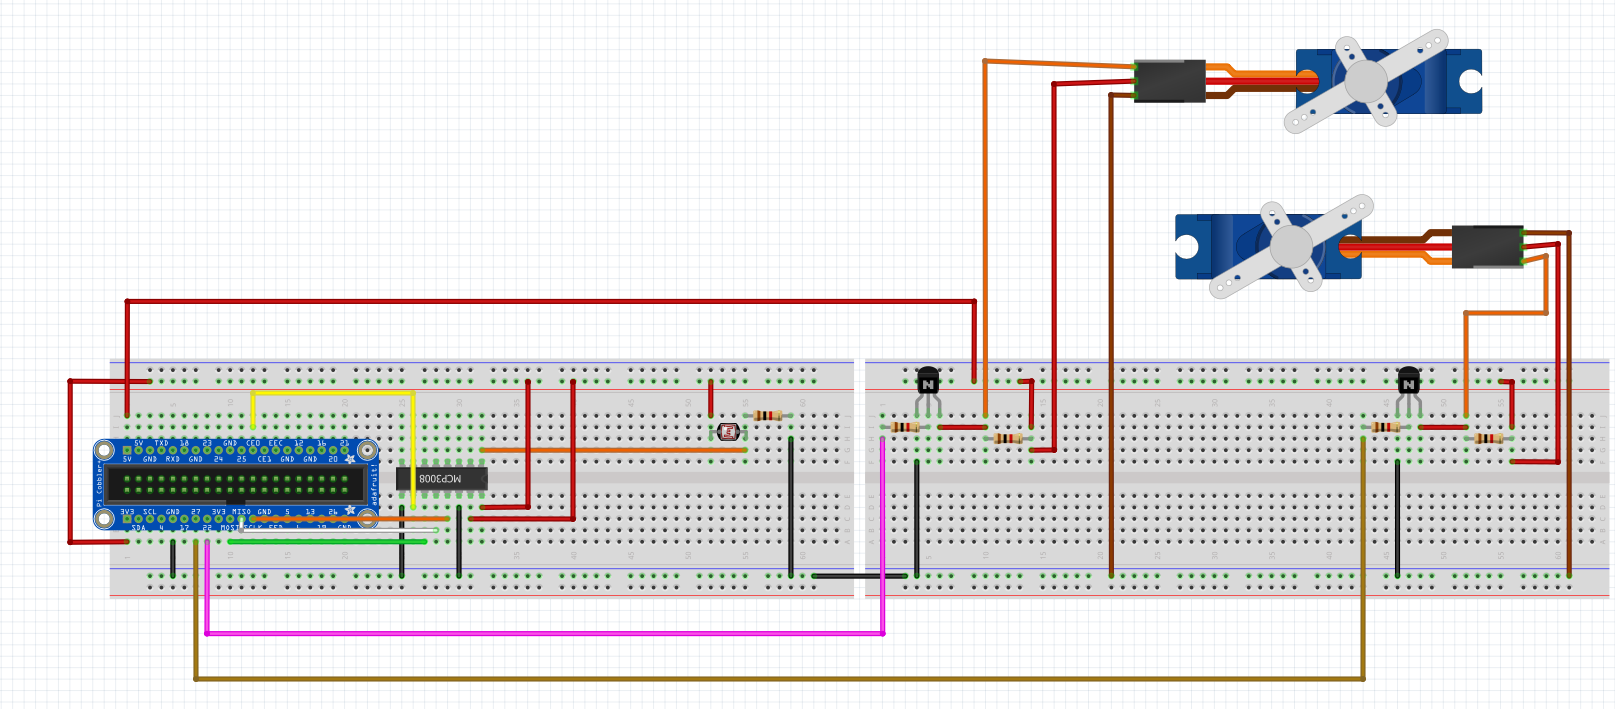
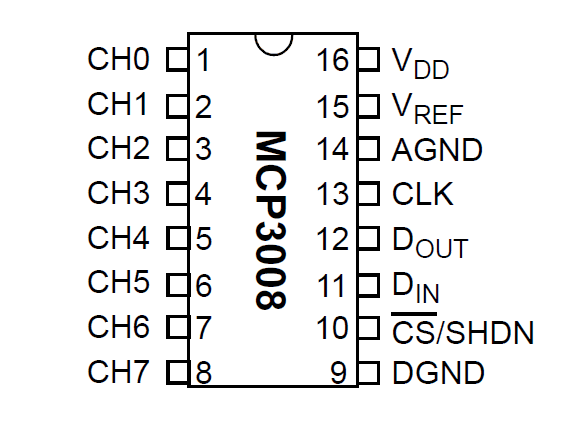
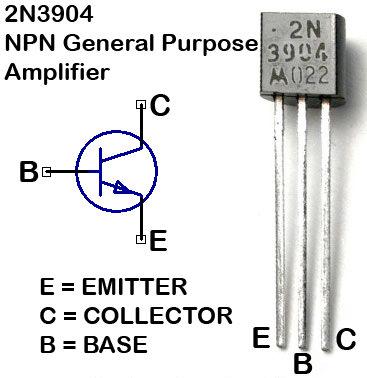
The electric circuit isn't that hard, since I didn't use too many components. You can just follow the picture and everything should be allright. But I'm still going to explain how the MCP3008 and the transistors work.
First about the MCP3008. On the fritzing scheme (the first picture) the MCP3008 is upside down. You don't have to put it upside down in you electric circuit. I just did it so the wires wouldn't overlap too much and so the rest of the scheme would be easier to understand. I have also included a picture of all the pins of the MCP3008 and what they do, but I'm still going to explain each pin.
CH0 up to CH7 are the channels you can use to connect a sensor. I only use one sensor (the ldr) so you only need one channel. In my code I have used channel 0, so it's best to connect your ldr to CH0 like in the fritzing scheme, else you would have to change the parts of my code where I read the ldr. So on this side of the MCP3008, you only have to connect one pin. The others don't have to be connected, unless you want to use more sensors.
On the left are the pins from the MCP3008 and on the right are the pins from the Raspberry Pi:
VDD = 3.3V
VREF = 3.3V
AGND = GND
CLK = SCLK
DOUT = MISO
DIN = MOSI
CS/SH = CE0
DGND = GND
Now for the transistors. If you look at the transistor from the flat side, then the left pin is the emitter, the middle pin is the base and the right pin is the collector. The emitter (left pin) has to be connected to the ground (GND). The base (middle pin) has to be connected with a GPIO pin from the Raspberry Pi, with a 1kΩ or a 10kΩ resistor. The collector has to be connected to the orange wire of the servo (this is the signal wire of the servo) (let's call this connection A). Then parallel on connection A, you have to connect the 5V from your Raspberry Pi with a 1kΩ or 10kΩ resistor (let's call this connection B). Then parallel on connection B, you have to connect the red wire of the servo (this is the + wire of the servo). The last wire, the brown one (this is the - wire of the servo), you just have to connect with the ground (GND) of your Raspberry Pi.
Setting Up Mysql on the Raspberry Pi
To be able to run my code, which you can download here, you will have to install flask and mysql on your Raspberry Pi. You also need Pycharm on your pc or laptop. Here I'm going to show you how to put mysql on your Raspberry Pi.
First you have to open the terminal of your Raspberry Pi, by connecting it to your computer or to a screen. You can easily connect your Raspberry Pi to your computer with putty. If you are in the terminal, first thing you have to do is type:
- sudo apt-get update && sudo apt-get upgrade.
This may take a while but it ensures that all the updates are done. When this is done, type:
- sudo apt-get install mysql-server
This is to install the mysql-server. If it asks for your password, just type in your password for the user you are working with. When this is done, type:
- sudo apt-get install mysql-client
This will install the mysql-client, so that you can connect with the database. After this type:
- mysql -uroot -p
This is to connect with the database with the root user of the Pi. Then just type in your password and click enter. Now you are to connected to mysql and everything you type now is in mysql untill you exit mysql.
If you want to change the password of the root user in mysql, you can do it by typing in this:
- SET PASSWORD FOR 'root'@'localhost' = PASSWORD('YourNewPassword');
You can also create a new user for mysql I you want so. Just type:
- CREATE USER 'NewUser'@'localhost' IDENTIFIED BY 'PasswordForNewUser';
- GRANT ALL PRIVILEGES ON *.* TO 'NewUser'@'localhost'
- WITH GRANT OPTION;
Now you have made a new user for mysql. If you type quit, then mysql will say Bye and now you're back to the terminal of your Pi.
Now to install the mysql connector, which you need to make connection with your database from python. Just type:
- sudo apt-get install python3-mysql.connector
Now the mysql connector is installed aswell.
Setting Up Pycharm for Your Pi
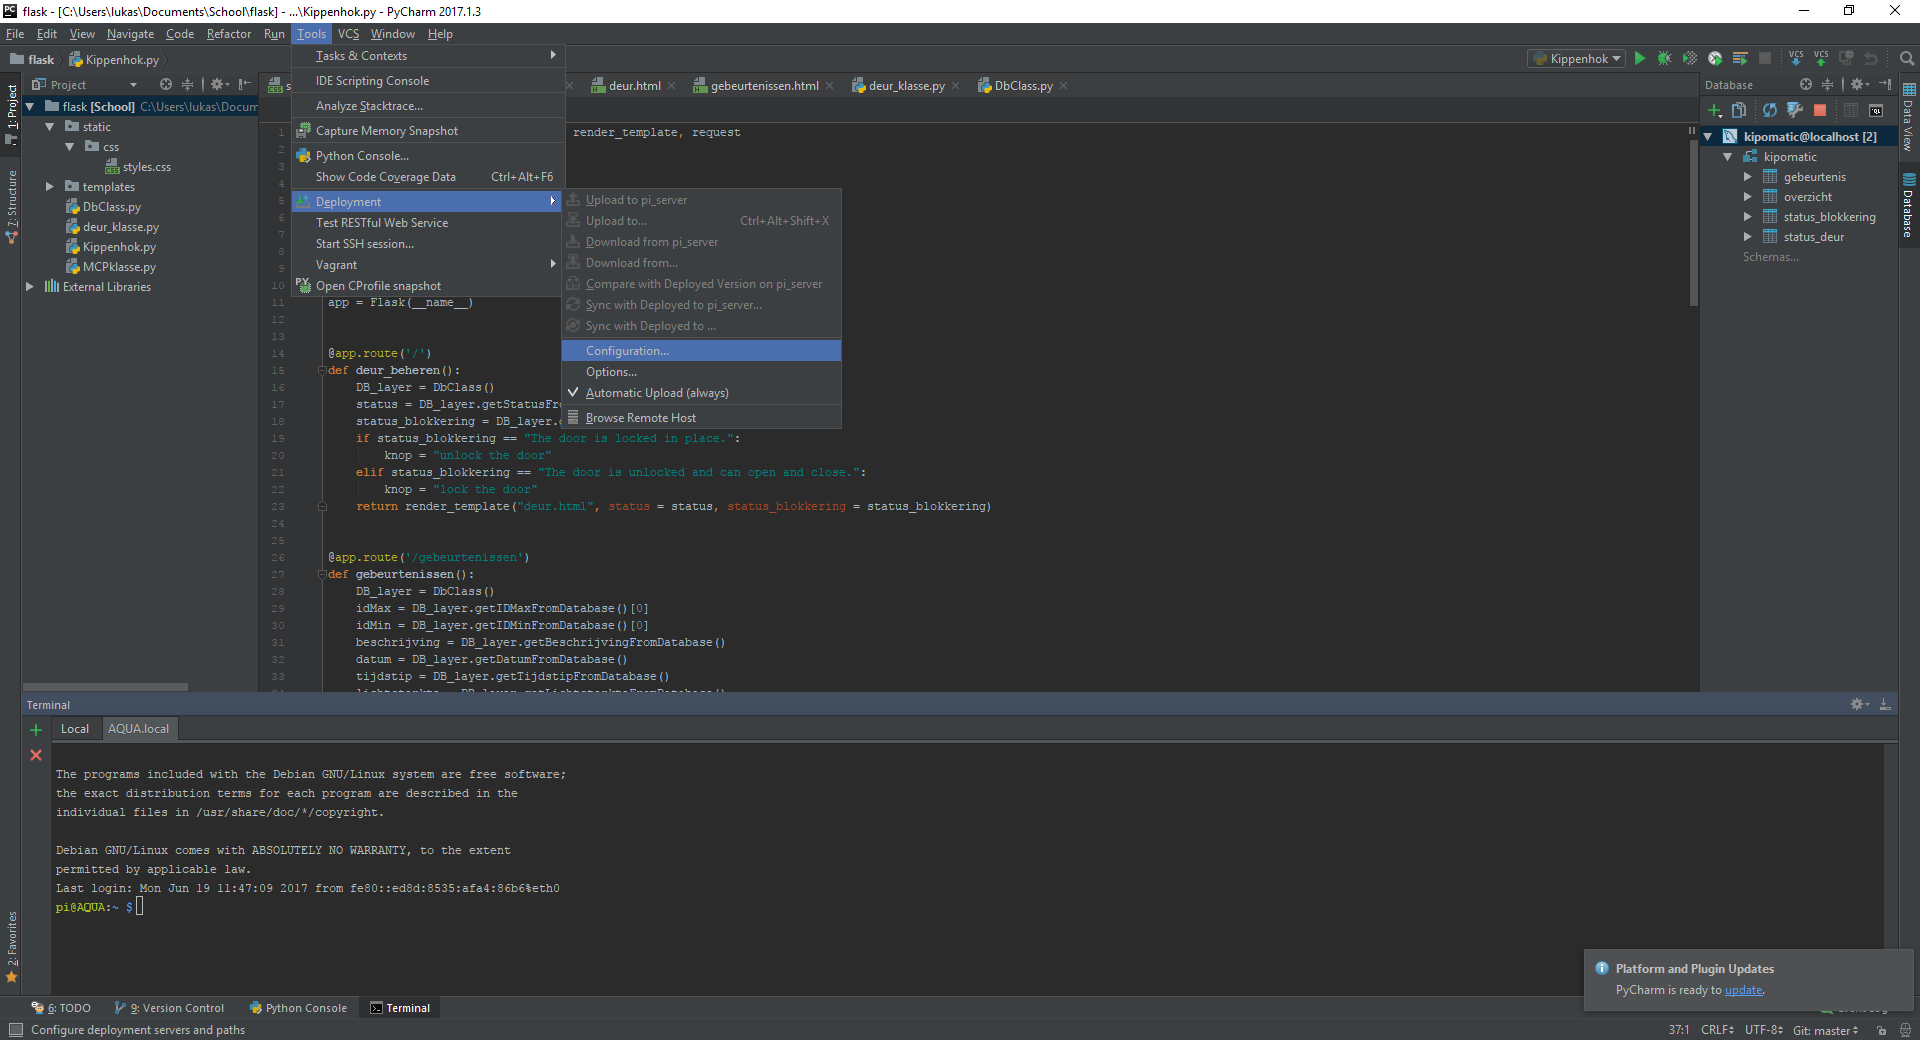
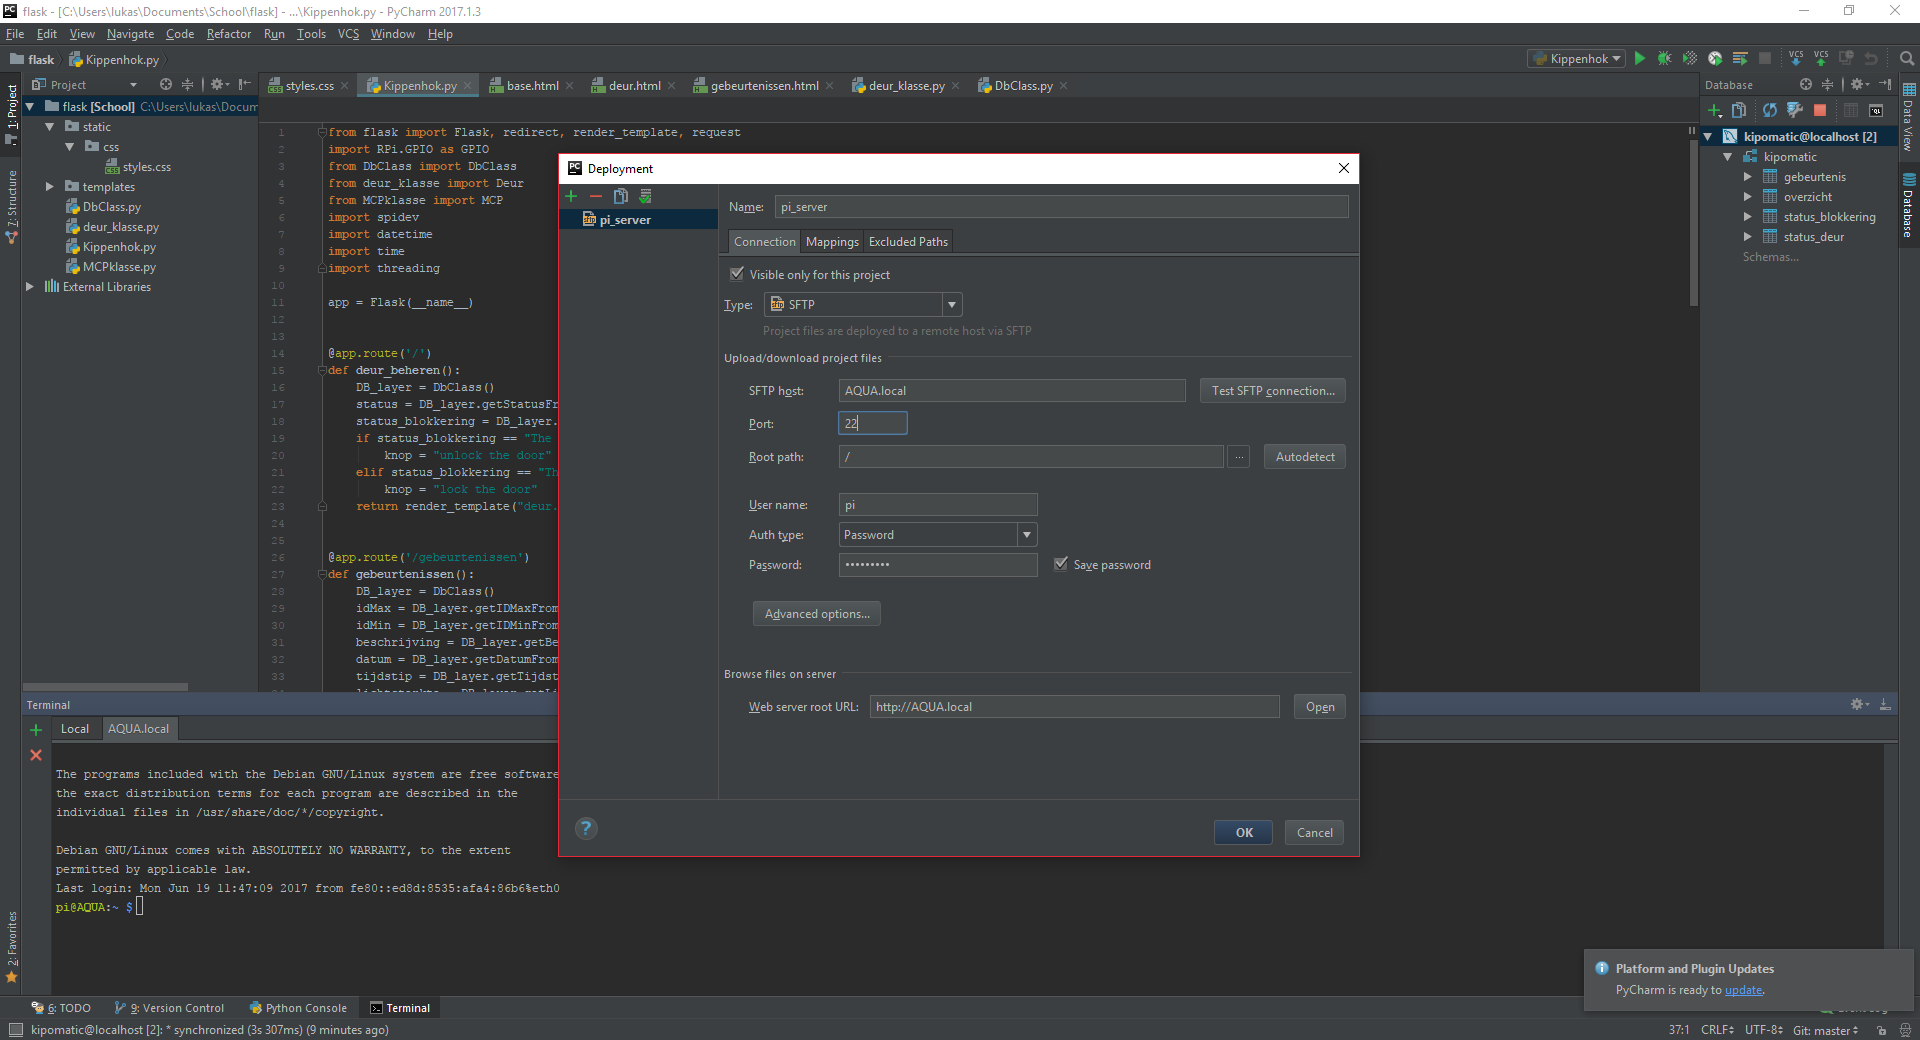
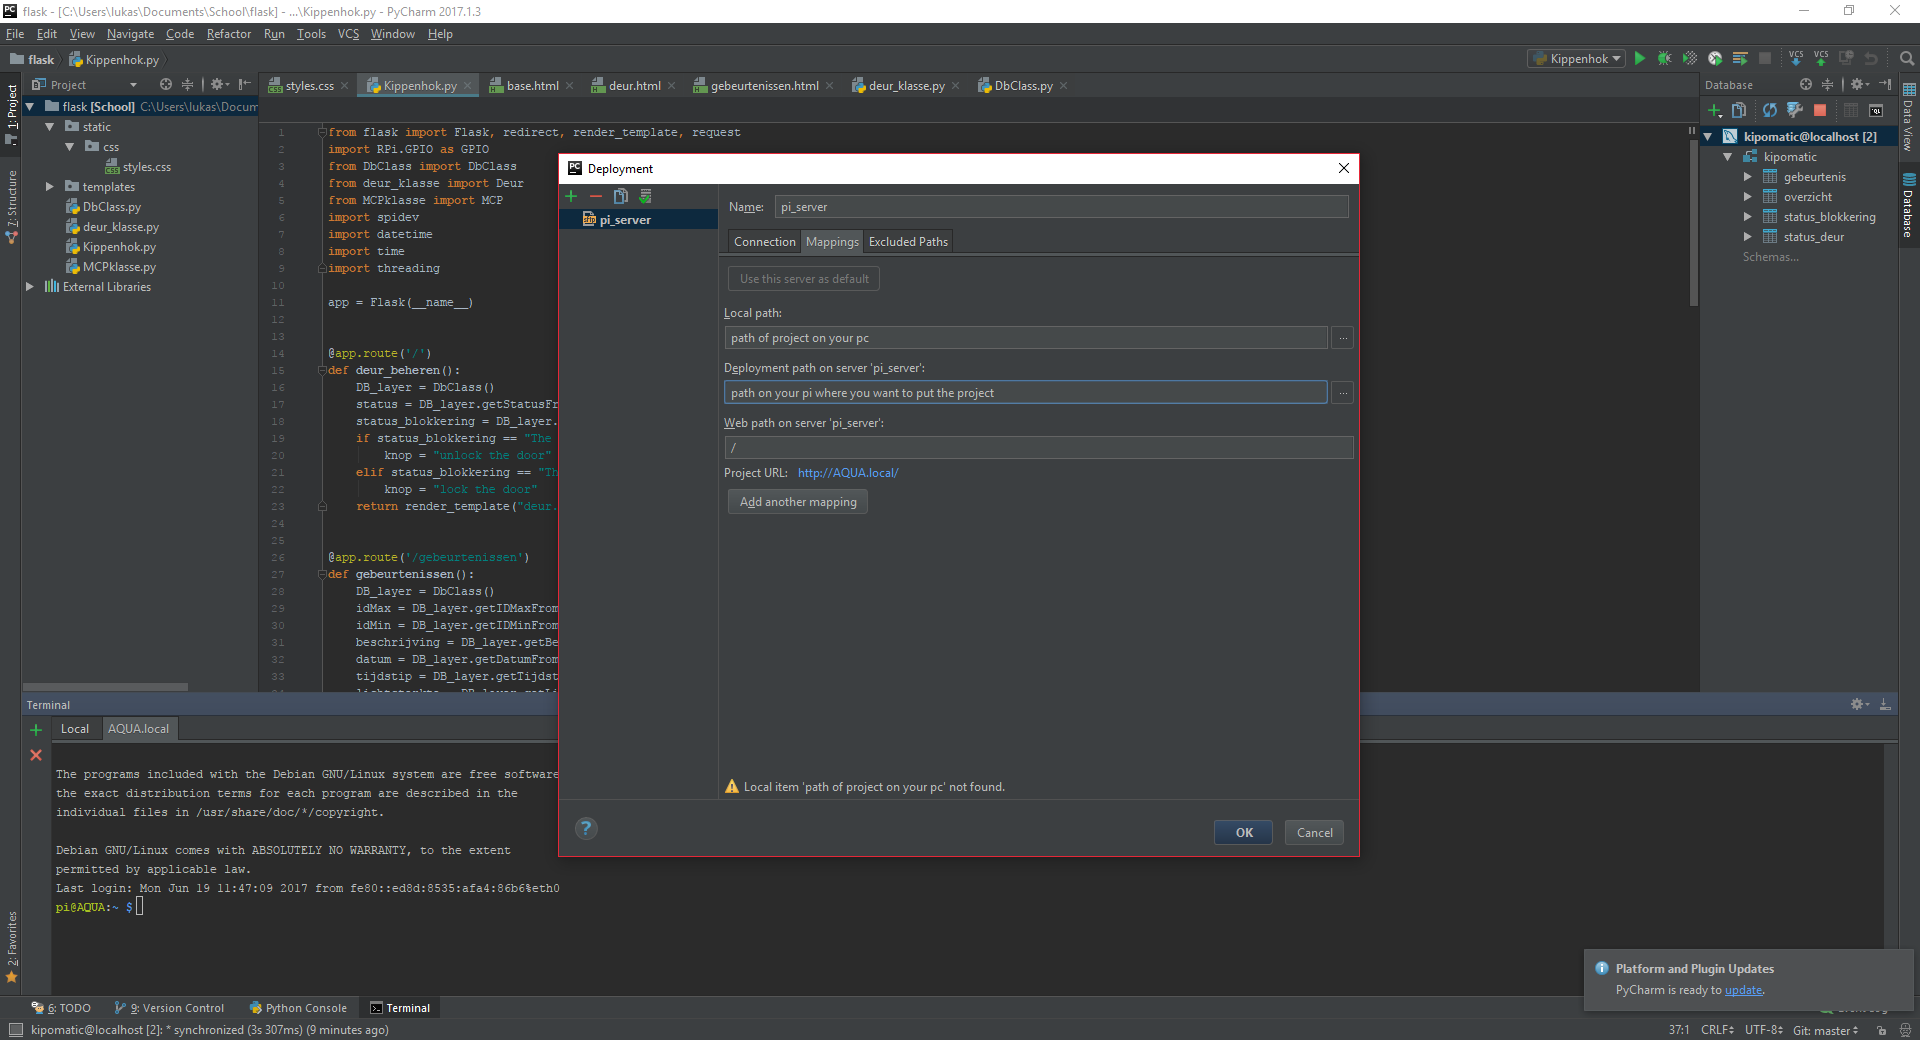
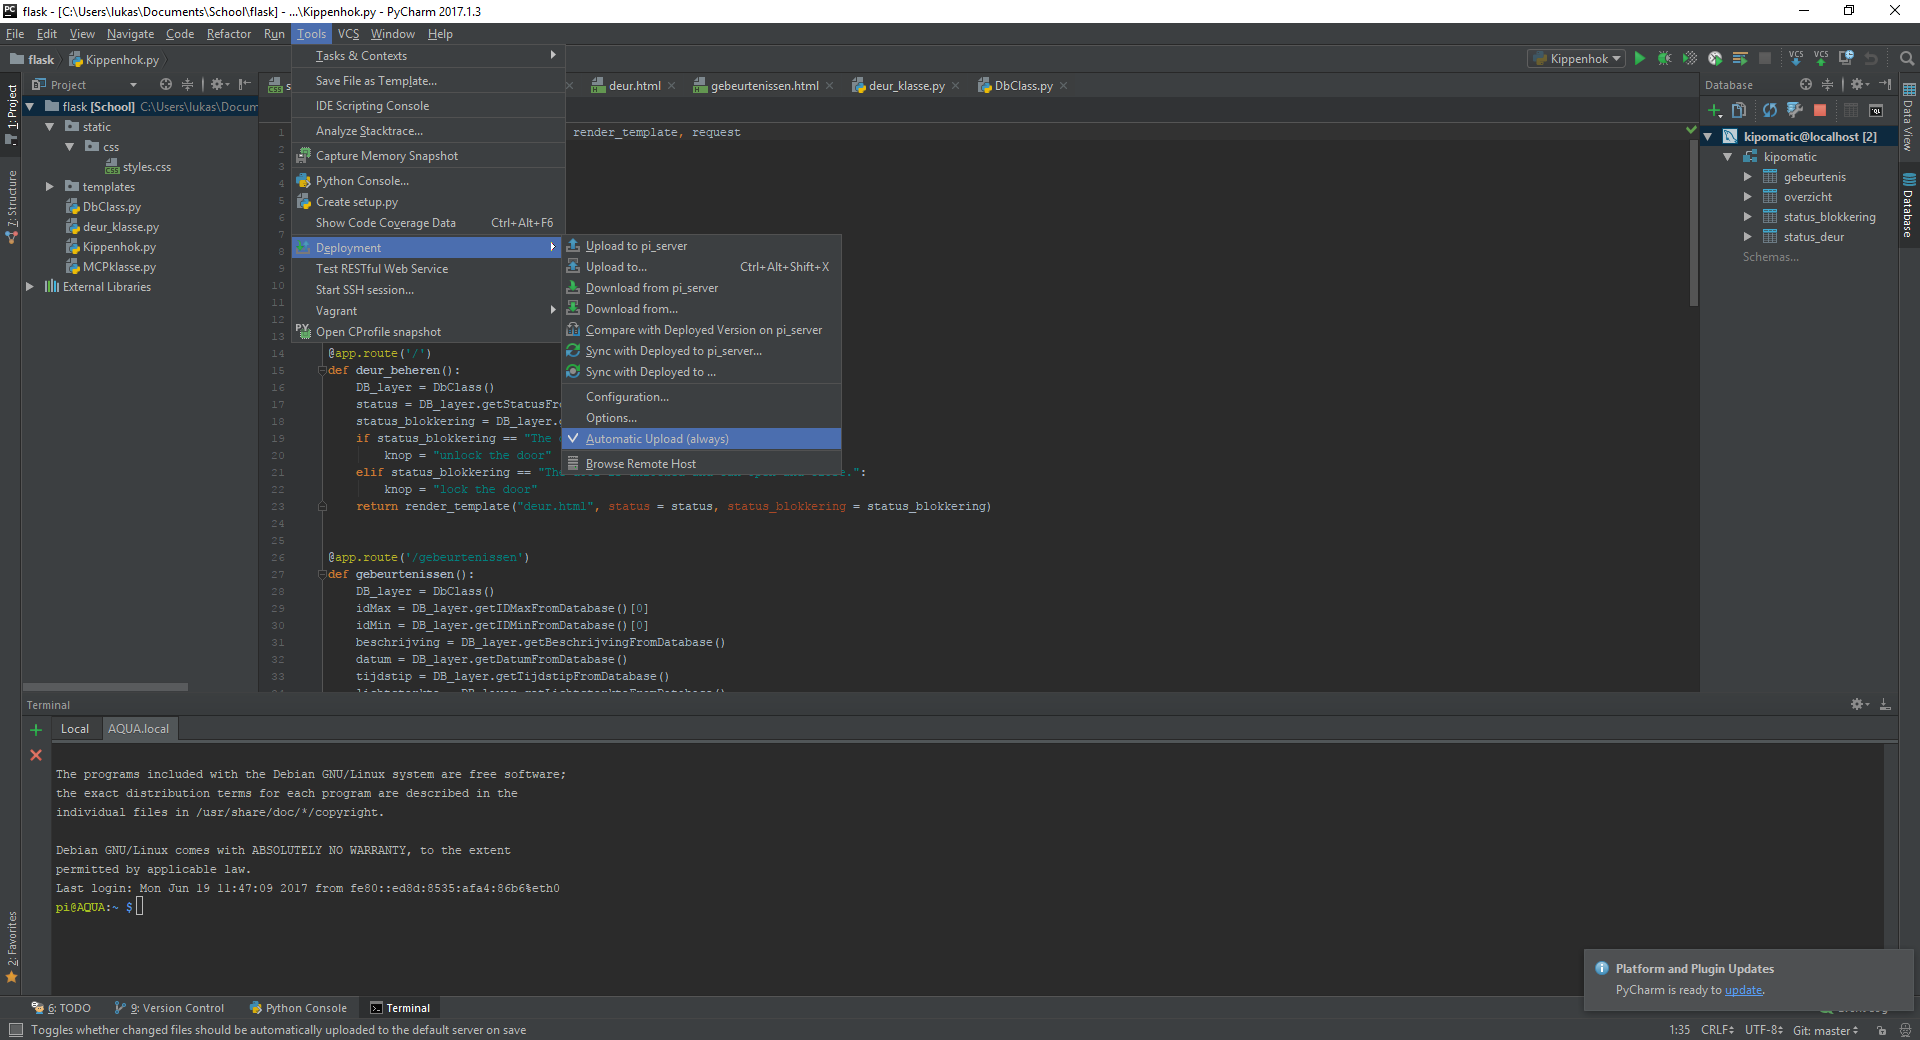
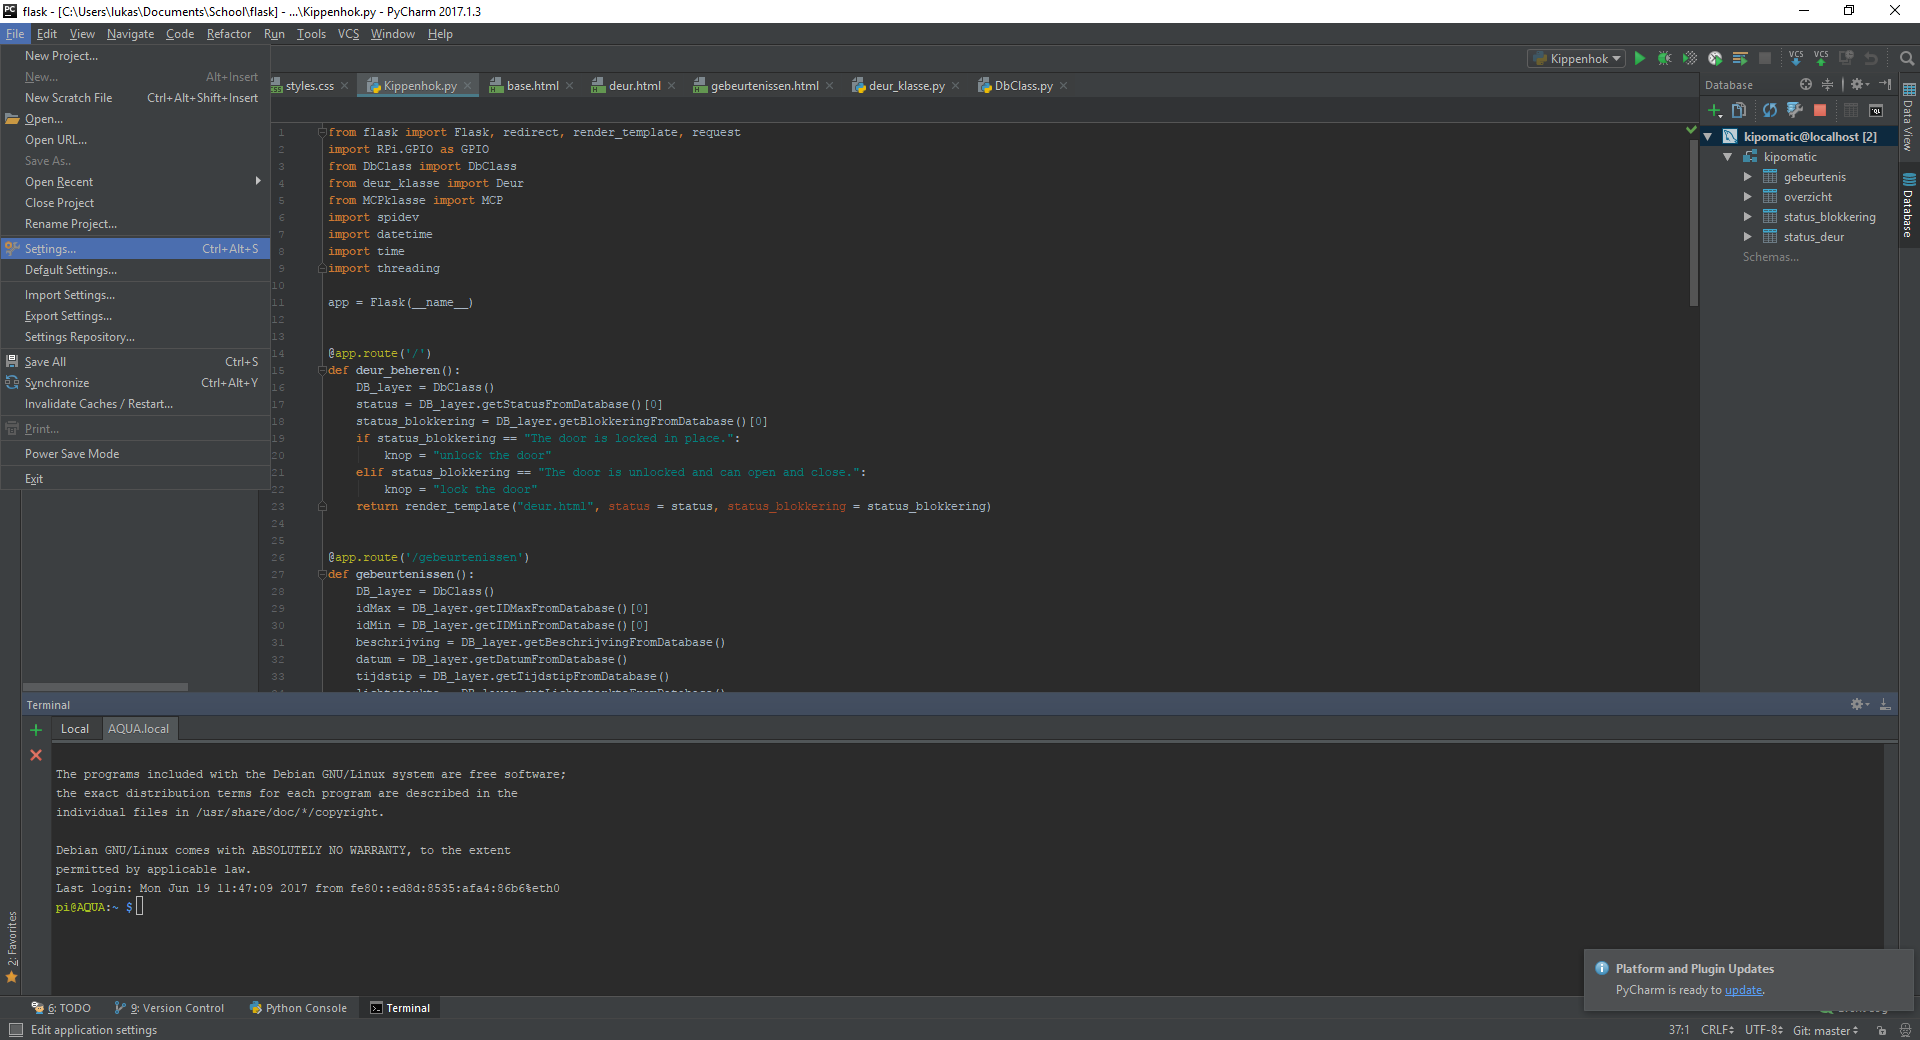
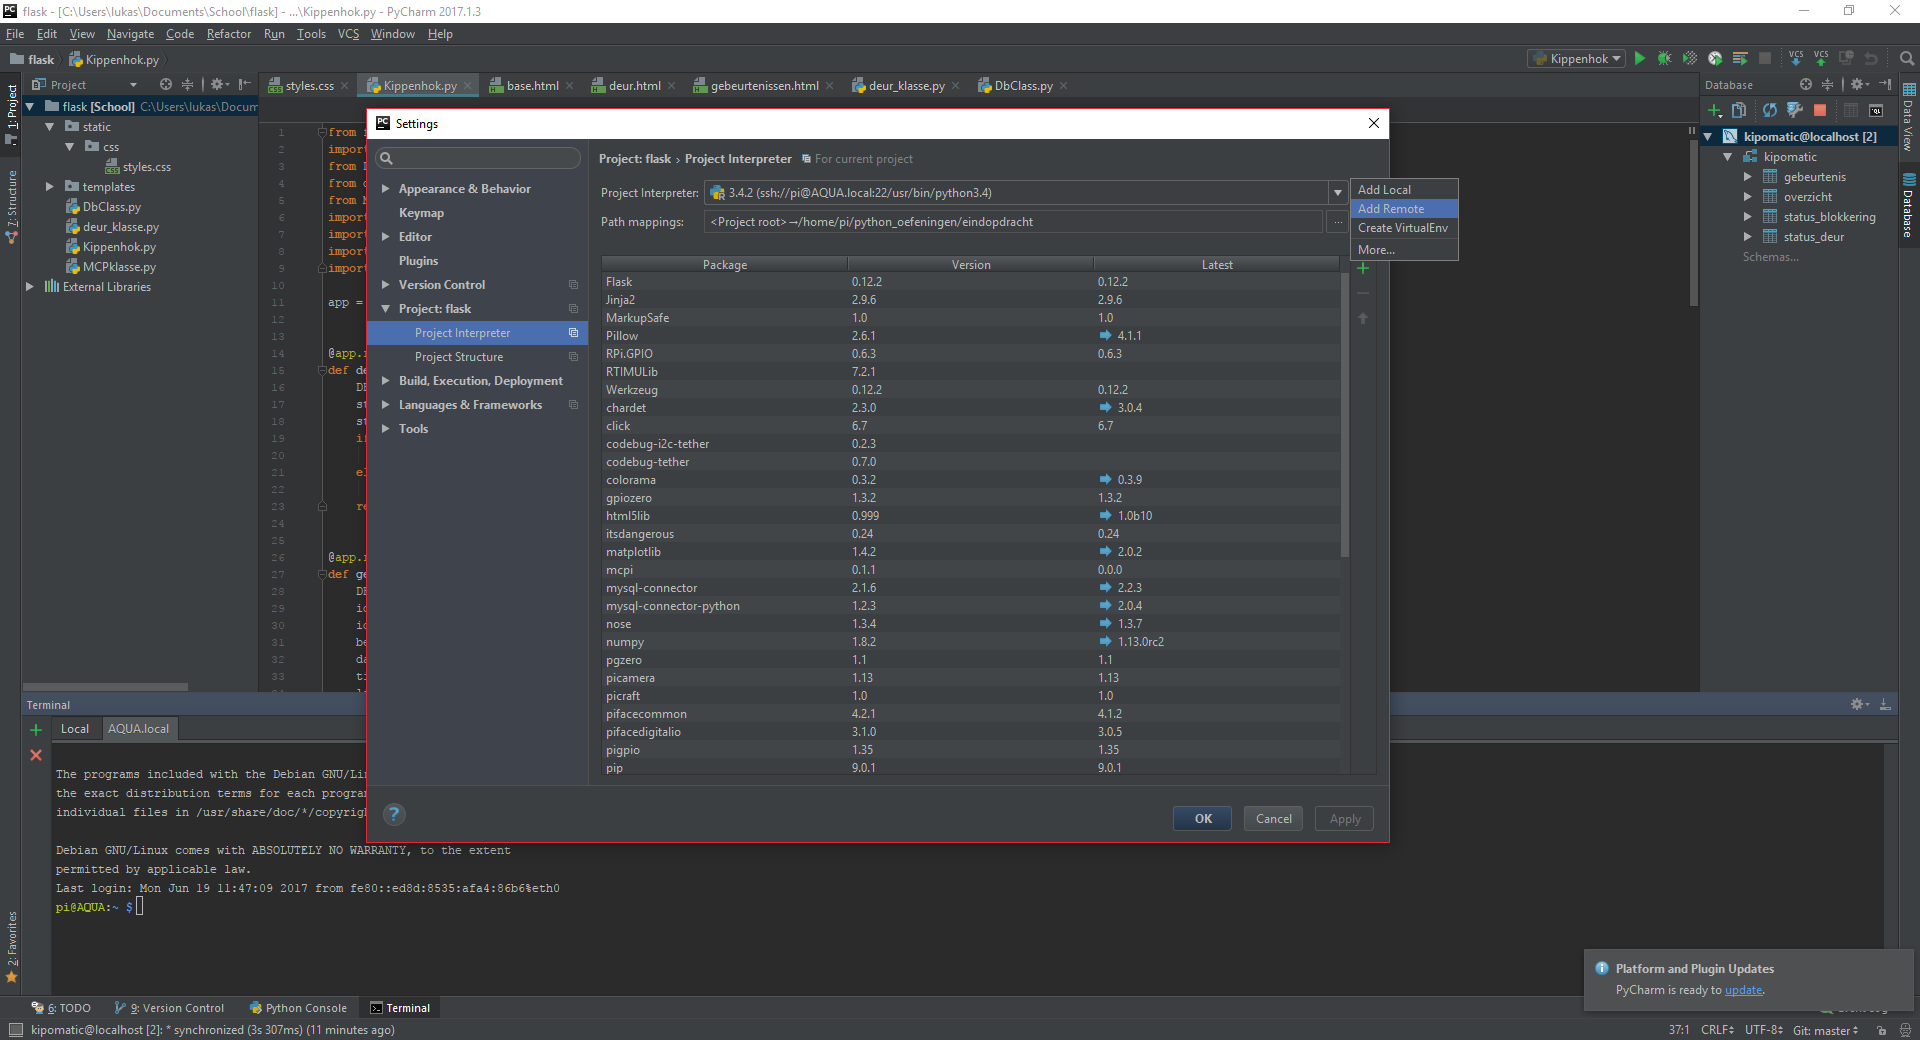
Here I will tell you how to set up everything in Pycharm for your Pi. You can follow the pictures aswell and I will be referring to them aswell.
First we will want to be able to connect to our Pi from Pycharm. The pictures 1 through 3 show you how you can do this. First open Pycharm and go to Tools. Then go to Deployment and then to Configuration. The second and third picture show you what you have to fill in here. Where AQUA.local is filled in, you have to fill in the name of your pi or the ip address of your pi. I work with the name of my pi, which is AQUA.local. On the third picture you have to fill in which project you want to connect to your pi and where you want to put it on your pi. Once this is done you just go to Tools and Deployment again. There you click on Automatic Upload if there is no checkmark besides it. This will make it so that everytime you save your project it will automatically get uploaded to your Pi (shown in picture 4).
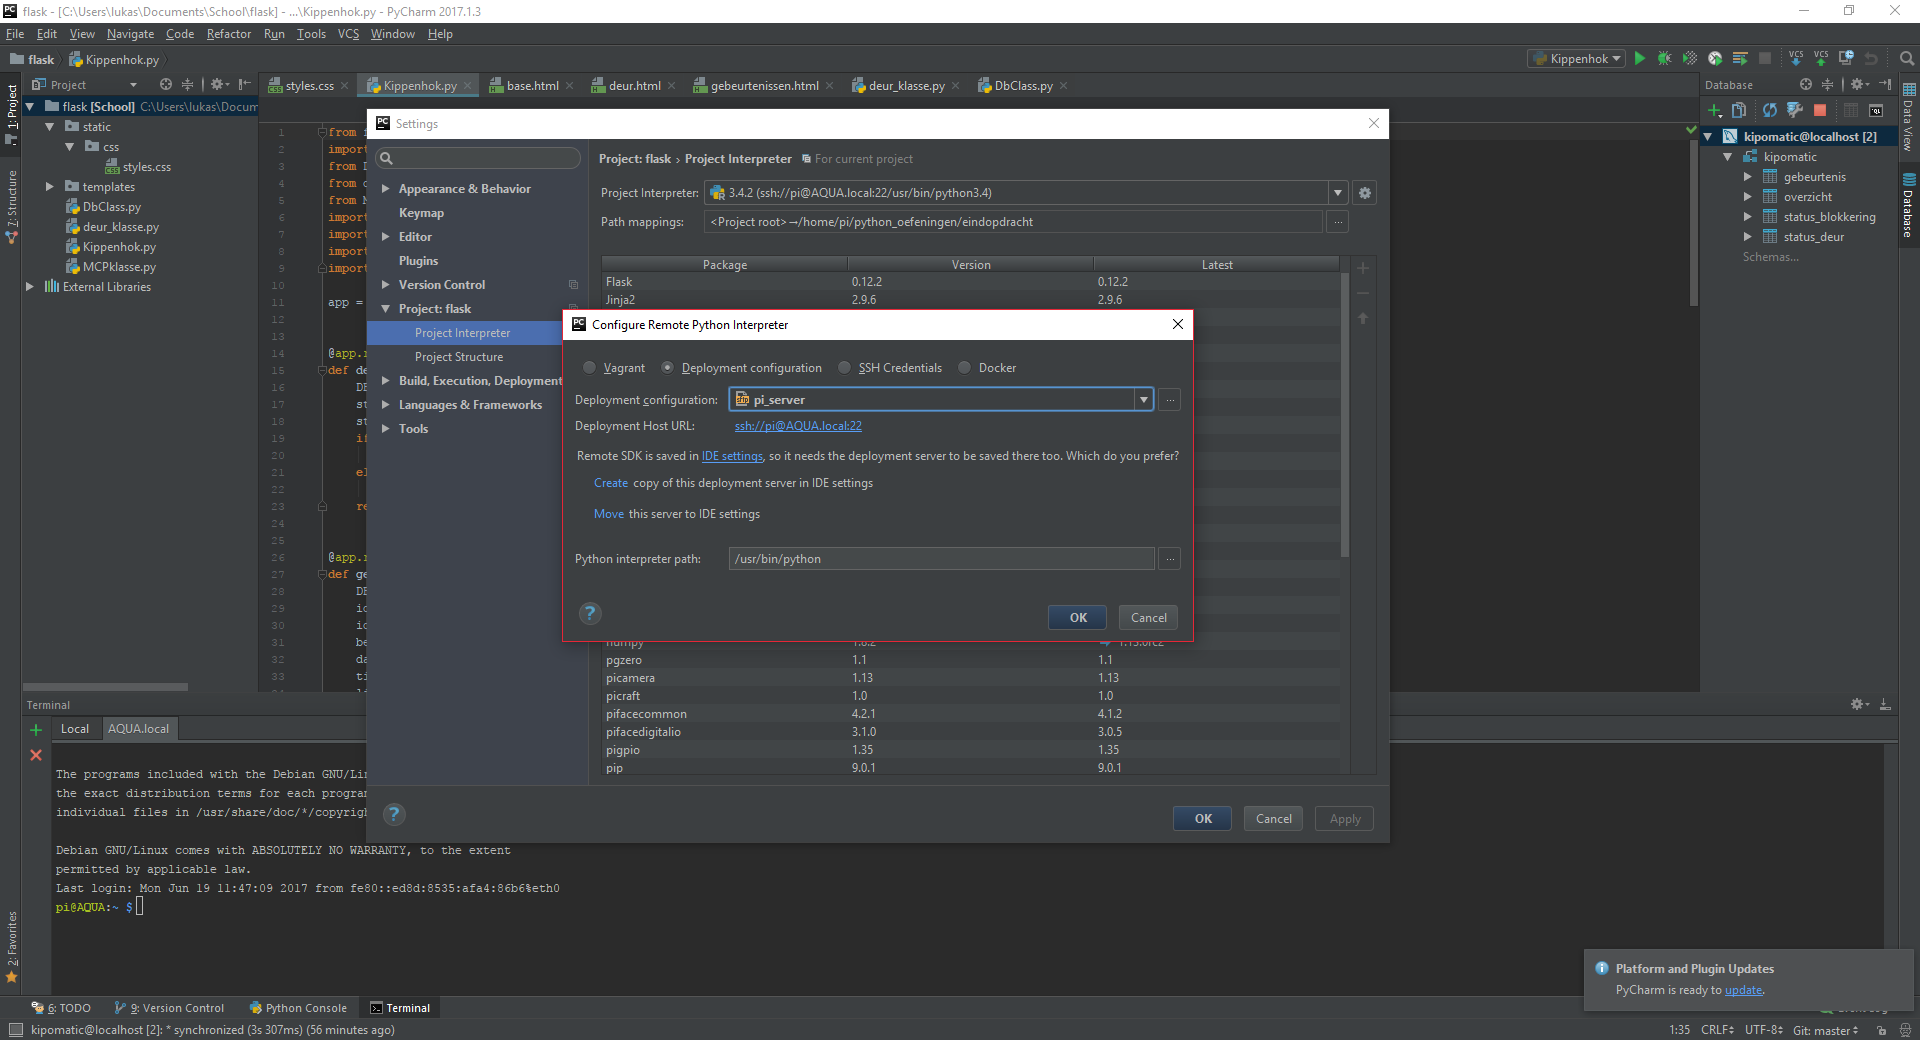
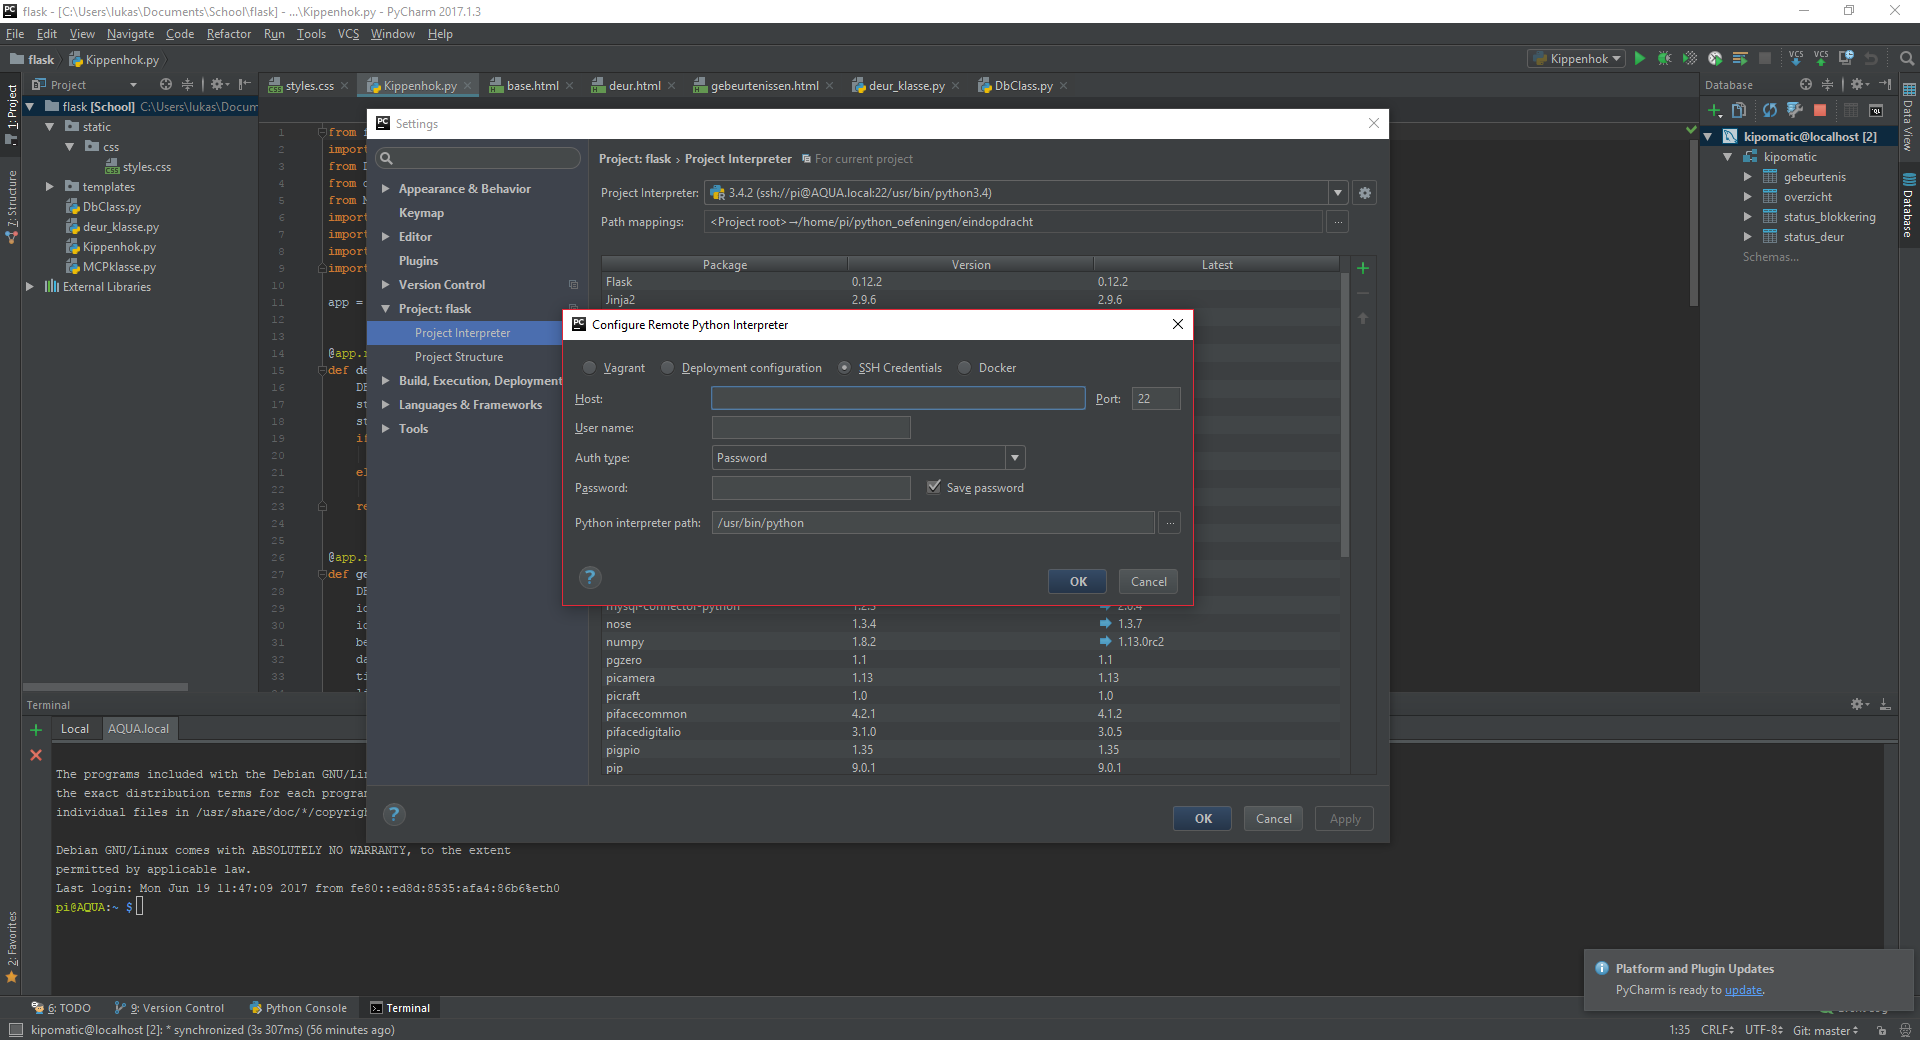
The next step to do is add the remote interpreter from your Pi to Pycharm. This is shown in pictures 5 through 8. So first go to File and Settings (picture 5). In the settings, go to Project interpreter and click on the gear in the top right and then click on Add Remote (picture 6). In picture 7 you have to fill in the name that you gave to the Deployment in picture 2. Then go to SSH credentials (picture 8) and fill the Host (Pi name or ip address), the port (22), the user name (if you have not changed the user name, then this is pi), the password (if you have not changed the password, then this is raspberry). You also have to select the path of the interpreter of python on your Pi. This should be somewhere in usr/bin/ on your Raspberry Pi. If you have done this click OK.
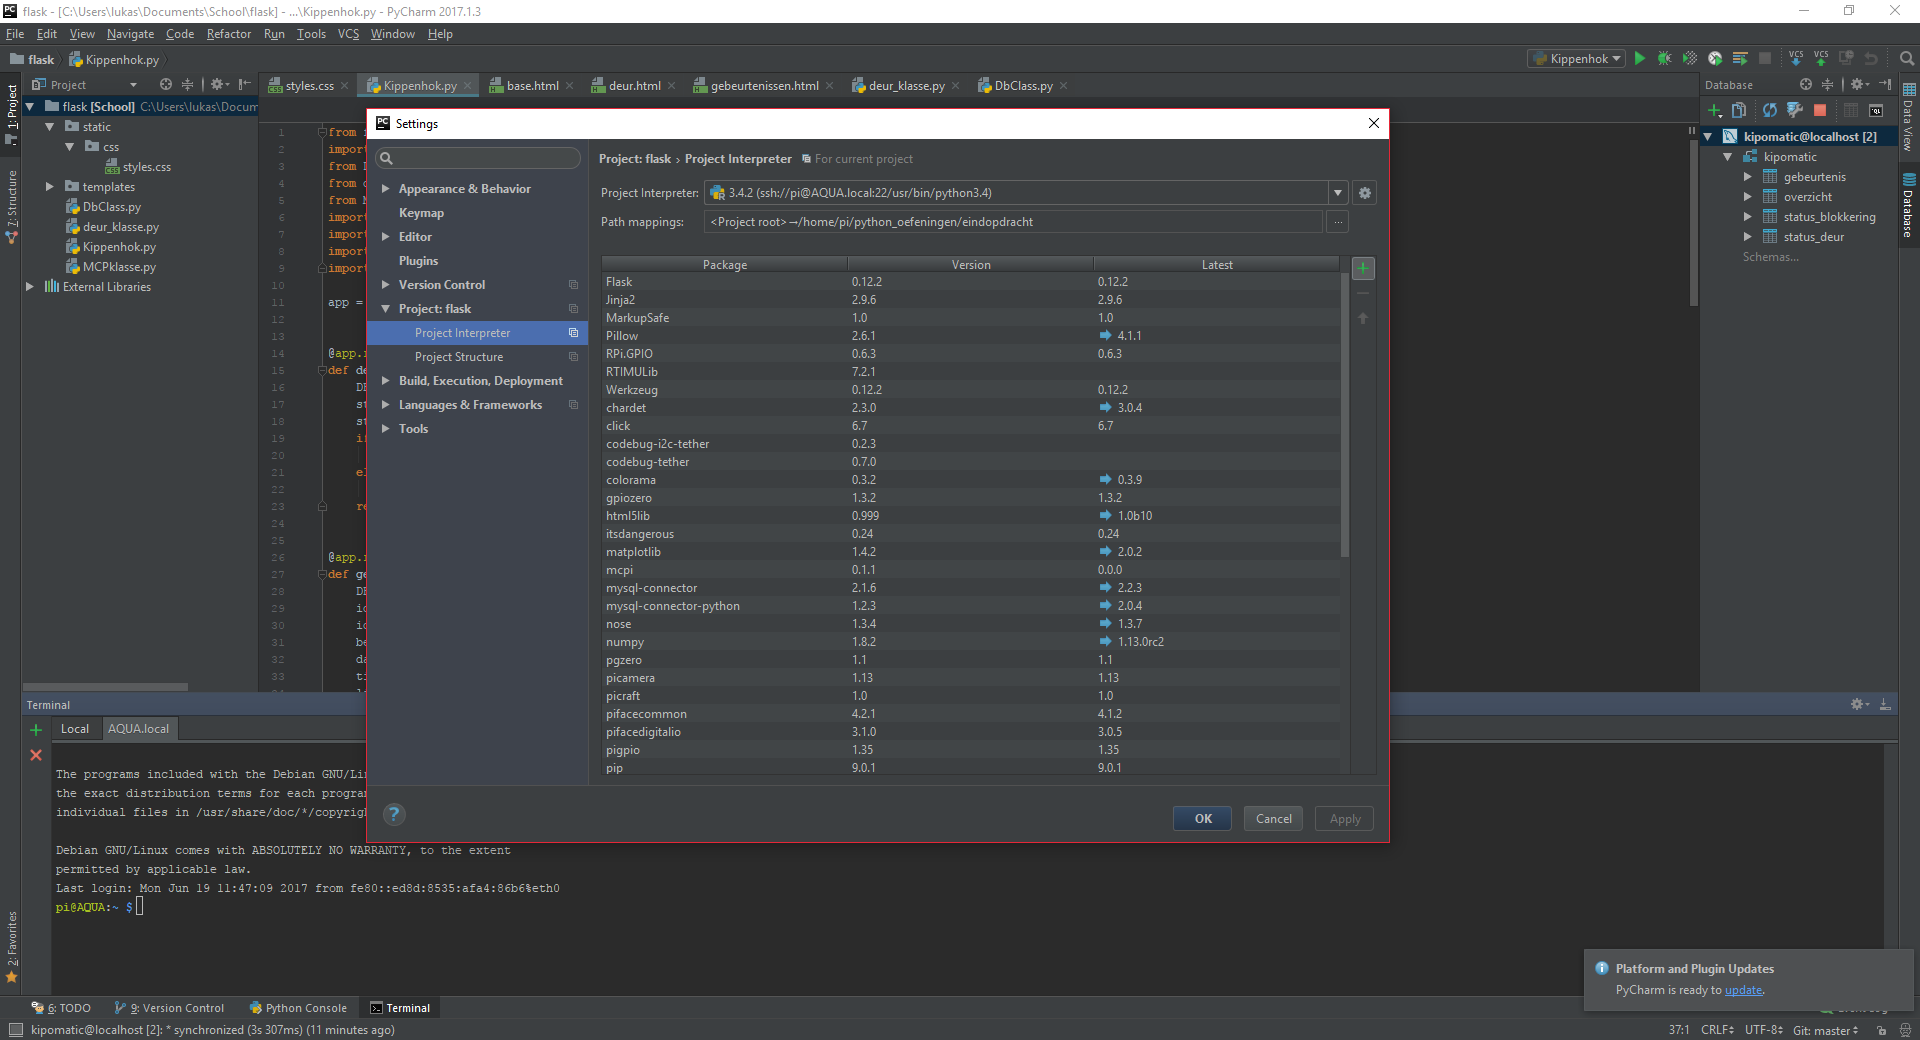
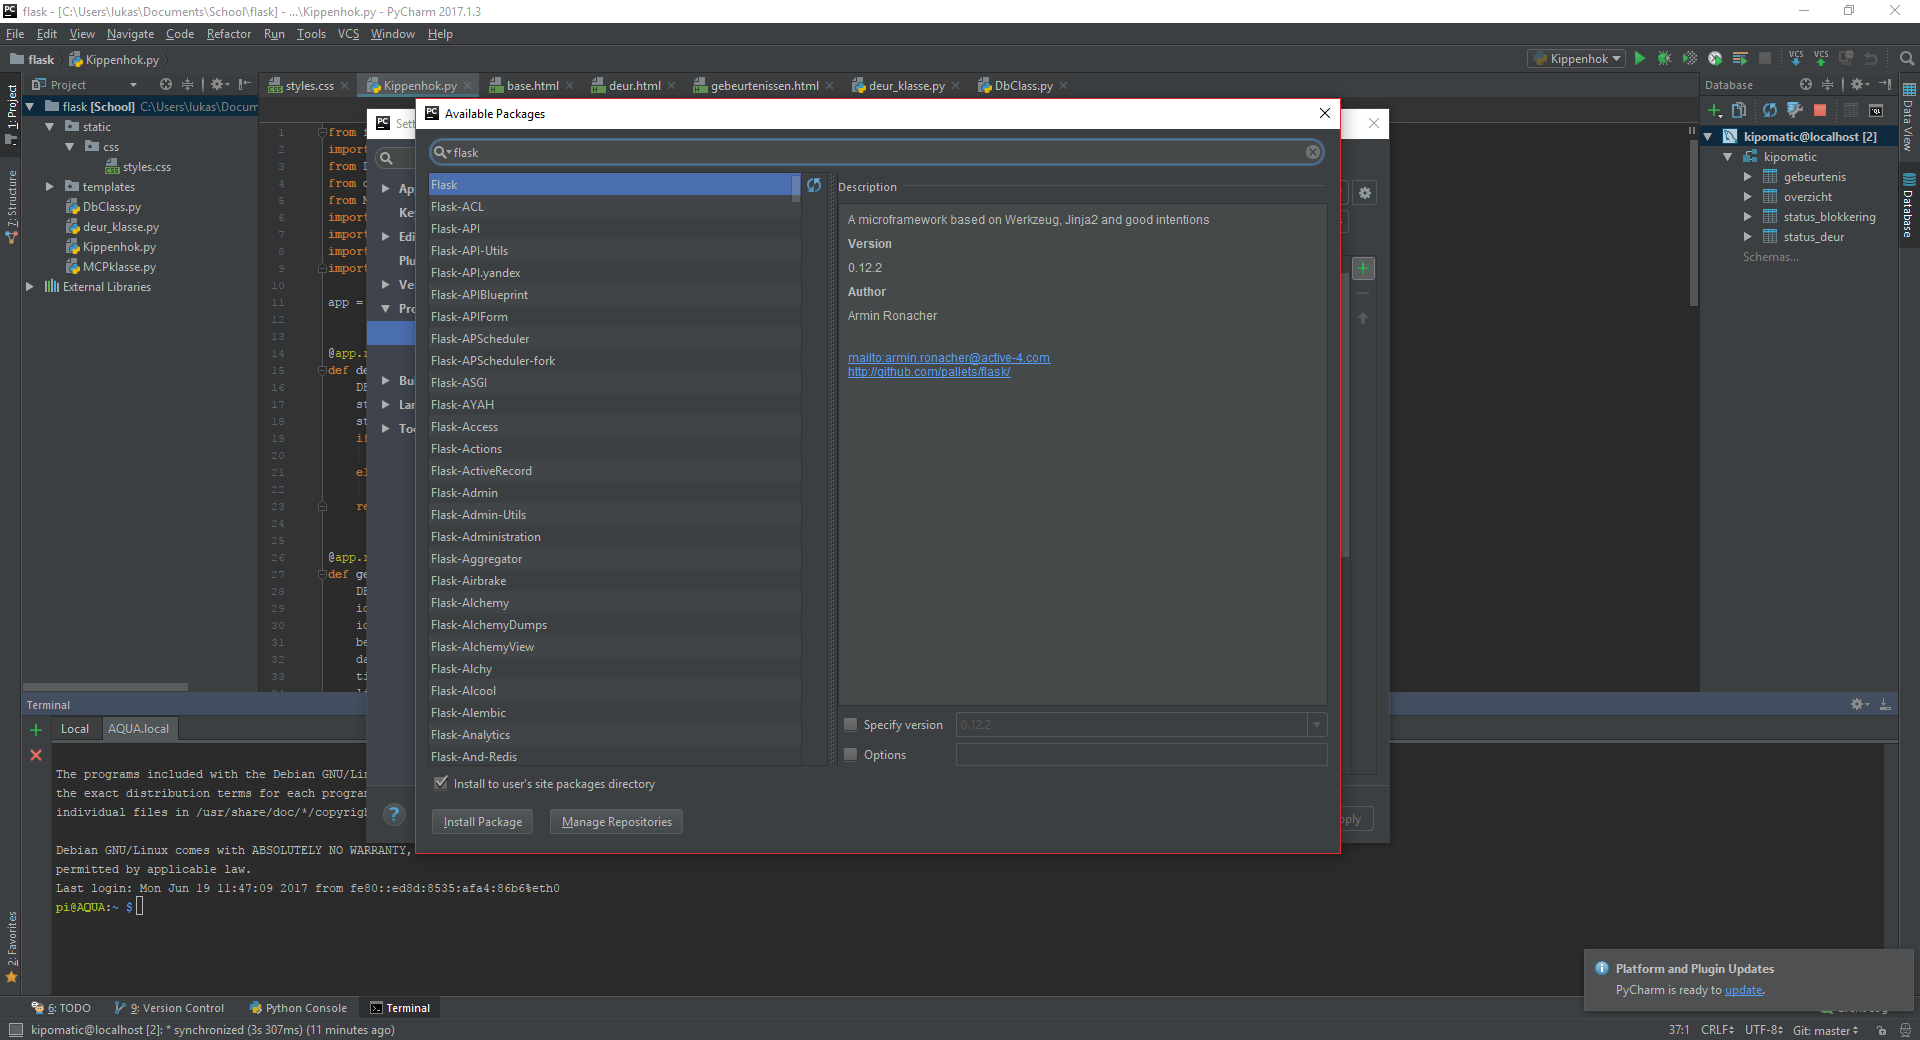
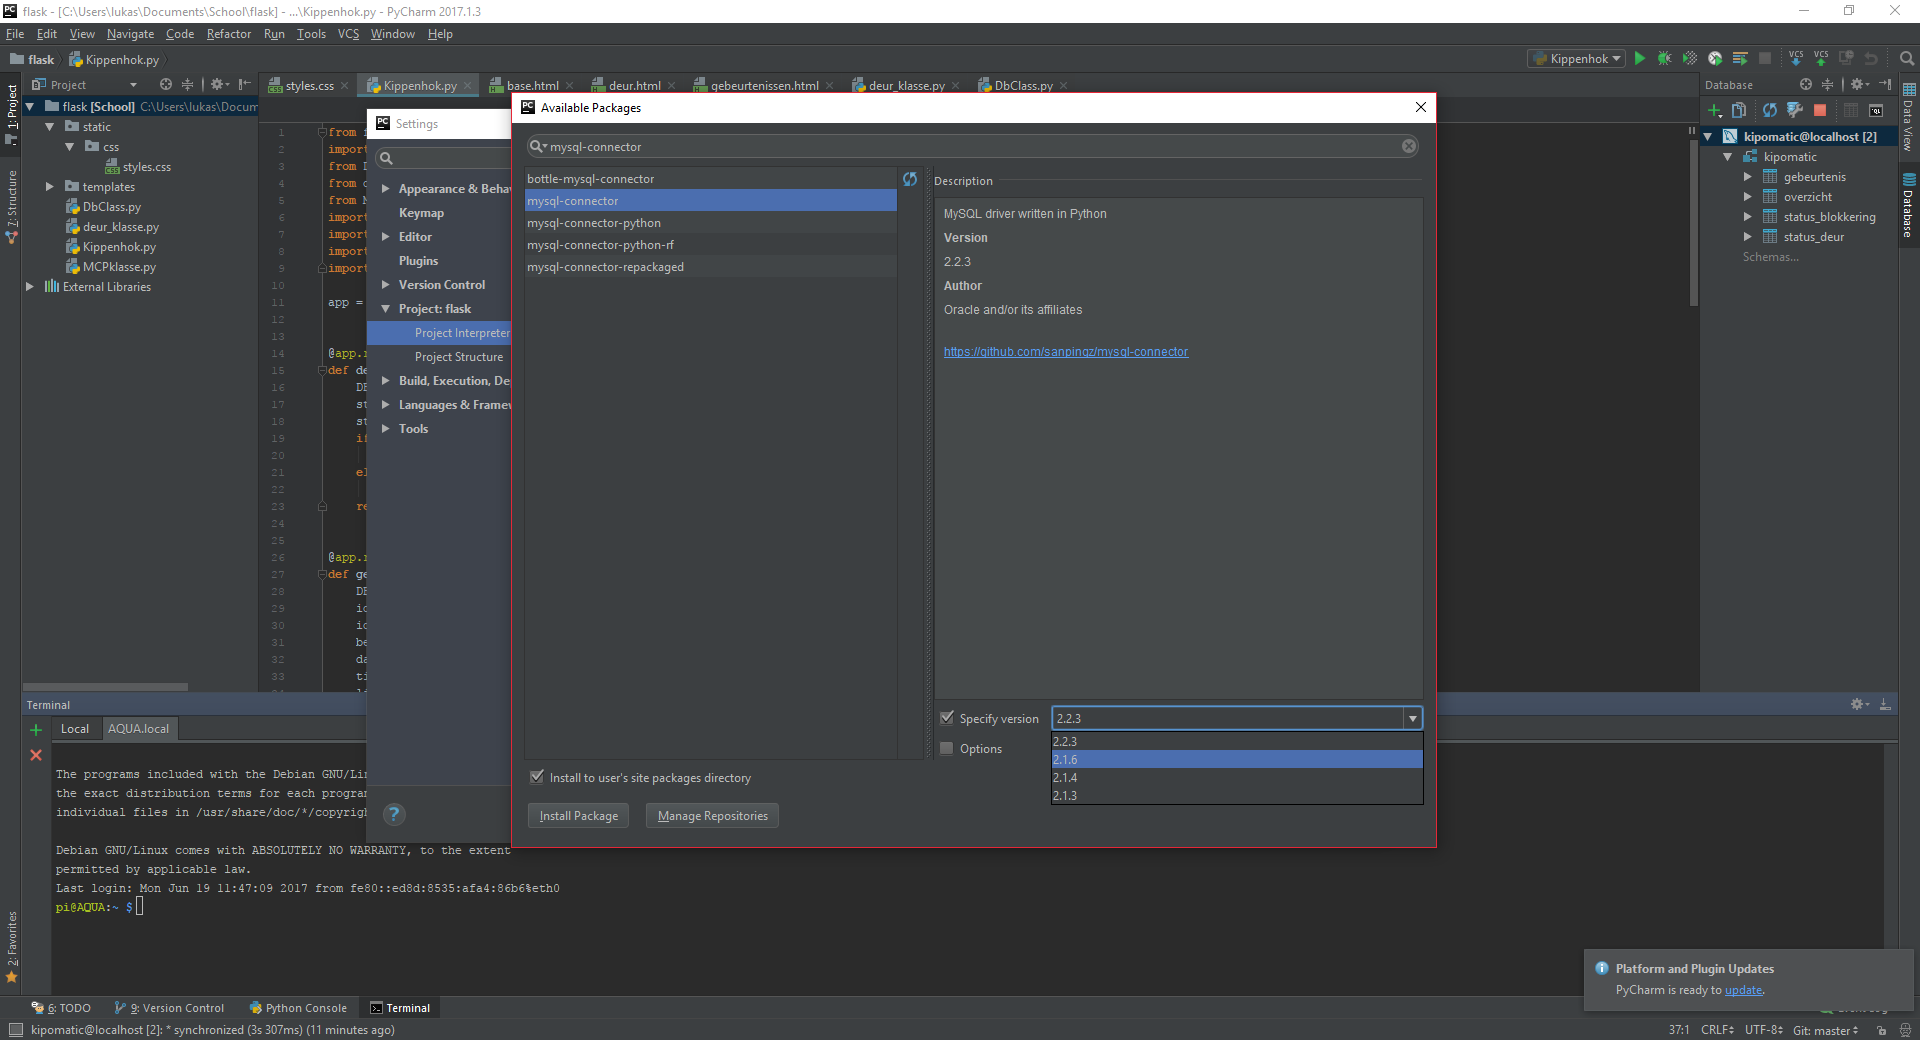
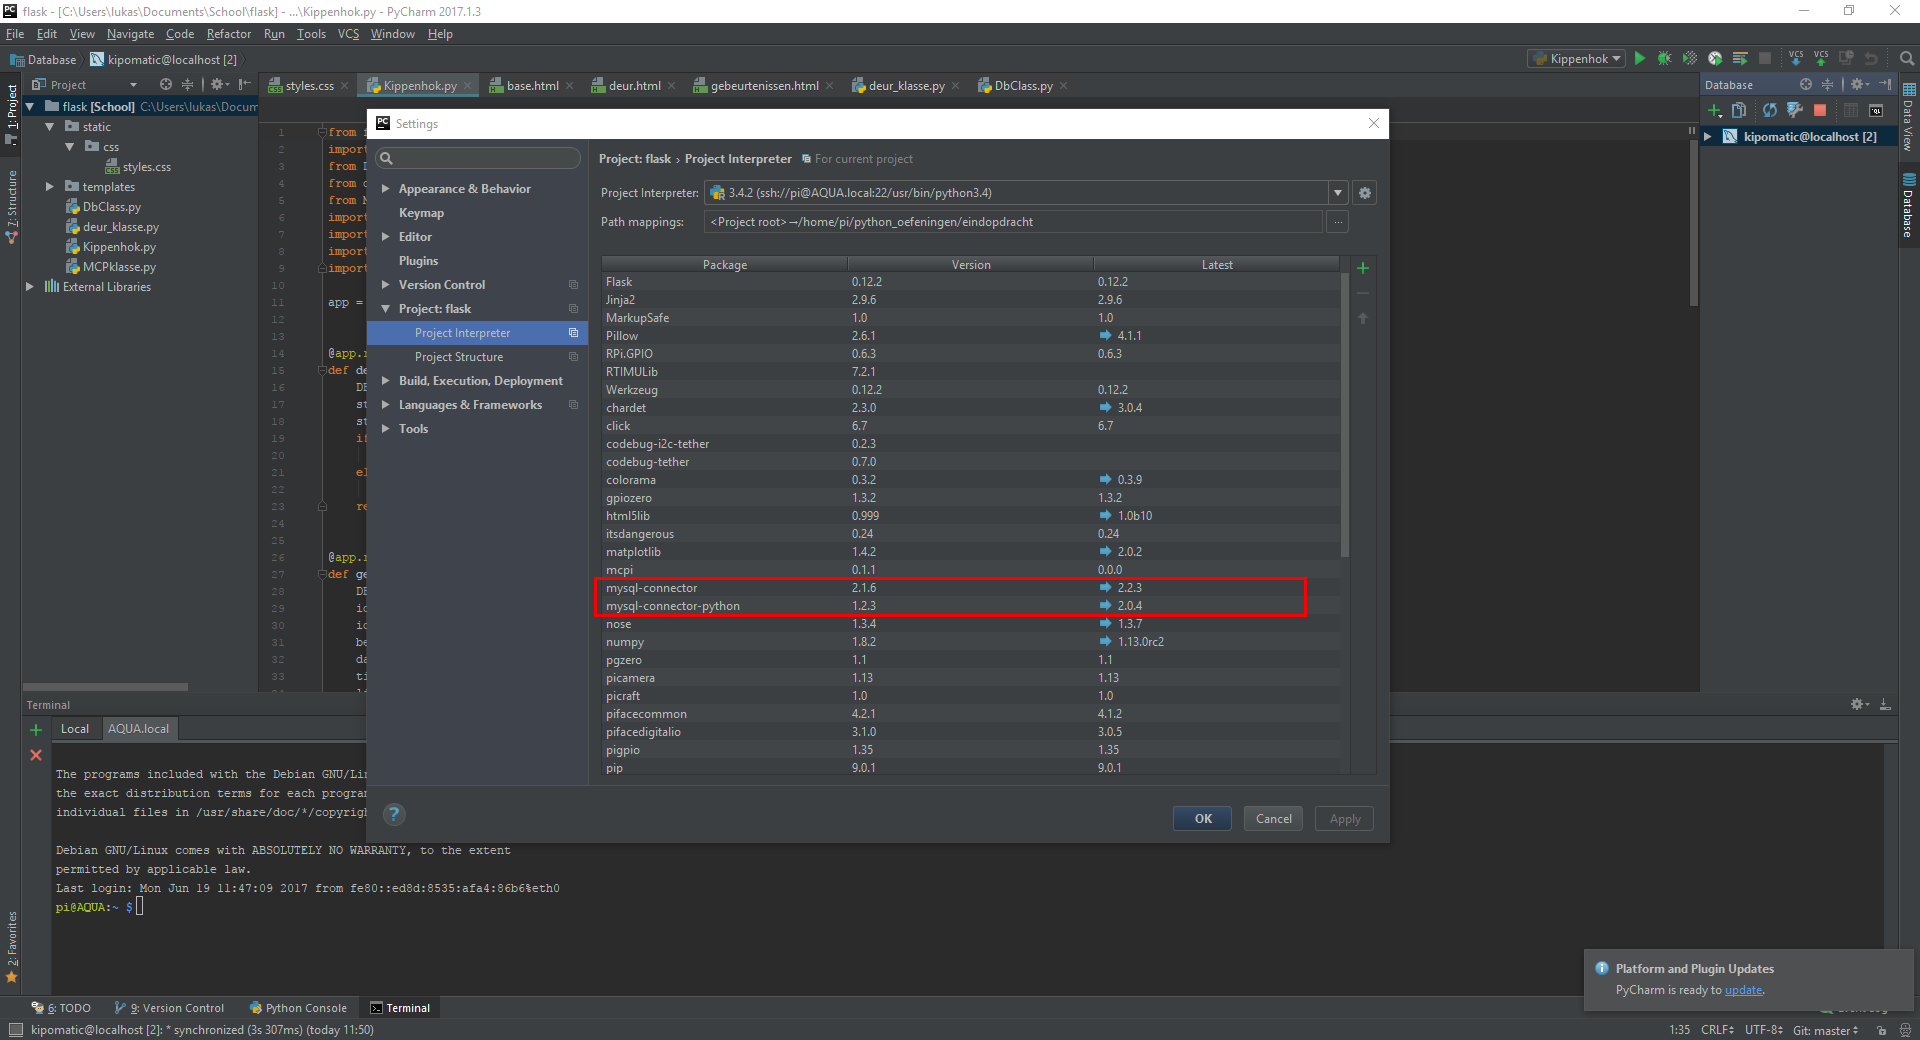
Now we will add flask and the mysql-connector to this Project interpreter. So go back to File, Settings and Project Interpreter. This time click on the green + (picture 9). Then type in flask and click on flask (picture 10). Then click on Install Package. Now flask is installed, but we still need the mysql-connector. So click on the green + again and this time type in mysql-connector. You will need to install both the mysql-connector and the mysql-connector-python (picture 11). I have not used the newest version of these. You can try to use the newest version, but if there are any problems with them, just know that the versions that I used (picture 12) do work, so you can install these instead of the new ones.
Making the Database
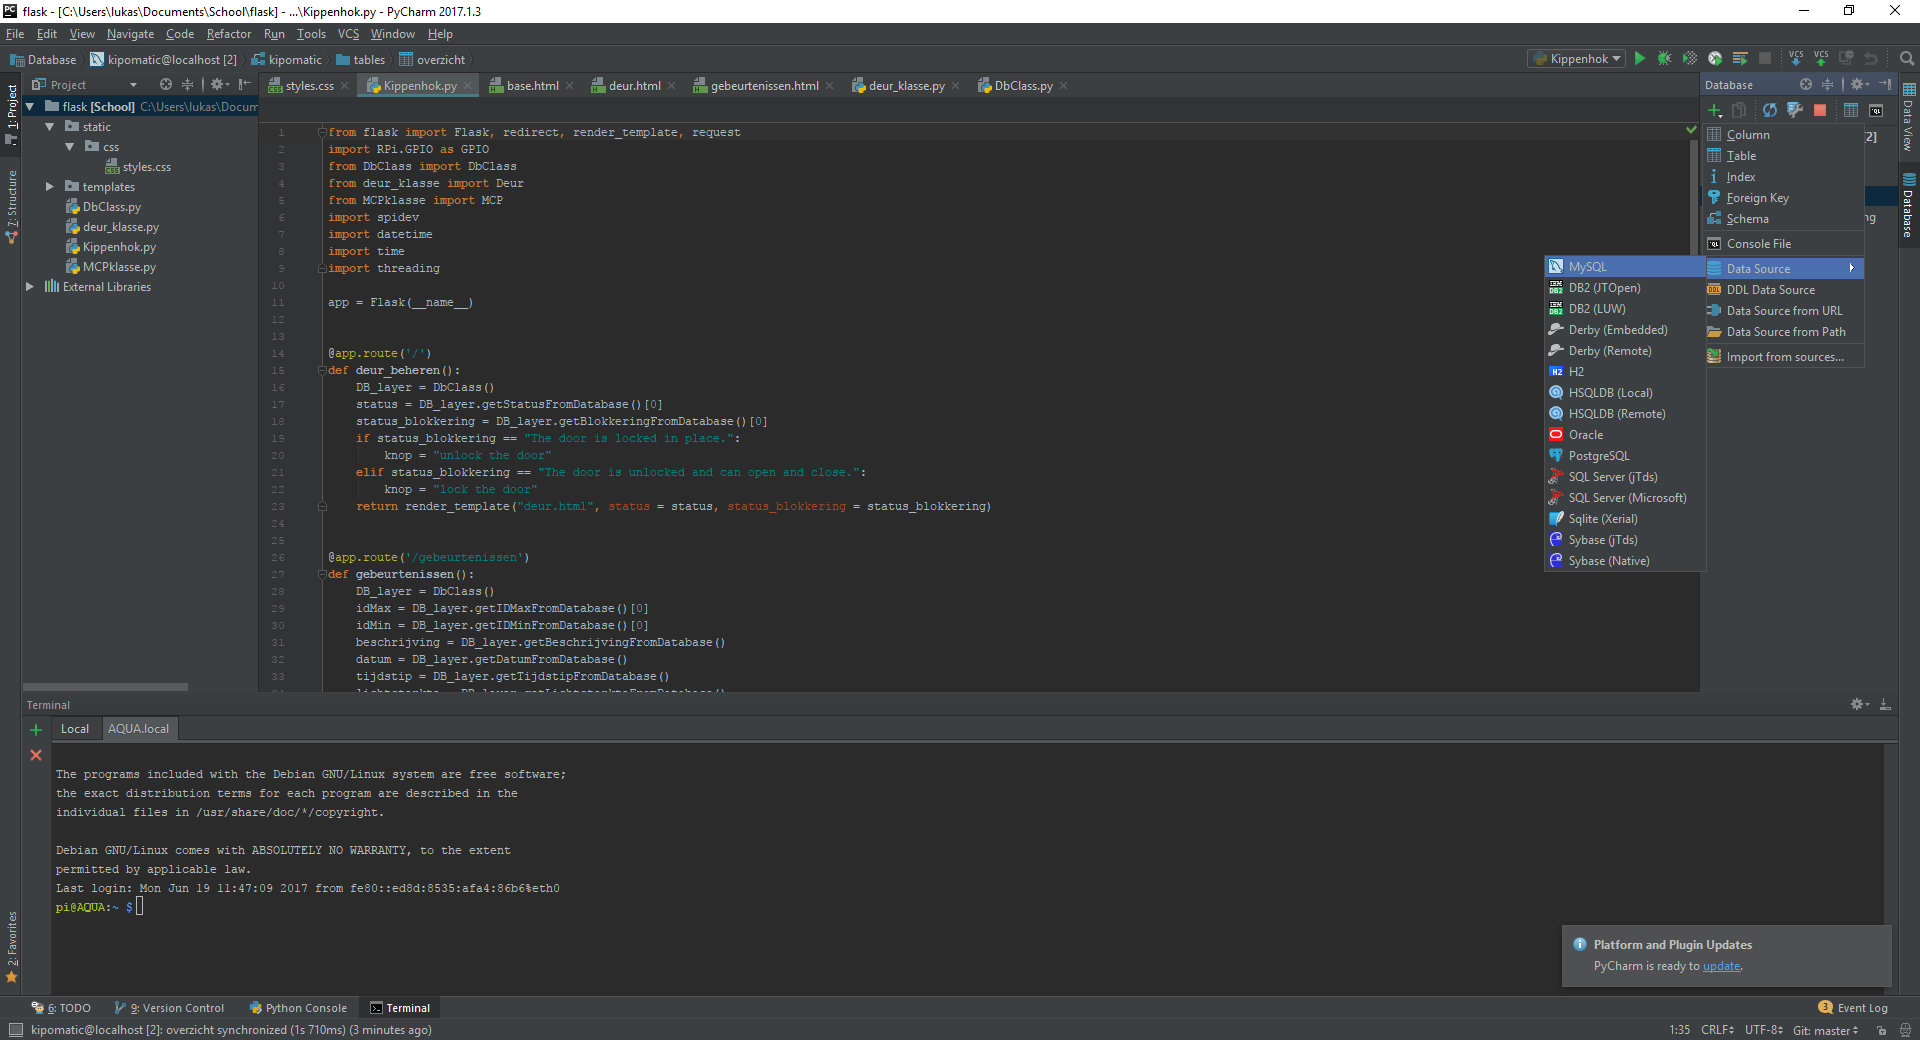
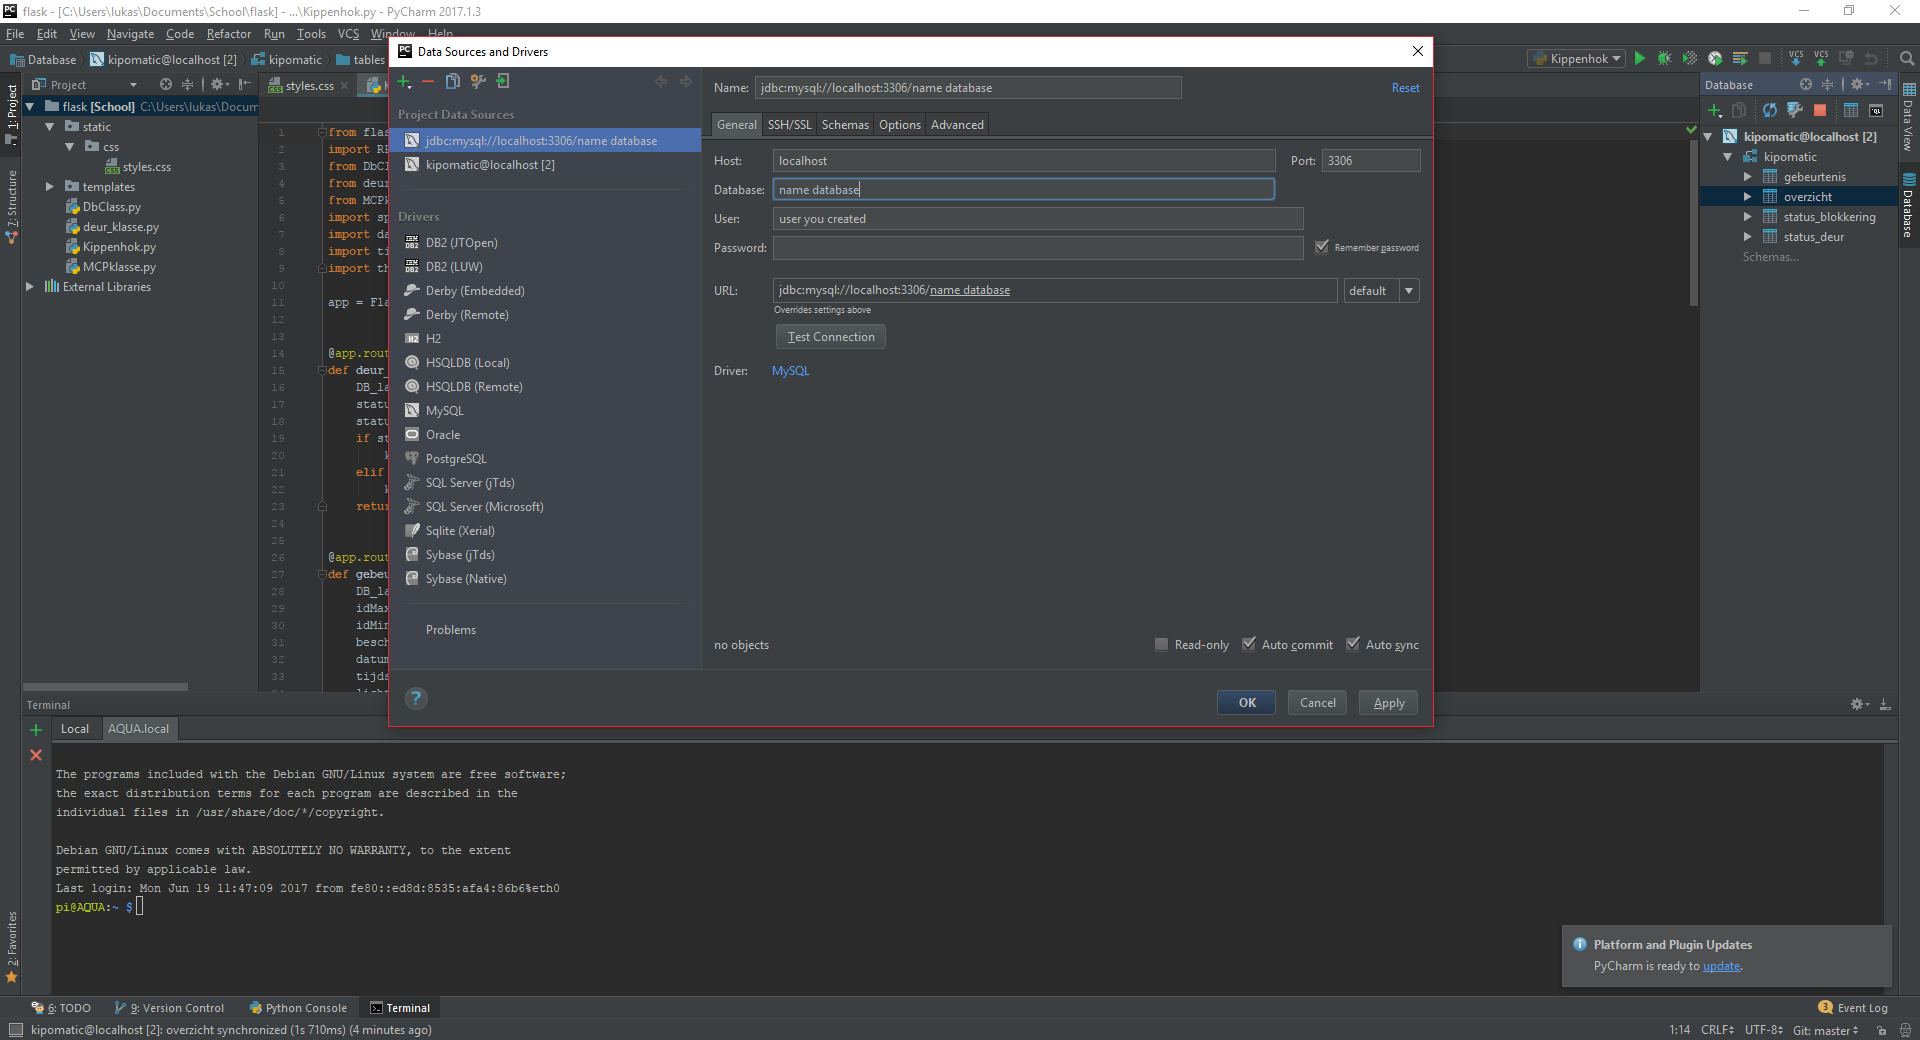
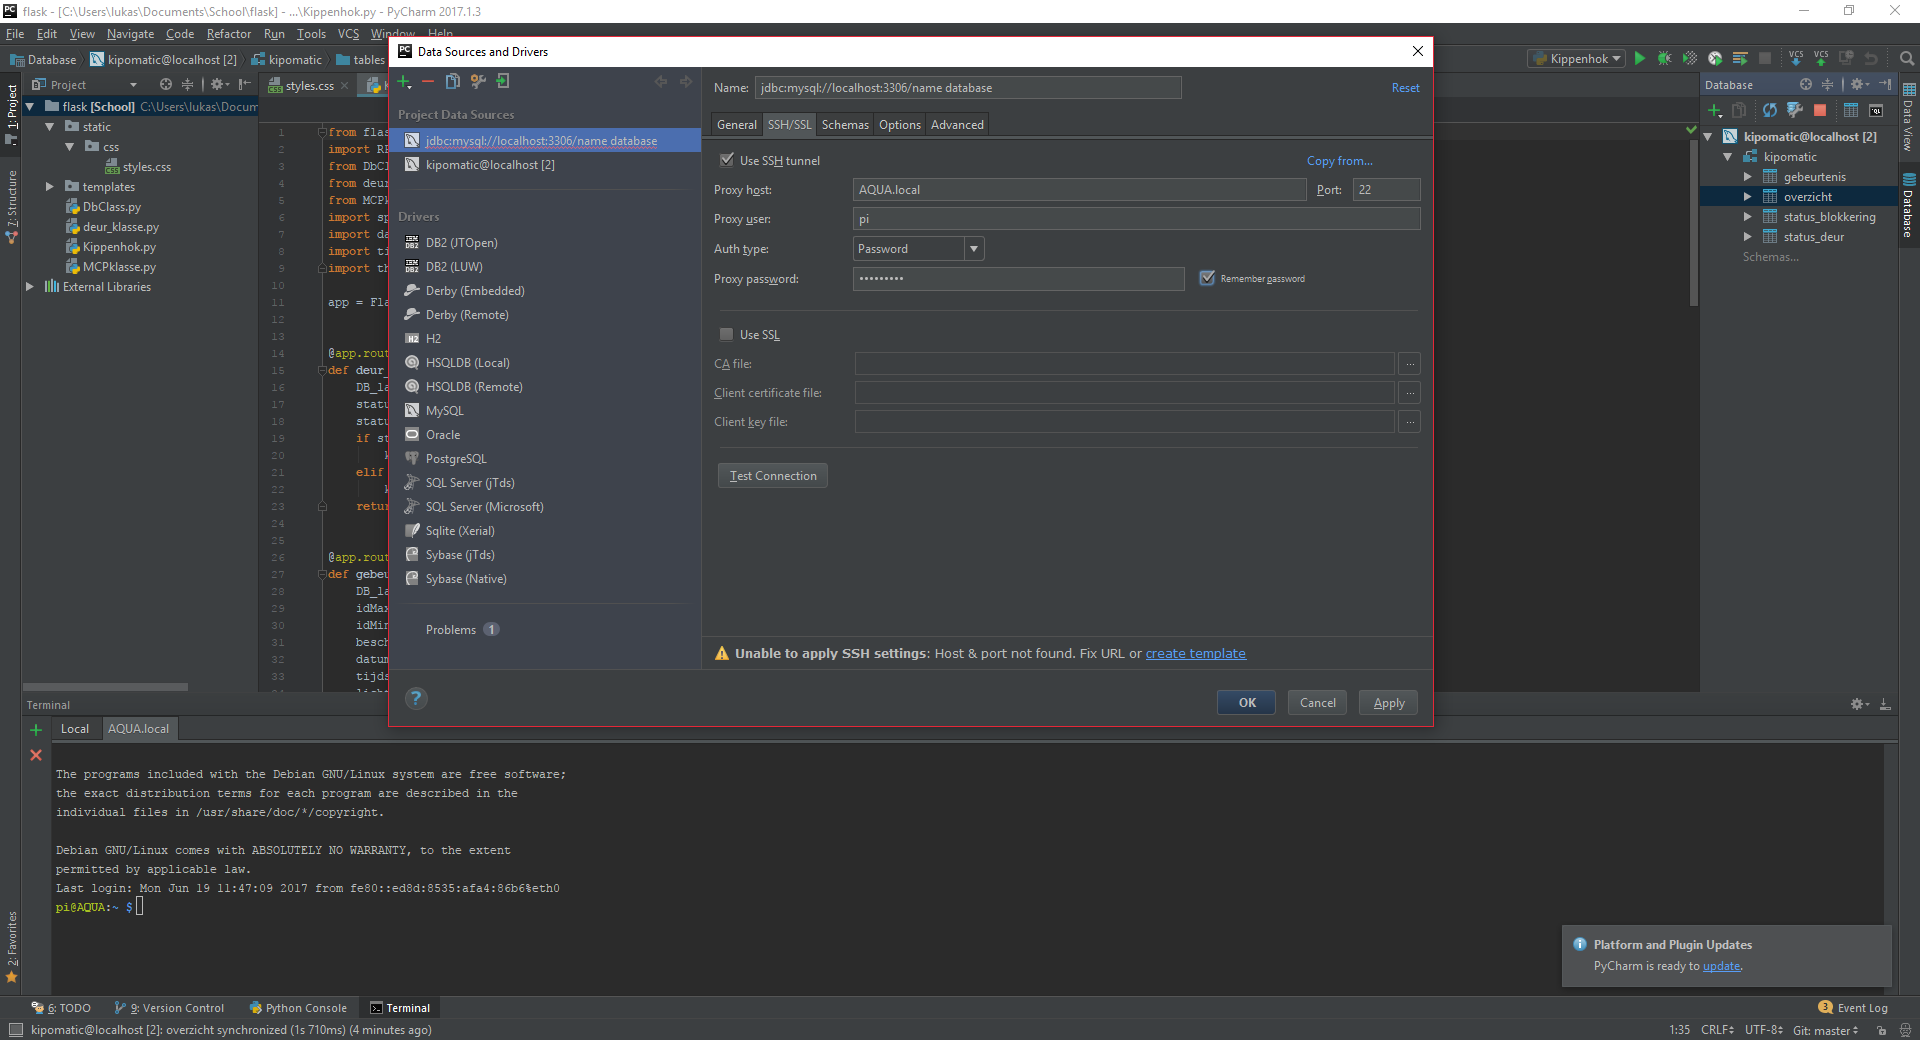
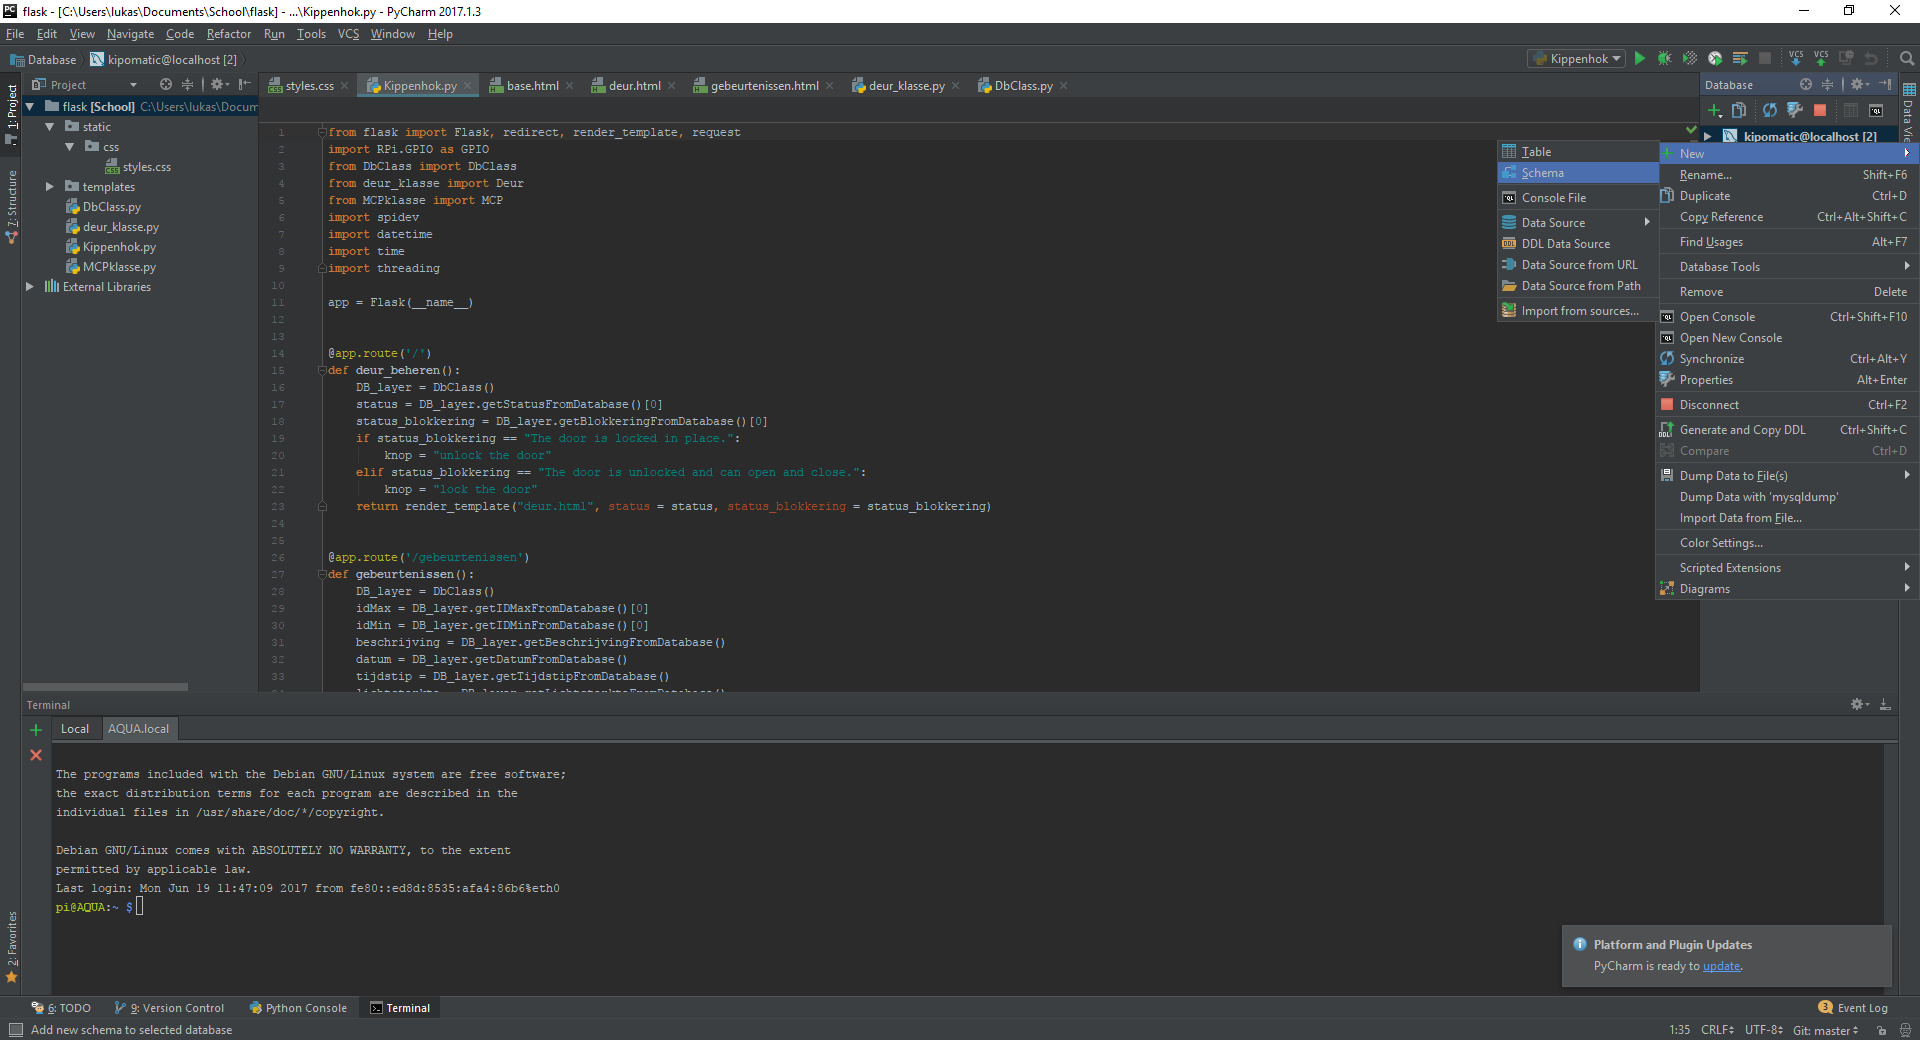
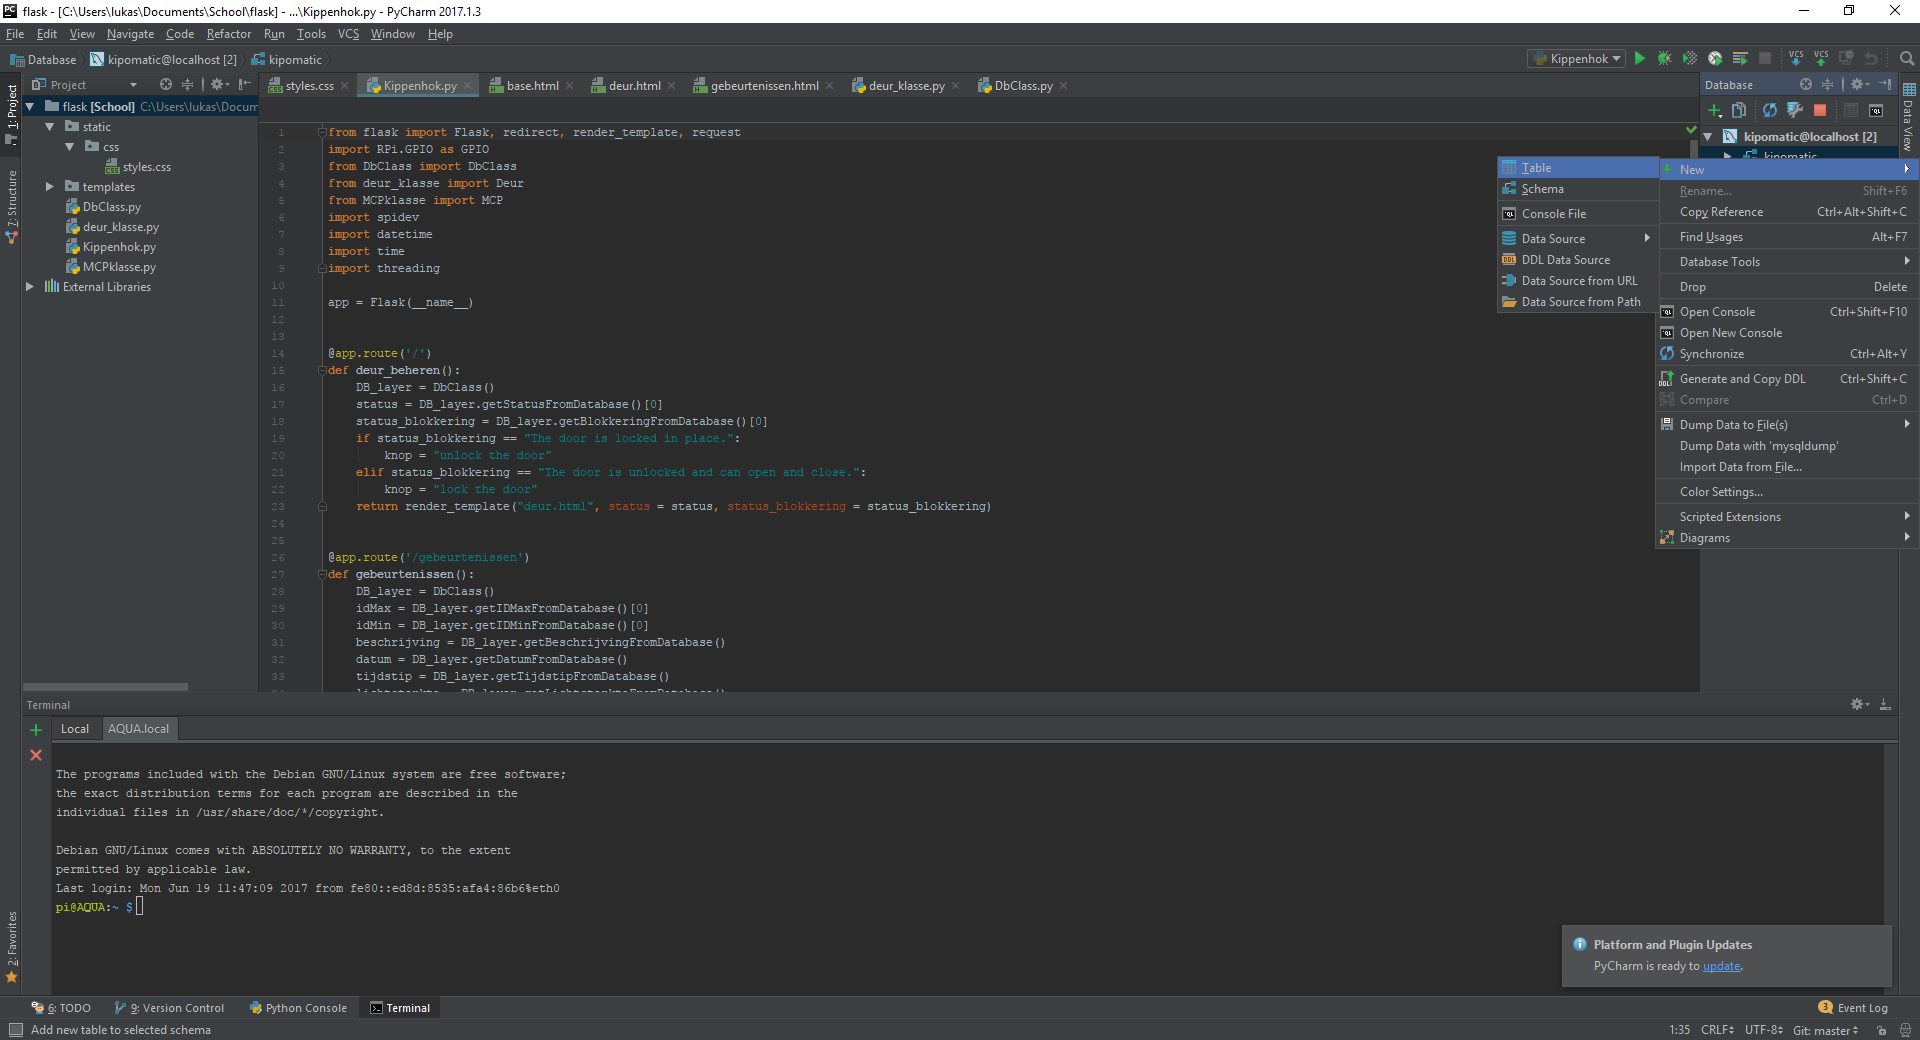
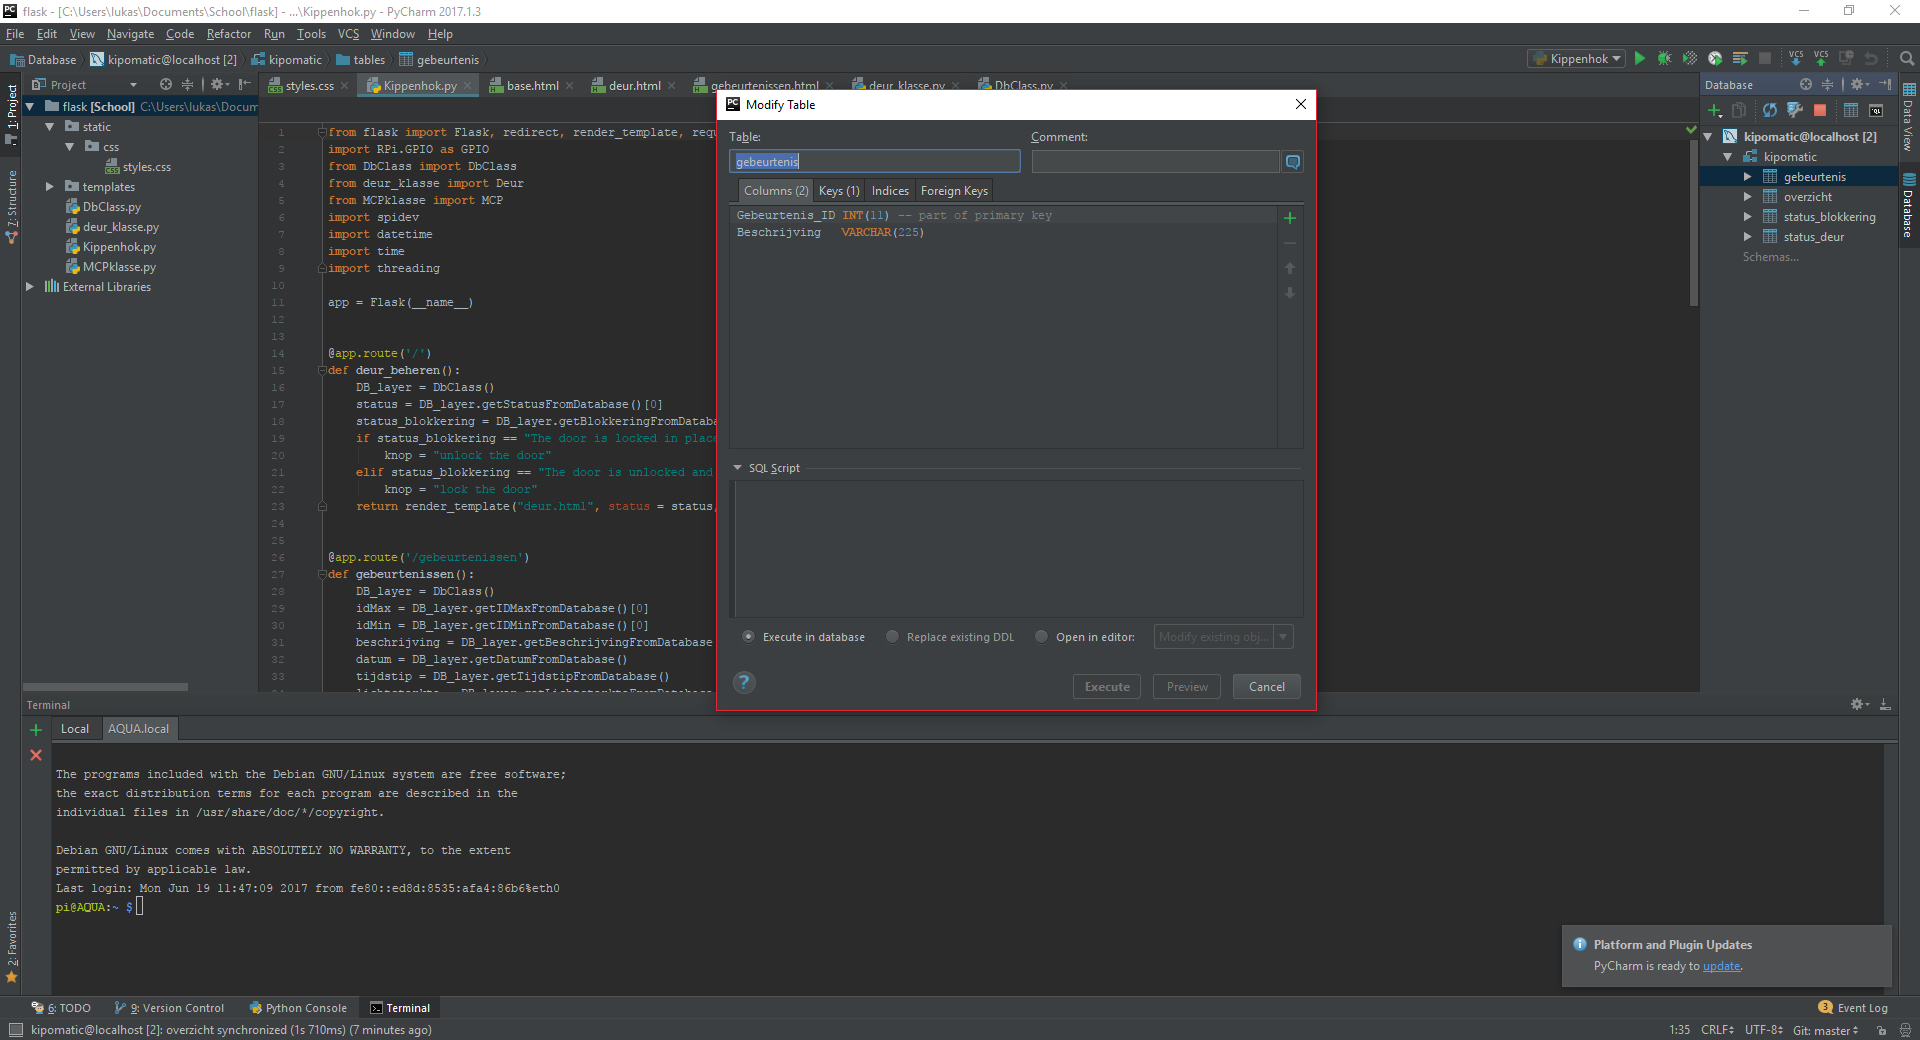
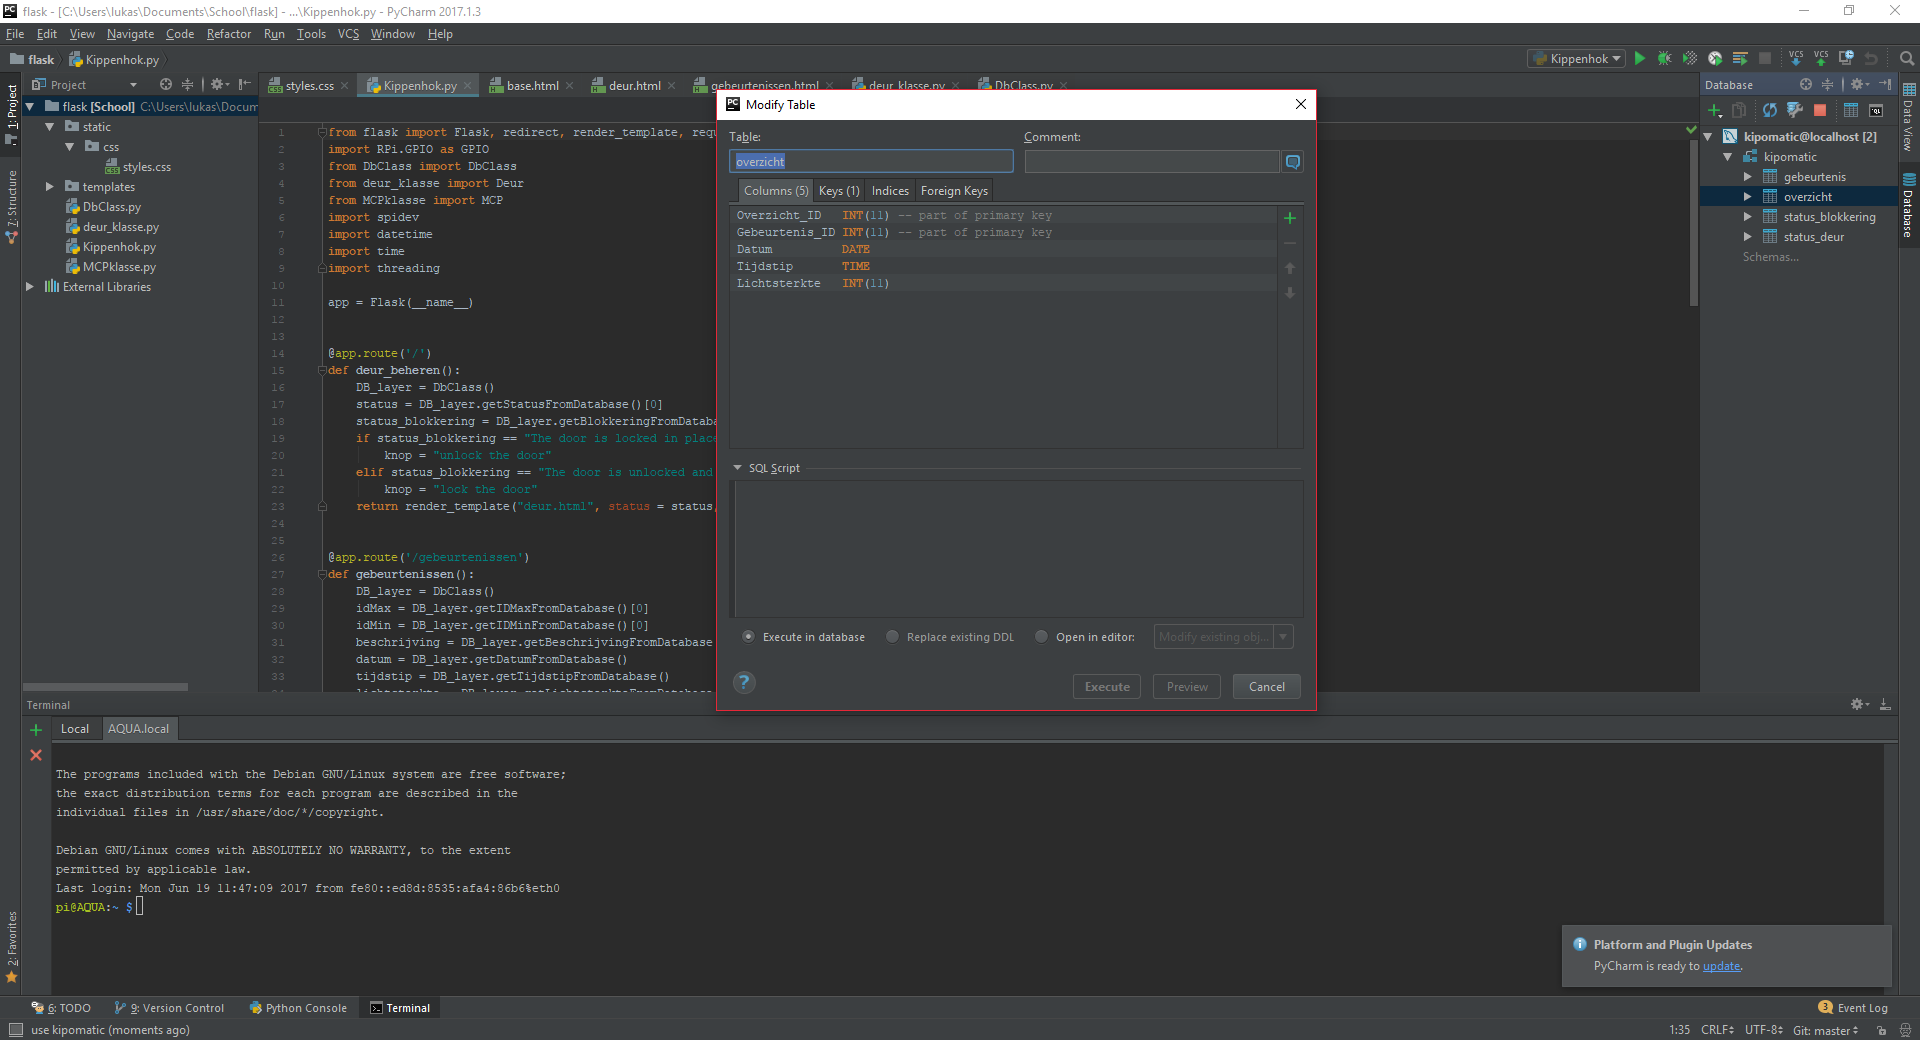
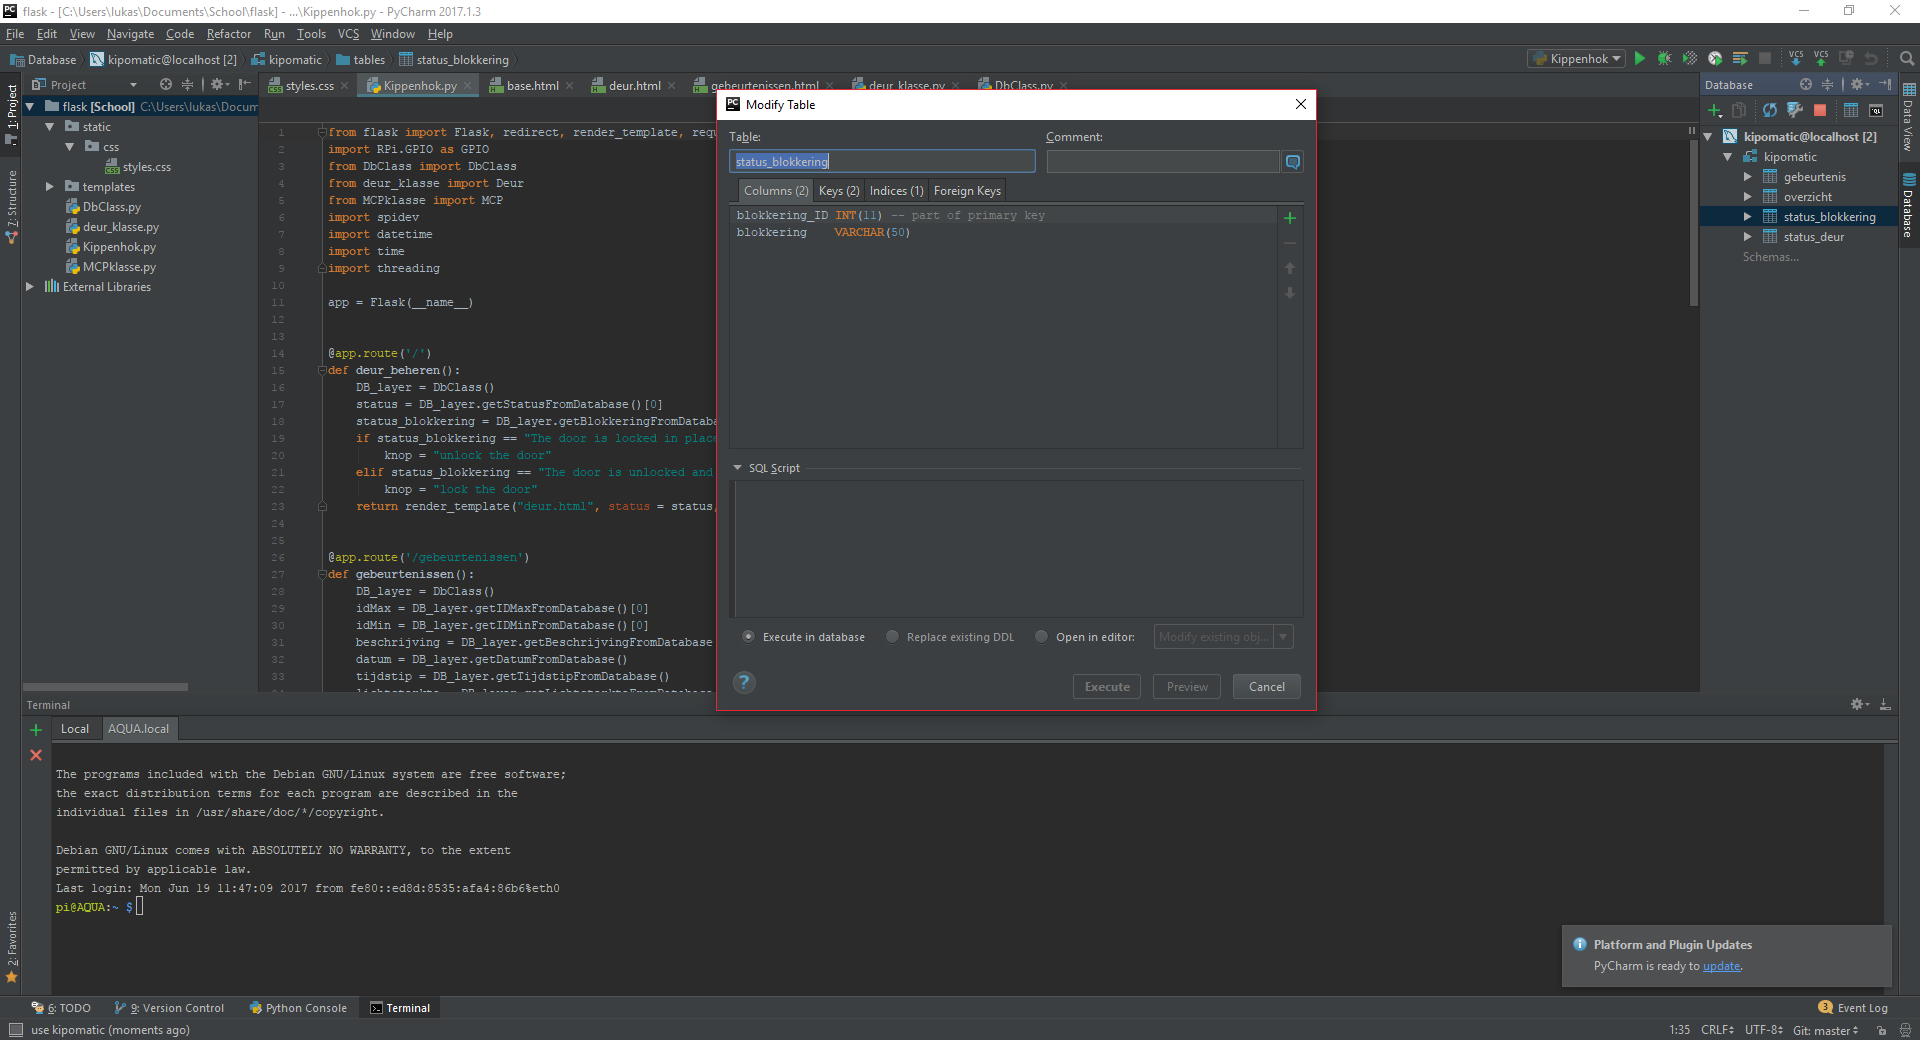
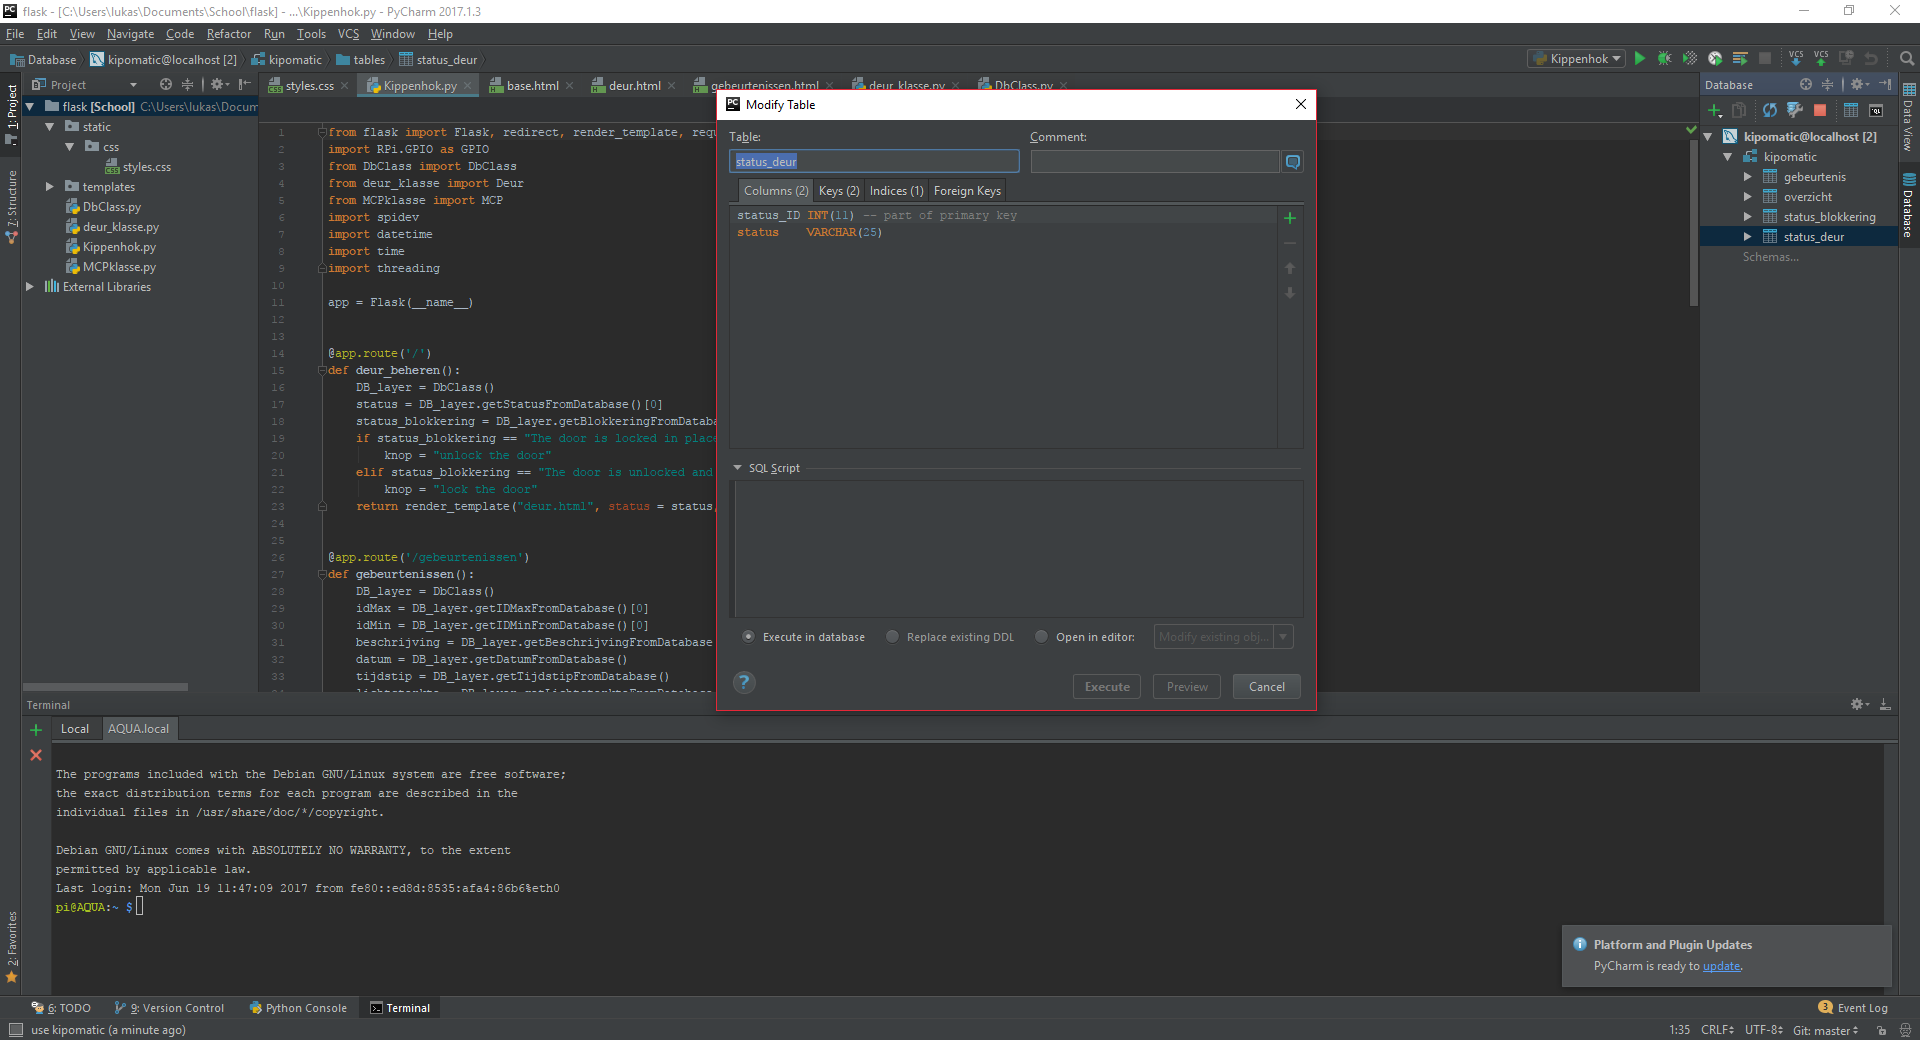
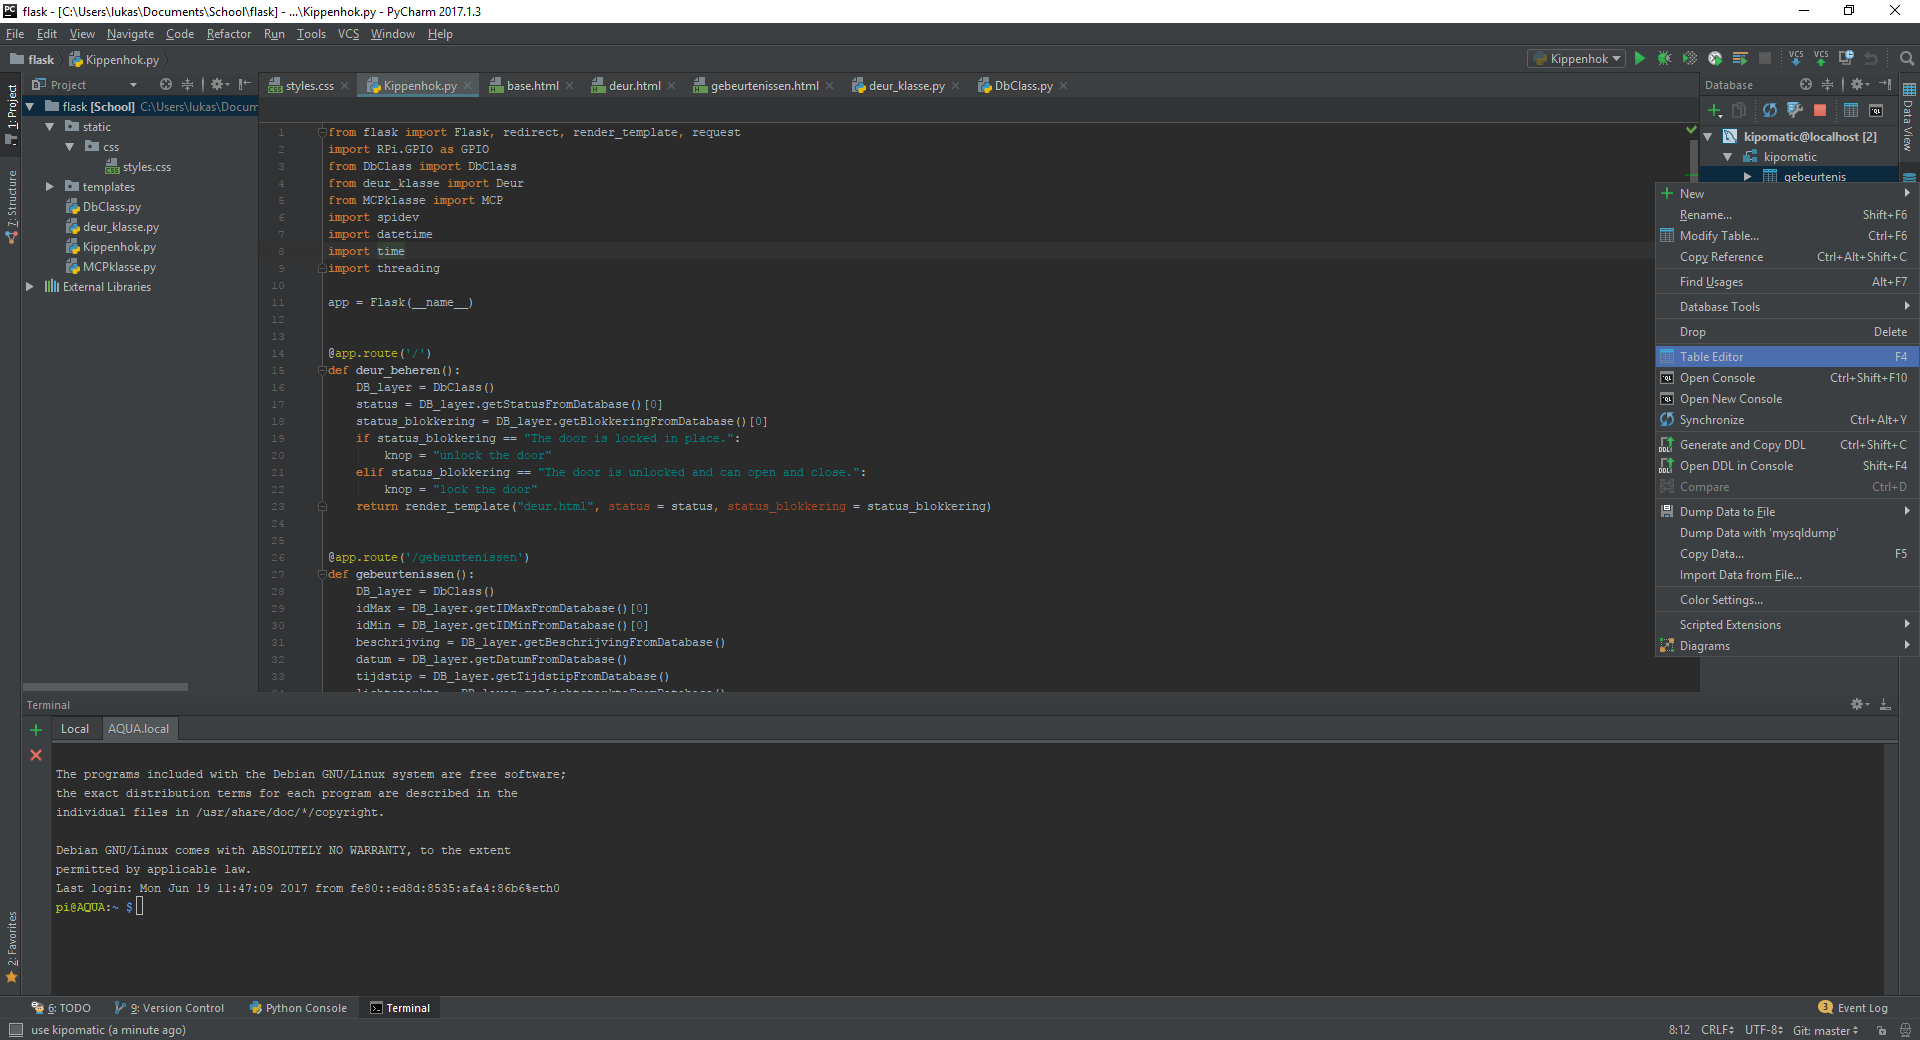
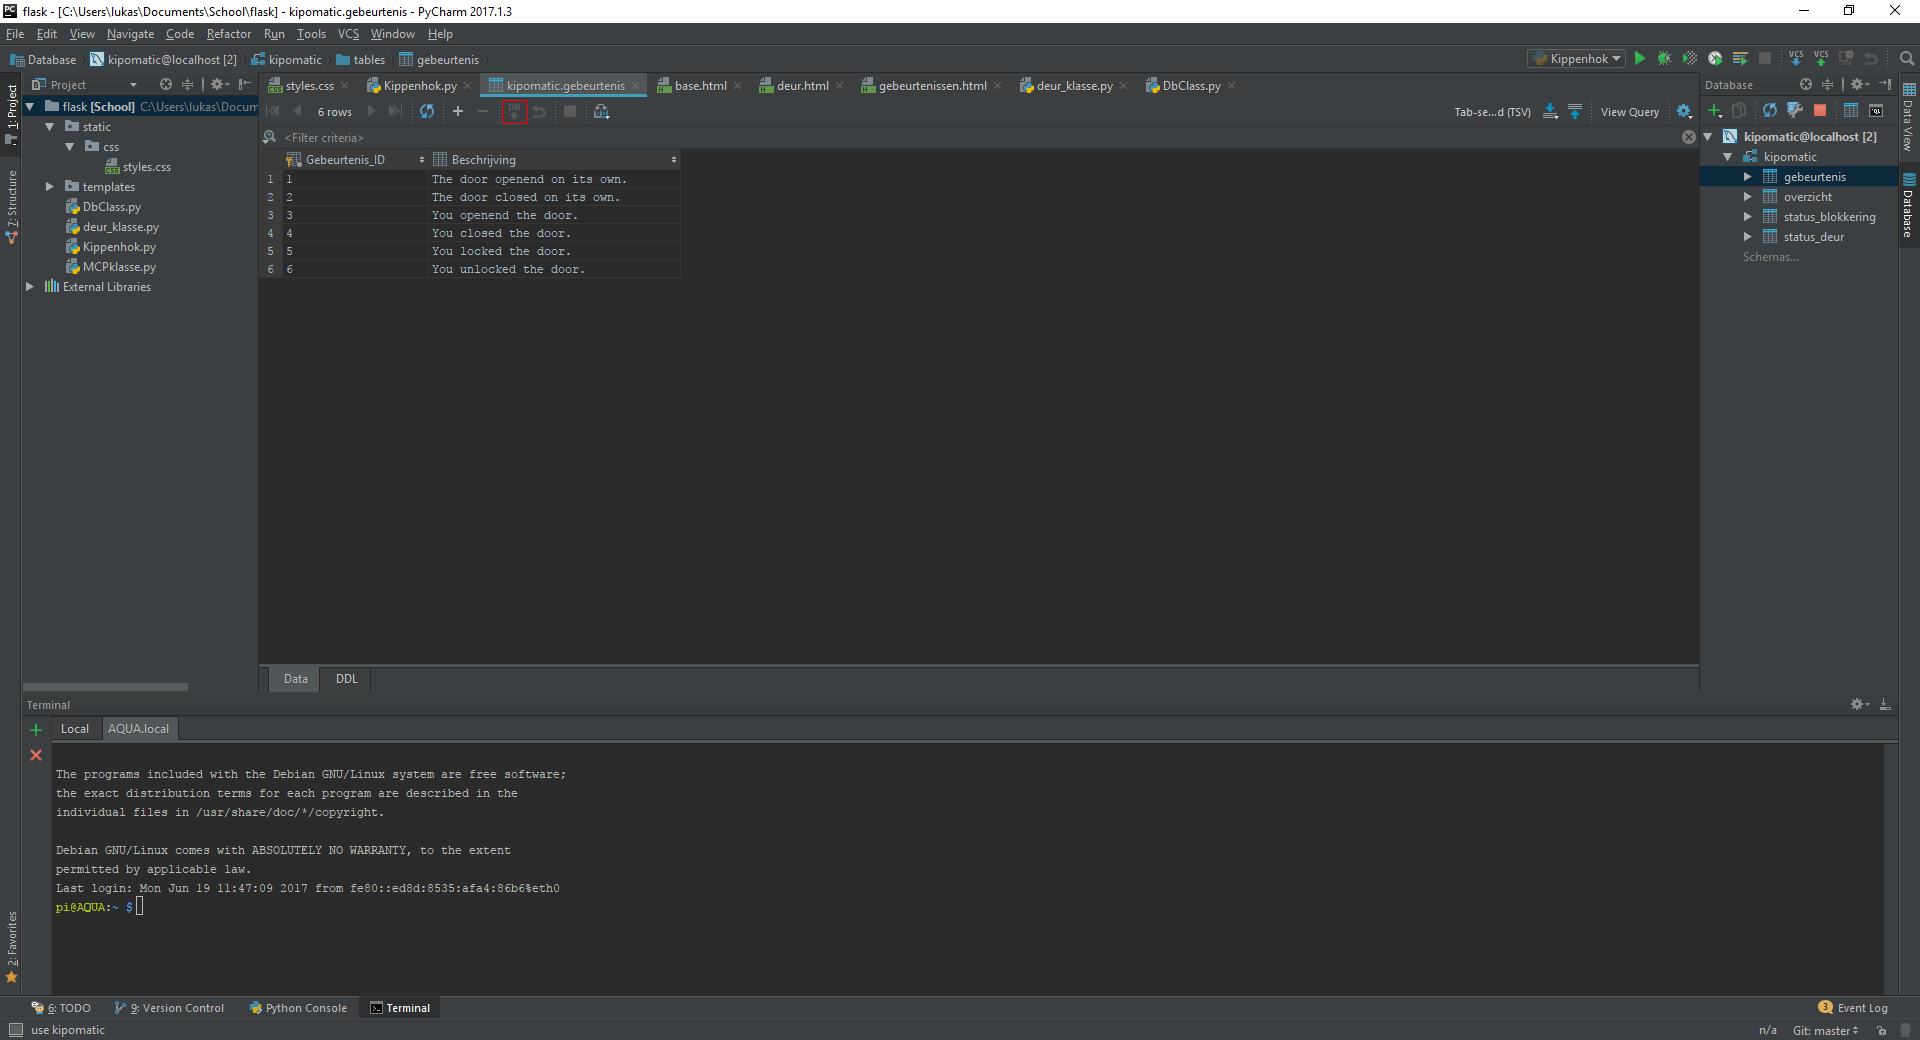
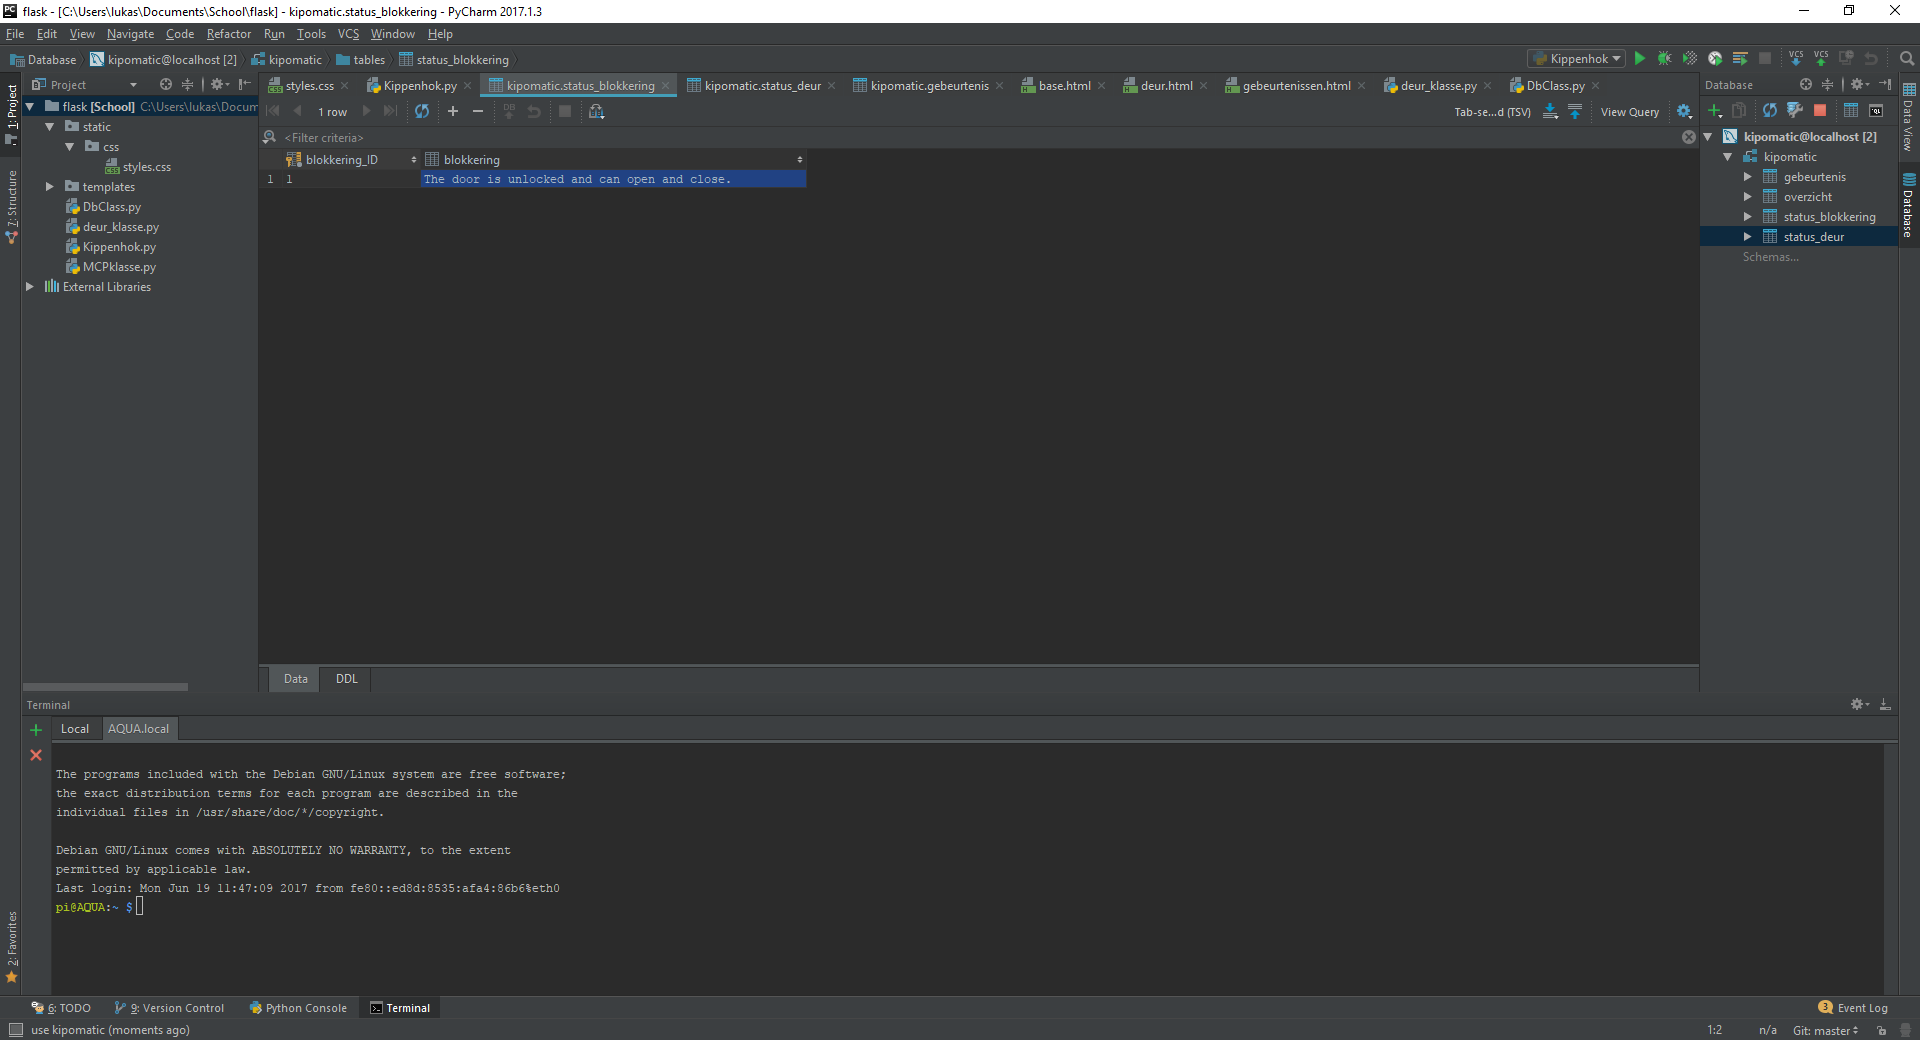
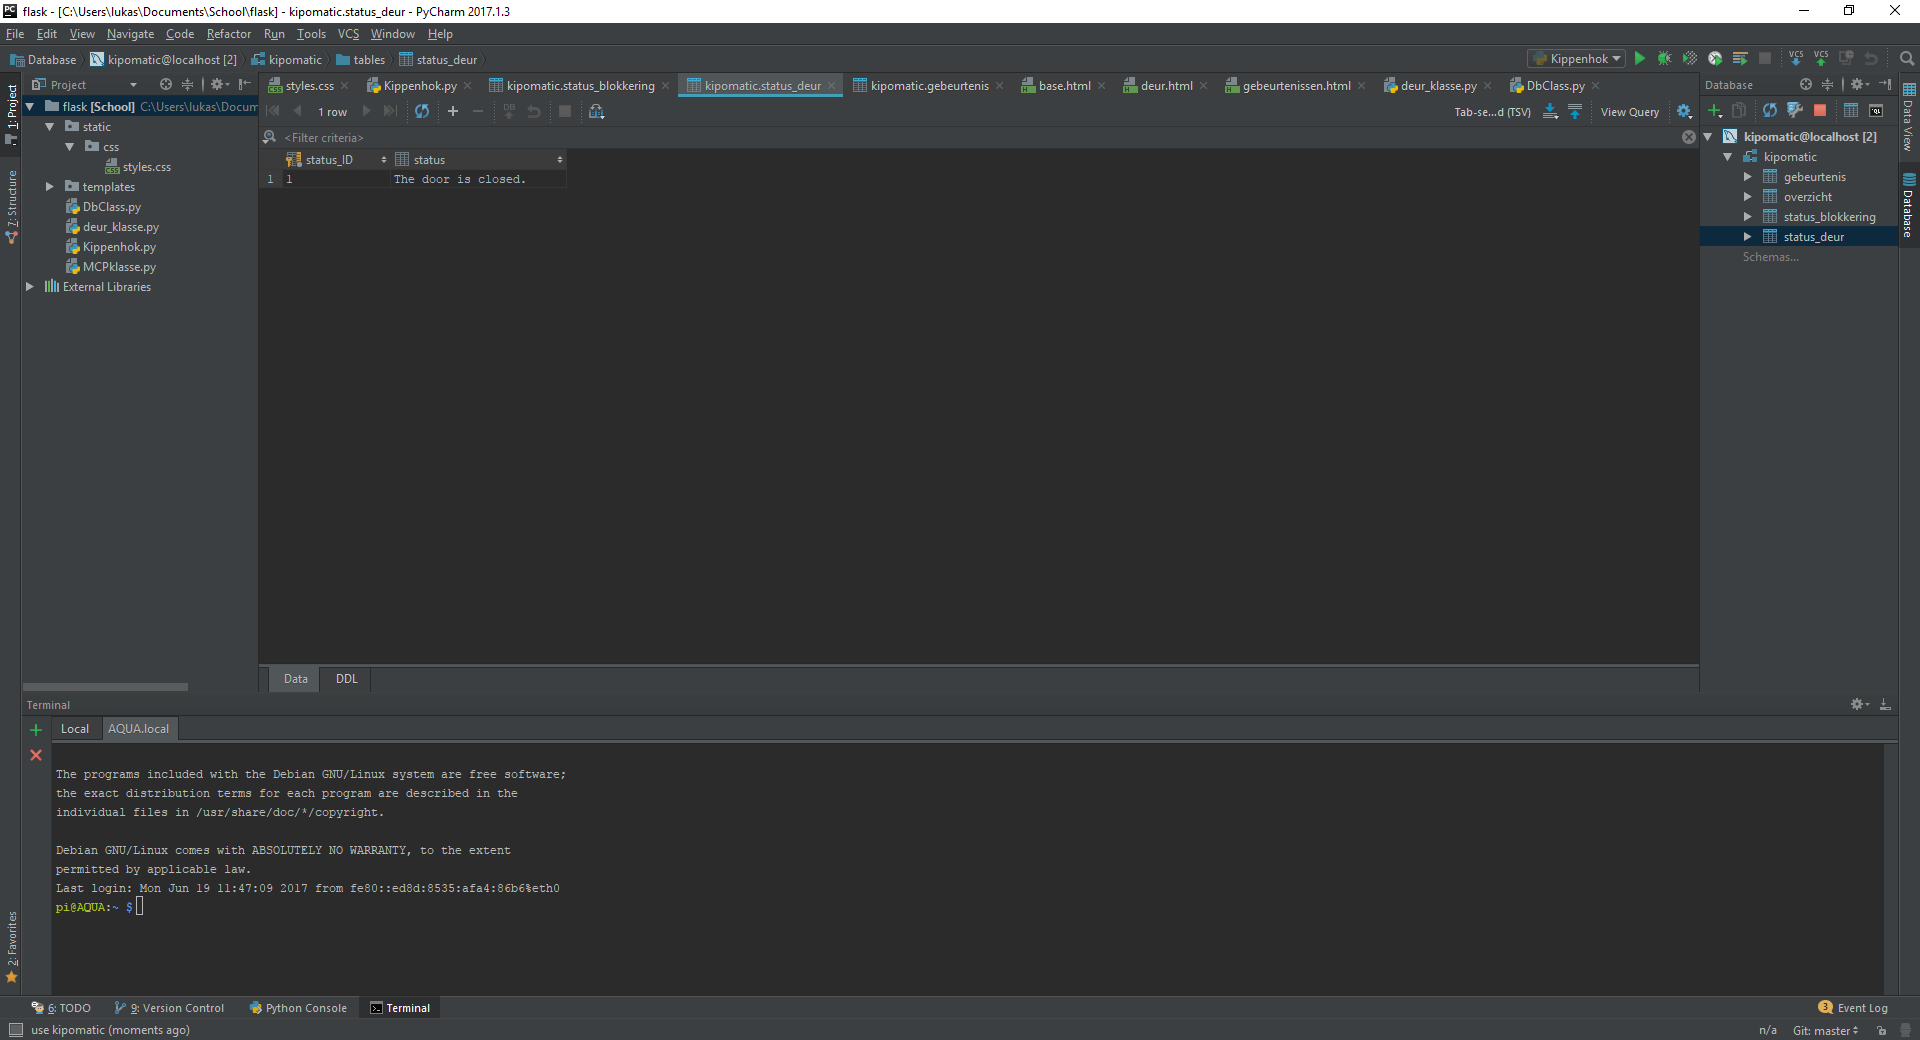
Now we will make the database. First go to database on the right in Pycharm. Then click on the green + and then click on Data Source and then select MySQL (picture 1). In General, fill in the name you want to give your database (I used kipomatic), the name of the user you created and the password of this user (picture 2). Then go to SSH/SSL. Here you fill in the name of your Pi or it's ip address,the port to use (22) the user that you use on your Pi and the password of this user (picture 3). If you have filled in all of this, click Apply and OK. Now rightclick on your newly created database and select New, Schema (picture 4). Then you just have to fill in the name of the new schema (I used kipomatic) and click Execute. Now rightclick on this schema and select New, Table (picture 5). You have to do this four times, because I have used four tables (pictures 6 through 9). Just make the same tables like I did and you should have no trouble when running my code. To put data in the tables, rightclick on the table and select Table Editor (picture 10). In the table gebeurtenis, you have to insert the same data as I did. You can find this data in picture 11, but make sure to upload the data to your database by clicking the arrow with DB (in the red rectangle on the picture). If you don't click this arrow, the data won't be saved in your database. It's also best to insert the data from picture 12 in the table status_blokkering and the data from picture 13 in the table status_deur, to avoid any problems. You don't have to insert any data in the table overzicht, because everytime the door opens or closes, this data will be automatically inserted in that table. Just remember that if the table overzicht has no data in it, then you will get an error when going to the second part of the webserver. So just open or close the door once to make this part of the webserver accessible.Now everything is set up to be able to run my code, which you can download here. (this is the same link as in step 3. I just put the link here again to make sure that you would be able to find my code.)
Putting It All Together
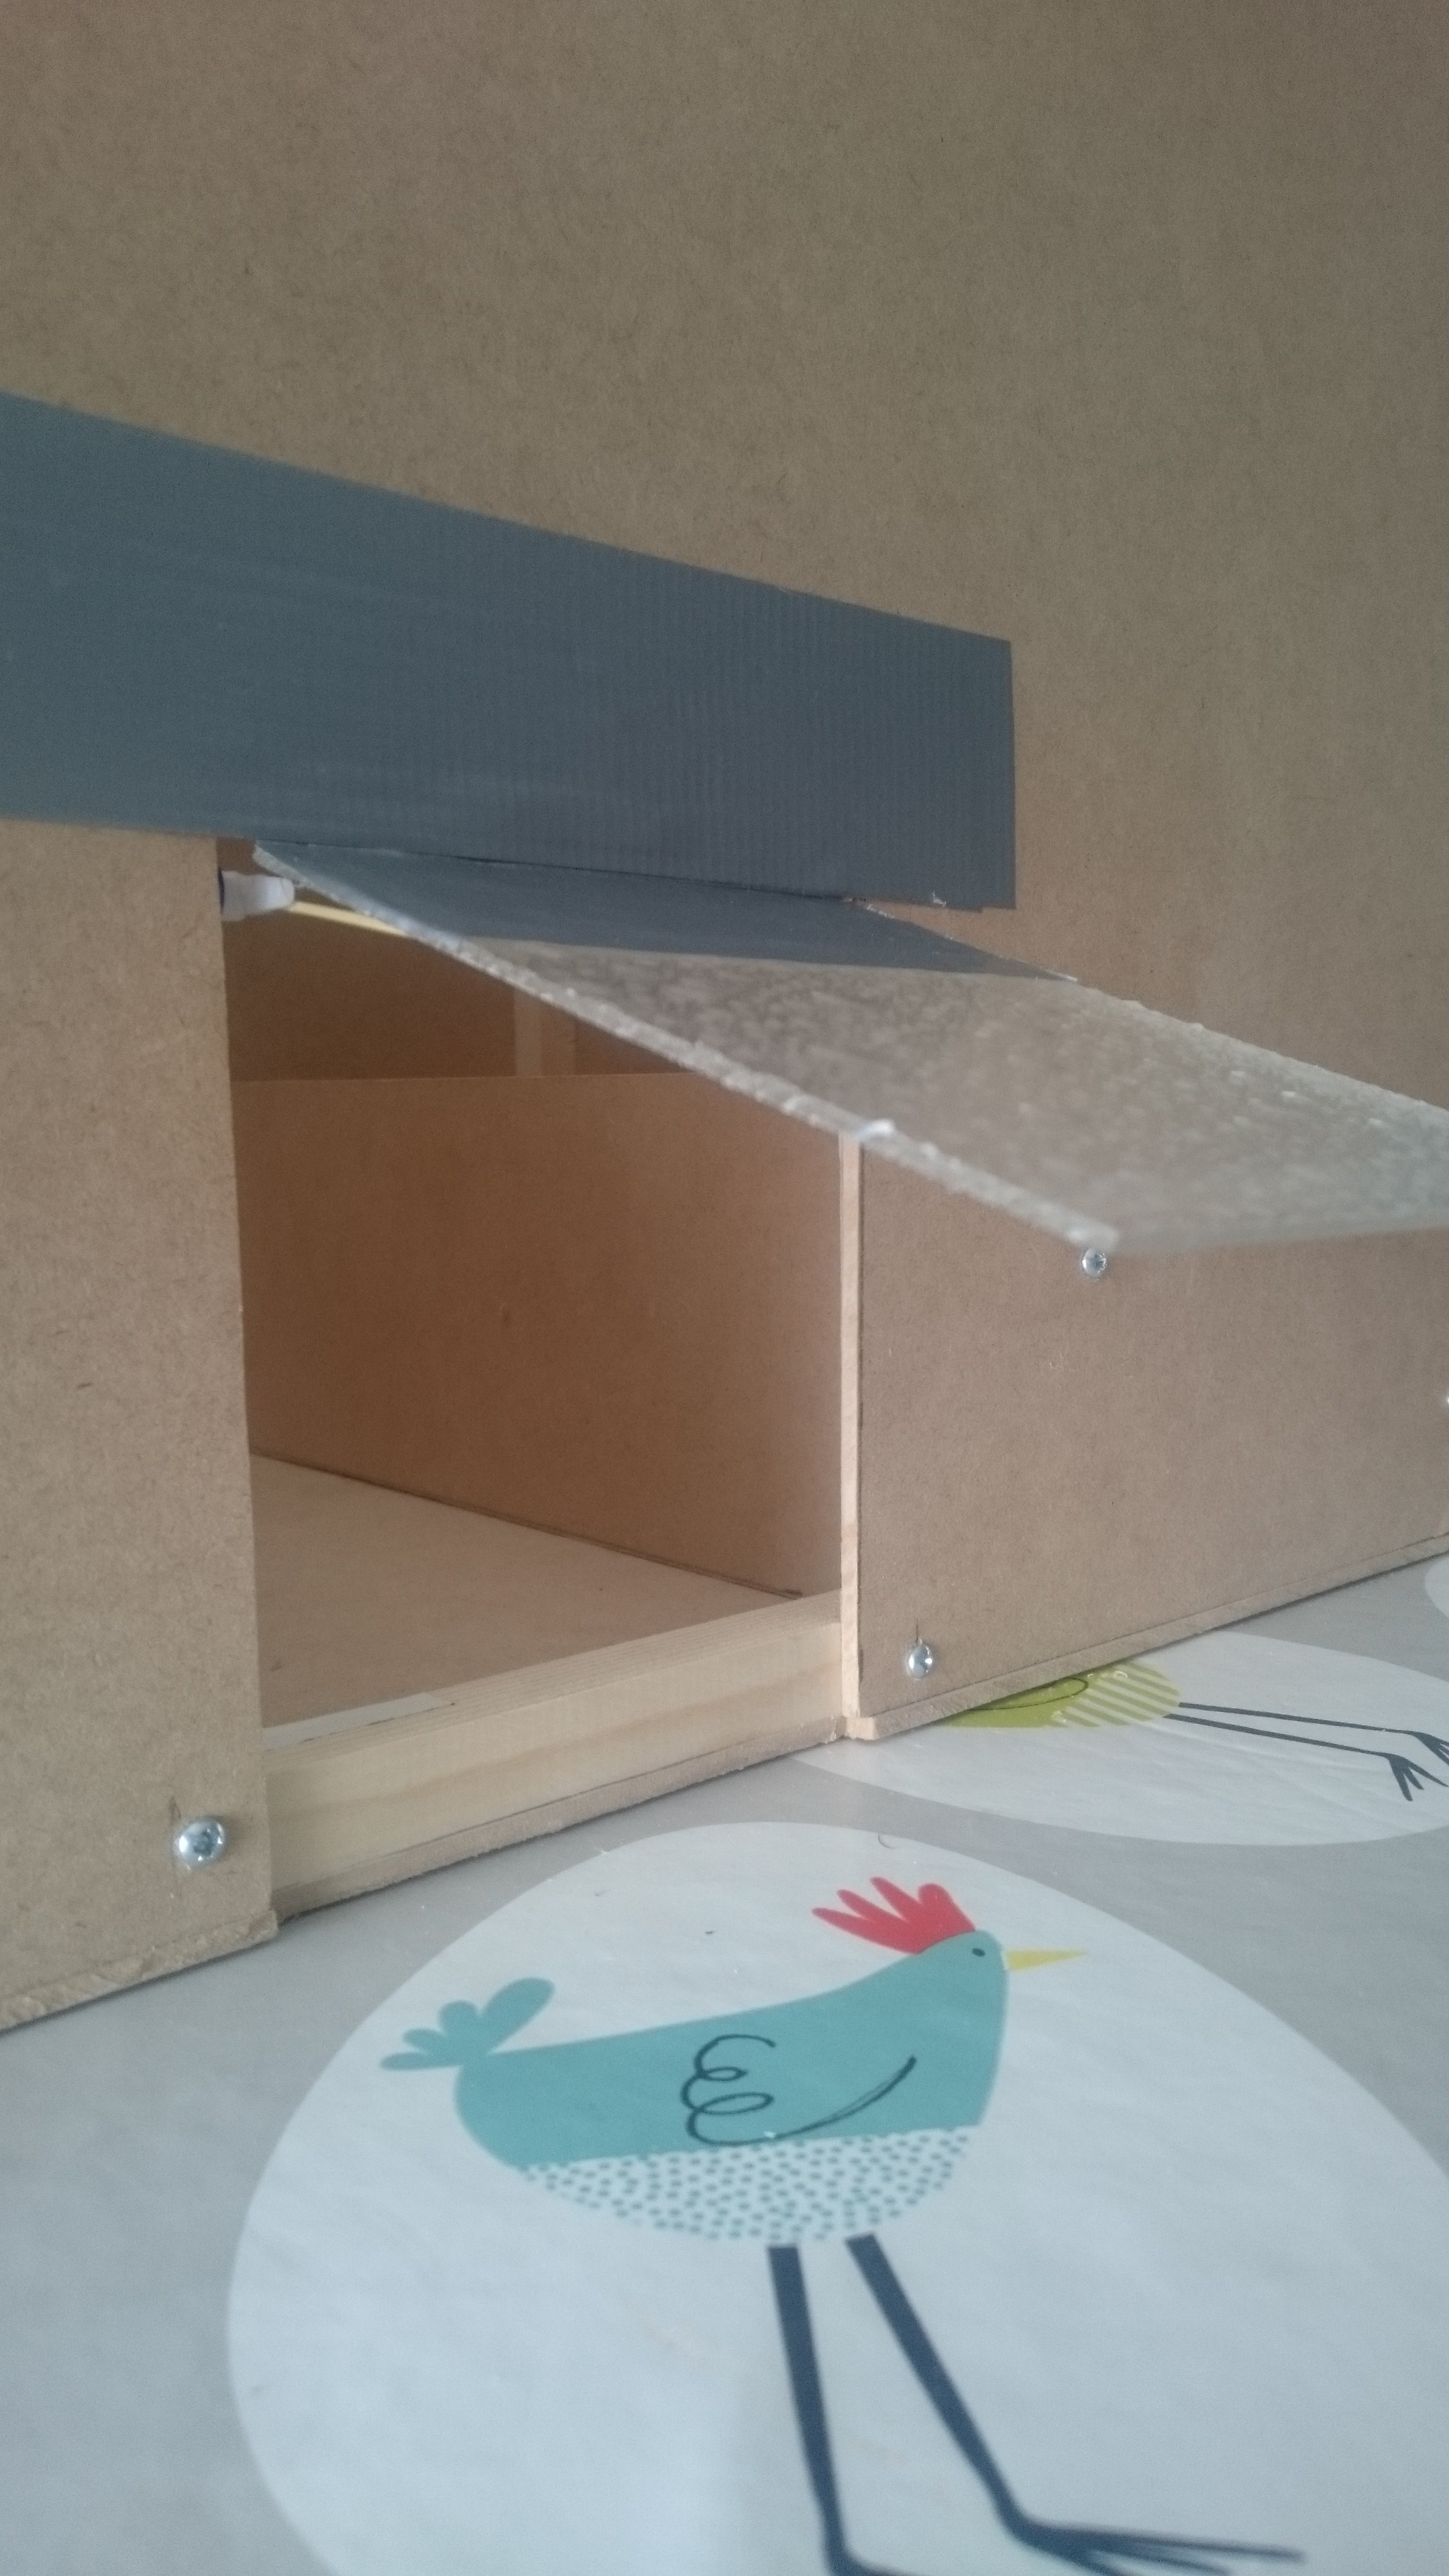
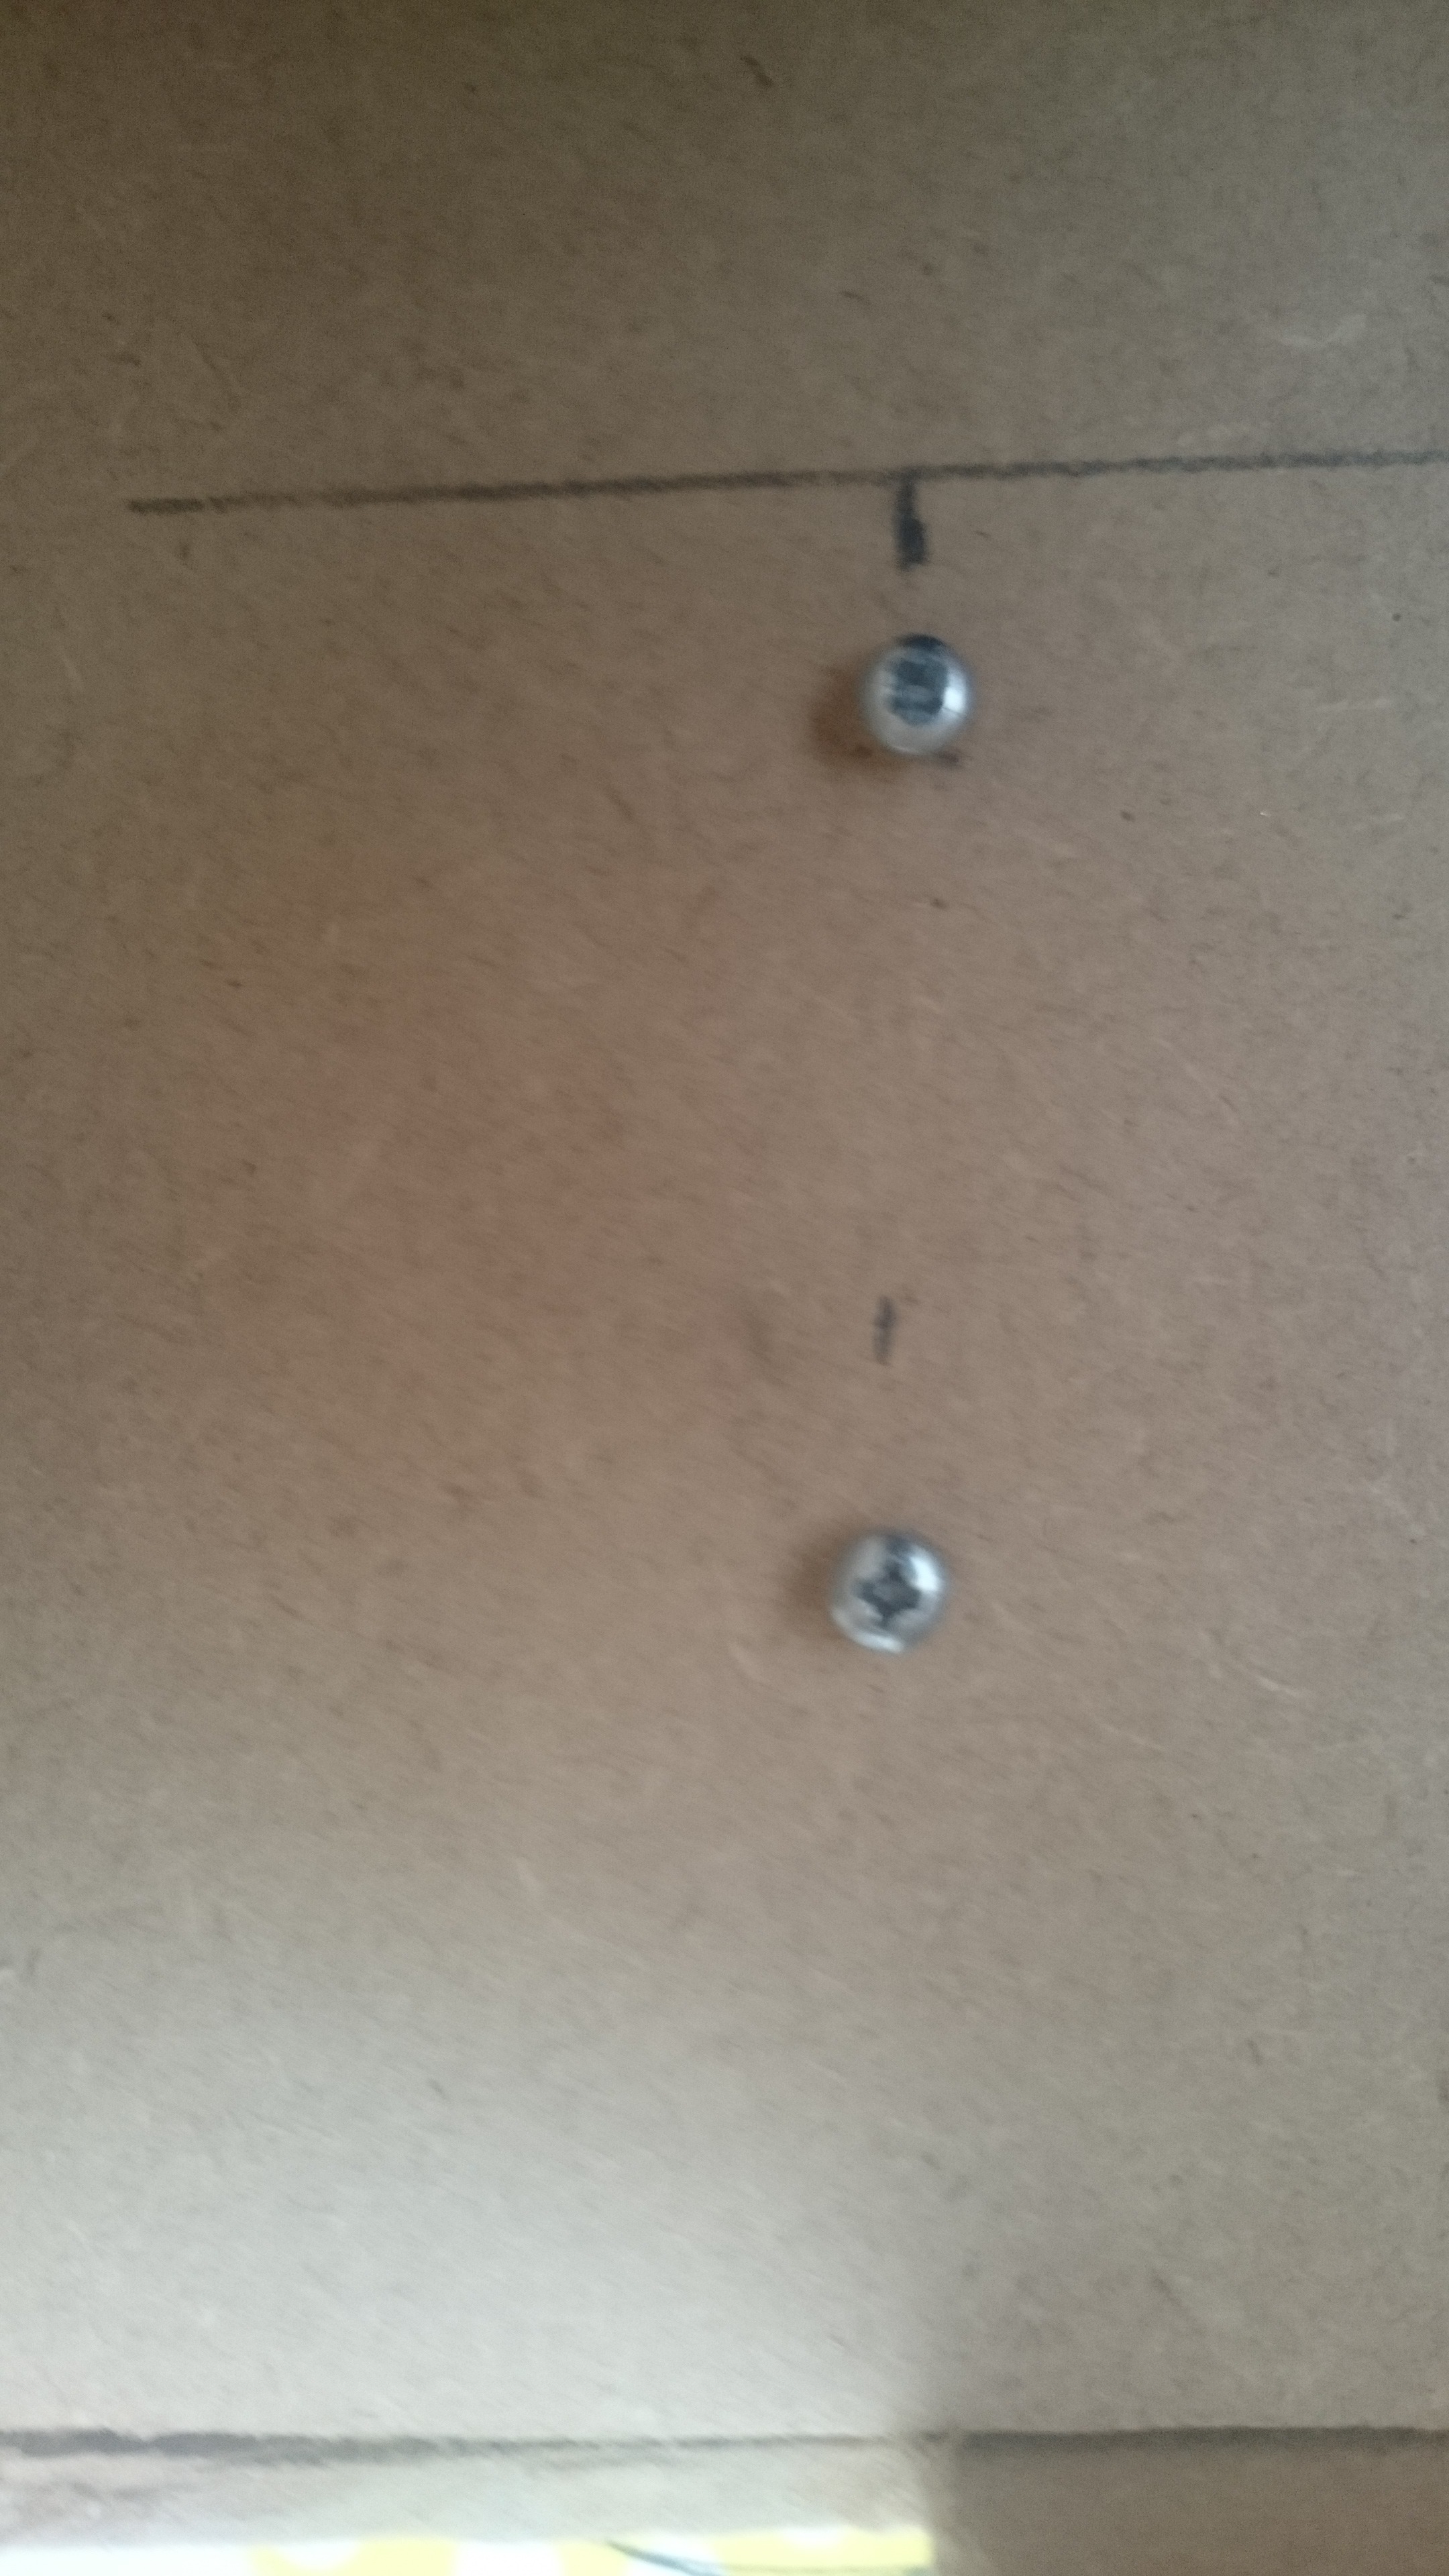
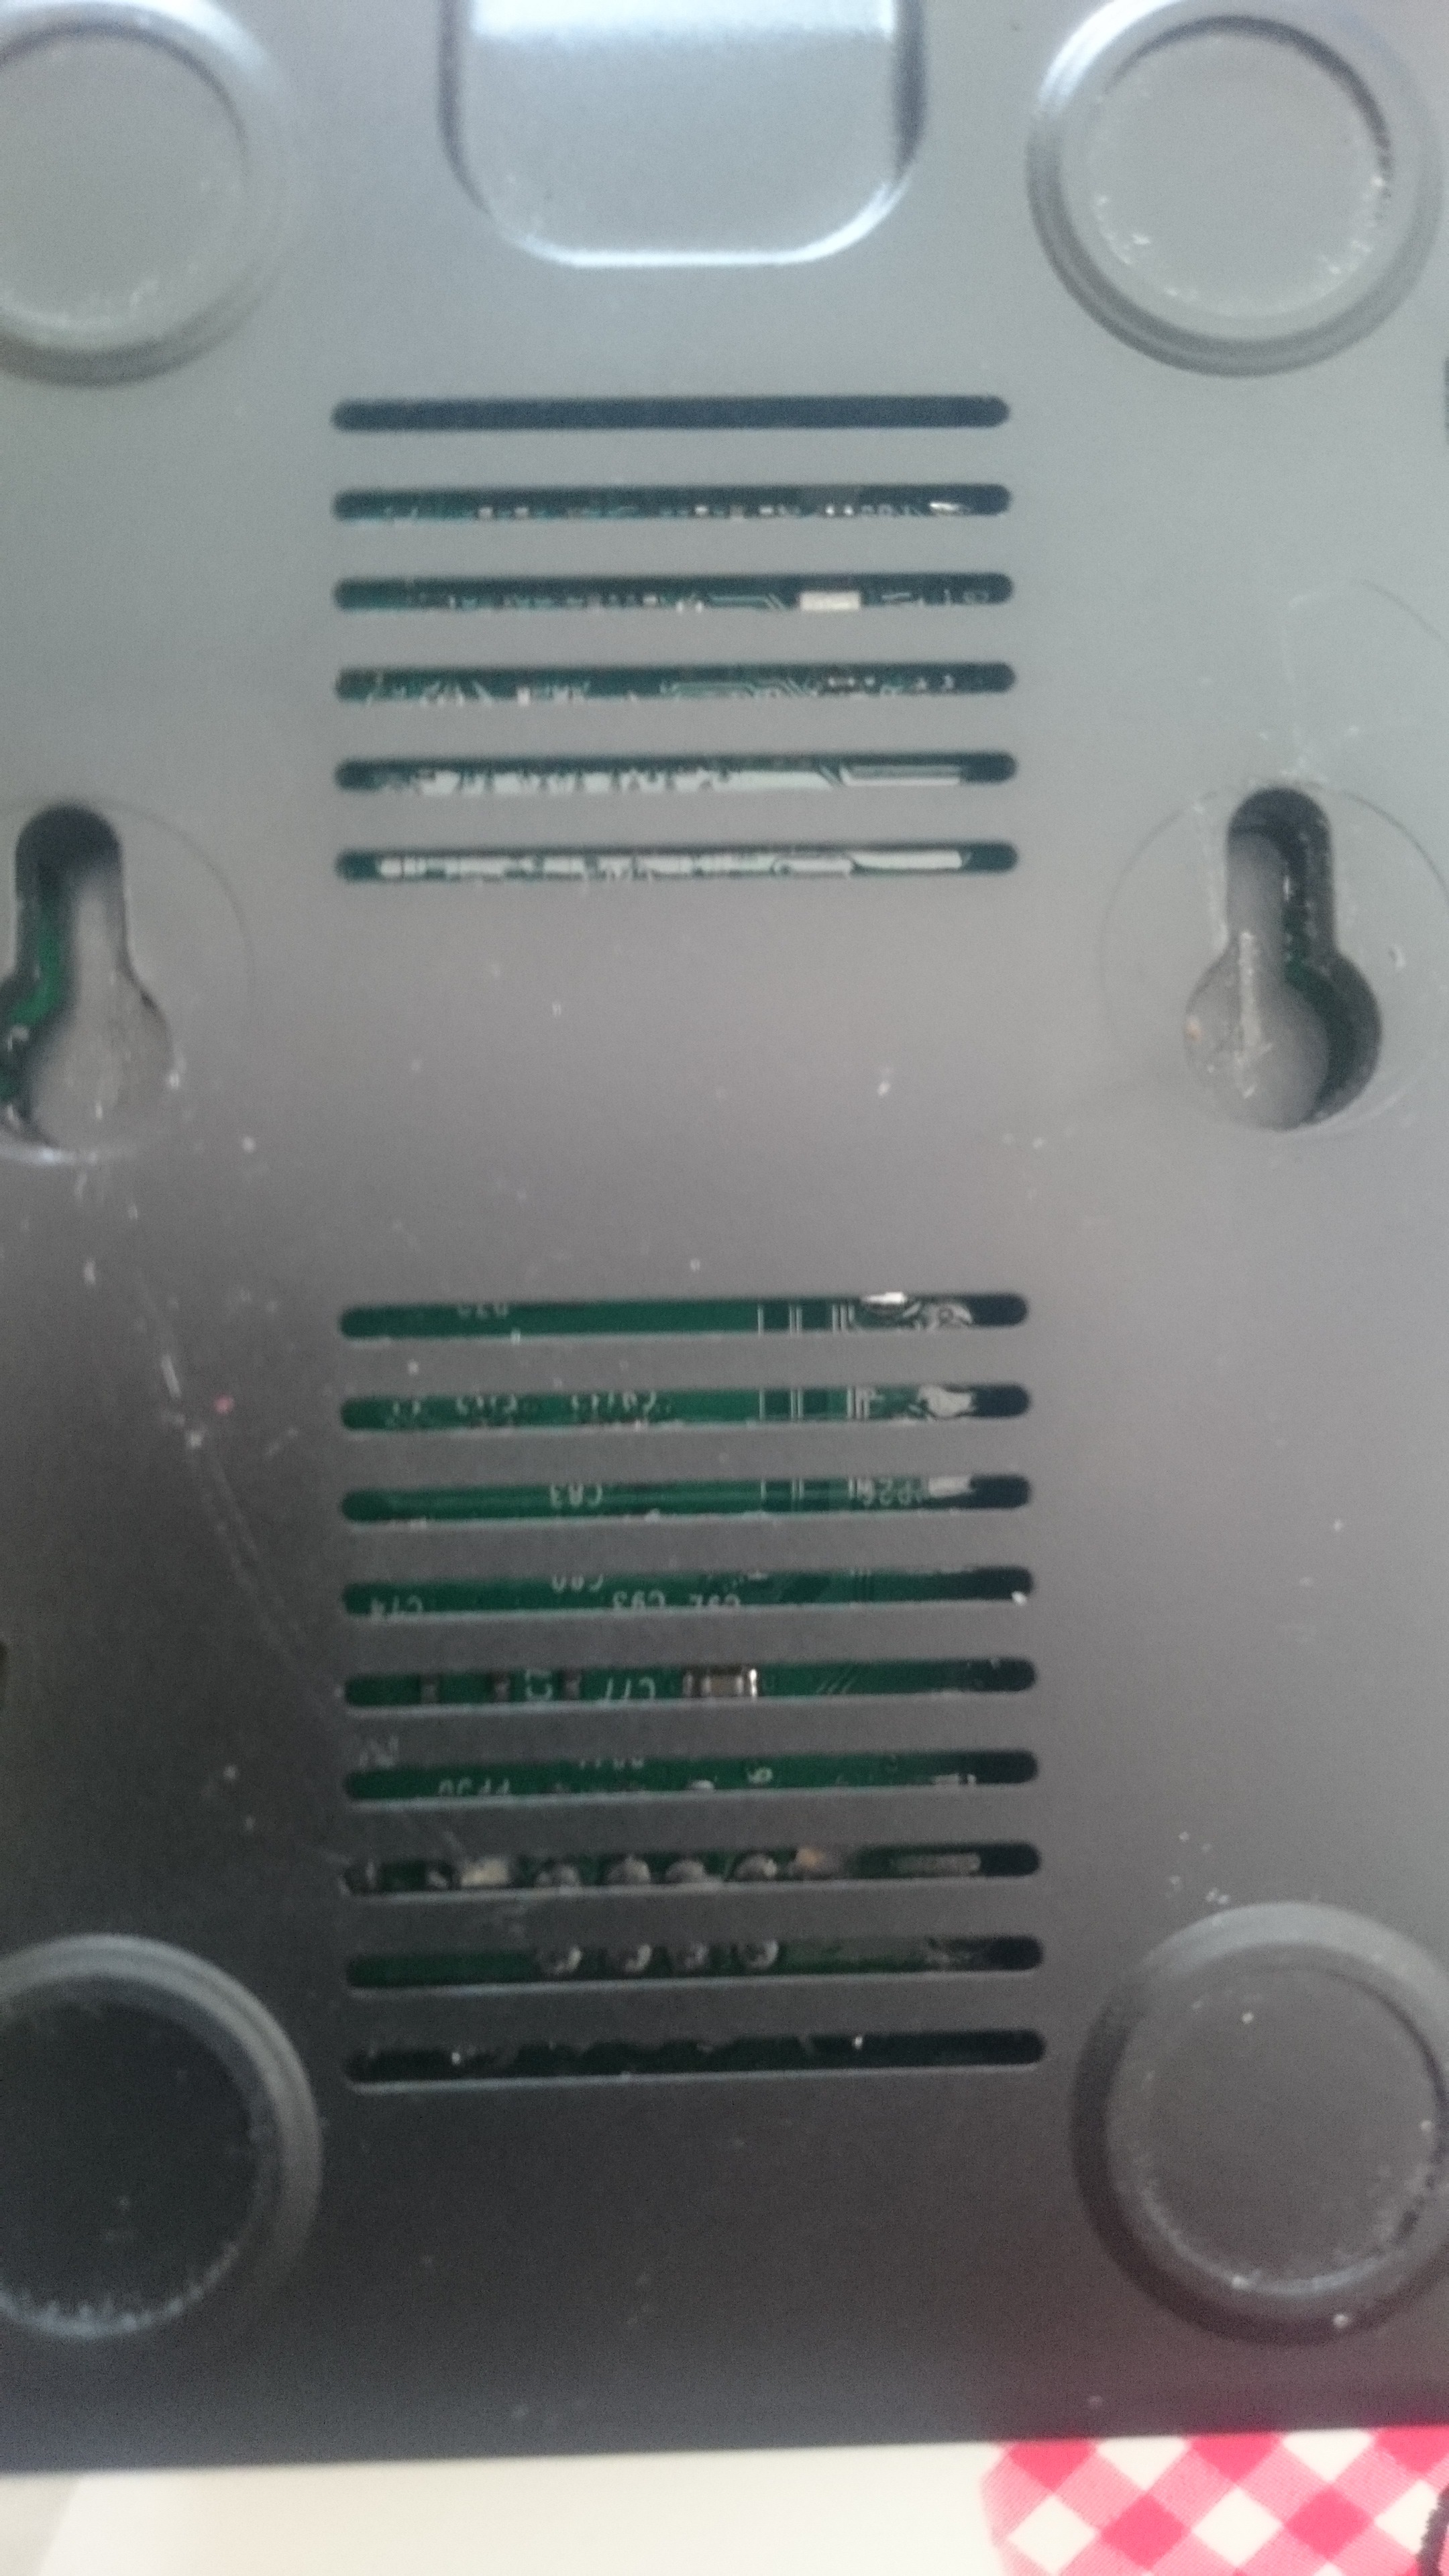
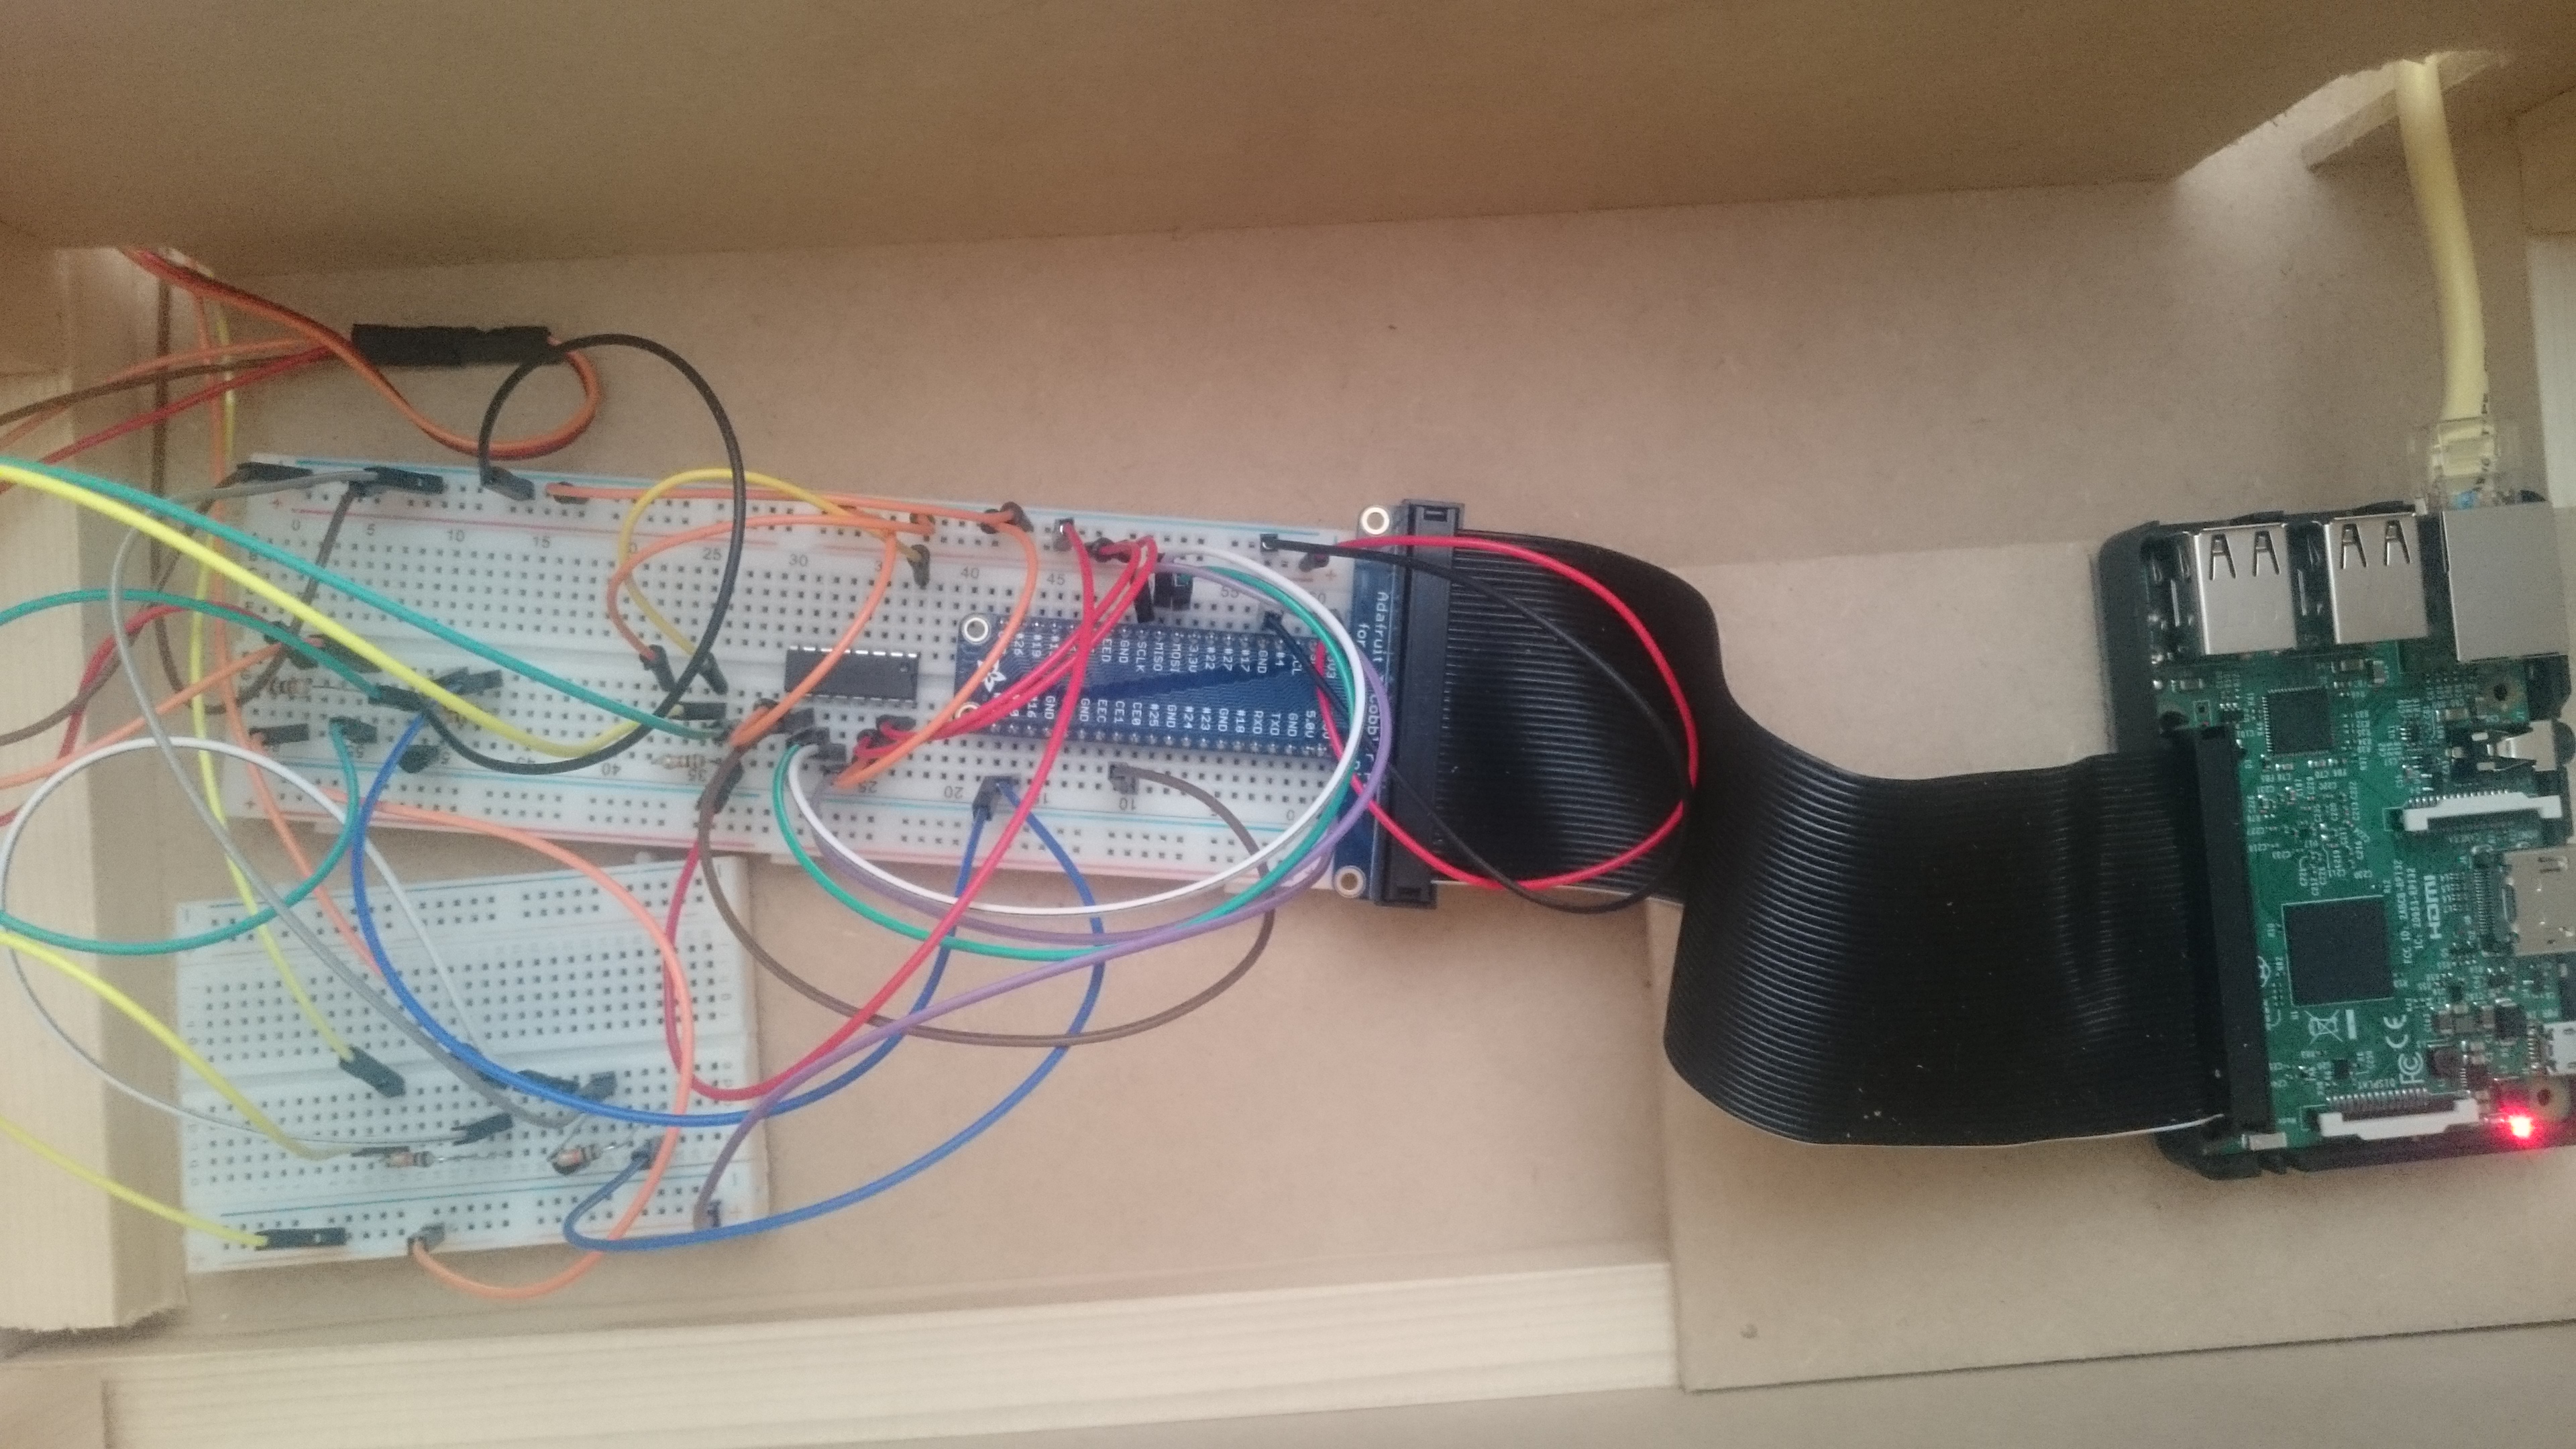
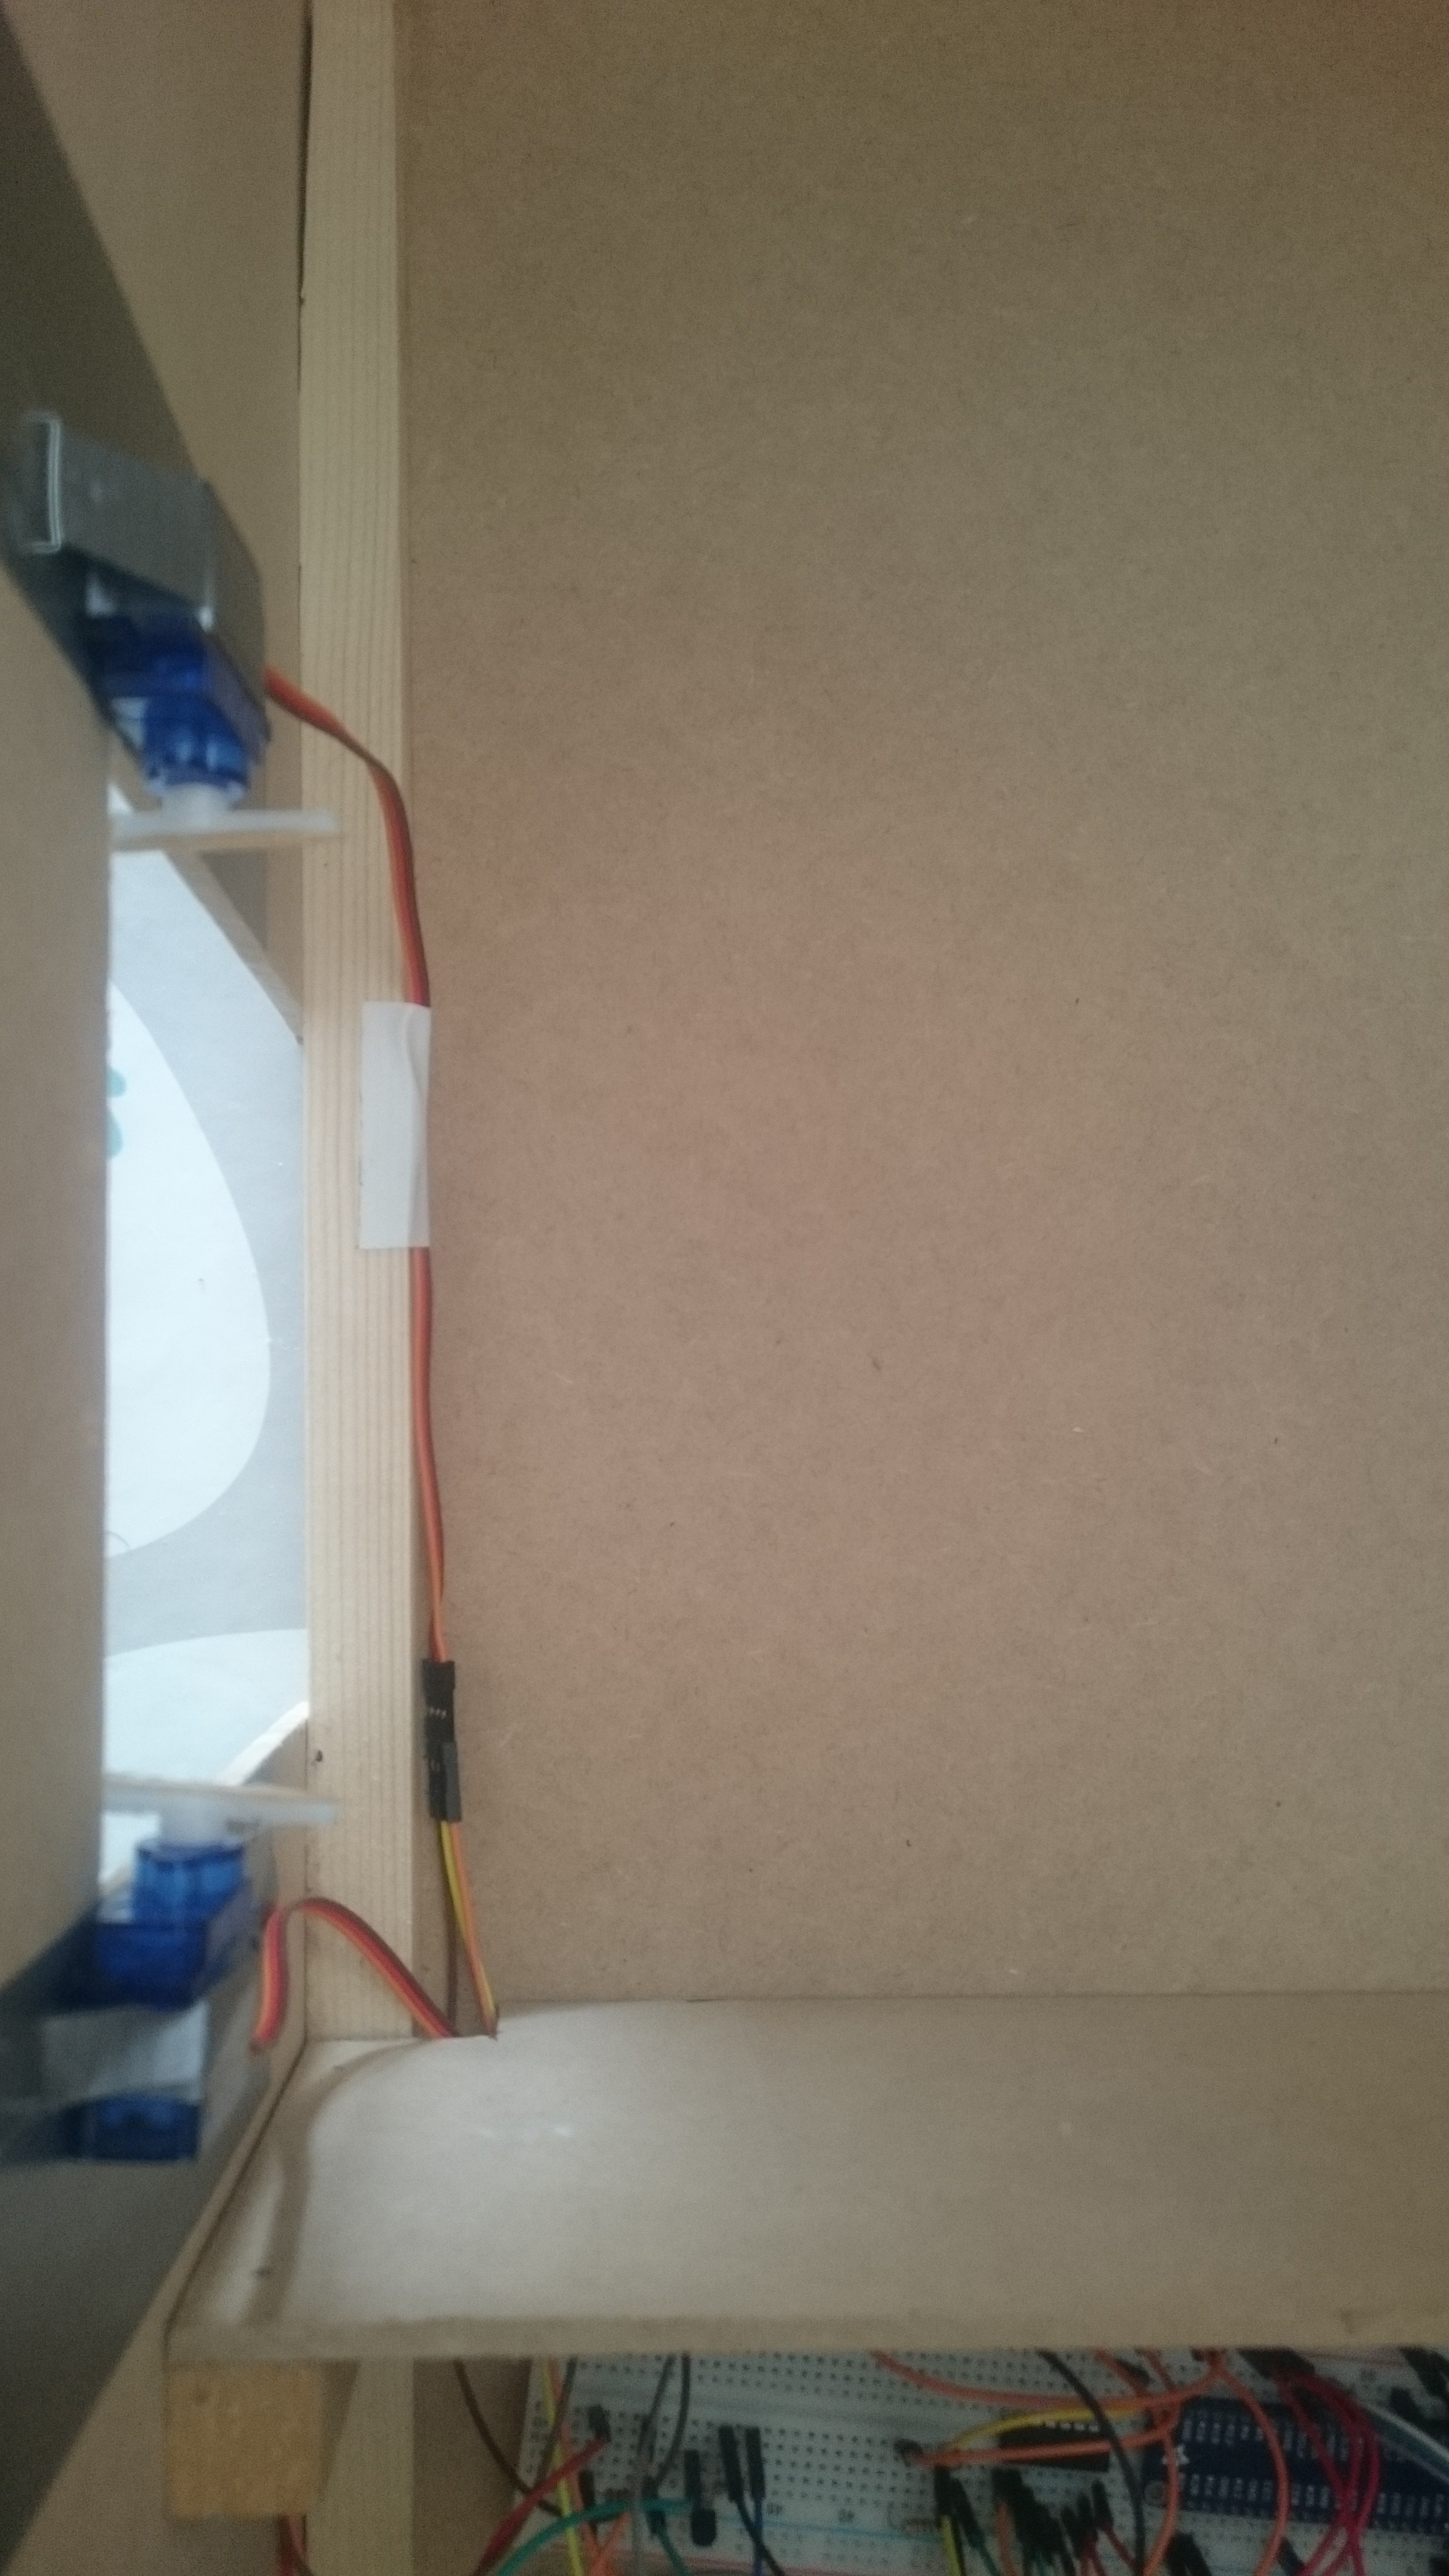
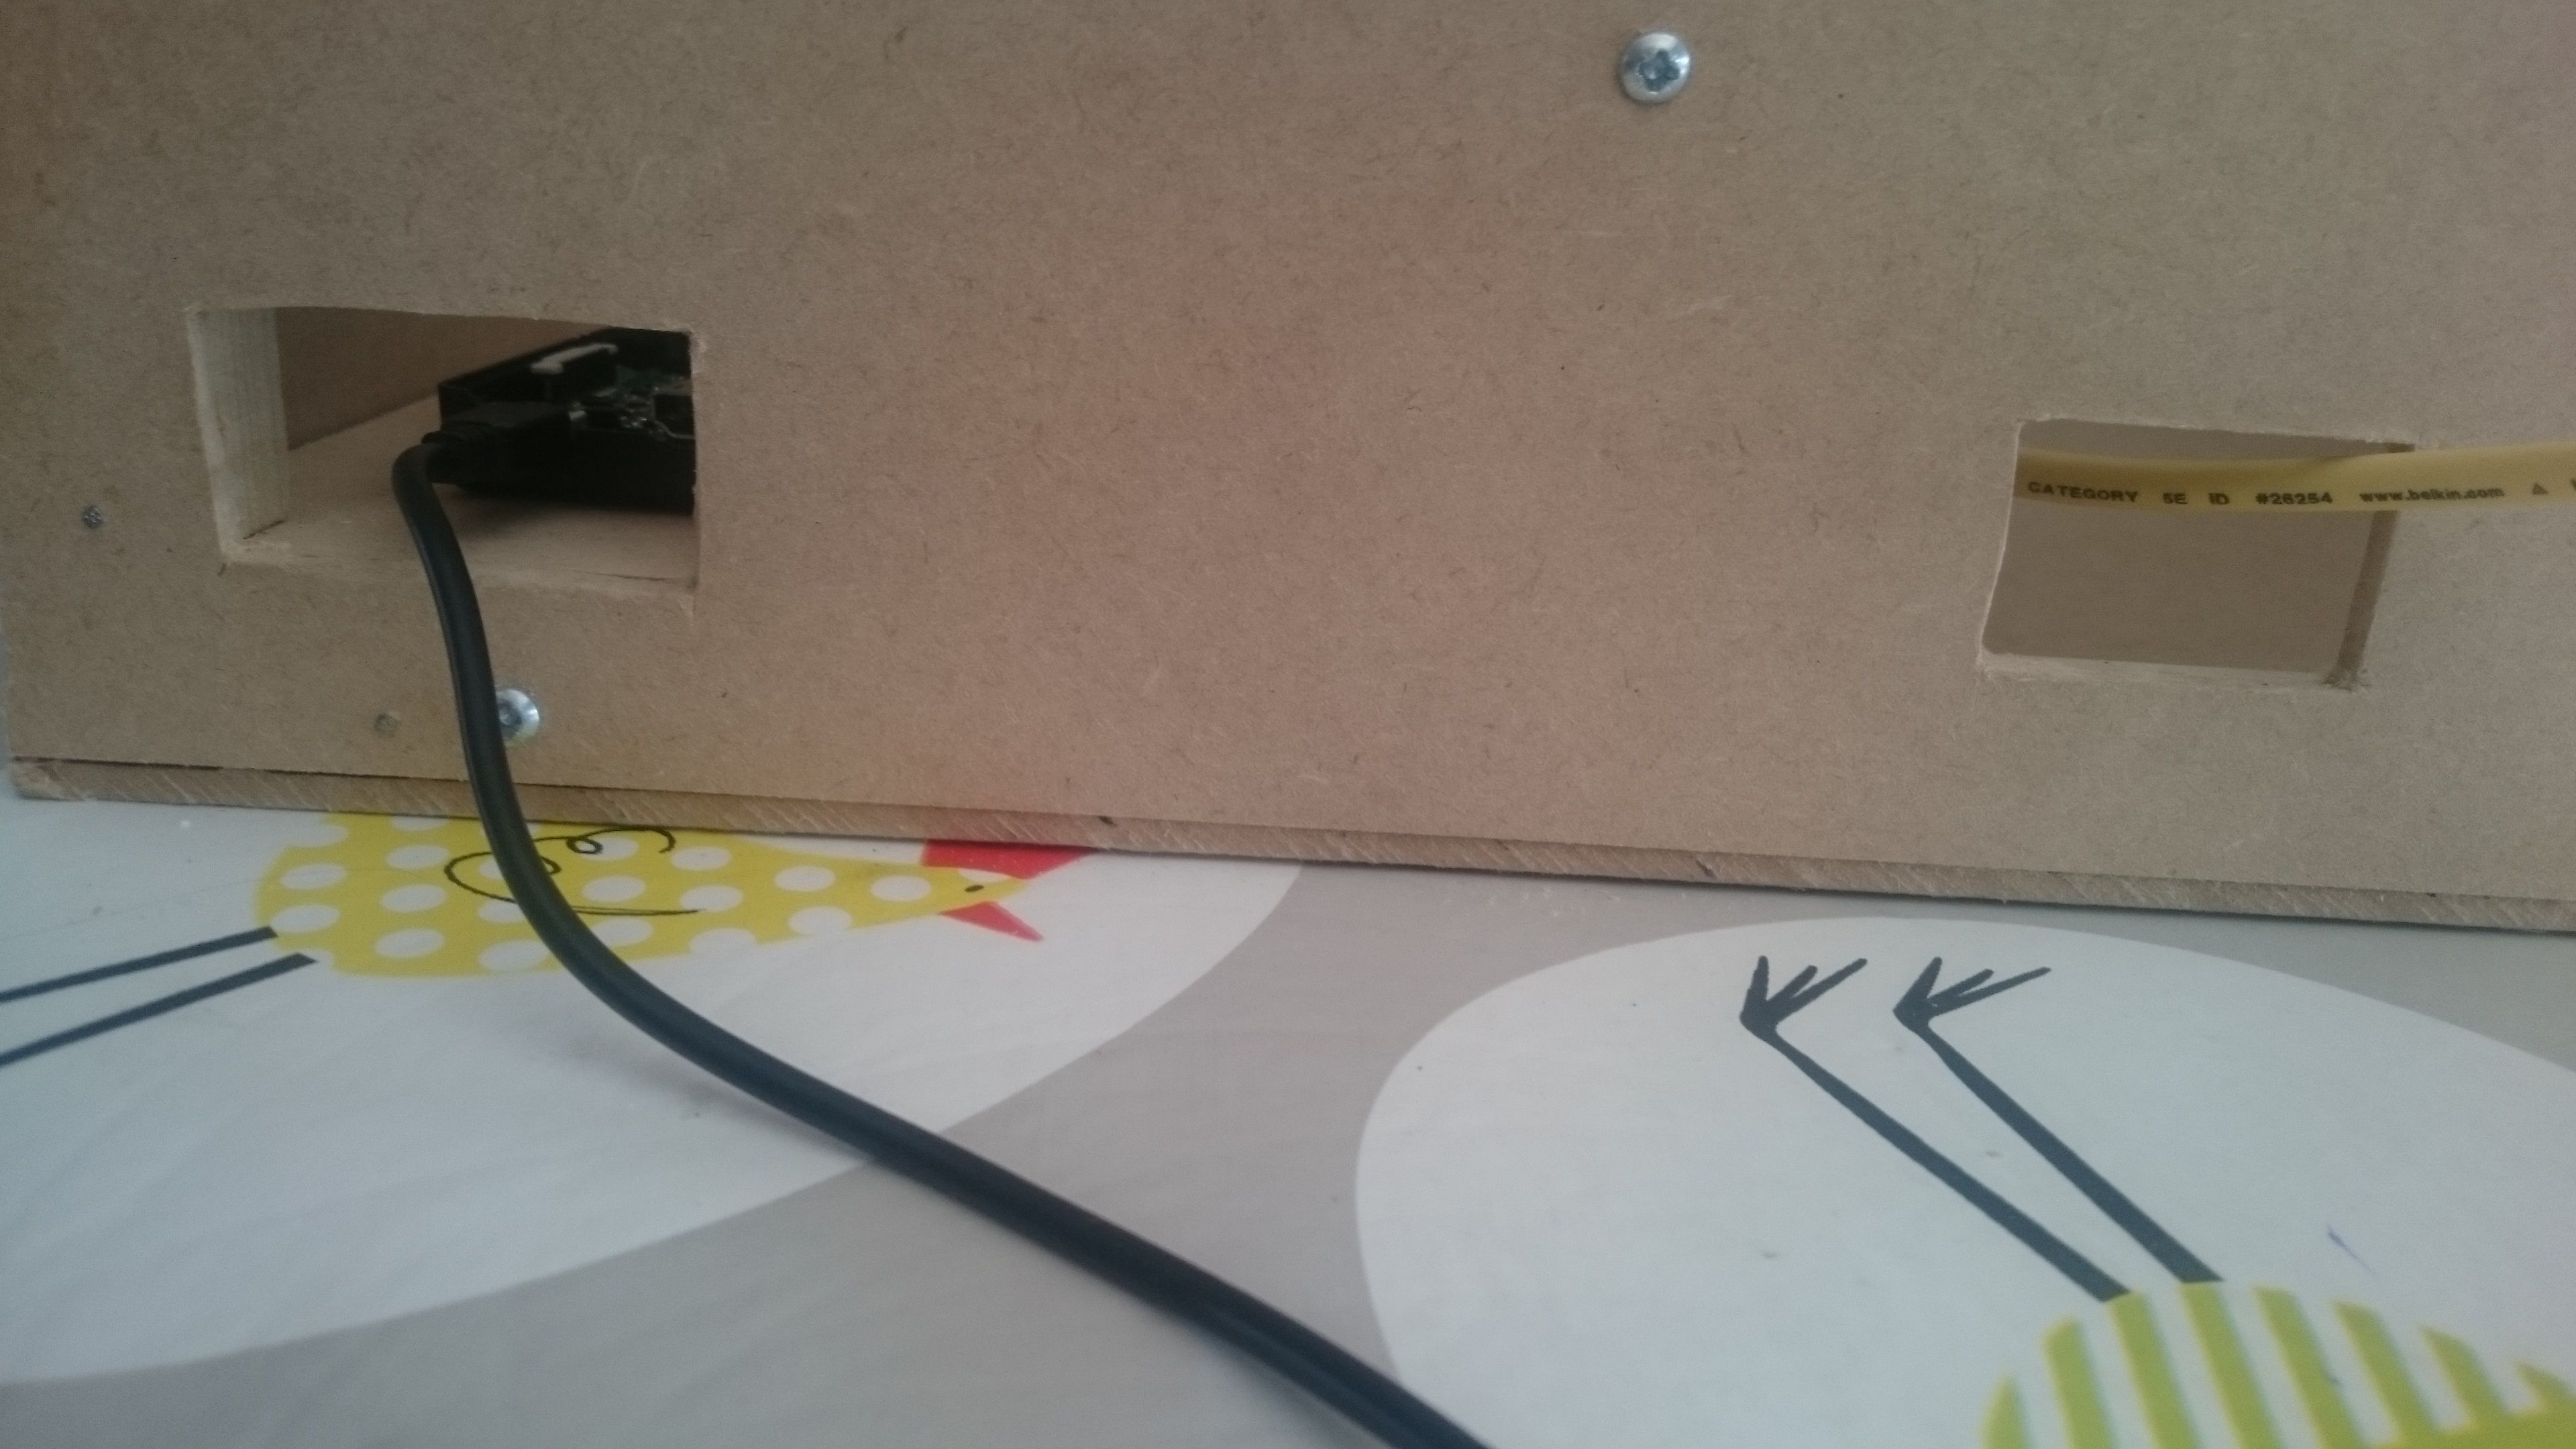
Now the last step is putting everything in the ckicken coop. I made a small chicken coop out of thin wood, because I have to be able to pick it up. For the Raspberry Pi I put 2 screws in the bottom of the chicken coop but not completely through the floor (picture 2). These screws are used to put The Raspberry Pi on, because the Raspberry Pi from SOS Solutions comes with a case that hase 2 holes on the bottom (picture 3). You can use these holes to put the screws in, so the Raspberry Pi can't move around in the chicken coop, but you can still take it out if you want to. For my breadboards, I just put some velcro on the bottom of the breadboards and on the chicken coop, so the breadboards won't be able to move around and do I can still take them out when I need them. To put the servos next to the door, so they can push the door open with the caps, I used duct tape and a staple to make sure that they won't fall off when opening the door (picture 5). I also made two holes in the back of the chicken coop (picture 6). One hole to be able to put the wire of the power adapter through and one hole to put the ethernet cable through, if you can't connect with your Pi via wifi.
If you now run my code, you just have to type in the ip address of your pi in google, followed by :5000 . This will bring you to the webserver. Here you can open and close the door whenever you want. You can also lock the door in position so the door won't open or close anymore untill you unlock the door. Also, if you open or close the door with the webserver, the door will automatically be locked in place, so the door won't immedtialy open or close again. You can still open or close the door through the webserver, even if the door is locked, so you don't have to unlock the door if you want to manage it manually. On the tab Events you can see all the events that happened with the door, when they happened and what the light intensity was when it happens. If you want it so this tab doesn't show the events from the past few weeks, you just have to delete the events you don't want to see anymore from the database table overzicht.
Finally the automated chicken coop door of my project is done. If you want to use this on your real chicken coop, you will probably need servos that are a lot stronger, because the sg90's that I used are not able to lift up a wooden door.