Automata in a Box: With Tinkercad
by thapaakash in Teachers > 3D Design
8162 Views, 49 Favorites, 0 Comments
Automata in a Box: With Tinkercad
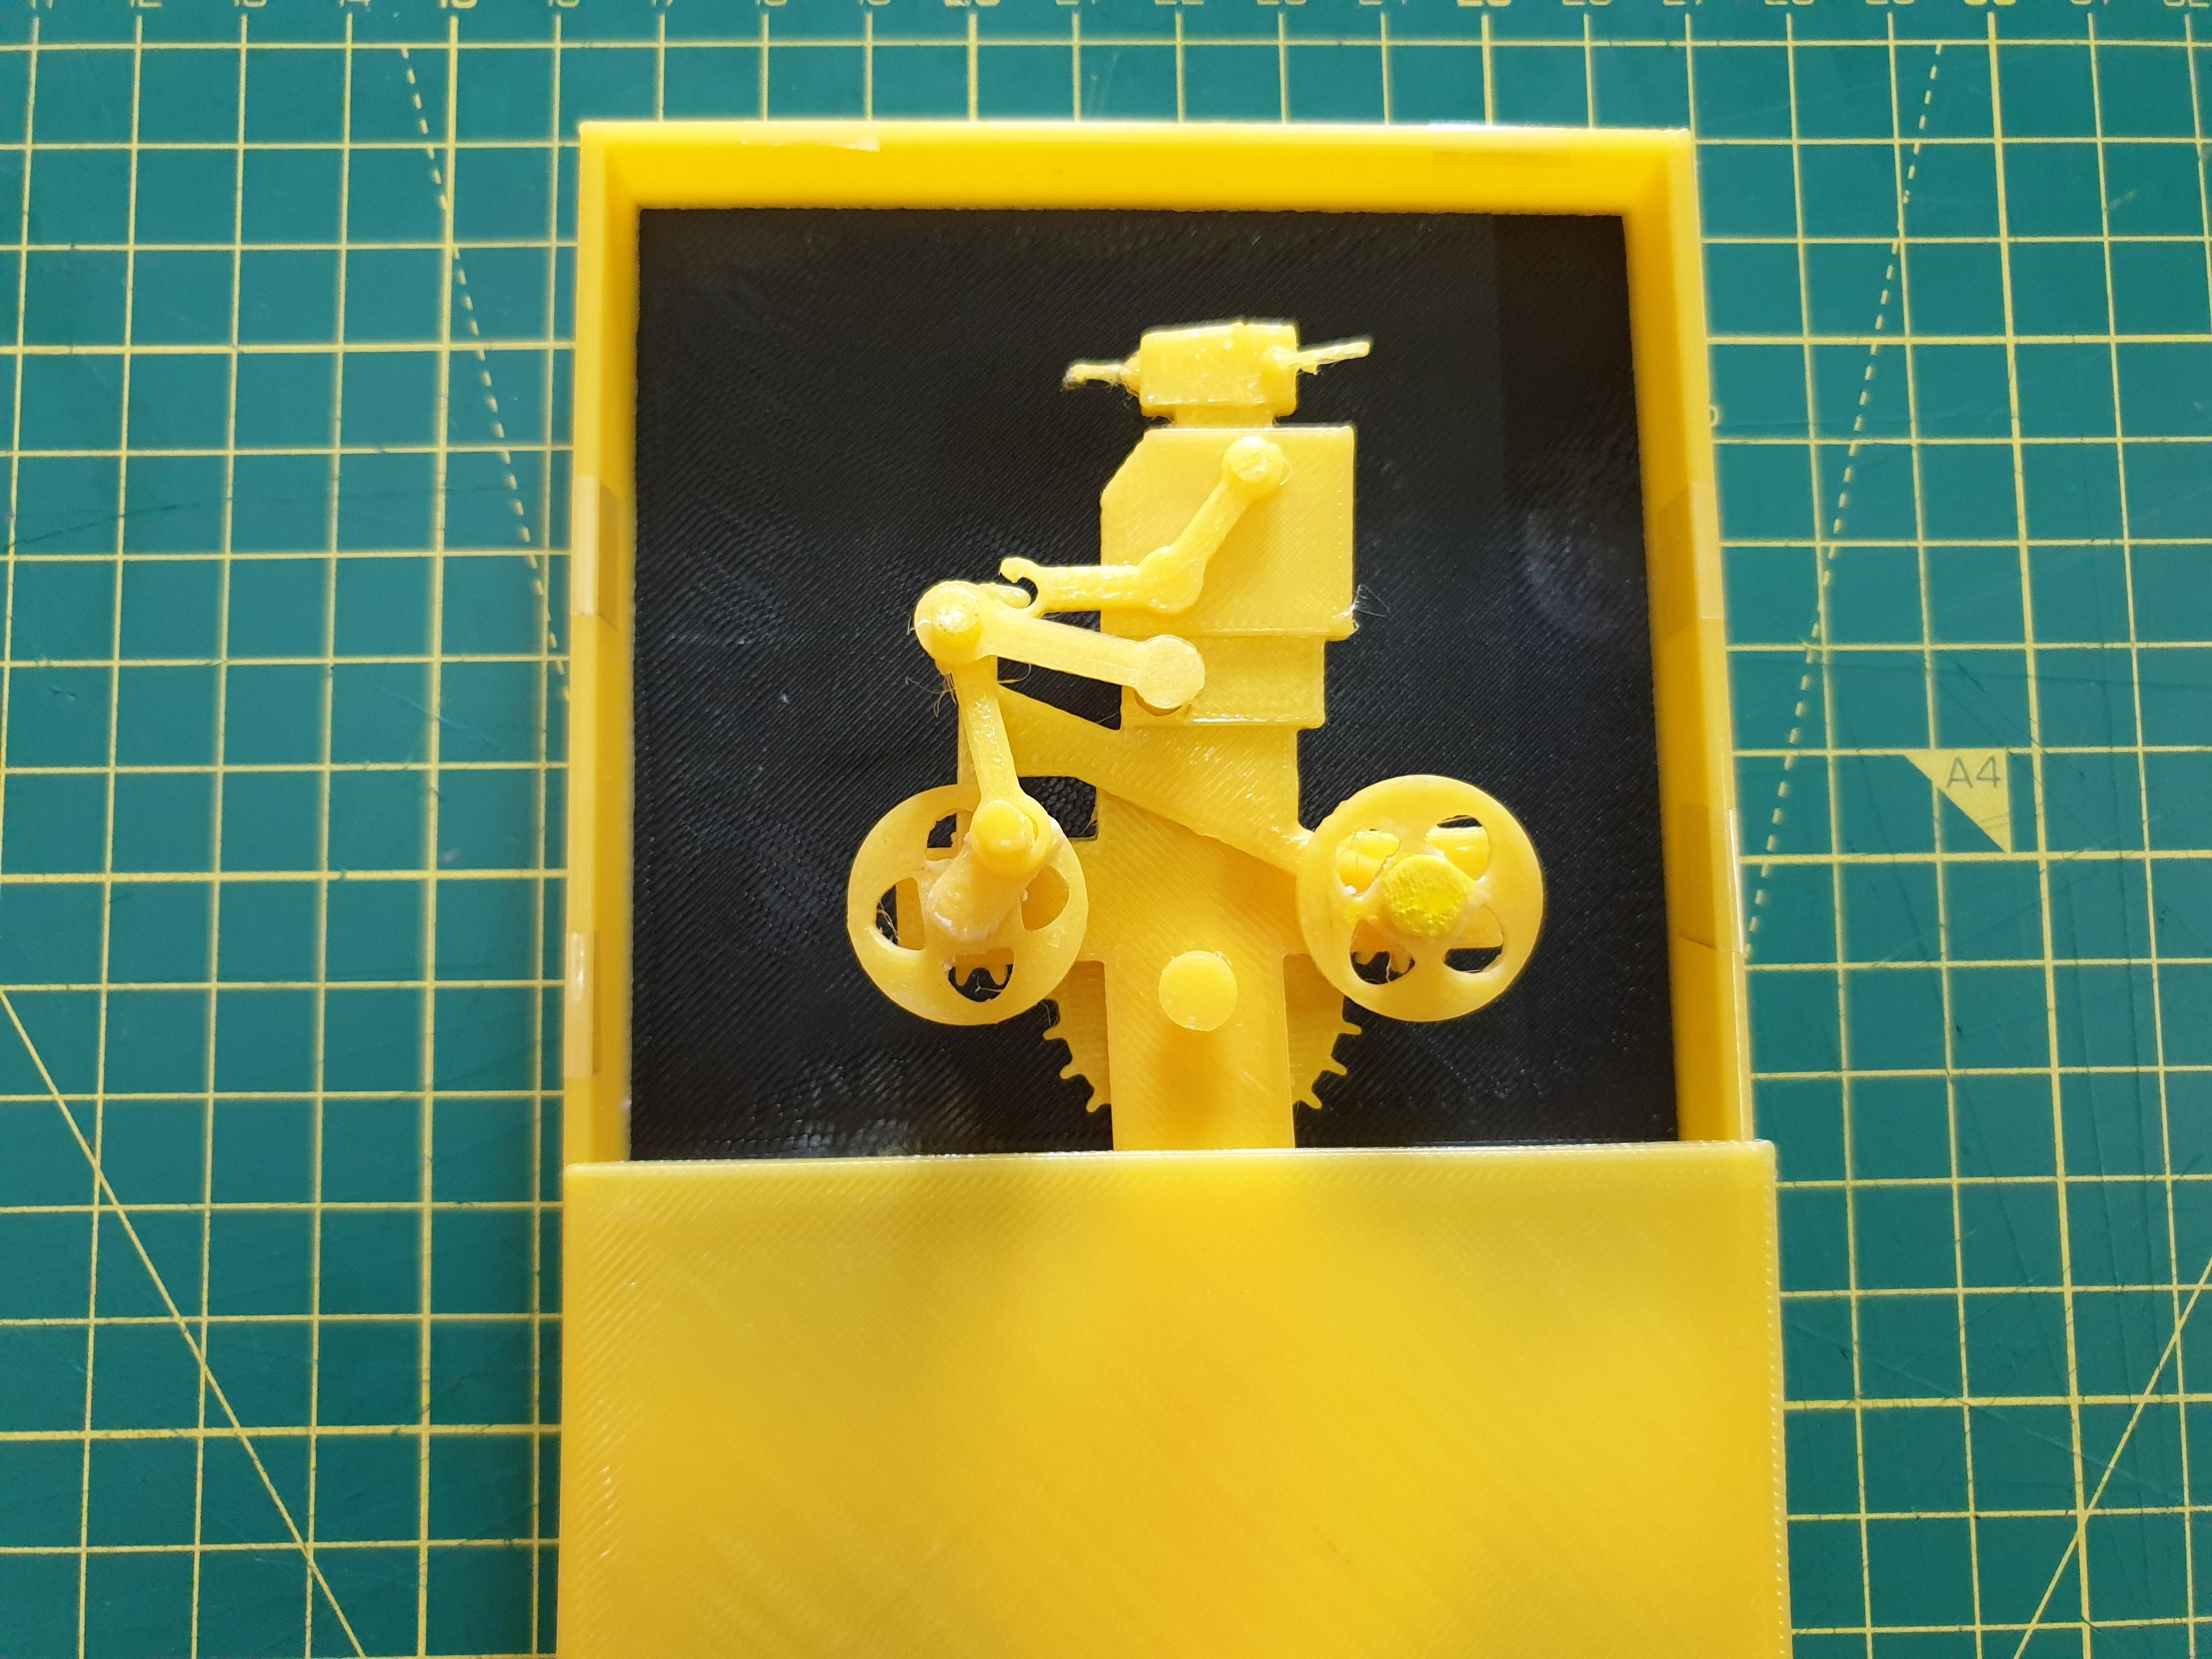
Cardboard Automata are a playful way to explore simple machine elements such as cams, levers, and linkages, while creating a mechanical sculpture. Working with simple materials, this activity is easy to get started, and
may become as complex as your mechanical sculpture ideas.
So far I have worked only with Automata having gears inside a cardboard box and the main figure or say sculpture outside the box, so for this project I decided to try making Automata with gear and figure/sculpture inside a 3d printed box.
Supplies
- Design program - I'm using Tinkercad
- Slicing Software - I'm using FlashPrint
- 3D Printer Filament - I'm using PLA
- 3D Printer
The STL
Here is the Stl file for quick download and printing.
After some experimentation I found this designs worked well, but you can tinker around with the measurements and create your own version. I'm providing the dimensions and measurements for the Gears, which I believe are main part of this project as measurements of all the other elements of the projects depend on them.
Downloads
The Instructable Bot
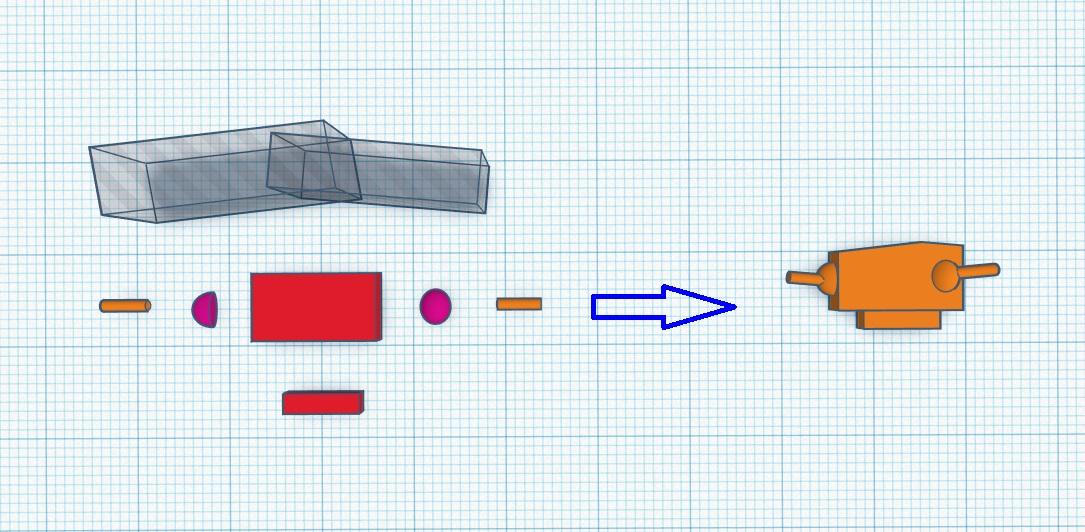
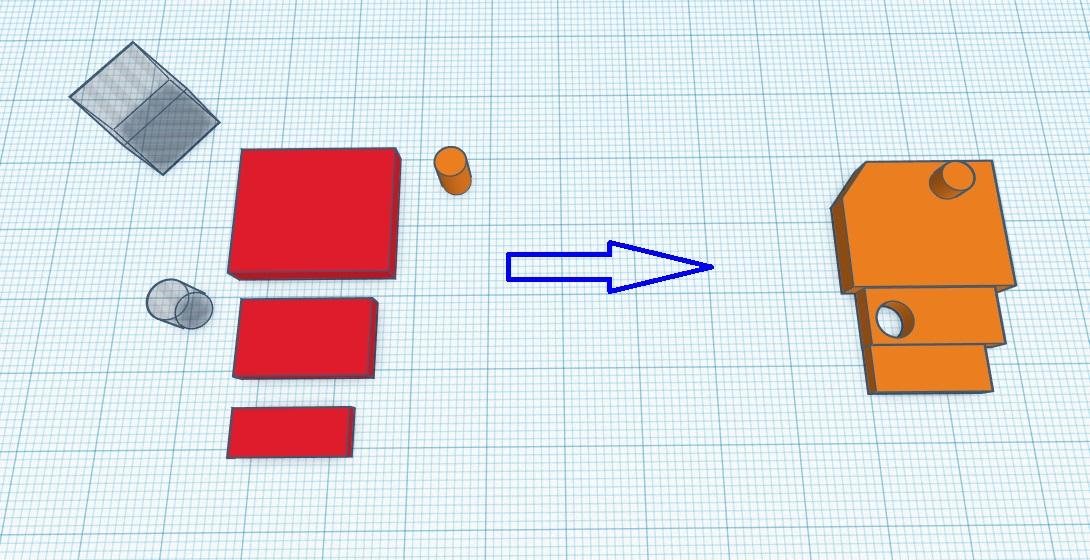
Head:
- Create a Box for the face. Then use 2 Hole Box and play around with the rotation angle. This to give the bot's face a sideways look/appearance.
- Next drag two Half Sphere to the Workplane for the bots ears.
- Two cylinders rotated at 90 degrees angle for bot's antennas.
- Create one more Box for the neck.
- Next Group(ctrl g = Group) them all together.
Body:
- Create 3 Boxes for the Bot's Upper body and Hip parts.
- Group a Solid Cylinder with Upper body's box. Here we will attach Bot's hands.
- Also, Group a Hole Cylinder with Bot's Hips. Here we will attach Bot's Legs.
- Next Group them all together.
Hand:
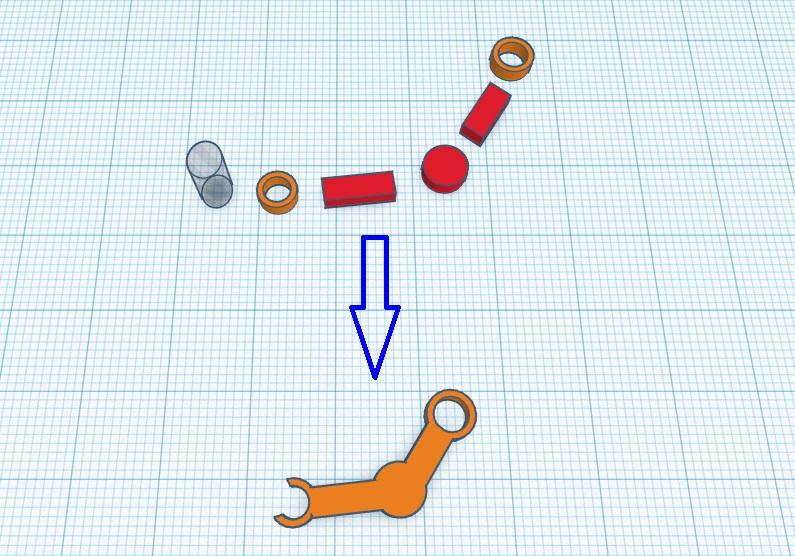
For Hands Group two, Boxes, two Tubes, one Hole Cylinder and A Solid Cylinder. Arrange them as in picture 3 above and group them all.
Legs:
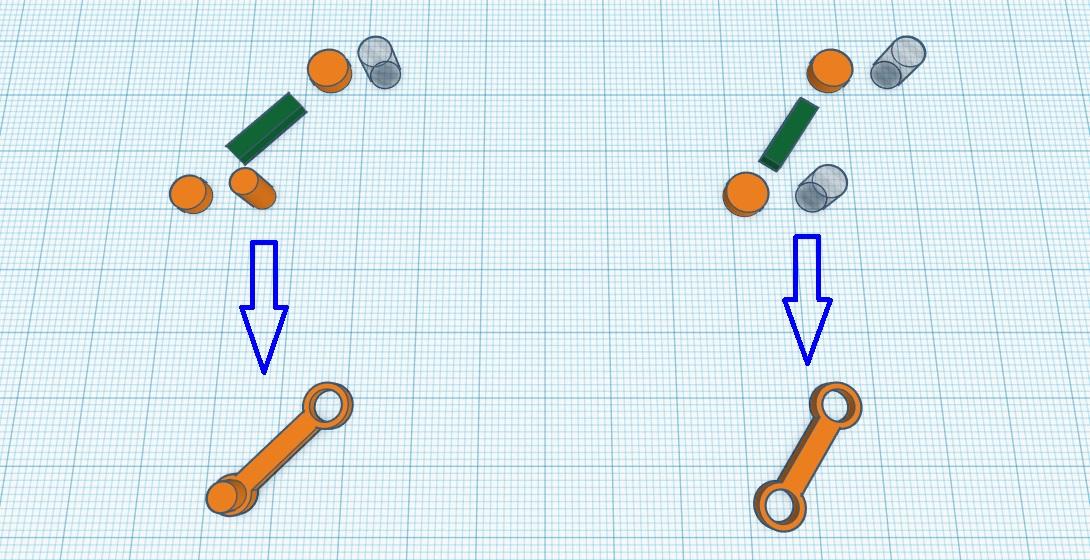
- For Thigh part of the Bot's legs Group A Box, 3 Sold Cylinders and a Hole Cylinder. Arrange them as picture 4, right figure.
- For Lower part of the leg, Group 2 Solid Cylinders, 2 Hole Cylinders and a Box. Arrange them as left figure in picture 4 above and group them all.
Bot's Tricycle
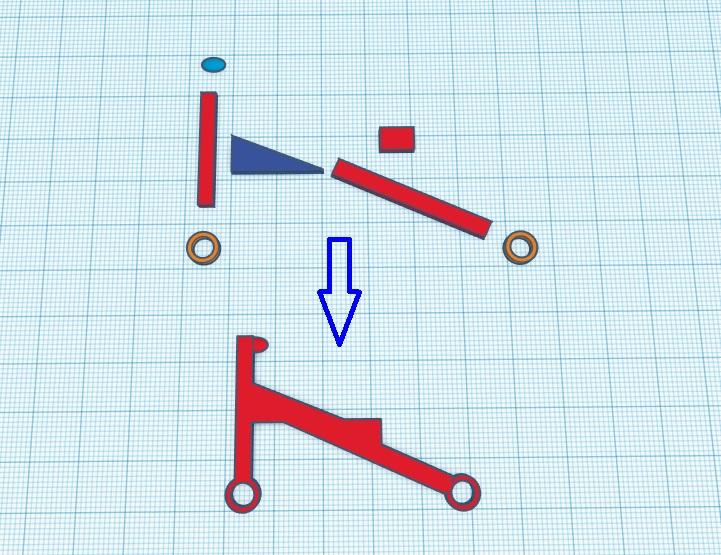
The Tricycle for the Bot made from 3 Boxes, 2 tubes and a Wedge. Play around with the size and angle so to fit them right and group them together.
Tricycle's Wheels
.jpg)
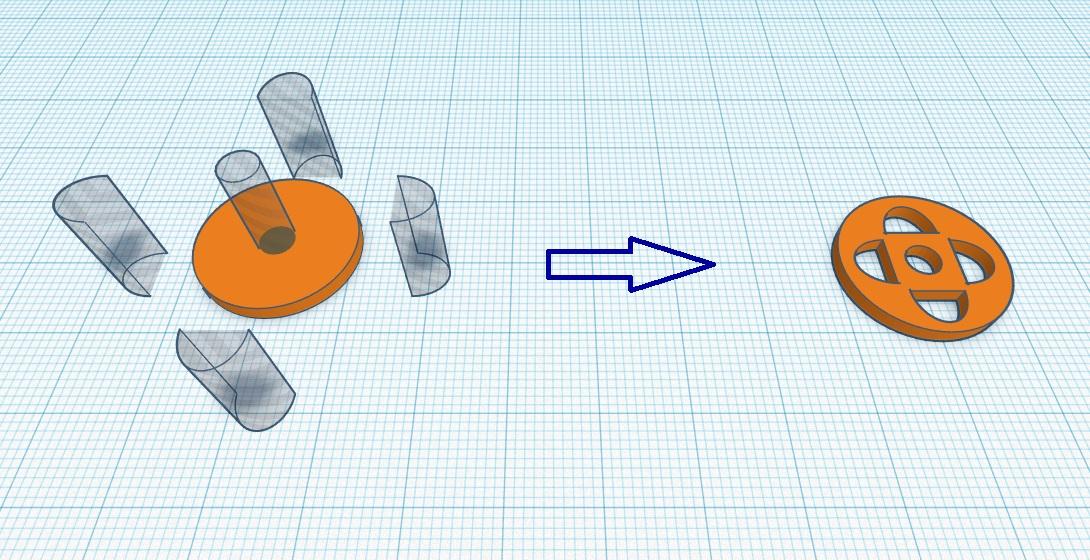
Create a sold Cylinder on the Workplane and change its height to 2mm.
For Wheel's Spokes, First drag 4 Rounded Roof the Workplane, Then rotate it to 90 degrees clockwise. Align them with the Cylinder. When you are happy with their position, Group them all.
Duplicate the Wheels so that we have two of them.
Gears
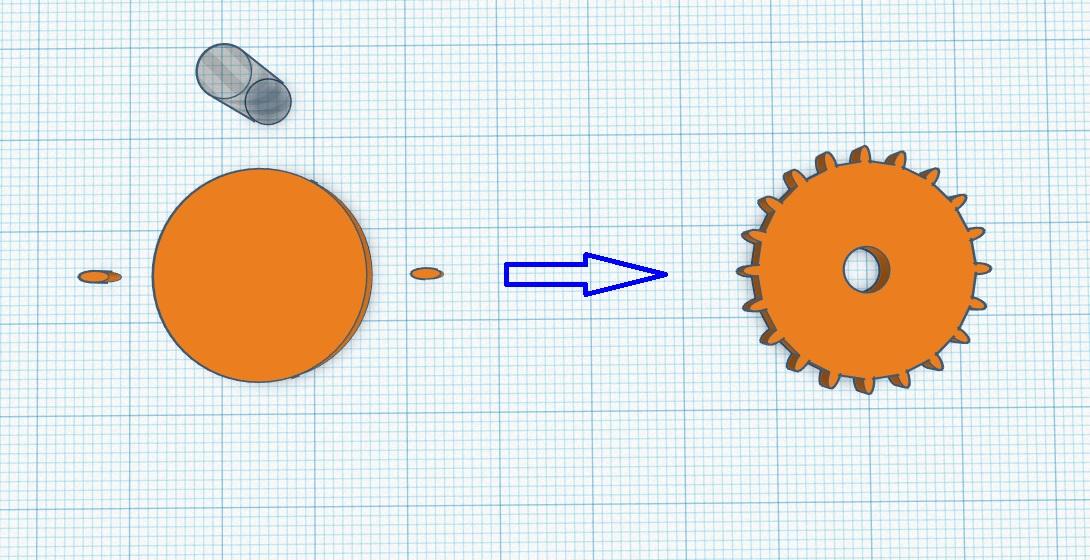
This is how I made the biggest Gear of this project:
- Create a Solid Cylinder. Select maximum sides for the Cylinder. Change its sides measurements to 44 mm and its height to 2mm.
- For the Gear teeth. Create a Solid Cylinder, select maximum sides and change its measurements to 3mm, 1mm, 2mm, for its Length, Breadth and Height respectively.
- Next, Duplicate this teeth and arrange both the teeth on the either sider of the bigger cylinder. Make sure that only 1mm of the teeth's length is inside the bigger cylinder.
- Group them. Now, Copy and rotate it to 9 degree angle Repeat this until we get the gear.
- Last, Create a hole at the center of the gear using Hole Cylinder.
Similarly, Create 6 more gears. My dimensions are as follow:
- 2 Small gears(Behind tricycle): Inner cylinder = 9.5mm x 9.5 mm x 2 mm. Number of teeth = 12, Rotation angle = 30 Degrees.
- 2 Medium gears(Master gear and the bottommost one), 22.5mm x 22.5mm x 2mm. Number of teeth = 20. Rotation angle = 18 degrees.
- 1 Medium gear(for operating small gears), 25mm x 25mm x 2mm. Number of teeth = 24. Rotation angle = 15 degrees.
The Pendulum Cross
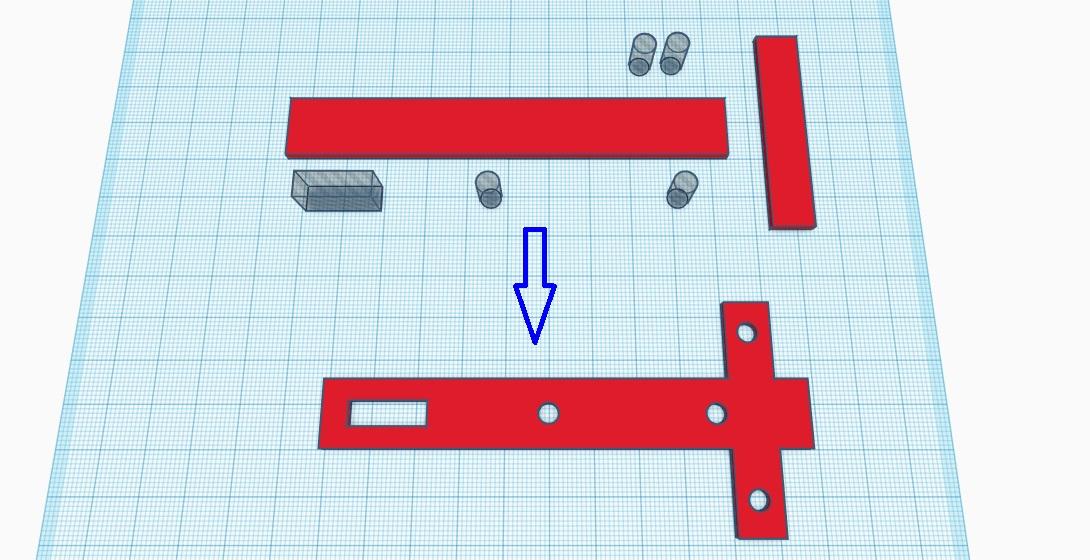
This cross will make the Bot move right to left when we rotate the gears.
For this Create Two Solid Box, 4 Hole Cylinder and a Hole Box. Align them properly and Group them.
The Axels/Rivets
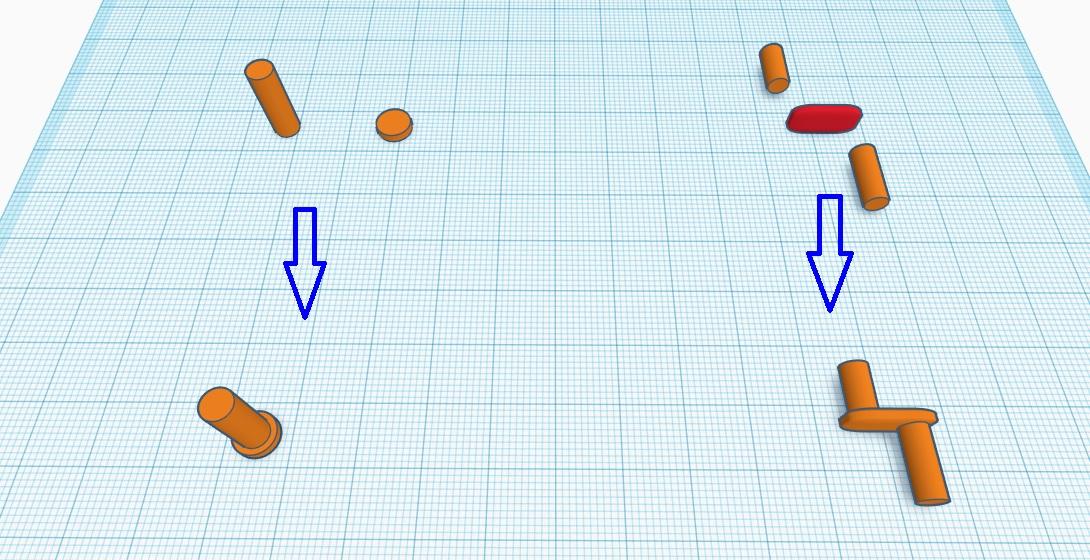.jpg)
For the axel(left figure), create two Solid Cylinder. The dimensions for stopper at the bottom are 6.5mm x 6.5mm x 2mm(LxBxH) and for the axel the dimensions are 4.5mm x 4.5mm x 12mm(LxBxH). Align them together and Group them.
For the stopper at the other end create Tube and adjust its dimensions so that the wheels and gears does not comes off from the Axels/Rivets.
Next, Create two Solid Cylinder and a Solid Box. Arrange and align then as in the right(above), and Group them. This will be the paddle of the Tricycle.
The Box
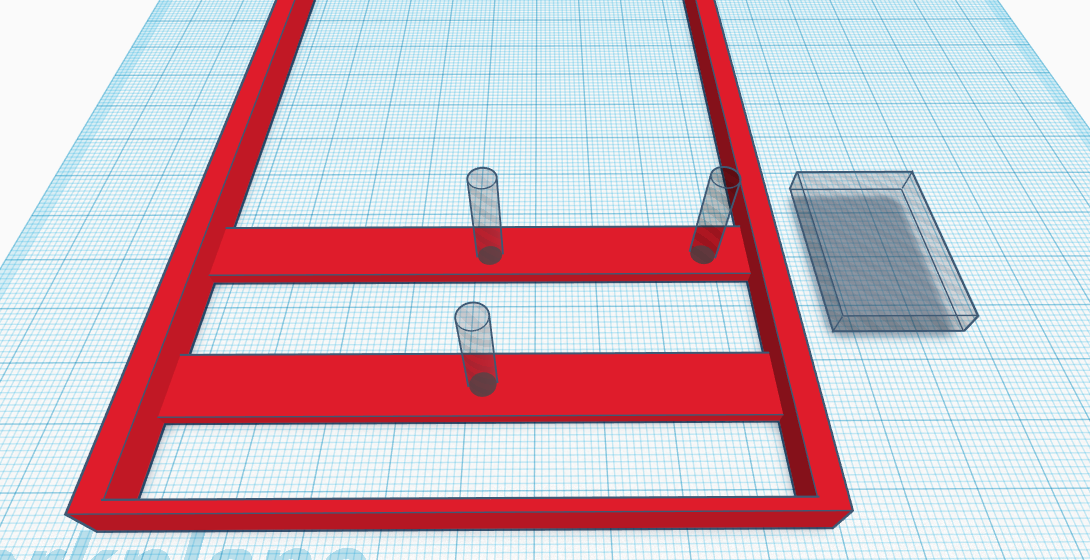.png)
My Box for the Automata is 177mm x 100mm x 12 mm(LxBxH).
The two Box strips at distance of 15mm and 50mm from the bottom of the Box will be used to place the gears and the pendulum.
Use 3 Hole Cylinders to place the gear axels and a Hole Box so that we can access the master gears to make the automata work.
Since, I have a printer with a single nozzle and I wanted to the background to be black in color, I design and printed the back plate separately. Also Initially, I decided to print the from of the box in orange so I design a separate plate for front side too. but later changed my mind and carried on with yellows color.
Assembly and Printing
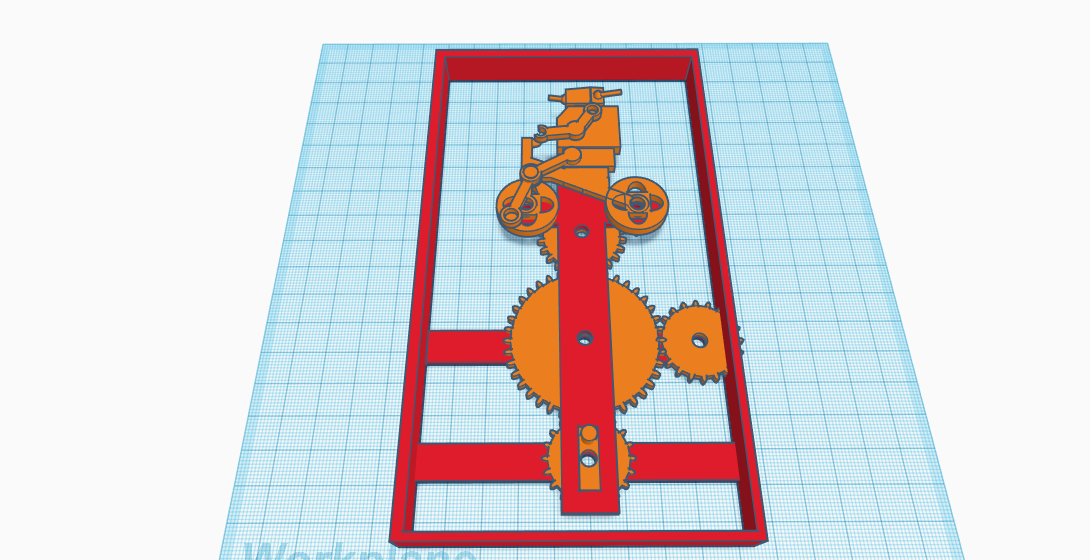.png)
The assembly of the automata is pretty simple. First lay down the box, then arrange the gears, refer the picture above.
Next, comes the pendulum/cross and on the top part of the cross attach the Bot and the wheels at the front side and 2 small gears at the back. Glue the paddle to the front wheel. Also Glue the small gears to the axel so that wheels can rotate with the gear. Lastly, connect the legs with the paddle and the hole at the hip.
I slice it in FlashPrint software with 20% infill, Extruder and Plate temperature being 200 and 55 degree Celsius respectively.
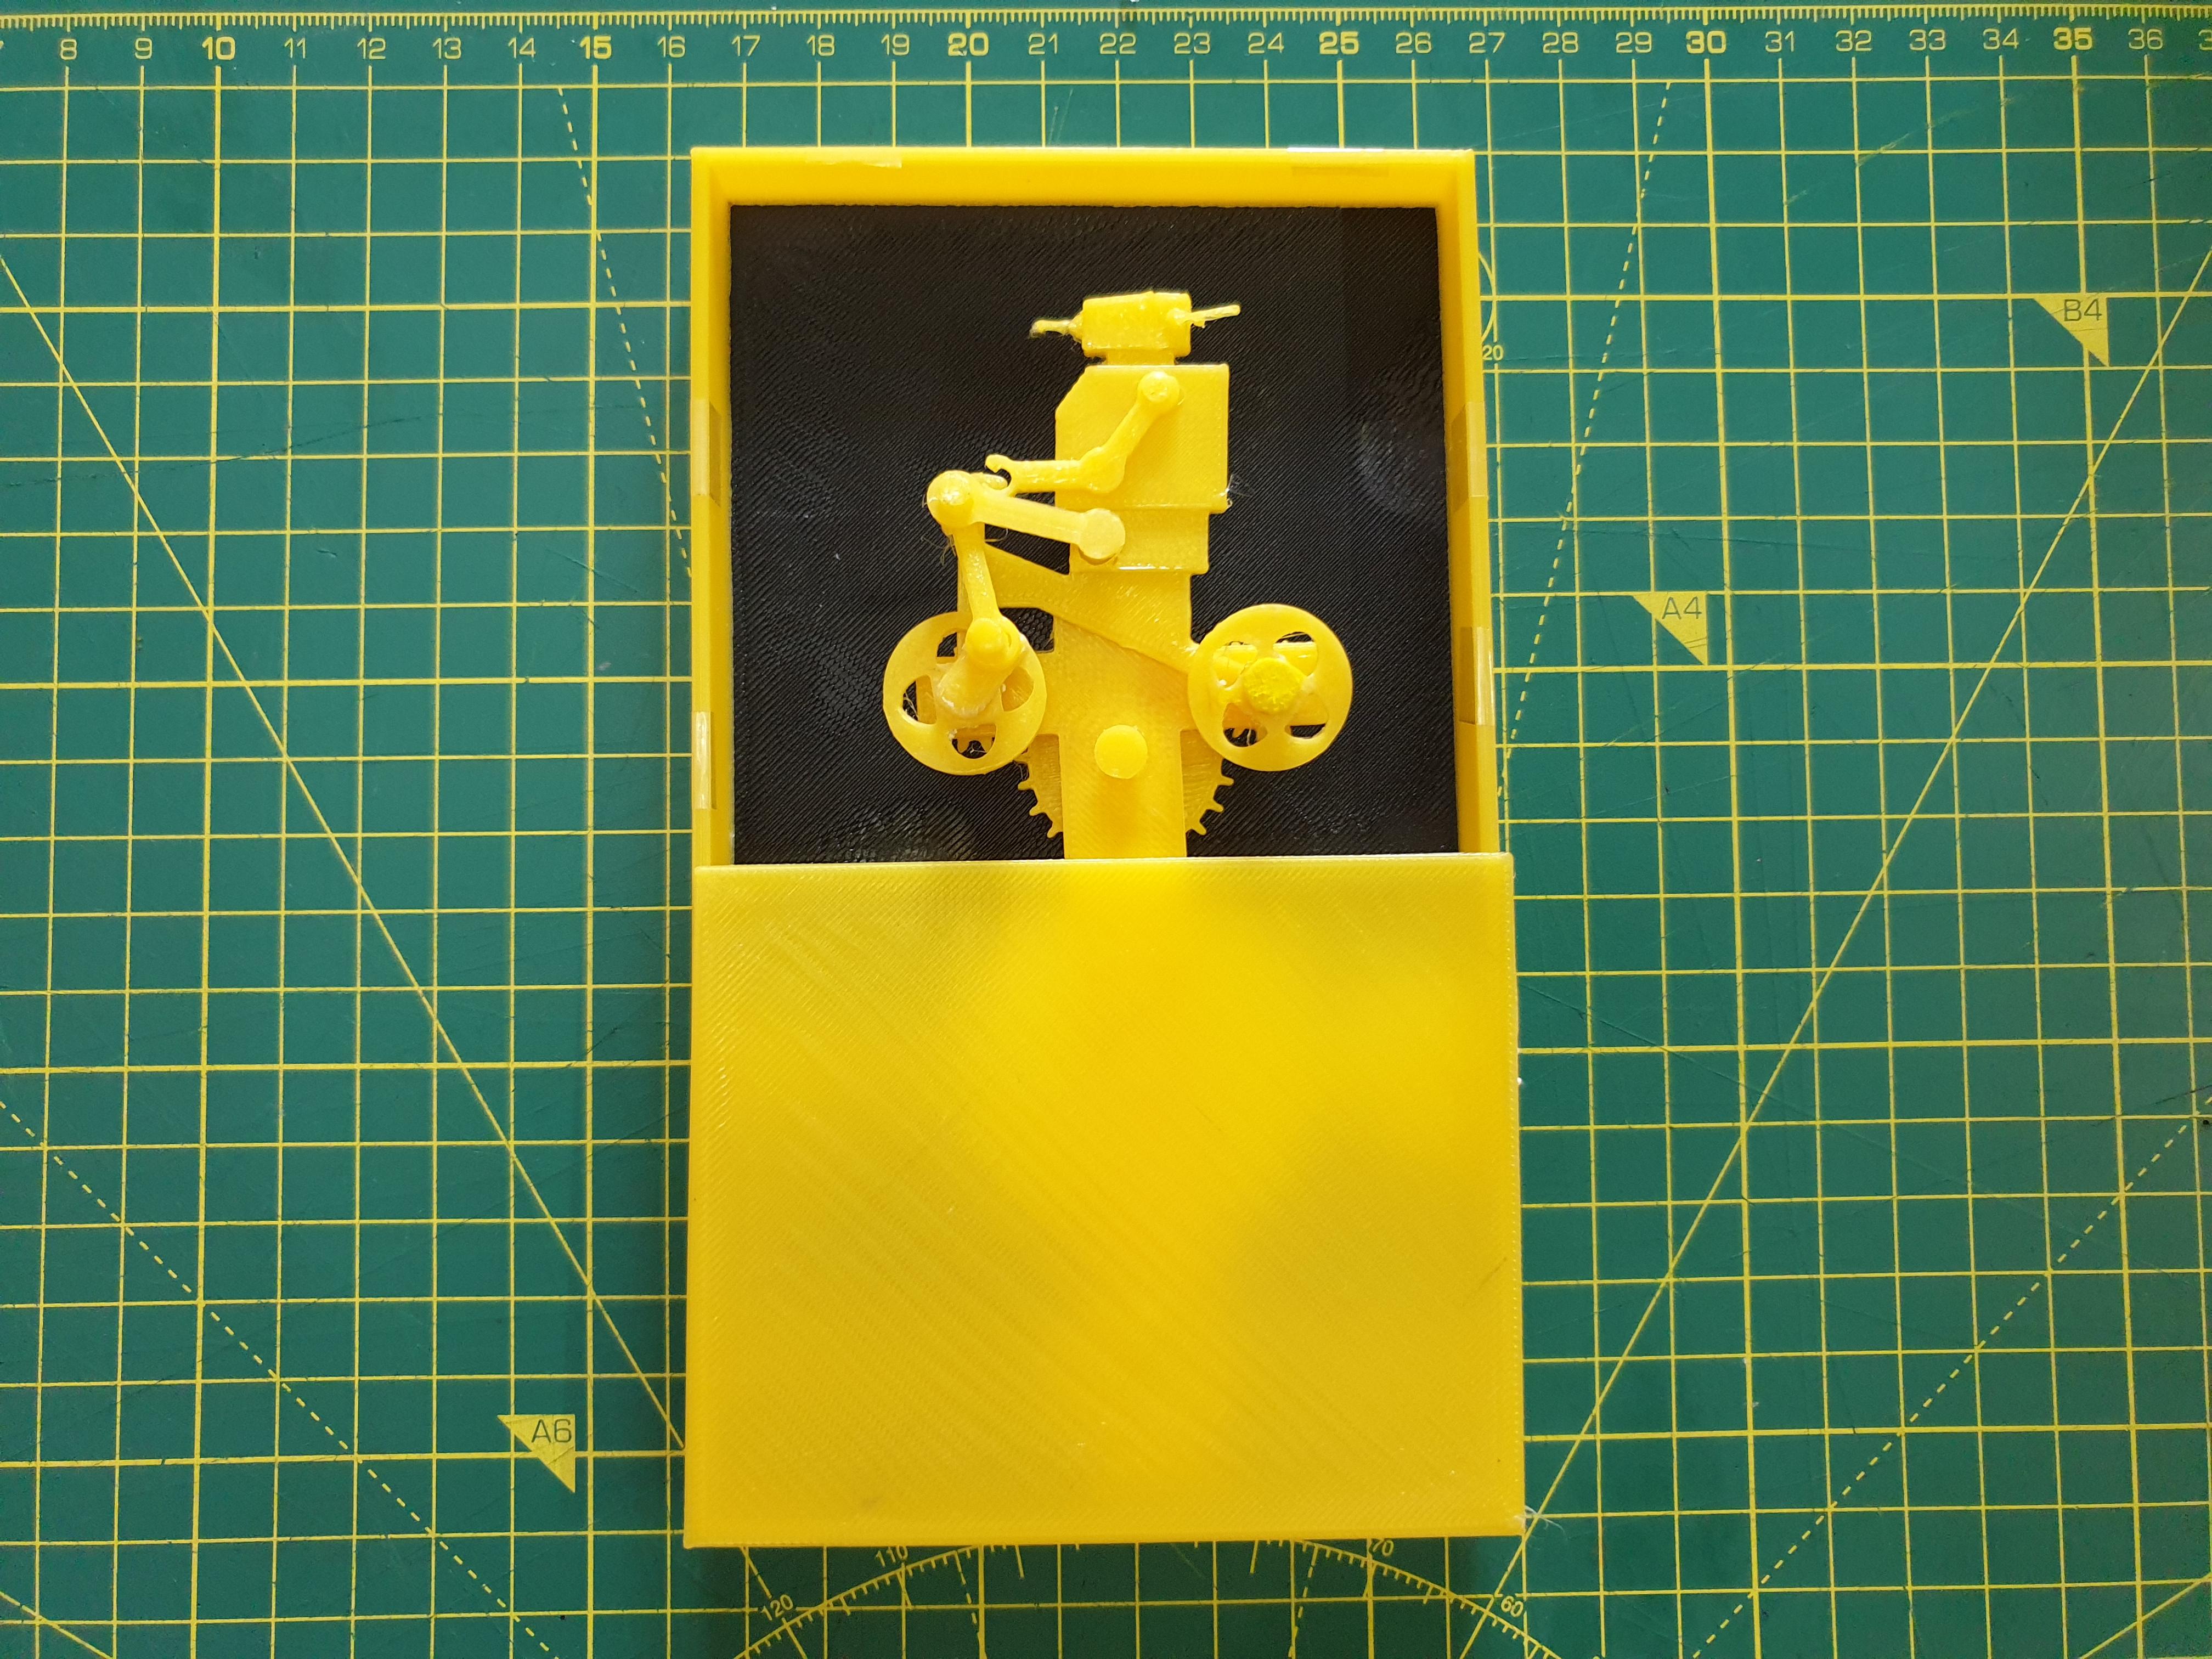
I wanted to print the Tricycle in blue, But at the time of printing I only have Yellow and Black :-(