Auto-Generated Custom Greenhouse
by Sam DeRose in Design > Software
4651 Views, 18 Favorites, 0 Comments
Auto-Generated Custom Greenhouse
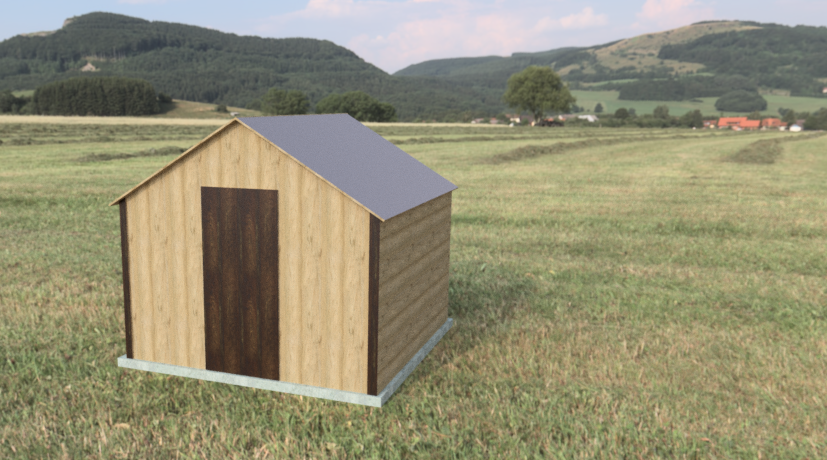
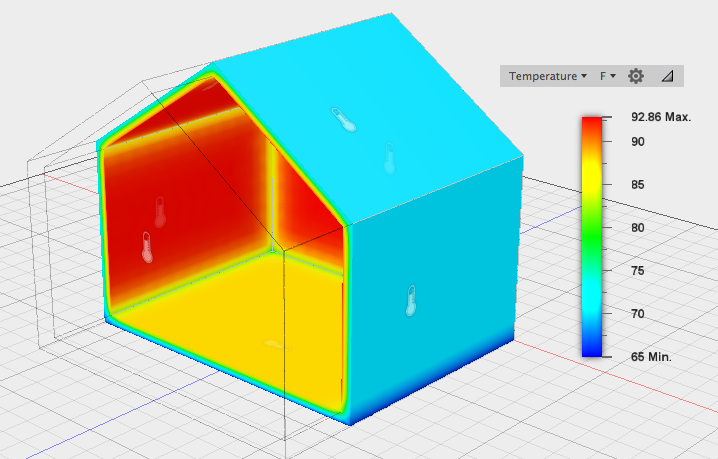
Hey all! This project culminates the work I did for Autodesk in my final semester of college. For the past few months I’ve been lucky enough to work part-time for Autodesk through their Campus Expert program. This post will walk you through how to use Fusion 360 and the Internet of Things to auto-generate your perfect greenhouse! What does that mean? Well, let’s tackle it one piece at a time.
Fusion 360
Fusion 360 is a computer-aided design program (a CAD tool), so you can build your models directly like you would in any other 3D CAD program, but you can also use Fusion 360’s API to write code that makes models for you! Here we will be using Python, which is one of the easier programming languages to work with.
Internet of Things
The Internet of Things (IoT) is a generalized term for the growing network of internet-connected devices. We are all used to computers and phones that can connect to the internet, but recently more and more “things” are being connected to the internet as well: watches, glasses, household appliances, cars, etc. Each new IoT device creates a new way to either gather data from the world (an input), or cause a physical action (an output). Many people are asking what will happen with all these interconnected input and output capabilities, and the answer is that we aren't really sure yet. Many people are currently working on answering this question, and this project is one of many other attempts to provide just a little bit more clarity to the issue.
Greenhouses
You may already know what greenhouses are, but for those who don’t… Greenhouses are used to grow plants when the ambient environment is not suitable to grow that plant. More explicitly, they are designed to maintain a certain environment inside that is more favorable than the one outside, and typically this means warmer. They work by absorbing more energy from the sun than they release through conduction, and thus they become hotter (we’ll talk more about this later). The final temperature inside the greenhouse depends on a bunch of stuff: the amount of sunlight, the outside temperature and humidity, the insulating properties of the greenhouse walls, and many other factors as well. Basically, this means if you’re in Sweden and you want to grow tomatoes you’ll need a different greenhouse design than if you’re in Jamaica.
So, to bring it all together, in this project we’ll be pulling data from the internet and using it to determine the ideal parameters for your greenhouse. These parameters will then be reflected in a 3D model of your greenhouse in Fusion 360.
But, you might wonder why Autodesk cares about IoT?
Autodesk sees a future where objects and products can be embedded with sensors that feed information back into their design process. New IoT technology and concepts combined with “the cloud” will enable manufacturers to capture, analyze, control, and manage data from remote products and assets. SeeControl is already working with Autodesk to achieve this. The purpose of this project is to provide a tangible example of how IoT could fundamentally change the way we design, make, and validate. This is a platform example. Greenhouses aren't really the end goal here, the important takeaway is the workflow.
Temperature Model
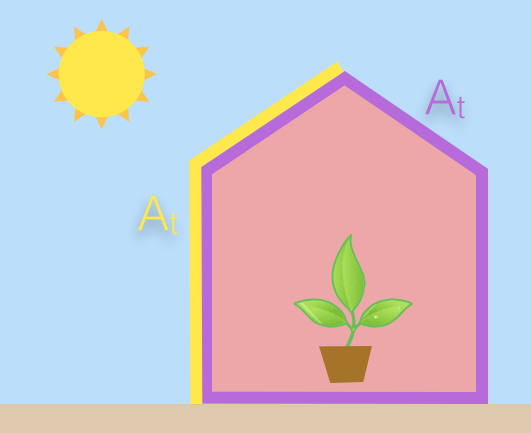
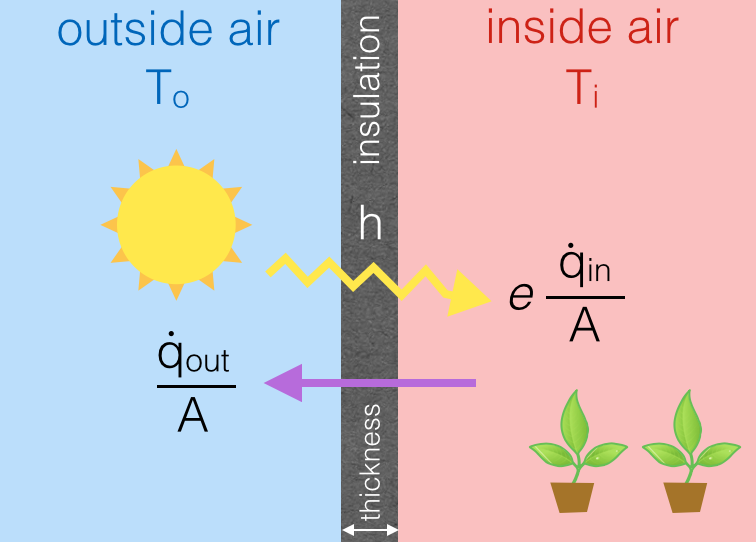
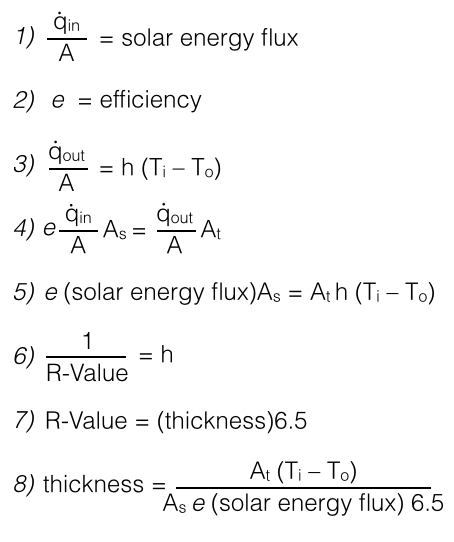
The first step in this project is to characterize the greenhouse system with some basic thermal principles. In reality, there are many different factors that contribute to the temperature inside a greenhouse, but for the sake of simplicity, our temperature model will consider the sun’s rays as the energy source, and the cooler ambient air surrounding the greenhouse as the energy sink. Radiation from the sun will pass through the walls of the greenhouse to heat the air inside with some efficiency factor, e (eq. 1). By Newton’s Law of Cooling (eq. 3), the hotter the inside air gets, the faster energy will flow out to the ambient air through the greenhouse walls. The efficiency factor in this case is a product of the wall thickness and the thermal resistance of the wall material, h (eq. 6). These energy flows are also defined per area. The input energy from the sun is only entering through the sides of the greenhouse facing the sun, but the output energy is conducting through all of the walls. Therefore we need to define two different areas: As, the area of the greenhouse facing the sun, and At, the total outside area of the greenhouse (first picture). Thus we have a model that looks like the second picture. This model isn't perfect, but it provides an approximation of the system, and a more complex model could easily be substituted into this workflow.
Since the input energy is constant, and the output energy rate increases as the inside temperature increases, we are looking at a first order differential equation. To find the steady state value of the system, we just need to find the temperature that yields an output energy rate equal to the input rate (eq. 4-5). However, we actually want an equation that solves for the wall thickness to achieve a desired temperature, so we’ll rearrange into eq. 8.
Set Up the Database
In this step we will create a simple online database that stores values for the average ambient temperature and the solar energy flux. In the next step we will write a python script that reads these values and uses them to build a 3D greenhouse model. This database acts as a stand-in for actual databases of temperature and solar flux information which could be used in the future.
We’ll be using a very simple XML page for this database, so you can use whichever web hosting service you want. If you already have a website, you could just add a page. I used 000webhost.com, which is free but slightly confusing.
Make an XML page with the content in the attached file.
Here we've used 70 as the ambient temperature and 100 as the solar energy flux. You can use these values or update them with your own.
Downloads
Python Script - Part 1


In this step we’ll write a python script that pulls values from the online database and determines the correct wall thickness based on these values. In the next step we’ll expand this script to build a 3D model of the greenhouse. (the script is attached in this step).
First, open Fusion 360 and click “Scripts and Add-Ins” in the toolbar. Make sure you are on scripts tab, then click the Create button. A new dialogue box will pop up. Select script, then python, and then give your script a name, description, and author. Click create to close the dialogue box. Select your new script and then click edit, this will prompt Spyder to open. Spyder is a python editing interface that’s built right into Fusion, so you’ll do all of the programming here.
At the top of the file, add these lines of code:
import adsk.core, adsk.fusion import urllib.request #from html.parser import HTMLParser import xml.etree.ElementTree as ET
The next step is to do some variable definitions. Here we’ll define the size of the greenhouse, and how hot we want the inside to be. In the future, the script could prompt the user what they want to grow in the greenhouse, and then it could pull in the correct temperature from another database. For now the temperature will be user-defined though. Here we have it set to 100 degrees F.
############### VARIABLE DEFINITIONS
### Prefered inside temperature [F]
insideTemp = 100
### Size of the greenhouse [ft]
wallHeight = 6
roofHeight = 9
width = 10
length = 10
### default insulation thickness, in cm
insulation = 10
### Solar flux efficiency
efficiency = 0.1
These next lines do the XML parsing. At the end of this block of code, the variables outsideTemp and flux will have the values you entered in the XML database.
############### PULL INPUTS FROM XML DATABASE
response = urllib.request.urlopen('YOUR XML URL')
pageContentsBytes = response.read()
pageContents = pageContentsBytes.decode("utf-8")
# convert byte object to string
tree = ET.fromstring(pageContents)
outsideTemp = int(tree.find('temp').text)
flux = int(tree.find('flux').text)
# Some helpful print statements for debugging
print('Outside Temp: ', outsideTemp, ' F')
print('Solar Heat Flux: ', flux, ' Btu/hr/ft^2')
Once we have the temperature and flux values, the next step is to plug them into equation 8 and solve for the wall thickness. To do that, we need to know a few different areas (As and At) so we’ll calculate those first. Also note that all length variables are eventually converted into cm, that’s because we’ll be using the Fusion API in the next step, and it uses cm as the default unit.
############### CALCULATE WALL THICKNESS
# calculate the areas, in ft^2
floorArea = (width*length)
sideArea = 2*(length*wallHeight)
frontBackArea = 2*(width*wallHeight) + ((roofHeight-wallHeight)*width) roofArea = 2*(((roofHeight-wallHeight)**2 + (width/2)**2)**0.5)*length
totalArea = floorArea + sideArea + frontBackArea + roofArea
sunArea = roofArea #### Area in the sun is approximated to be the roof area!
# Some helpful print statements for debugging
print('Floor Area: ', floorArea, ' ft^2')
print('Total Area: ', totalArea, ' ft^2')
print('Sun Area: ', sunArea, ' ft^2')
# convert ft to cm
wallHeight = wallHeight * 30.48
roofHeight = roofHeight * 30.48
width = width * 30.48
length = length * 30.48
# flux is measured in Btu/hr/ft^2
insulation = (totalArea * (insideTemp - outsideTemp)) / (sunArea * efficiency * flux * 6.5)
print('Insulation Thickness: ', insulation, ' inches')
# convert inches to cm
insulation = insulation * 2.54
By this point, all of the greenhouse dimensions should be defined, and the next step is to actually generate the greenhouse model.
Downloads
Python Script - Part 2


In this step we will write python code that builds a 3D model of the greenhouse in Fusion 360. We’ll do this by using Fusion 360’s API, which allows us to write lines of code that correspond to the operations we are familiar with in direct modeling.
When using Fusion to build a simple shape, the first step is usually to draw out a 2D sketch of a profile we want to extrude, and then extrude it. For the greenhouse, we’ll also shell the body to create a uniform wall thickness on all sides. The following block of code will do these operations with lines of code.
## These lines setup the Fusion API
app = adsk.core.Application.get()
ui = app.userInterface
############### SKETCH
# Create a new sketch on the xy plane.
sketches = rootComp.sketches
xyPlane = rootComp.xYConstructionPlane
sketch = sketches.add(xyPlane)
# Draw five connected lines.
lines = sketch.sketchCurves.sketchLines
line1 = lines.addByTwoPoints(adsk.core.Point3D.create(0, 0, 0), adsk.core.Point3D.create(width, 0, 0))
line2 = lines.addByTwoPoints(line1.endSketchPoint, adsk.core.Point3D.create(width, wallHeight, 0))
line3 = lines.addByTwoPoints(line2.endSketchPoint, adsk.core.Point3D.create(width/2, roofHeight, 0))
line4 = lines.addByTwoPoints(line3.endSketchPoint, adsk.core.Point3D.create(0, wallHeight, 0))
line5 = lines.addByTwoPoints(line4.endSketchPoint, adsk.core.Point3D.create(0, 0, 0))
############### EXTRUDE
# Get the profile defined by the sketch
prof = sketch.profiles.item(0)
# Create an extrusion input
extrudes = rootComp.features.extrudeFeatures
extInput = extrudes.createInput(prof, adsk.fusion.FeatureOperations.NewBodyFeatureOperation)
# extInput defines the parameters for the extrude
# Define that the extent is a distance extent of LENGTH
distance = adsk.core.ValueInput.createByReal(length)
# Set the distance extent to be one-sided
extInput.setDistanceExtent(False, distance)
# Set the extrude to be a solid one
extInput.isSolid = True
# Create the extrusion
ext = extrudes.add(extInput)
# ext is the extruded feature
############### SHELL
entities = adsk.core.ObjectCollection.create()
entities.add(ext.bodies.item(0))
# grab the body to do a body shell
features = rootComp.features
shellFeats = features.shellFeatures
isTangentChain = False
shellFeatureInput = shellFeats.createInput(entities, isTangentChain)
thickness = adsk.core.ValueInput.createByReal(insulation)
shellFeatureInput.insideThickness = thickness shellFeats.add(shellFeatureInput)
Save the file, navigate back to Fusion, find the script in the Scripts and Add-Ins pop up window, and click Run. You should see your greenhouse appear! Use the Section Analysis tool under the Inspect drop down to slice your model in half so that you can check the dimension of the wall thickness.
Thermal Simulation
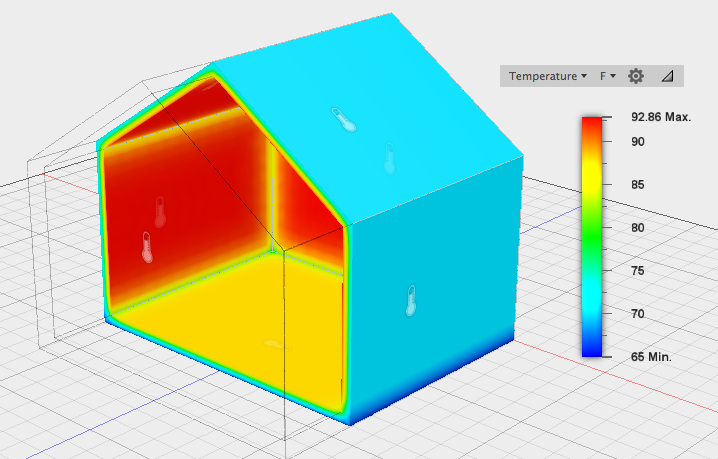
Hey! You’re done! You can go out and build your custom greenhouse now. But, I always like to do a little work to try and validate things before I fully trust them. An easy way to do that is with a simple thermal simulation in Fusion 360. These results will show us if we’re in the right ballpark.
In Fusion 360, with your greenhouse model open, switch over to the Simulation workspace. In the toolbar, click Study, and select Thermal. In the Load drop down menu, choose Applied temperature, and select all outside faces of the greenhouse. Using the selection filter may help with this. Set these faces to be fixed at your ambient outside temperature. Click Ok. Back in the Load drop down menu, choose Surface Heat. Select the two internal top faces of the greenhouse (the area in the sun), choose Constant for the input type, and enter the solar energy flux value for your area, remember to account for the efficiency factor as well! In a pinch, just just 2.000E-05 W / mm^2, this is about a 10% efficiency with normal sunlight in the US. Click Ok, and then click Solve in the toolbar. The simulation should run and you should be able to see what the maximum temperature inside the greenhouse is. Hopefully it’s close ish to your preferred inside temperature.
Testing & Validation
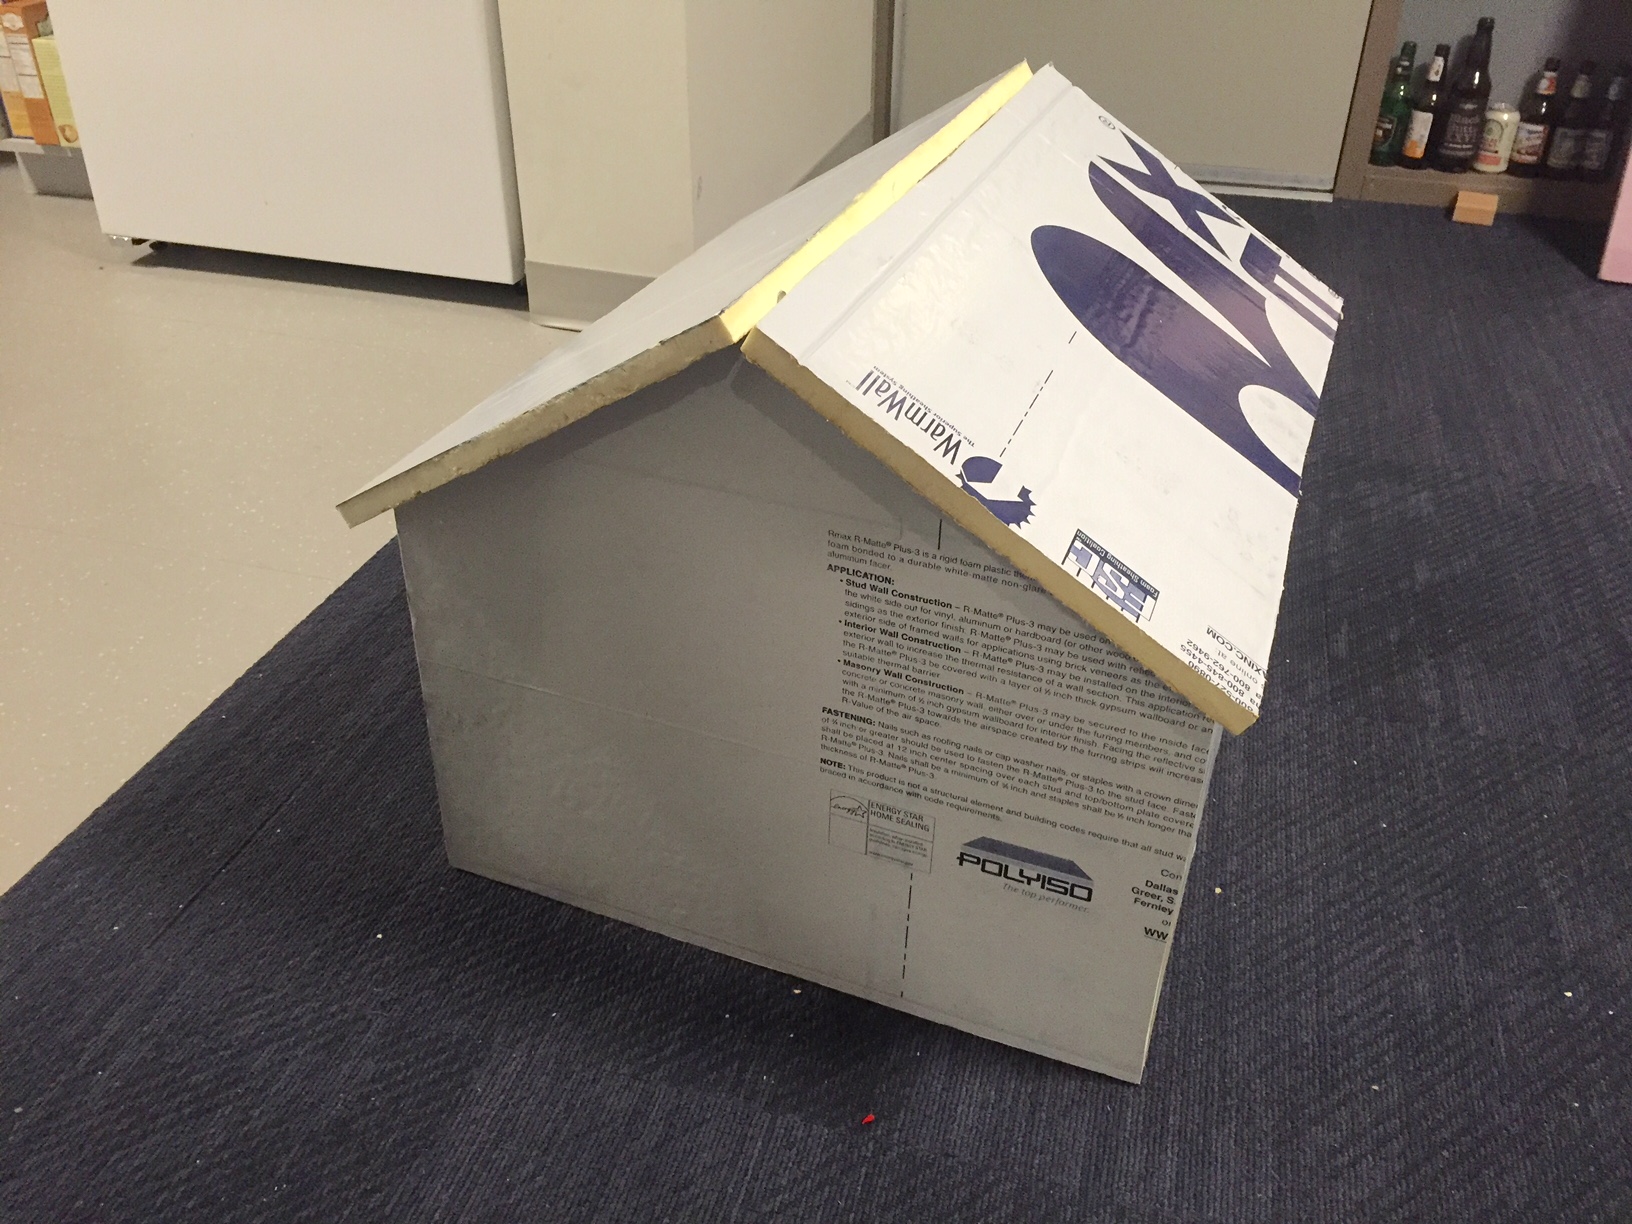
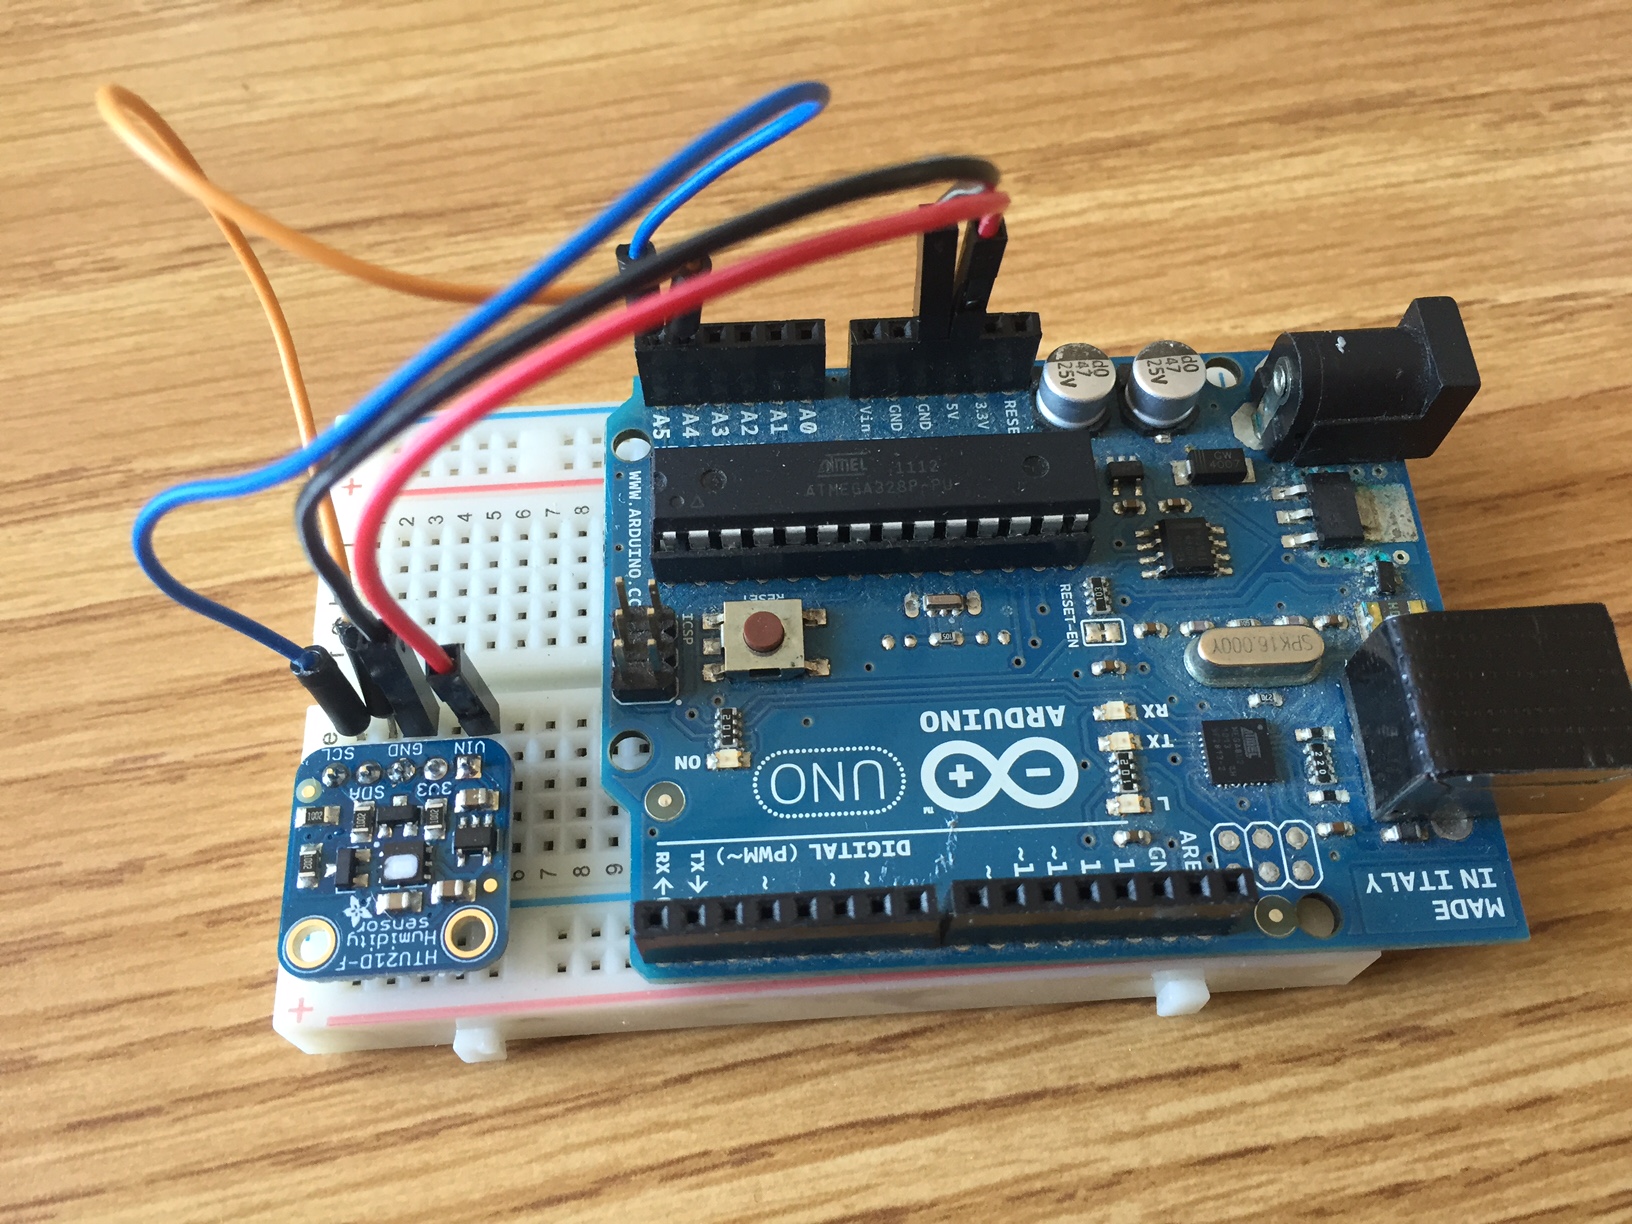
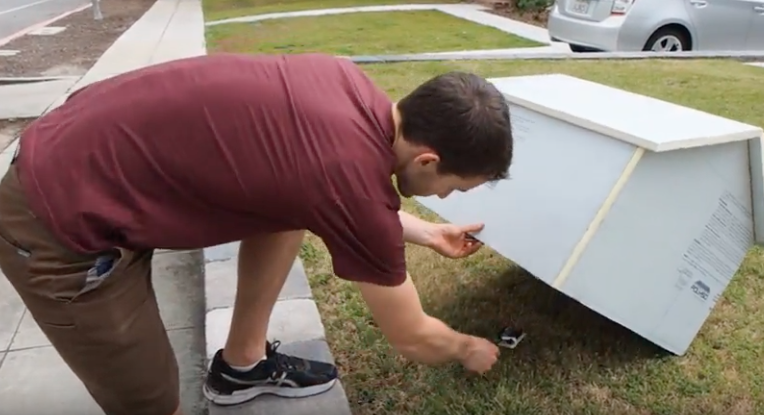
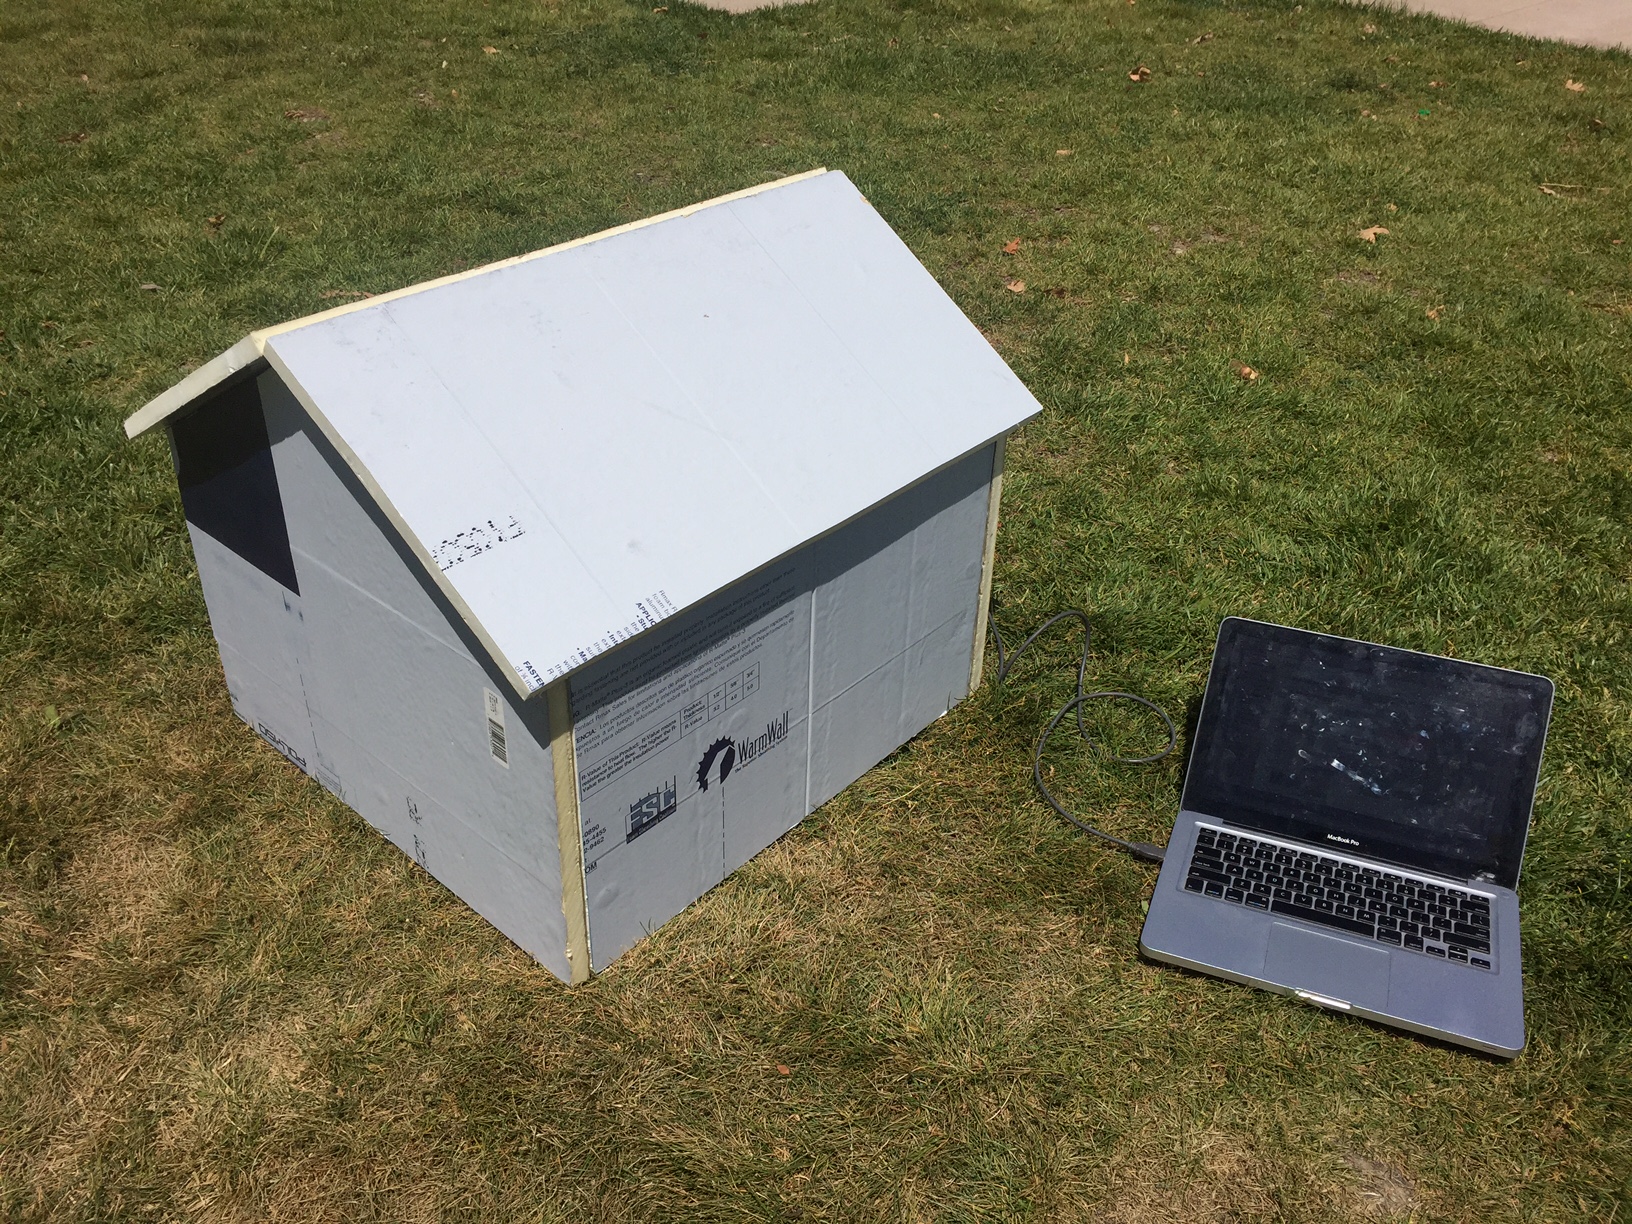
Running a simulation in Fusion is a great first check to do, but really validating this system requires actually testing a greenhouse in the wild. To do this, we can build a scale model of a greenhouse, put it outside in the sun, and measure the internal temperature over time. If a Fusion simulation predicts the correct internal temperature, then we can validate the model. If the actual temperature is different from the predicted temperature, then we can use this information to tweak and improve the model.
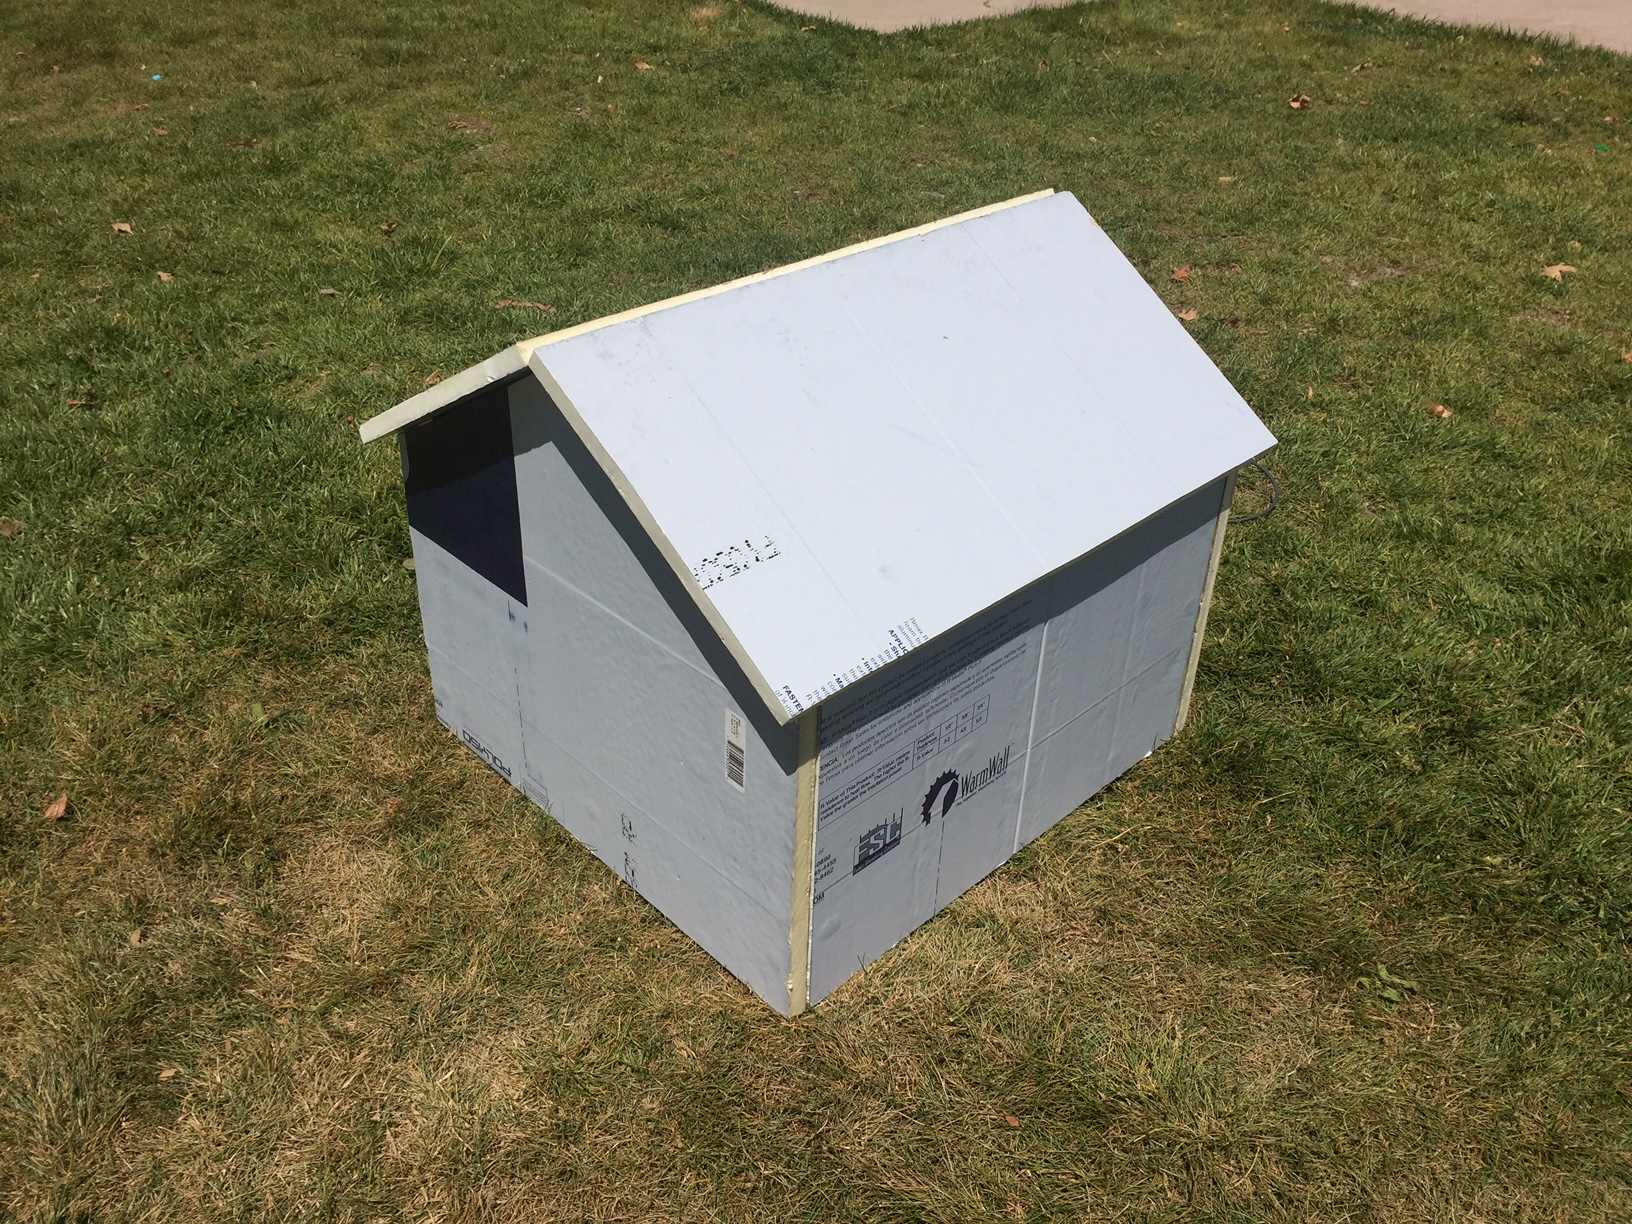
I built a 2-foot-tall scale model greenhouse out of 1-inch RMAX insulation and rigged it with an Arduino temperature sensor from Adafruit. I put it outside on a warm sunny day and collected a few trials of data. I then simulated the exact same configuration in Fusion 360 and found that the model was predicting temperatures that were way too hot. After some tweaking, I found that decreasing the solar energy flux efficiency to about 10% yielded more accurate results. This is where that 10% efficiency value came from, if you were wondering.
Conclusion
In this project we've seen how IoT can be combined with CAD tools like Fusion 360 to create a smarter workflow. This not only allows you to grow awesome tomatoes where ever you happen to live, but also provides a glimpse into the future of optimized design processes. You could imagine how integrating the greenhouse with an internet-connected temperature sensor could allow the system to improve over time as it learns from the data collected by the greenhouse. This sort of closed-loop design could allow systems to continually optimize themselves over time.