Augmented Reality Police Car
by allisonbouganim in Circuits > Art
5479 Views, 62 Favorites, 0 Comments
Augmented Reality Police Car
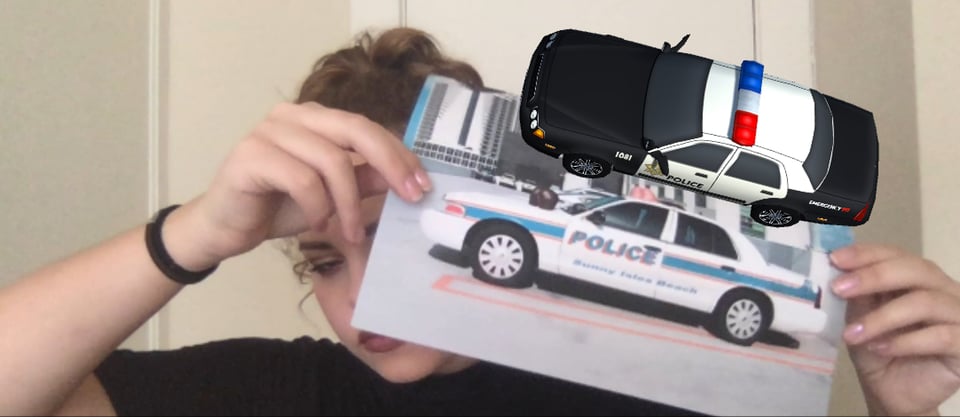

You will follow these 29 steps to making your own AR scene/ image.
-These steps can be applied towards any image, scene, or "floating object".
-100% free and fun.
Download Unity

Download Unity from the https://unity3d.com website.
-Go to "Get Unity Now"
-Personal/Free download
-Download Installer
And proceed with instructions
Download Vuforia
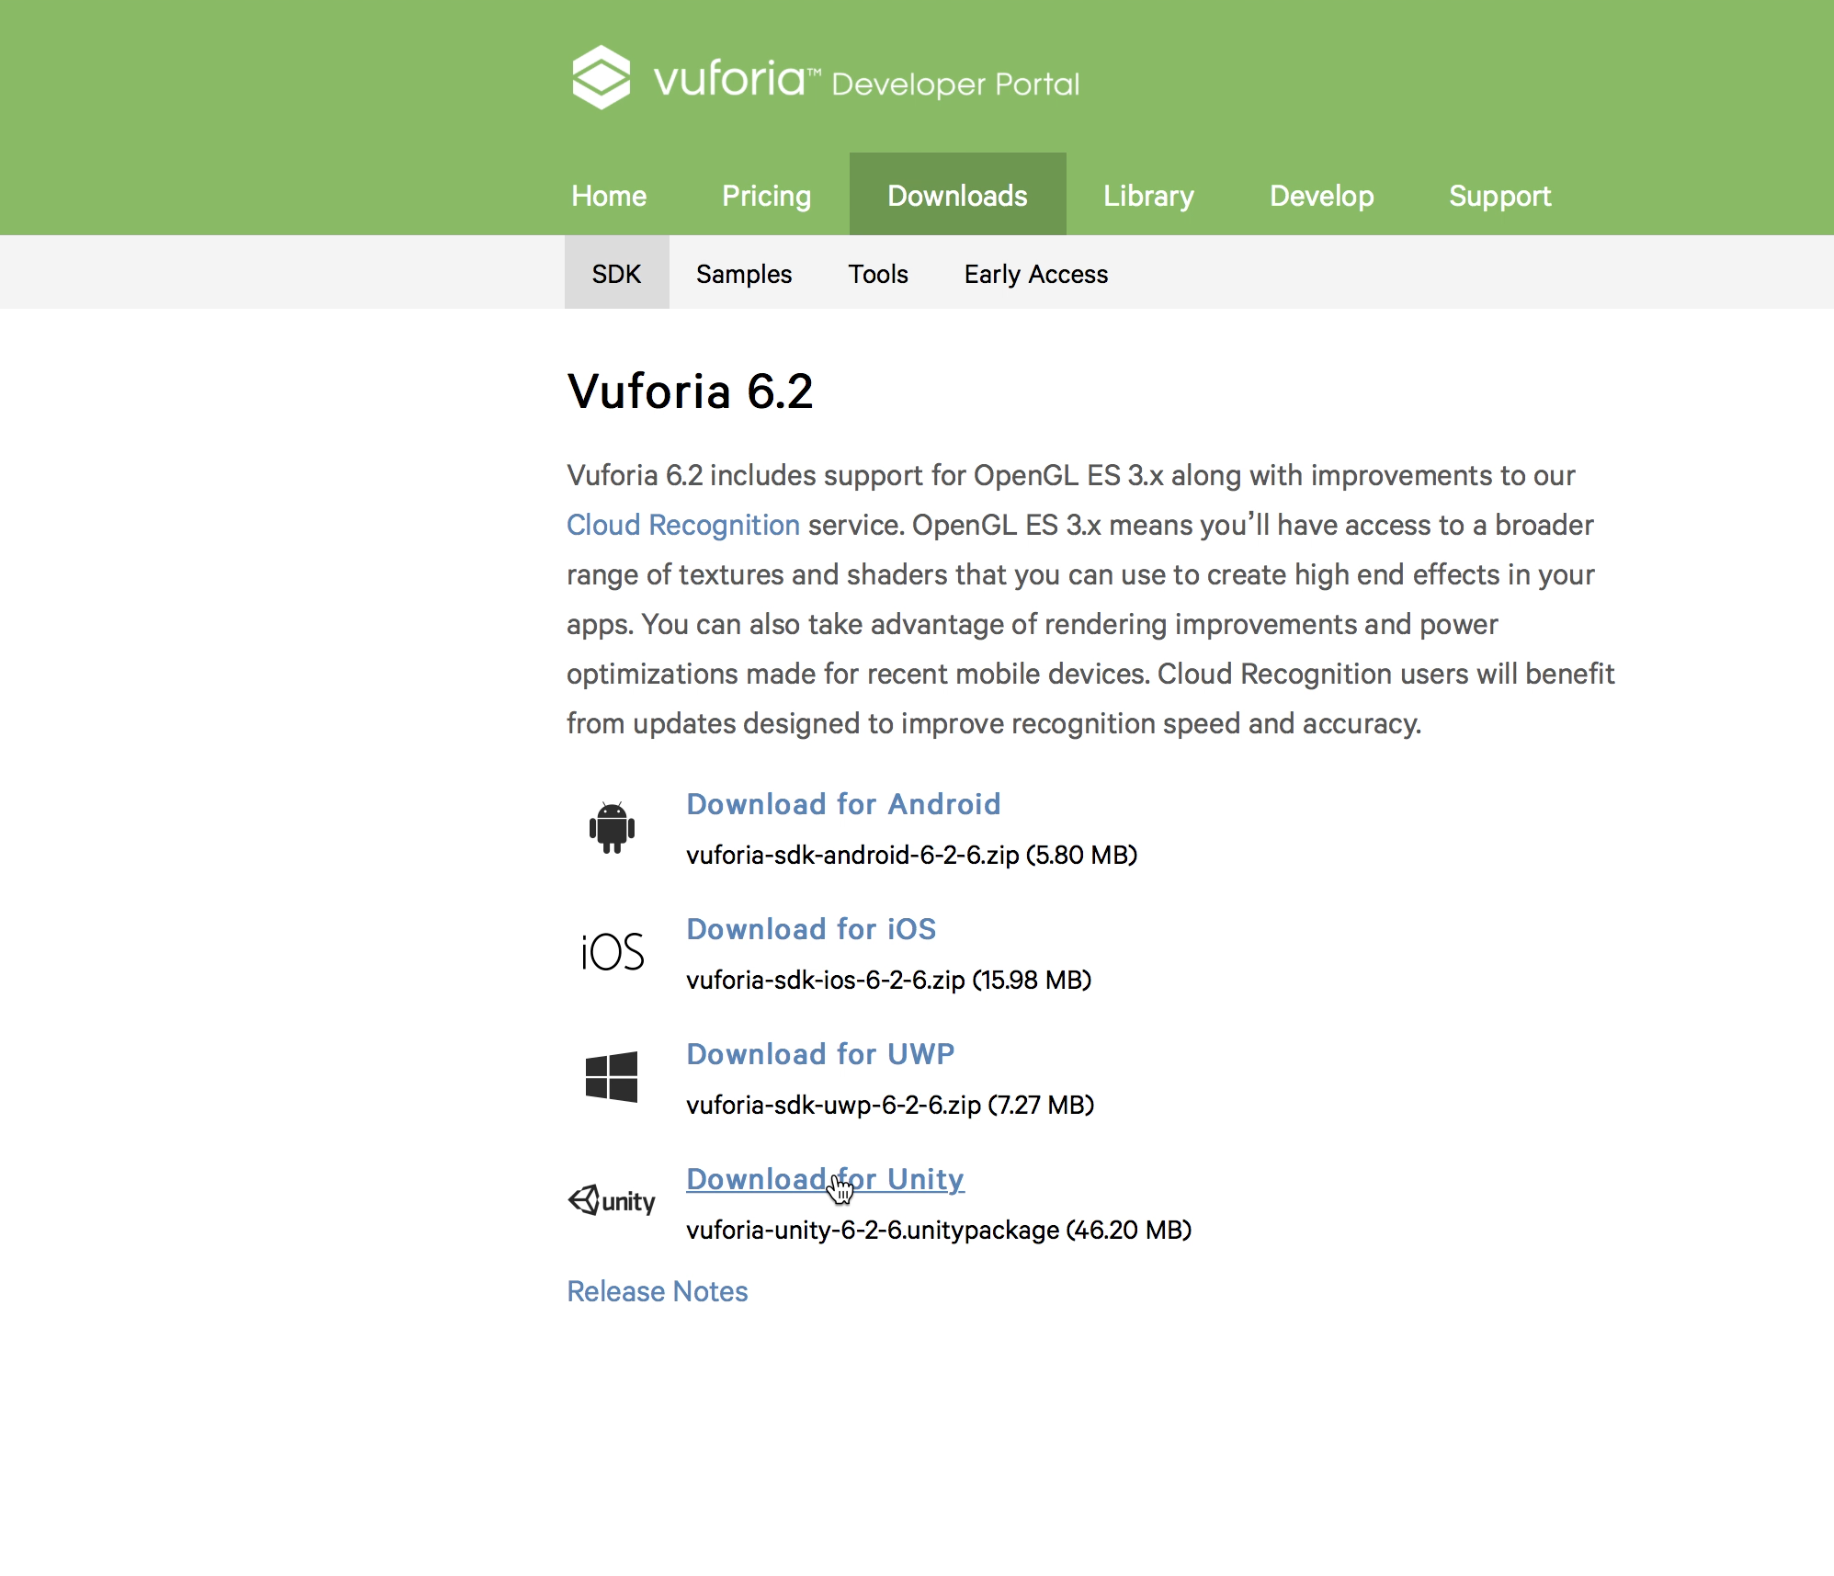
Download The Vuforia SDK File from https://developer.vuforia.com/downloads/sdk
-Click on "Download for Unity"
-Create an Account
-Drag the Vuforia file onto your desktop
Start Your Project
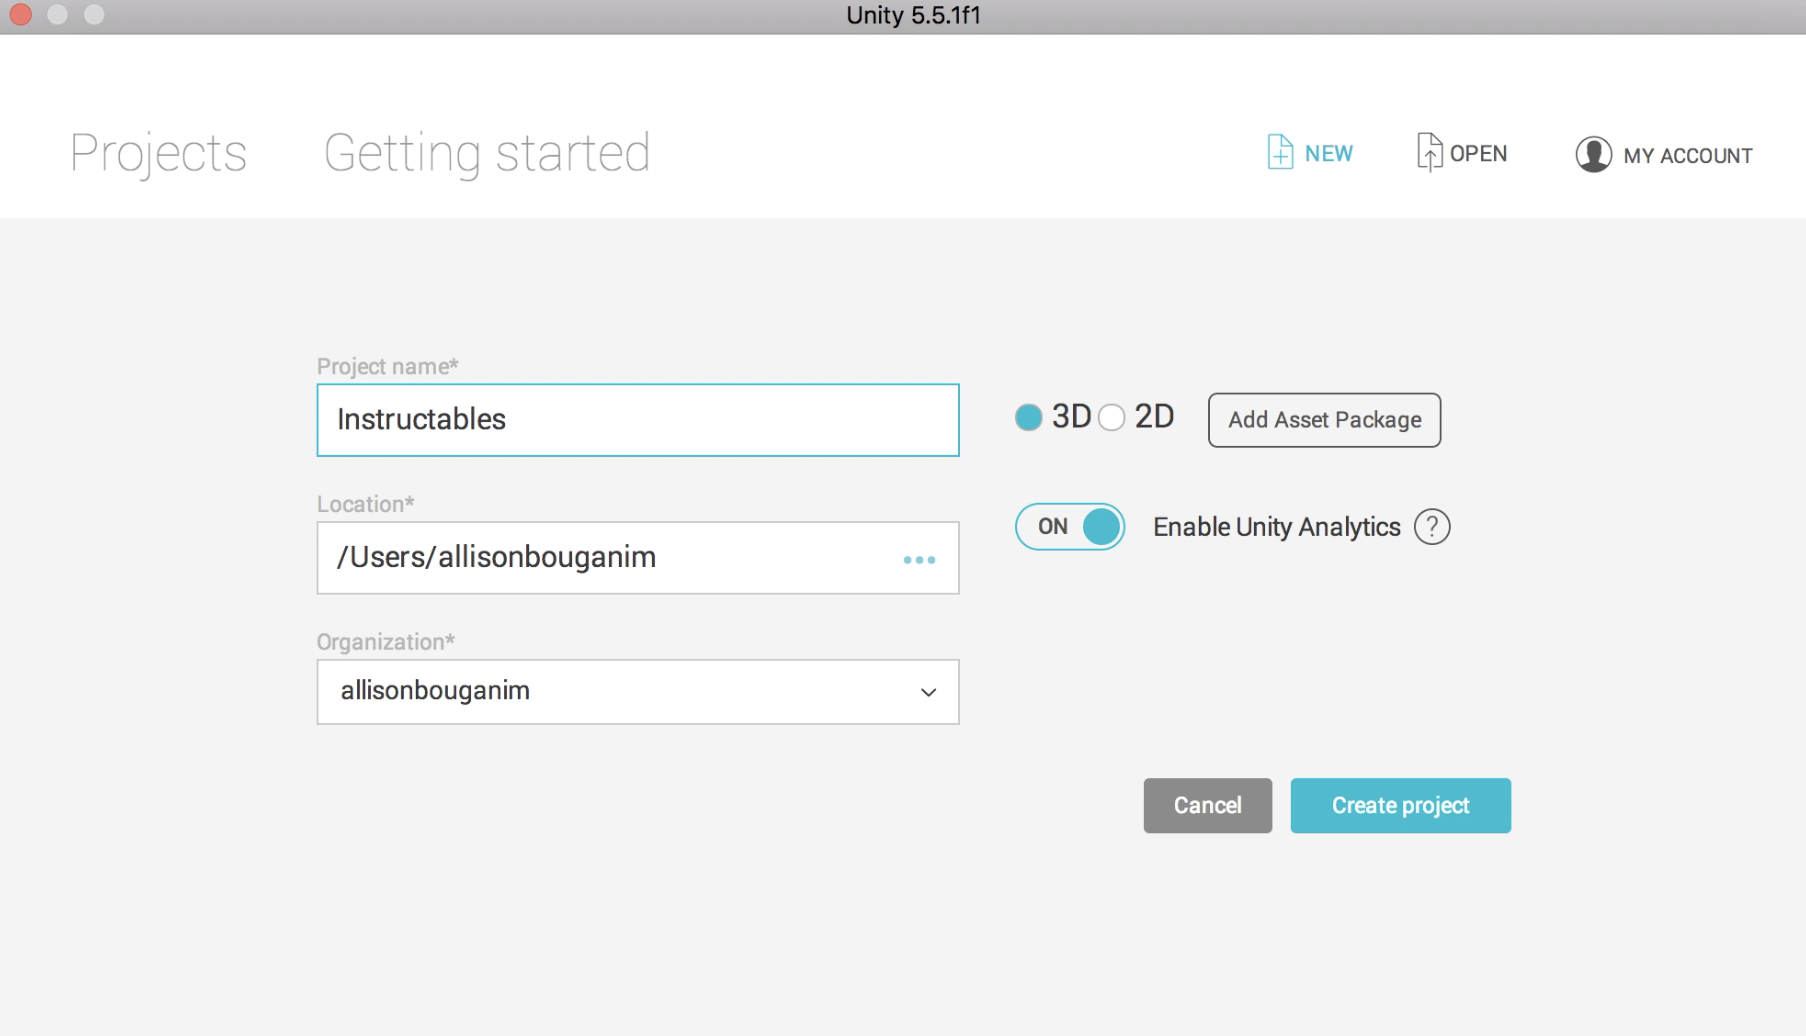
Open up Unity.
-Open New Unity Project
-name project
-create project
Delete the Main Camera
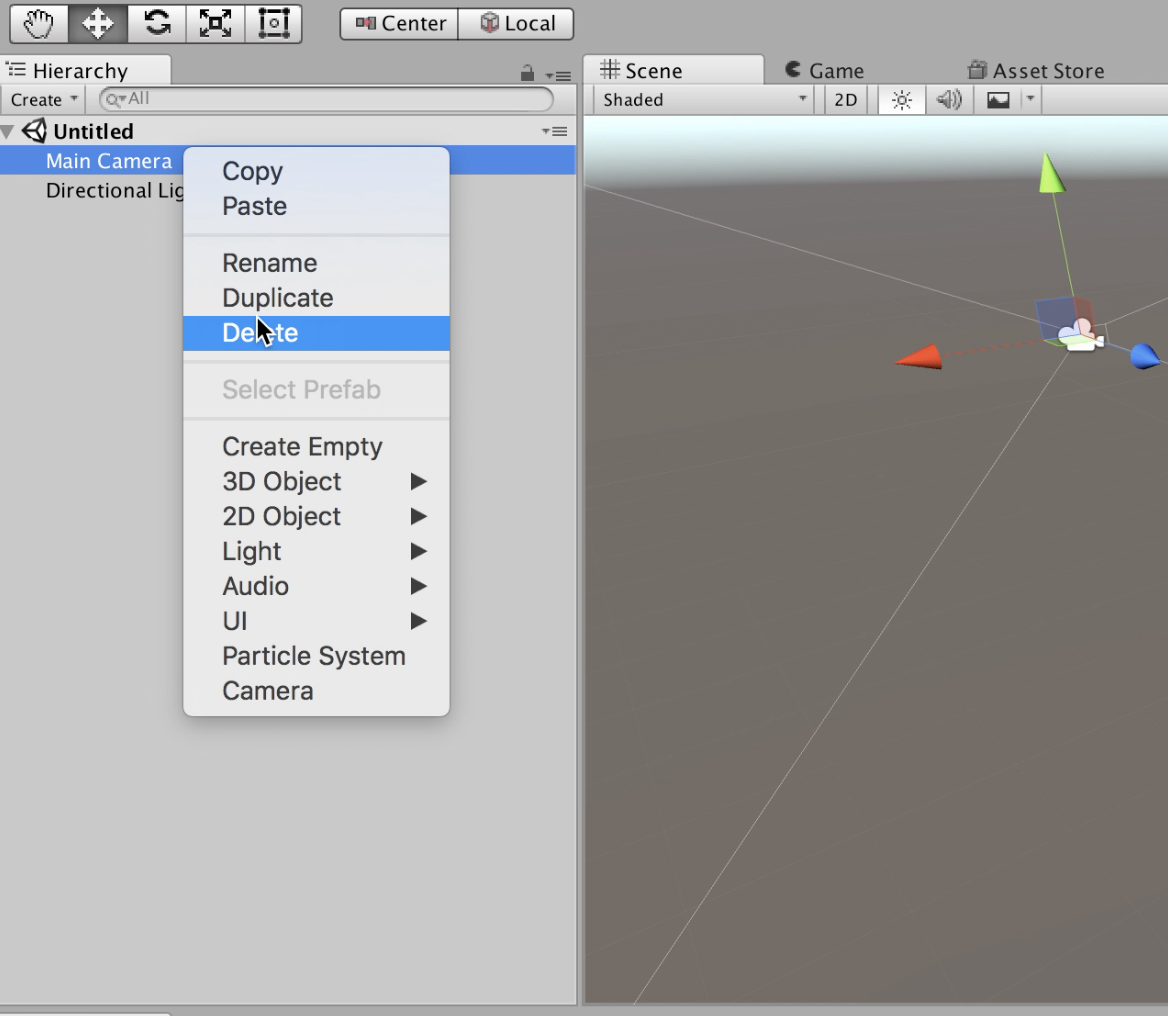
-When you get into the project; delete the Main Camera
Import Vuforia
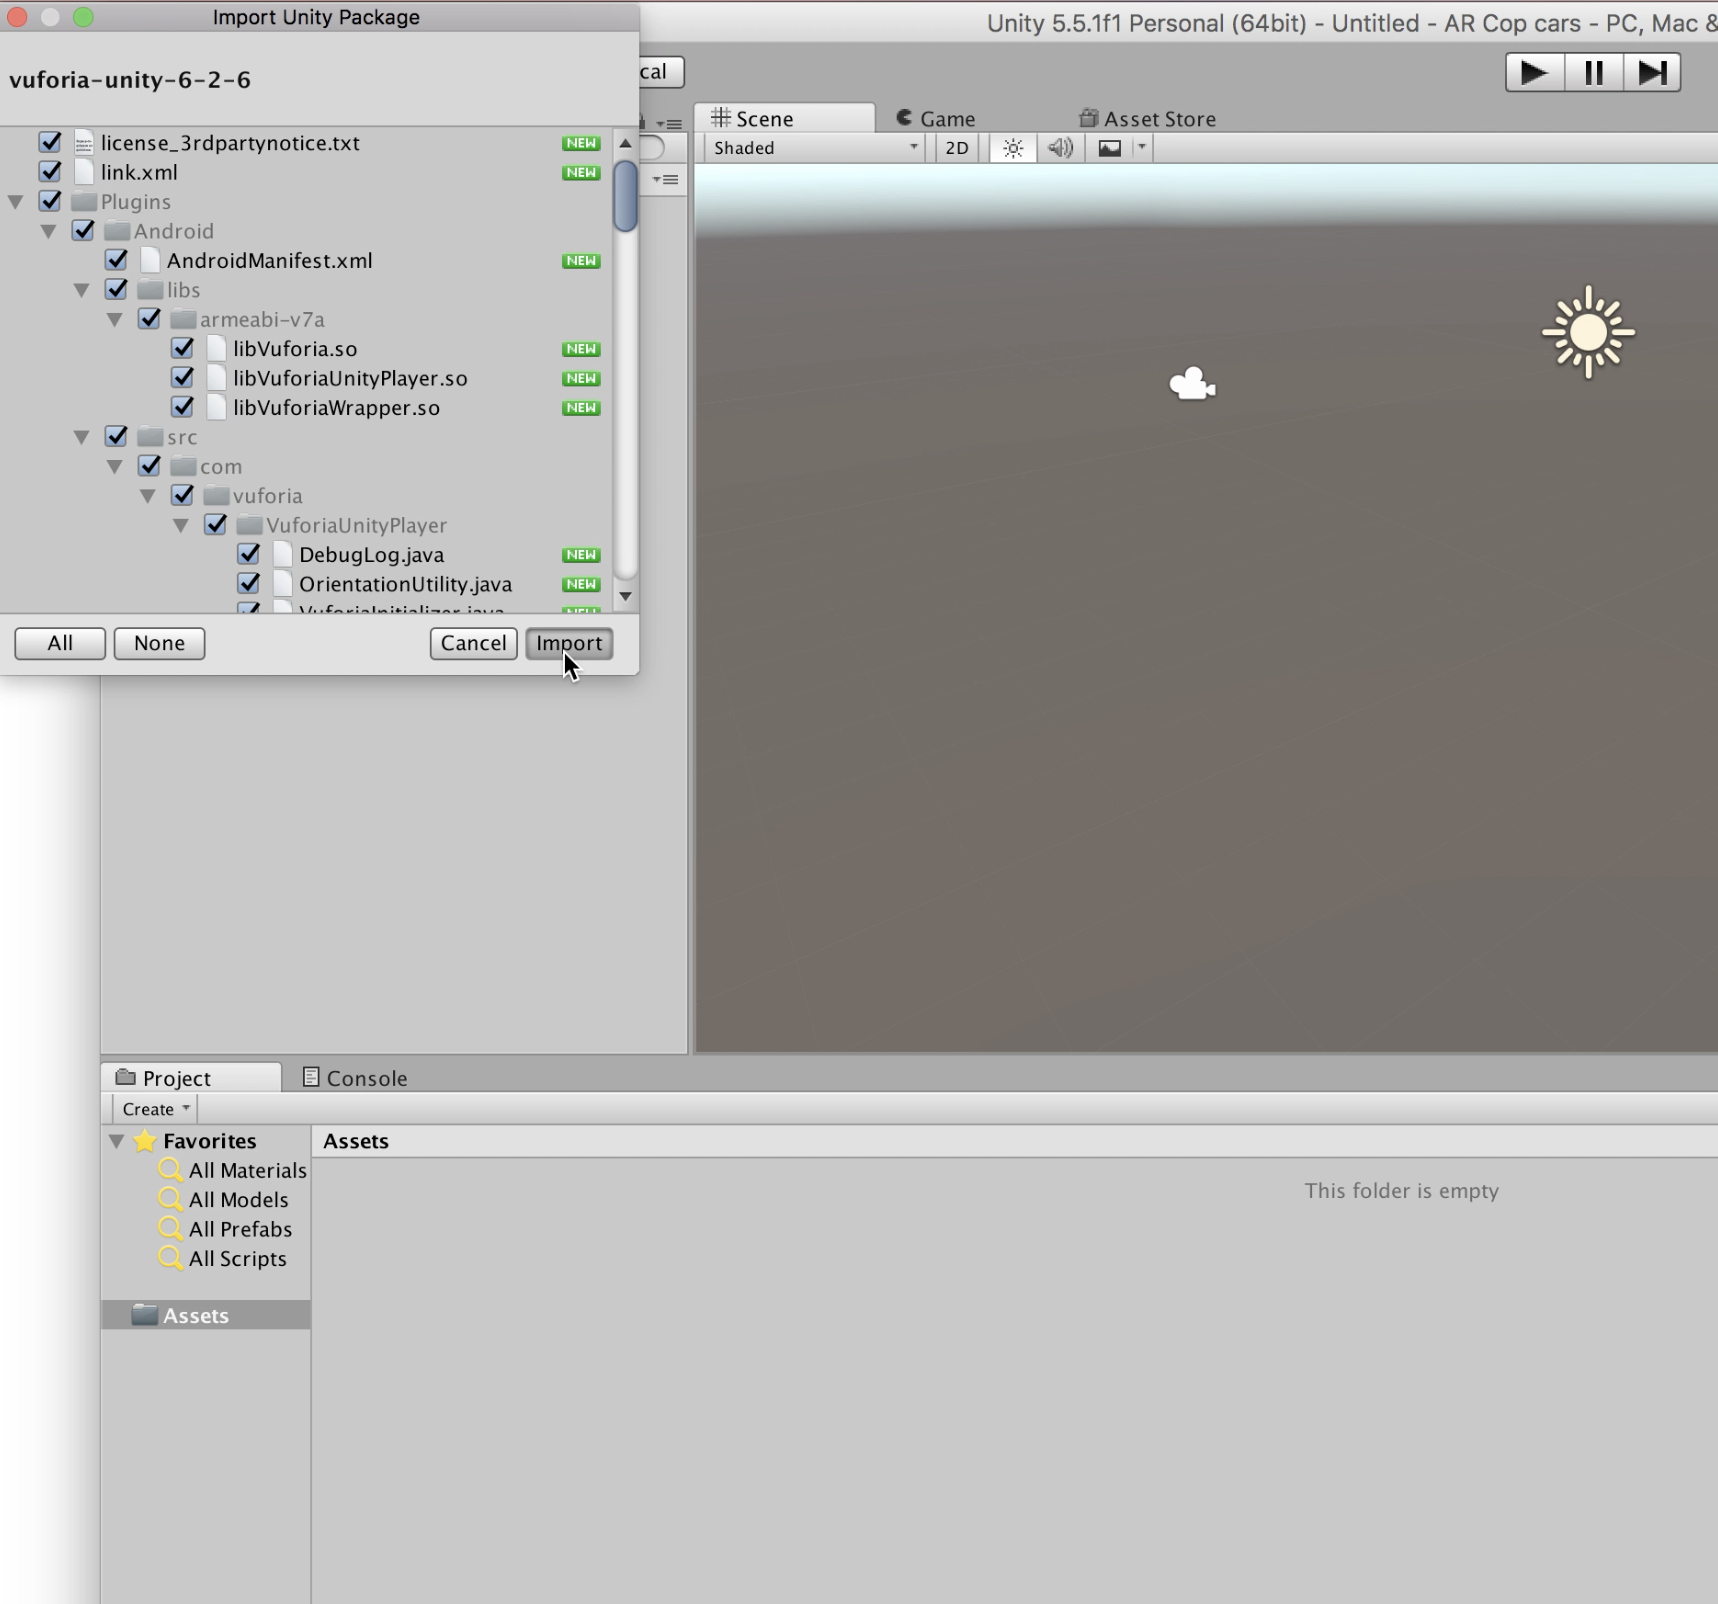
Drag in the Vuforia Package
-Press import
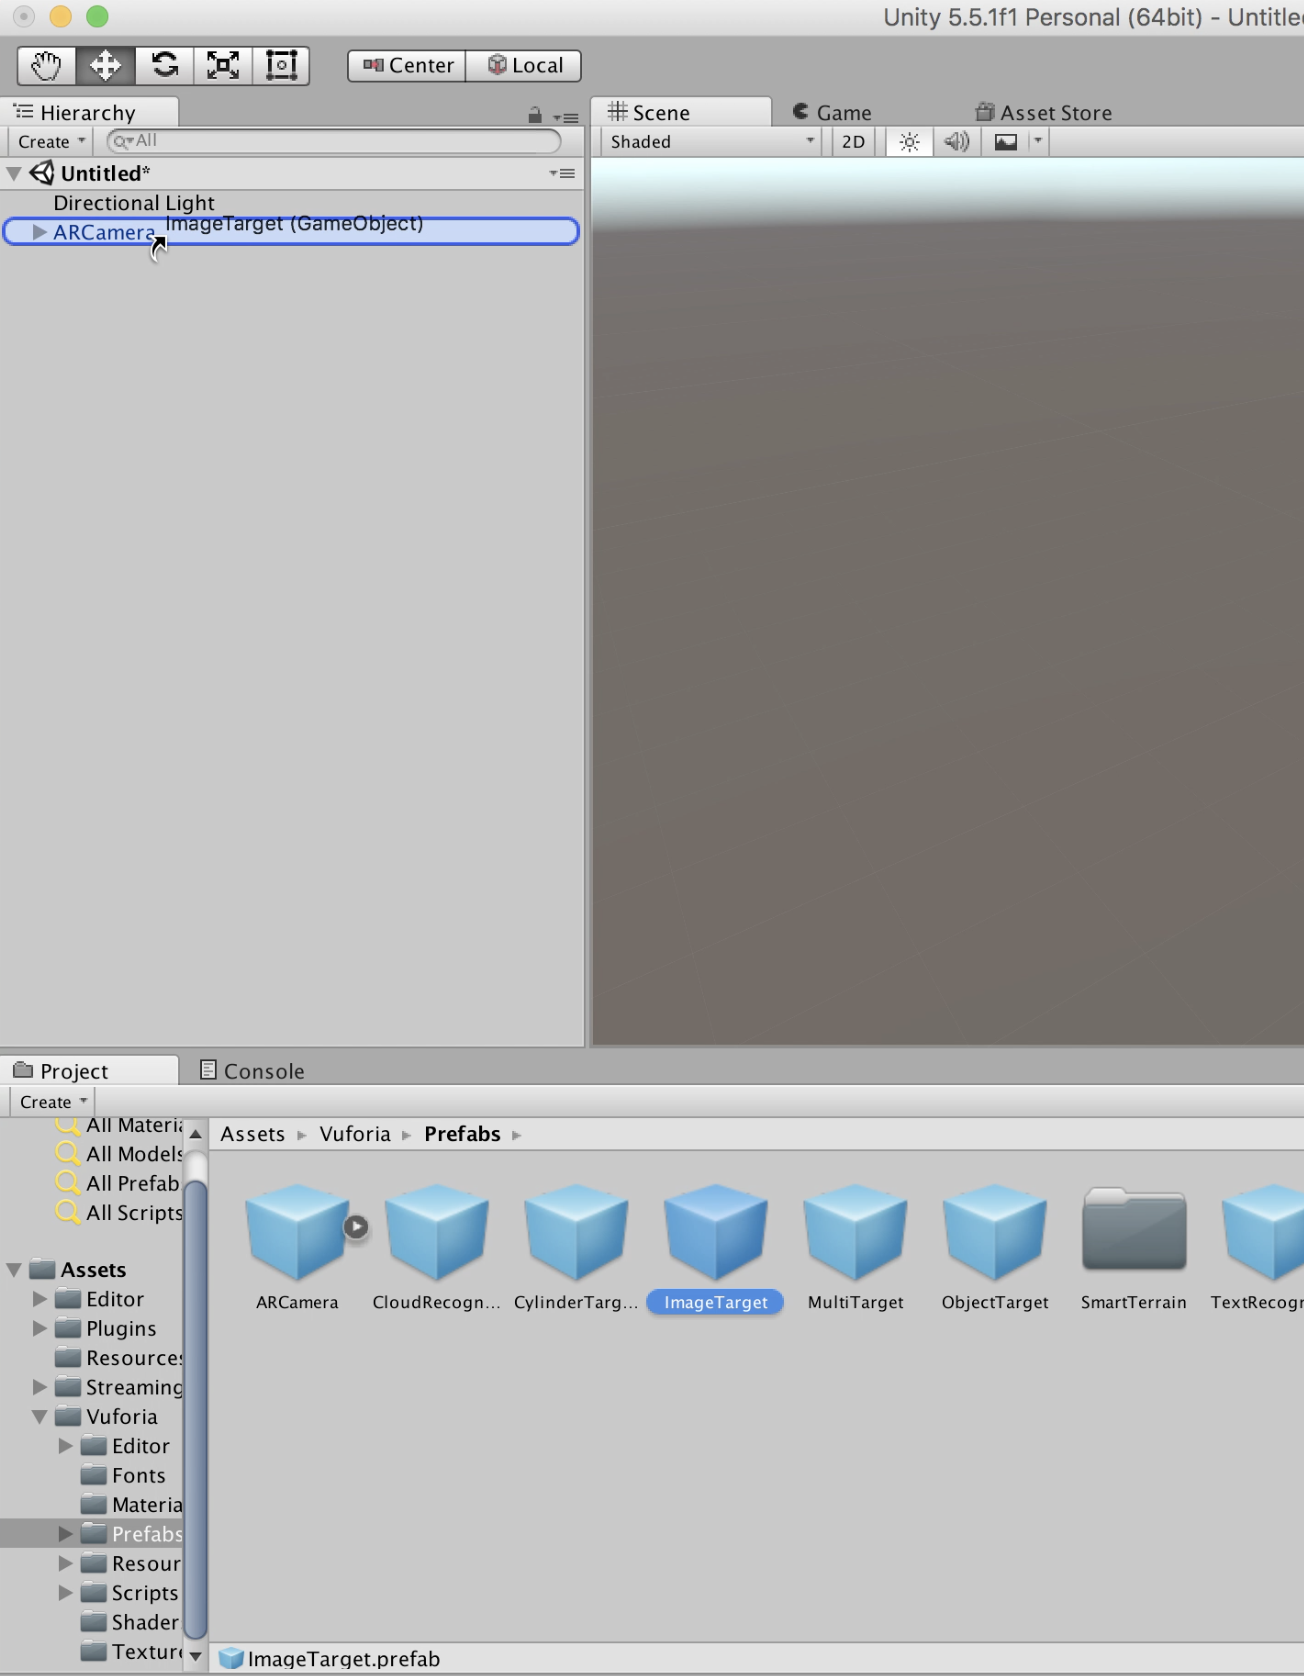
New Camera
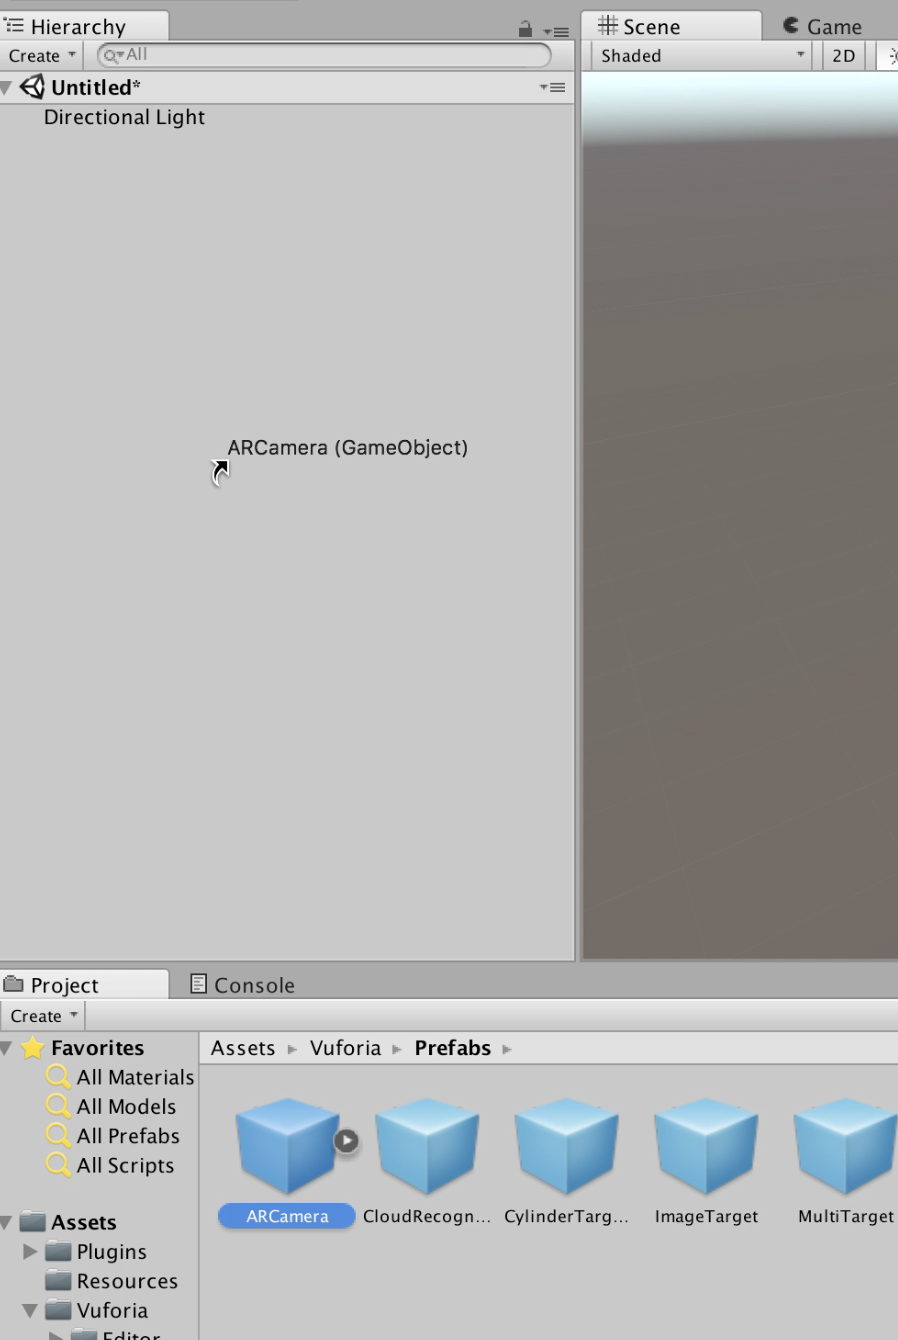
-click the Assets folder
-click the Vuforia folder
-click prefabs
-drag the AR camera to the top left side of the screen (where the main camera once was)
Develop
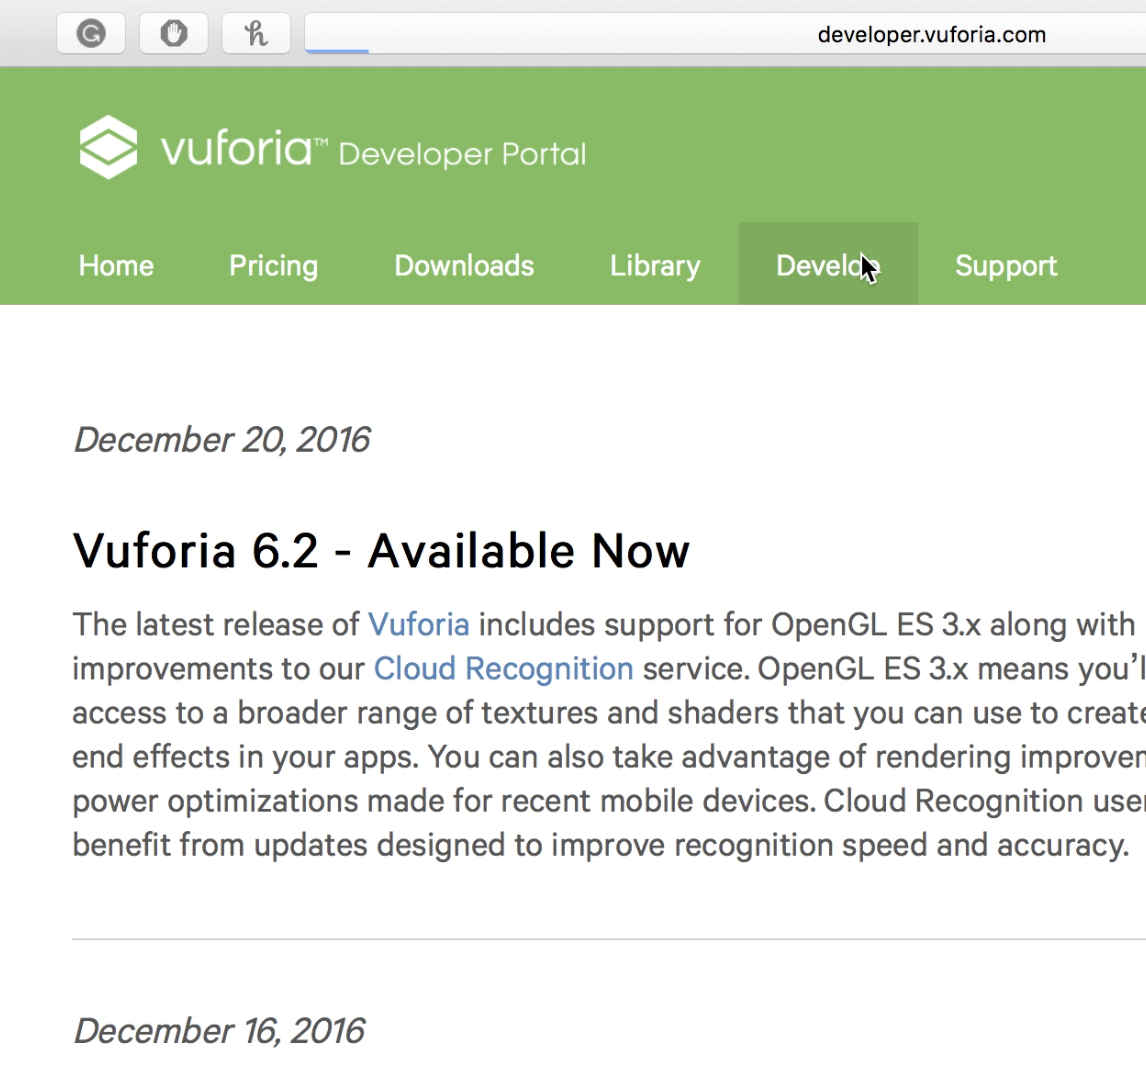
Go to your web browser and go to the Vuforia Developer Portal
-Click Dev Portal
-Click Develop
License Key
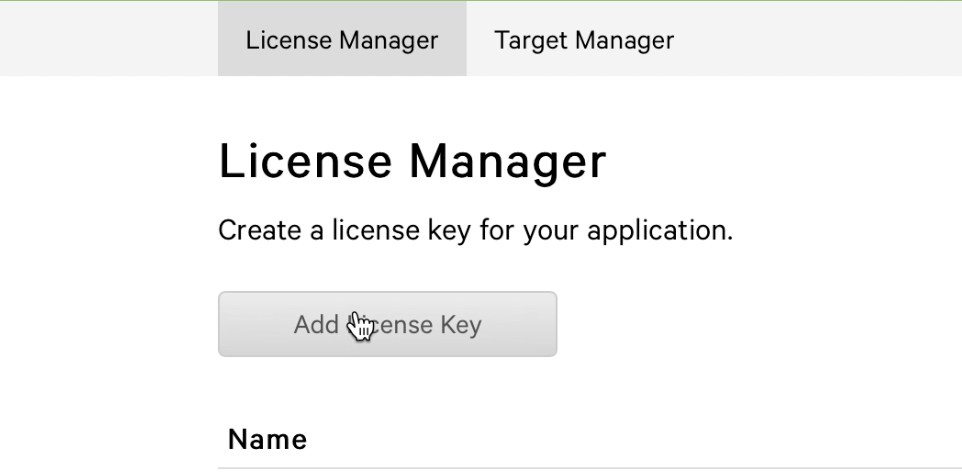
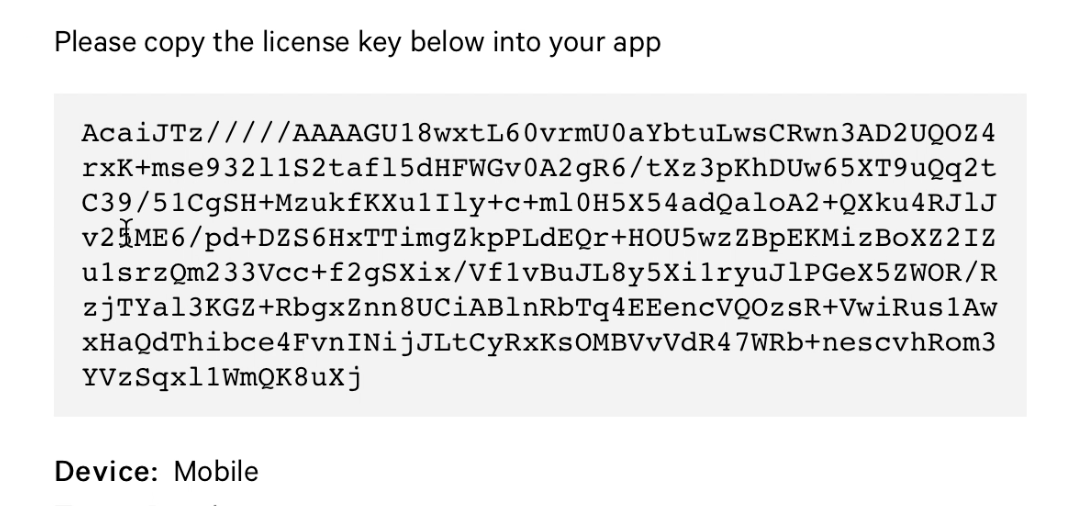
At the "develop" tab you have to create a license key
-Click add license key
-Copy text from the box
Go Back to Unity
Go back to Unity
Device Tracking
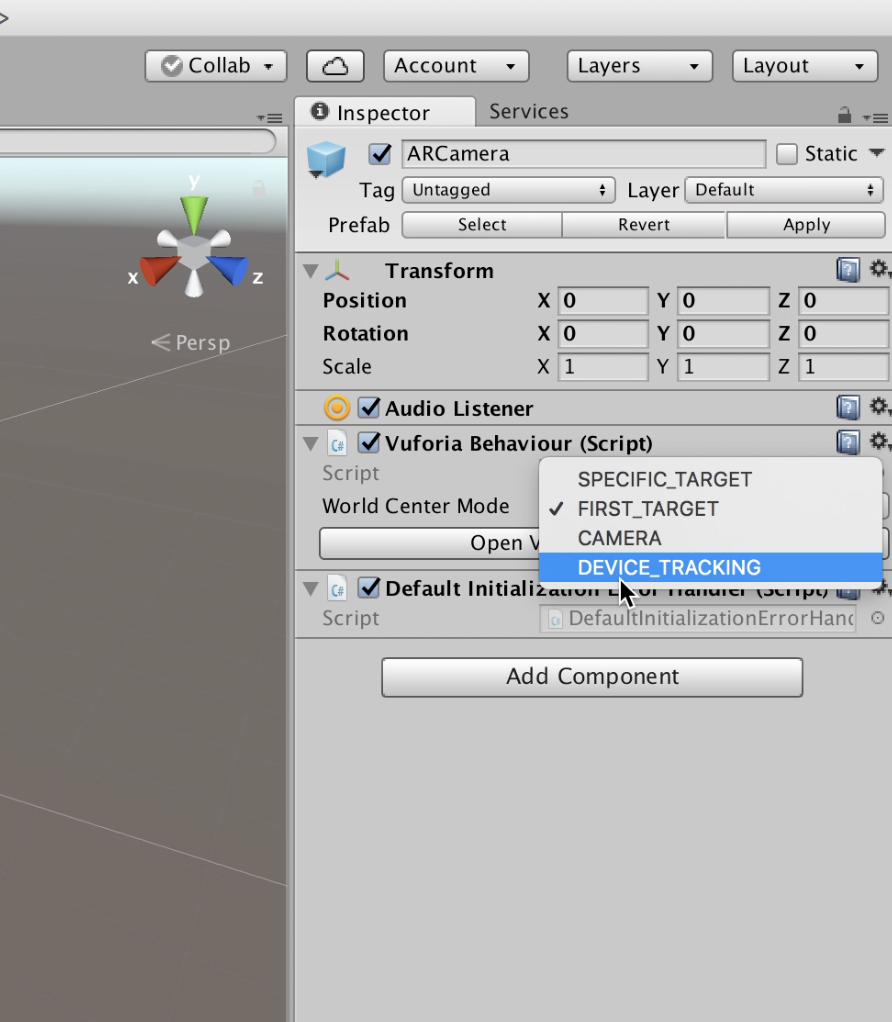
(right side)
-change "world center mode" to Device Tracking
Apply License Key
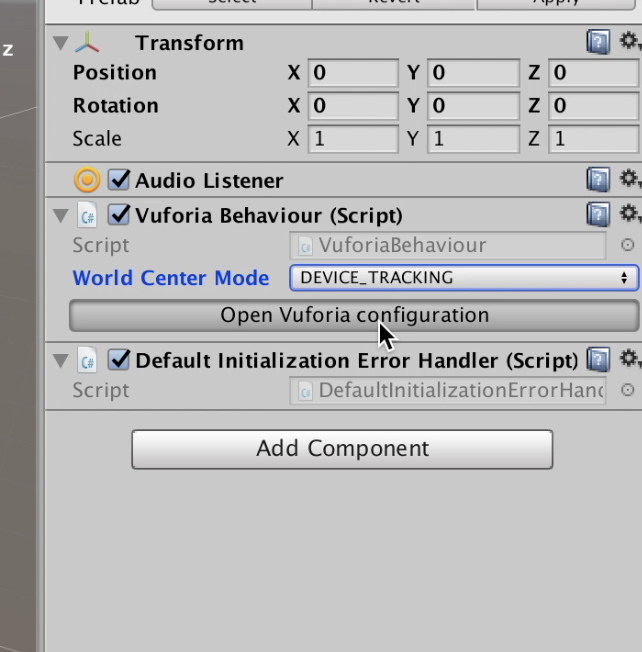
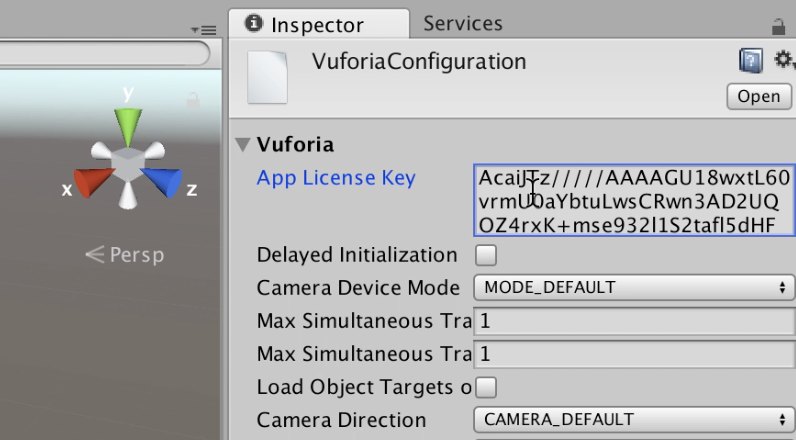
(Right side)
-Click "Open Vuforia Configuration"
-Paste text where it says "App License Key"
Find Image
Do you know the image you want to use as your AR surface?
-If you don't, find it.
Download Your Image to Vuforia
Go back to your Developer portal
-click "Target Manager"
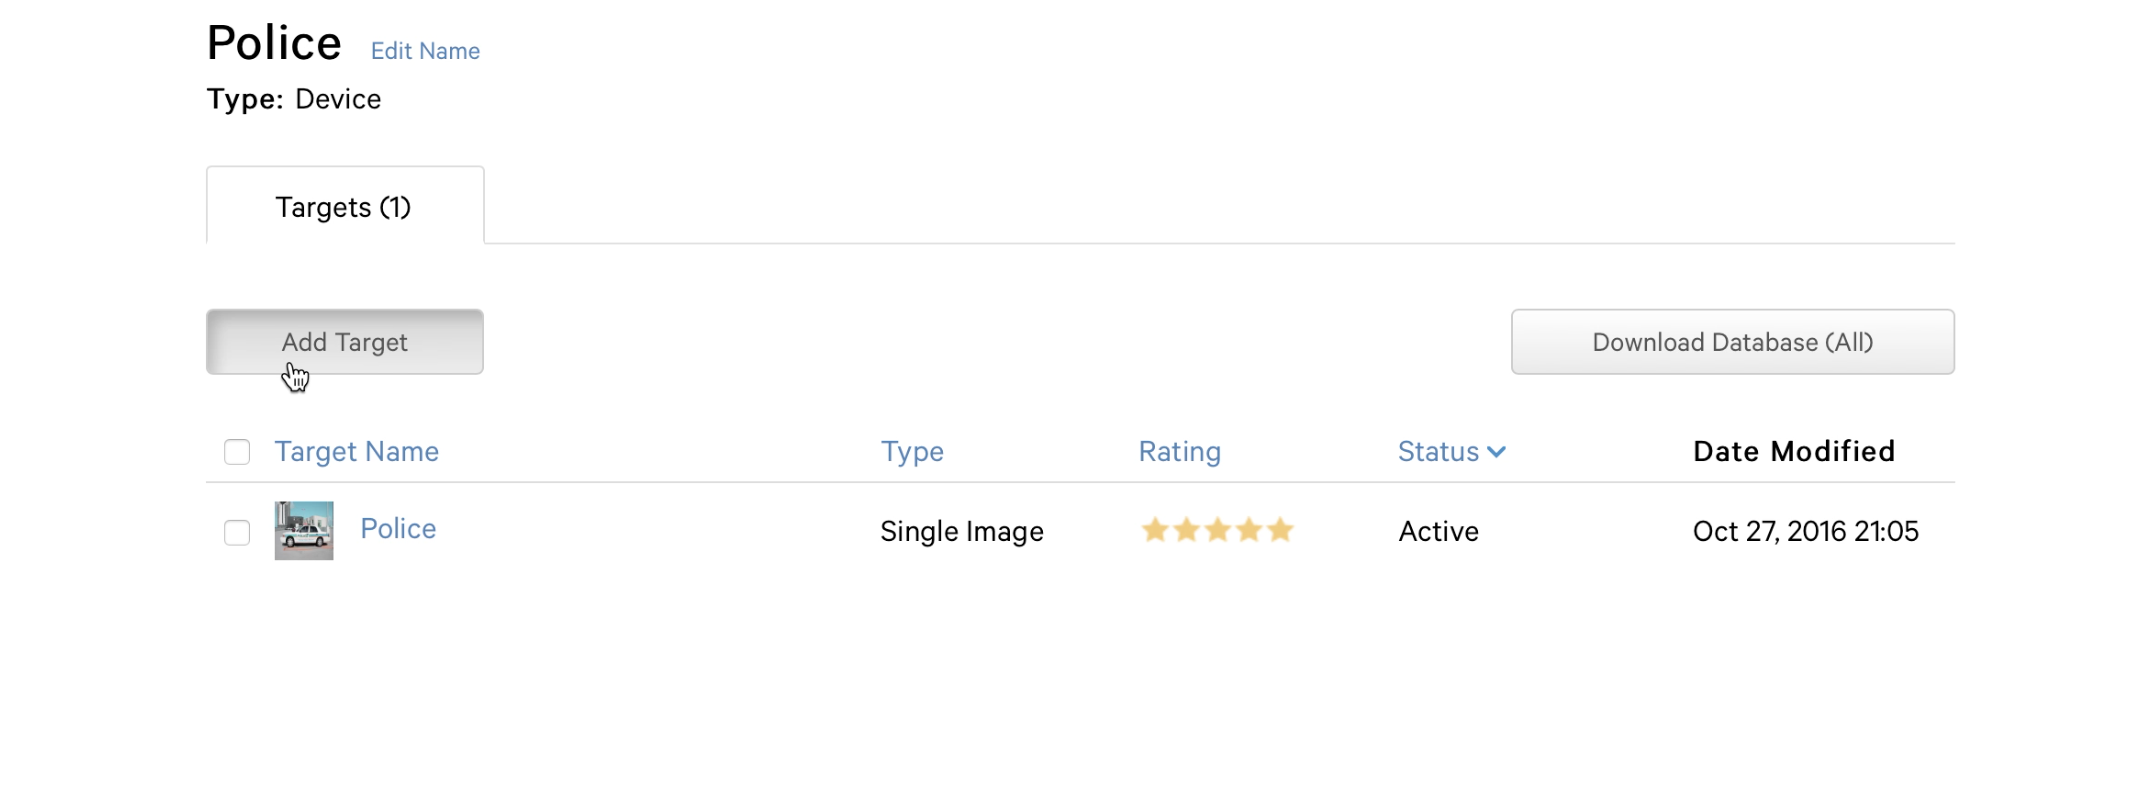
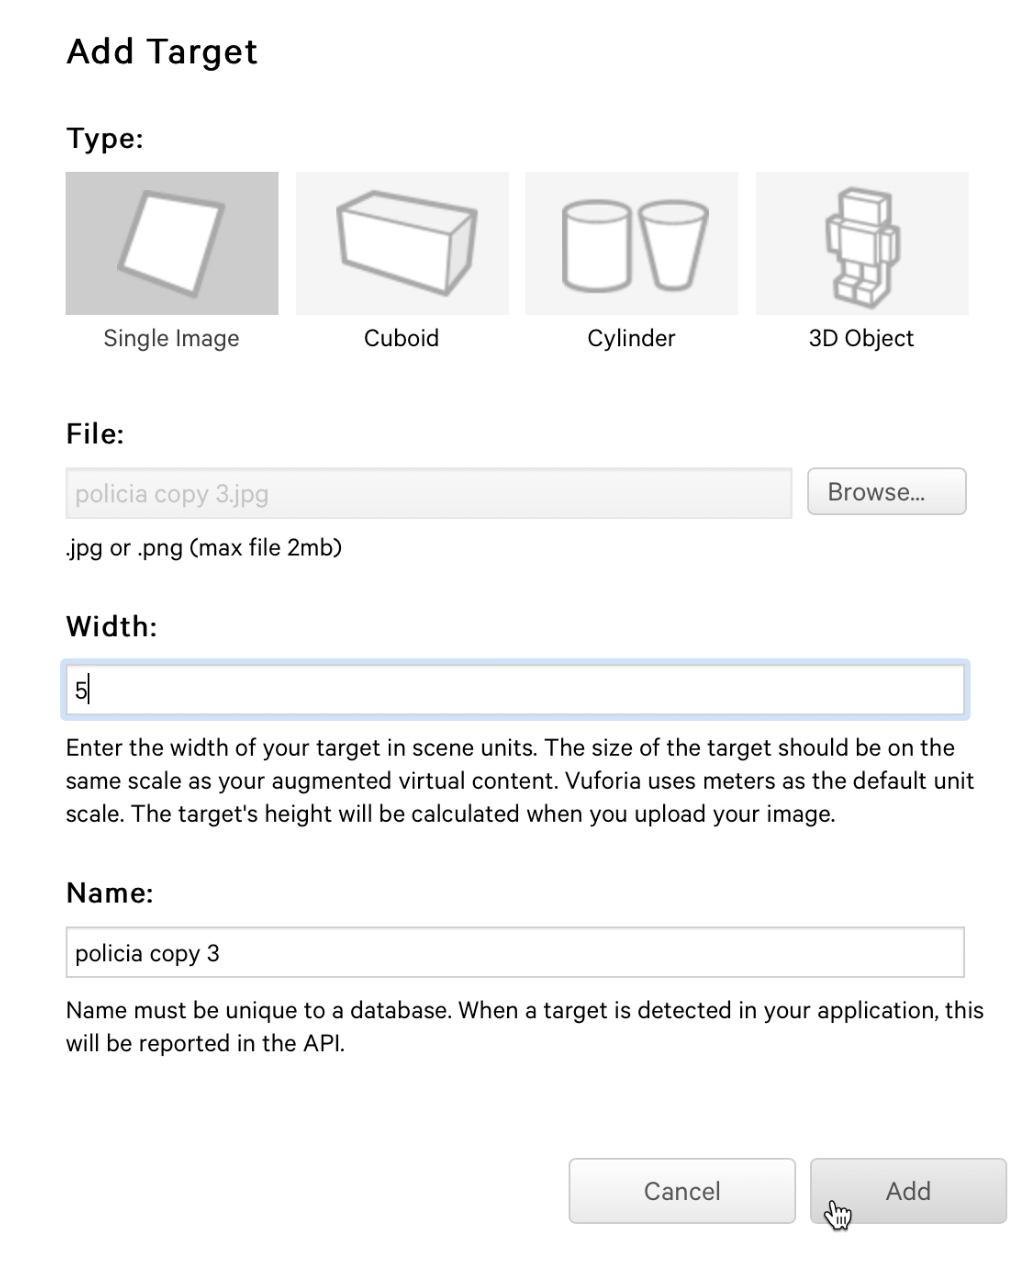
-Click and make your image target (my target was called Police)
-Add target (you will now upload the image target or image surface that you'd like to use)
For width you can put virtually any number, I always put 5.
-click Add
-upload Target
Select Target
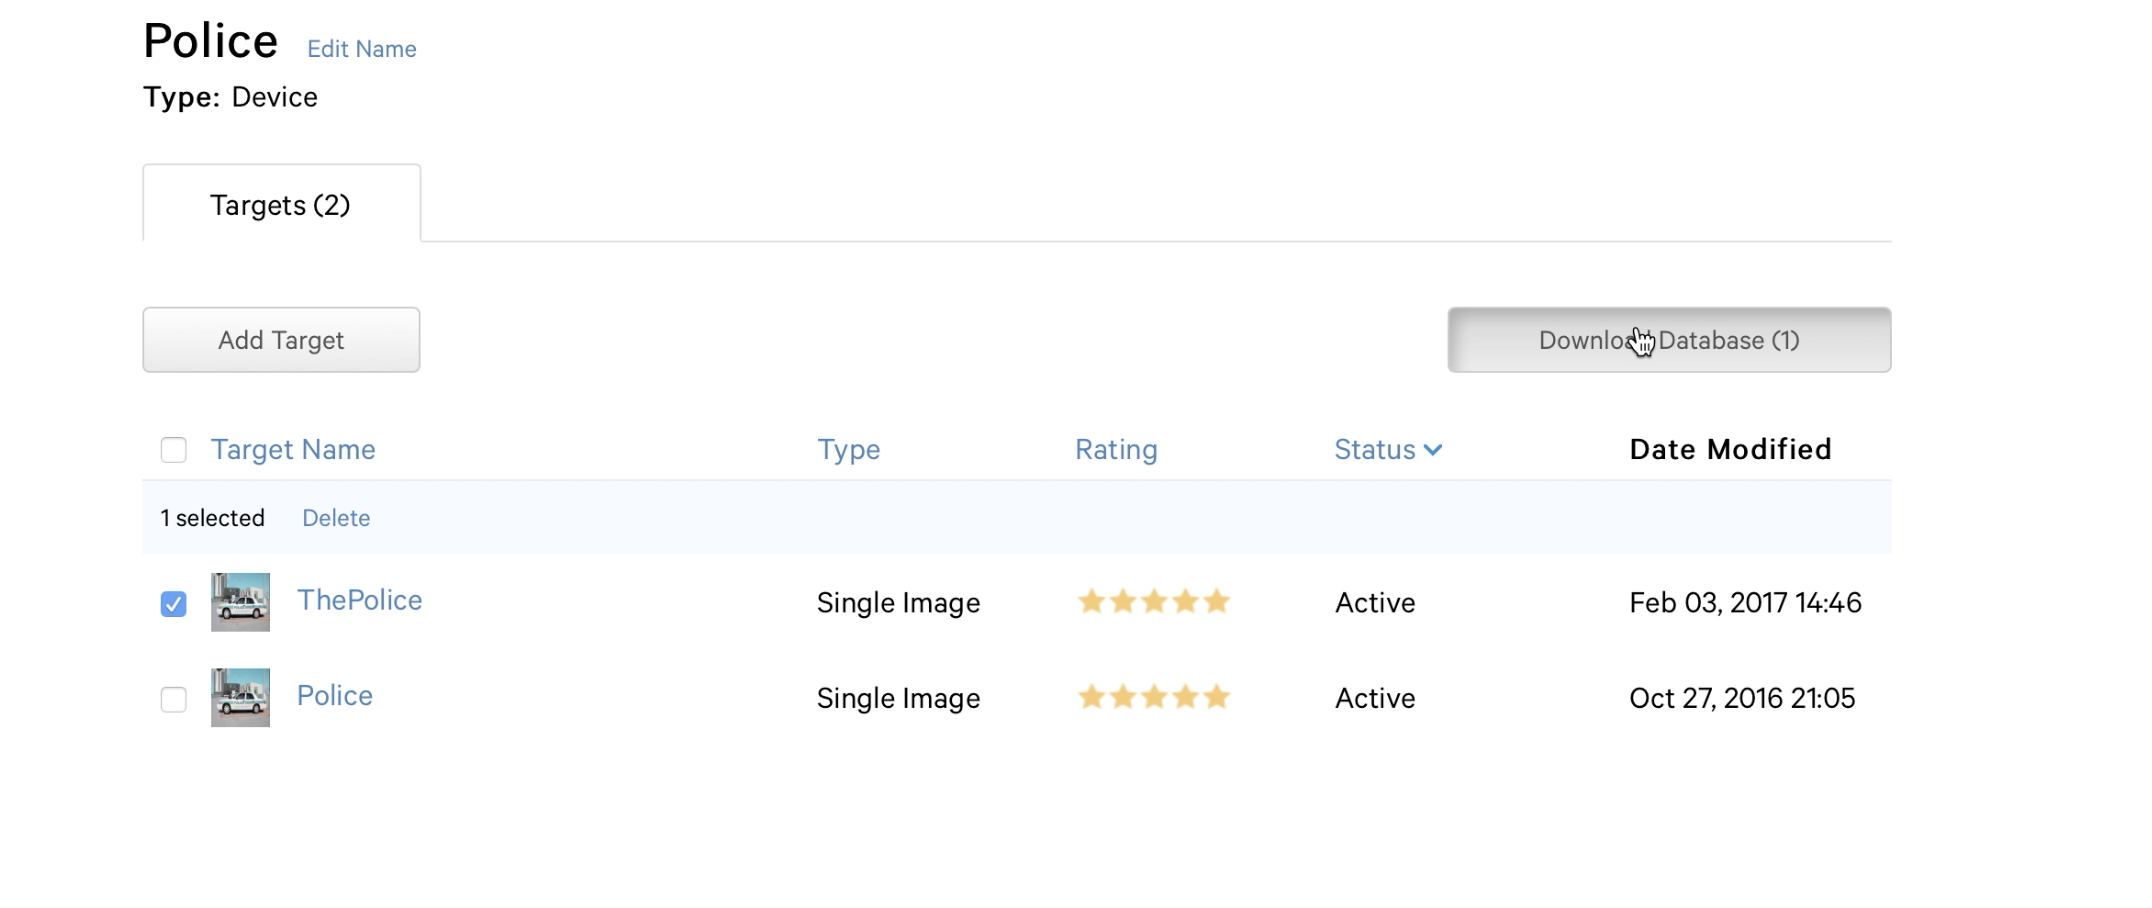
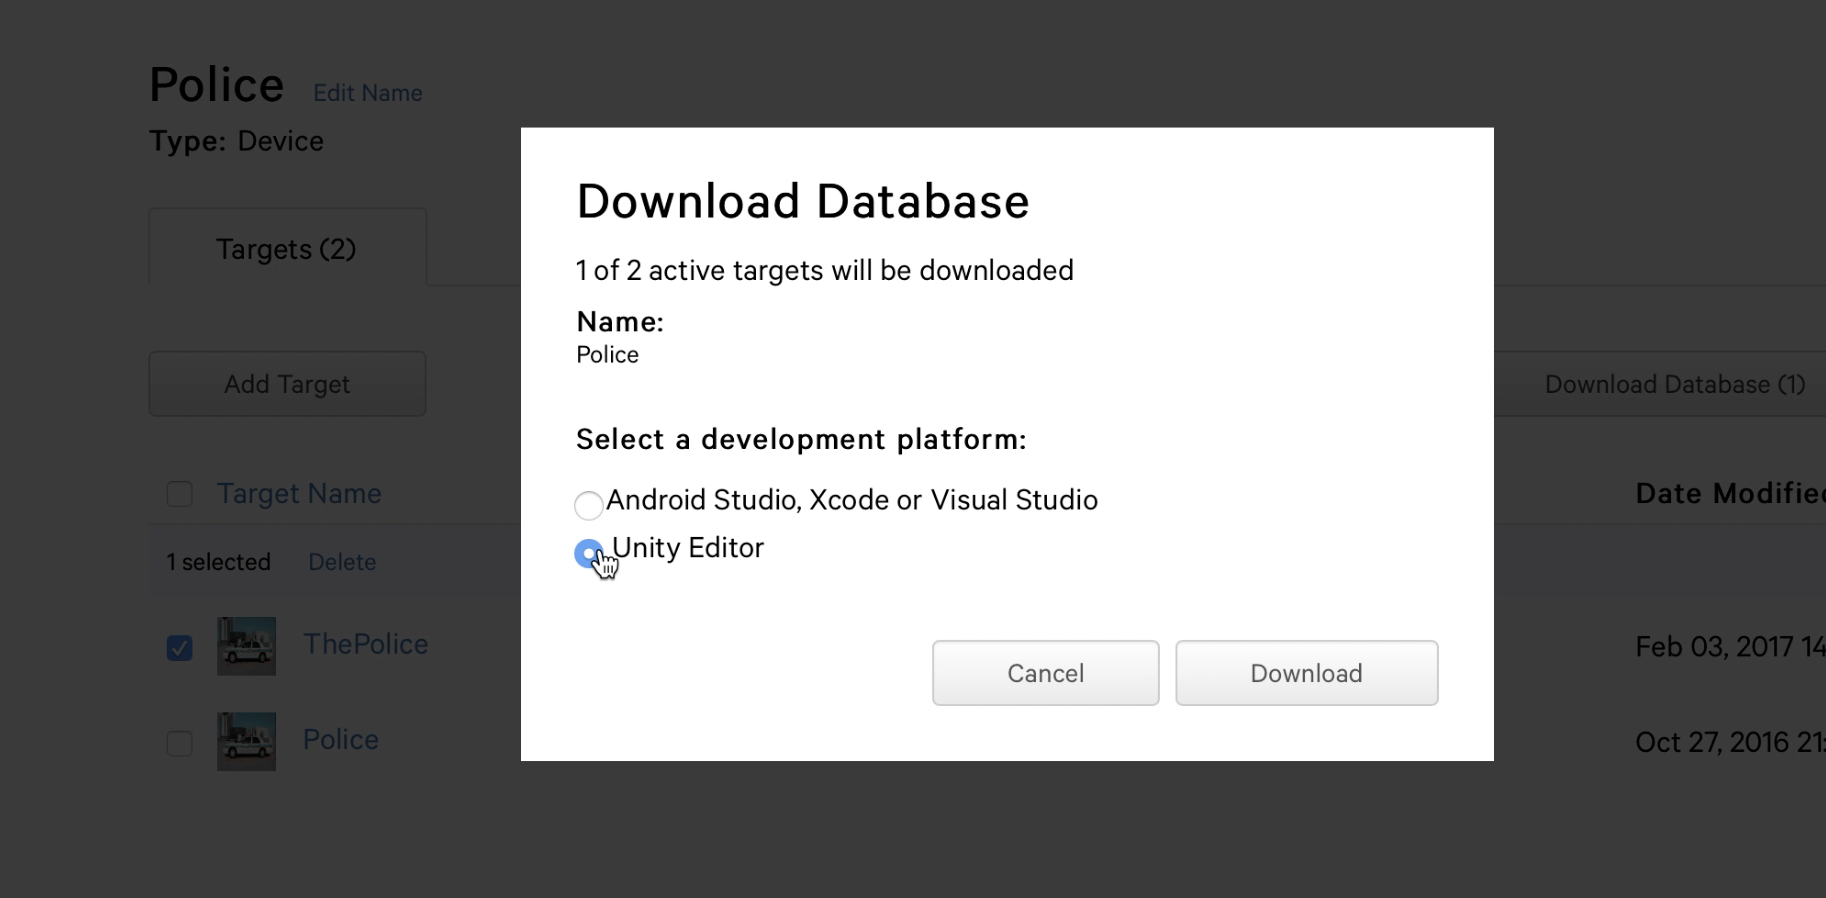
Select Target
-download database
-select "Unity Editor" as your development platform
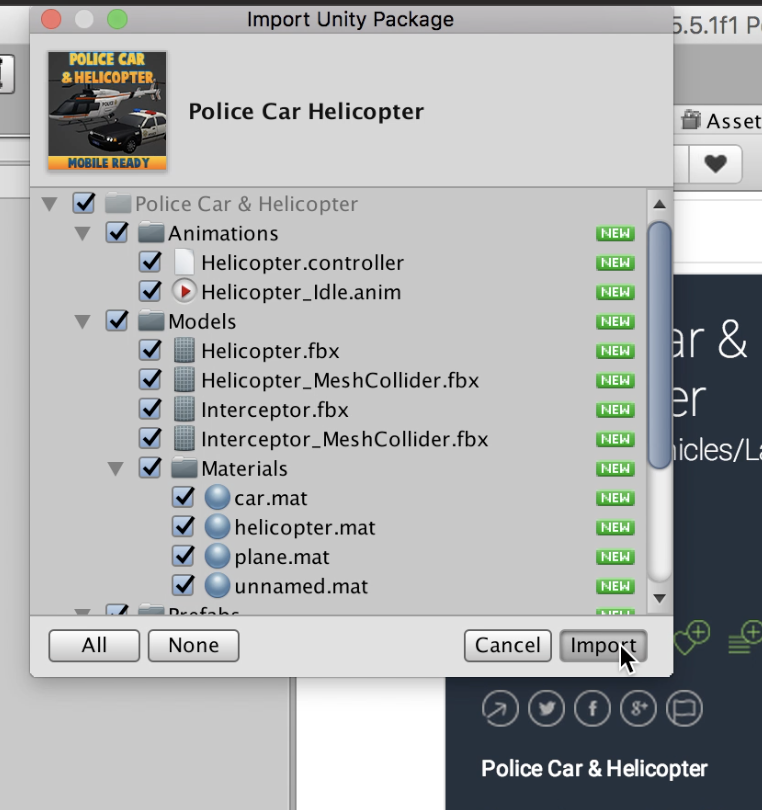
Drag Your Package Into Unity
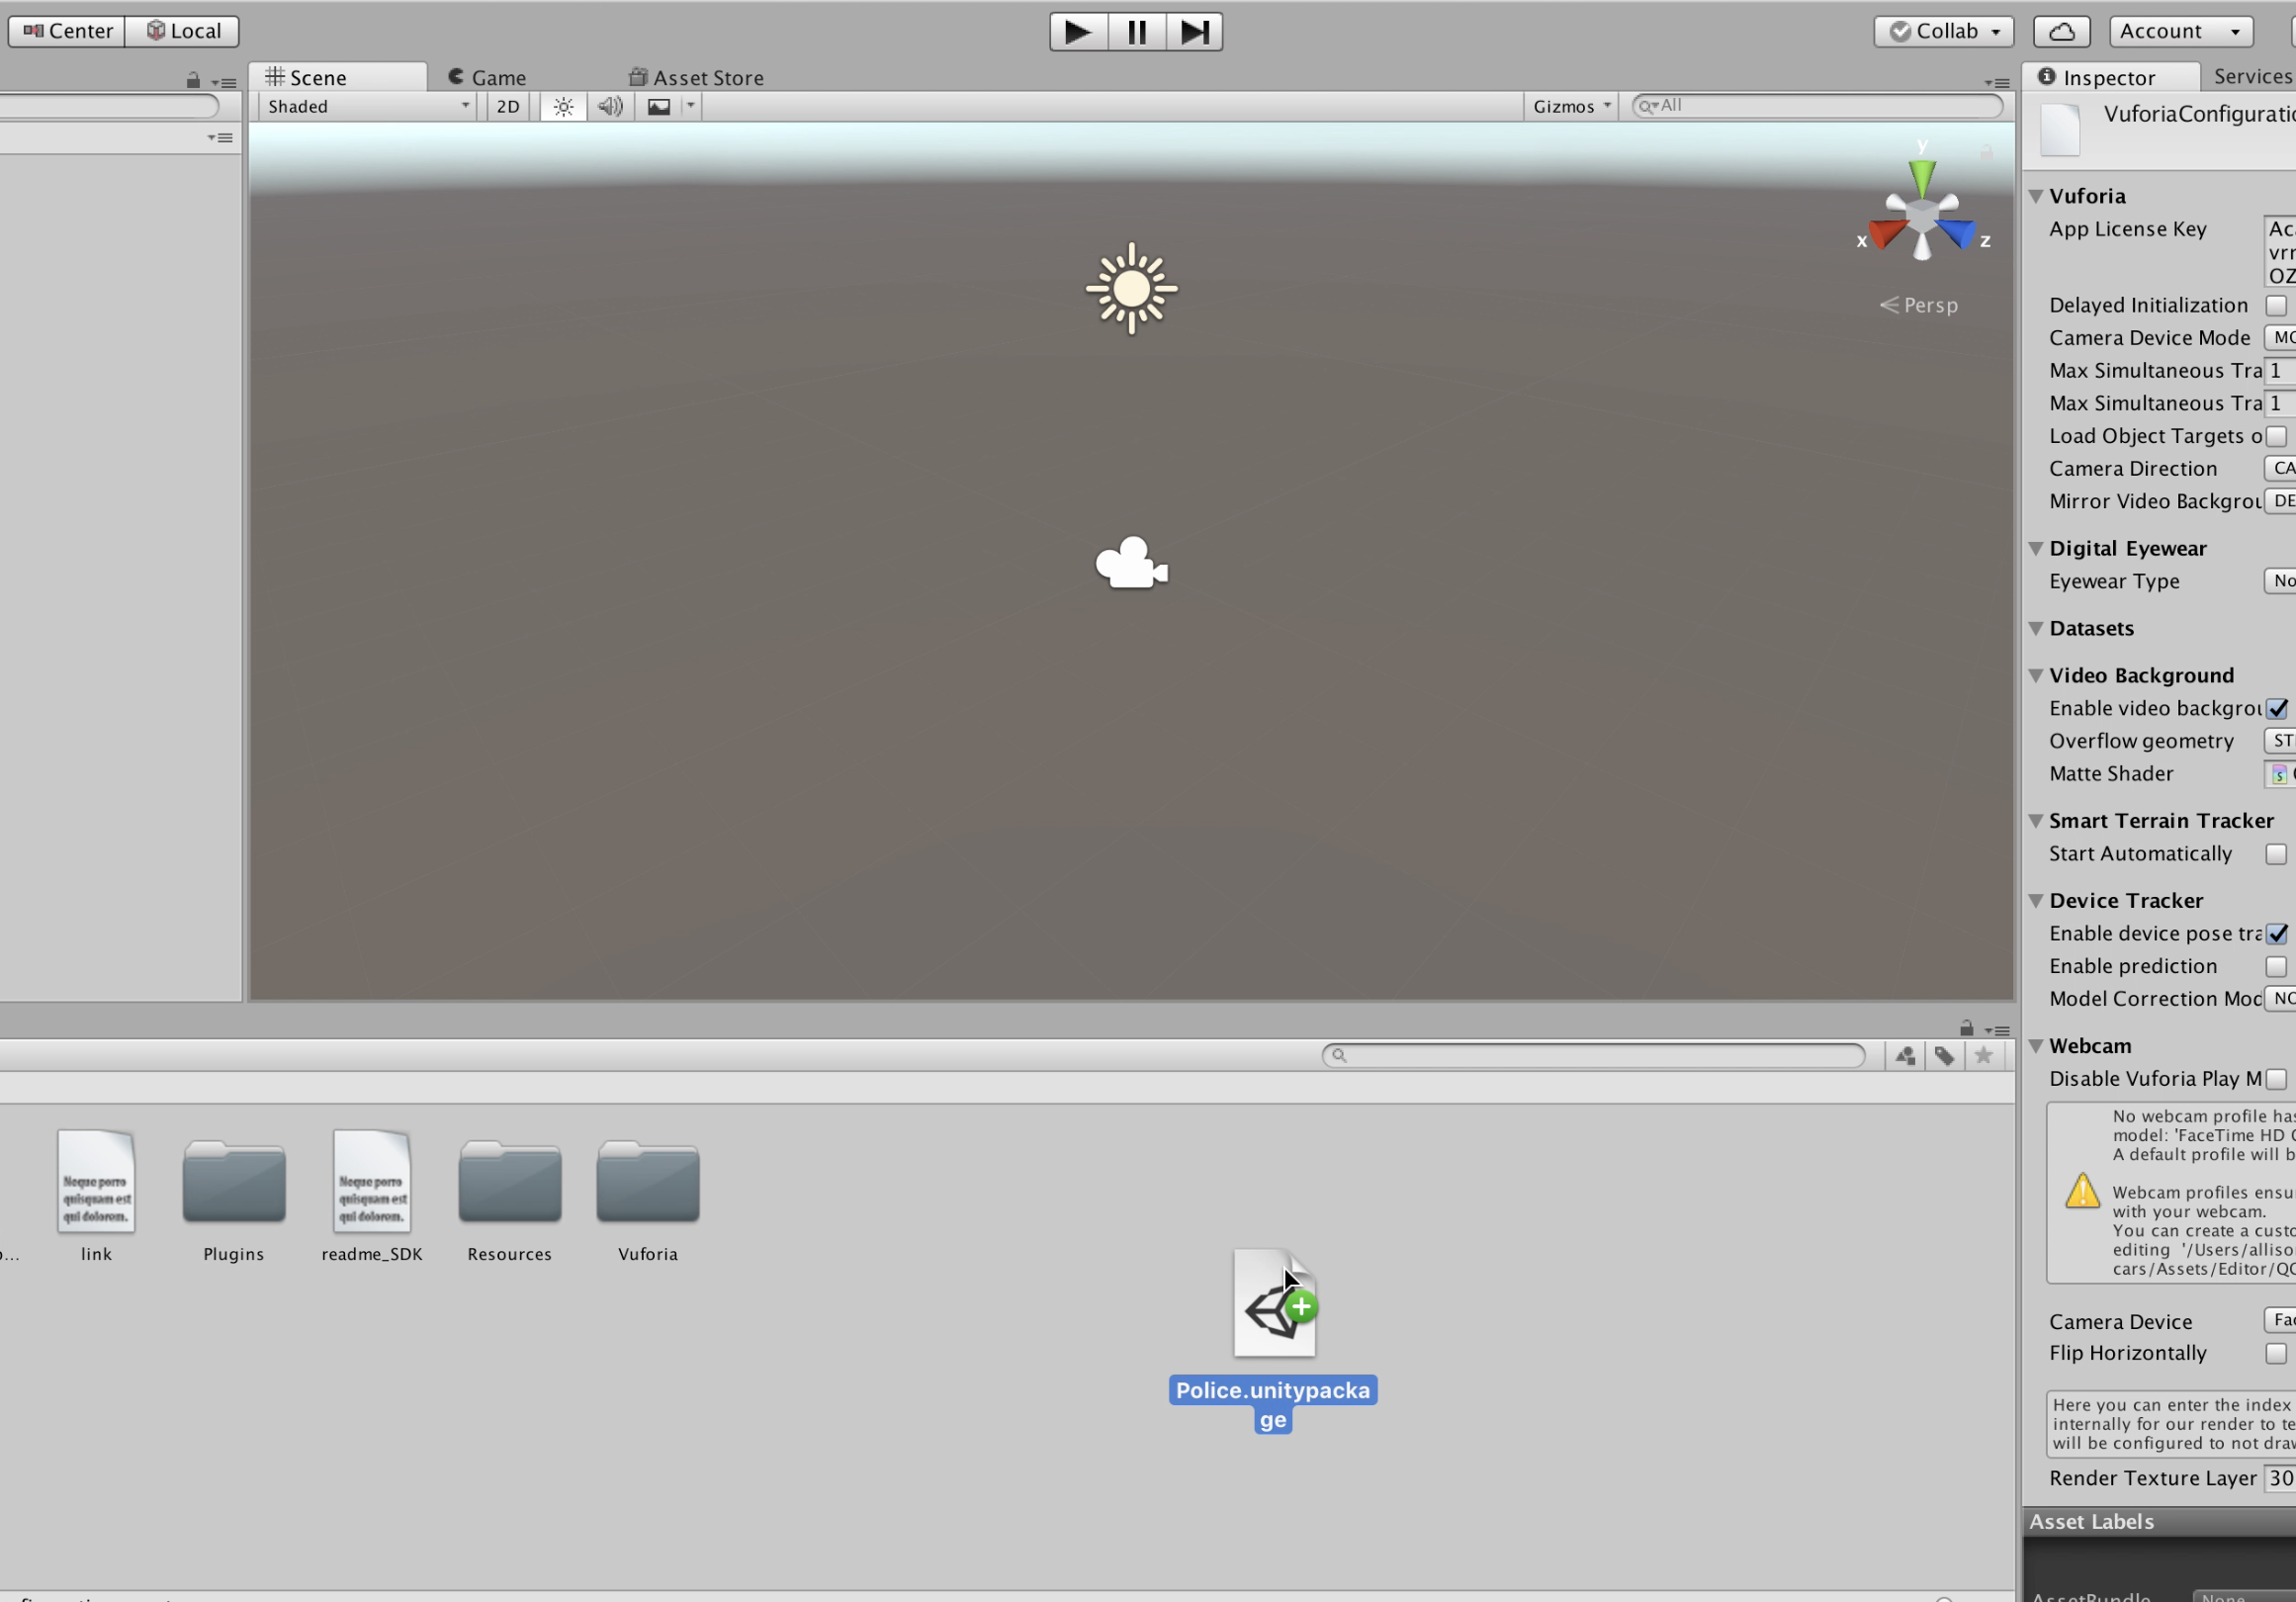
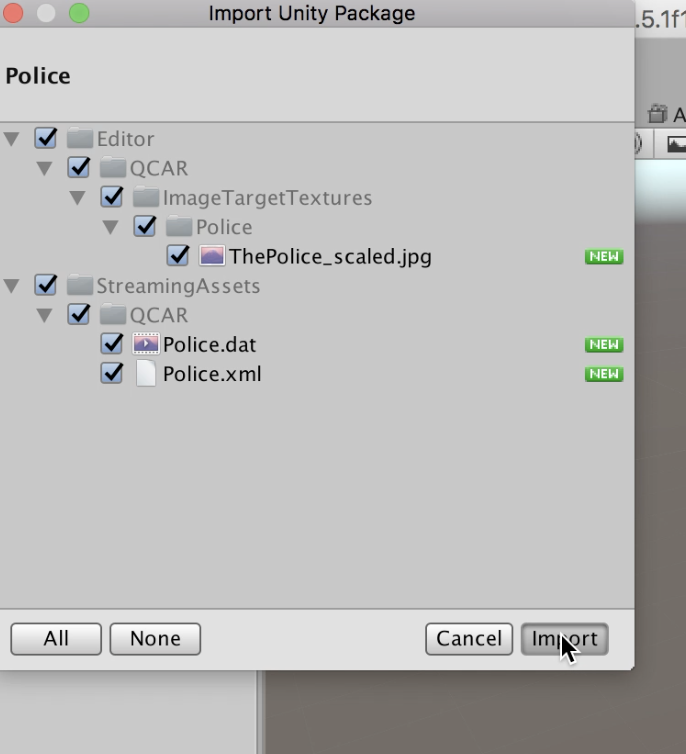
Drag your (file) unity package into unity
To do that you will:
-click on your assets folder
-drag the package in
-select "import"
Datasets
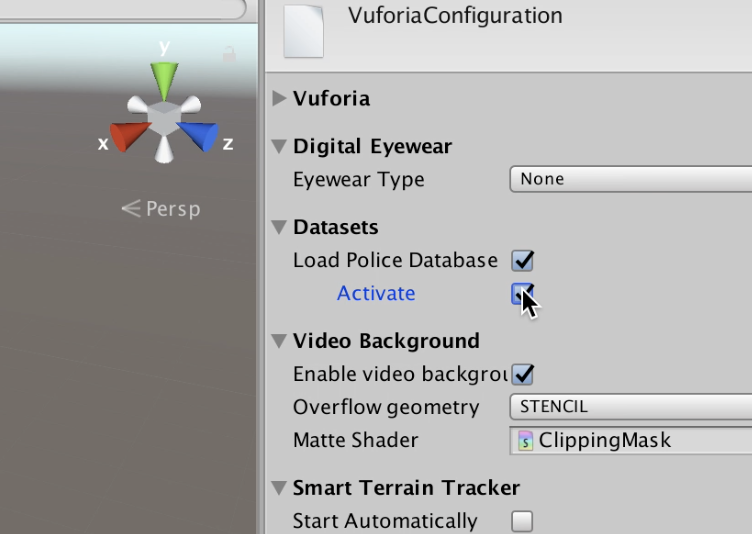
Go to "Datasets"
-click "load image file"
-click "activate"
Back to Vuforia Folder

(bottom left side) Go back to Vuforia
-click Vuforia
-click Prefabs
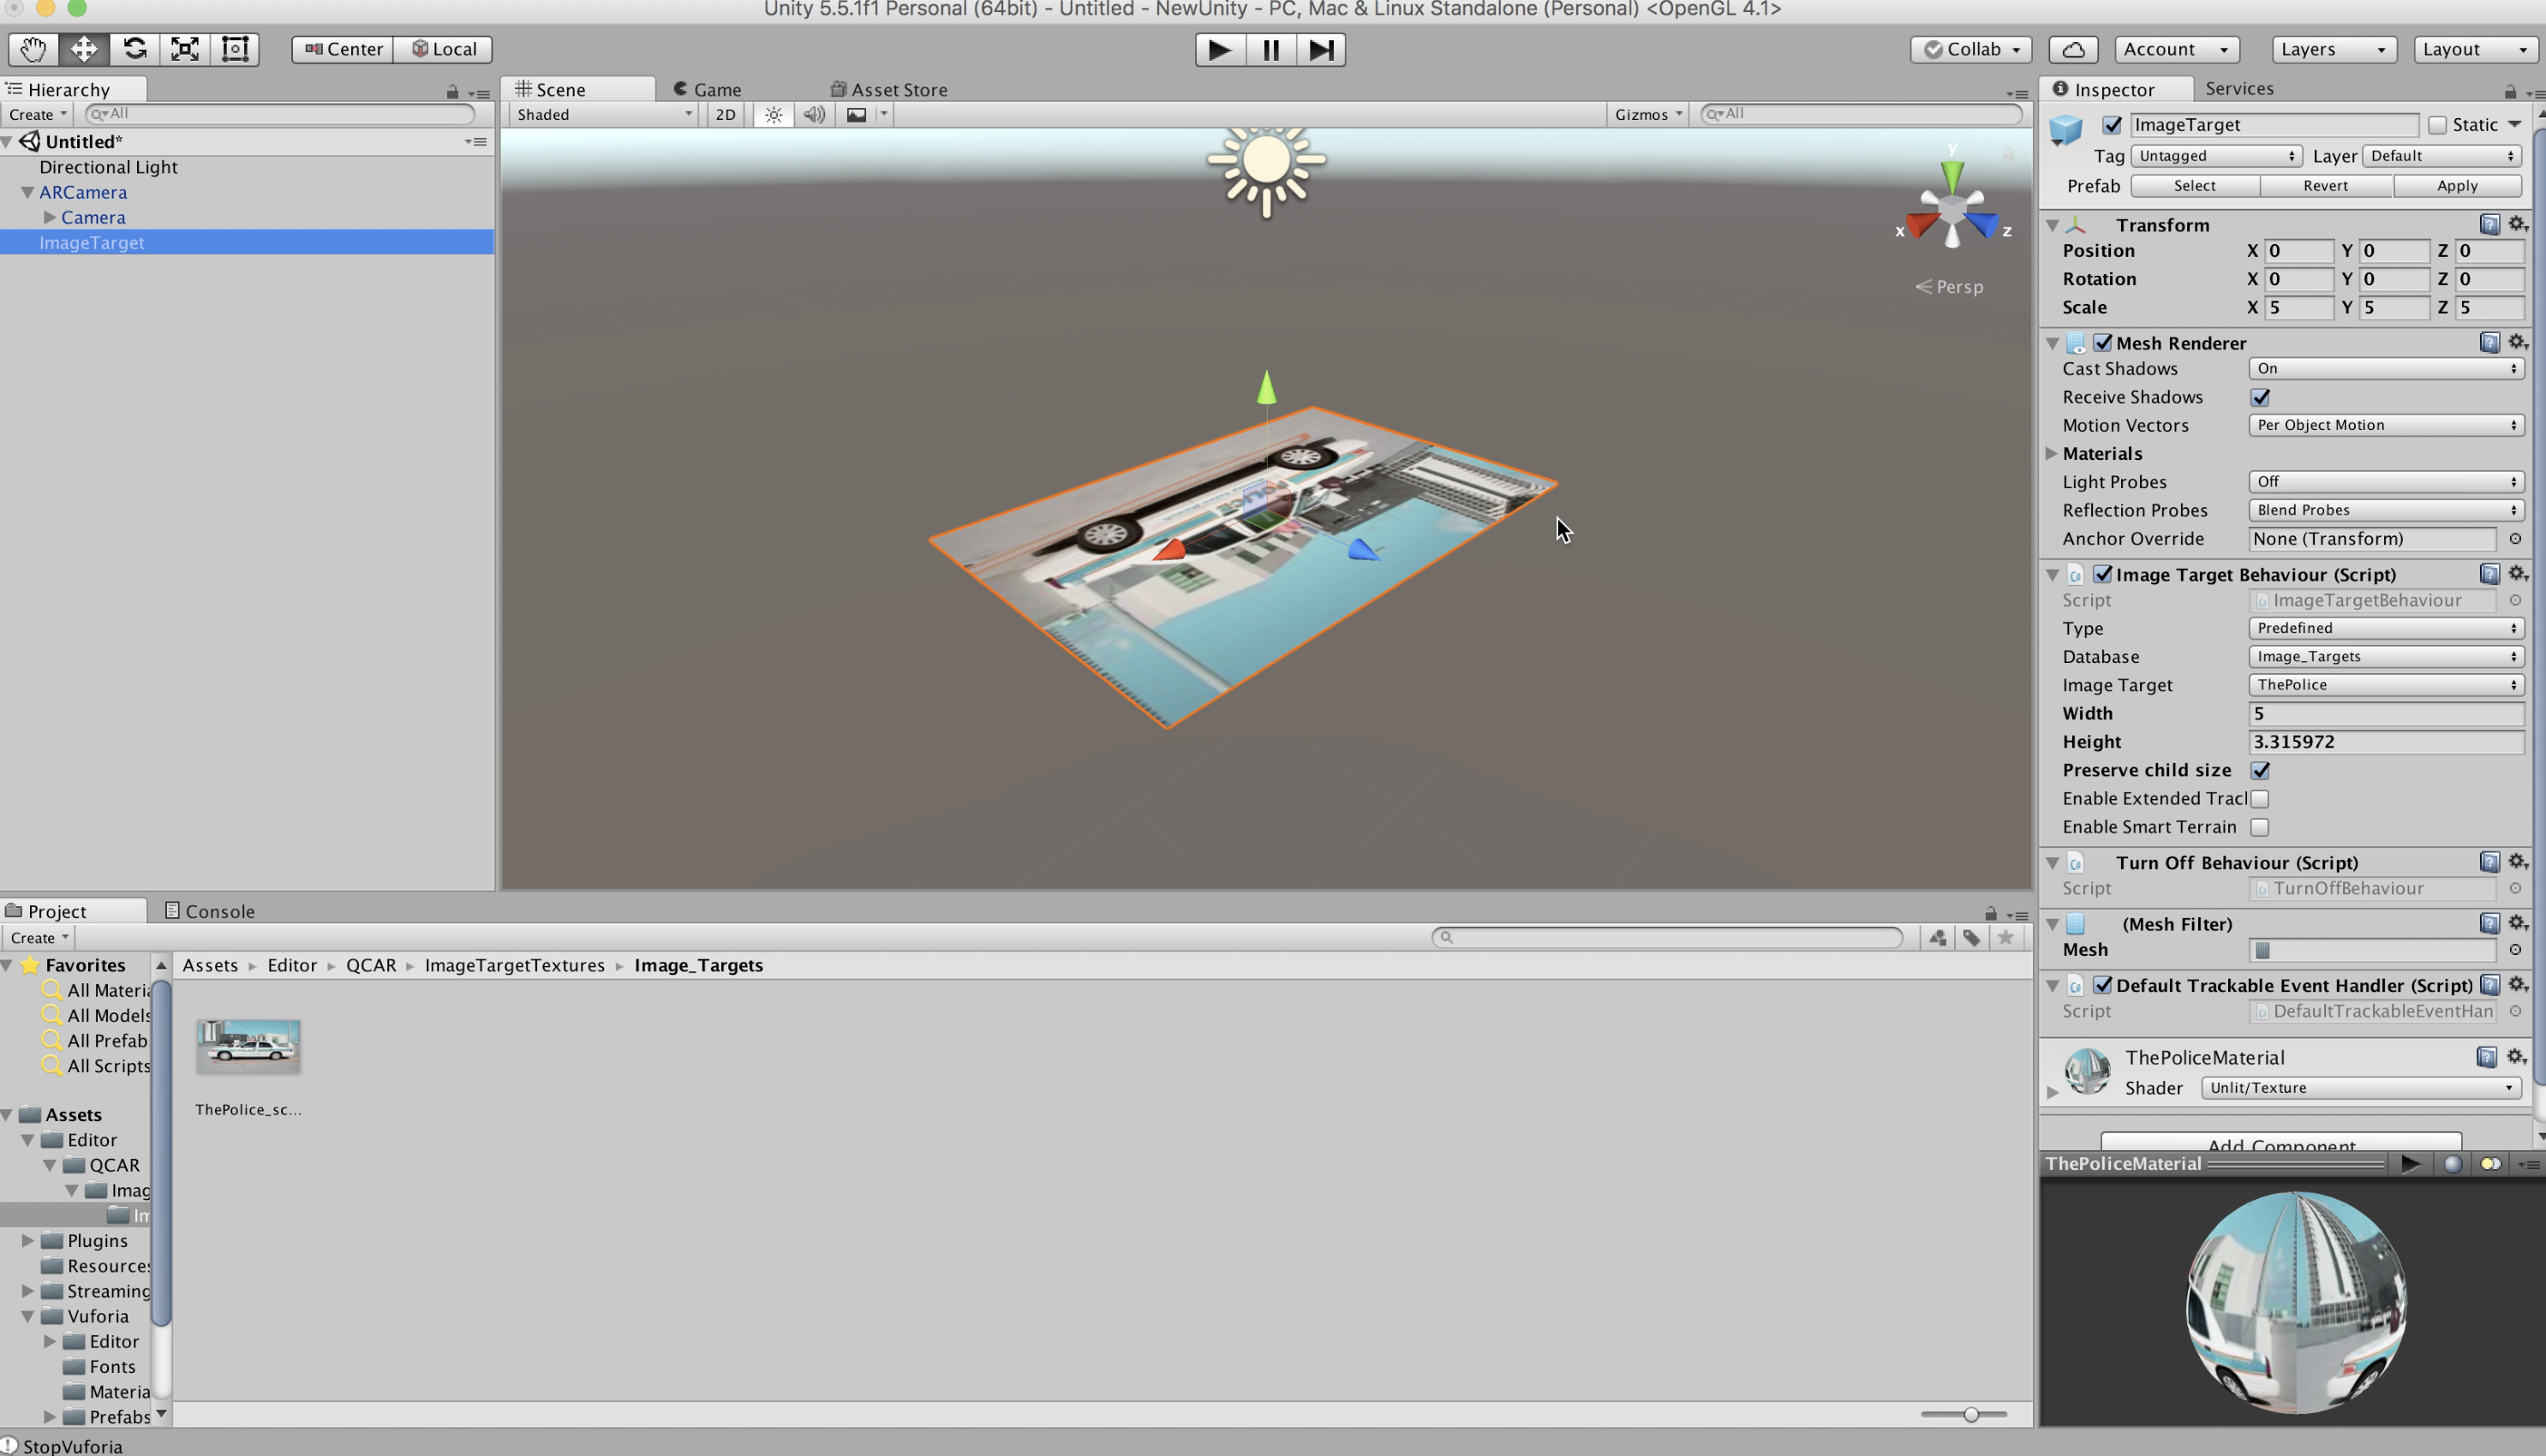
Image Target
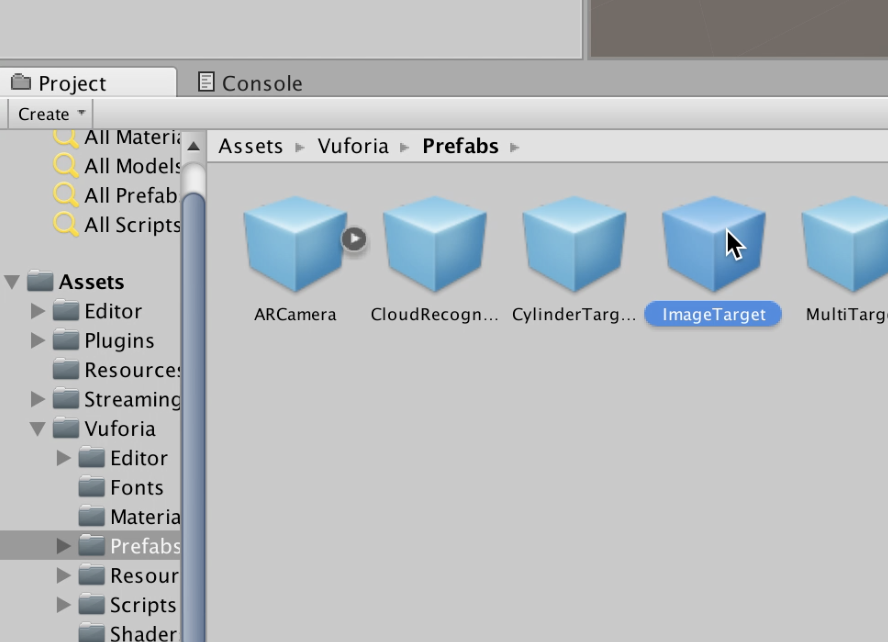
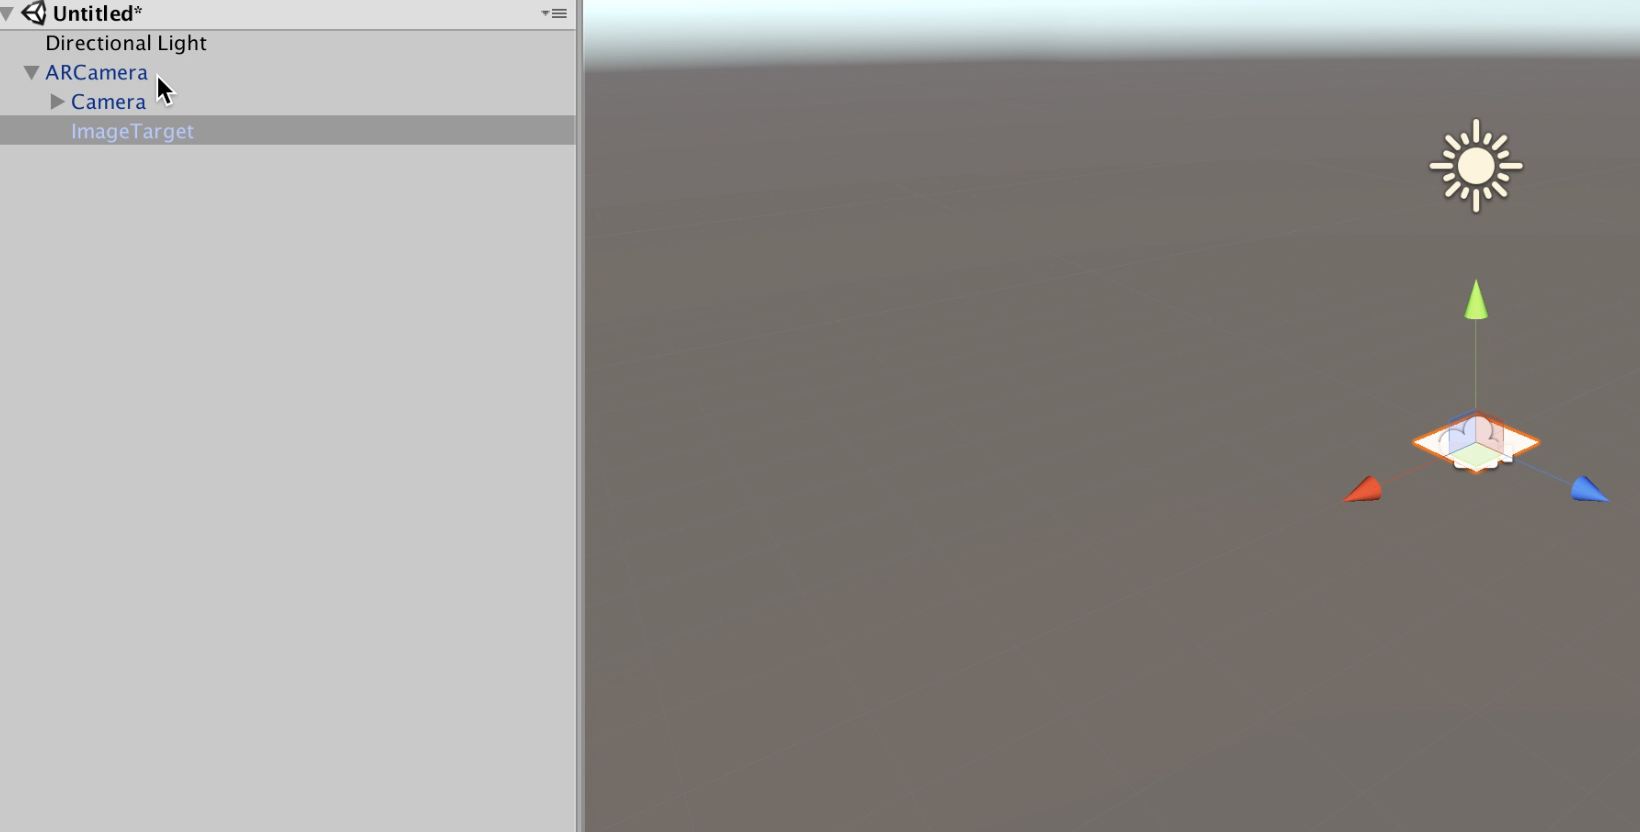
Select the blue "Image Target" cube
-drag the cube ONTO the AR camera so it becomes a child (on the top left side)
Image Target Behaviour
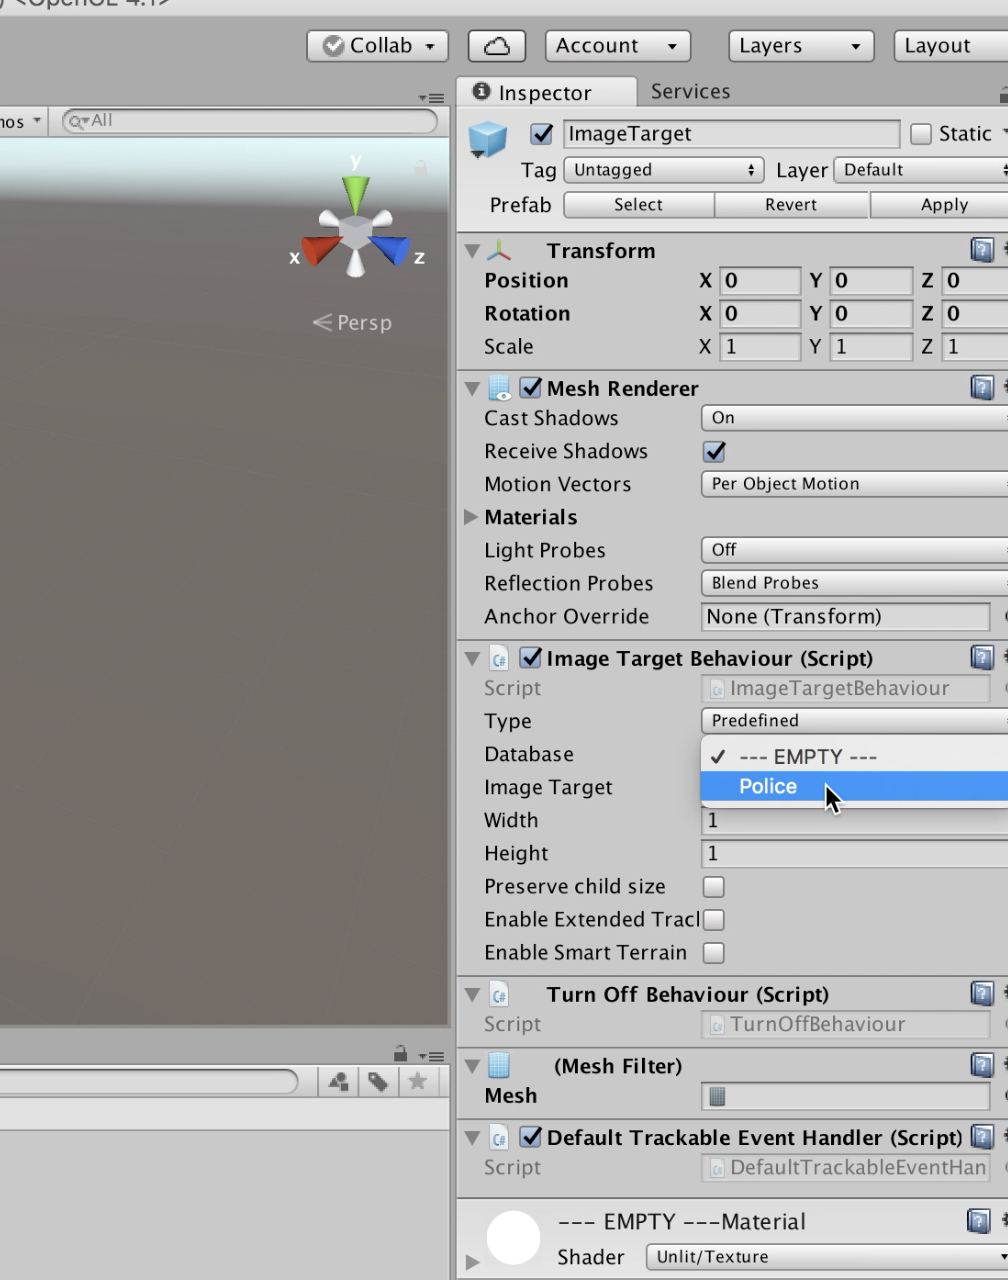
Go to: Image Target Behaviour (on the right side)
-go to database
-click targets and sure that's your file
Assets
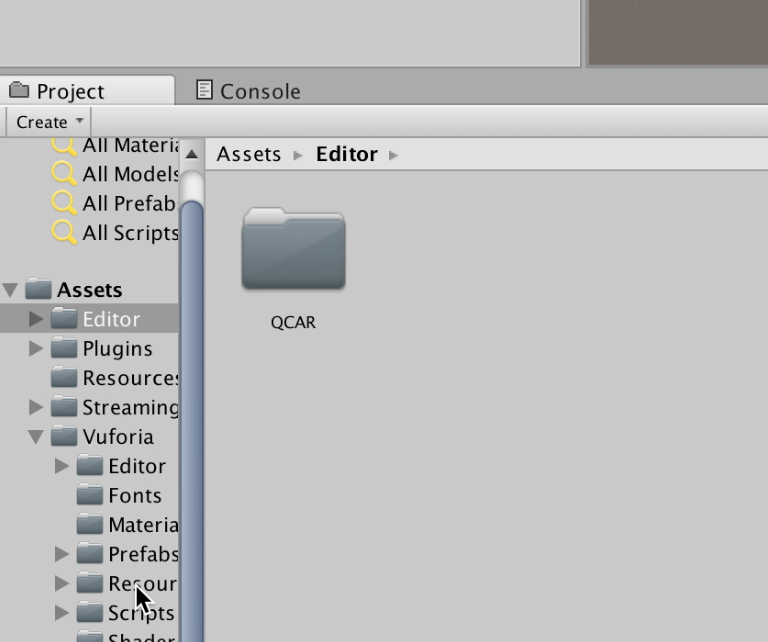
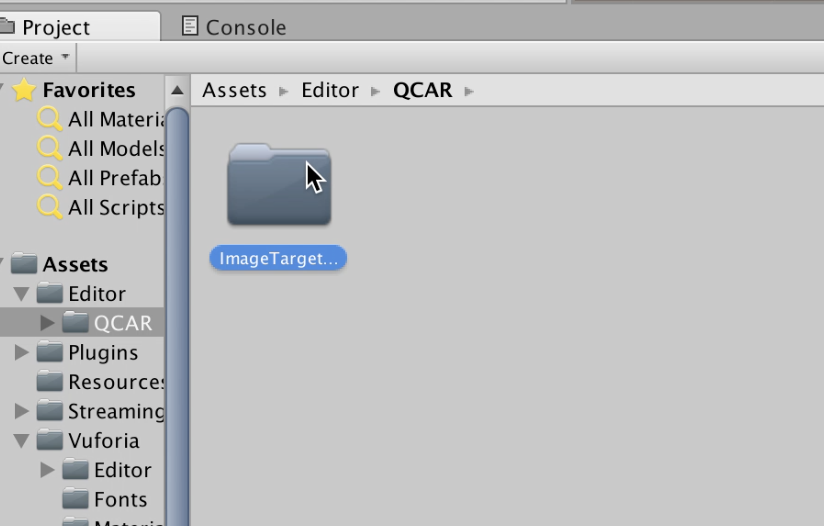

(left side) Go to assets
-click assets
-click editor
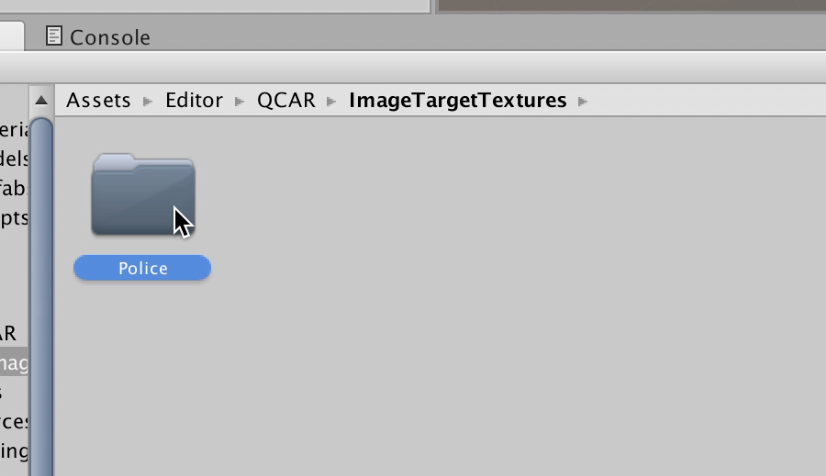
-click QCAR
-click Image Target Textures
-(your) Image_Target (mine was named police)
Click on Your File
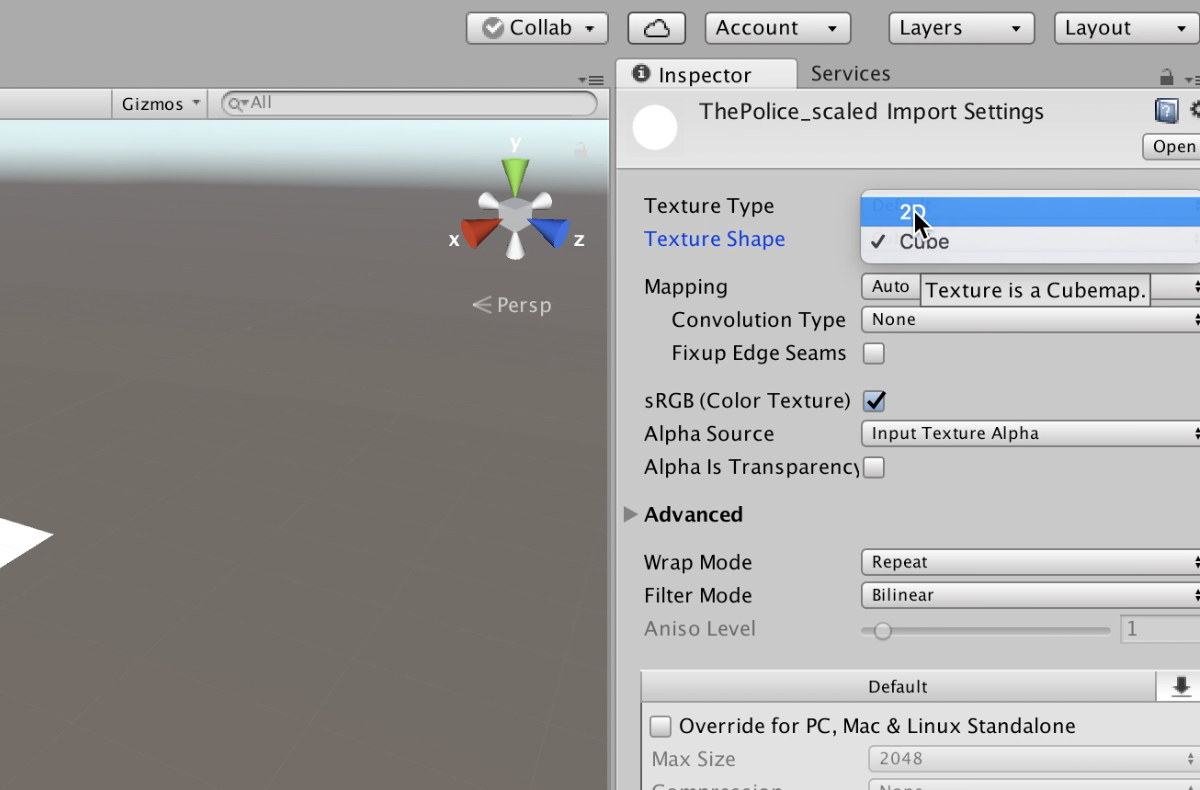
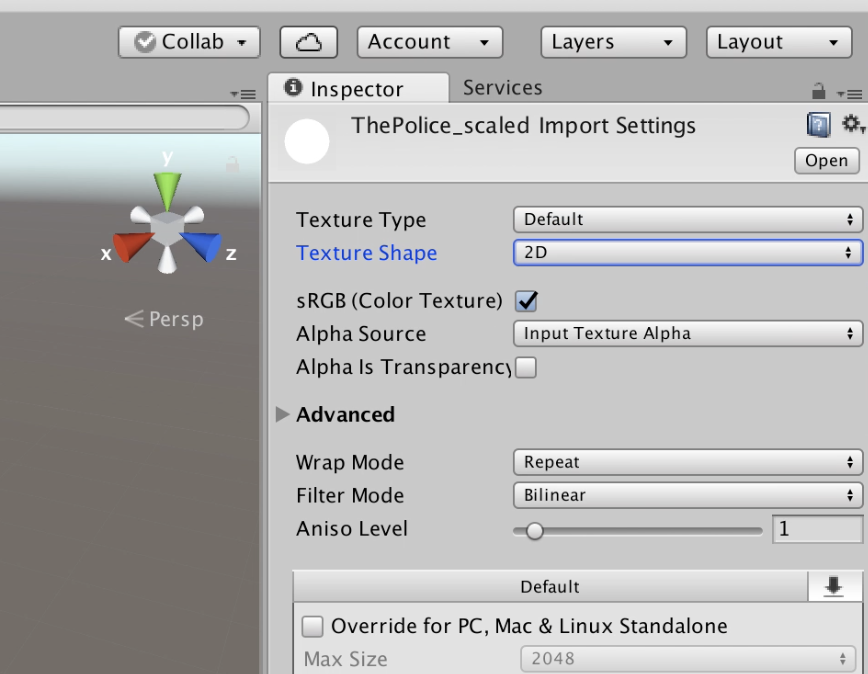
Click on your file
(right side)
-change "Texture Type": from Channel to Default
-change "Texture Shape": from Cube to 2D
Apply Image Target
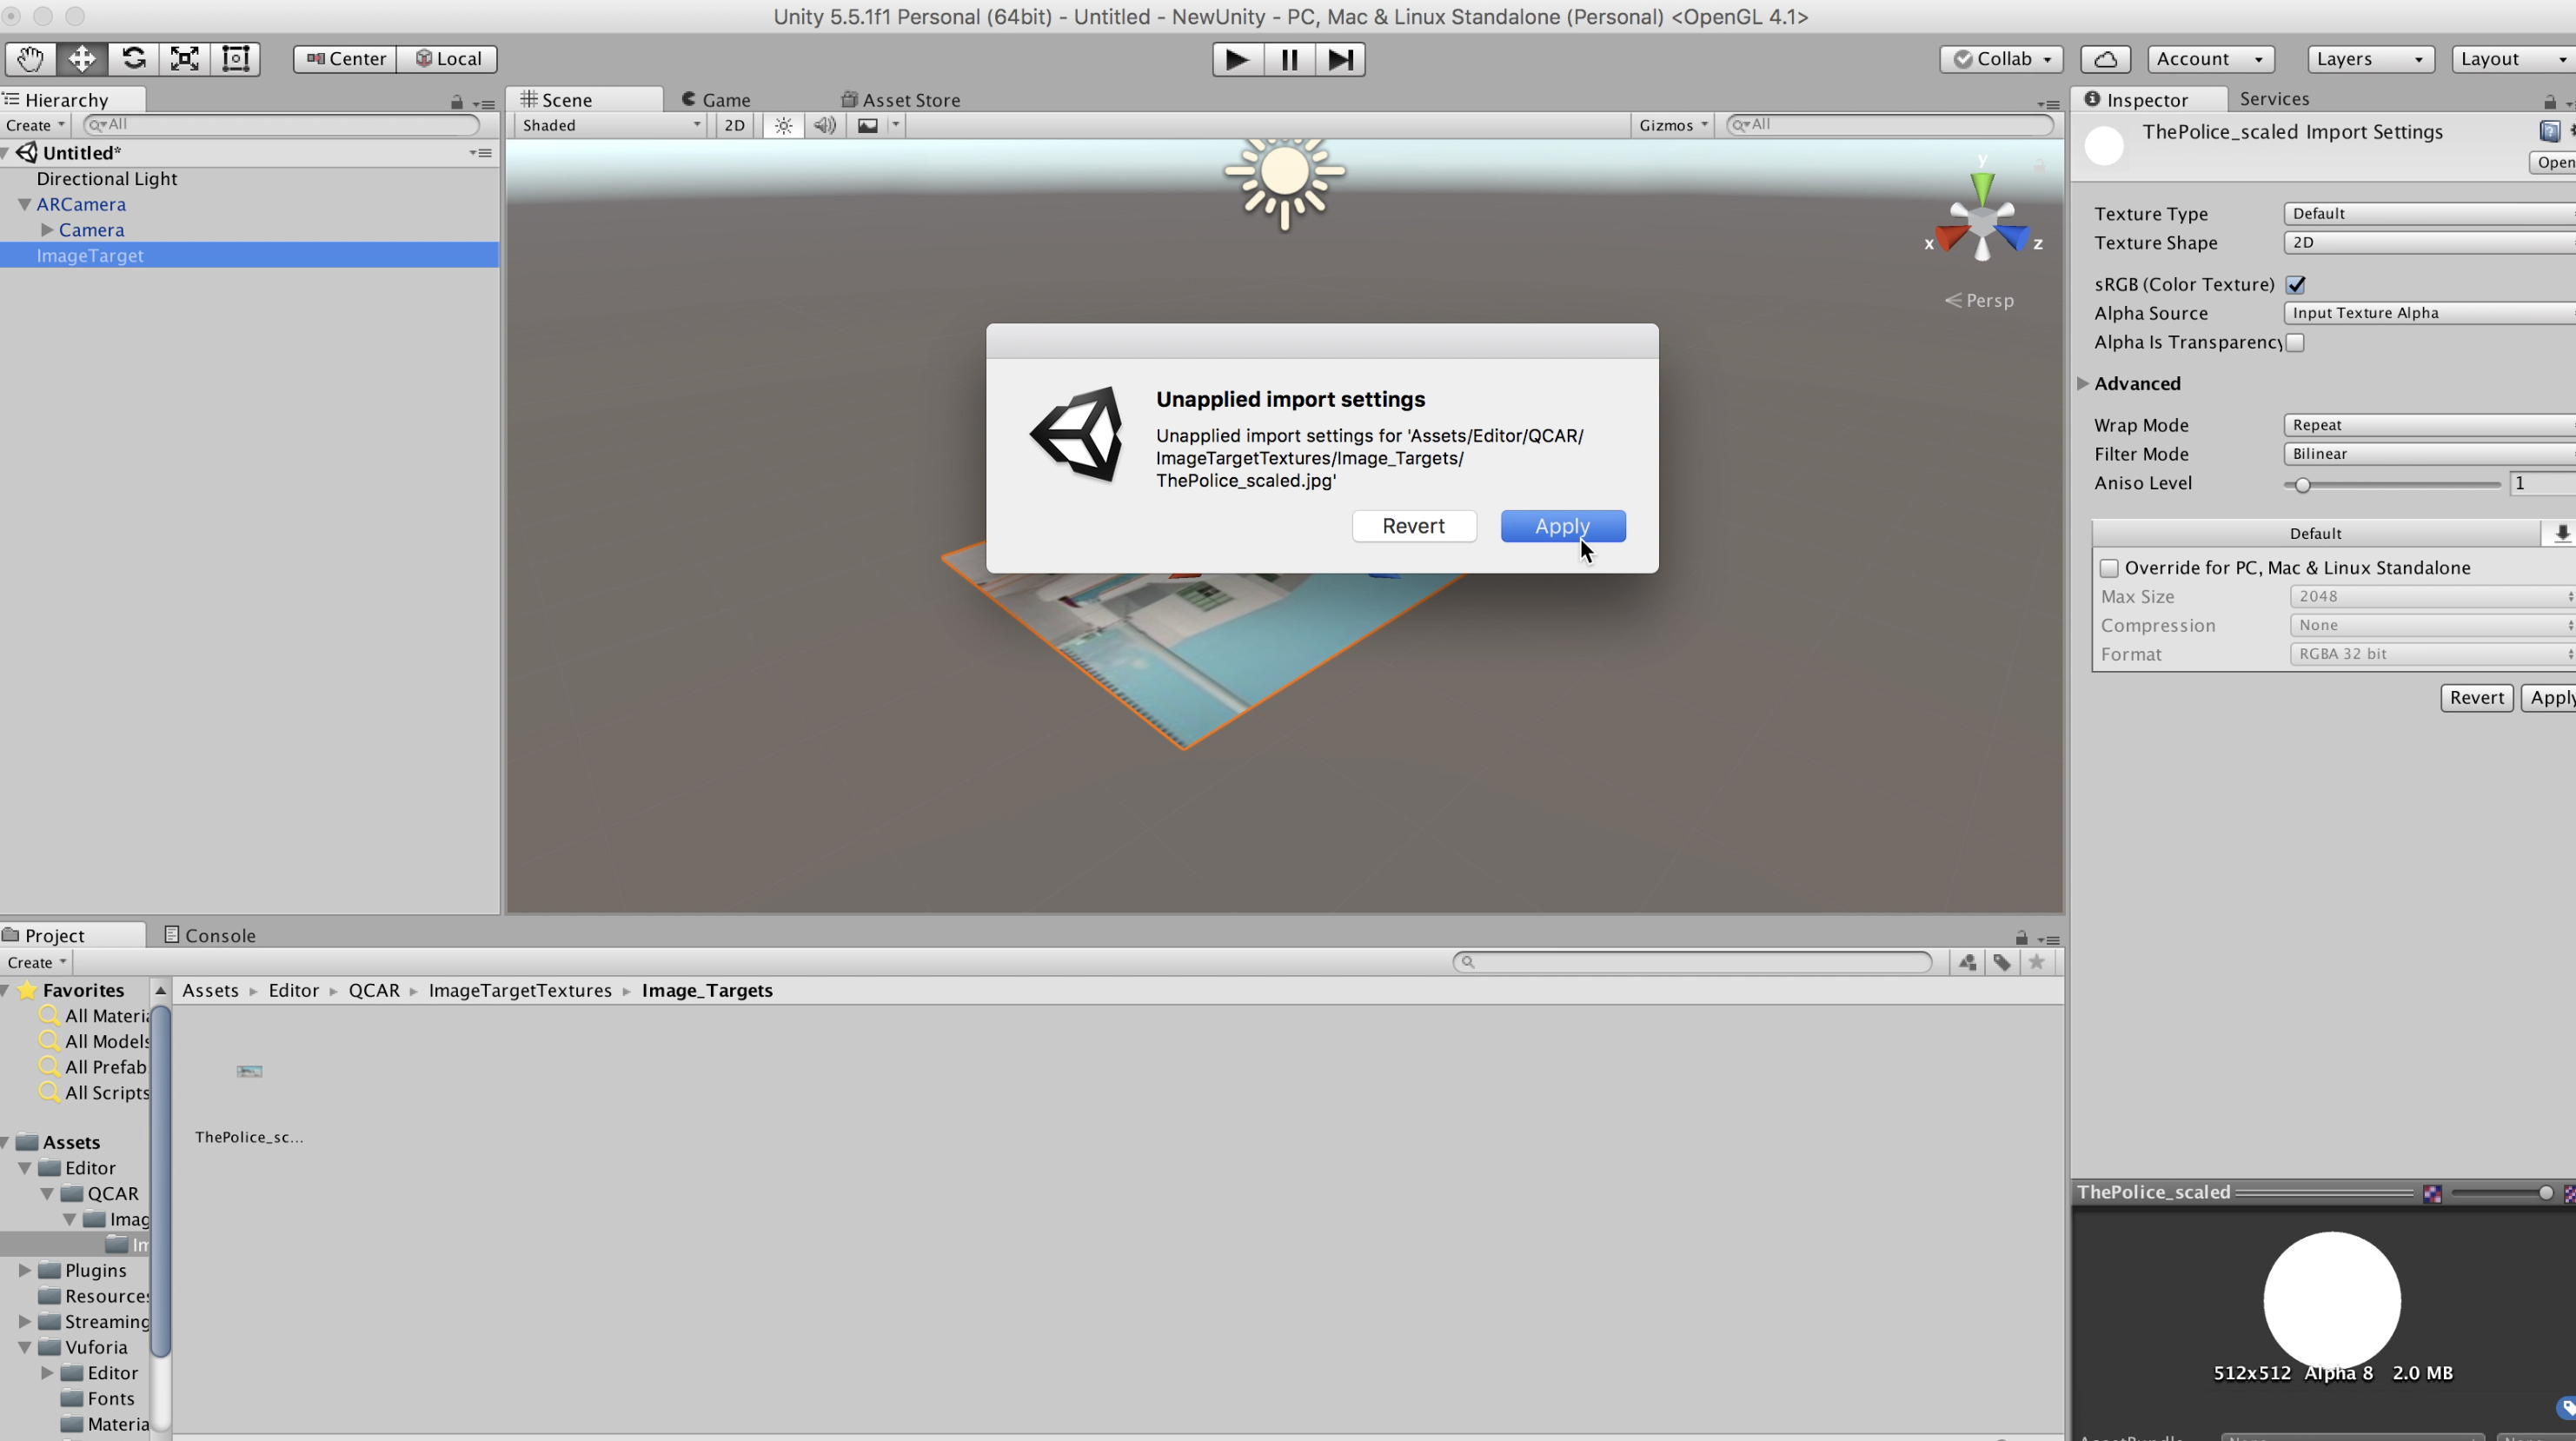
(top right side)
-go to Image Target, press it
-a window should pop up. Press: Apply
Get Object From Asset Store
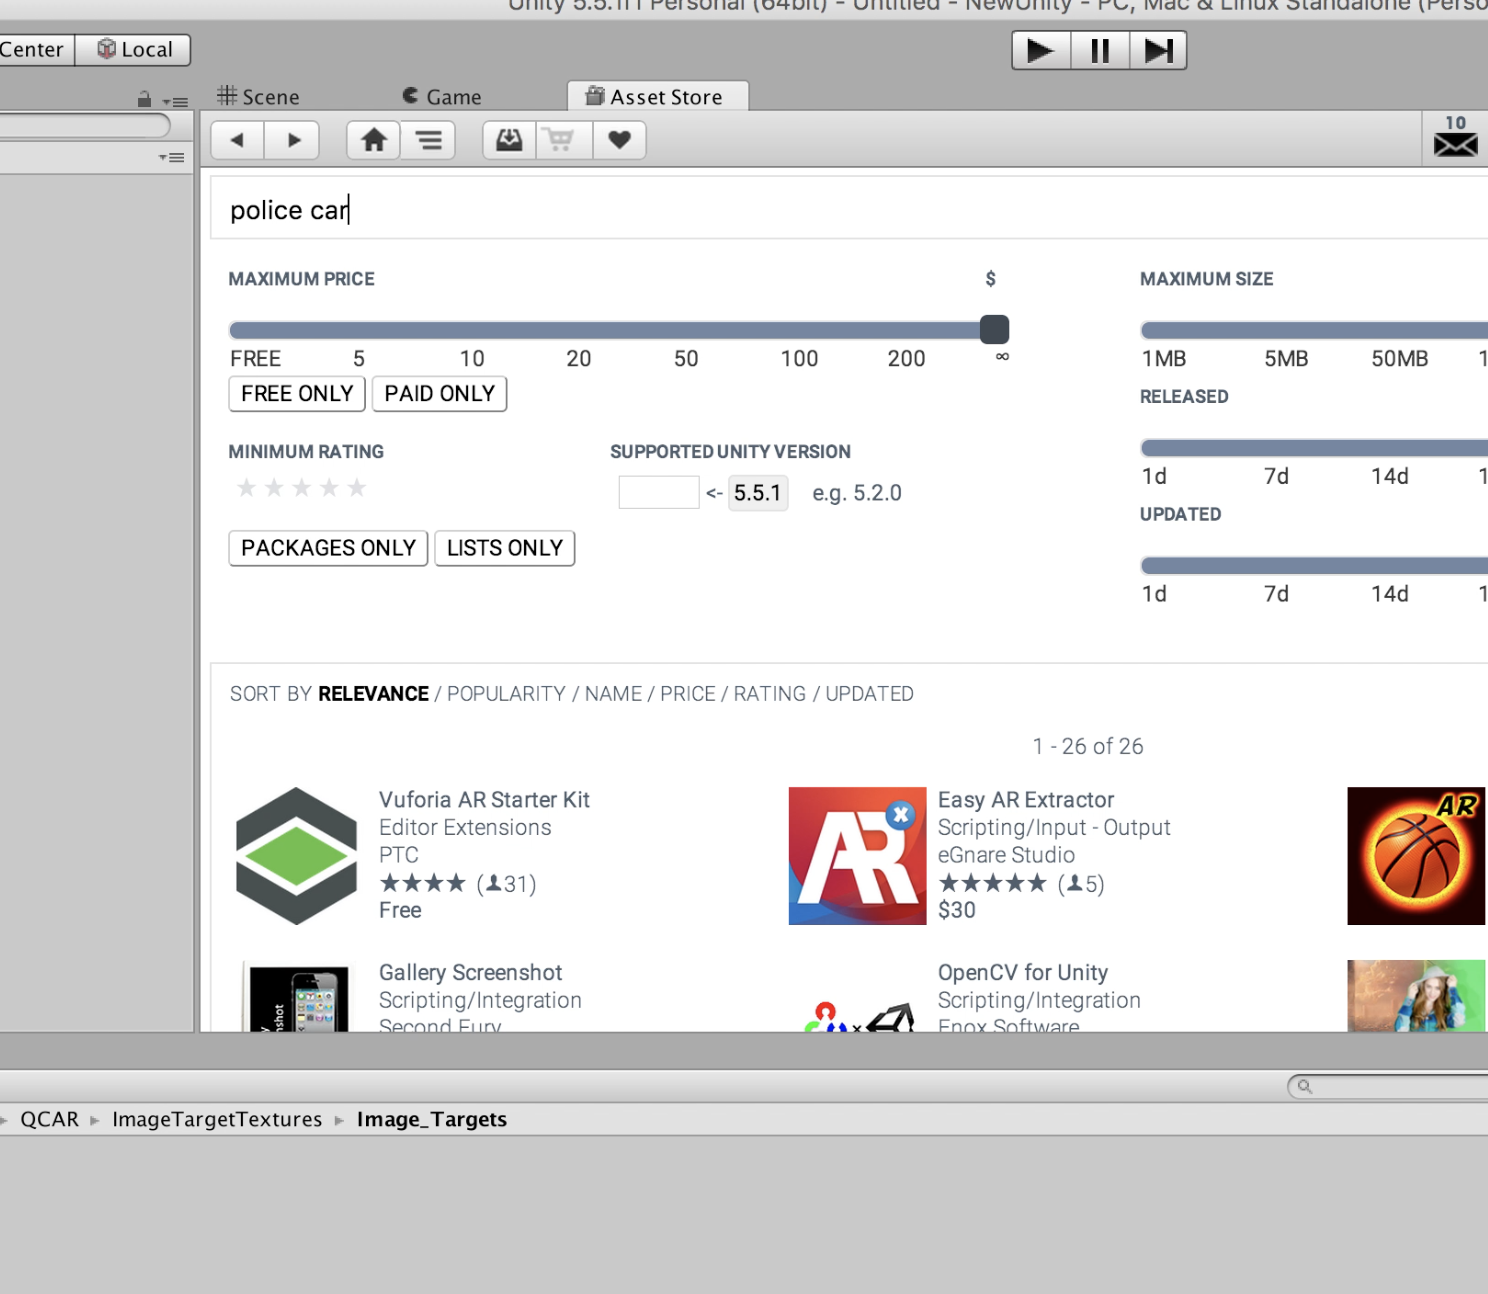
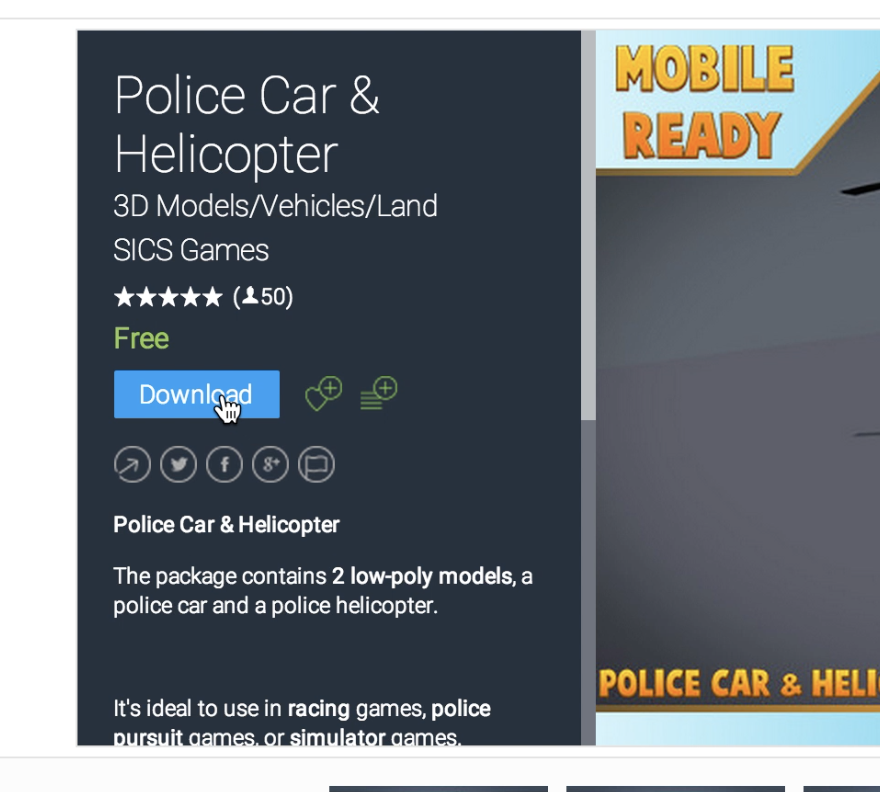
Once your image loads, go to the Asset store.
-search for an object you want to have in your scene
-chose object
-download object
-Once it downloads, press: Import
Find Folder
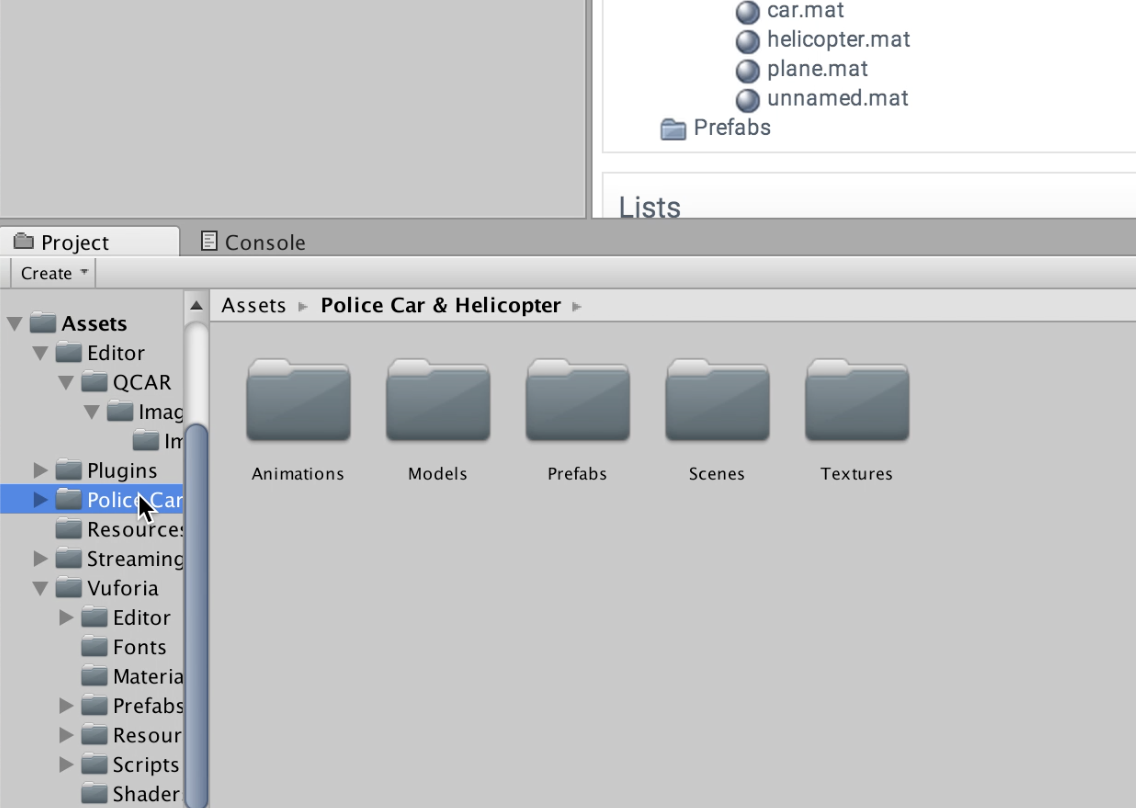
Find the new folder where you object is
(I downloaded a police car, so mine says "police car")
Models
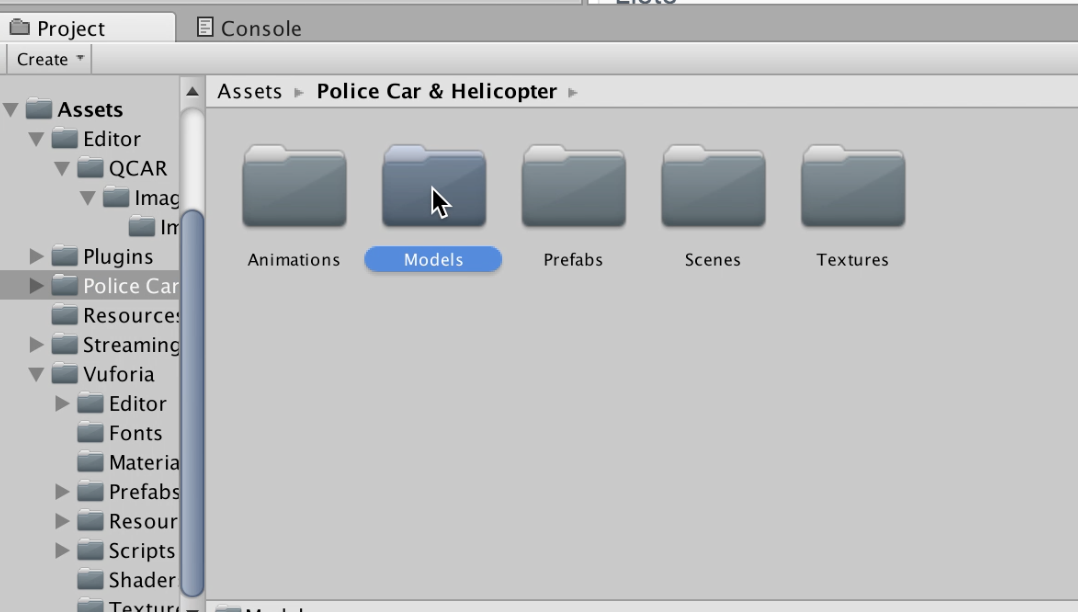
Click the new folder where your object is.
-Go to "models"
Go Back to the Main Scene
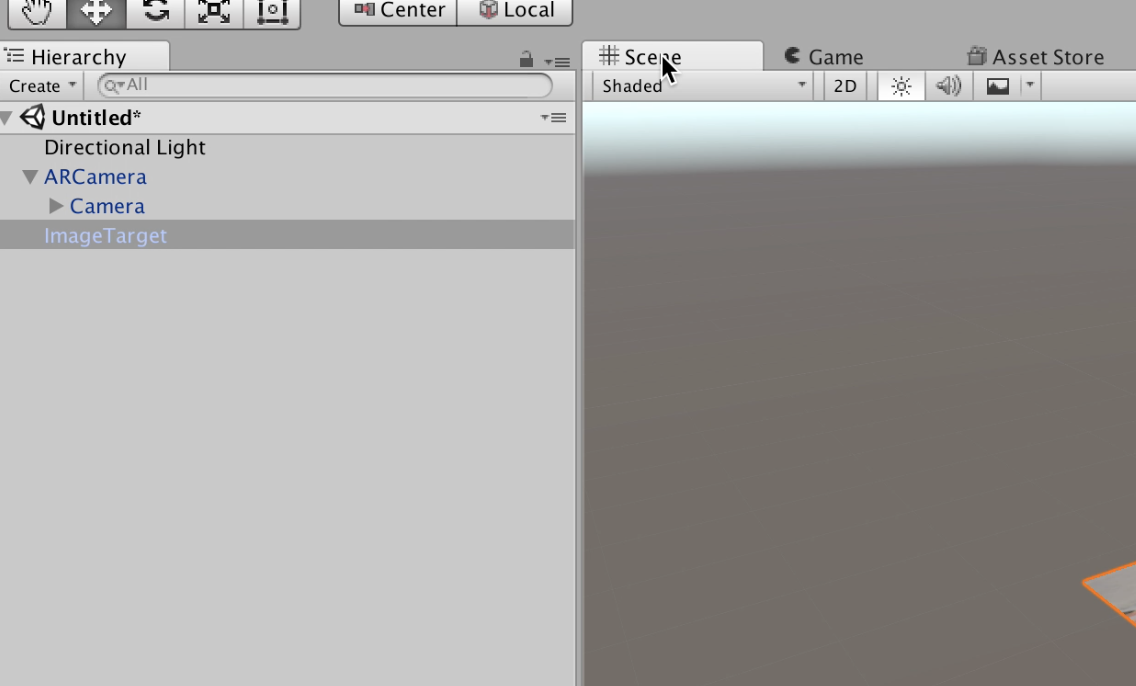
Bring your screen back to "scene" from the "asset store" window.
Position Your Object
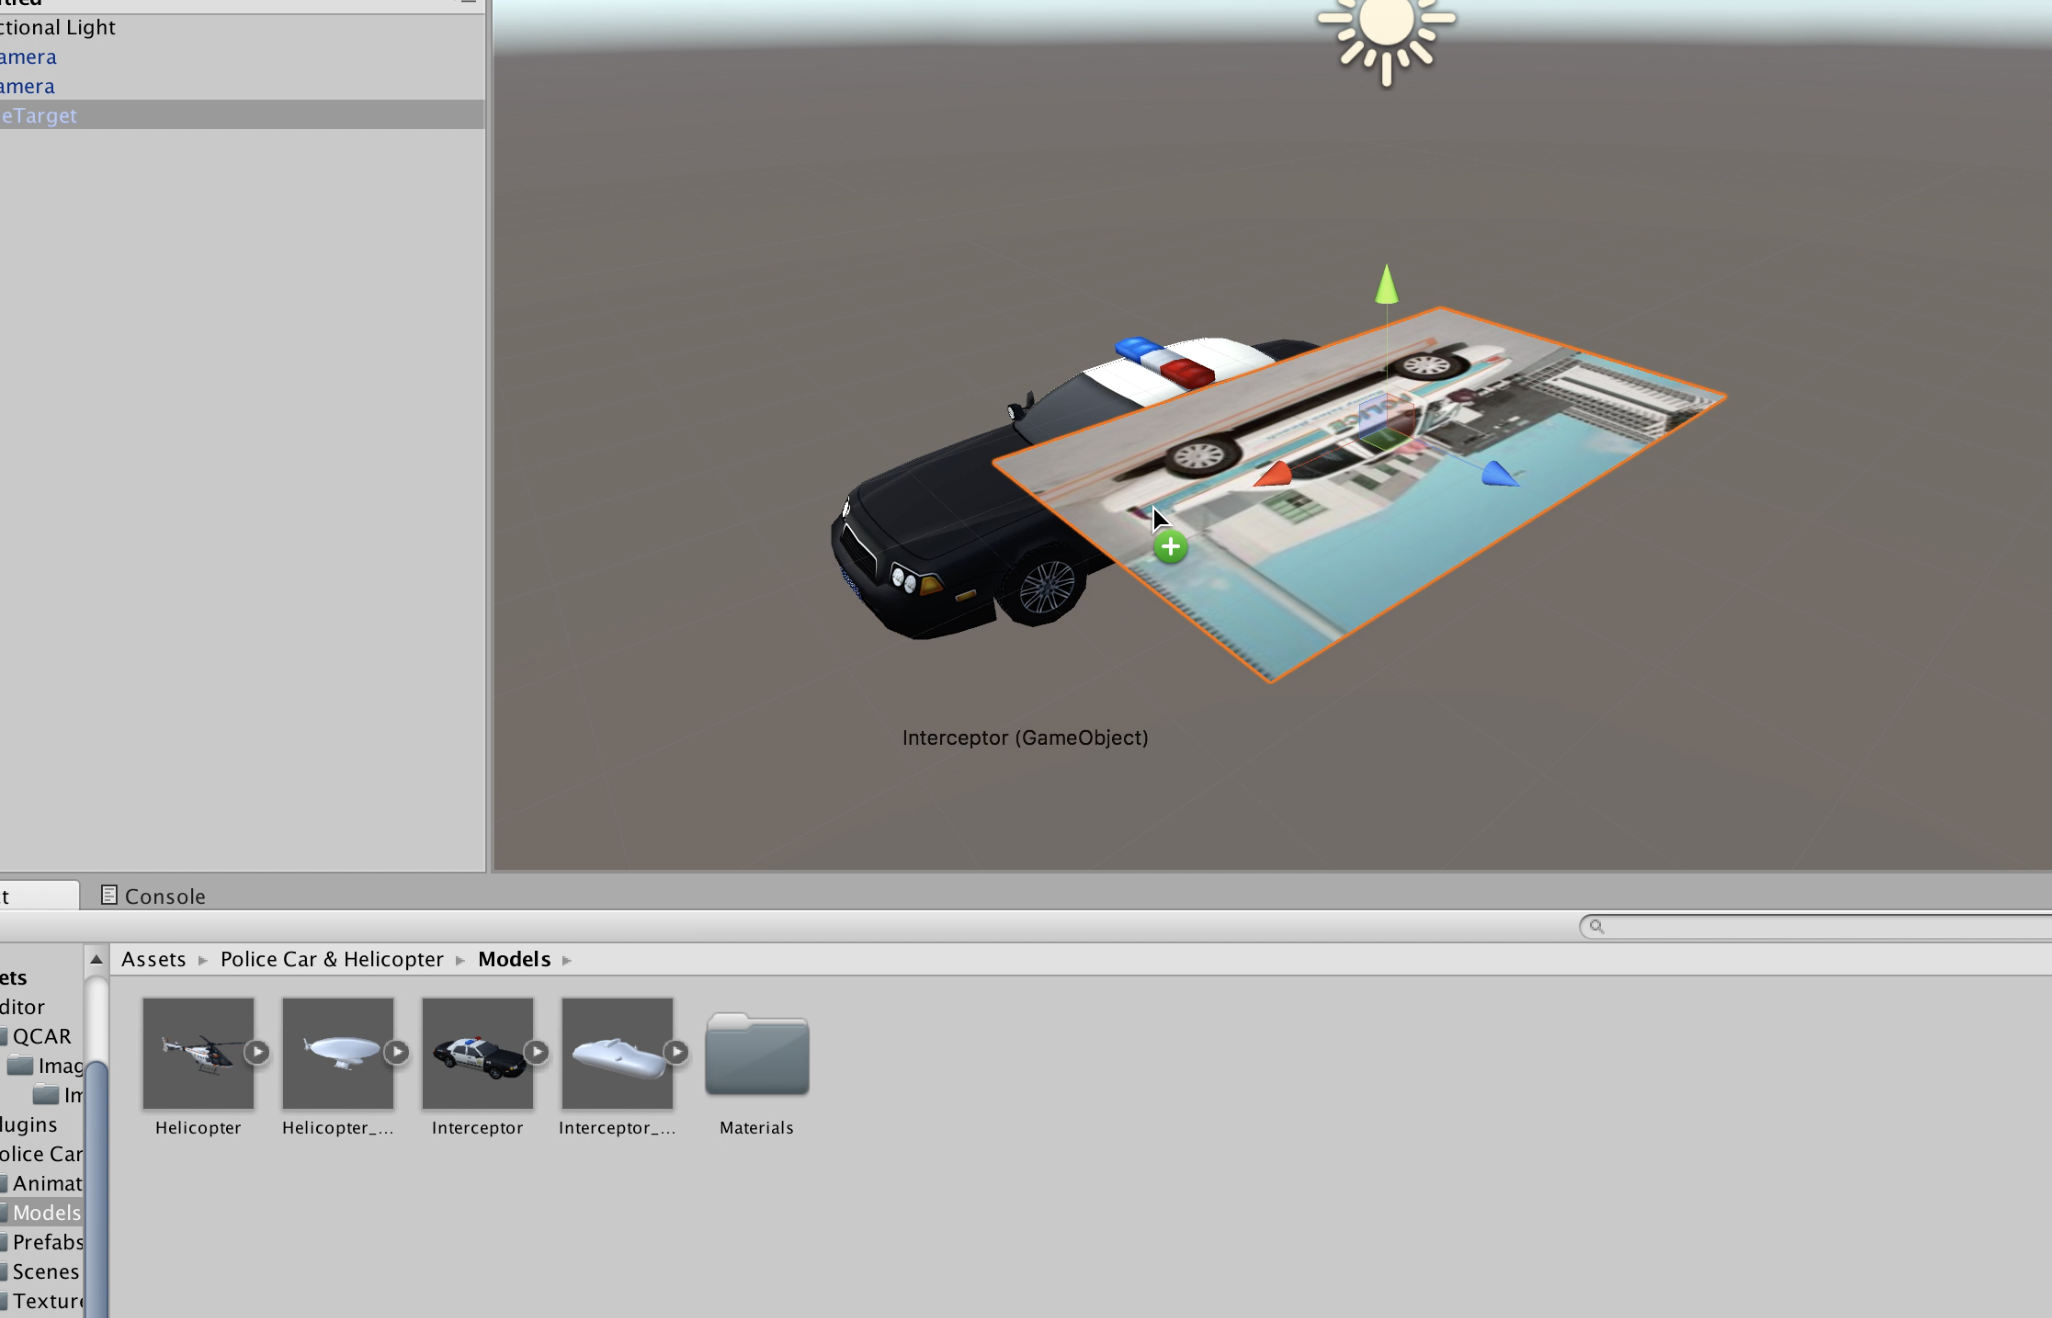
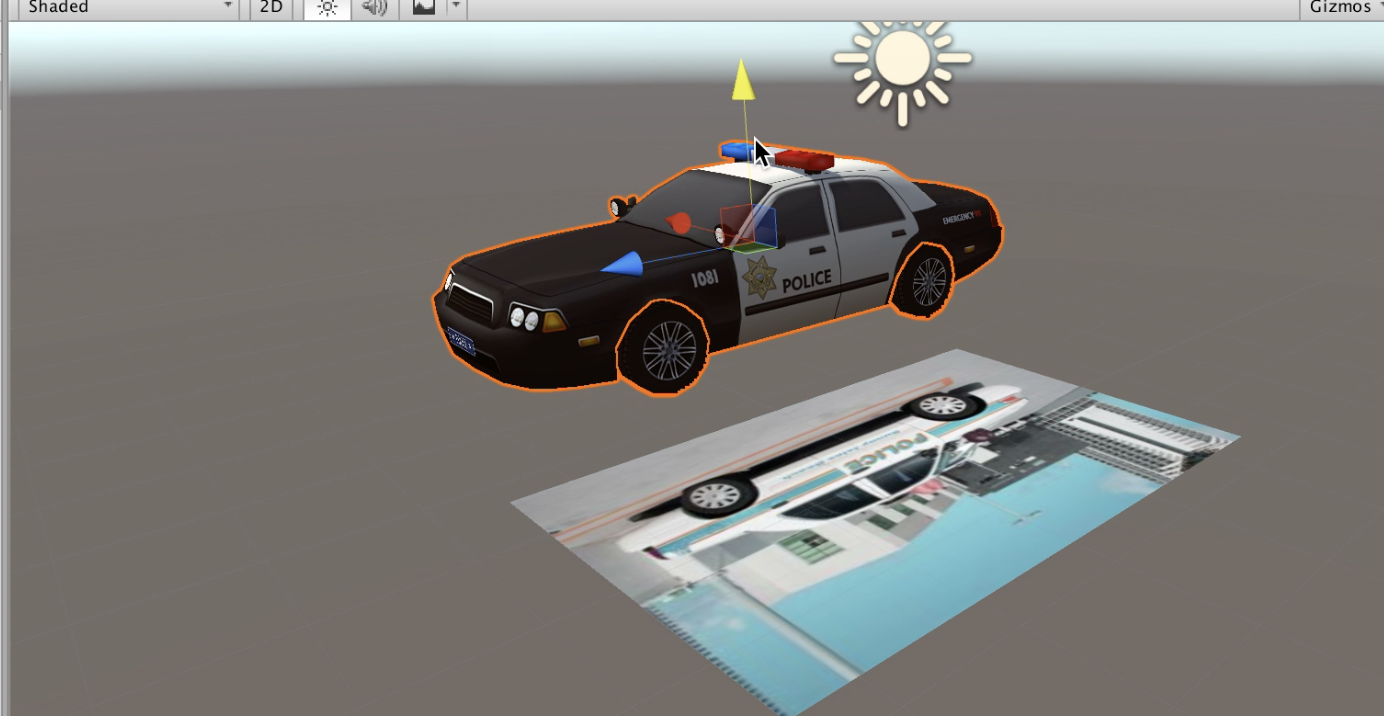
Drag and drop your new object onto the screen
-use the blue, red, and green arrows to position your object
Activate Your Image
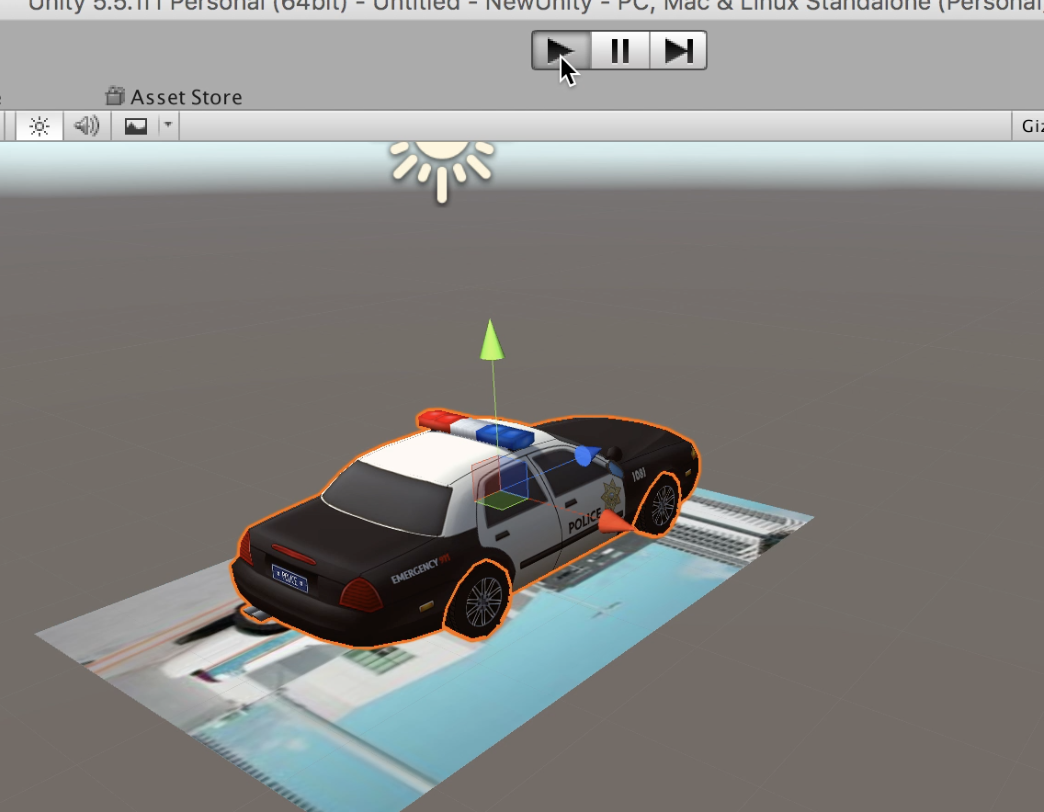
Once everything is positioned and scale:
-press the left arrow on the top of your screen to play and activate your image
Time to Play
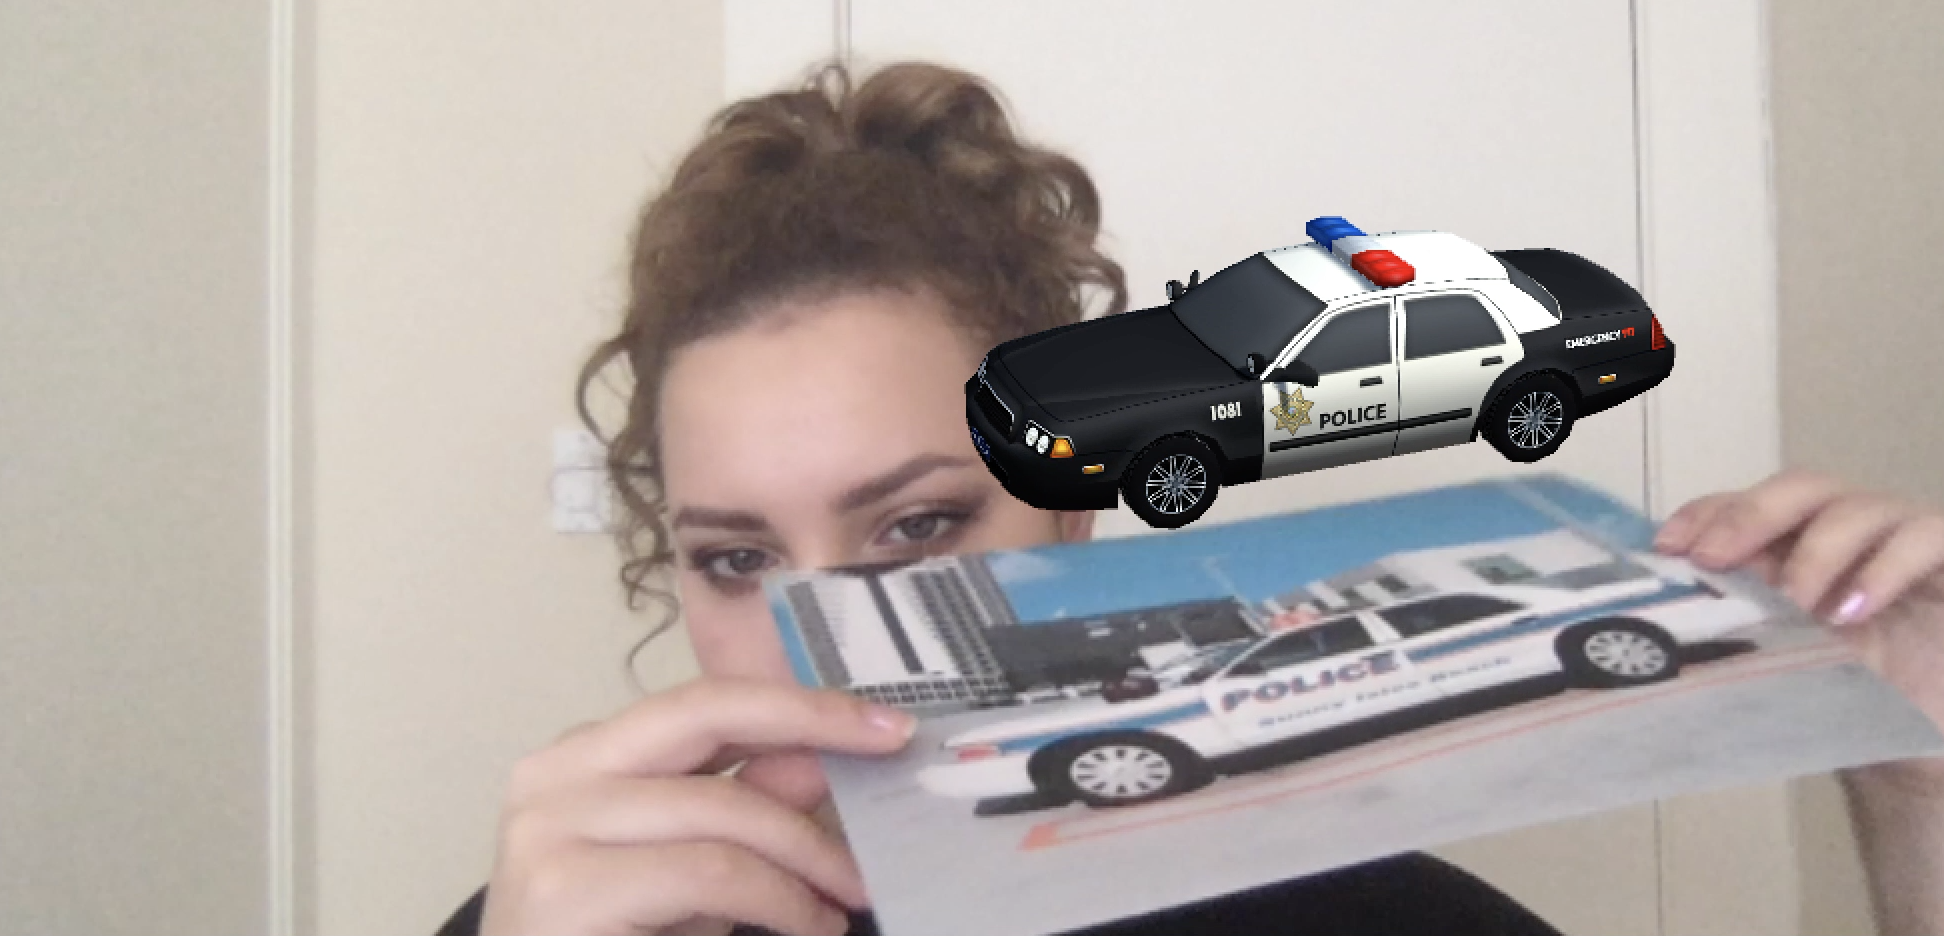
Now, have fun :)