Audiobooks for Your IPod From Purchased Books on CD
by runfromnuke in Circuits > Apple
1591 Views, 5 Favorites, 0 Comments
Audiobooks for Your IPod From Purchased Books on CD
This instructable is for those of us who wish to have complete access to our pre-purchased media through our iPods. I guess this system could work for other portable devices that will work through iTunes, but I'm not entirely sure.
Things you will need:
iTunes
An audiobook (or many audiobooks) on CD
iPod -- One with a large storage capacity is preferred, but these instructions will show you how to minimize the file size.
TIME -- You can easily find this in those spaces where you aren't doing anything!
OPTIONAL:
Audacity (Get the stable version.)
LAME MP3 Encoder (Get this one before you install Audacity)
When installing Audacity, it should automatically locate the LAME MP3 Encoder if I remember correctly. If not, it will ask you to locate it, so put it someplace easy to find.
*I am not responsible for what you do with this instructable.*
Your Audiobooks

As you will have noticed, audiobooks come on MANY CDs. I've seen some with four disks, and others with twelve. Either way, this will take a lot of time.
Make sure all of the disks are rather clean; too many scratches and it will not read properly when you're ripping it.
Make sure all of the disks are rather clean; too many scratches and it will not read properly when you're ripping it.
Preparing ITunes
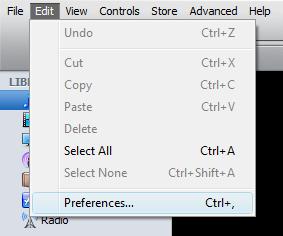
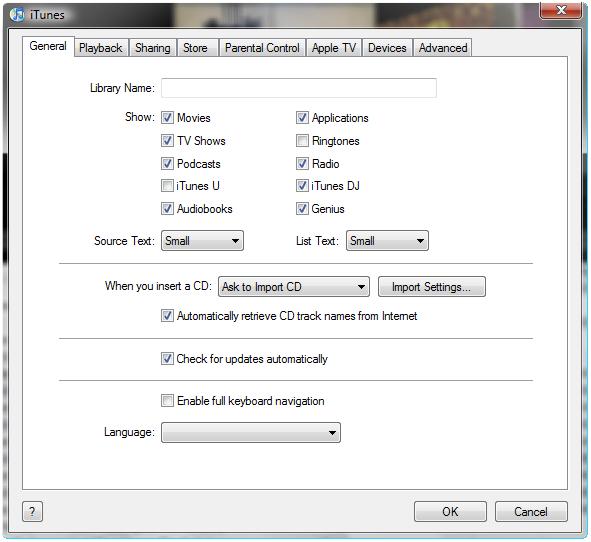
When you open iTunes, the default format for all files is .mp4 (this includes .m4a and .m4v {audio and video respectively}). We're going to change this.
You want iTunes to rip tracks as .mp3, that way you can alter them later on. Here's how you go about doing this:
"Edit" > "Preferences" > "Import Settings..."
From this point, you'll want to click the first drop-down listed as "Import Using:" and choose "MP3 Encoder". Choose the next drop-down ("Setting:") and choose "Custom...".
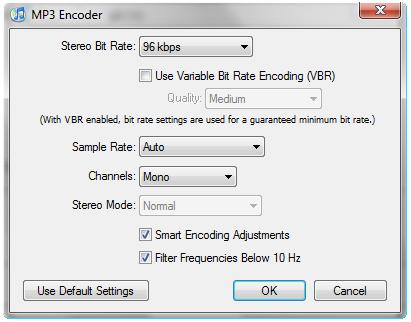
Match the settings on the screen that pops up to this:
Stereo Bit Rate: 96 kbps
(Unchecked) Use Variable Bit Rate Encoding (VBR)
Sample Rate: Auto
Channels: Mono
(Checked) Smart Encoding Adjustments
(Checked) Filter Frequencies Below 10 Hz
Then click "OK". Make sure that the "Use error correction" is checked too.
I know that most people want to have stereo sound, even I do. Stereo sound is great for music, but this is just somebody reading into a microphone. The point being: cut down on storage size by switching to a mono channel.
When you're done ripping your audiobooks, you can change it back to a higher bitrate and a stereo channel so your music will rip properly.
Preparing the Disk
Put the disk in your disk drive. When iTunes reads it, it should ask if you want to import the CD to your library. For the time being, click "No".
When you look at the track list, you'll see quite a lot of items! Select all of the tracks that have the body of the text on them; try to avoid the tracks that only tell you to switch out the CDs. If you cannot avoid those annoying blurbs, you're going to need to get Audacity.
Make sure that you have all the tracks highlighted. Now do the following:
"Advanced" > "Join CD Tracks"
Now you should see that all the selected tracks are encased in a single bracket. This means that the multiple tracks will be stored as one in your library. Make sure that all the tracks OUTSIDE of the bracket are unselected. The only item that should be clicked is the one with the bracket.
Now, click on "Import CD".
Repeat this step for all of the disks of your book.
After the Ripping
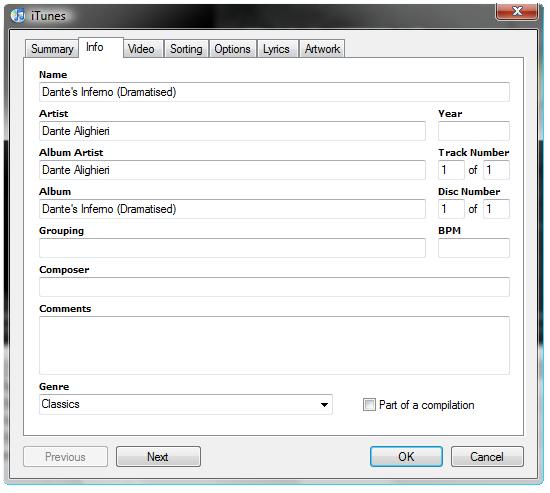
Now that you have the file copied to your computer, find it in your iTunes library. When you find it, right-click the item and select "Get Info".
When this screen comes up, click on the "Info" tab. Here's a basic rundown of how this page should look.
NAME
ARTIST
ALBUM ARTIST
ALBUM
GENRE
Put all the proper information into their respective boxes, then click on "OK".
When this screen comes up, click on the "Info" tab. Here's a basic rundown of how this page should look.
NAME
ARTIST
ALBUM ARTIST
ALBUM
GENRE
Put all the proper information into their respective boxes, then click on "OK".
Fine Tuning How Your IPod Shows the Book
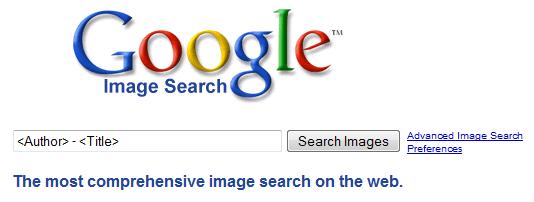
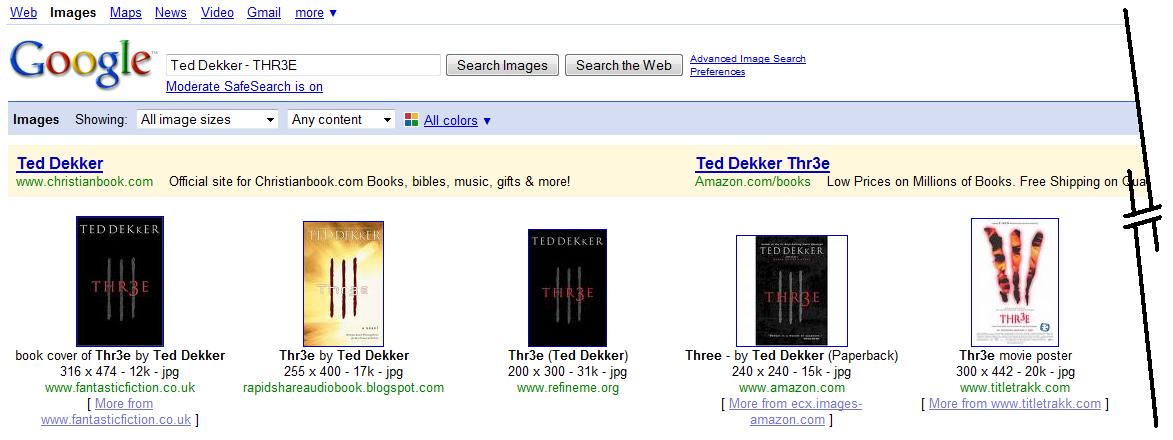
I prefer to have album art on my iPod, but it isn't required.
To find the album art, pull up Google (or Yahoo!) Images. Put the name of the author and book in the search bar, then click "Search Images".
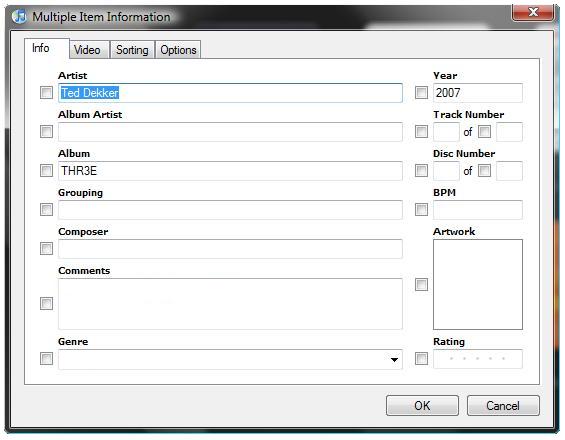
When you find a good image, click on it and then click on "See full size image". Right click on the image and choose "Copy Image". Go into iTunes and right-click on the selected tracks, then choose "Get Info". Right-click on the "Artwork" section and select "Paste". Then click "OK".
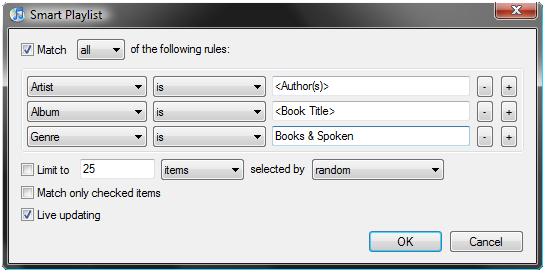
This will have the audiobook show up as multiple items on your iPod's "Audiobook" sub-menu. To make it a bit easier to get around, I recommend setting up a smart playlist.
To do this, hold the "Shift" key and click on the "Add Playlist" icon in the bottom left corner of the iTunes main screen. It should look like a gear when you hold "Shift".
When the smart playlist setup screen comes up, set it up as the image depicts.
Fine Tuning the Audio Files
THIS STEP IS COMPLETELY OPTIONAL!
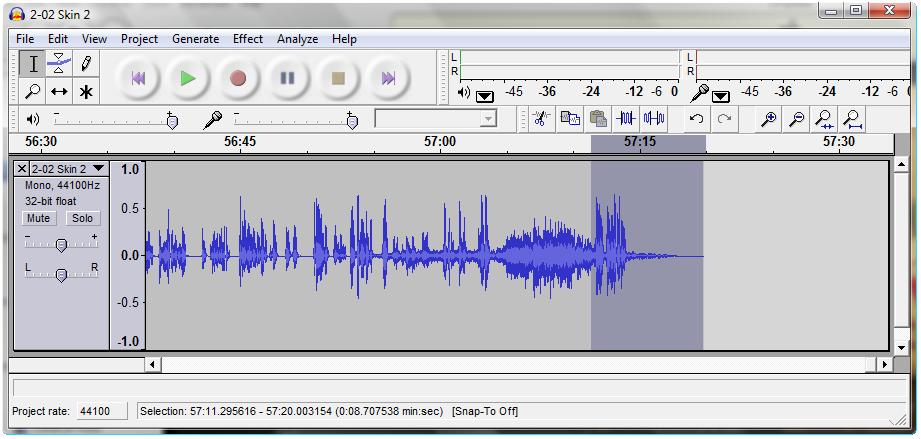
If you find the blurbs at the end of each track asking you to insert the next disk annoying, you'll want to install Audacity and set it up with the LAME MP3 Encoder so you can take them out of the files.
Open Audacity, then in the "File" menu, select "Open". Go to your "iTunes Music" folder and select the folder of the author of your books. Select one track at a time to work with.
After a short while, you should see scope of the audio file in the main section of the Audacity screen. All you have to do is highlight the short section at the end that contains the "Insert next disk" message. PLAY THE SELECTED BLURB TO MAKE SURE YOU WON'T BE REMOVING ANY OF THE STORY! Once you are satisfied with the selection, press the "Delete" key on your keyboard.
Now that you have removed the reminder at the end, goto "File" > "Export As MP3...". Make sure that the file name and directory are the exact same as they were when you retrieved the file. Audacity will ask you if you want to overwrite the files that are already in that folder, click "Yes".
Setting Things Up in Your IPod

Simply highlight the files of each disk, and then drag and drop them onto the name of your iPod in the "Devices" menu. After that, drag and drop the name of your smart playlists to your iPod as well.
Now you're good to go!
Now you're good to go!