Astrophotography Stacking and Post-processing
by poblocki1982 in Craft > Photography
3688 Views, 24 Favorites, 0 Comments
Astrophotography Stacking and Post-processing
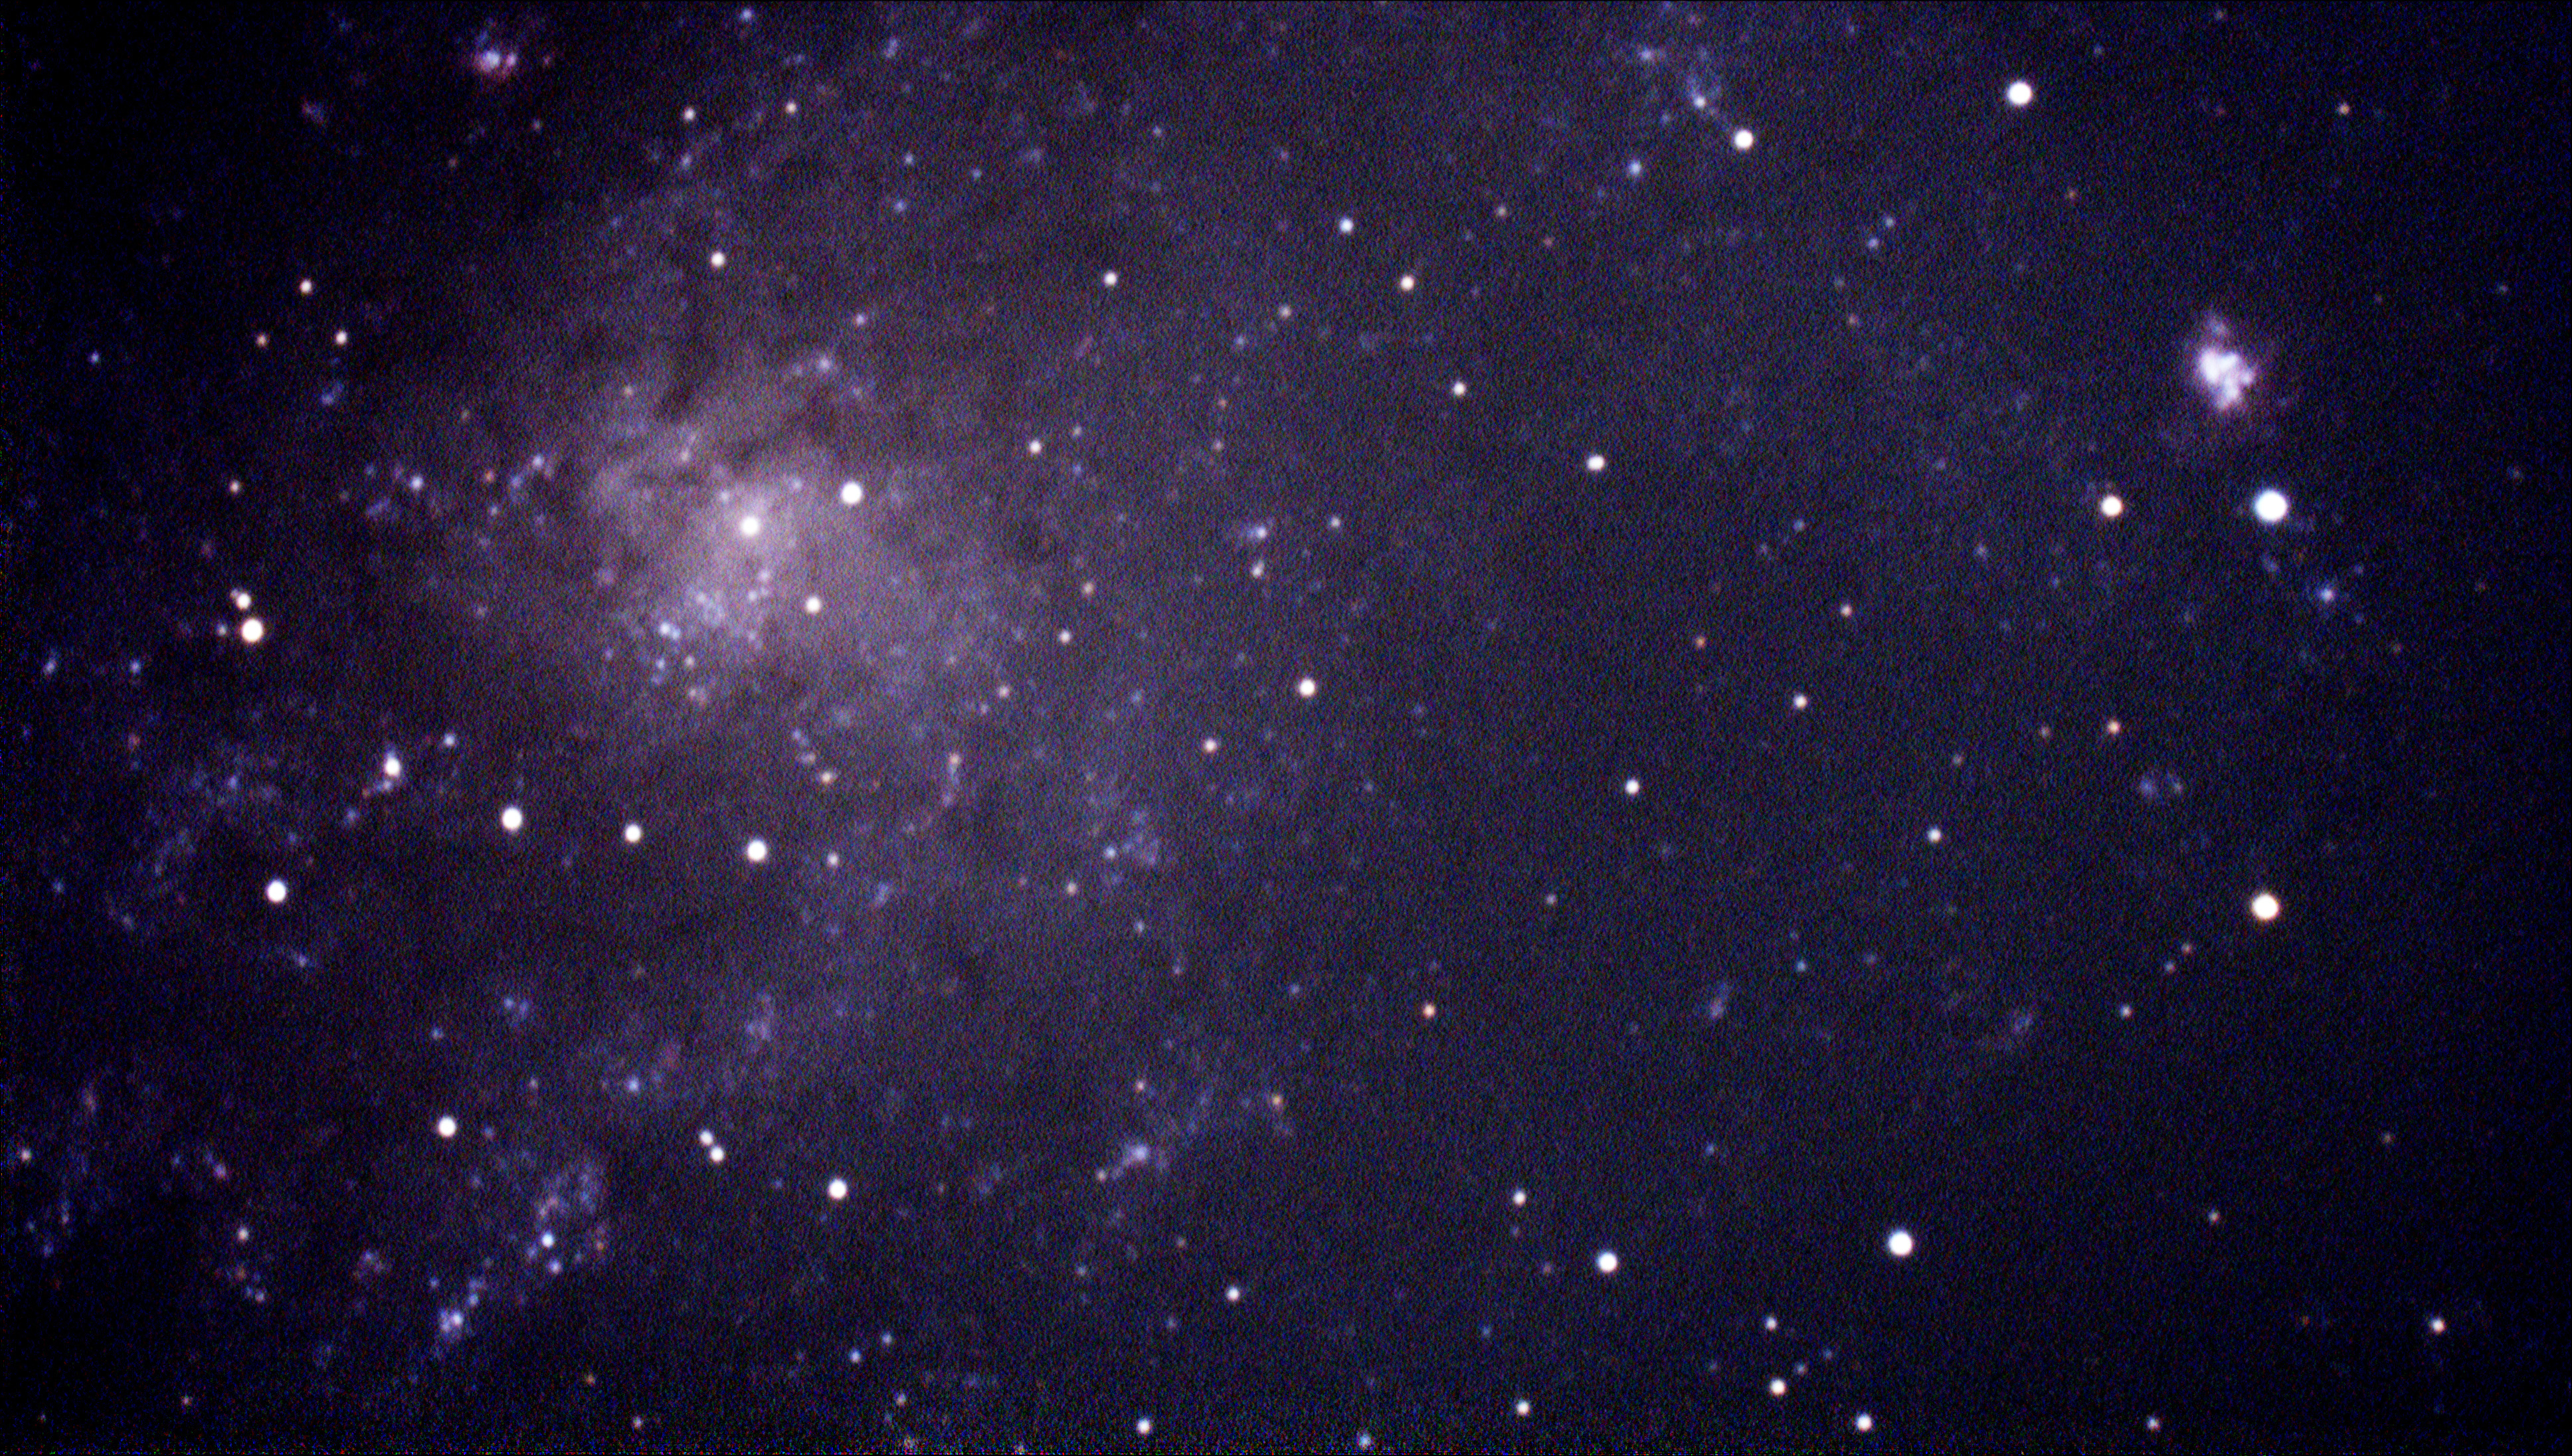
It took me a while to learn how to take all calibration frames and what settings to use in stacking software, so I decided to share my experience with you.
In this Instructable I will talk you through basic post-processing that you can use to 'extract' details and colors of deep sky objects from you pictures and enjoy the results.
Supplies
- Telescope with camera (webcam or DSLR)
- Photoshop software
- Deep Sky Stacker software
Calibration Frames
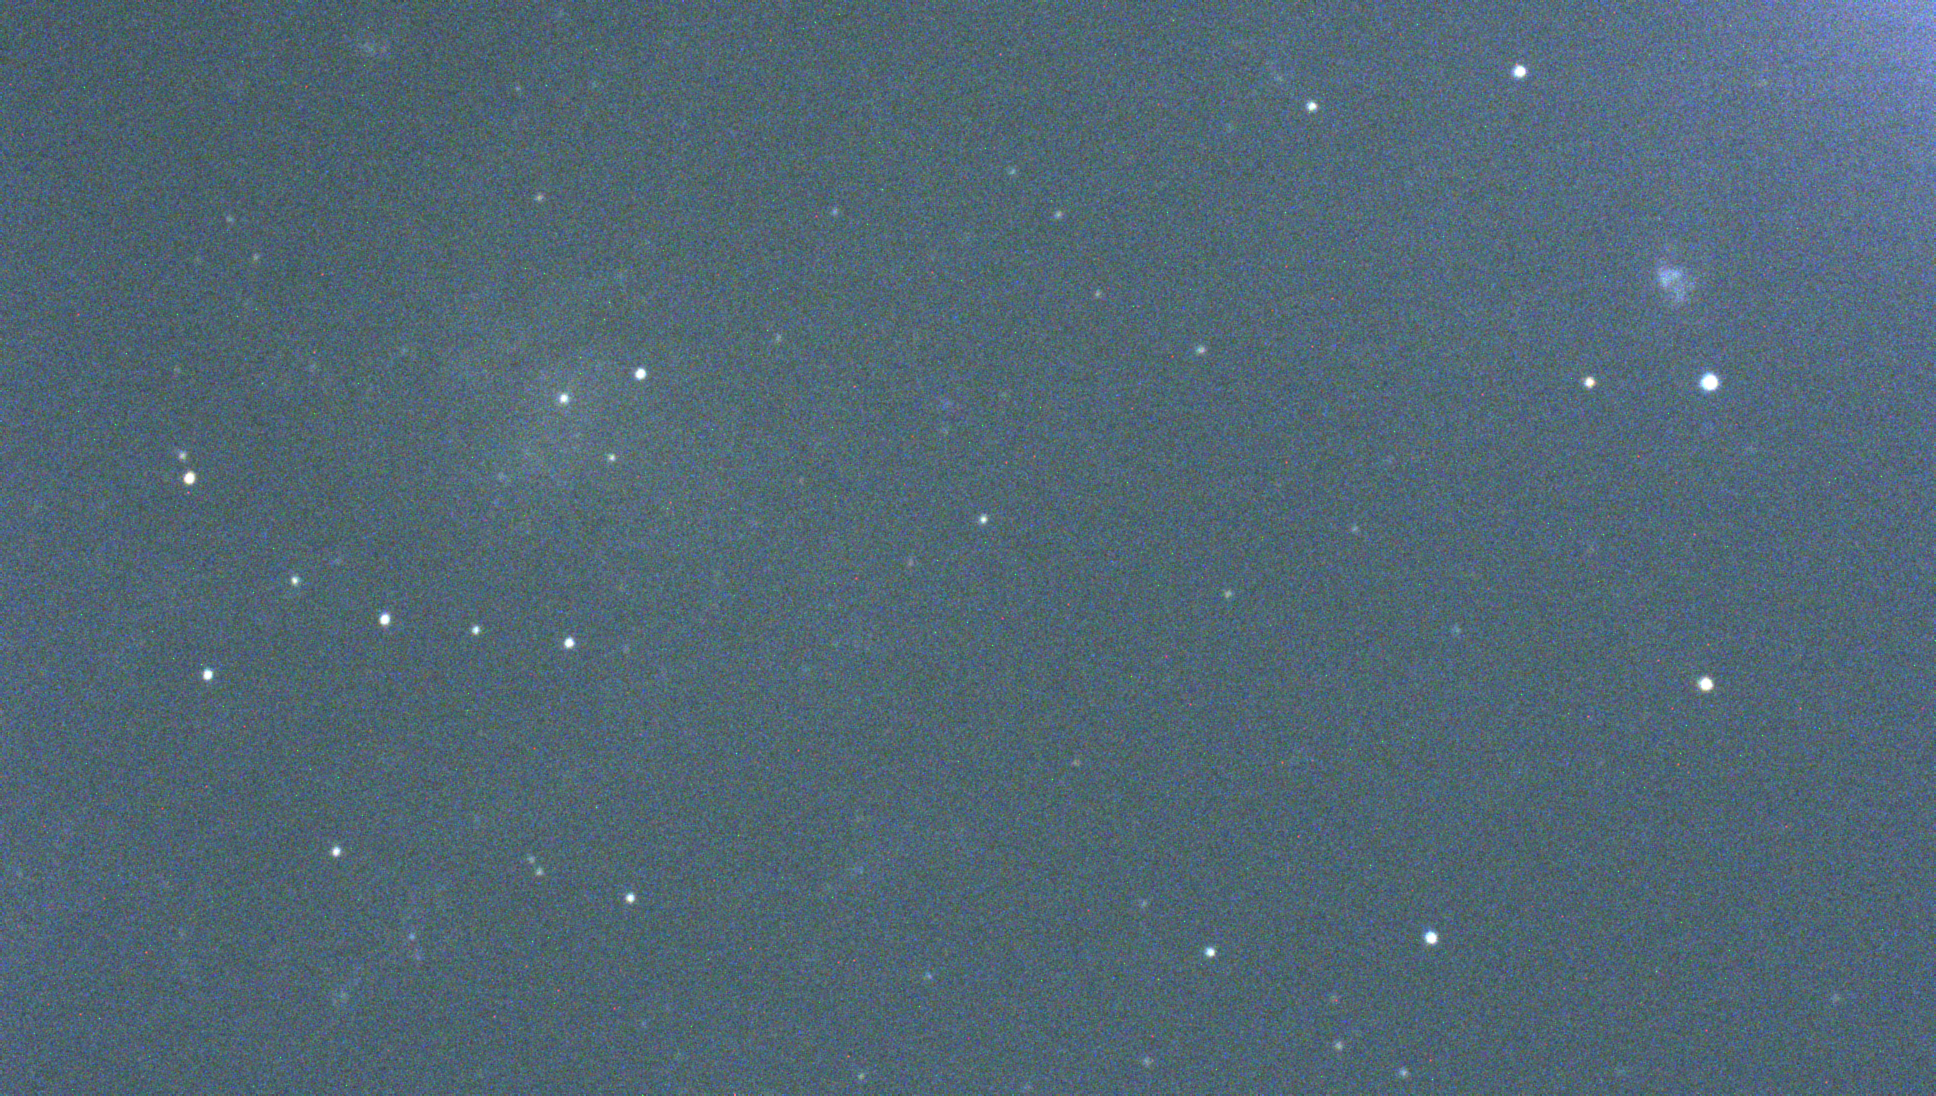

Light Frames - these are the pictures you take using your webcam or DSLR. They contain the information about the object you are photographing. Depending on type of object it's good to have about 1-2 hours of exposure (galaxies and nebula). In my case I used 30 seconds exposures and I took 120 light frames of the Triangulum Galaxy (M33)
Flat Frames - To take them you will uniform light source and here is the link to the 'light box' that will enable you to take flat frames quickly and easily. The main reason to take these frames is to remove and dust contamination on your camera sensor and to have uniform illumination in your final picture. I use light box mainly because I can take the flat frames on the same night right after taking light frames. You have to remember to take flat frames with exactly same settings (exposure, gain, etc.) and same temperature.
https://www.instructables.com/id/Telescope-Light-B...
Dark Frames - To take them you just have to cover your telescope. The main reason taking them is to remove amp glow which CMOS sensors produce especially with longer exposures. You have to remember to take flat frames with exactly same settings (exposure, gain, etc.) and same temperature.
Bias Frames - To take them just disconnect your camera from telescope and cover the lens. Setup the ninimum exposure time as possible and take about 50-80 frames. The main reason to take them is to remover dead pixels from your final image. In case of bias frames temperature doesn't have to be the same, but remember to keep same gain as your light frames.
Deep Sky Stacker
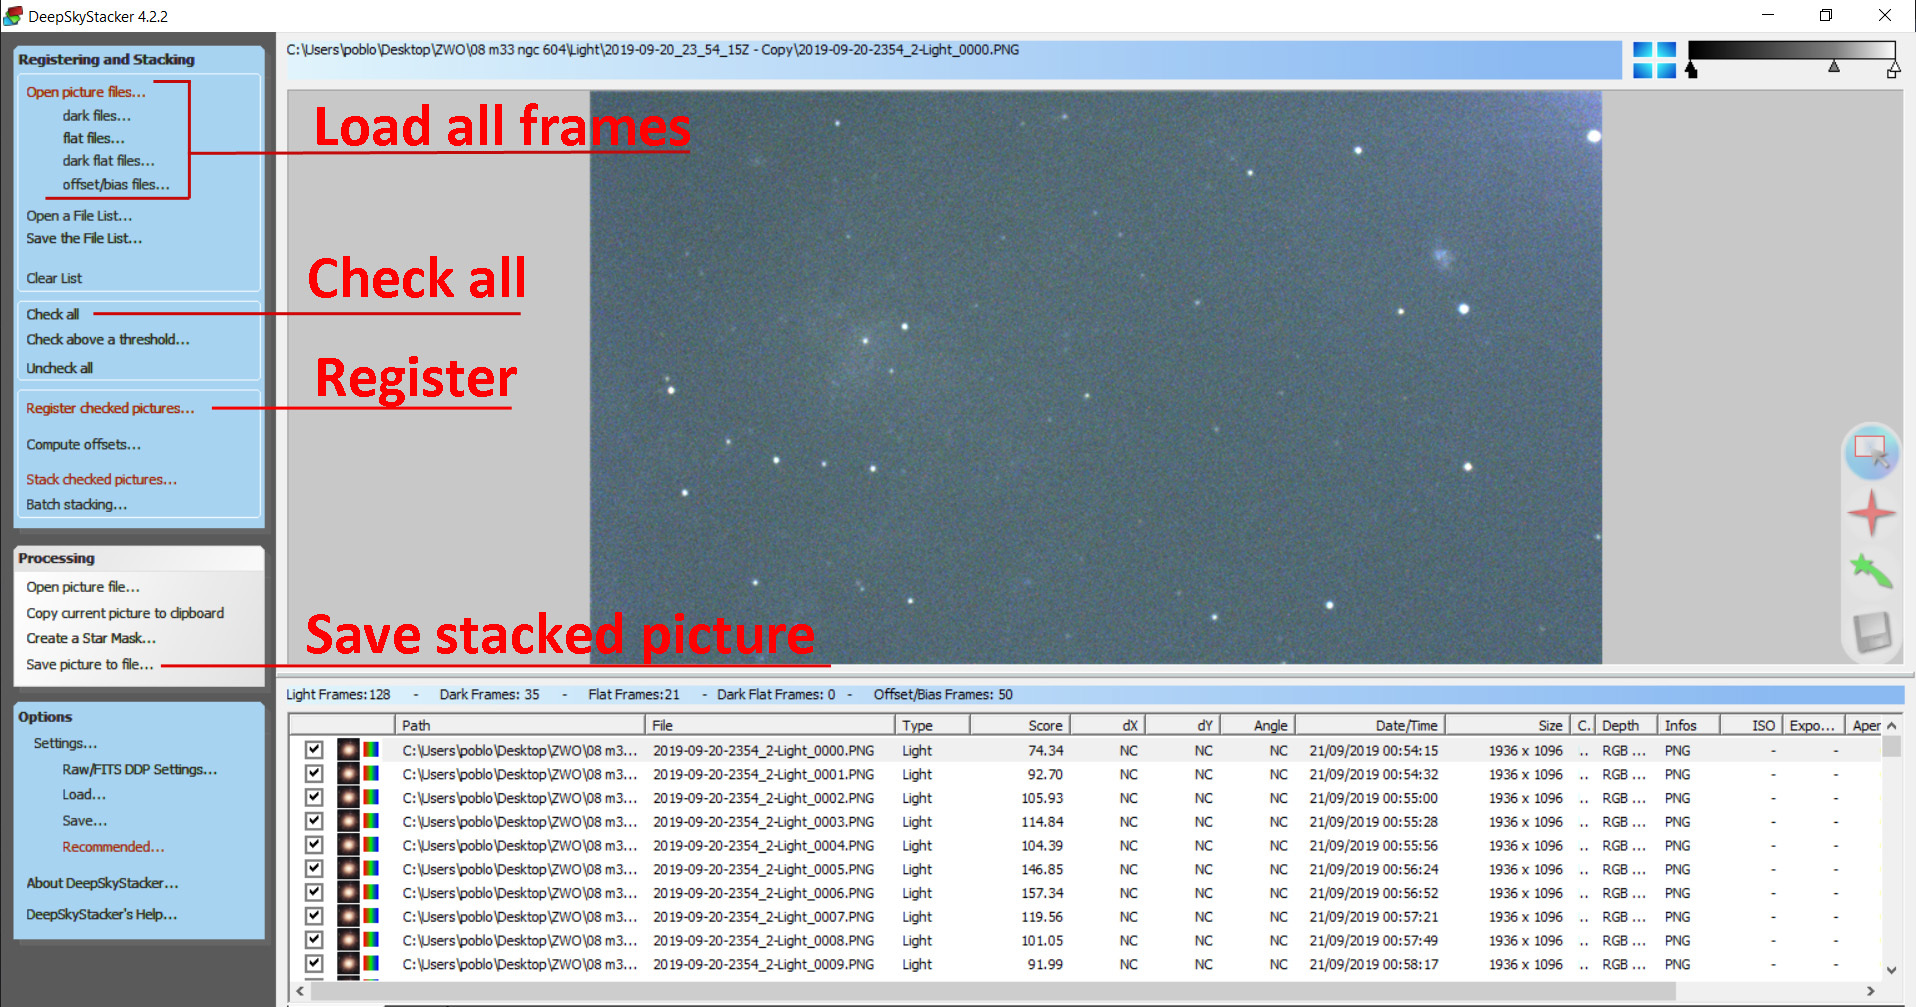
You can download this free piece of software here http://deepskystacker.free.fr/english/download.htm
I use DSS because it's very reliable and gives really good results. Once you open the program on the right side you have options to load all frames, picture frames (light frames), flat , dark and bias calibration frames.
Once you done, click 'check all' and then register checked pictures. Another window will open with quite few settings which I will explain in another step.
Deep Sky Stacker Settings
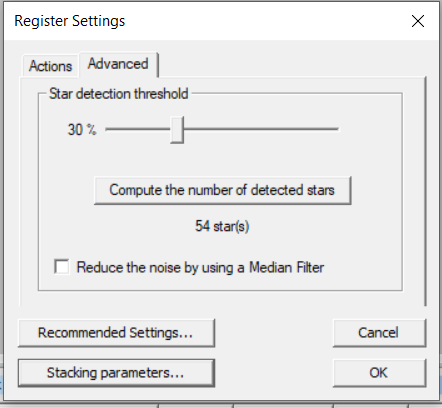
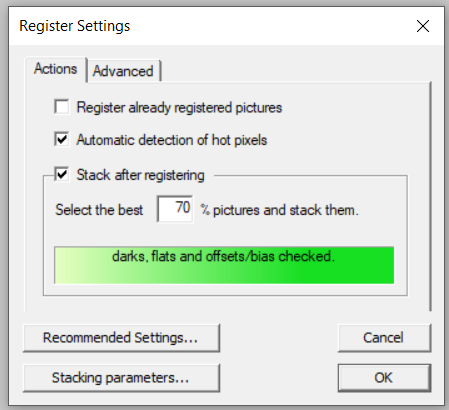
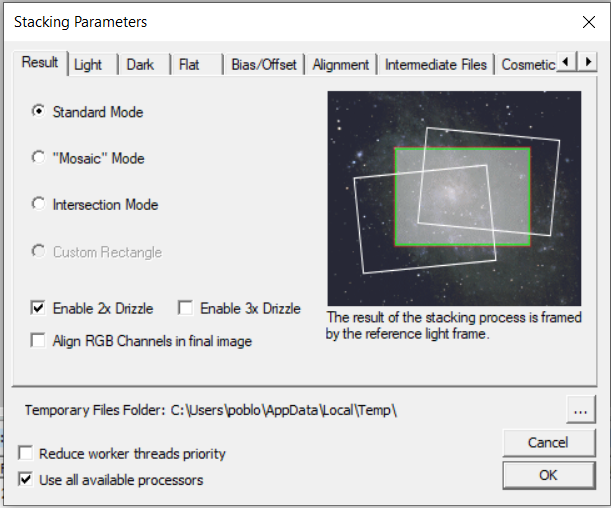
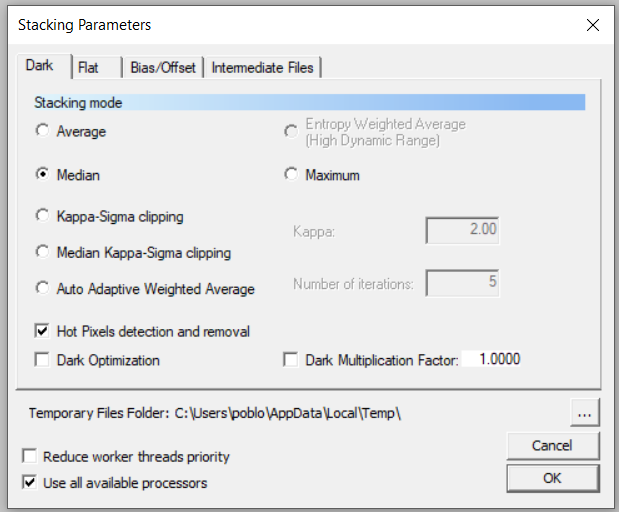
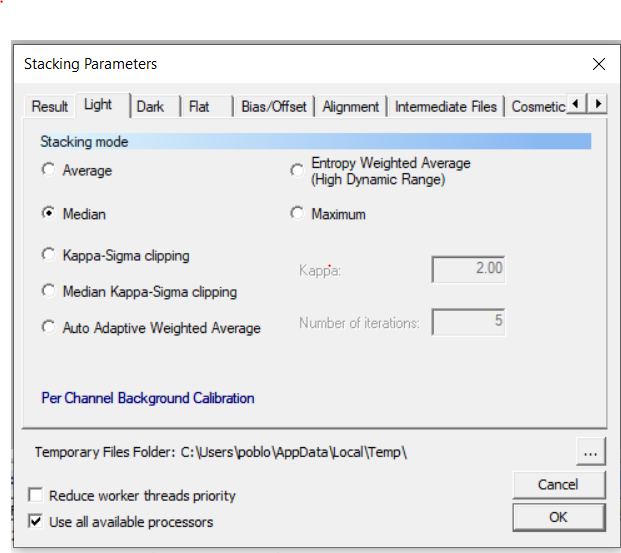
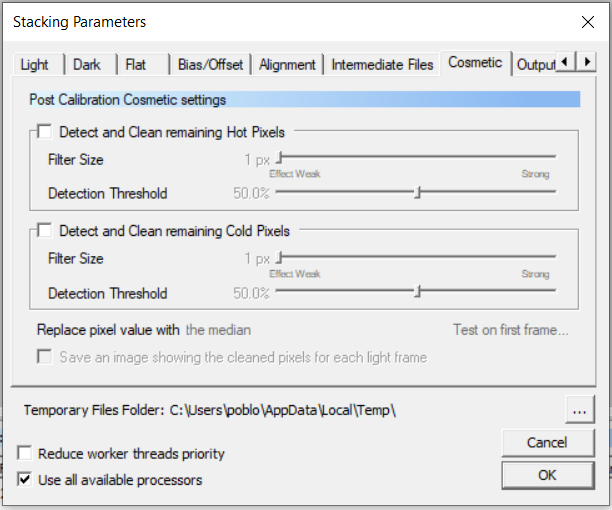
Here are the screenshots of all the settings that work really well for my images. You can play and change them of course (i actually recommend that), and if something won't work you can use my settings as default.
One of the important setting is 'star detection threshold'. Change the percentage bar to have 50-100 starts that will be used for calibration. Occasionally DSS may confuse hot pixels with stars and stacking won't be successful. In that case try to reduce number of stars and repeat stacking process.
For Flat, Dark and Bas frames use 'Median' stacking mode.
Make sure to uncheck 'Detect and clean remaining hot pixels' we have bias frames for that.
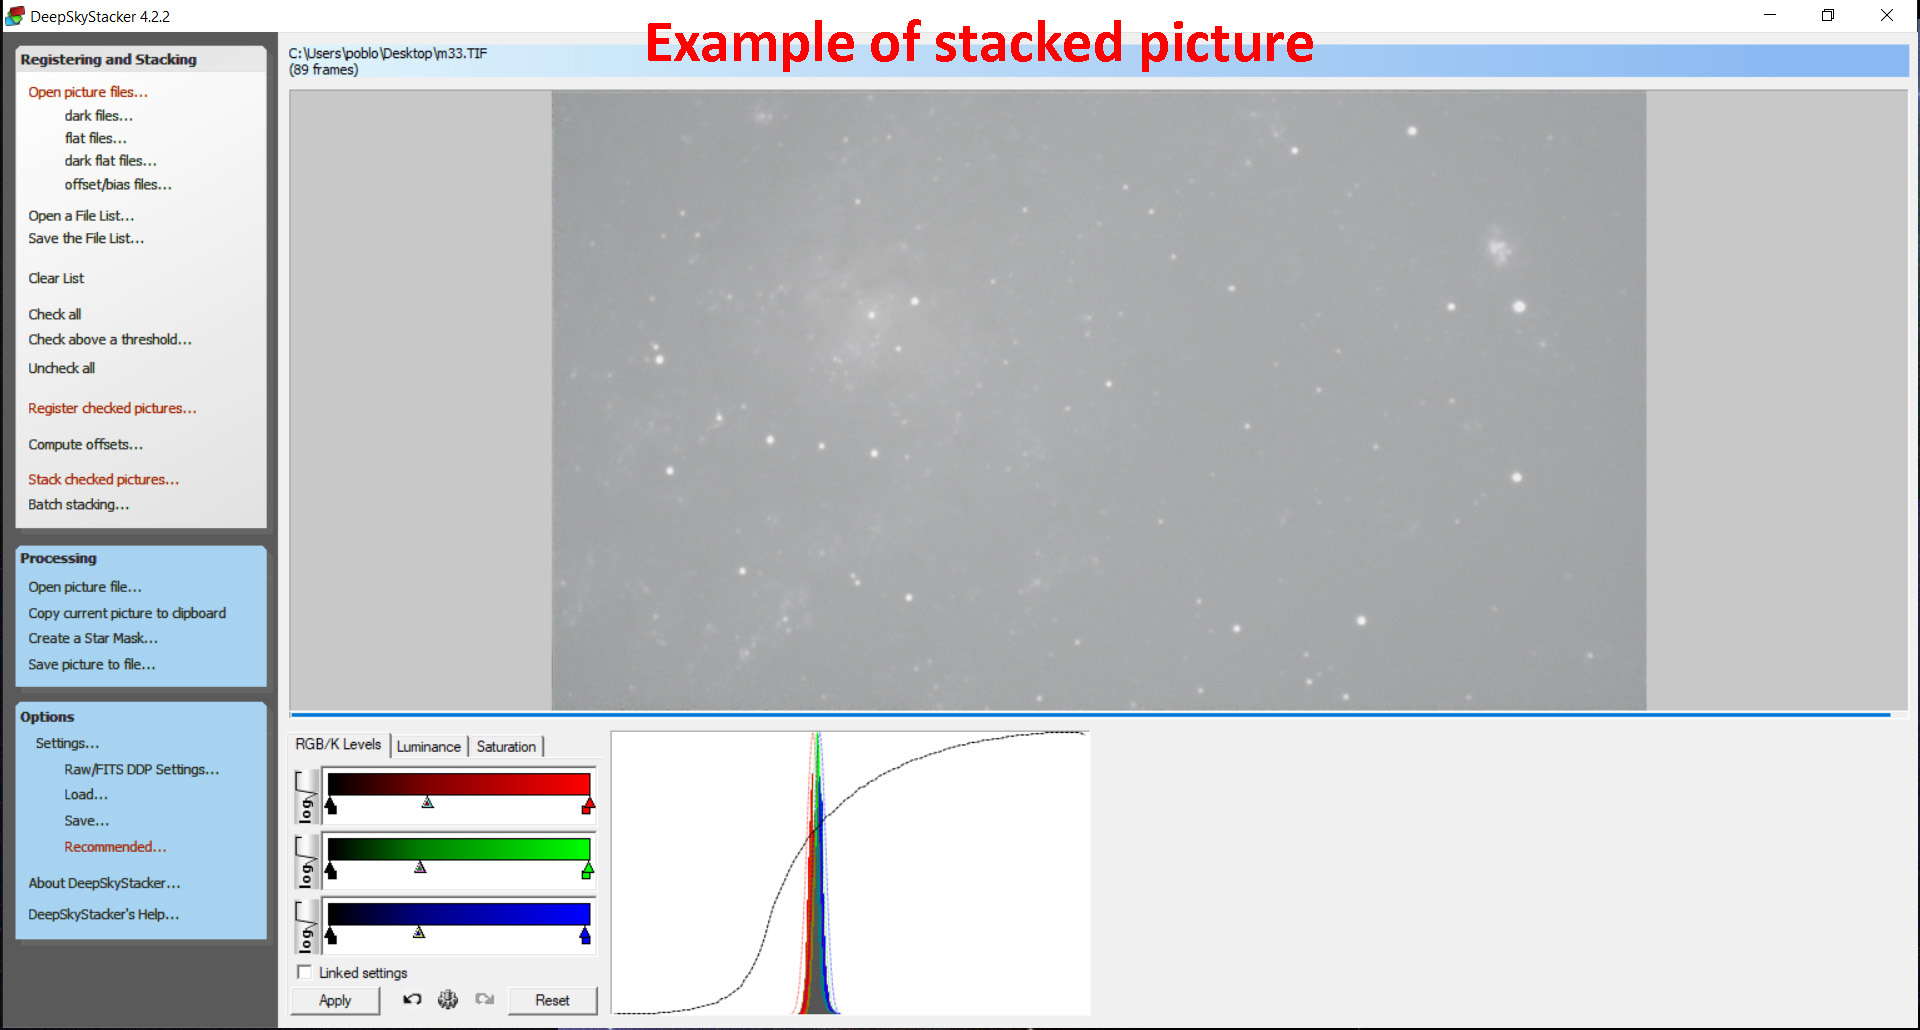
After stacking process is completed don't forget to save your picture. It won't be very detailed and most likely you won't see your deep sky object, but we will use Photoshop next to bring out ll the details.
Photoshop - Threshold
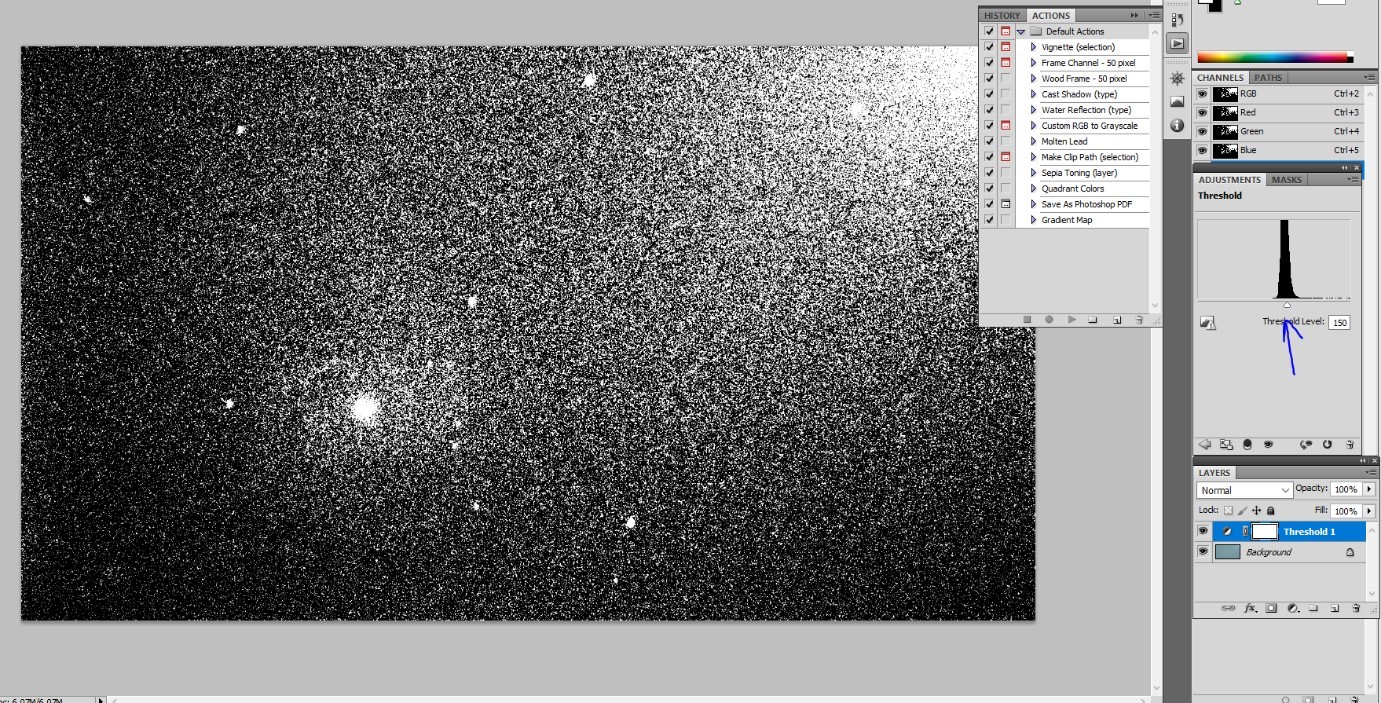
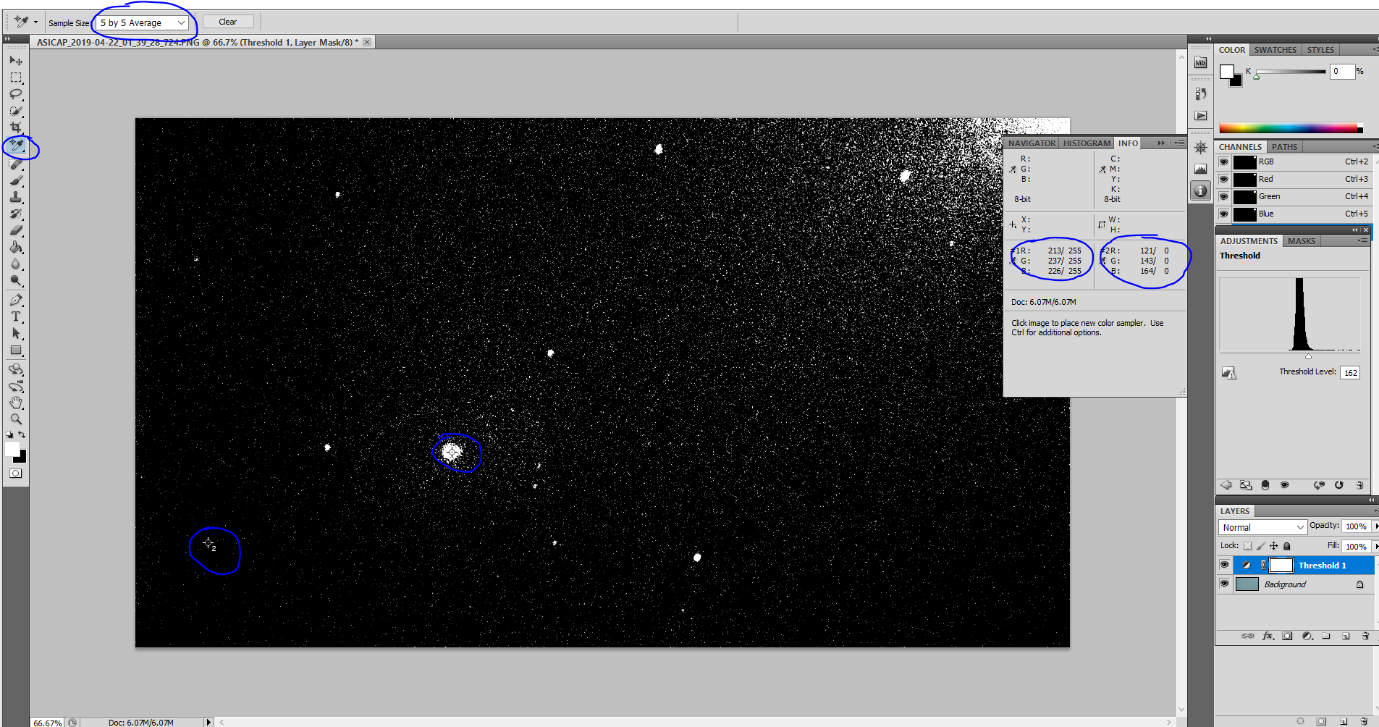
Open your stacked picture in Photoshop.
1. Layer -> New Adjustment Layer -> Threshold
Move the threshold bar until you will see light and dark areas in your image (see pictures above)
2. Color Sampler Tool – 5 by 5 Average (black and white point)
Use color sampler tool and select the brightest and darkest point in your image. You should see RGB values for both points (see picture above)
Photoshop - Levels
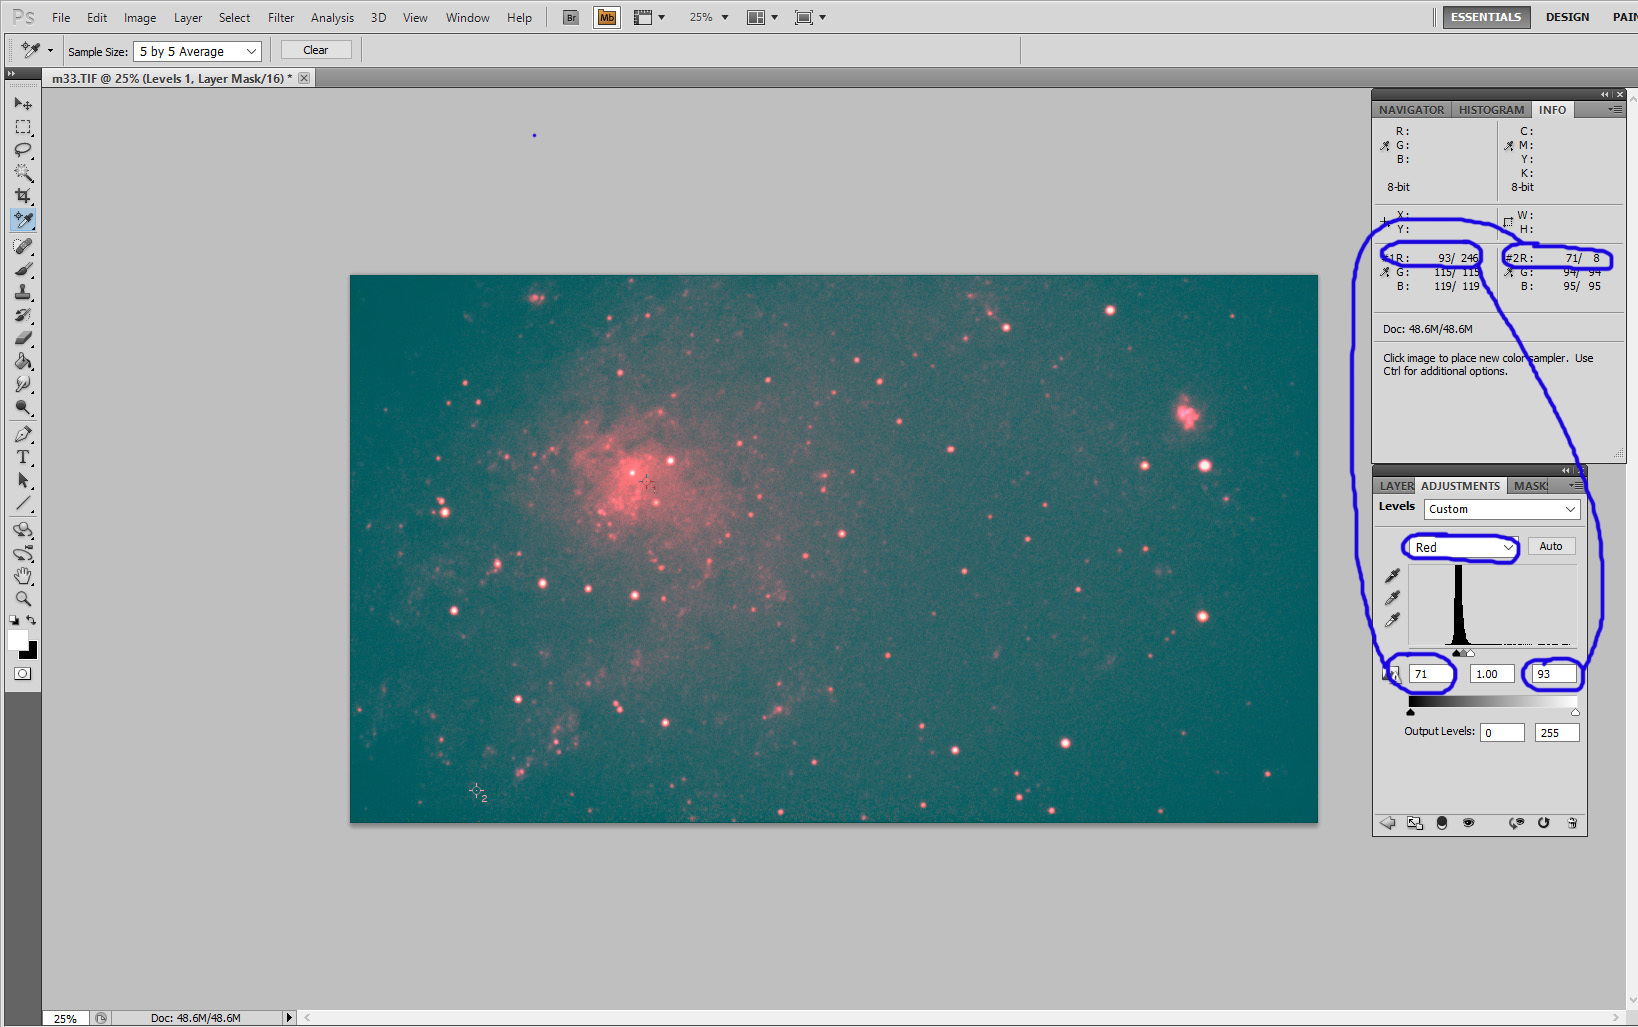
Image -> Adjustments -> Levels
New window will open and choose one RGB channel at the time and change the values to the the values from two sampled points from previous step. For example, Choose red (R) and change left side value to '71' which is your brightest point and the right side value to '93' which is the darkest point.
Repeat above procedure for all three channels R, G and B and after you finish you should be able to see your deep sky object.
Photoshop - Curves
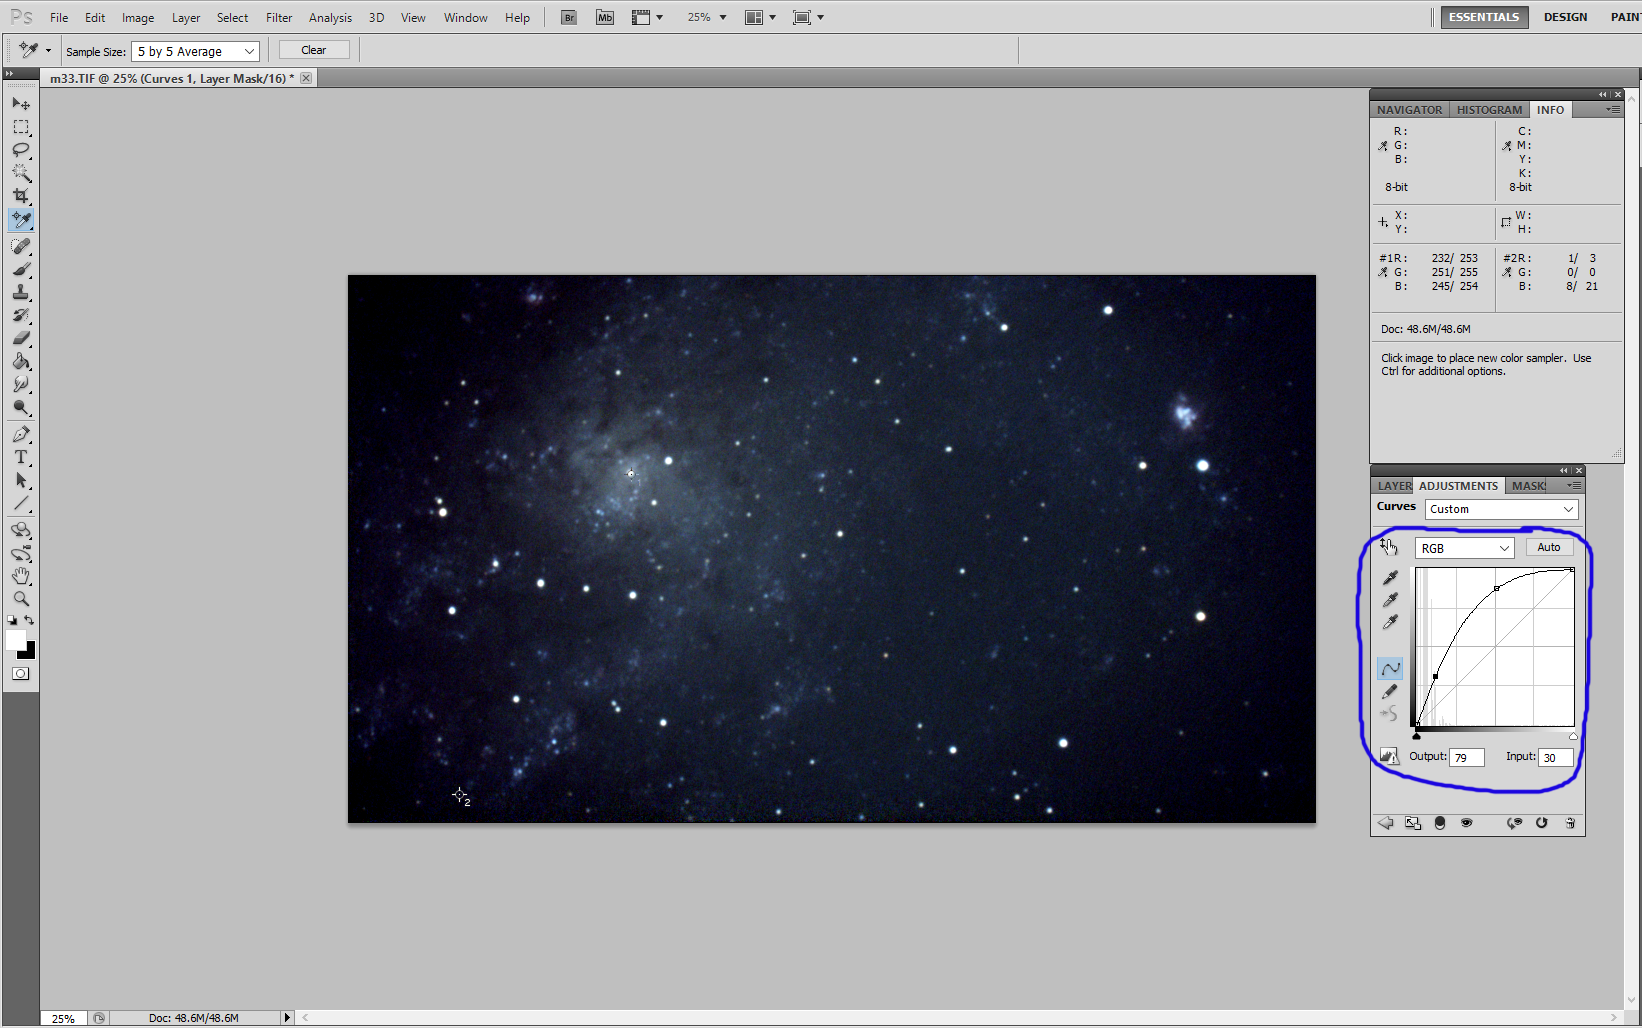
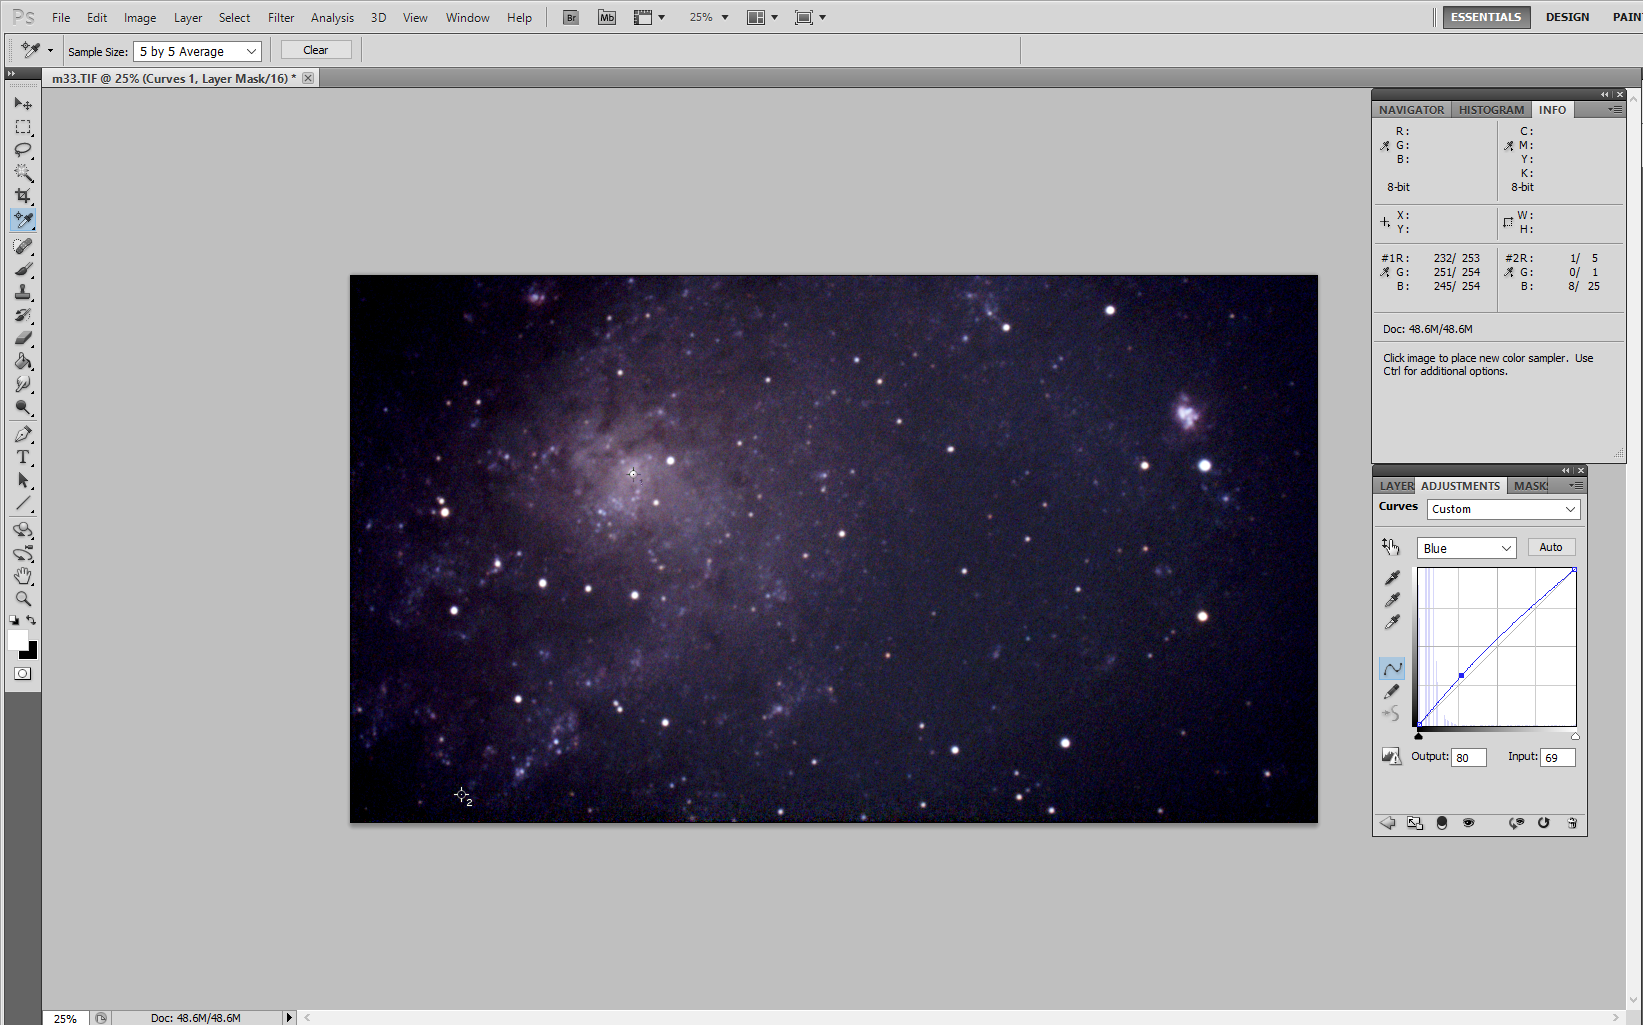
Layer -> New Adjustment Layer -> Curves
New window will open and try to change the shape of the RGB curve from straight line to slightly curved parabolic shape (see pictures above).
You can play with R, G and B channels separately to bring out the colors of the galaxy or nebula.
Now you can try to change Brightness/Contrast slightly Layer -> New Adjustment Layer -> Brightness/Contrast
and sharpness Filter -> Sharpen - Sharpen More