Assistive Guitar Pick
by Brunner8591 in Circuits > Assistive Tech
2672 Views, 2 Favorites, 0 Comments
Assistive Guitar Pick

What we did: An assistive guitar pick was developed for individuals who have low muscle tone and contractures in the hand.
- To learn about our purpose for this project, how to wear the assistive pick, and view a demo of playing the guitar using the pick, watch the attached video titled, "InstructableVideo".
Why we did it: Many individuals want to play the guitar and want to create enjoyable music; however, a variety of hand disabilities affect different individuals and prevent them from holding a guitar pick and using the guitar pick to strum a guitar. The disabilities range from low muscle tone or contractures in finger and hands to physical tics, caused by diseases like Parkinson’s. These disabilities affect the hands and fingers of the individuals, restricting the full potential of the individual to play guitar. The engineered device allows users with such disabilities to play the guitar without the need to hold a pick.
Reference Documents:
- Requirements sheet
- Competitor analysis
- Final Decision Matrix (insert matrix doc here and one file for download)
Gather Materials
Bill of Materials:
The materials you will need for this are:
1. Smooth-On Smooth-Cast 325 ColorMatch Liquid Plastic Compound 2 lb Trial Size
- Source: Amazon.com
- Link to Product: https://www.amazon.com/Smooth-Smooth-Cast-ColorMat...
- Cost: $26.22
2. 8 in. x 1/2 in. Velcro Brand One-Wrap Straps
- Source: Home Depot
- Link to Product: https://www.homedepot.com/p/VELCRO-Brand-8-in-x-1-...
- Cost: $2.98 for a pack of 5 (Total of 30 straps needed for this project)
3. Duct Tape (0.75 in. x 180 in.)
- Source: Staples
- Link to Product: https://www.staples.com/
- Cost: $1.88
Necessary Equipment
Necessary Equipment:
1. Smooth-On Silicone Mold Making, Liquid Rubber OOMOO 30 2 lb Trial Size
- Souce: Amazon.com
- Link: https://www.amazon.com/Smooth-Silicone-Making-OOMO...
- Cost: $29.99
2. Non-Sulfer Molding Clay
- Source: Michael's Arts and Craft Store
- Link: http://www.michaels.com/
- Cost: $11.99
3. Small Uniform Plastic Container, around 3x3x3 in
- Source: Michael's Arts and Craft Store
- Link: http://www.michaels.com/
- Cost: $3.99
4. 3D-Printer (MakerBot Printer)
- Source: School resources
- Link: https://store.makerbot.com/printers/replicator/?ut...
- Cost: Printer was available for use through the school
5. Disposable Plastic Cups and Stirring Rods
- Source: Stop and Shop
- Link: https://stopandshop.com/
- Cost: $3.99
6. Soldering Tool
- Source: School resources
- Link: https://www.walmart.com/ip/Yescom-937D-60W-Solderi...
- Cost: Tool was available for use through the school
7. Ruler
- Source: School Resources
- Link: https://www.walmart.com/ip/Business-Source-Standa...
- Cost: Ruler was available for use through the school
8. Precision Blade
- Source: School Resources
- Link: https://www.officedepot.com/a/products/263319/X-Ac...
- Cost: Blade was available for use through the school
3D Print the Guitar Pick
Download the attached CAD file for the guitar pick and use a 3D printer to print the part. Click here to download the file.
3D-Printing the Guitar Pick:
- Download the Sketchfab CAD file.
- Follow printer's instructions to successfully 3D print the pick.
Making the Mold


Creating the mold:
- Set up the plastic cups, stirring rods, Oomoo liquid silicone, clay, and plastic container on a covered surface.
- Mix equal parts of the pink and blue materials into a cup, and stir thoroughly. Make sure there is enough mixture to fill half of your container.
- Lay the pick at the bottom of the container, and pour enough silicone over it that the entire pick is covered, with some extra poured on top.
- Let the mold dry for 6 hours.
Finishing the Mold


Finishing the Mold:
- Remove the mold from the plastic container. You can use a knife to push it up, but don't damage it.
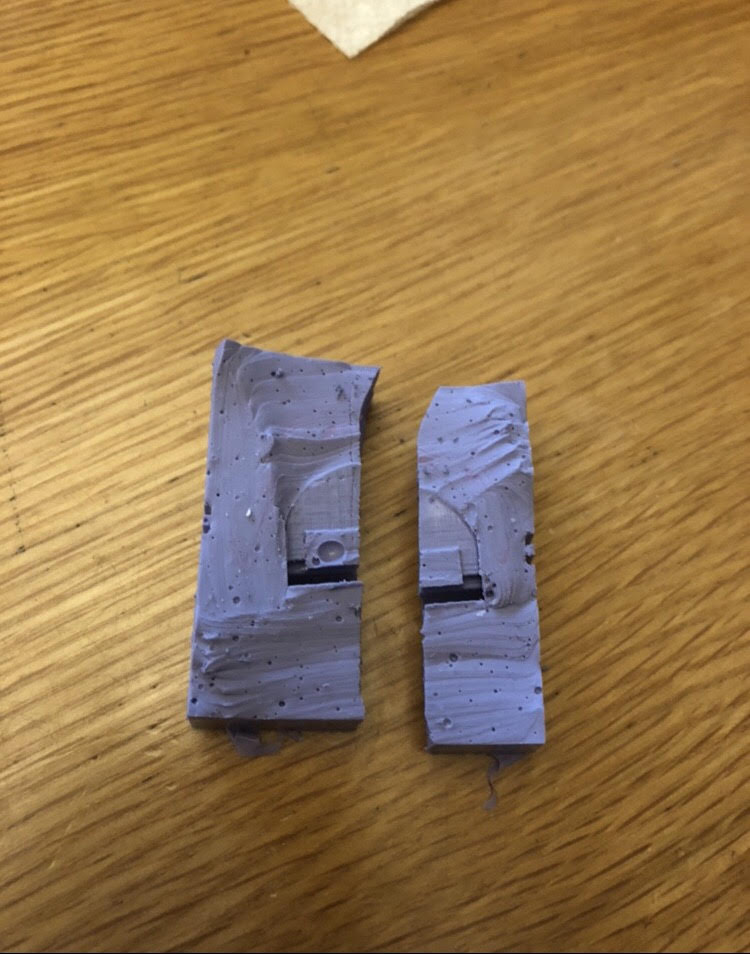
- Cut the mold in half using a knife. Be sure not to damage the pick, and try to make the cuts as clean as possible.
- Cut the half with more of the pick in it in half as well, so that there is a cut running through the center of the pick as shown above.
- Remove the pick from the mold. Be careful not to damage the mold too much.
- The top half of the mold, aka the one with the pick in it, should have the pick cavity close to the surface. Peel back a small part of silicone above the cavity, to form a hole for pouring. Make sure not to tear off the piece you peeled, just pull it back.
Casting the Pick

Casting the Guitar Pick:
- Following the instructions on the liquid plastic container, mix the materials in equal volume in a plastic cup. The cup should start to heat up.
- Assemble the pieces of the mold, and peel back part of the mold in order to pour the mixture in, as shown above. Put the peeled off flap back into place.
- Let the plastic harden for approximately 30 minutes.
Making the Adjustable Velcro Strap


Creating the Velcro Straps:
Smoothing the Strap Slots:
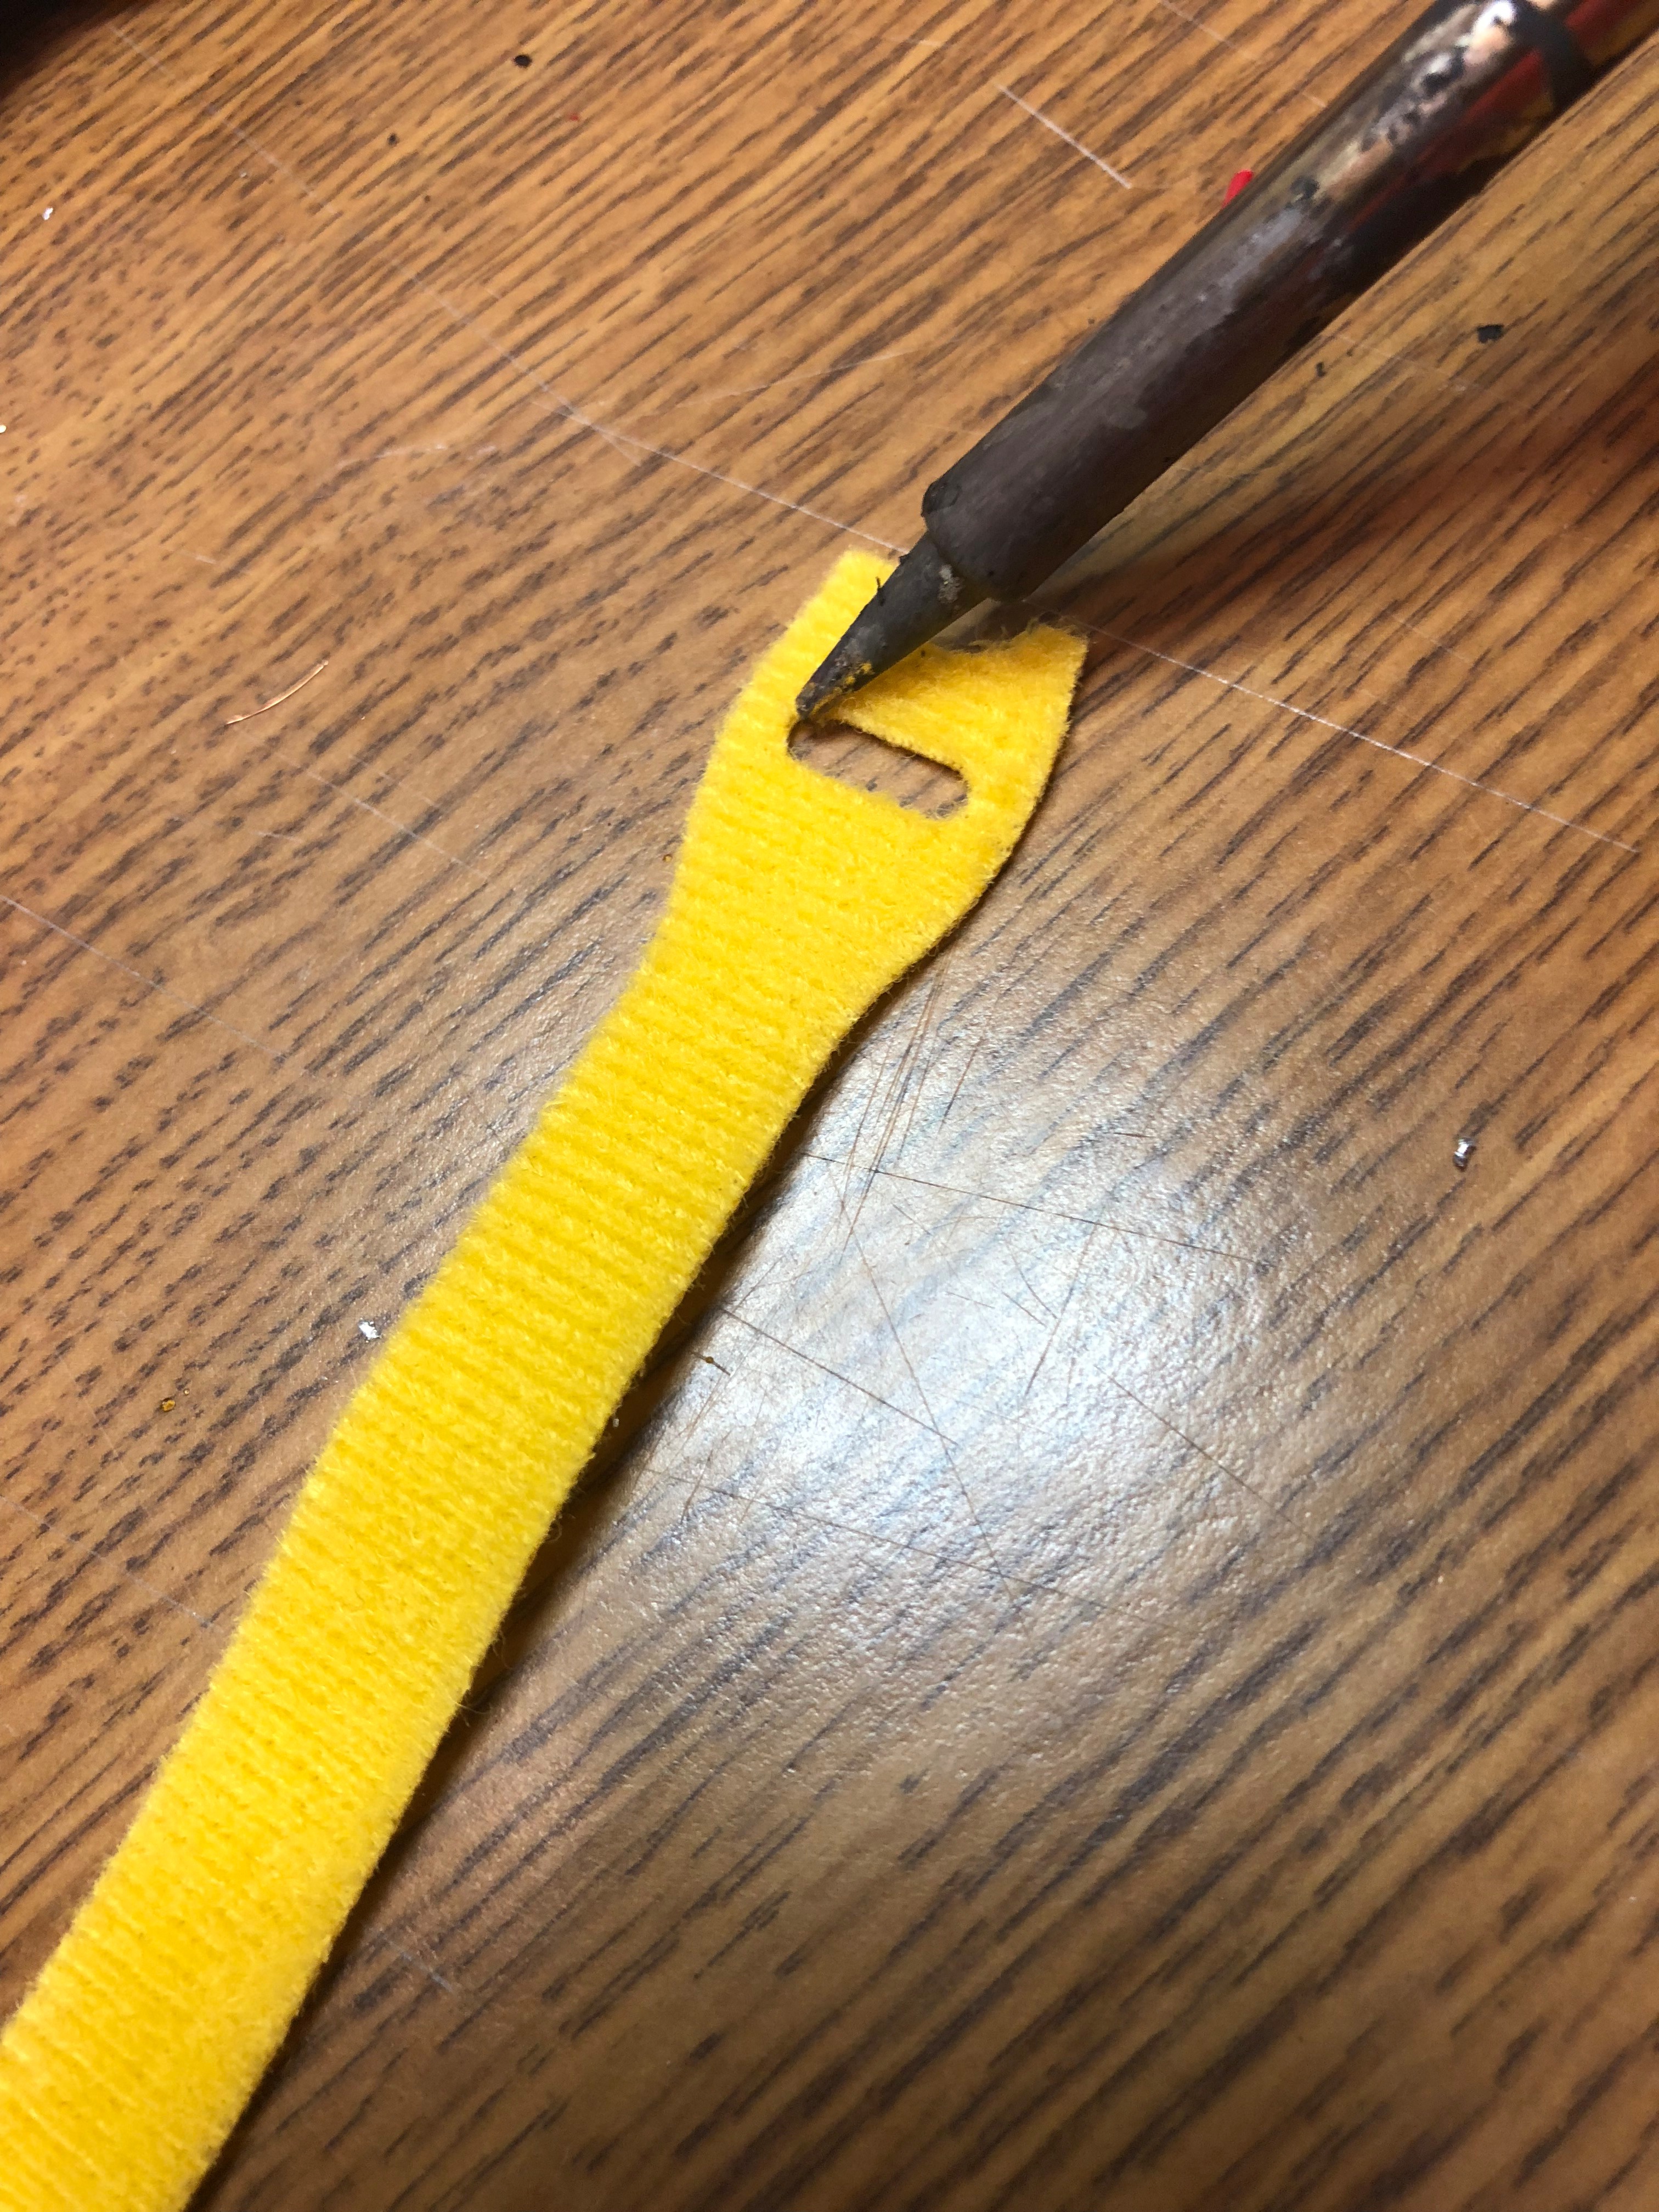
- Preheat the soldering iron to 260 degrees Fahrenheit in order to have optimal control over the melting process.
- Taking a Velcro Strap, flip the strap so the Velcro side is facing up.
- Carefully smooth the plastic around the slot using the tip of the iron.
- Turn over the strap, and smooth the felt around the slot.
- Repeat this process for 30 straps.
Taping the Straps:
- Place a precision blade upon an object of height 0.25 inches or 0.5 inches.
- Place the duct tape on its side and slice through it, making the new width 0.5 inches.
- Cut out 30 pieces of duct tape measuring 0.5 inches by 1.97 inches.
- Place the piece of tape on the felt side of the Velcro strap so there are approximately 0.2 inches of tape that can be folded over the bottom edge of the slot.
- Repeat this process for 30 straps.
Finished Pick


- Remove the pick carefully from the mold. Remove any excess material from the pick.
- Allow the pick to harden for 24 hours.
- Put the Velcro strap through the hole in the pick as shown, and tighten until it does not rotate around the finger
Improvements/Future Extensions
- One possible future extension would be to modify the pick so that it can accommodate a regular pick of the user’s choice. This modification would give the user the freedom to choose the characteristics of the pick.
- A more durable material or method to reduce friction between the Velcro and itself when it is put through the slot could be found, as the duct tape may eventually wear off.
- Smoothing out the edges of the ring could potentially improve the comfort level of the assistive device.
References and Resources
References
- Mayo Clinic Staff. (2016, July 06). Dupuytren's contracture. Retrieved February 26, 2018, from https://www.mayoclinic.org/diseases-conditions/dup...
- Nall, R., & Reed-Guy, L. (2012, July 20). Ulnar Nerve Palsy (Dysfunction): Symptoms, Causes, and Treatment (W. Morrison, Ed.). Retrieved February 26, 2018, from https://www.healthline.com/health/ulnar-nerve-dys...
- Pick Assists. (2018). Retrieved February 26, 2018, from http://www.adaysworkmusiceducation.com/pickassists...
- SharkTooth Crossover Picks Aid Injured Guitarists. (n.d.). Retrieved February 26, 2018, from http://www.strum-n-comfort.com/inthenews/sharktoot...
- Special Guitar Pick. (2007, August 09). Retrieved February 26, 2018, from https://abledata.acl.gov/product/special-guitar-pi...
- Tucker, J. (2012). Adaptive Equipment. Retrieved February 26, 2018, from https://accessmusictherapy.com/adaptive-equipment/
- WATCH: Fixperts Create a Guitar Pick for Disabled Player. (2016, April 01). Retrieved February 26, 2018, from http://acousticguitar.com/watch-fixperts-create-a...
- ZeroGravity Orbit Guitar Pick Medium Single: Musical Instruments. (n.d.). Retrieved February 26, 2018, from https://www.amazon.com/ZeroGravity-Orbit-Guitar-M...
Resources
The team would like to acknowledge the incredible support of the teachers at the Massachusetts Academy of Math and Science.