Assemble OSOYOO Model-3 Robot Car for Arduino
by osoyooproduct in Circuits > Robots
1372 Views, 0 Favorites, 0 Comments
Assemble OSOYOO Model-3 Robot Car for Arduino
The OSOYOO Model 3 Robot Car DIY Starter Kit for Arduino is an exceptional entry point into the world of robotics and programming. This comprehensive kit is designed to provide beginners and enthusiasts with all the necessary tools and resources to build and program their very own robot car.
In this project, we will install the fundamental framework of the robot car and program it to perform basic movements in the subsequent steps.
With step-by-step instructions and meticulously curated components, the kit empowers users to assemble a functional robot car that can be controlled and customized using the Arduino platform. The kit includes a range of modules such as motors, sensors, wheels, and an Arduino board, enabling users to delve into exciting projects like line following, obstacle avoidance, and remote control.
Supplies
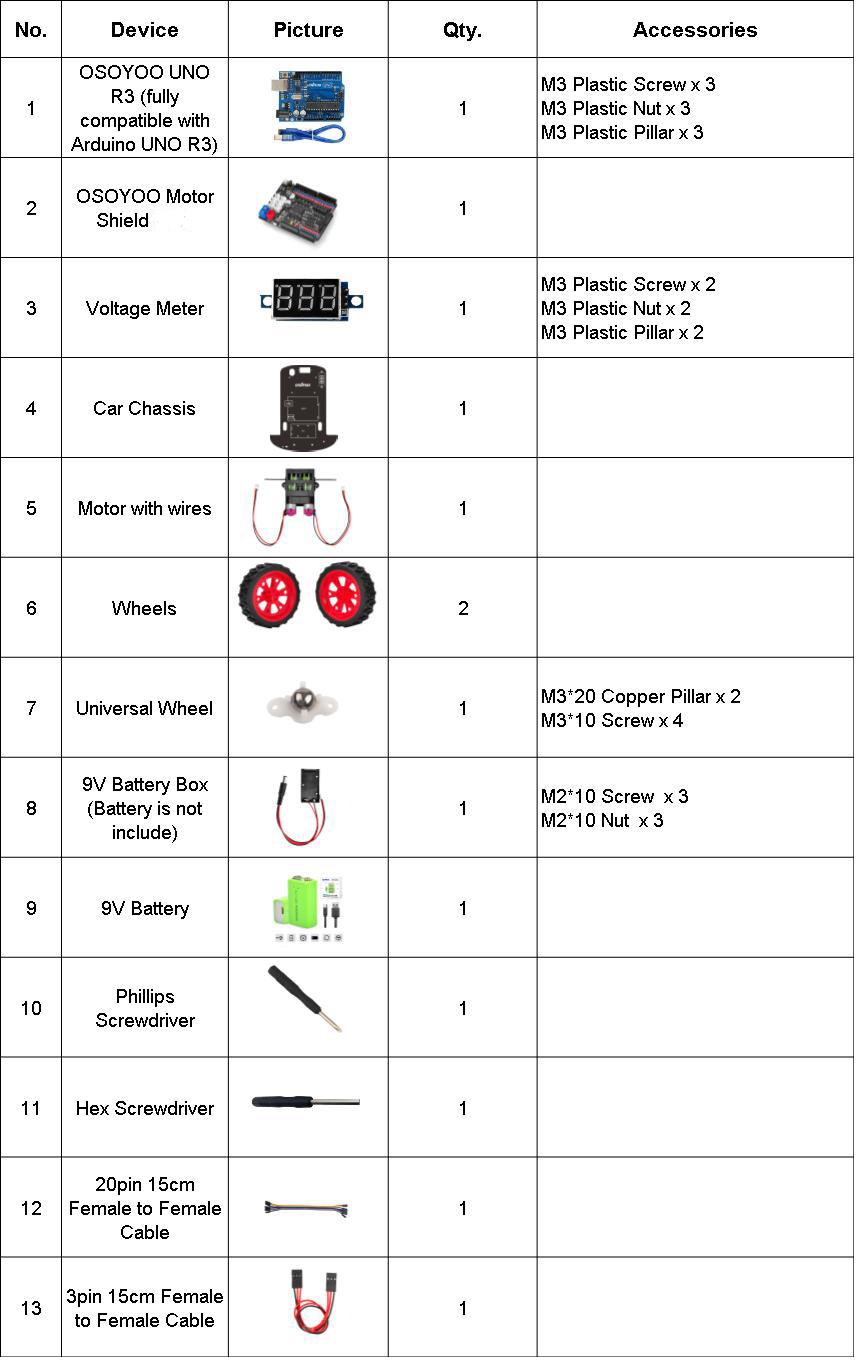
For this Arduino robot car kit, you need the components shown in the picture.
You can get the component package from the link below:
Remove the Protective Film
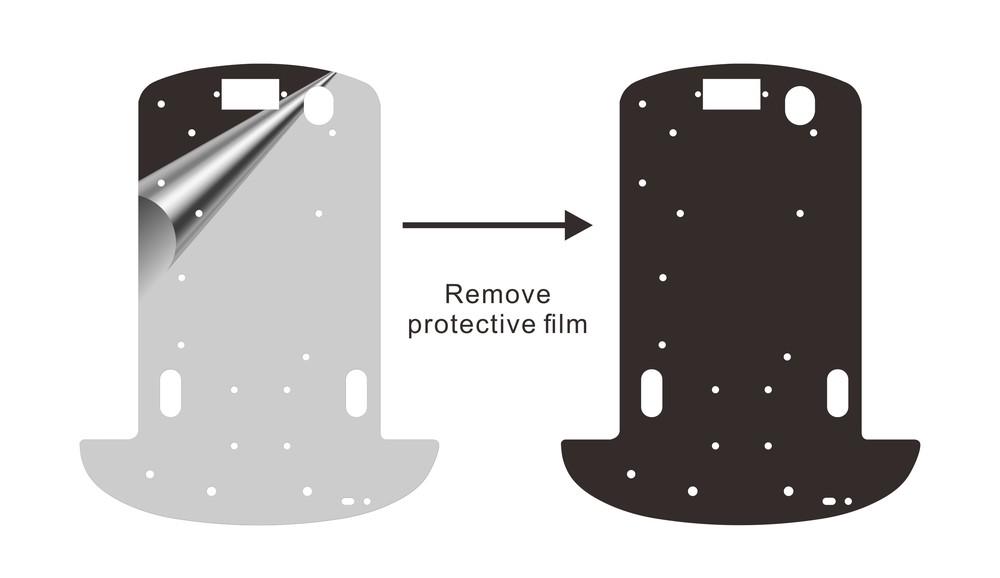
Remove the protective film from the Chassis
Install the Motor
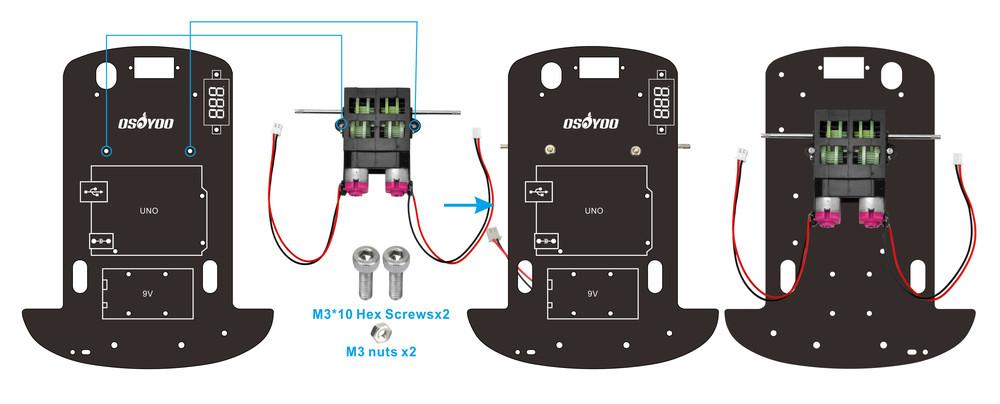
Install the motor under the chassis with M3 Hex screws and nuts
Install the Universal Wheel
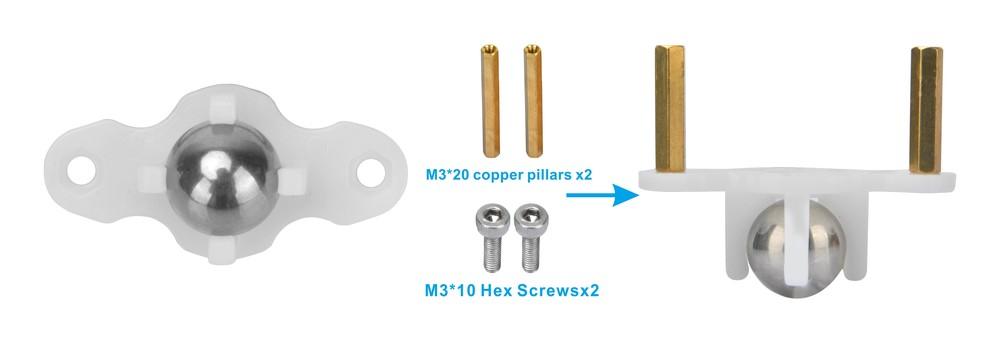
Install the universal wheel with the M3 Hex screws and copper pillars
Install the Universal Wheel
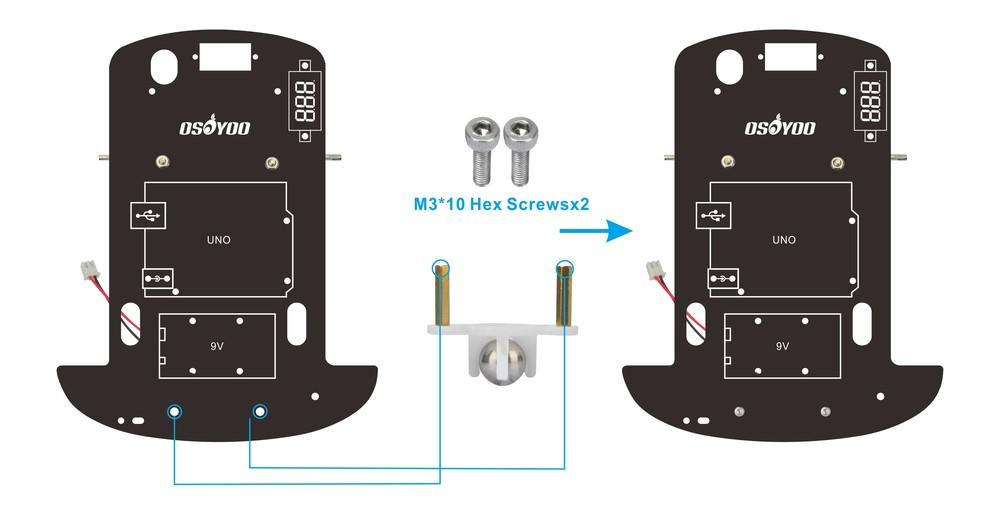
Install the universal wheel under the chassis with the M3 Hex screws
Install OSOYOO UNO Board
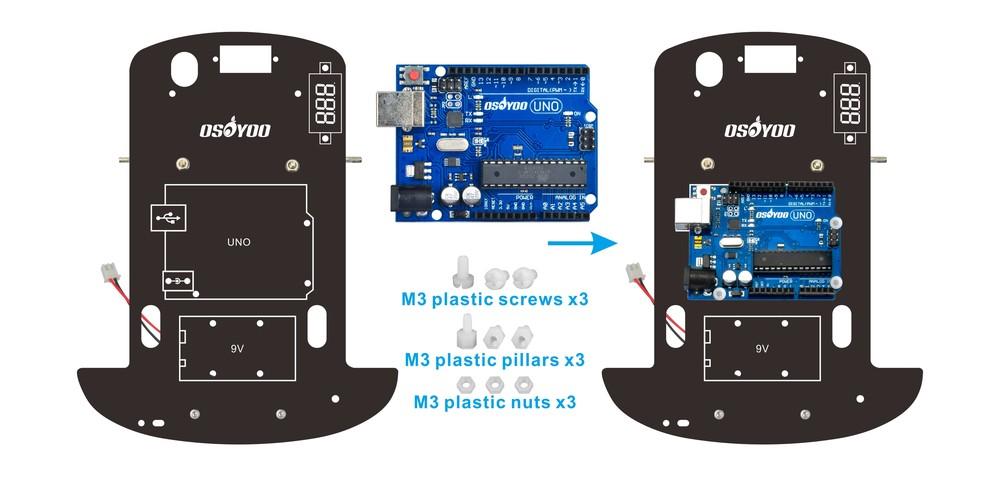
Install OSOYOO UNO Board on the chassis with M3 plastic screws, pillars, and nuts
Install the Battery Box
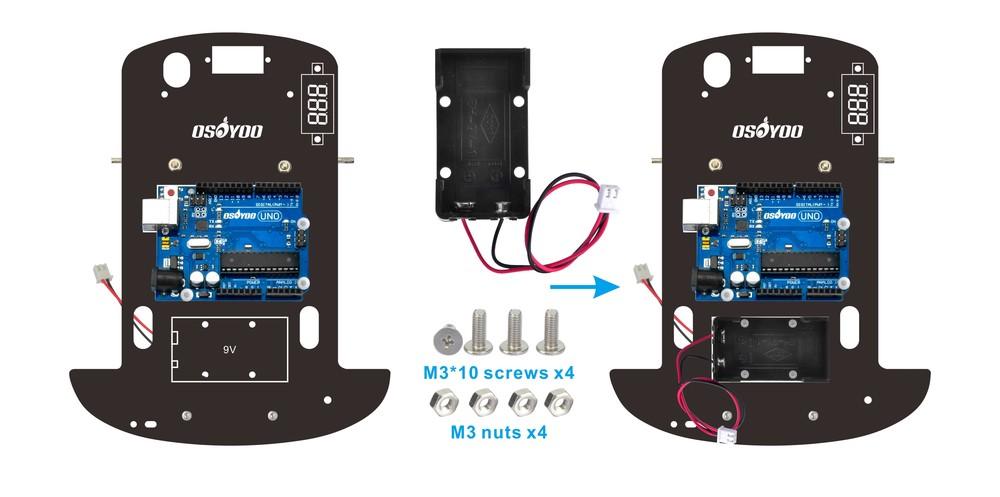
Install the battery box on the chassis with M3 Phillips screws and nuts
Plug the OSOYOO Motor Shield Board
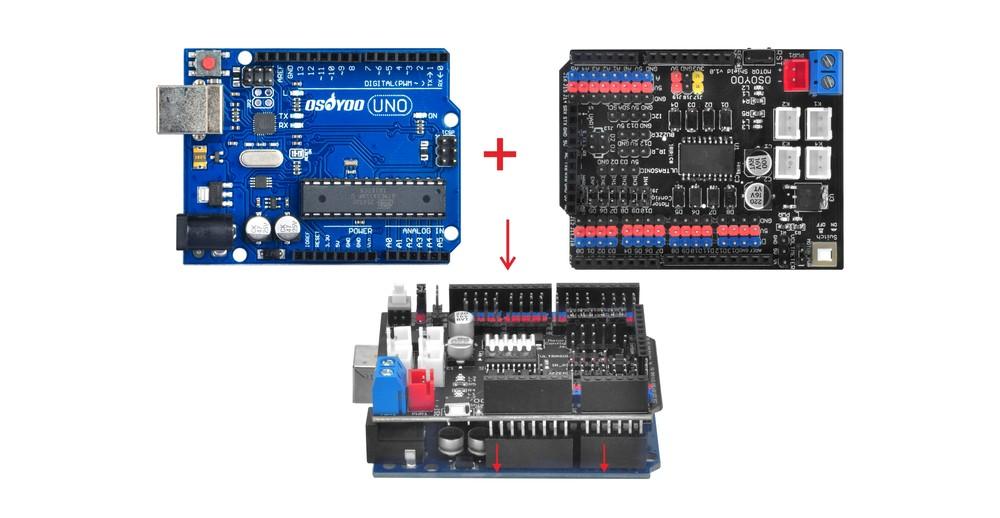
Plug the OSOYOO Motor Shield Board in OSOYOO UNO board
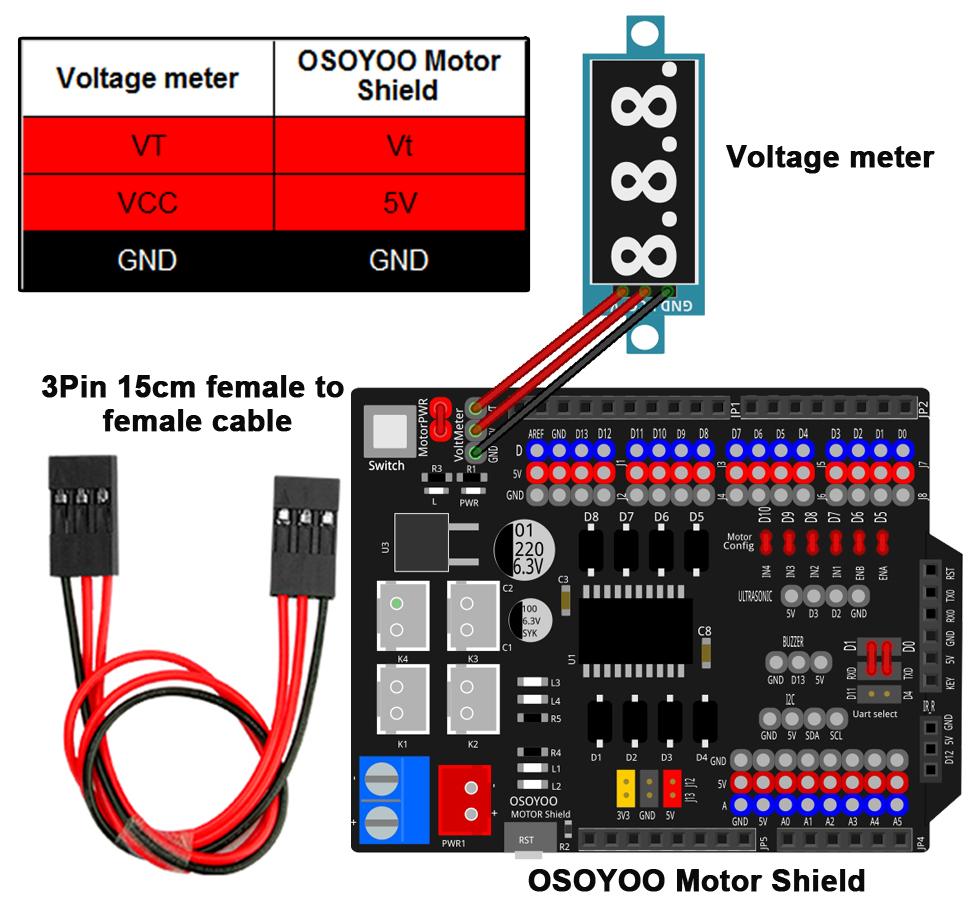
Install the Voltage Meter
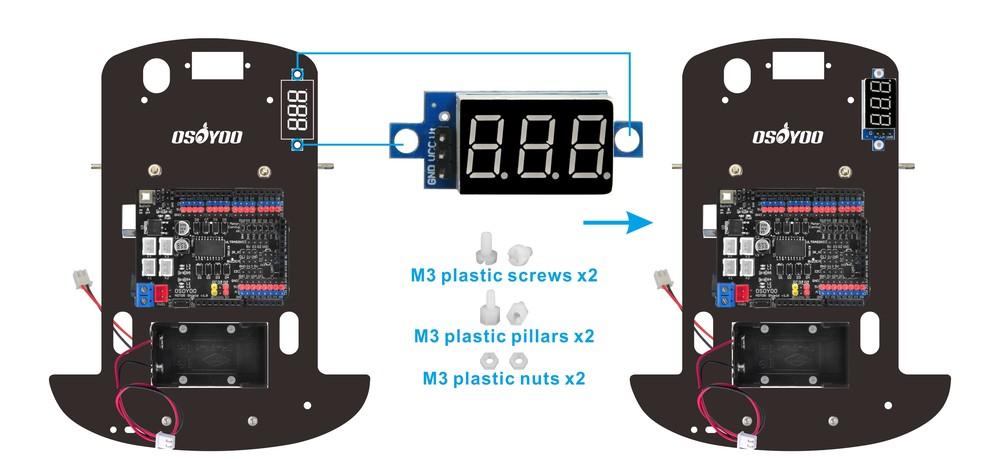
Install the voltage meter on the chassis with M3 plastic screws, pillars, and nuts
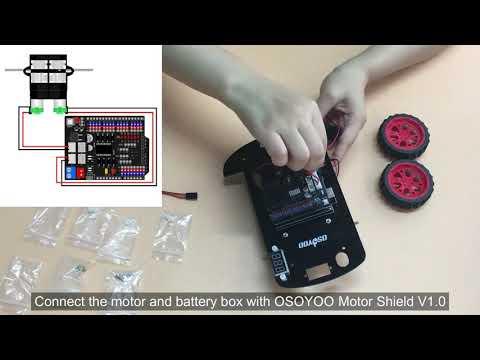
Connect OSOYOO Motor Shield With the Motor
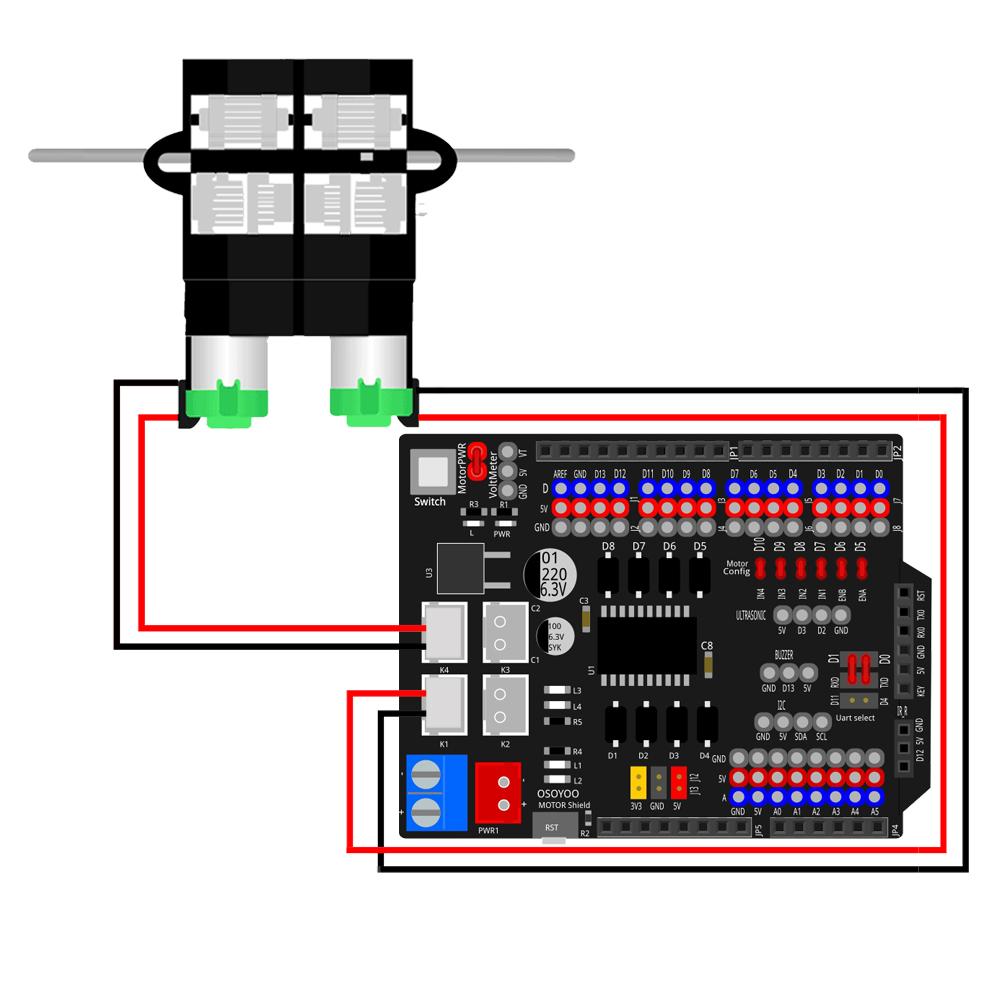
More detail about OSOYOO Motor Shield, please refer to this link:
https://osoyoo.com/2023/01/16/introduction-of-osoyoo-motor-shield-v1-1-v1-2/
Connect OSOYOO Motor Shield With the Battery Box

Connect OSOYOO Motor Shield With the Voltage Meter
Install the Wheels

Hardware installation is nearly complete. Prior to inserting the battery into the box, it's essential to first upload the sample code to the OSOYOO Basic Board for Arduino.
Software Installation
Acquire the code from https://osoyoo.com/picture/2WD_Car_V2.0/code/lesson-1.zip, extract the files, and proceed to upload them to the IDE.
Testing
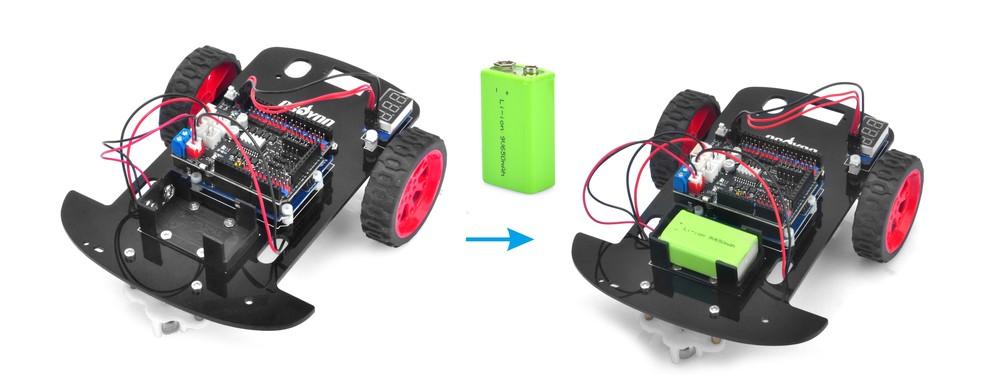
Detach the OSOYOO Basic Board for Arduino from your PC. Confirm the power switch on the OSOYOO Motor Shield is off. Insert a 9V battery into the designated compartment, ensuring correct polarity to avert potential device damage and fire hazards.
Position the car on the ground. Activate the OSOYOO Motor Shield switch. The car should exhibit the sequence: forward, backward, left turn, right turn, then come to a halt.
If the car's behavior contradicts the expected outcome mentioned above, meticulously examine your wire connections, validate the status of the 7 jumper caps on the OSOYOO Motor Shield, and ensure the battery voltage exceeds 7.2V.