Artistic Photo Manipulation in Photoshop
by hauntedworkshop in Design > Digital Graphics
1192 Views, 7 Favorites, 0 Comments
Artistic Photo Manipulation in Photoshop
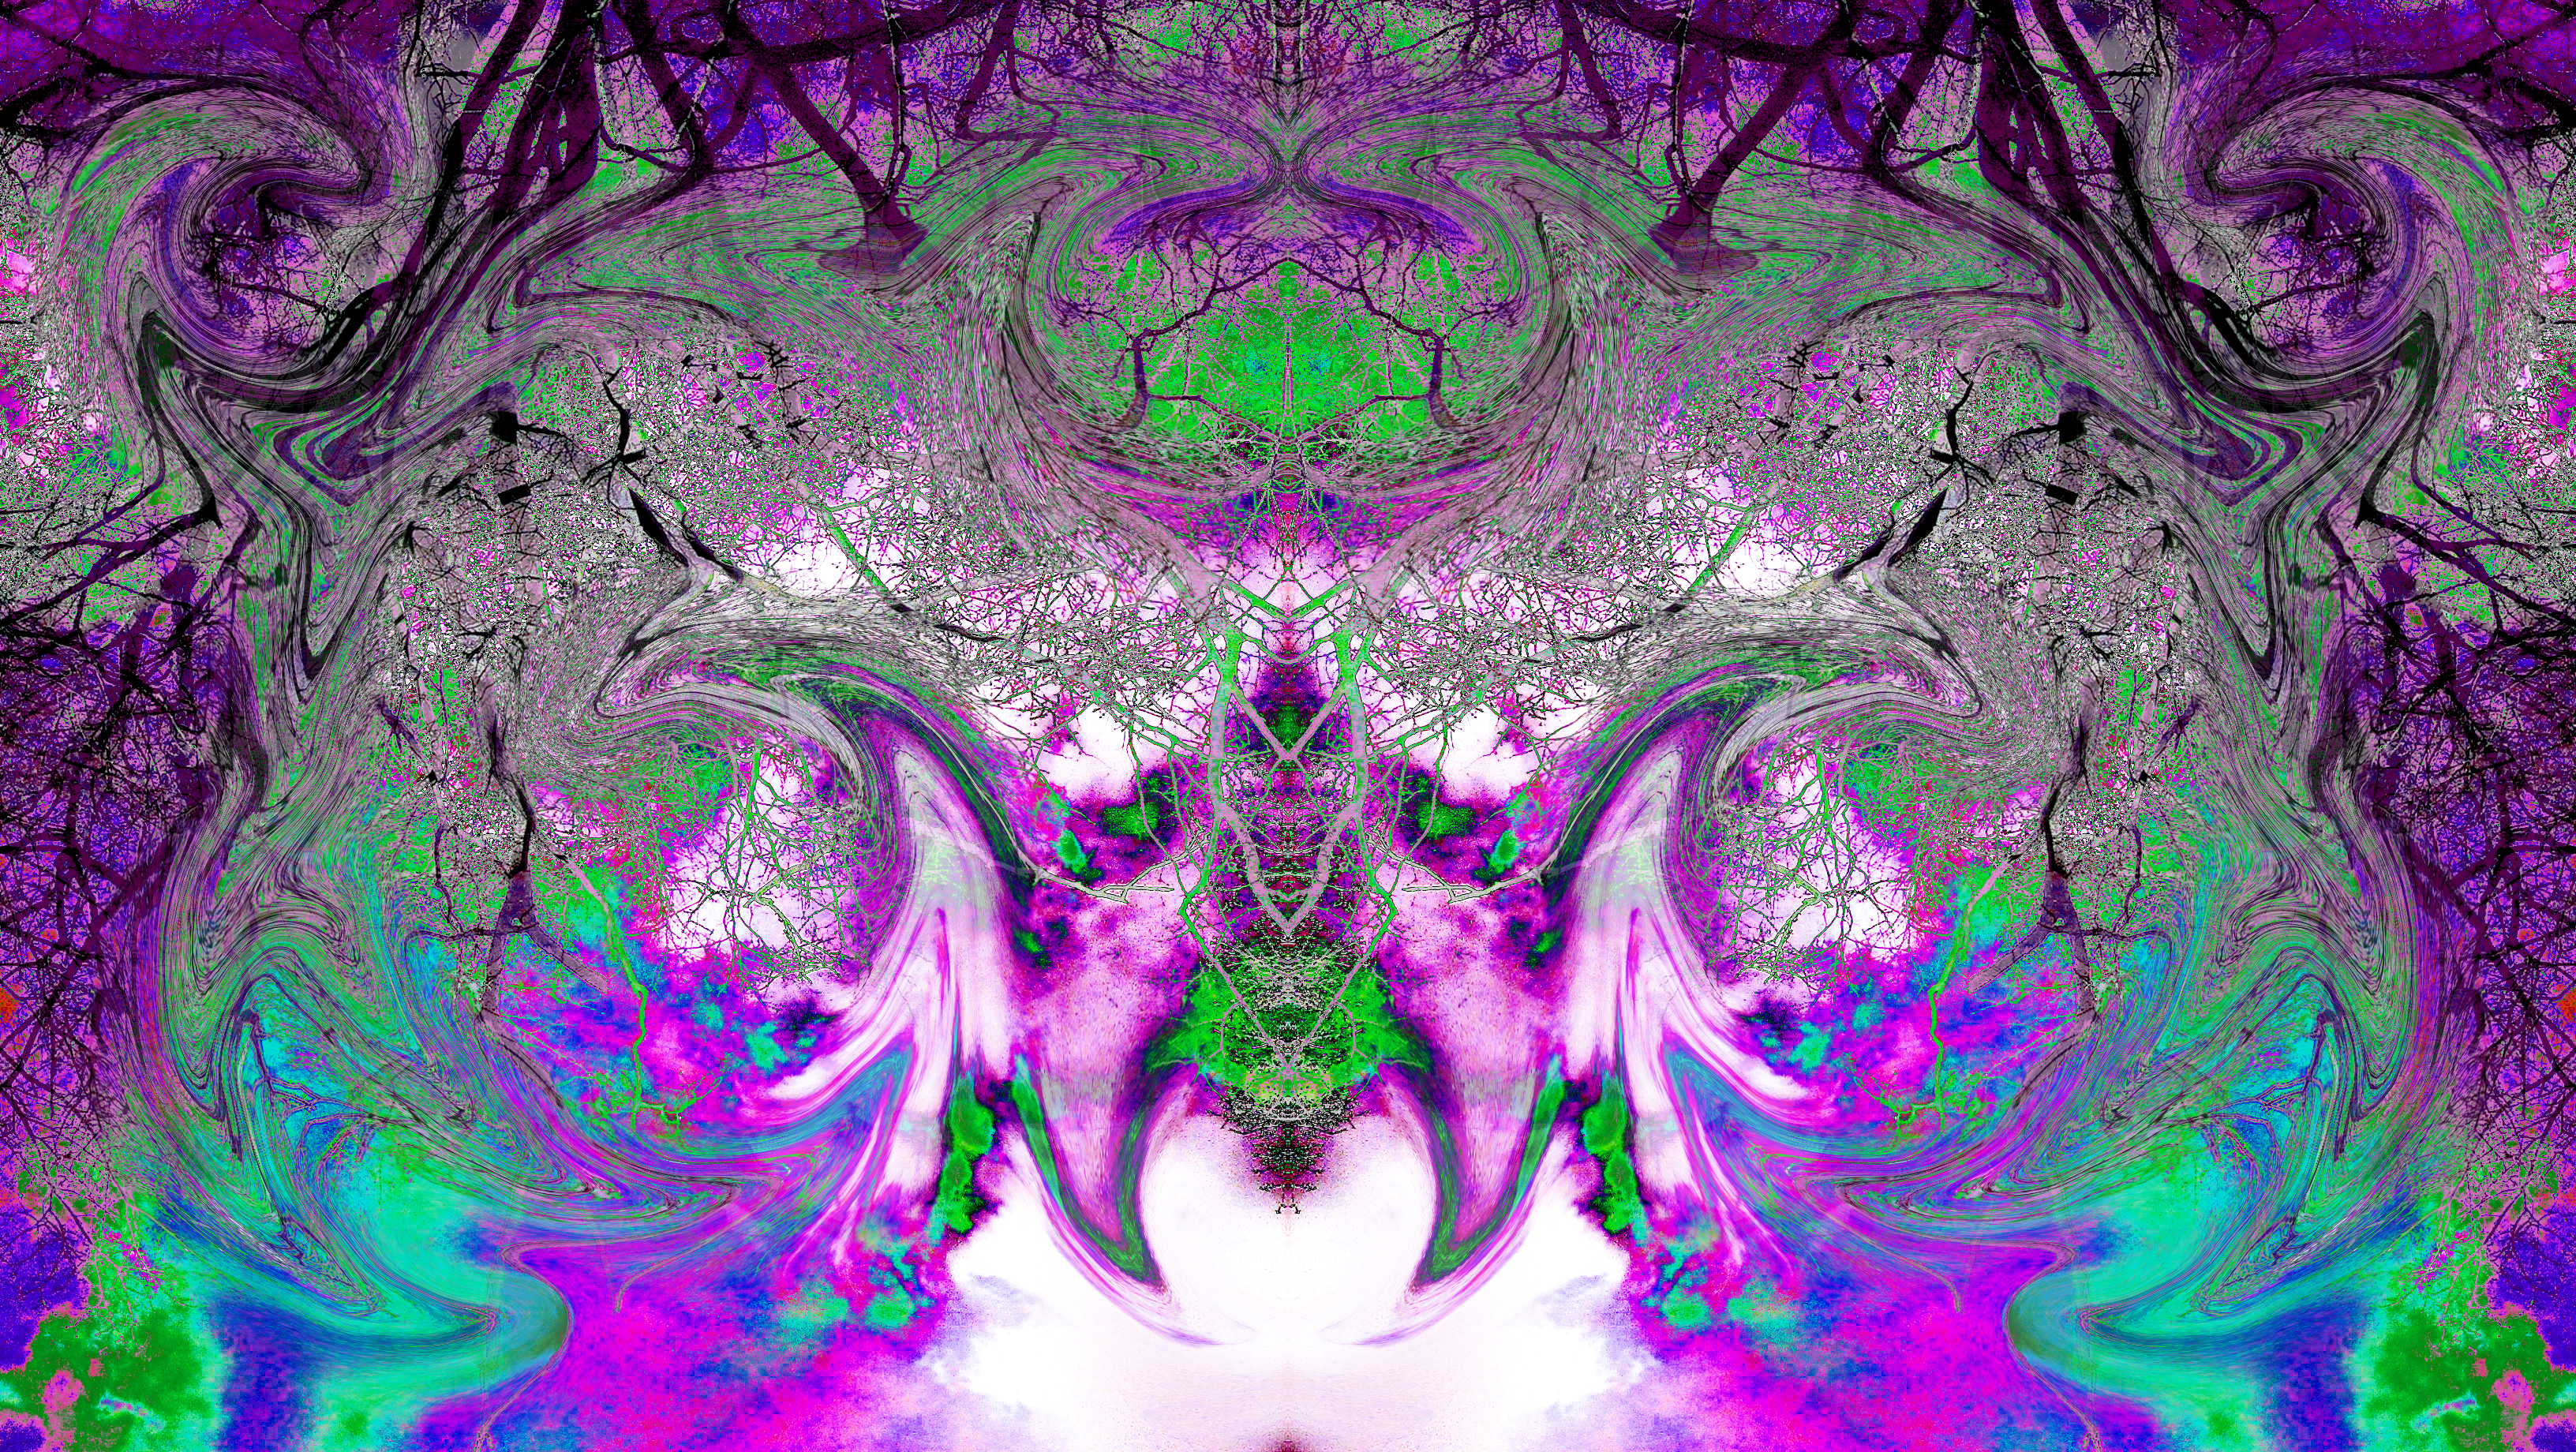
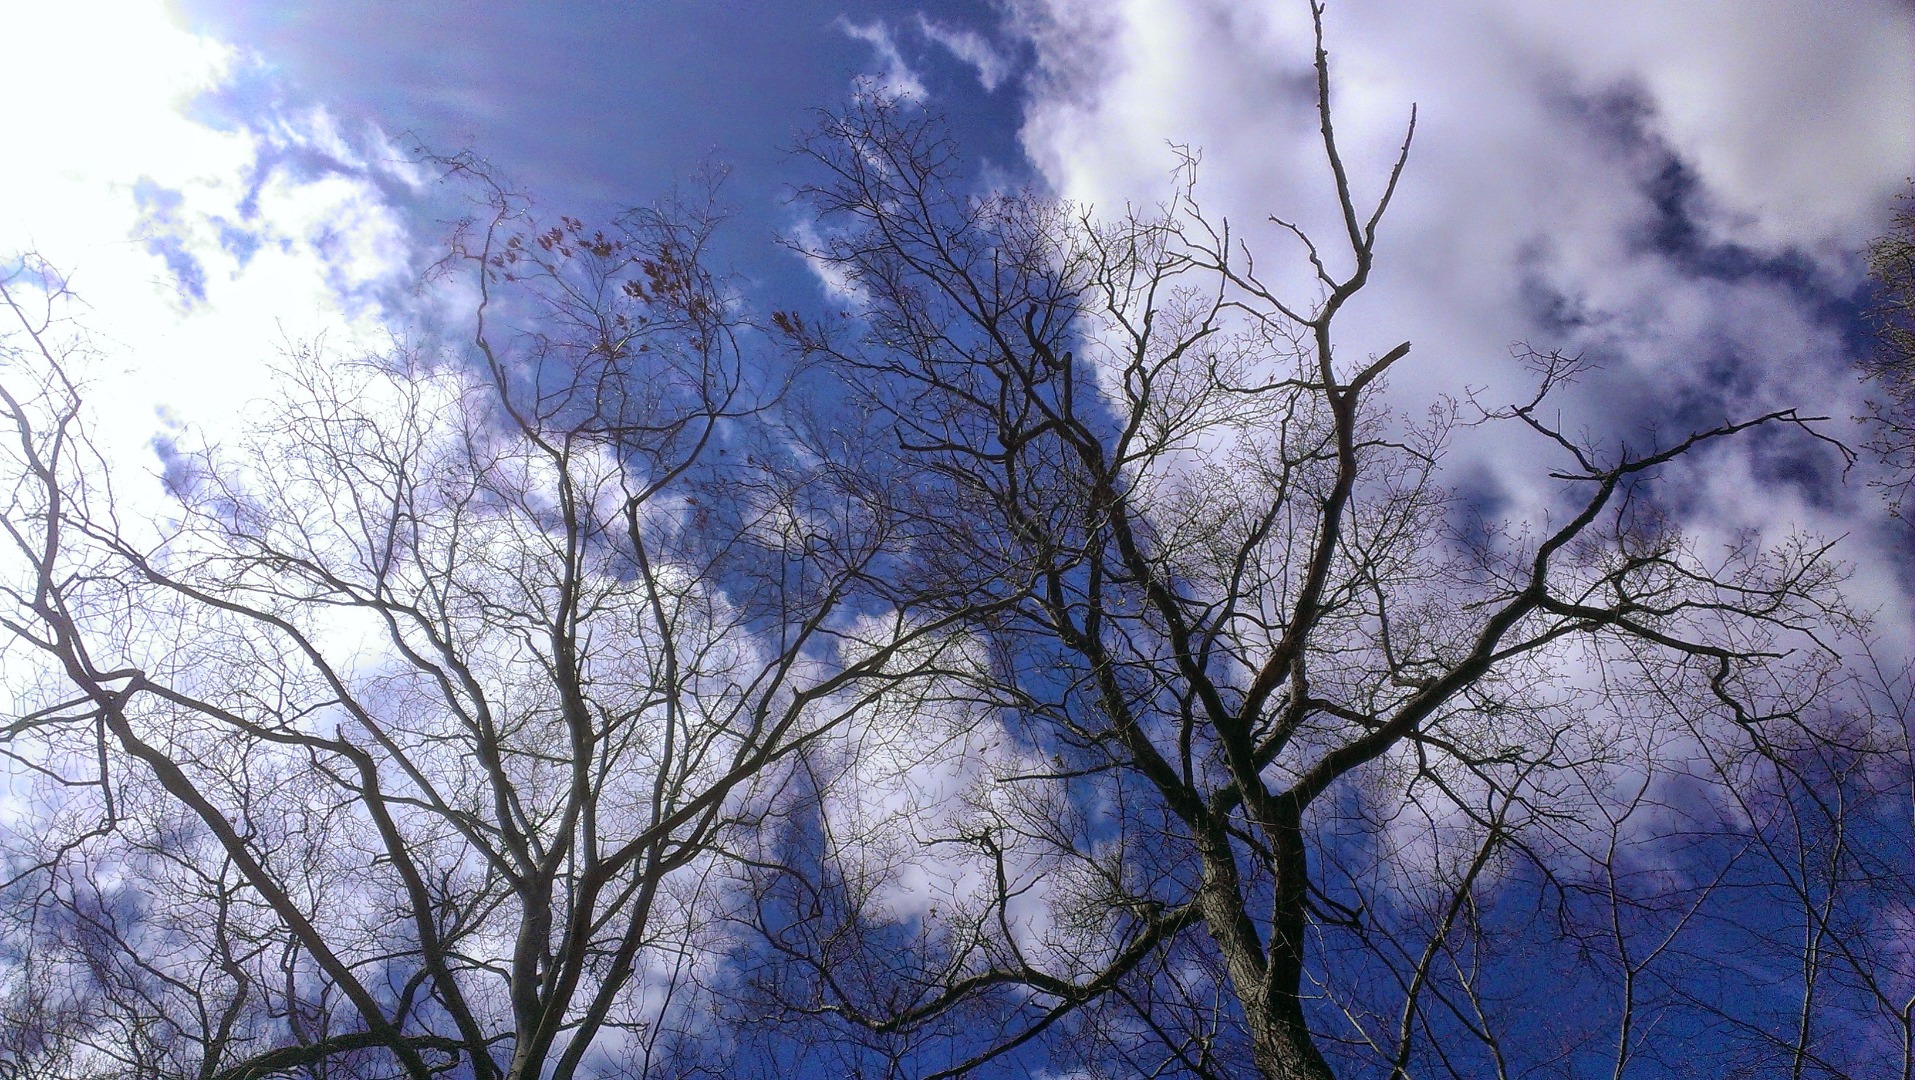
Take a picture of trees, clouds, anything you'd like and turn it into a whole new piece of art. Feel free to use my starting photo to play with, but using your own image is more rewarding.
Open Your Image in Photoshop
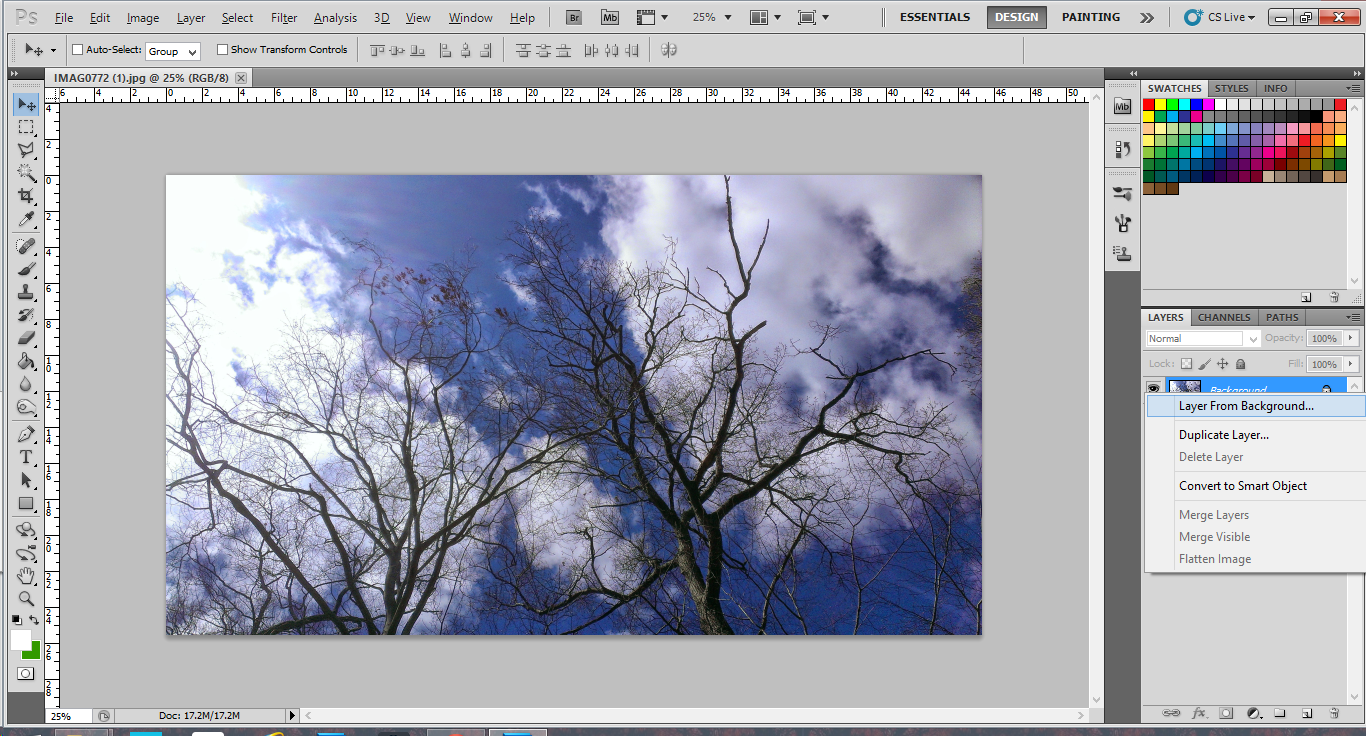
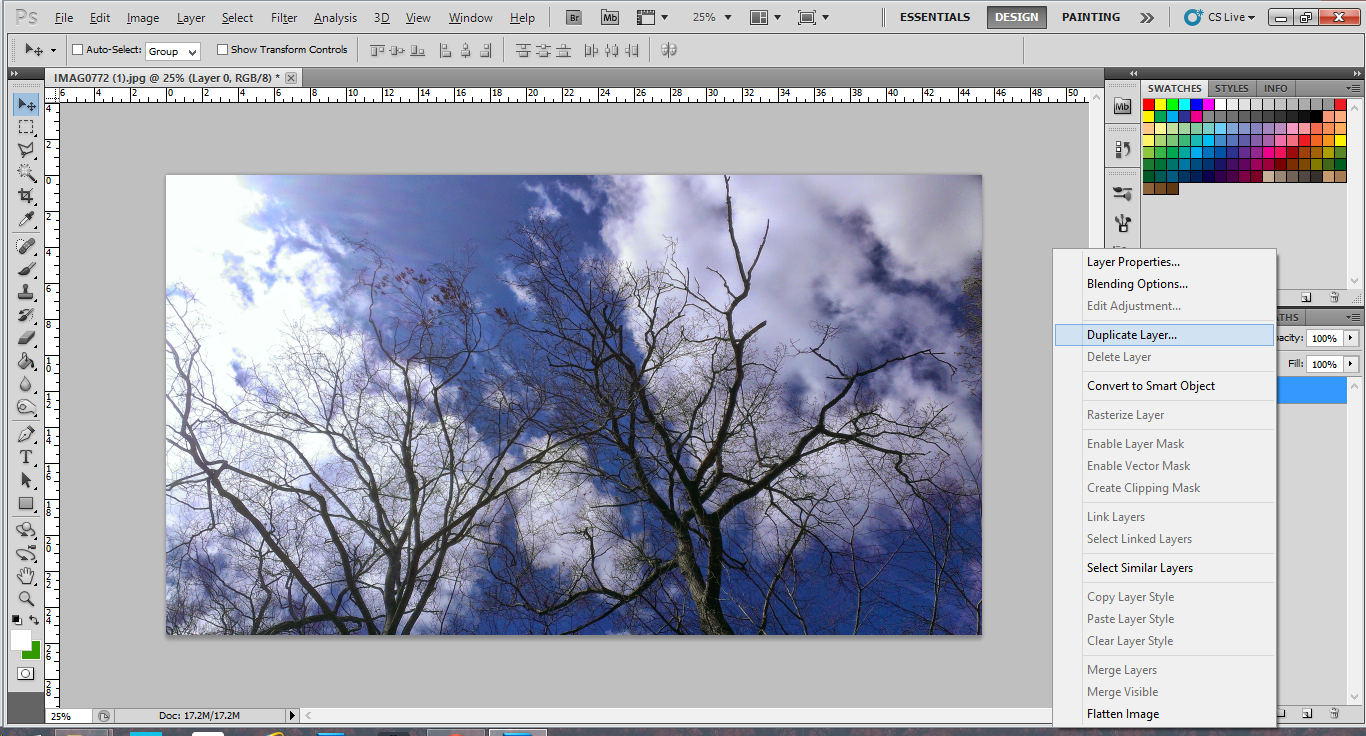
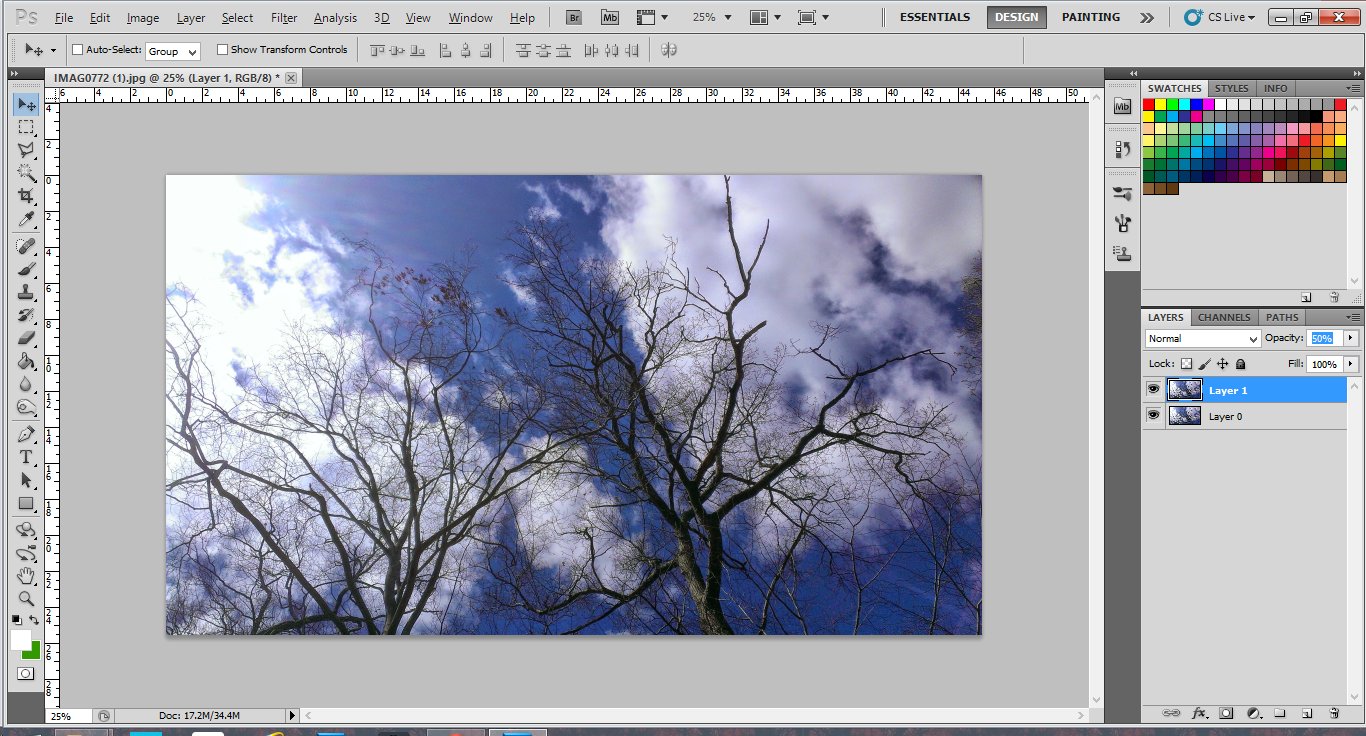
Open your image in Photoshop and make sure the layer is unlocked. Either right click on the layer and click Layer From Background, or double-click the layer name to change the name. Name the layer whatever you'd like. I called it Layer 0.
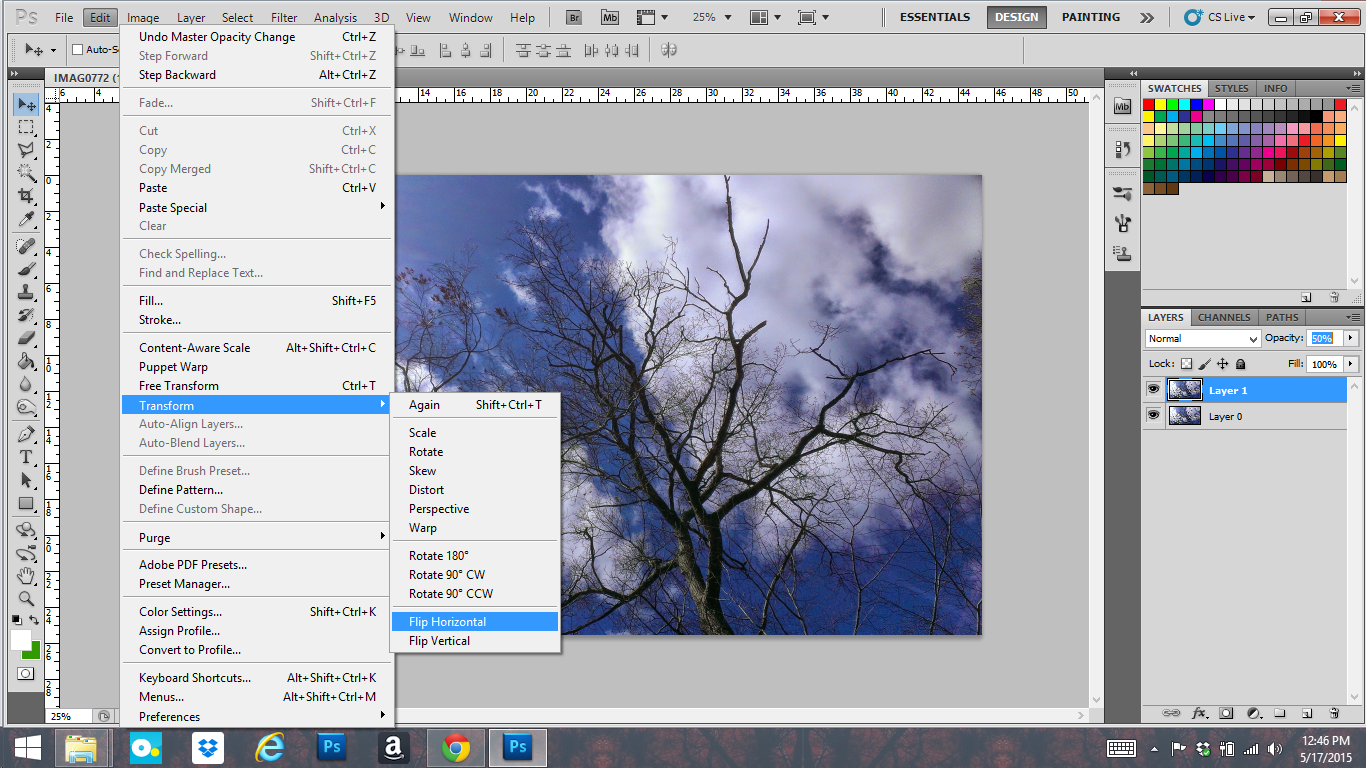
Press ctrl +j or right-click the layer and click Duplicate Layer to duplicate the layer. Set the new layer's opacity to 50%. Click Edit ->Transform -> Flip Horizontal.
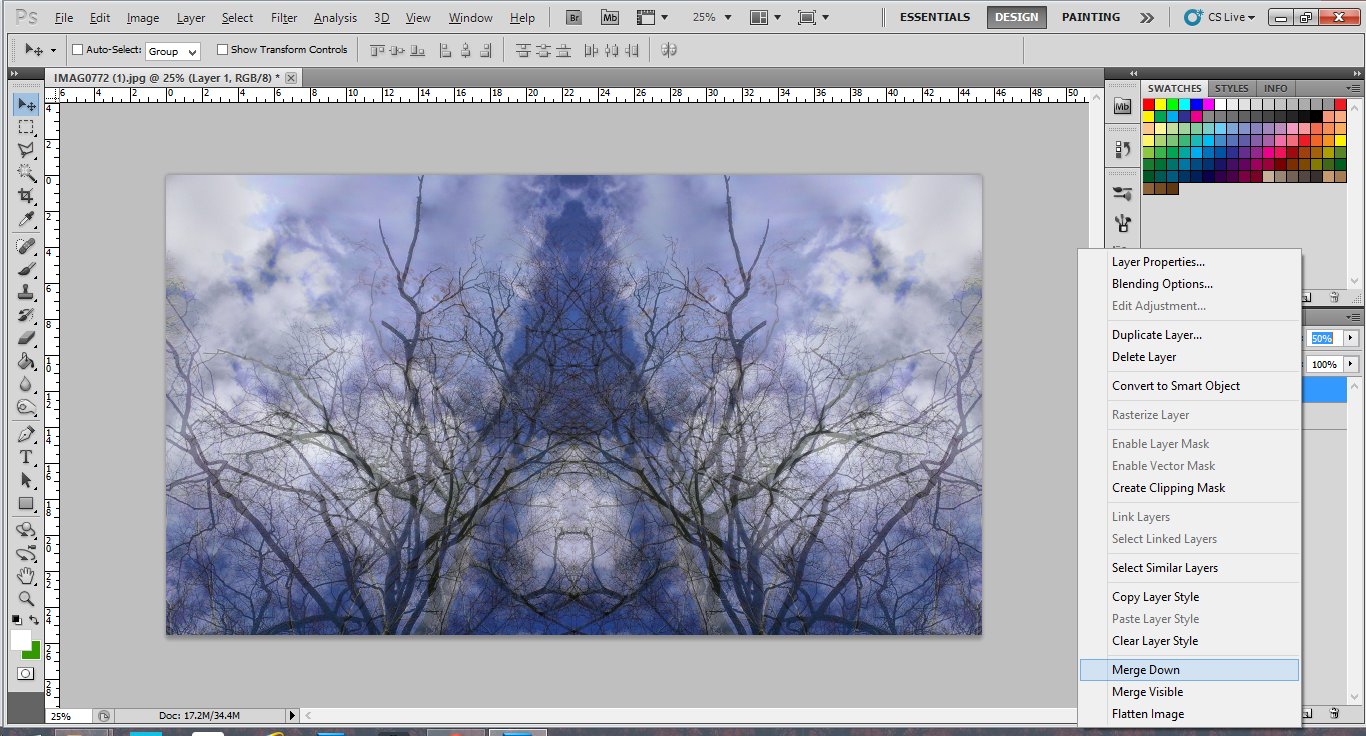
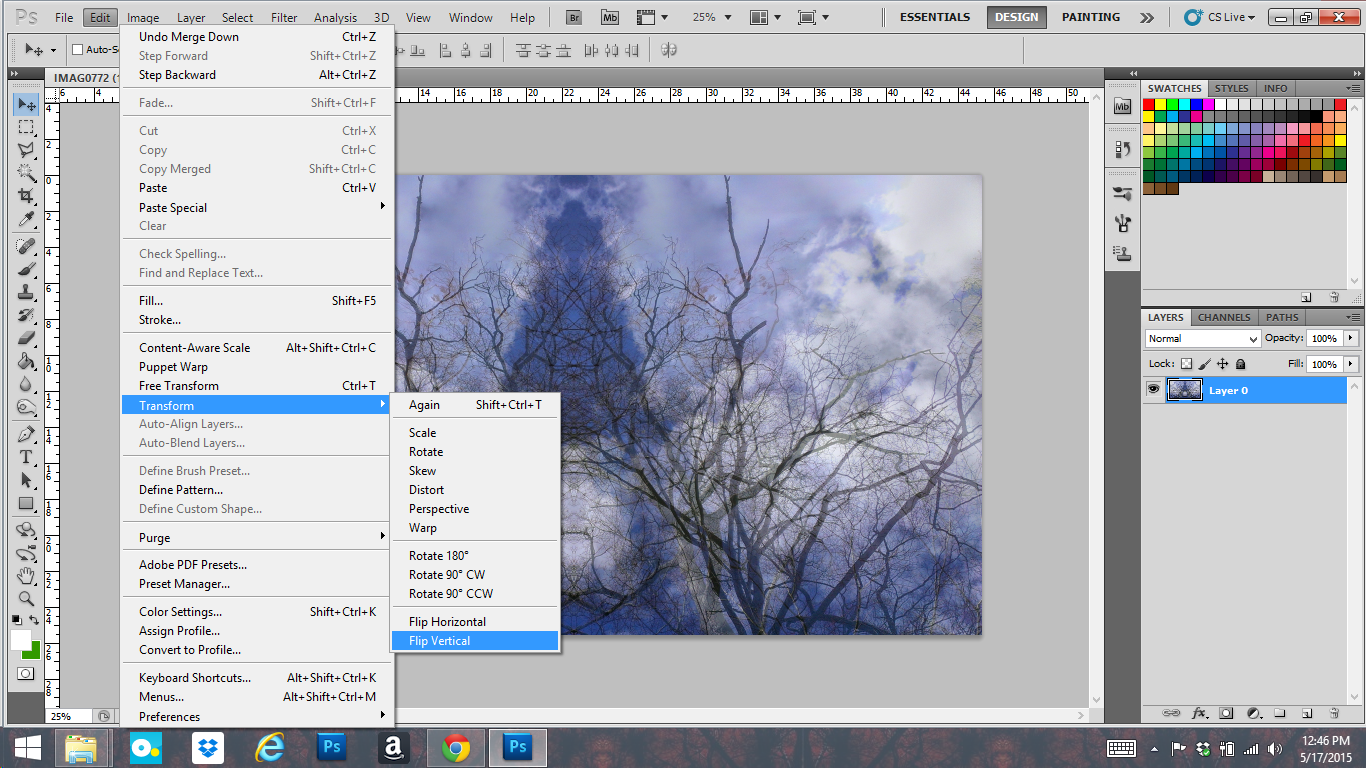
Right click on the top layer and click Merge Down. Click Edit ->Transform -> Flip Vertical.
Play With Levels, Curves, Hue and Saturation...
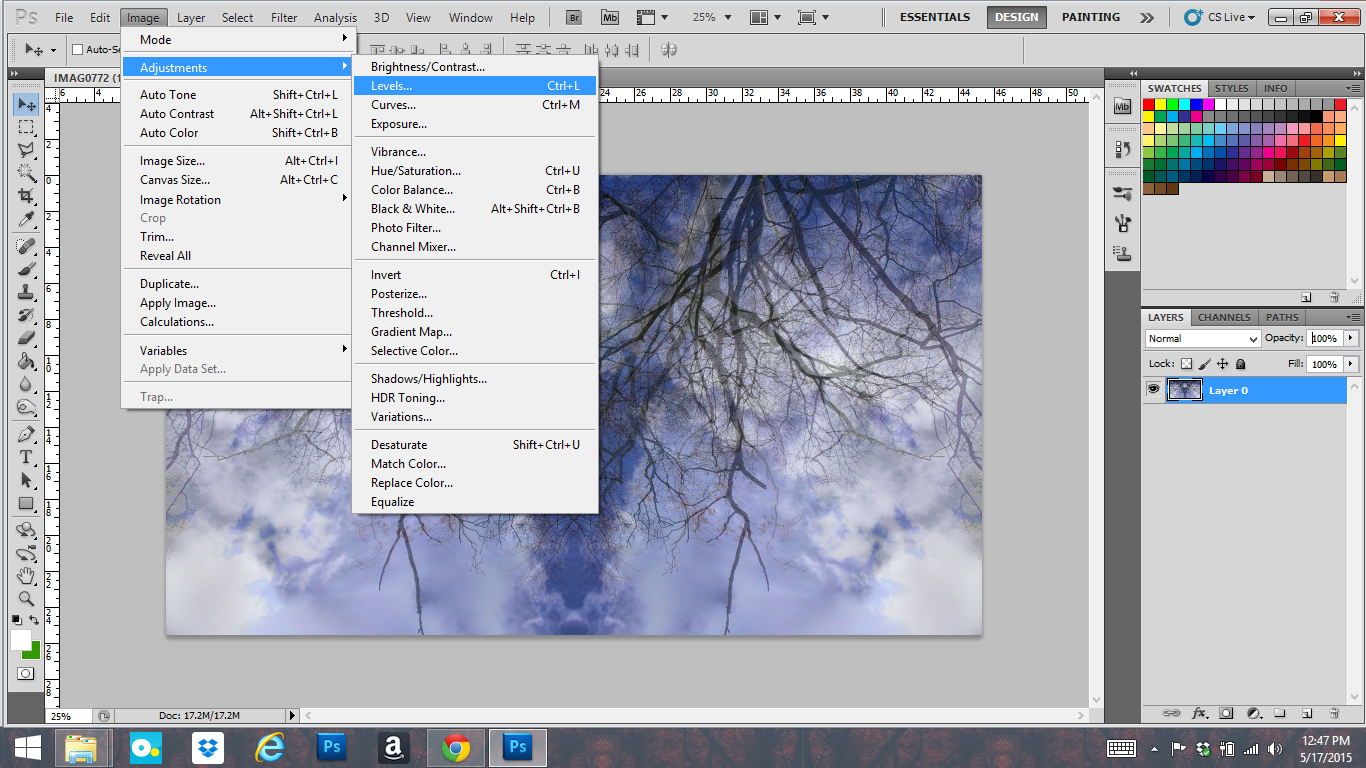
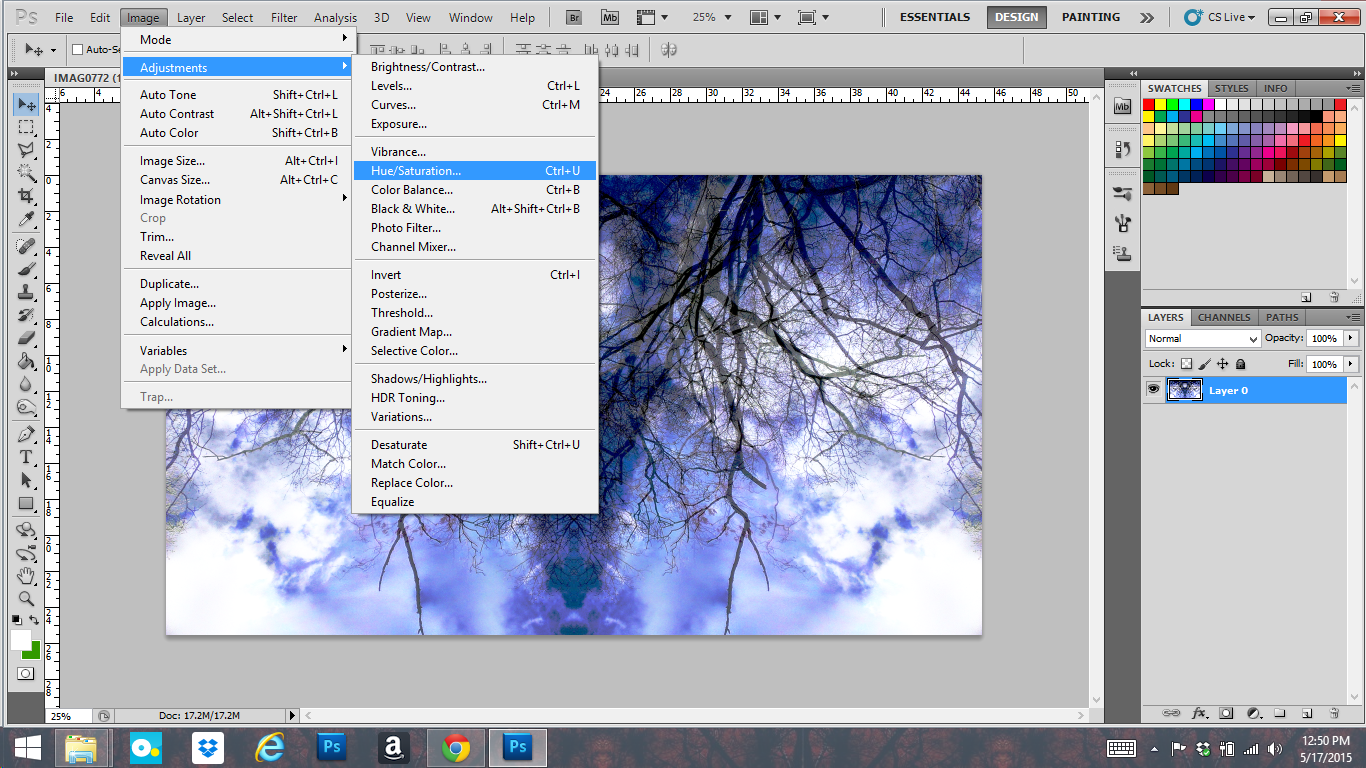
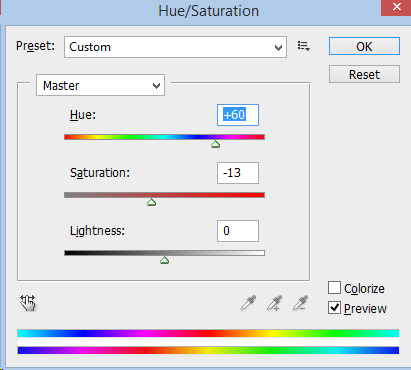
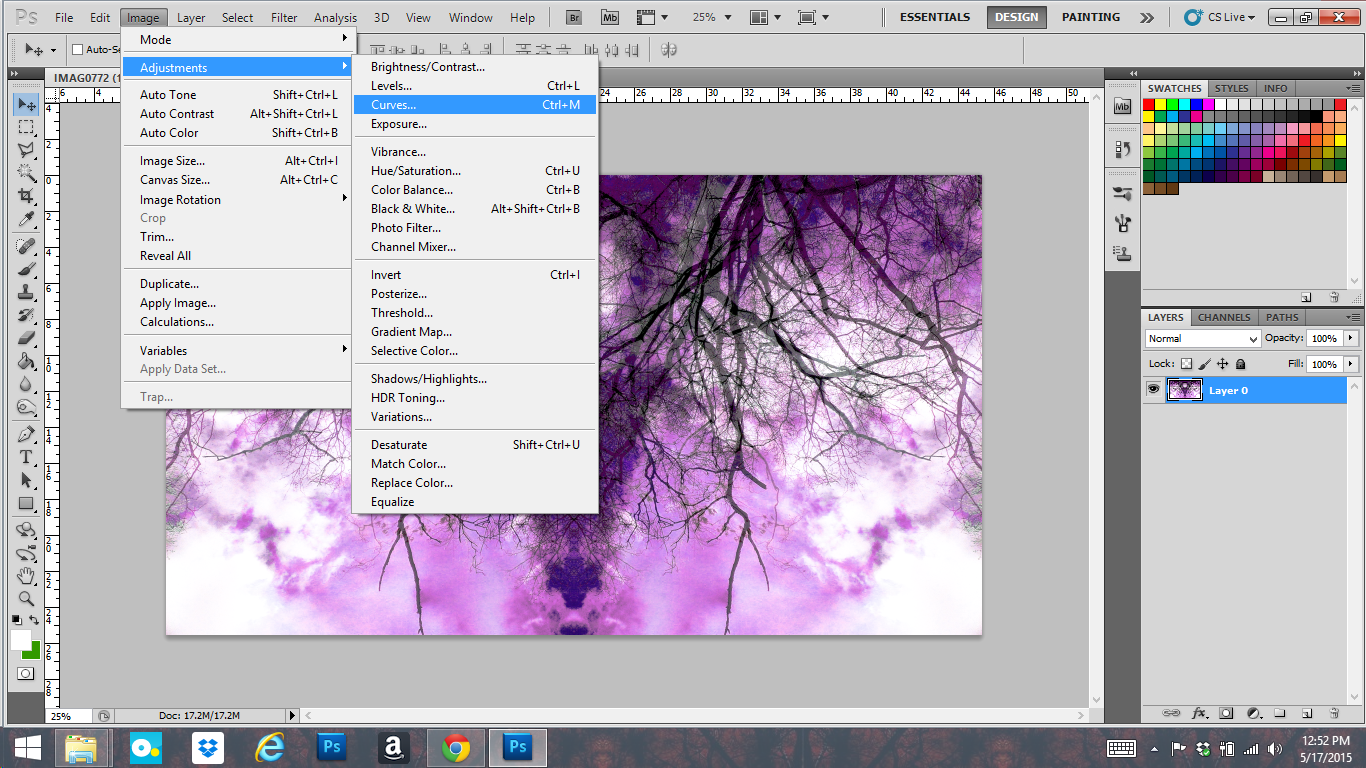
Press ctrl +j or right-click the layer and click Duplicate Layer to duplicate the layer.
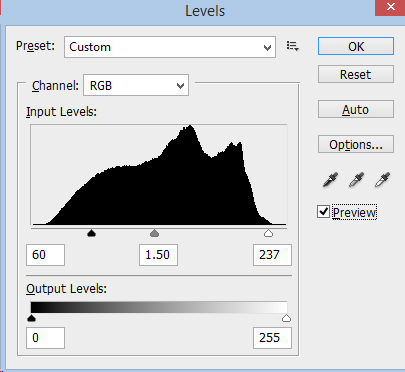
Click Image -> Adjustments -> Levels. Make sure the Preview check box is checked so you can see your changes. Drag the sliders left or right until it looks the way you'd like it. You can change the levels of each channel and/or all channels. When you're happy, click OK.
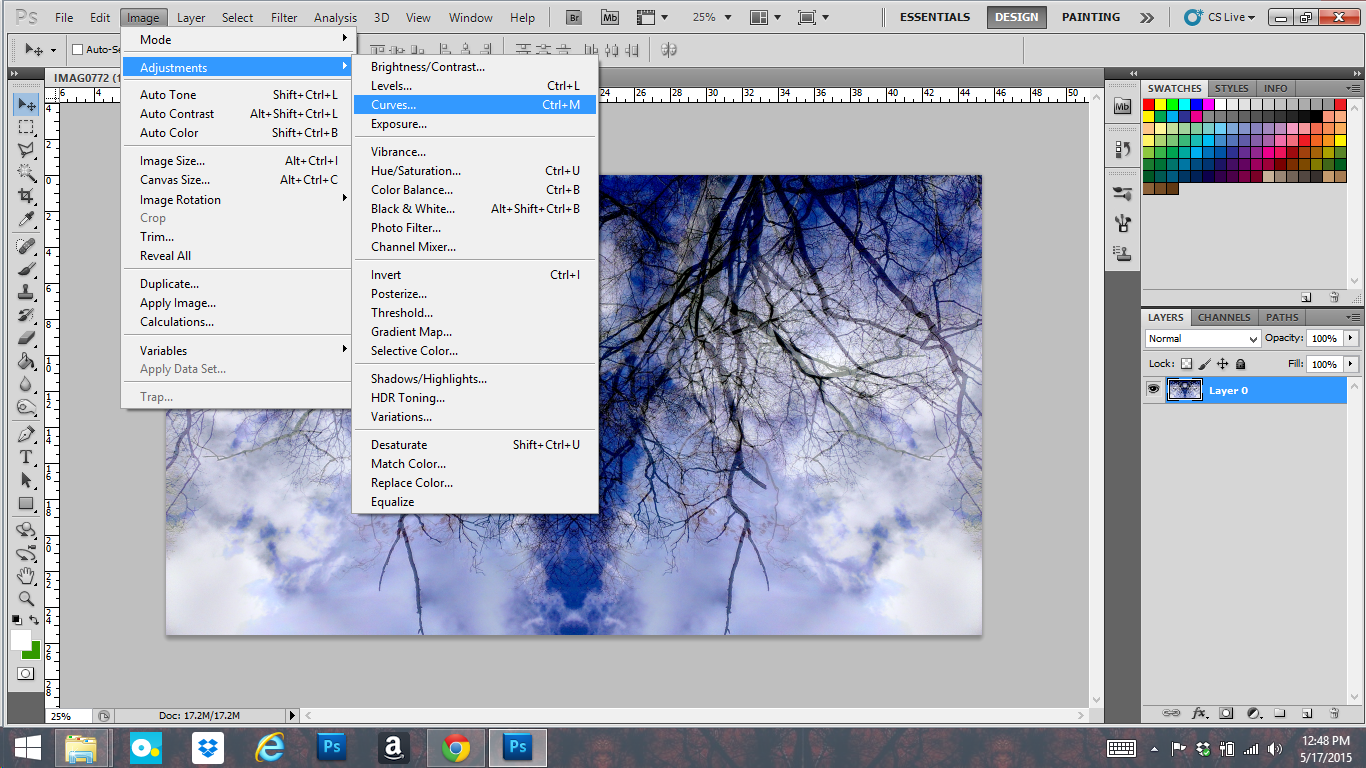
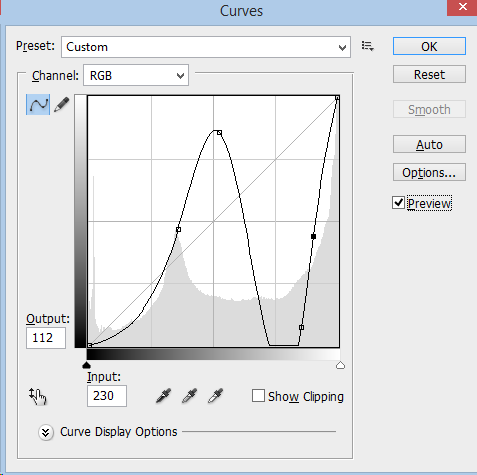
Click Image -> Adjustments -> Curves. Click anywhere along the diagonal line and drag. Add several more points by clicking on the line and dragging. The more points you have, the more broken up the colors get. Play around with it until you like what you see. You can remove points by clicking on a point and press the Delete key. When you like it, press OK.
Click Image -> Adjustments -> Hue/Saturation. Drag the sliders around until you're pleased with your choices. Again, you can change individual channels and/or all. If you want a monotone image, click on Colorize.
Now you can go back into the curves and/or levels settings to modify even more.
Split, Move, and Flip Your Image
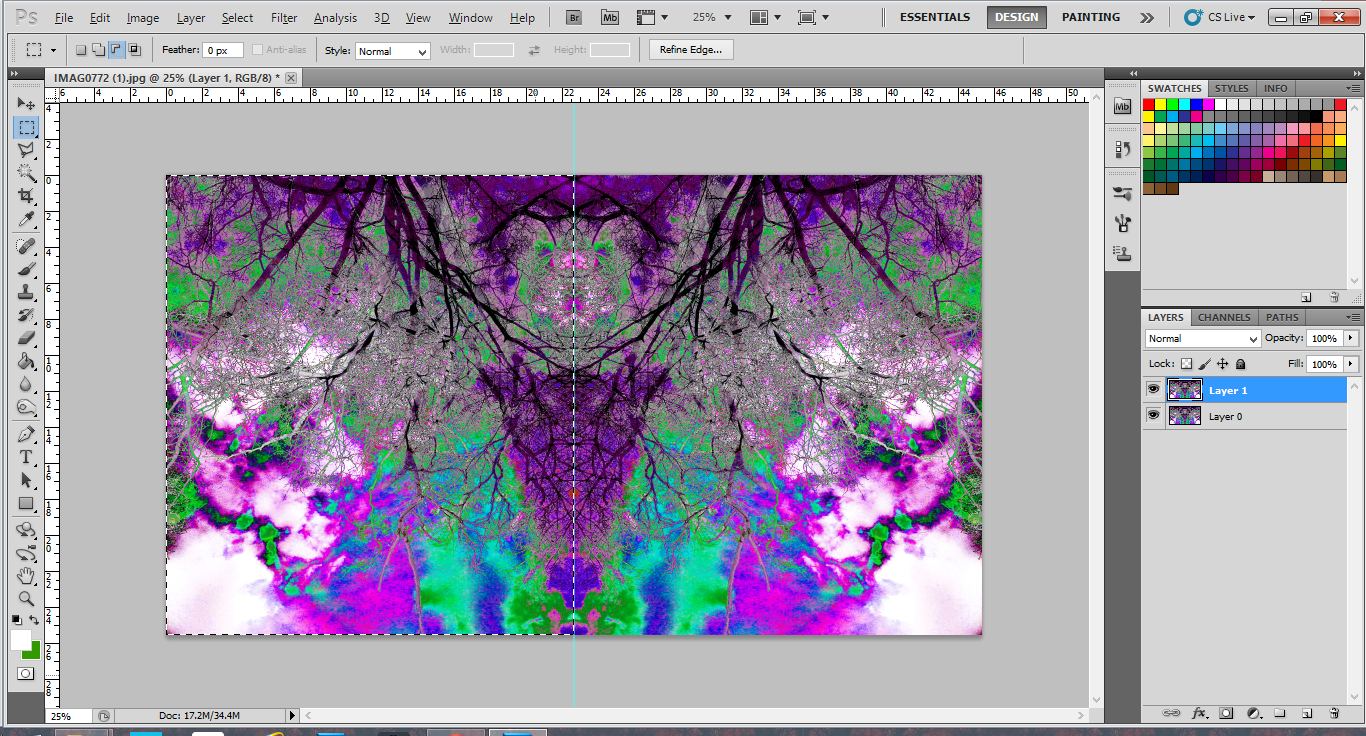
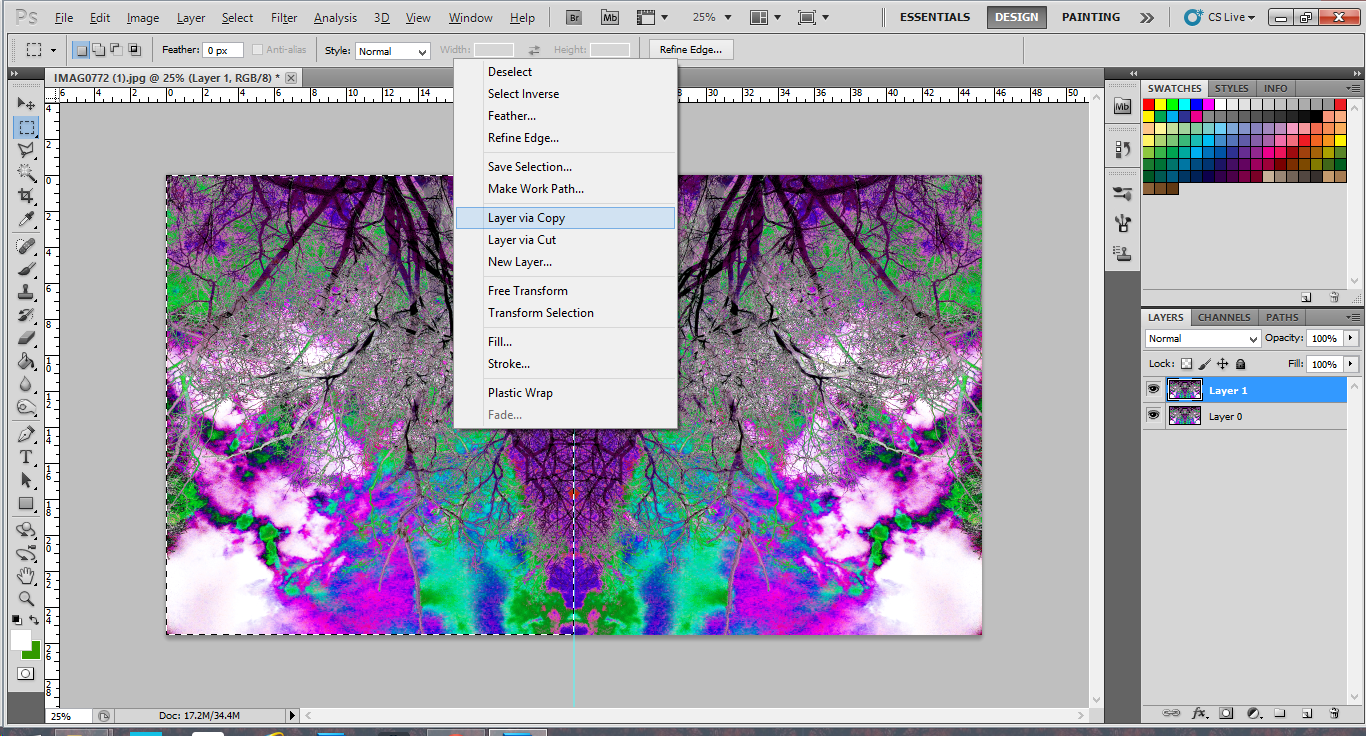

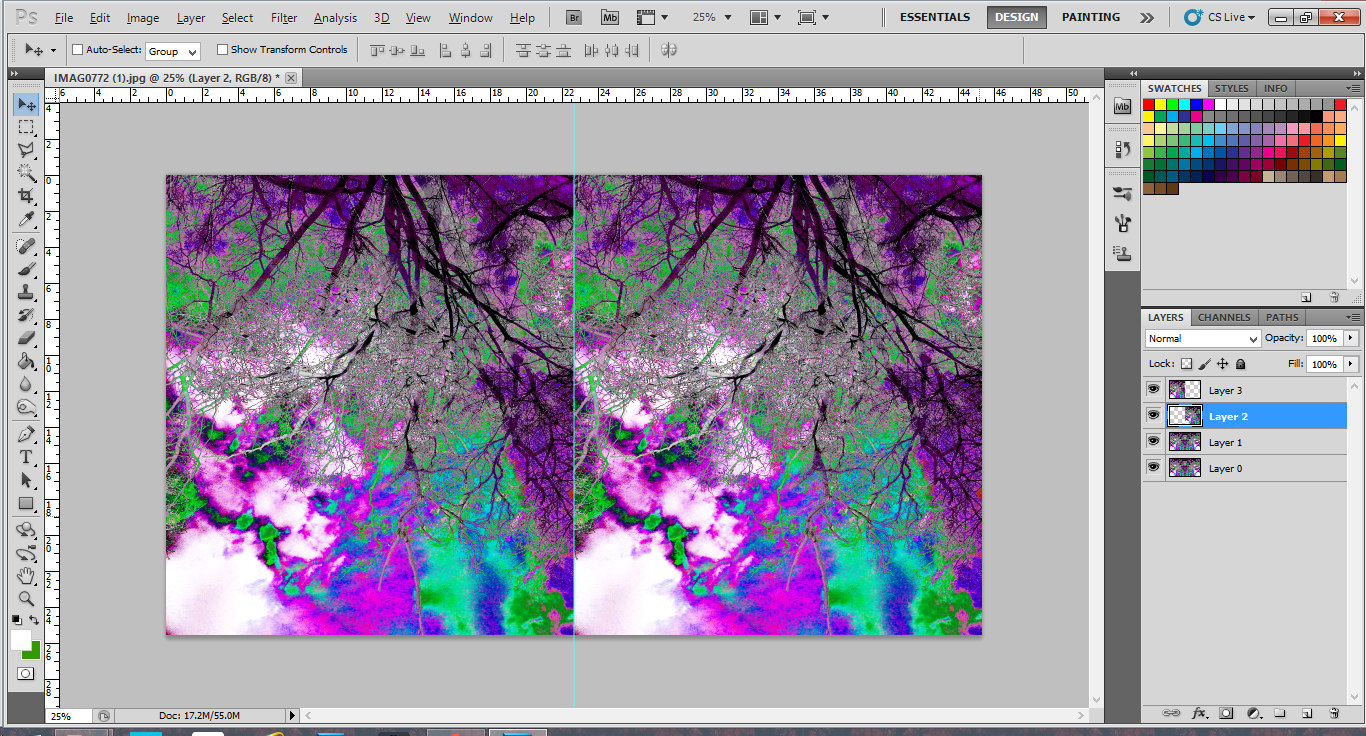
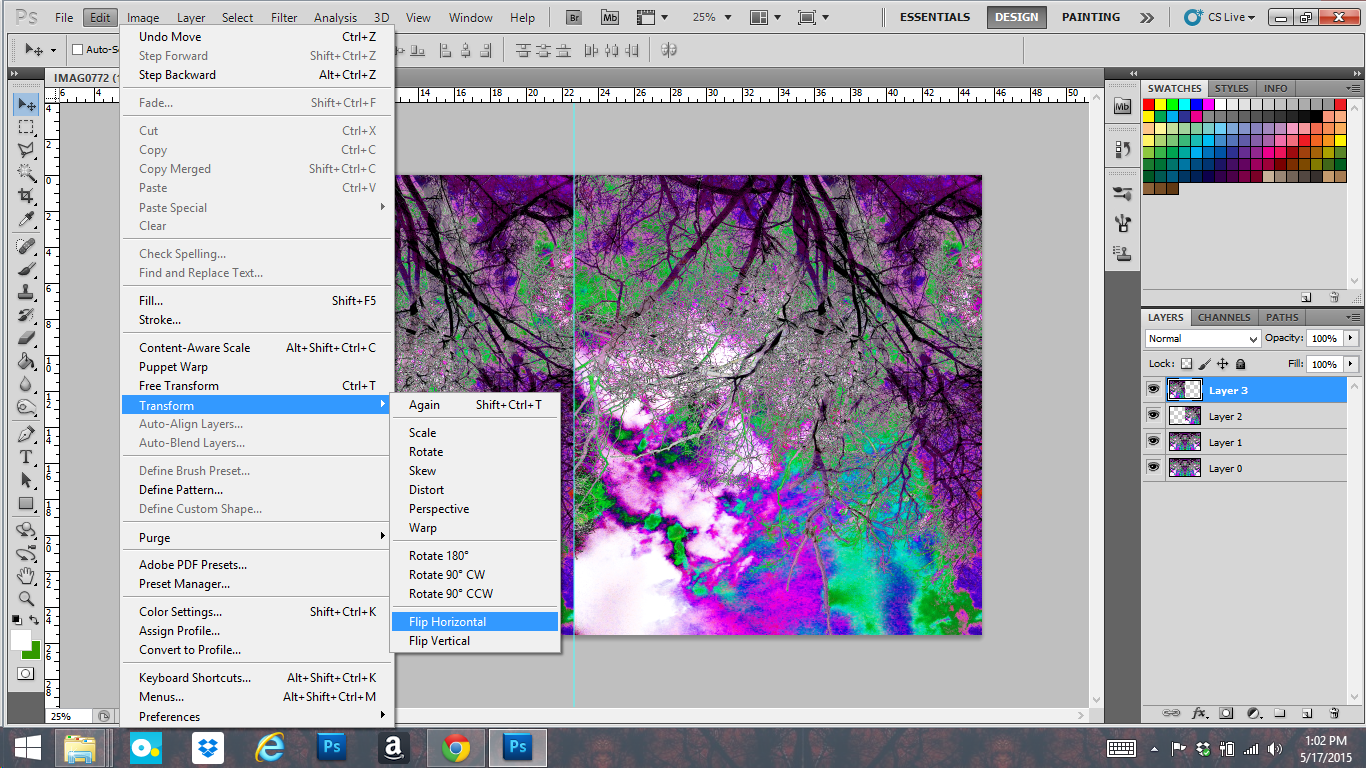
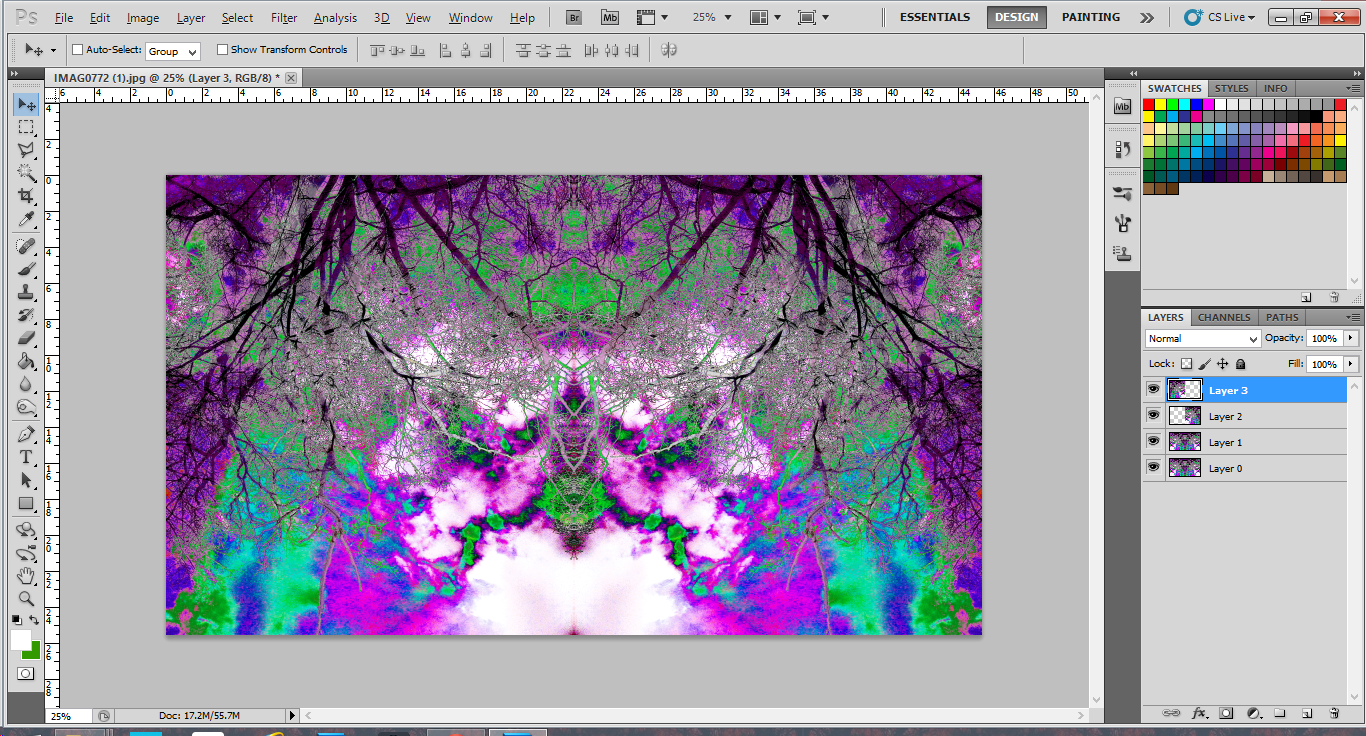
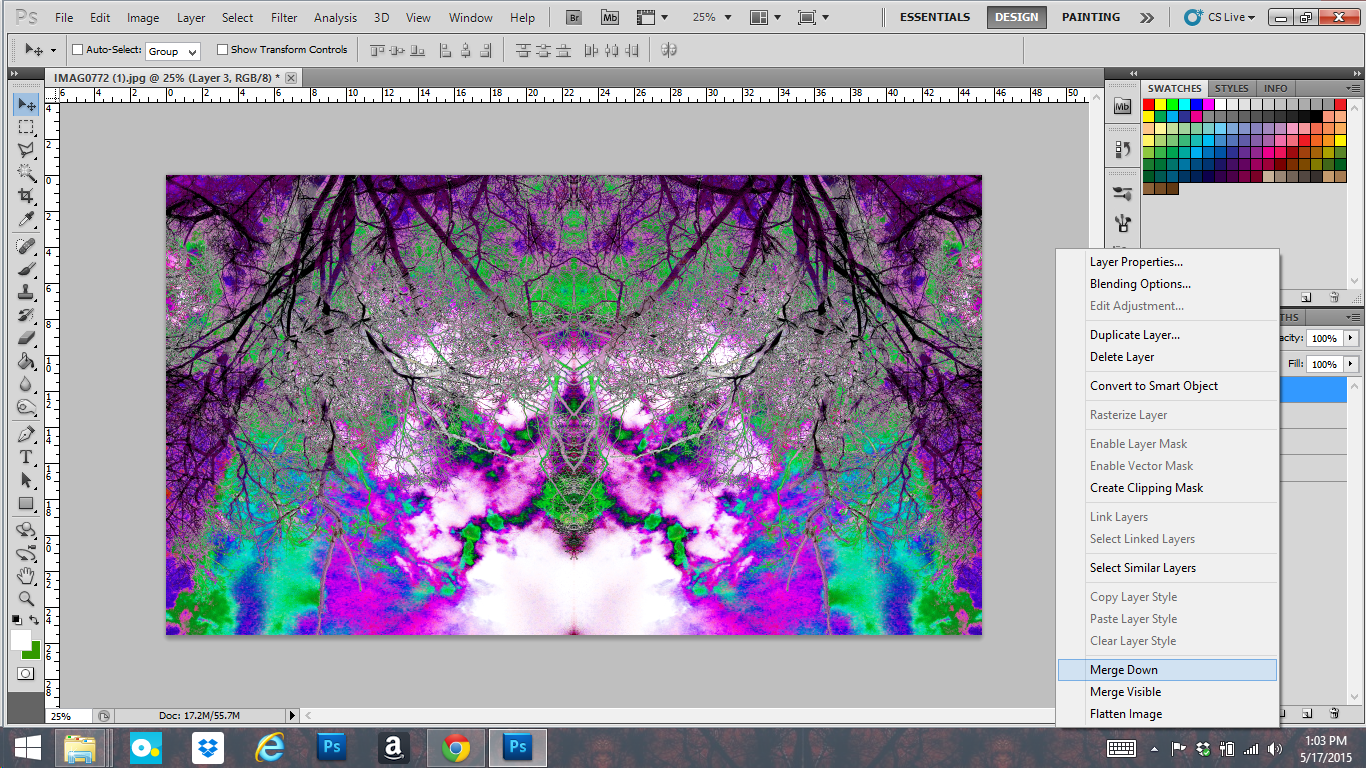
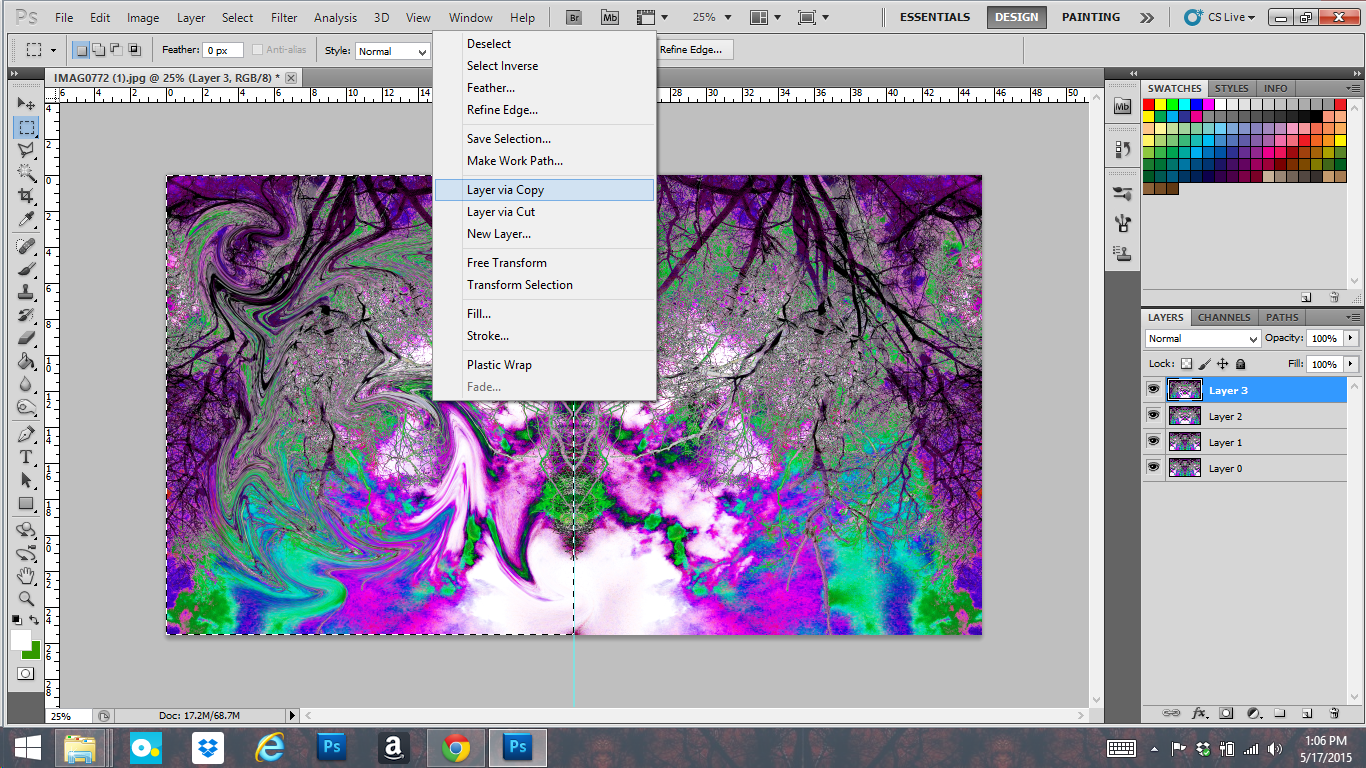
Drag a vertical Guide line to the center of your image from the ruler on the left side of the screen. Using the Rectangular Marquee Tool, select the left half of the image. Right-click the selection and click on Layer via Copy or Press ctrl +c to copy this selection, then ctrl +v to paste the selection to a new layer. Press ctrl +j or right-click the layer and click Duplicate Layer to duplicate the layer.
Using the Move Tool, hold shift and click and drag the selection to the right side. You can also use the arrow keys to move it.
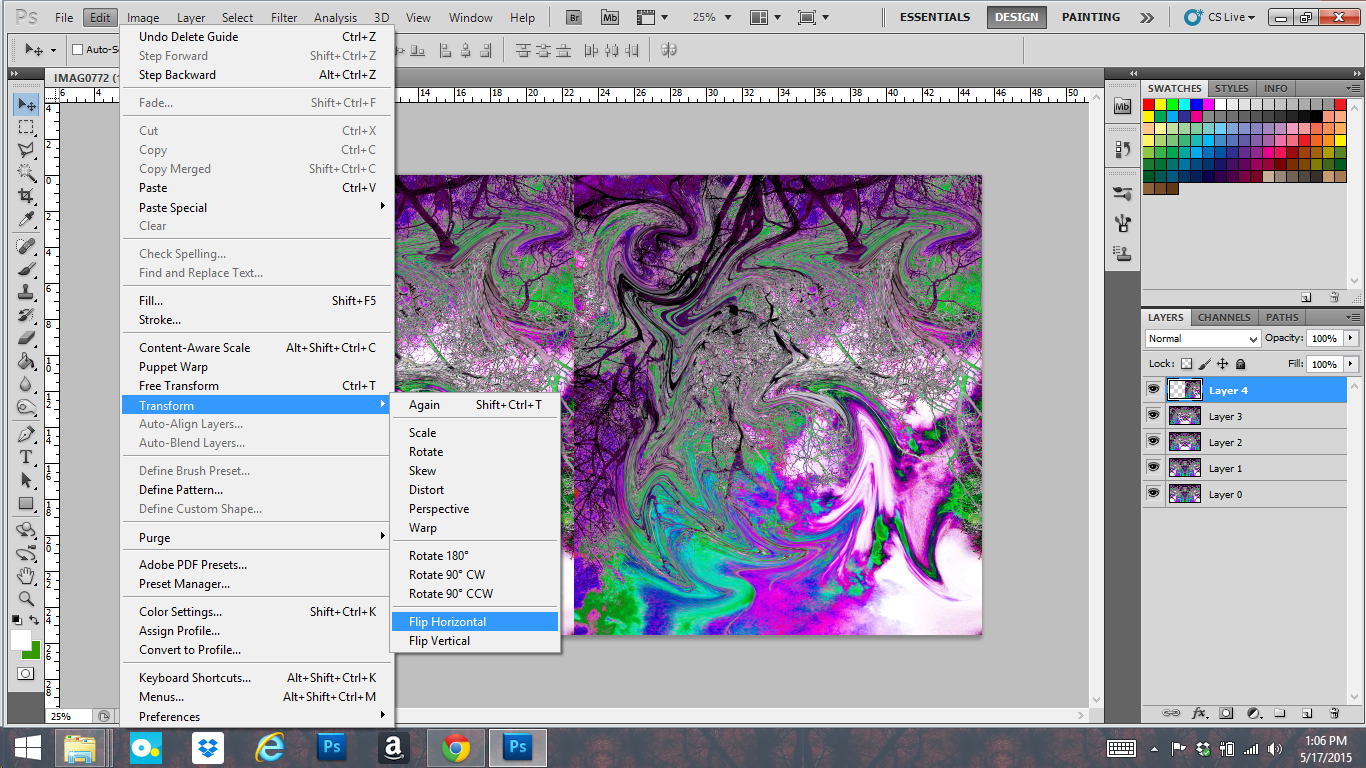
Click on the previous layer (right side of the image). Click on Edit -> Transform -> Flip Horizontal.
Right-click on the top layer (left side of your image) and click Merge Down.
Add Some Swirls to Your Masterpiece.
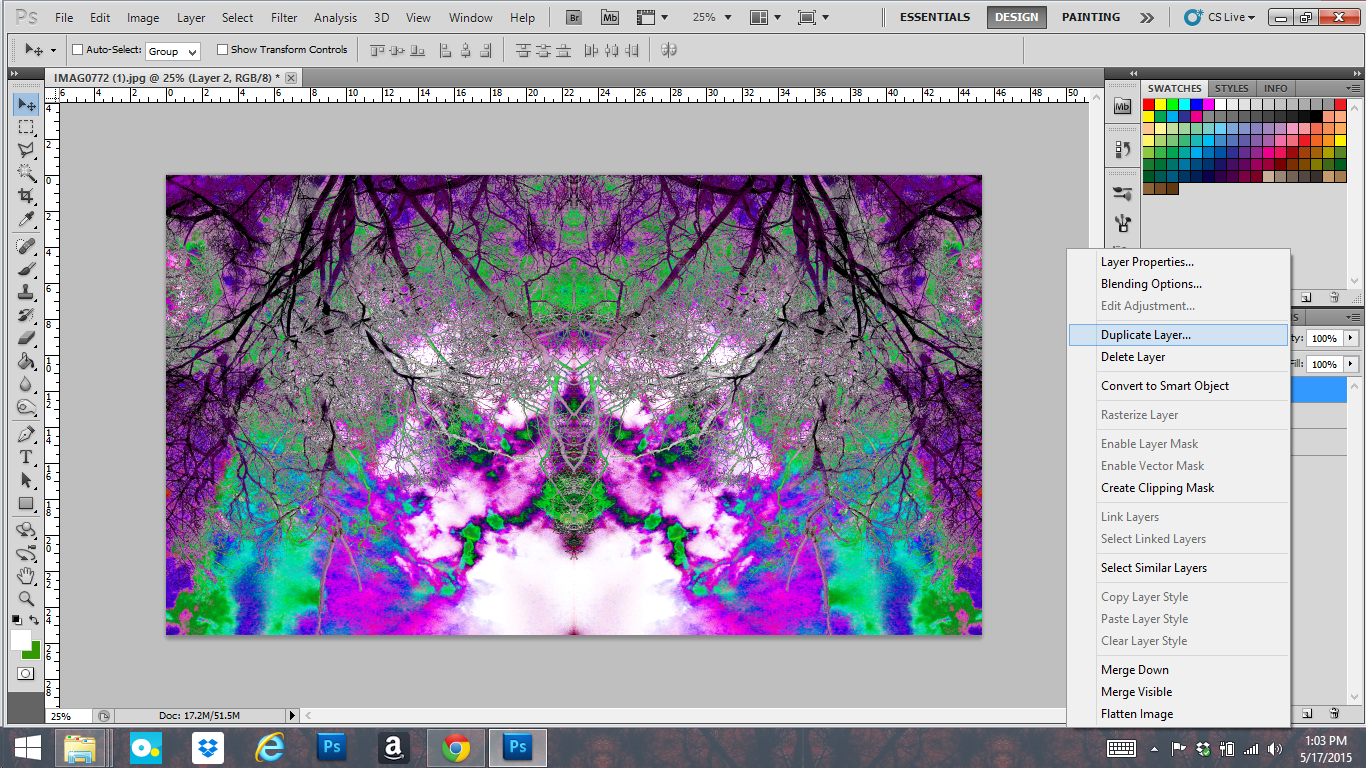

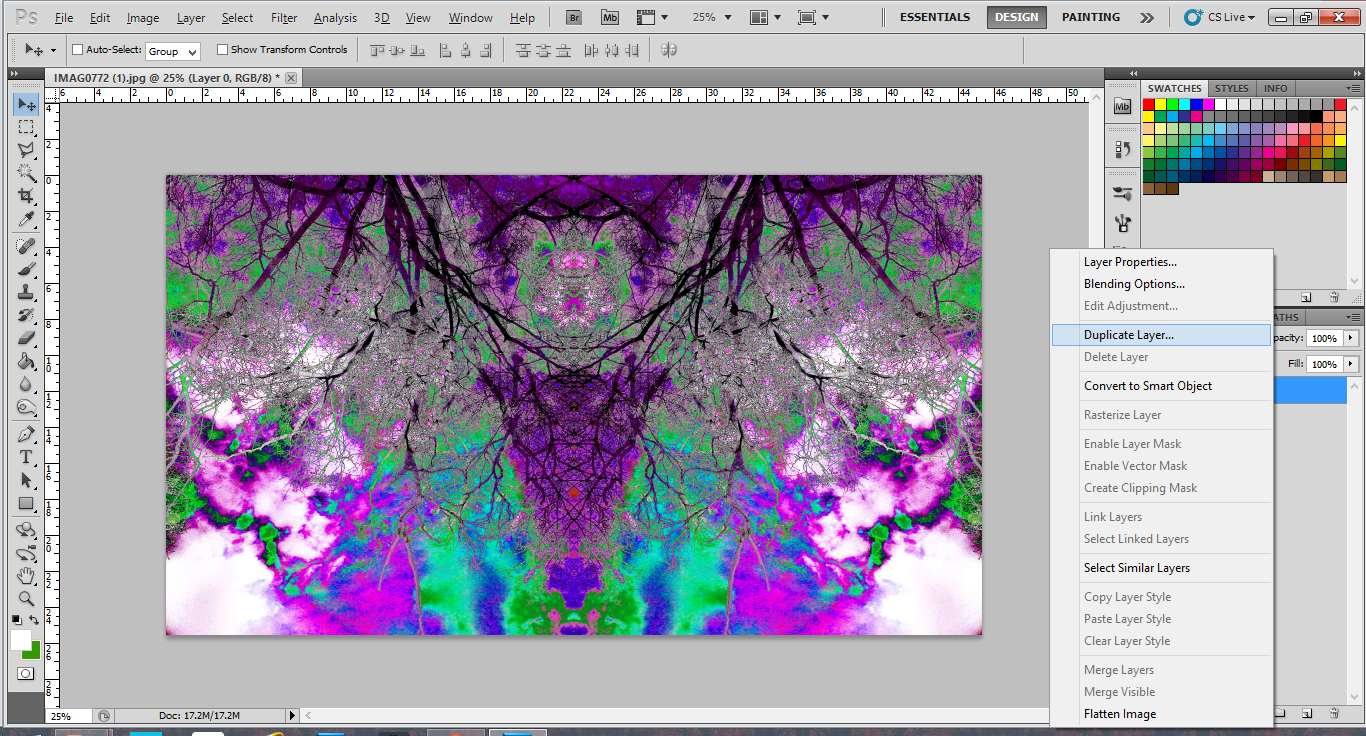
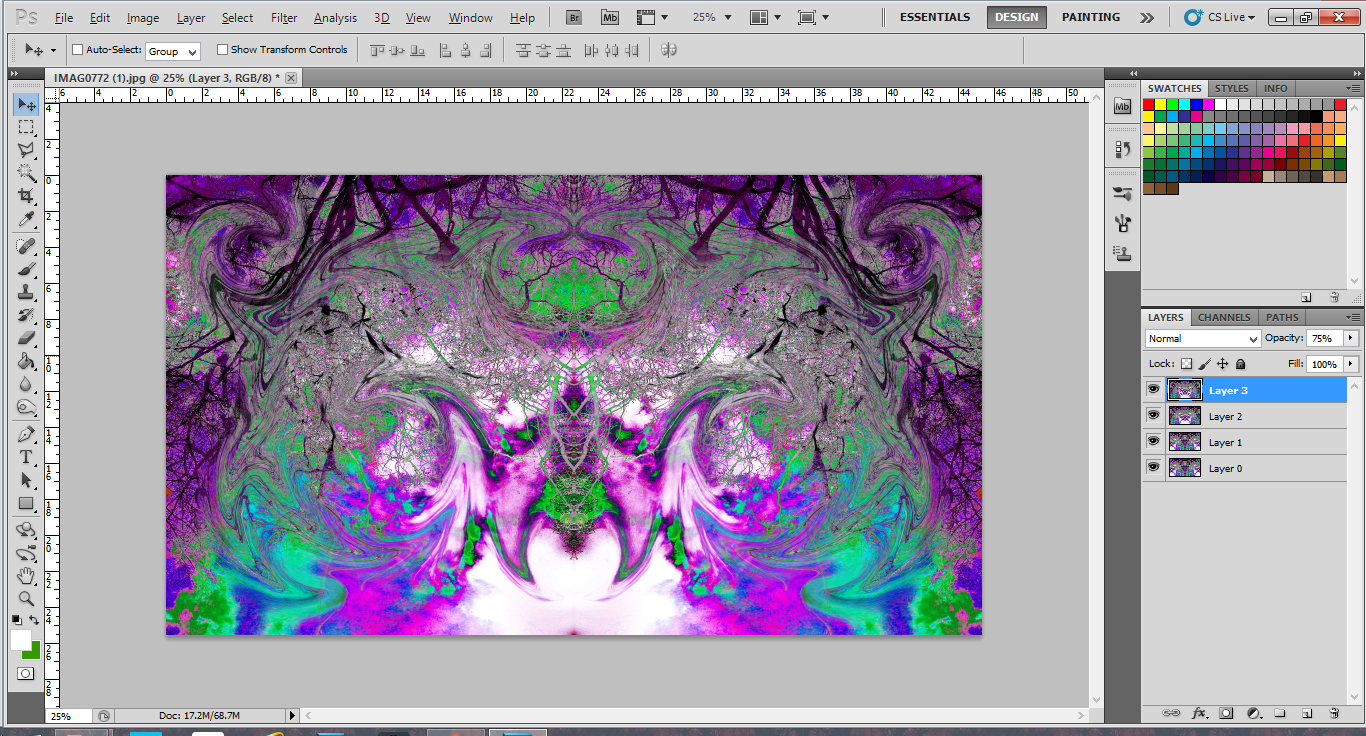

Press ctrl +j or right-click the layer and click Duplicate Layer to duplicate the layer.
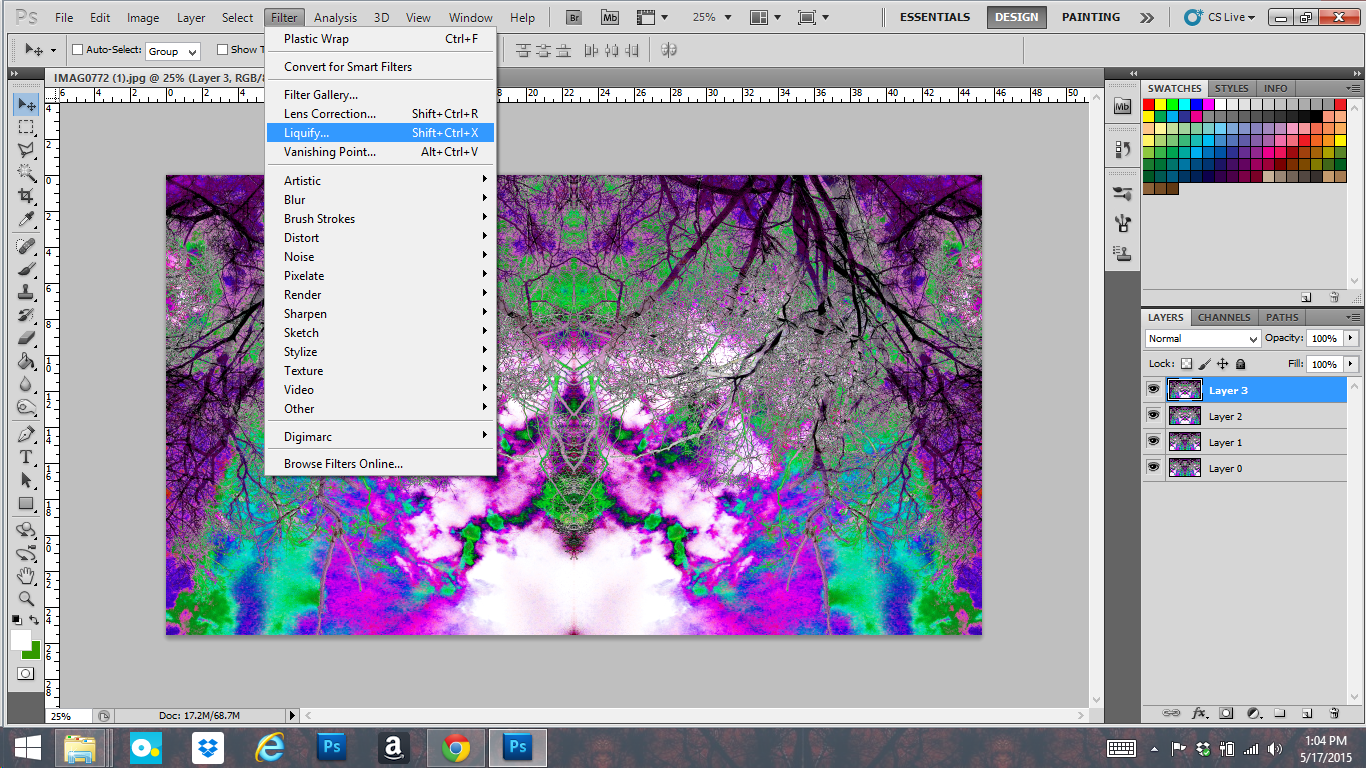
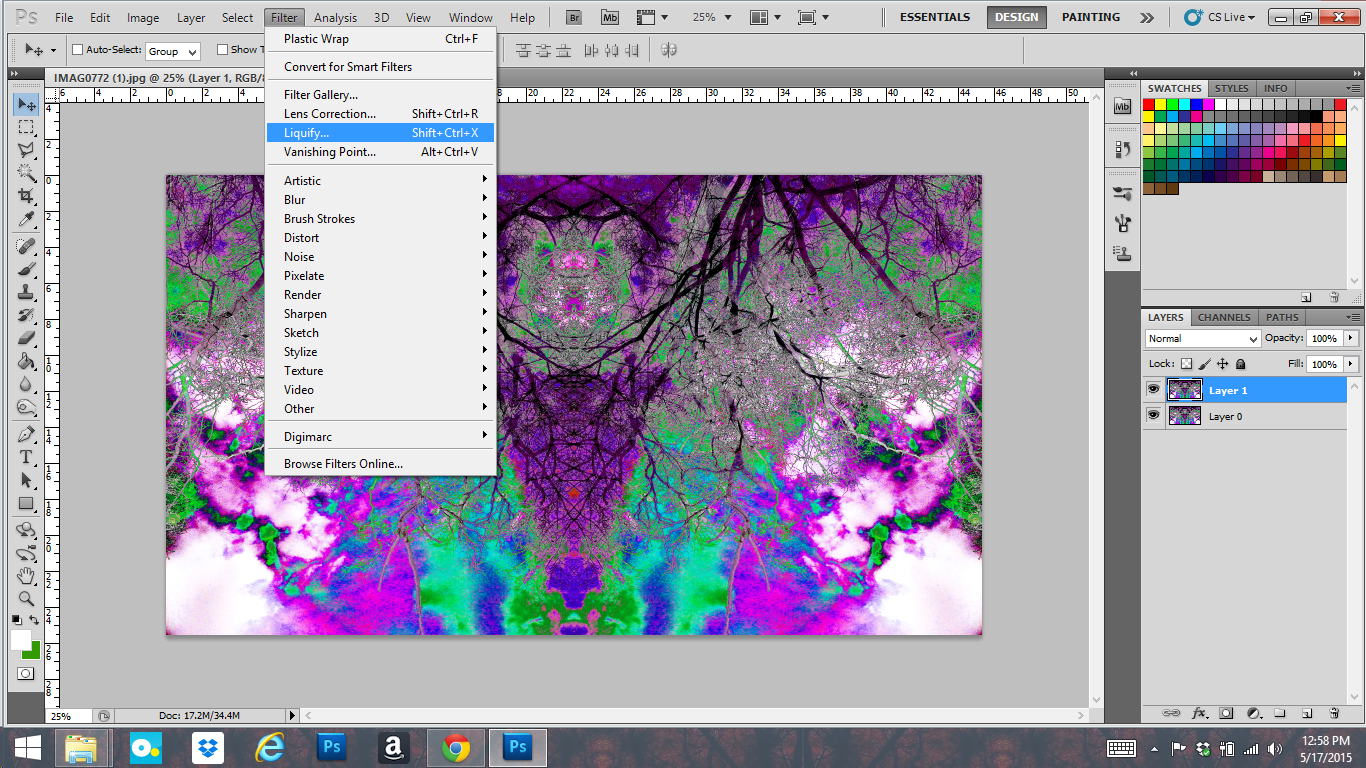
Click Filters -> Liquify or shift -> ctrl -> x.
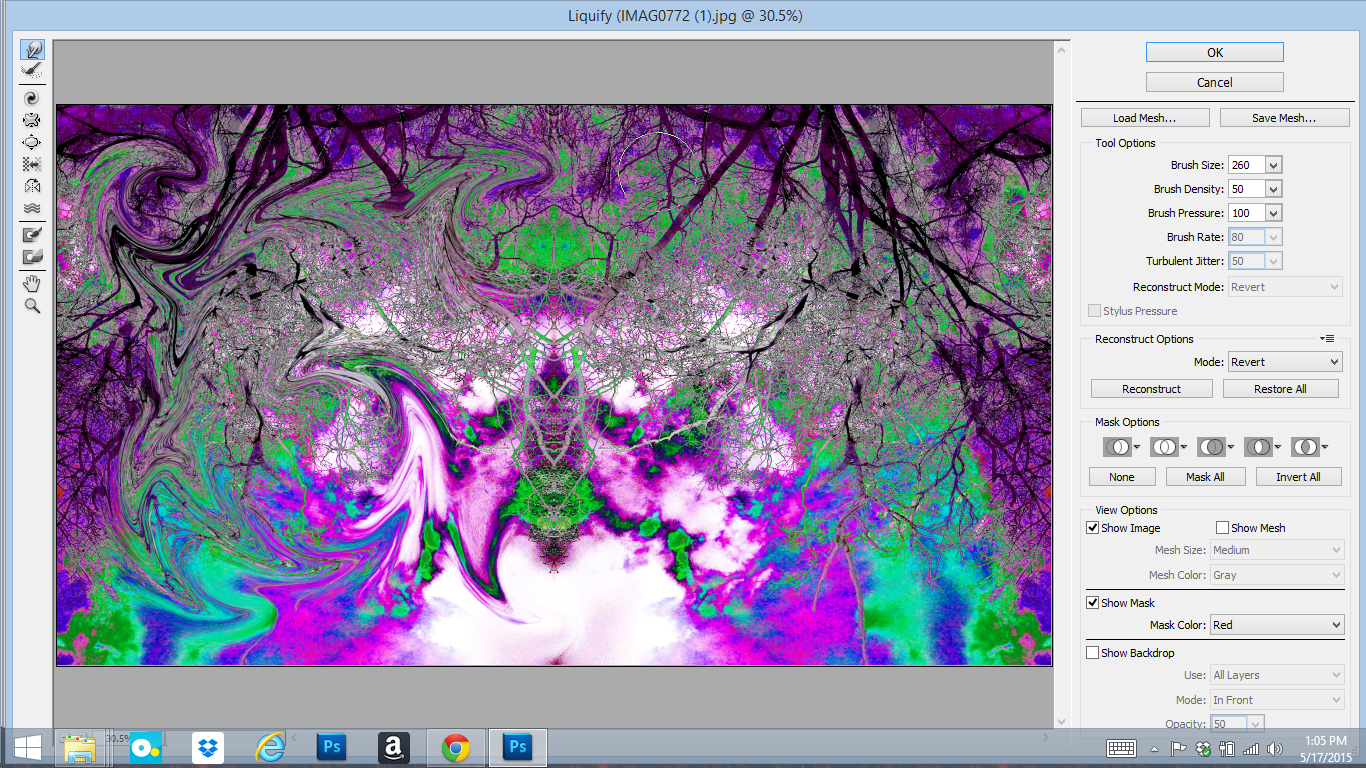
Play around with the settings and start dragging parts of the image in swirls or other designs. Do different areas, but only do the left side of the image. We'll duplicate and flip this side like we did in the last step. Once you're happy with your work, press OK.
Using the Rectangular Marquee Tool, select the left half of the image. Right-click the selection and click on Layer via Copy or Press ctrl +c to copy this selection, then ctrl +v to paste the selection to a new layer. Press ctrl +j or right-click the layer and click Duplicate Layer to duplicate the layer.
Using the Move Tool, hold shift and click and drag the selection to the right, stopping at the edge. You can also use the arrow keys to move it. Click on Edit -> Transform -> Flip Horizontal. Right-click on the top layer (left side of your image) and click Merge Down.
Set the layer opacity to 75% or whatever looks good to you.
Save your work and marvel at your masterpiece!
Keep Playing
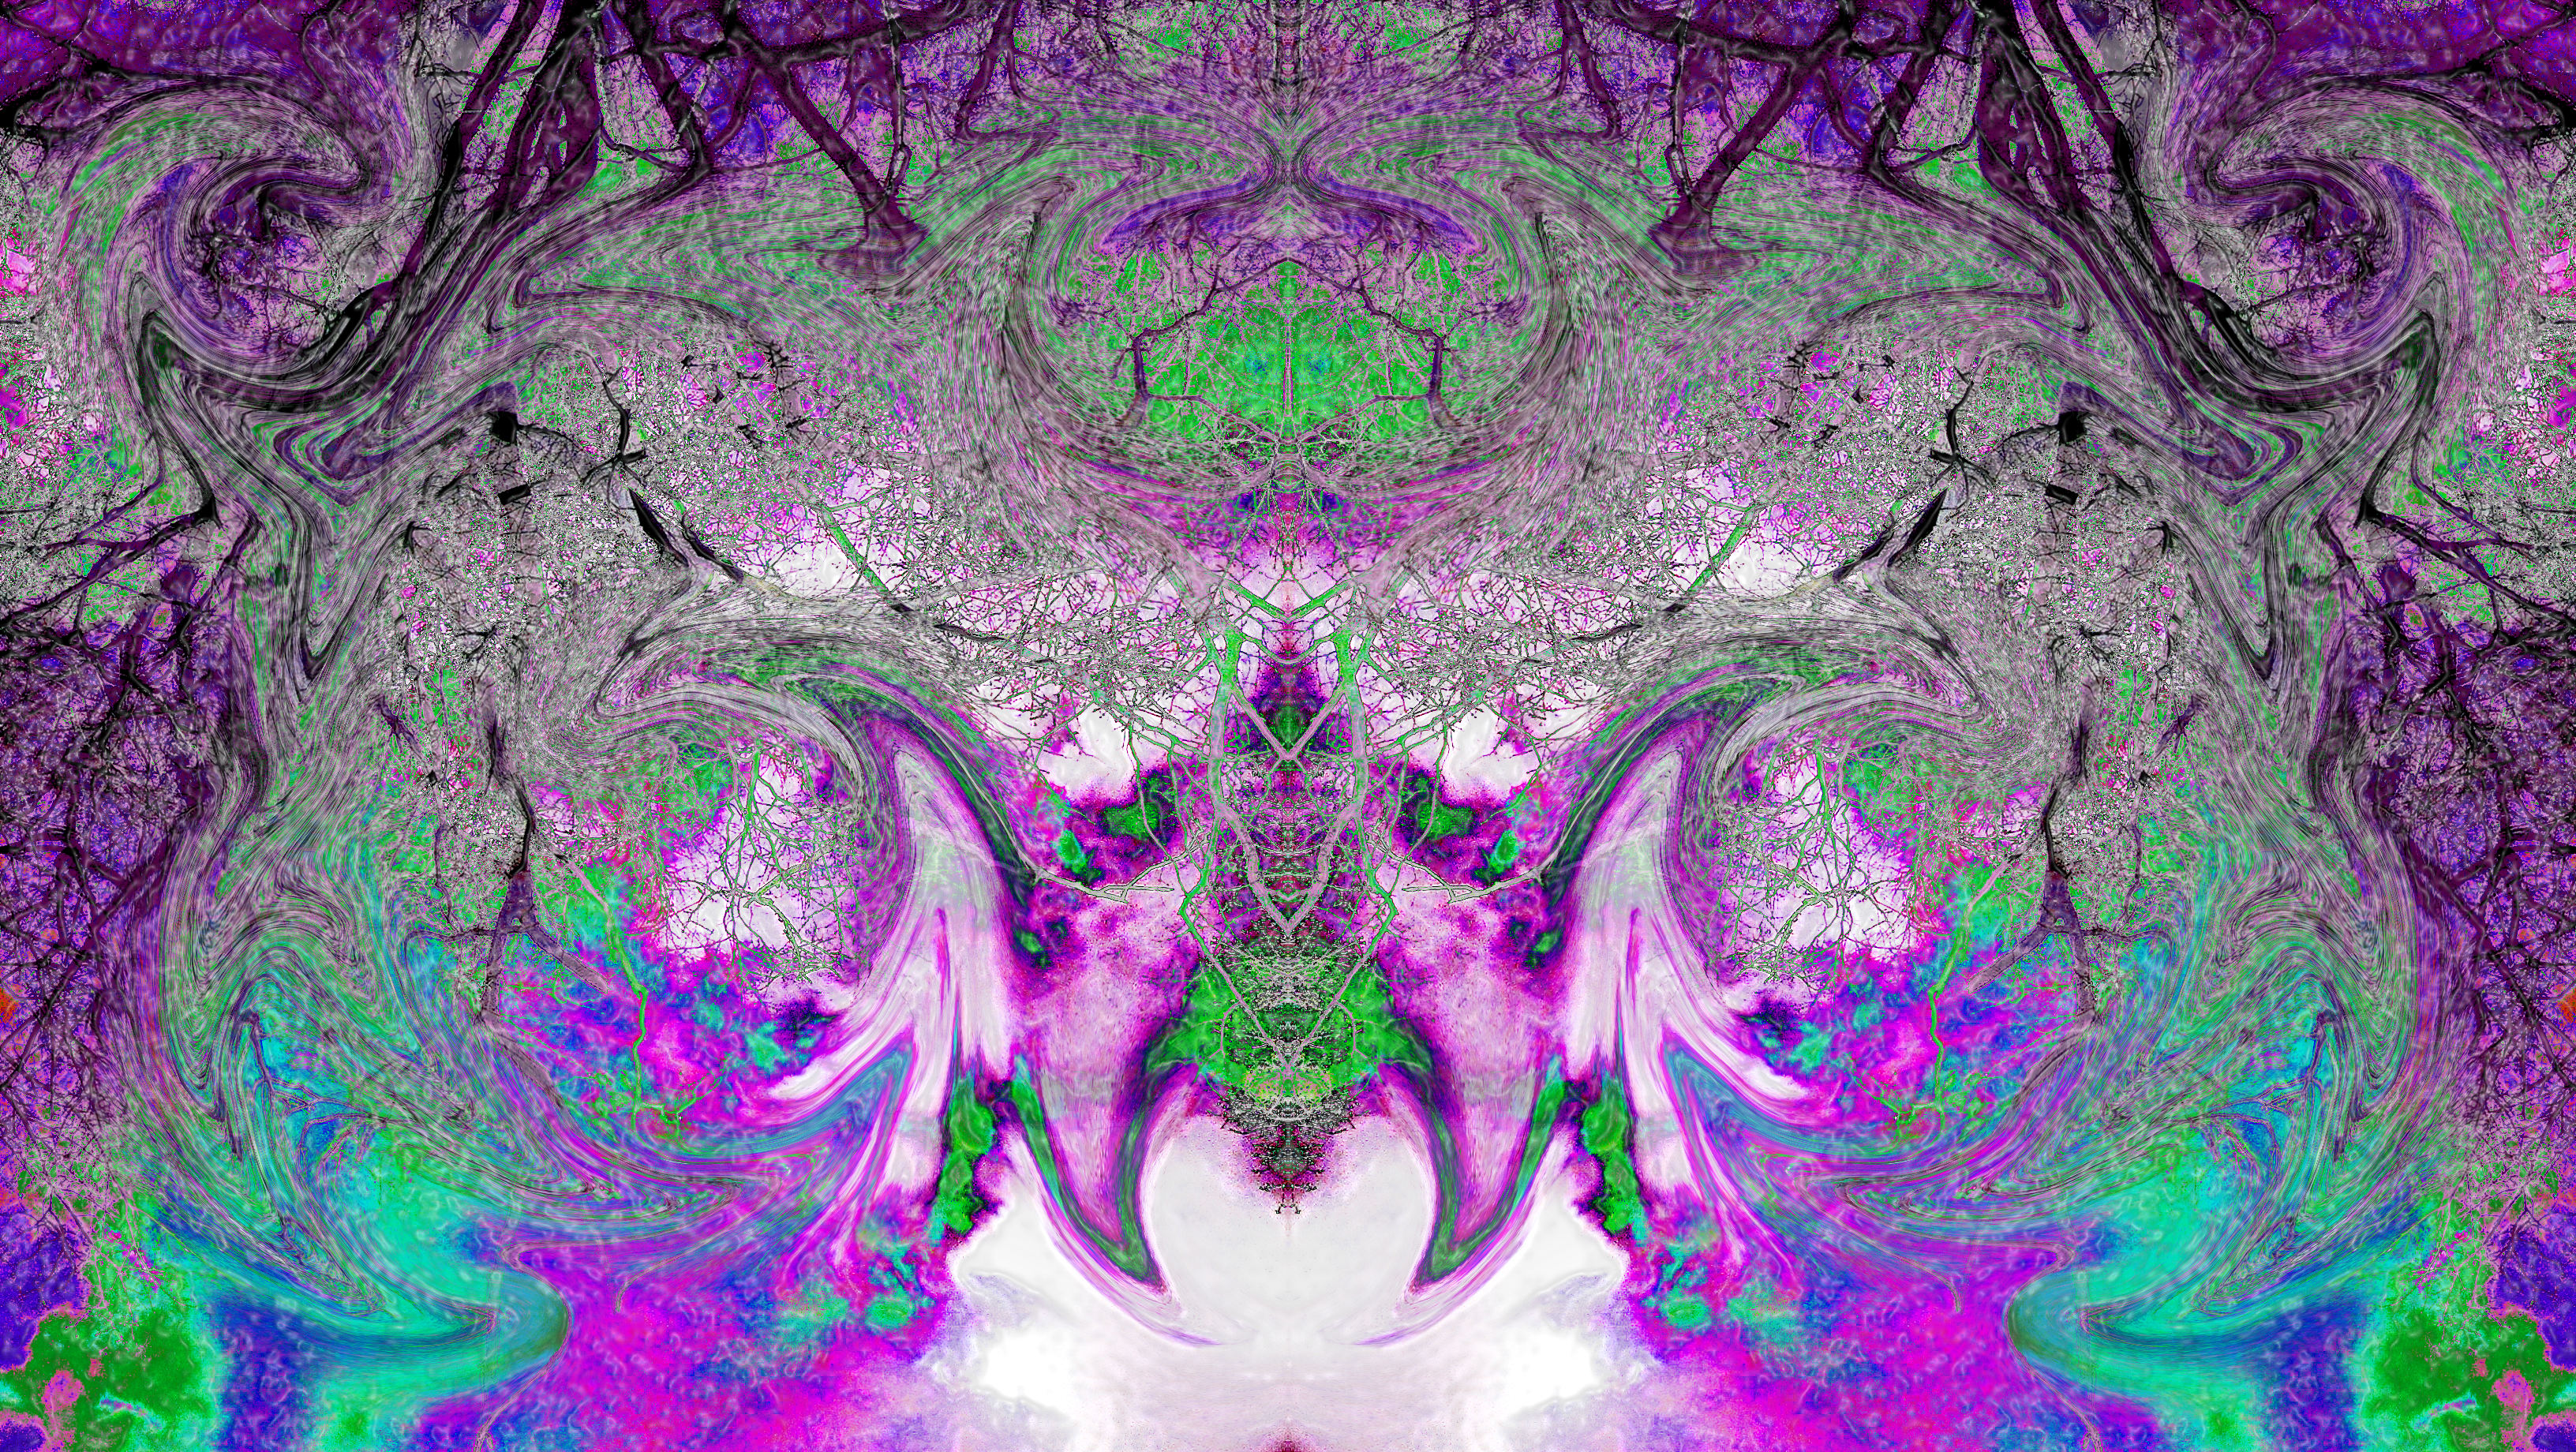
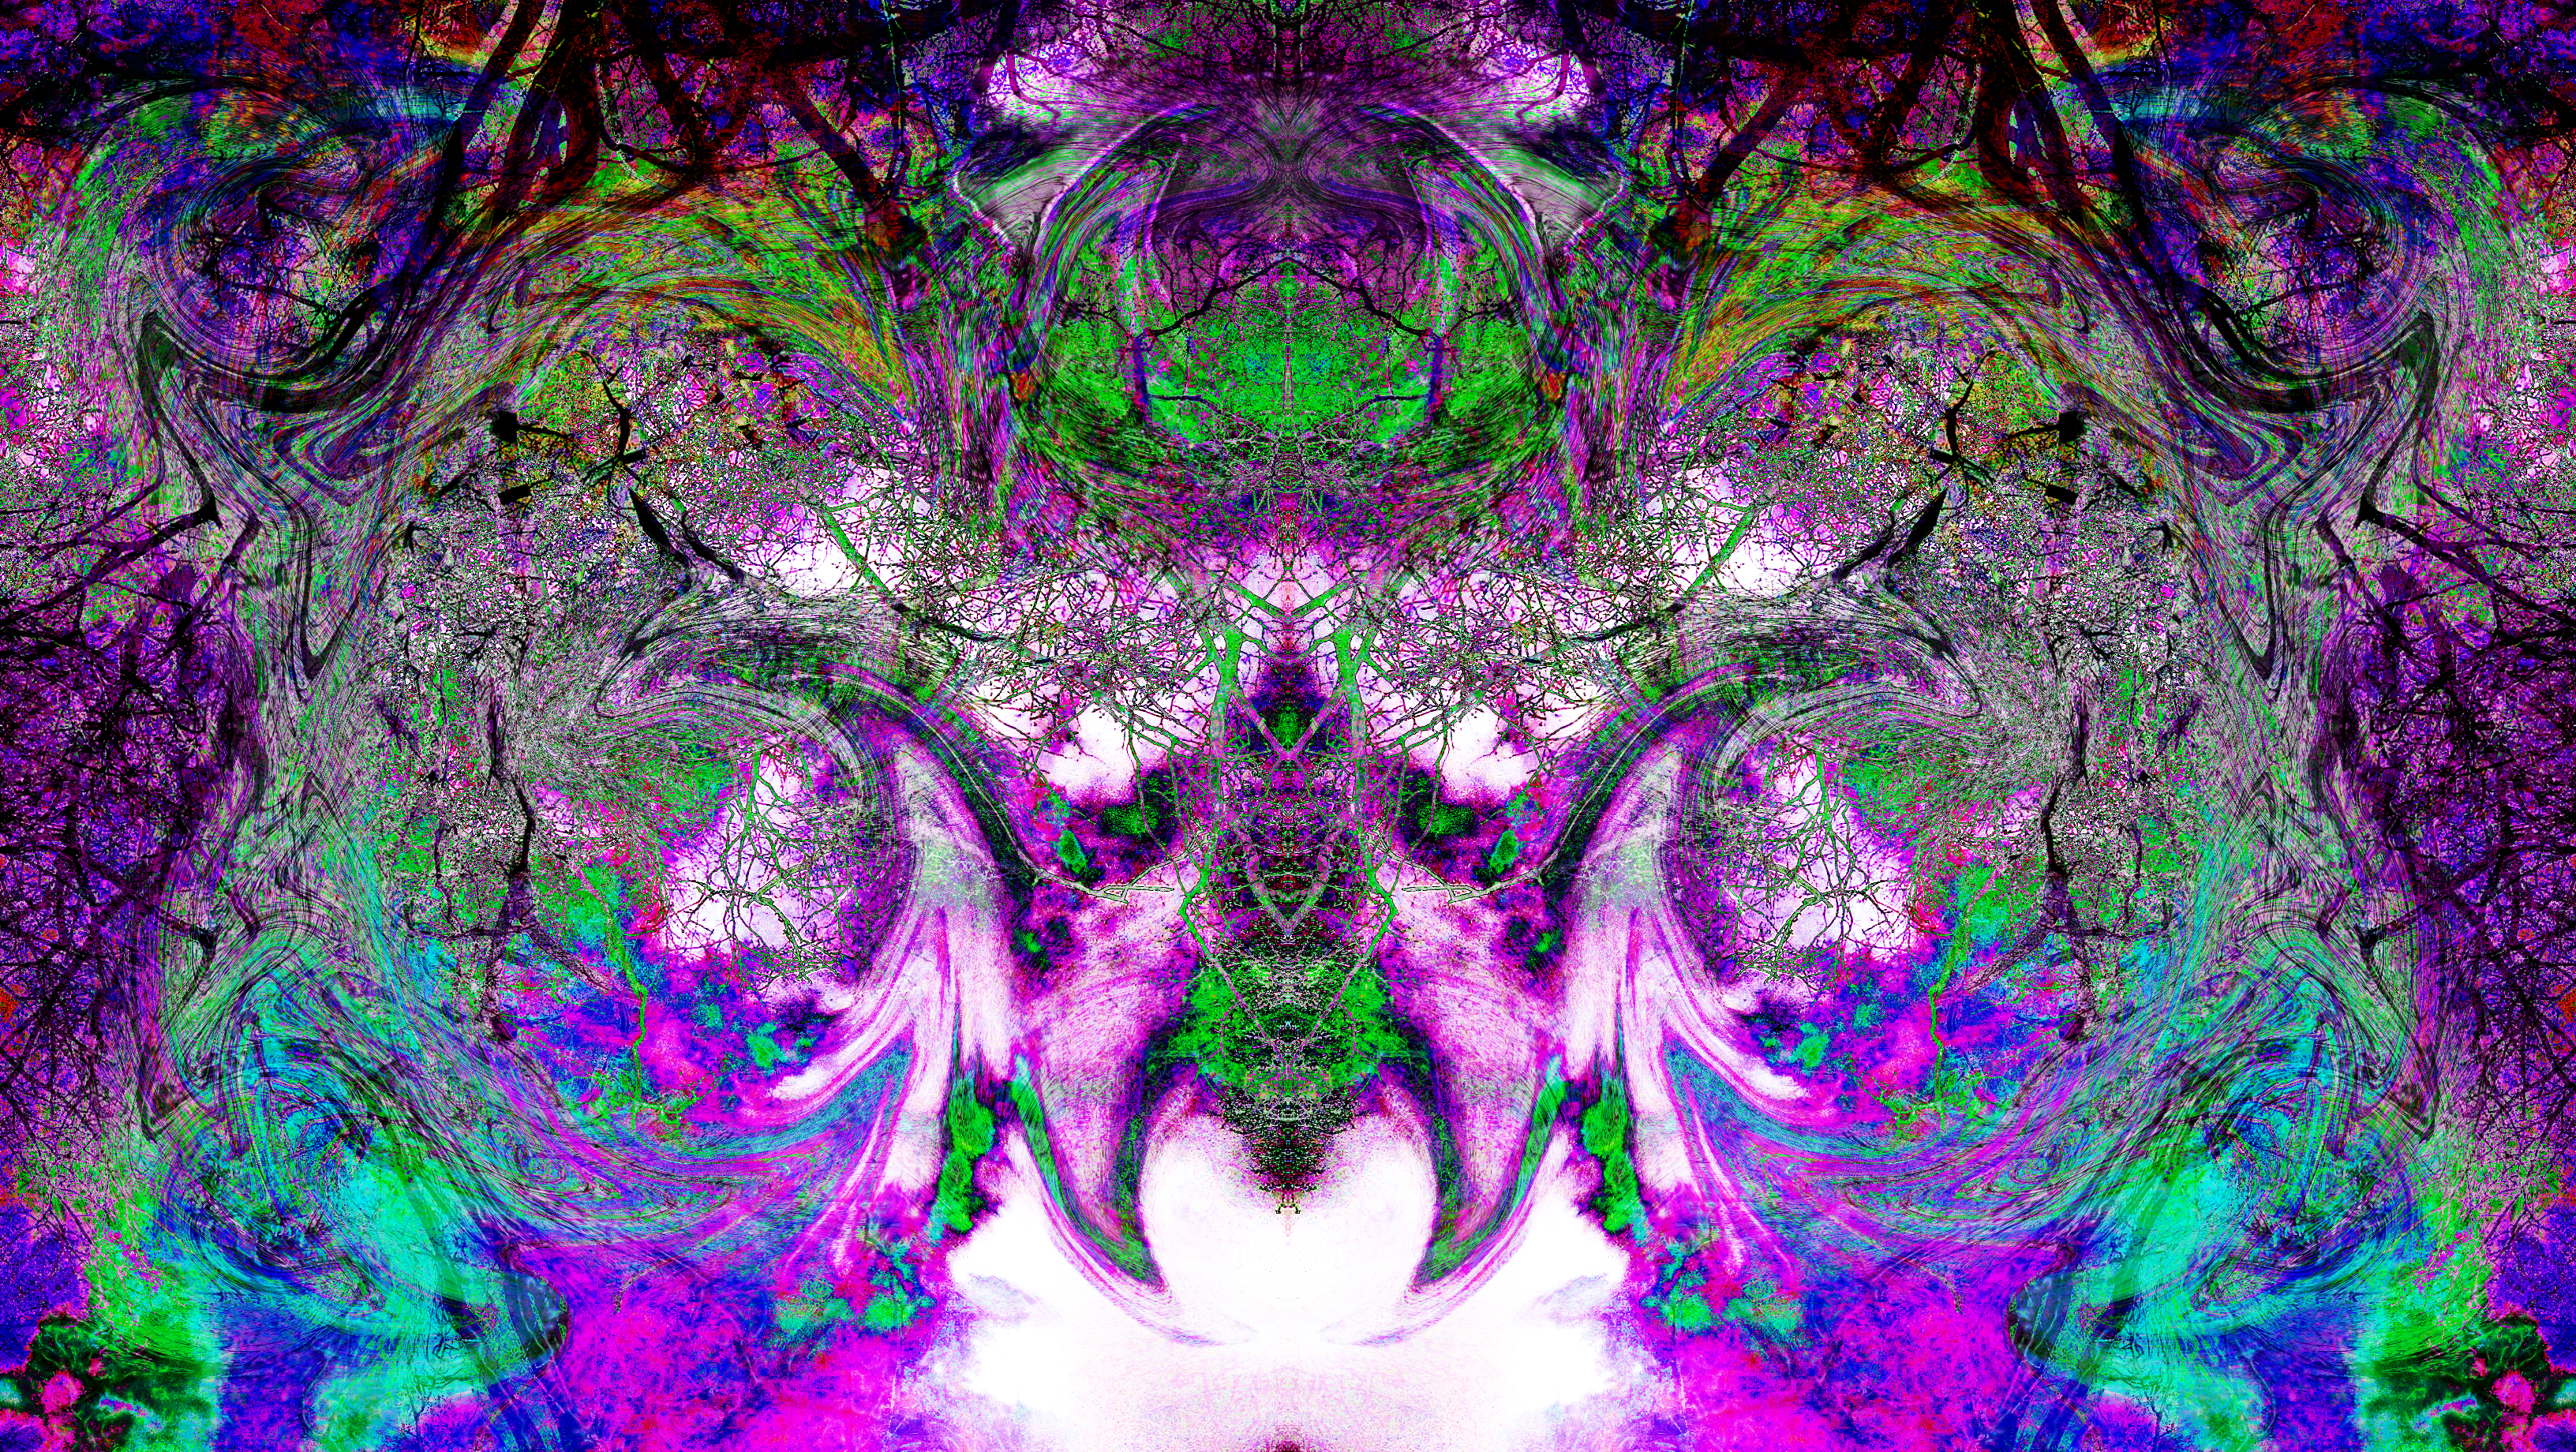
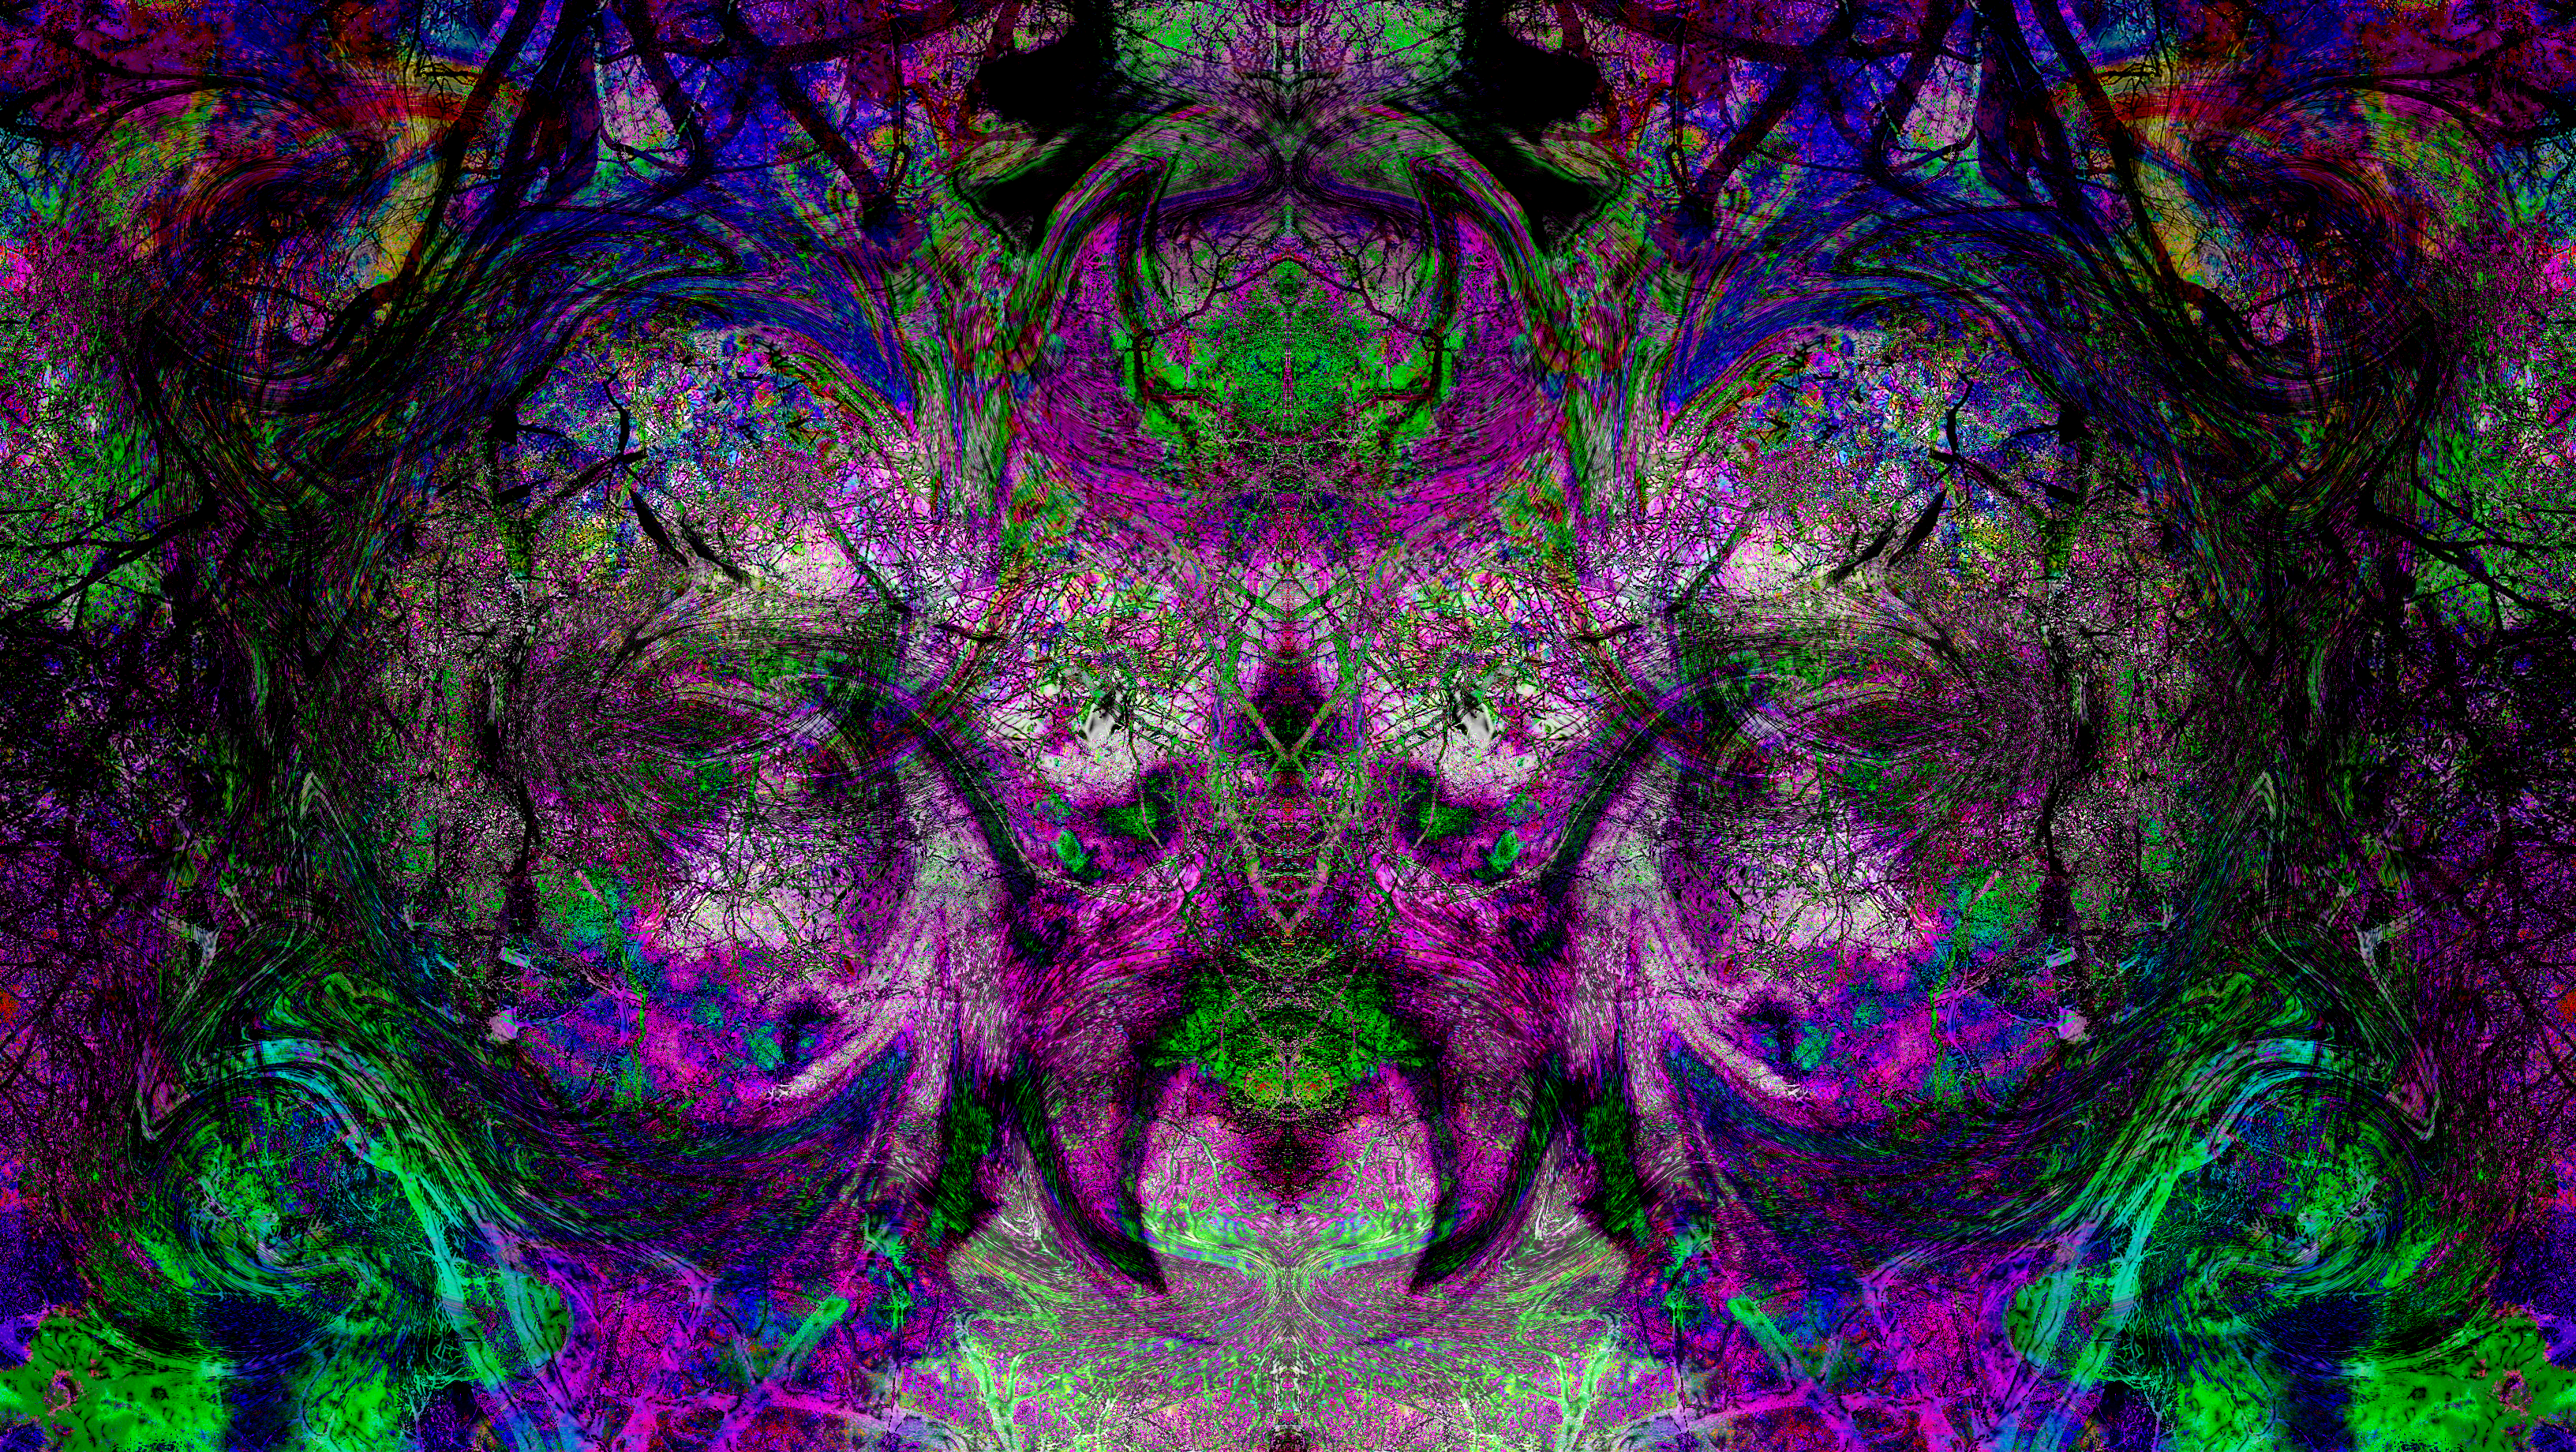
Explore different filters, effects, layer blending modes, etc. There's really no limit to the art you can create.