'Artistic Moon Lamp' - Sculpted With Molded Paper and 3d Printing. 3D Design Tutorial With Fusion 360
847 Views, 16 Favorites, 0 Comments
'Artistic Moon Lamp' - Sculpted With Molded Paper and 3d Printing. 3D Design Tutorial With Fusion 360
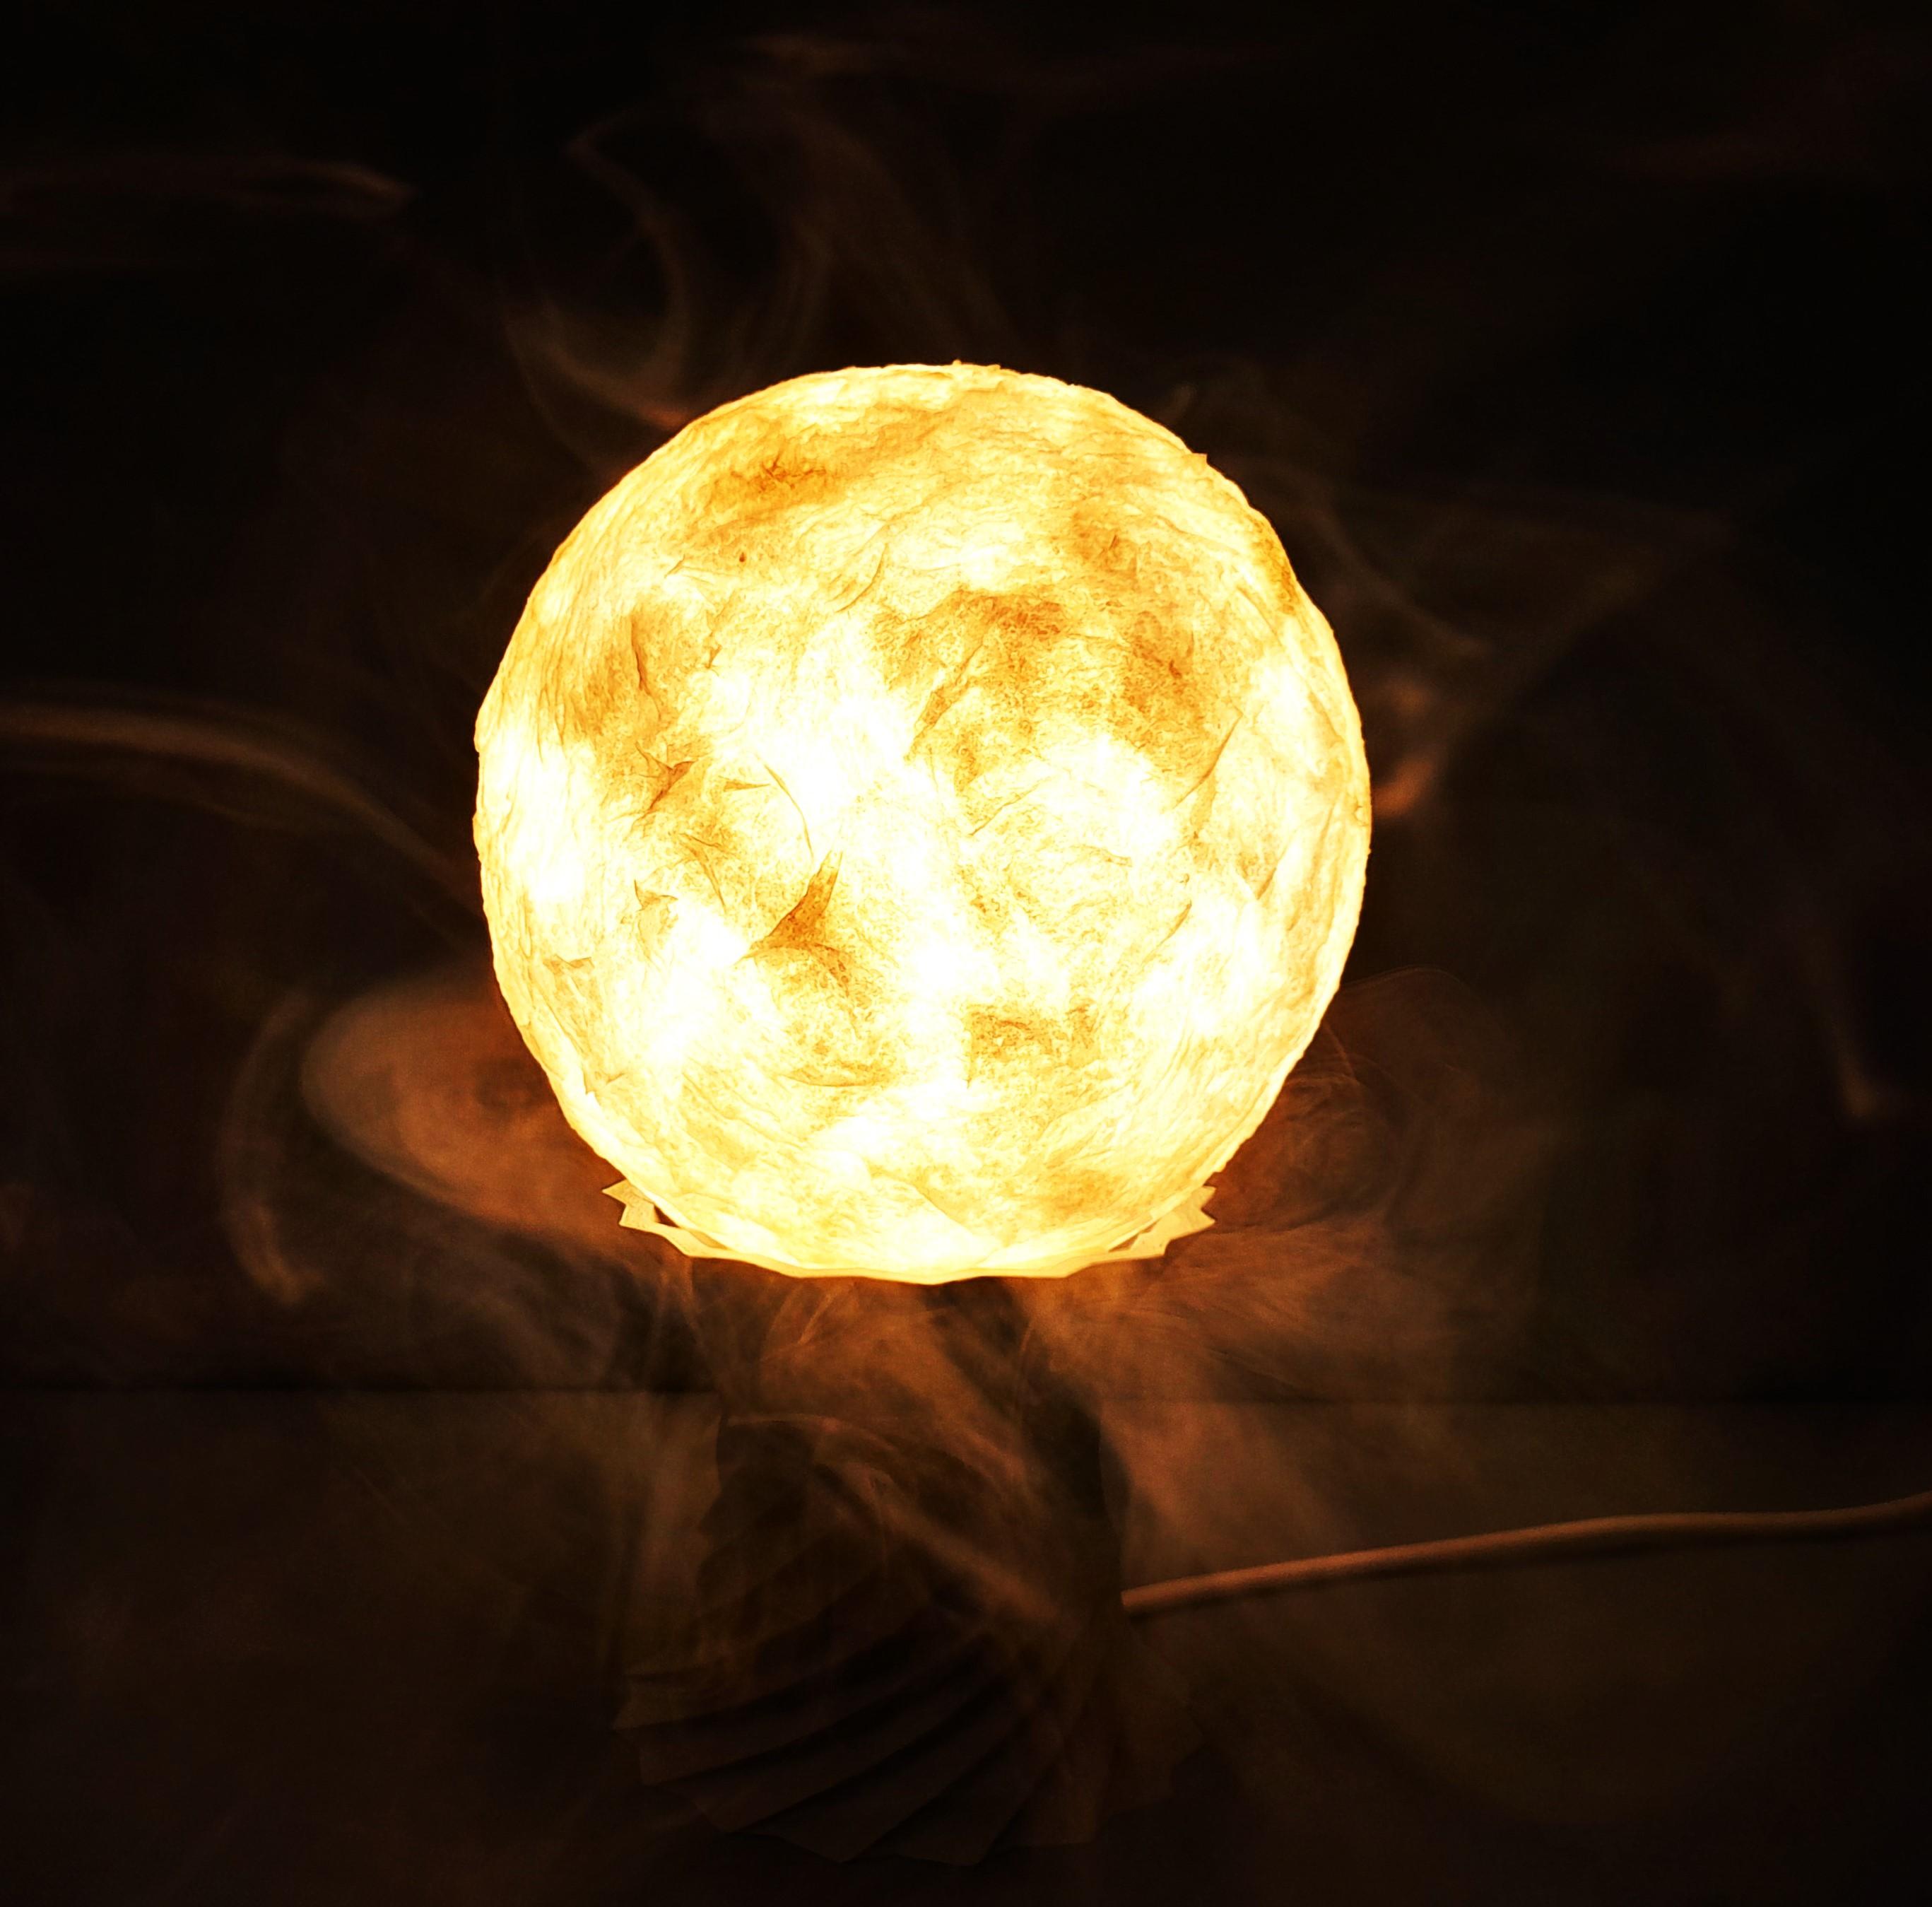
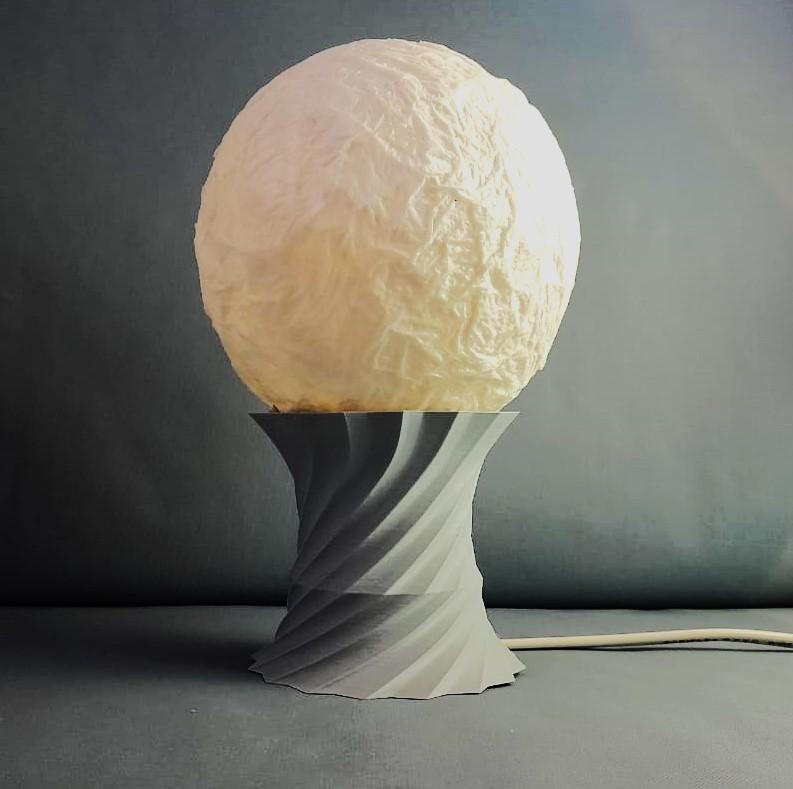
Night lamps typically emit light from a central point, which can be harsh on the eyes. A diffused glow would be much gentler. The moon's soft, soothing light inspired this lamp, which mimics its diffused glow. Made to resemble the moon, the lamp uses simple household materials like tissue paper, white glue, and a balloon.
The base is 3D printed, but a wooden structure can also be used for support. To enhance the artistic effect, a cloud-like appearance can be created using smoke or dry ice.
Supplies
This item is highly reproducible by anyone interested. The supplies are general available items. you can see the images of the items in the respective steps as you read along. The Supply items are:
For The Moon Light:
Balloon: Sculpting base for the Basic shape of the moon.
Tissue Paper: Any kitchen tissue roll will be okay.
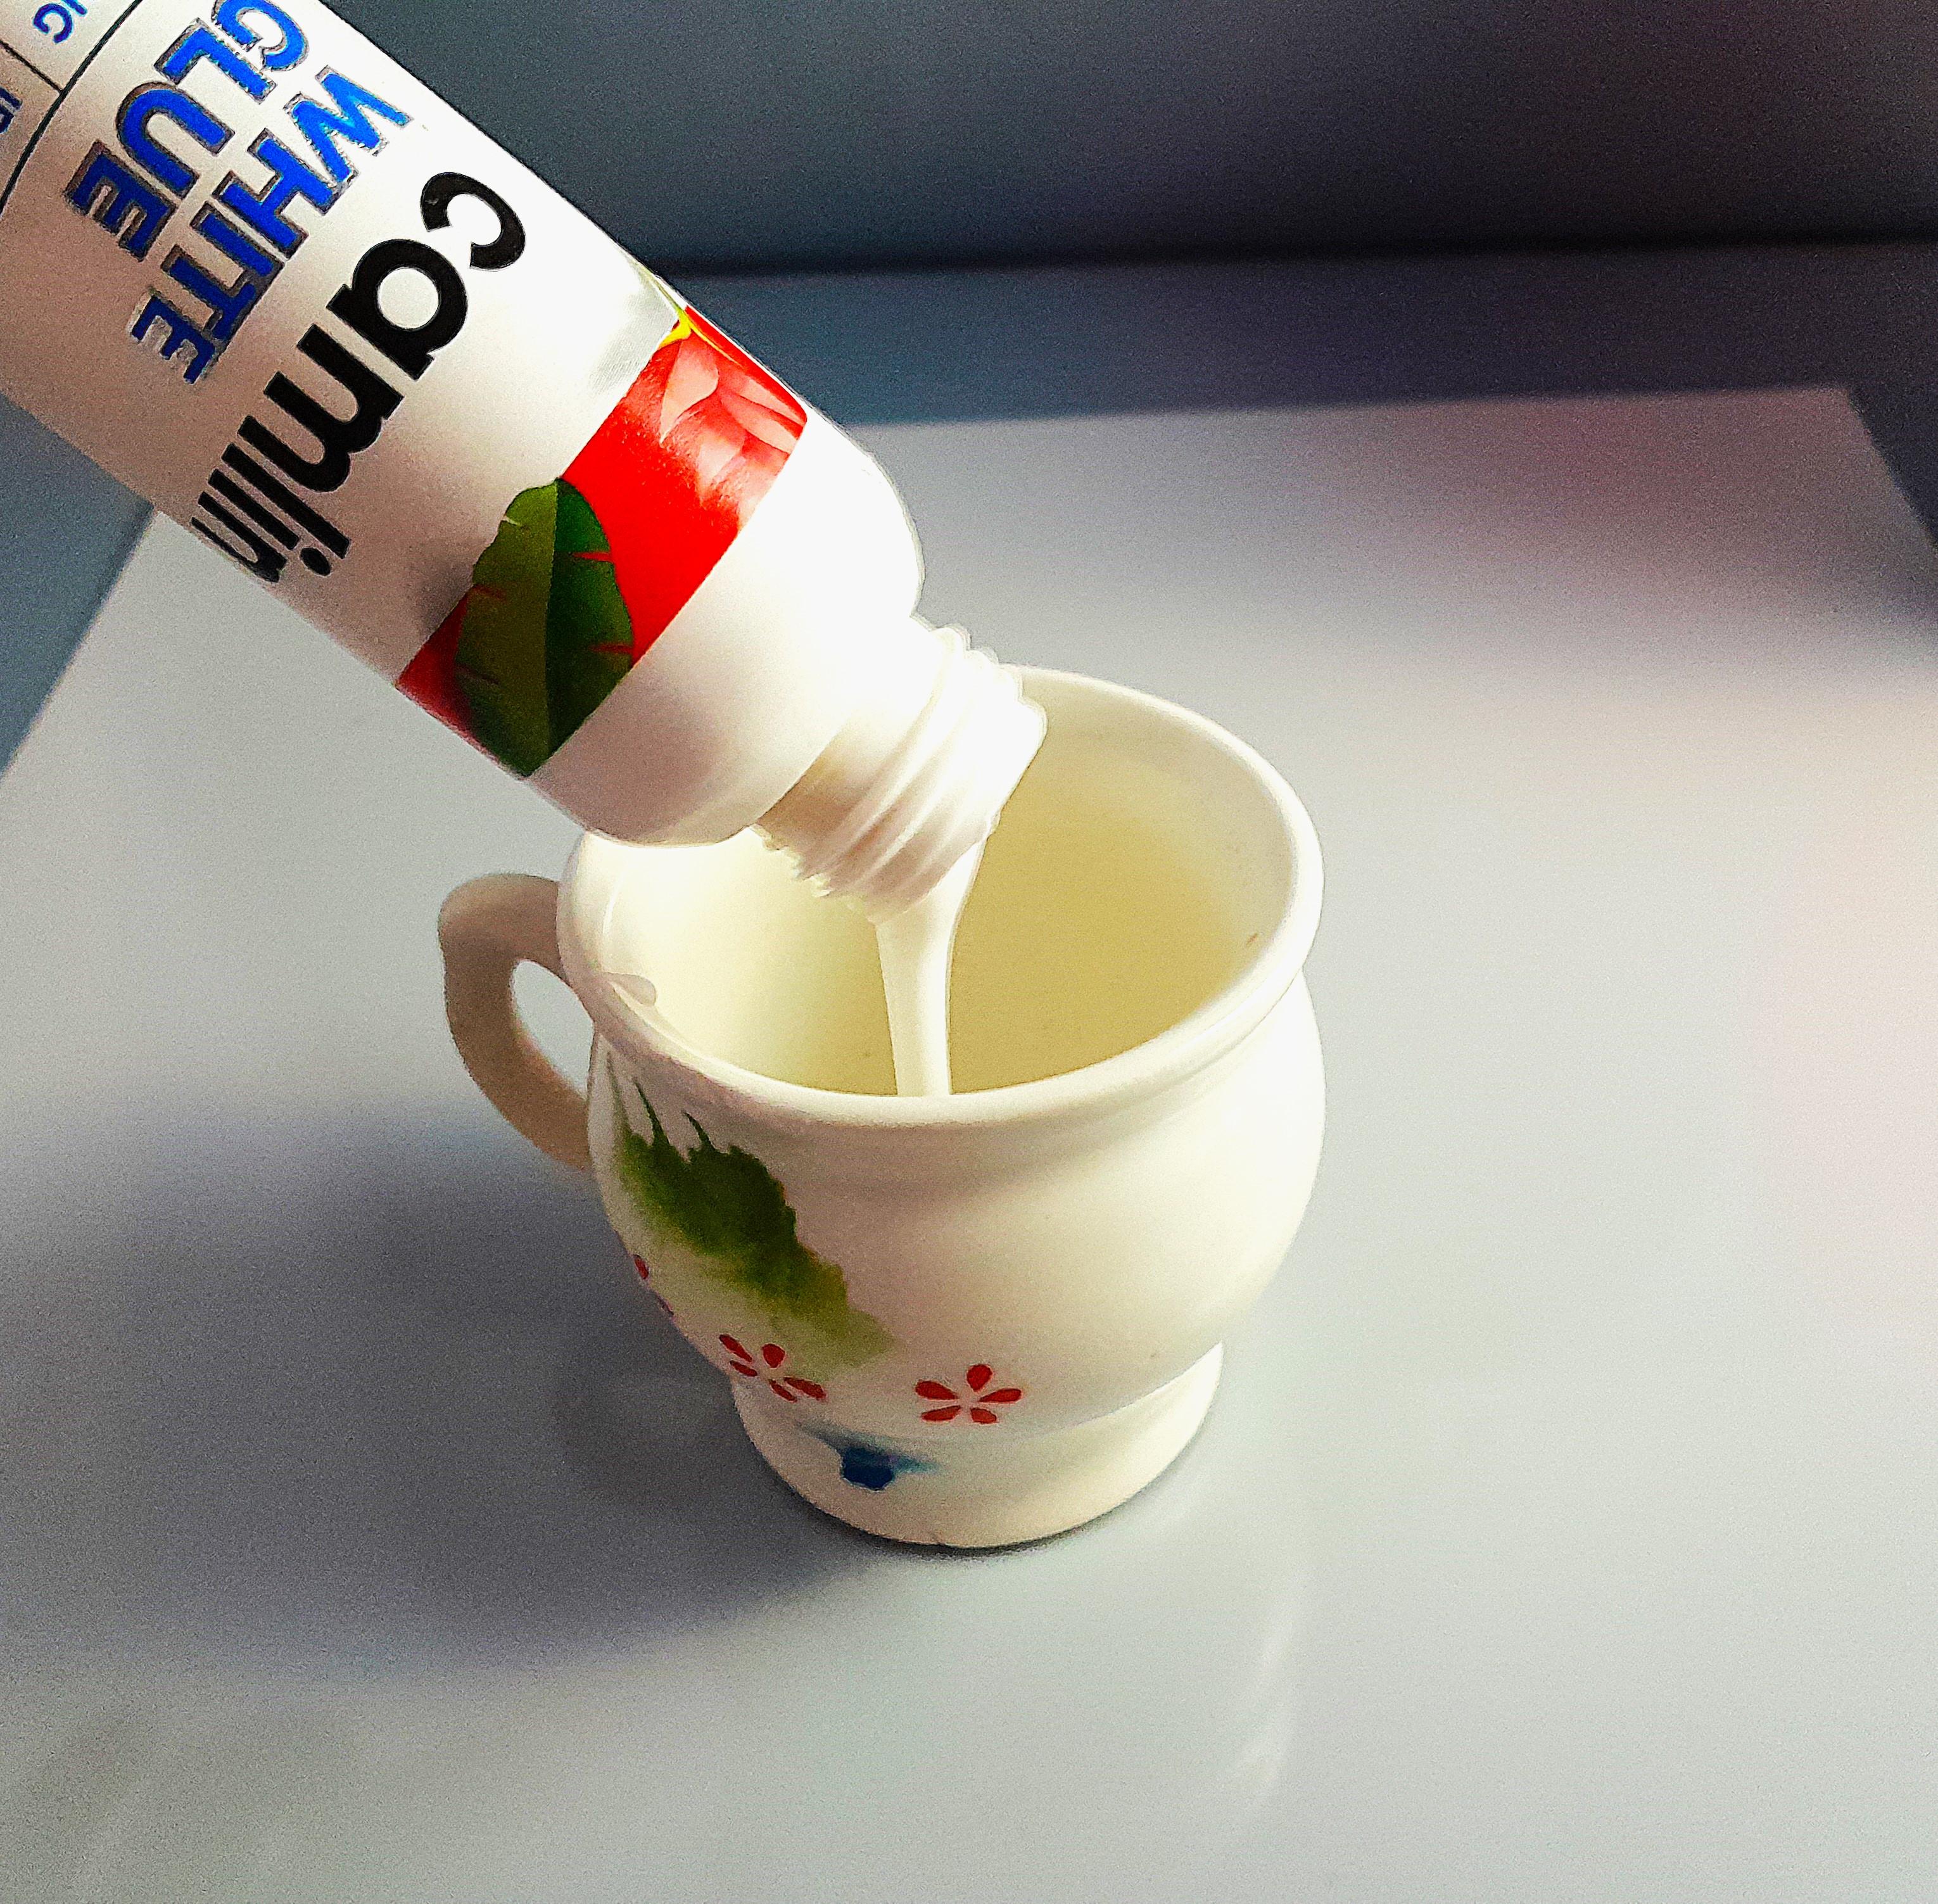
White glue: Which mixes well with water. Because we need to thin it out by water so it soaks the tissue fully
Paint Brush: To apply the glue.
Small low power light bulb for lamps: Like small LED bulb, Lamp Bulb or any other types of bulb you can get
Transparent tape.
Electrical Tape.
Electrical wire and plug for the connection
Misc. items like Wire Cutter, Knife, scissors etc.
For The Base Design:
Fusion 360 for modelling, get it for free trial, education use or buying options.
A 3d printer to print the base.
Basic Ingredient Preparation
Each step is shown in a picture by order.
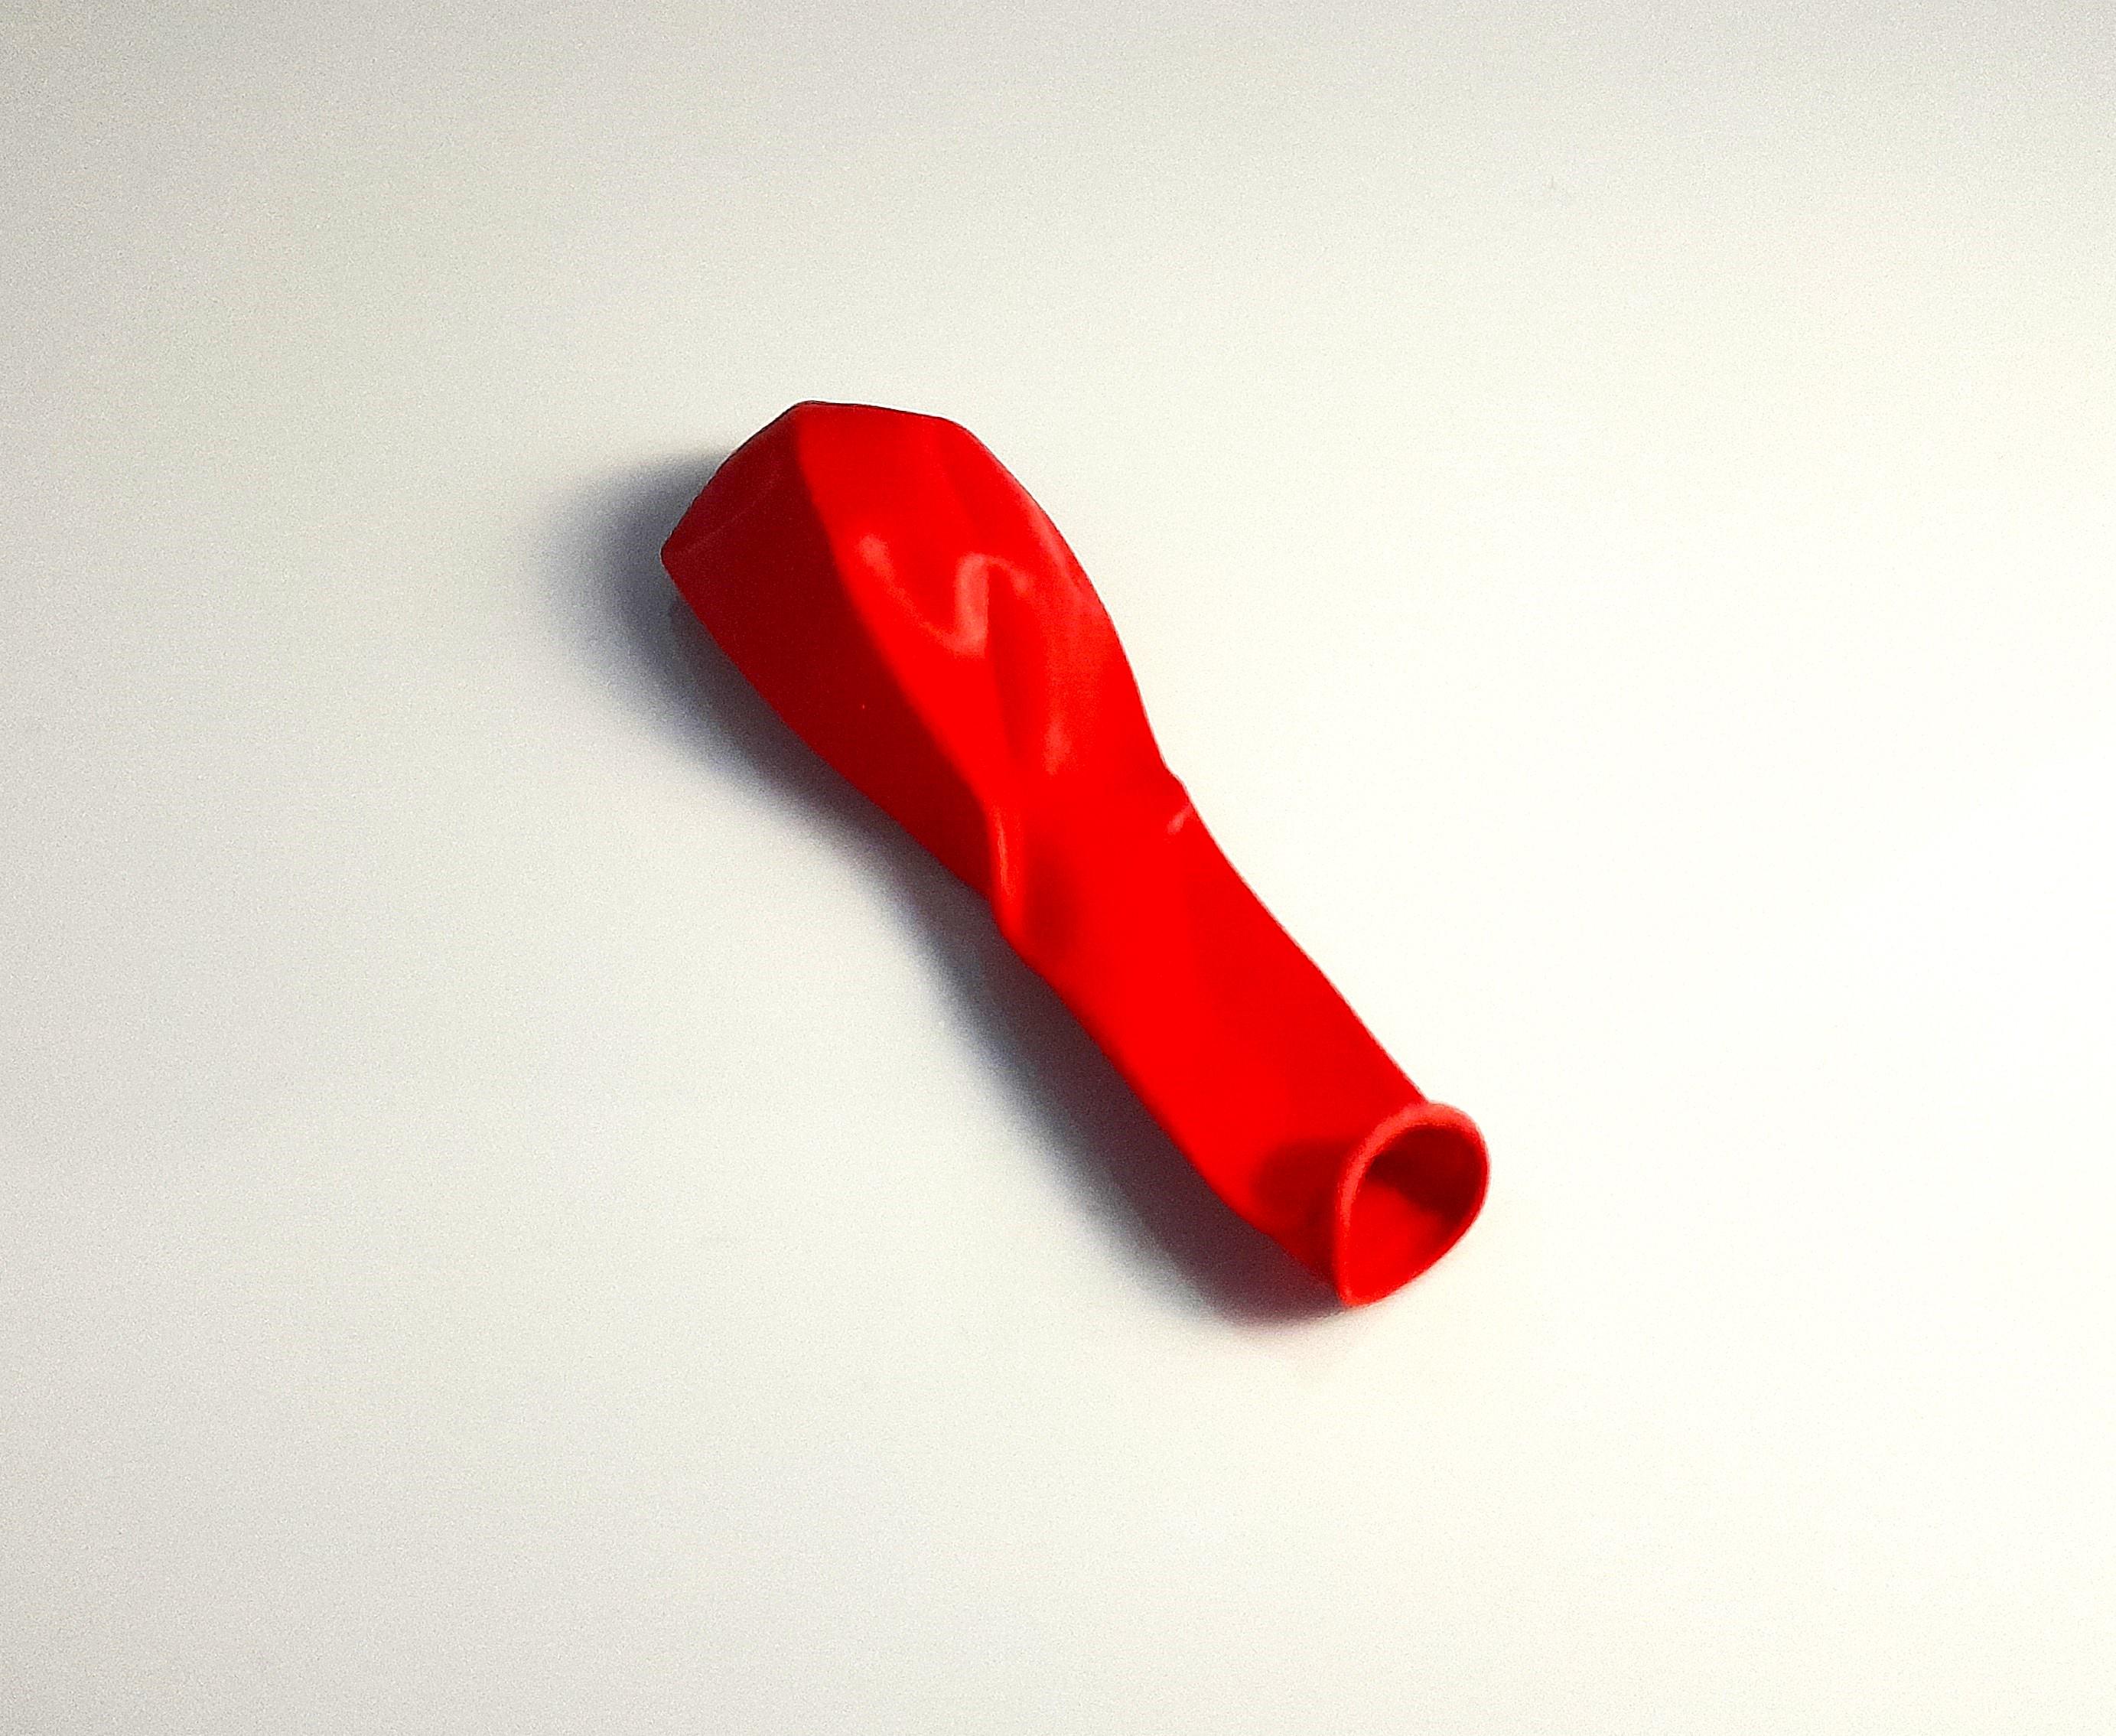
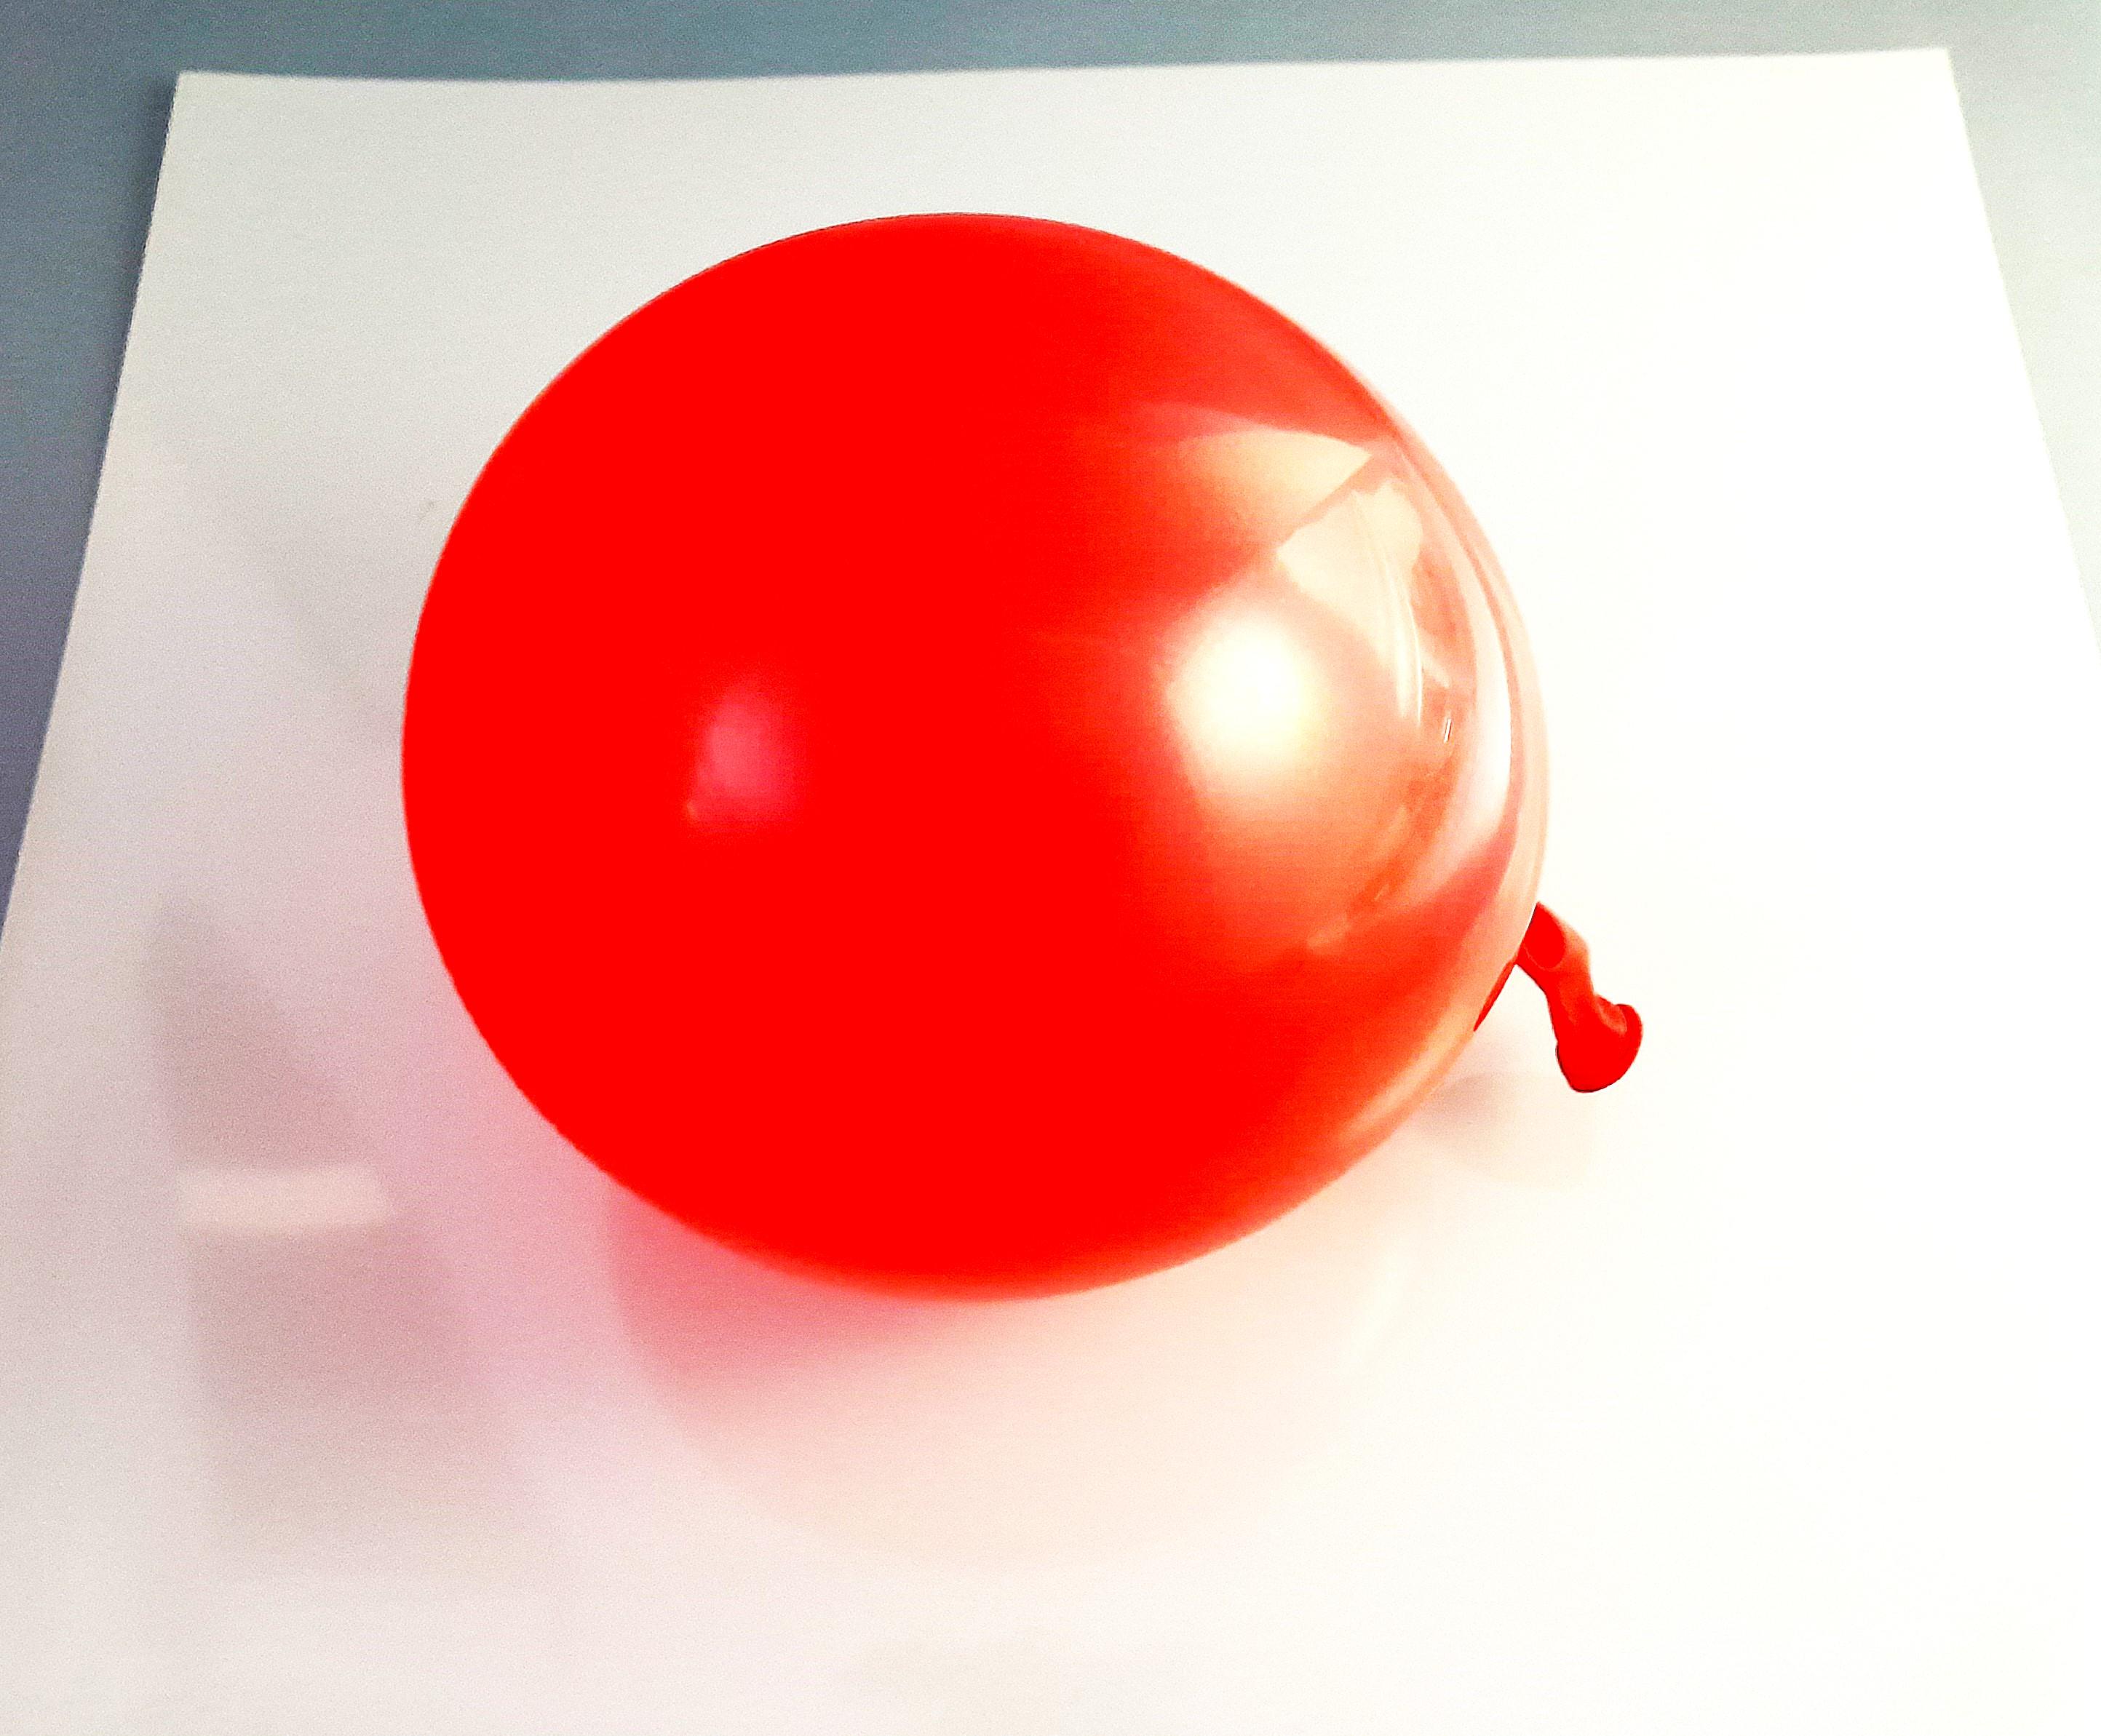
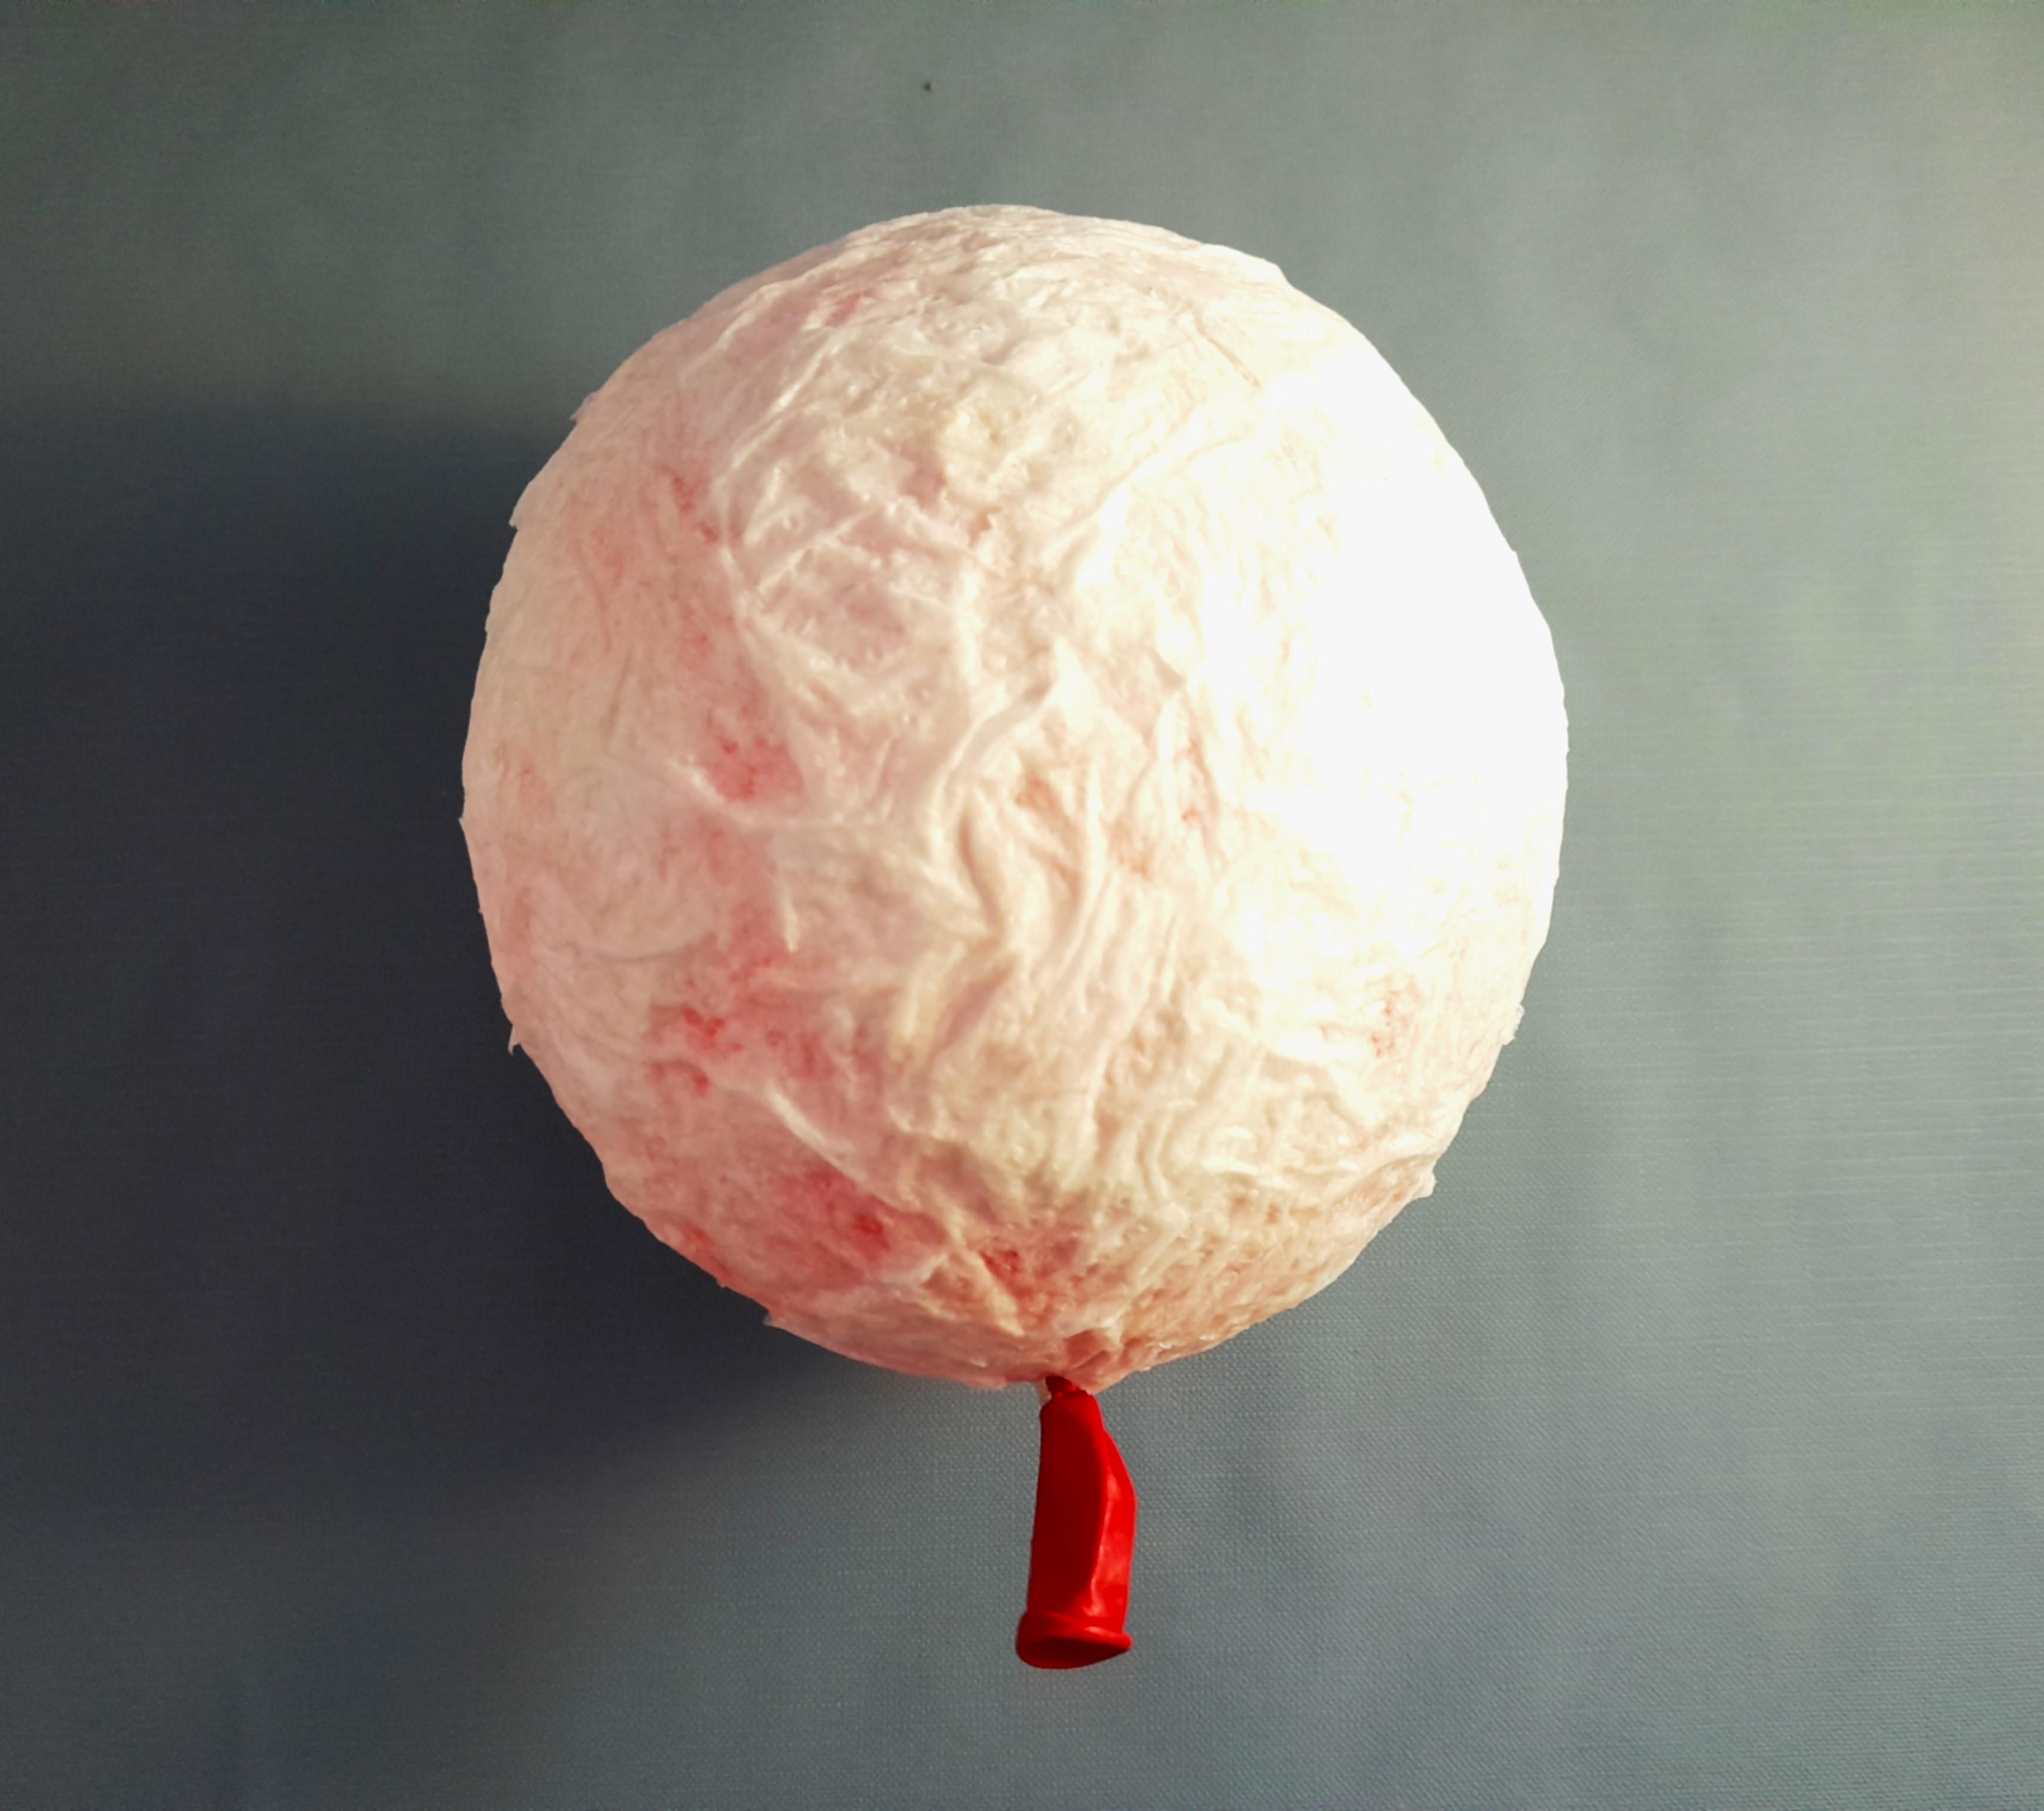
- I used a simple balloon used in parties.
- It has to be blown slowly while taking care that it maintains a round shape. After you have a perfect shape, give it a knot at 1 inch or more distance from the open end. Then it will not be oval in shape and maintain a good spherical base for the moon.
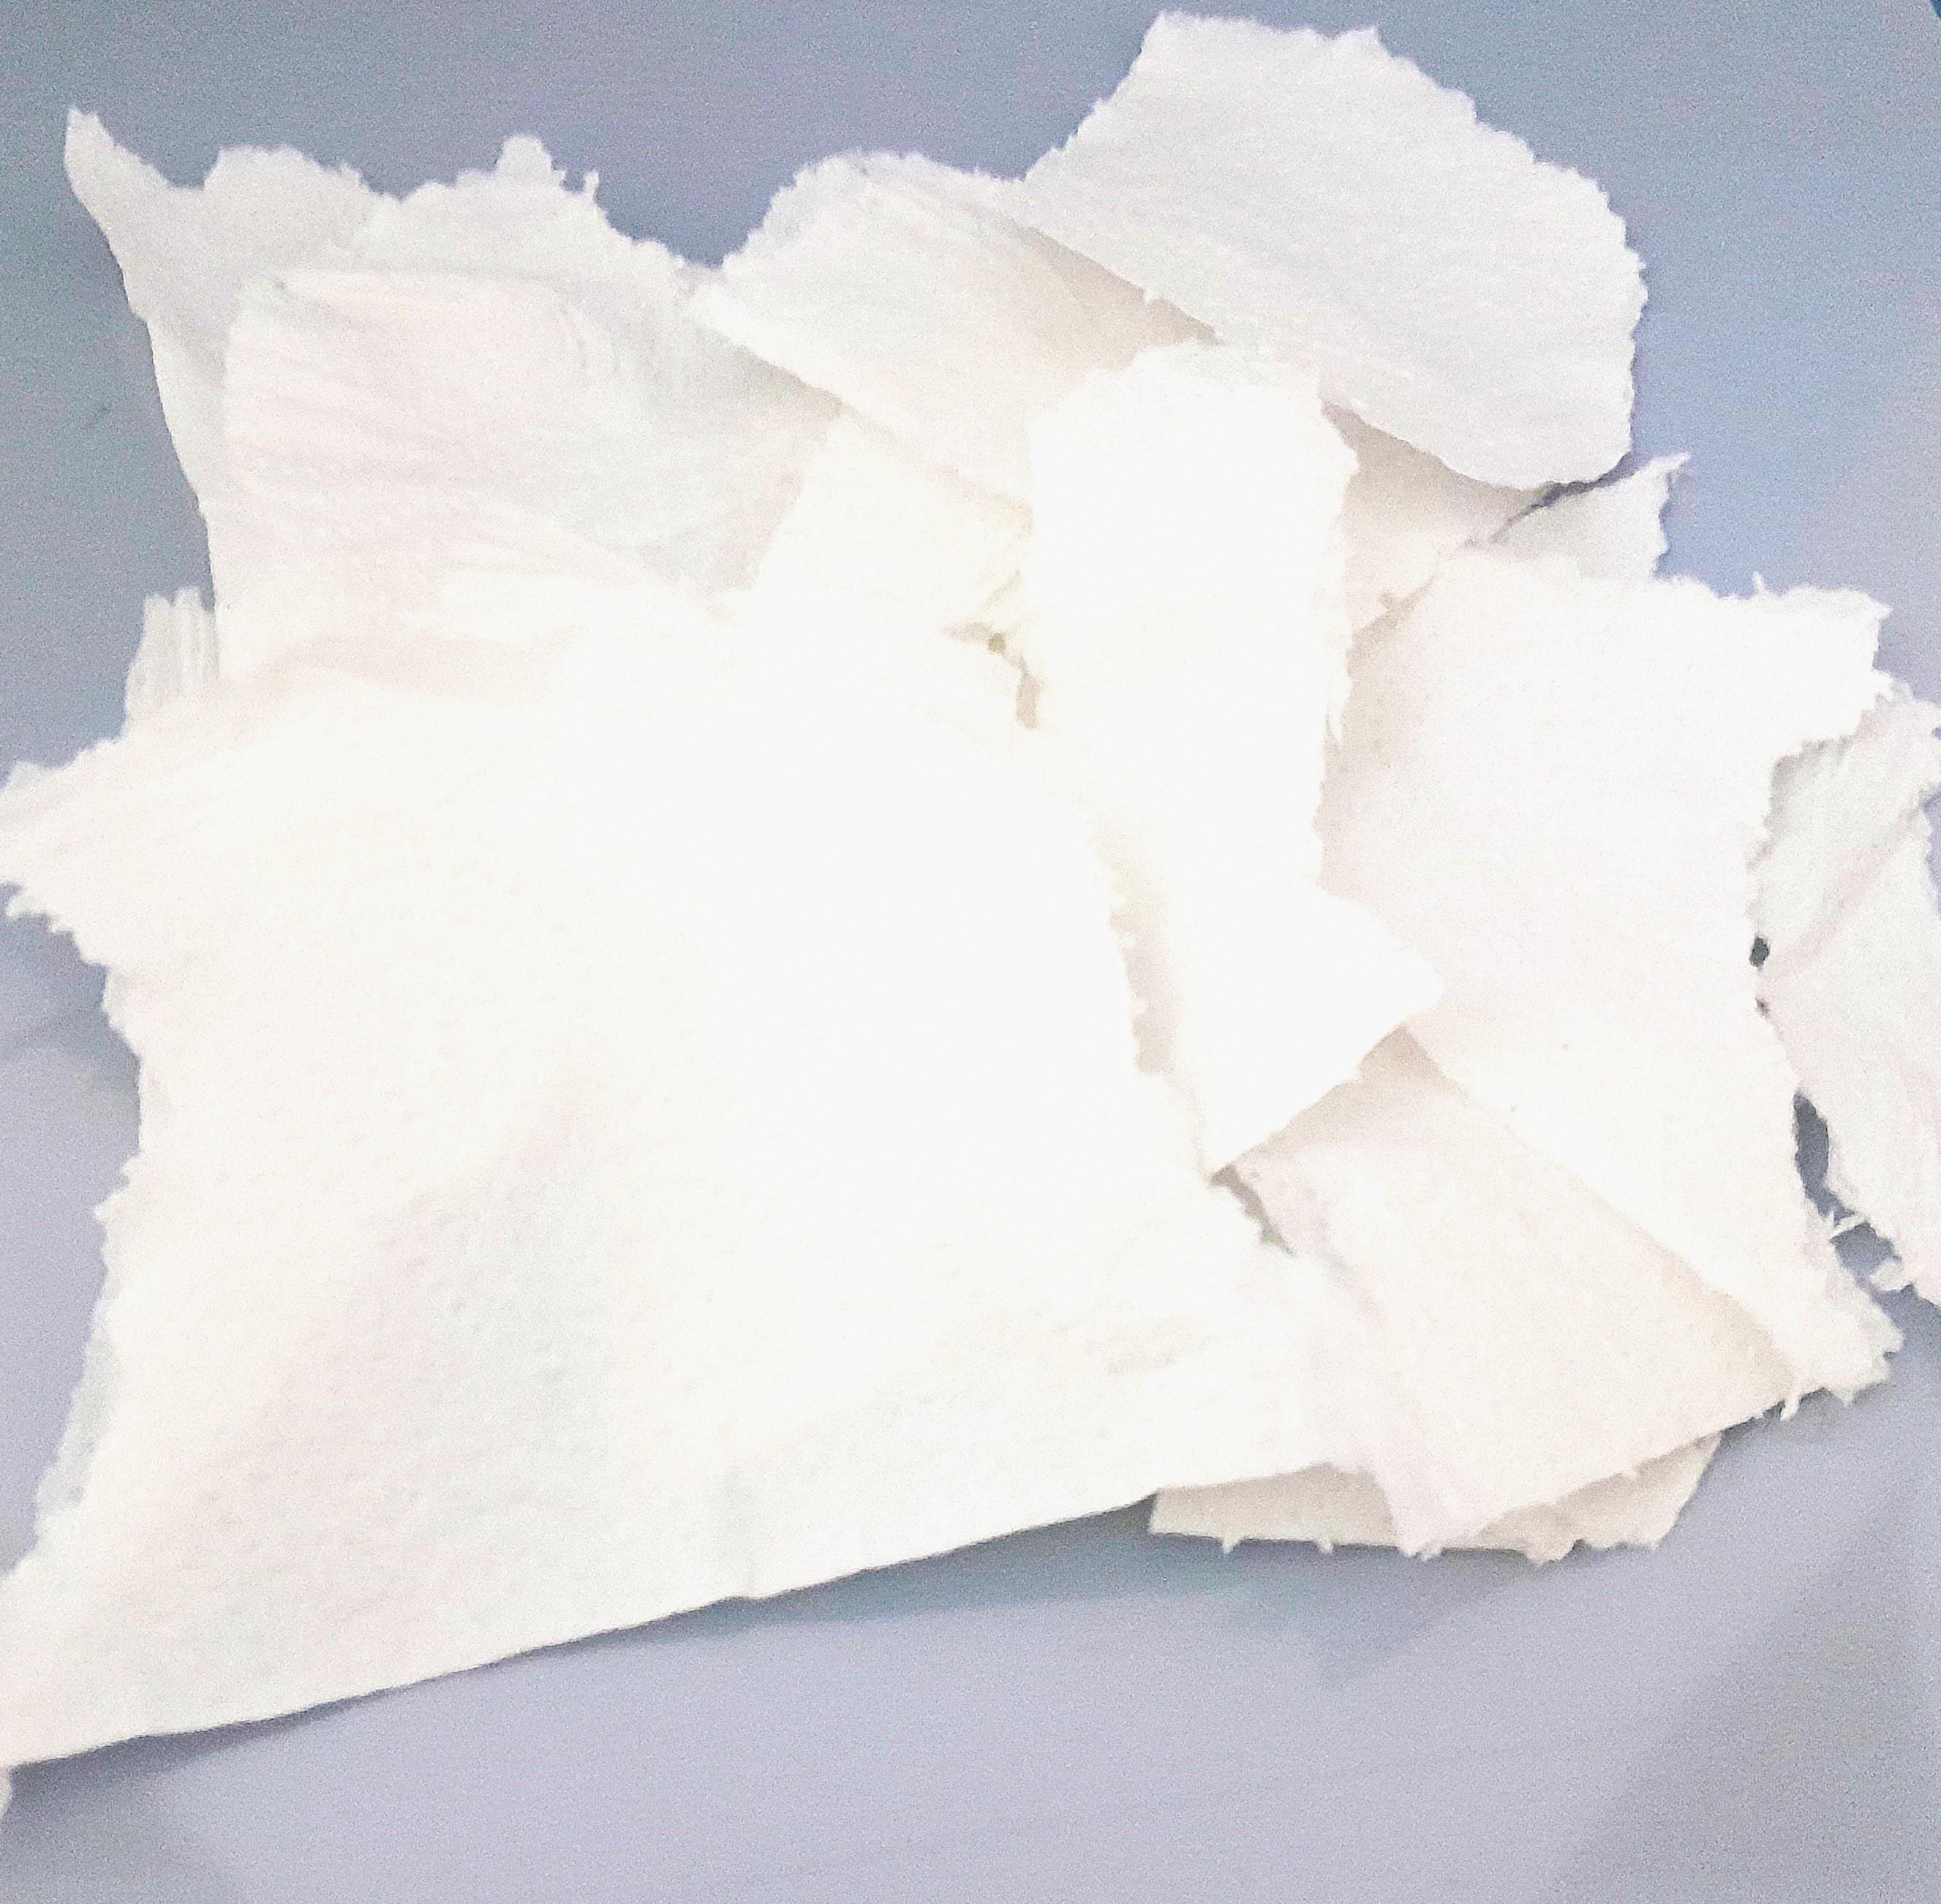
- Tear some pieces from a tissue roll
- Pour white glue in a cup
Sculpt With Paper and Glue

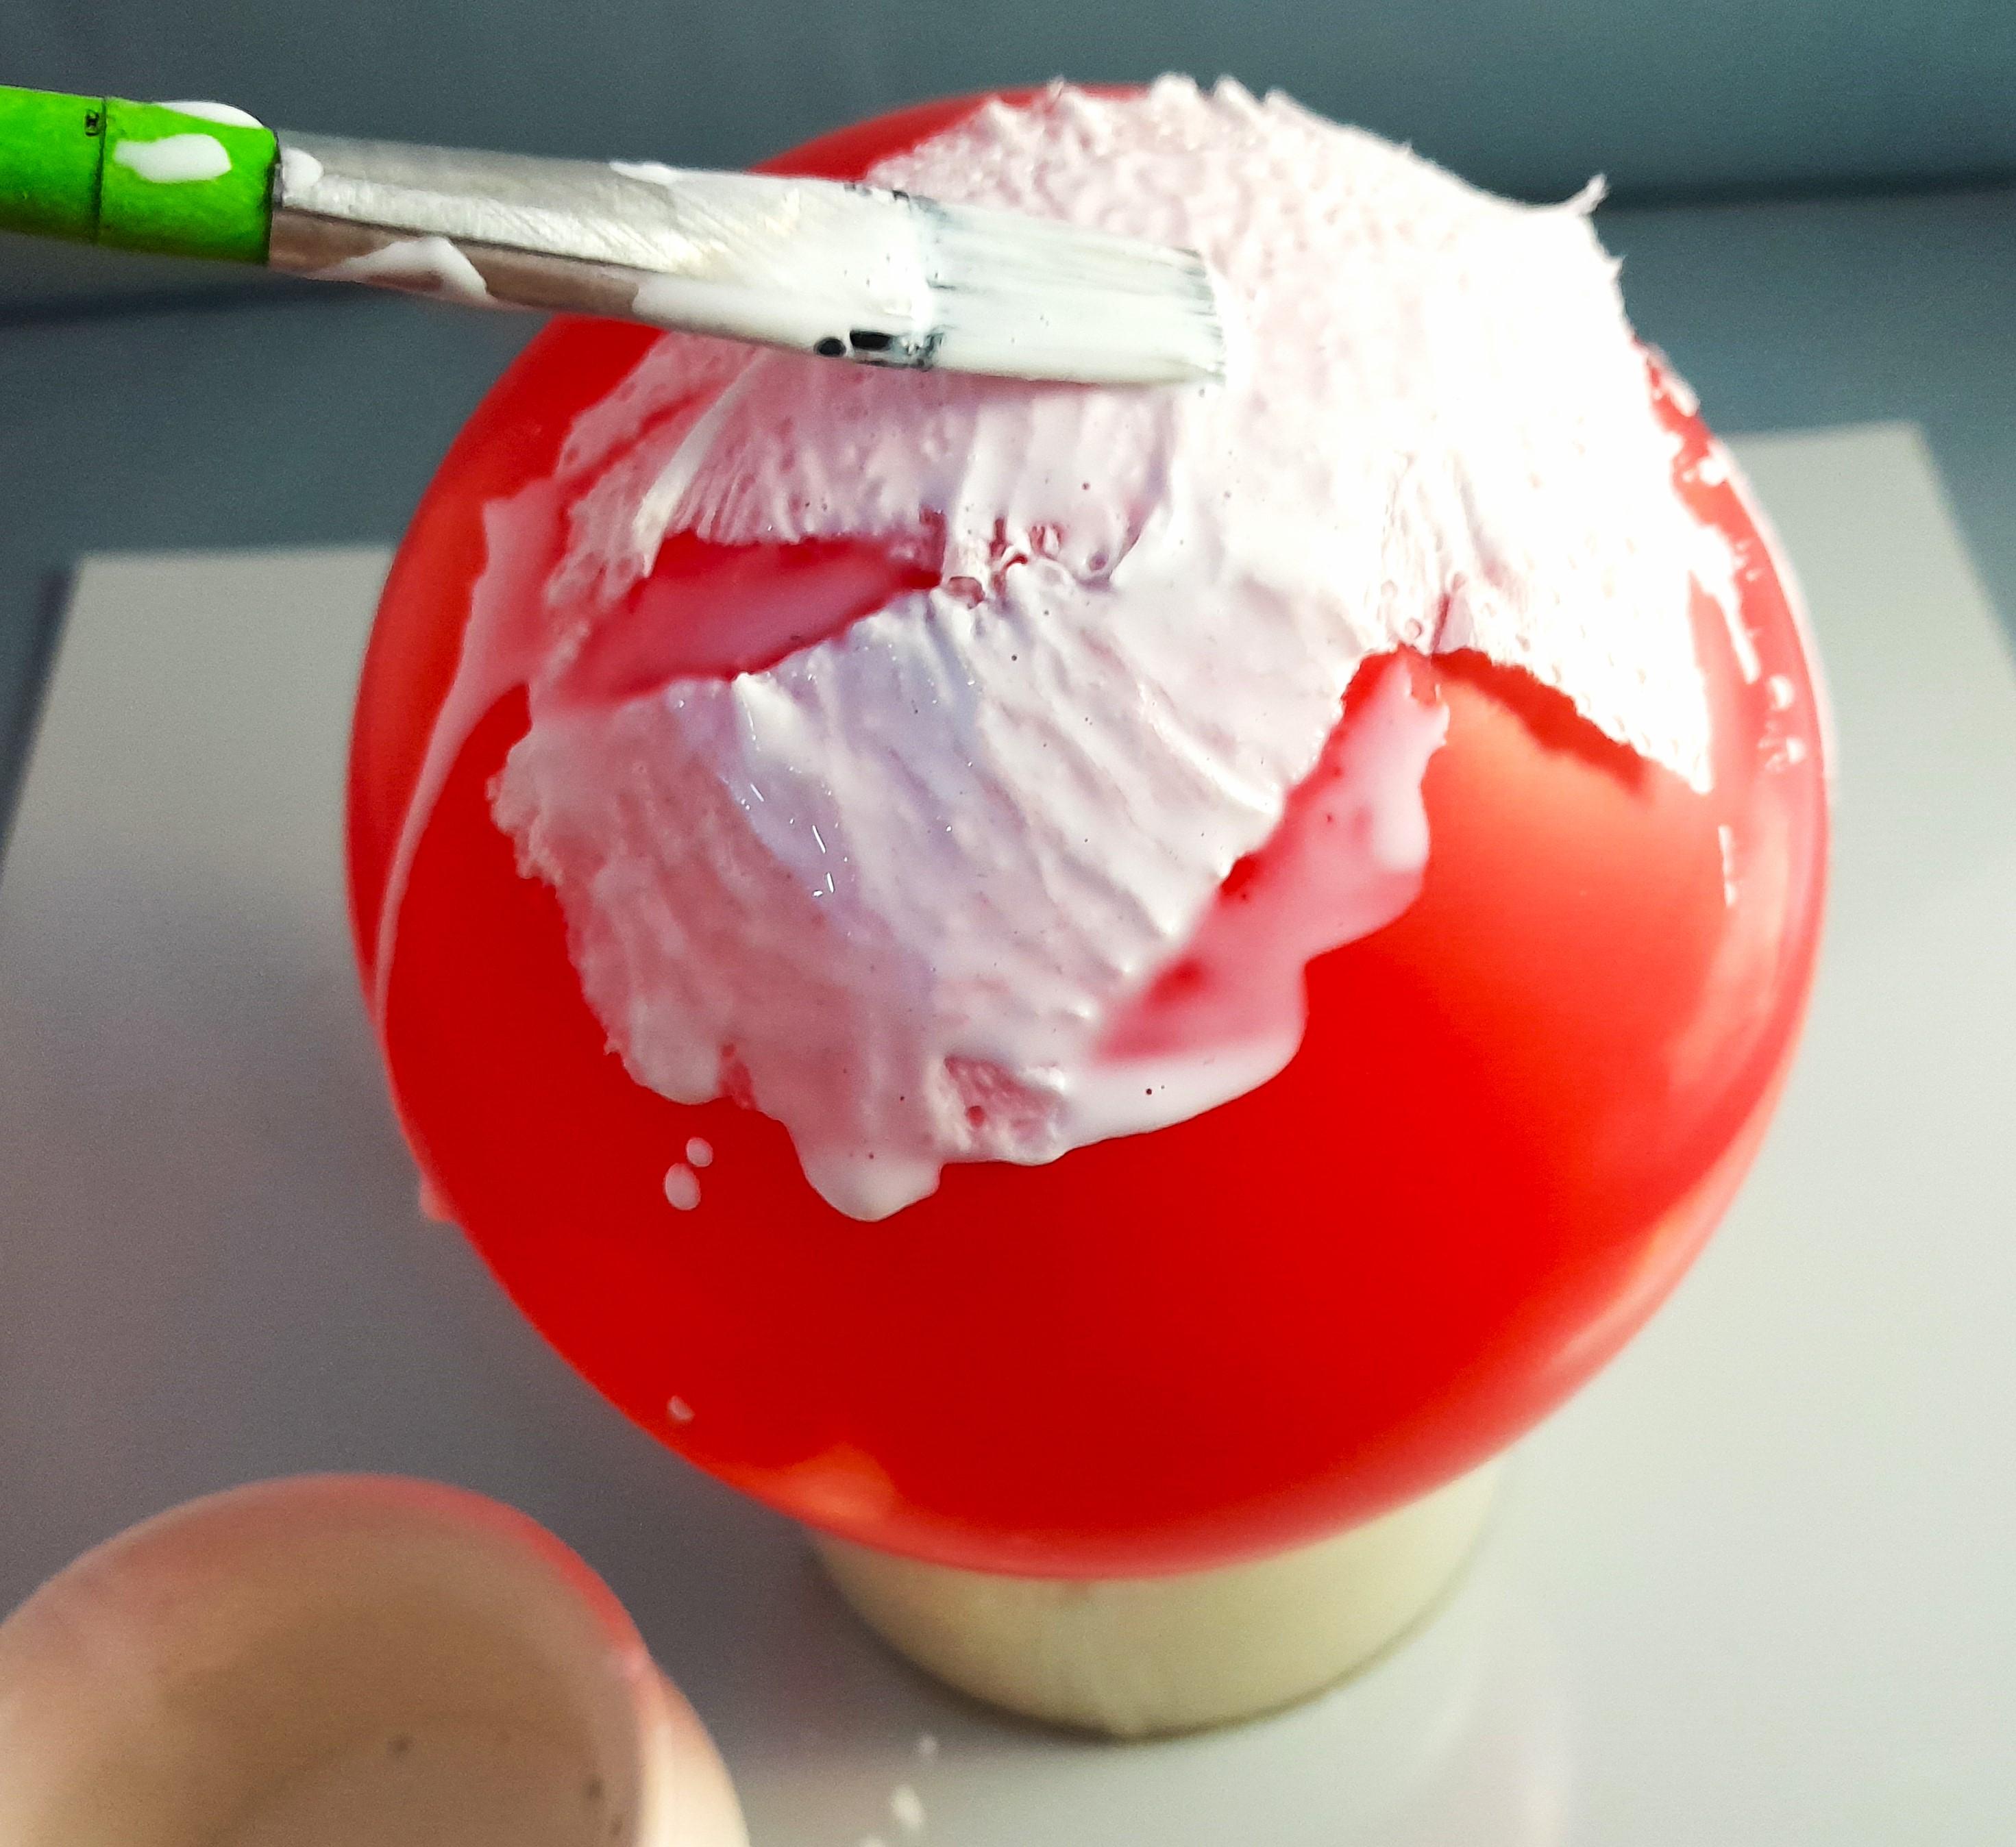
- Mix few teaspoon of water with the glue so it becomes a little thin. It should have the consistency shown in the picture. This will help it to soak the tissues well and form a solid bond.
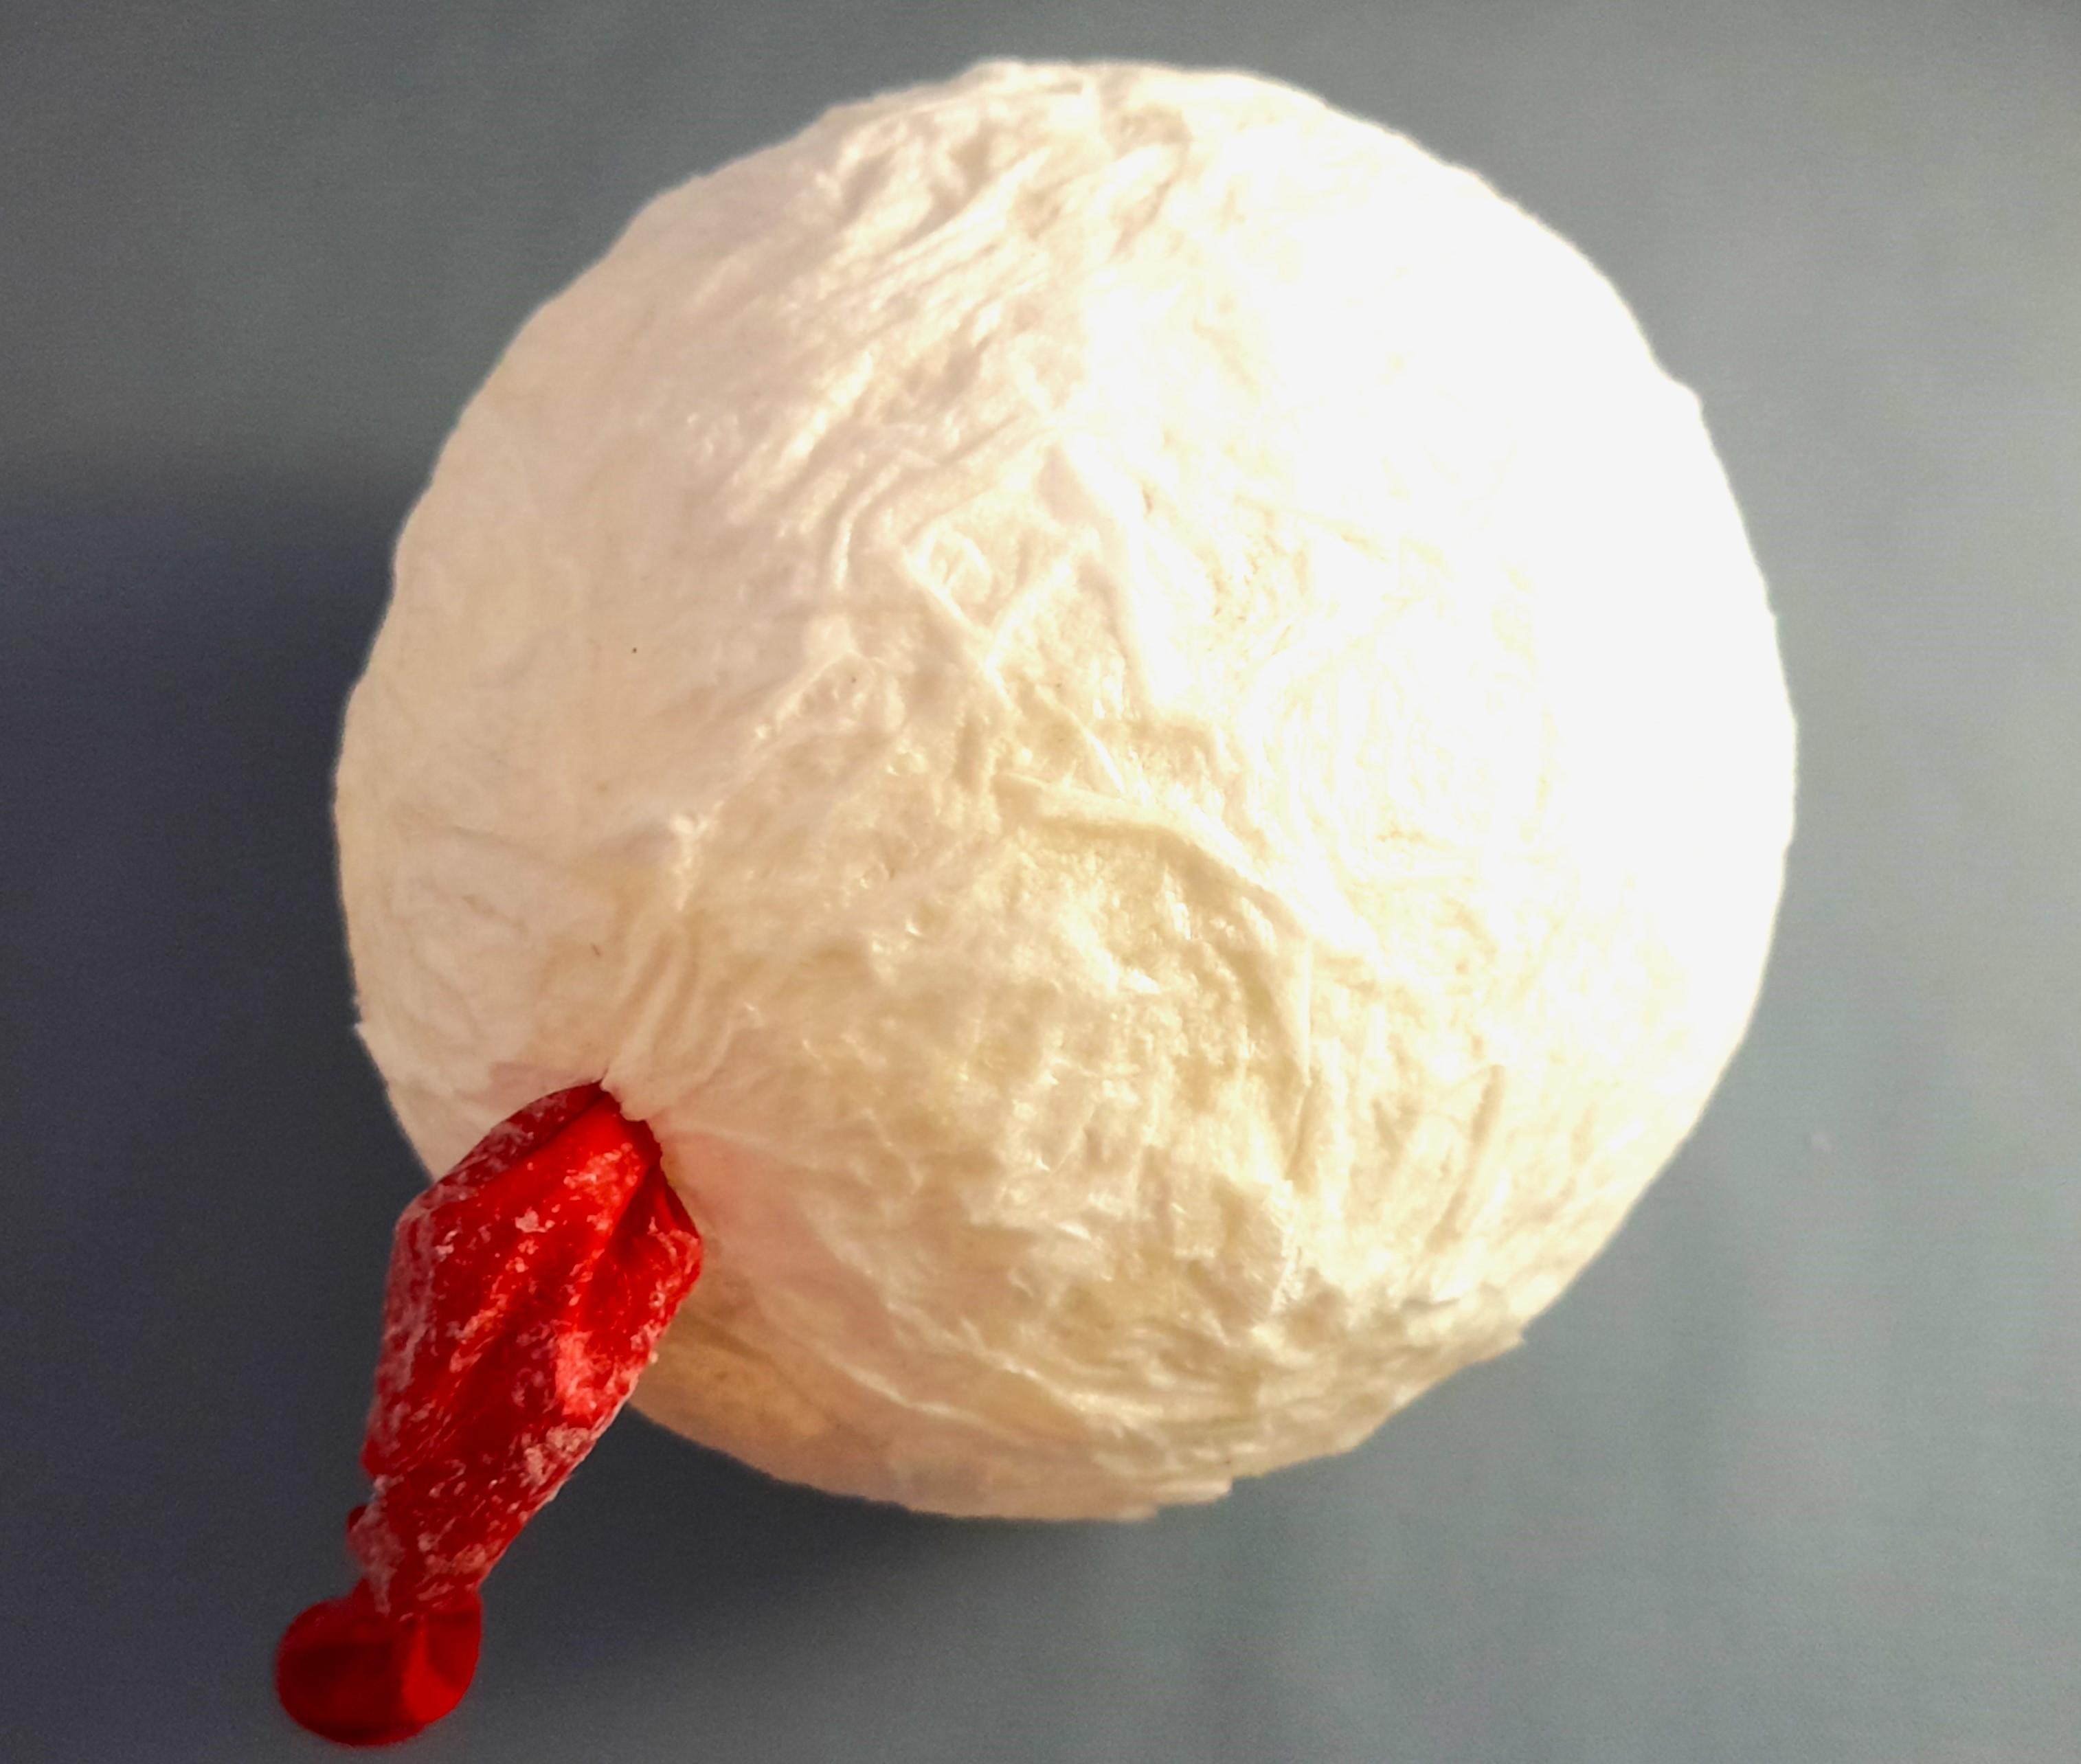
- Put the balloon on a round object like a roll of transparent tape. Then cover it with tissue pieces and put glue on it with the help of a painting brush. drag the brushes away from the edges so the tissue lays flat over the balloon.
- 3 layers of tissue papers will be okay for good strength of the sphere. However in some places provide 4-5 tissue layers as well. So that when the light is placed inside, some parts will appear darker than the other parts. It will then look like the moon.
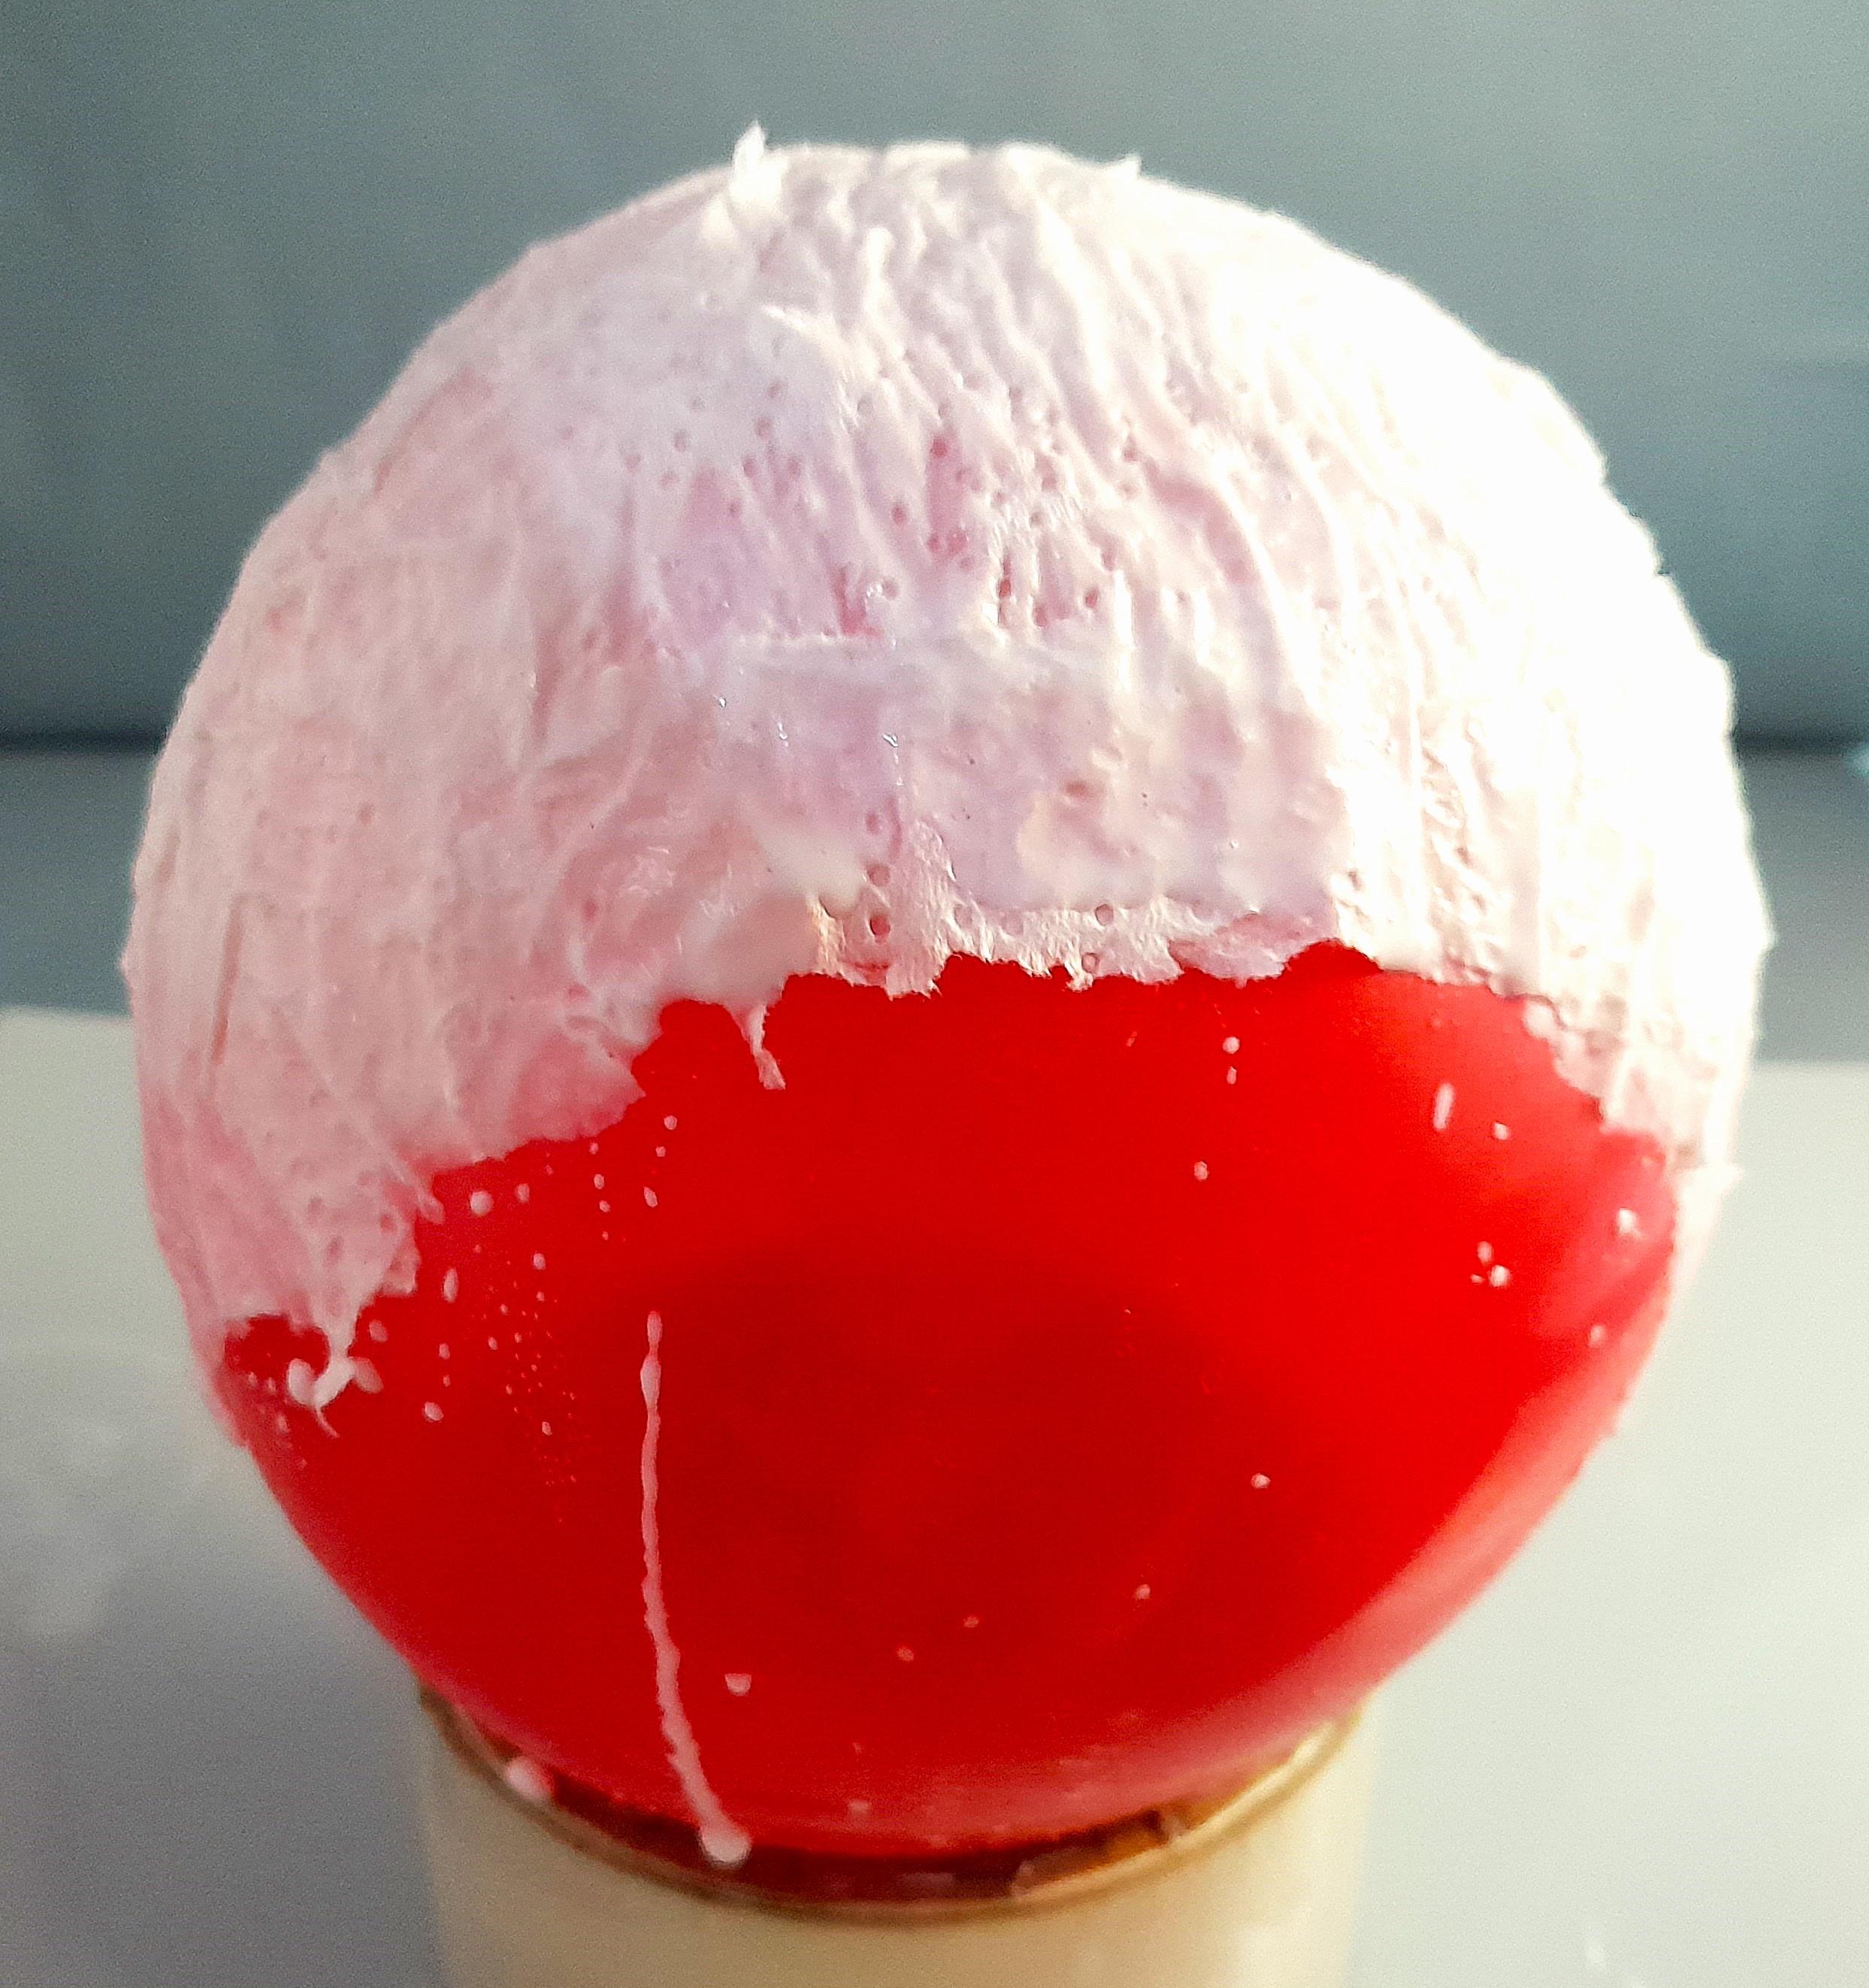
- When the top half is covered, turn it over. Then cover the bottom part of the balloon with tissues as well.
Extracting the Balloon From Inside

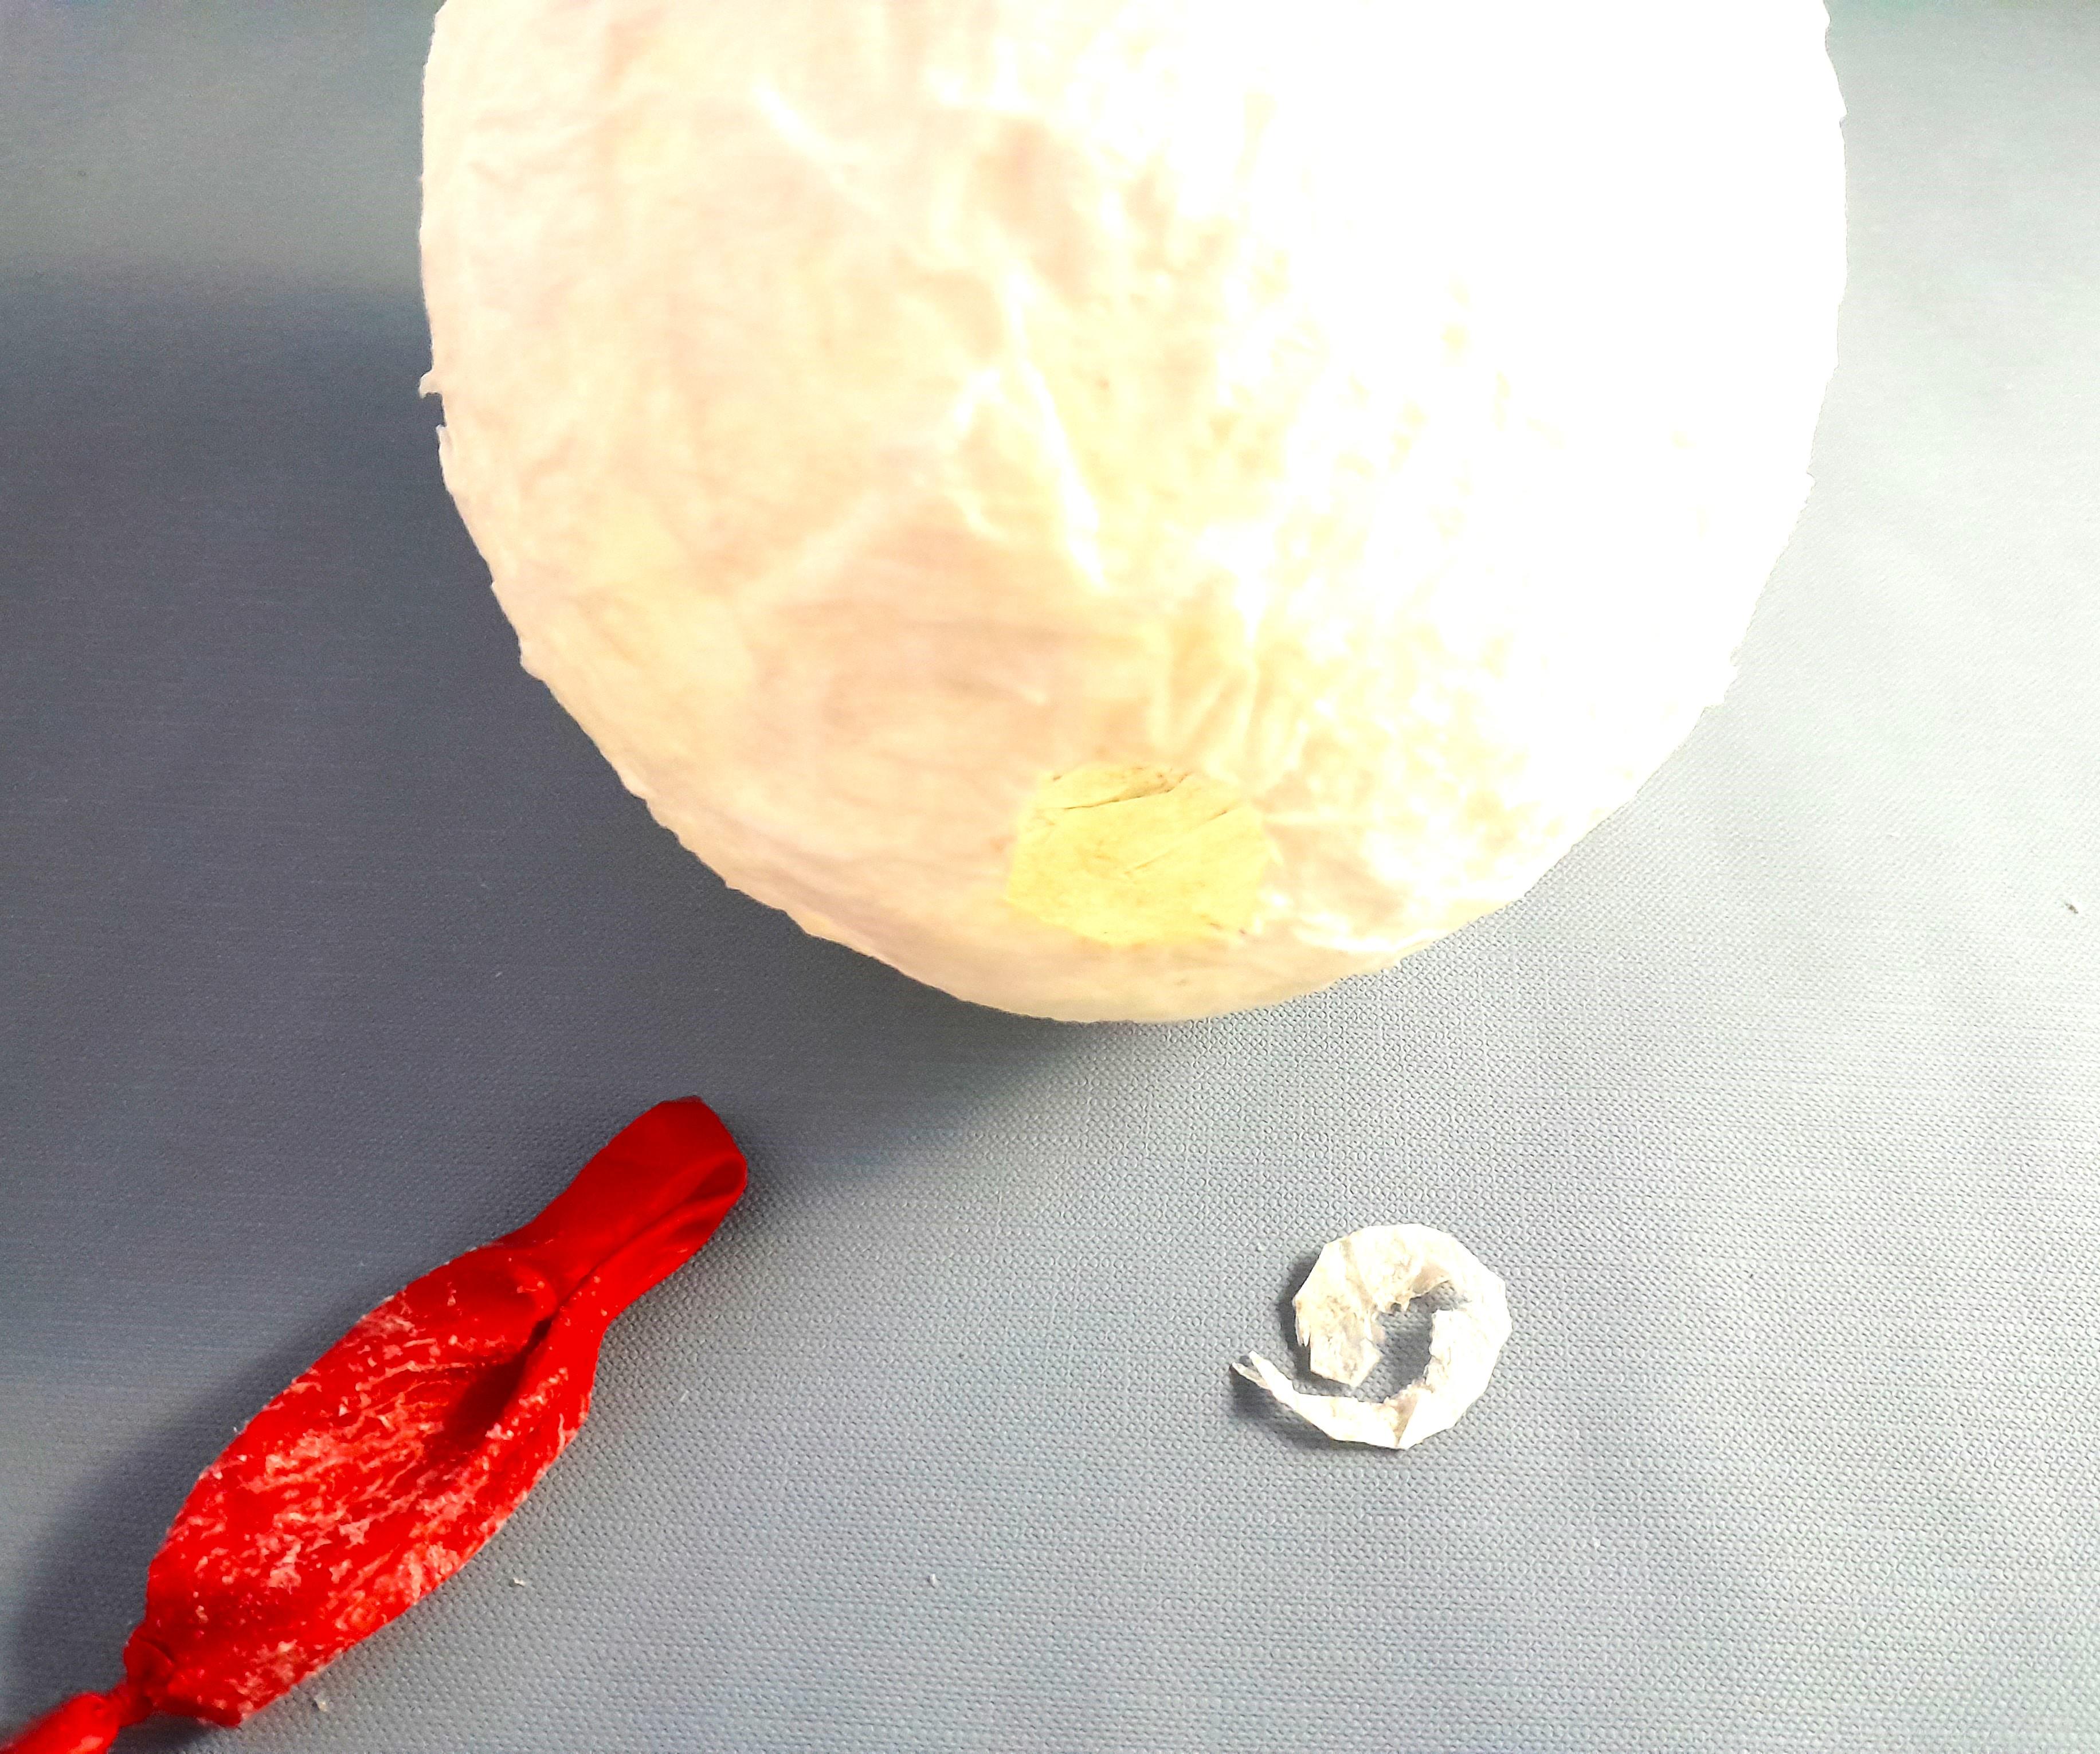
- Give a day of rest for the glue to dry up. It should feel strong enough similar to the base of thumb/ palms.
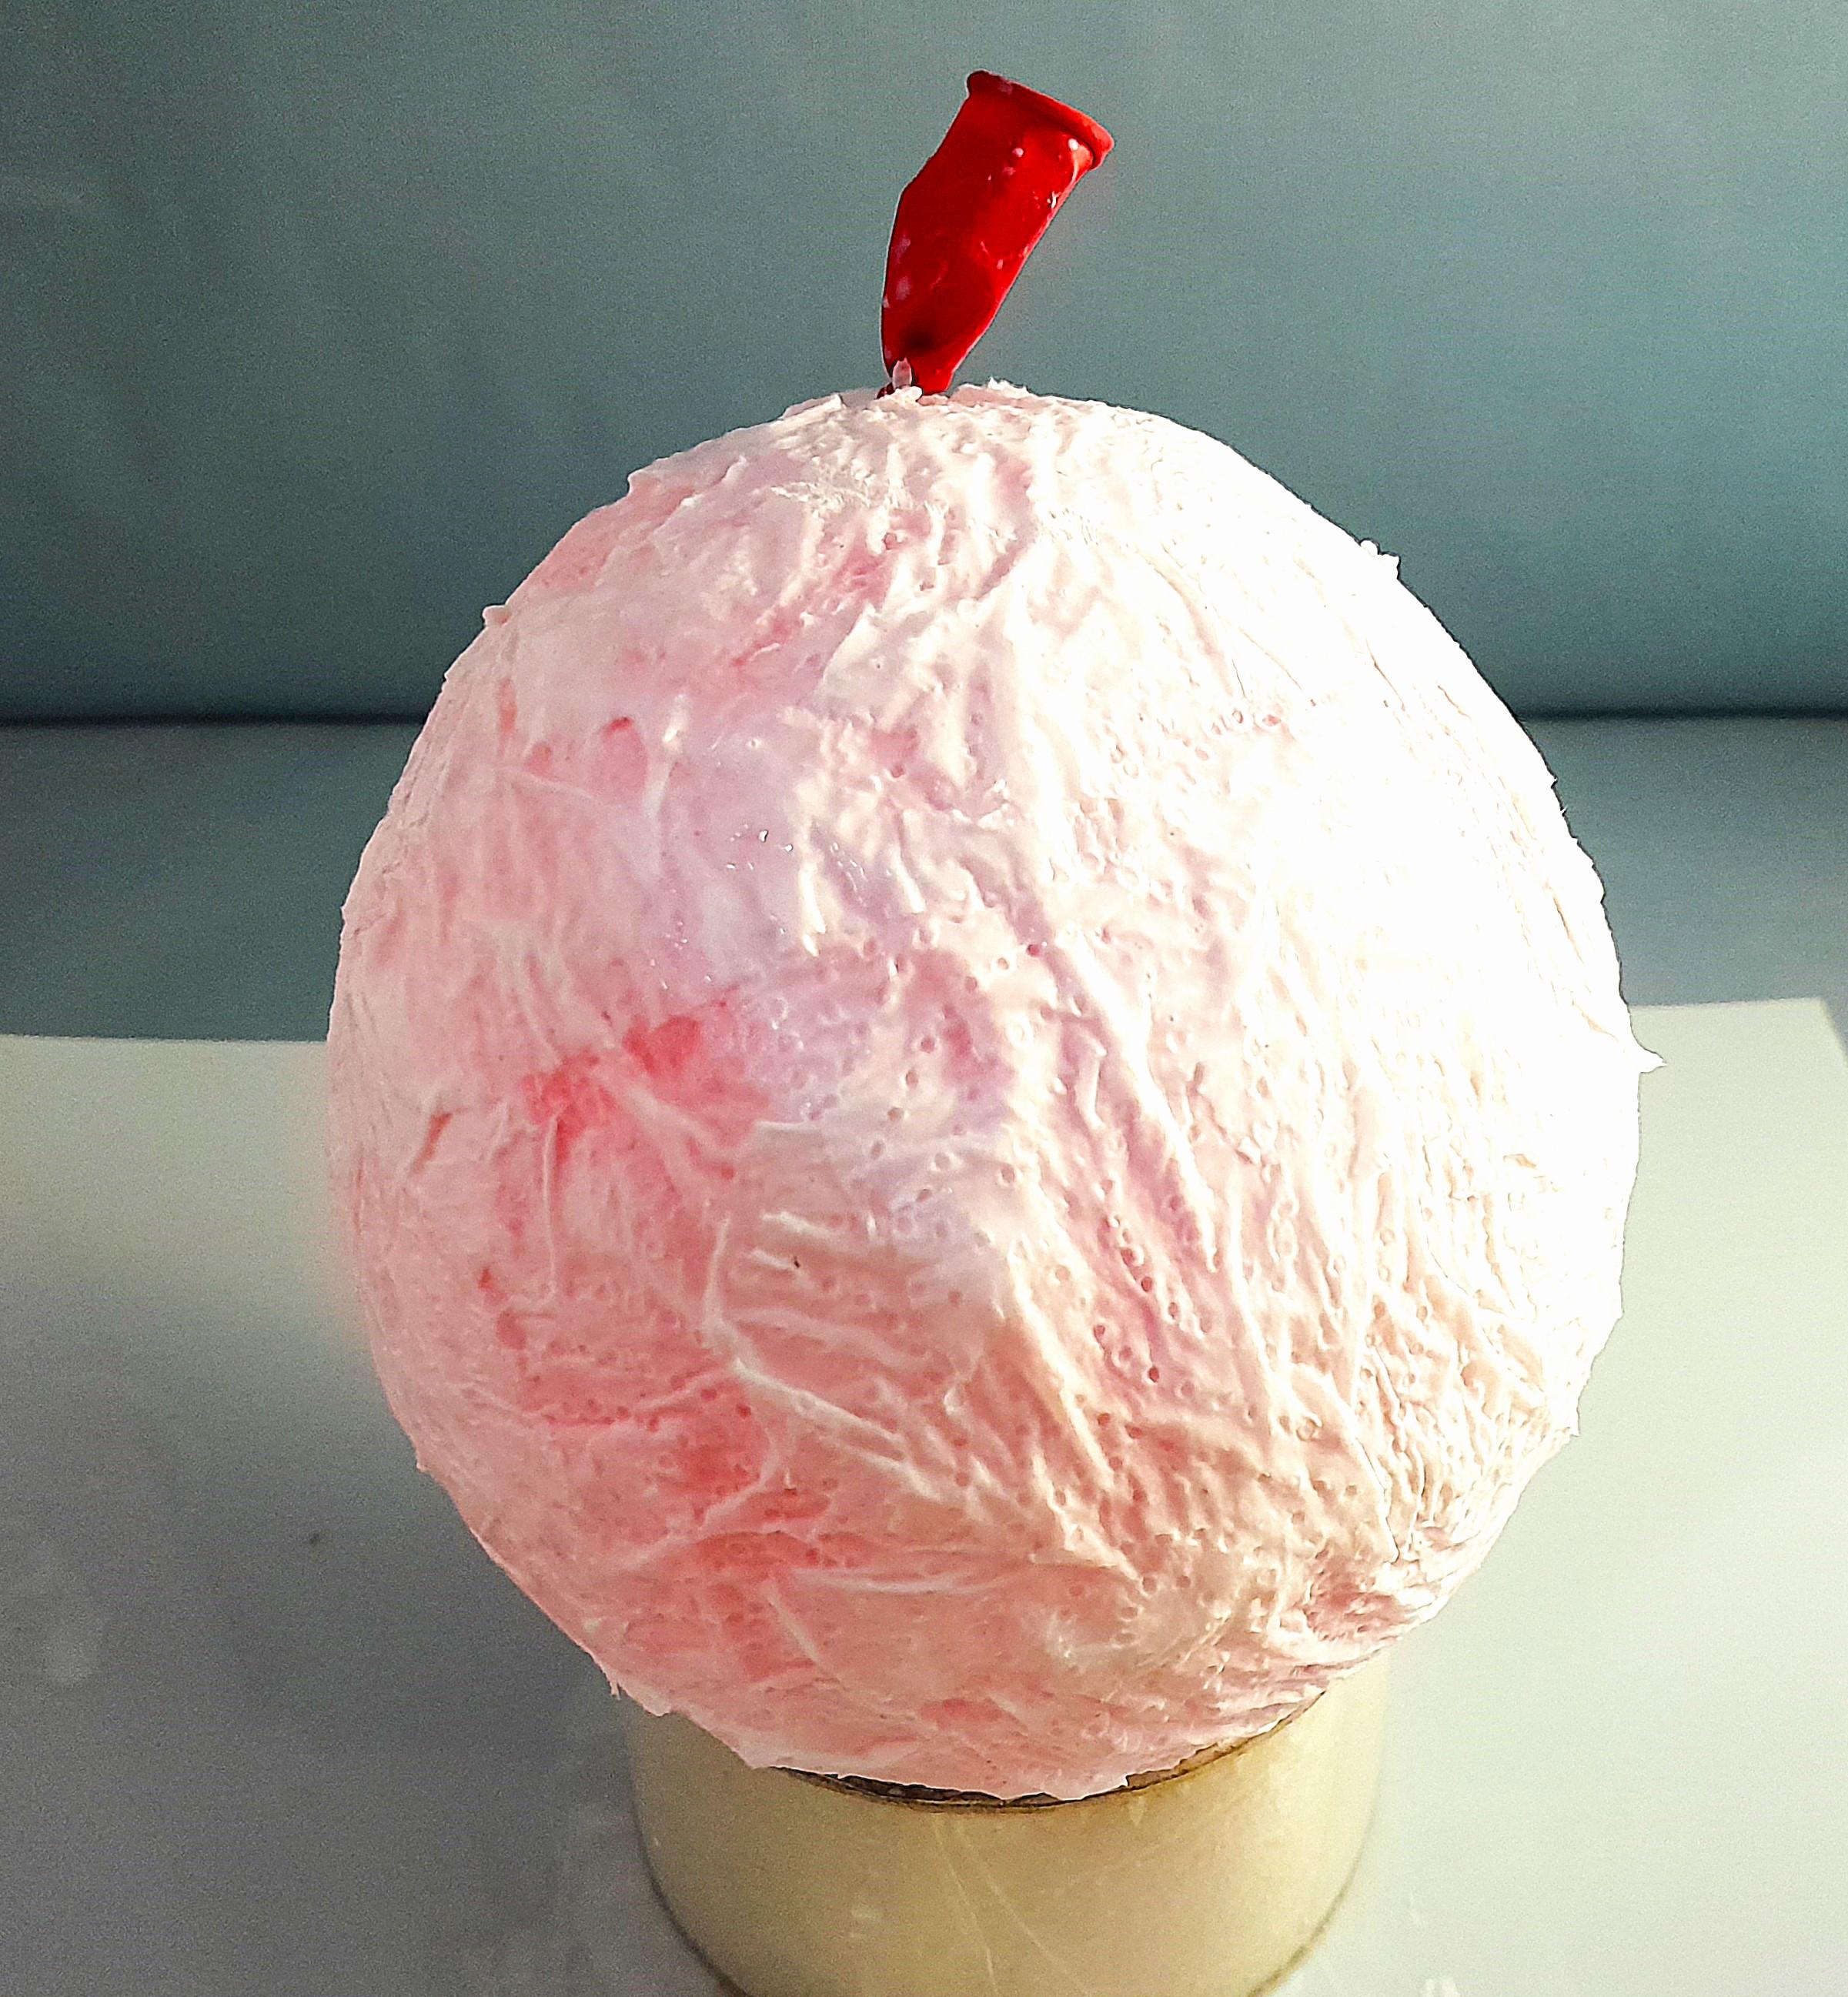
- Make a small hole in the balloon with a sharp knife. But kindly keep holding the outside portion of the balloon with the other hand. I could not show it in the picture as i had to hold the camera with the other hand. you don't want the balloon to go inside when it gets deflated.
- The balloon will slowly deflate and detach from the outer shell. You can use the backside of a paint brush to wedge between the balloon and the shell for separating them if required.
- Cut a round portion from the balloon opening by a scissor to place the bulb inside.
Preparing the Bulb
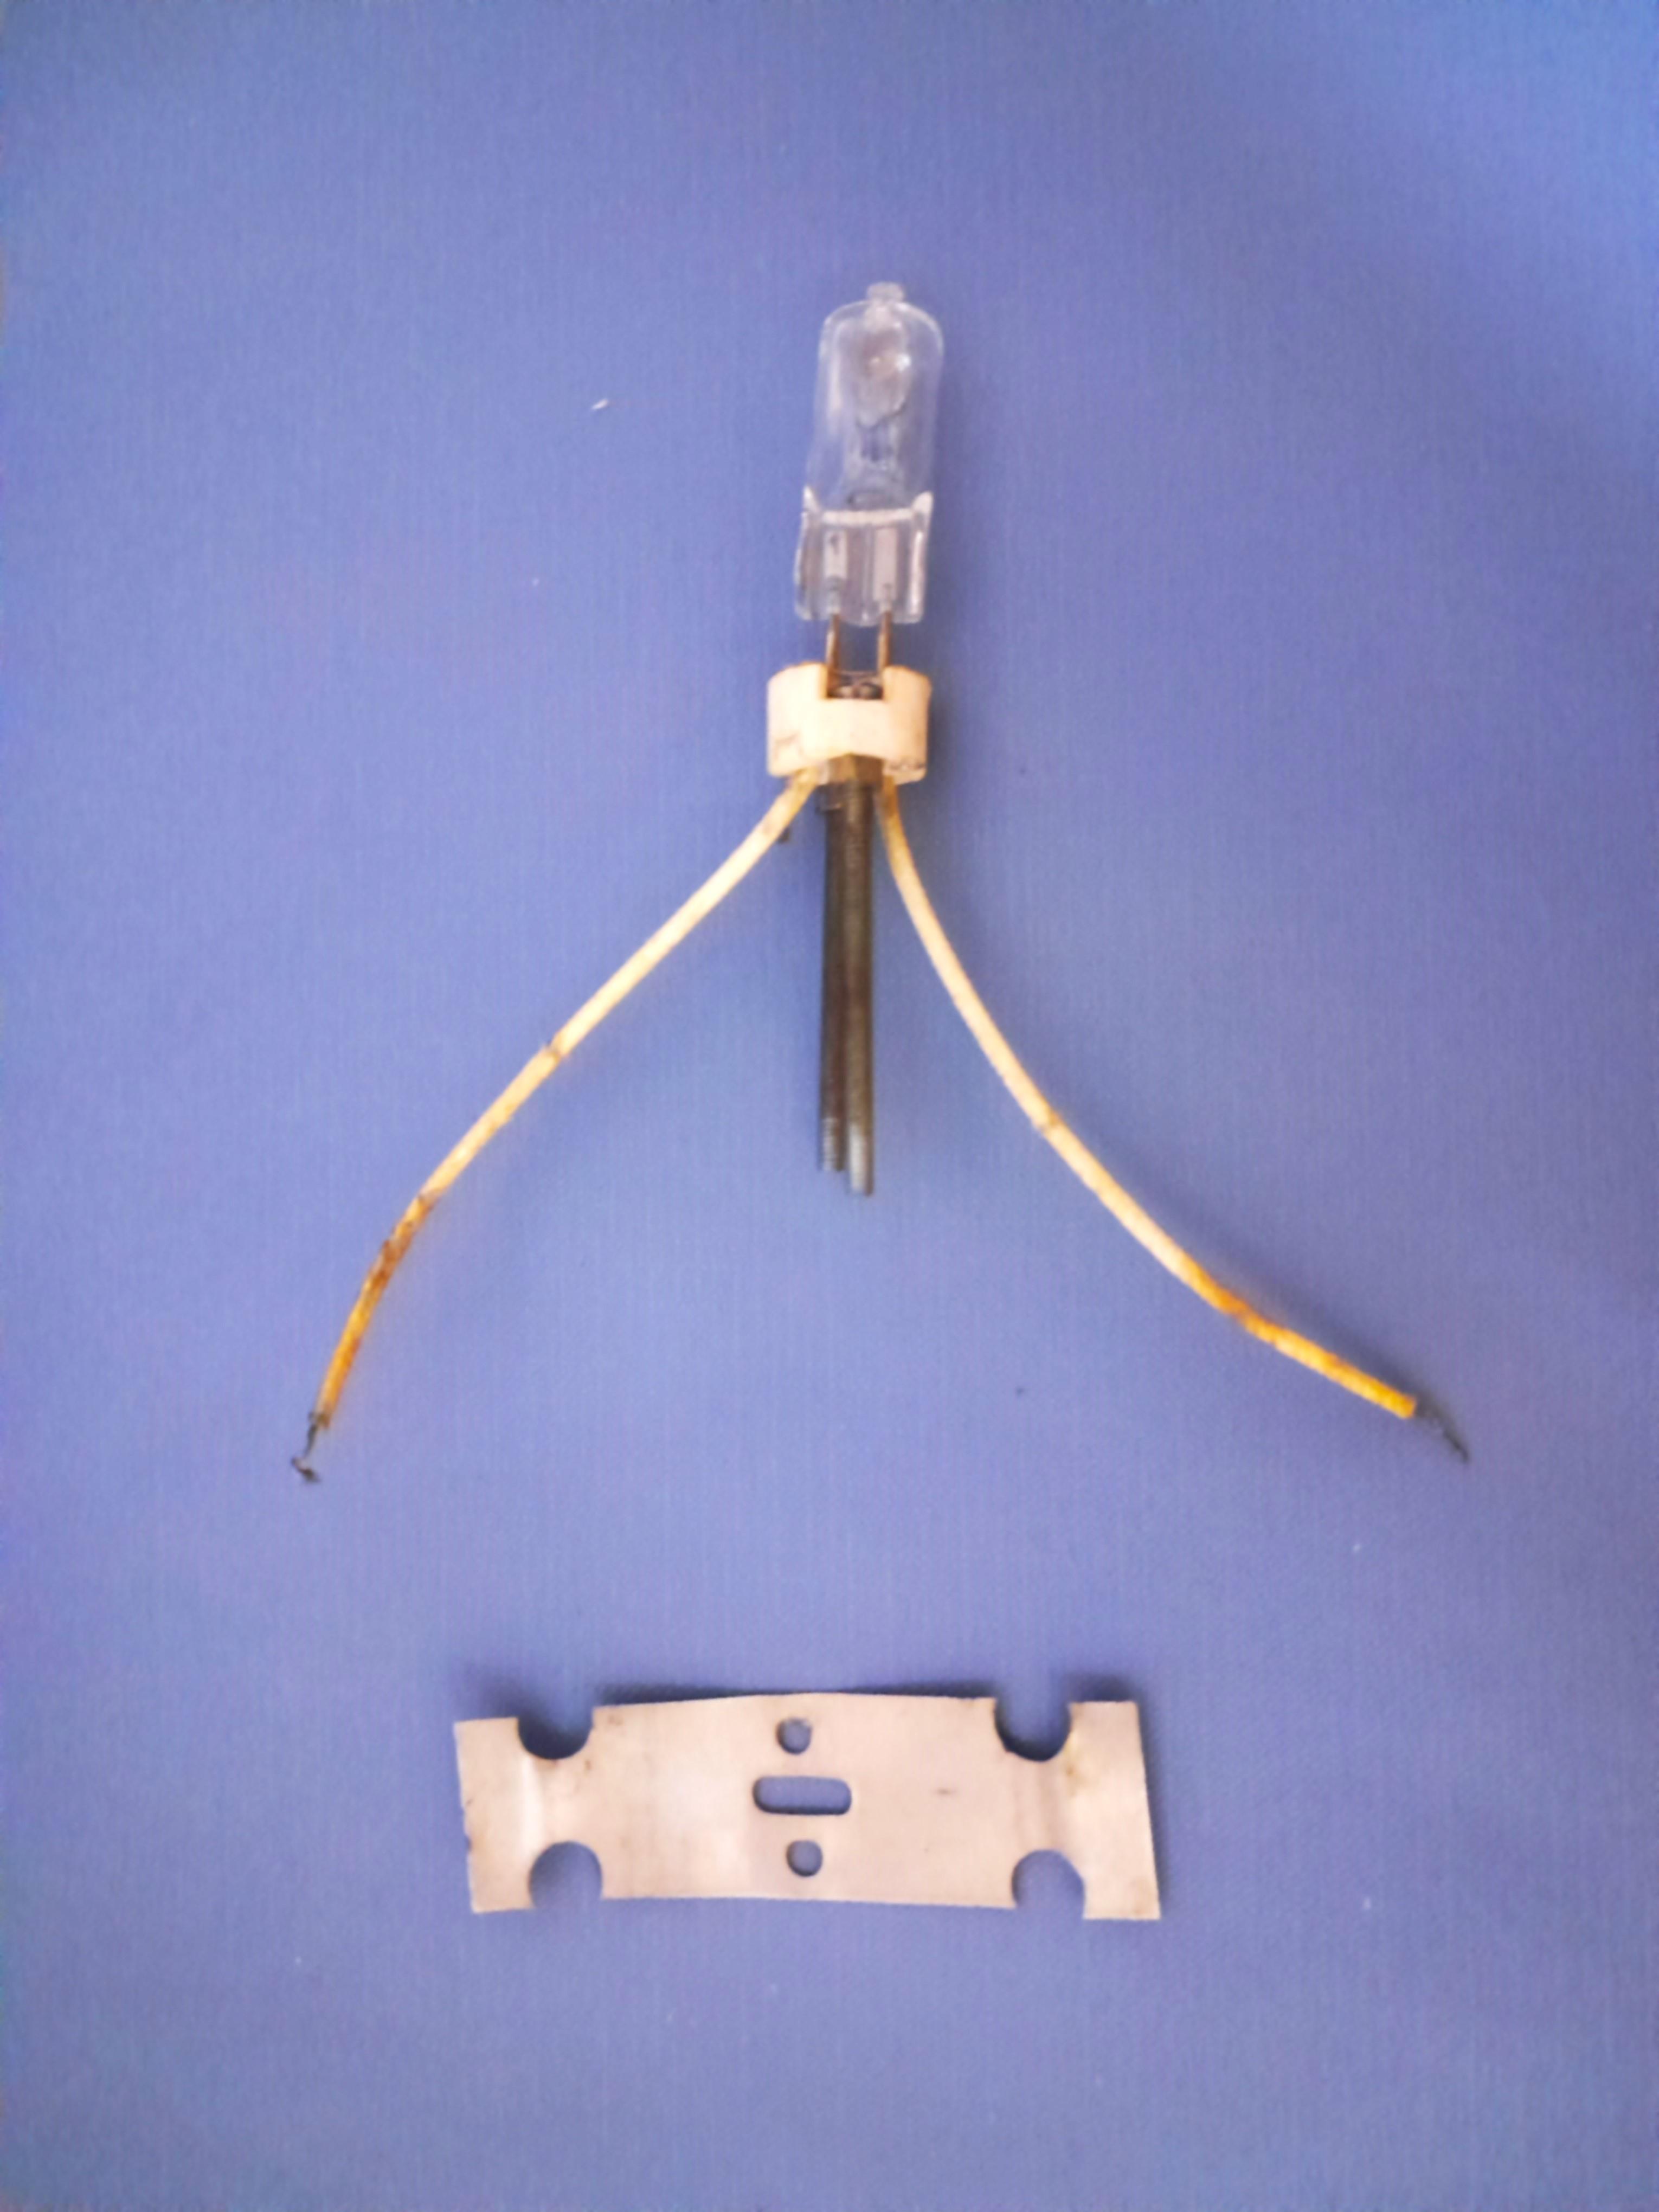
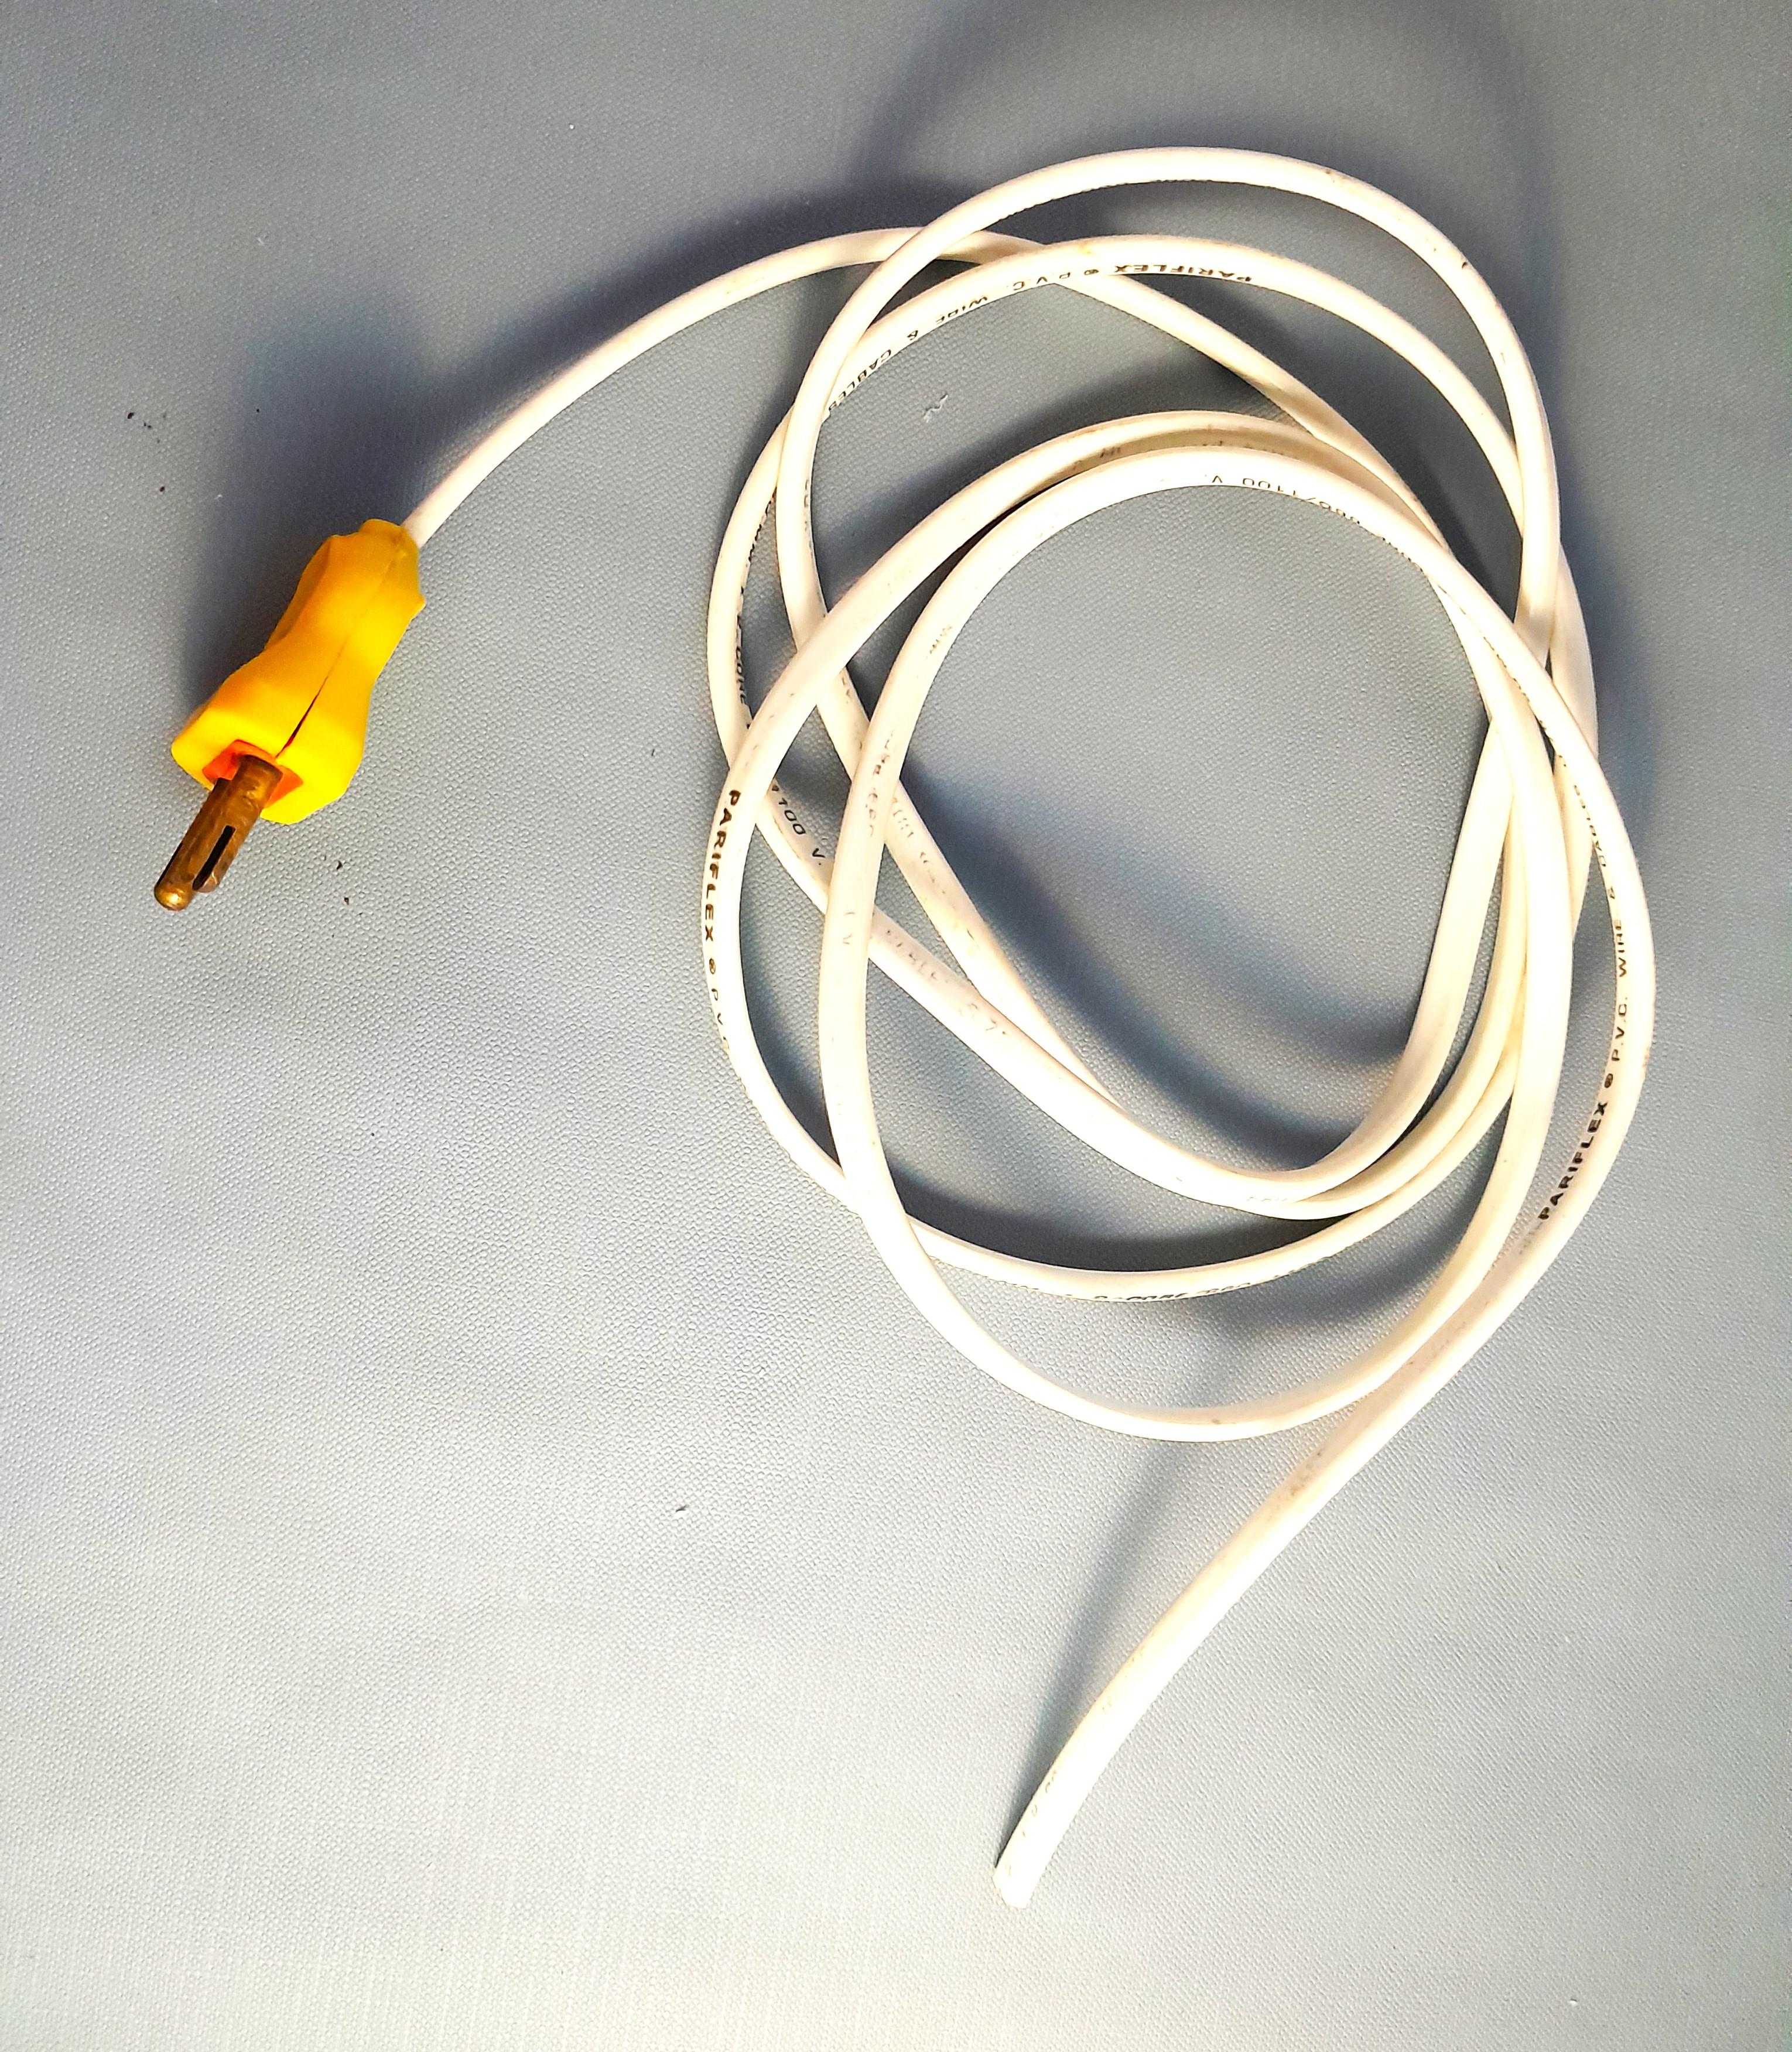

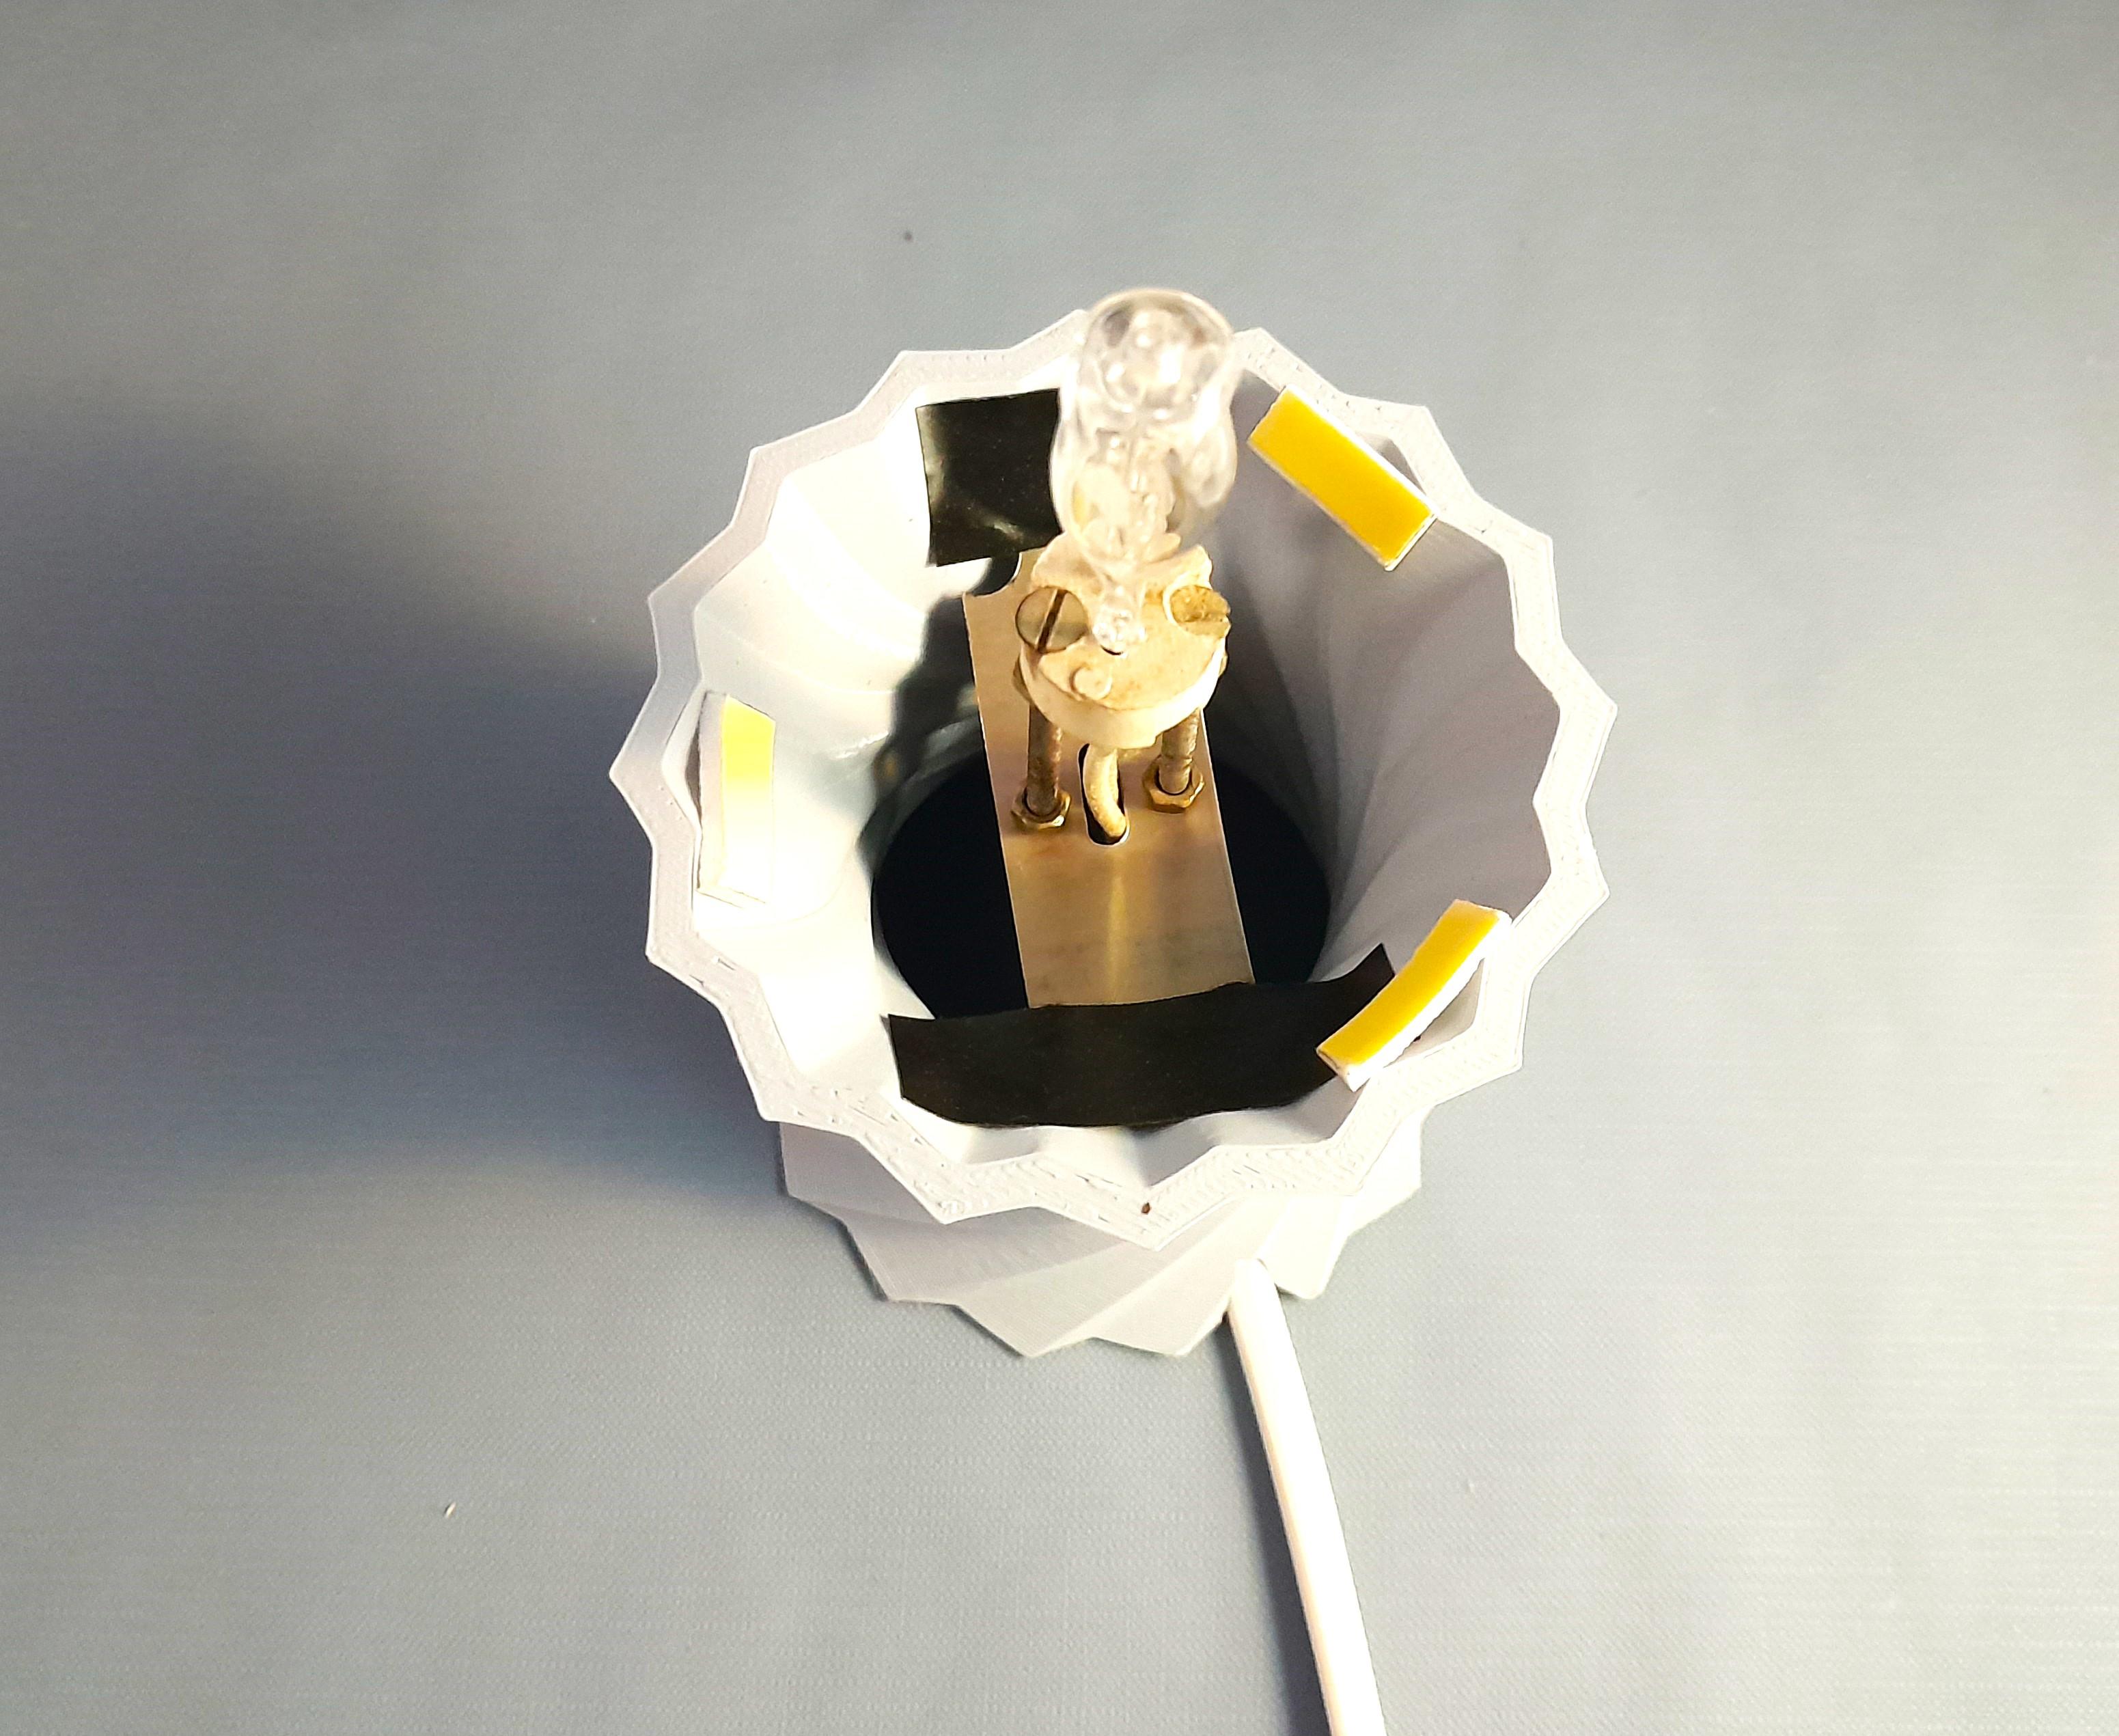
- I used a bulb specially used inside lamps as shown. The bulb needs to be placed vertically at the center of the moon shell. That is why it has the long screws to elevate it inside. You can also use an LED bulb taped to a stick to achieve similar effect.
- Take 1 meter wire connected to a plug. You can buy it from any electric store.
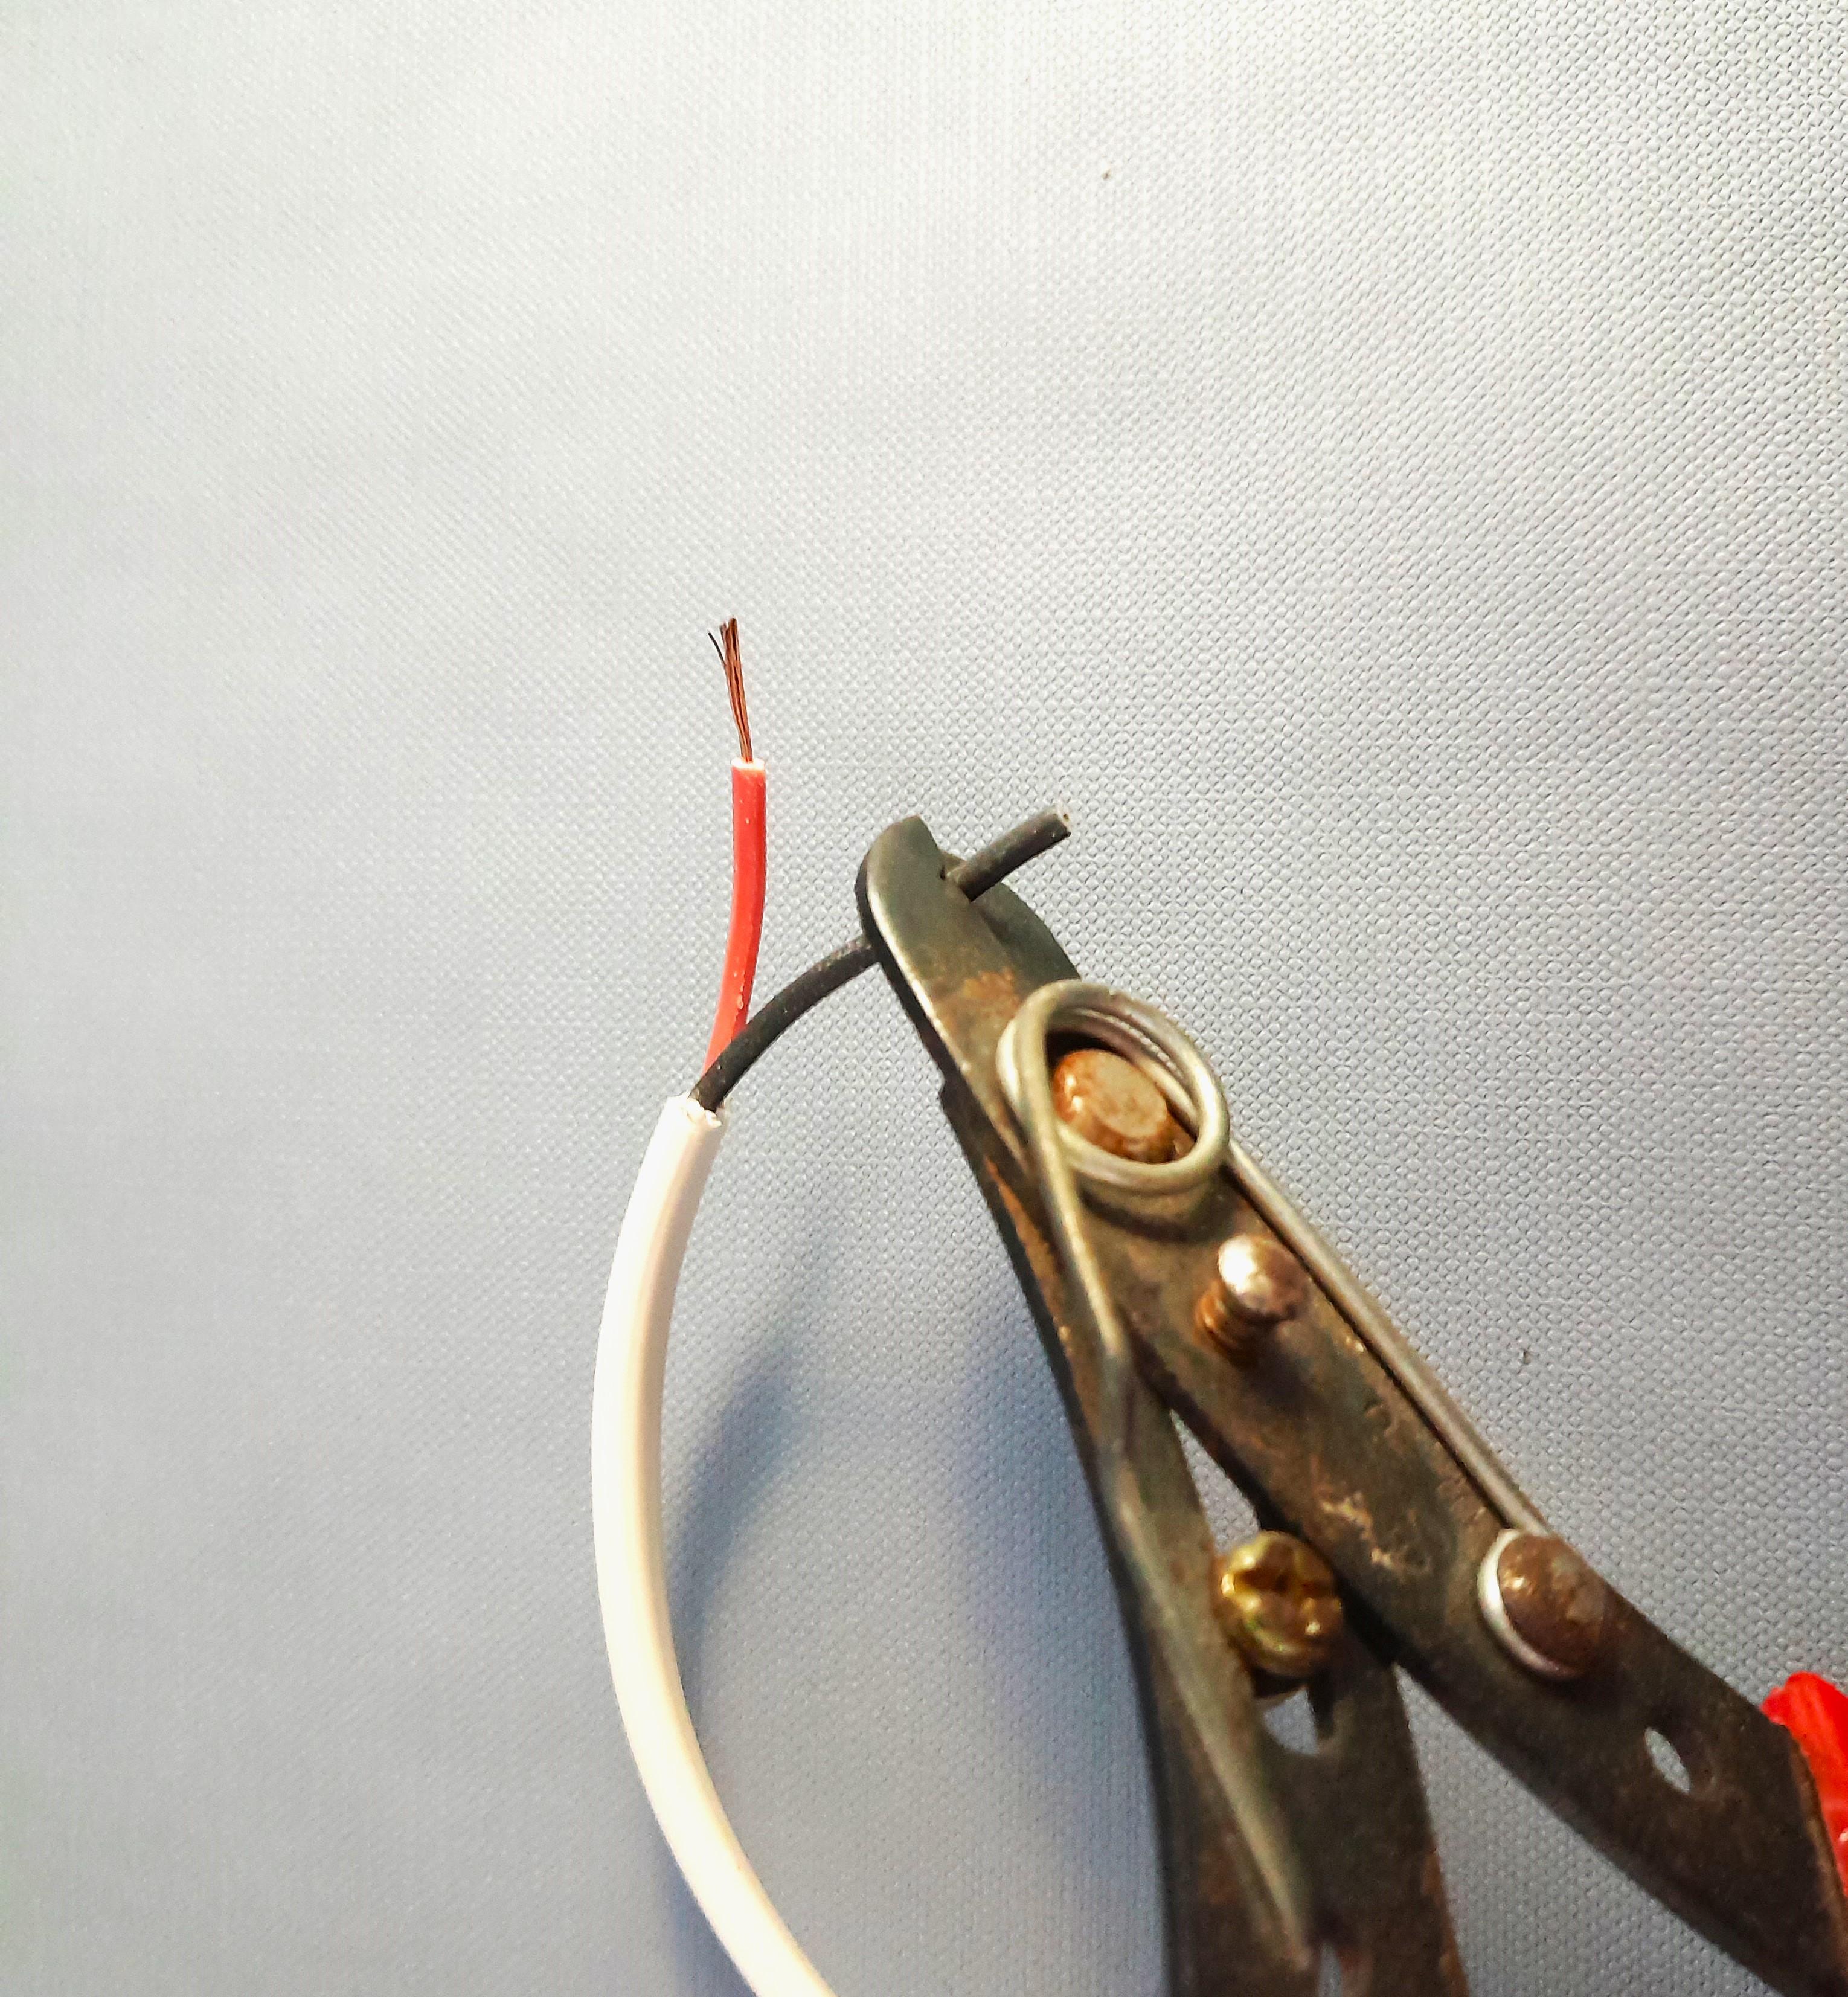
- Cut the ends of the wire with a wire-cutter.
- Connect the wire ends with the bulb wires. Then tape around the connections separately with electric tapes for safety.
Digital Artistry!: Fusion 360

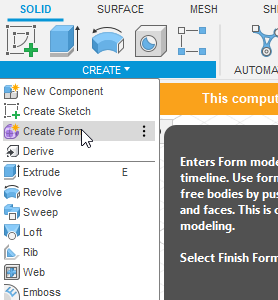
- Go to Autodesk Fusion 360 website. Register and download a free trial / educational use/ paid version as you want. Install it in your PC /Mac. I used a PC.
- Open Fusion 360. Then 'Create'> 'Create Form'. Since the spiral is not a regular shape, we wil use form builder to do this.
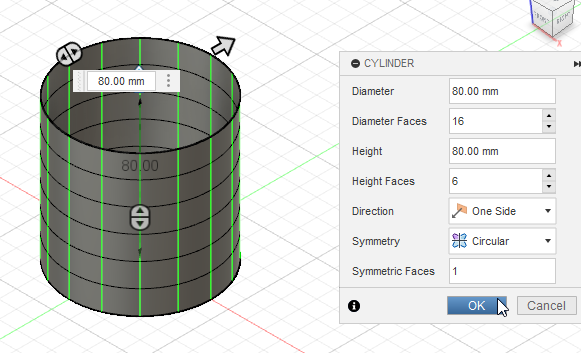
- Create a 'cylinder' from the list. Provide diameter, height as you like. make sure the 'Circular Symmetry' is on.
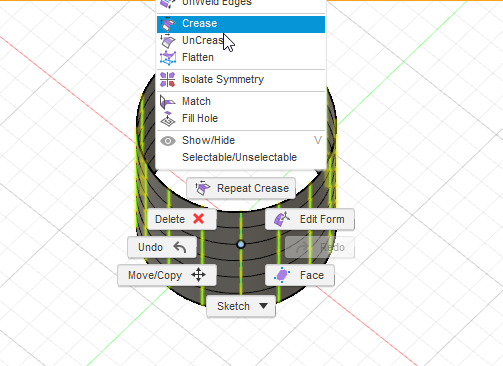
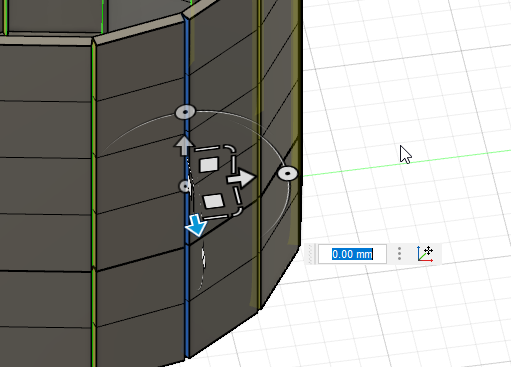
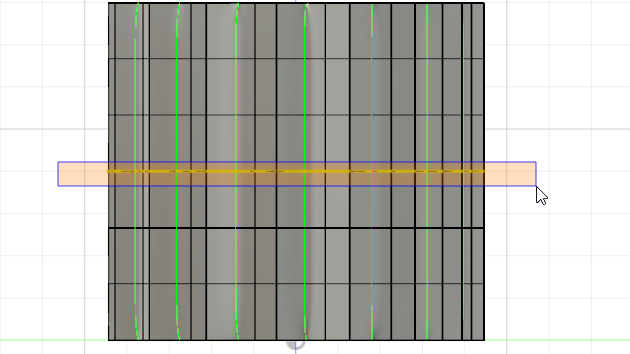
- Select one vertical line shown in green as shown in the 4th picture. Due to symmetry, all the lines will be selected. Then turn them into 'crease' by right clicking.
Wall Thickness
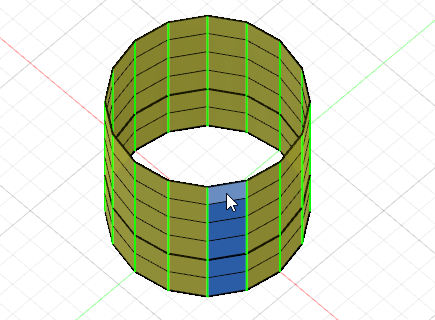
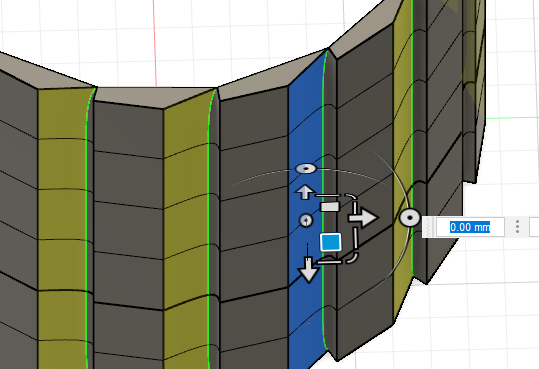
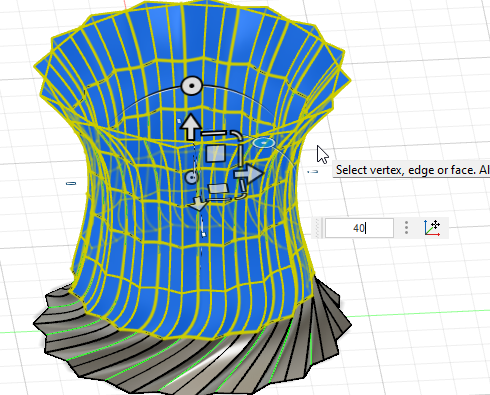
- Select face: Select a set of vertical faces as marked in blue. Carefully click at the center of the faces, not the edges.
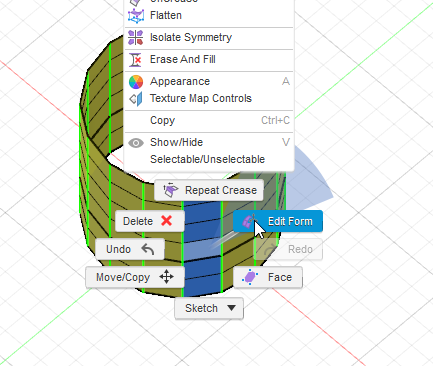
- Then 'Right-click'> Edit form.
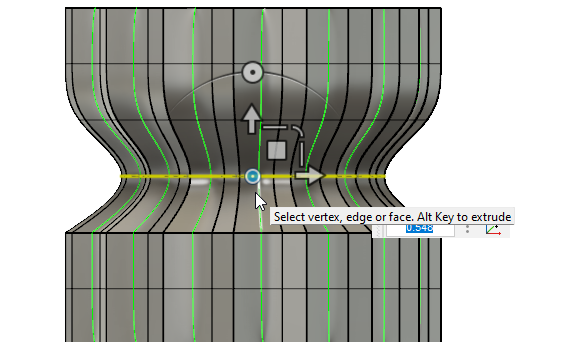
- Extrude: Go to the top view (by clicking 'top' on the view cube at the top-right portion of the screen btw). Now keep 'Alt' pressed and drag the blue square to give i some thickness as shown.
Making the Crease
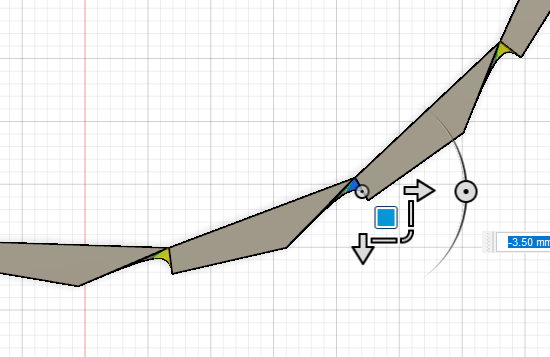
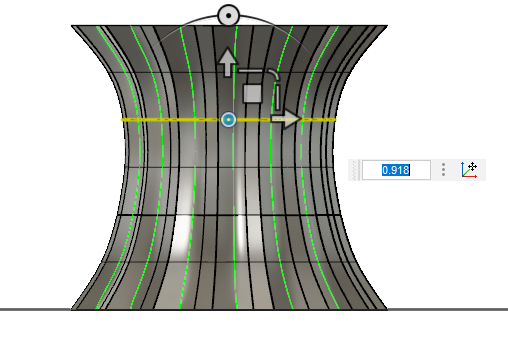
- Now select the edge faces of the extruded portion as shown in blue color.
- Go to the top view and drag to get one side of the crease.
- Then select the other edge faces.
- The again drag to get a perfect crease at the center.
Making the Side Profile
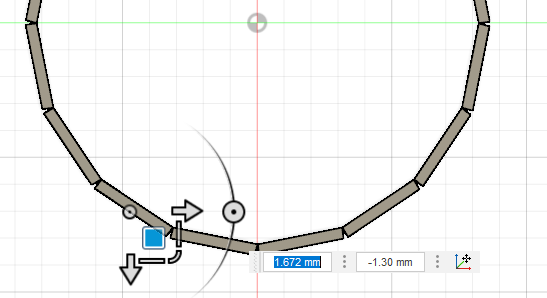
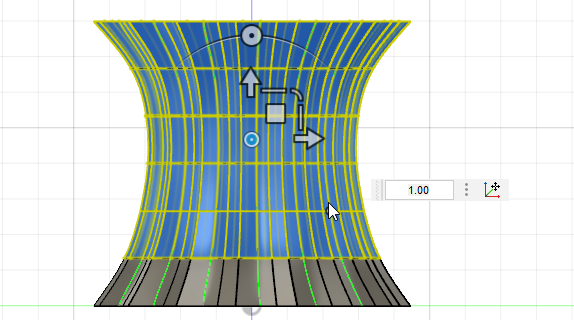
- In the horizontal view, select any edge loop by dragging the cursor.
- Use the 'Dot' as pointed by the cursor in the picture to scale the individual loops.
- Make the shape as you like. you can make various shapes by modifying the edge loops.
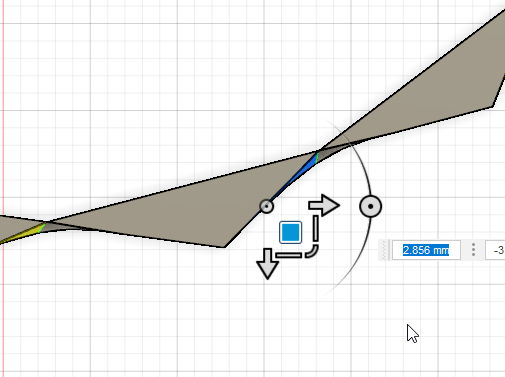
Adding Twist in the Story
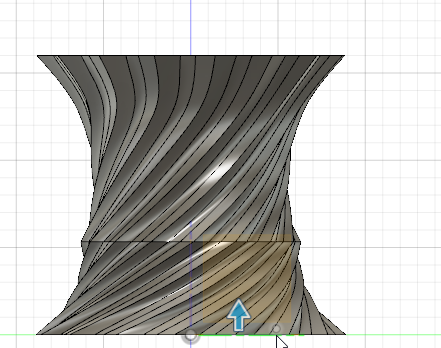
- Now you need to add a twist in the vase. In the horizontal view, select all faces except the bottom row.
- Use the 'rotate dot' shown in blue and twist it by specifying degrees of rotation. Similarly keep providing twists to the layers above also.
- If you want other designs like: a line between layers, deselect the last edge and twist to see how you like the design. You can scale also to change the loops afterwards. You can make different kinds of designs with the techniques discussed . The more you play with the design, the more innovative designs can emerge.
Transforming Into a Solid.
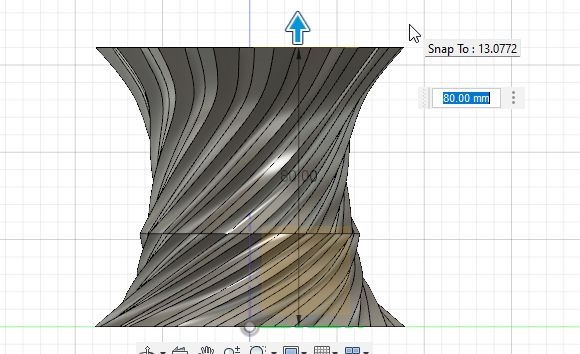
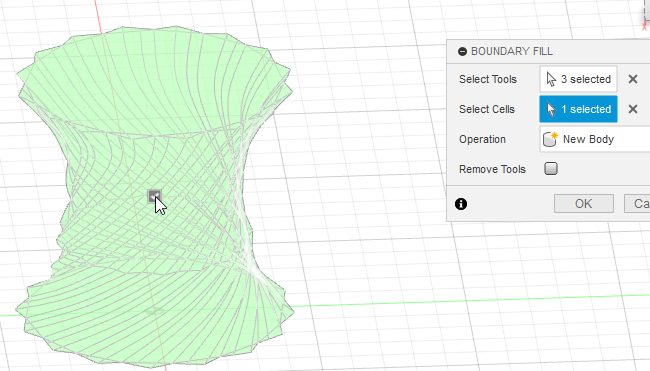
- You need to specify boundaries to fill a solid. In horizontal view, drag the lowermost plane to the top as shown to create the top end.
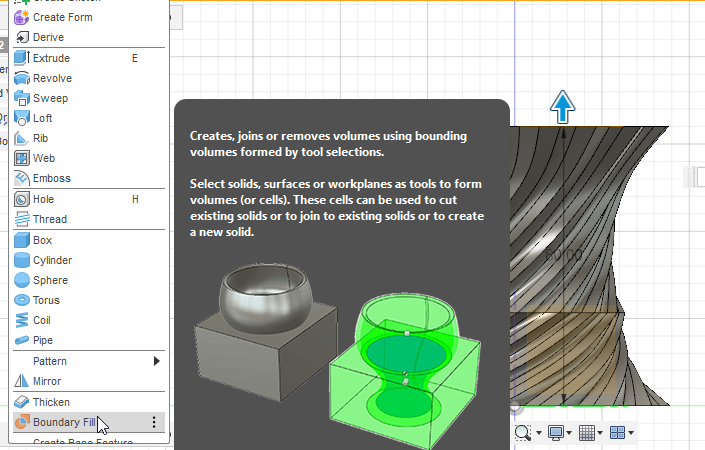
- Select boundary fill from the dropdown menus as shown.
- Select the planes and the shell. Tick on the center box as shown. You will get the solid in this way.
Making Another Solid to Cut Out Shell
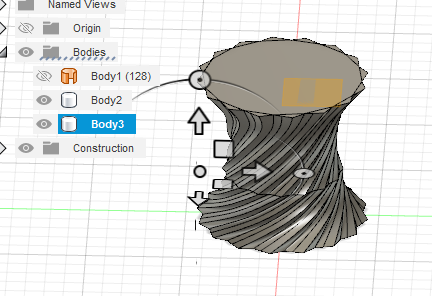

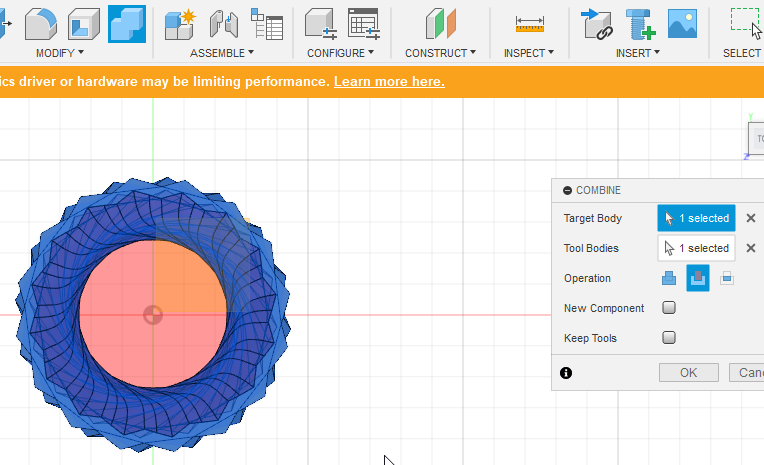
- Now copy paste the Vase body as shown
- Scale one of them in X and Y direction while keeping Z as 1.
- Then go to 'Combine' menu and change the combination 'Operation' type to trimming as shown.
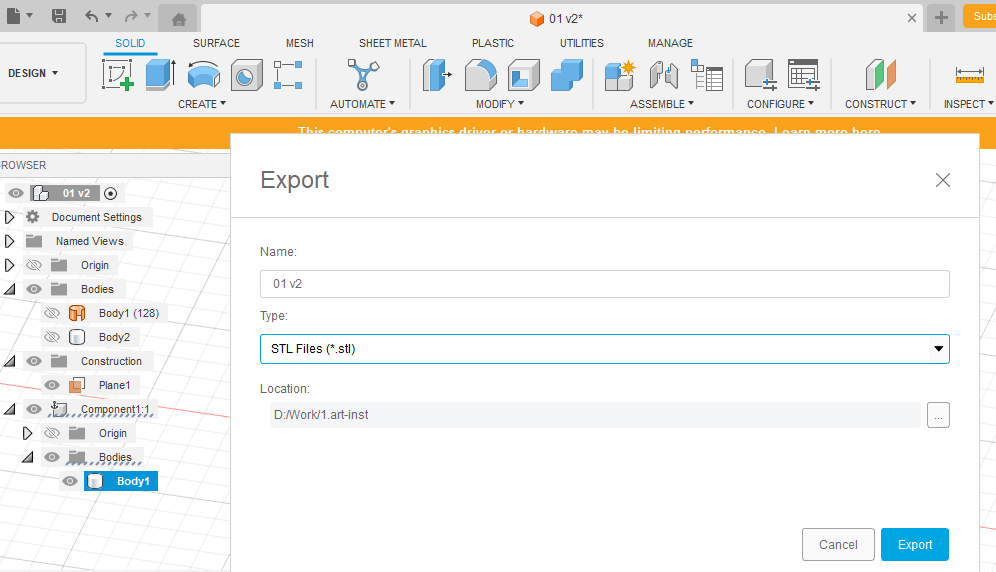
- Once you get the body, export it to '.stl' form for 3D printing.
Preparing the Support
- The printable stl is attached here.
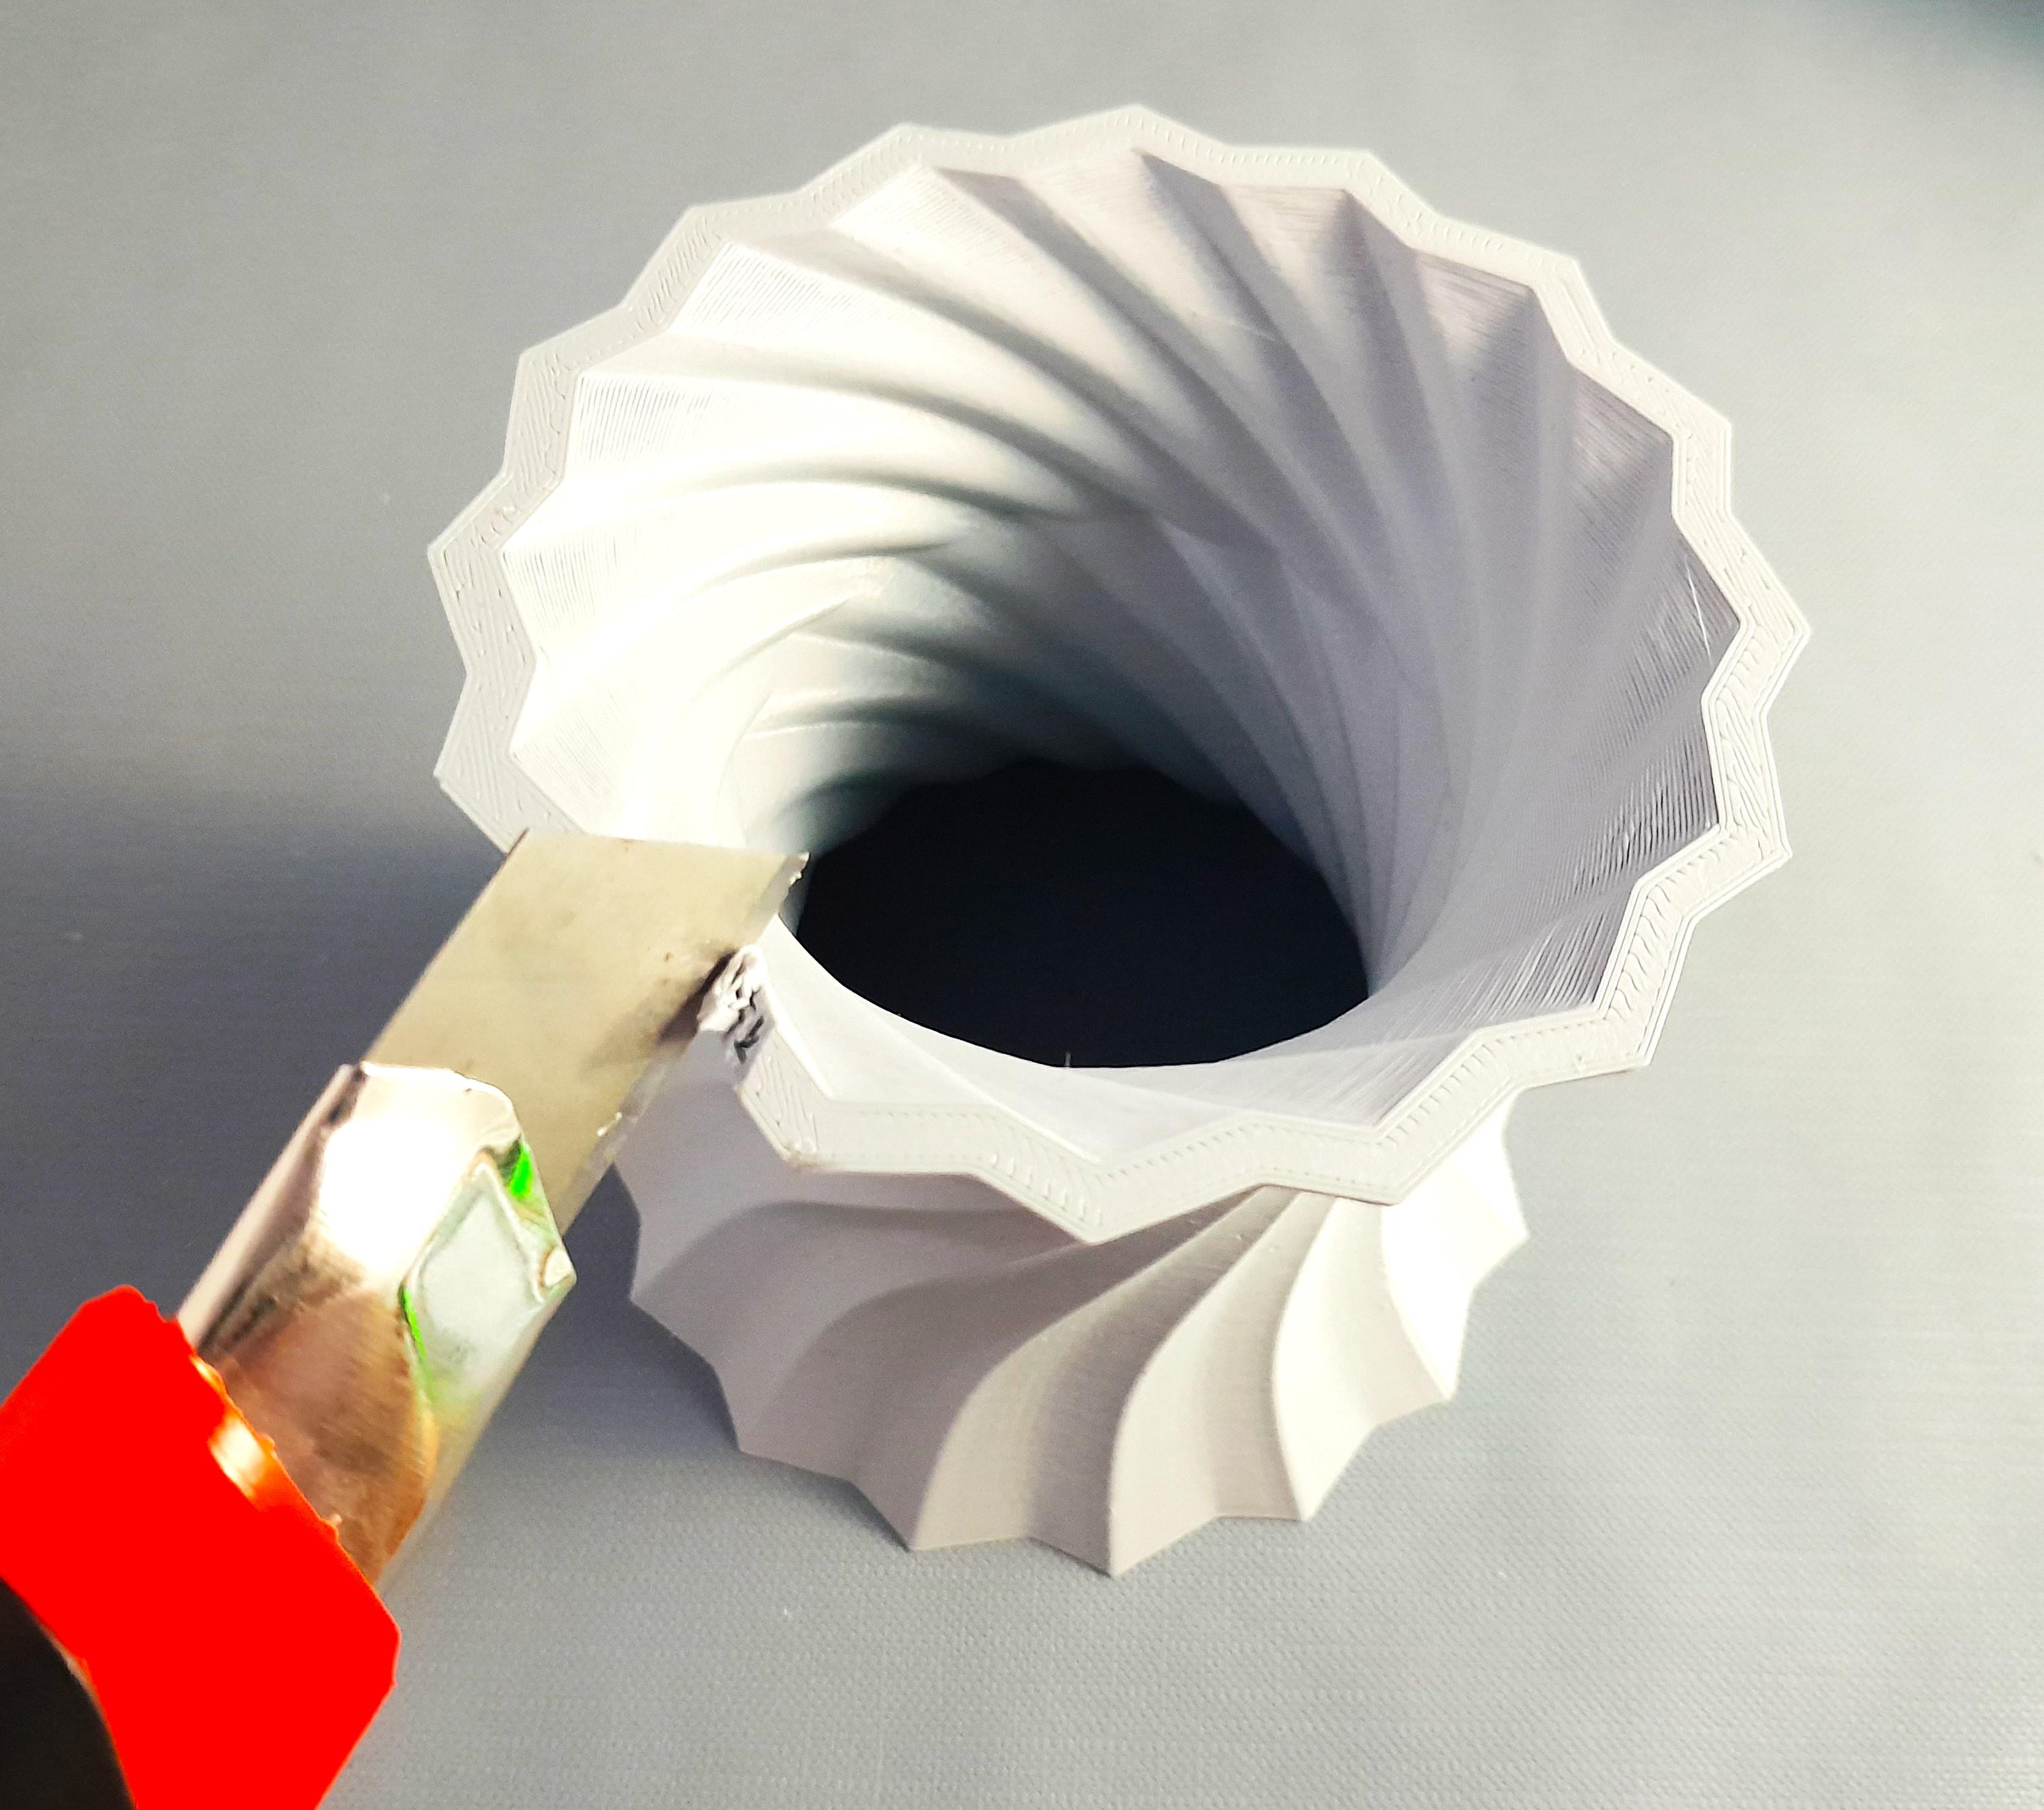
- Now Cut a small portion of the Print with help of a knife for the wire to go in.
- Secure the lamp bulb with tapes. And provide two sided tapes as shown along the edges to place the Moon shell on.
Downloads
Finish!
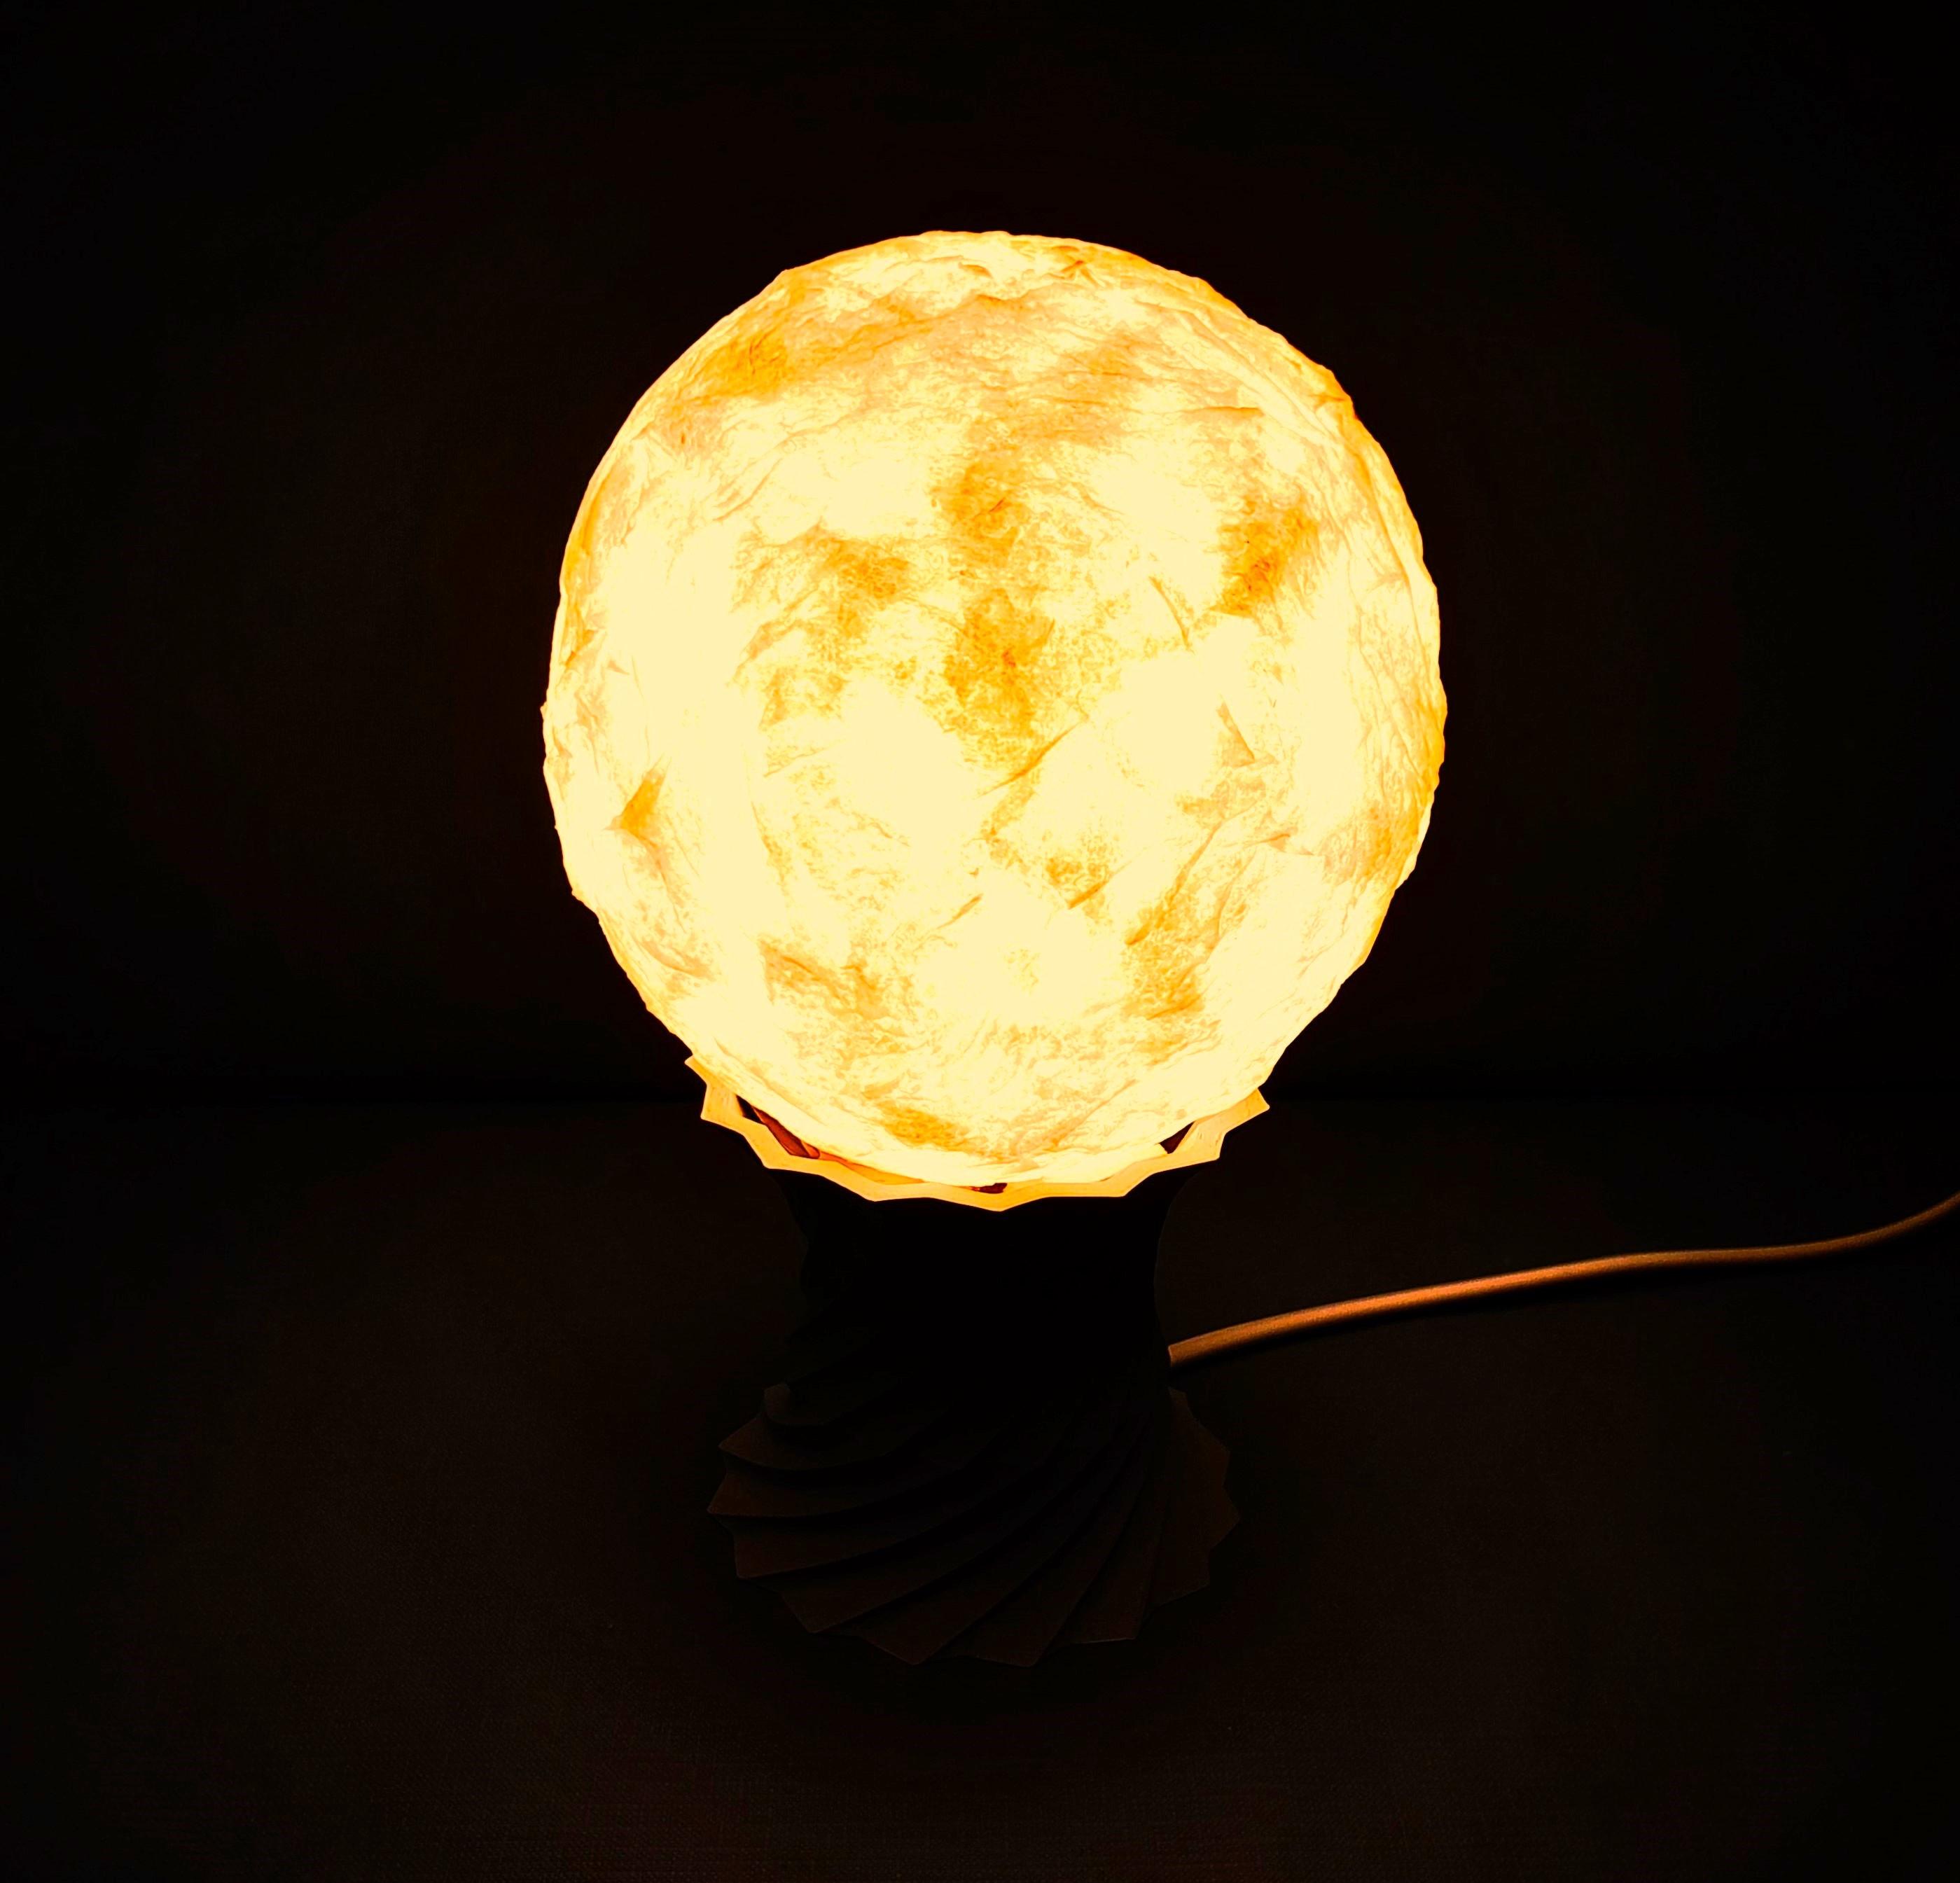

The Lamp is ready. After turning the lights off, I turned the lamp on and it looked good!. Use smoke or dry ice to give a cloudy look with right timing of photography. That's it for now and Hope to see you soon!