Ikea Hack: Articulating Camera Mount
by Sake of Making in Circuits > Cameras
6868 Views, 72 Favorites, 0 Comments
Ikea Hack: Articulating Camera Mount
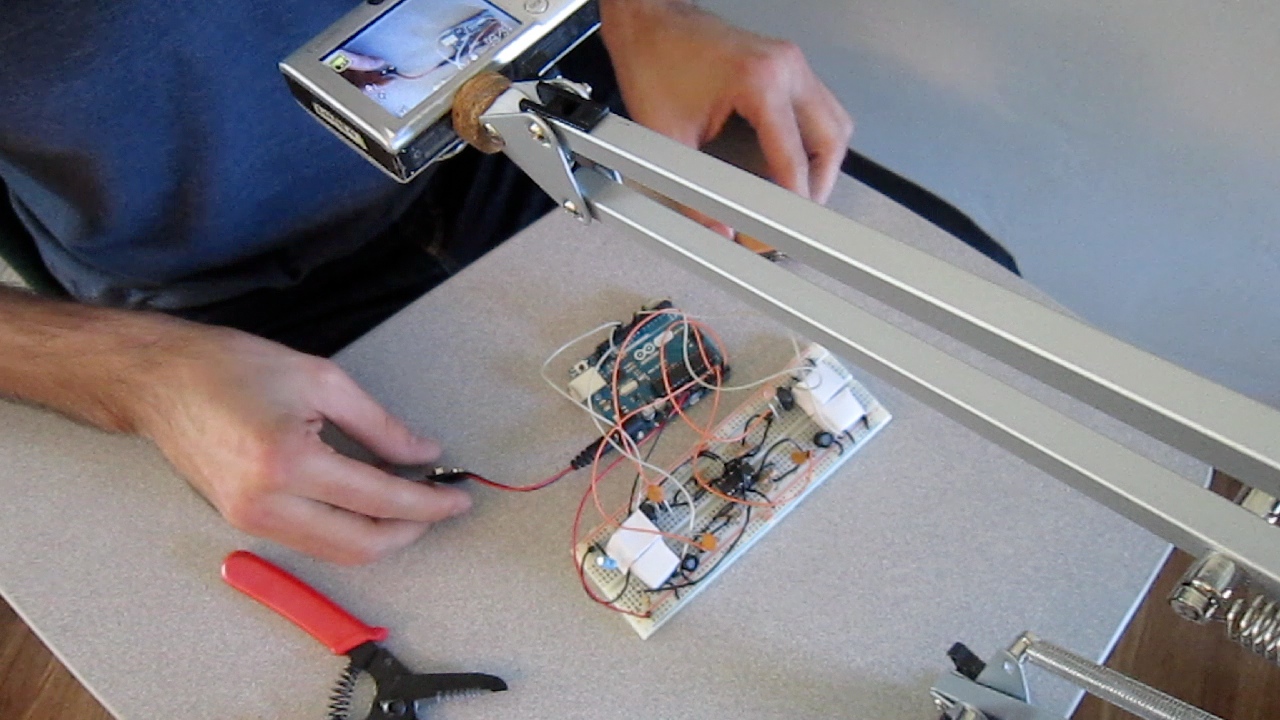
The Articulating Camera Mount is an easy Ikea hack and amazing tool for the amateur desktop photographer. It allows for overhead and hands-free shots. This can be great if you're trying to scan a document or shoot time-lapse or instructional videos. Plus it only costs $14.
Materials + Tools
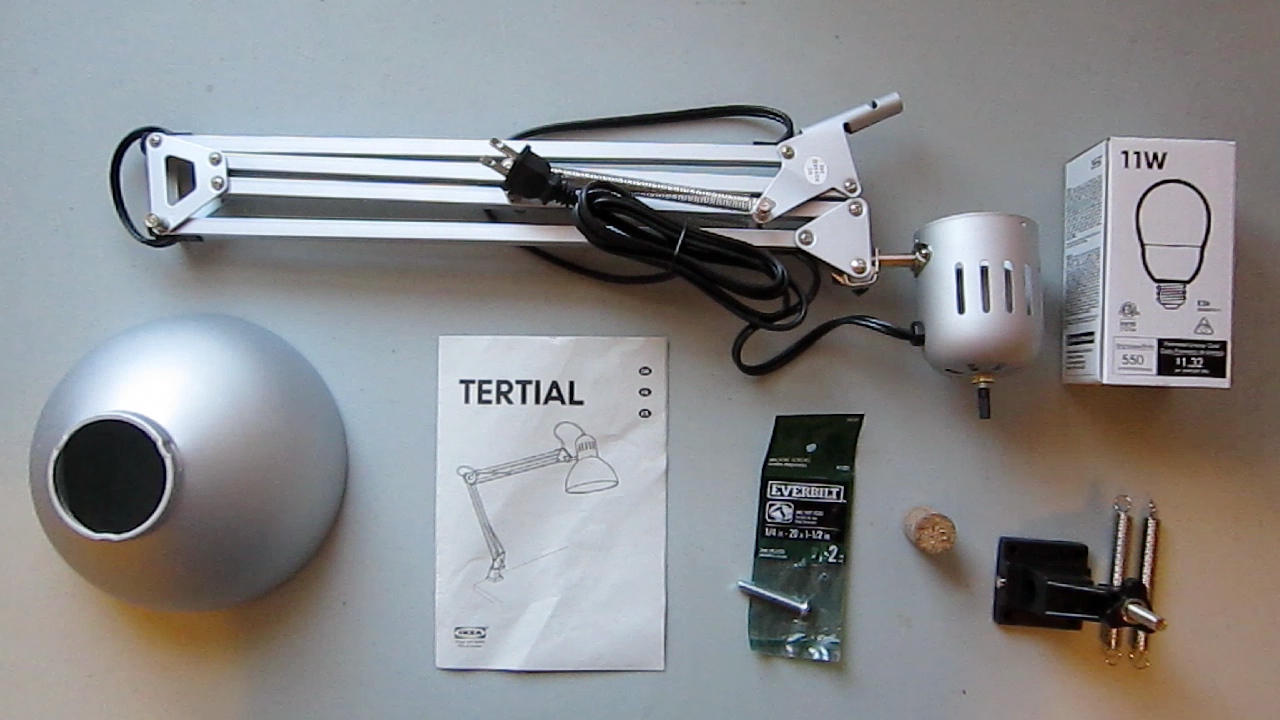
Materials
- Tertial Lamp from Ikea
- 1/4 in by 20 screw from Home Depot
- wine cork from cellar
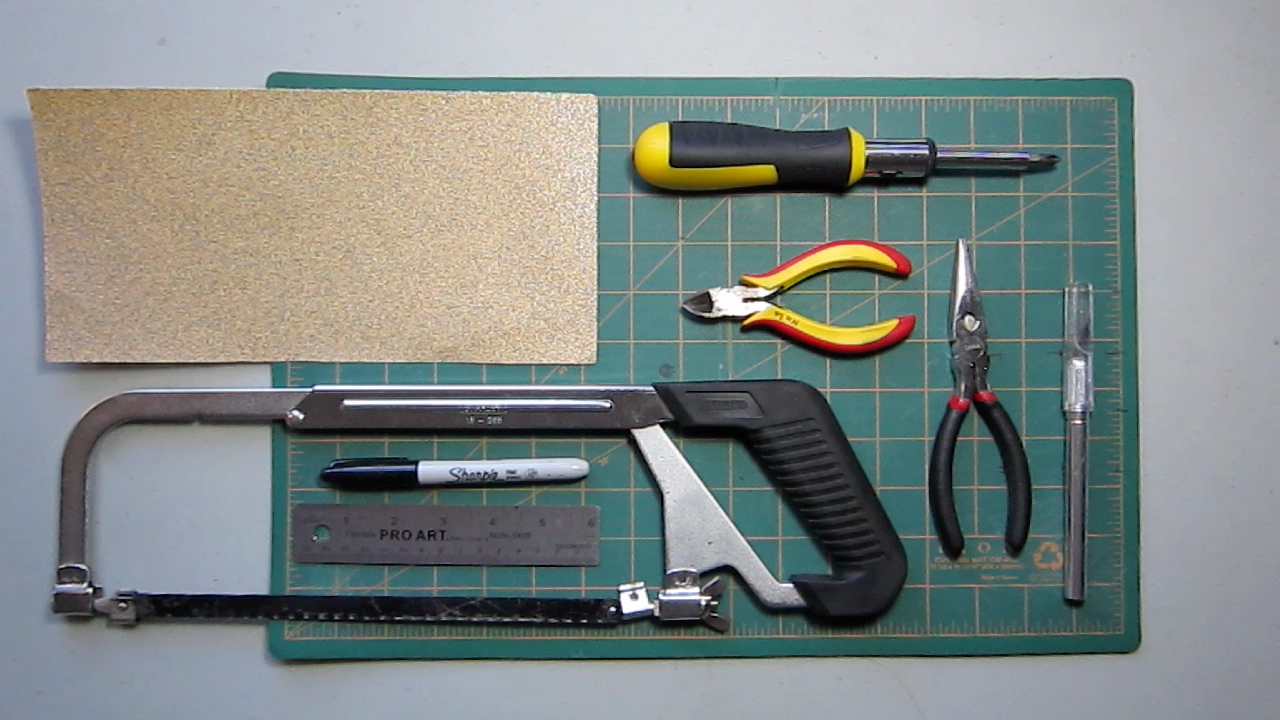
Tools
- screw driver
- wire cutter
- needle nose pliers
- hacksaw
- cutting mat
- Sharpie
- ruler
- sand paper
- X-acto knife
Remove Lamp
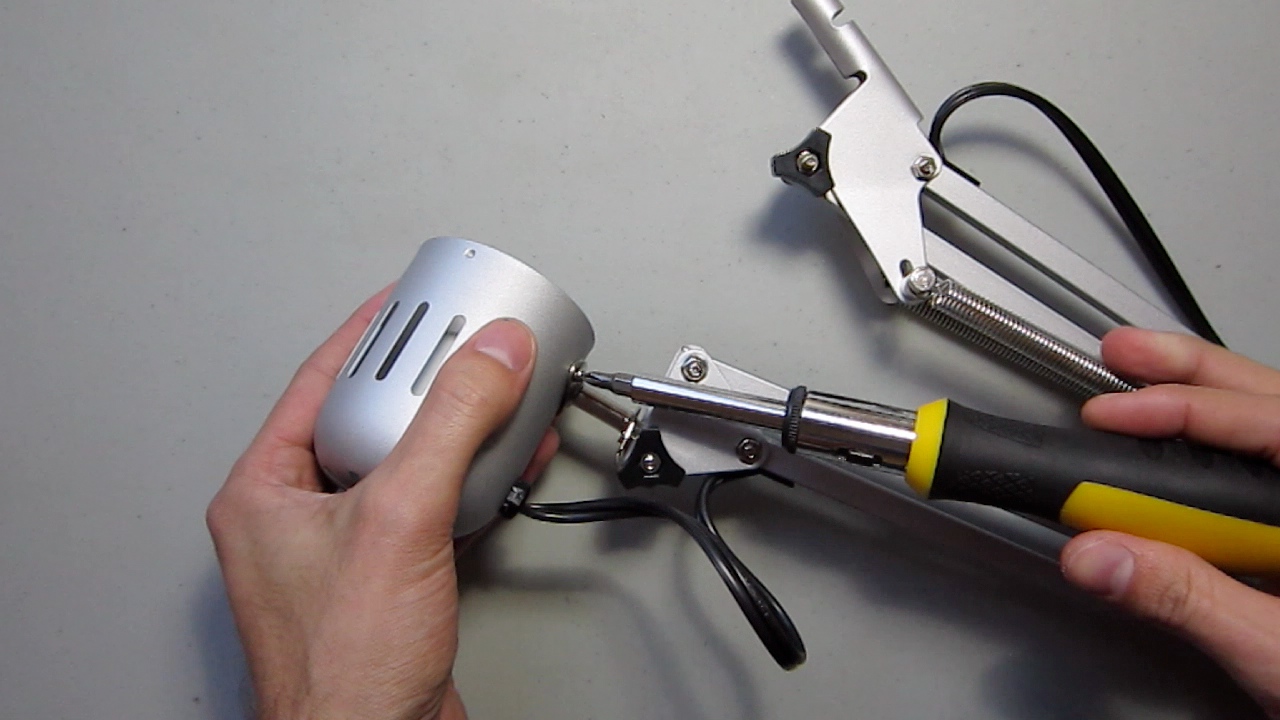
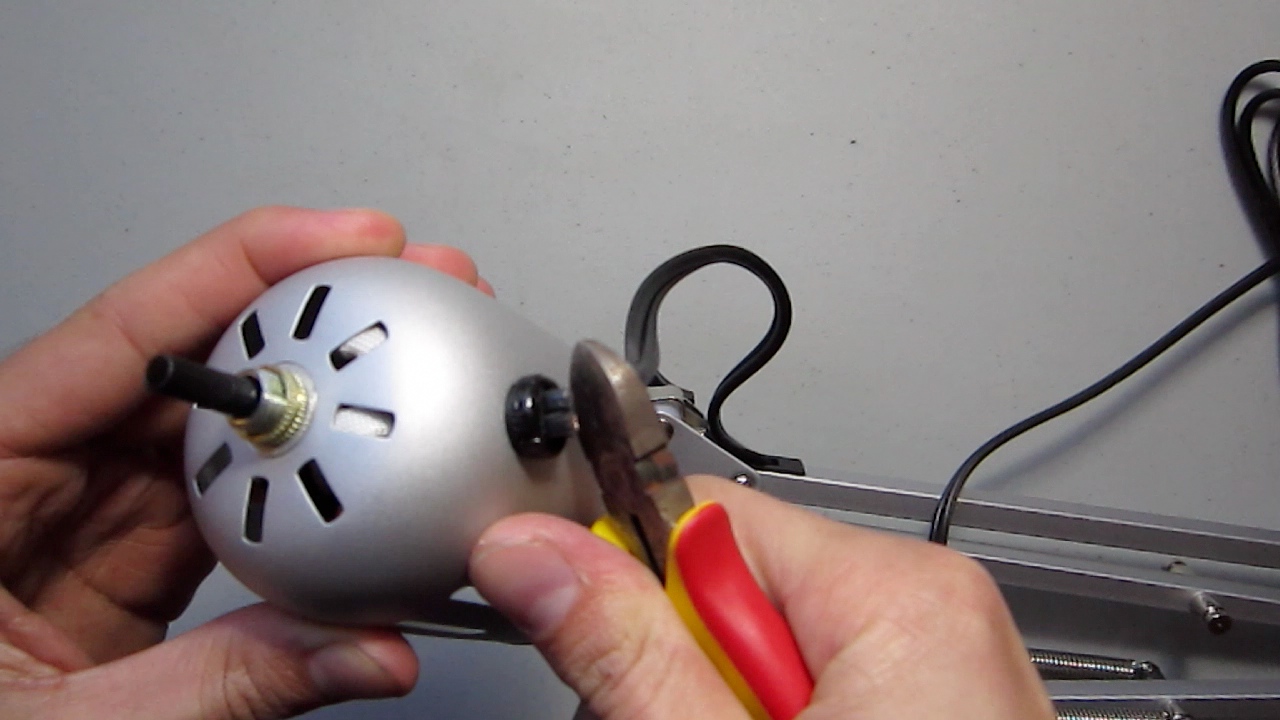
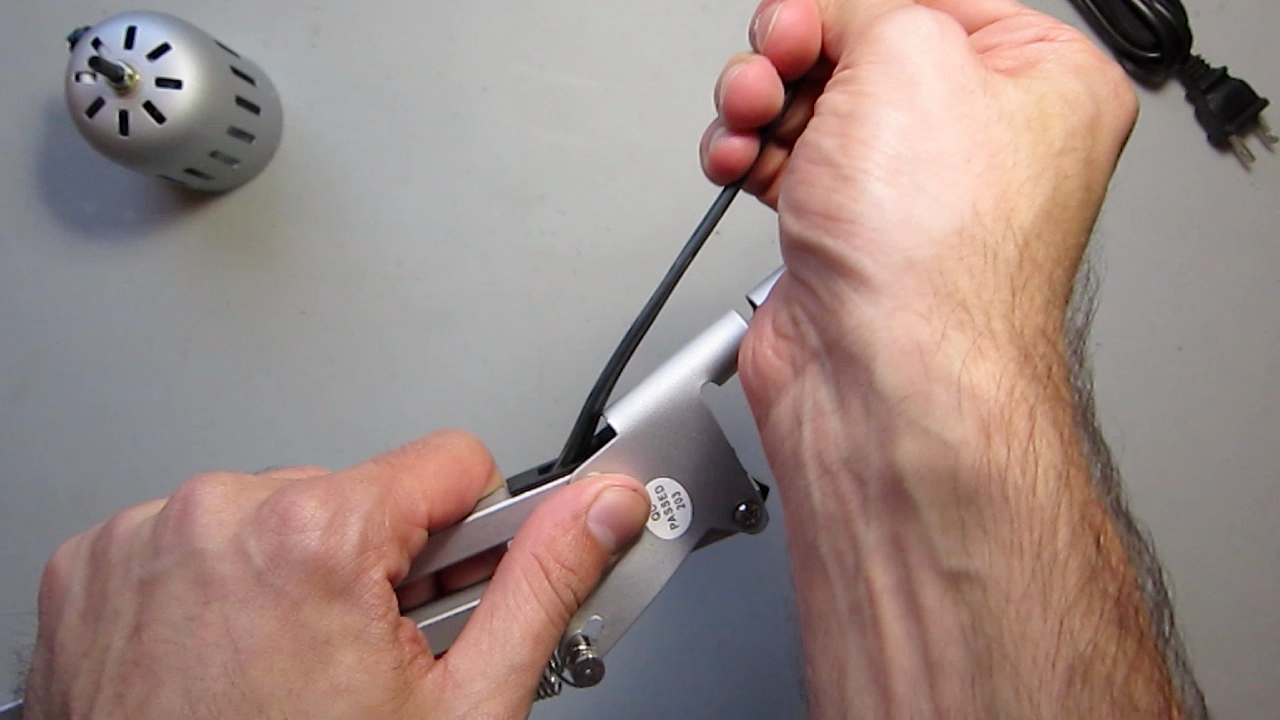
- Unscrew the lamp head from the arm.
- Check that your lamp is not plugged into any wall sockets and cut the cord at the base of the head. If you can find a way to remove the lamp without cutting the cord, more power to you.
- Unthread the cord from the arm.
Add Springs
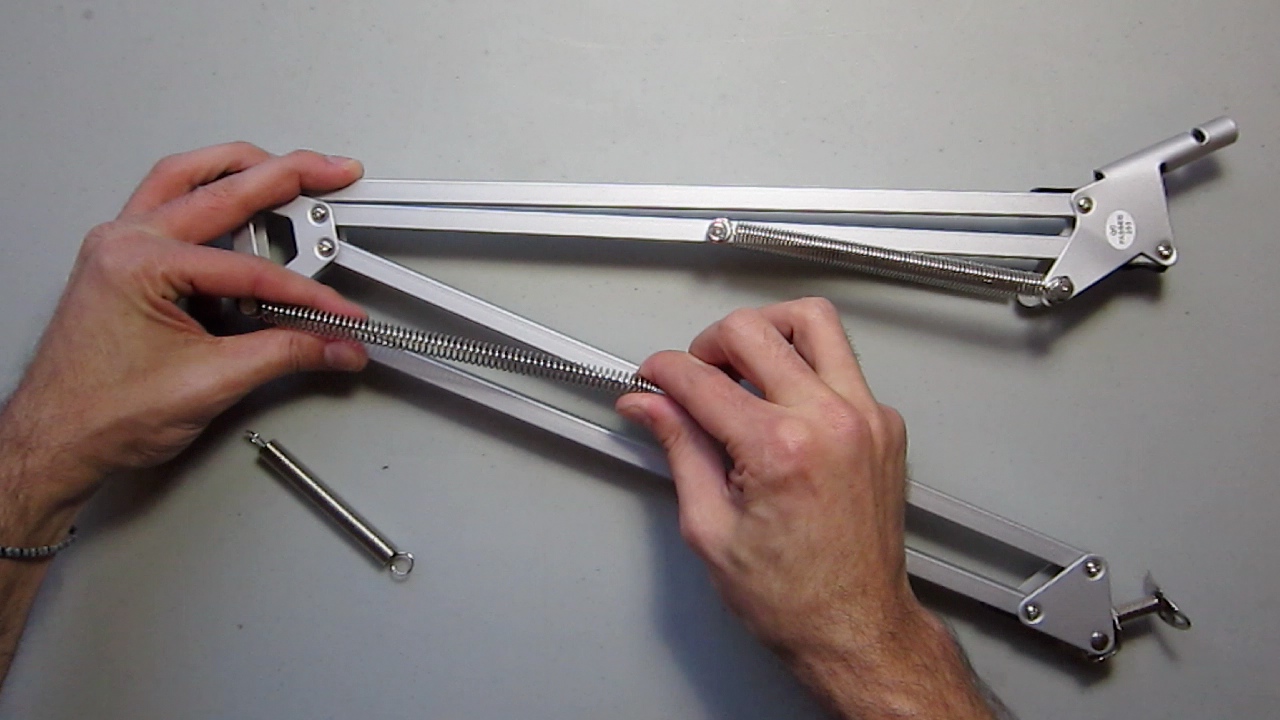
Attach the springs that came with the Tertial lamp to the arm.
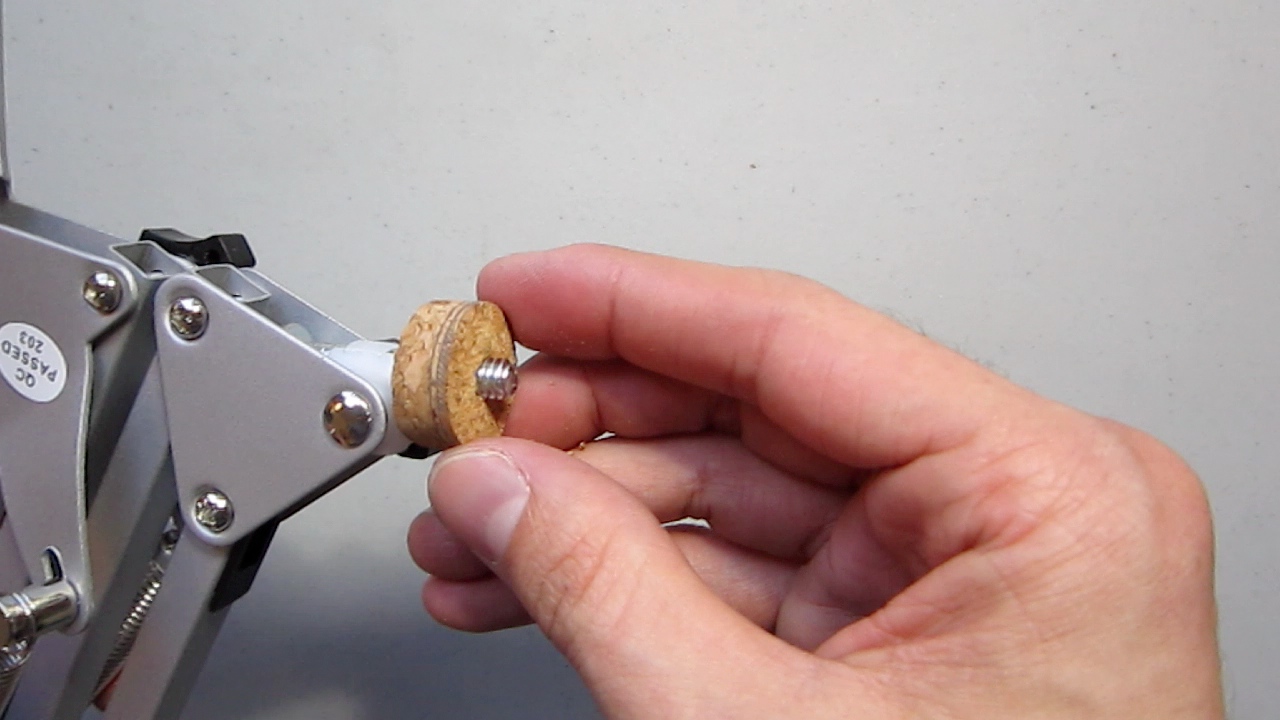
Swap Pin
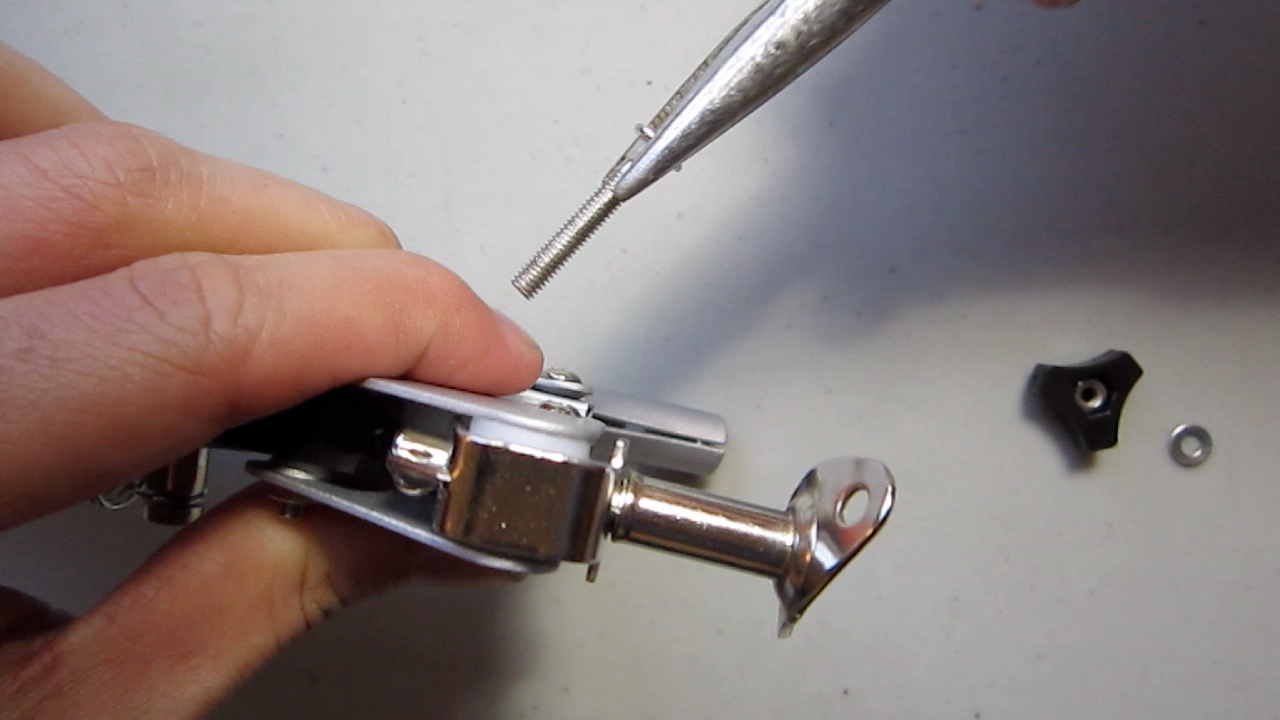
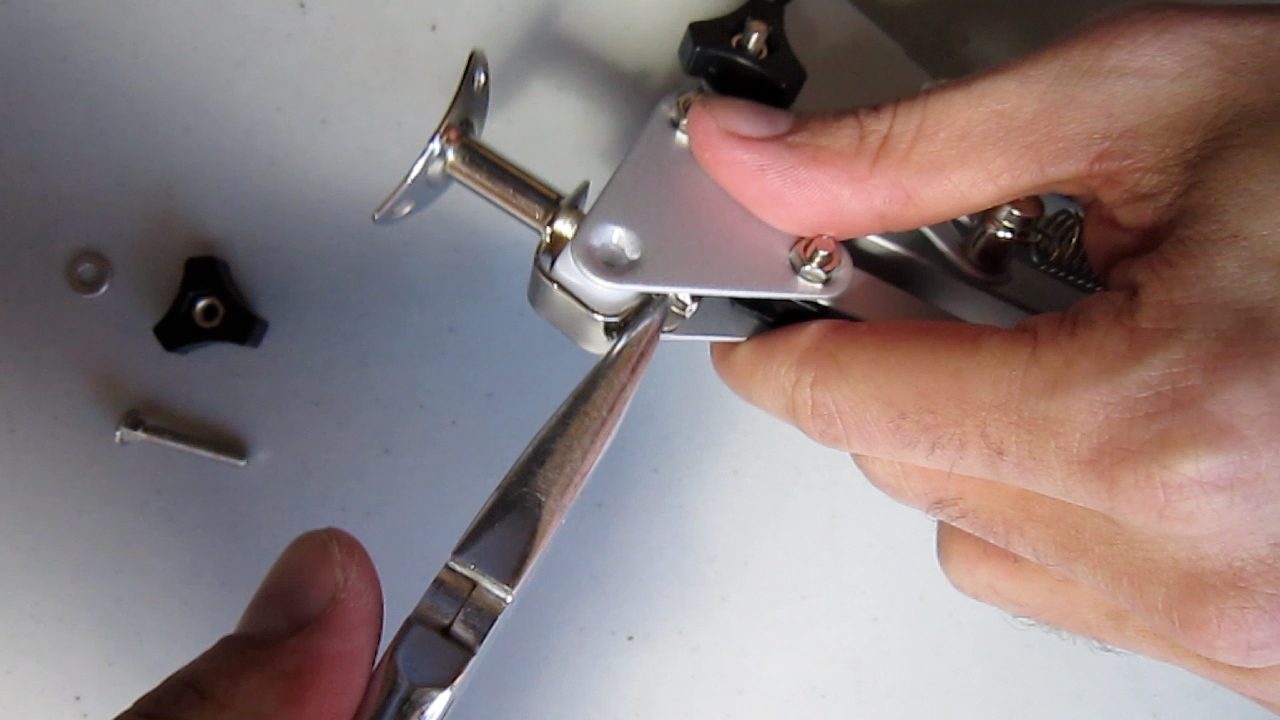
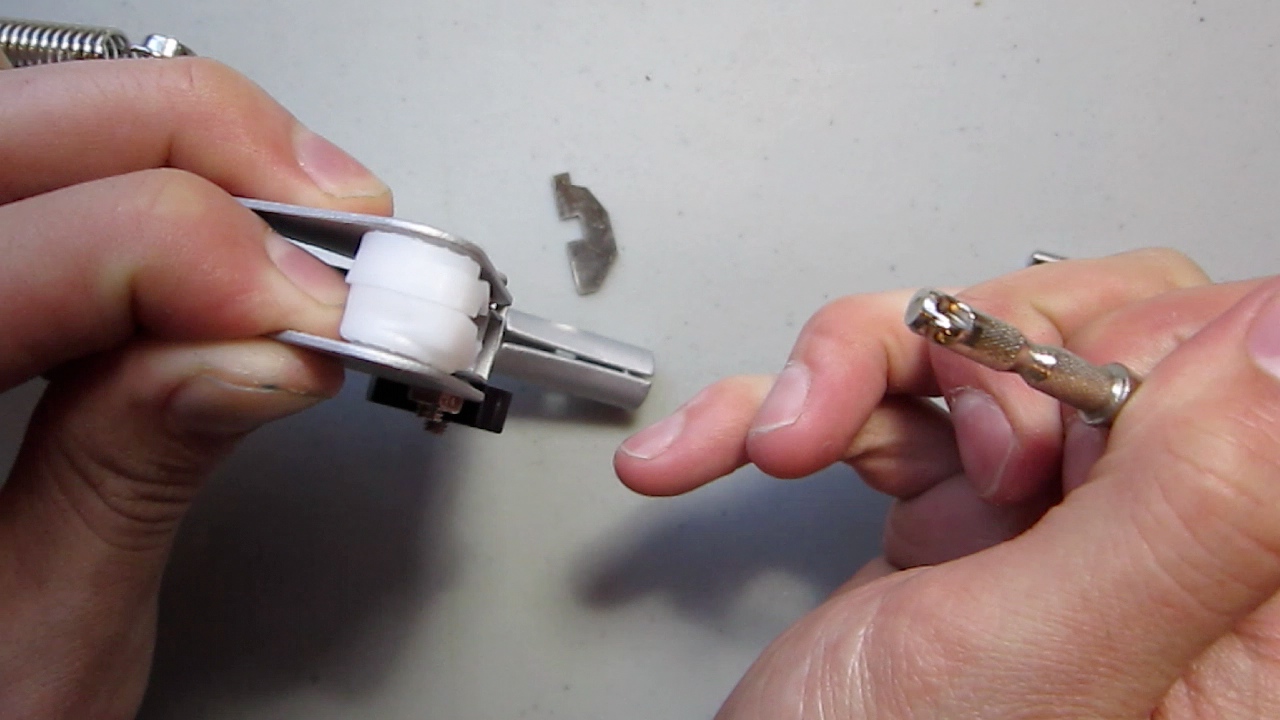
- Loosen the joint by removing the screw.
- Use needle nose pliers to remove the metal cross sections.
- Pull the pin from the plastic socket.
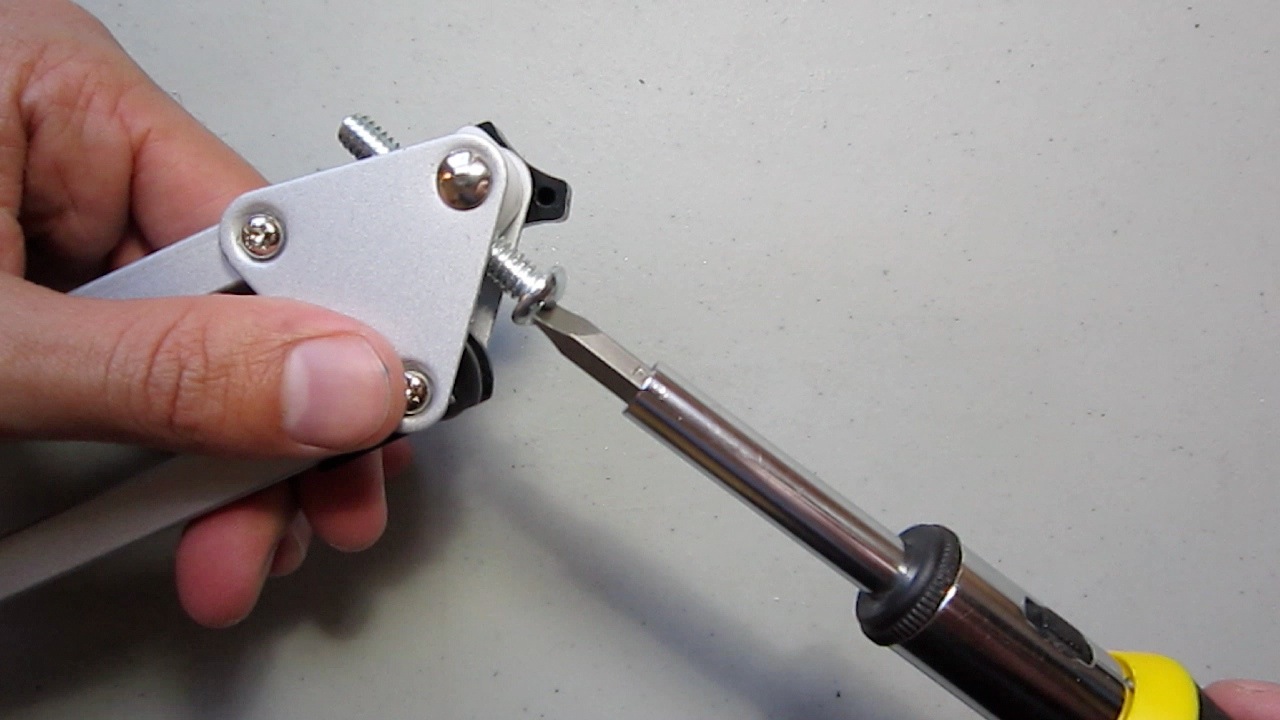
- Screw the 1/4x20 screw into the plastic hole and return the original screw.
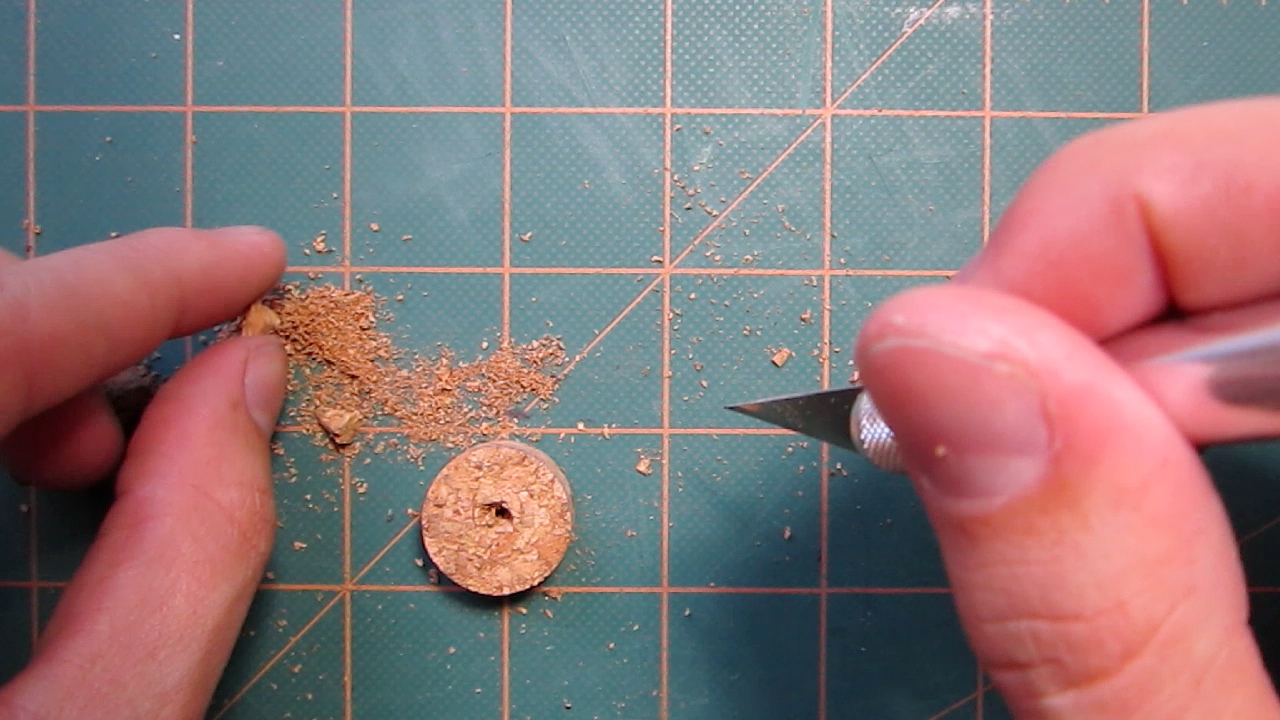
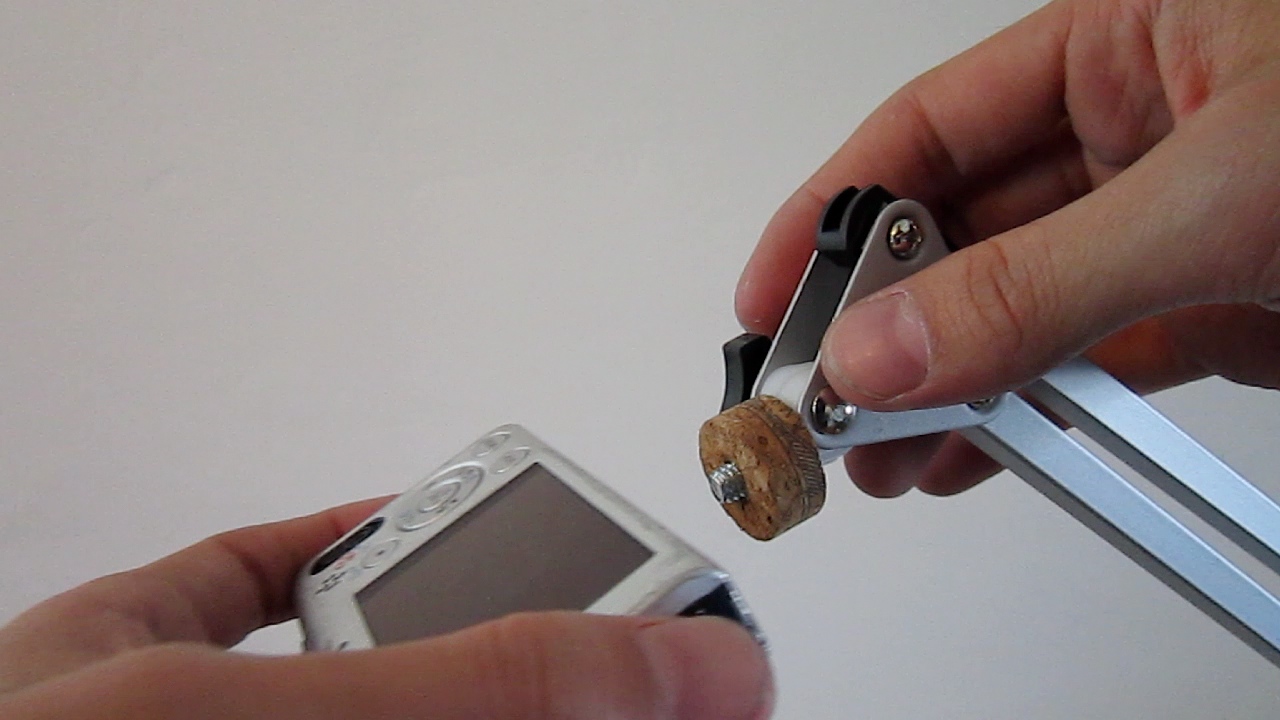
Prep Cork
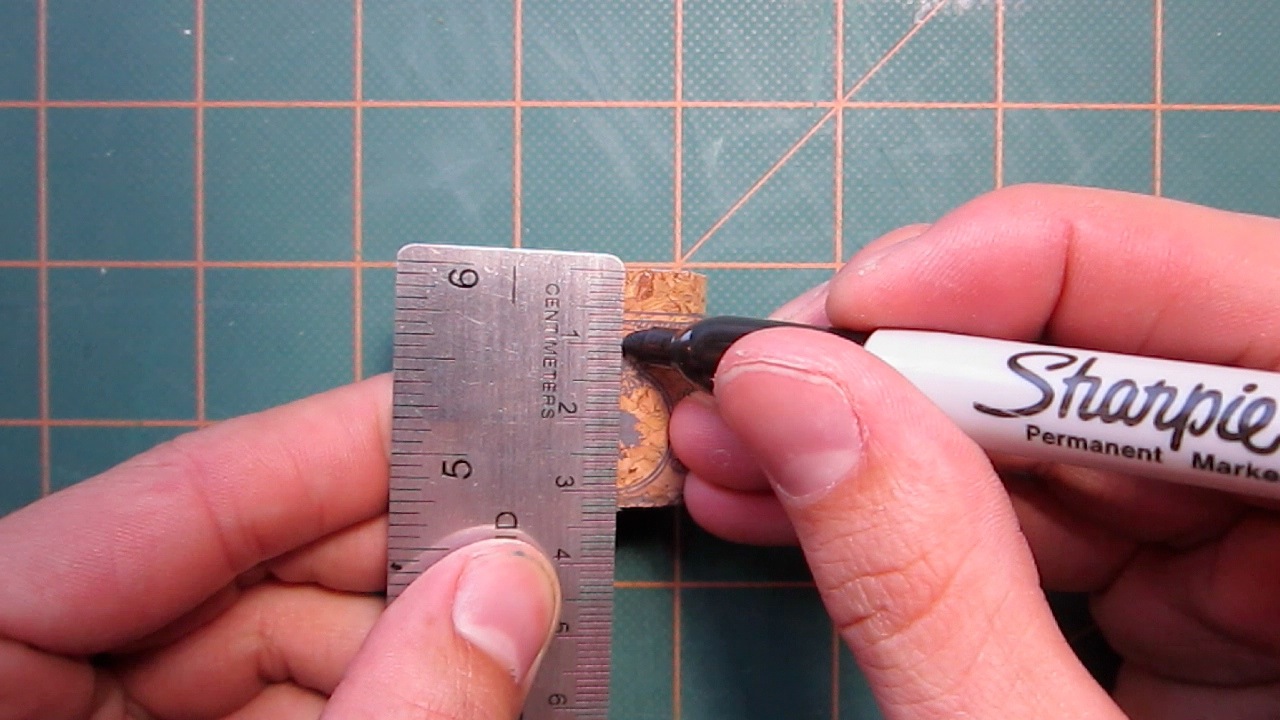

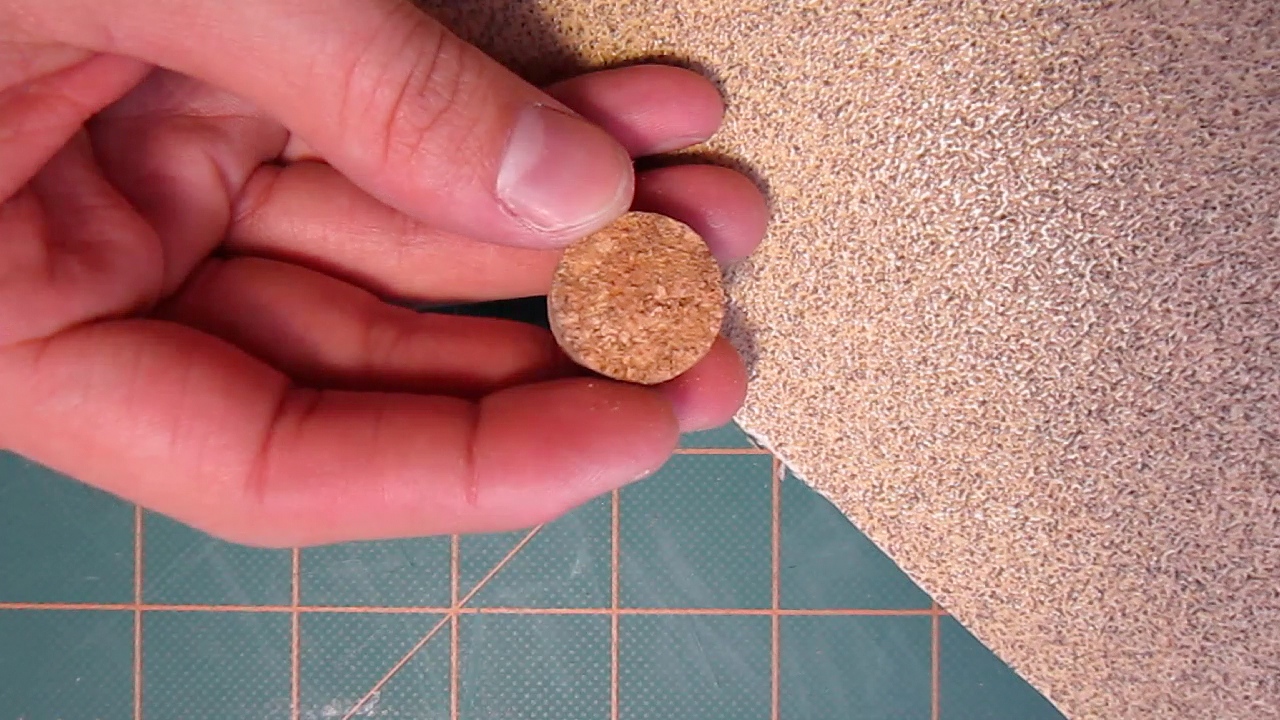
- Measure 1cm of the cork and mark with the Sharpie.
- Use a hacksaw to cut the piece of cork.
- Smoothen the rough side on sand paper.
- Cut a hole, just large enough for the screw, in the center of the cork.
- Thread the cork snugly onto the screw. This will help protect your camera.
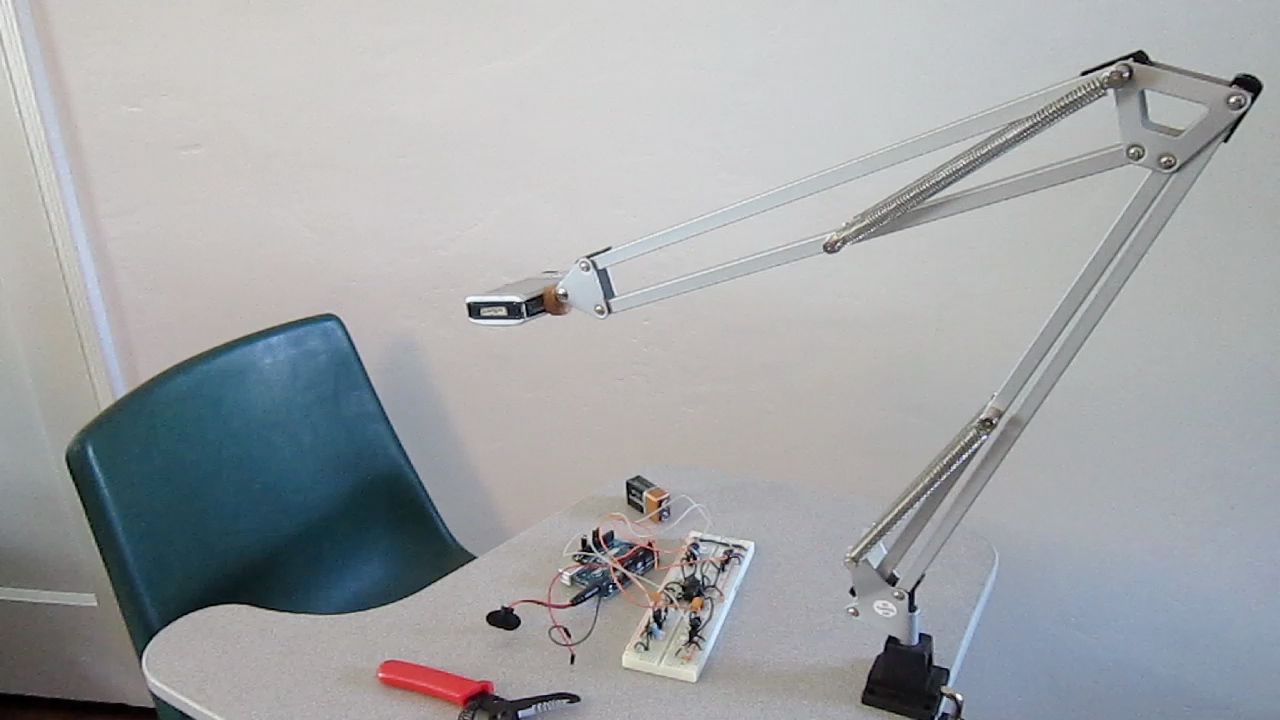
Enjoy
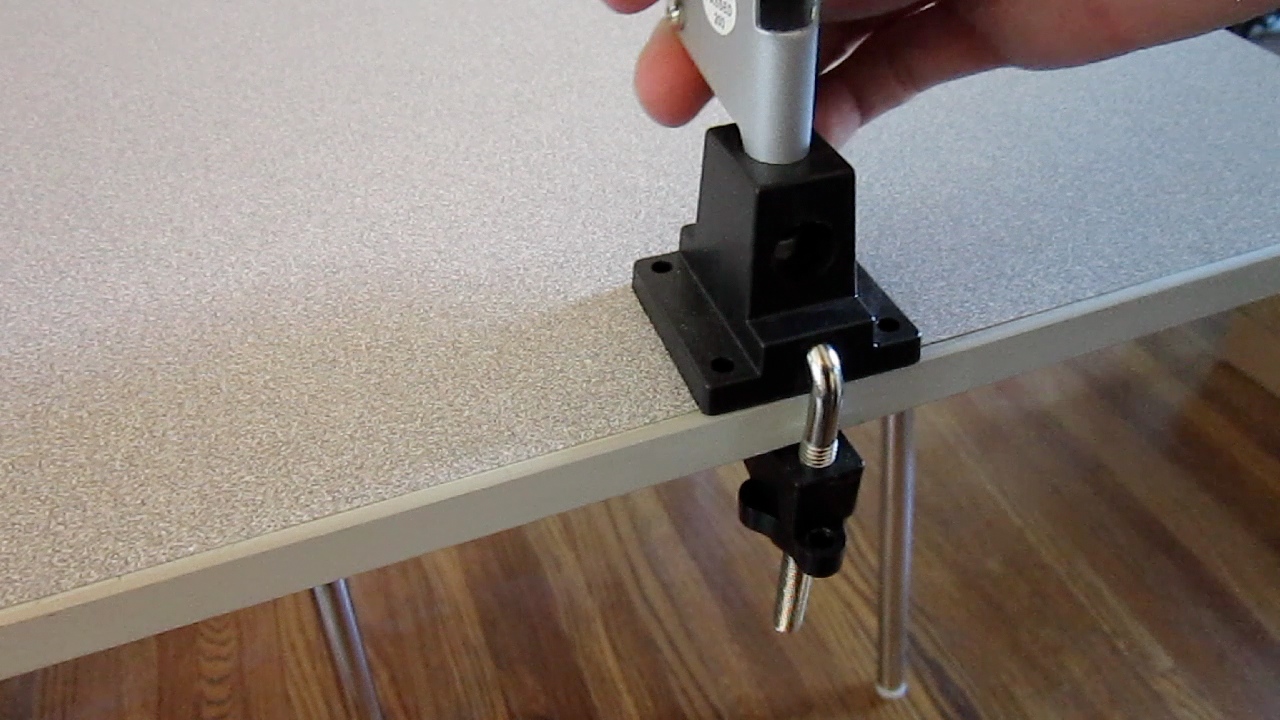
- Attach the arm to the base.
- Thread a point and shoot camera to your Articulating Camera Mount.
- Start shooting!