Arduino Voice Control
Step 1: Part list
Step 2: The Access port
Step 3: Arduino
Part List
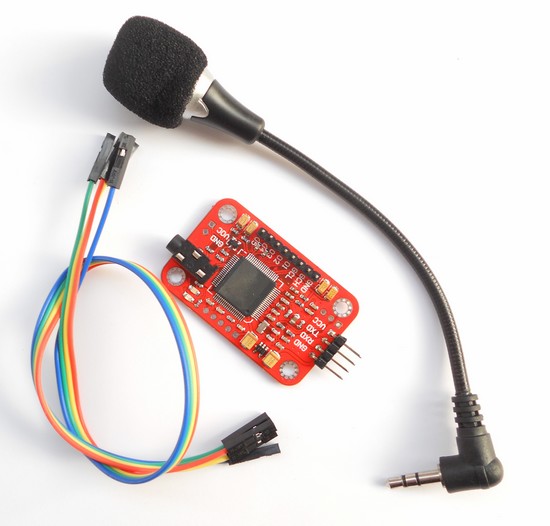

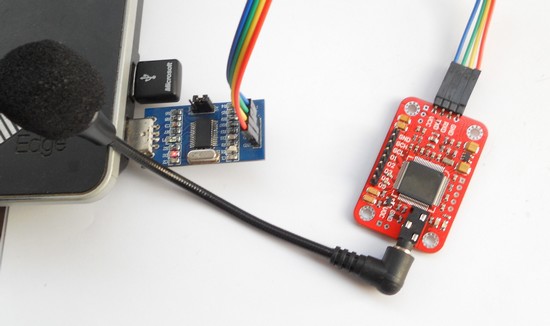
- Voice recognition module V2 (Ebay ~22$)
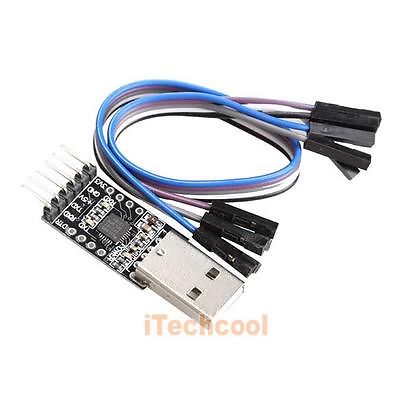
- USB to TTL module (~2$)
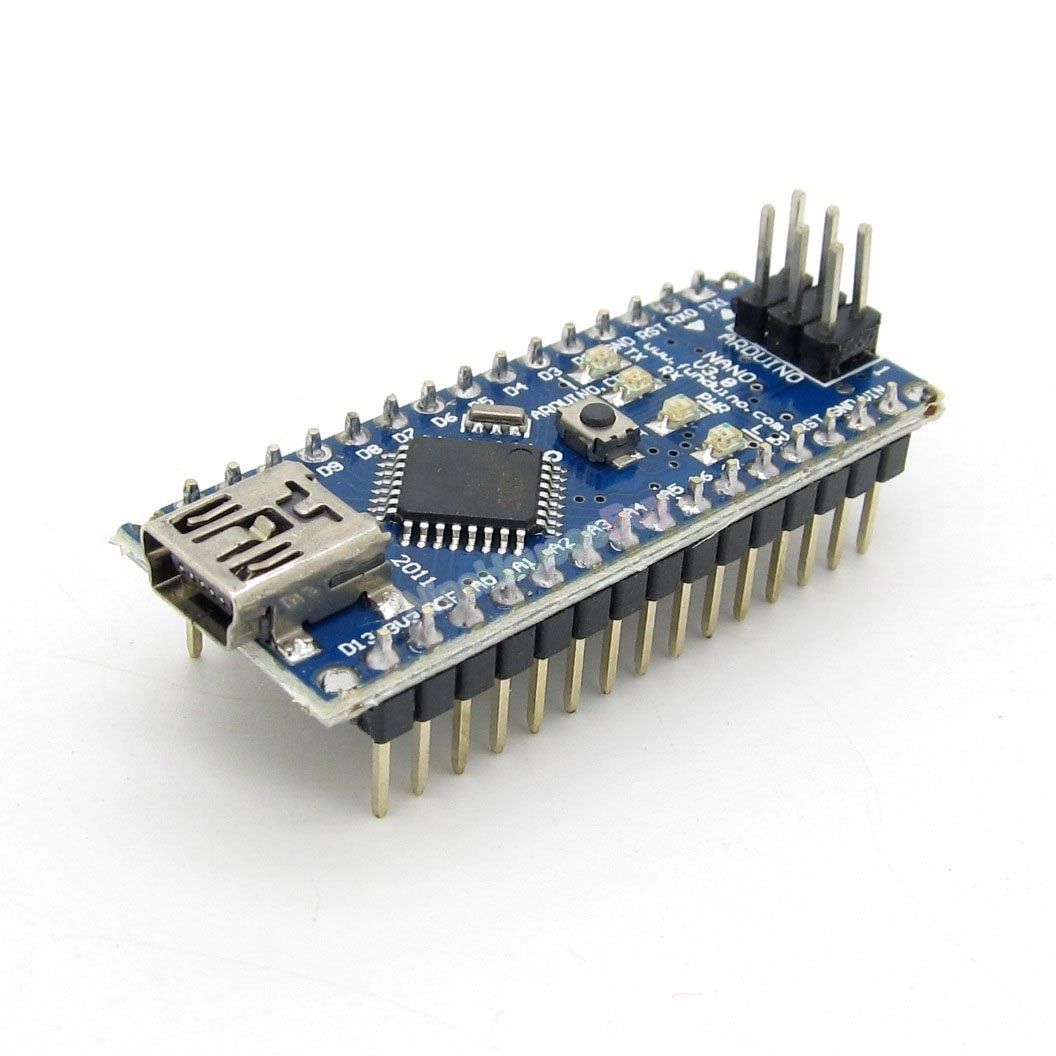
- Arduino nano (~6$)
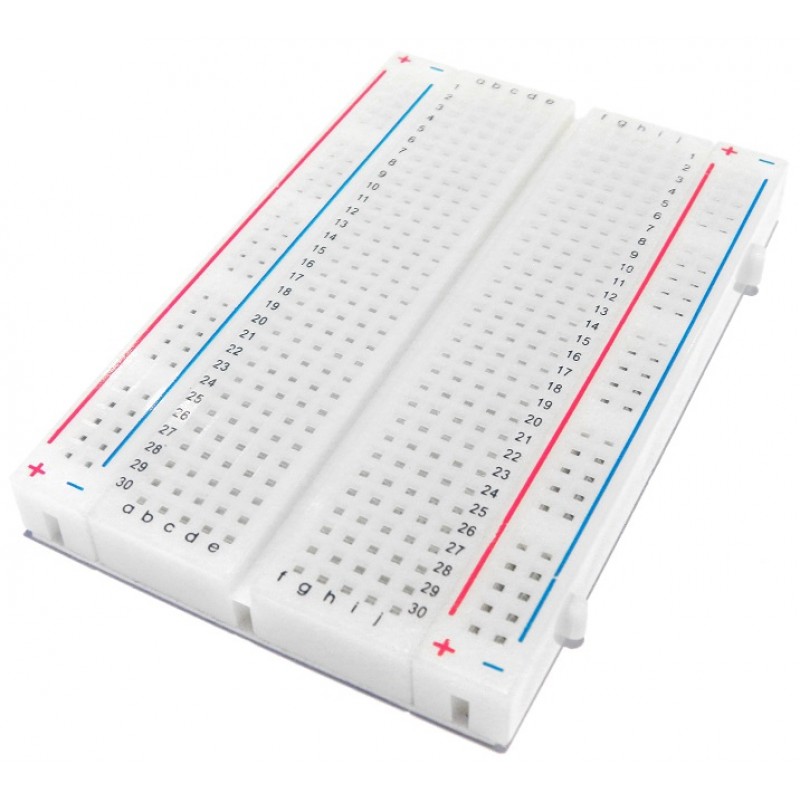
- Breadboard
- 3 Led
- some wire
Software:- Serial tool (Im using Accessport, link in video description)
Teach the Voice Module
This module can learn 3x5 voice command. (3 group, each group with 5, max 1300ms long command)
To teach, we need a serial tool: Accessport.
- Start the program, plug in the module with the USB to TTL board.
- From the Monitor/Ports menu, select the voice module. If not see, click refresh.
- In settings menu use this settings:
Baud rate: 9600
Parity bit: NONE
Data bit: 8
Stop bit: 1
Send format: HEX
Receive format: Char
Other settings as default.
- The first time, we need to choose "common" or "compact" mode.
Im using "common mode".
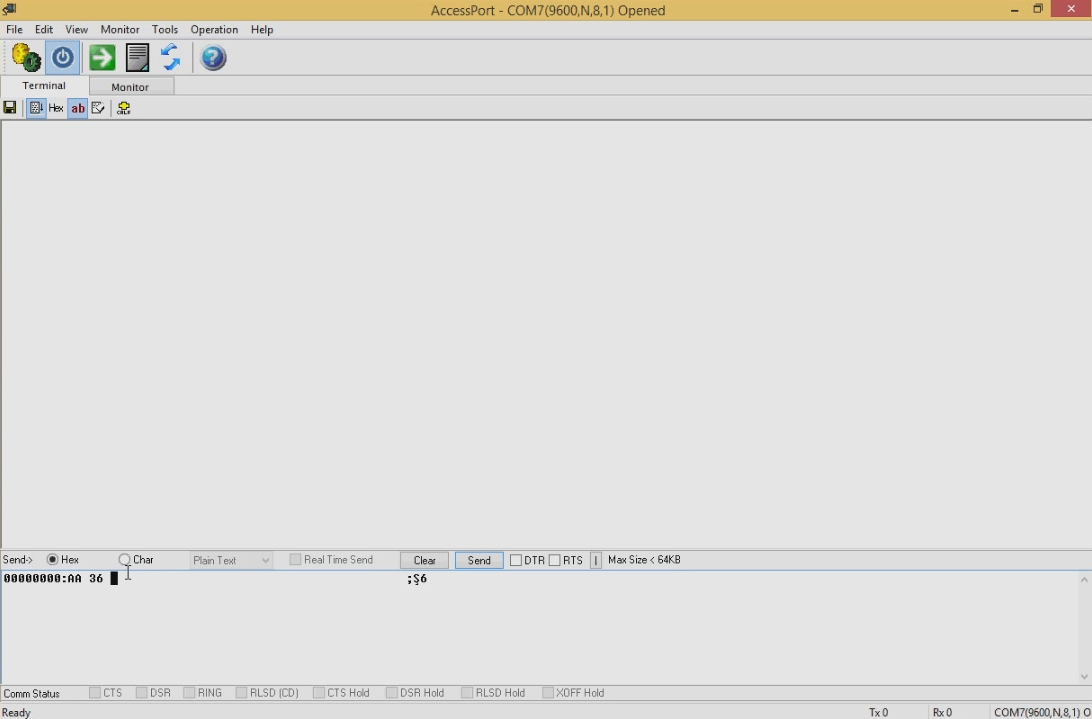
- For this, send "0x36" to the board.:
Just type after the "00000000" AA36, and click "Send".
If its ok, above you can see "common mode" text.
The modul now ready to learn.
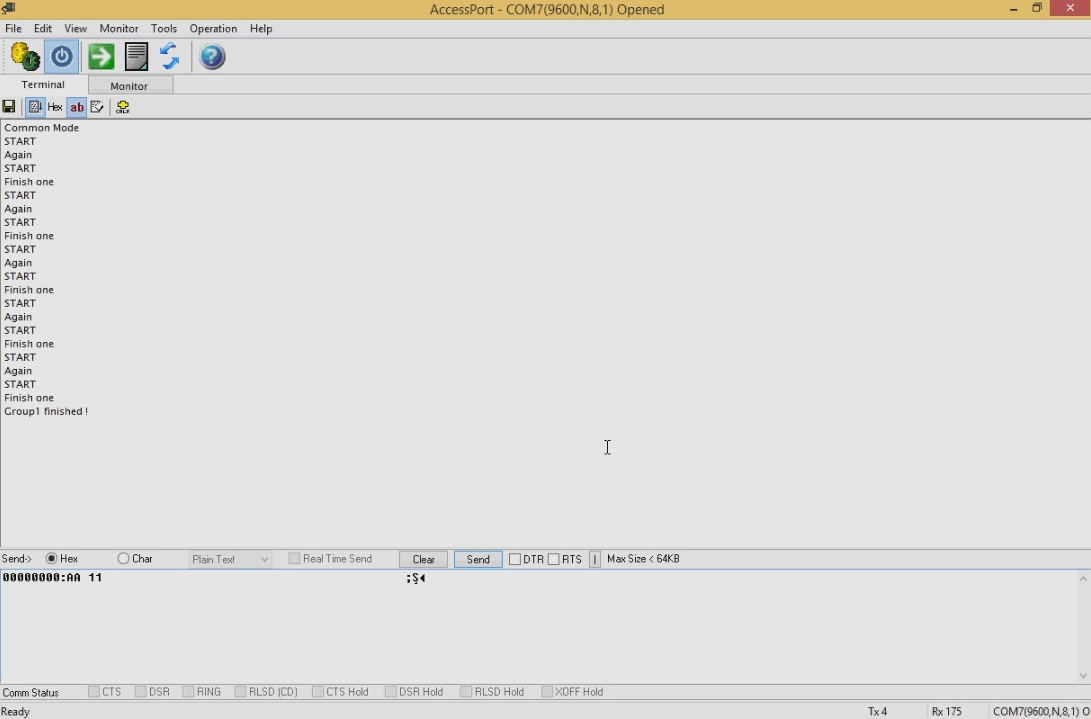
- To teach the commands, send "0x11" to the module. (this mean, we record to the first group).
Type after the "00000000" AA11, and click "Send".
- After appear the "START" word above, tell the first command, repeat if ask.
"Finish one" mean, you done with the command, immediately afterwards ask the 4 other command in same way.
"Group 1 finished" mean you are done, close the app, unplug the module,
The Arduino Code
- After disconnected the voice module, connect the arduino, and upload this code.
Or download from my google docs. (Link in the video description)
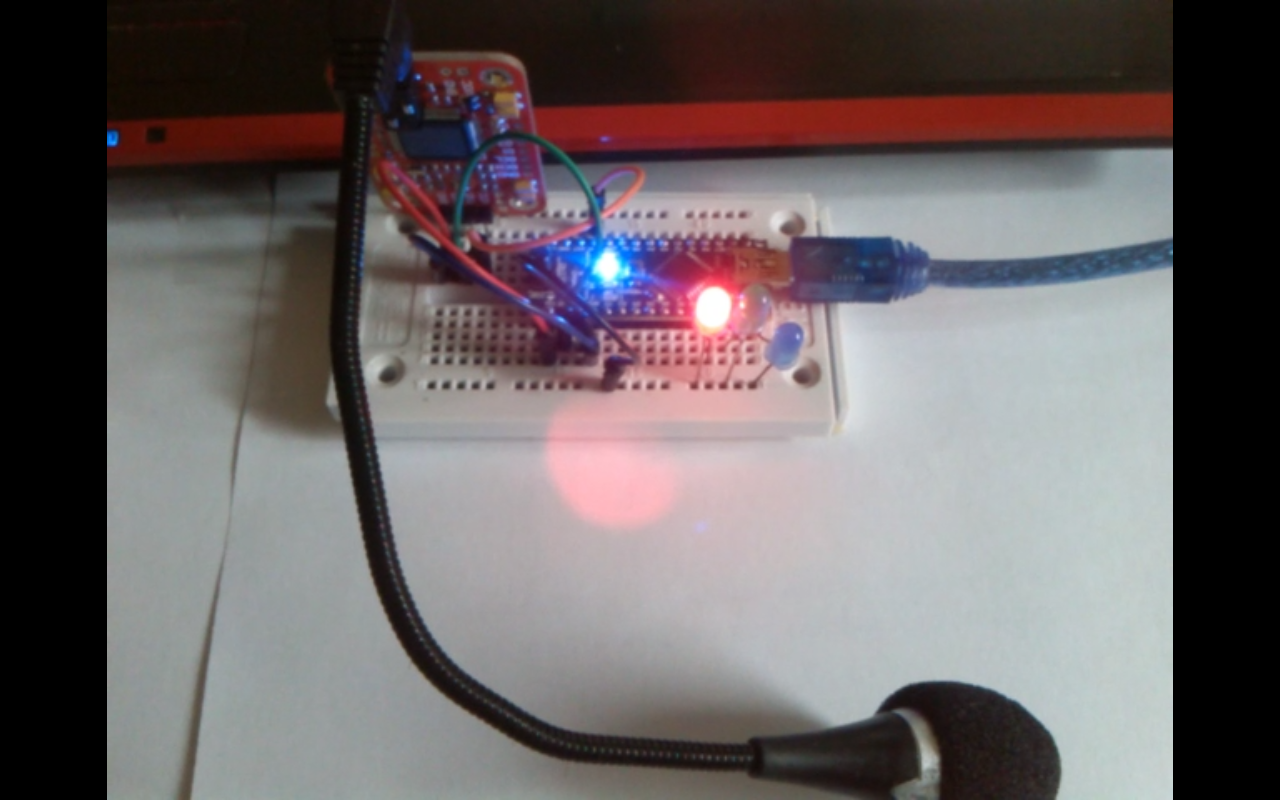
- Leds connected to the pin 9,10,11. (use resistor)
- After code uploaded, unplug the arduino, connect the voice modul:
VCC to 5V
GND to GND
Rx to Tx
Tx to Rx
- Power on the arduino, wait 3-5 sec until ready.
- Talk to your arduino :)
Code:
int redPin = 9;
int greenPin = 10;
int bluePin = 11; byte
com = 0; //reply from voice recognition
void setup() { Serial.begin(9600);
pinMode(redPin, OUTPUT);
pinMode(greenPin, OUTPUT);
pinMode(bluePin, OUTPUT);
delay(2000);
Serial.write(0xAA);
Serial.write(0x37);
delay(1000);
Serial.write(0xAA);
Serial.write(0x21);
}
void loop()
{
while(Serial.available())
{
com = Serial.read();
switch(com)
{
case 0x11:
digitalWrite(redPin, HIGH);
break;
case 0x12:
digitalWrite(greenPin, HIGH);
break;
case 0x13:
digitalWrite(bluePin, HIGH);
break;
case 0x14:
digitalWrite(redPin, HIGH);
digitalWrite(greenPin, HIGH);
digitalWrite(bluePin, HIGH);
break;
case 0x15:
digitalWrite(redPin, LOW);
digitalWrite(greenPin, LOW);
digitalWrite(bluePin, LOW);
break;
}
}
}