Arduino UNO Logic Sniffer
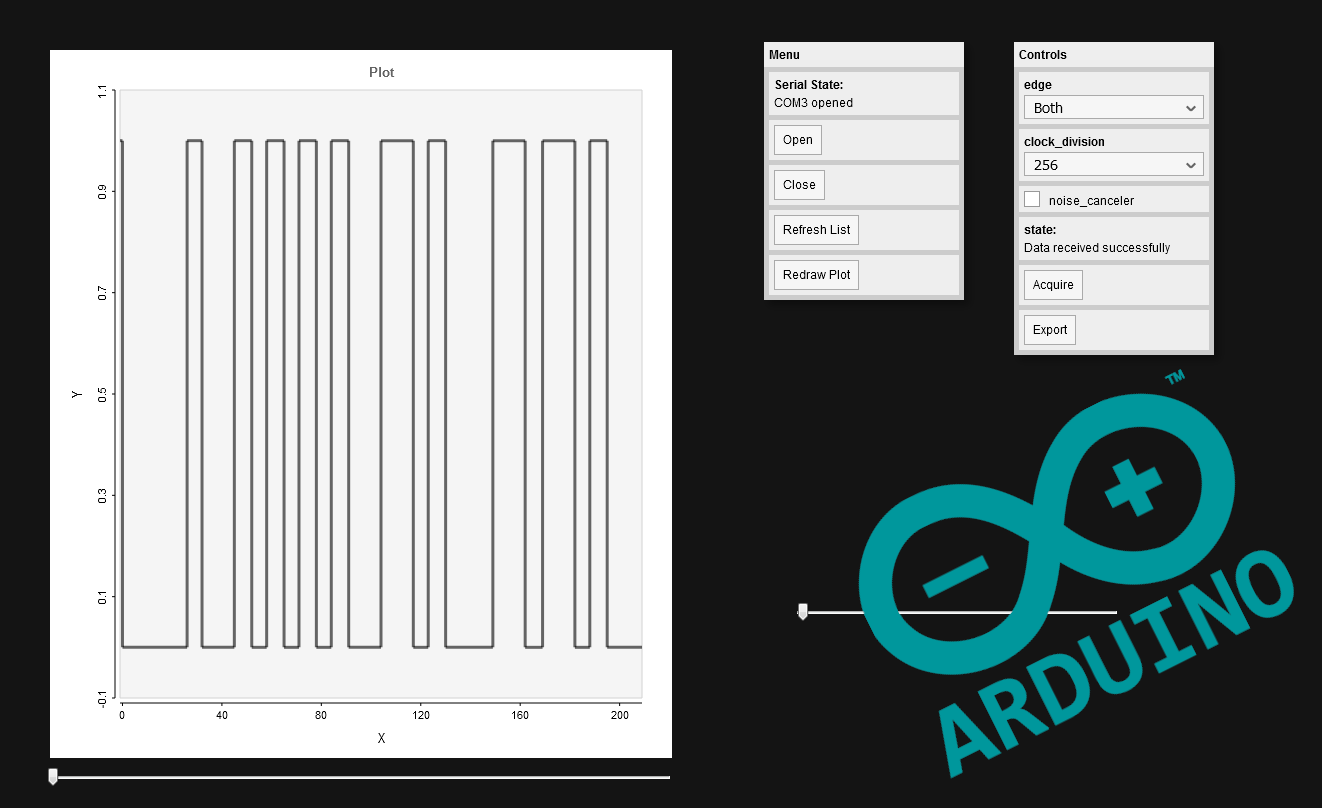
This project started as a simple experiment. During my research over the ATMEGA328P's datasheet for another project, I found something rather interesting. The Timer1 Input Capture Unit. It allows our Arduino UNO's microcontroller to detect a signal edge, store a timestamp, and trigger an interrupt, all in hardware.
I then wondered in which application it could be useful, and how to test it. As I want to get a logic analyzer for some time now, I decided to try implementing one in my Arduino UNO board, just to test the feature, and see if we can get good results out of it.
I am not the only one that had this idea, and you will find plenty of them by just googling "Arduino Logic Analyzer". At the beginning of the project, as it just started as an experiment, I wasn't even aware that people already made it, and was impressed by the good results they achieved with this little piece of hardware. However, I couldn't find another project using the input capture unit, so if you have already seen this, let me know!
To summarize, my logic analyzer will:
- Have one channel,
- Have a graphical interface,
- Communicate with the interface through USB,
- Run on an Arduino UNO board.
It will finally have a 800 samples memory depth, and was able to successfully capture a 115200 bauds UART message (I didn't really tested it at higher speeds).
This instructable contains both the "how it works" and "how to use it" parts of this project, so for those that are not interested by the technical side, you can directly jump to the step 4.
Supplies
I wanted to keep the analyzer as simple as possible, so requiring very little hardware.
You will need:
- An Arduino UNO board (or equivalent as long as it relies on the ATMEGA328P MCU),
- A computer,
- Something to debug (an other Arduino UNO board works fine to do some testings).
The code for both the Arduino UNO and web interface can be found here.
You will also need the p5.serialcontrol, and PulseView software.
Working Principle
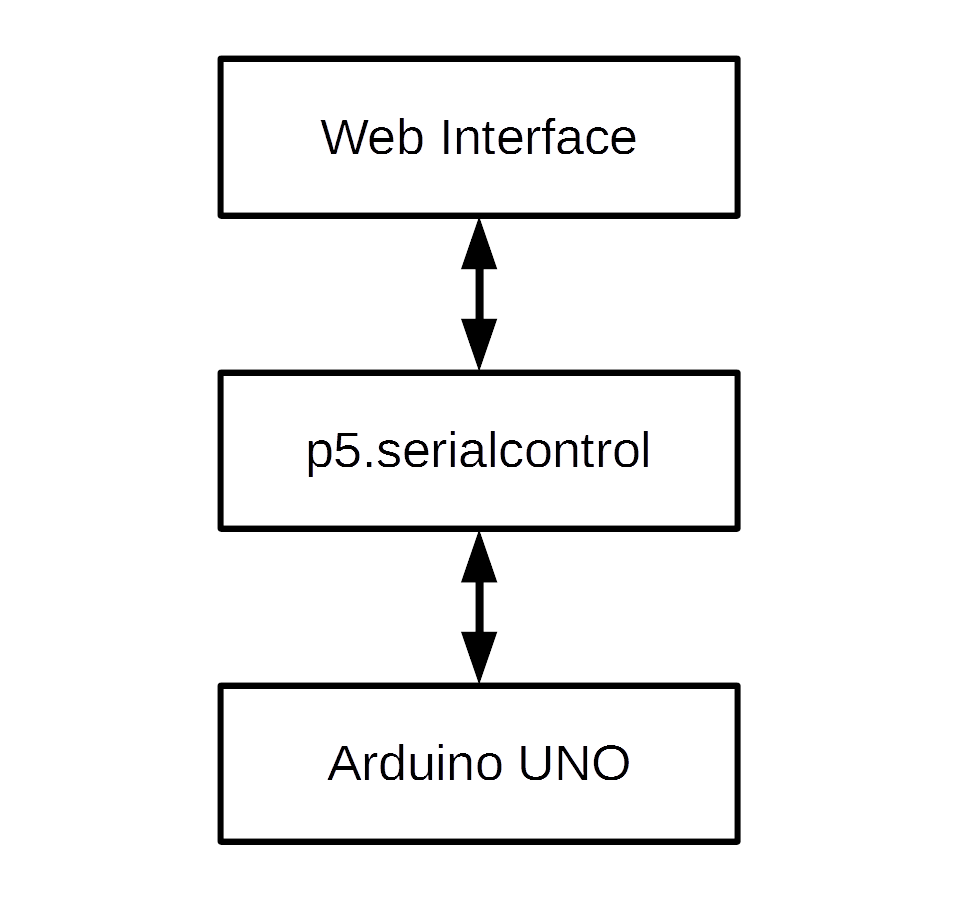
The idea is simple. You choose the capture settings, and click on "acquire". The web interface will send them to the p5.serialcontrol software, which allows us to use the serial interface from a browser, as it can't directly access it. The p5.serialcontrol software then relays the information to the Arduino UNO board, which captures the data, and sends them back to the interface through the same path.
Easy! Well... As I am not really good at Human/Machine interface programming or web technologies, mine is certainly a bit ugly and buggy. But it allows me to start a capture and retrieve my data back, which is what it has been designed for, so I think its fine. For more serious analysis work, I import my records into PulseView, which is easy to use and offers a good set of features and protocol decoders, as we will see later.
The Arduino UNO's input capture unit can be configured to use different clock divisions, thus reducing the resolution, but increasing the delay before overflow. It can also triggers on rising, falling or both edges to start capturing the data.
Arduino UNO Sketch
I wrote and compiled the sketch with the Arduino IDE. I first started by setting up the Timer1 in "Normal" operation mode by writing to its TCCR1A and TCCR1B registers in the setup(). I then made some functions to ease a bit its usage in the future, like the one to set the clock division named "setTim1PSC()". I also wrote functions to activate and deactivate the Timer1 input capture unit and overflow interrupts.
I added the "samples" array, which will hold the data acquired. It is a global array that I set to "volatile" to prevent the compiler to make optimizations and put it in flash, as it was doing during my first compilations. I defined it as a "uint16_t" array, as the Timer1 is also 16bit, with a length of 810. We stop capturing at 800 values, but as the test is done outside of the interrupts for obvious speed reasons, I chose to keep 10 more values to prevent overflow. With a few extra variables for the rest of the code, the sketch is using 1313 bytes (88%) of memory, leaving us with 235 bytes of free RAM. We are already at a high memory usage, and I didn't want to add more sample capacity, as it could cause weird behaviors due to too few memory space.
In my quest to always increase execution speed, I used function pointers instead of if statements inside the interrupts, to reduce their execution time to a minimum. The capture pin will always be the Arduino UNO number 8, as it is the only one connected to the Timer1's input capture unit.
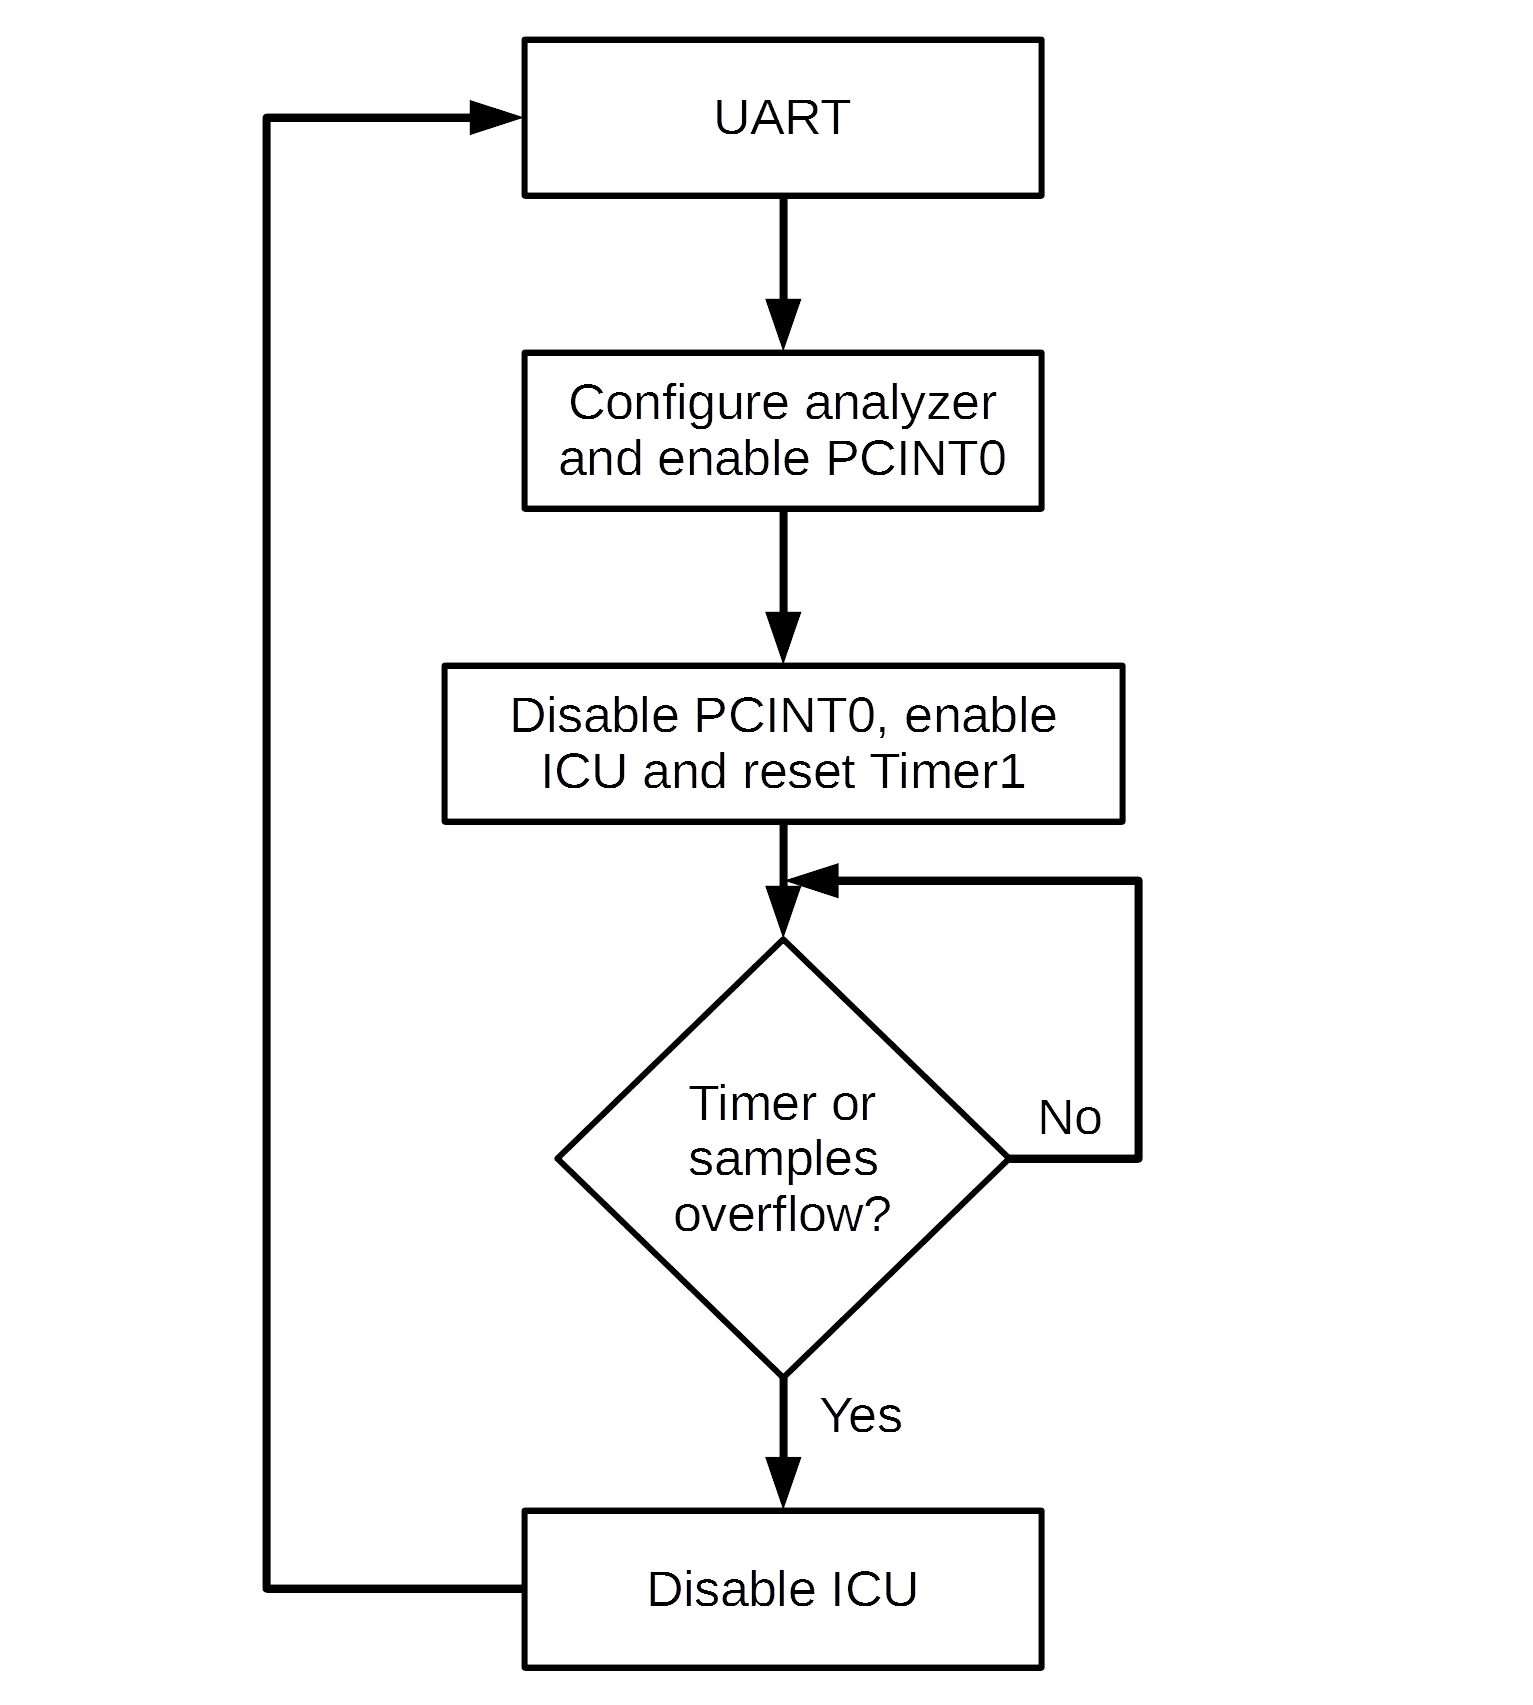
The capture process is shown on the image above. It starts when the Arduino UNO receives a valid UART data frame, containing the desired capture settings. We then process those settings by configuring the right registers to capture on the chosen edge, and use the right clock division. We then enable the PCINT0 (pin change) interrupt to detect the first signal edge. When we get it, we reset the Timer1 value, disable the PCINT0 interrupt, and enable the ICU (Input Capture Unit) interrupt. From that moment, any falling/rising edge on the signal (depending on the configuration chosen), will trigger the input capture unit, thus saving a timestamp of this event into the ICR1 register, and executing an interrupt. In this interrupt we put the ICR1 register value into our "samples" array, and increment the index for the next capture. When the Timer1 or the array overflows, we disable the capture interrupt, and send the data back to the web interface through UART.
I decided to use a pin change interrupt to trigger the capture, as the input capture unit only allows to capture on one or the other edge, not both. It also causes a problem when you want to capture both edges. My solution has then be to invert the bit that controls the edge selection in the input capture control register at each sample retrieved. That way we loose in execution speed, but we can still use the input capture unit functionalities.
So, as you may have noticed, we don't really capture each sample at fixed time intervals, but we capture the moment where a signal transition happens. If we had captured one sample at each clock cycle, even with the highest clock division, we would have filled the buffer in approximately 0.1s, assuming that we were using the uint8_t type, which is the smallest one in memory without using structs.
Web Interface and P5.js
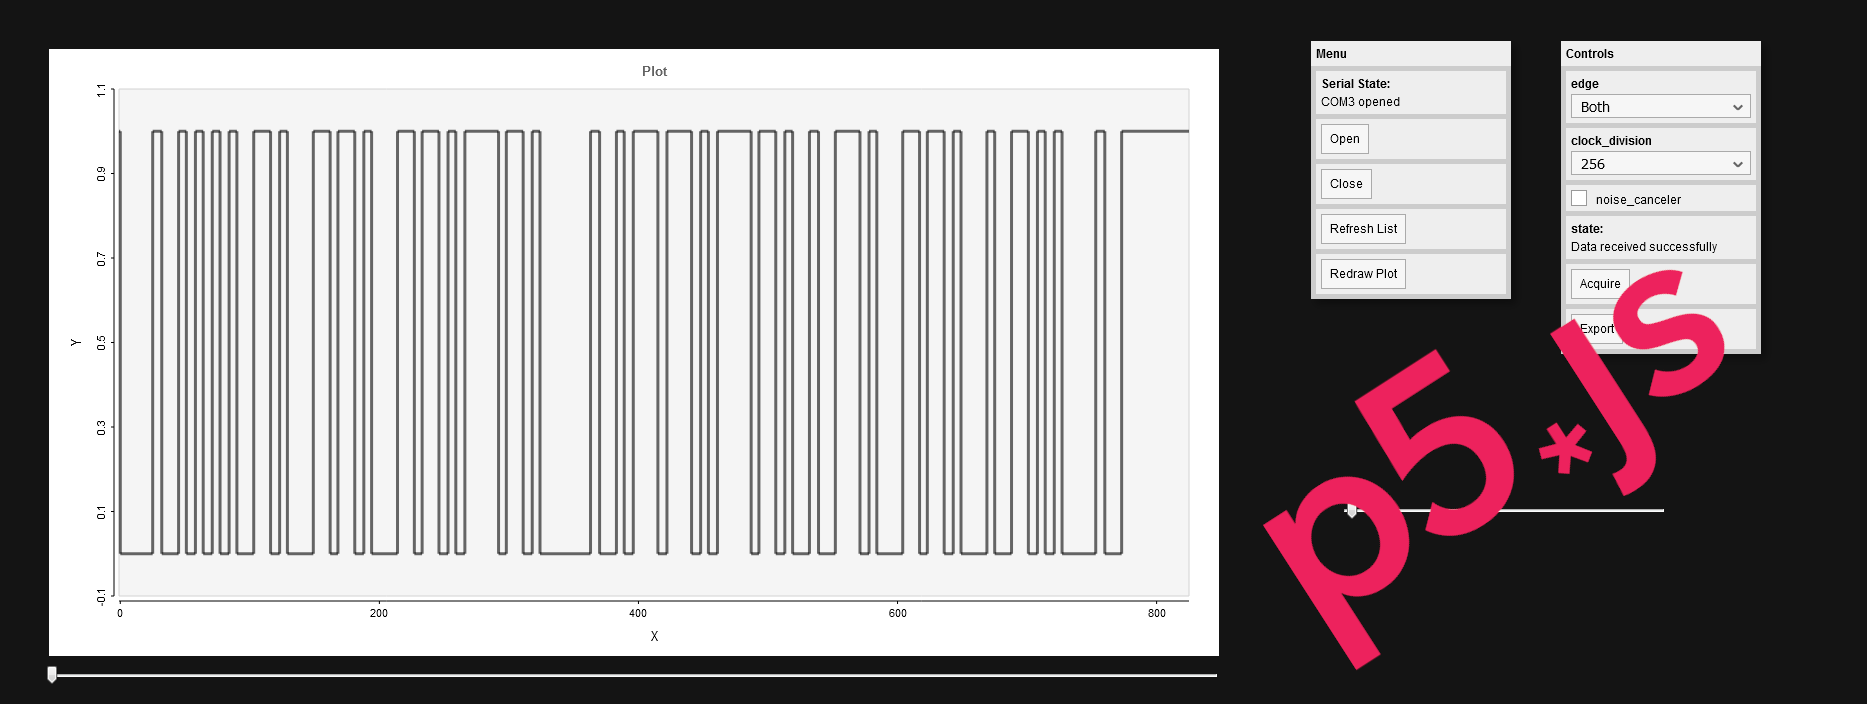
As the title implies, the web interface was made with the help of p5.js. For those who don't know it already, I highly recommend you to go and check the website, as it is a really good library. It is based on Processing, is easy to use, allows you to get good results very fast, and is well documented. It is for all that reasons that I chose this library. I also used the quicksettings.js library for the menus, the grafica.js one to plot my data, and the p5.serialport library to communicate with the Arduino UNO.
I will not spend too much time on the interface, as I just designed it for data preview and settings control, and also because it wasn't the subject of my experiment at all. I will however explain in the following parts the different steps to use the whole system, thus explaining the various controls available.
System Setup
First thing is to download the Arduino UNO and interface code here if not already done. You can then reprogram your Arduino UNO board with the "UNO_LS.ino" sketch through the Arduino IDE.
You should have downloaded the p5.serialcontrol software from its github repository. You have to get the zip file matching your operating system (I only tested it on Windows). Extract the zip in a folder, start the executable found in it, and leave it like that. Don't try to connect to any serial port, just leave it running in background, it will be used as a relay.
Open the "Interface" folder. You should find a file named "index.html". Open it in your browser, it is the web interface.
And that's it! You don't need to download extra libraries, everything should be included in the package I provided.
Connection, Configuration and Acquisition
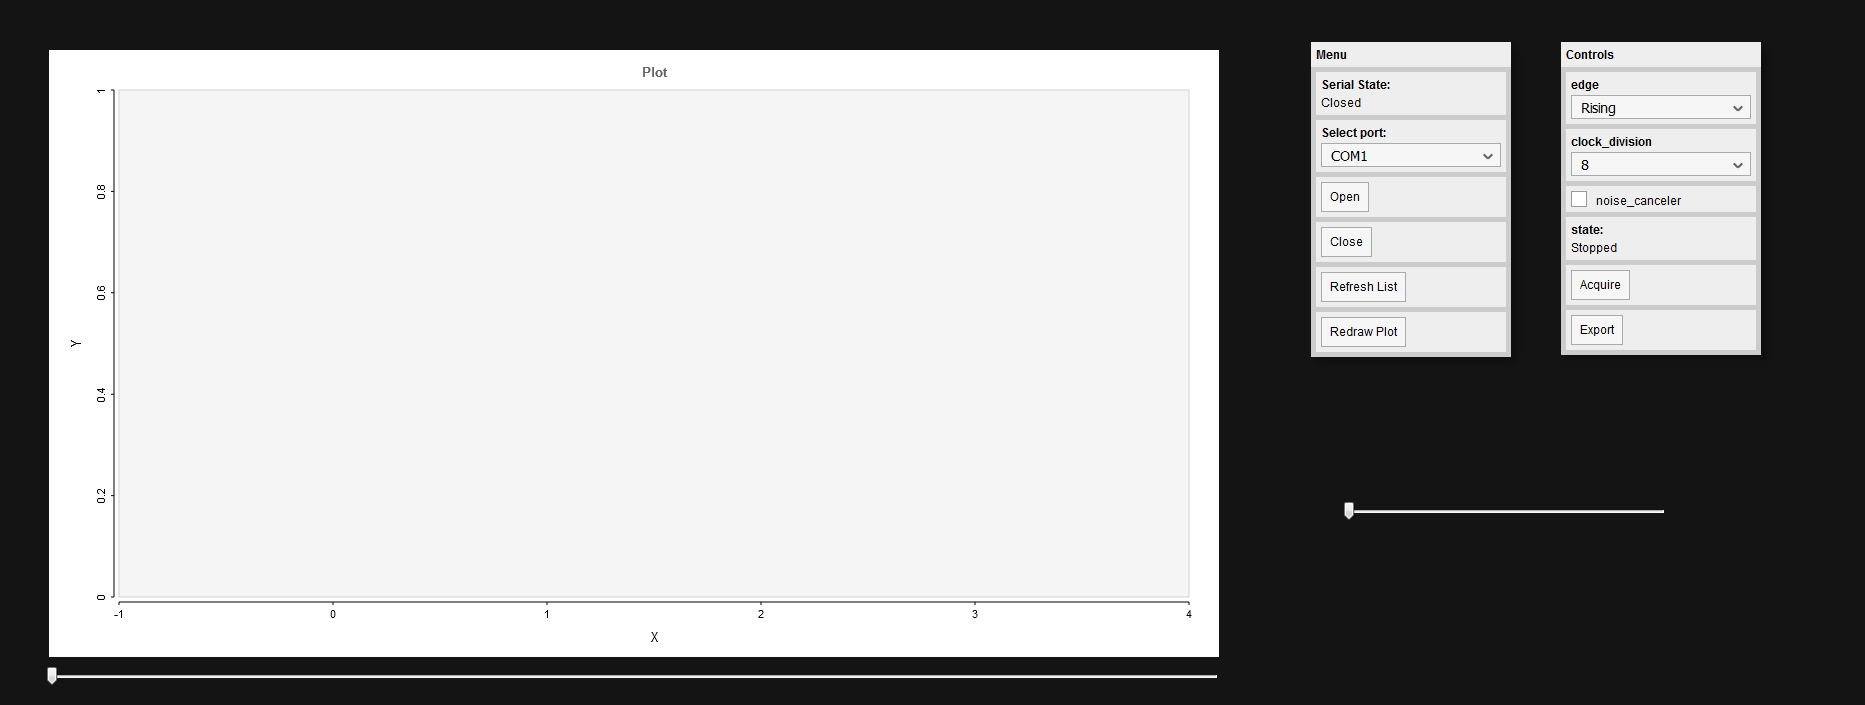
To connect the interface to the Arduino UNO board, just select the corresponding port in the list and hit the "Open" button. If the operation was successful, the "state" message should display something like "COMX opened".
You can now choose your capture options. First is the edge selection. I recommend you to always use "Both", as it will give you the best representation of the real signal. If the "Both" setting fail to capture the signal (if the signal frequency is too high for example), you can try with either the "Rising" or "Falling" edge setting, depending on the signal you try to see.
The second setting is the clock division. It will give you the resolution at which you will be able to capture the signal. You can choose to set the division factor by either "8", "64", "256" and "1024". The Arduino UNO board uses a 16MHz quartz to clock the microcontroller, so the sampling frequency will be "16MHz/division factor". Be careful with this setting, as it will also determines for how long you will be able to capture a signal. As the Timer1 is a 16bit timer, the capture time allowed before overflow will be "(2^16)*(division factor)/16MHz". Depending on the setting you chose, it will range between ~33ms and 4.2s. Keep your choice in your mind, you will need it later.
The last setting is the noise canceller. I didn't conduct a lot of testing on it, and you will not need it in 99% of the cases, so just leave it unchecked. For those who are still curious about it, you can search for the noise canceler in the Timer/Counter1 section of the ATMEGA328P's datasheet.
Don't forget to connect the Arduino UNO board's pin 8 to your signal, and wire the grounds together to have the same voltage reference for both the testing circuit and logic analyzer. If you need ground isolation, or need to measure signals with levels different from 5V, you will probably need to add an opto-isolator to your circuit.
Once everything is configured correctly, you can press the "Acquire" button.
Capture Results and CSV Data Export
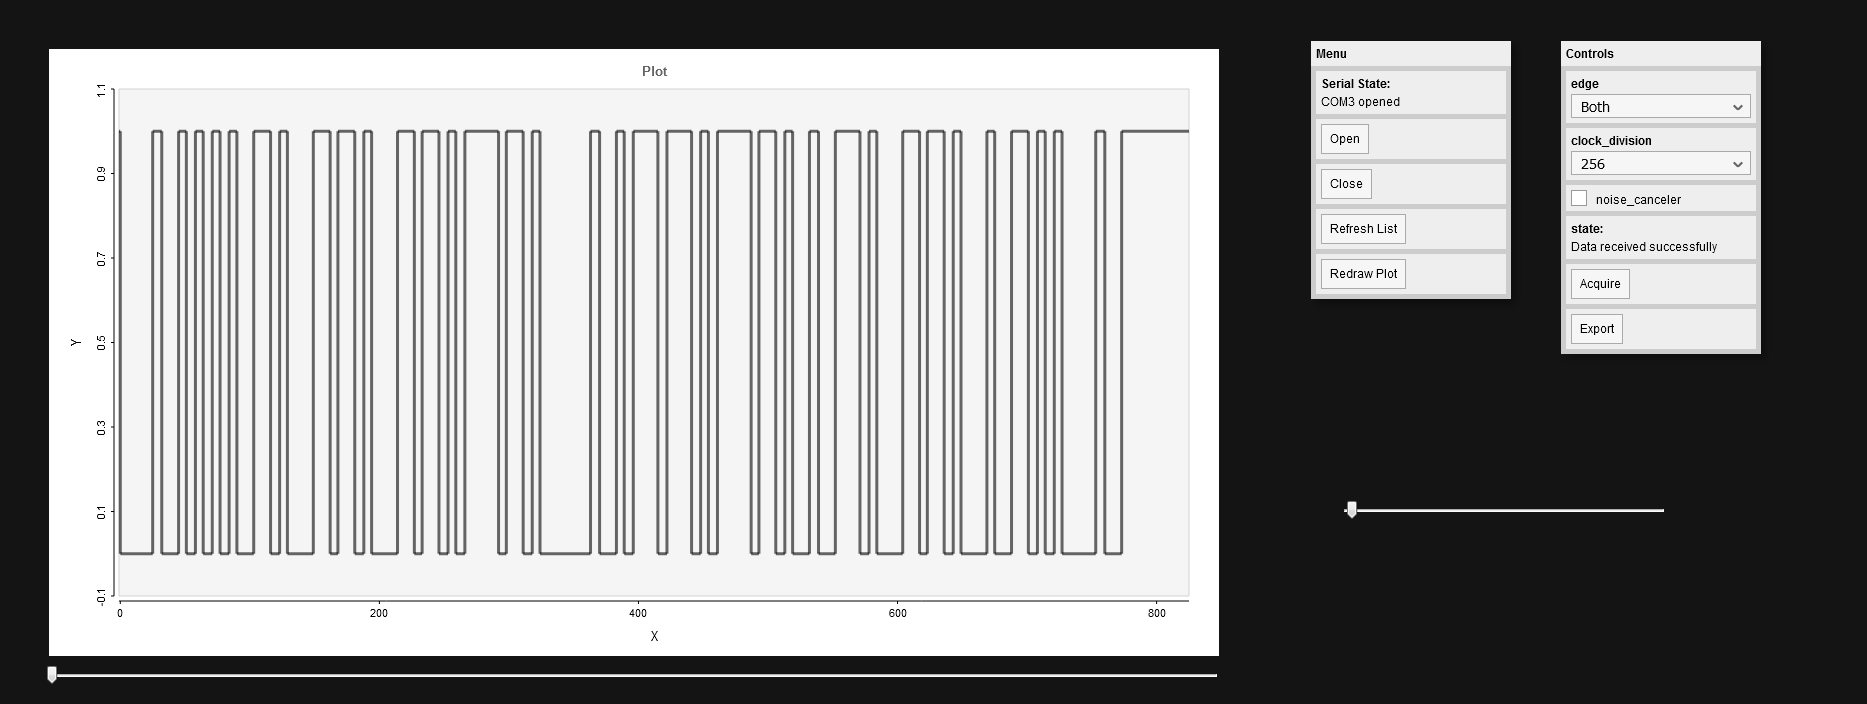
Once your Arduino UNO finishes a capture, it will automatically sends back the data to the web interface, which will plot them. You can zoom in or out with the right slider, and travel through the samples with the bottom one.
The plot only gives you a preview, and doesn't have any data analysis tools. Thus, in order to conduct further analysis on your data, you will have to import it into PulseView.
The first step is to export a csv file containing all your data. To do so, you just need to click on the "Export" button from the web interface. Save your file in a known location when prompted.
Now open PulseView. On the top menu bar, click on "Open" (folder icon), and select "Import Comma-separated values...". Select the previously generated csv file containing your data.
A small window will appear. Leave everything as it is, you just need to modify the "Samplerate" setting according to the clock division factor chosen for the capture. Your samplerate frequency will be "16MHz/(division factor)". Then click on "Ok", your signal should appear on the screen.
PulseView Signal Analysis
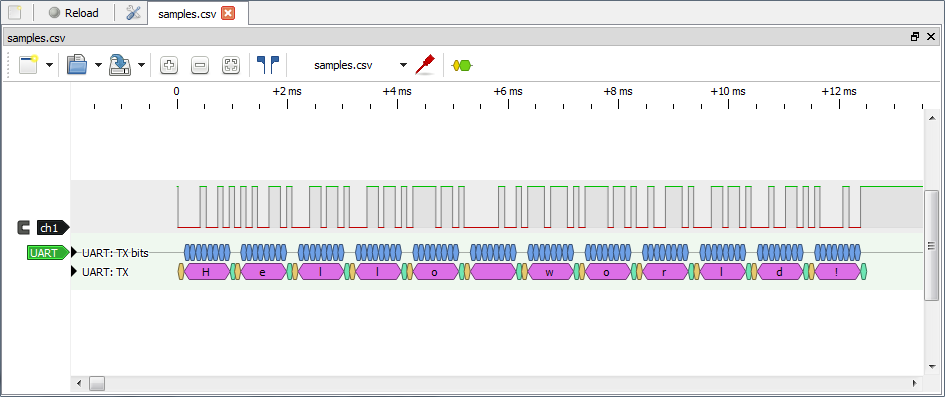
PulseView features a lot of protocol decoders. To access them, click on "Add protocol decoder" in the top menu bar (most right tool). For my experiment, I just sent a simple UART message at 9600 bauds, so I searched for "UART".
It will add a channel with a tag on its left (just like the one for your data). By clicking on the tag, you can change the decoder's settings. After choosing the right ones, I was able to retrieve the same message as the one sent by the my test device. This shows that the whole system works as expected.
Conclusion
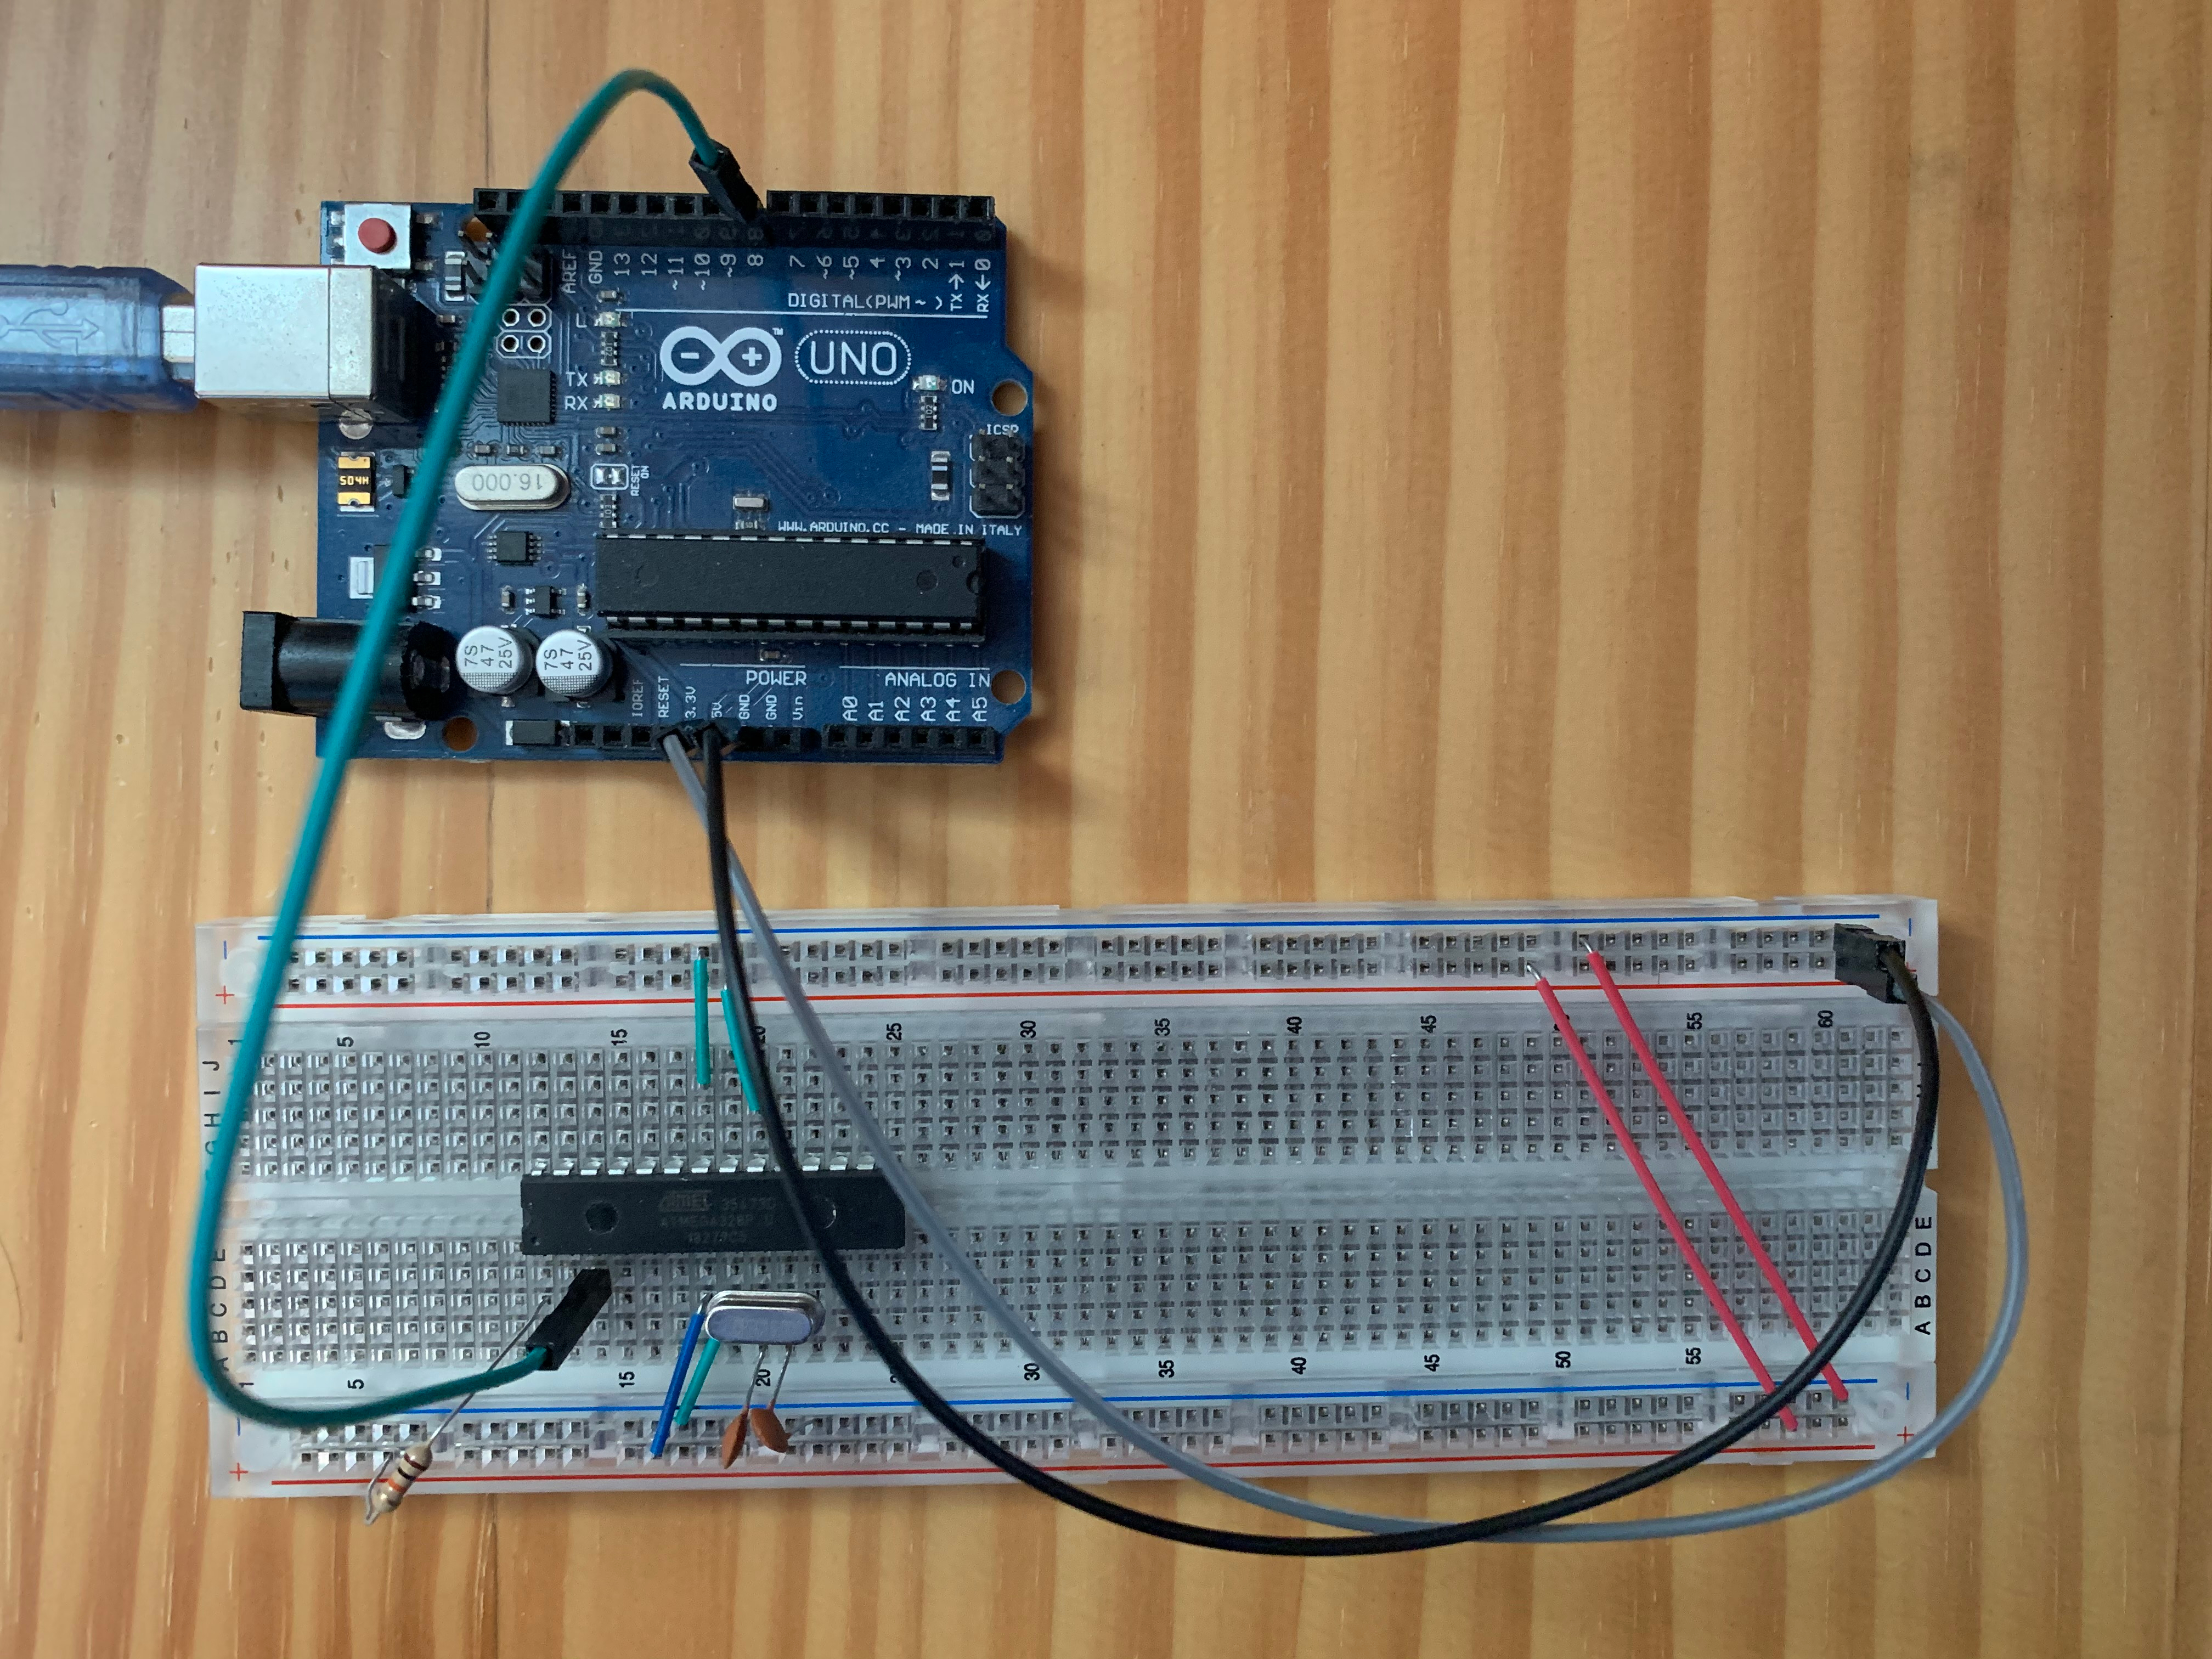
Even if the project was, at the beginning, an experiment, I am happy with the results I got. I was able to sample UART signals at up to 115200 bauds in "Both" edge mode without any problem, and I even managed to goes up to 230400 bauds in "Falling" edge mode. You can see my test setup on the picture above.
My implementation has several drawbacks, starting by the fact that it can only capture one signal at a time, since only the Arduino UNO's pin 8 is "input capture capable". If you are searching for an Arduino logic analyzer with more channels, go check Catoblepas' one.
You can't expect an Arduino UNO to be able to capture signals with high frequencies (some MHz), as it is only clocked at 16MHz (if anyone did it, I would be interested to see its method). However, I am still impressed by the results we can get out of this ATMEGA328P microcontroller.
I don't think that I will do much work on the code. I conducted my experiments, and got the results I was searching for. But if anybody wants to contribute, feel free to modify and redistribute all or part of my code.
That was my first Instructable, and a long one I think. I hope that it has been an interesting reading for you.
Let me know if you find errors, or if you have any question!