Arduino Relay Activated Lamp
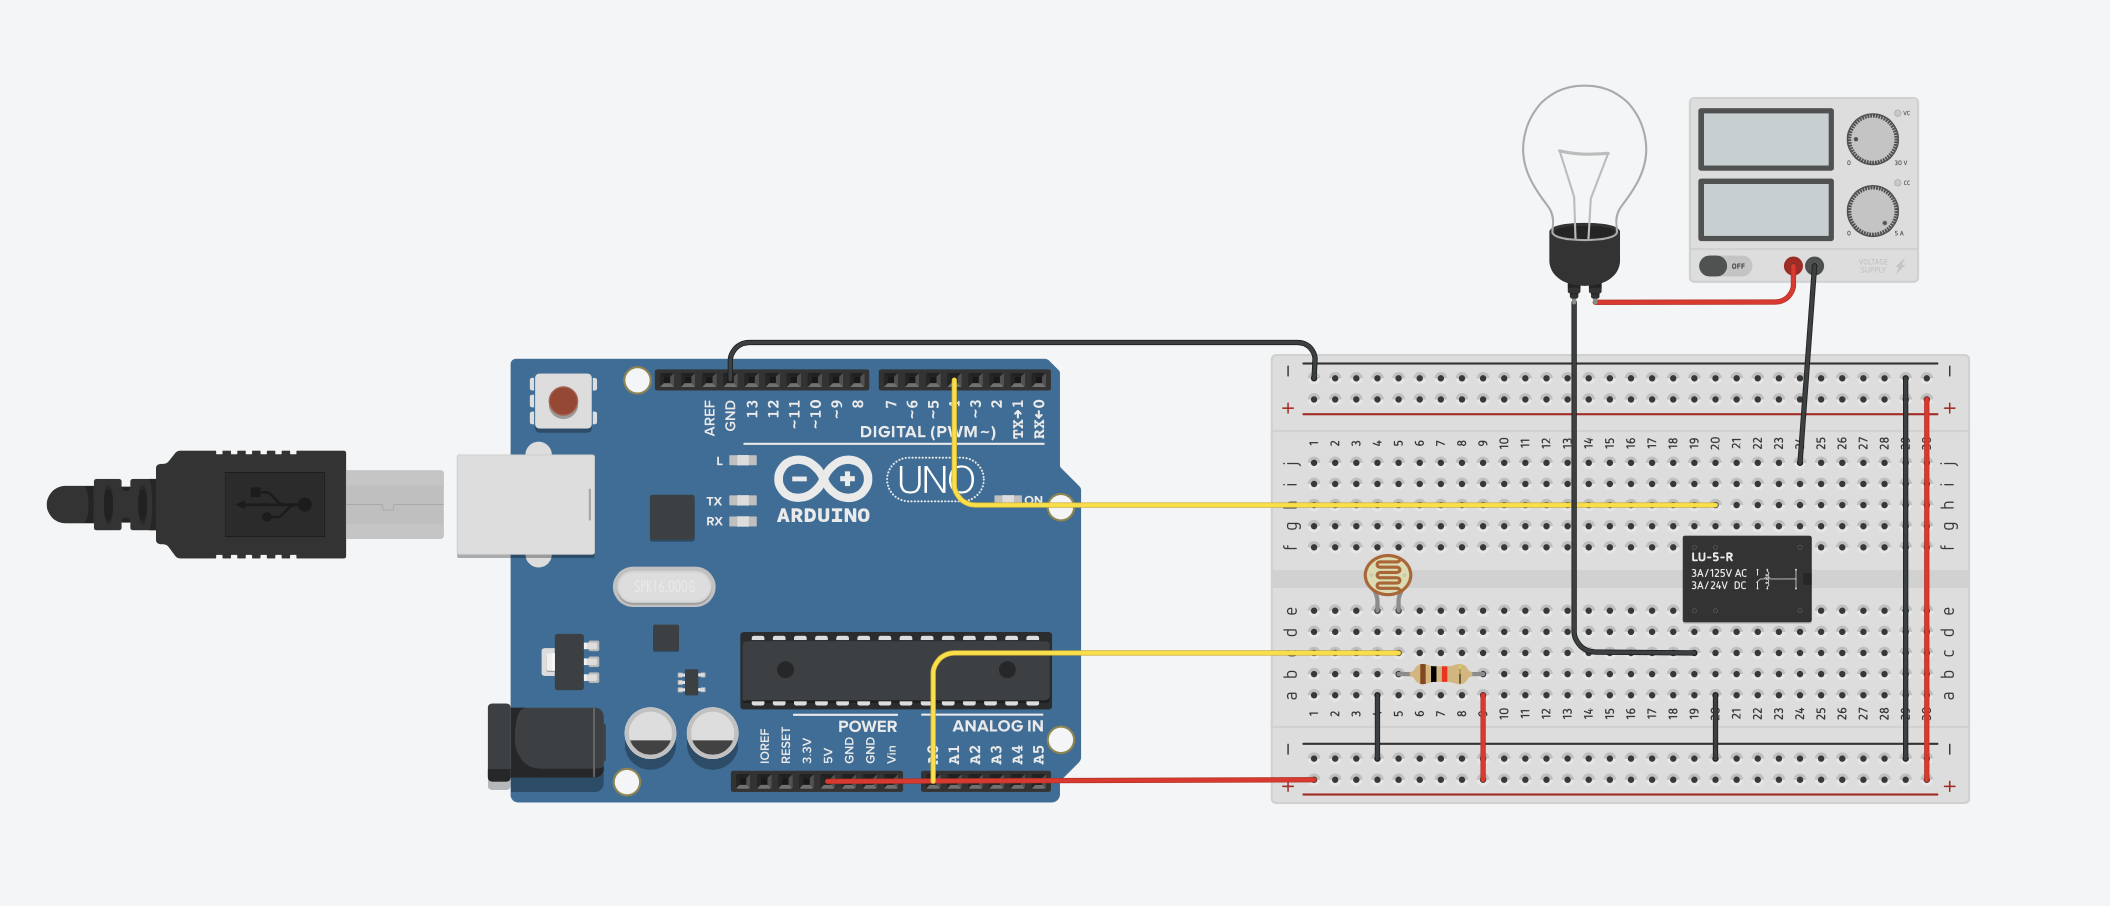
In this tutorial you will be able to make a relay activated lamp using code.
We will be using tinkercad for this project and the following devices will be needed:
-LDR
-Relay
-Light bulb
-Power source
-Arduino
-Breadboard
Set Up the Breadboard
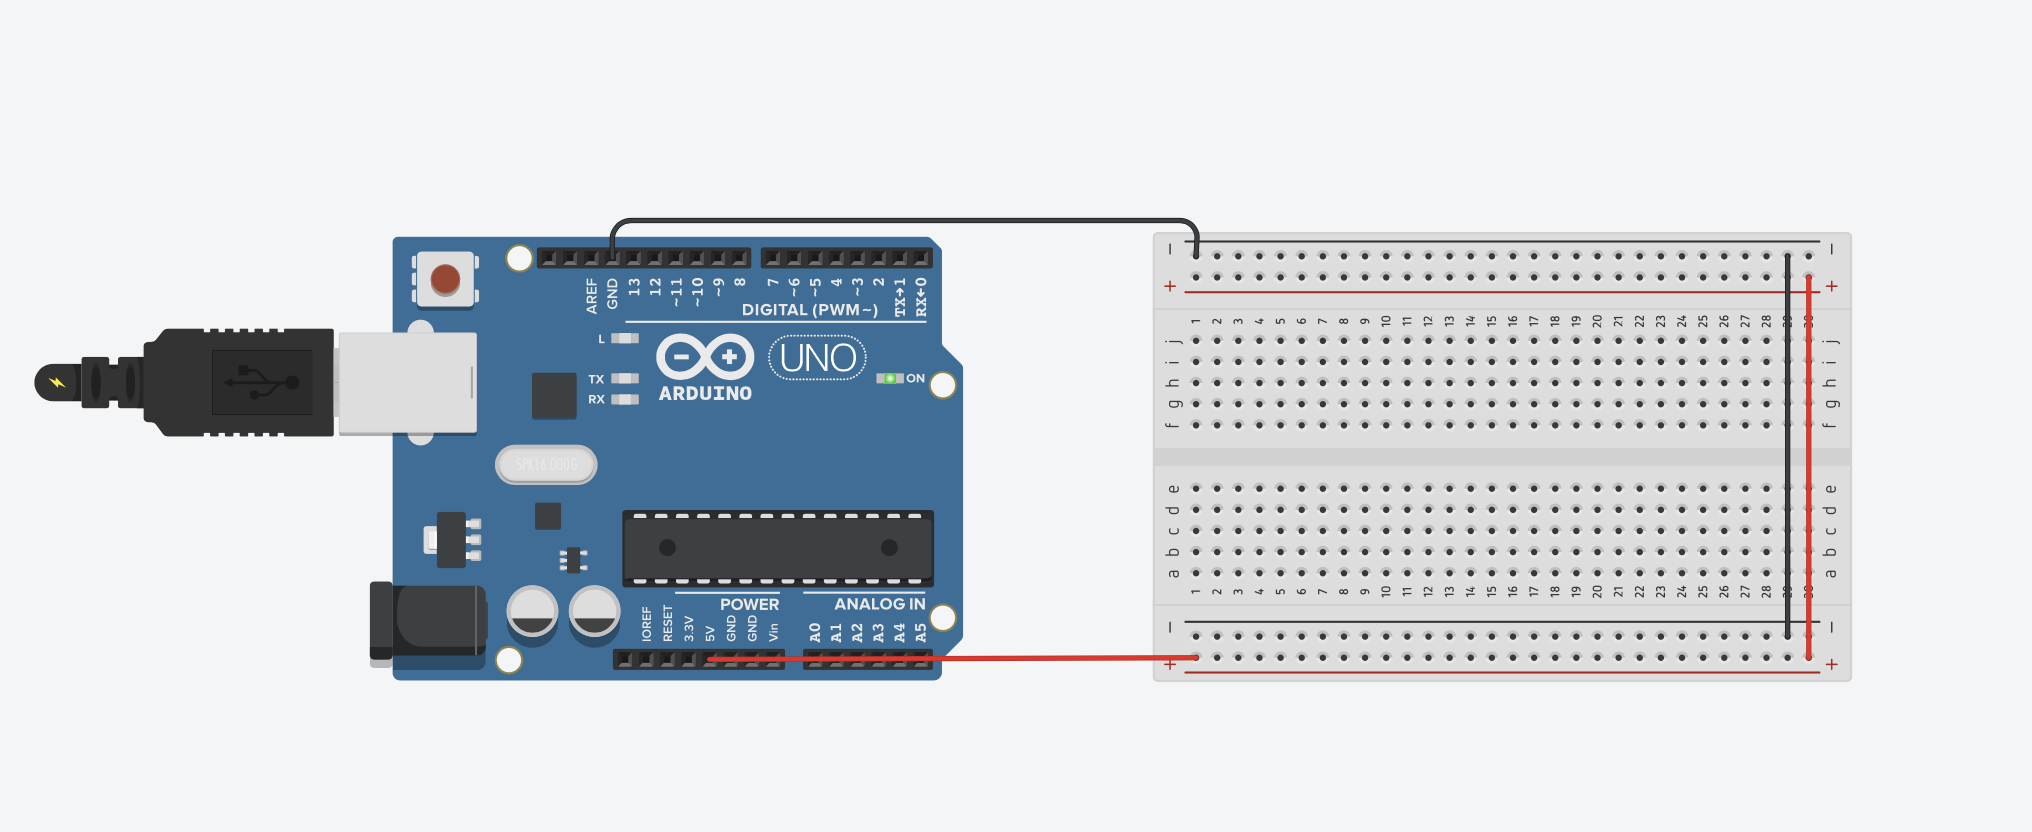
Copy the image above as it will allow you to add in more features such as the LDR and relay.
Add in the LDR and 1k Resistor
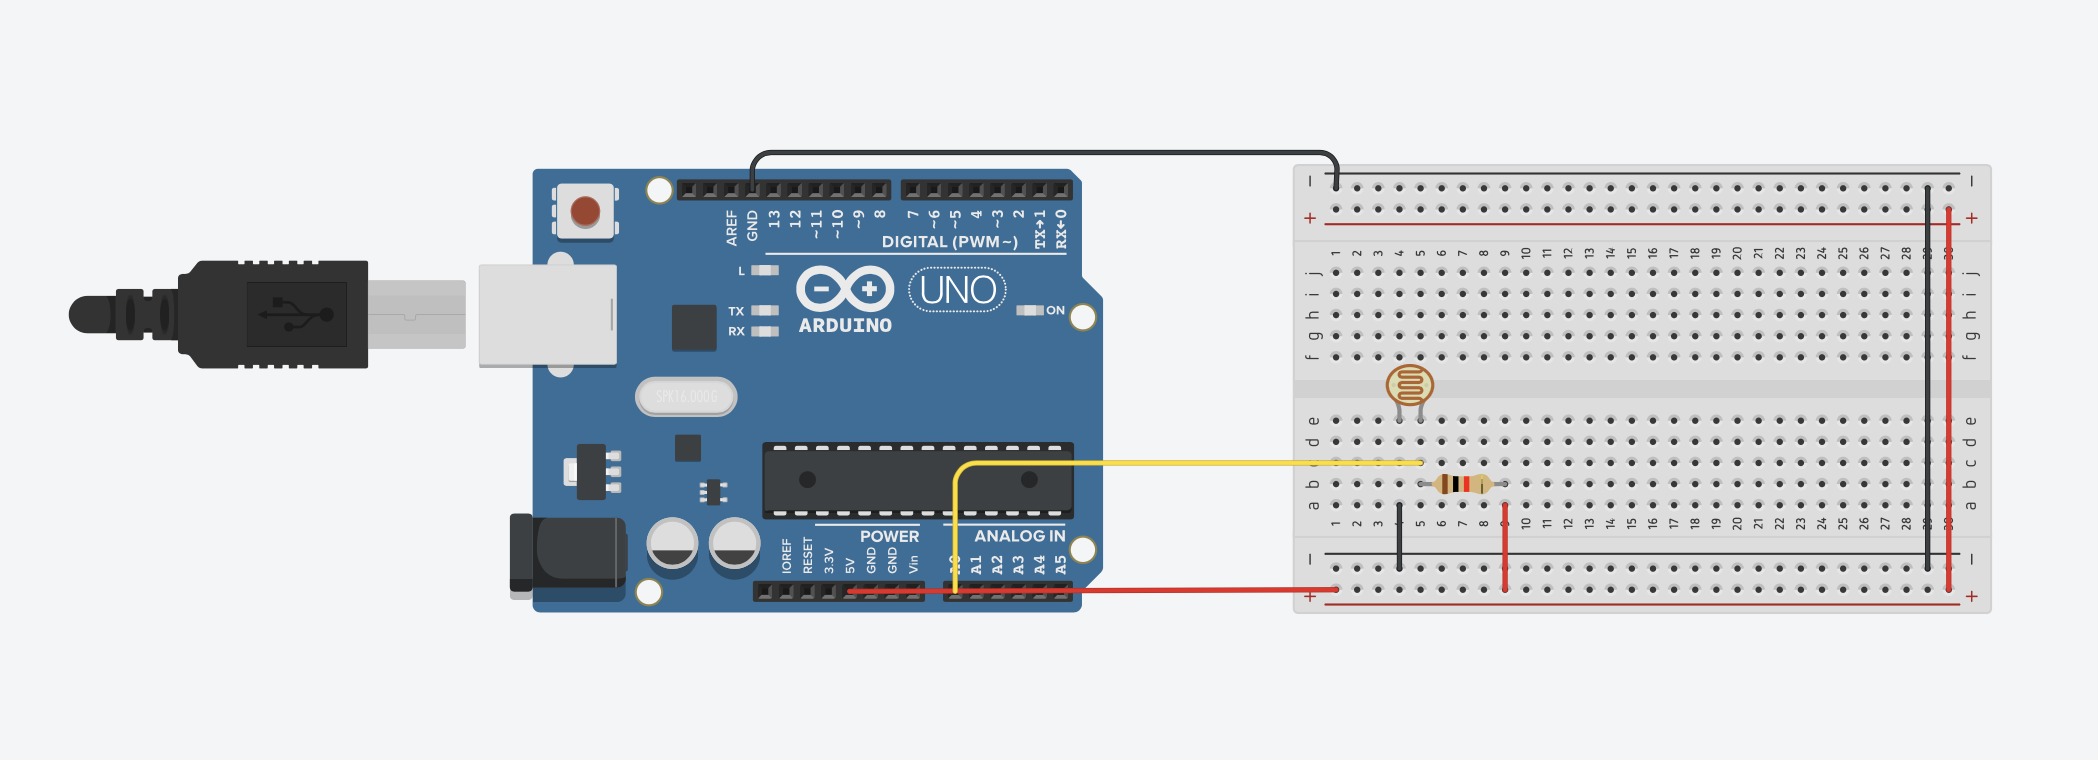
Add in the LDR and resistor into the circuit and wire it properly.
Add in the Relay
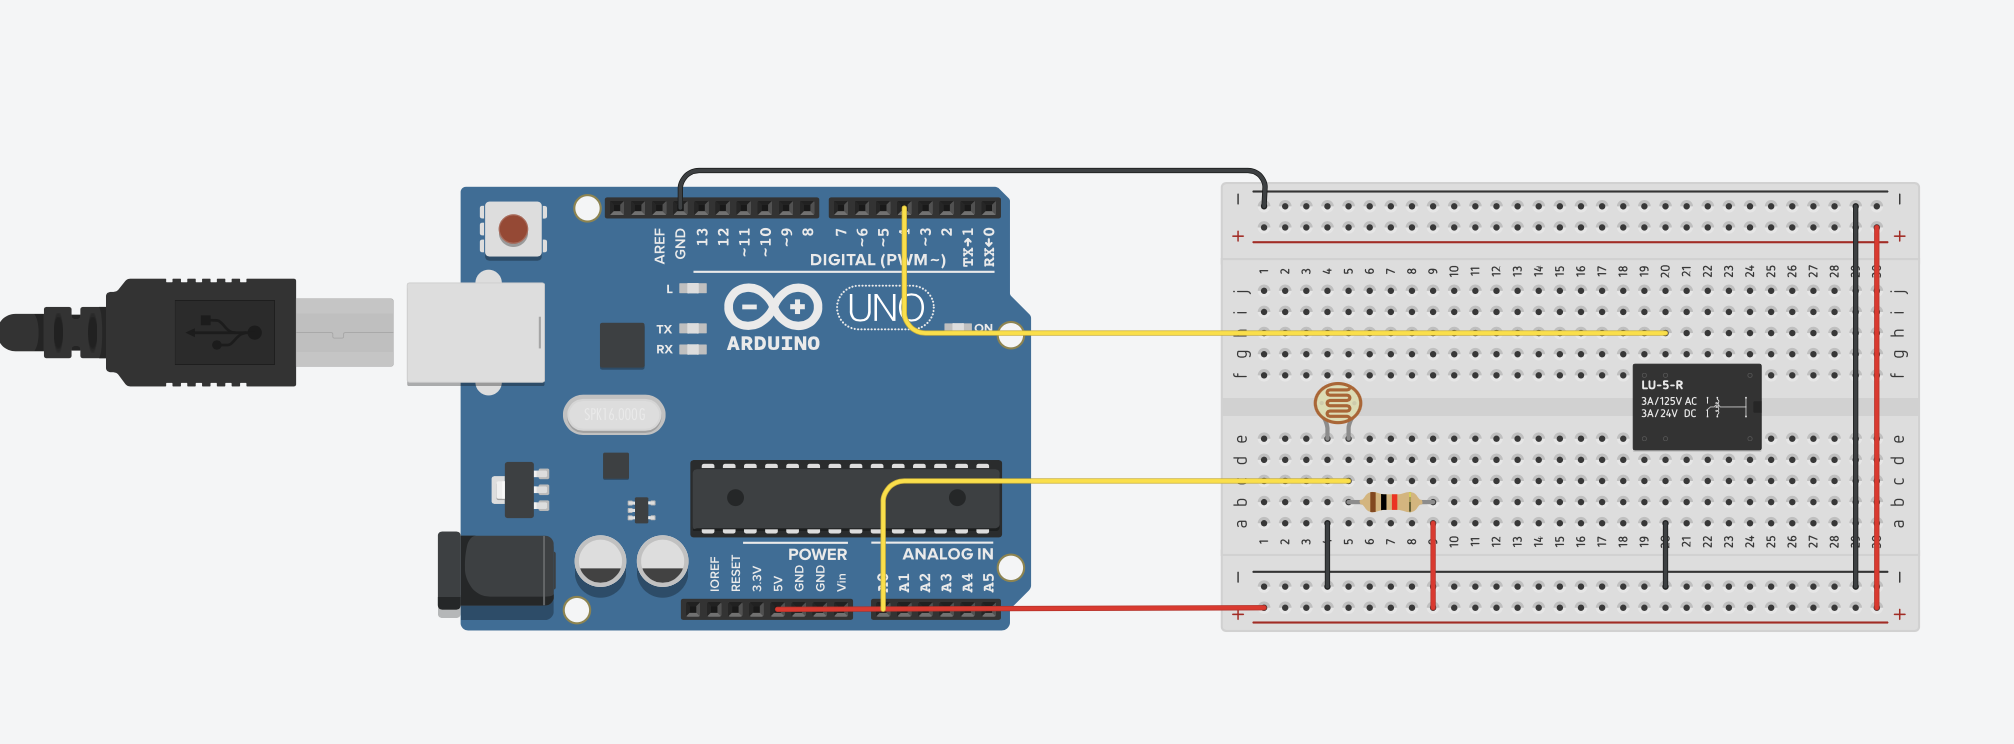
You will now need to add in the relay into the circuit as shown in the image. Make sure the wires line up with the right point on the relay.
Add in the Light Bulb
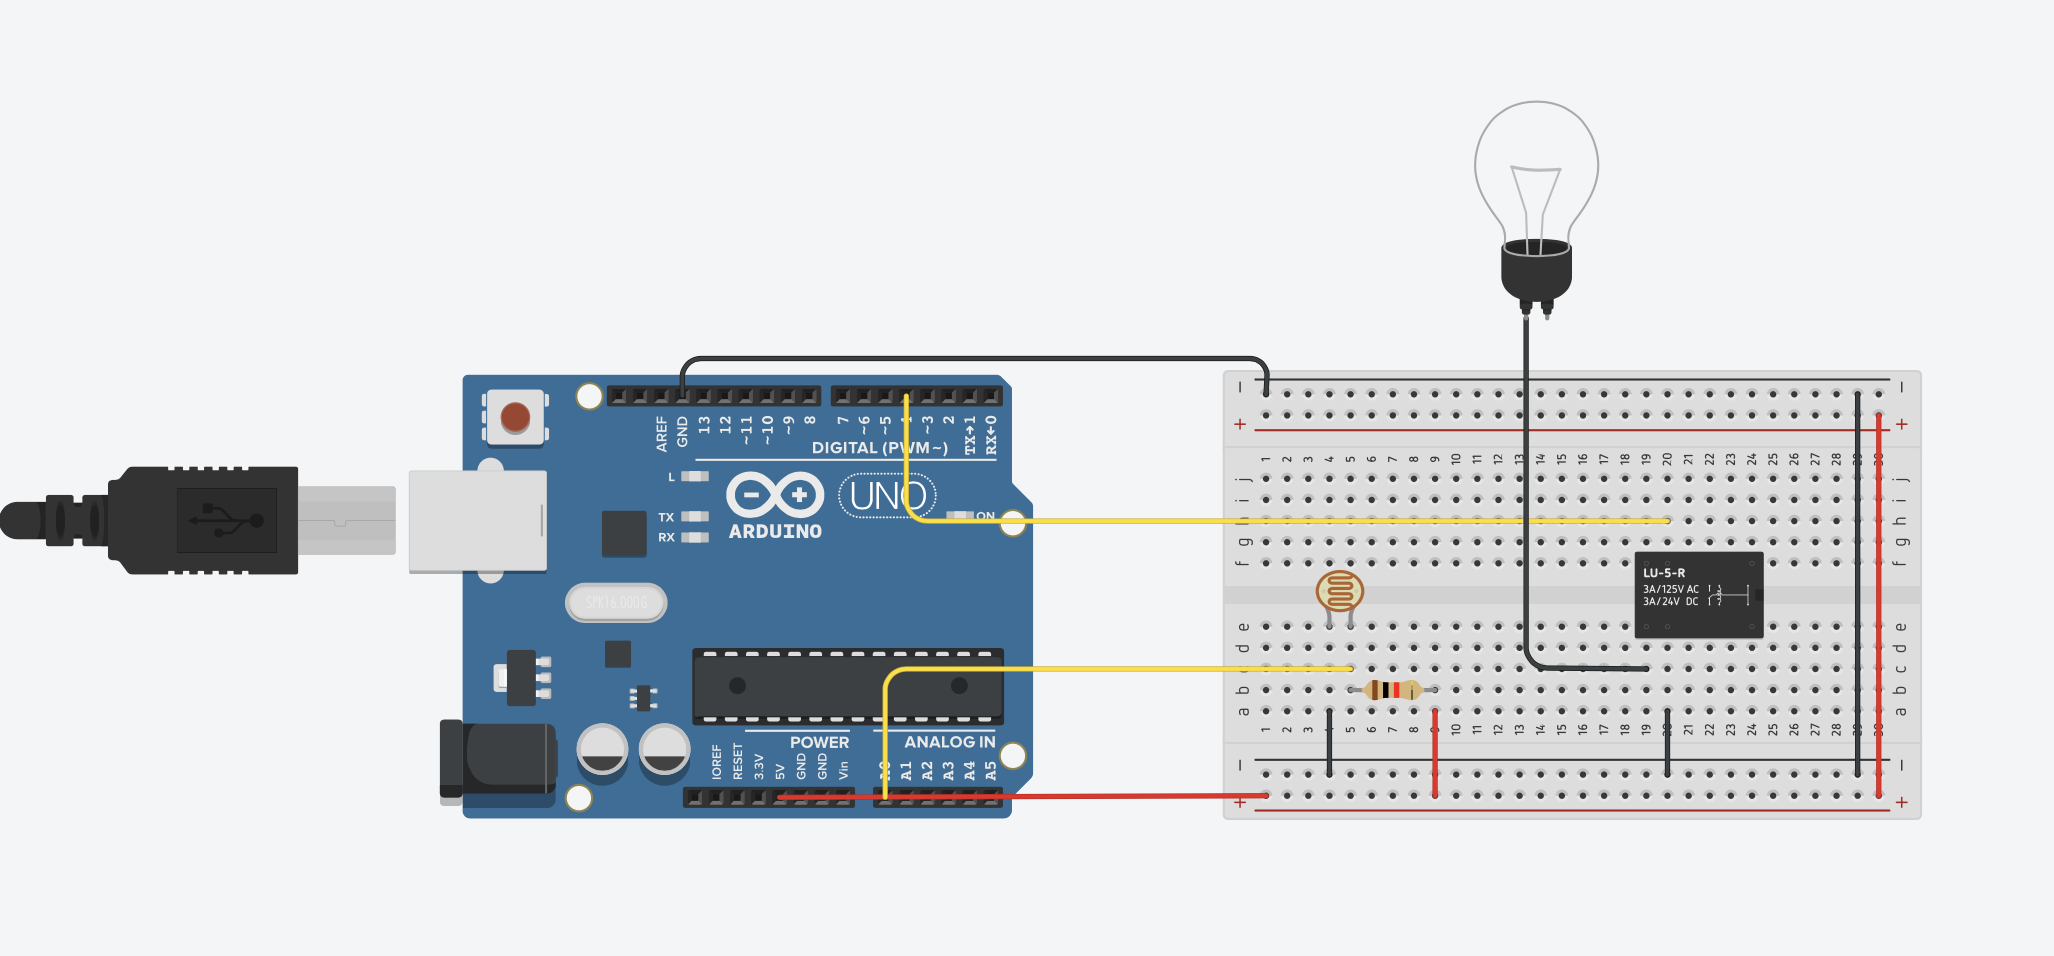
Add the light bulb into the circuit as shown in the image. It should be connected to the point on the relay
Add in the Power Source

Add in the last component to complete the circuit. Make sure the entire circuit is wired properly.
Code
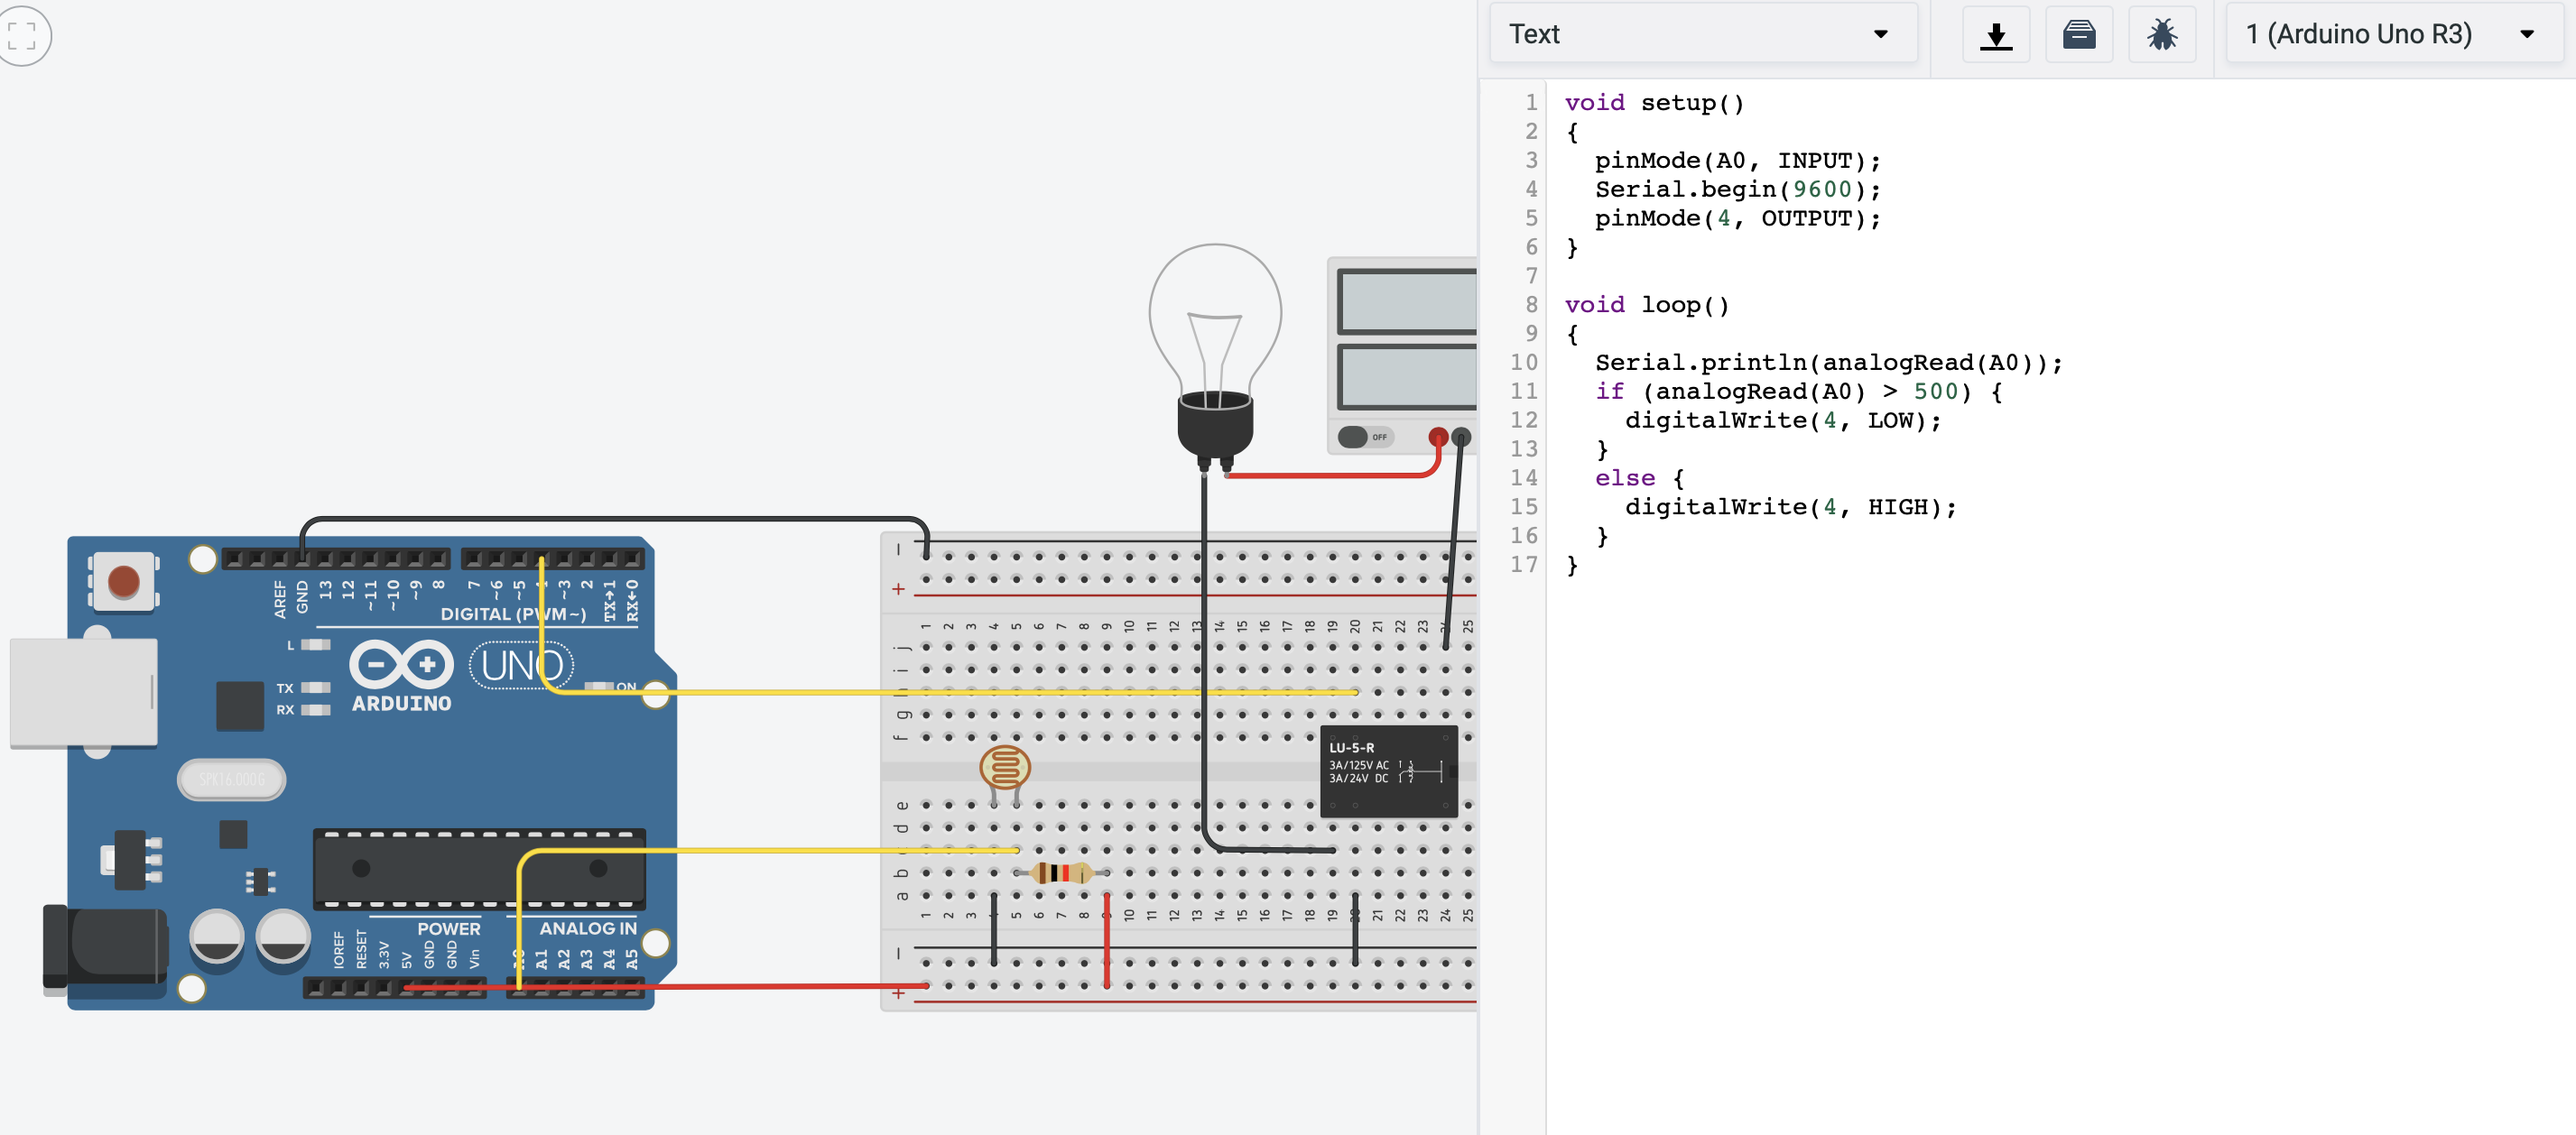
The code shown in the image is what you will need to make your project work effectively. The light bulb will only turn on when the LDR sensor determines that it is dark.