Arduino RGB LED & Piezo Music Sync
by Makeademic in Circuits > Arduino
8224 Views, 18 Favorites, 0 Comments
Arduino RGB LED & Piezo Music Sync
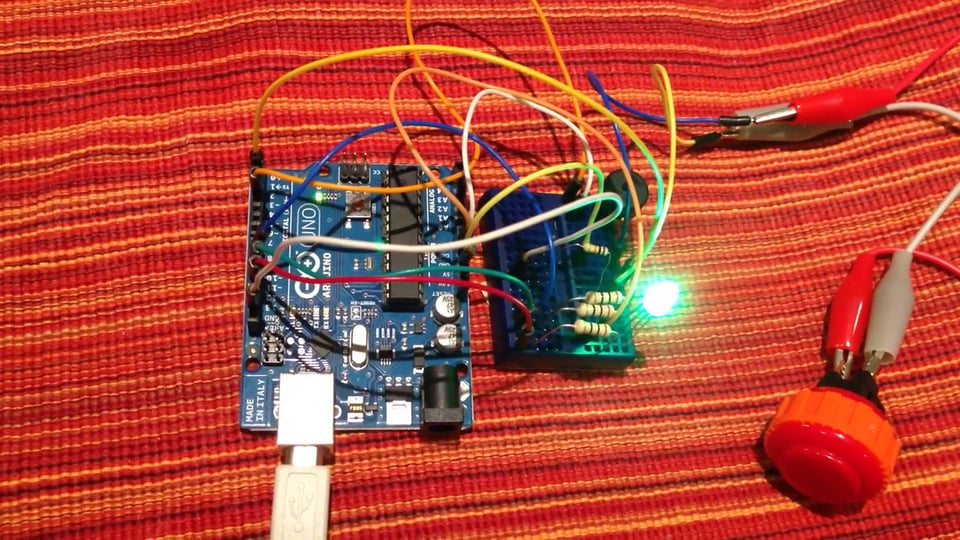
Have you ever wanted to get the timing of the color of an RGB LED to sync with your piezo notes? If so, this is the Instructable for you! This project was designed by Rachelle Tan and Emily Brooks as part of the Physical Computing and Fabrication course at the Digital Humanities Summer Institute 2016 at the University of Victoria. The elements included were an origami heart box that opened to reveal a big red button that when pressed started a rainbow LED display that syncs with the first stanza of "What the World Needs Now" by Hal David and Burt Bacharach. I have included our Arduino files and a diagram to help you replicate the project. I would love to see how you use and modify this tutorial!
Parts Needed
For this project you will need:
(1) Computer/Laptop with Arduino software downloaded
(1) Arduino Uno
(1) USB cable
(1) Breadboard
(1) RGB LED
(1) Piezo
(4) Resistors
(10) Jumper cables
(1) Big Red Button (not pictured)
(2) Alligator clips (not pictured)
Start Arduino Sketch
To start you new sketch:
- Open Arduino
- Go to File > New
- Go to File > Save and name your sketch folder
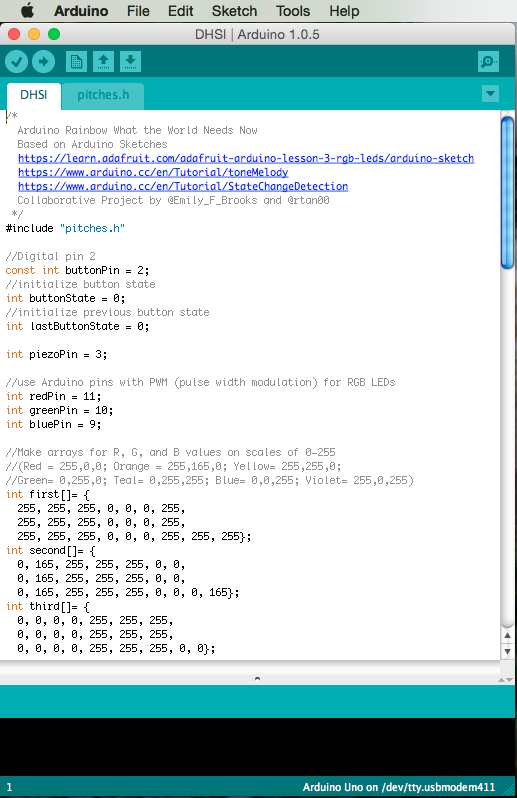
- Declare your variables as int (integers)
- Make arrays[] for melody, note durations, and the red, green, and blue values
- In void setup(), set your pinMode for the RGB pins as OUTPUT and for the button as INPUT
- In void loop(), use digitalRead to read the value of whether the button has been pressed or not to determine if the tone should be played
(Links are connected to Arduino Reference pages)
Include Pitches Library
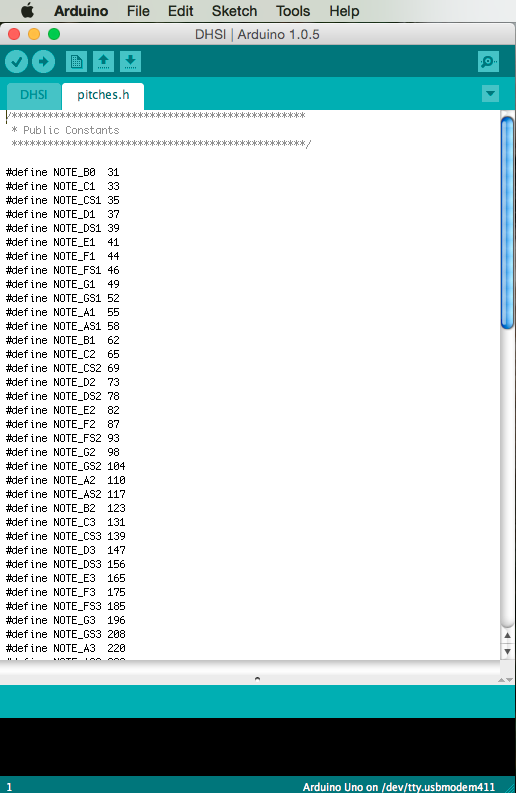
To include the pitches.h library:
Downloads
Finish Code
In order to finish the code:
- Determine what colors and order you want for your array. Make arrays for R, G, and B values on scales of 0-255 (Red = 255,0,0; Orange = 255,165,0; Yellow= 255,255,0; Green= 0,255,0; Teal= 0,255,255; Blue= 0,0,255; Violet= 255,0,255)
- Read your sheet music and translate into usable data (C4=middle of piano/treble clef, 4=quarter note)
- Write a function to analogWrite values to each pin of the RGB LED
Find finished code attached to this tutorial.
Downloads
Assemble Prototype
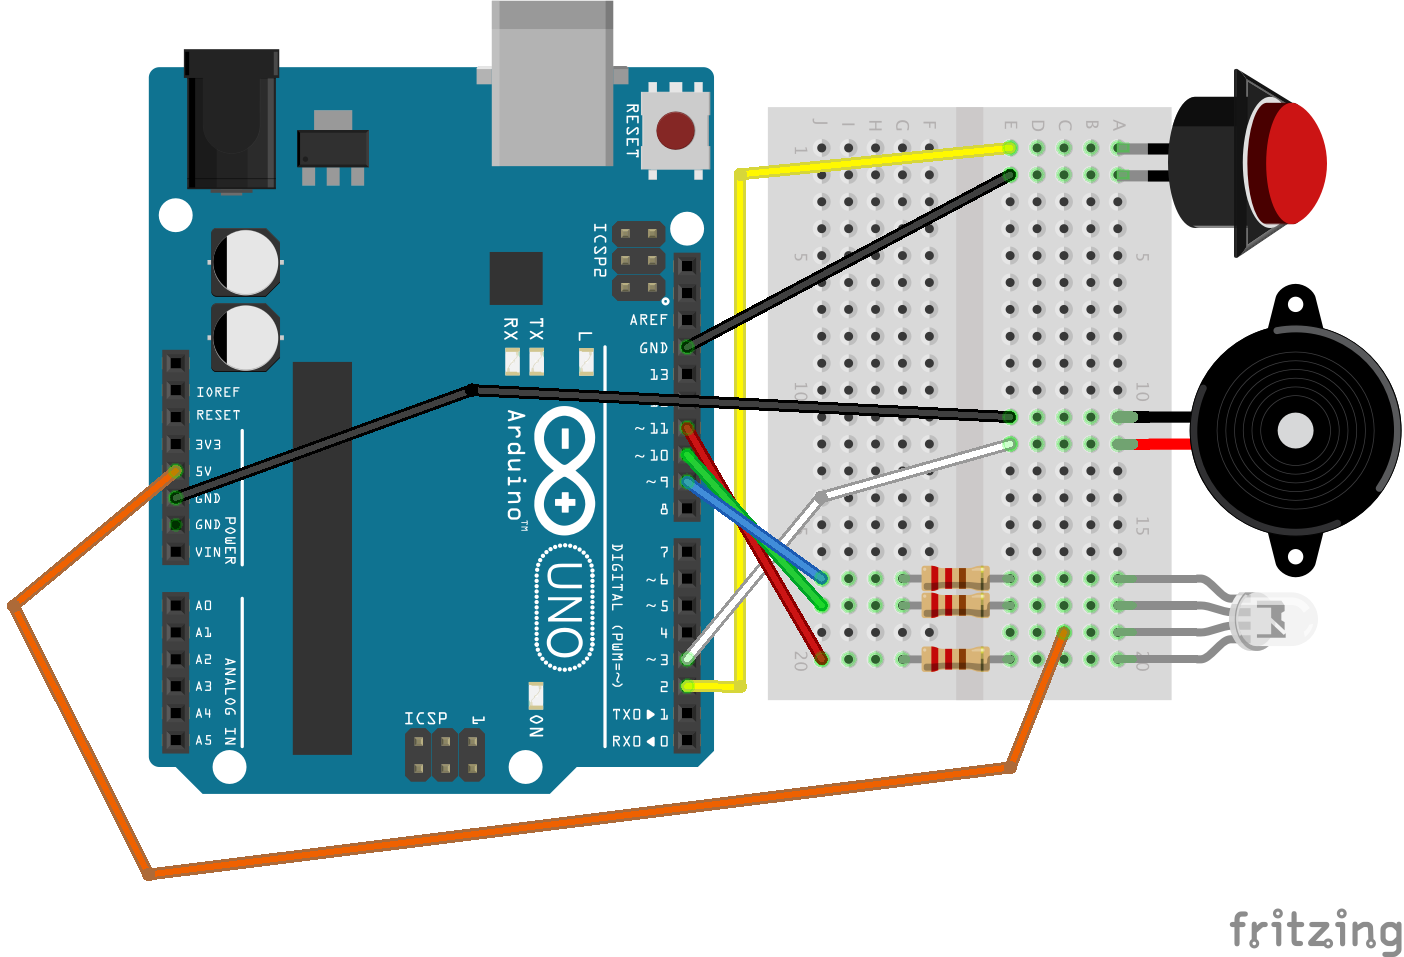
To assemble your prototype:
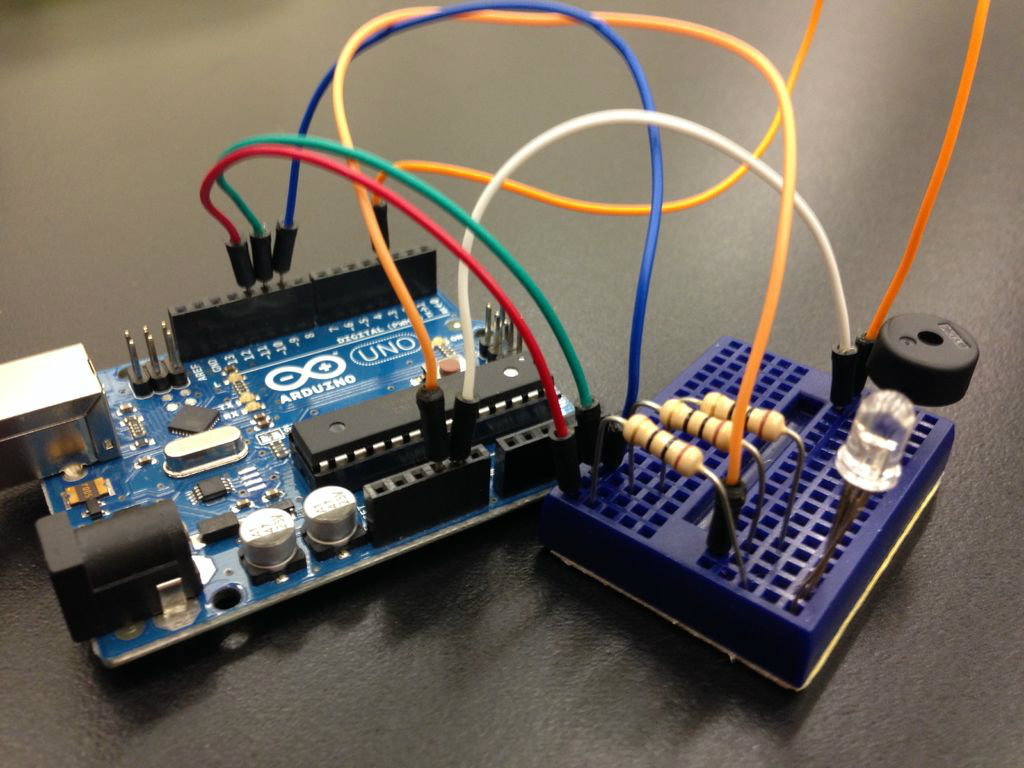
- Orient your breadboard and Arduino next to each other
- Carefully plug the leads of the piezo, RGB LED, and button into the breadboard as shown in the diagram (we used alligator clips to connect the button)
- Plug in the resistors of the RGB LED pins
- Use jumper cables to connect the parts to the Arduino pins based on the pin numbers you declared in your code
Run Code and Enjoy!

To complete the project:
- Connect your Arduino to your computer/laptop via USB cable
- Verify your code by hitting the checkmark in the top left hand corner
- Go to Tools > Board and select Arduino Uno
- Go to Tools > Serial Port and ensure that your laptop is recognizing that you have connected your Arduino
- Click the right arrow (Upload) and enjoy the efforts of all of your hard work!