Arduino Fixed-point Vehicle Proximity Detector.
by maxhirez in Circuits > Arduino
26280 Views, 80 Favorites, 0 Comments
Arduino Fixed-point Vehicle Proximity Detector.
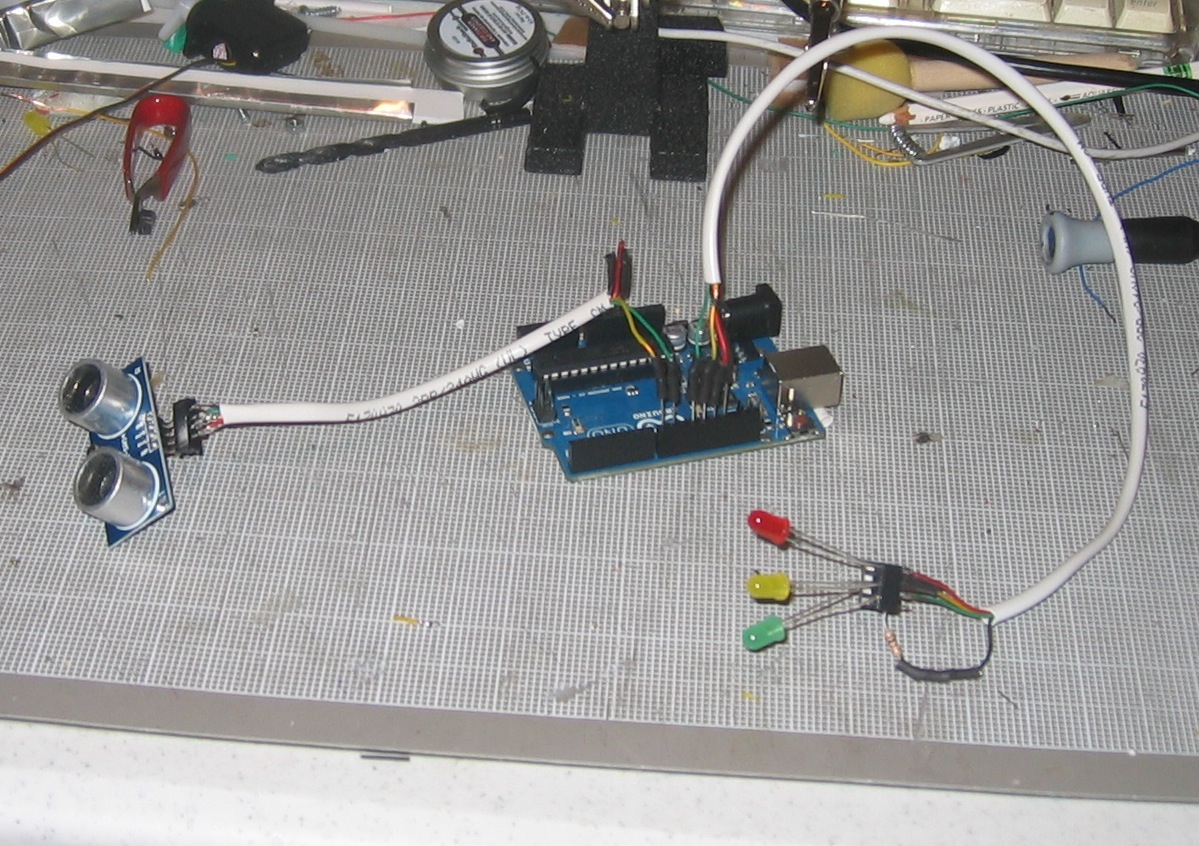
This is the high-tech version of hanging a tennis ball from the ceiling from a piece of string. Of course, if you have two different types of vehicles, that tennis ball isn't going to land in the same place on both of them. This project can prevent hundreds of dollars in dry-wall repair and bicycle crank replacements, not to mention the shame of poor parking skills.
In this instructable, we'll be making everything "plug-n-play." This gives us three advantages. First off, you don't have to worry about frying electronics with poor soldering technique. Second, modular impermanence means you can use almost all the parts again just by pulling them out of their sockets. Third, good Arduino hardware and breadboard practices are oriented towards pin-plugging, so we'll include a technique that can be adapted to almost anything you want to plug into your Arduino (servos, motors, sensors, even speakers.)
To begin, gather your materials:
-An Arduino UNO board. (Duemillanoves and Megas should work just as well, I just haven't tested them.)
-An HC-SR04 Ultrasonic Ping sensor. There are two types commonly available-you want the four pin type for this tutorial.
-One Red LED
-One Yellow LED
-One Green LED
-Two 8-pin Din sockets
-One 180Ω Resistor
-24 gauge solid 2-twisted Pair Telephone hookup wire.
-Eight #17 stick pins
-about 4 inches of 1/8" heat-shrink tubing.
Tools:
-Soldering Iron and solder
-Angle snips
-Heat source for the heat shrink tubing (candle lighters or paint-remover guns work well.)
-Needle nose pliers and a "helping hand" work stand never hurt
Step One:Ground the Current Limiting Resistor
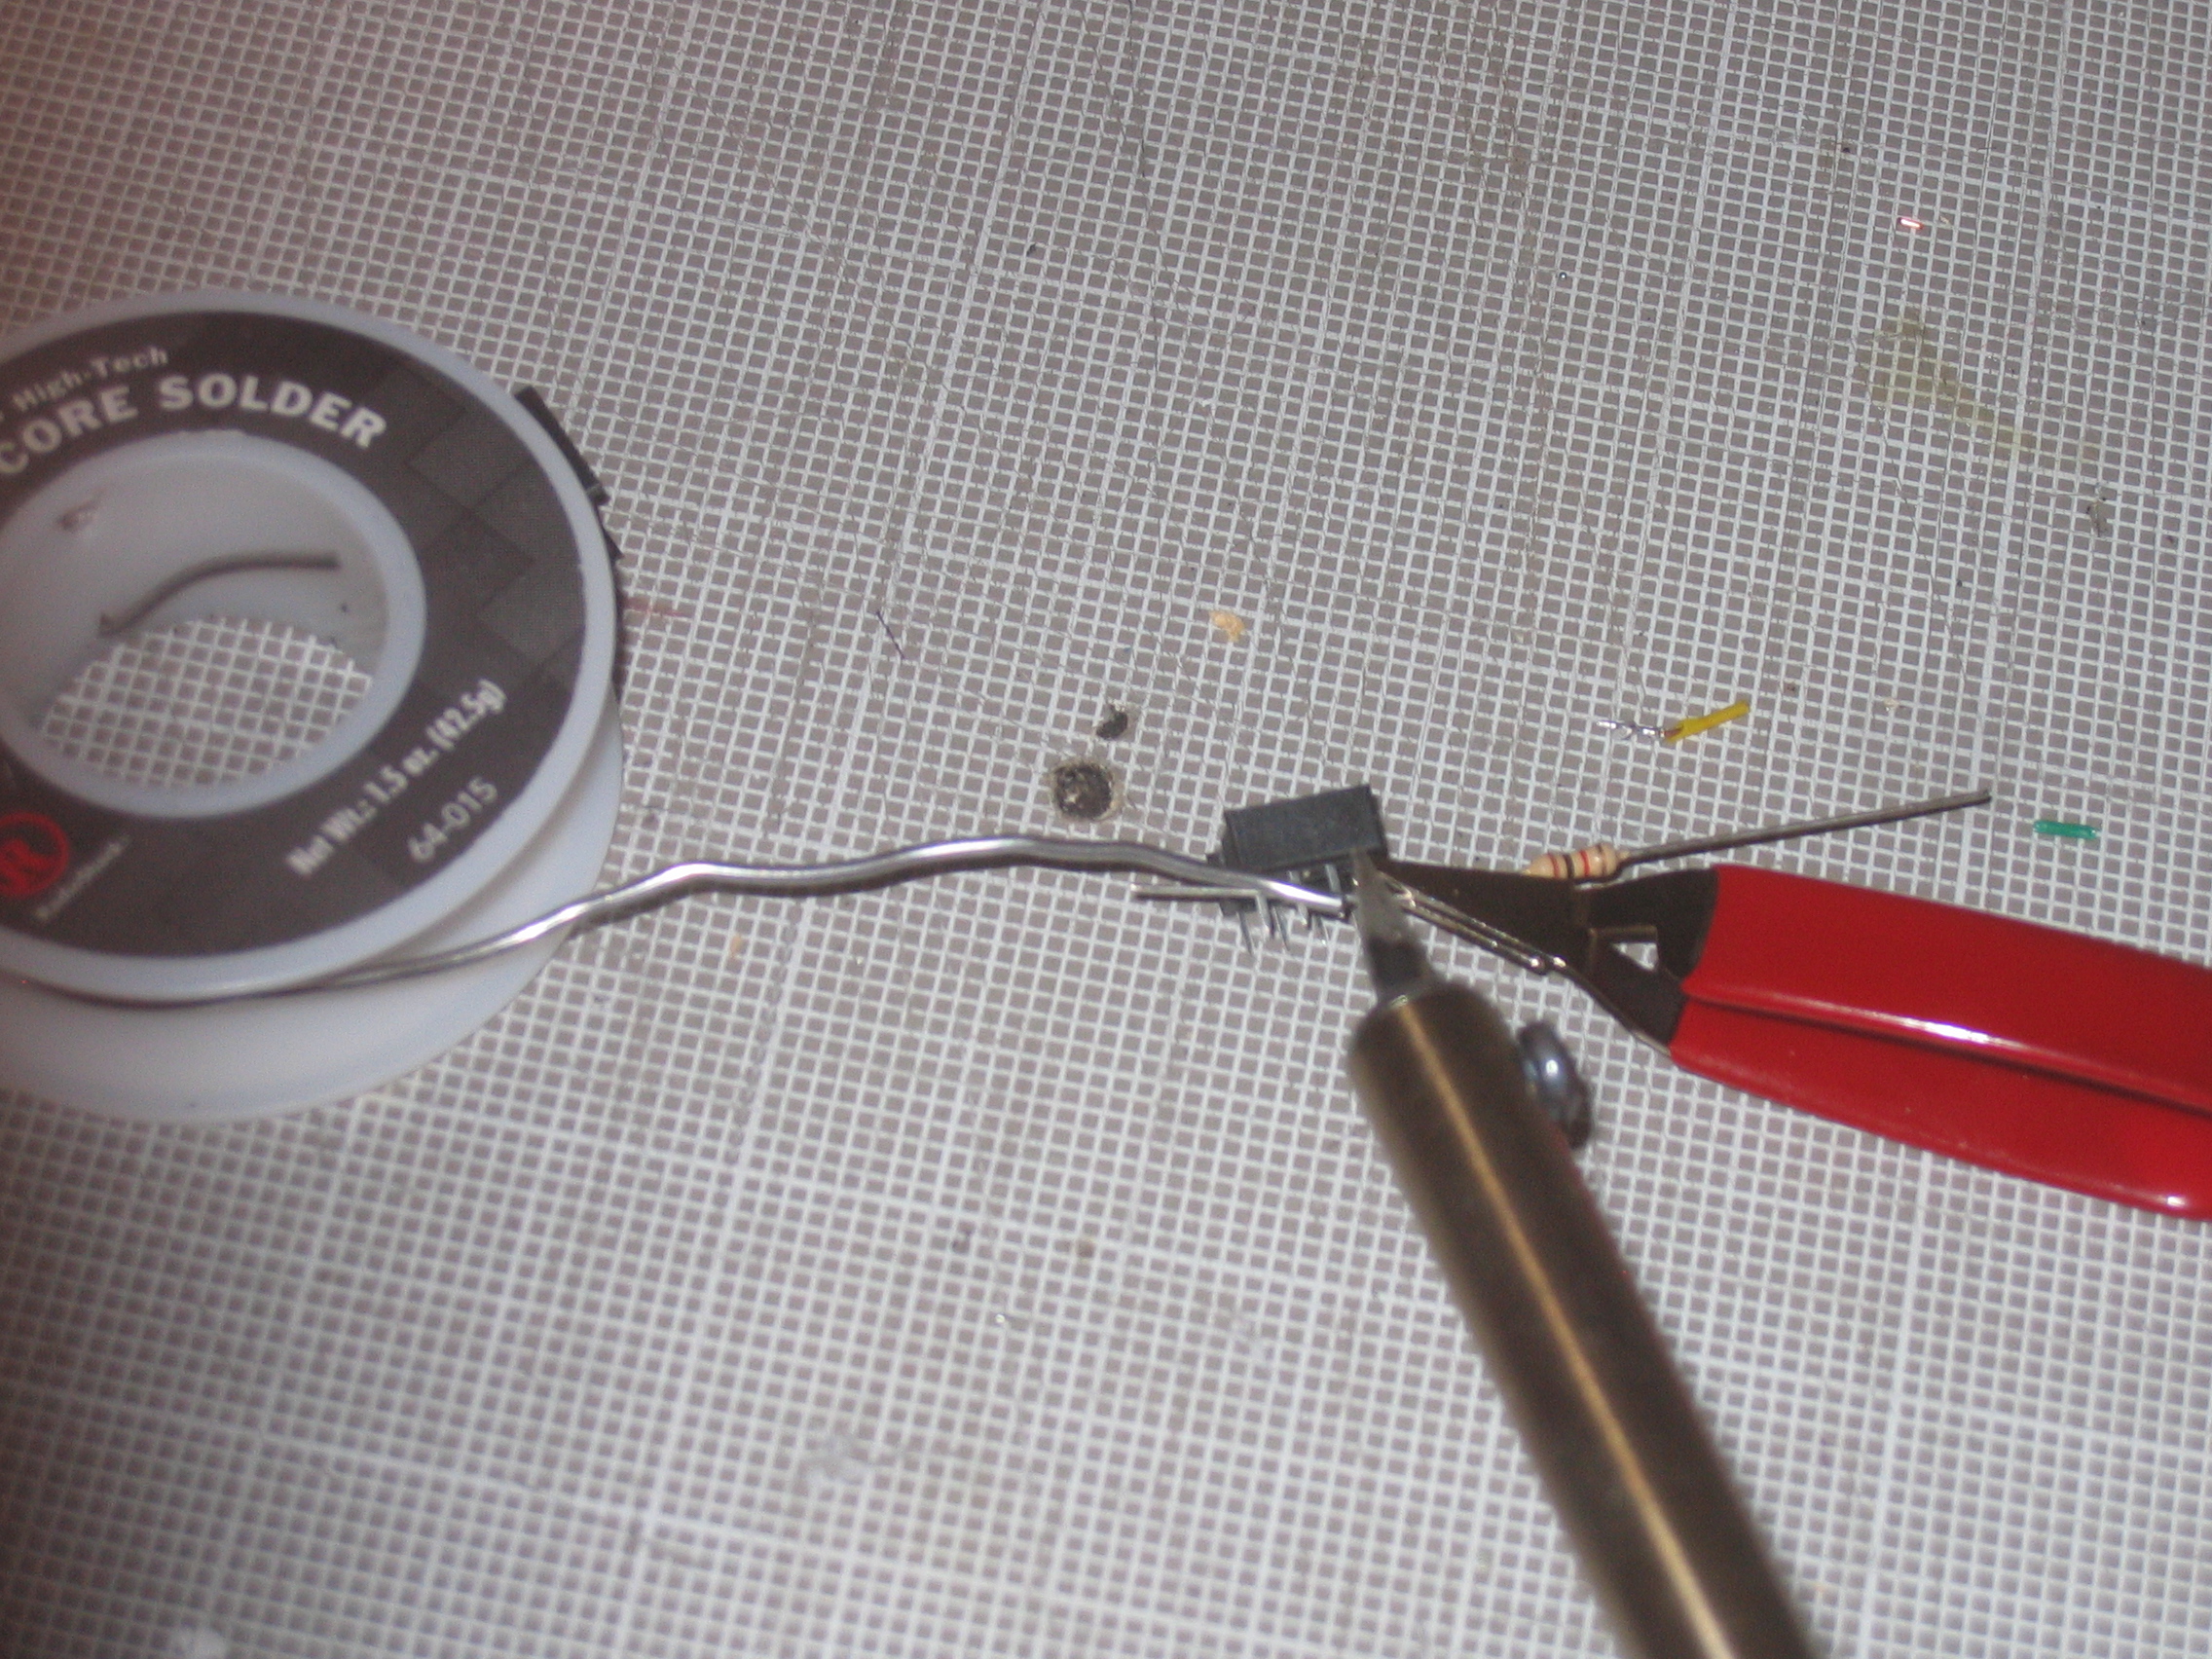
First, take one of the 8-Pin DIP sockets and your 180Ω resistor. Place the resistor across three pins of the socket and solder it to each pin. (It won't hurt anything to solder it to all 4. Also, a resistor will probably stand up to the soldering without the heat-sink in the photo. It's just good practice and it holds it in place well.)
Step 2:Add Color Coded Voltage Feed Wires
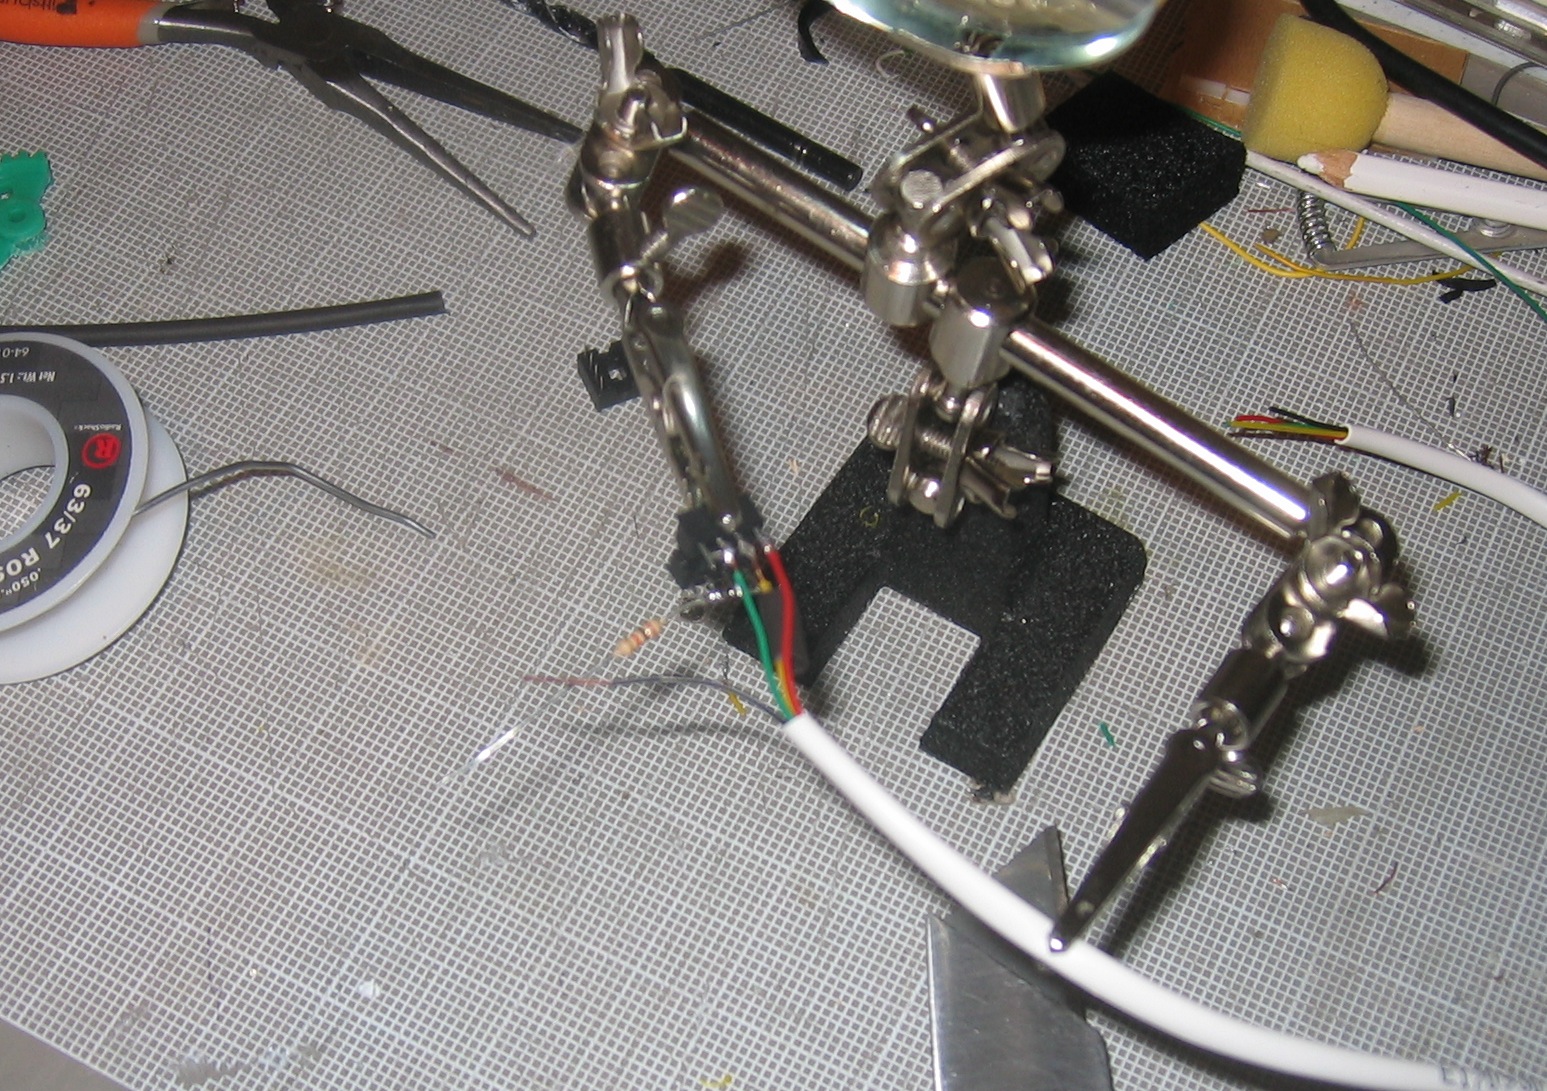
Take a length of phone hook up wire (the length should be determined more or less by how high above where you plan to mount your Arduino you want your indicator lights to be) and strip about 1 1/2"-2" of the outer insulator off of it. Then strip about 1/8" of the insulator off of each of the red, green and yellow wires. We're going to keep everything color coded and consistent here, and phone hookup wire is a great way of doing that. Solder one wire to each pin across from the three pins that you soldered the resistor to so that the yellow wire is in the middle (you may want to heat-shrink at least the yellow wire.)
Step 3:Ground the Resistor
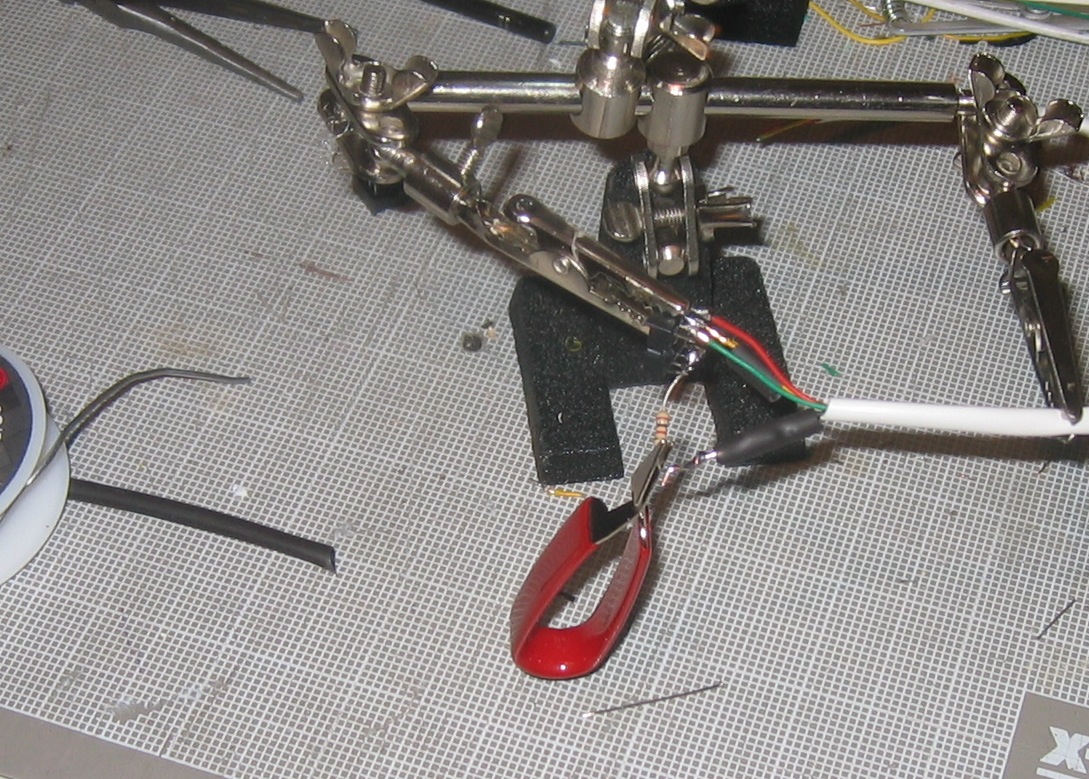
Strip 1/2"-3/4" of the insulator off of the black wire and slide a length of heat shrink tubing over the remaining insulator on that wire. Then wrap the stripped lead around the free lead of the 180Ω resistor and solder them together. (Again, the heat sink probably isn't necessary, but it can't hurt.) Snip any extra lead off, slide the heat-shrink tubing over the joint and shrink it.
Step 4-Making the Rail Plugs
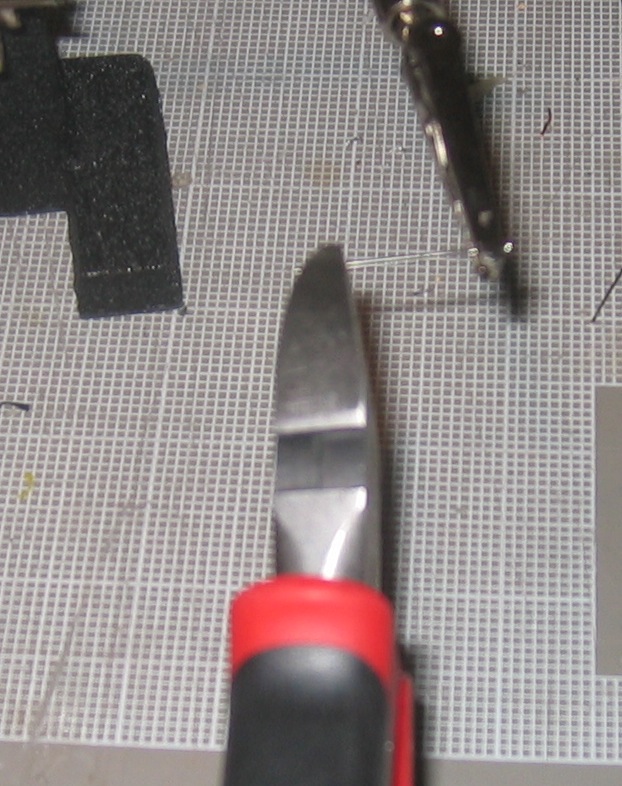
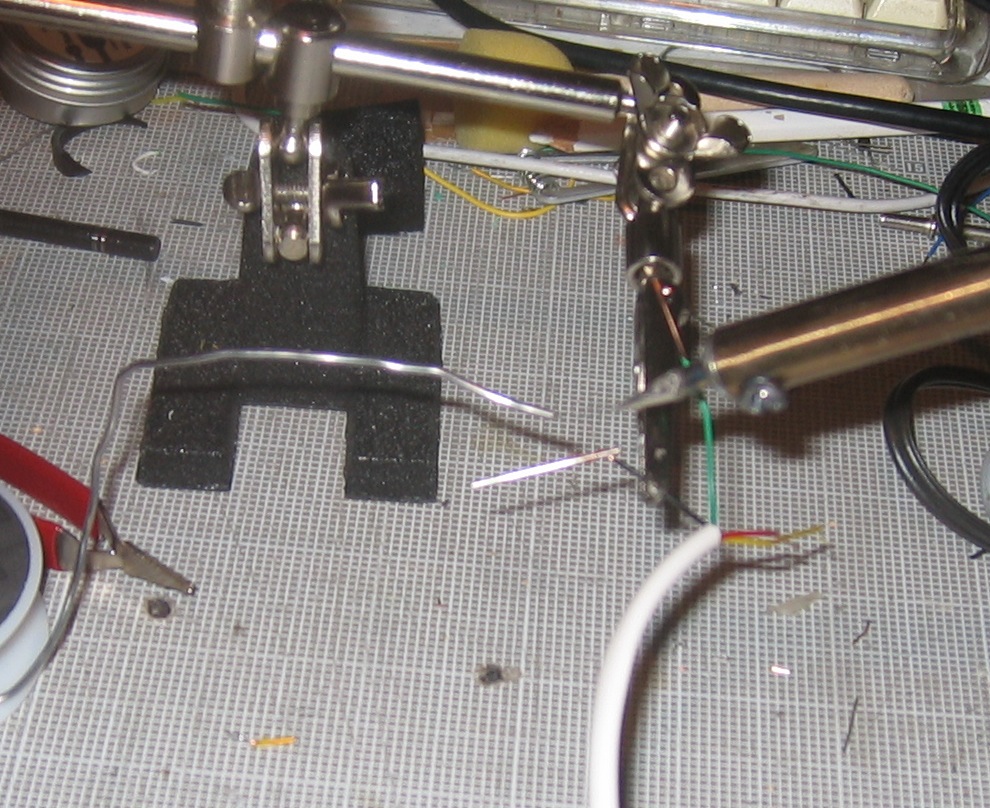
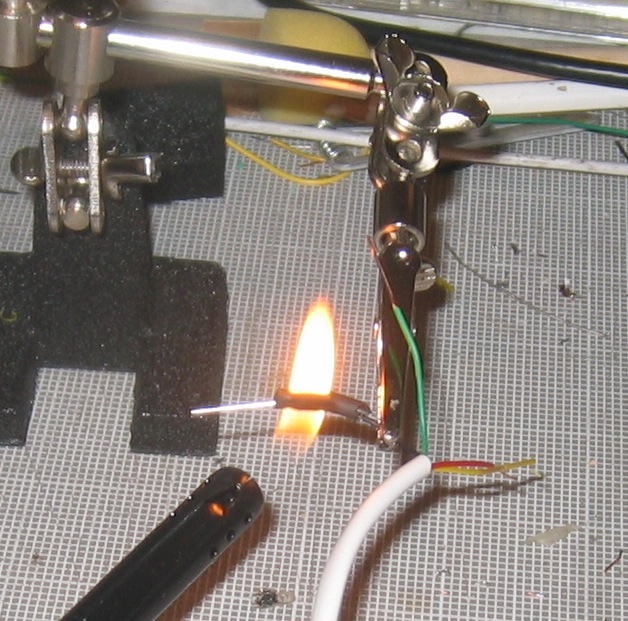
Rail plugs are an easy way to make nearly any electronic part with wire leads more easy to use with your Arduino or breadboard. You can use snap-off rail pins, but a much easier way to do it involves using regular sewing stick-pins. #17 size seem to work best for me. First, cut the pointy end of the pin off (first image for this step.) Next, strip the hookup wire-about 3" off the outer casing and about 1/2" off of each separate wire. Coil the lead of the first wire around the "head" end of the stick pin so that about 1/4" of the pin is wrapped in wire and solder them together (second image.) Then slide a length of heat-shrink tubing long enough to cover the solder joint plus about 1/8" extra for the wire side and 1/16" extra for the pin side (it doesn't have to be that exact, just as long as there's enough extra to grab and you don't have any wire sticking out from the tubing on the pin-side) and shrink it into place (third image.) Once the heat-shrink has cooled, straighten out the joint. Repeat this with each of the four wires.
This isn't exactly how commercial jumper wires are made but it's a close analog. I have used this on technique on motors, servo plugs, speakers, a flashlight lamp socket, and a USB cable (to make a very convenient regulated +5v breadboard power source using my computer or a cell phone charger.)
This isn't exactly how commercial jumper wires are made but it's a close analog. I have used this on technique on motors, servo plugs, speakers, a flashlight lamp socket, and a USB cable (to make a very convenient regulated +5v breadboard power source using my computer or a cell phone charger.)
Step 5: Make the Sensor Socket
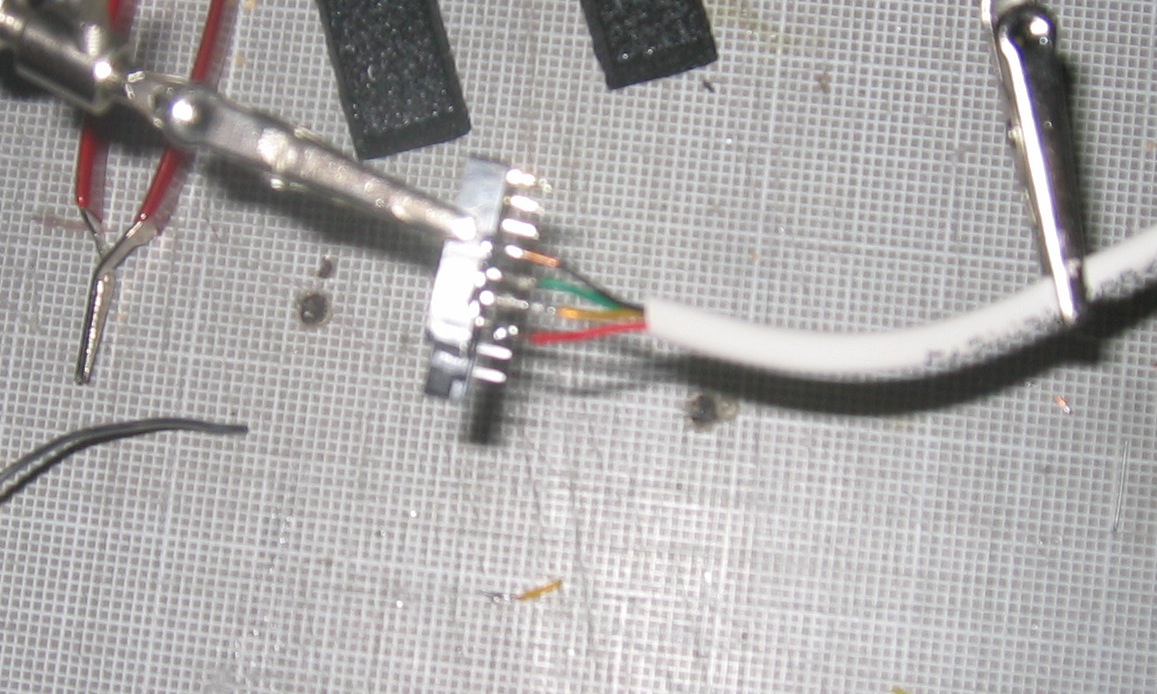
Take another length of phone wire (as long as you need it to be to reach from where you'll place your Arduino to where you want to mount the ultrasonic sensor.) Strip about an inch of the outer insulator off of it and about 1/8" off of each of the leads. Solder the leads to the socket in this order, left to right: Red, Yellow, Green and Black. Be careful not to solder-bridge any pins, and you may want to heat-shrink every other pin.(Note:Rather than use an 8-pin socket, I used part of a 20 pin I had littering my workspace and cut the ends off. It really doesn't matter.) If you want, you can cut the center rails of the dip socket and leave it one-sided, but if you leave the "back" half of the socket on you can easily mount it to something in your garage with a zip tie.
Next, make rail plugs for the other end of this wire by repeating Step 5 of this tutorial with this phone wire.
Next, make rail plugs for the other end of this wire by repeating Step 5 of this tutorial with this phone wire.
Step 6:ARDUINO-fy It!

Now is where it all comes together.
First, insert your LEDs into the LED DIP Socket from Steps 1-4 so that each color of LED corresponds to the color of wire soldered to each pin. Make sure to insert them so that the anode (the longer of the two LED leads) of each is on the colored wire side and that the cathode (the shorter lead) is on the ground side (with the resistor on it.) Then insert the rail plugs on the other end of this phone wire into the Arduino digital rail in this order: Black in GND, Red in 13, Yellow in 12 and Green in 11.
Next, insert your HC-SR04 module into its DIP rail so that the pin labeled Vcc corresponds to the socket pin with the red wire soldered to it and the at the other end labeled GND corresponds to the pin with the black wire soldered to it. Then insert the rail plugs on the other end of this phone wire into the Arduino in this order: Yellow to digital pin 8, Green to digital pin 9 (and in the POWER rail on the other side of the Arduino) red into 5V and black into GND (there are two on that rail-use either.)
Step 7:Program the Arduino
Plug your Arduino into your computer, fire up the Arduino programming environment and copy and paste the code below into a blank sketch. Compile it and then upload it into your Arduino board.
A few things to note:
-I've included a simple serial link that allows you to see how close the nearest object that the sensor is reading is. This will let you get a feel for the sensor's capabilities by moving it around some and bringing your hand closer to and farther from the sensor. To see a readout of the distance from the sensor that the nearest sensed object is, simply open the serial monitor by selecting Tools>Serial Monitor from the Arduino Menu bar while the Arduino is still attached to the computer. You can if you wish remove the lines pertinent to the serial monitor, but it's not hurting anything and leaving them in once the Arduino is disconnected from the computer won't affect the functioning of the unit in any way.
-I've set the yellow and red light sensor distances at 5 feet and 6 inches respectively so that standard practice tells the driver to slow down at yellow and stop at red. These variables are warnDistance and stopDistance. If you want to use different distances, simply change the values of these to constants to the distance in inches you wish to assign to each range in the definition lines of the code (ie, the ones that begin with "int" and end with the number and a semicolon.)
-If for some reason you want to join the 21st century and the rest of the world, you can easily adjust the program to work with centimeters by changing the line:
distance = duration / 72 / 2;
to
distance = duration / 29 / 2;
Then simply adjust warnDistance and stopDistance to the distances you wish to use in centimeters.
CODE:
//"Arduino Garage Tennis Ball." A distance sensor with LED Stoplights for people with multiple vehicles going into a limited space.
const int triggerPin = 8;
const int echoPin = 9;
int redPin=13;
int yellowPin=12;
int greenPin=11;
long duration;
long distance;
void setup(){
pinMode (13, OUTPUT);
pinMode (12, OUTPUT);
pinMode (11, OUTPUT);
Serial.begin(9600);
}
void loop()
{
int stopDistance=6;//object distance in inches from sensor that you want to trigger the Red LED.
int warnDistance=60;//object distance in inches from sensor that you want to trigger the Yellow LED.
pinMode(triggerPin, OUTPUT);
digitalWrite(triggerPin, LOW);
delayMicroseconds(2);
digitalWrite(triggerPin, HIGH);
delayMicroseconds(5);
digitalWrite(triggerPin, LOW);
pinMode(echoPin, INPUT);
duration = pulseIn(echoPin, HIGH);
distance = duration / 72 / 2;//determines distance in inches of object from sensor by microseconds to inches formula.
if (distance >= warnDistance){
digitalWrite (redPin, LOW);
digitalWrite (yellowPin, LOW);
digitalWrite (greenPin, HIGH);
}
else if((distance>stopDistance) && (distance<warnDistance)){
digitalWrite (redPin, LOW);
digitalWrite (yellowPin, HIGH);
digitalWrite (greenPin, LOW);
}
else{
digitalWrite (redPin, HIGH);
digitalWrite (yellowPin, LOW);
digitalWrite (greenPin, LOW);
}
Serial.println (distance);
}
Step 8:Power It, Mount It and Go!
I won't go into the specifics of powering the Arduino away from the computer. You can buy a commercial "wall-wart" power source or use a 9v battery with a N-size power plug (remember, tip positive.) Plenty of advice is floating around the interwebs on the subject. Just make sure it's enough to run the board and pump enough light out of your LEDs so that you can see them through the windshield in the environment you're installing them in.
Mount the board, the sensor and the LEDs in the use environment. Try to keep everything in a relatively dry spot that won't get too cold or hot. Also you don't want a lot of vibration-it's pretty easy to shake the LEDs and the sensor out of their mounts.
Here's a video of me using it in my garage. Not the highest quality, mind you. If enough people vote for me in the Arduino Instructables challenge, then I can win a really kick-@ss camera and post even better videos of my geekery.
Step 9: Take It Even Farther!
As you can see, it's pretty easy to put something like this together. However, there are ways to make it even better.
One way is to make the ranges physically adjustable using potentiometers on the analog rail. Look at the "AnalogInput" example in the sketchbook of the Arduino environment to get ideas on how you'd pull this off. Essentially you would have to make a three-out rail plug for both the 5v and Ground pins that go to the HC-SR04 and feed them to two variable resistors with the center of each going to a rail plug for two analog ins on the Arduino. Programming would involve mapping the analogRead values on those inputs to stopDistance and warnDistance variables. This would allow you to figure out the distances in the garage environment without dragging your computer out and recoding in place.
Another option would be to try to build some kind of enclosure that let you mount the system to your car's bumper so that you could use it for parallel parking/back up warning. The problem is, the HC-SR04 unit would have to be pretty much exposed to the worst elements your car goes through all the time in order to function. Talk about a challenge.
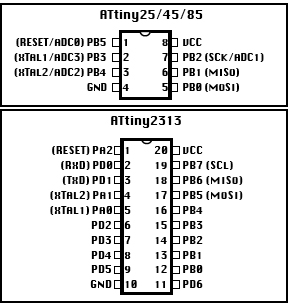
The last option I'll throw out is to use an AT Tiny microcontroller to free up the your Arduino for another project. There are just enough ins and outs on an AT Tiny 45/85 (and plenty of memory for this sketch) to use either for this application. For instructions on how to program one of these marvelous "mini-Arduinos," check out MIT's High-Low Tech or another one of my instructables, Tiny Programmer. Of course you'll have to reassign and reconfigure the pins and power arrangements-the AT Tiny doesn't have a built in power regulator or rails, but again a regulated 5v power supply should work just fine. I'd recommend using a breadboard to suss out your circuit and then soldering it up using a pre-cut perforated PC board that matches your breadboard layout. Looking at the sketch, I'd probably assign the following pins:
triggerPin = 0;
echoPin = 1;
redPin =4;
yellowPin=3;
greenPin=5;
Configuring the pins to ins/outs, that would mean HC-SR04 yellow and green to AT Tiny 45/85 pins 5 and 6 respectively and the LED DIP socket leads in this order: green to AT Tiny 45/85 pin 1, yellow to AT Tiny 45/85 pin 2 and red to AT Tiny 45/85 pin 3. Make sure to power the HC-SR04 by hooking its red wire to the same power that feeds the AT Tiny and ground it and the LED DIP socket the microcontroller's ground.
(I know that there are probably commercially available products that do what this does, but if that's the way you think, you're probably on the wrong website! Happy making!)