Arduino - Piezo Three Button Piano
by lolagrace in Circuits > Arduino
4629 Views, 1 Favorites, 0 Comments
Arduino - Piezo Three Button Piano
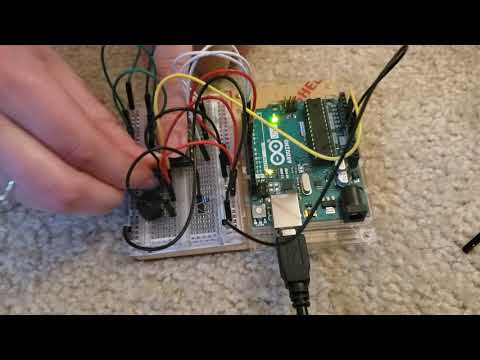
The three-button piano is a project for beginners with some experience using the Arduino.
I was inadvertently swept up in trying to create this while playing around with piezo buzzer for the first time. It was SO loud! In trying to figure out various methods to make the buzzer quieter and trying out different frequencies using the tone() and noTone() function, I realized it might be fun to try and mix the piezo buzzer together with my other favorite components of my Arduino kit: buttons and the potentiometer.
Materials needed include:
- 1 Arduino
- 1 Breadboard
- 1 USB Cable
- Jumper Wires (various colors)
- 1 330 Kilo-ohm Resistor
- 1 Piezo Buzzer
- 3 Push Buttons
- 1 Potentiometer
Piezo Buzzer
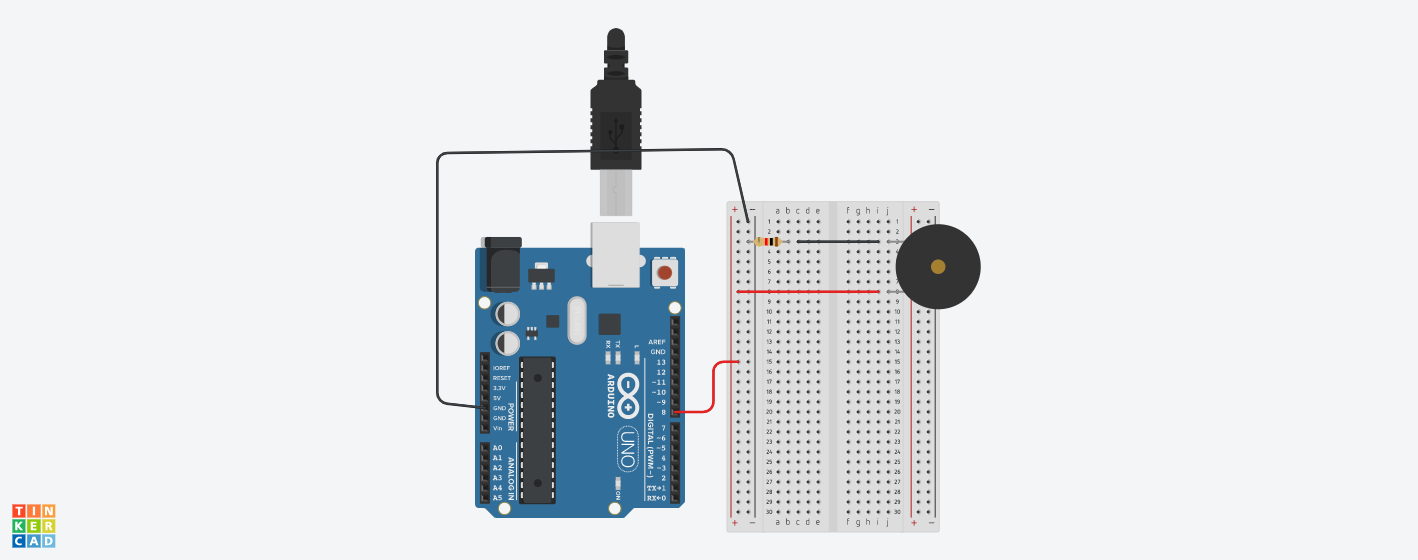
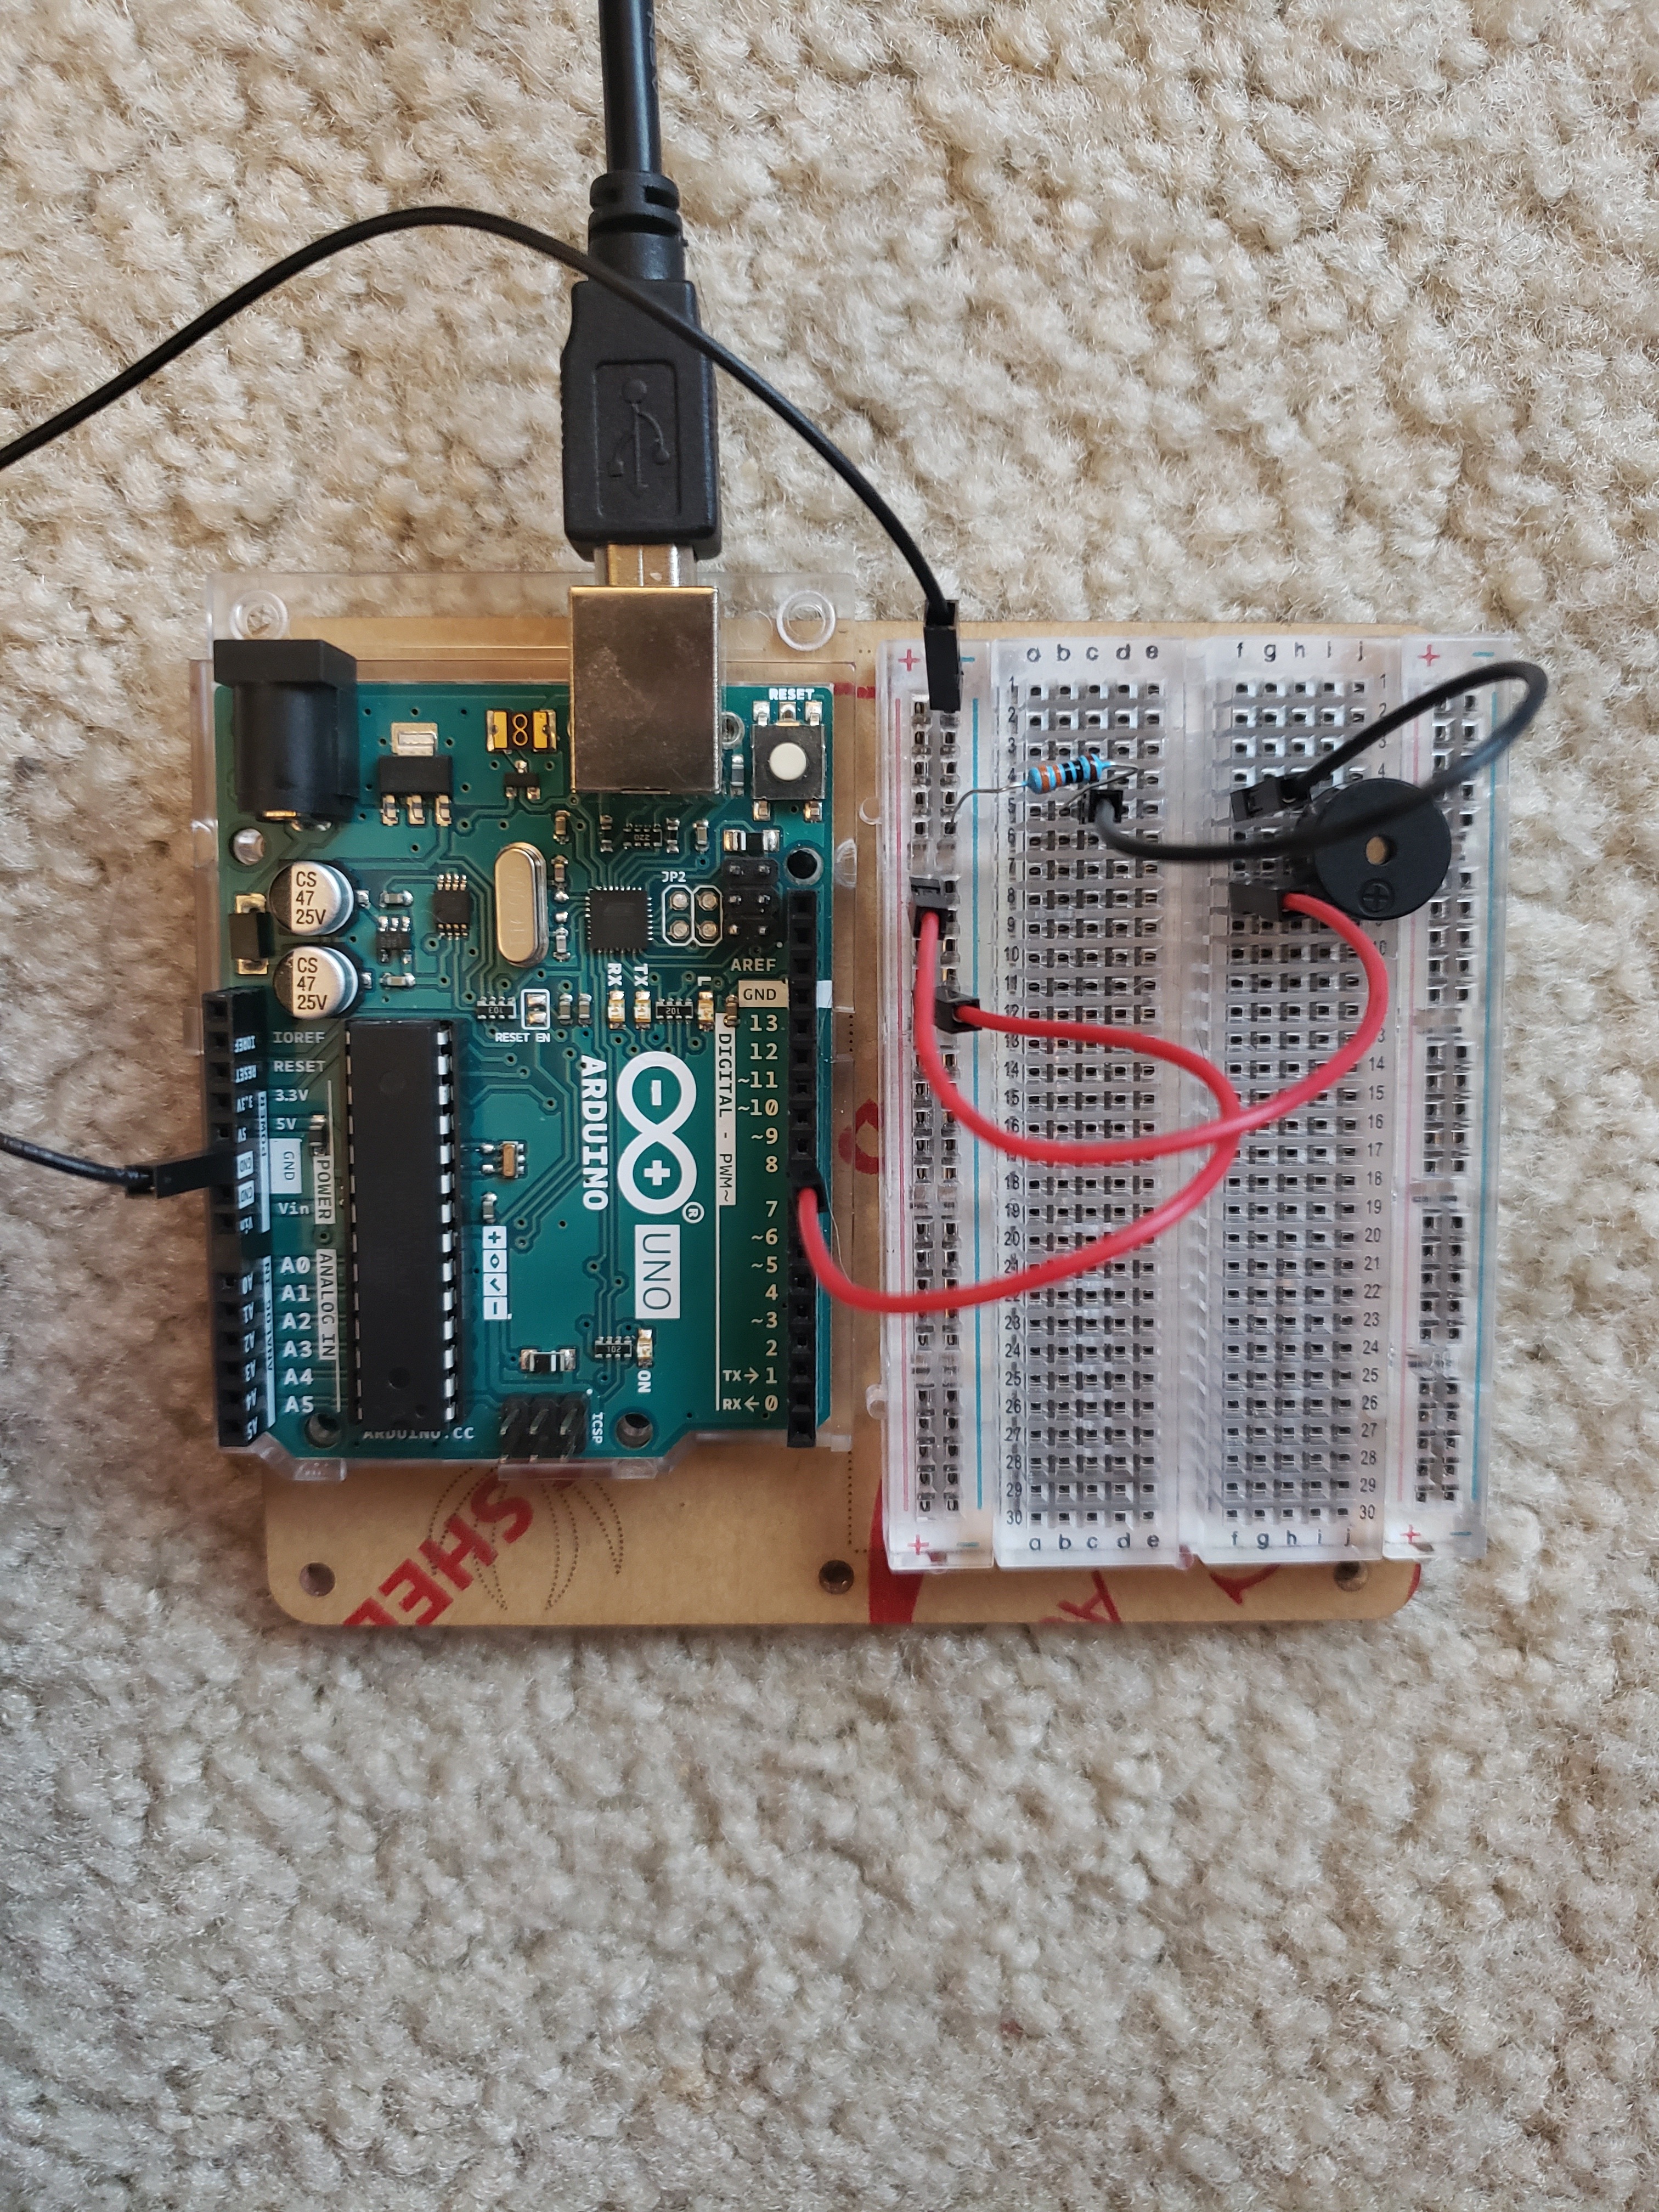
To start out, set up the piezo on the breadboard of the Arduino. One side of it (the shorter leg side) needs to run to ground. The other side (the longer leg side) needs to connect to a digital input pin. I chose to connect it to 8.
Push Buttons
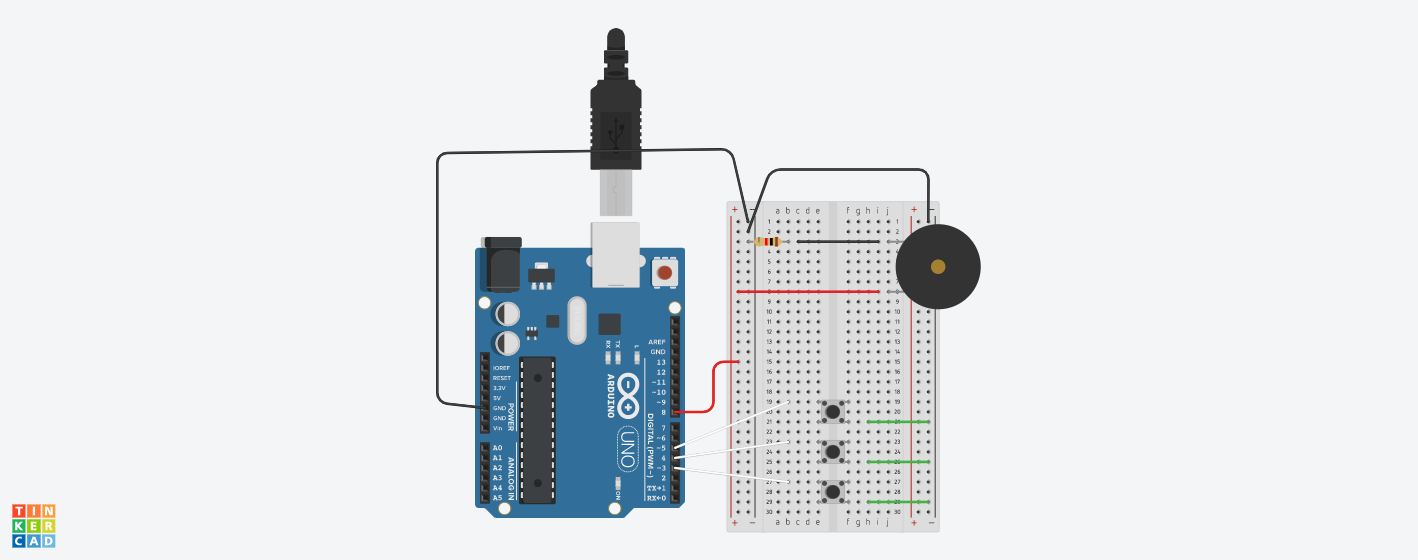
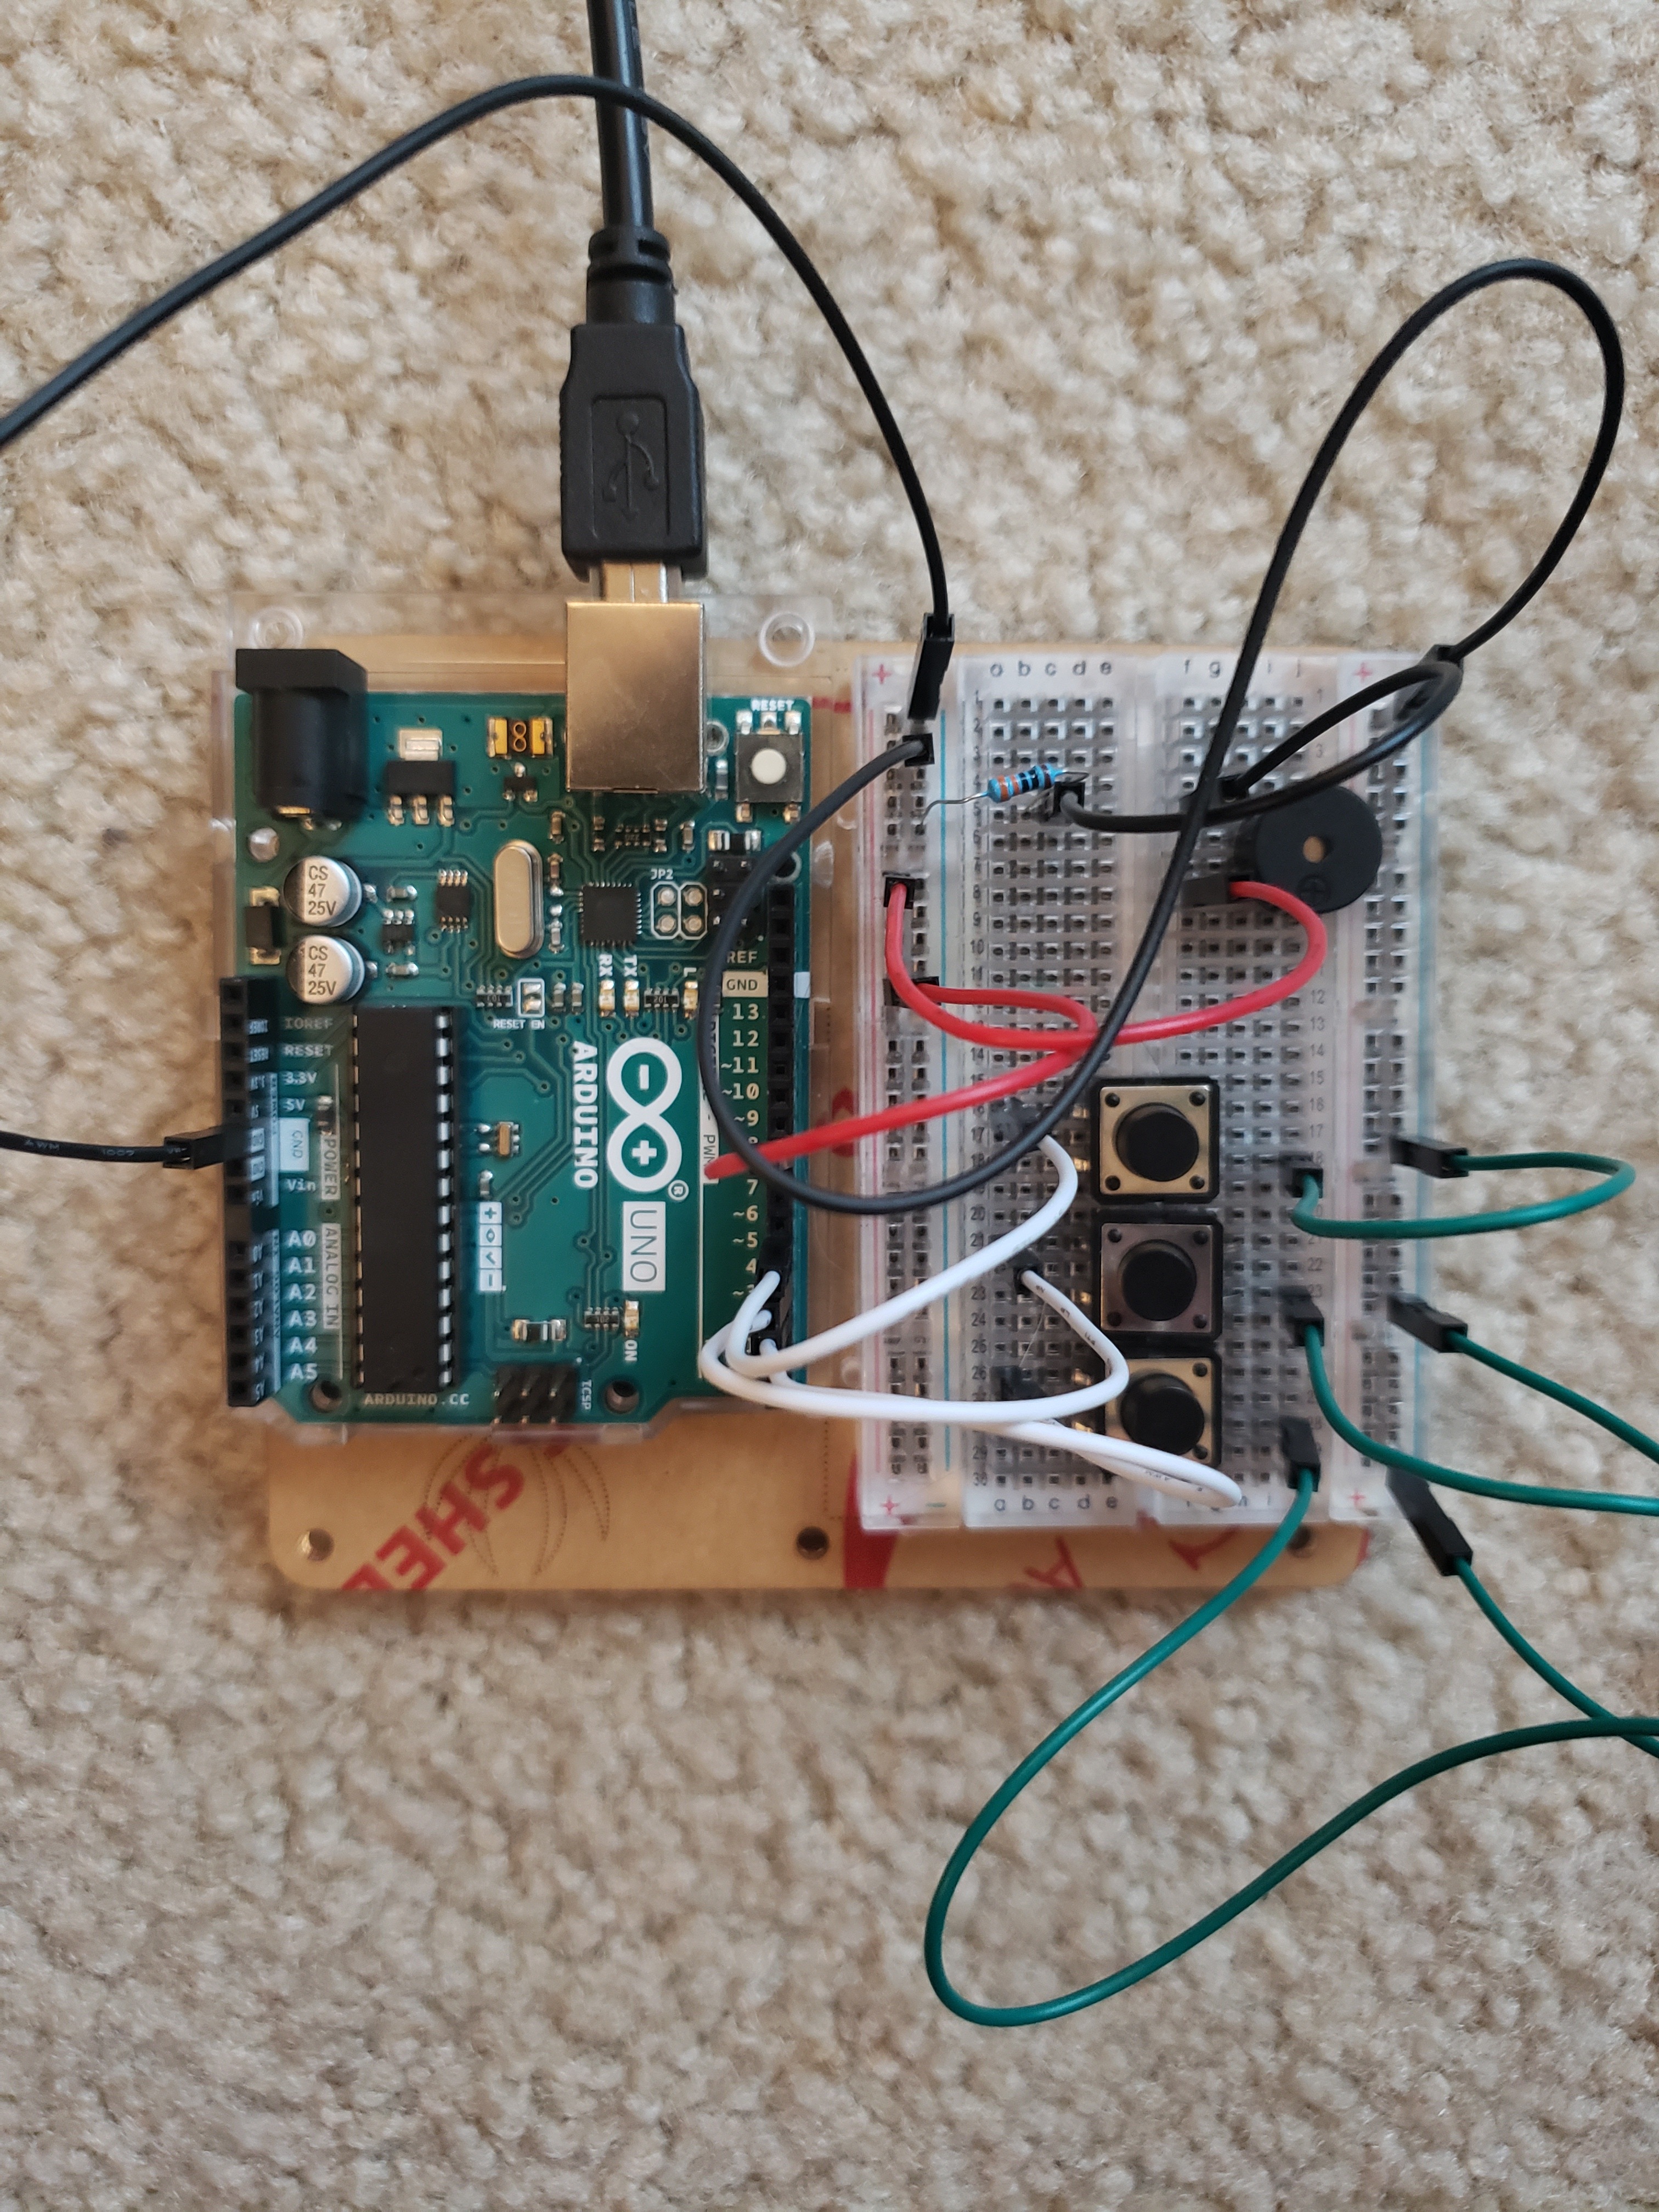
Next, it's time to set up the push buttons. Like the piezo, the push buttons needs to connect to ground and to a digital input pin.
Potentiometer
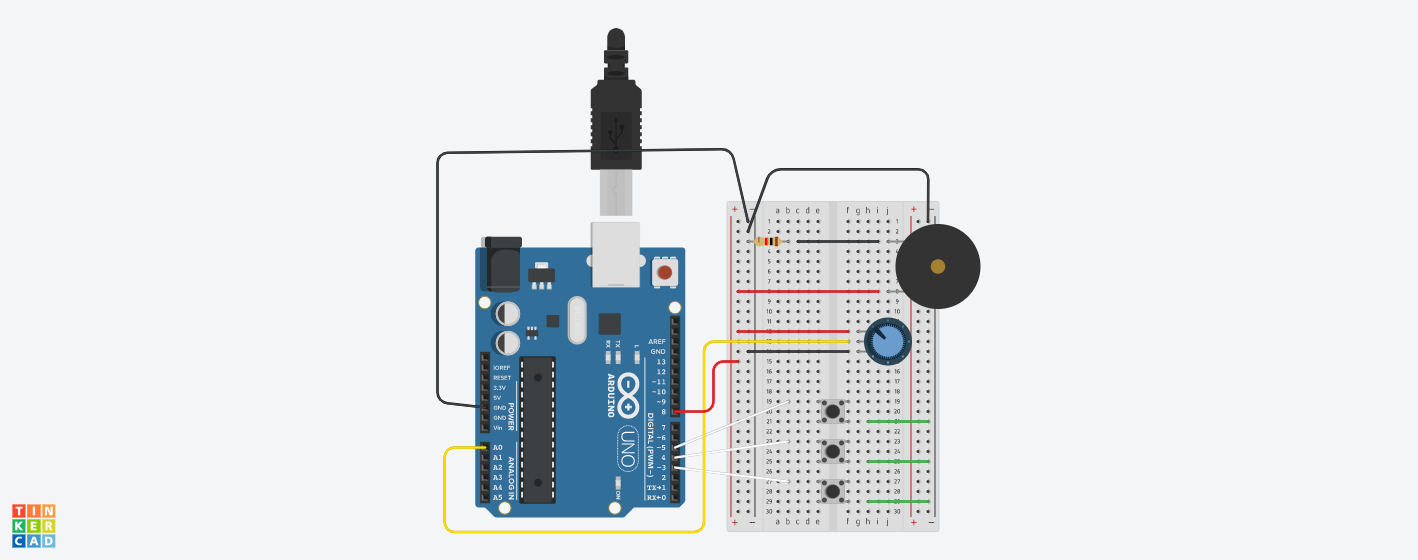
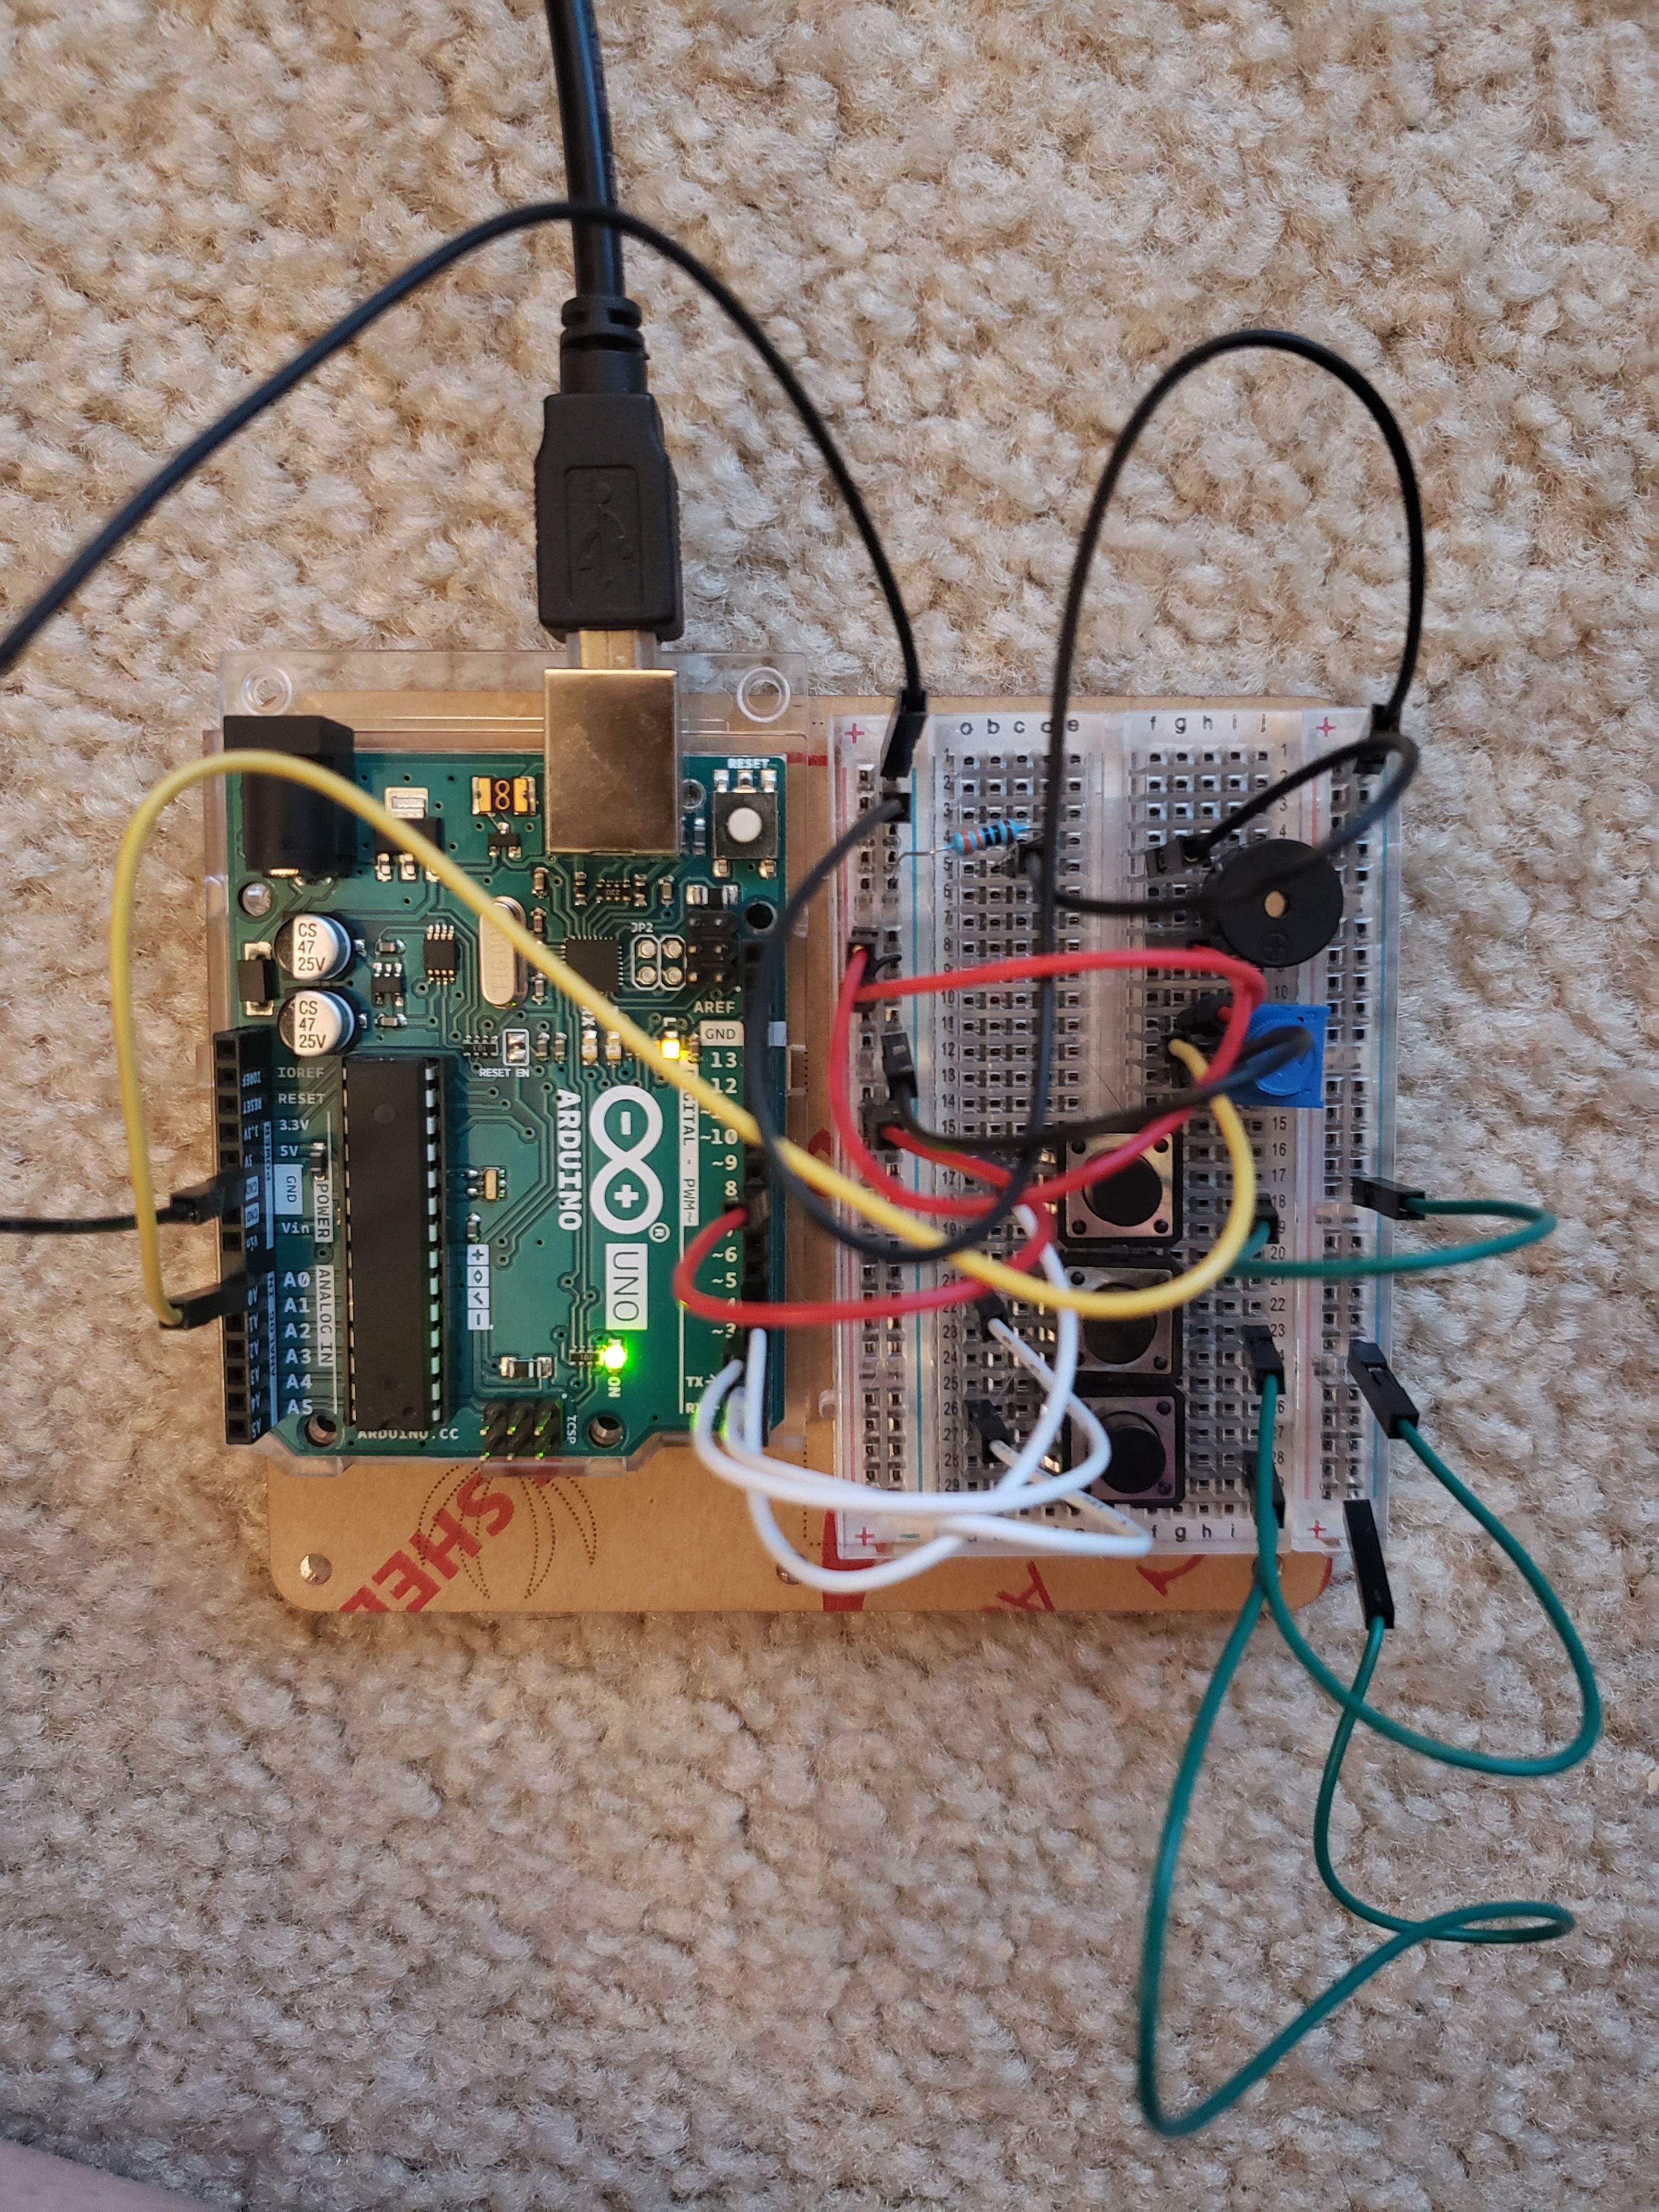
The final step in the physical build is the potentiometer. Potentiometers come in a few different forms. We'll be using the potentiometer as a voltage divider, so all three of its legs need to be connected.
Right Leg: Negative Bar (Ground)
Middle Leg: Analog Pin 0
Left Leg: Positive Bar
Code!
While writing out code for this project, I referenced information on a few specific types of functions:
noTone() (I didn't end up using this one. I set the frequency to "0" instead.)
Another wonderful reference for first-time users of the Piezo Buzzers can be found here. Though the idea of changing the sound of the piezo buzzer seems simple, it can be a bit overwhelming at first!
The tone() function can be broken down into three parts:
- Pin (the pin that the piezo buzzer is connected to)
- Frequency (the frequency of the sound in hertz)
- Duration (the duration of the sound given in milliseconds)
Basically, it looks like this: tone(pin, frequency, duration). The third component (duration) is optional, while the other two are necessary for the buzzer to function. The "frequency" component of the tone function is what can be thought of as "the sound" that is being produced by the buzzer.
You'll also notice that the code features two other bits of code. There's some if/else statements set up to tell the Arduino what to do if different buttons are pressed as well as to set it up with "frequency = 0" in situations when none of the buttons are being pressed. Within the if/else statements, map() functions are used to map the scale of the potentiometer onto a set of frequencies. These can be changed! Play around with different frequency values to see what different sounds you can get from the piezo.
Check out the code that I used to create the three-button piano here or check below.<p>int piezoPin = 8; //Set up pin connected to Piezo. int sensorPin = 0; //Set up pin connected to the sensor (the potentiometer). int sensorValue = 0;
int button1 = 5; //Set up the input pins connected to the buttons.
int button2 = 4;
int button3 = 3;
int frequency = 0;
const int delayTime = 500; //Set up a constant for the variable of delay time in the tone() function.
void setup() {
pinMode(button1, INPUT_PULLUP);
pinMode(button2, INPUT_PULLUP);
pinMode(button3, INPUT_PULLUP);
}
void loop() {
sensorValue = analogRead(sensorPin); //Read the sensor.
//Map the different values of the potentiometer to a set of frequencies for each of the three buttons.
if (digitalRead(button1) == LOW) {
frequency = map(sensorValue, 0, 1023, 400, 499);
}
else if (digitalRead(button2) == LOW) {
frequency = map(sensorValue, 0, 1023, 500, 599);
}
else if (digitalRead(button3) == LOW) {
frequency = map(sensorValue, 0, 1023, 600, 699);
}
else {
frequency = 0;
}
tone(piezoPin, frequency, delayTime); //Set up the tone() functions with variables.
}