Arduino PS/2 to USB Adapter
by ArduinoCheckMate in Circuits > Arduino
12397 Views, 24 Favorites, 0 Comments
Arduino PS/2 to USB Adapter
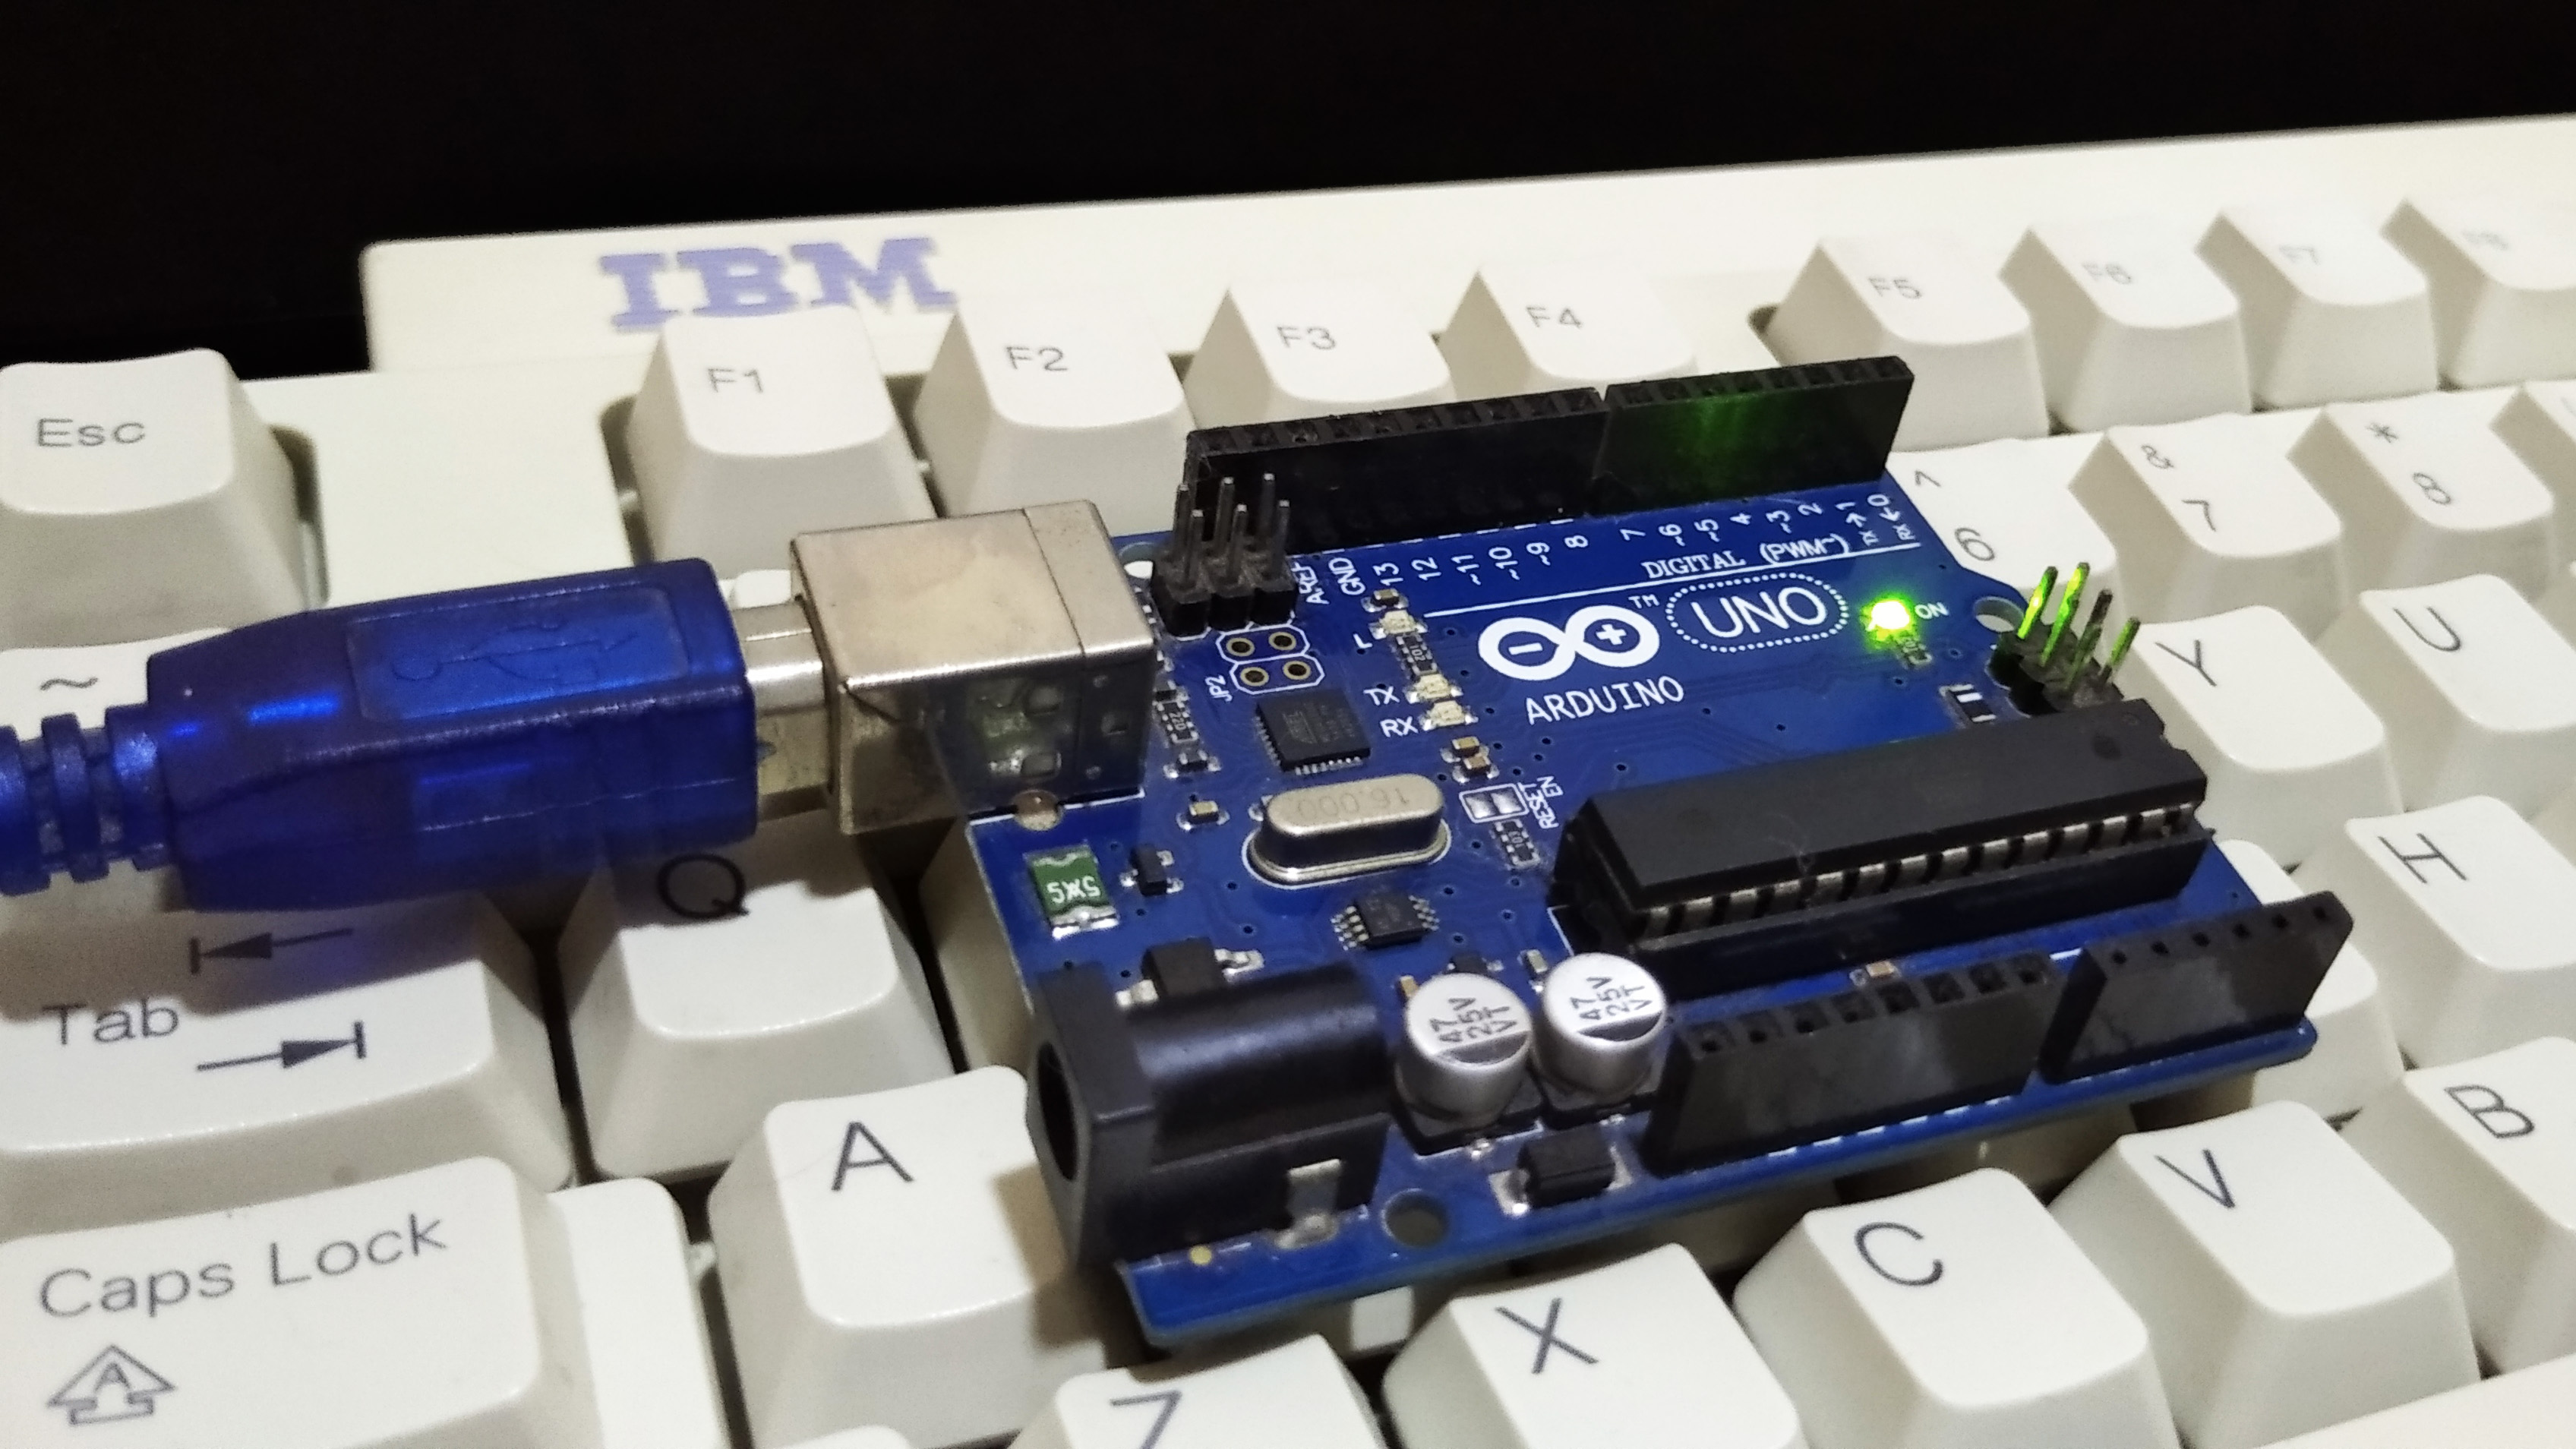
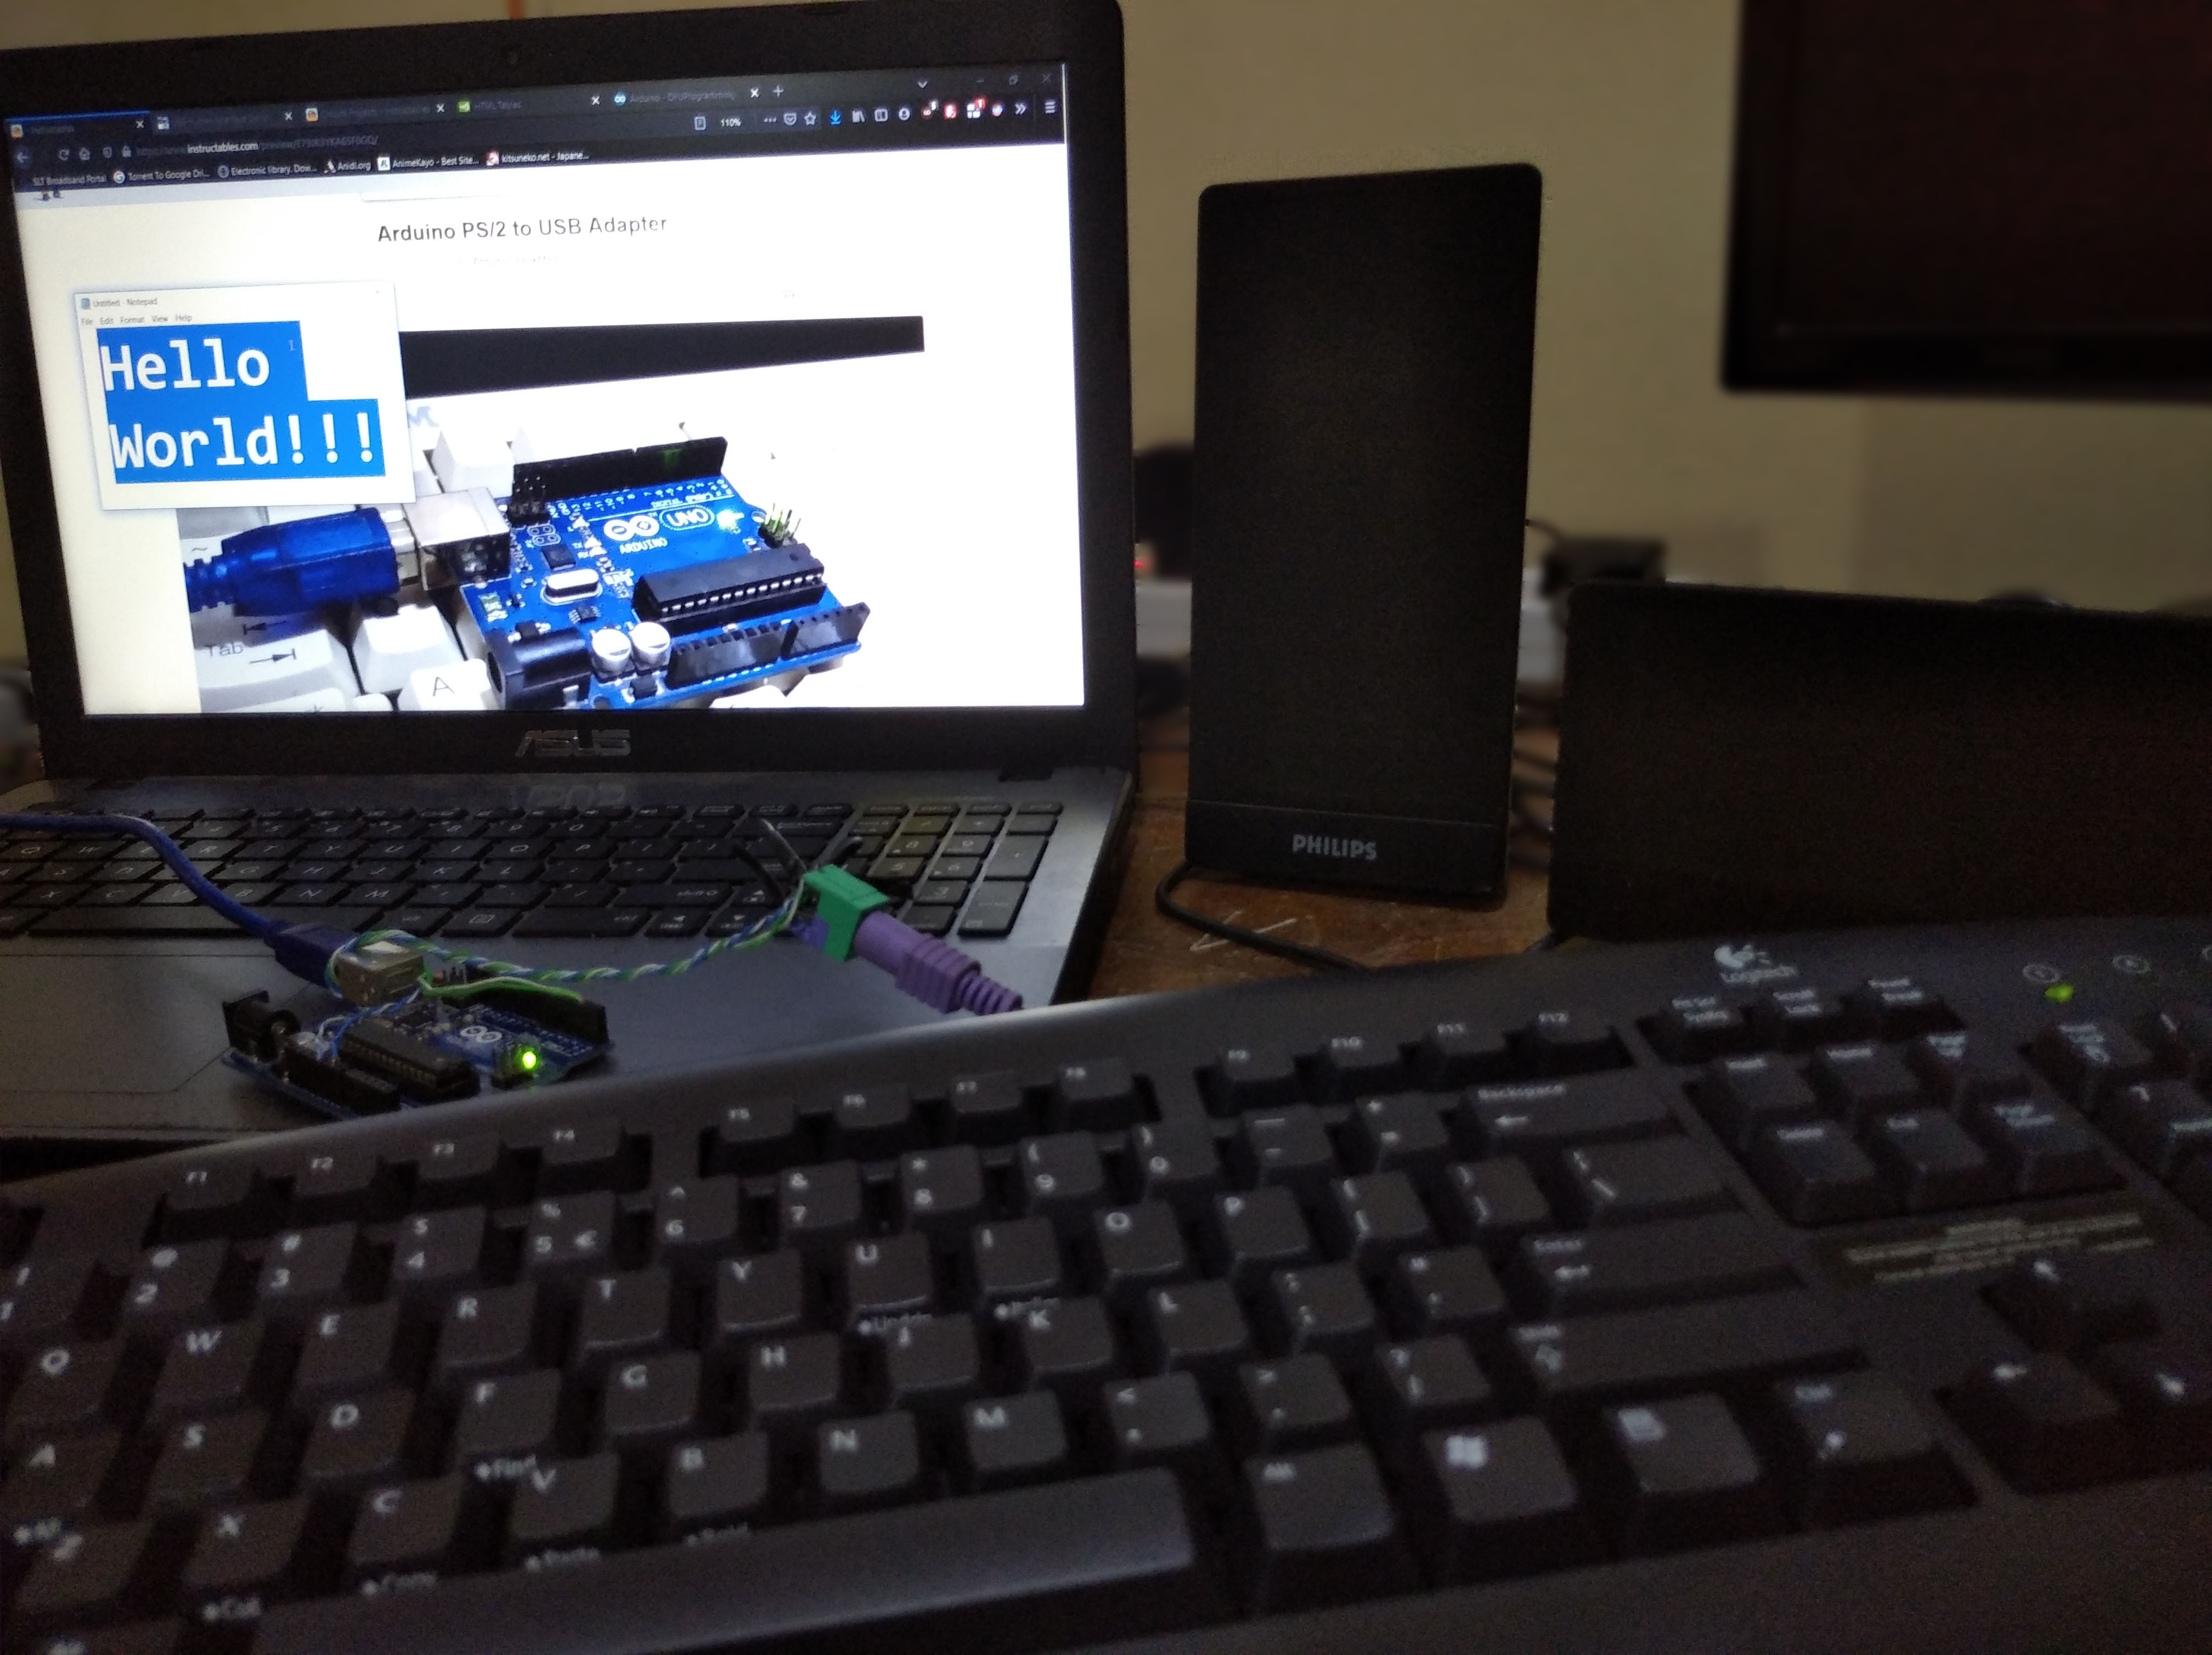
Did you ever wanted use your old PS/2 Keyboard with your laptop or new desktop PC and found out that they don't have PS/2 ports anymore? And then rather than go buy a cheap PS/2 to USB Adapter like a normal person would do, wanted to use your Arduino as a PS/2 to USB Adapter. Then you have come to the right place :)
Fair warning before we get into it. When you are using your UNO/Mega as a USB-HID device(Not limited to keyboard, it can even be a mouse,joystick,etc.) you will temporarily loose its functions as a Arduino. By that I mean you can't use the Serial communications and you can't reprogram it via the USB. This is because we will be over-writing the firmware on its USB interface chip(little guy near the USB port Atmega8U2 and 16U2 depending on the revision). But don't worry you can't actually brick your UNO/Mega by doing this it is always reversible.
Also by any chance if you have an Arduino that already has a USB-HID capability (Arduino Pro Micro or Leonardo,etc do a google search) you can forget this instructable ever existed go directly here to save yourself from a world of trouble, just kidding!
Supplies
- Hardware
- Arduino UNO or Mega
- PS/2 Keyboard
- Optionally an extra Arduino or Any kind of USB programmer(USBasp,etc) may come in handy.
- Software
- Atmel FLIP
-
PS2KeyAdvanced library for Arduino IDE
Wiring and Setting Up
.jpg)
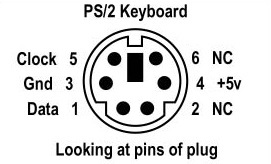
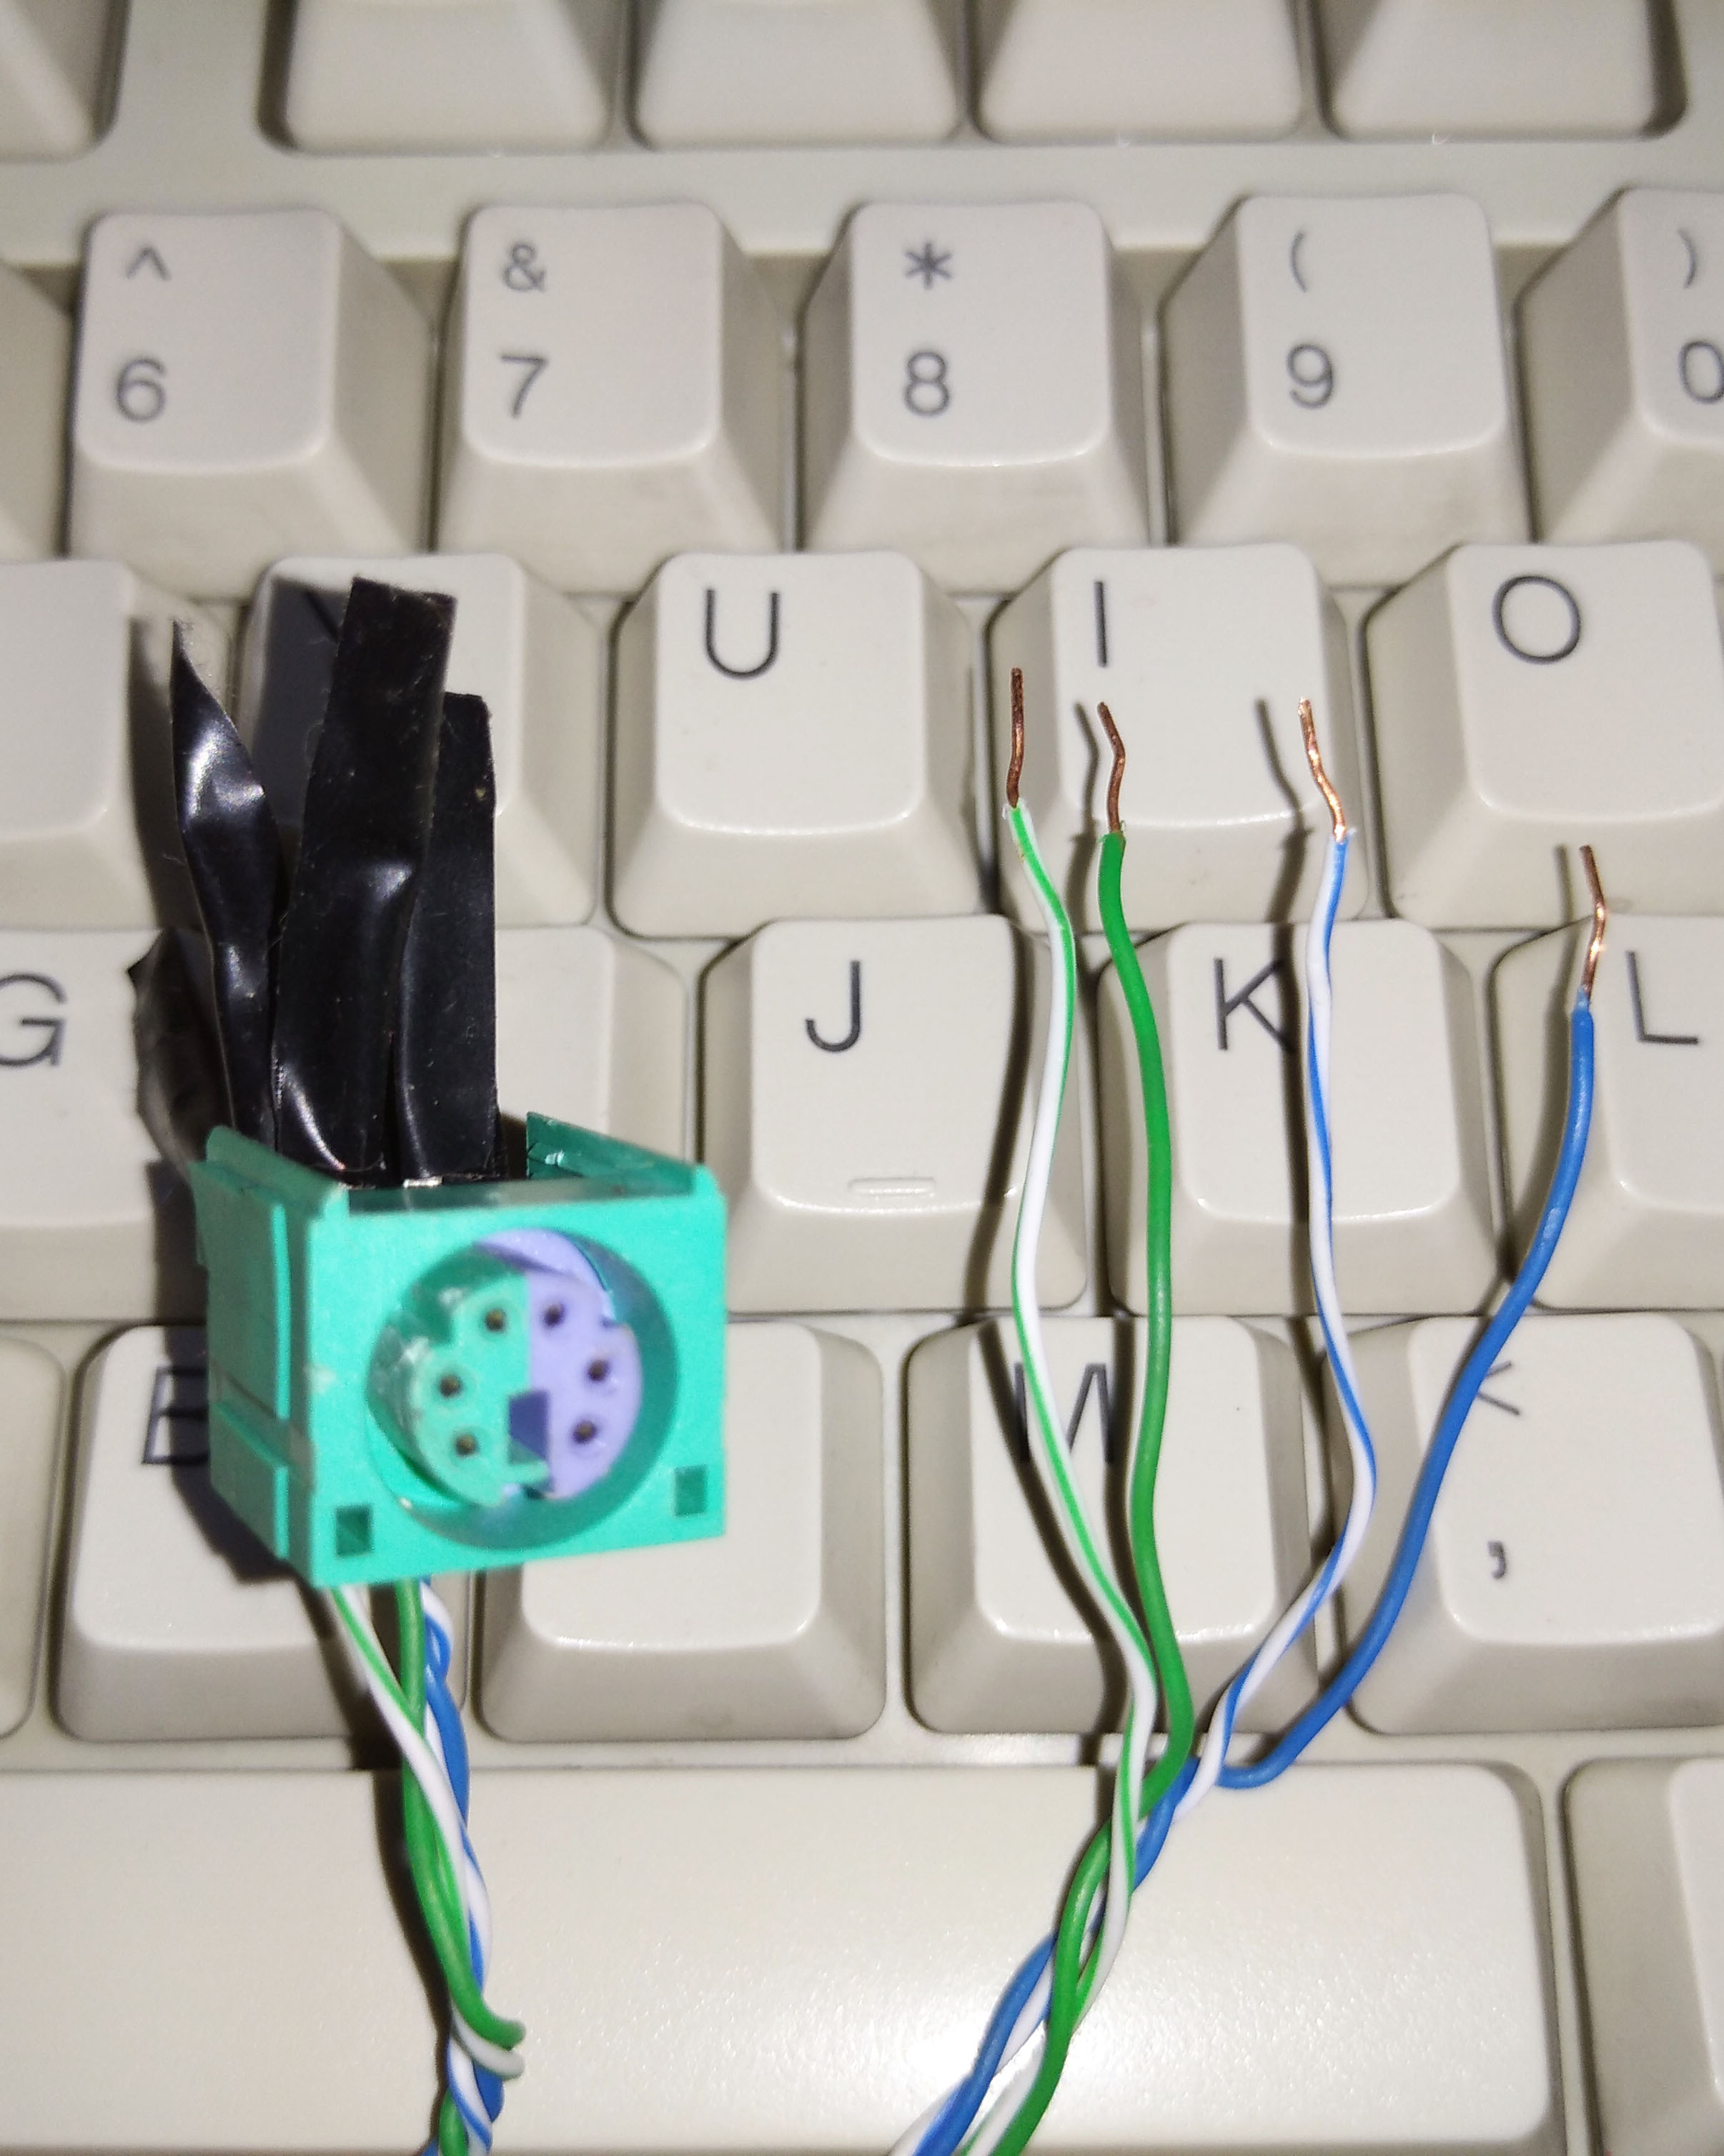
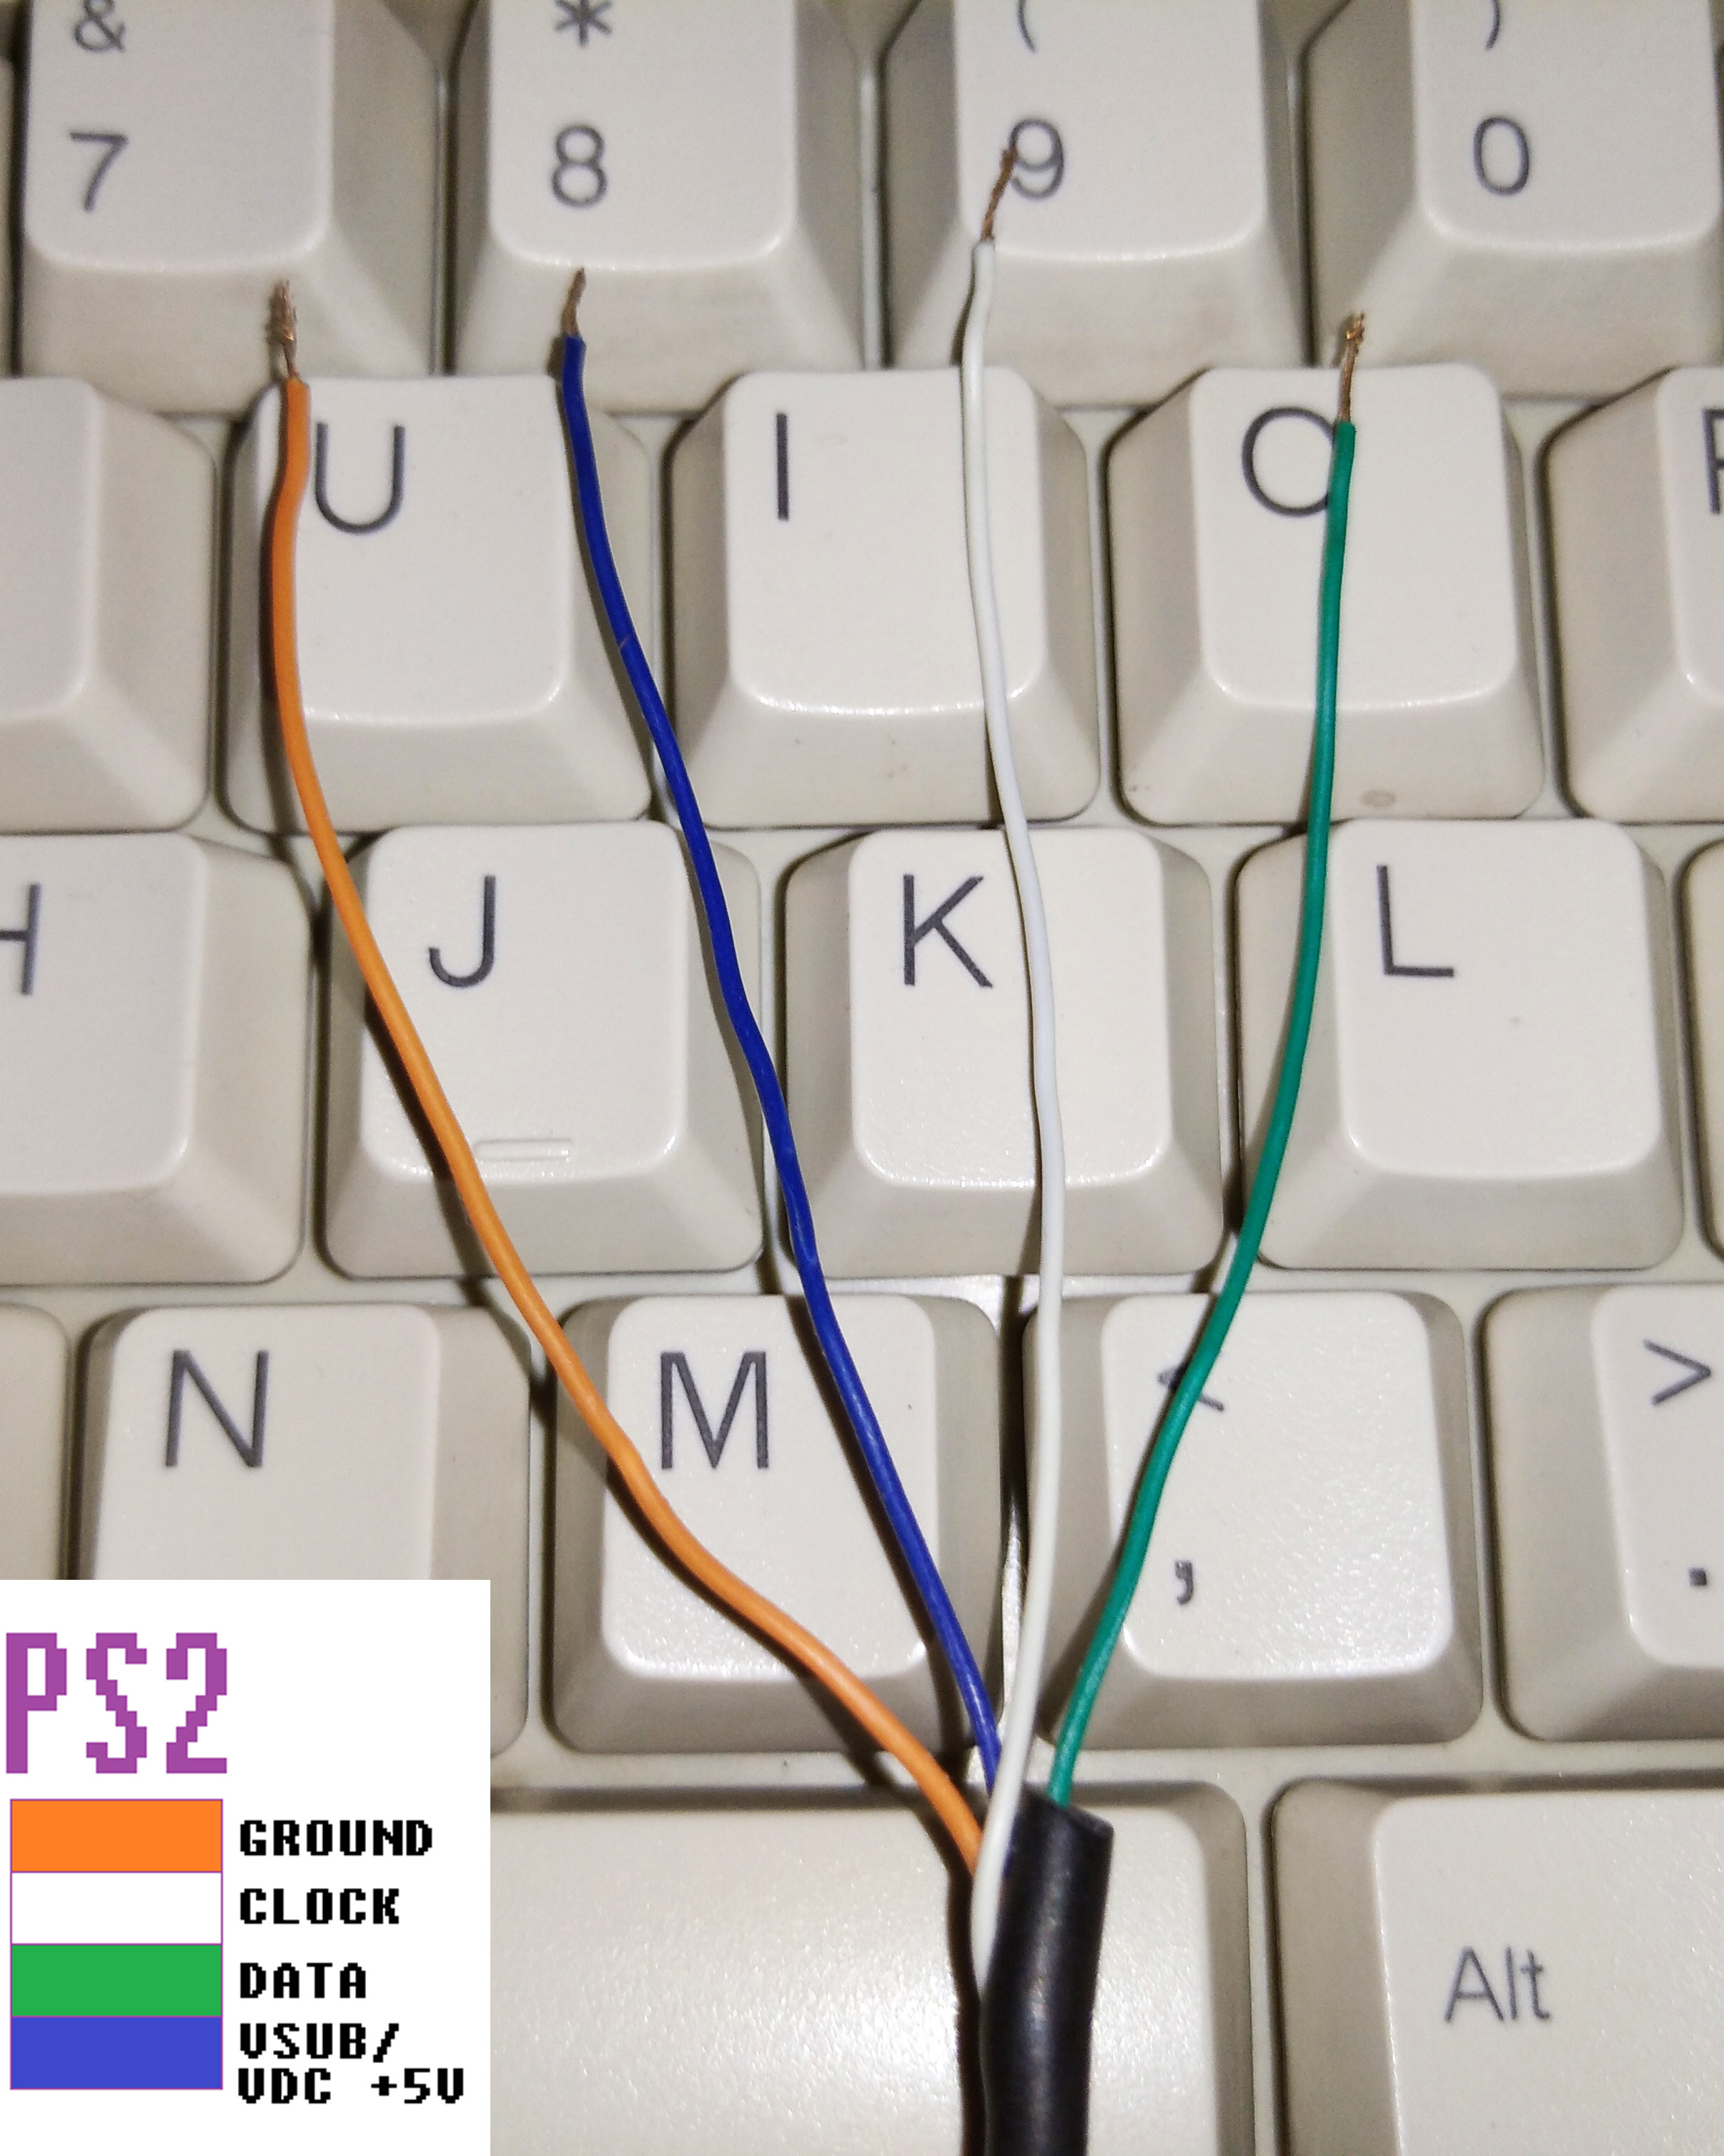
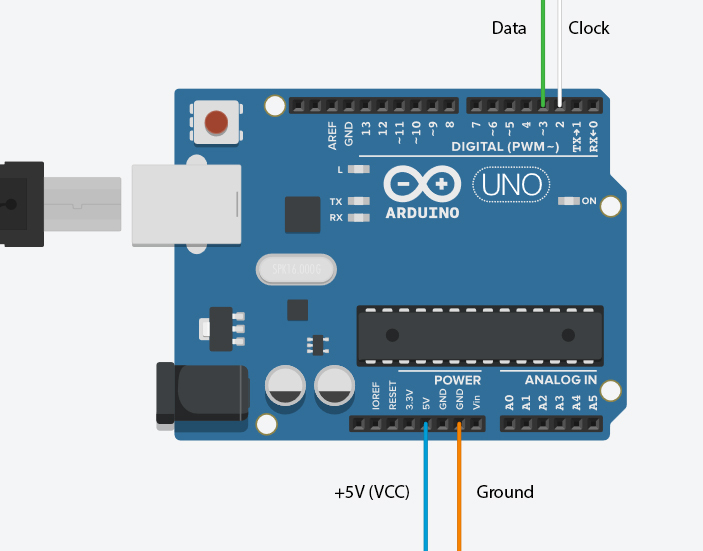
Depending on the situation you can either find a breakout board or salvage an old port from a motherboard(my 2nd try) or if you are feeling particularly moody you can even cut the purple jack altogether and expose the 4 wires(my 1st try) and connect them to the UNO.
Keyboard___________Arduino
+5V(VCC)__________+5V
GROUND__________GND
CLOCK____________PIN 2**
DATA______________PIN3*
*You can change the DATA pin to what ever you want but remember to update the the sketch.
**CLOCK has to be connected to an interrupt pin on Arduino which can only be either PIN 2 or 3(remember to update the the sketch) on an UNO. For more information and different board configs you can check the comment section of PS2KeyAdvanced library examples.
Testing Keyboard
Before you go all hands on deck first make sure everything is working on keyboard and library.
Here I have attached a modified version of the SimpleTest.ino from PS2KeyAdvanced library examples with updated clock and data pins and also a "make" and "break" representation. Here is some explanation for the output.
- This "make" and "break" scancode system and "Code" which is the isolated(c & 0xFF) scancode of either the key-press or key-release plays an important part in PS/2 to USB conversion and I recommend you study the other 2 examples that comes with library to get a better understanding if you are planing on improving or changing(remapping keys to different layouts) the final sketch. Also you can get a complete list of PS/2 scancodes from the library by opening either 'PS2KeyAdvanced.h' or 'PS2KeyCode.h' files from '\Documents\Arduino\libraries\PS2KeyAdvanced\src\'
- "Status Bits" refers to modifier keys(Ctrl,Alt,Windows,Shift/Caps) and you will see that with each additional modifier key, this value changes while the main "Code" of normal(non-modifier) key is unchanged. But in final sketch I have disregarded this method and implemented these modifier keys as simple key-presses(You will see that these modifier keys also have "make" and "break" scancode independent from normal keys whether or not multiple keys are pressed.) because it makes things easier with USB-HID protocol.
Downloads
PS/2 to USB Conversion Preview
Before updating the Atmega8U2 or 16U2(UNO Rev3) to identify our Arduino as a USB keyboard we should make sure all the conversion stuff is working correctly and the final final sketch is uploaded or otherwise it will be a major pain to keep over-writing the firmware again and again between the Original and USB-keyboard hex files just so you could upload the correct sketch. This becomes especially true if you don't have any external programmer like a USBasp or another Arduino to use as a ISP. So here we will upload a 'DEBUG' version of the final sketch with a human readable output(through the serial monitor) to test things out.
The output you see will be formatted like this when every key is released,
00 00 00 00 00 00 00 00
Here's a basic explanation for the expected output,
- For each new multiple modifier key-press you should get a newline with different values for 'xx'. Finally when you release all modifier keys 'xx' should become 00.
xx 00 00 00 00 00 00 00
- For each new multiple normal key-presses(for an example we will press both hypothetical key a,key b and key c with values 'xx','yy' and 'zz' in that order) you should get continuous(not mandatory) newlines like this,
00 00 xx yy zz 00 00 00
- when you only release key b the output should change to,
00 00 xx 00 zz 00 00 00
- and if you press new key d with value 'nn' without releasing key a or key b your output should change to,
00 00 xx nn zz 00 00 00
- and finally return to this when every key is released,
00 00 00 00 00 00 00 00
- and lastly if you press either Caps Lock,Num Lock or Scroll Lock you should get something like this with multiple lines at the same time,
00 00 xx 00 00 00 00 00
00 00 00 00 00 00 00 00
00 00 00 00 00 00 00 00
If everything here happens you are golden to proceed!
Downloads
Technical Explanation
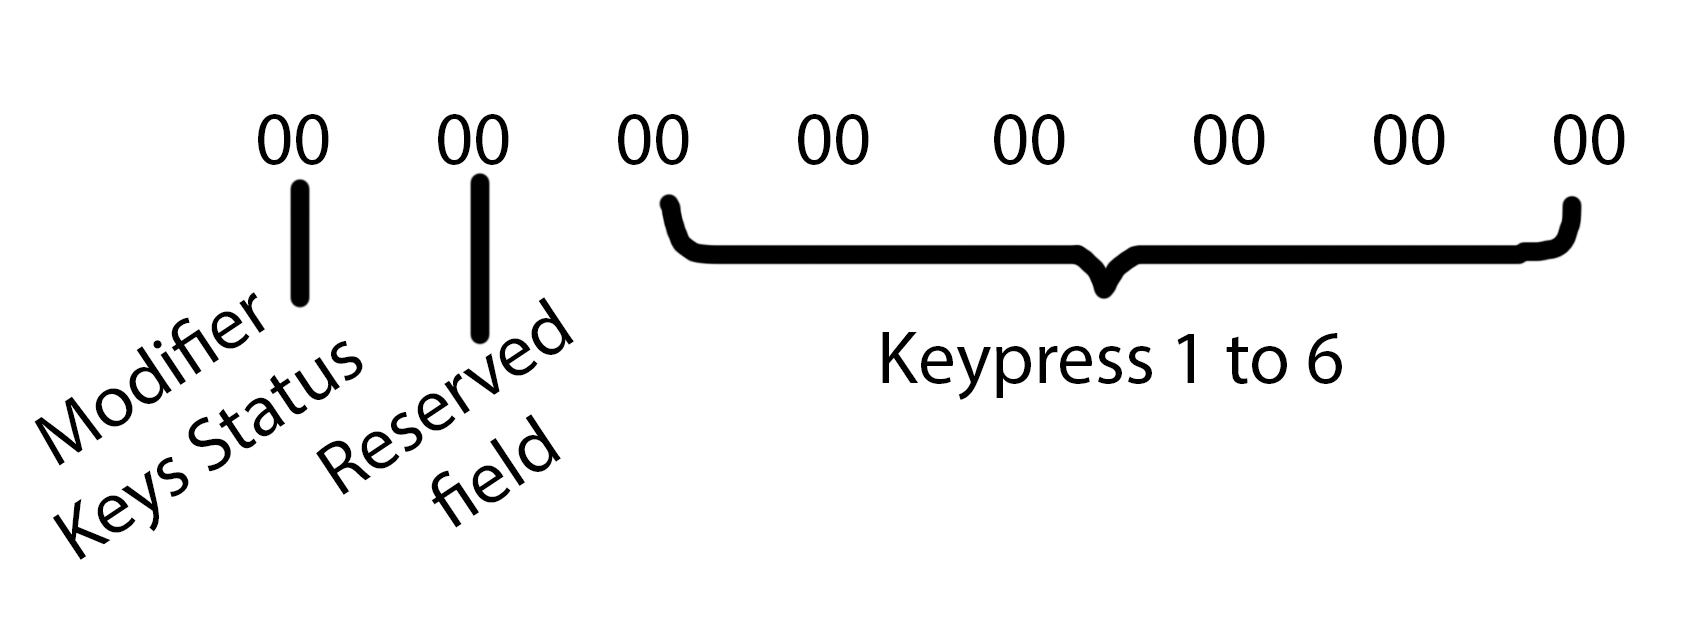

If you like you can skip this step. This is just an explanation for the previous outputs. The output 8 bytes array you saw is formatted according to the above fig.1 You can learn much more about this and also how the modifier keys status byte is written from this wiki about USB-HID. Basically what my code does is each time a new key is pressed (PS/2 protocol refers to this as 'make') it cycle through the last 6 bytes of the array that are used for normal key-presses, and fill in the first empty byte it finds with the relevant 'HID scancode'(Shown as in fig.2 Also you can find a complete list from the attached PDF) for the received 'PS/2 scancode'. And finally when the relevant key is released(PS/2 protocol refers to this as 'break') the code will cycle through the current byte array and clear only the relevant byte.
If you followed till here and also if you read the wiki page you will see that there is a little problem in this method, normally when the key is released, in HID protocol the remaining bytes get re-arranged as to get rid of empty bytes between remaining non-empty bytes. But for some reason regardless of how many ways I tried I couldn't get it to work as intended without accidentally clearing unwanted bytes for pressed keys too. If you can improve this to get it working please leave a comment. Although at the end of the day this problem doesn't affect functionality of the keyboard as long as the Arduino still registers every key-pressed regardless of their pressed order(Which doesn't affect anything in practical usage).
Downloads
Uploading the Final Sketch
So before you finally update the firmware of Atmega8U2 or 16U2(UNO Rev3) to identify our Arduino as a USB keyboard we must upload the Final Sketch. After you upload this, if you go to the serial monitor you will see it prints garbage with every new key pressed this is a good omen that everything is working as intended and we can proceed to final step. YAY!!!
Downloads
Updating the Firmware
Finally you can update the firmware of your Arduino to register it as USB keyboard. For this I'm not going to go into much details as it will make this instructable too long.
- Follow this guide from arduino.cc about 'Updating the Atmega8U2 and 16U2 on an Uno or Mega2560 using DFU' but rather than using 'Arduino-usbserial-uno.hex' use the attched 'Arduino-keyboard-0.3.hex'
- In FLIP remember to select the target device as Atmega8U2 or 16U2 depending on you Arduino and, from select the communication medium choose USB and finally Load the correct hex file before selecting run.
- If you ran into a driver error, go to windows device manager and select to search for the unknown driver inside the installation directory of FLIP '\Program Files (x86)\Atmel\'
- If you ran into errors while updating the firmware from FLIP multiple times, close FLIP and run 'Reset Preferences' from 'Start menu\FLIP\' and then restart FLIP and do the configuration steps before trying again this usually works for me.
- If you want to restore you Arduino to its original state just follow the above arduino.cc guide to the letter without using this hex file.
Downloads
Enjoy......

Now enjoy your newly converted PS/2 to USB keyboard.... P.S. This Instructable was fully written from a external PS/2 keyboard connected to my laptop through the Arduino :)