Arduino Neopixel

Welcome back to another instructable! Today, we are going to be making our very own Neopixel.
Supplies
The supplies needed for this project are:
- Arduino Uno R3: https://a.co/d/0lki3hk (x1)
- Jumper Wires: https://s.click.aliexpress.com/e/_DEv98Cd (x3)
- Neopixel: https://www.adafruit.com/product/1612 (x1)
Note: You may have to solder in this tutorial, these steps will not be provided. Also, you can use different Neopixels, but you may have to modify the code slightly.
Wiring

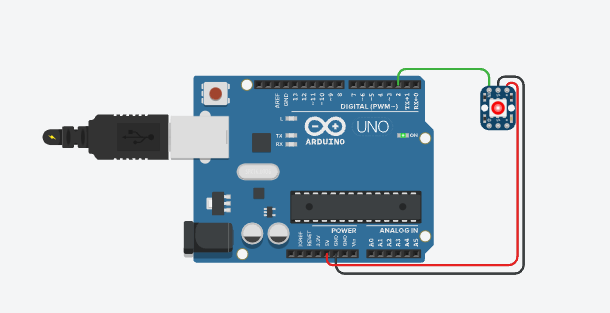
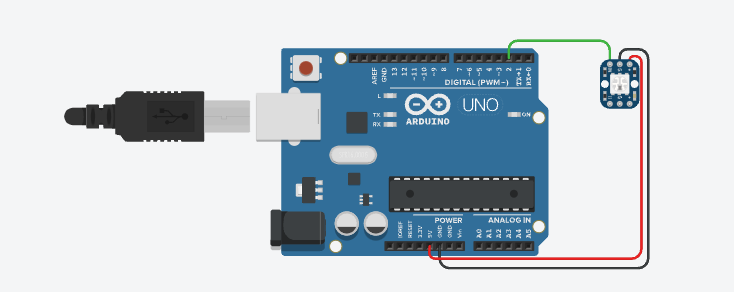
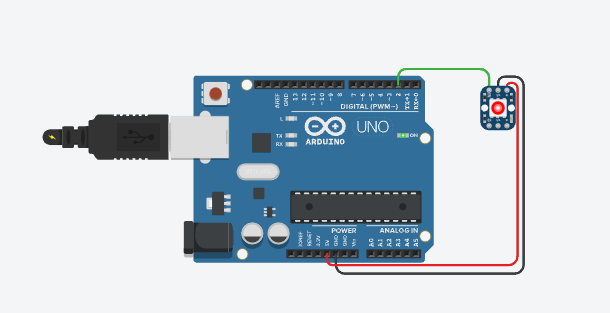
Let's start wiring. To begin, we need to first, wire the IN pin to any digital output pin on your Arduino, for this example, I've used pin 2. Now, you need to wire the G to ground, and + to the 5V pin. Once you have completed that, you may now move onto coding your Neopixel!
Coding

Now, in this step we will be coding our Neopixel. So, let's begin! First, we want to include our Adafruit library, and go ahead and make some crucial variables.
Note: I have provided the .ino file below for you
Now, let's go ahead and get our setup and loop functions.
Put together, the code should look something like this
There you have it! Your own custom Neopixel! If you liked this tutorial, please, make sure you favorite it!
TROUBLESHOOTING:
- Try changing line 6, NEO_GRB to NEO_RGB, or NEO_BRG
- Copy and paste the code above
- Confirm you've wired the pins correctly
- Confirm that you've used strip.show(); on line 17