Arduino Light Intensity Lamp
.png)
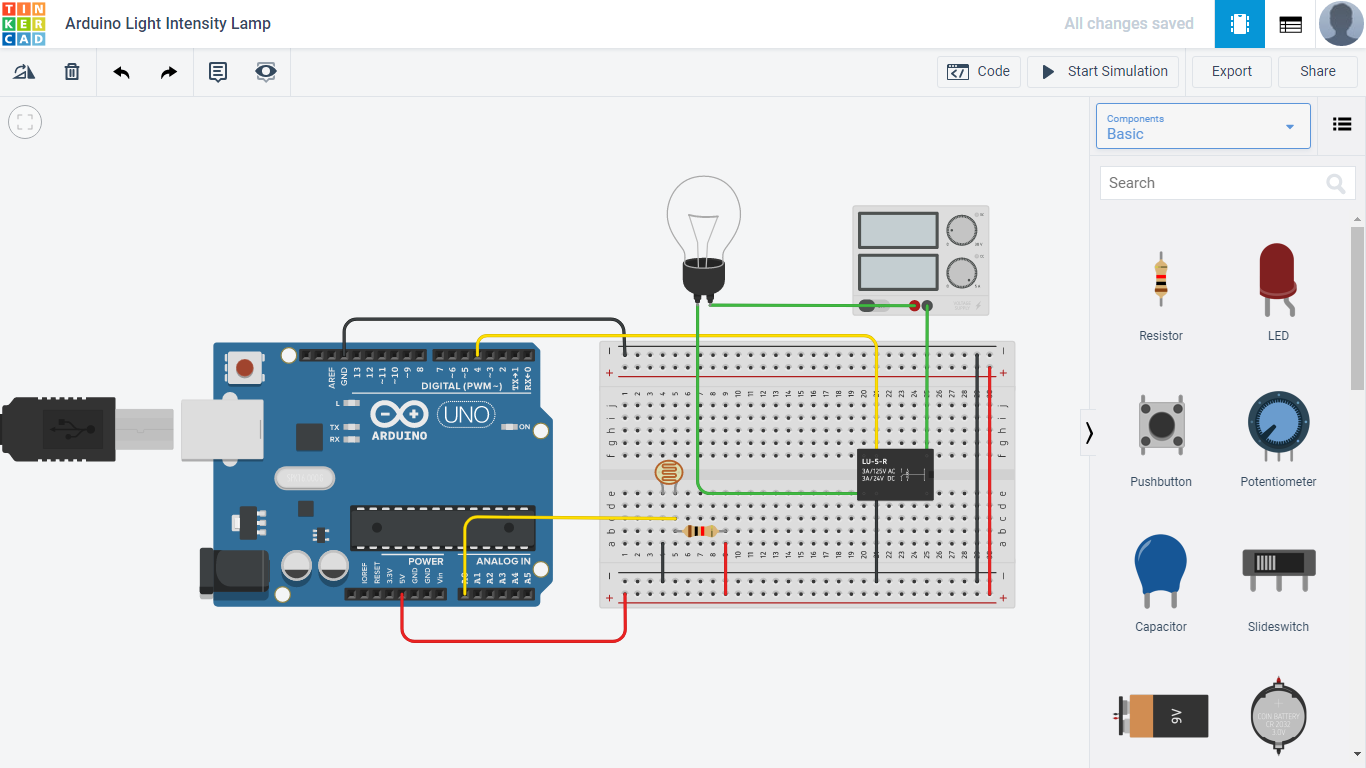
Hello, everyone! Right now, I'll be explaining how to build an Arduino light intensity lamp in tinkercad. This circuit allows the lamp to detect the light cycle of day and night and adjusting its brightness based on the cycle, meaning the lamp will automatically turn on when it's dark.
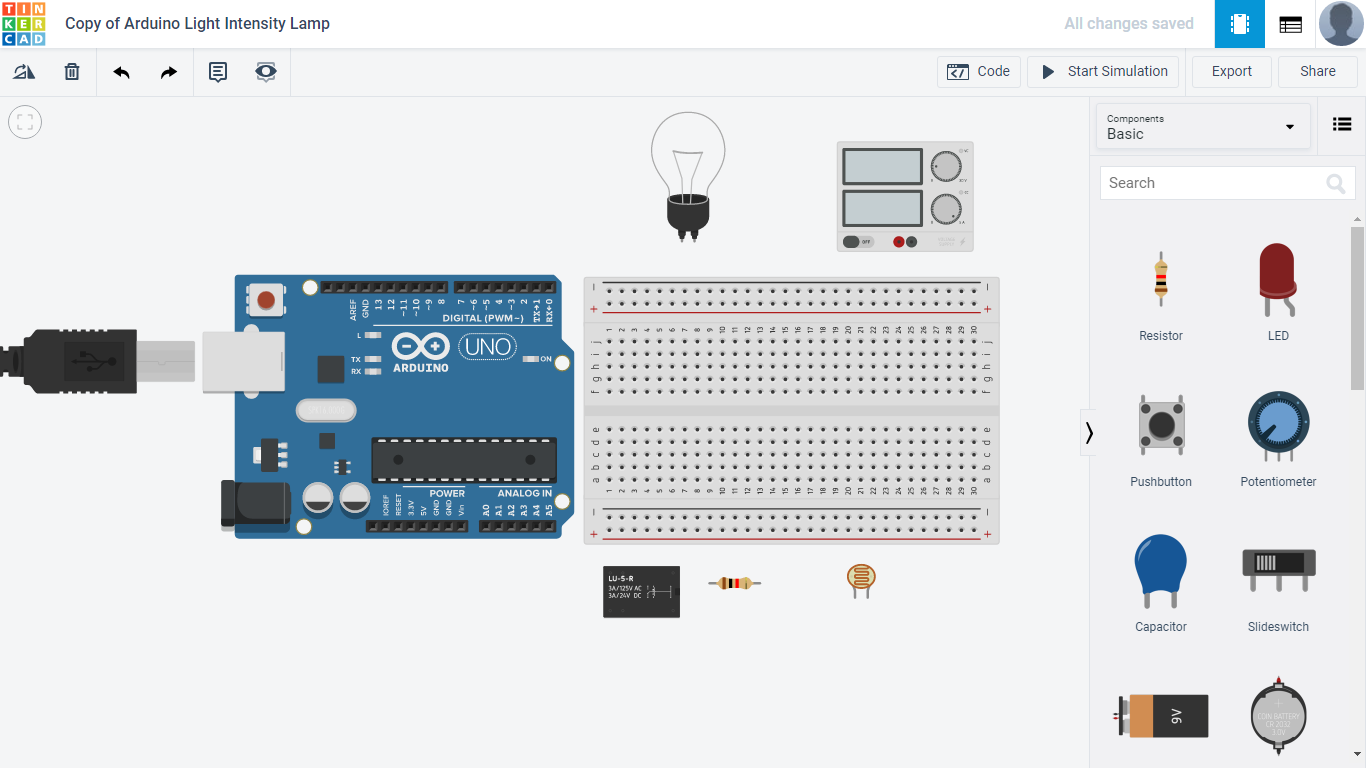
Supplies
- 1 LDR/photo-resistor
- 1 Arduino micro controller
- 1 standard light bulb
- 1k ohms resistor
- 1 Relay SPDT
- A power source
- Wires of different colors
- Breadboard (optional, any size works)
Gather All the Supplies
.png)
Setup
.png)
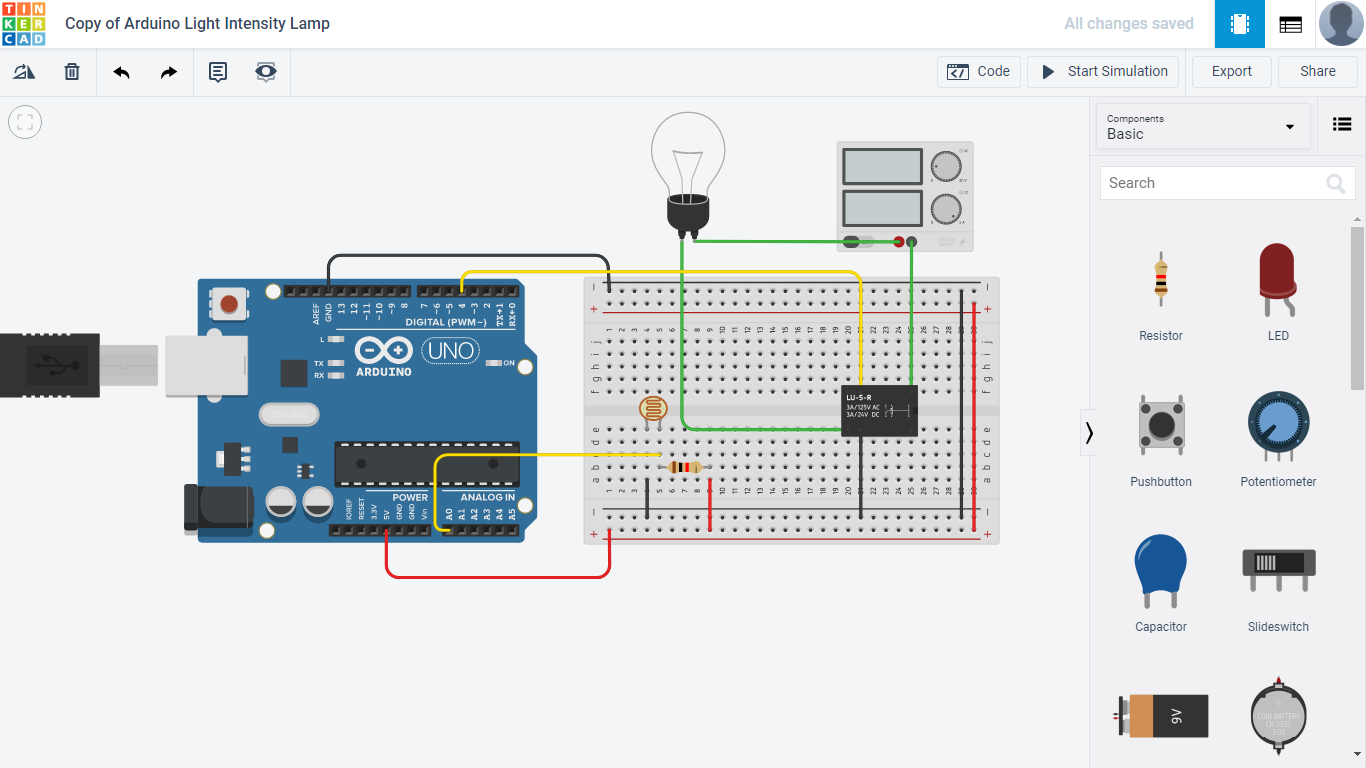
As you start to connect each component, make sure to use different colored wires to organize the circuit, so it will be easier for you and others to identify what each wire does.
Steps
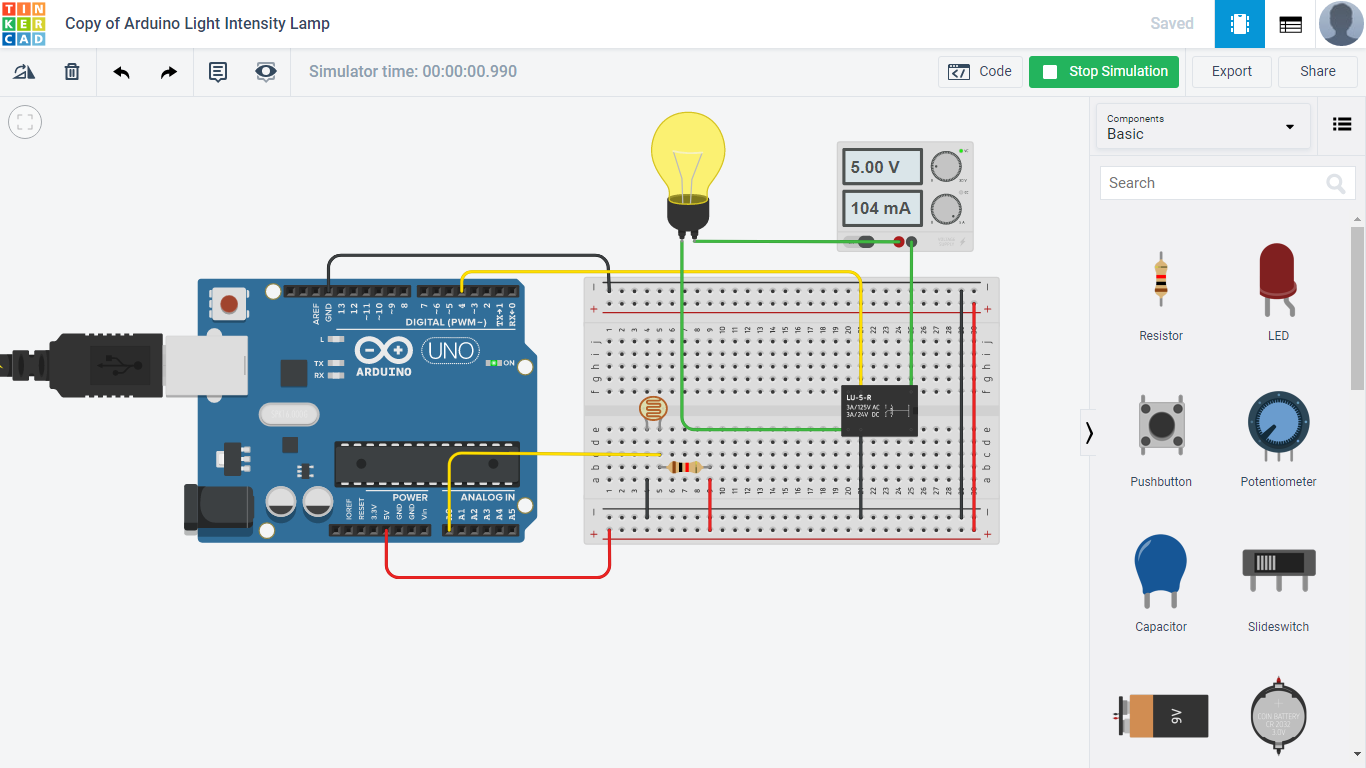
- Place all the components on the breadboard in locations similar to the pictures shown above
- Connect the 5V power to the positive power rail and ground to the negative power rail(make sure power rails on both sides are connected)
- Connect pin 4 to terminal 5 of the relay
- Connect terminal 8 of the relay to the negative power rail
- Connect the positive power supply to one of light bulb's terminal and connect the negative power supply to terminal 1
- Connect the other terminal of the light bulb to terminal 7 of the relay
- Connect pin A0 on the row that contains the 1k ohms resistor and one of photoresistor's terminal
- Connect the other photoresistor terminal to the negative power rail
- Connect the other end of the 1k ohms resistor to the positive power rail
Code
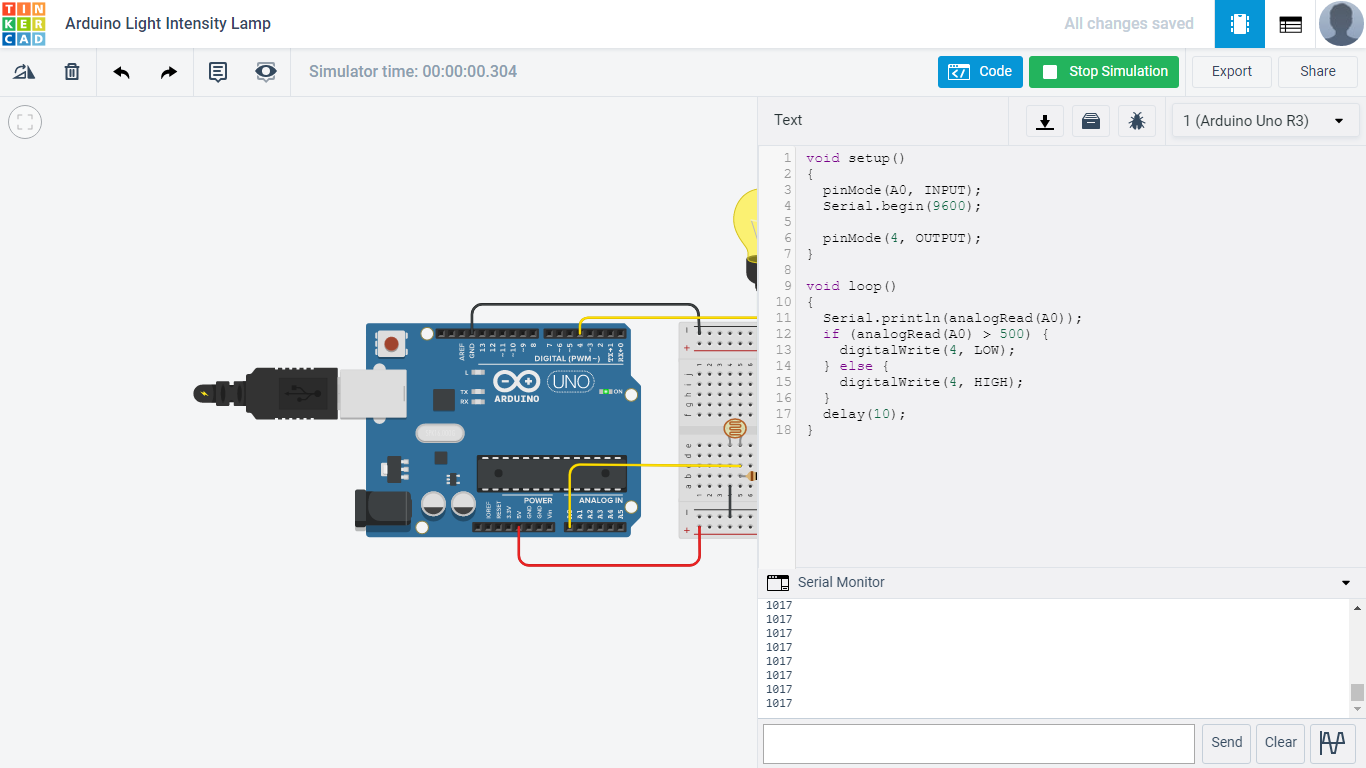
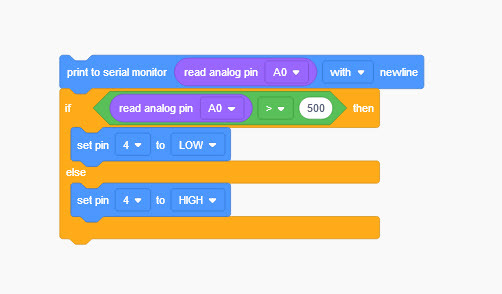
Next up is to write a code that allows the photoresistor to detect the lighting condition and change the amount of light the light bulb radiate accordingly. To do that, I used conditional formatting, the if/else statement on the value of A0. If the value of A0 is equal or more than 500, it sets the digital pin 4 to LOW, and if the value is less than 500, then it sets the pin 4 to HIGH. And since pin 4 is connected to the relay, so this allows the circuit to know when is it time to turn on its light. The photos above show the code written in text form and in brick form.
Result
.png)
By the time you are done, the light bulb should be able to adjust its brightness depending on the photoresistor. If the photoresistor is in the dark, then the light bulb will light up and if the photoresistor is in the light, then the light bulb will not light up.
Tutorial Video
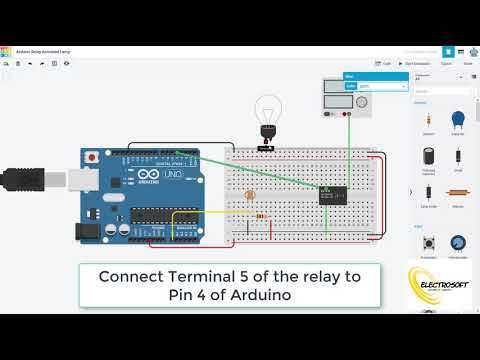
If you still have some problems with making this circuit, then take a look at this video. The video will guide you step by step through the whole process.