Arduino Leonardo Adaptive Game Controller for Quadriplegics
by Carter in Circuits > Arduino
189 Views, 2 Favorites, 0 Comments
Arduino Leonardo Adaptive Game Controller for Quadriplegics
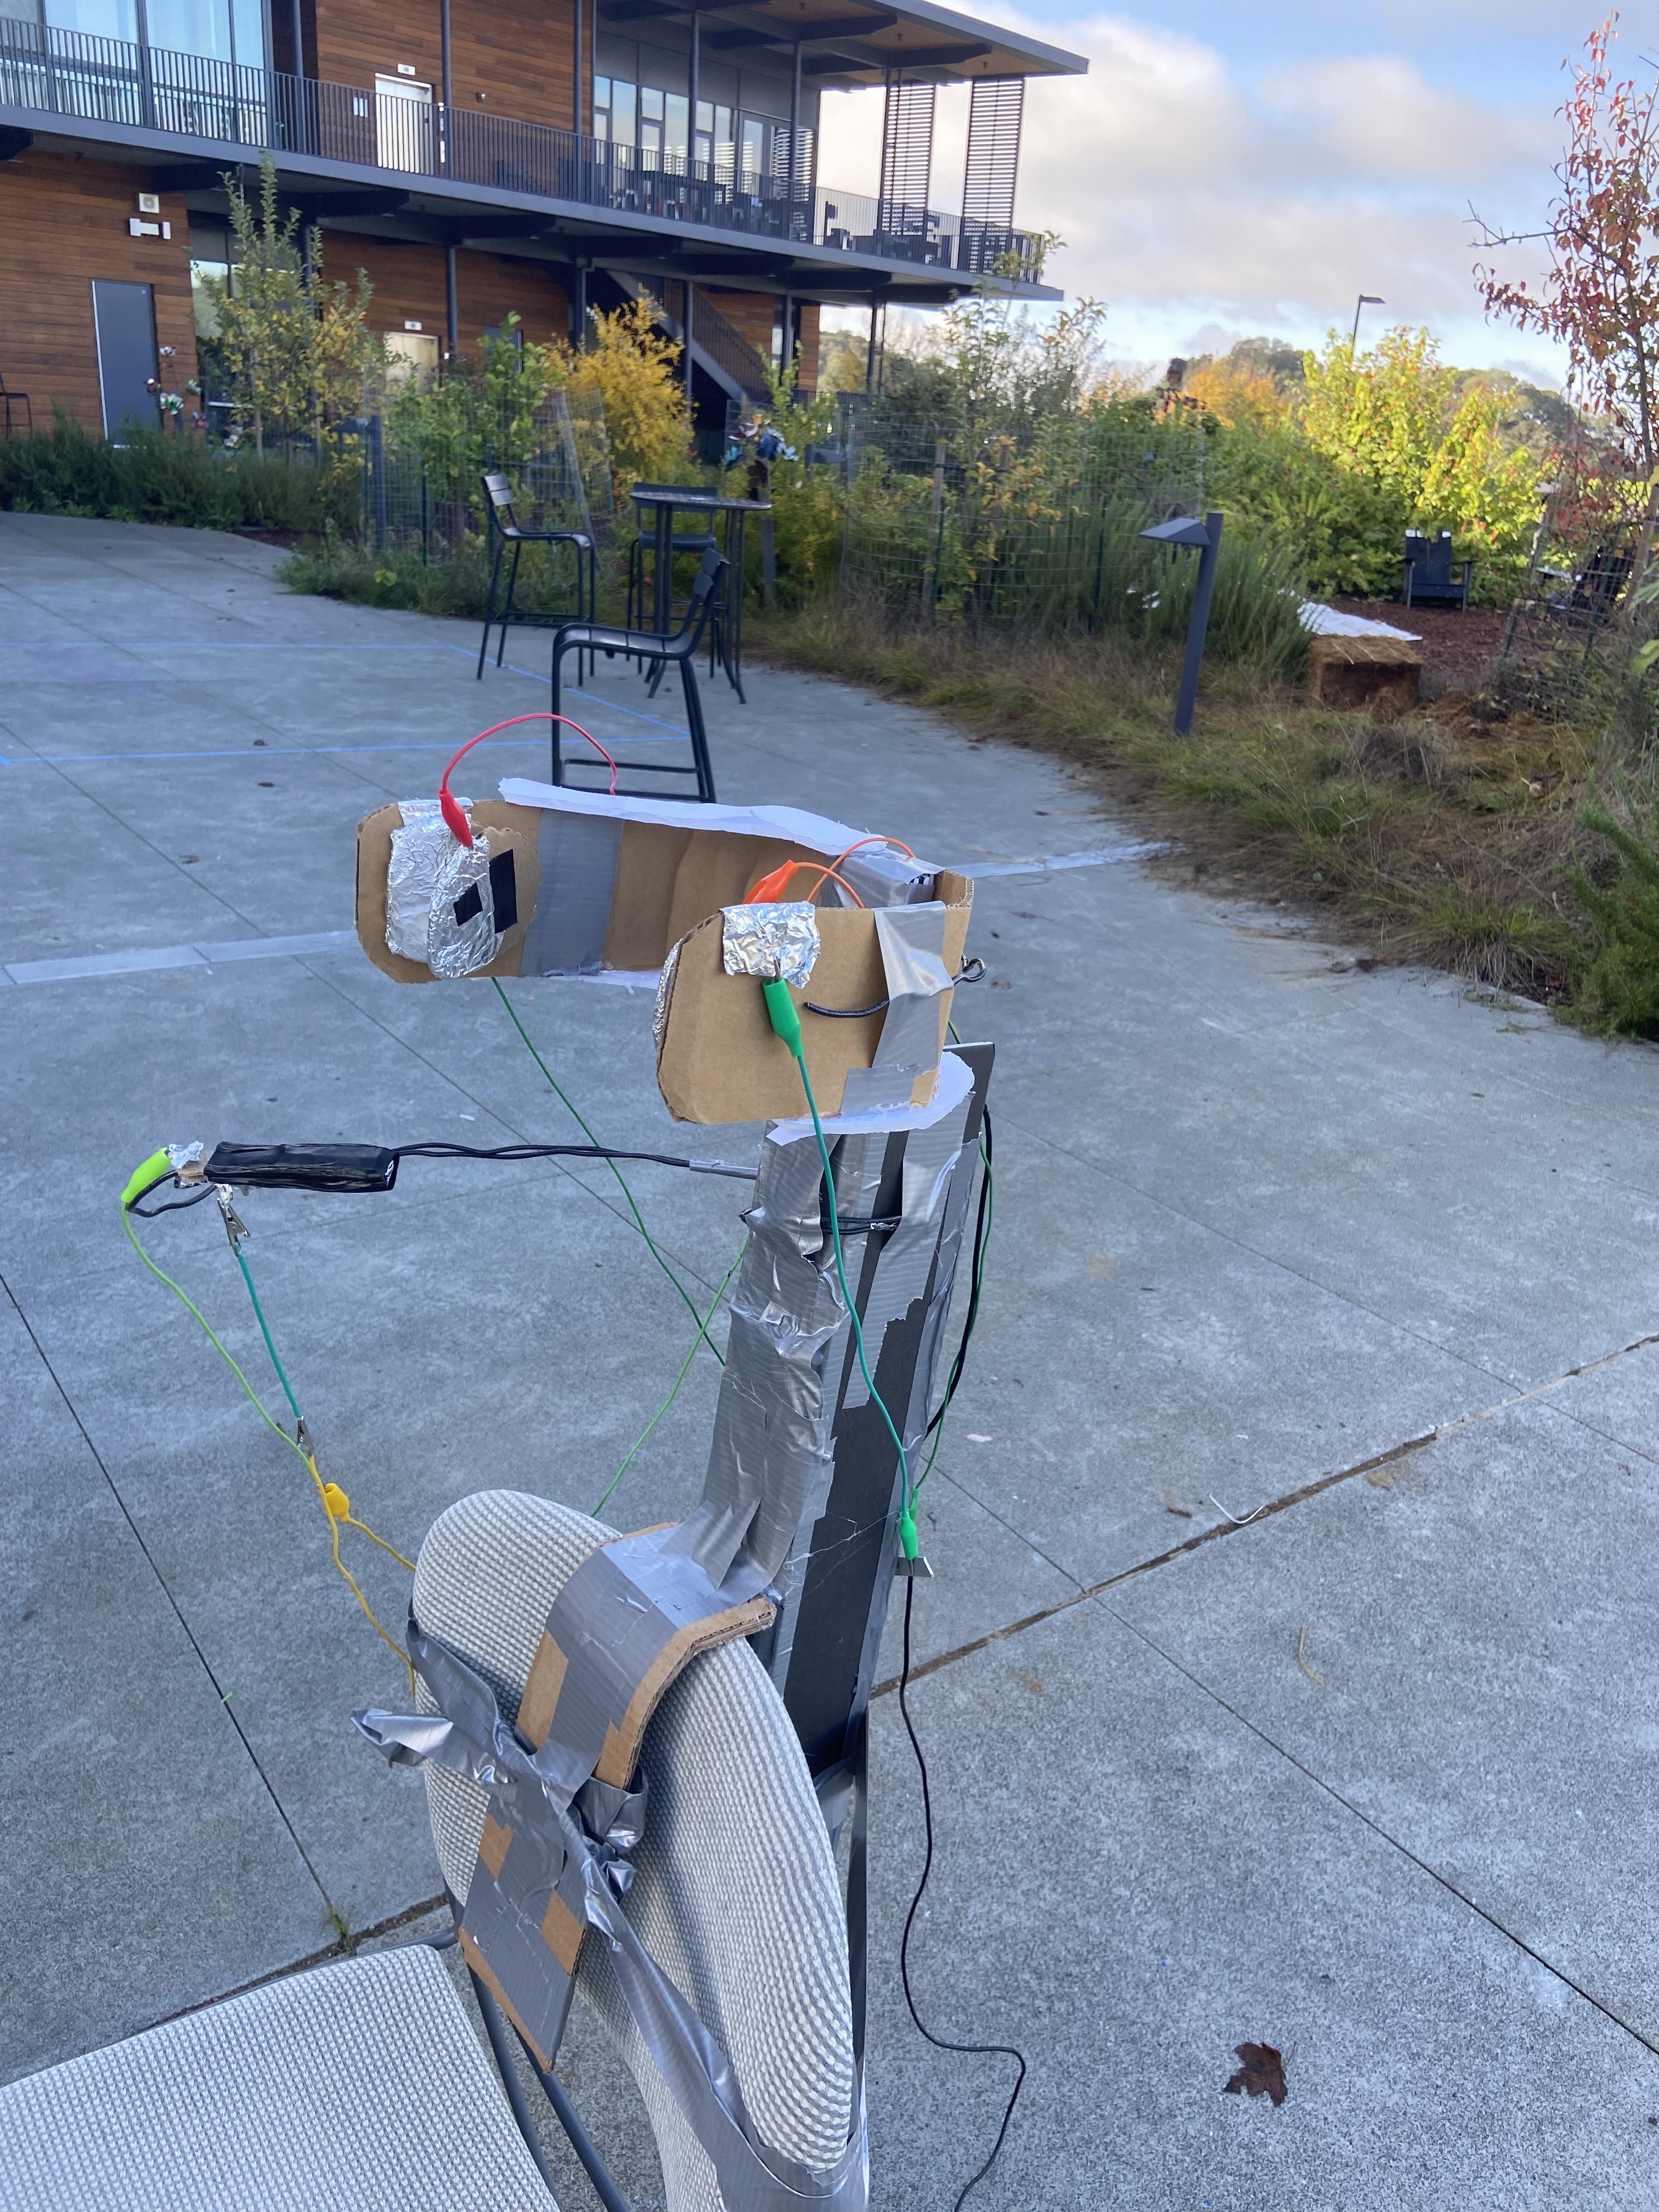
Click here to view an instructional video
The goal of this project was to make an affordable controller for someone who is quadriplegic. Most of the adaptive controllers on market right now are quite expansive. The controller I made is able to utilize an Arduino as well as more cost-effective materials. Have fun building and I hope you enjoy the final product!
Supplies
thick wire (to help support)
Resistors (1 Megaohm) - has to be 1 Megaohm
Pre-made space invaders game here
If the solder, perf board, and Arduino Leonardo is too much you can always buy a makey makey. Wich is less work to put together but more expensive.
The Mouth Piece
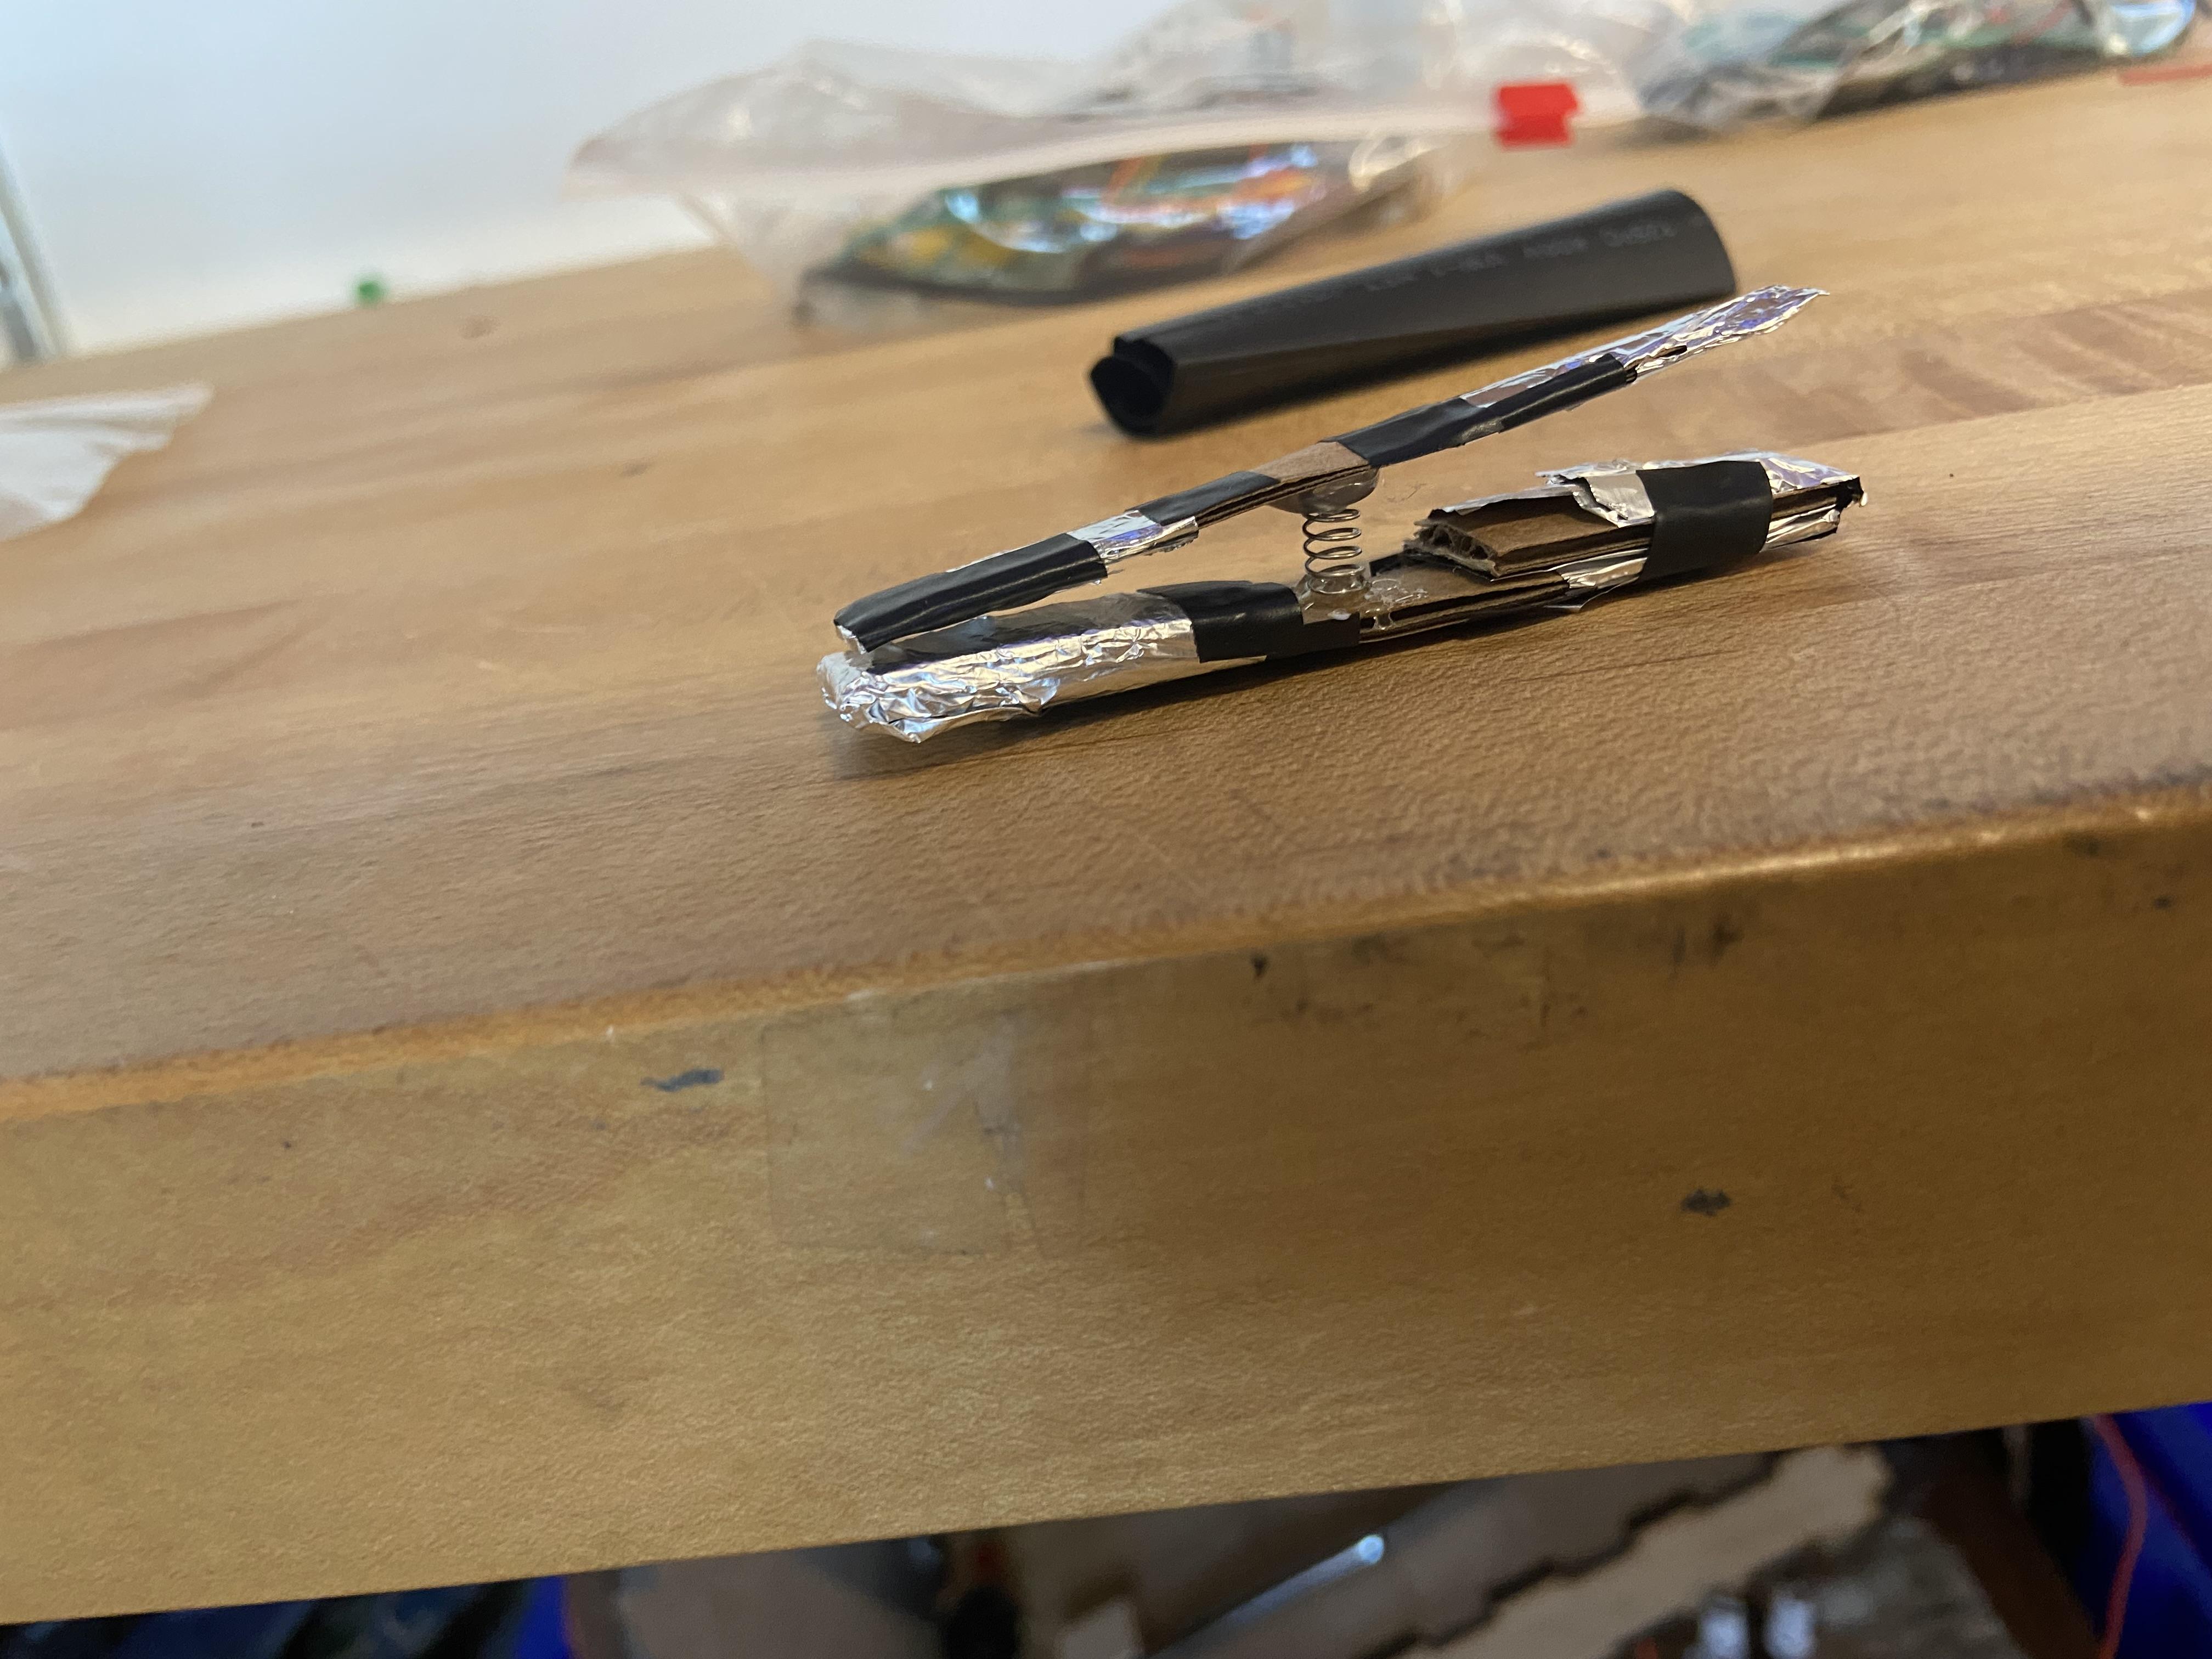
To start our controller, we are going to build the mouthpiece first.
1. cut two thin pieces of cardboard (make sure they are similar in length)
2. On the top piece, cover the end in tin foil and make sure it lines all the way down the top. Should look like a little tail on the end.
3. take a spring out of any pen you have in your house. Put the spring in the middle of the two pieces of cardboard as seen above.
4. Hot glue the spring in place on the cardboard. Then hot glue the non-tinfoil end of the pieces of cardboard.
5. Now try pressing down on the two pieces of cardboard and see how far you can push it down without too much effort. take that distance and build a thin cardboard raiser that ensures that the two ends touch when pushed together.
6. After that, wrap the bottom end (including the raiser) in tinfoil and line the back of that piece of cardboard with tin foil as well to make a tail at the end.
7. Now take two large heat shrinks, cut them in half, and tape them together. Note: I used electrical tape, I don't know how well duct tape will work.
8. Put the heat shrink around your mouthpiece and shrink until it fits snuggly around the mouthpiece without pushing it down. (make sure the tails are visible after the heat shrink)
9. If the tails are touching with out support, cut a small cardboard divider to put between the two.
Head Piece
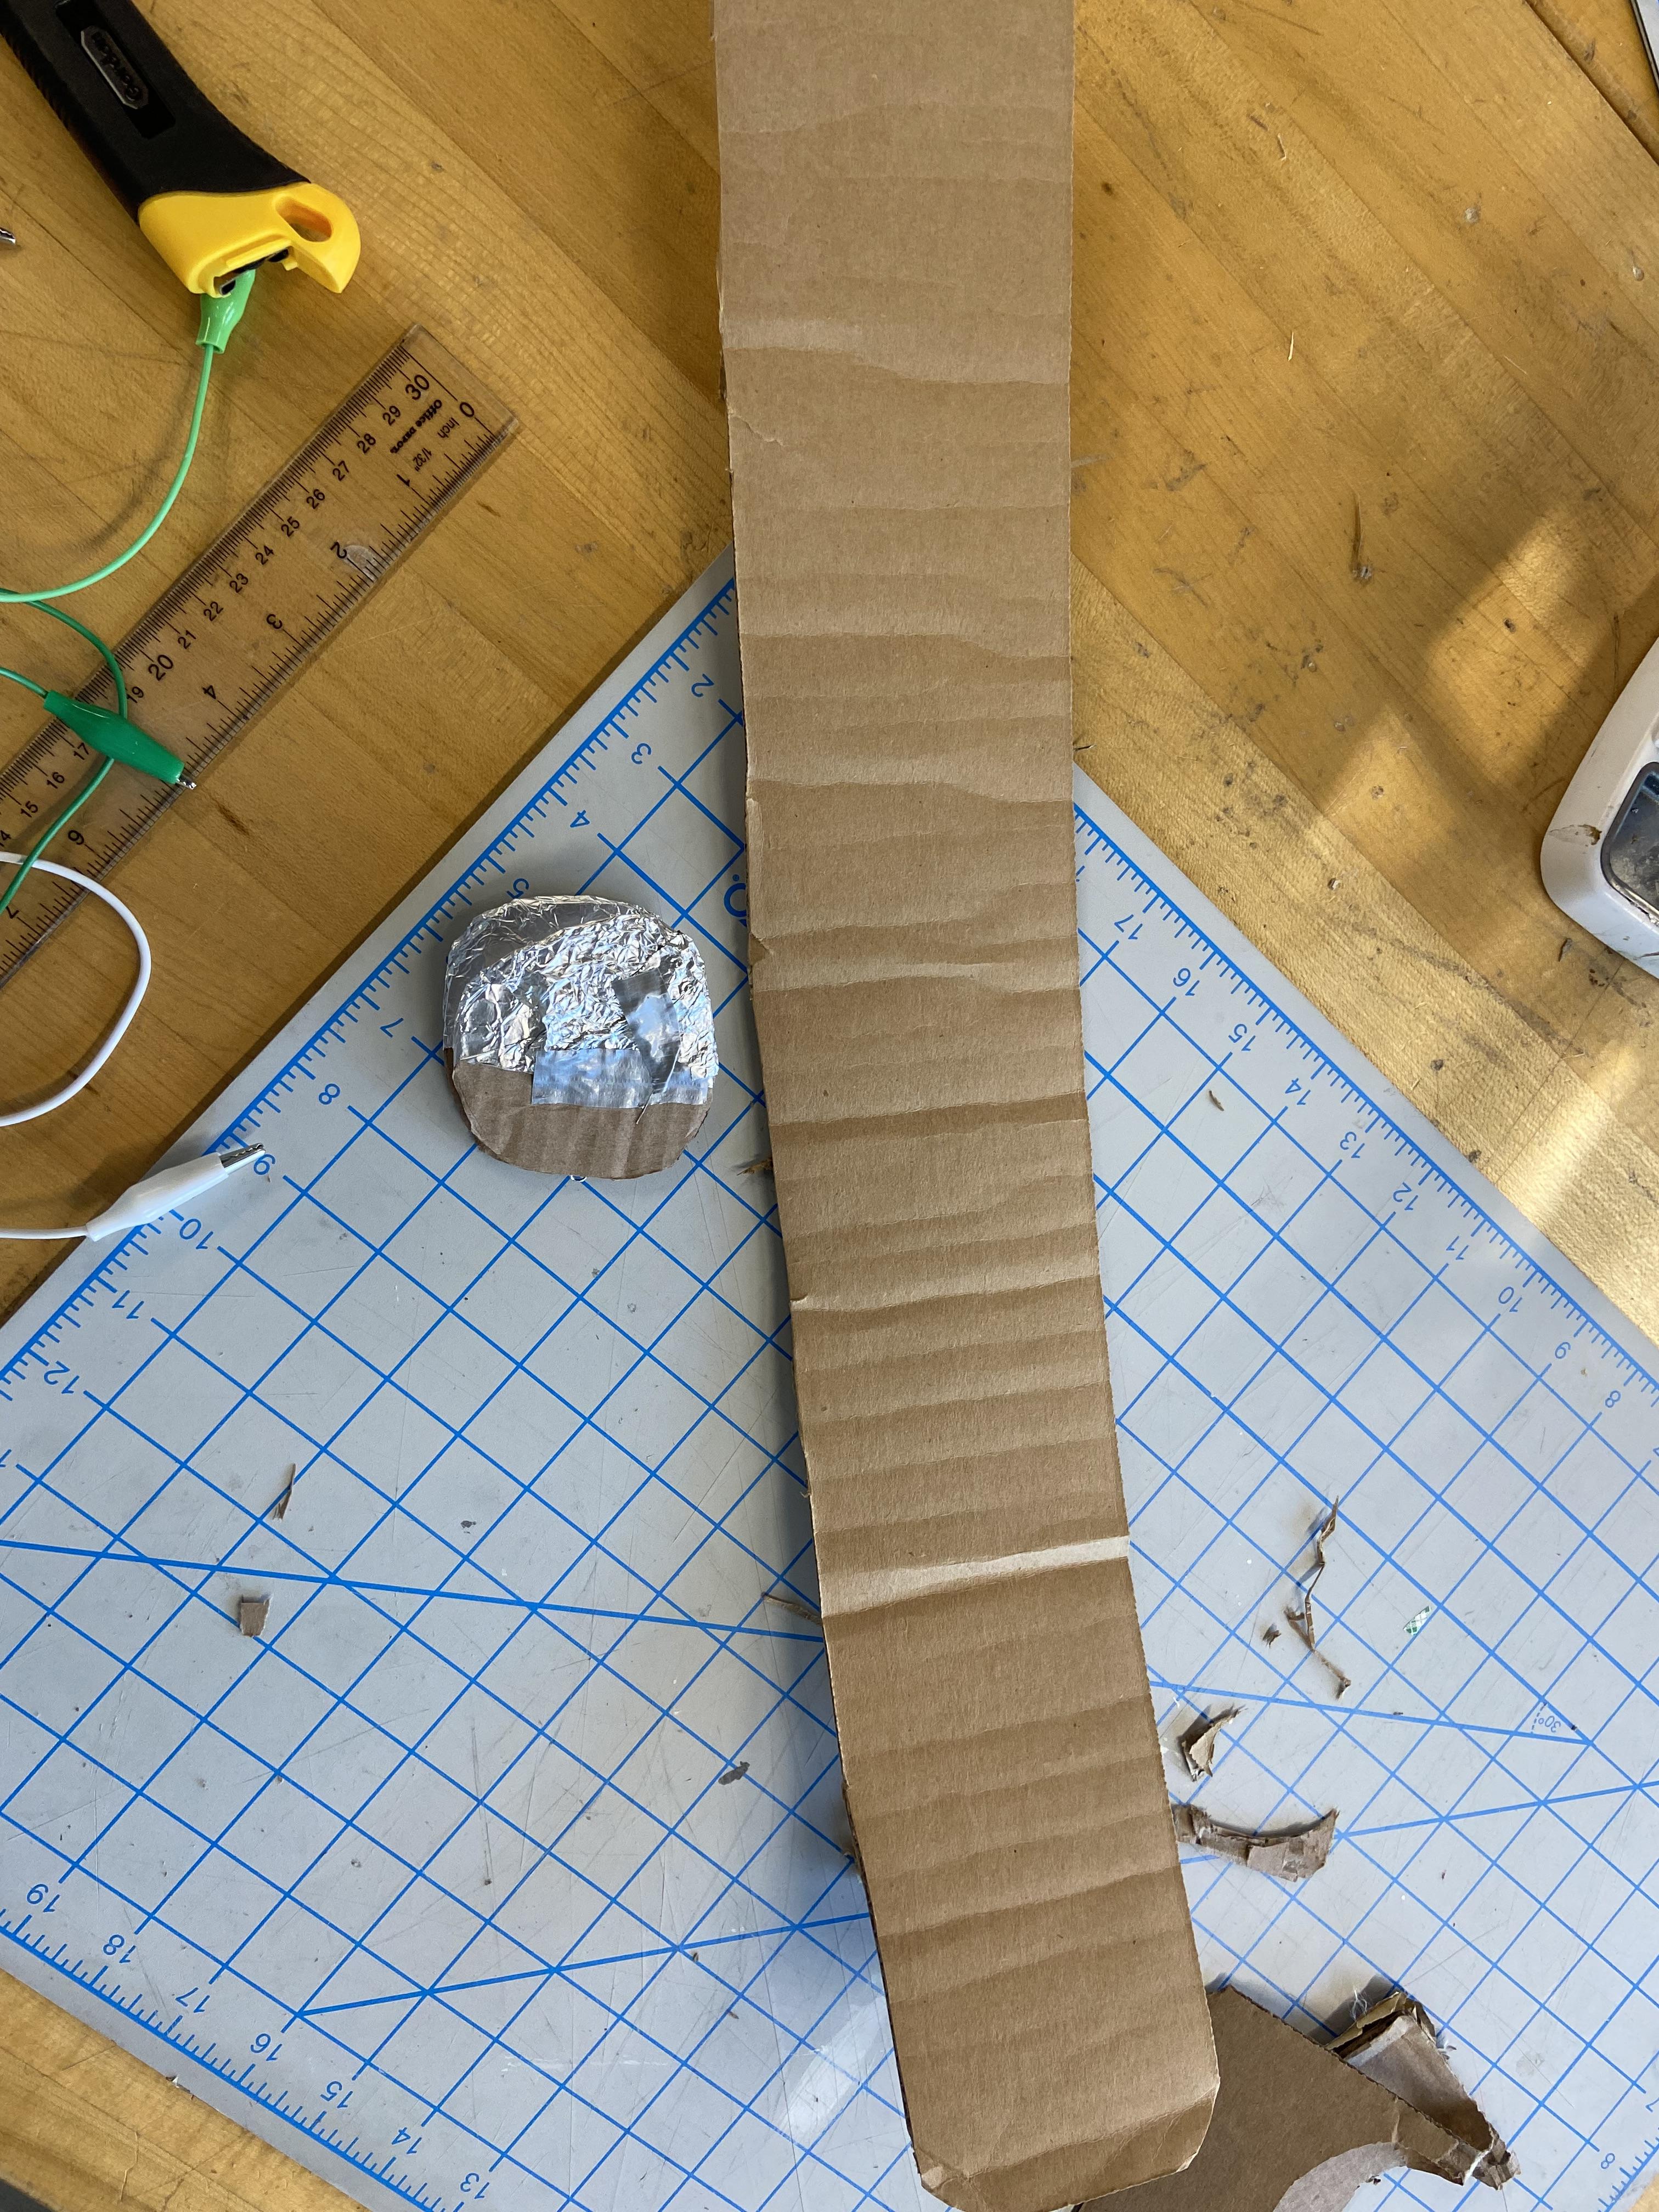
Moving on we are going to make the headpiece
1. Measure the height of the user's head.
2. To make it as comfortable as possible it should be a little less tall than their head (try a half-inch)
3. Now, cut a strip of cardboard according to the measurements (for aesthetics you can cut each of the corners off but it's really not necessary)
Controller Spine
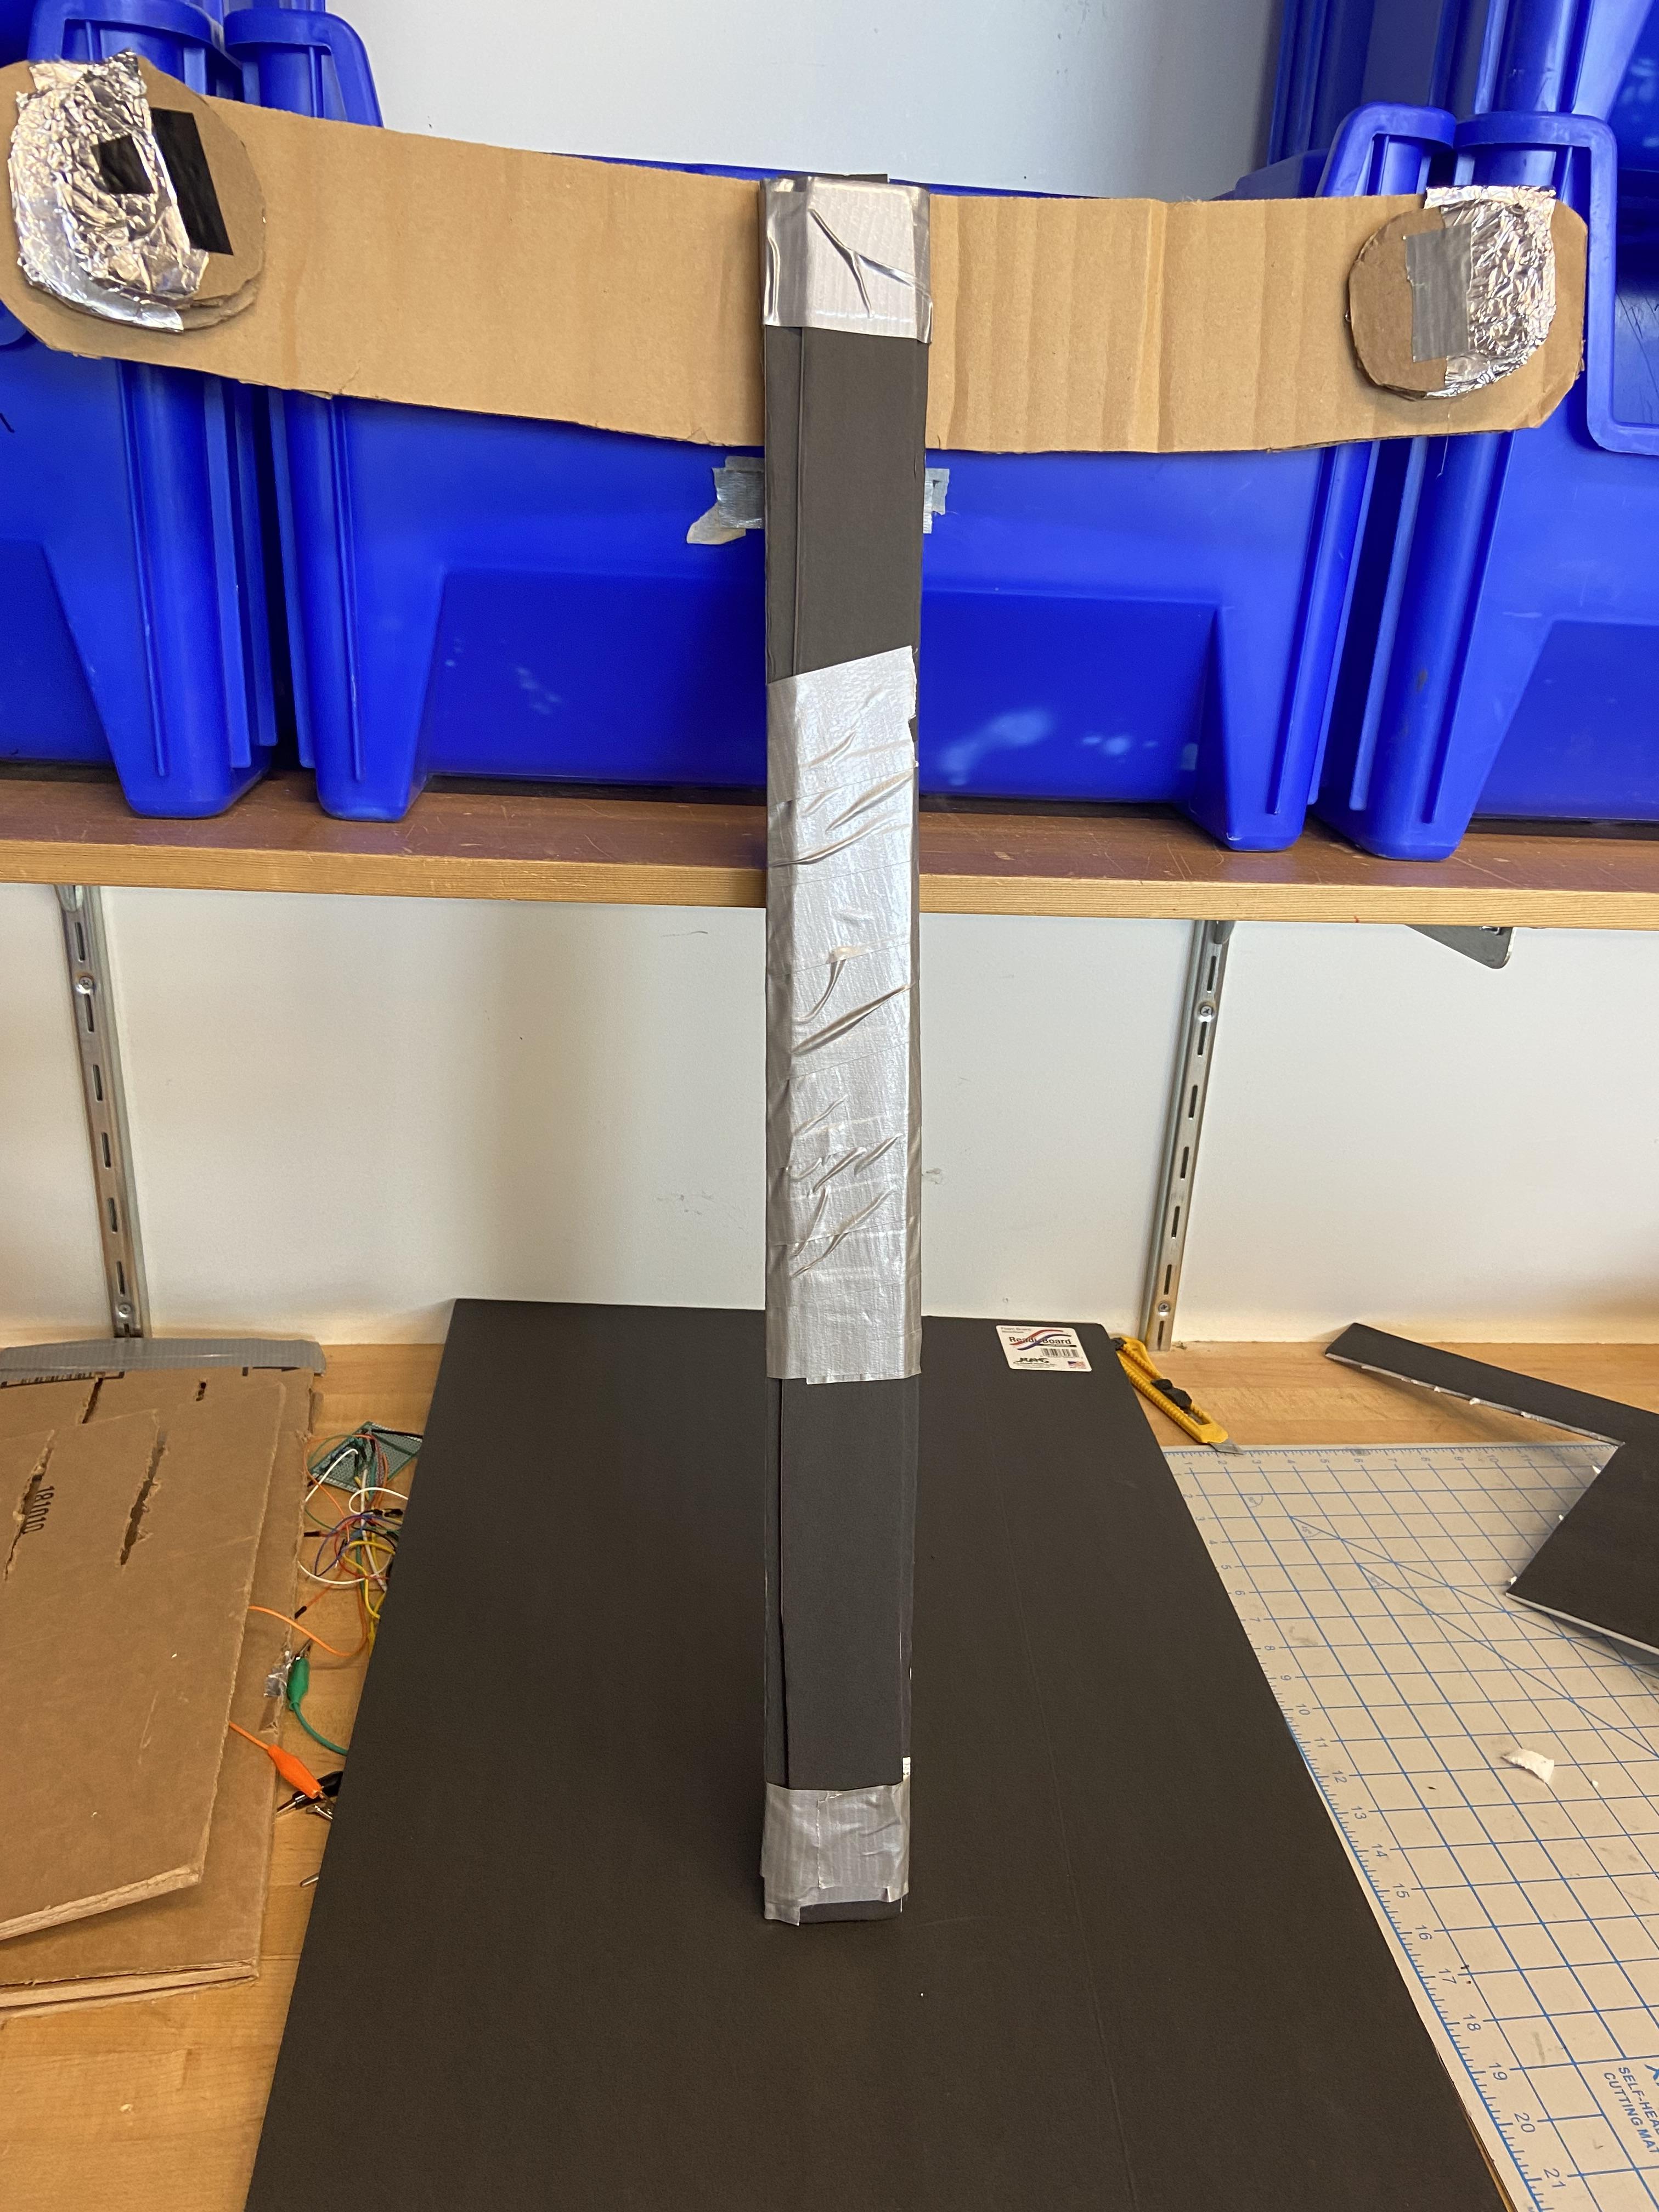
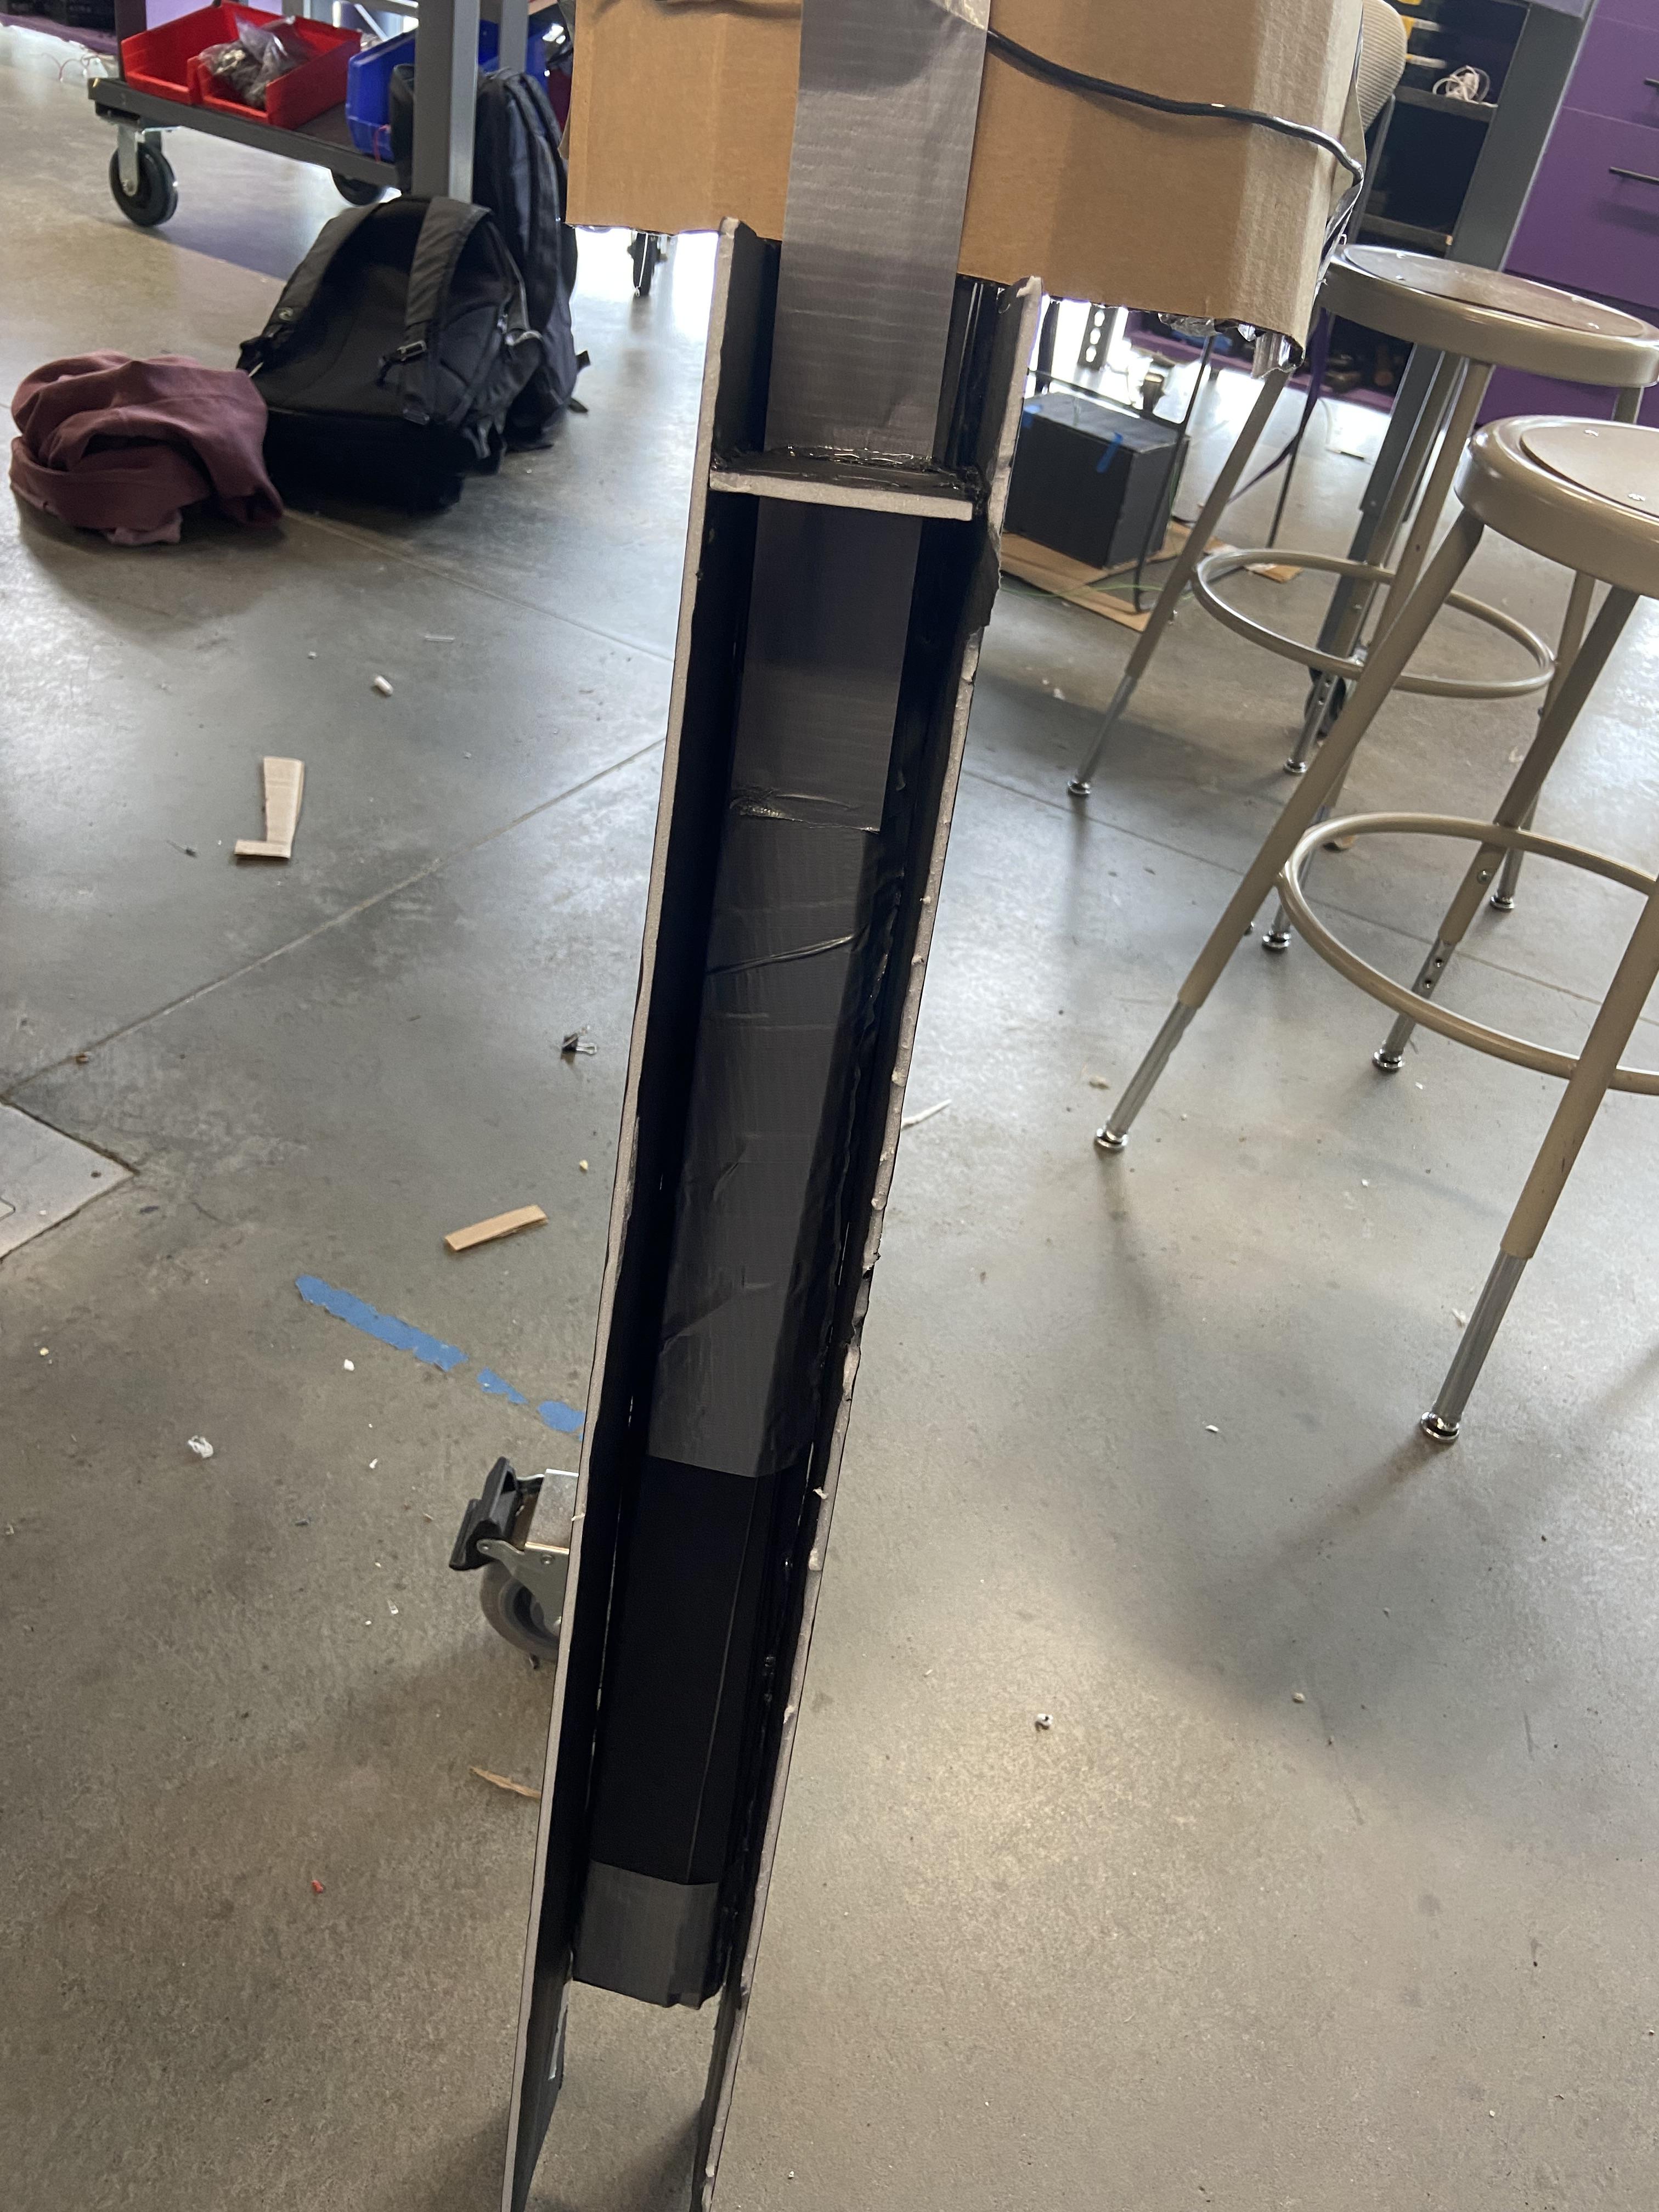
1. Cut 6 pieces of foam board that will be long enough to cover the entire back of the chair and come up to the top of the user's head. (make it at least wide enough to fit an Arduino Leonardo comfortably)
2. Hot glue them all together.
3. On the middle, top, and bottom tape them all together.
4. glue the headpiece to the back of the spine.
5. cut two more pieces of foam board to make a 3D rectangular shape to the spine as seen above. (make it at least long enough to fit an Arduino Leonardo)
6. hot glue both of these pieces to each side of the spine. Then (once hot glue has dried) line the edges with duct tape
7. cut a piece of foam board that fits snuggly between the two back pieces of the spine as seen in the second picture above. Hot glue it in place just below the top as seen in the second picture above.
8. line the back of the headpiece with thick wire to have it keep its shape. tape over it on both sides and in the middle.
9. Cut a long piece of foam board that covers the entire open backspace between the foam platform and the bottom of the spine. Glue this into place then line the edges with duct tape
Electronics
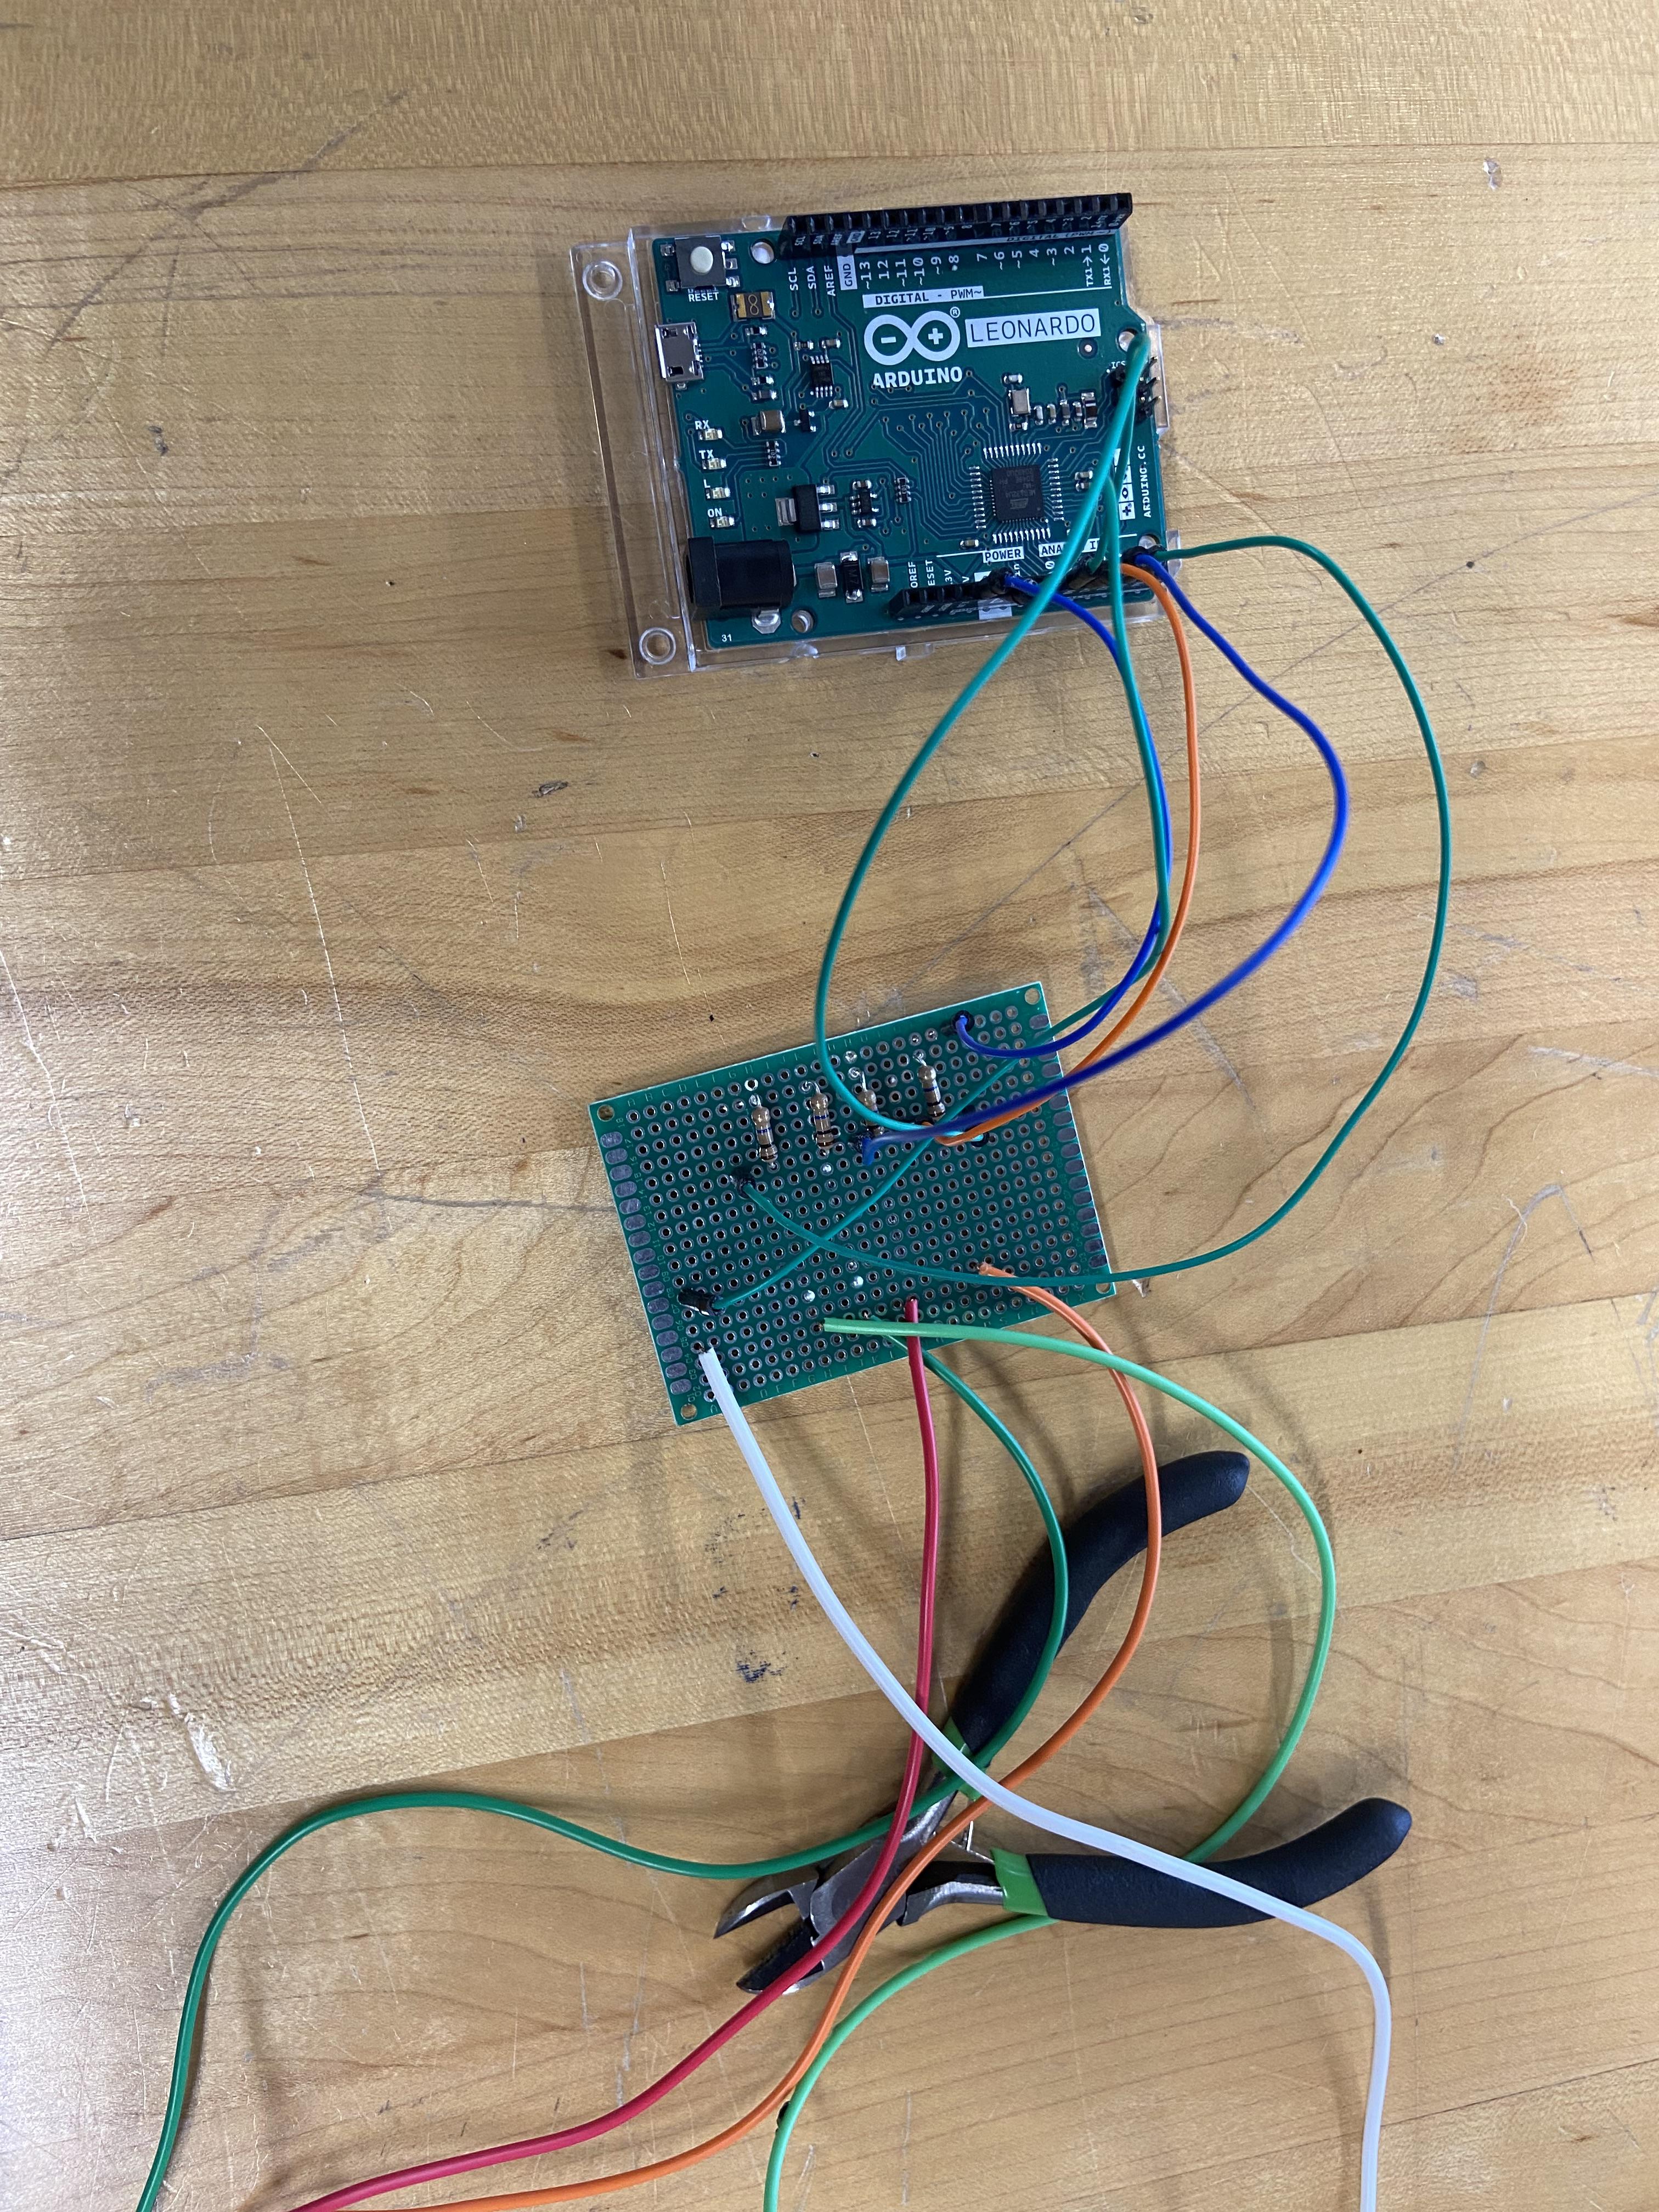
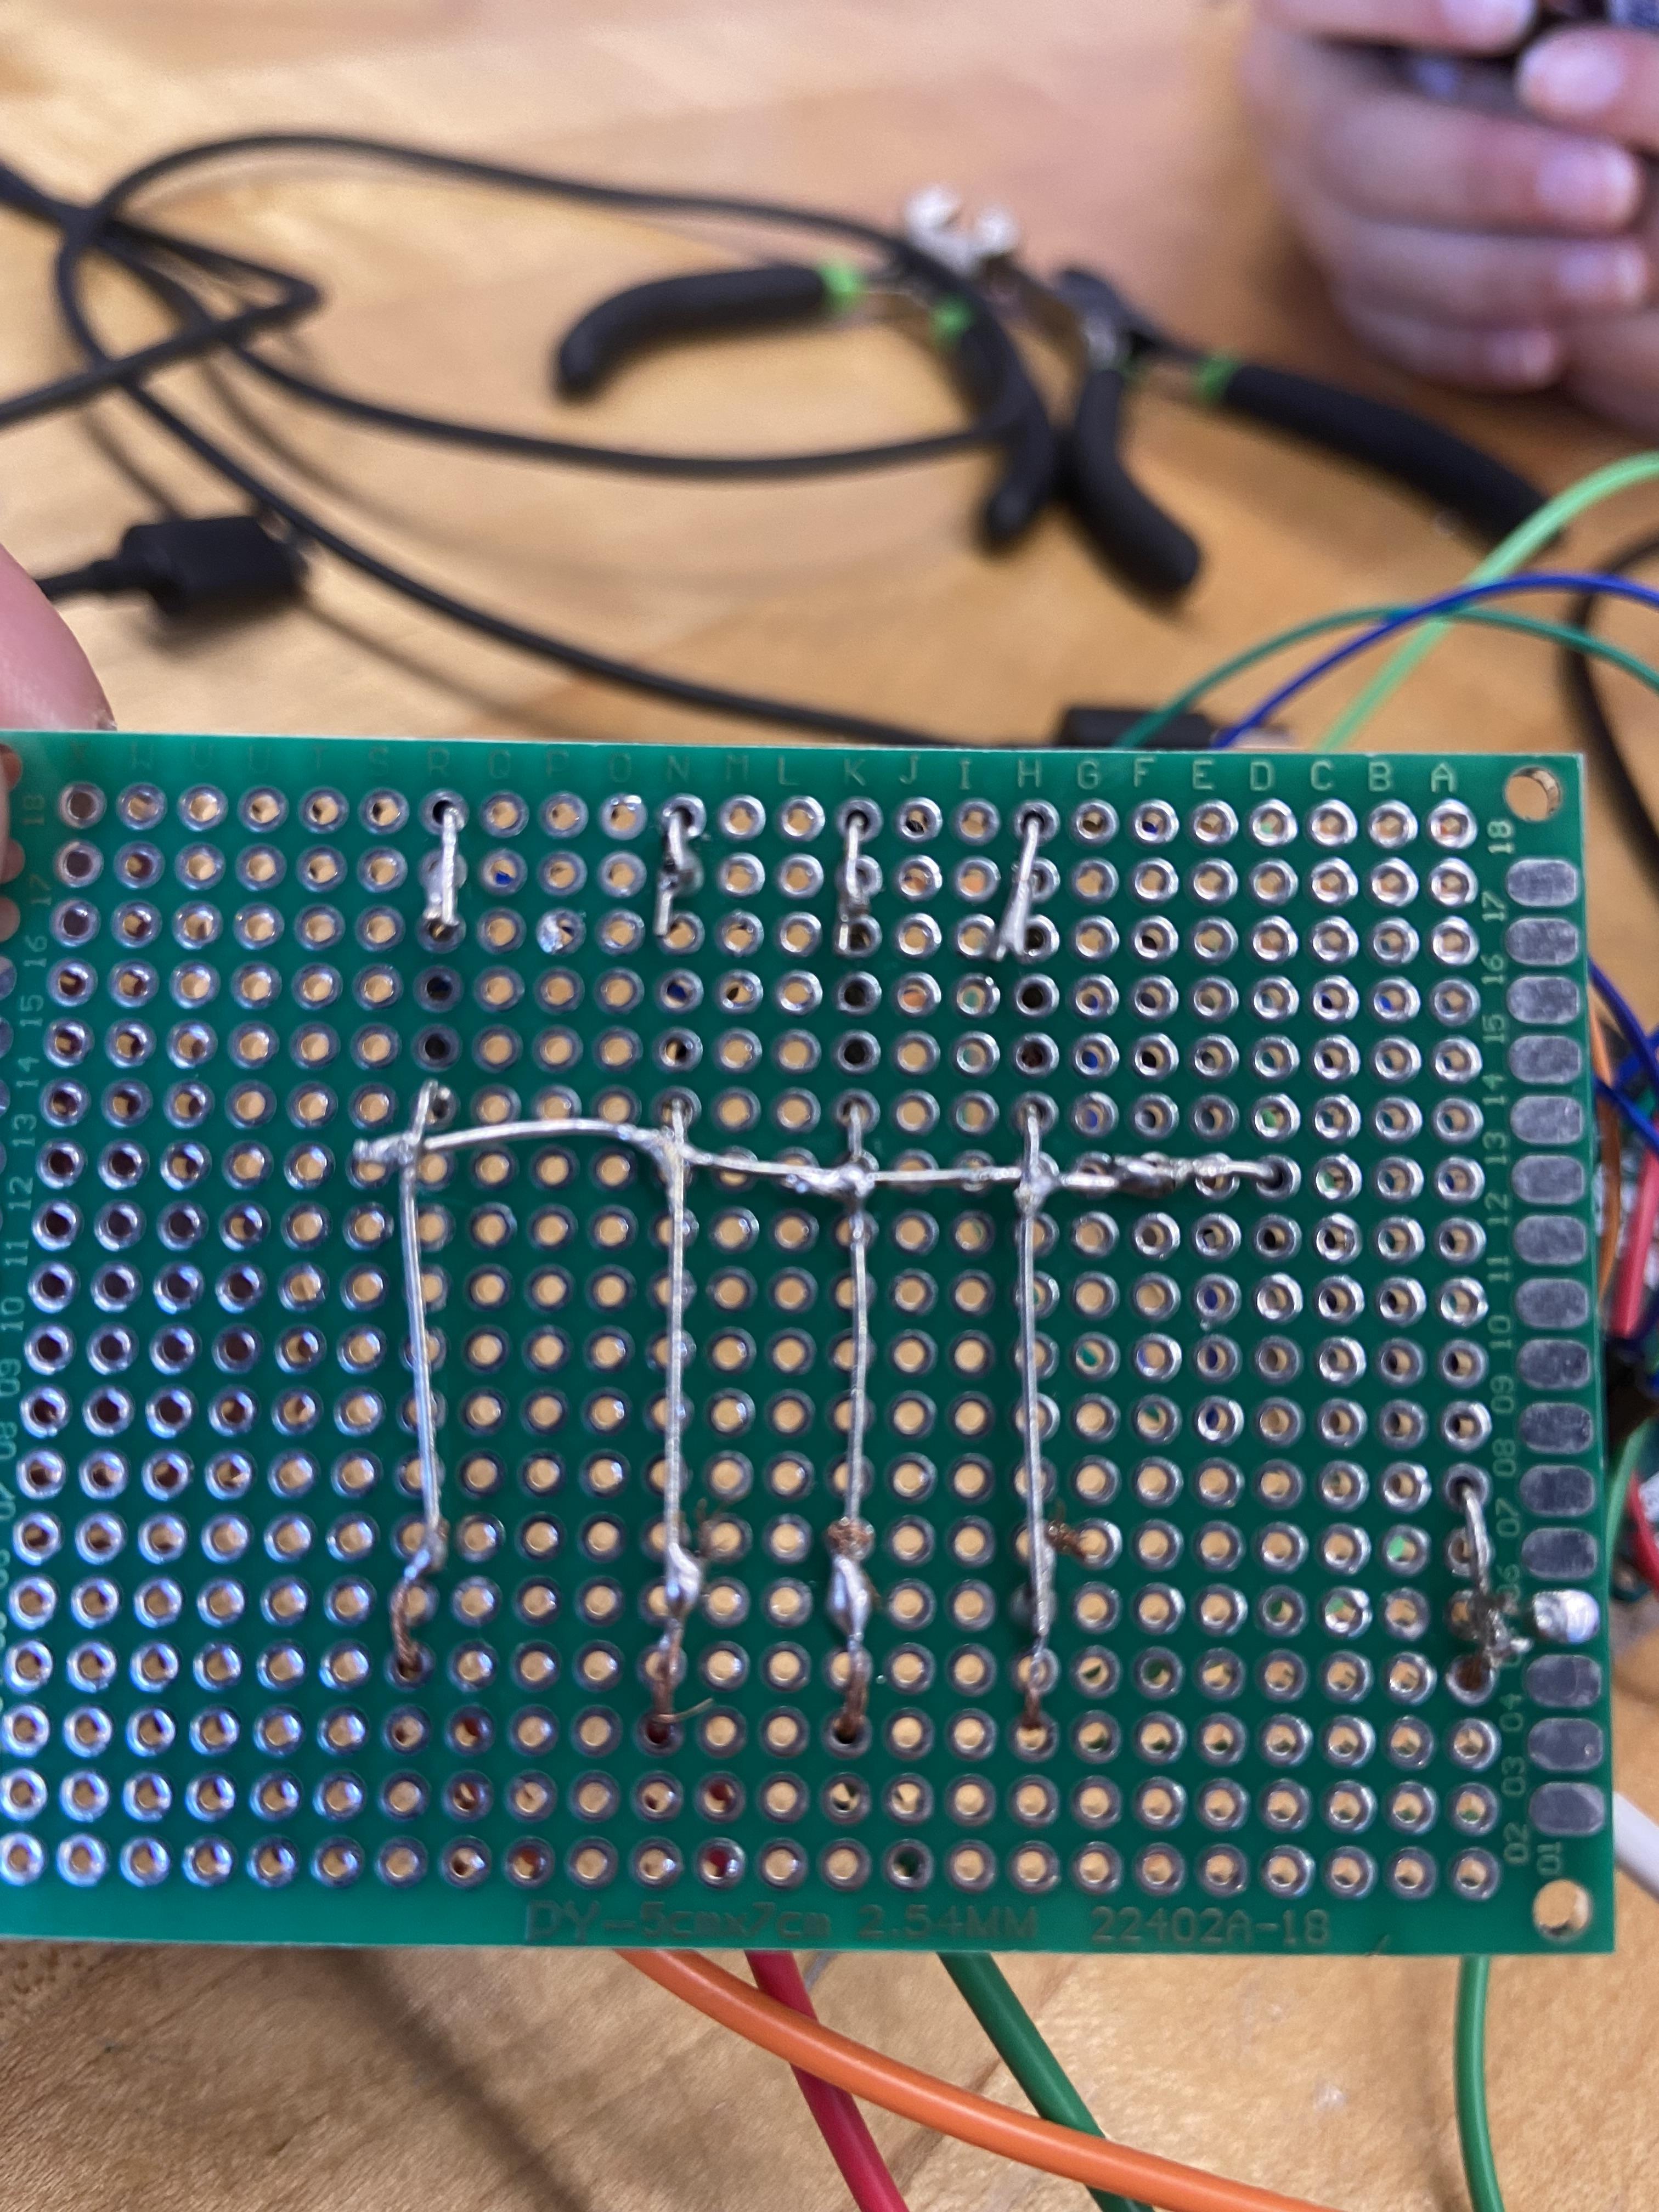
Now we get to play around with a little bit of hardware.
1. Get an Arduino and make sure to download the Arduino application to your computer
2. tag this code into the Arduino app
3. get a perf board, 3 megaohm resistors, 5 wires, 4 alligator clips, solder, and a soldering iron.
4. reconstruct the perf board above.
Make sure you wire the 5V pin across the resistor before the A0-A4 pins. Then wire the A0-A4 pins to alligator clips. To wire the alligator clips just strip the ends. Then put the ground off to the side (the white wire in the first picture above.)
5. Plug a USB into your Arduino and computer and flash the code to the Arduino, make sure you select the port.
Intagration
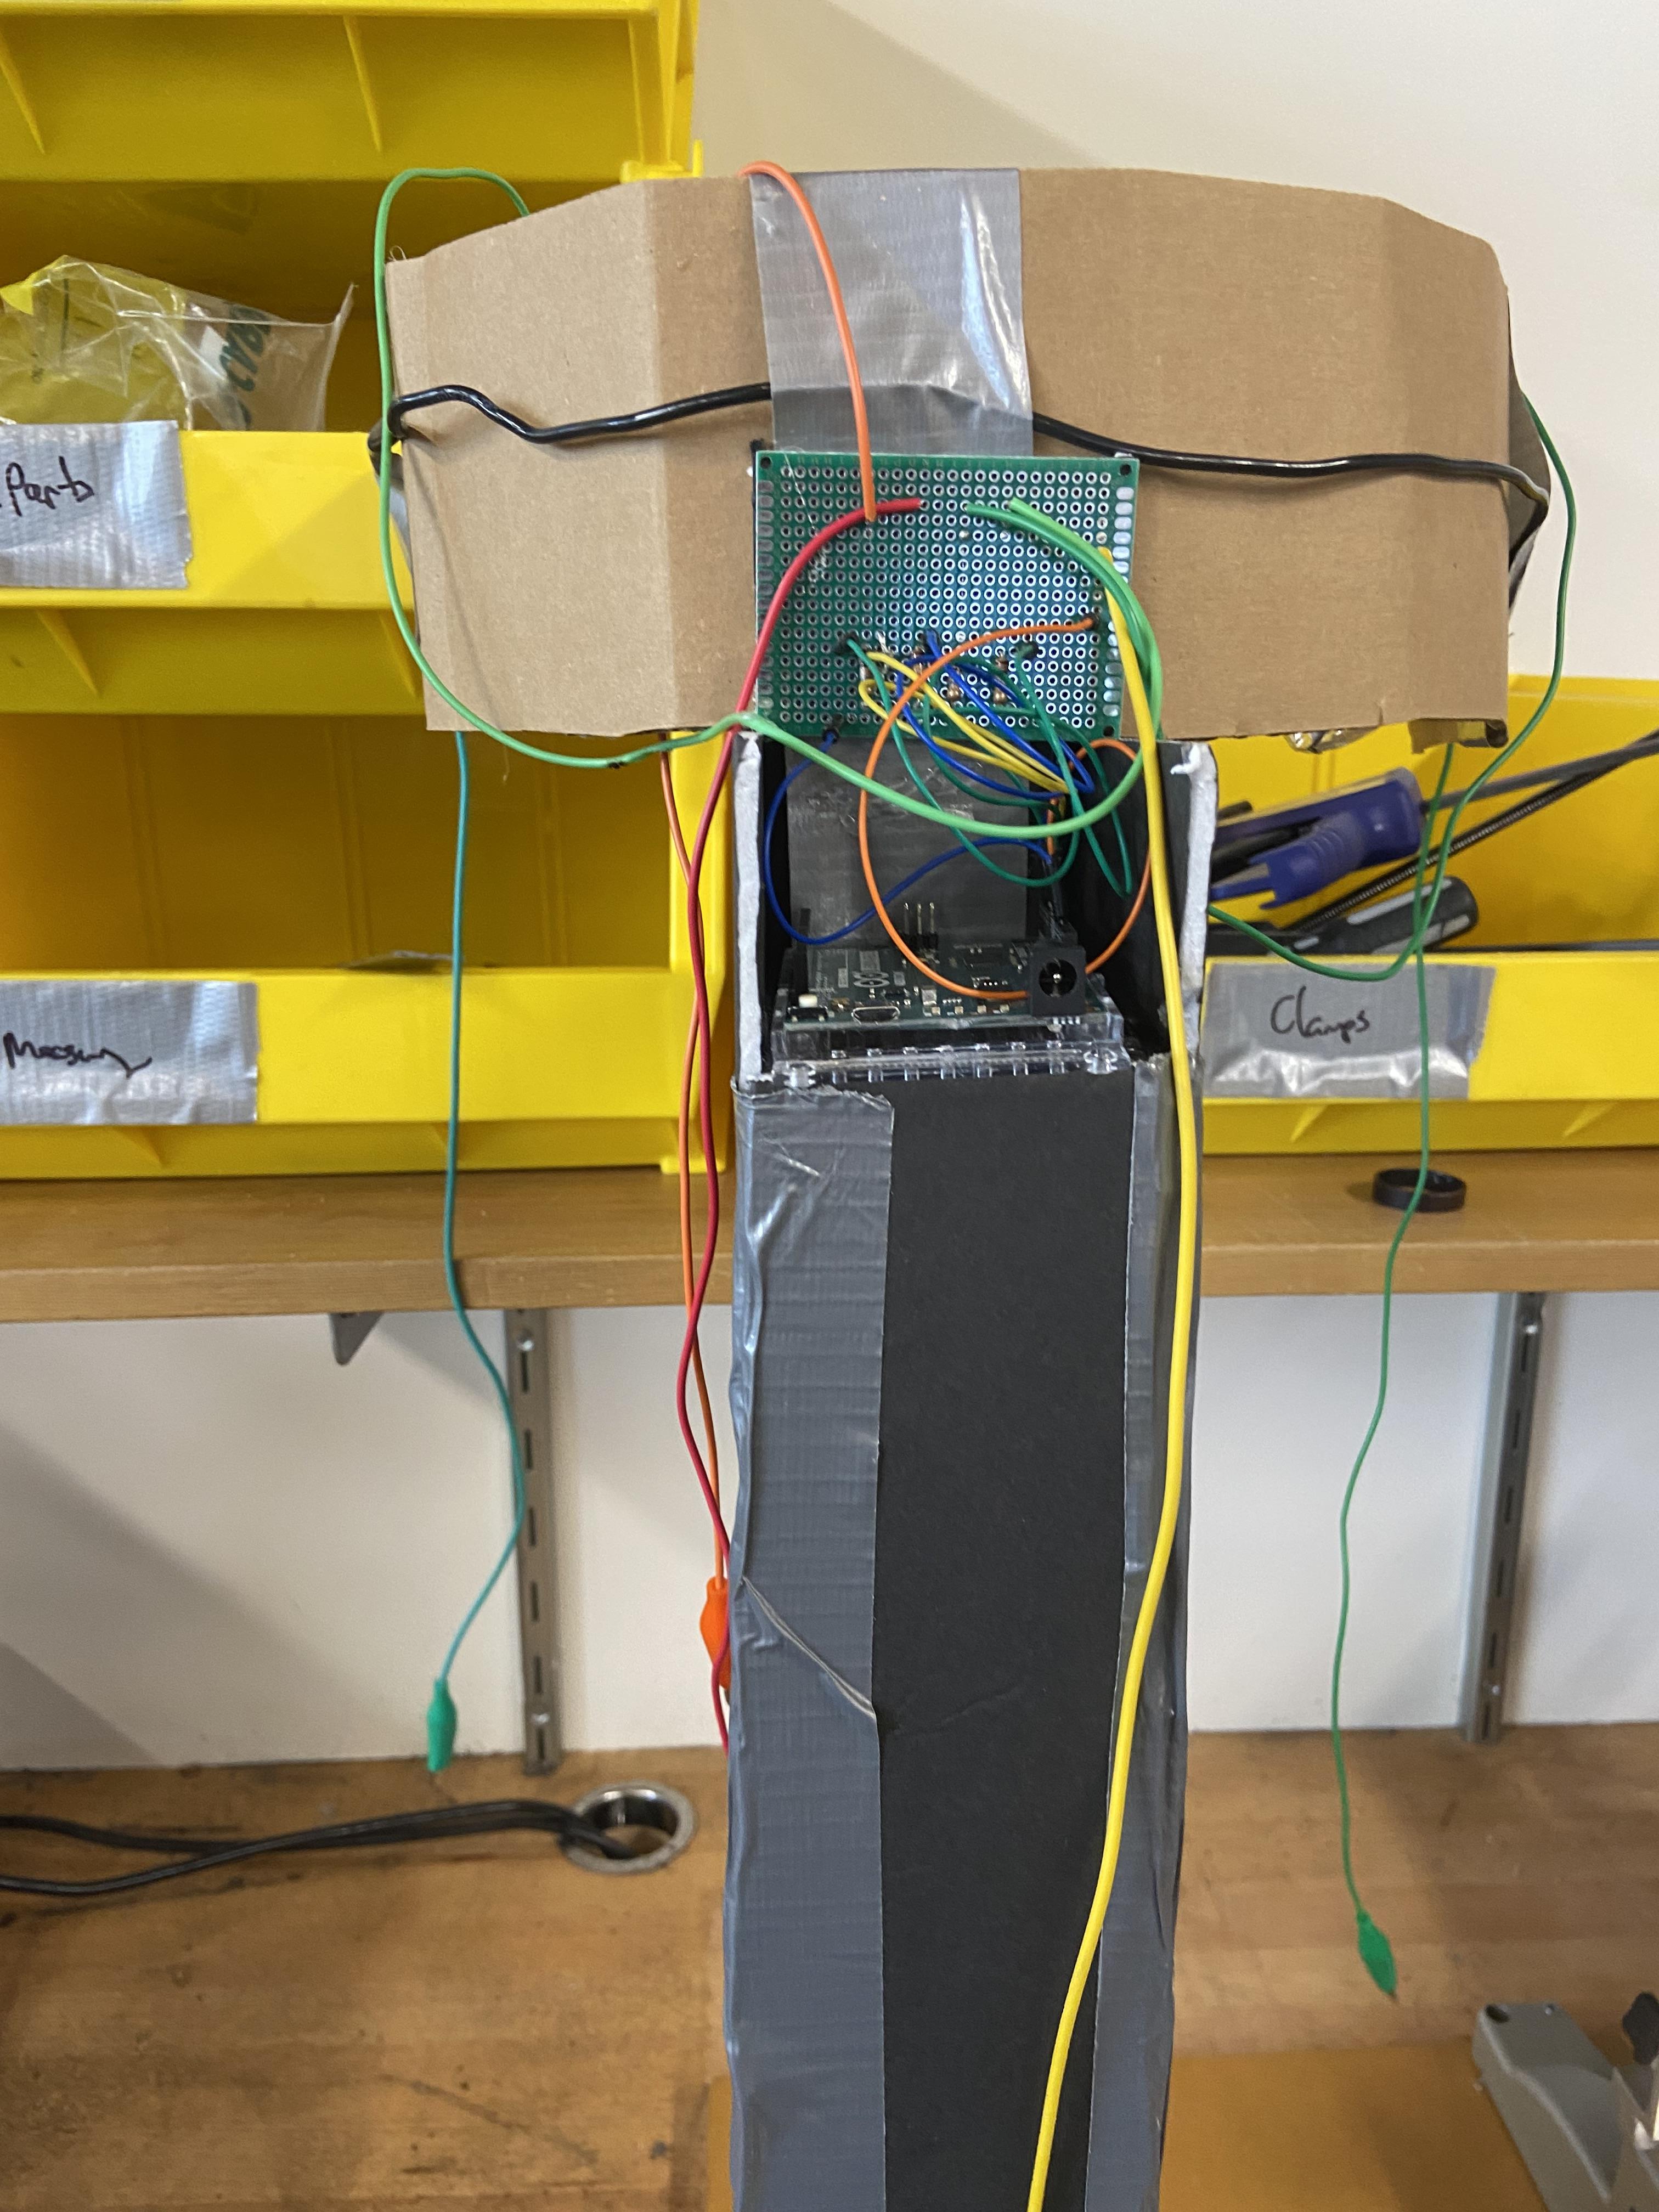
Once the Arduino is finished, hot glue the Arduino onto the platform. Then hot glue a small piece of foam board onto the perfboard (make sure to keep all hot glue off of the circuits). After that, hot glue the back of the perfboard right above the Arduino (as seen in the picture above.)
Buttons
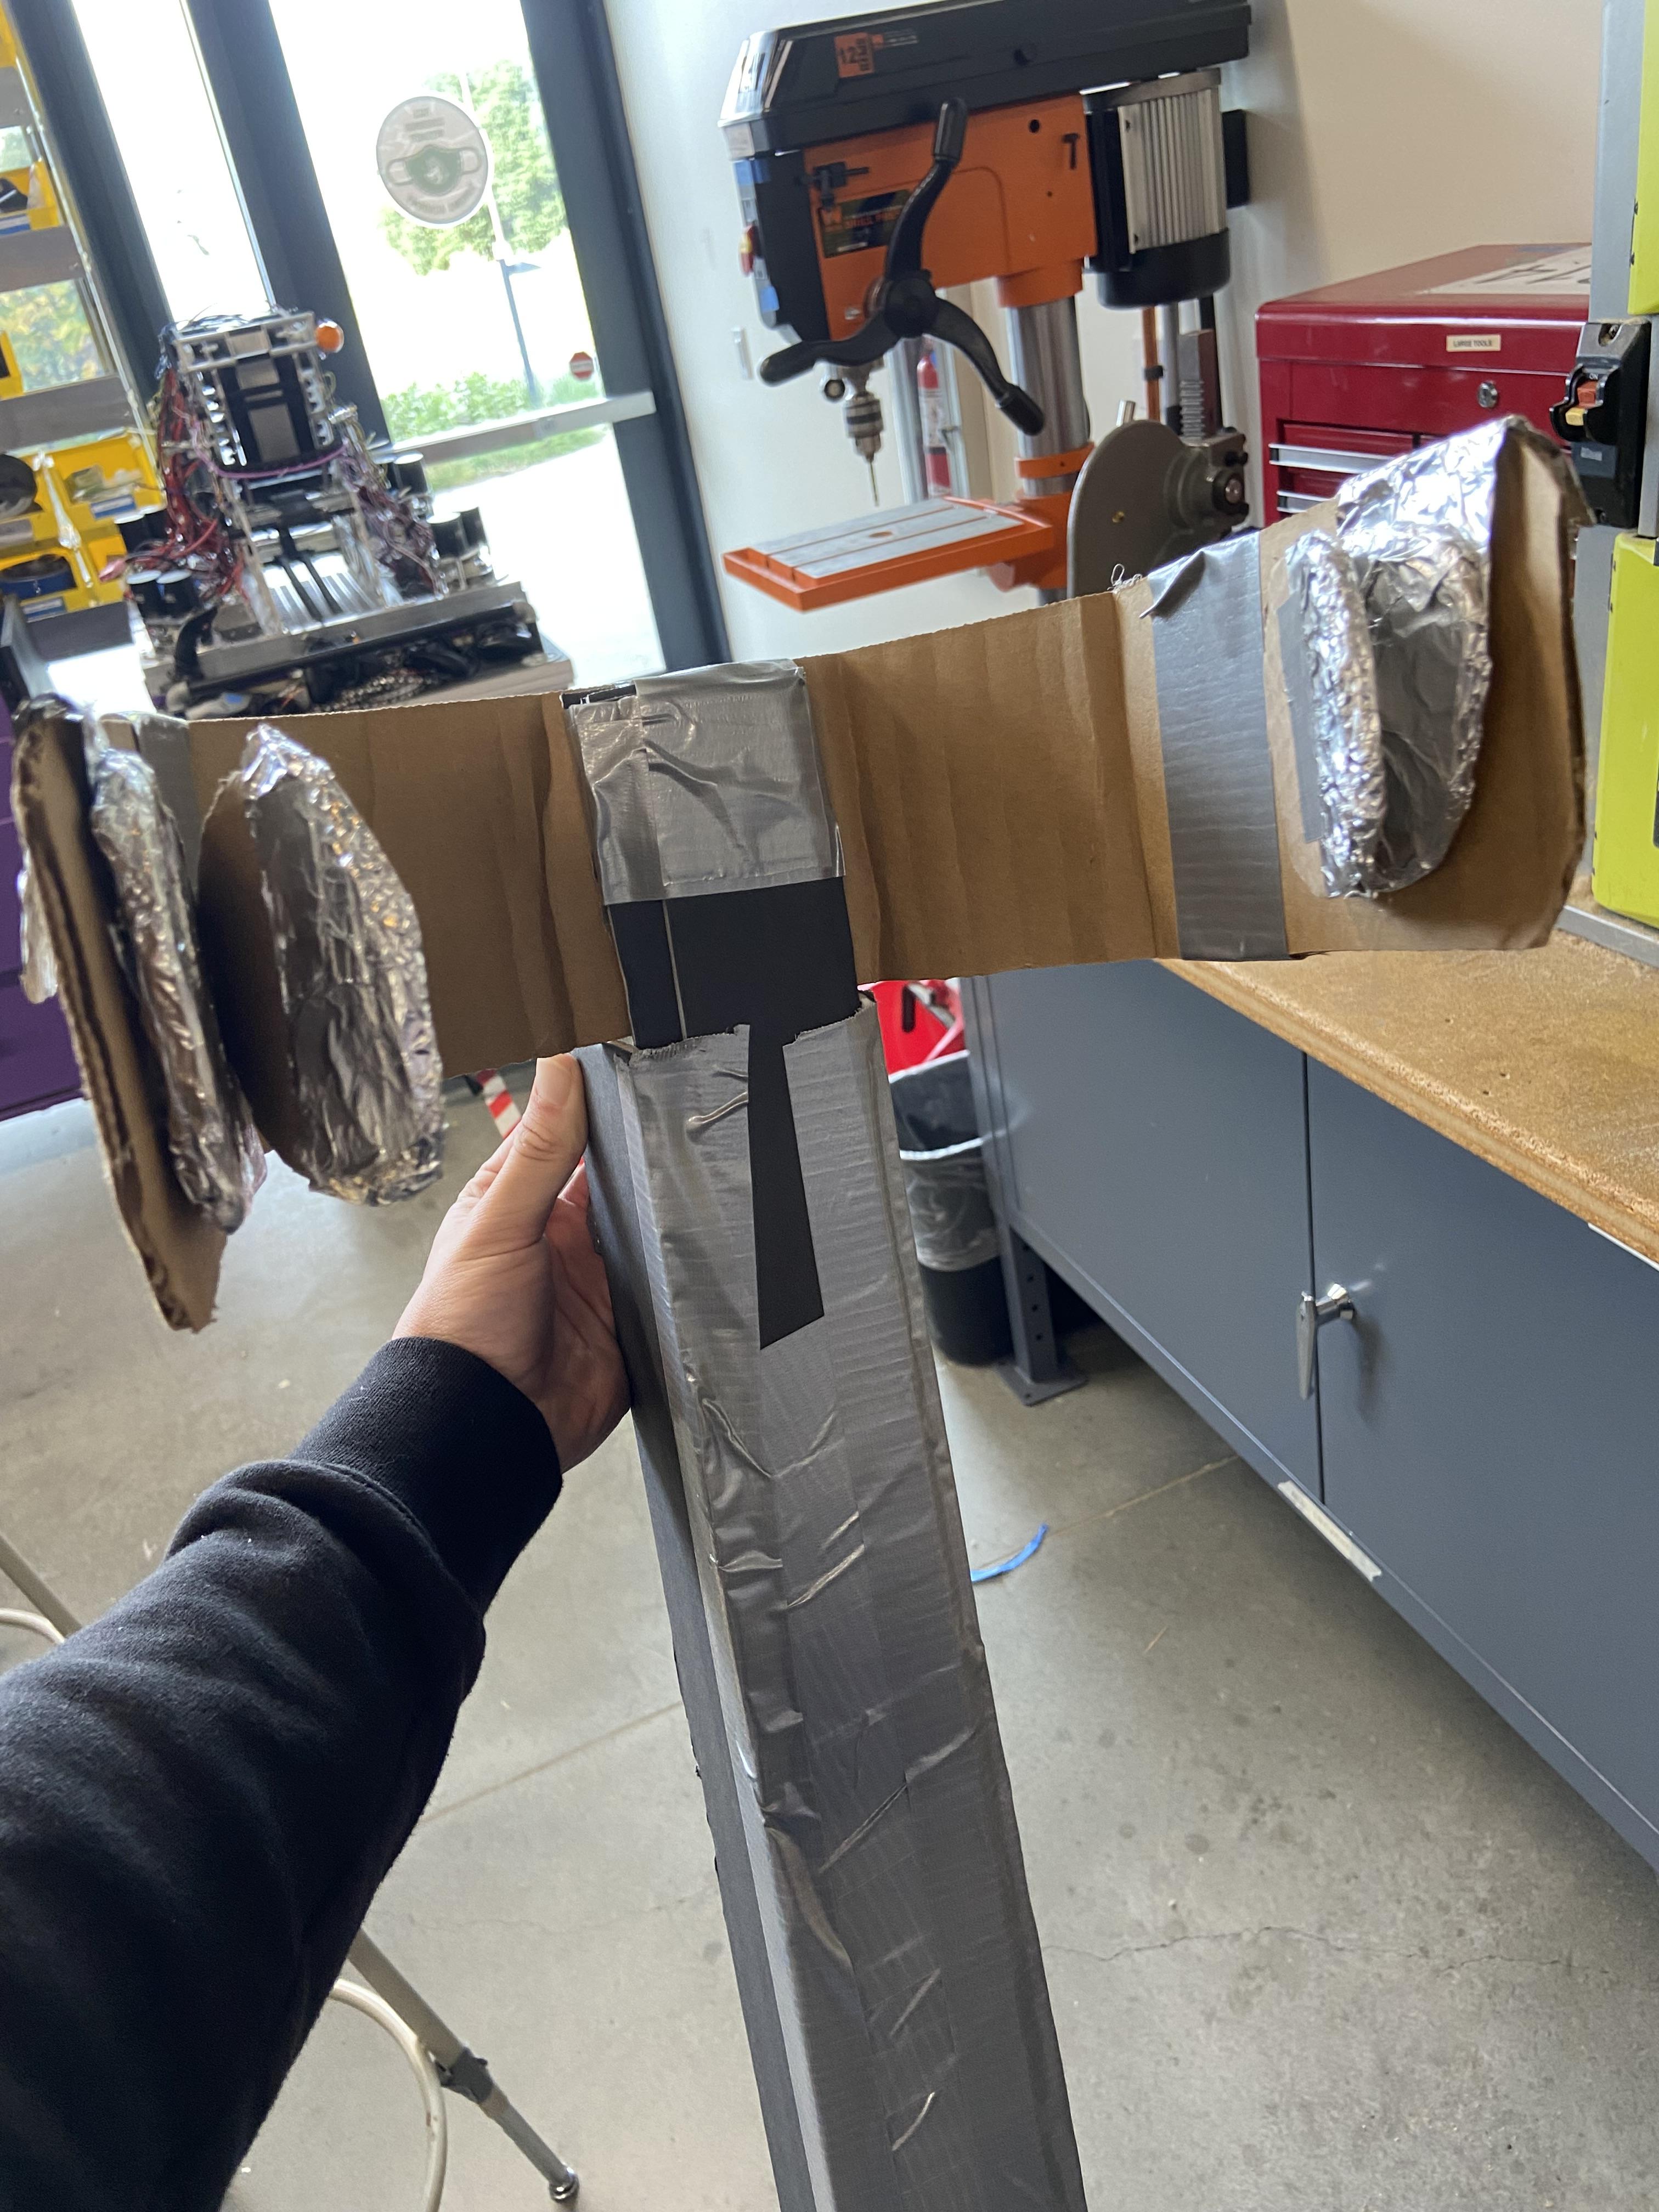
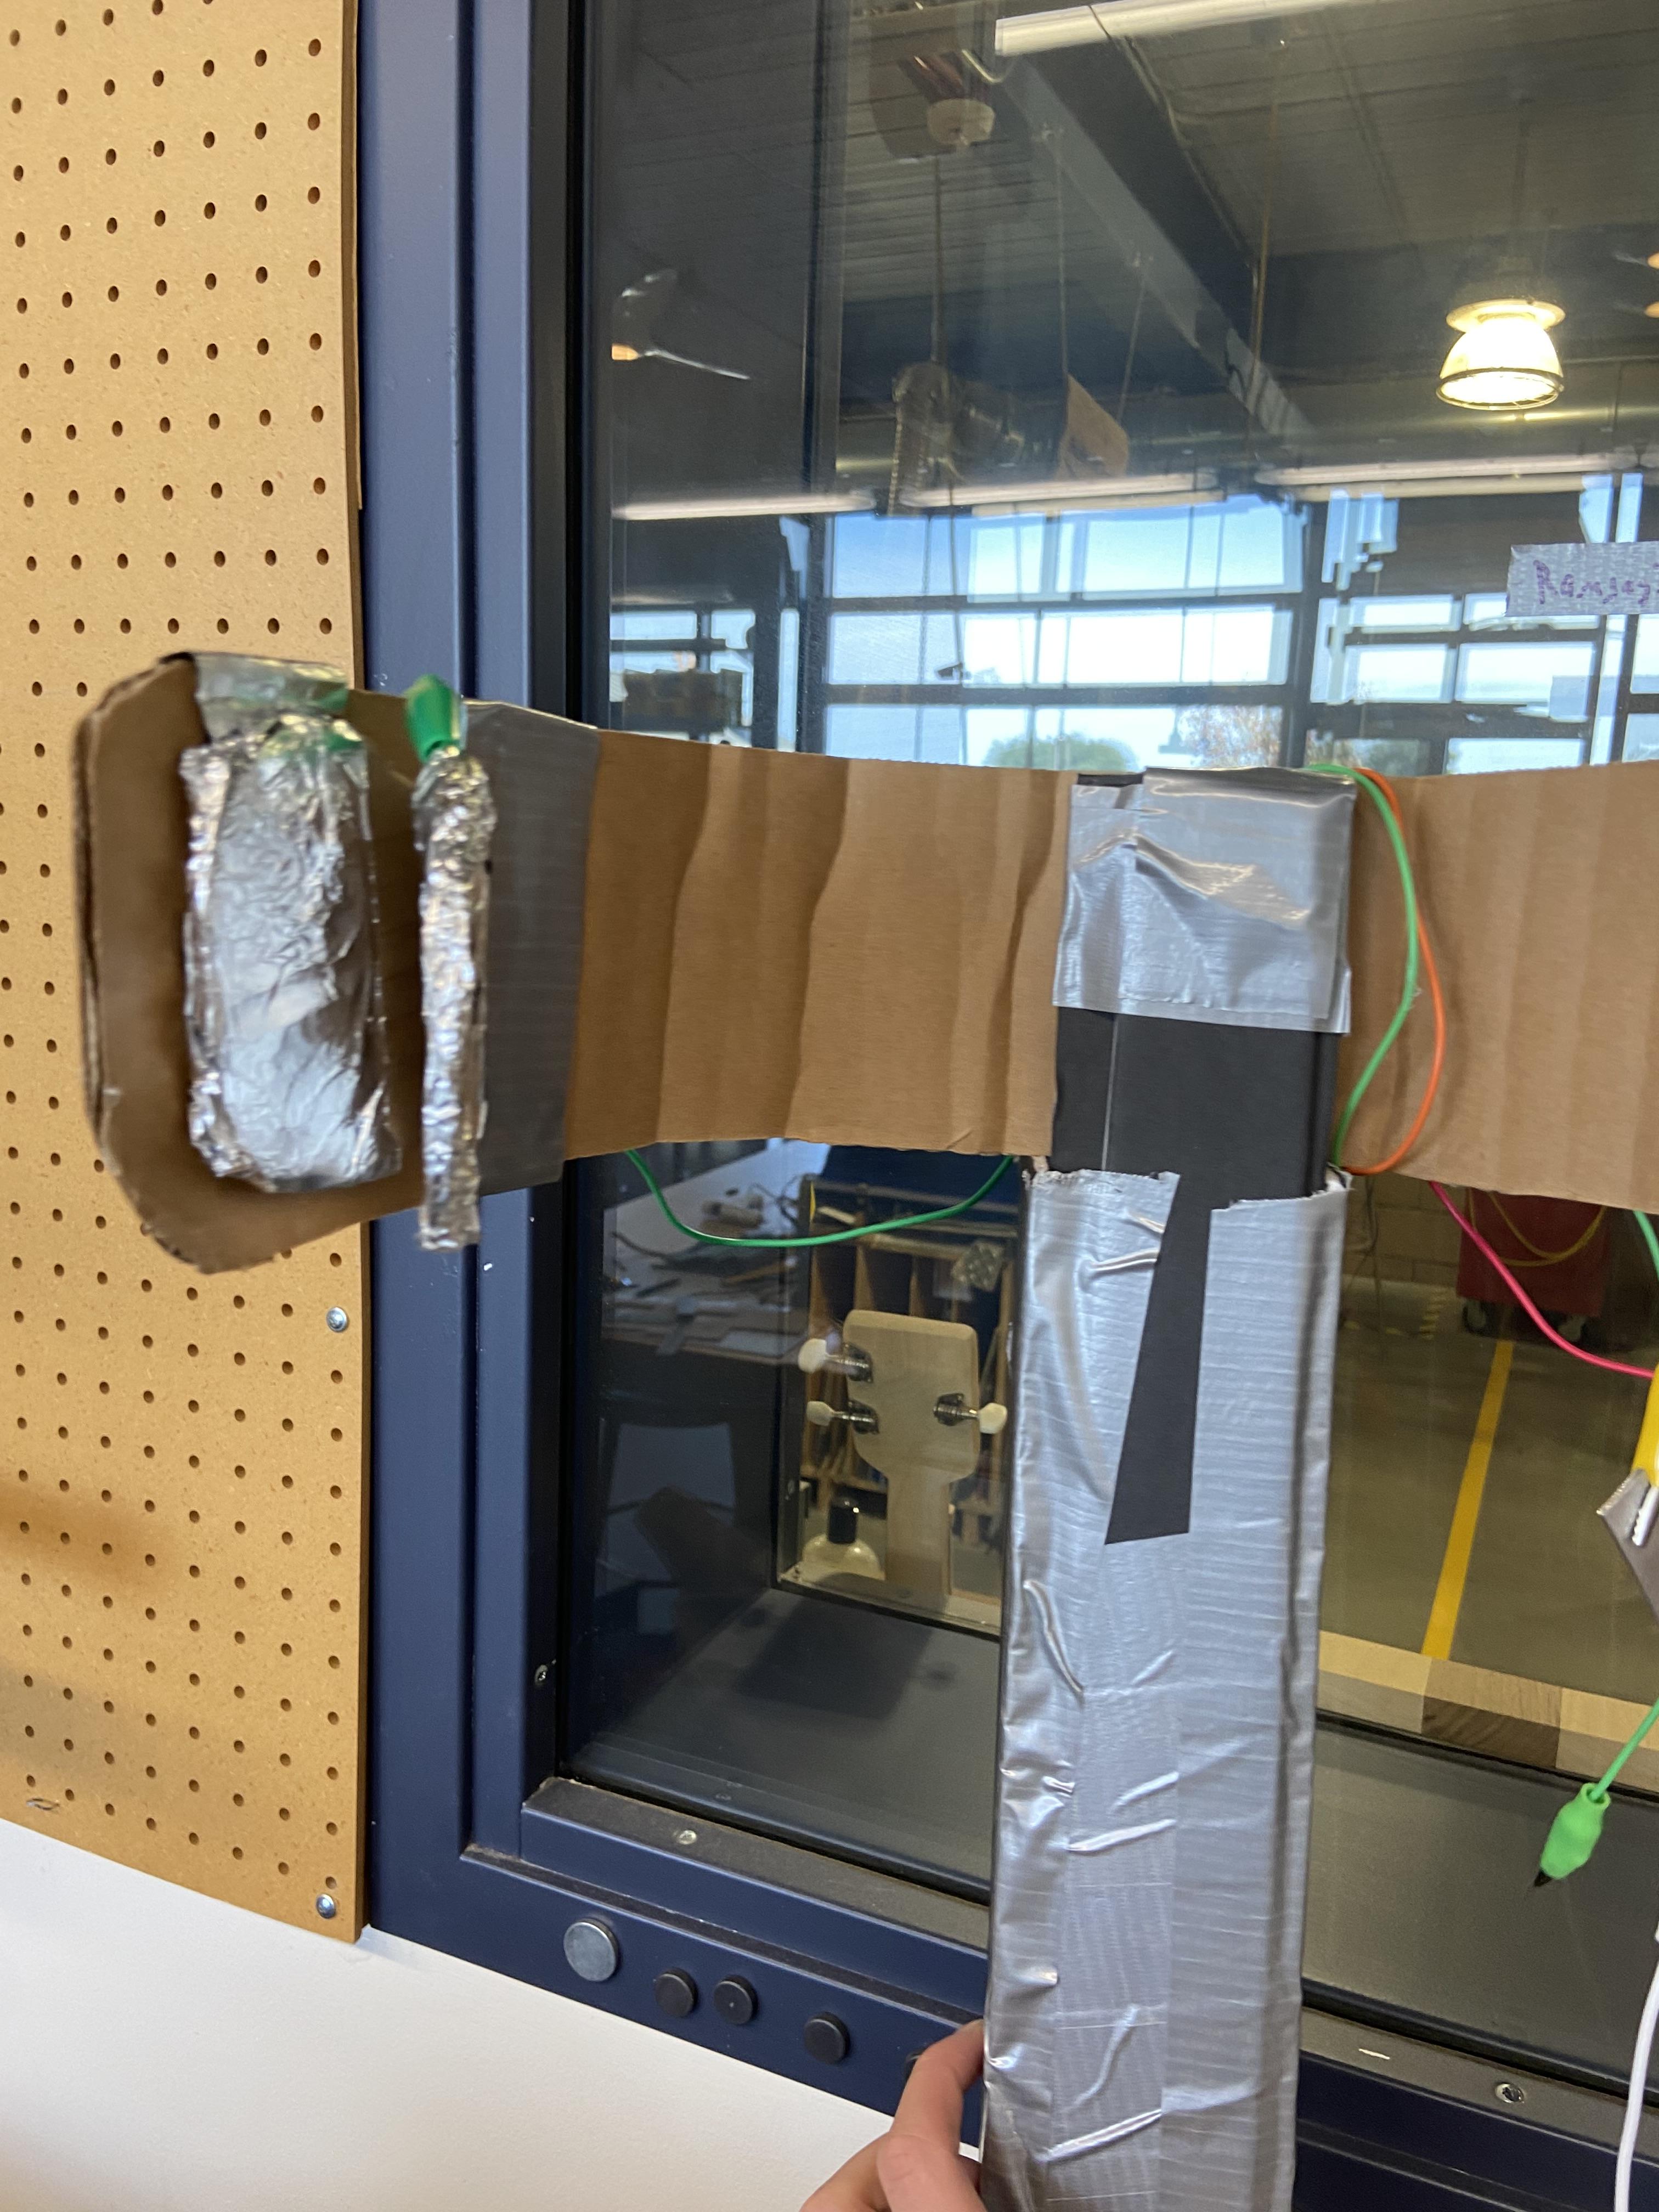
Now to make the buttons
1. Cut four equal size circles
2. Cover the ends of each circle in tin foil
3. Take 2 paperclips and pull the middle part up on each one.
4. Stick each end of the paper clip into the the cardboard
5. Glue each button on either side of the head rest, make sure that it alligns comfortably with the users head.
6. now take two strips of tinfoil and hot glue them to the backside of each button. Make sure the tinfoil is going back over the headrest making a little tail. This will be used for the ground for each button
Head Piece Reinforcement
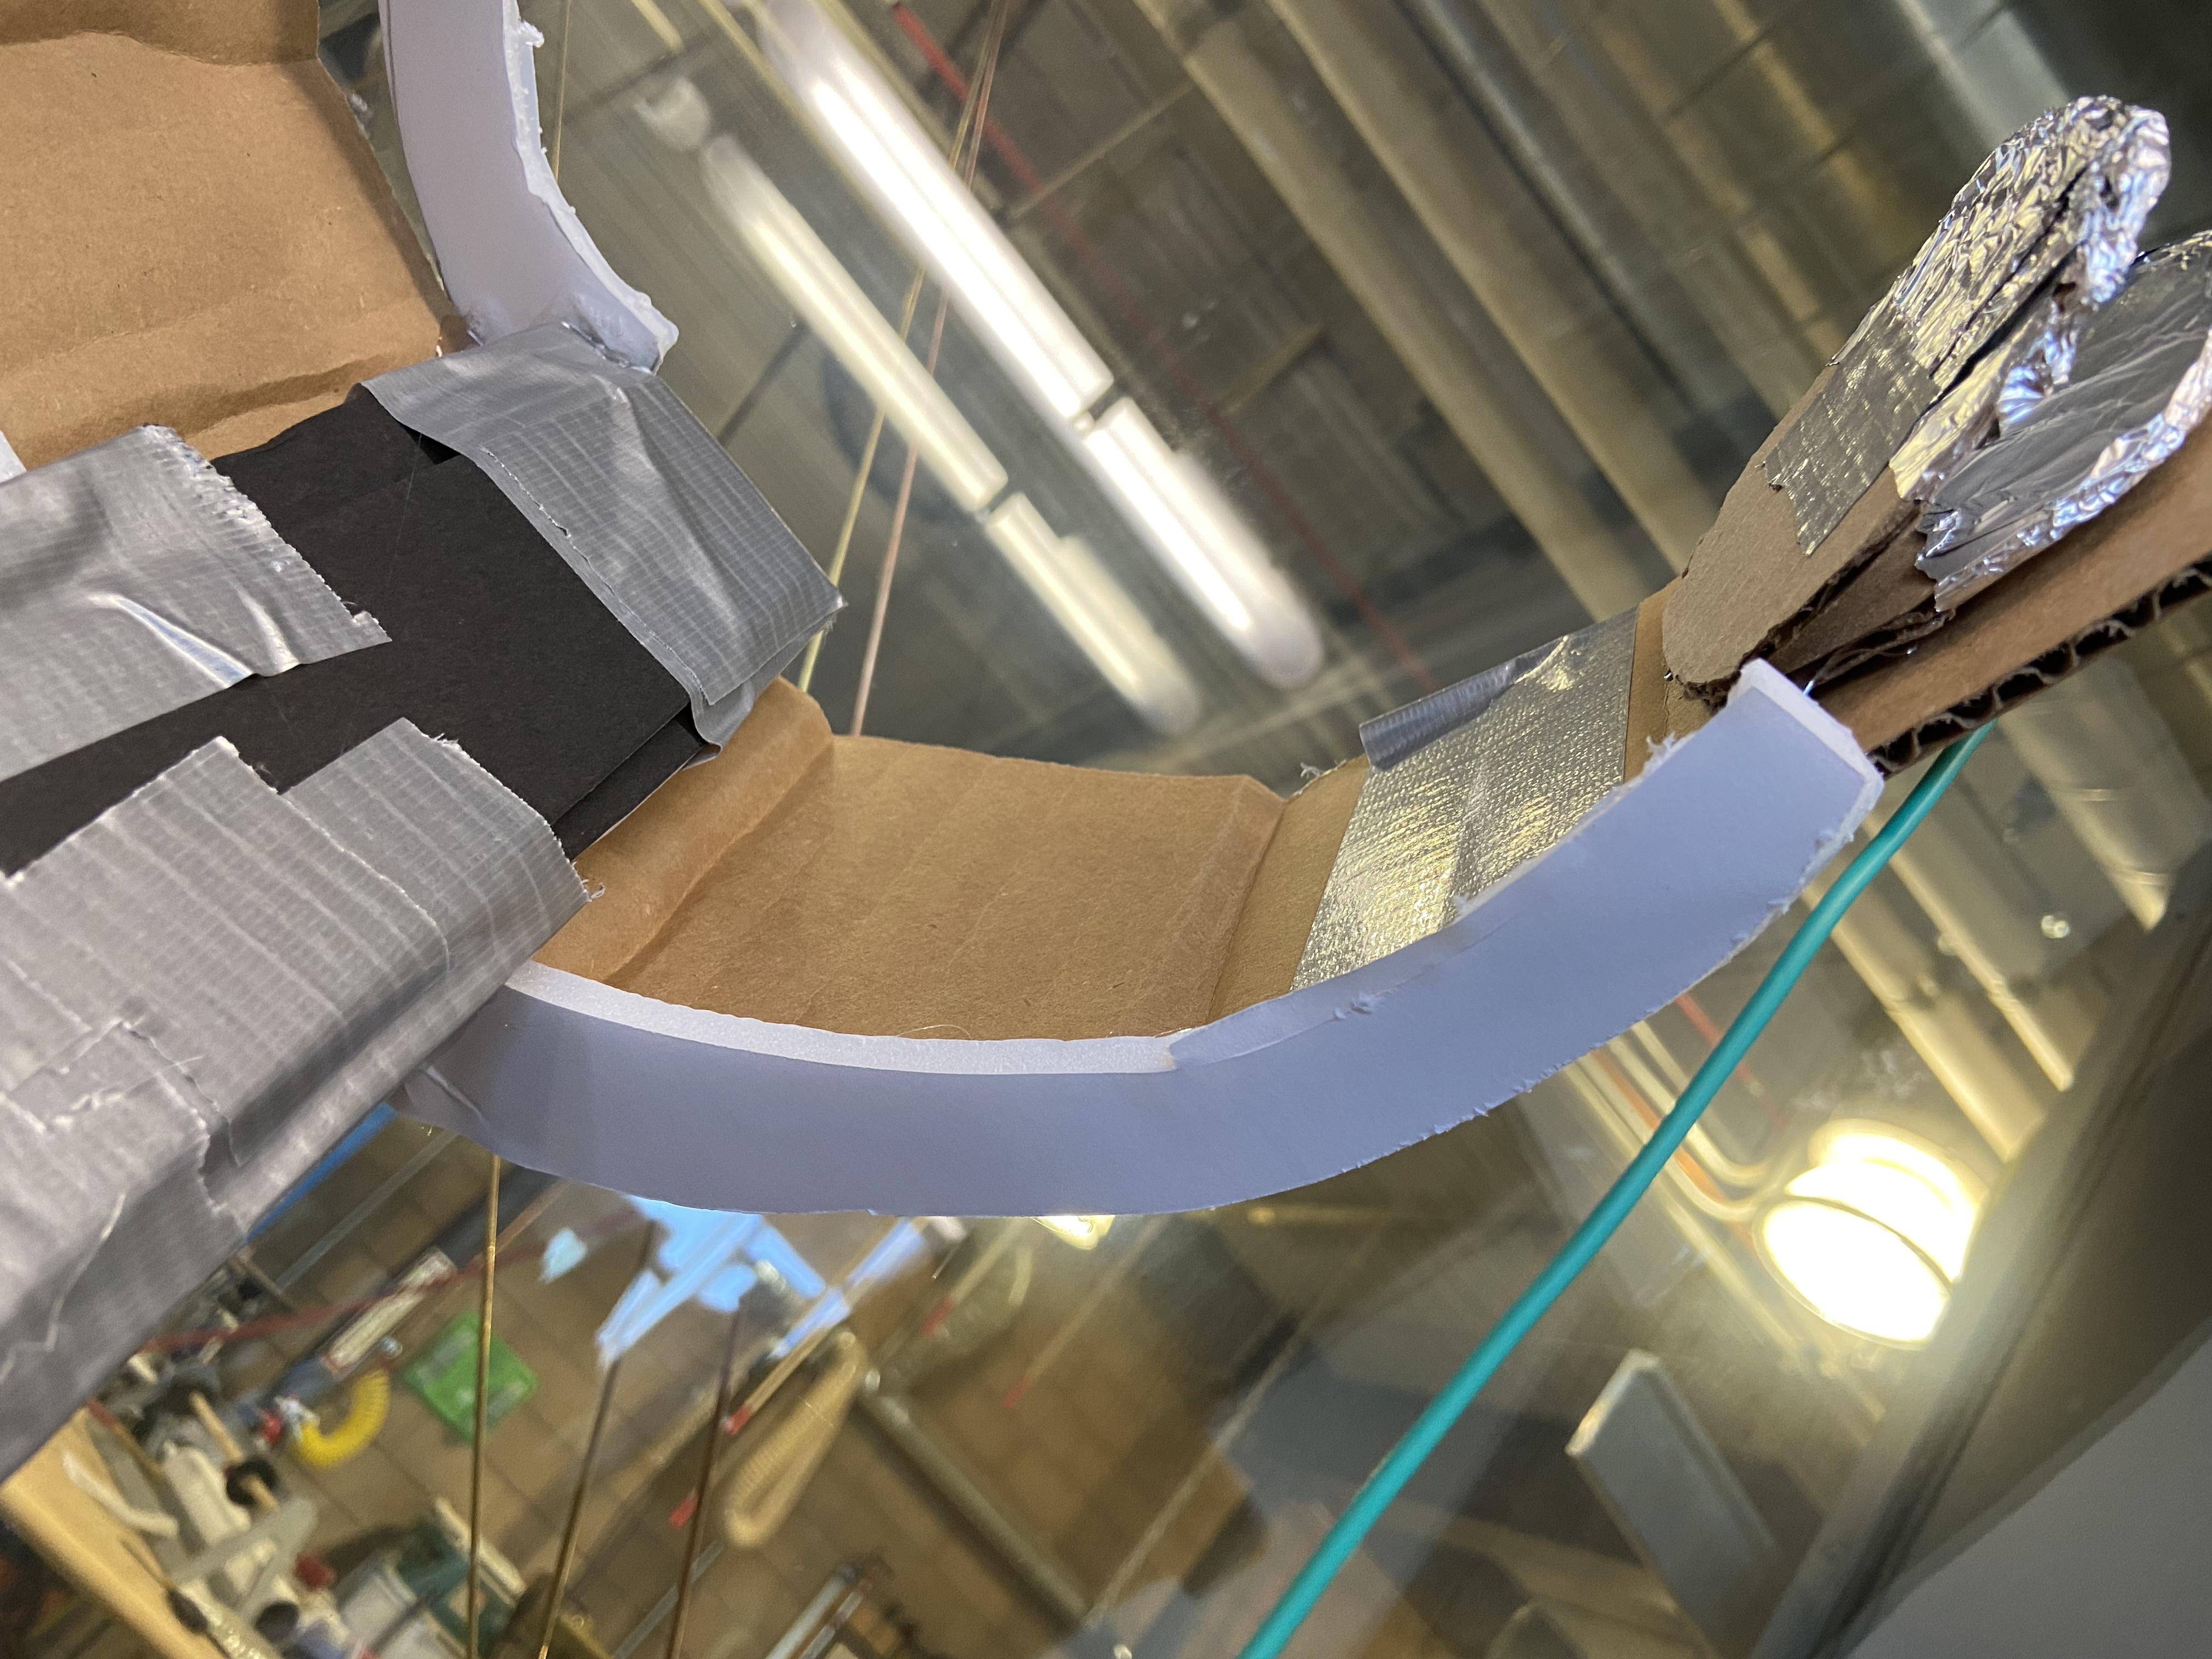
All you need to do here is cut 4 pieces of foam board that can line the top and bottom of your headpiece. This gets a little tricky when figuring out the curve but it shouldn't be too hard. Then hot glue all of the pieces into place.
Support for the Mouth Piece
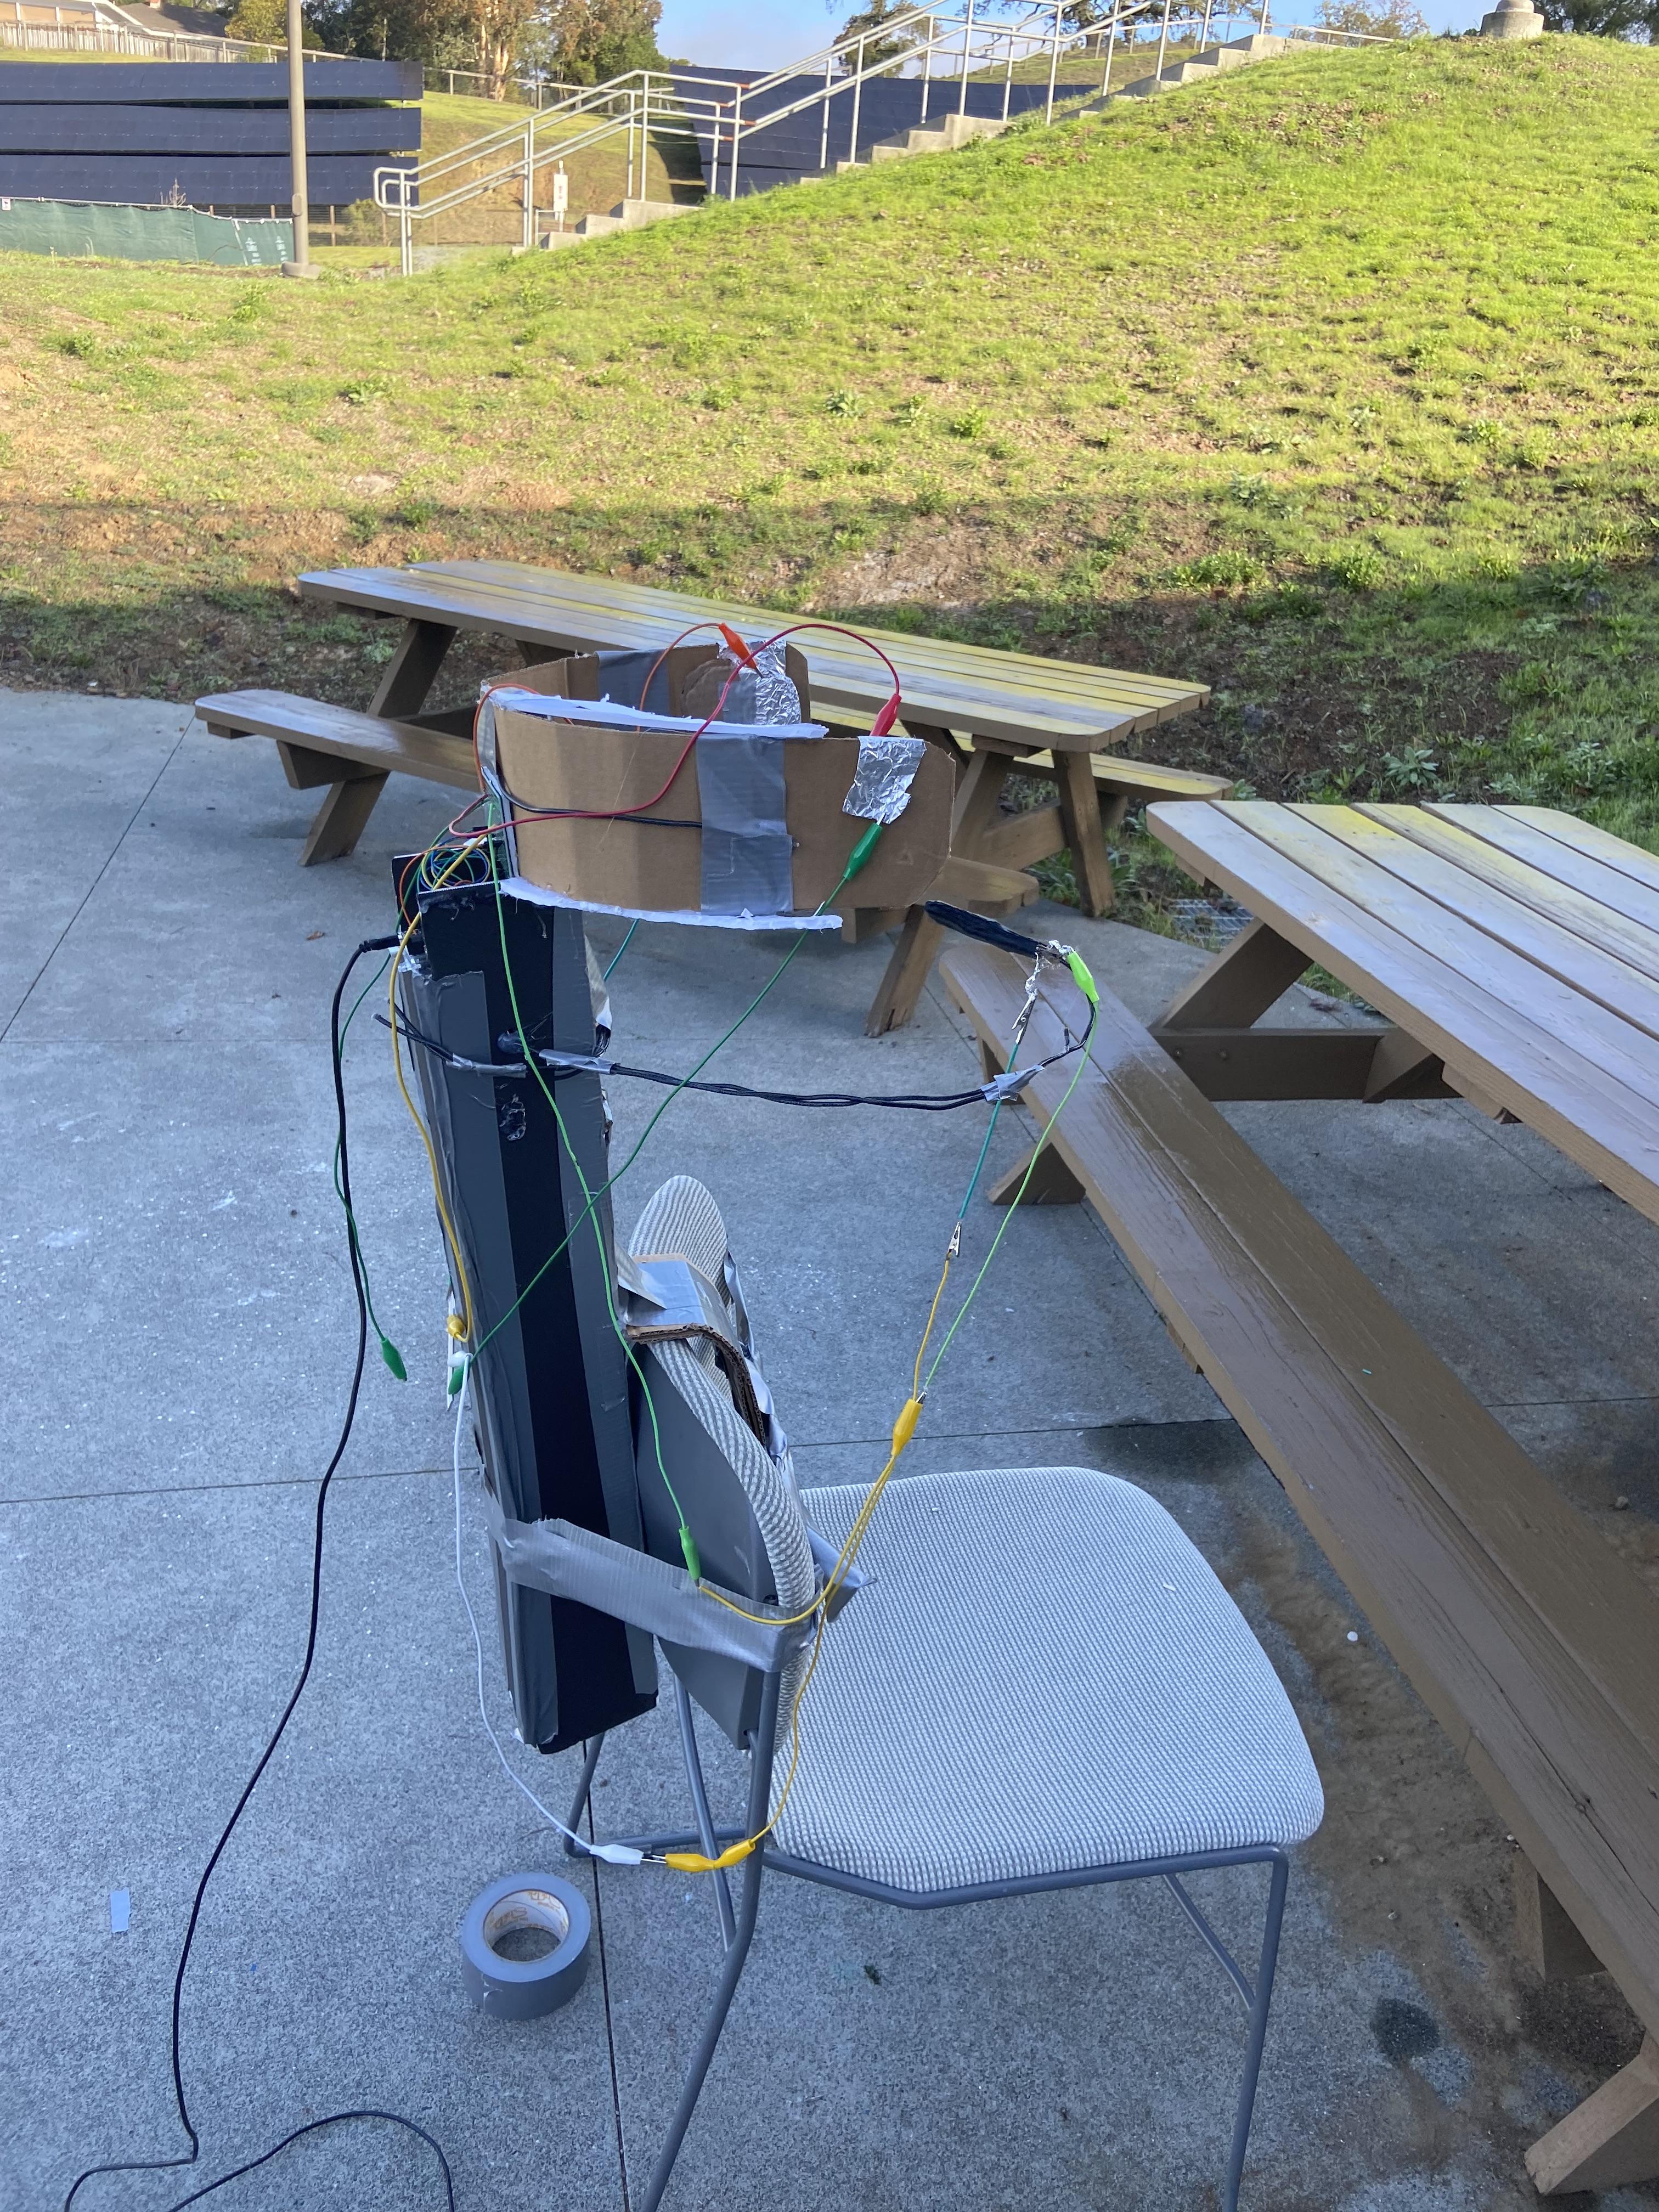
1. cut a hole in both sides of the spine just big enough for the thick wire to fit through
2. Take the thick wire and hot glue one end to the mouthpiece (make sure you pull out enough for the wire to wrap one and a half times around the spine). One piece of wire may be too flimsy, if so tape two together as seen above.
3. put the other end of the wire through the hole and wrap it around the front. Use duct tape on the front of the spine to hold it in place. Then fill each hole without glue
Now you should have an adjustable wired mouthpiece.
Keeping It on the Chair
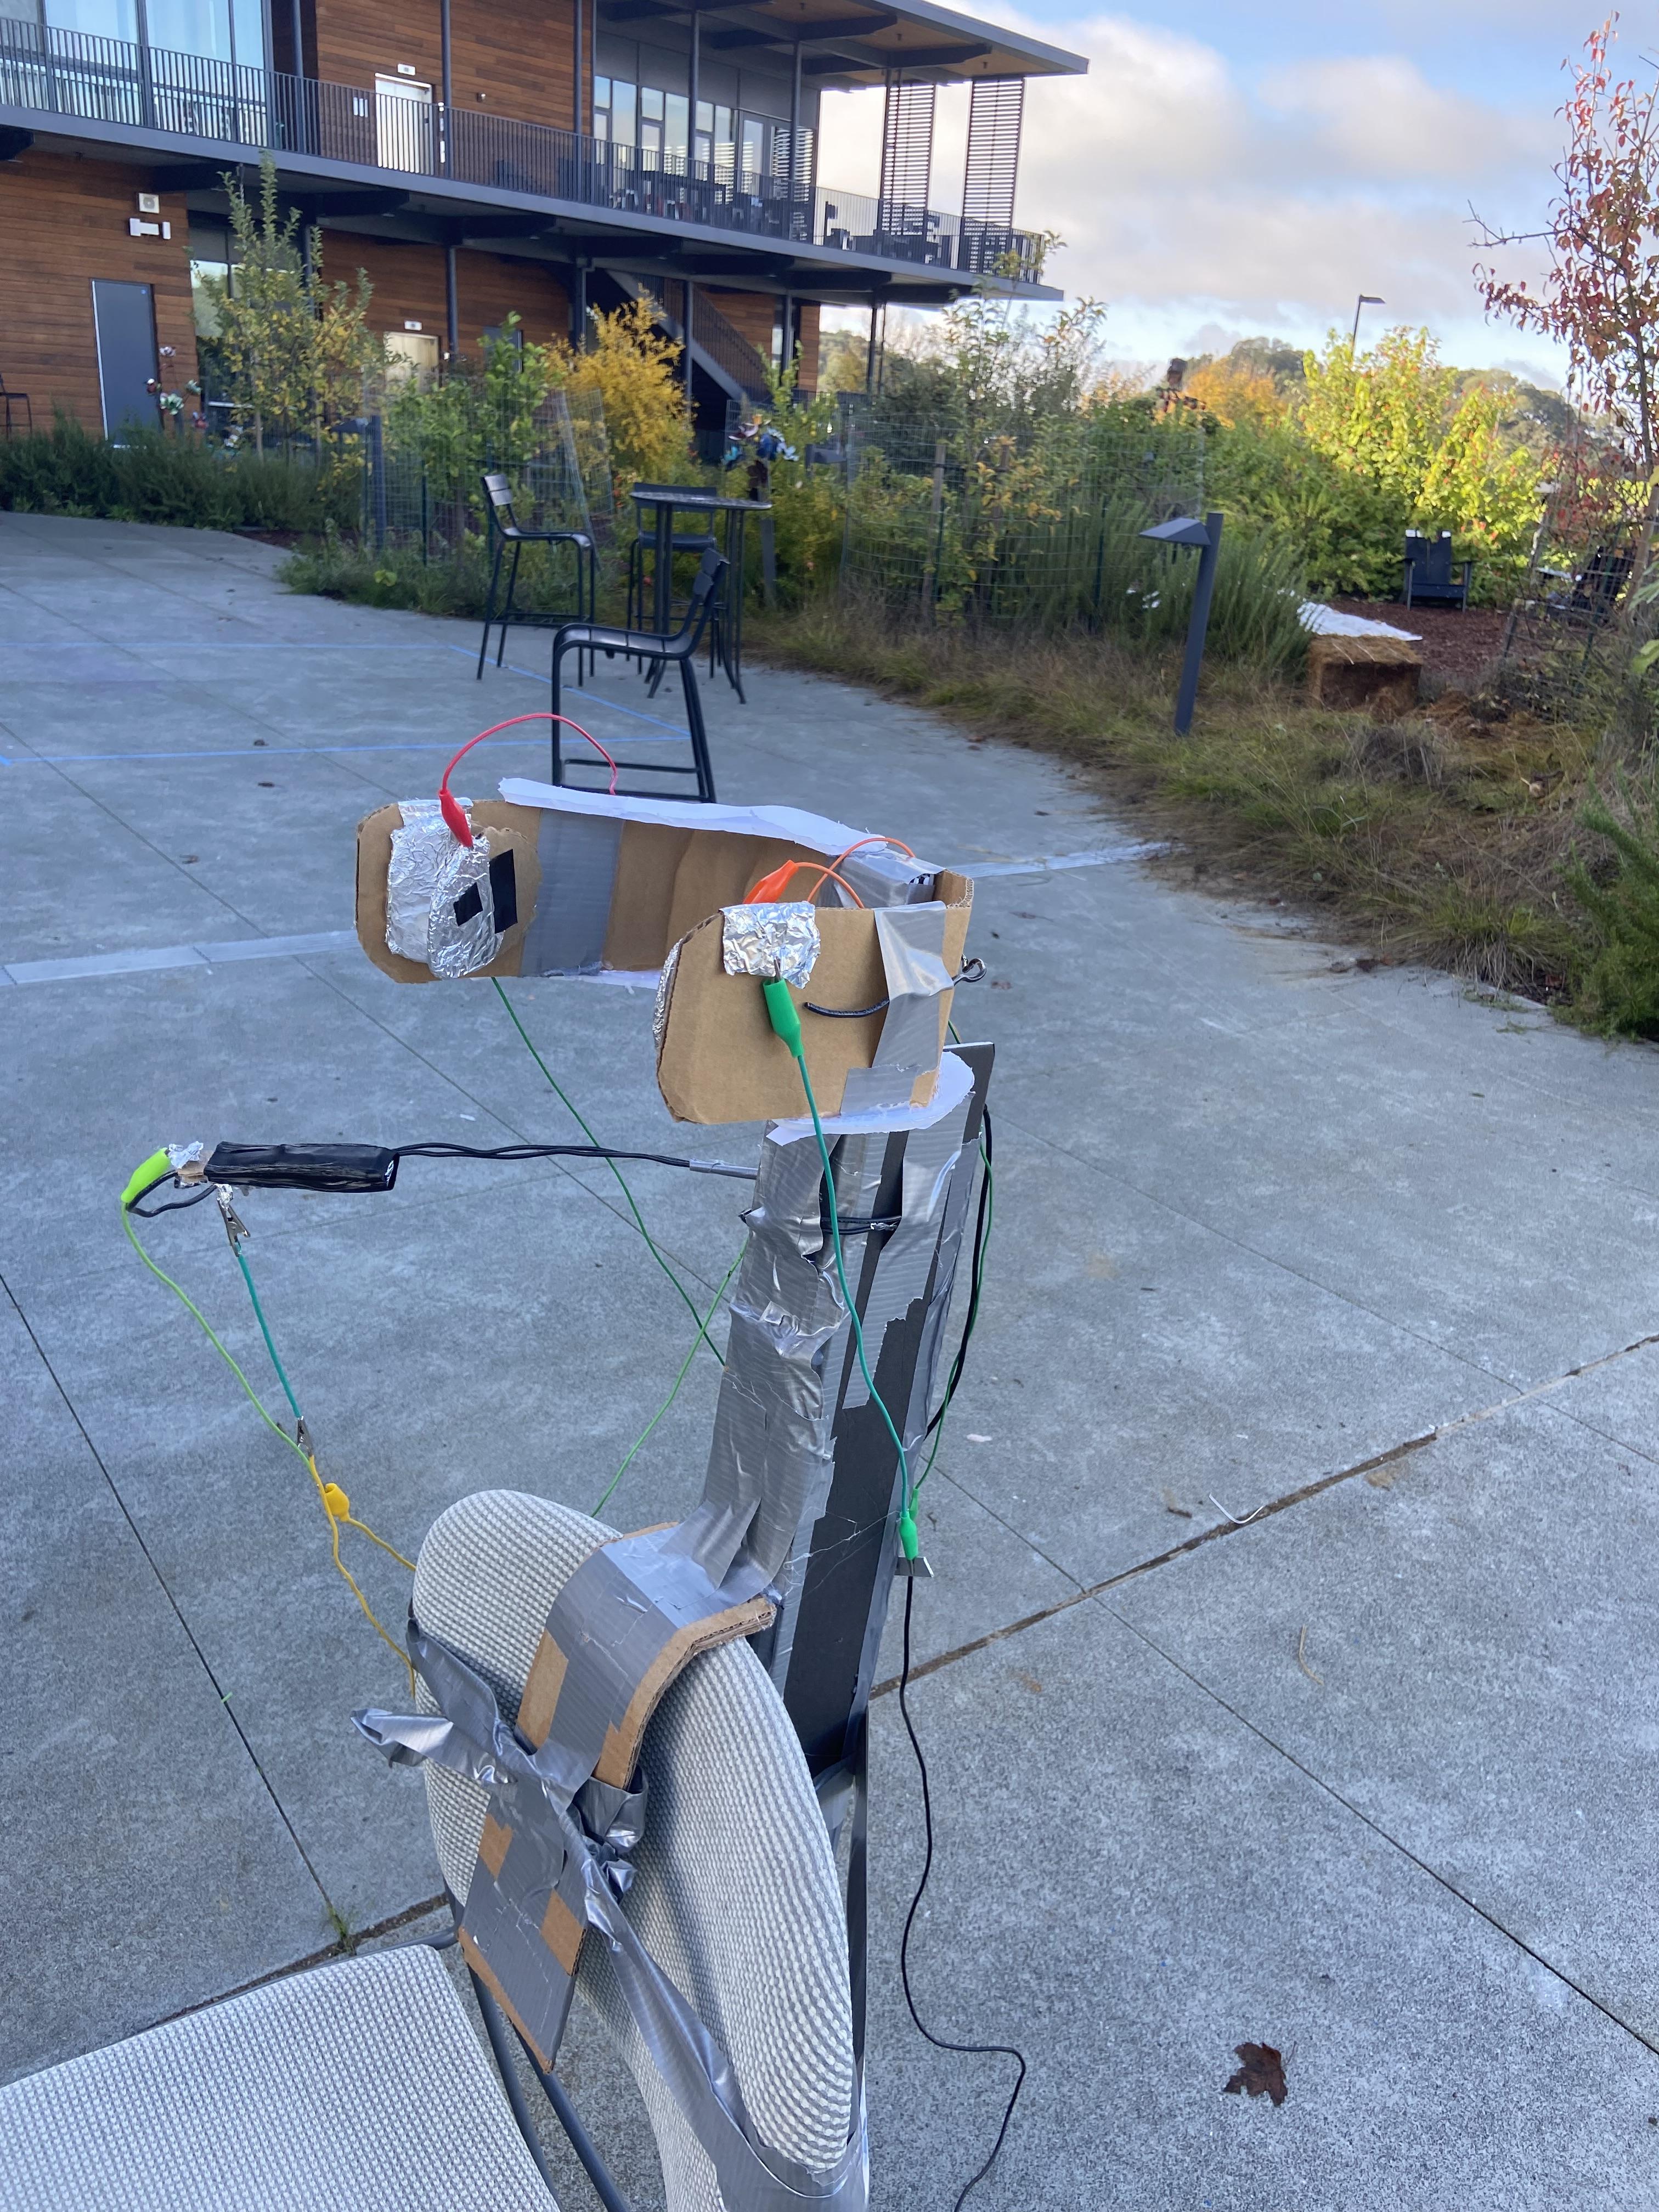.jpg)
Disclaimer: we ran out of velcro while I was working on my project so I did have to resort to making a tape belt but for the instructable, you will be using velcro.
1. measure the distance from the top of the chair to the back of the user's head.
2. Now apply that measurement to the controller set from the headpiece down.
3. Mark the end of the measurement.
4. Now cut out a cardboard strip that is as wide as the controller's spine and bend it so it creates the shape you see above.
5. Line it up with your mark and tape the top to the spine to hold it in place and then start gluing over and under. (you're going to need to do multiple coats and probably going to need more tape)
6. Now take off enough tape to go from one end of the spine to the other plus a little more (do it 2x).
7. Fold both your strips in half.
8. Hot glue velcro to the end of each strip
9. tape each strip to opposite sides of the spine
Set Up and Wiring
You're almost done! Now we just need to hook everything up.
Grab any piece of the metal strip and hook the ground wire up to it. Now put three more alligator clips onto the metal strip. Now we have three alligator clips for pins and three for ground. Attach the ground clips to the tails of the buttons and one of the mouthpiece tails. Take the pin clips and attach them to the other half of both the buttons and the other tail on the mouthpiece. Now once all the code is flashed you should have a fully working controller.