Arduino LED Chaser ( With 5 Effects )
by Shoeb ALI in Circuits > Arduino
21306 Views, 38 Favorites, 0 Comments
Arduino LED Chaser ( With 5 Effects )
In this tutorial I am going to explain you how to make LED chaser with the help of arduino.
In this led chaser I add 5 patterns.
Follow these steps for making arduino LED chaser.
Hardware Required
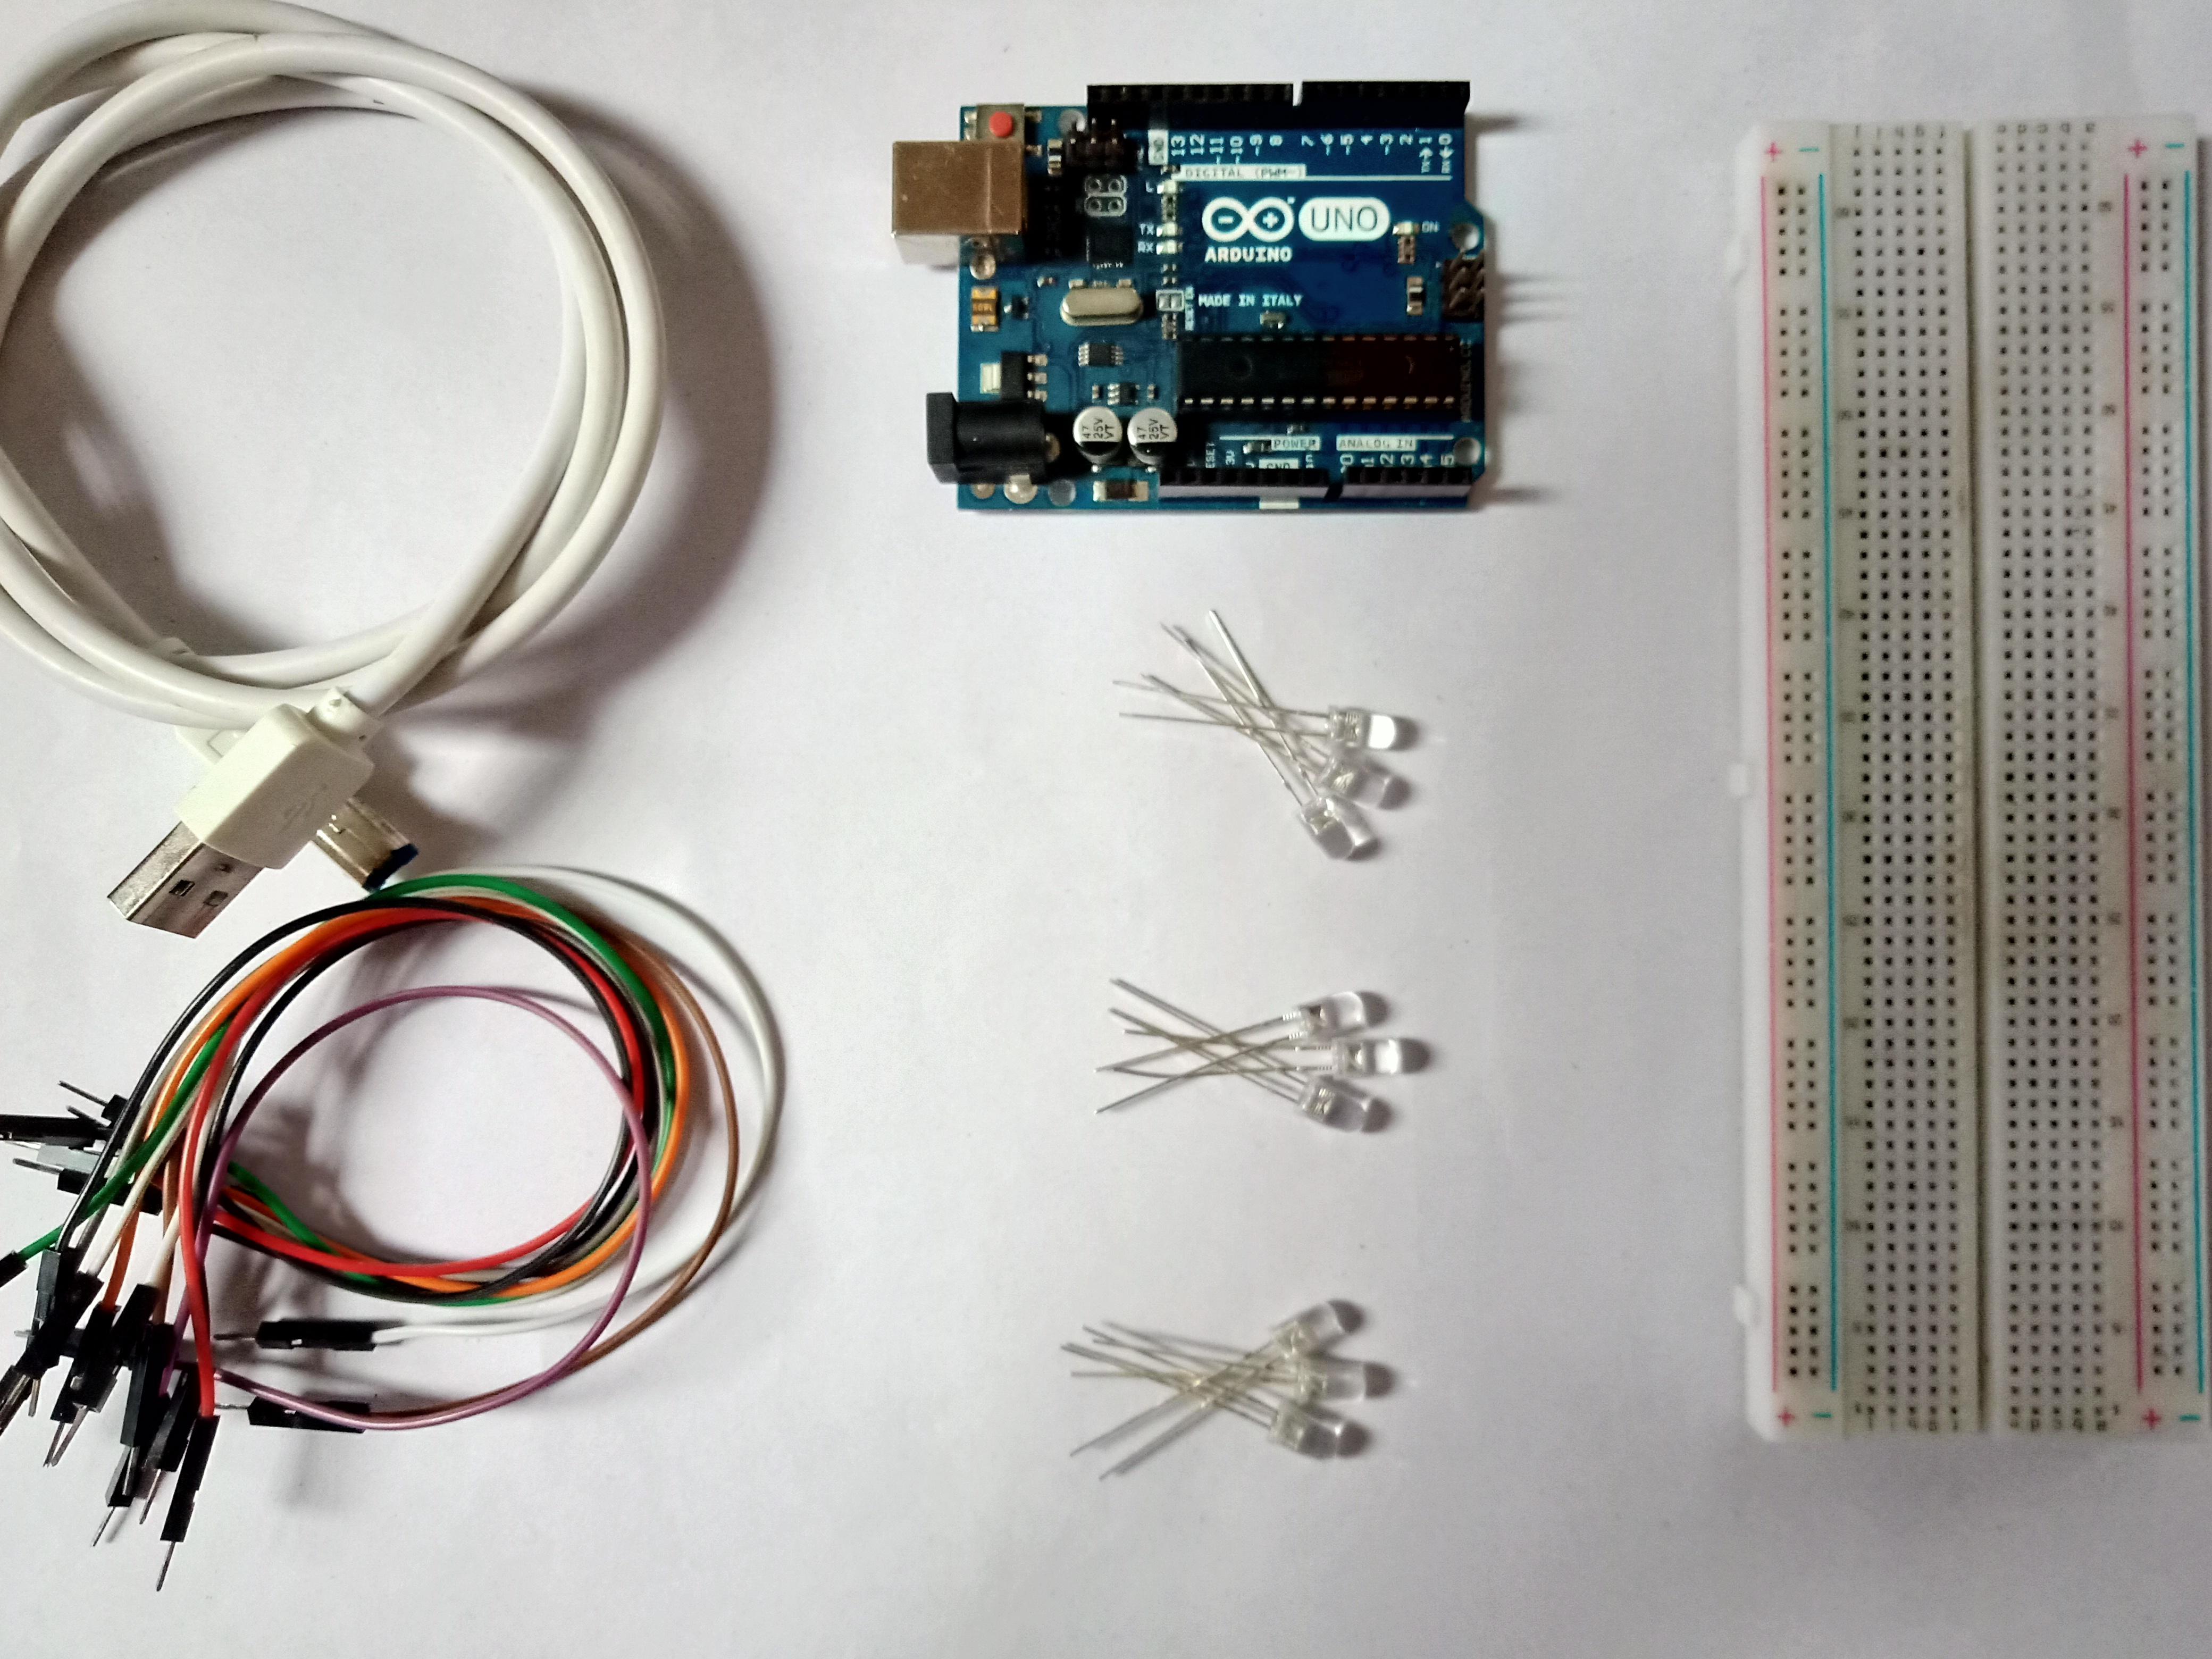
2. Arduino uno x1 (with cable )
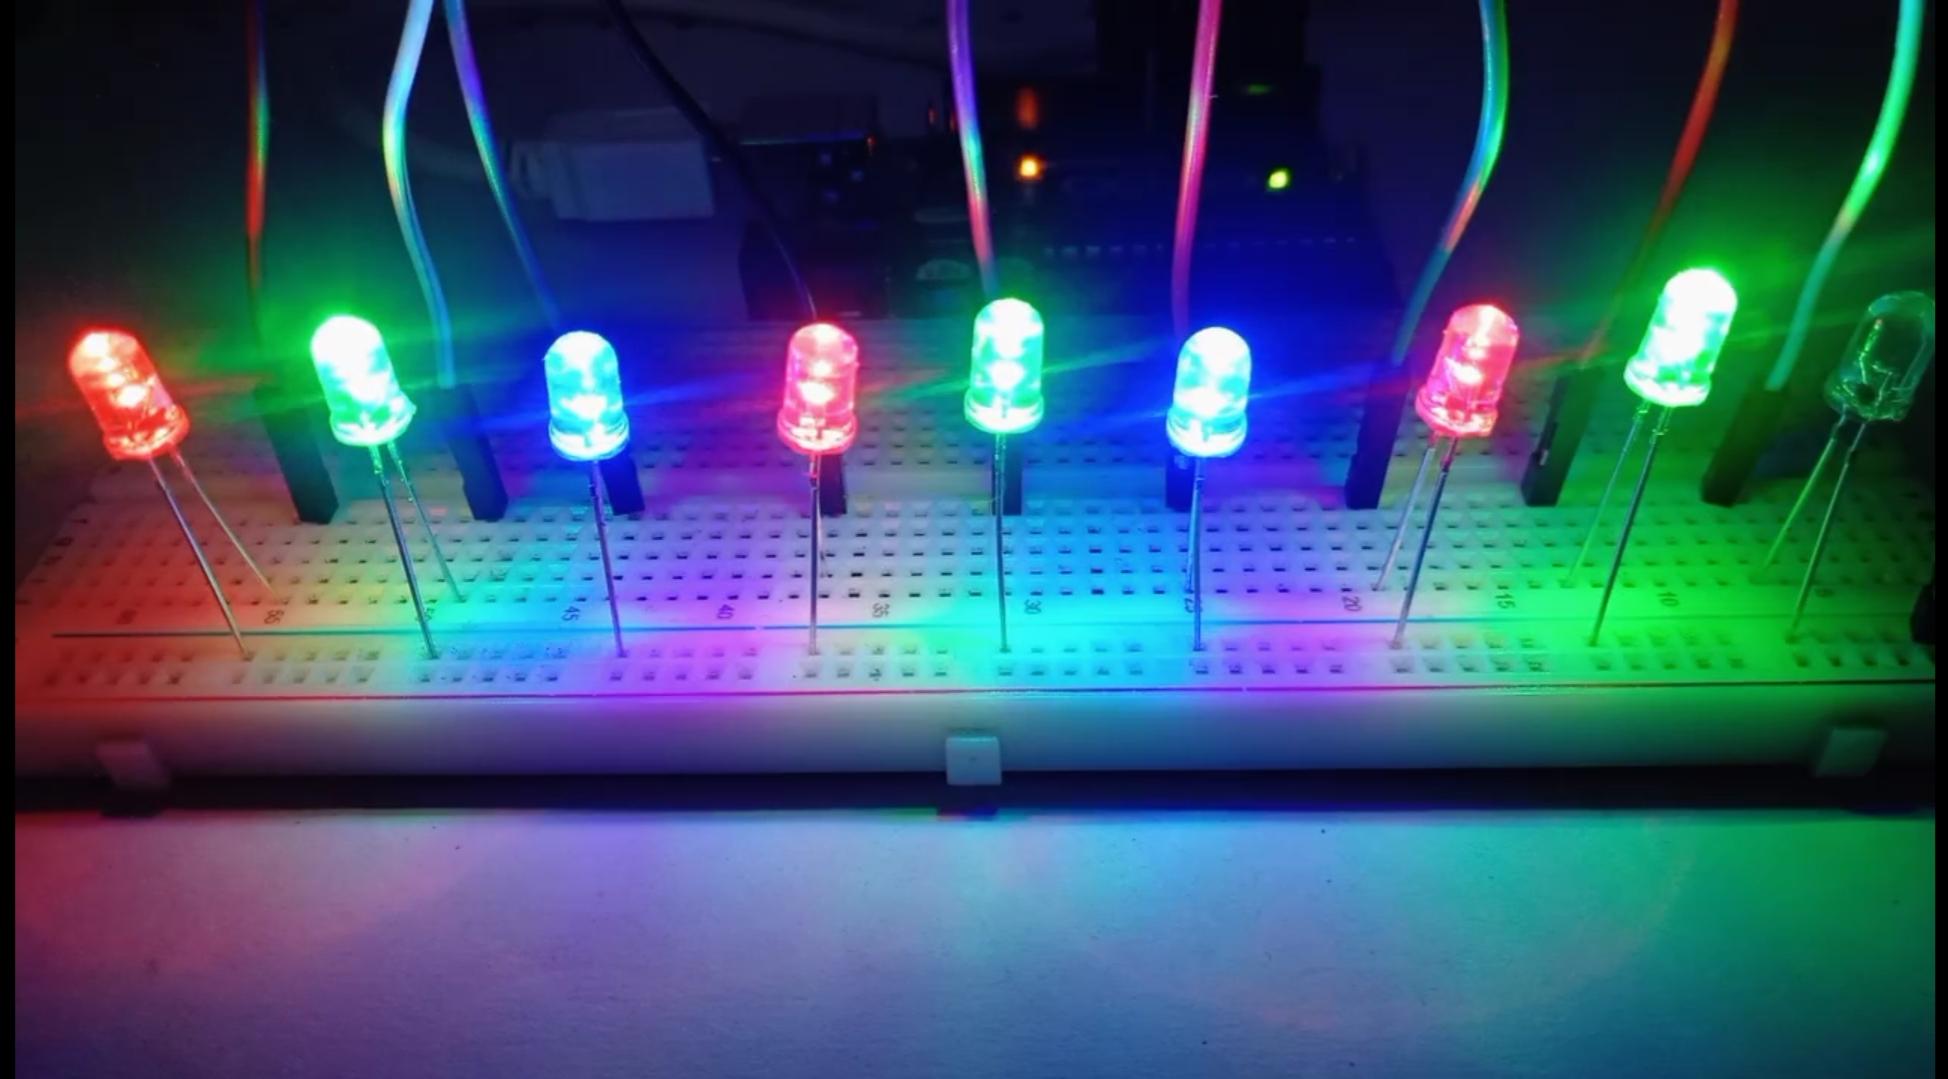
3. LED x9 ( 3 Red, 3Blue, 3 Green LEDs)
4. Jumper cables
(Note : for more safety of LED you can add resistor)
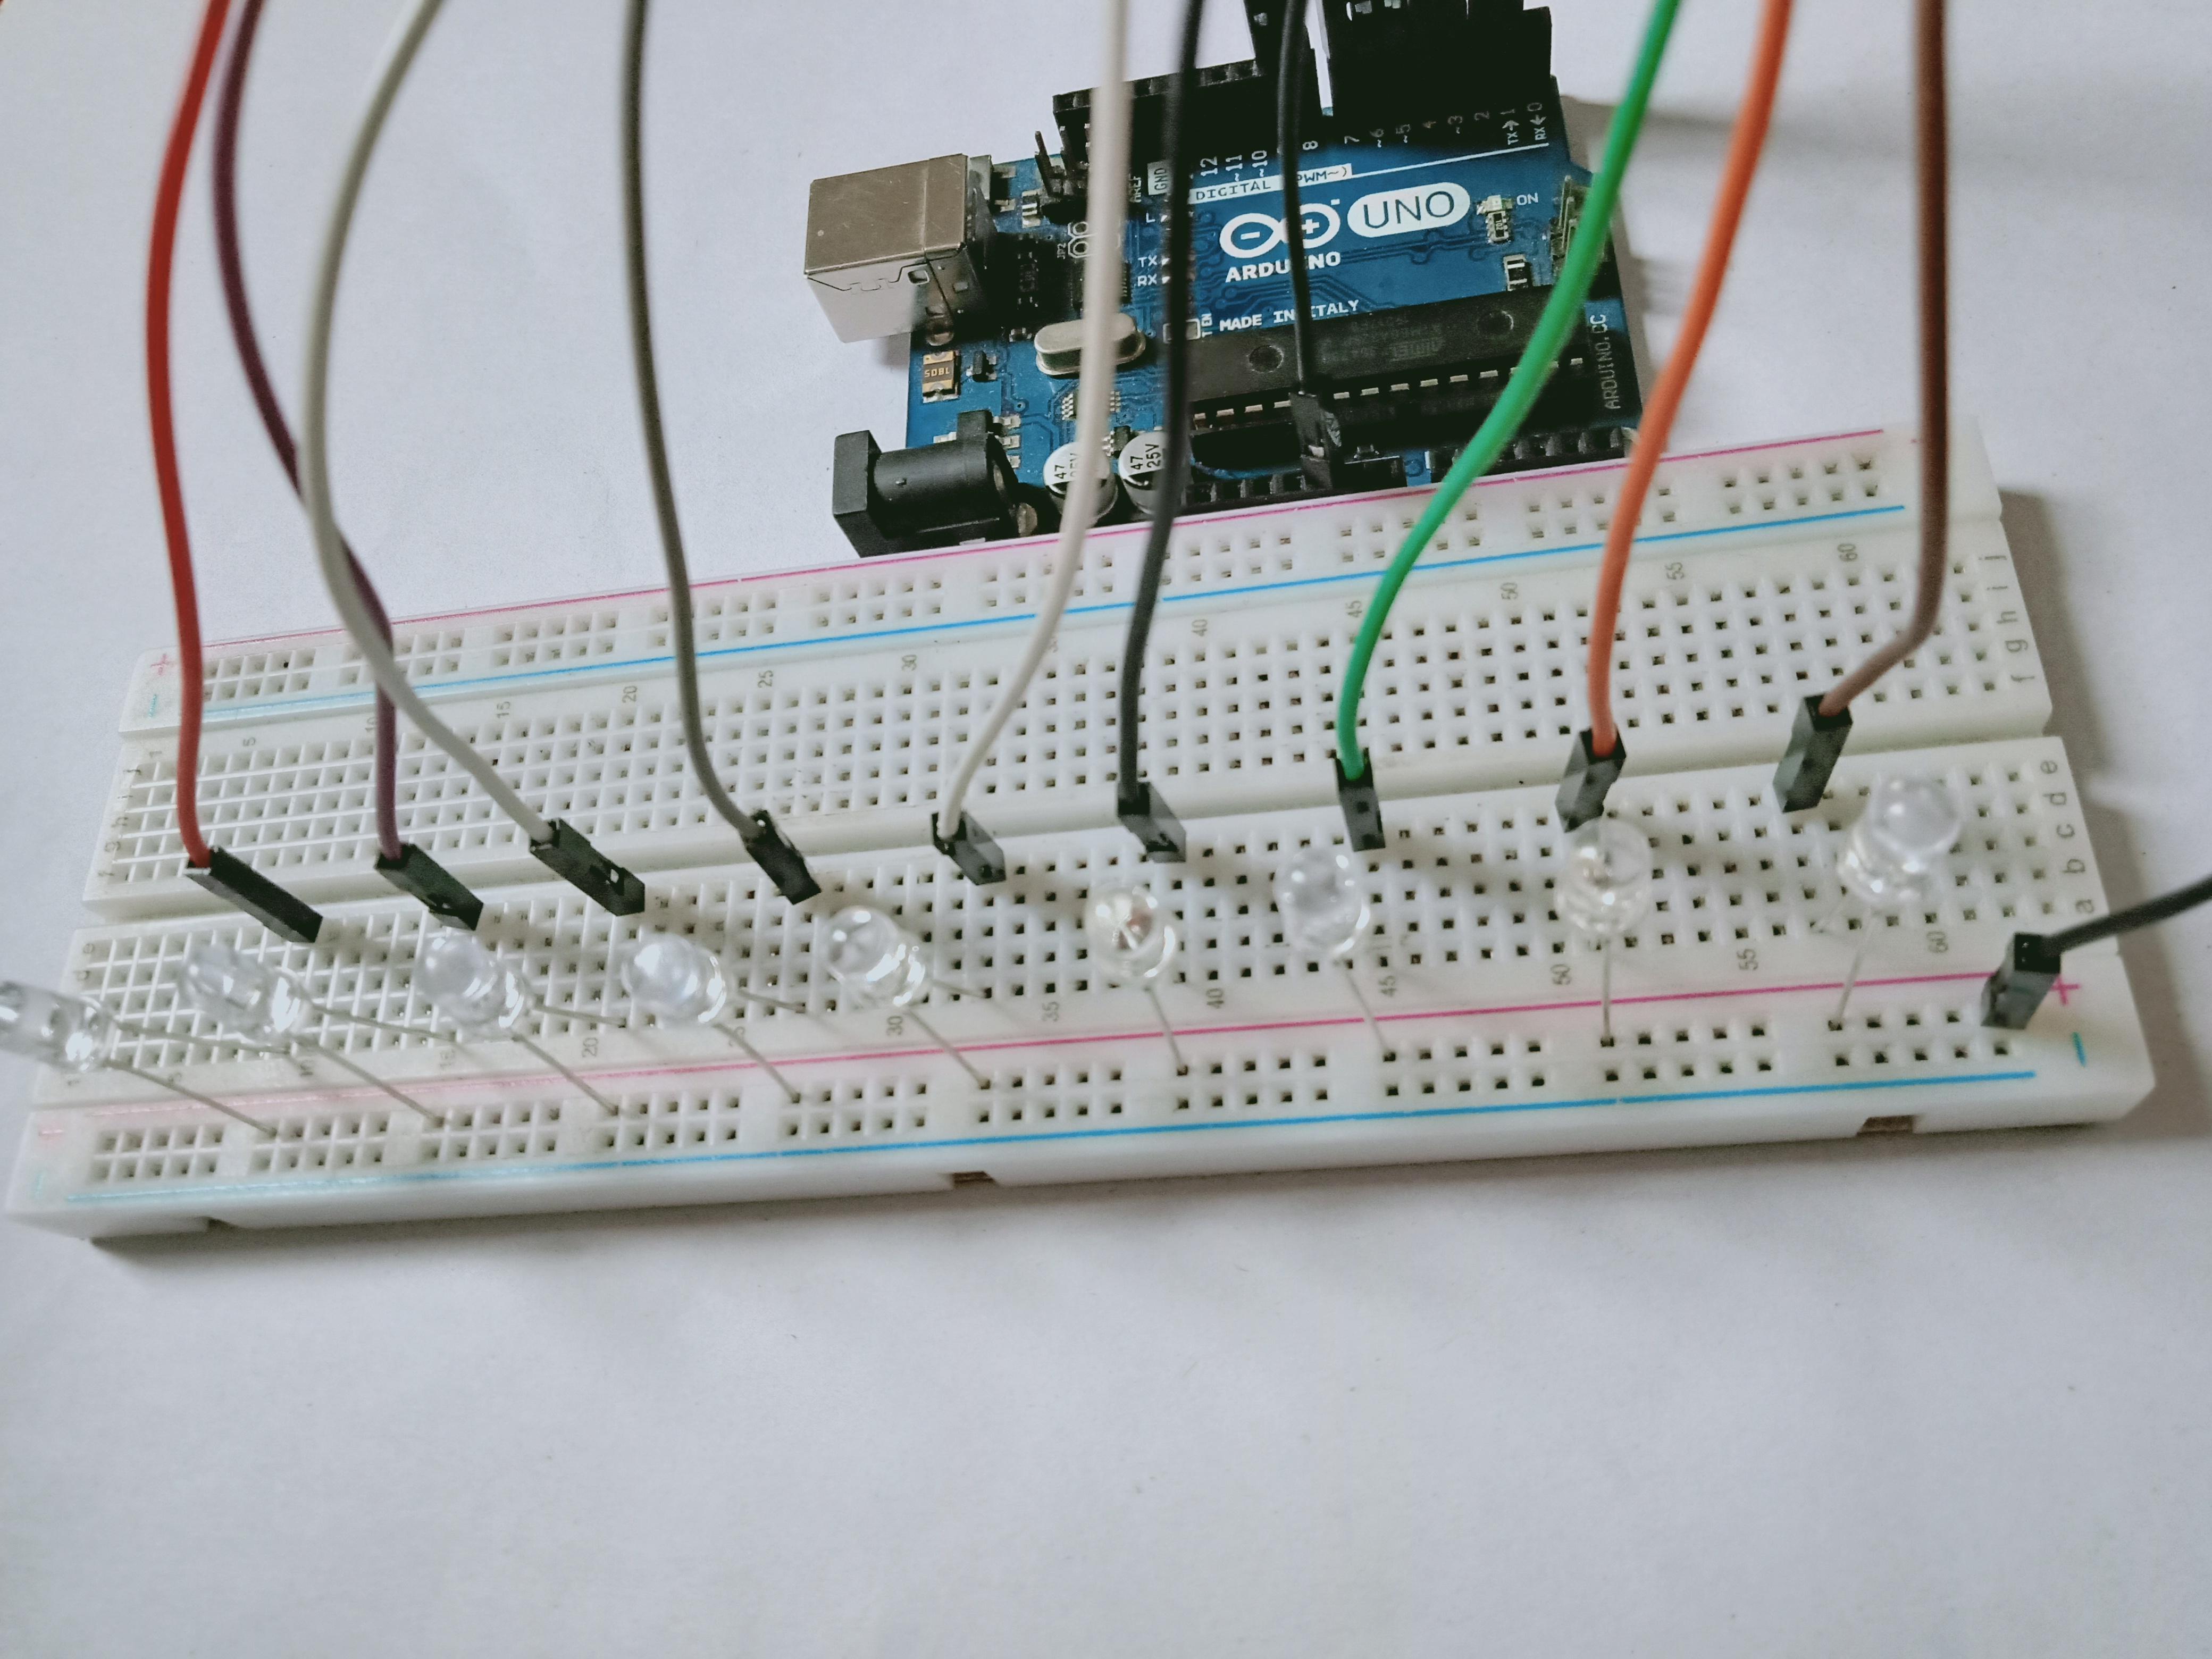
Circuit Connection
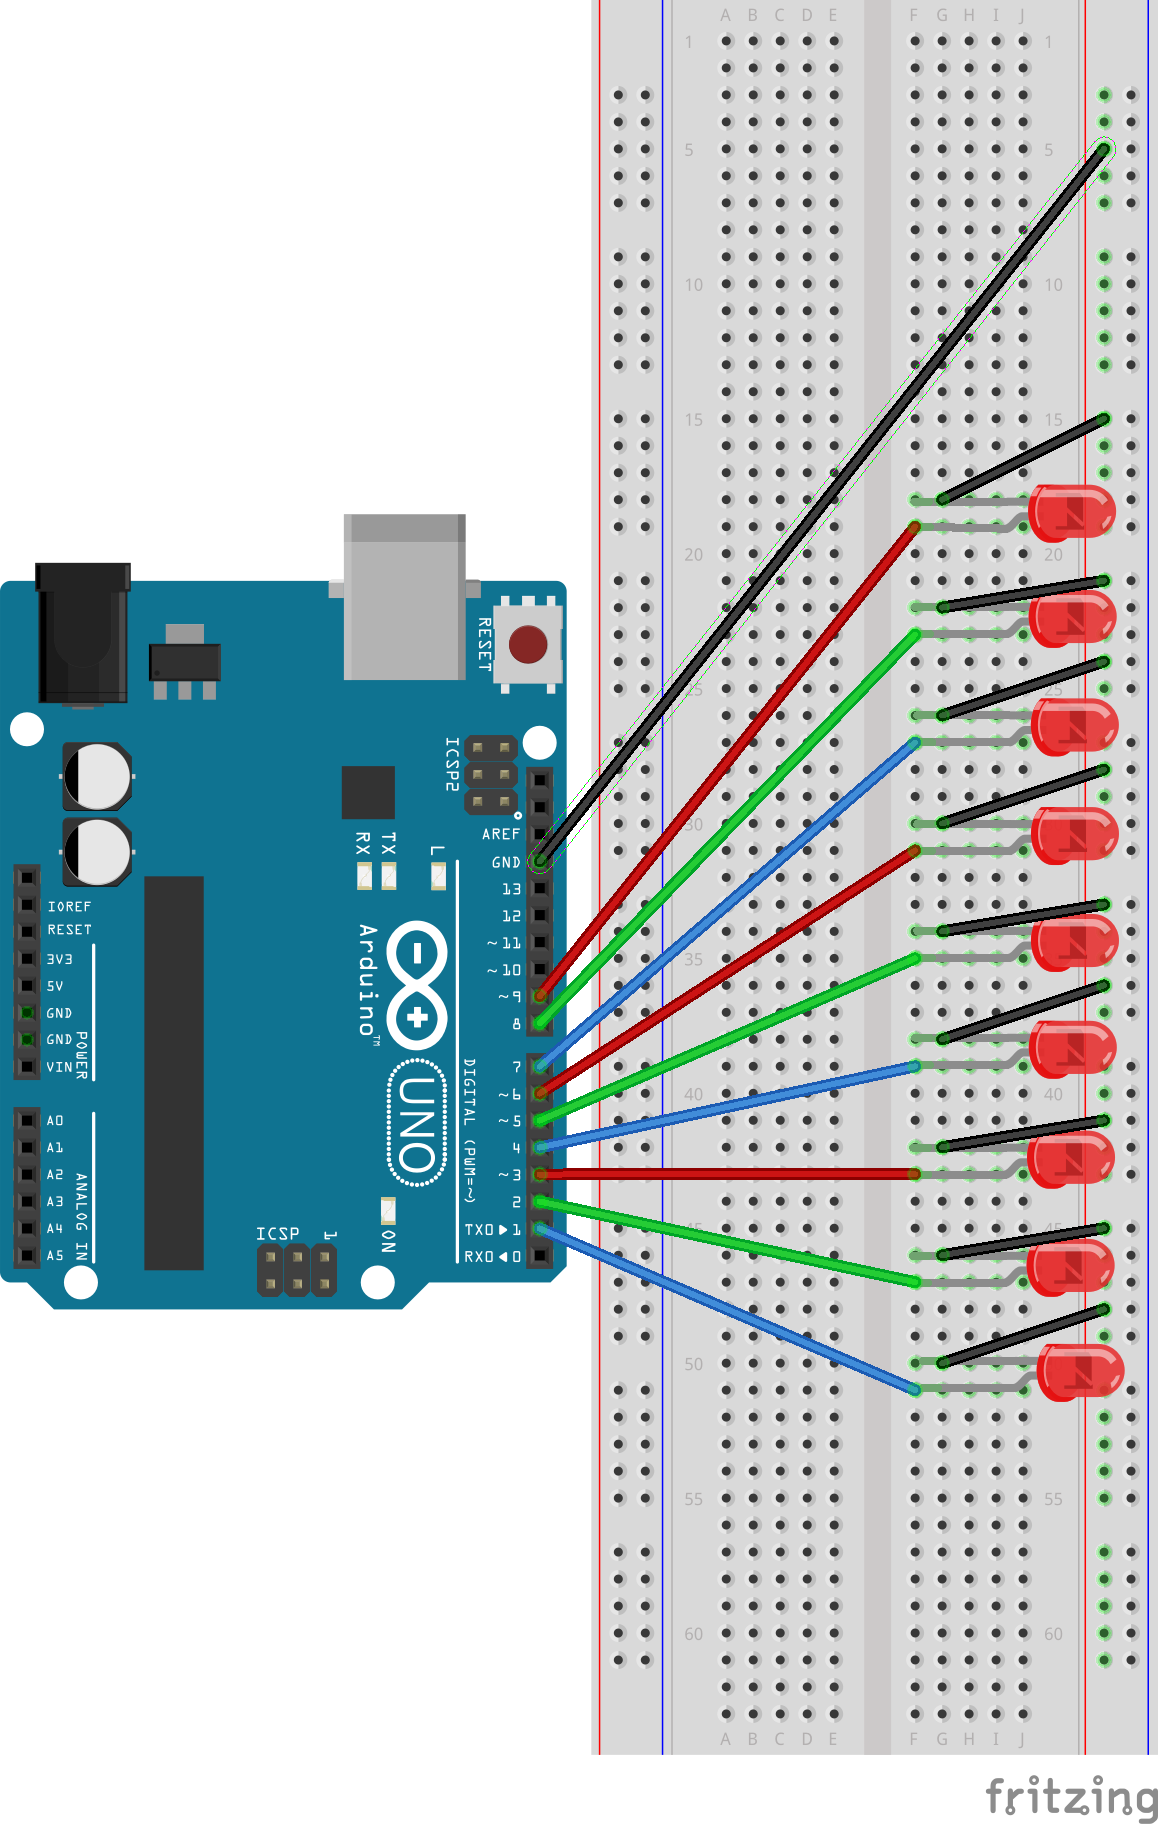
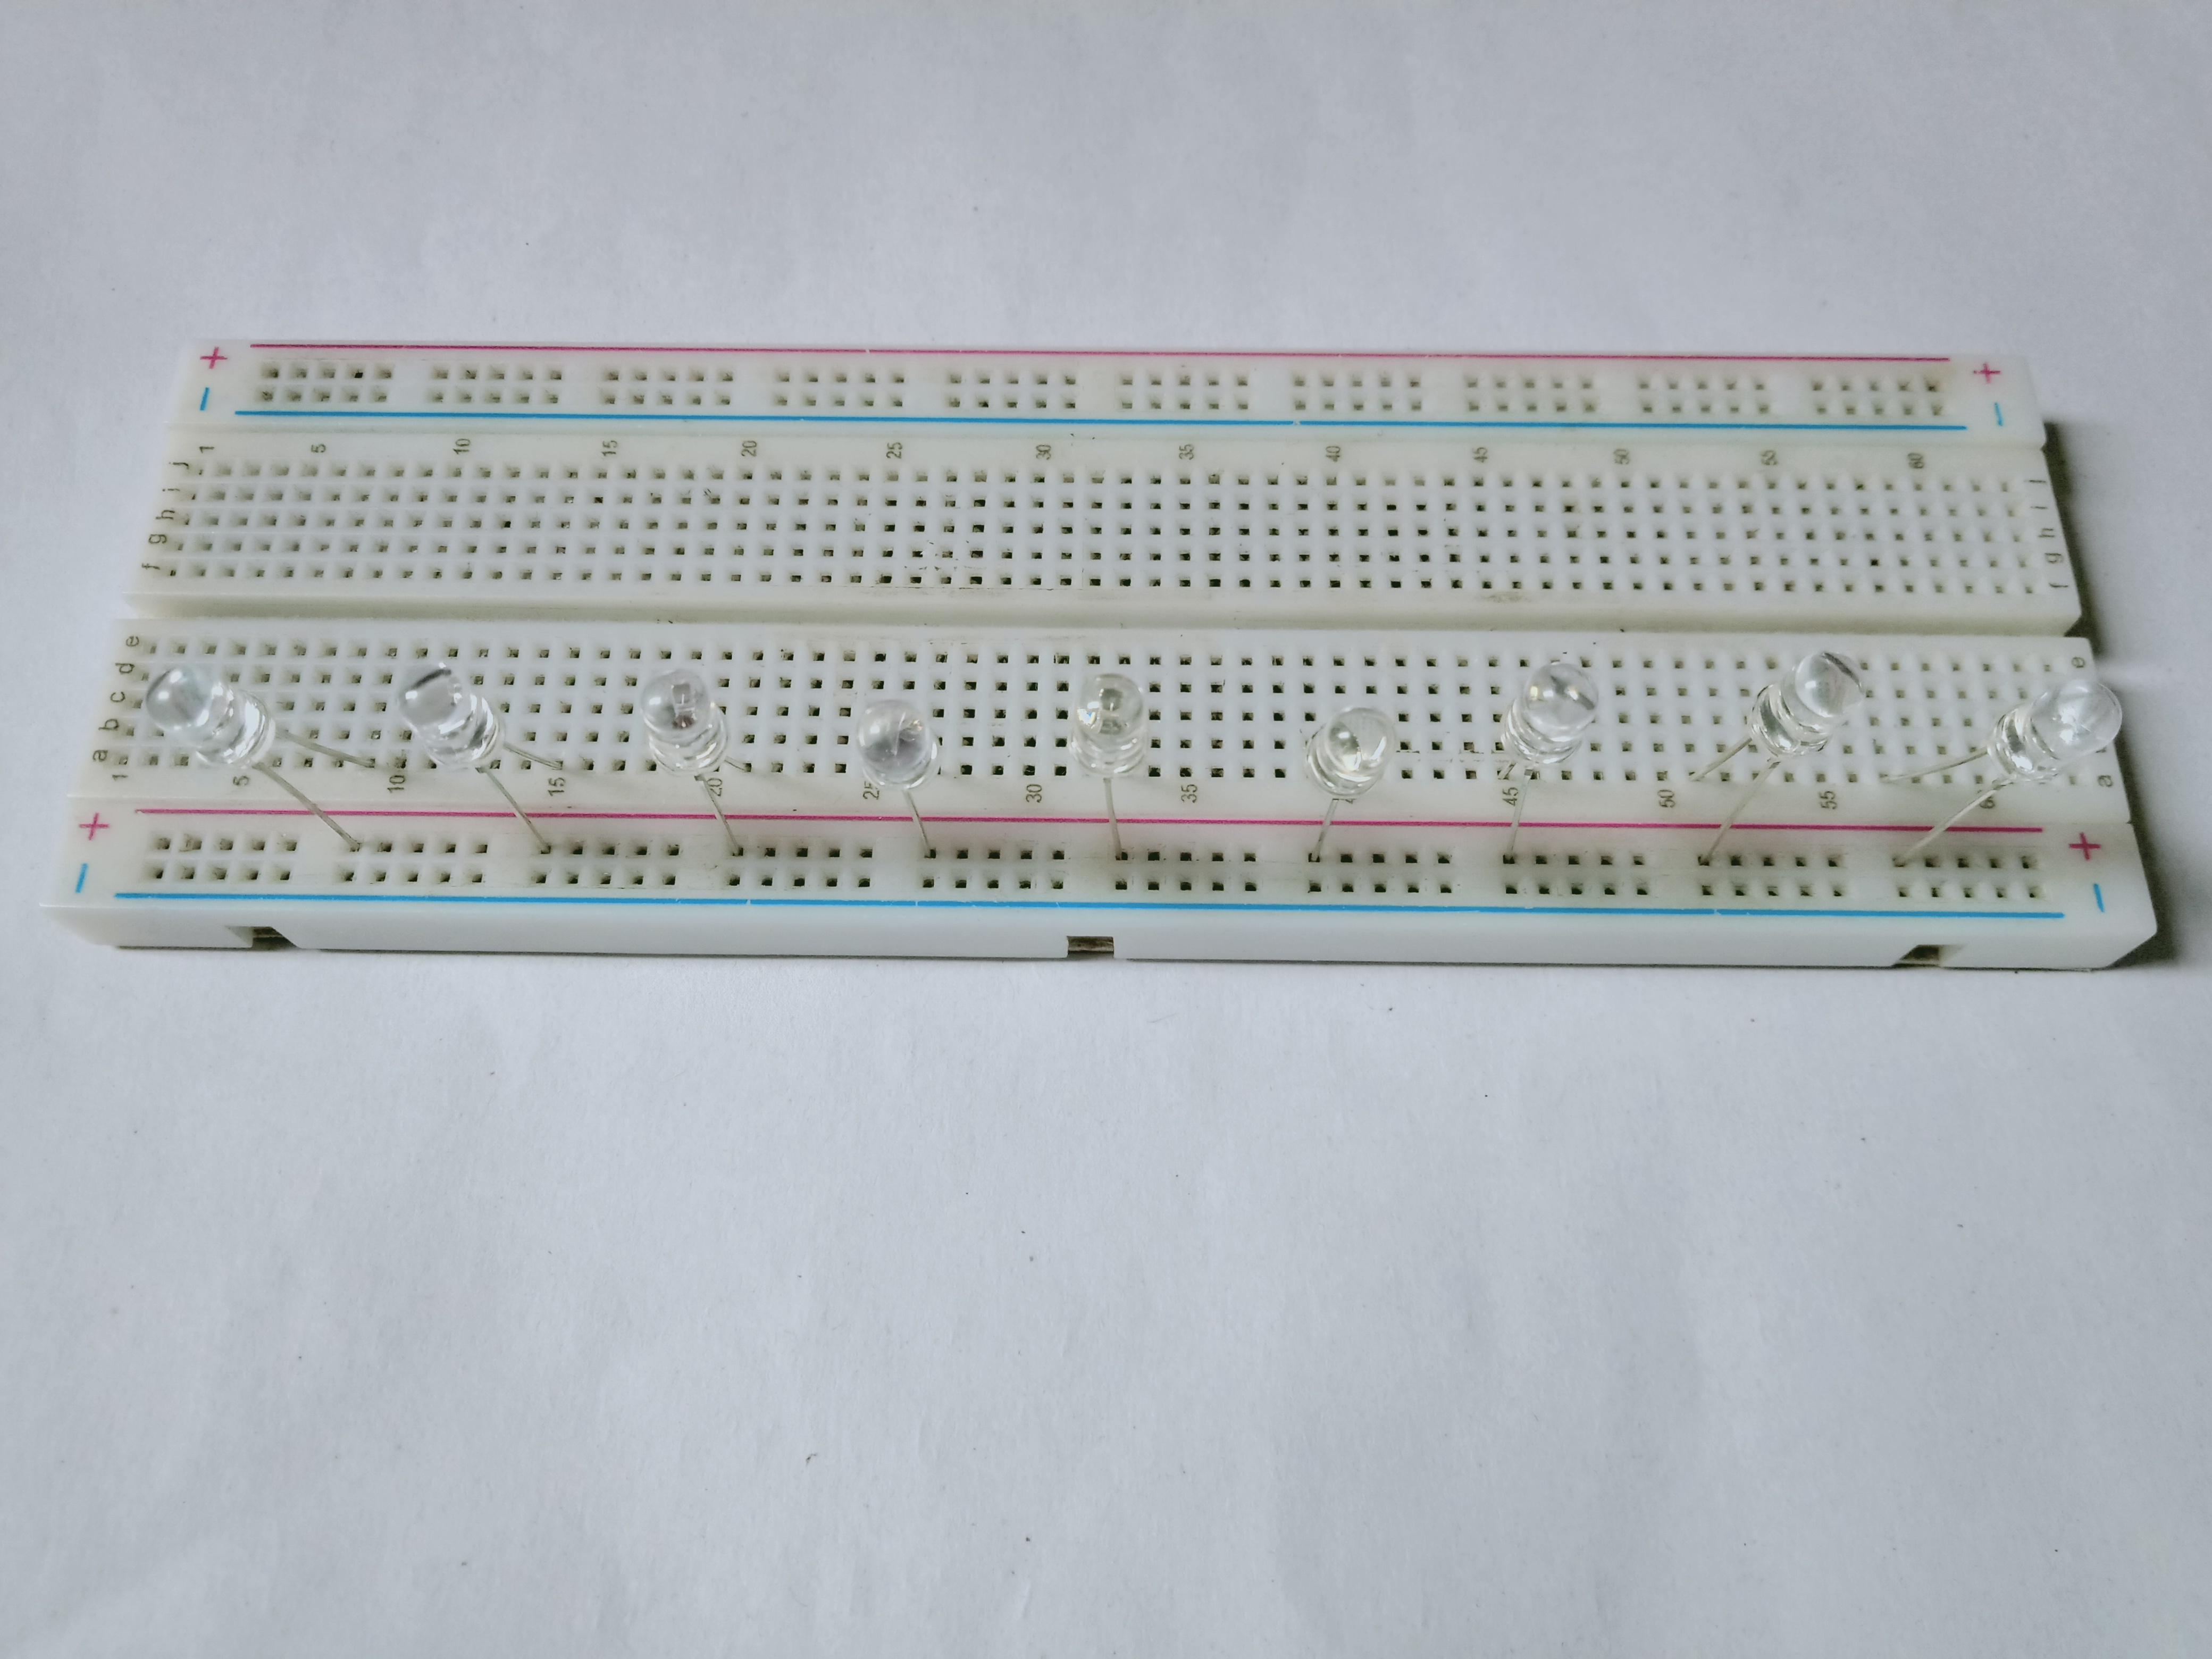
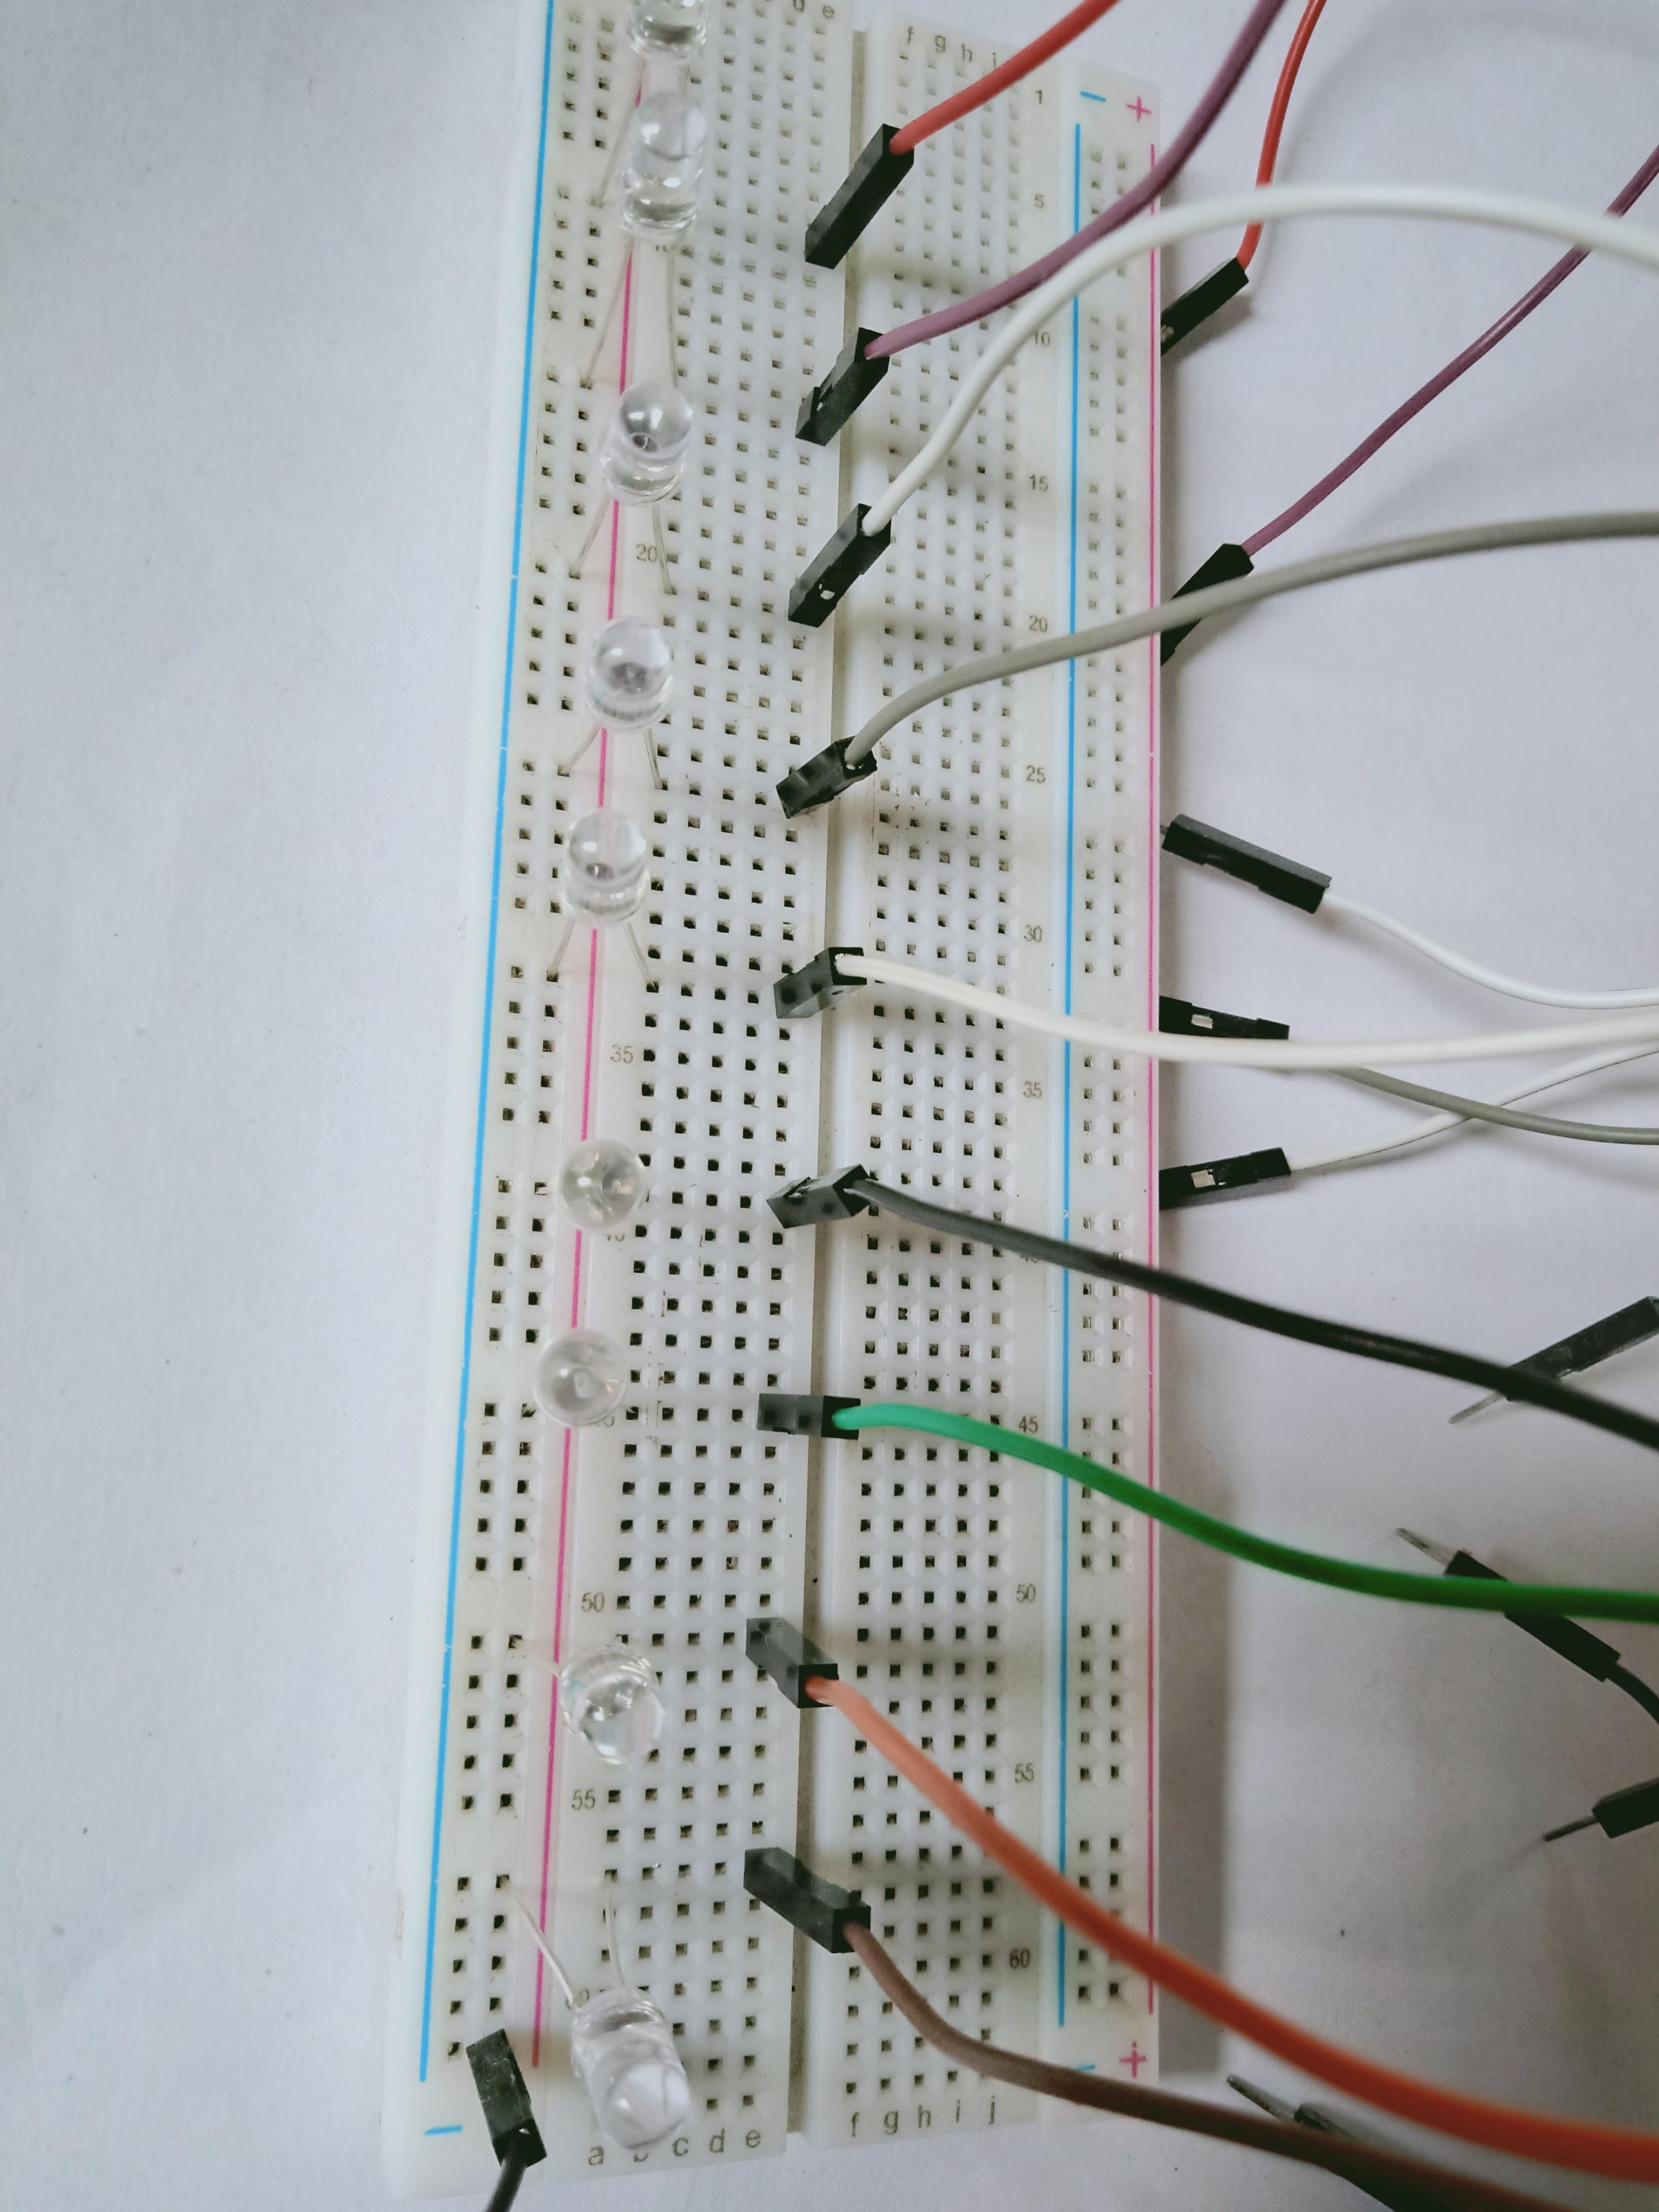

diagram connect all LED negative terminal on
negative port of breadboard
2. I add LED in this pattern
R G B R G B R G B
But you can add LED according to your choice.
3. Now connect jumper cables on the positive
side of each LED's
4. Now take arduino and connect 2nd terminals
of these jumper cables with digital pin 1 to 9
of arduino.
(for more safety of your LED you can connect
resistor with positive side of LED and then you
can connect this with digital pins of arduino
by jumper cables)
5. Connect ground pin of arduino with the
negative side of all LED.
Our circuit connection is completed
Programming
For programming open arduino IDE software in your computer.
Now copy this code and paste it in arduino IDE
OR download .ino file and open it in arduino IDE
void setup()
{
pinMode(1,OUTPUT);
pinMode(2,OUTPUT);
pinMode(3,OUTPUT);
pinMode(4,OUTPUT);
pinMode(5,OUTPUT);
pinMode(6,OUTPUT);
pinMode(7,OUTPUT);
pinMode(8,OUTPUT);
pinMode(9,OUTPUT);
}
void loop()
{
int i;
// 1st pattern repeat 1 times
for(i=1; i<=10; i++)
{
digitalWrite(i,HIGH);
delay(50);
digitalWrite(i,LOW);
delay(50);
}
for(i=10; i>=1; i--)
{
digitalWrite(i,HIGH);
delay(50);
digitalWrite(i,LOW);
delay(50);
}
delay(1000);
//2nd pattern repeat 1 times
for(i=1; i<=10 ; i++)
{
digitalWrite(i,HIGH);
delay(50);
}
for(i=1; i<=10 ; i++)
{
digitalWrite(i,LOW);
delay(50);
}
for(i=10; i>=1 ; i--)
{
digitalWrite(i,HIGH);
delay(50);
}
for(i=10; i>=1 ; i--)
{
digitalWrite(i,LOW);
delay(50);
}
delay(1000);
//3rd pattern repeat 1 times
for(i=1; i<=10 ; i++)
{
digitalWrite(i,HIGH);
delay(50);
}
for(i=11; i>=1 ; i--)
{
digitalWrite(i,LOW);
delay(50);
}
for(i=10; i>=1 ; i--)
{
digitalWrite(i,HIGH);
delay(50);
}
for(i=1; i<=10 ; i++)
{
digitalWrite(i,LOW);
delay(50);
}
delay(1000);
//4th pattern repeat 1 times
for(i=1; i<=5 ; i++)
{
digitalWrite(i,HIGH);
digitalWrite(11-i,HIGH);
delay(100);
}
for(i=1; i<=5 ; i++)
{
digitalWrite(i,LOW);
digitalWrite(11-i,LOW);
delay(100);
}
delay(100);
for(i=1; i<=5 ; i++)
{
digitalWrite(i,HIGH);
digitalWrite(11-i,HIGH);
delay(100);
}
for(i=5; i>=1 ; i--)
{
digitalWrite(i,LOW);
digitalWrite(11-i,LOW);
delay(100);
}
delay(1000);
//5th pattern rpeat 1 time
for(i=1 ; i<=3 ; i++)
{
digitalWrite(i,HIGH);
digitalWrite(i+3,HIGH);
digitalWrite(i+6,HIGH);
delay(500/i);
}
delay(500);
for(i=1 ; i<=3 ; i++)
{
digitalWrite(i,LOW);
digitalWrite(i+3,LOW);
digitalWrite(i+6,LOW);
delay(500/i);
}
delay(1000);
}
Now upload this code in in your arduino board
Downloads
Testing

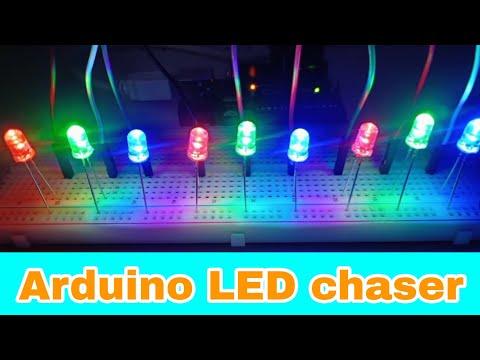 || how to make arduino LED chaser ||)
So now LED is blinking with all five effects. And each effect is repeated one time