Arduino Bluetooth Shield for Wireless Programing and Data Monitoring - Jetpack
by GeorjaiwinM in Circuits > Electronics
2607 Views, 17 Favorites, 0 Comments
Arduino Bluetooth Shield for Wireless Programing and Data Monitoring - Jetpack
)
Wouldn't it be wonderful to program your Arduino wirelessly? All of us know how annoying it is to have to plug in your Arduino project into a computer every time we have to upload a sketch, debug or read some information over serial monitor. Just imagine a project with lots of sensors and you need to unplug everything just to reprogram your Arduino.
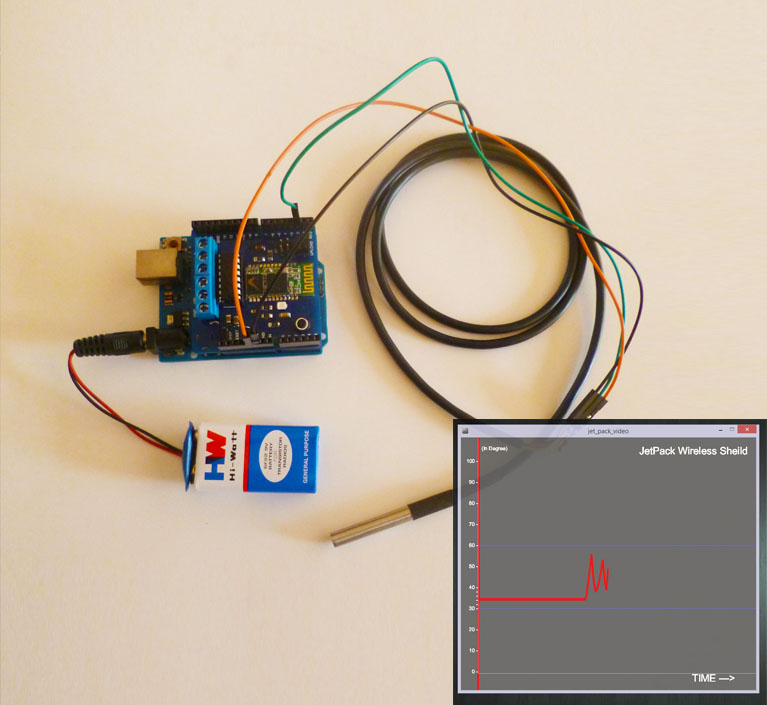
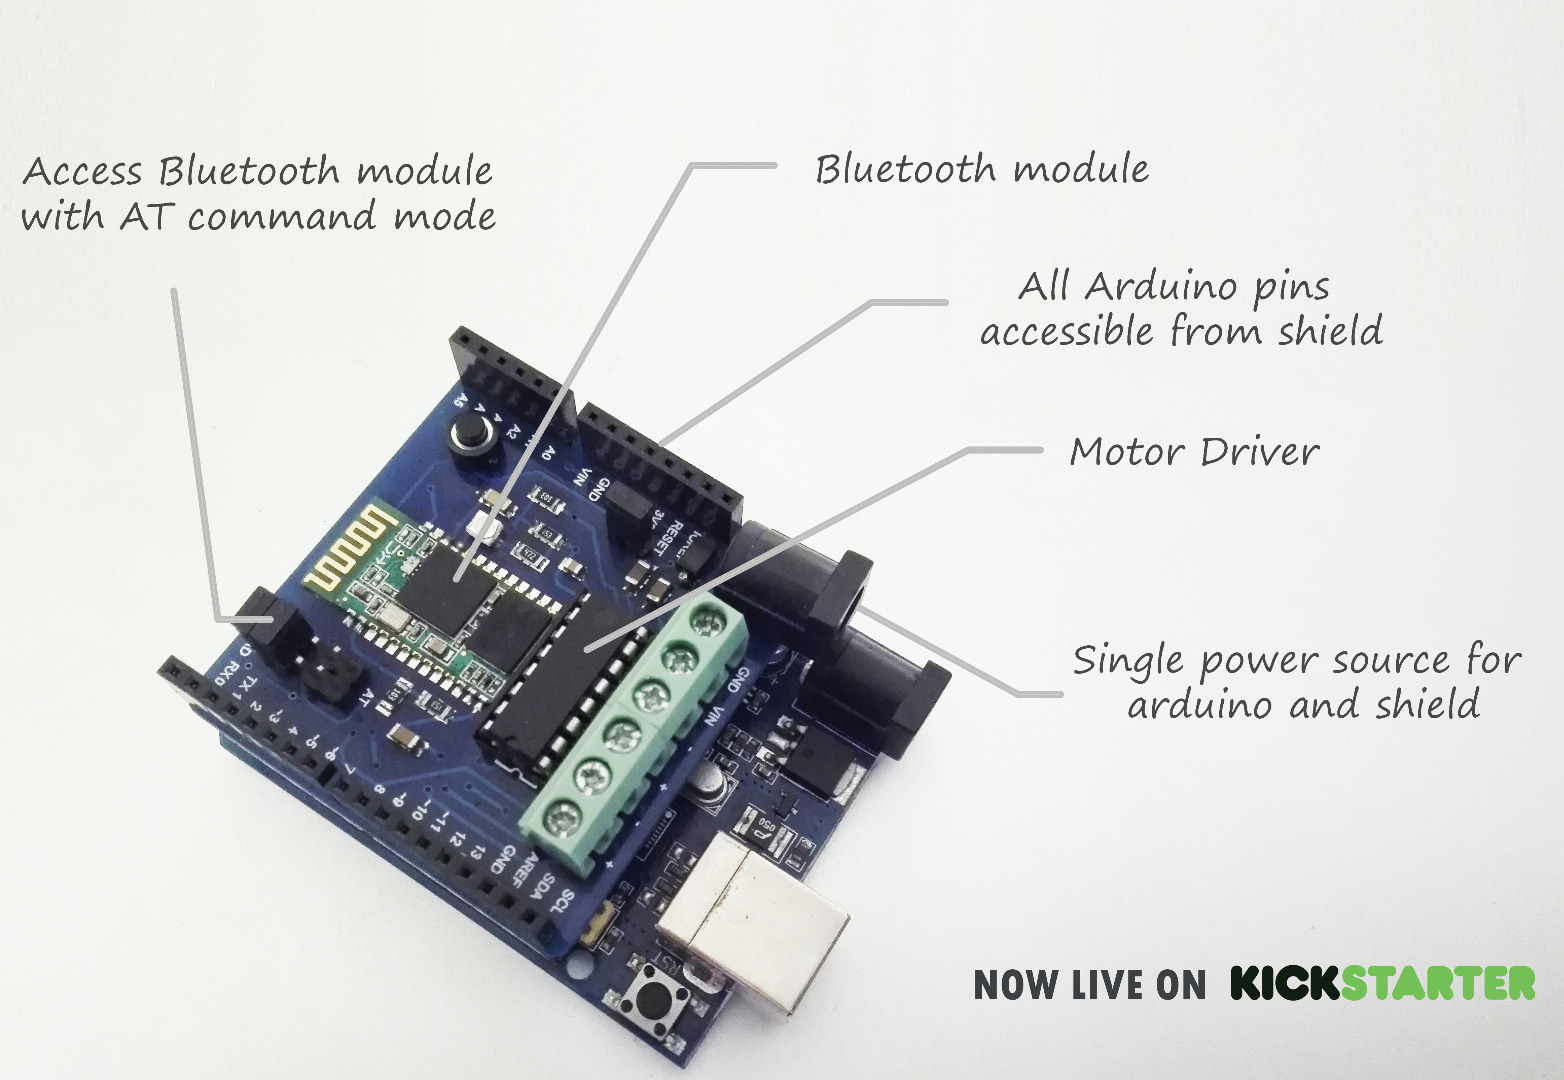
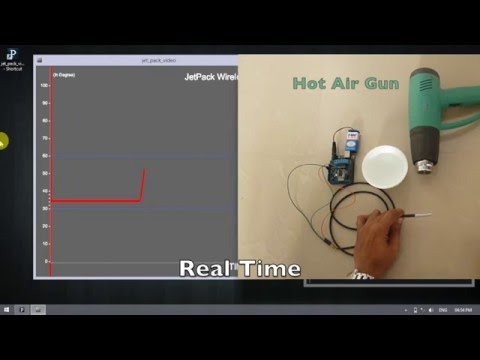
Jetpack is a Bluetooth and motor driver shield to program Arduino wirelessly . We thought real time data monitoring would be an interesting application so we have a designed a temperature monitoring system here, you can read the data with a temperature probe and you can plot it in real time with the processing software
Got 750% funded on Kickstarter! We are amazed by this response and so jet pack is now available for pre-order on http://www.jetpackshield.com/
Things required:
Hardware
- Arduino
- Jetpack buetooth Shield
- DS18B20 temperature sensor(or any sensor that you want to monitor)
- 4.7k resistor
Software
- Arduino IDE
- Processing software
If you want this shield we are live on kickstarter http://kck.st/1R3PIWE
Connect Your Temperature Sensor As Shown
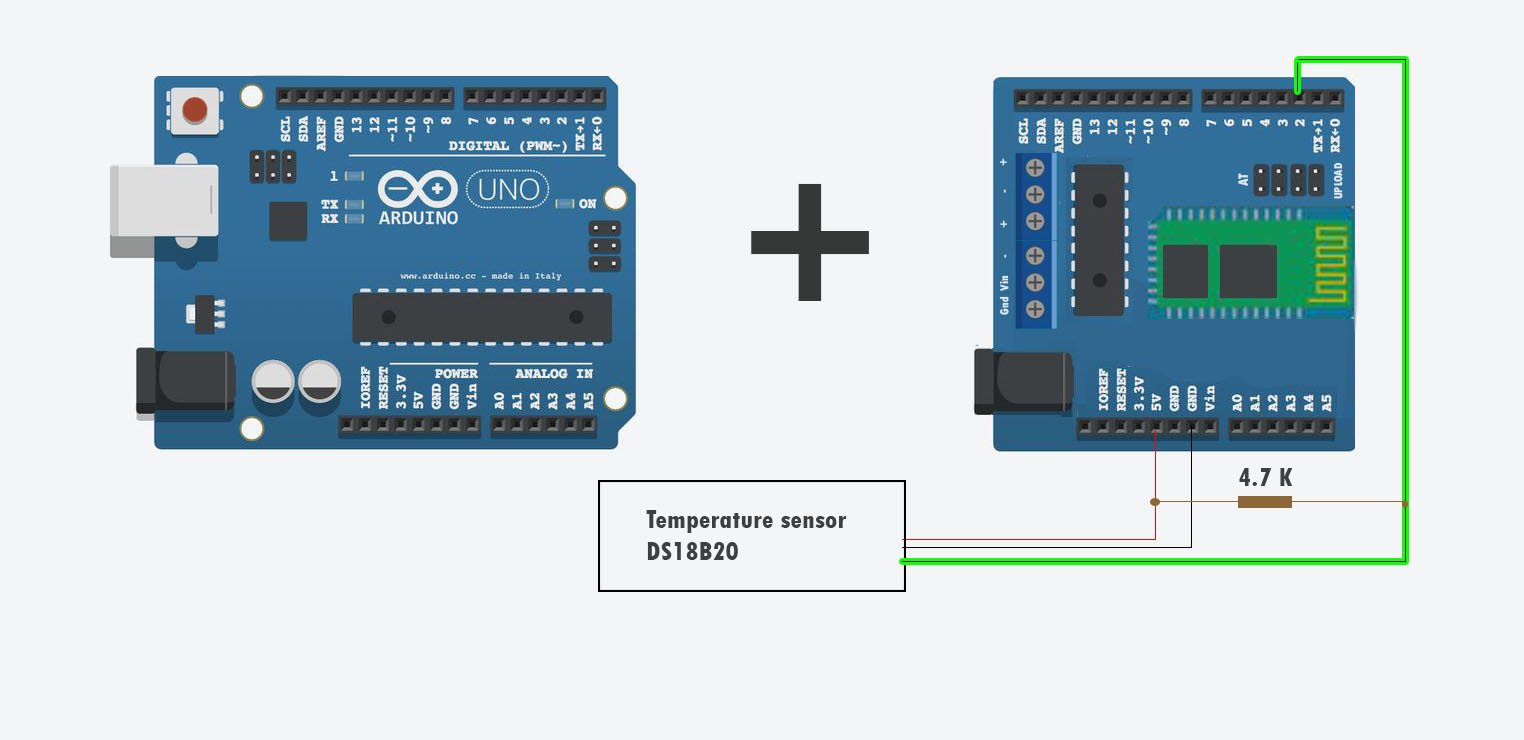
Mount jetpack shield onto Arduino board and connect the temperature sensor
Turn on Your System's Bluetooth and Pair It With Jetpack
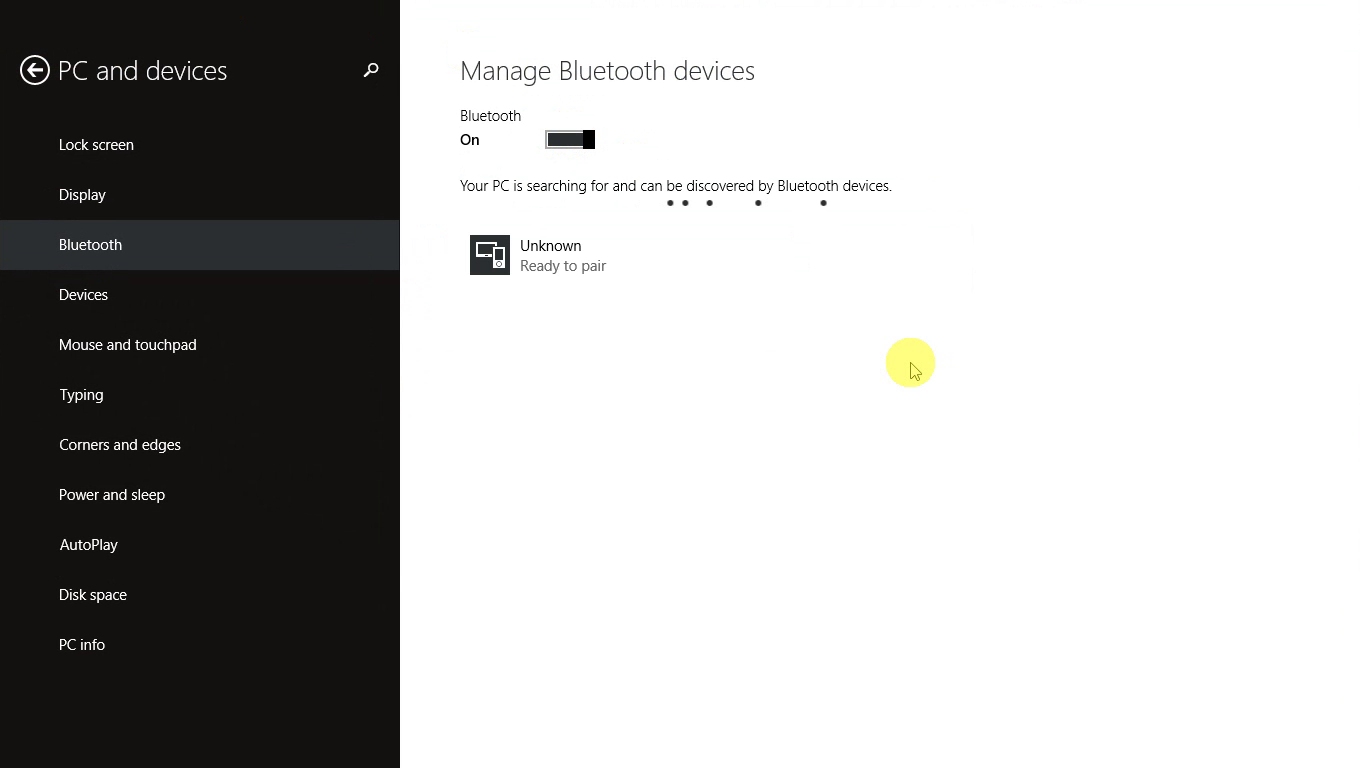
Click on "pair" with unknown device which shows up on the Bluetooth discovery list
Enter the Password and Press Next
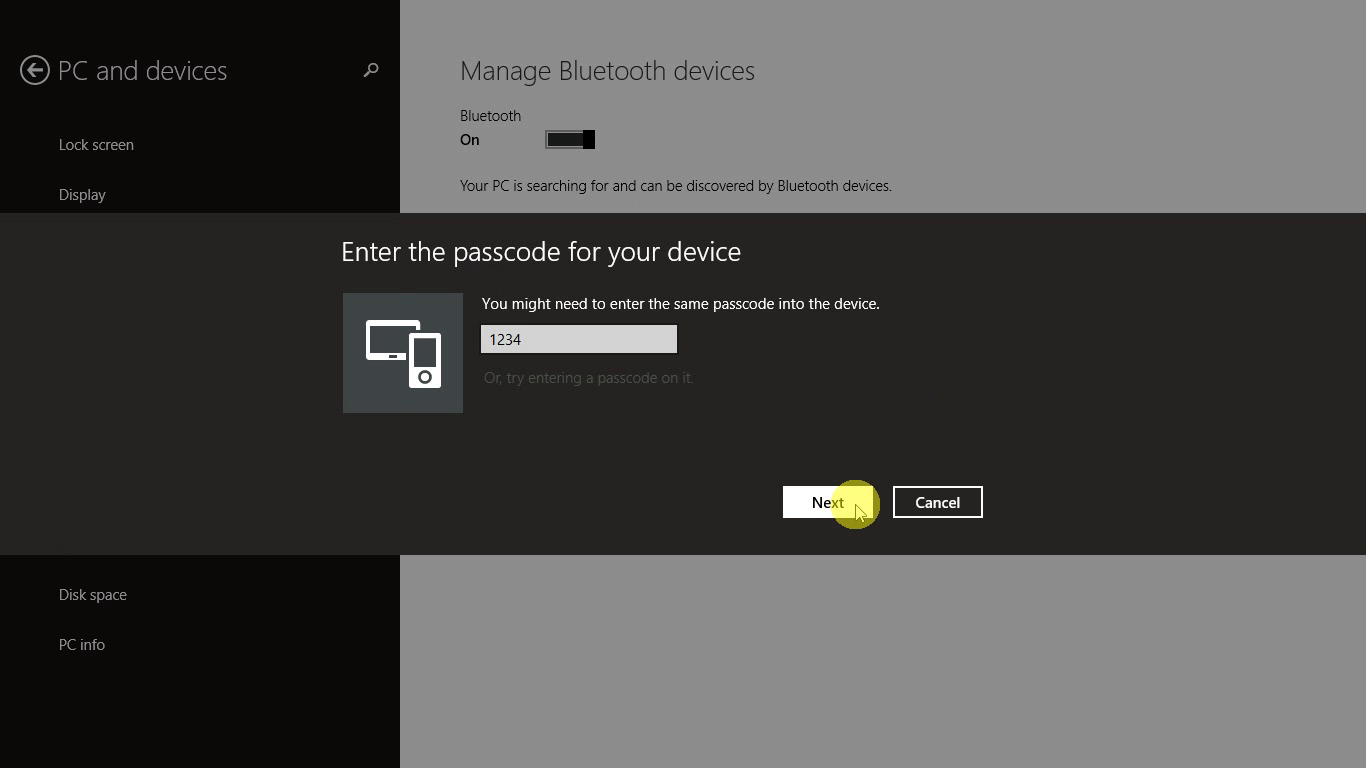
The default password is '1234'
Open Bluetooth Setting From the Bottom Right of Your Task Bar
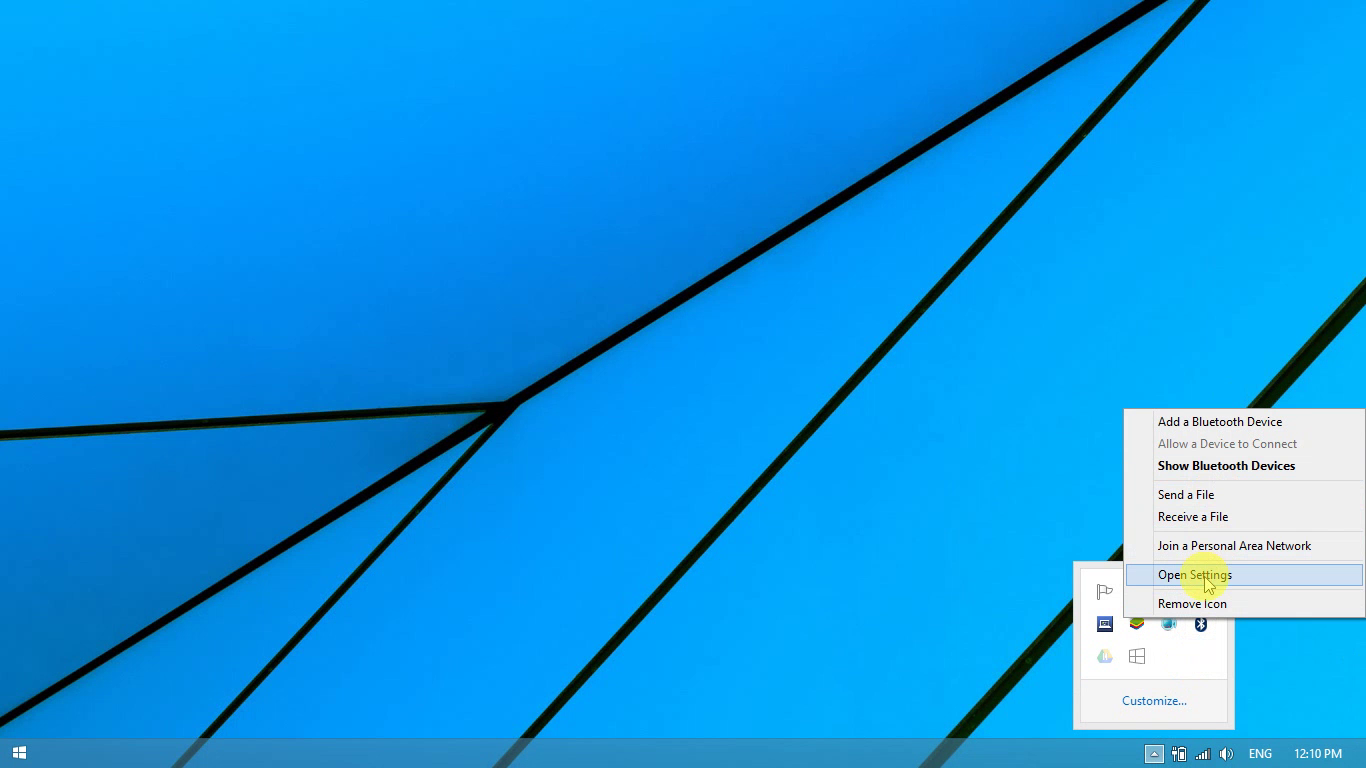
Right click on the Bluetooth icon on the task bar, click on ''settings"
Find Out Your "Outgoing COM Port" by Clicking on COM Port Tab
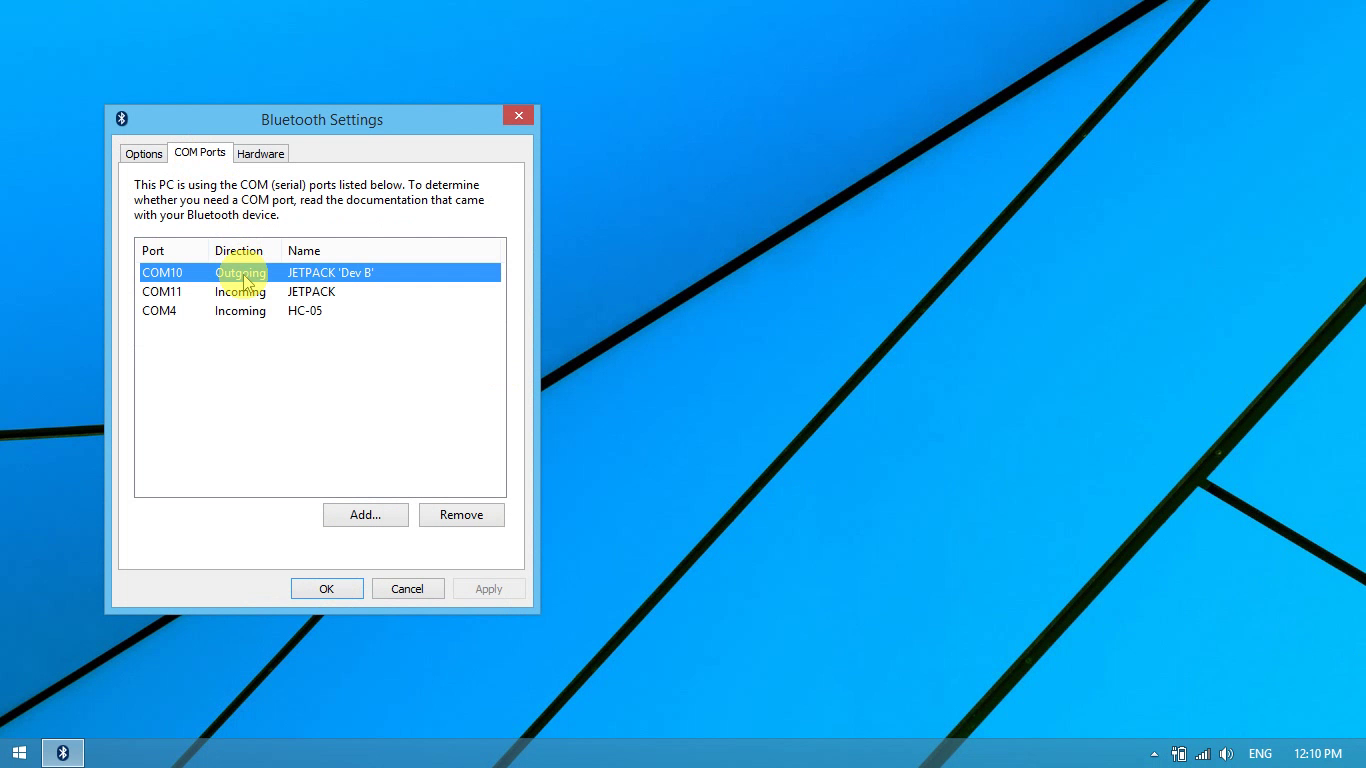
Here its COM10 by the name Jetpack
Open Arduino IDE, Select Outgoing COM Port and Upload Sketch Wirelessly!
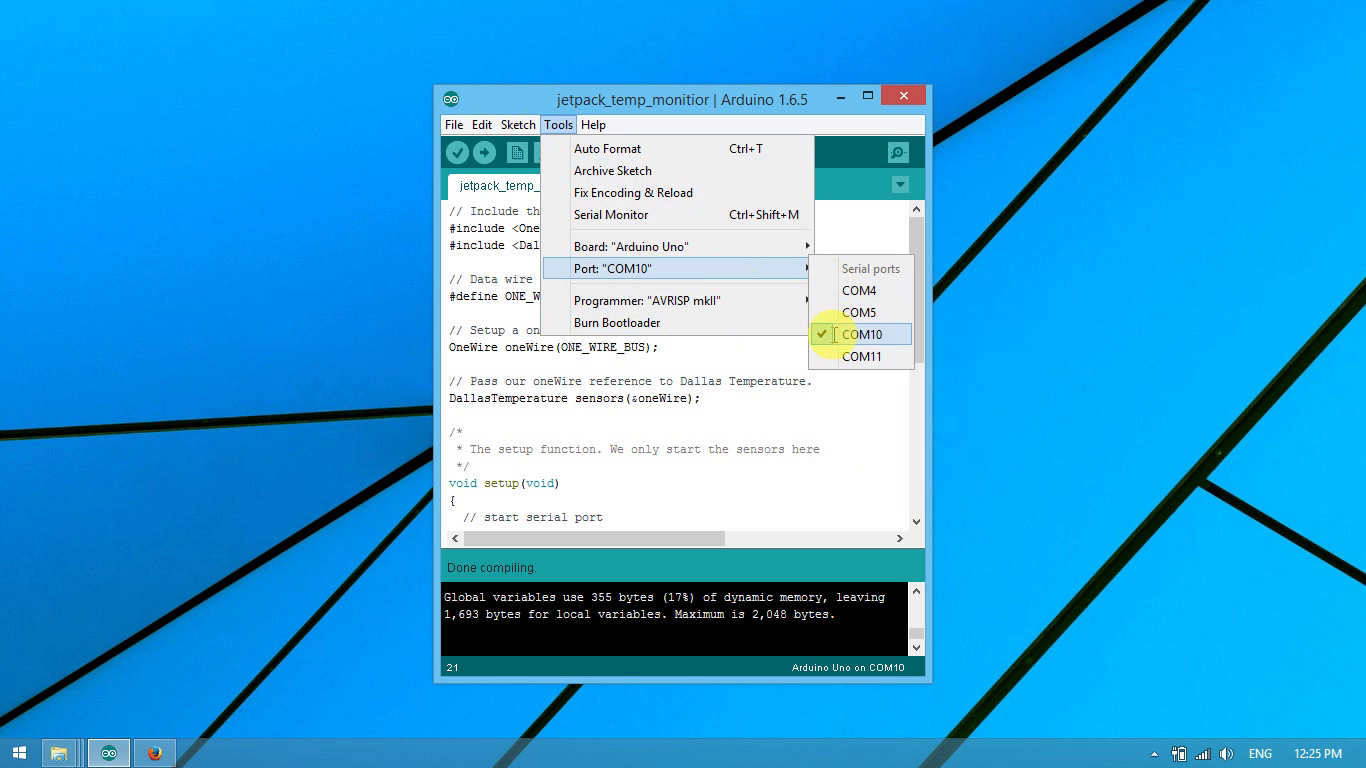
- Open the tools Tab in the Arduino IDE
- Select "Port COM10" option
- Select the outgoing COM Port
- Upload sketch
The code is given below
Downloads
Open Processing, Paste Code Given Below and Press Play. See Your Sensor Plot Graphs in Real Time!
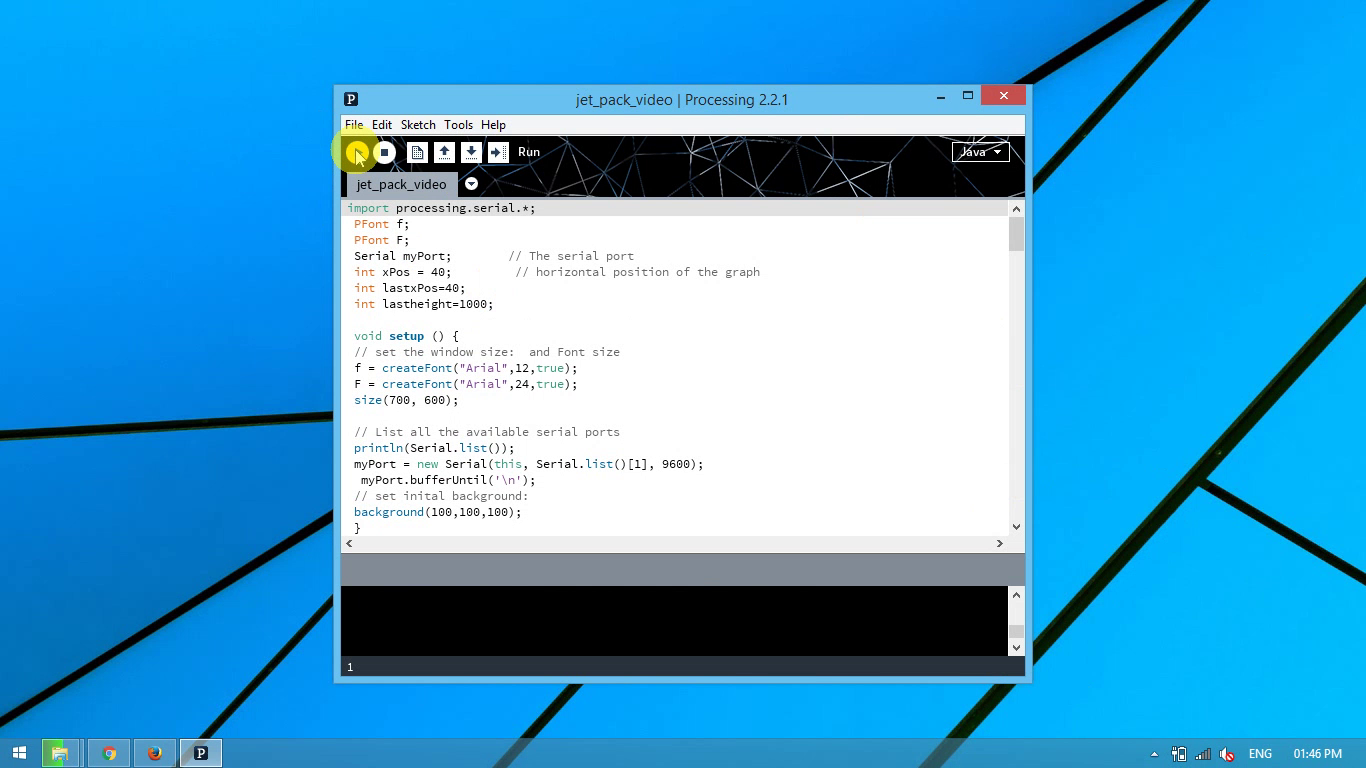
- Open Processing
- Paste code from here
- Press Play
- Enjoy live data stream!
The code is given below