Arduino Birthday Cake Topper
by Autodesk Circuits in Circuits > Arduino
8957 Views, 64 Favorites, 0 Comments
Arduino Birthday Cake Topper
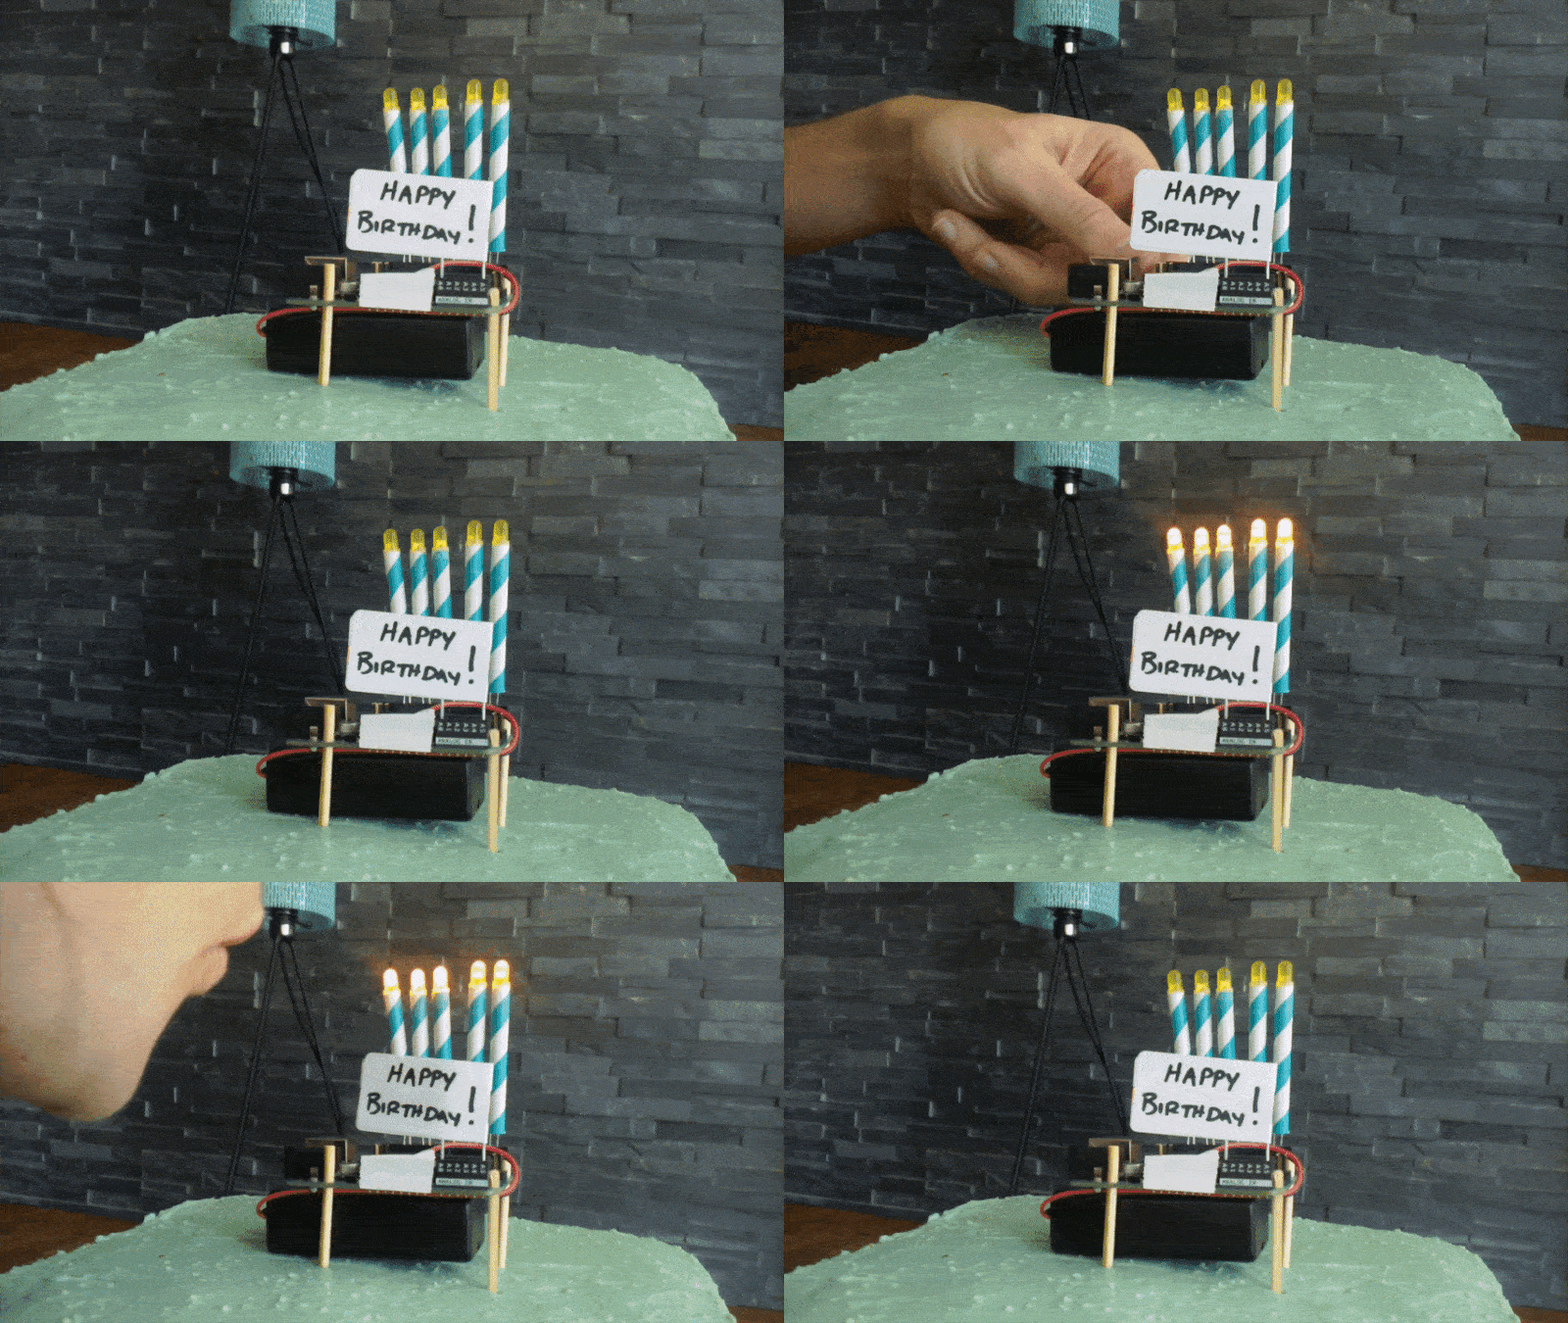
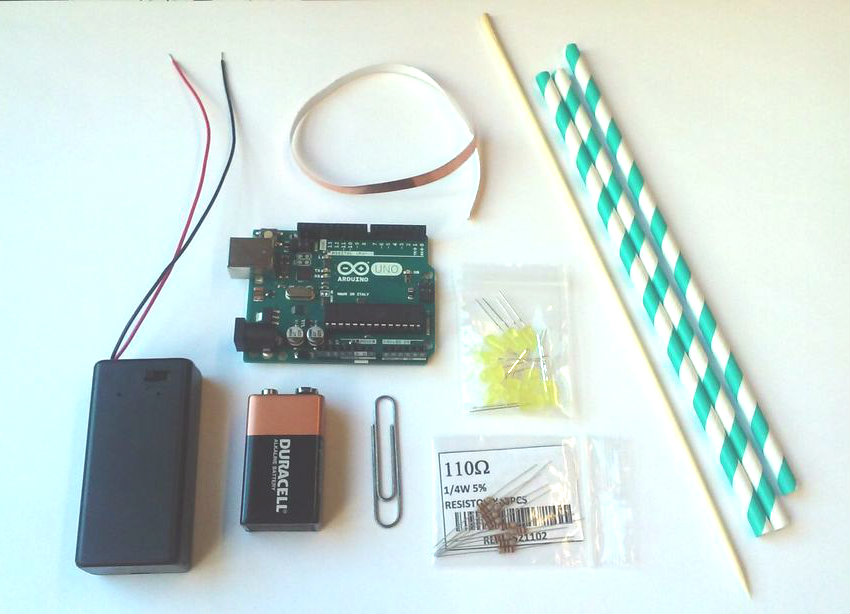
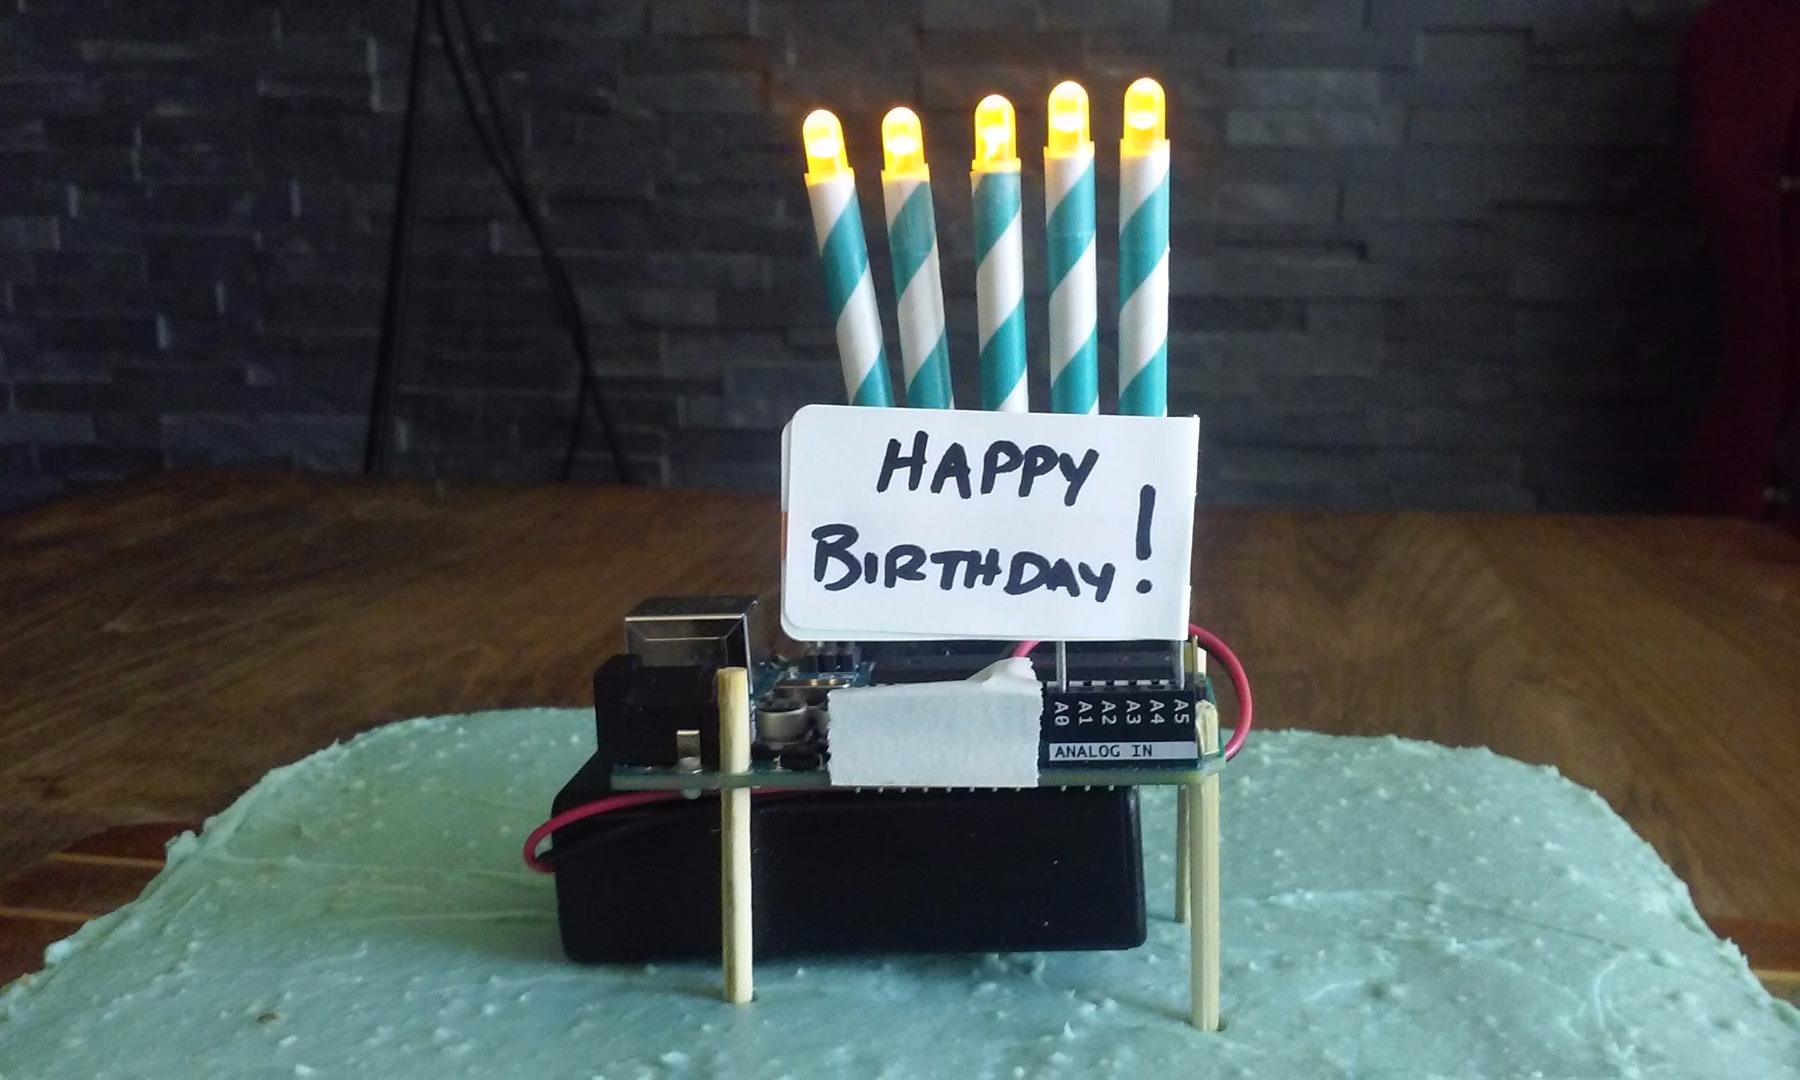
In celebration of Arduino's Birthday on April 2nd, I decided to make an awesome Arduino-based birthday cake topper with elecronic "candles" that can be blown out.
Parts list:
- 1 x Arduino Uno
- For each "candle", you will need:
- 1 x 5mm yellow LED
- 2 x 110Ω 1/4 watt resistors
- 1 x paper straw
- 1 x 9V battery
- 1 x 9V battery holder
- 1 x Paper clip
- 1 x Adhesive address label or paper and glue
- 3" of copper tape
- 1 x wooden dowel or skewer
- Hot glue gun
Program the Arduino Uno
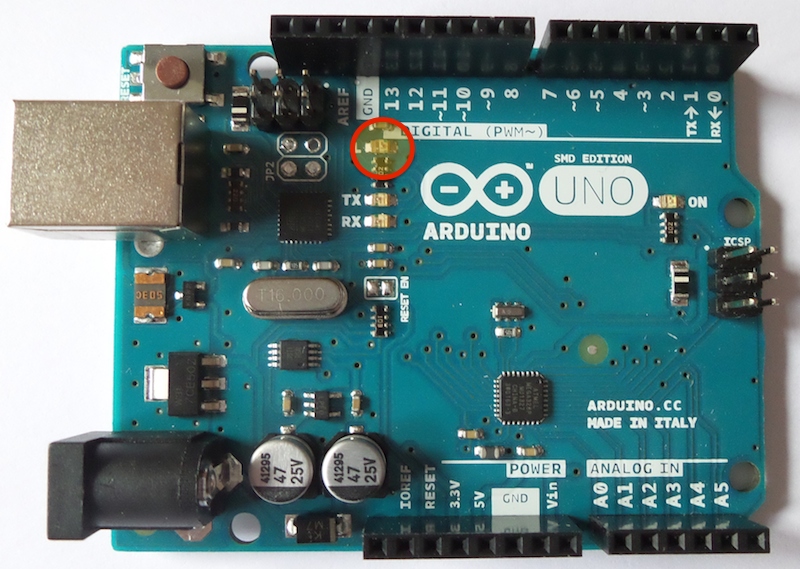
The Arduino file for this project is below. Simply open it in the Arduino IDE, and program the board as normal. When it has been programmed, you can test it using the LED circled in the picture above. It should be flickering when the Arduino Uno is powered. Using a piece of wire, connect analog in A0 to either of the GND (ground) connections, and the LED should flicker out after 1 second and stay off. If you want to test again, press the reset button and repeat the process.
Here's a 123D Circuits project, illustrating how the cake topper works. You can press "Start Simulation" to try it out:
Downloads
Add the Battery and Legs
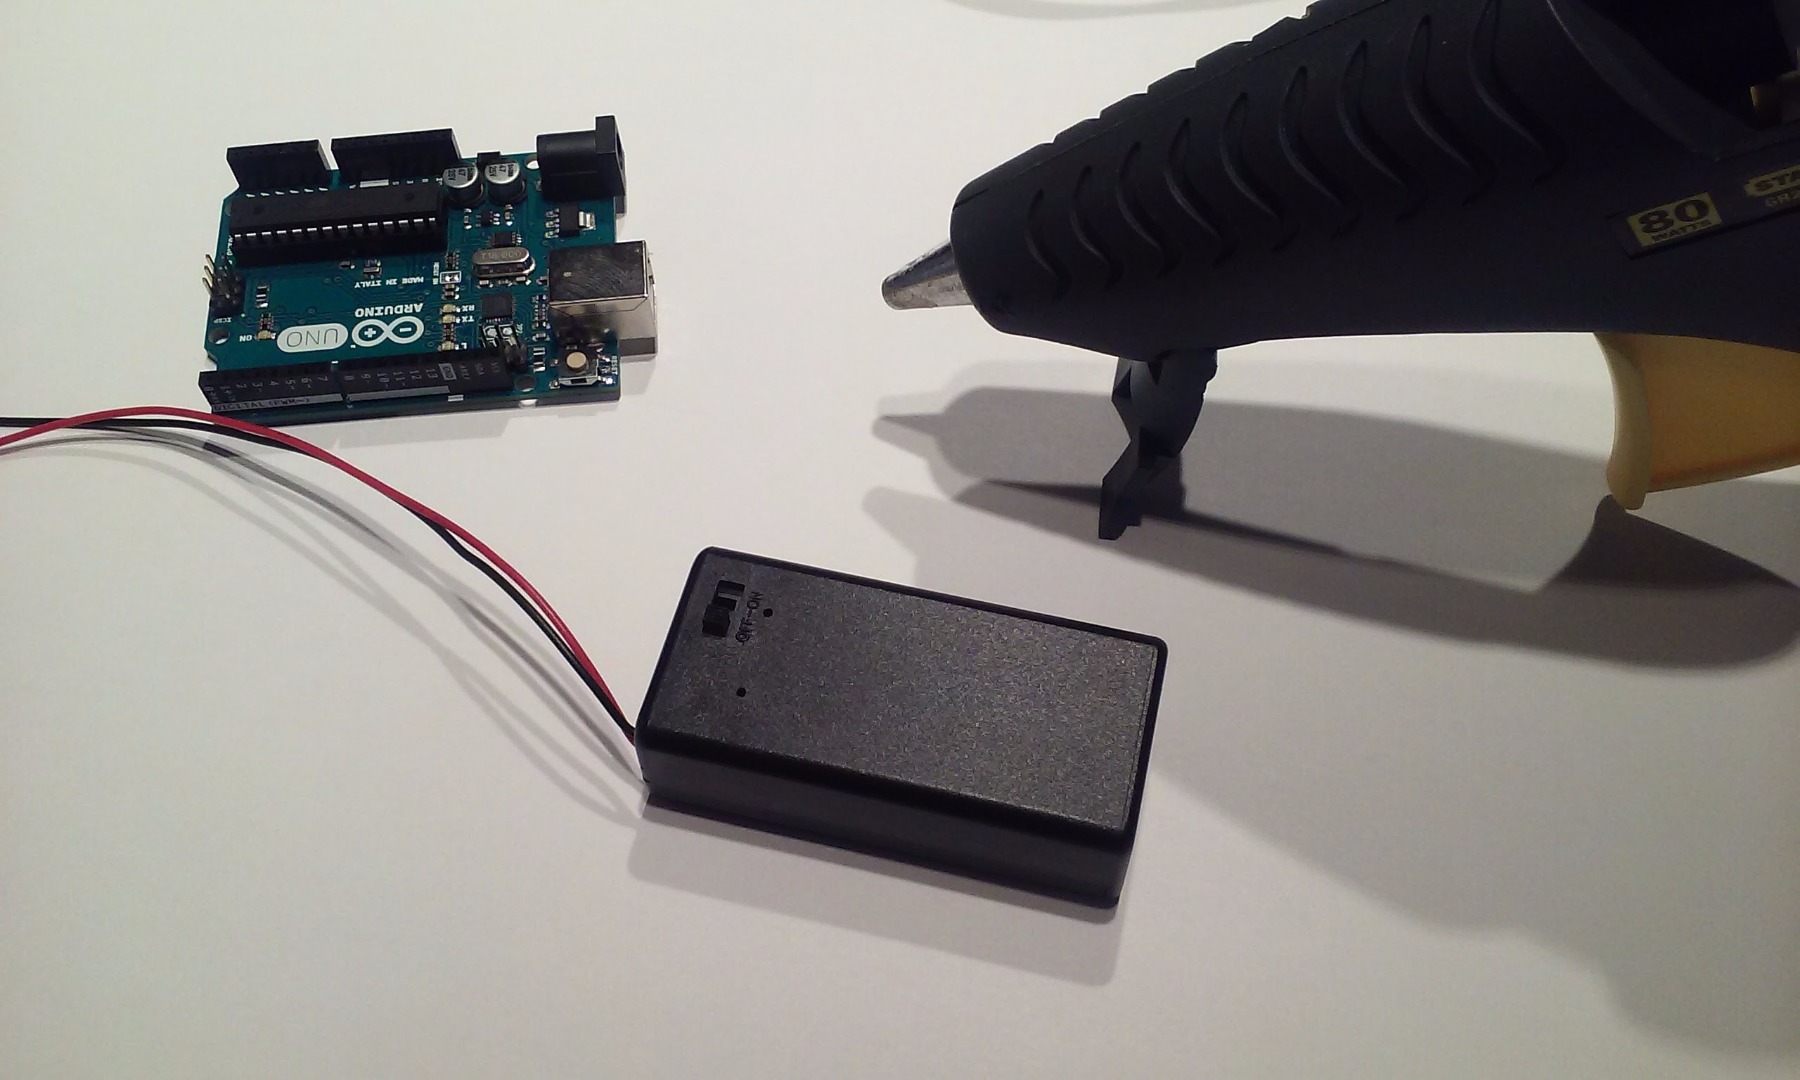
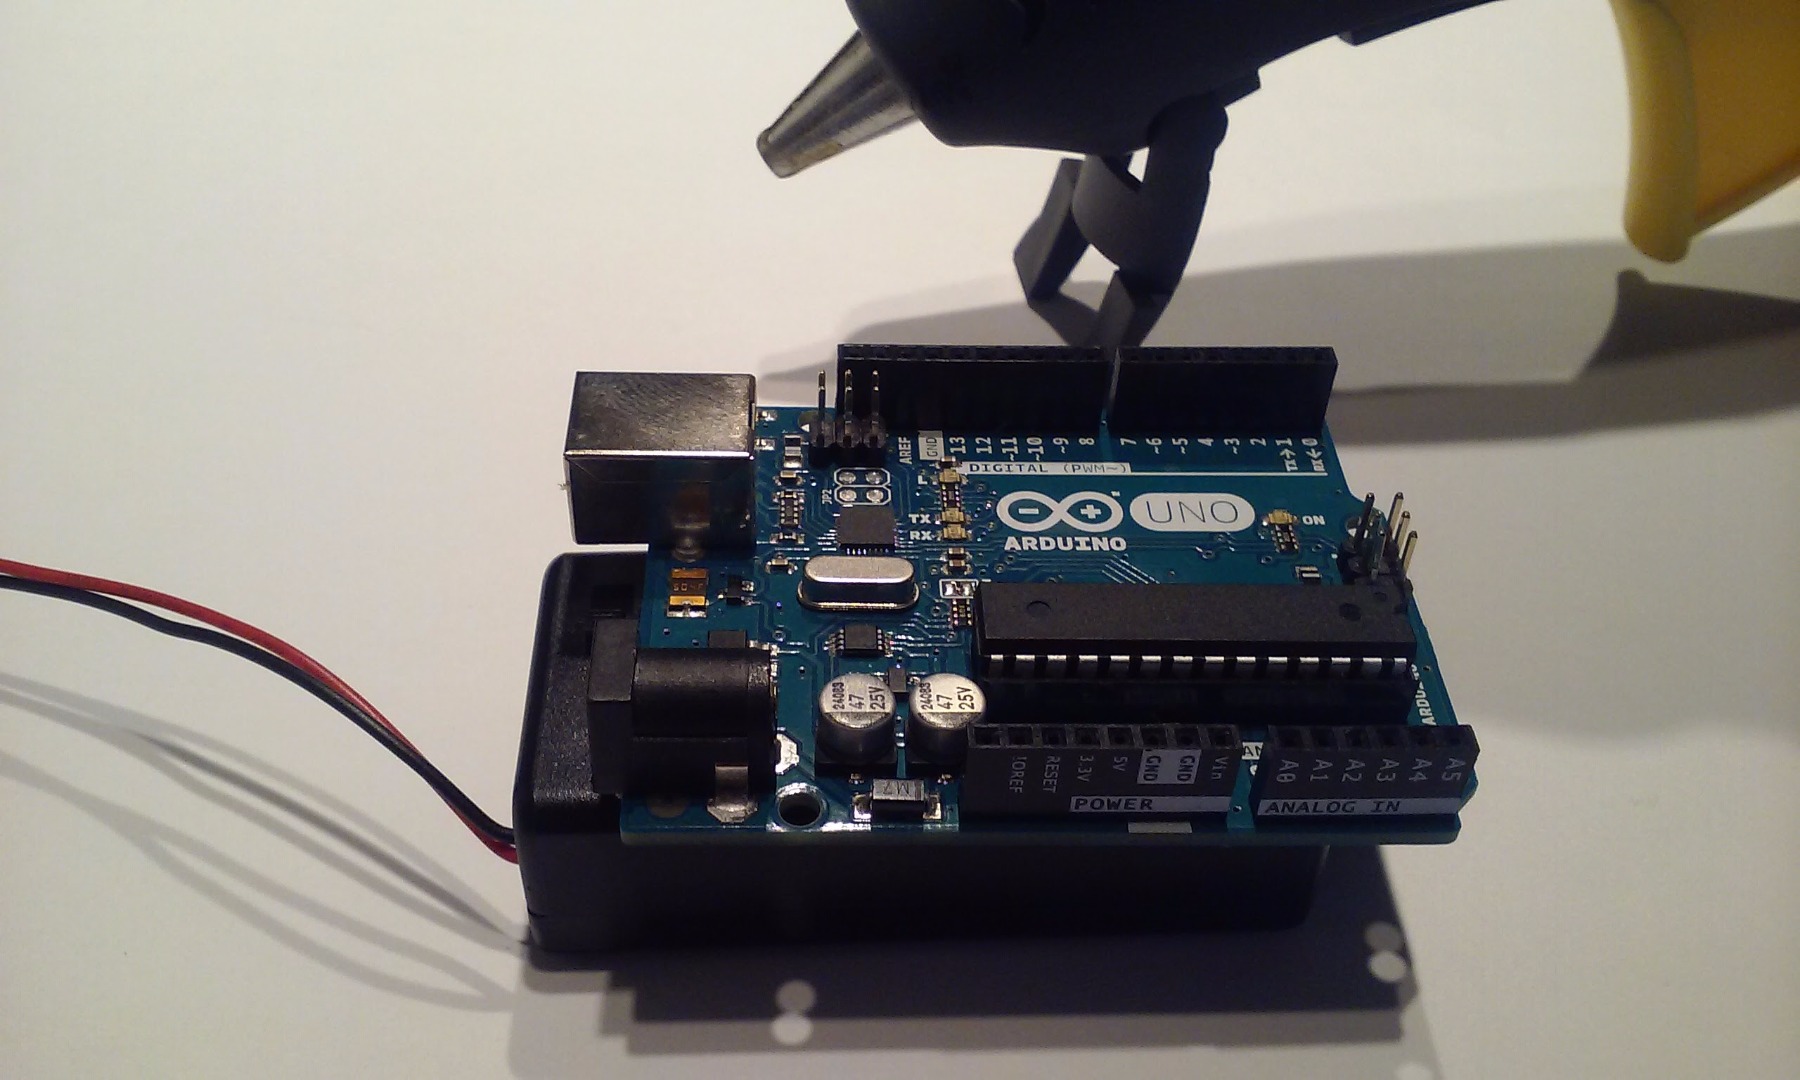
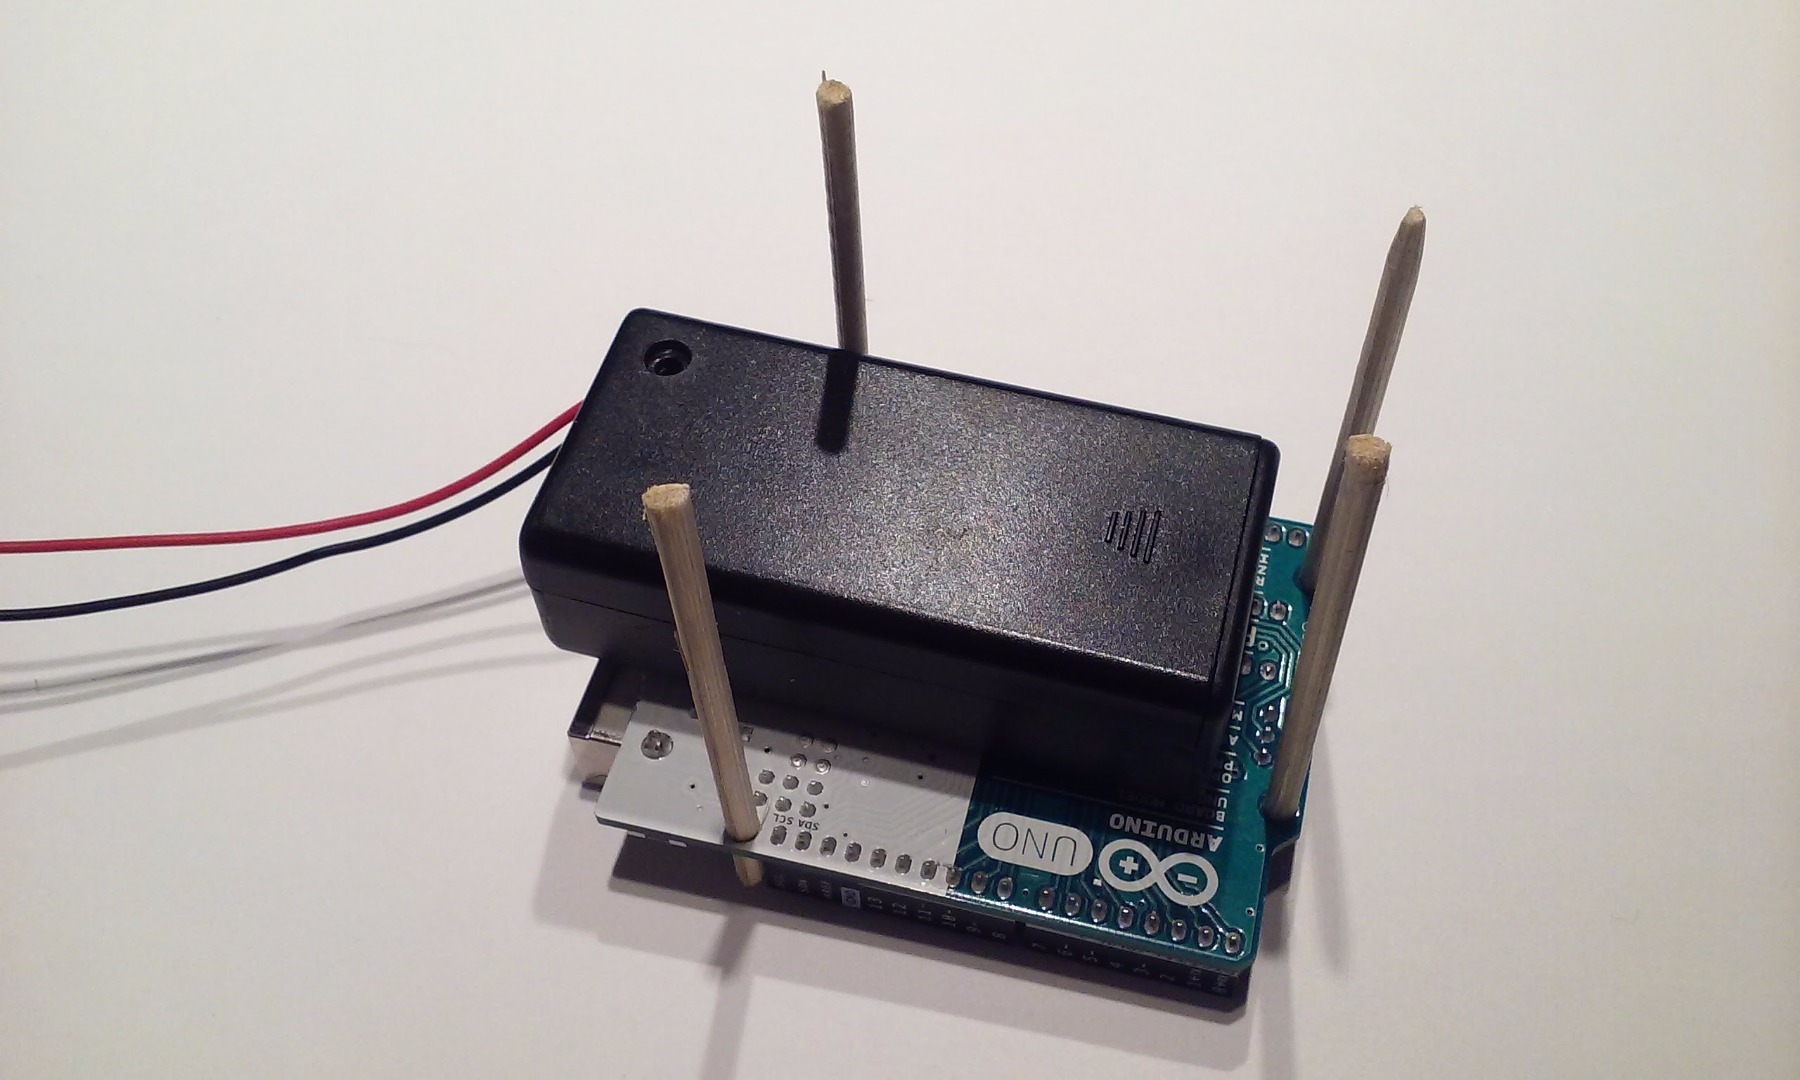
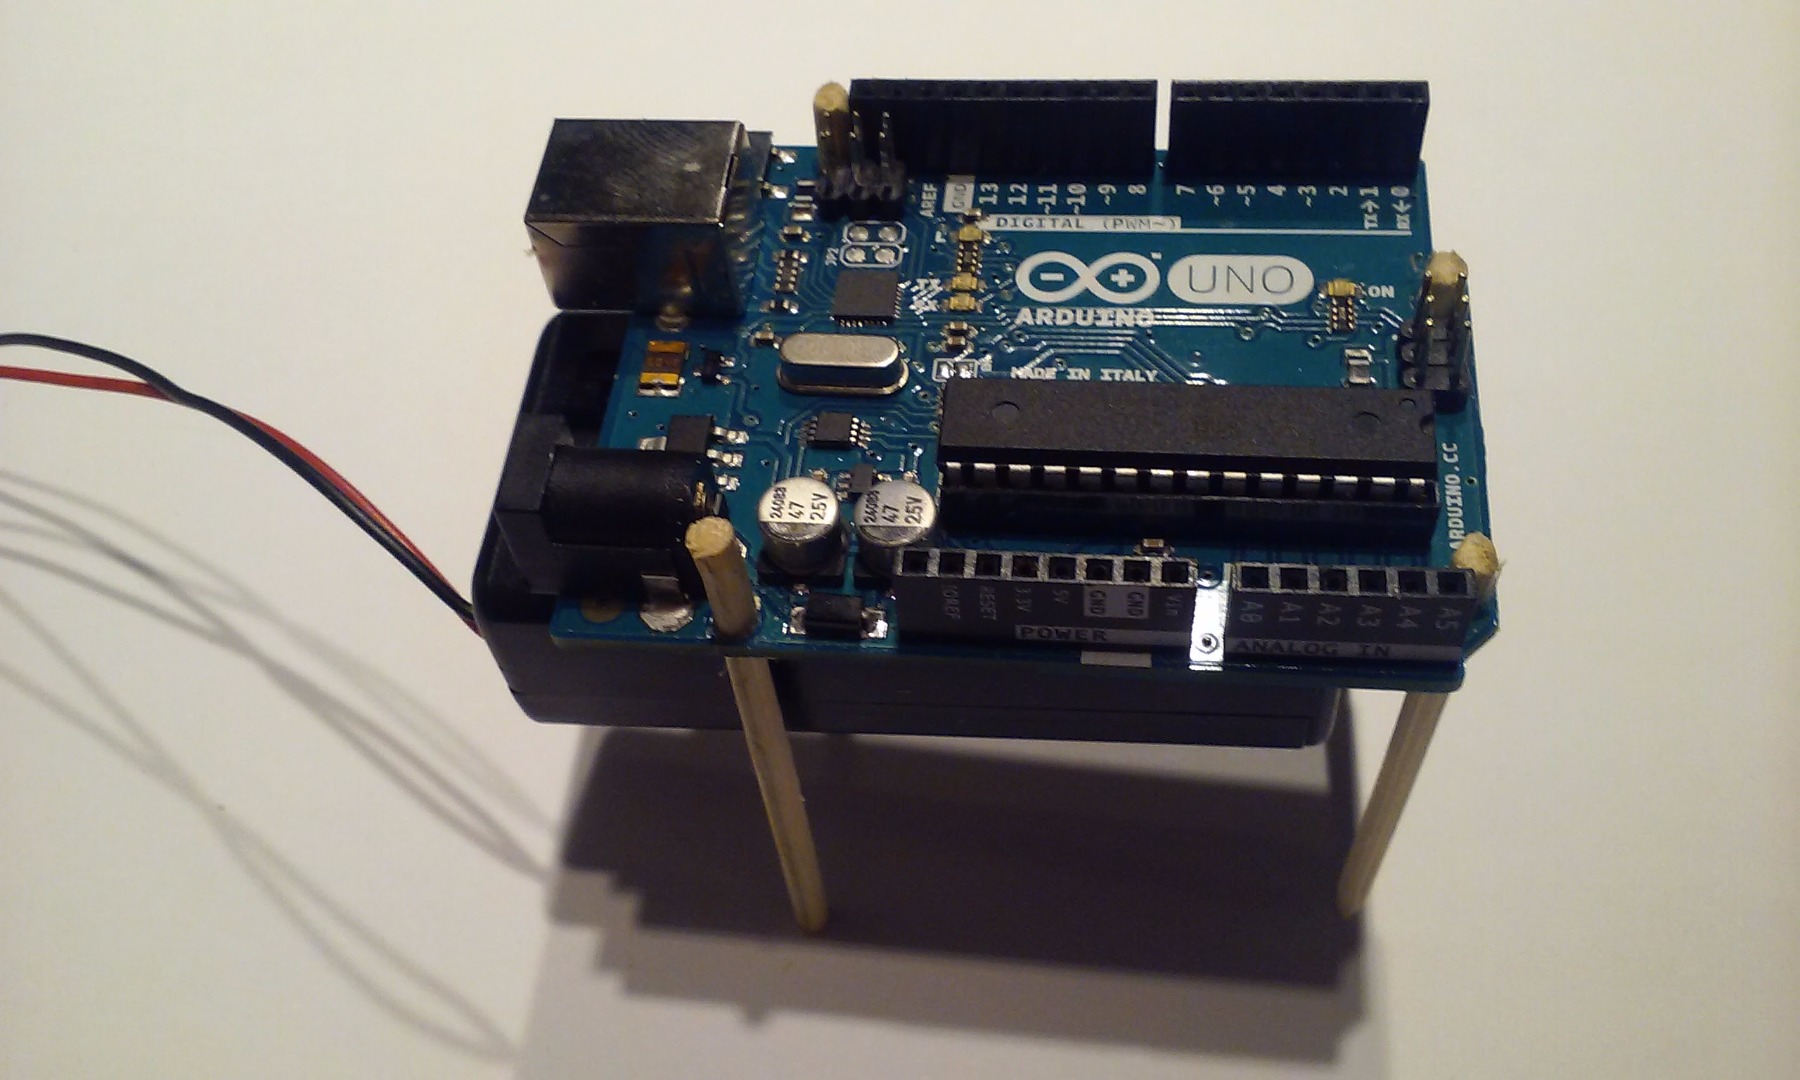
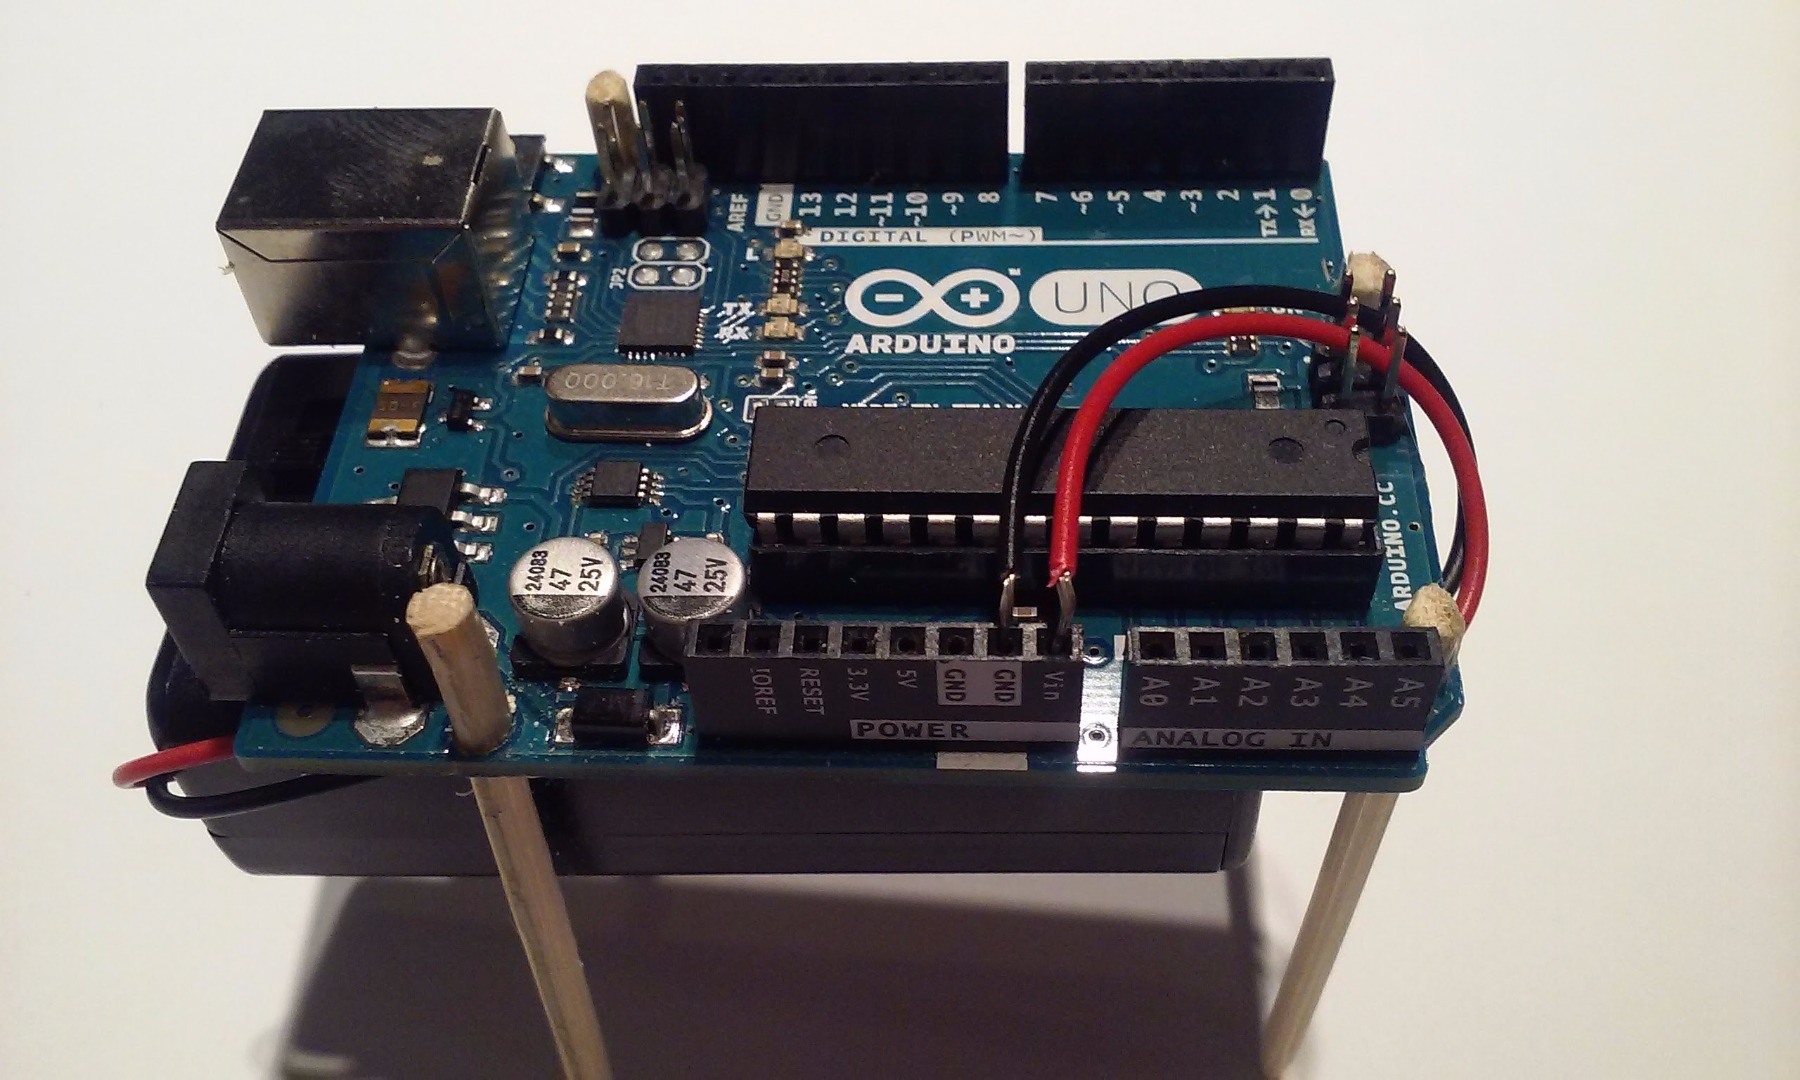
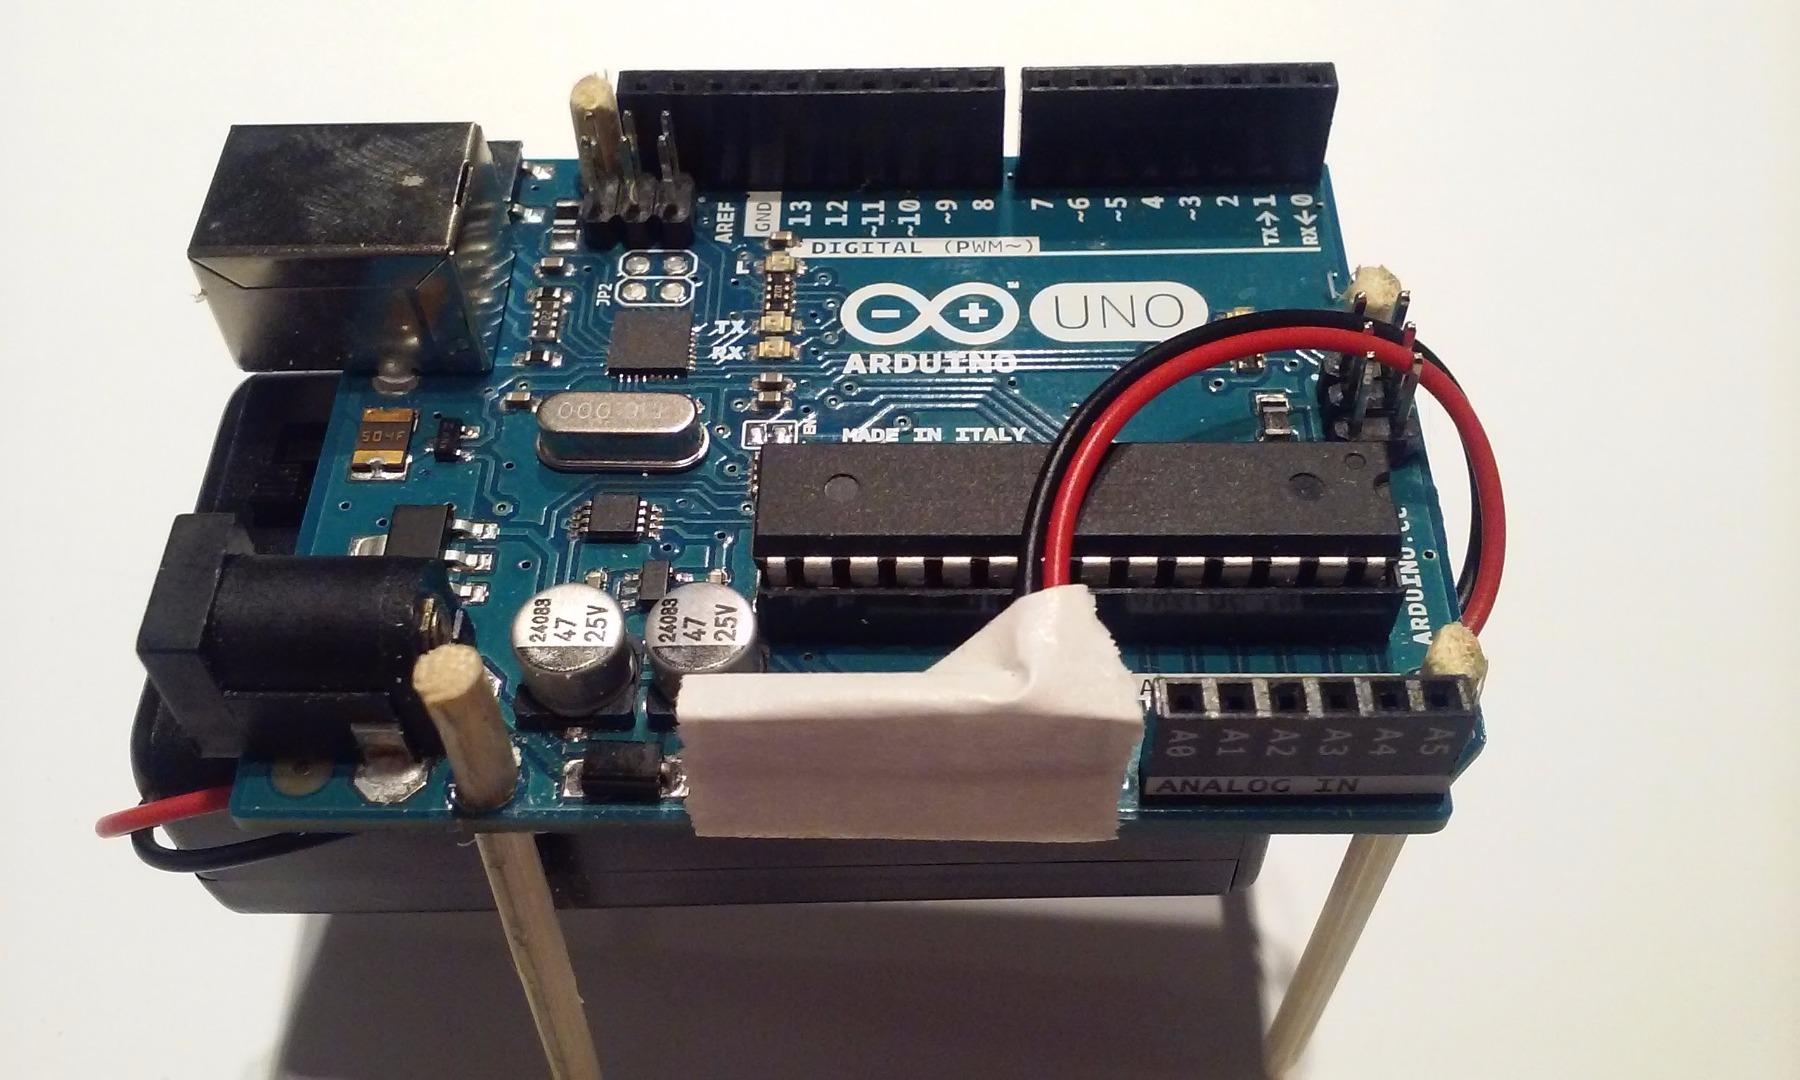
Put the 9V battery into the battery box and make sure the switch is turned off (if there is one). Attach the battery box to the underside of the Arduino UNO with hot glue. Position it such that the on/off switch is accessible. For mine, I positioned it so that the switch was right next to the USB connector on the Arduino Uno board.
Find a skewer or wooden dowel that closely matches the mounting hole diameter of the Arduino Uno board. Cut four 2-1/2" sections and press into the mounting holes. These are the stands that will be pressed into the cake when the topper is put on.
Feed the two wires from the battery box over to the adjascent GND and VIN header holes of the Arduino Uno. The black wire should go in the GND hole, and the red wire goes in the VIN hole. I then taped mine in place using masking tape to make sure that they stay there.
You can test the power connection by turning on the power switch. Again you should see the LED start flickering.
Make the "candles"
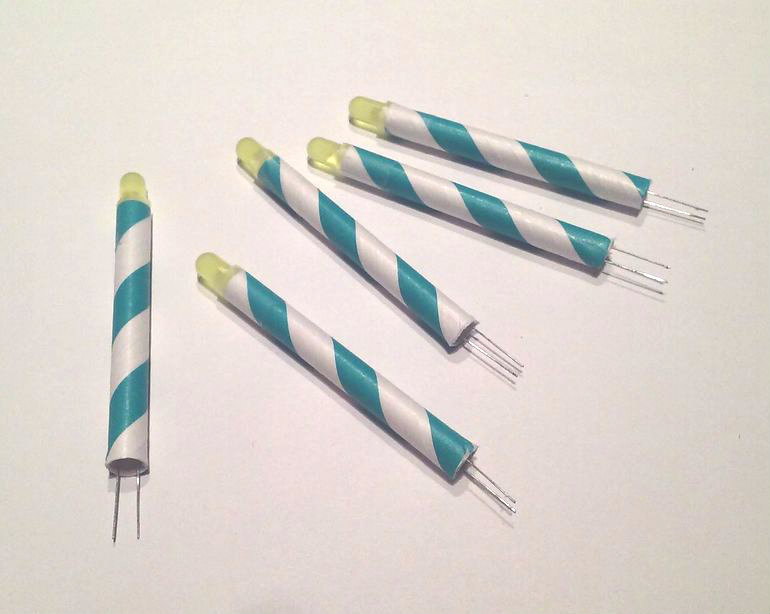
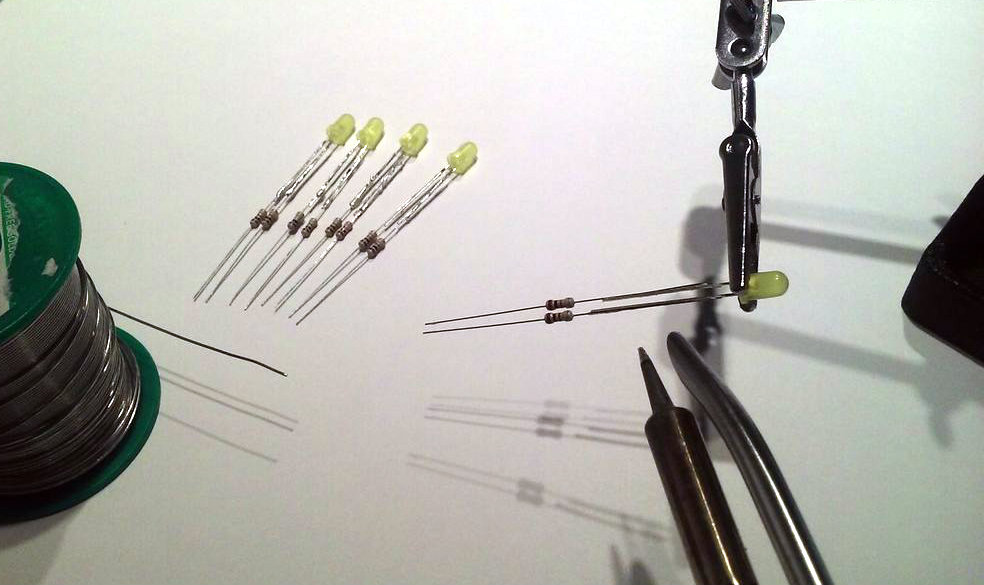
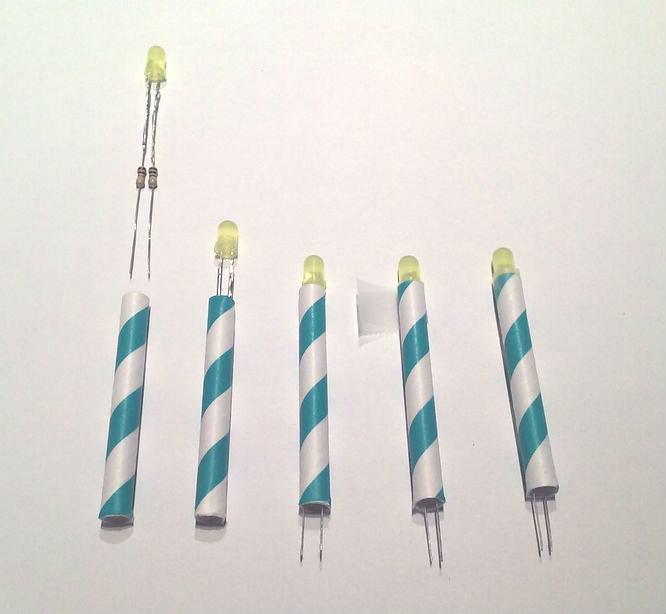
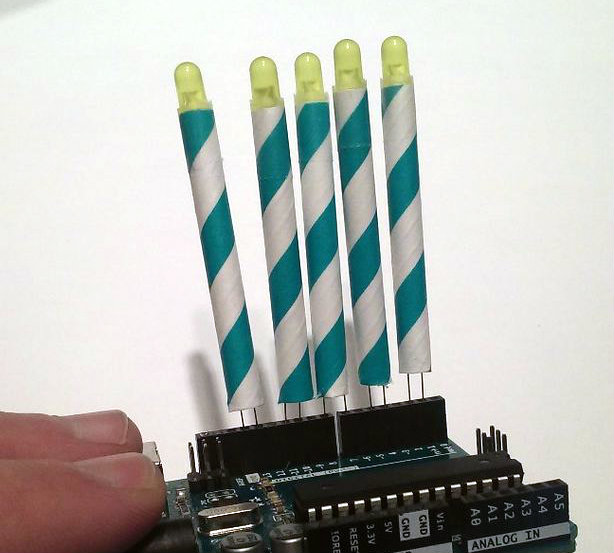
To make each candle, you will need to solder a 100 or 110Ω resistor to each leg of the LED. The resistors are necessary current-limiters for the LED and provide the height for the candle. They also allow the candle to be plugged directly into the header on the Arduino.
Once the soldering is done for each LED, measure and cut a paper straw section for each candle that allows the LED to sit flush at one end with the resistors inside and 1/4 inch or a little more of the resistor leads protruding from the other end.
If necessary, apply regular clear tape to the base of each LED to attach it to the straw.
With the Auduino Uno powered, put each candle in place in the digital headers. The candles will be in the following positions:
- 1 and 2
- 4 and 5
- 7 and 8
- 10 and 11
- 13 and GND
The candles will only light when the wires are in a certain direction, so if a candle doesn't light, turn it around so that the wires are switched and try again.
The "Happy Birthday" Flag
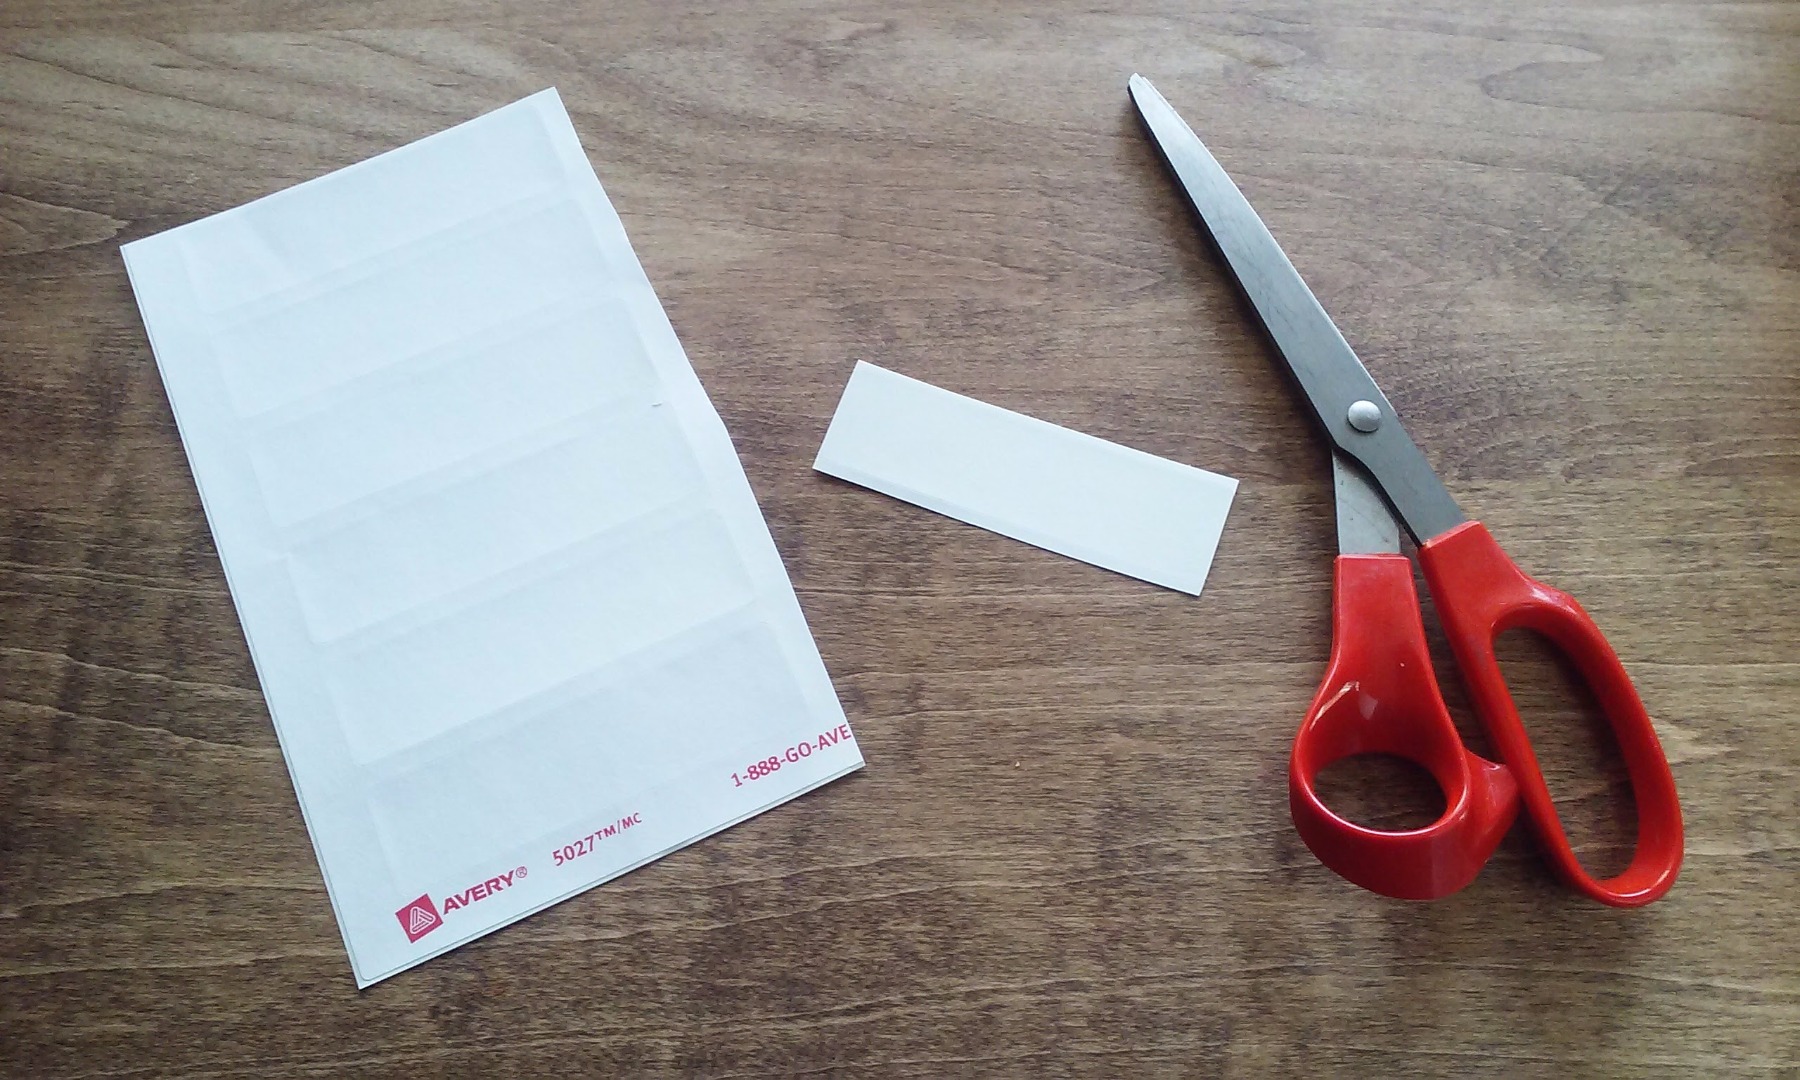
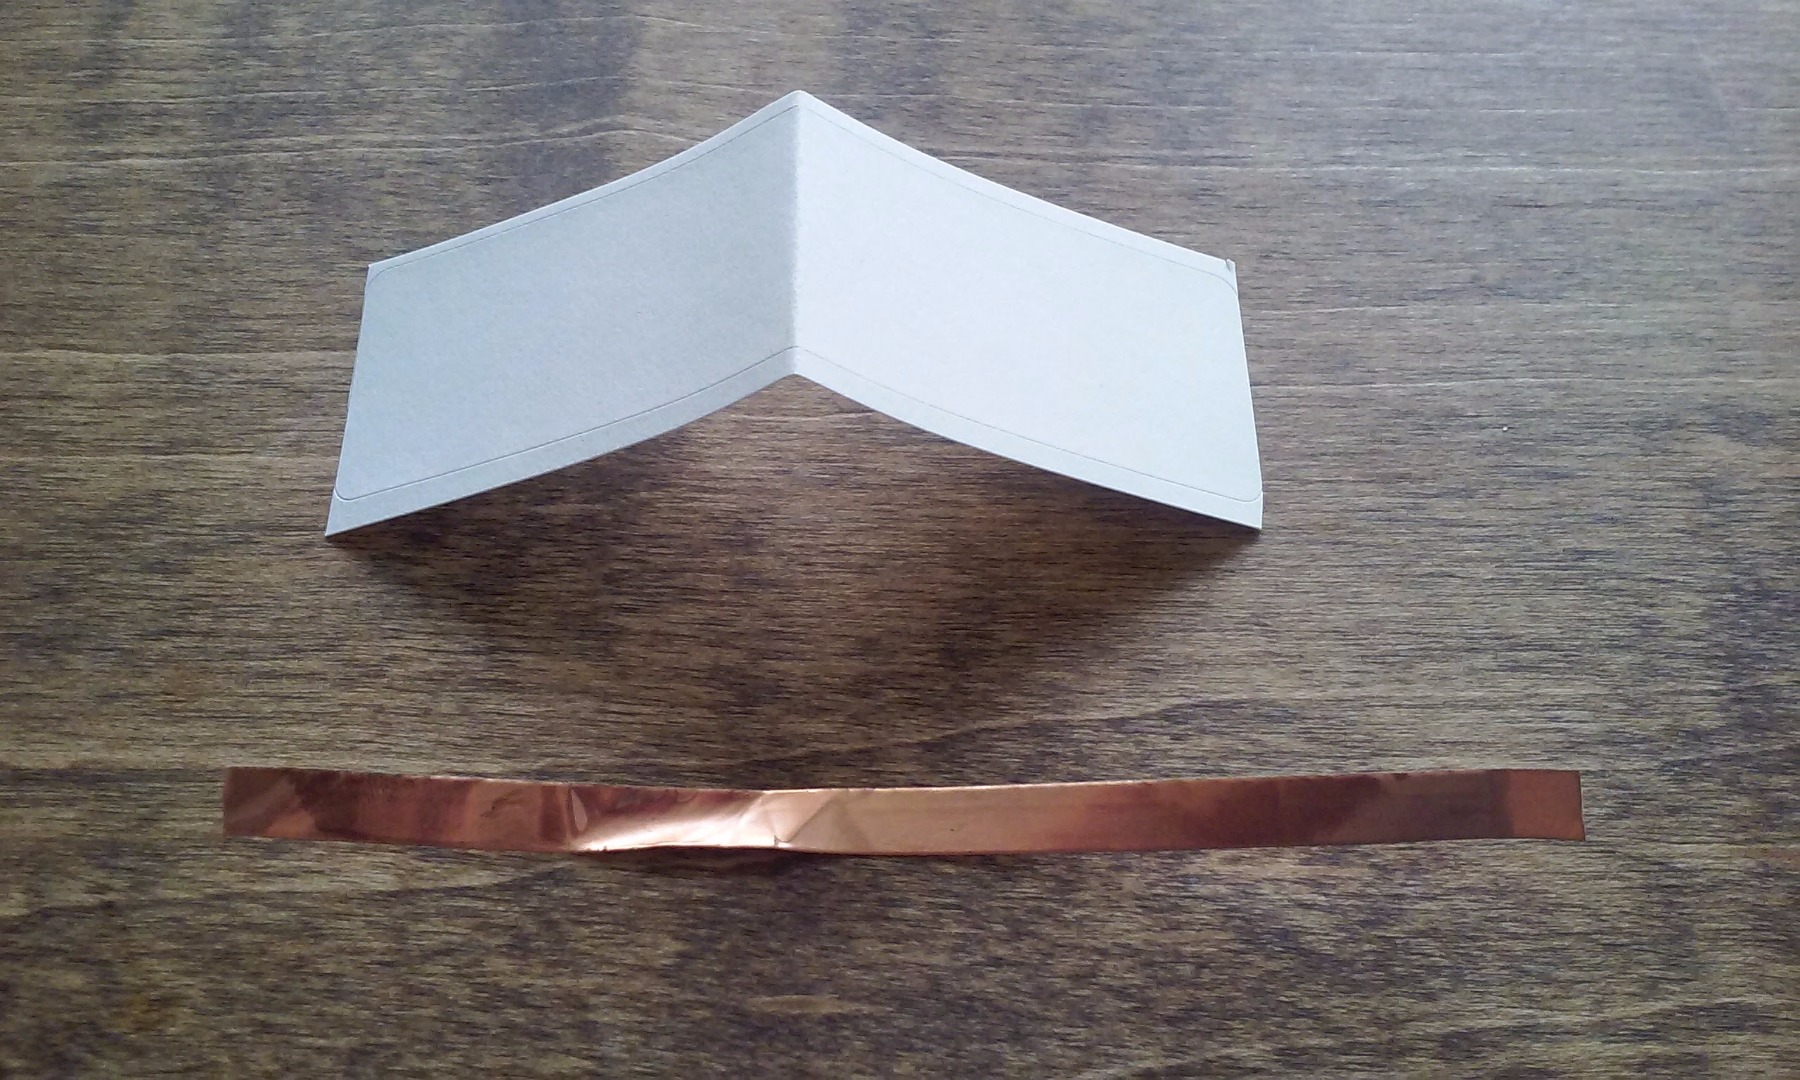
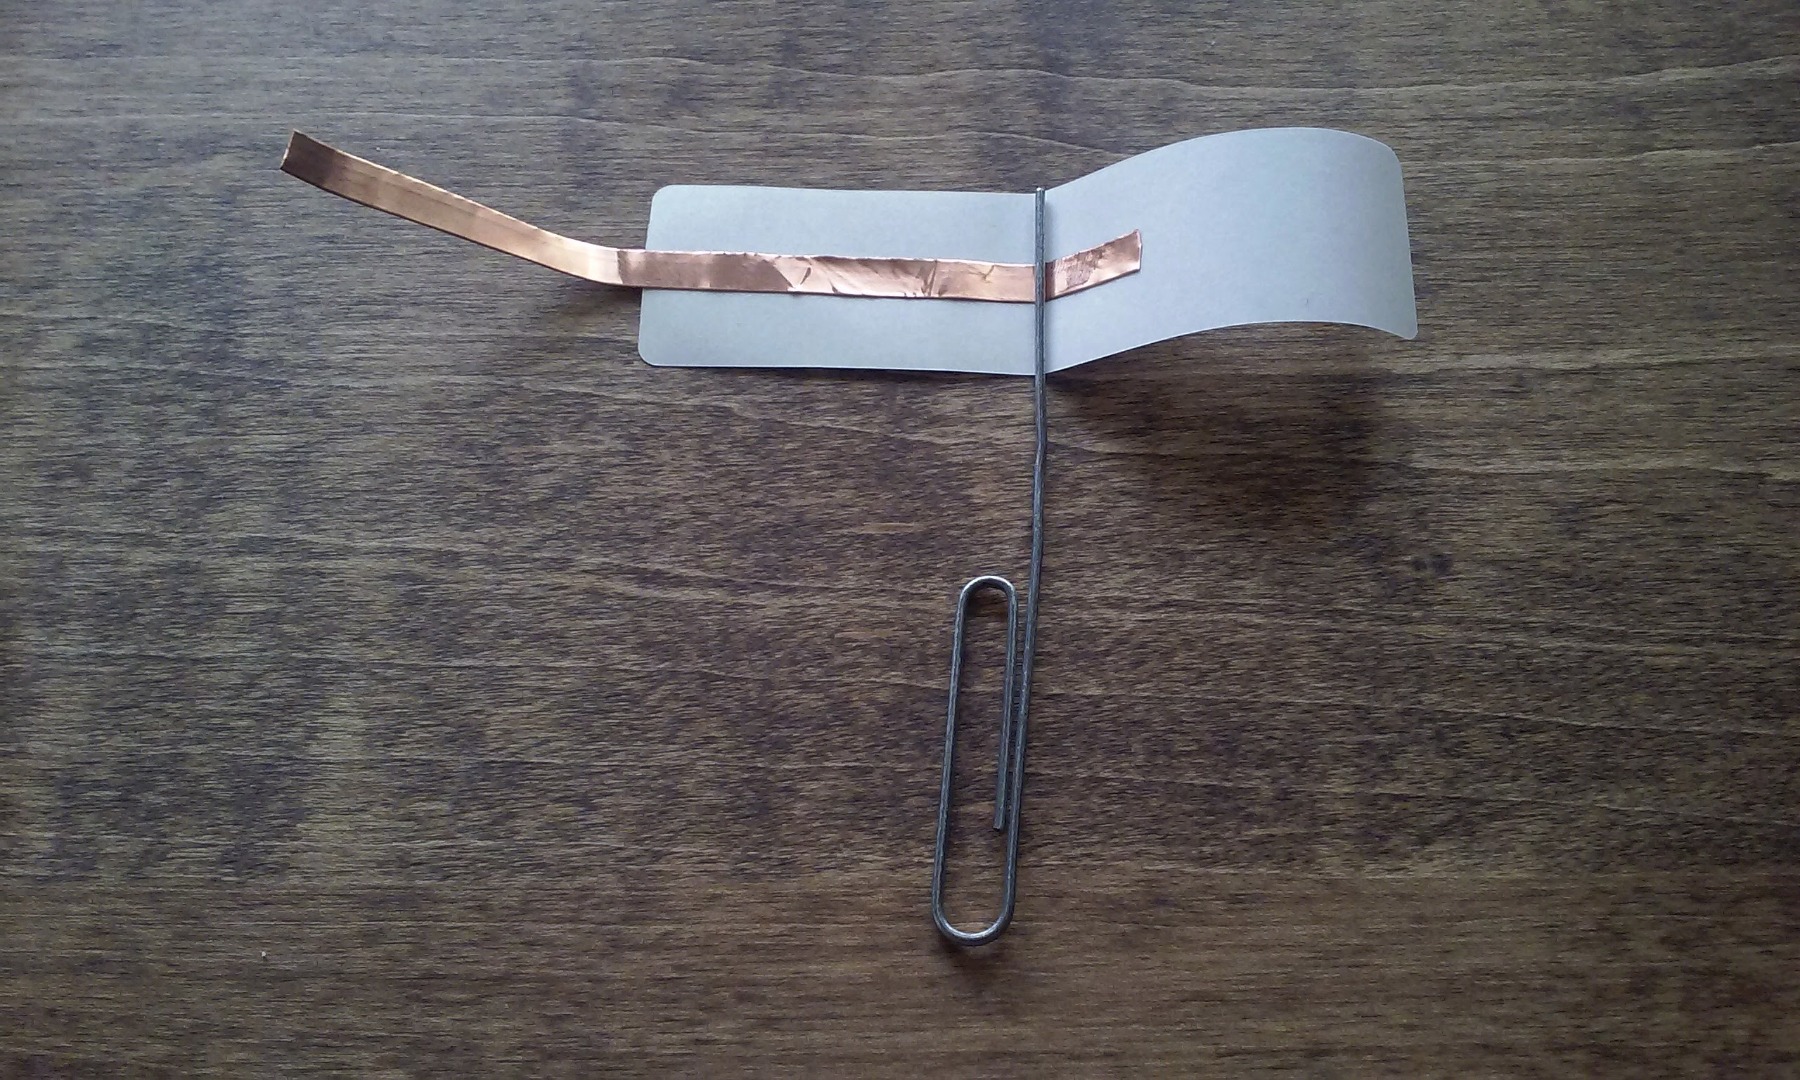
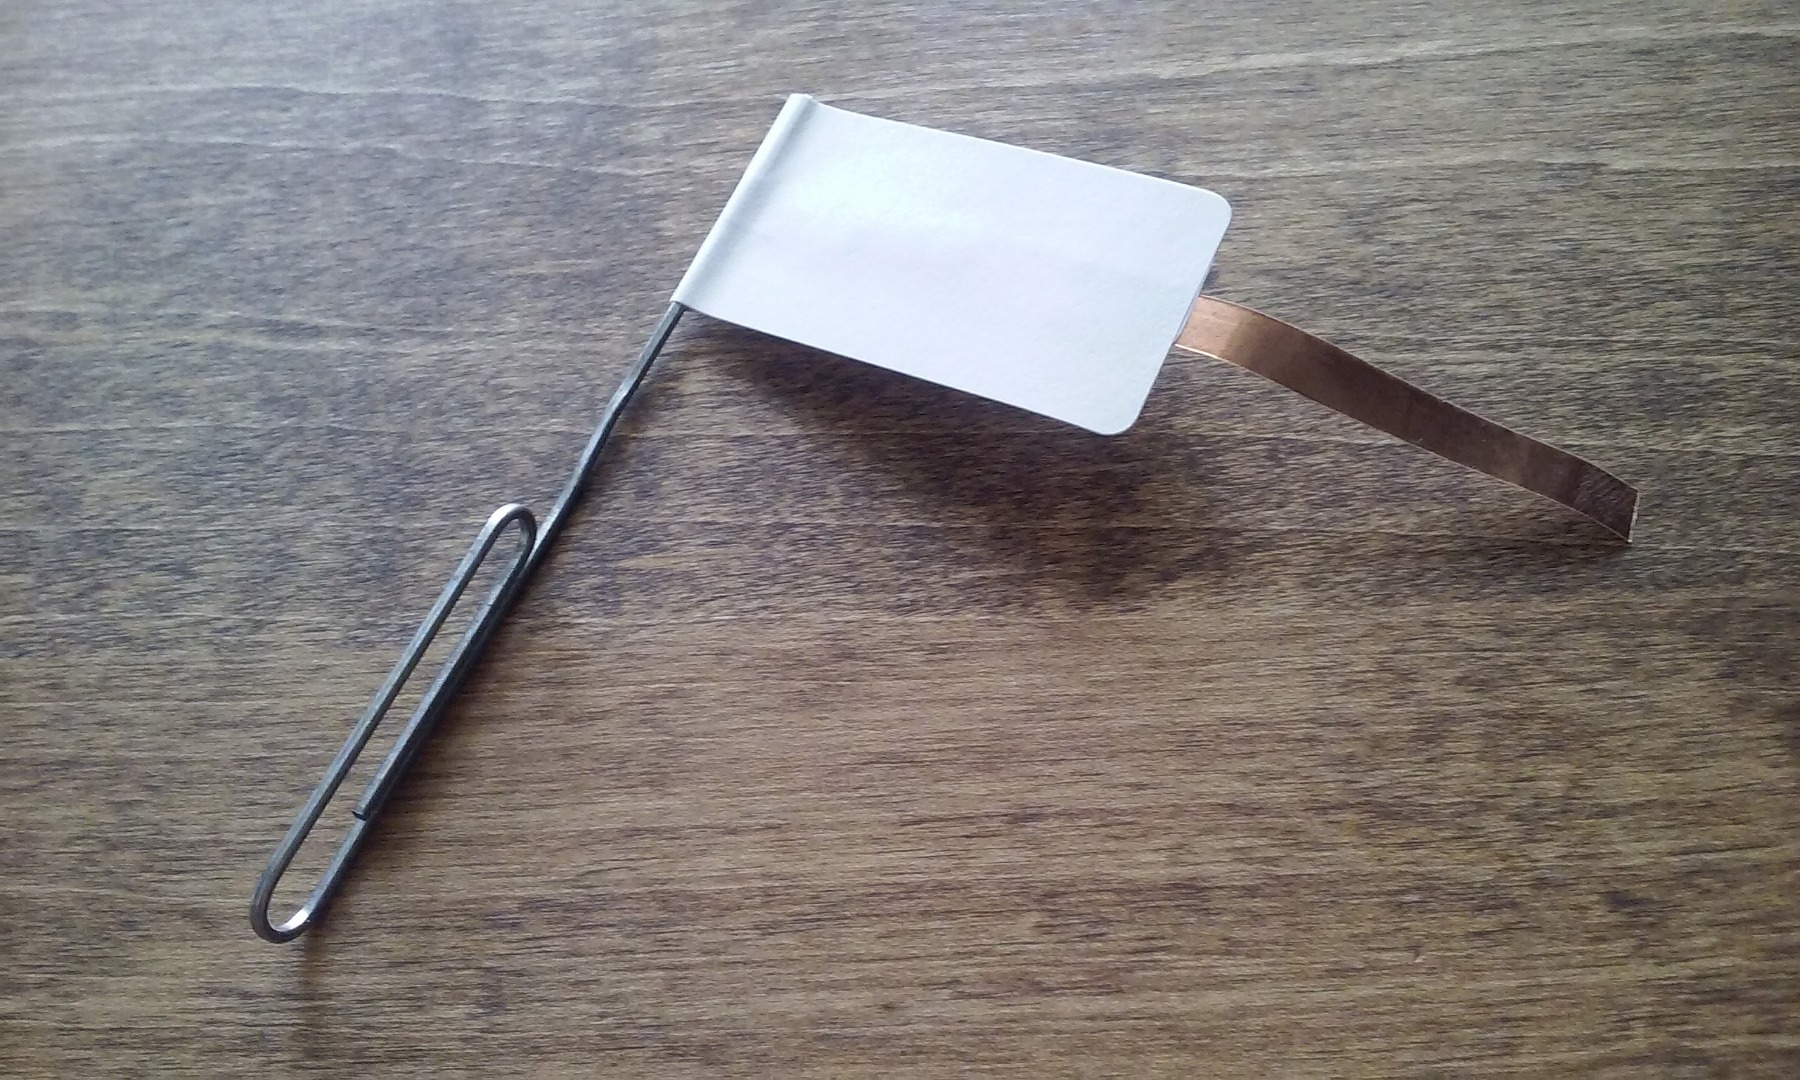
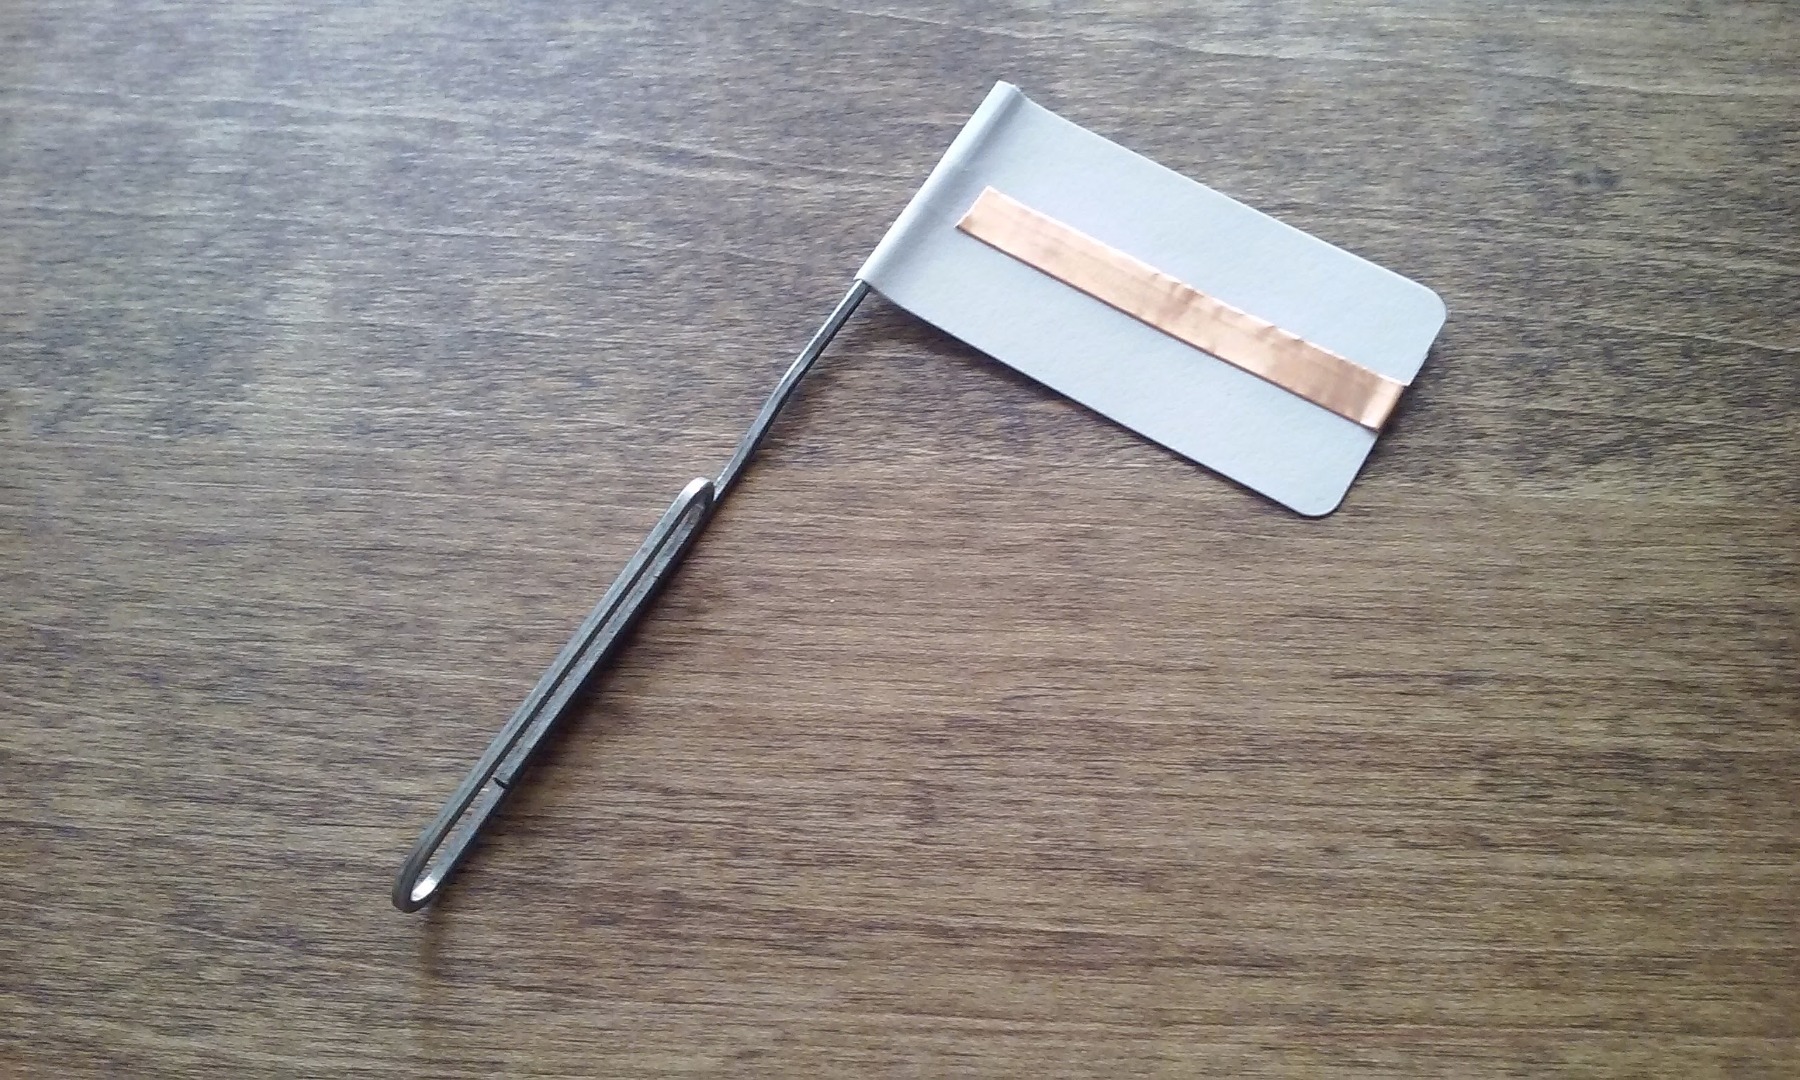
In order to "blow out" the candles, you need a switch that responds to air movement. This will be made from a small paper flag, some copper tape, and a couple of pieces of metal paperclip.
I used an adhesive address label that I had lying around (Avery 5027) for the flag. You can use a piece of cardstock or white paper and glue or tape just as easily.
Fold the paper in half. If it is an adhesive label, remove the back to expose the adhesive.
Lay the copper tape down on the paper/label adhesive-side-to-adhesive-side, such that the copper tape goes across the fold and out past one edge.
Place an unfolded paperclip along the fold and close the paper/label (if no adhesive, use glue or tape it closed). The tail end of the copper tape should be hanging out from between the folded paper/label.
Fold the copper tape around the edge and attach it to one side of the flag. It should go most of the way across that side of the flag.
Cut the paperclip wih wire cutters so that about 3/8" of paperclip remains protruding from the flag.
Write "Happy Birthday", or whatever you wish on the black side of the flag.
Completing the Switch and Trying It Out
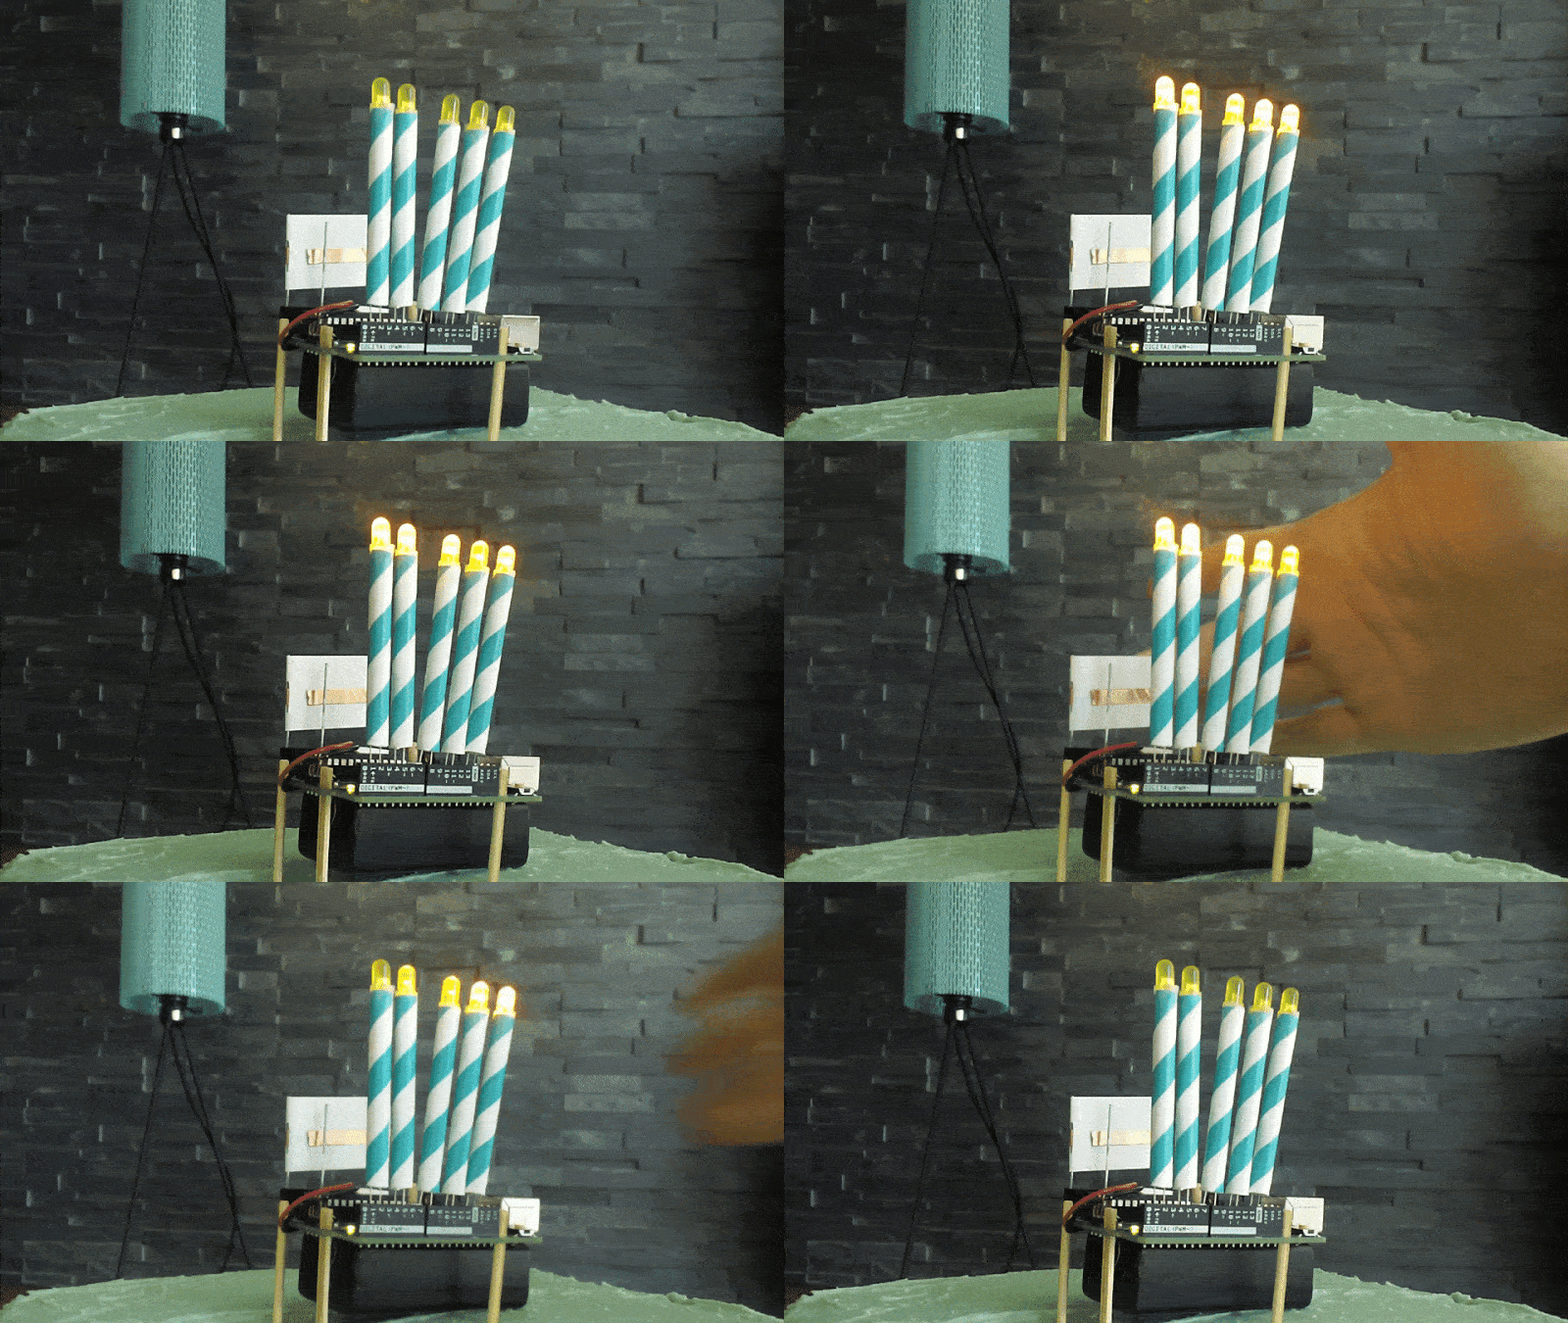.gif)
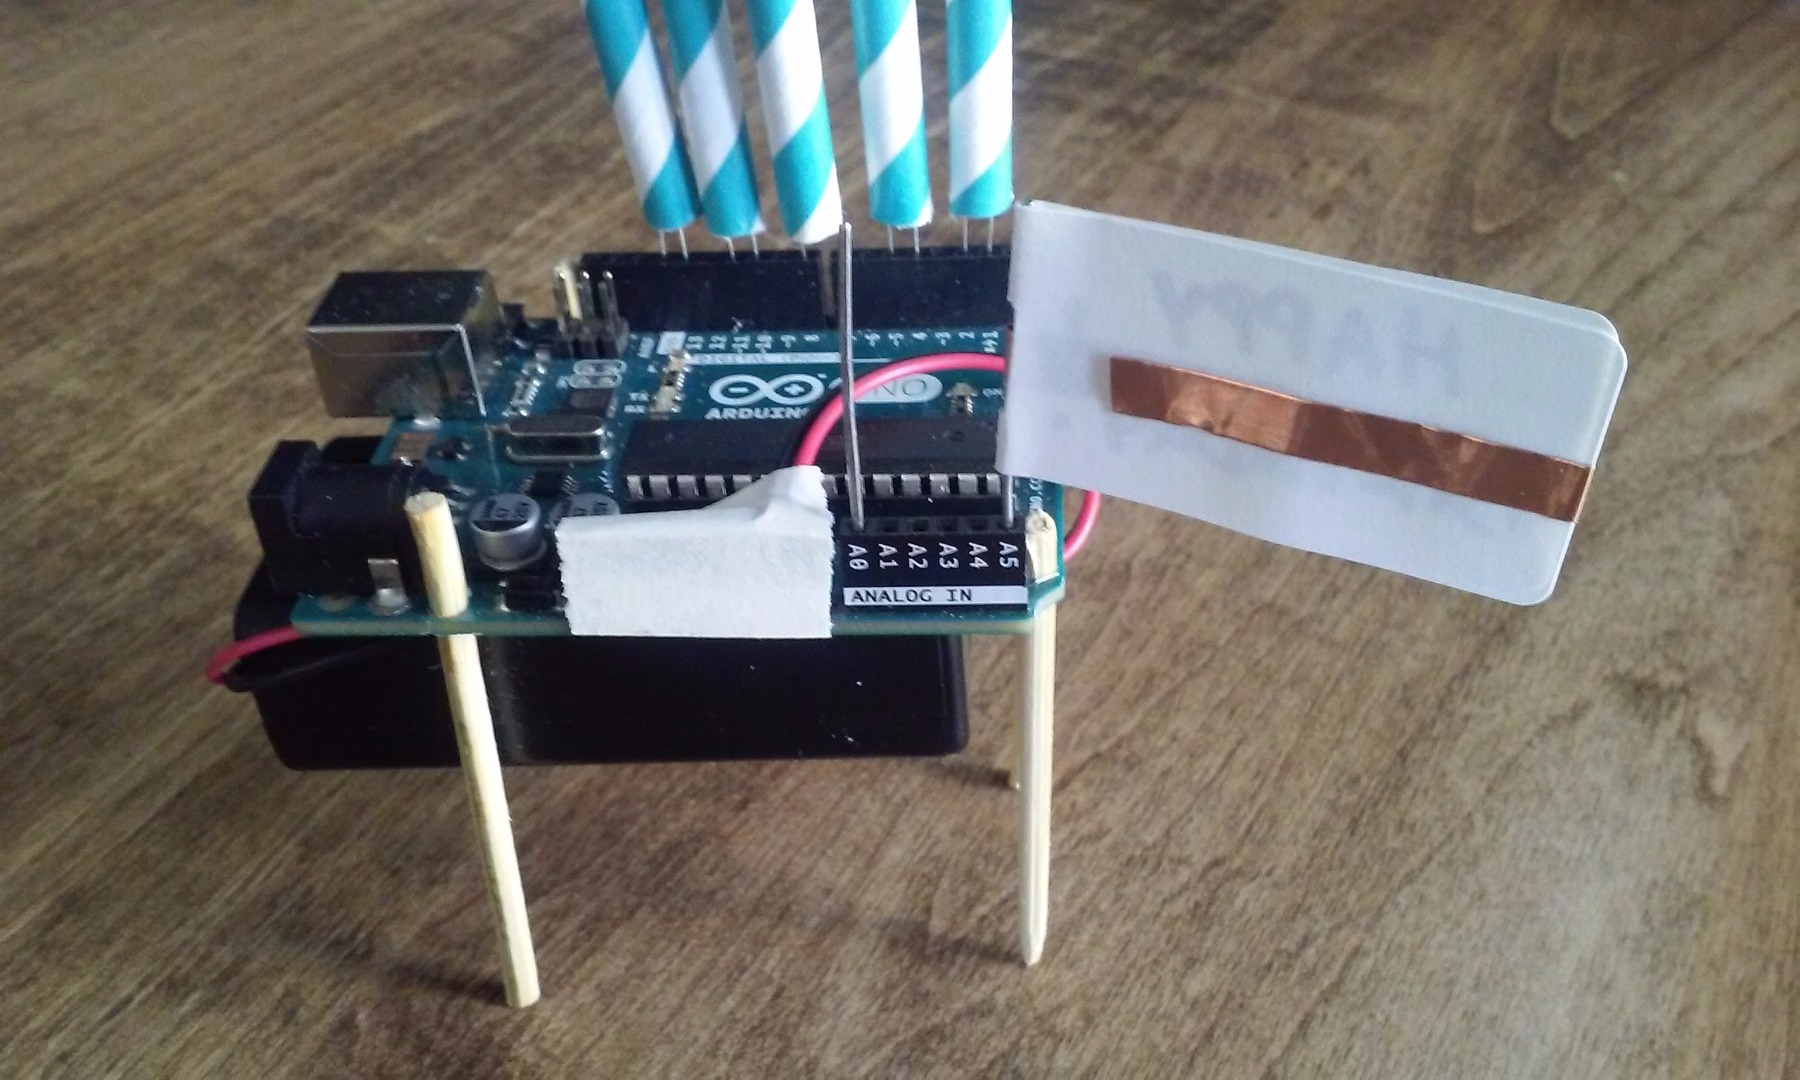
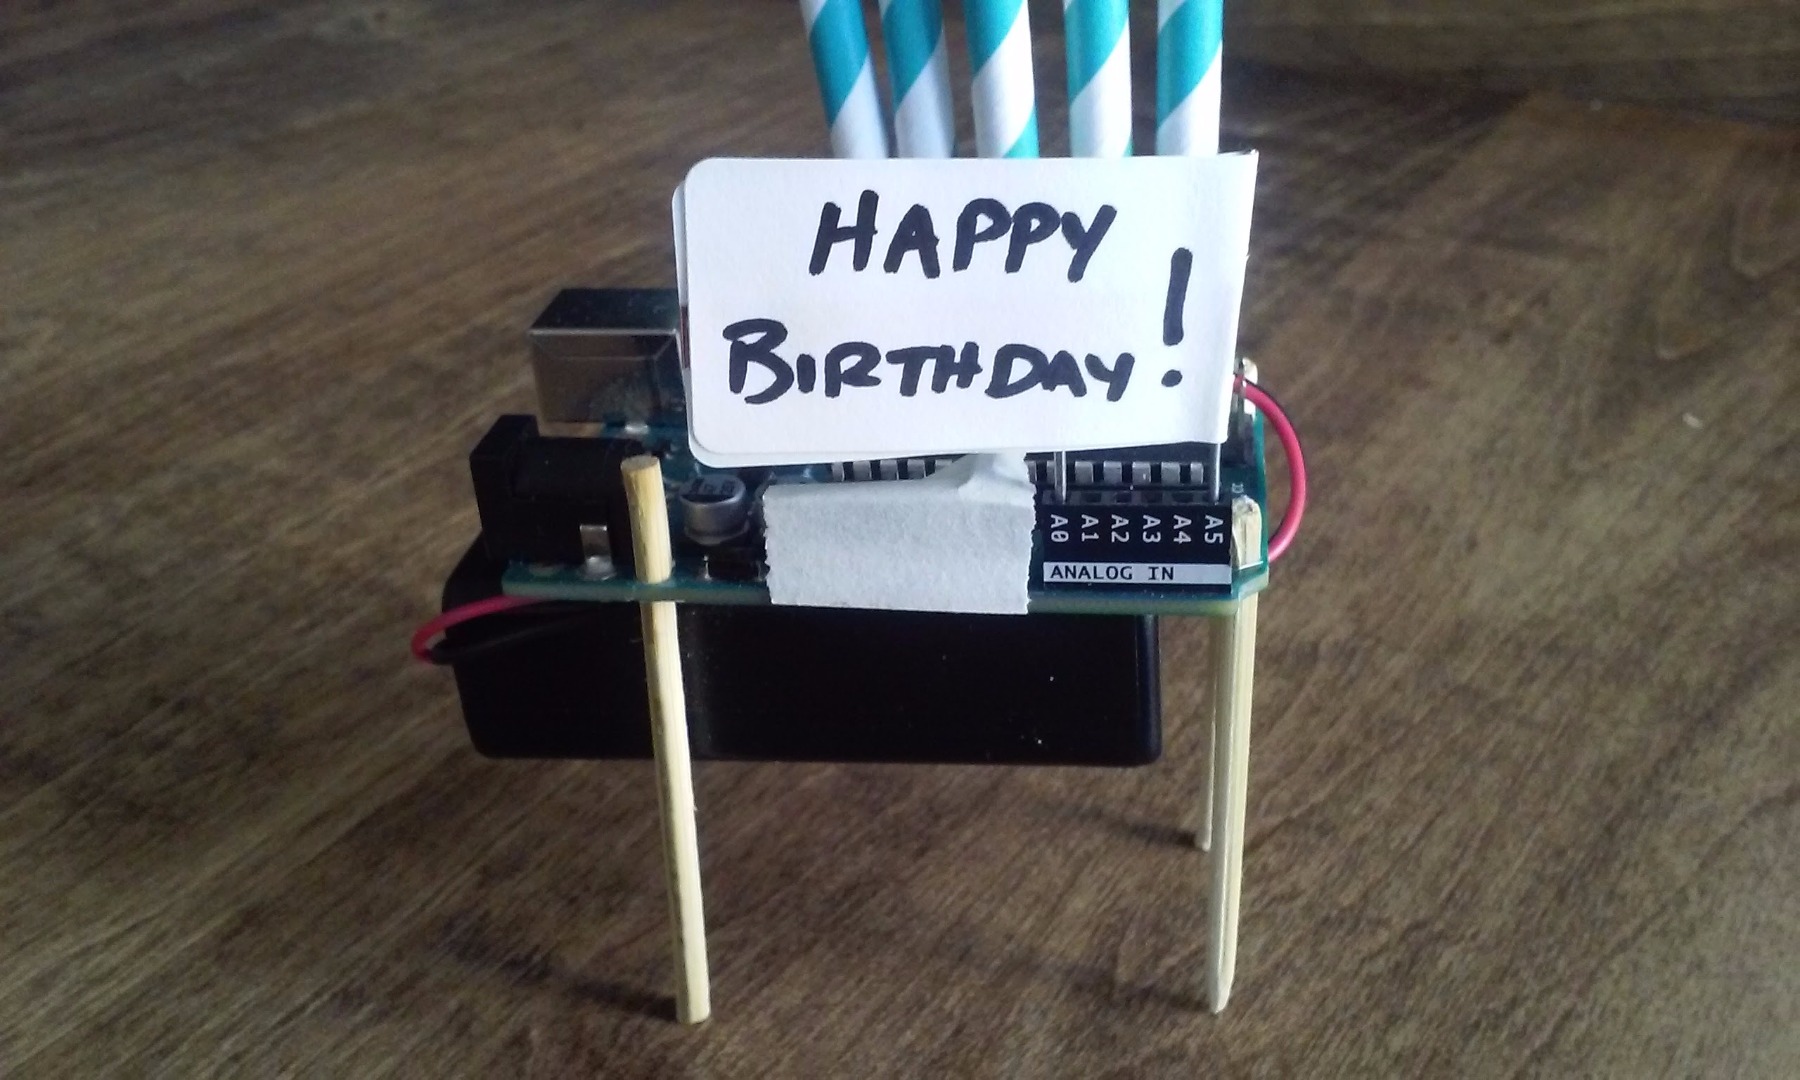
Place the flag in either the analog in A0 or A5 hole, depending on which direction the flag faces with the words visible.
Trim a straight section of the paperclip so that it is similar length to the piece in the flag. Place it in the other hole (A0 or A5).
When the copper tape comes into contact with the other paperclip piece, the switch is completed. Position the flag so that it is almost touching the other paperclip.
If the Arduino Uno is powered and the candles are in place, they will go out when the switch is closed by blowing on the flag.
You can press the reset switch on the Arduino Uno to turn the candles back on.
Have fun and a happy birthday!