Arduino AI Fun With TensorFlow Lite, Via DumbDisplay
by Trevor Lee in Circuits > Arduino
1777 Views, 4 Favorites, 0 Comments
Arduino AI Fun With TensorFlow Lite, Via DumbDisplay
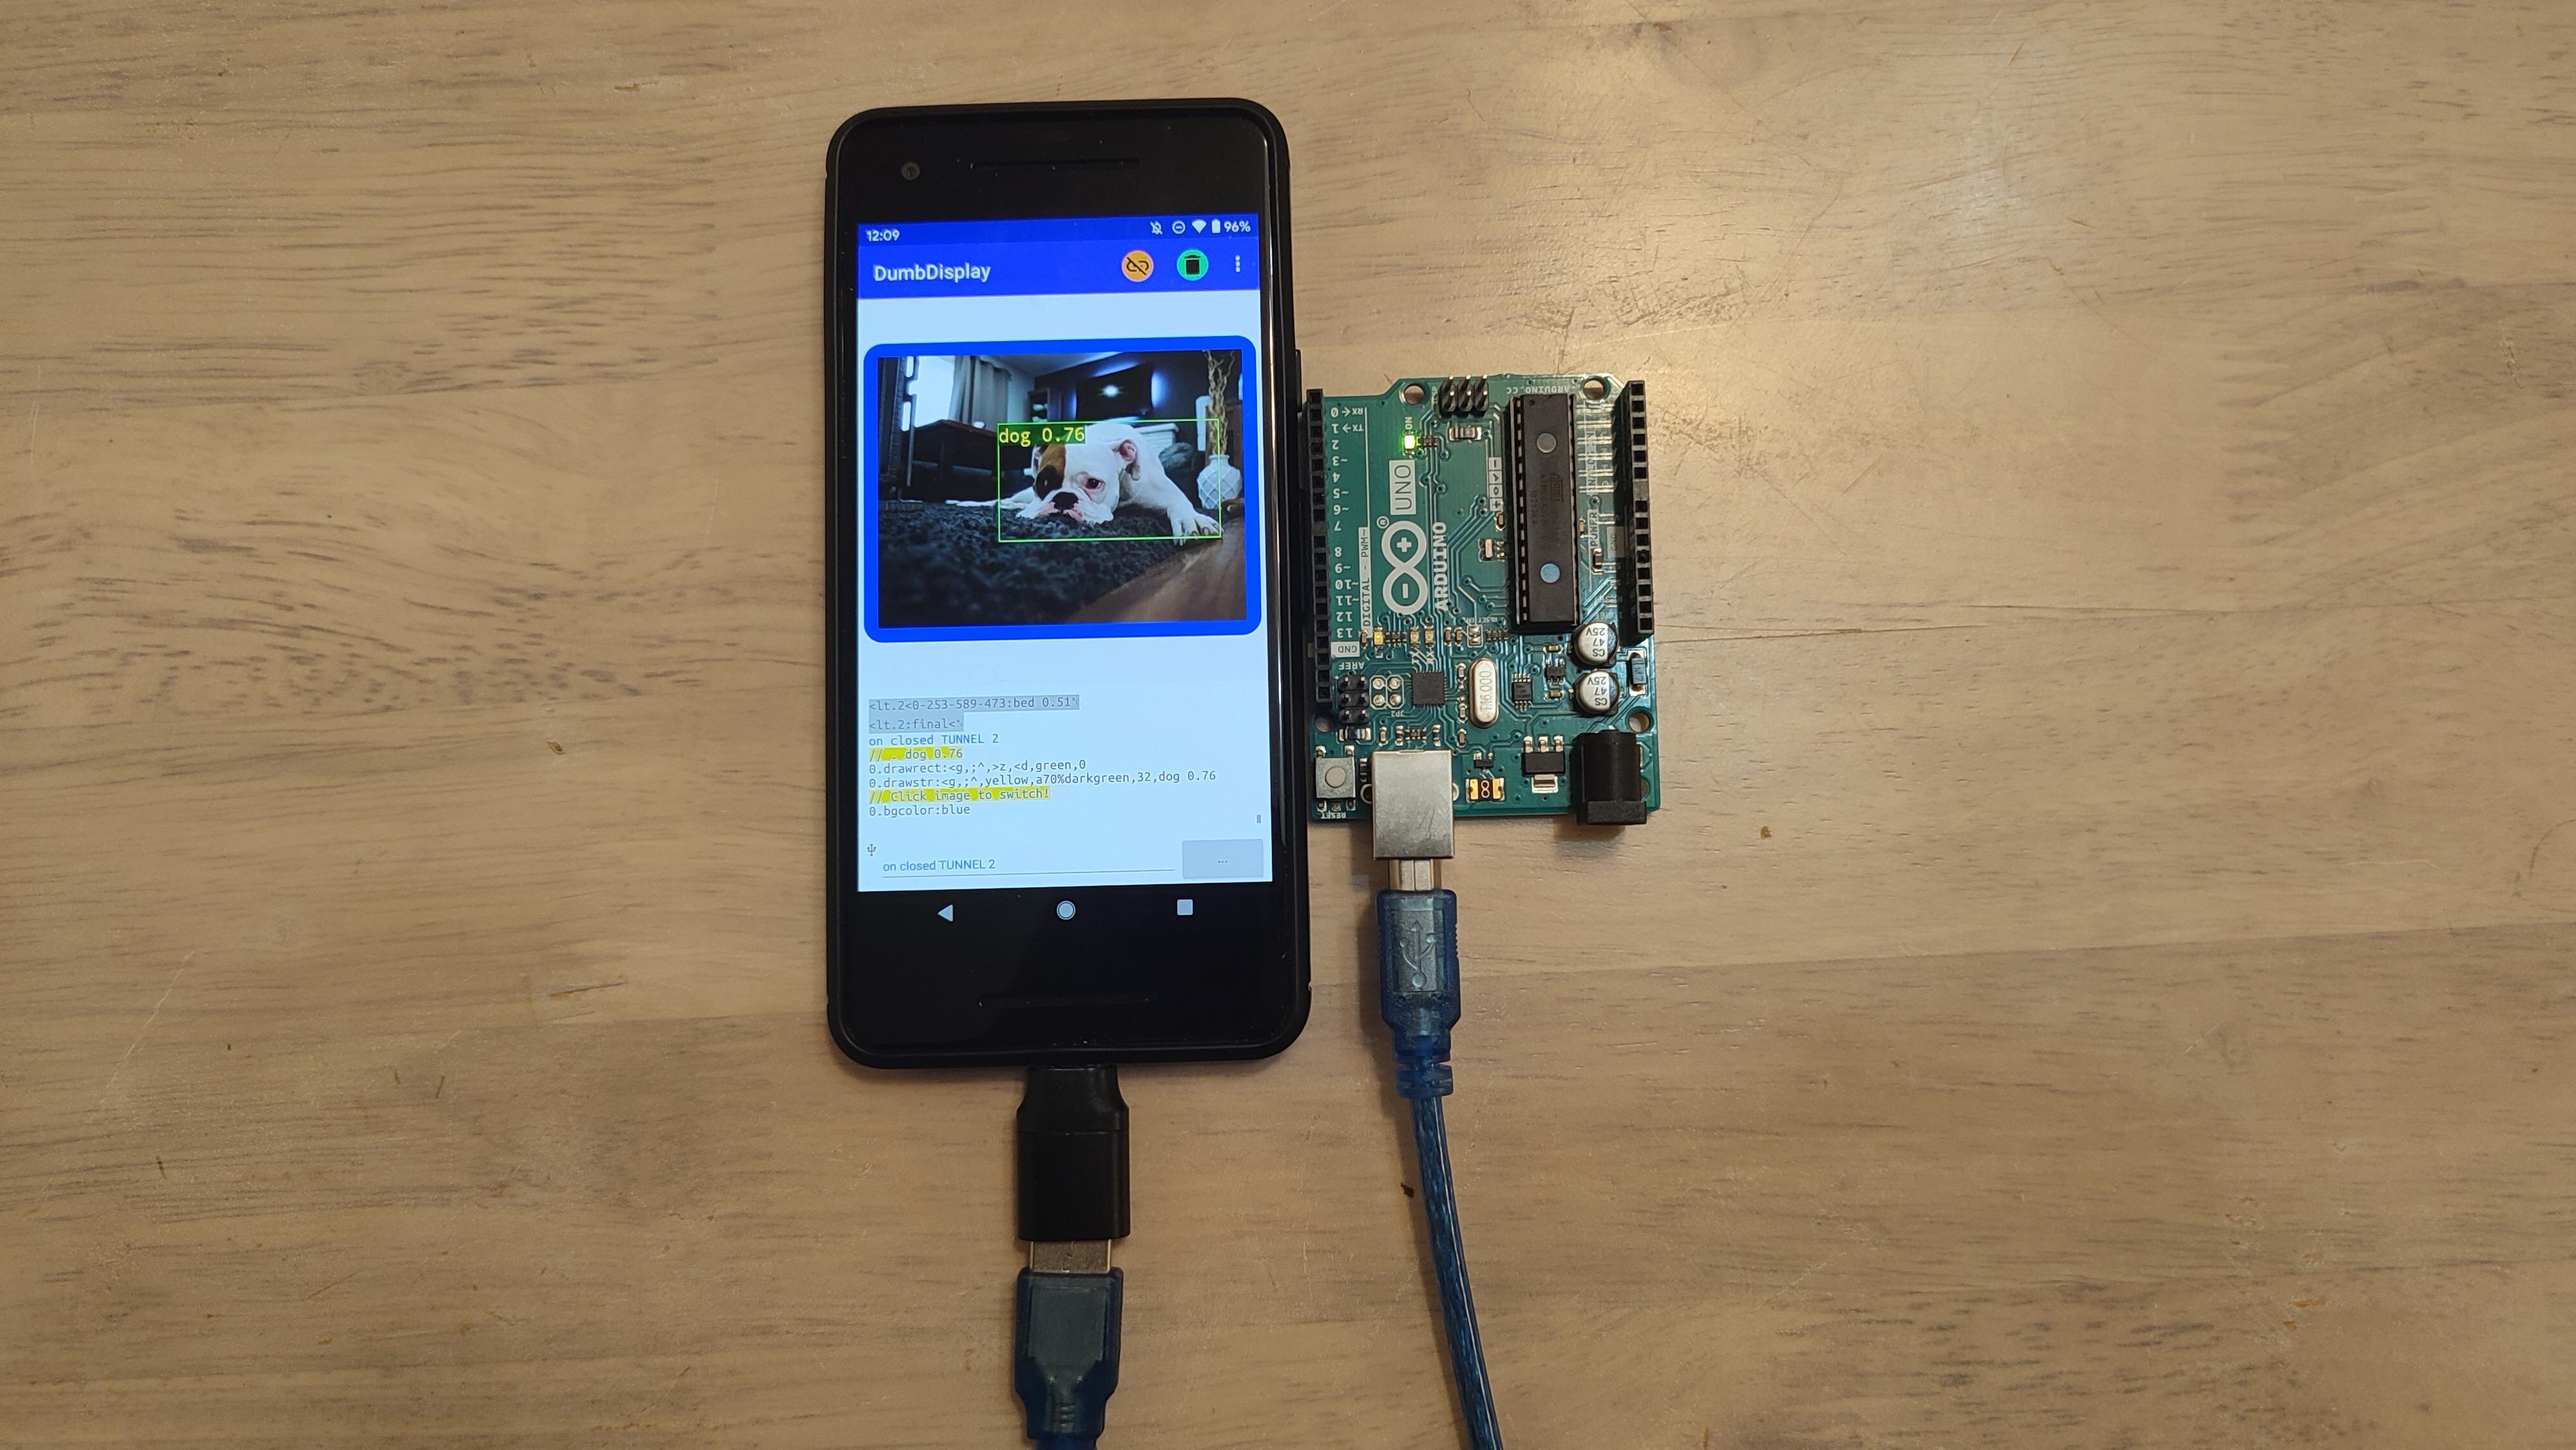
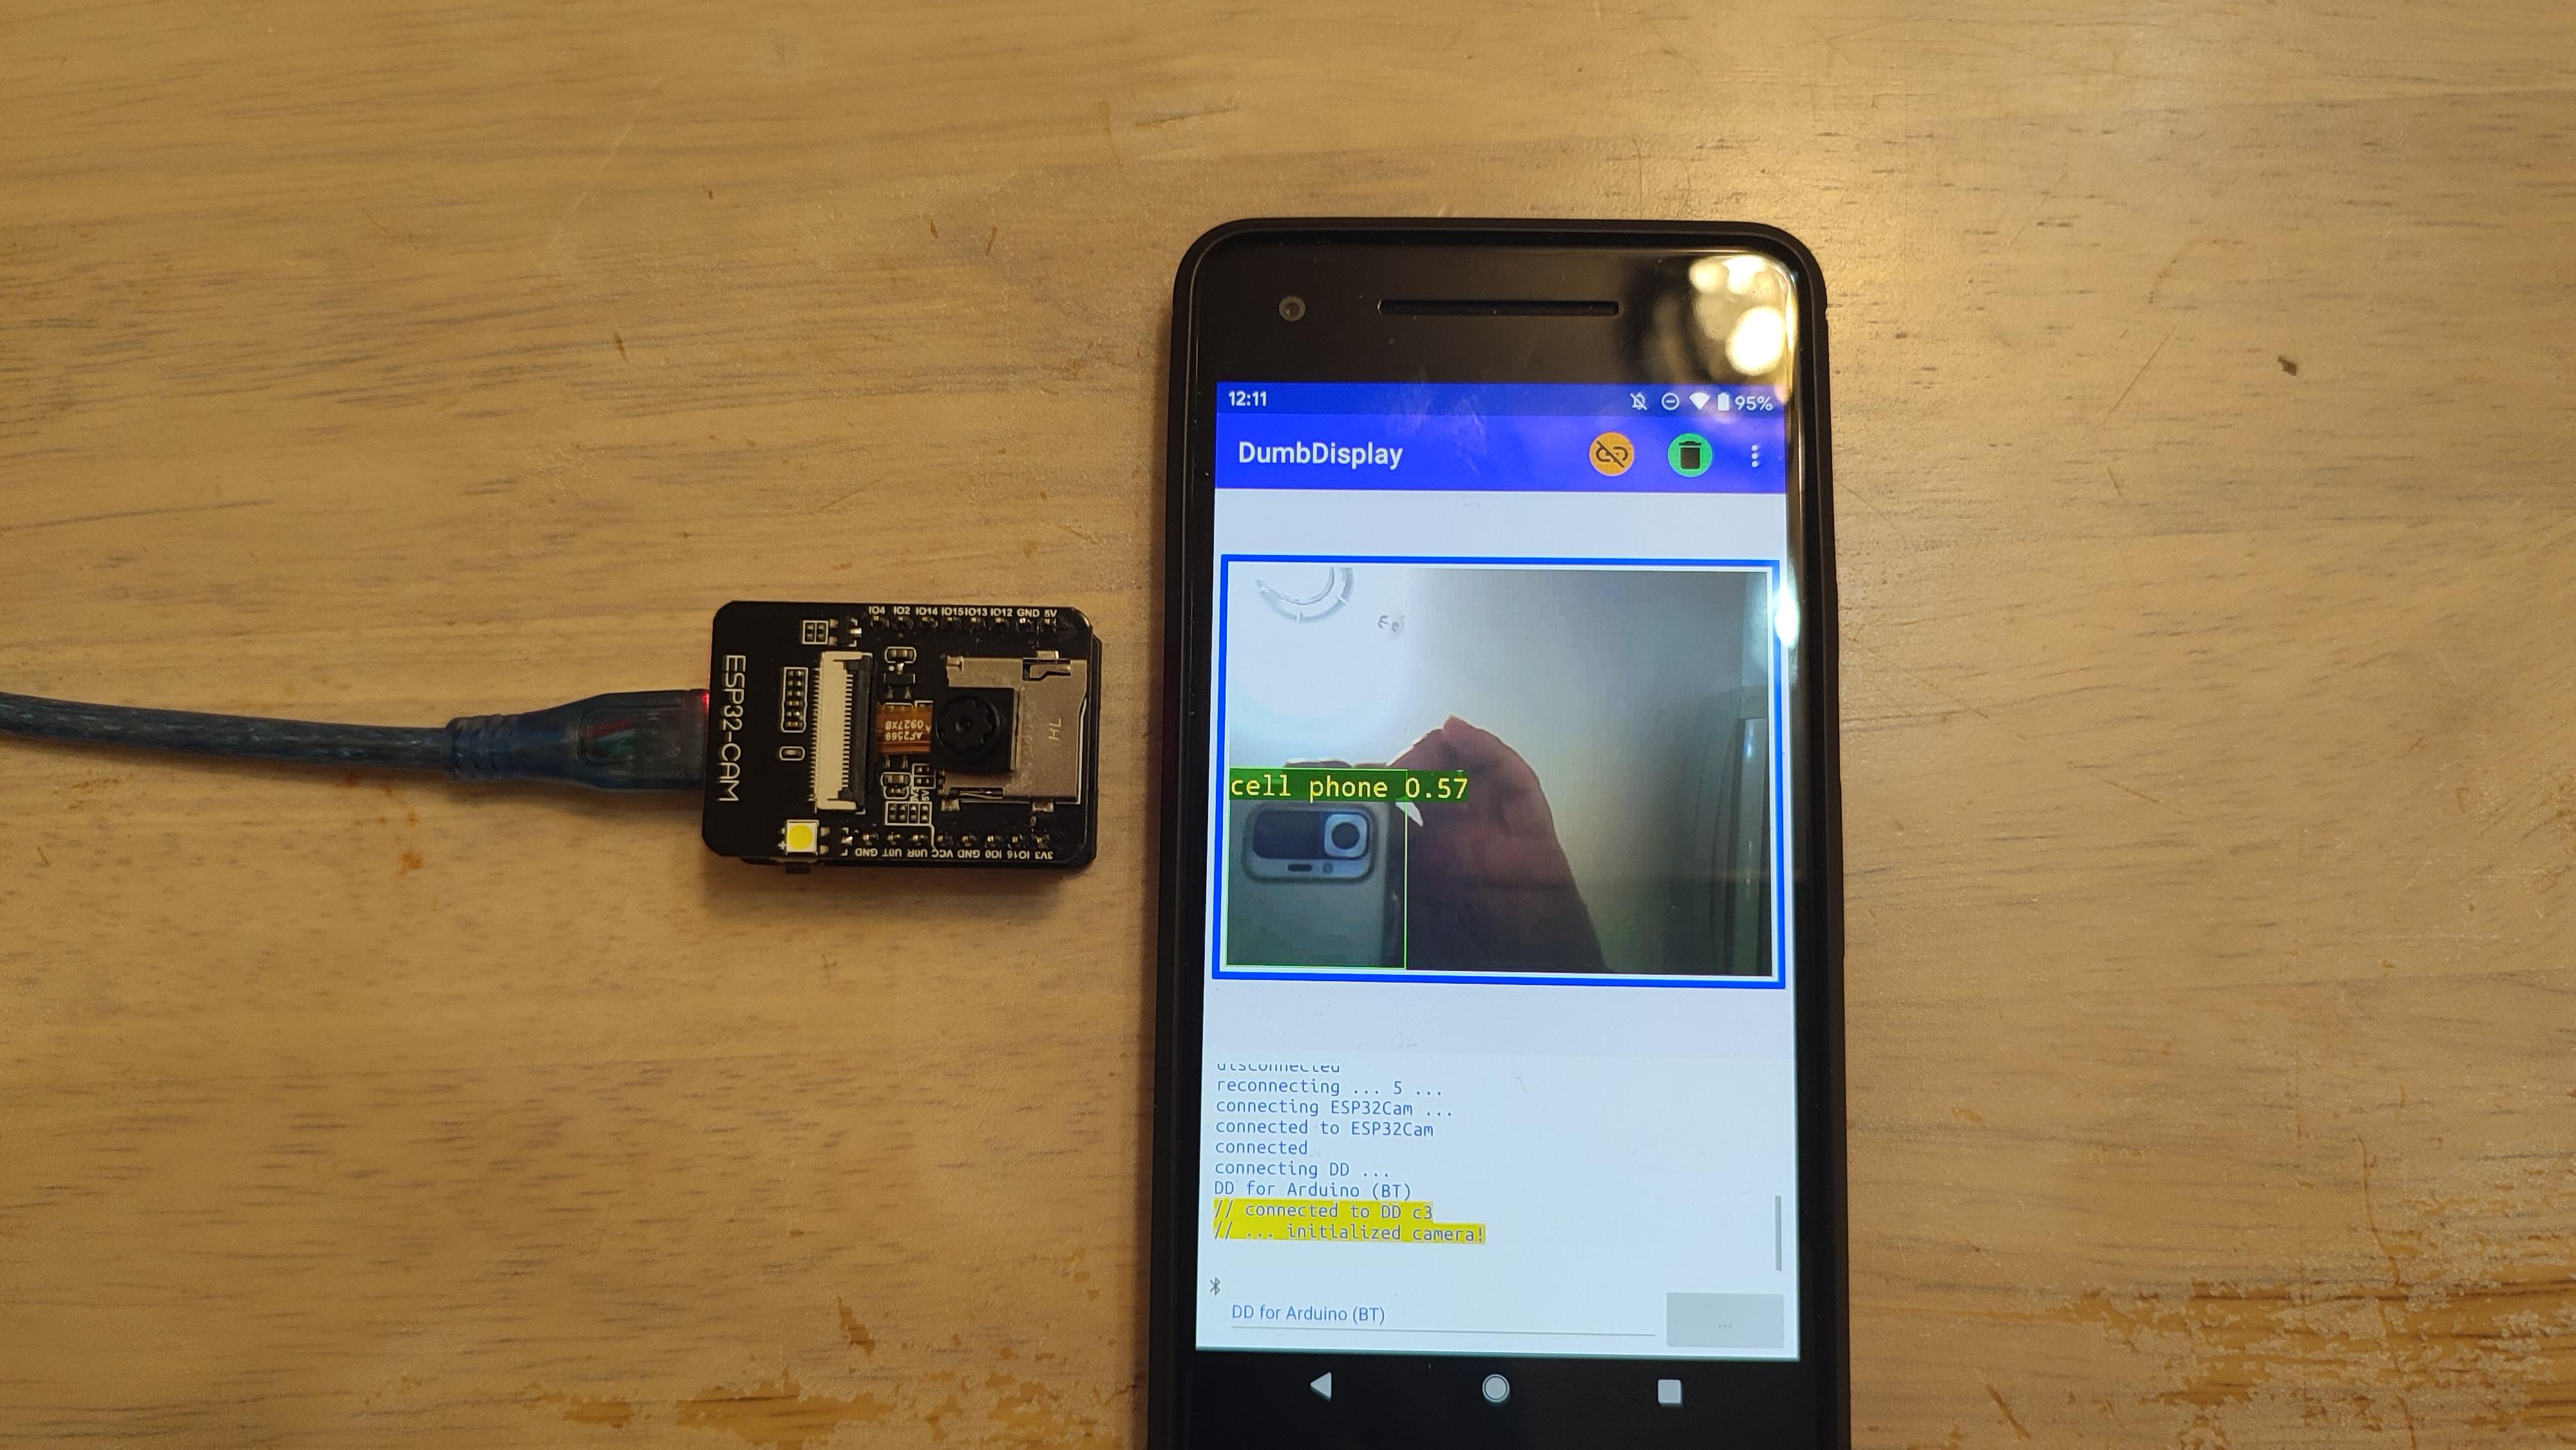
Due to the limited powerfulness of Arduino UNO, it is likely not practical to expect to run AI object detection model using Arduino UNO. Nevertheless, it doesn't stop the fun, since the heavy lifting of running TensorFlow Lite can be delegated to your relatively much more powerful mobile phone.
Indeed, this is the direction. Through DumbDisplay, microcontroller will do the driving, nevertheless, it is your mobile phone that will run object detection model with TensorFlow Lite.
Two demos will be presented in this post. One with Arduino UNO; one with ESP32-CAM.
Preparation
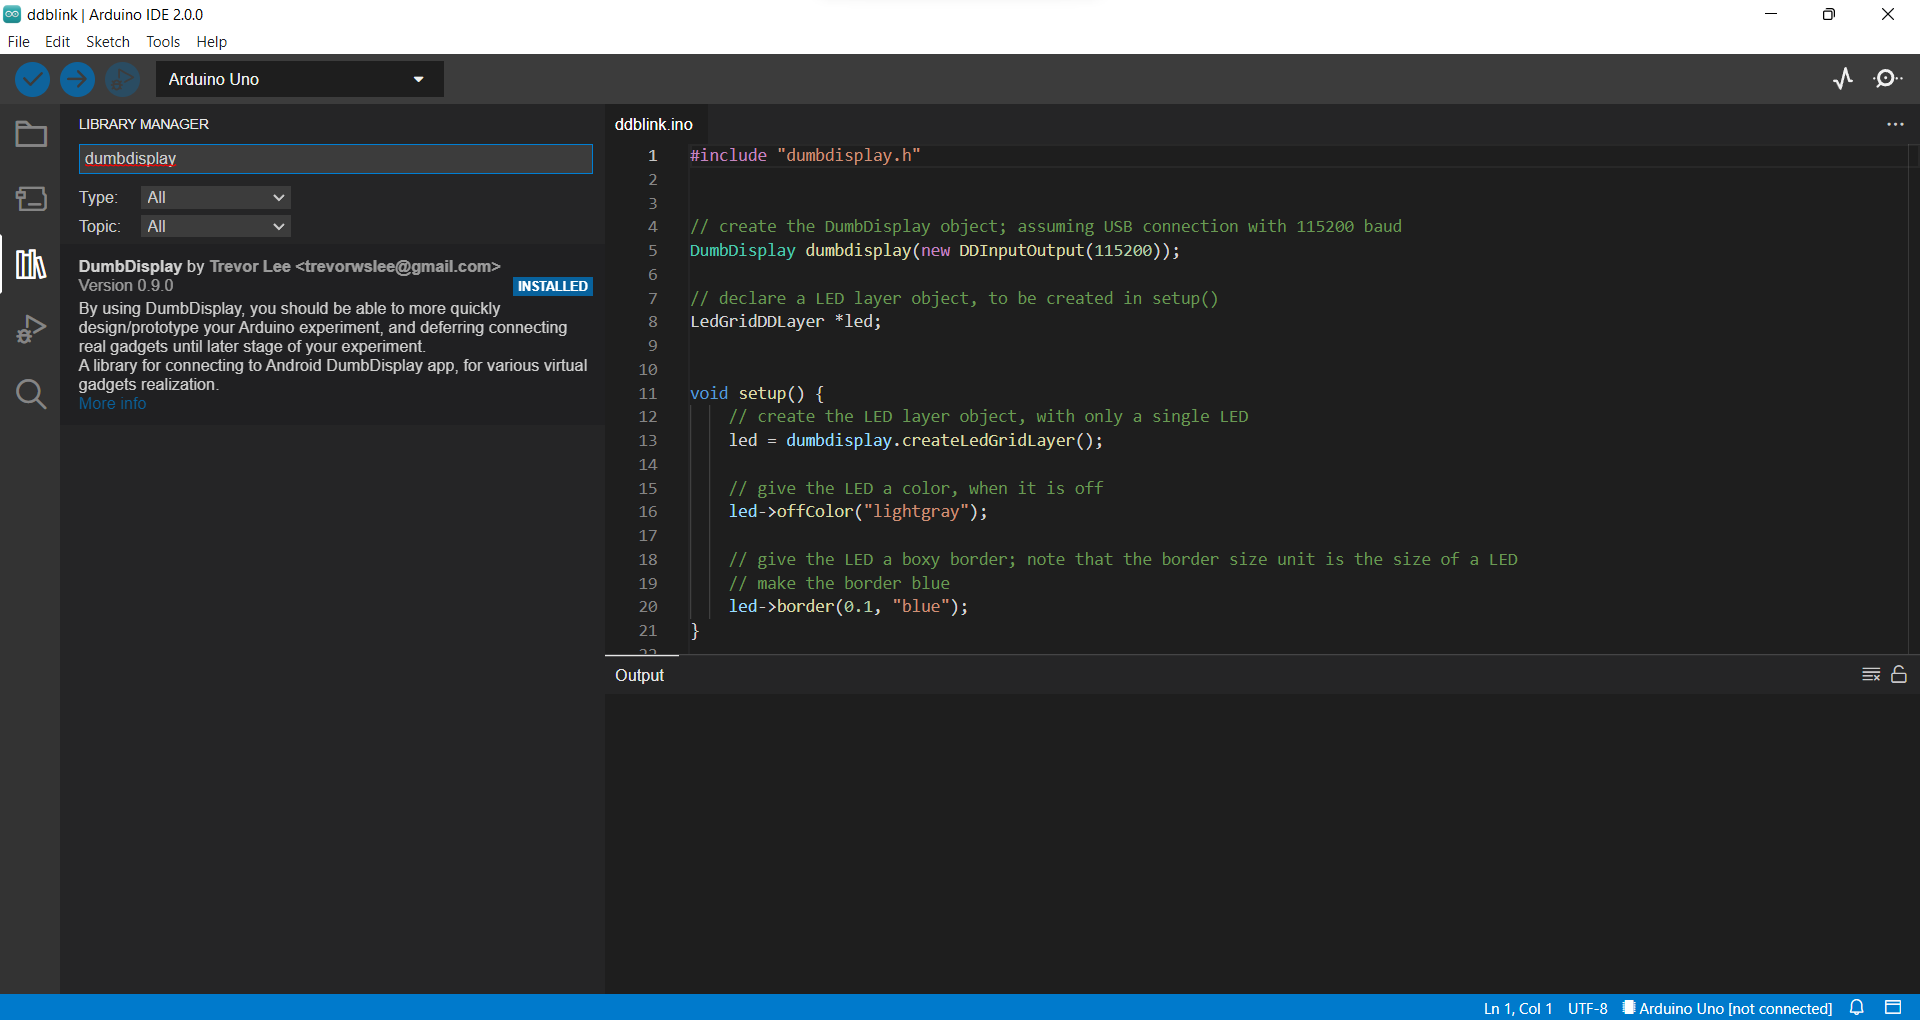
In order to be able to compile and run the sketch shown here, you will first need to install the DumbDisplay Arduino library. Open your Arduino IDE; go to the menu item Tools | Manage Libraries, and type "dumbdisplay" in the search box there.
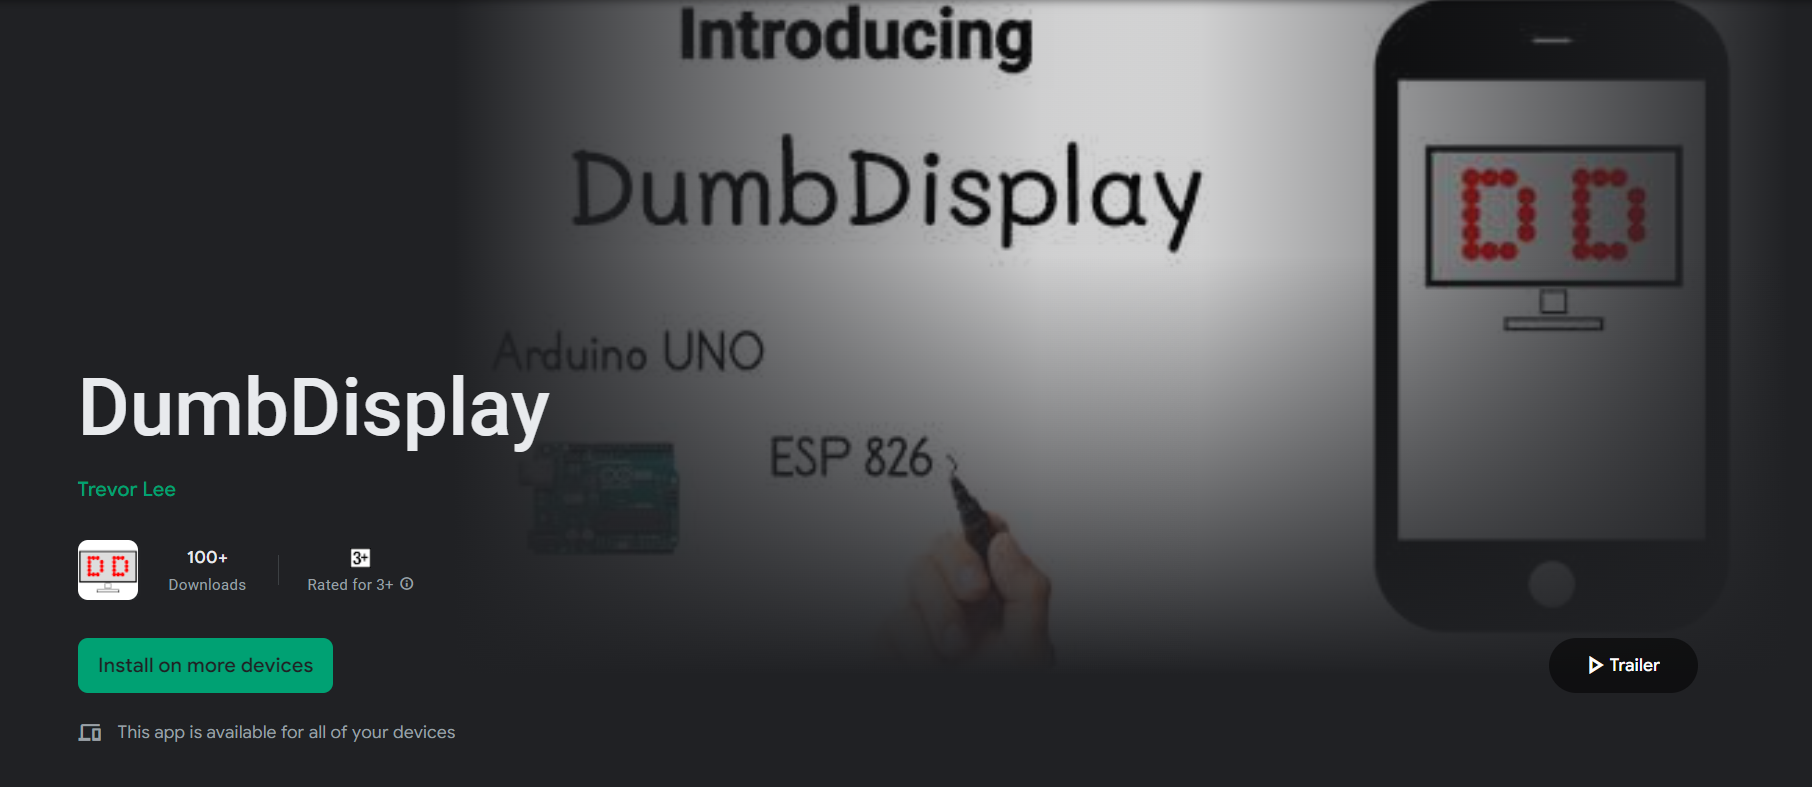
On the other side -- your Android phone side -- you will need to install the DumbDisplay Android app.
Arduino UNO Demo
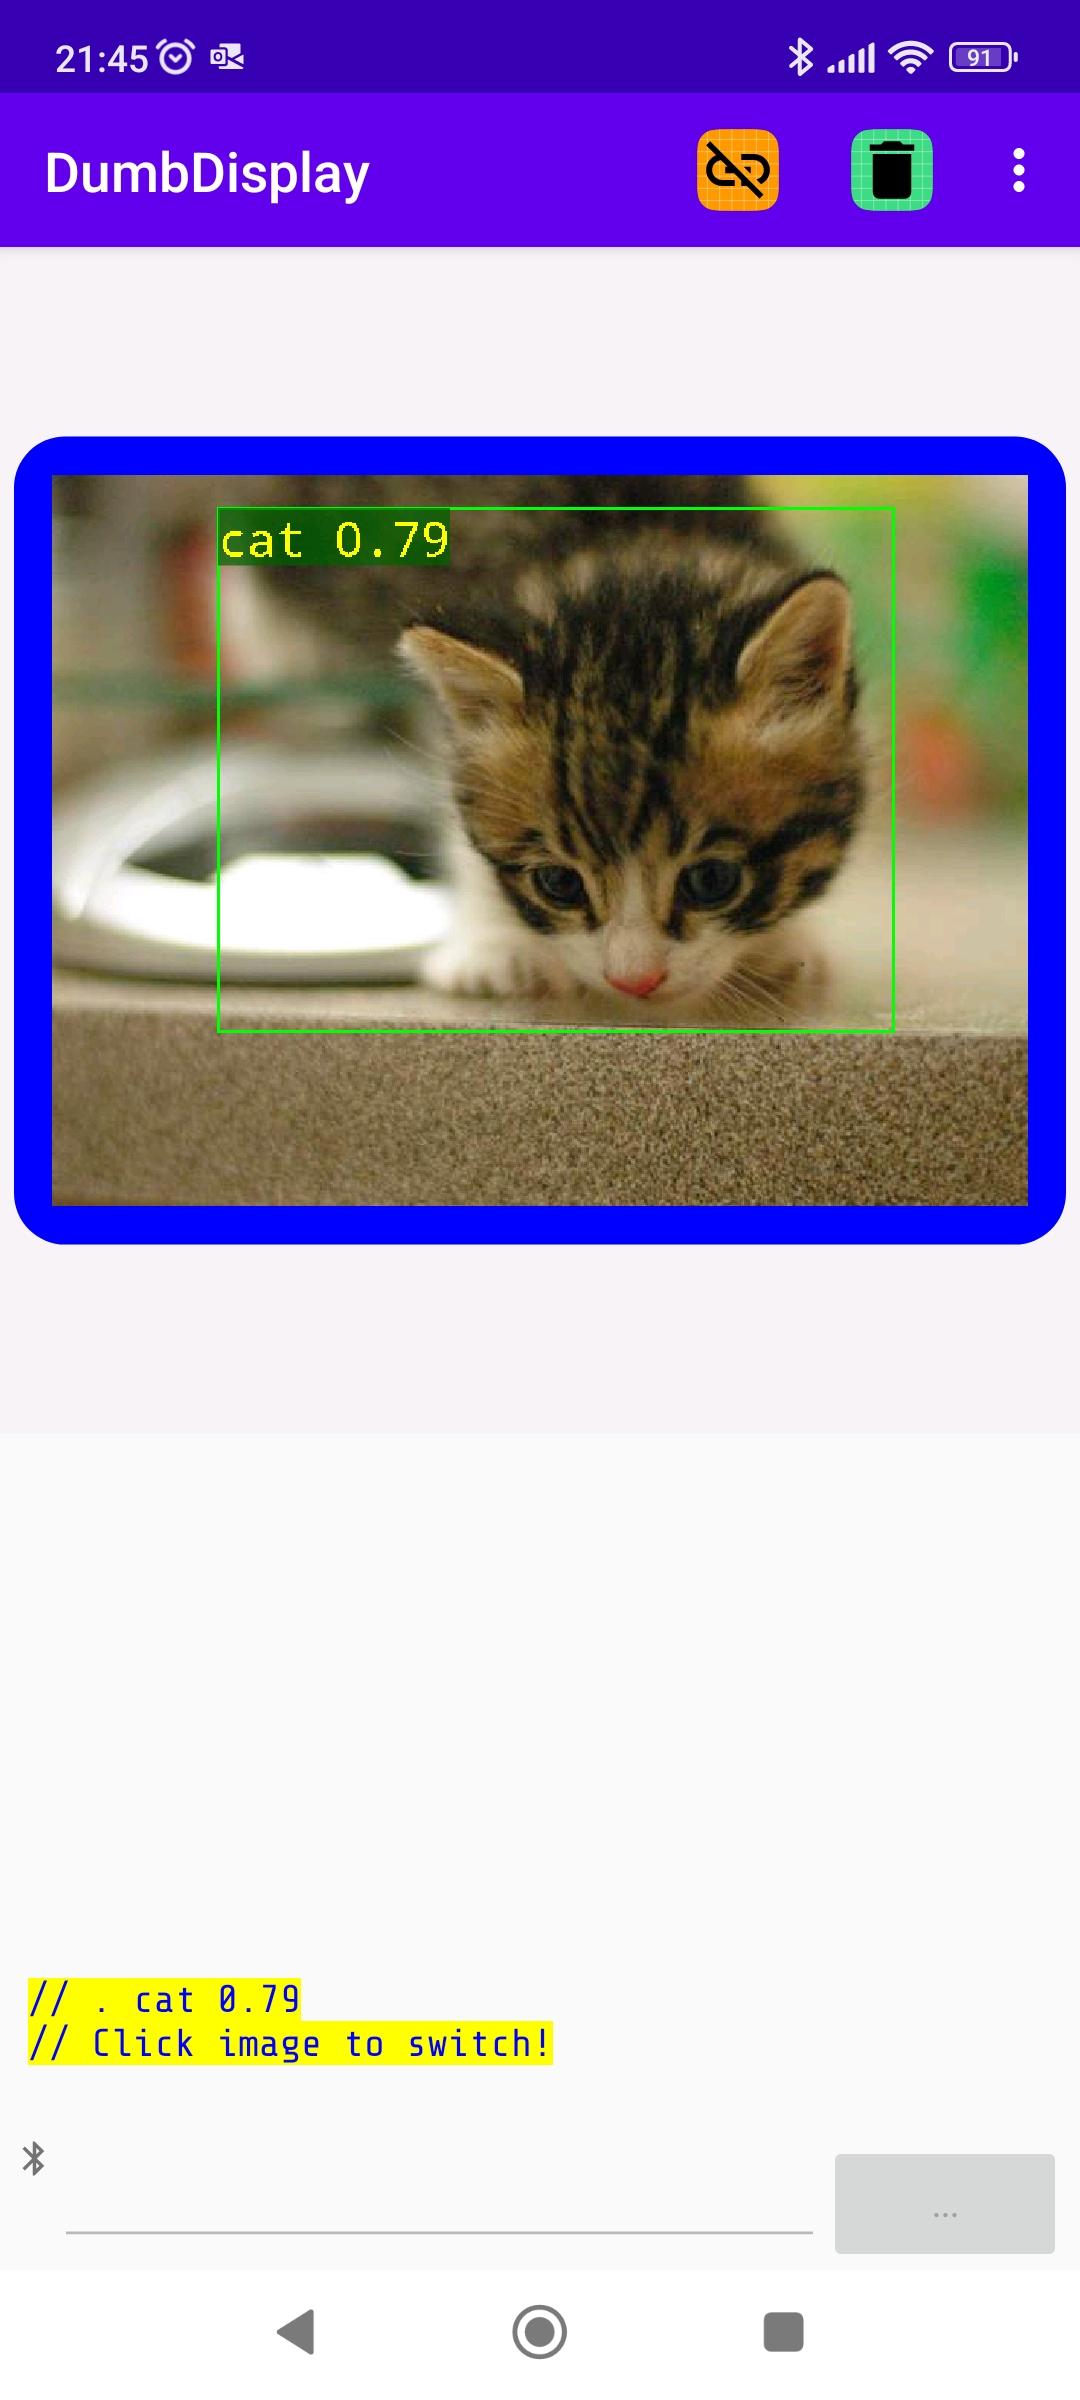
The first demo runs on Arduino UNO.
- It drives DumbDisplay Android app to download an image from an URL it chooses.
- After successful downloading of the image, it draws the downloaded image to DumbDisplay.
- Then it sends a request to DumbDisplay Android app to run example object detection model with TensorFlow Lite, on the downloaded image.
- Once it gets back object detection results, it shows them on the image drawn.
Arduino UNO Demo Sketch
Not only that the sketch can be run with Arduino UNO, it can be run with other types of microcontroller boards, like Arduino Nano or ESP32. You can download the sketch here.
Note that when run with ESP32, Bluetooth connection to DumbDisplay Android app is set up with name BT32 (reference); otherwise, like in Arduino UNO case, OTG connection is assumed (reference).
#if defined(ESP32)
  // ESP32 board ... additional use Bluetooth with name "BT32"
  #include "esp32dumbdisplay.h"
  DumbDisplay dumbdisplay(new DDBluetoothSerialIO("BT32", true, 115200));
#else
  #include "dumbdisplay.h"
  DumbDisplay dumbdisplay(new DDInputOutput(115200));
#endif
A "graphical DD layer" is created and setup for drawing image etc.
  graphical = dumbdisplay.createGraphicalLayer(640, 480);
  graphical->border(10, "blue", "round");
  graphical->padding(15);
  graphical->backgroundColor("white");
  graphical->penSize(2);
Note that 640x480 is the image size of the downloaded image.
Image download is through an "image download tunnel" to the connected DumbDisplay Android app
web_image_tunnel = dumbdisplay.createImageDownloadTunnel("", "downloaded.png");
Note that the web image will be downloaded and stored in your phone with name downloaded.png, and DumbDisplay Android app requires permission from your to access your phone's storage (specific for DumbDisplay app). You do this from the Settings page of DumbDisplay app.
Image detection on the downloaded image is through an "object detection demo service tunnel".
object_detect_tunnel = dumbdisplay.createObjectDetectDemoServiceTunnel();
Web images are downloaded from different URLs, and drawn to the graphical layer.
const char* getDownloadImageURL() {
  // randomly pick an image source URL from a list
  int idx = random(5);
  switch(idx) {
    case 0: return "https://placekitten.com/640/480";
    case 1: return "https://source.unsplash.com/random/640x480";
    case 2: return "https://picsum.photos/640/480";
    case 3: return "https://loremflickr.com/640/480";
  }
  return "https://placedog.net/640/480?r";
}
...
    String url = getDownloadImageURL();
    web_image_tunnel->reconnectTo(url);
...
       // web image downloaded and saved successfully
        graphical->drawImageFile("downloaded.png");
        // detect objects in the image
        object_detect_tunnel->reconnectForObjectDetect("downloaded.png");
...
Notice that after drawing the downloaded image, the "object detection tunnel" is called to perform object detection.
And the object detection results come back is handled like:
        DDObjectDetectDemoResult objectDetectResult;
        if (object_detect_tunnel->readObjectDetectResult(objectDetectResult)) {
          dumbdisplay.writeComment(String(". ") + objectDetectResult.label);
          int x = objectDetectResult.left;
          int y = objectDetectResult.top;
          int w = objectDetectResult.right - objectDetectResult.left;
          int h = objectDetectResult.bottom - objectDetectResult.top;
          graphical->drawRect(x, y, w, h, "green");
          graphical->drawStr(x, y, objectDetectResult.label, "yellow", "a70%darkgreen", 32);
        }
One more thing. If you feel like to download another web image for image detection fun, click the downloaded image drawn on DumbDisplay Android app.
ESP32-CAM Demo
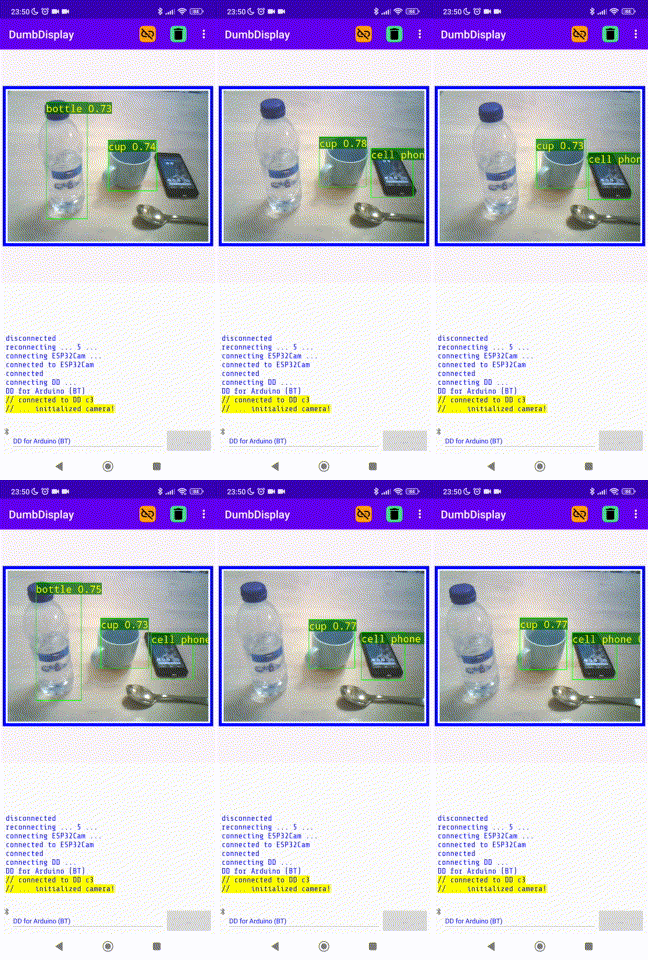
The ESP32-CAM Demo is derived from my previous experiment with ESP32-CAM. For the steps of setting it up, you may want to refer to my previous YouTube video ESP32-CAM Experiment -- Capture and Stream Pictures to Mobile Phone.
The sketch is pretty lengthy, since it not only includes the similar code as shown in the Andrino UNO demo, it also includes the code to drive the attached OV2640 camera module. You can download the sketch here.
Basically
- ESP32-CAM will drive OV2640 to capture images (VGA resolution) in real-time continuously
- the captured image will be sent to DumbDisplay app [for caching]
- ESP32-CAM will draw the cached image on DumbDisplay app
- Like in parallel, ESP32-CAM will drive DumbDisplay app to perform object detection on the cached image
- When ESP32-CAM receives the object detection results, it overlays the object markers on the image shown.
By default, it connects to DumbDisplay app via Bluetooth with name ESP32Cam.
#define BLUETOOTH


#ifdef BLUETOOTH
  #include "esp32dumbdisplay.h"
  DumbDisplay dumbdisplay(new DDBluetoothSerialIO("ESP32Cam"));
#else
  #include "wifidumbdisplay.h"
  const char* ssid = <wifi SSID>;
  const char* password = <wifi password>;
  DumbDisplay dumbdisplay(new DDWiFiServerIO(ssid, password));
#endif
Nevertheless, if you choose to, you can use WIFI for the connection. Just comment out the the line that defines BLUETOOTH, and fill in the proper WIFI ssid and password.
Two "graphical layers" combined (one on top of another) are used for showing the captured image and the object detection markers
  // create the top layer for showing detected object rectangles
  objectLayer = dumbdisplay.createGraphicalLayer(imageLayerWidth, imageLayerHeight);
  objectLayer->border(10, "blue");
  objectLayer->padding(5);
  objectLayer->noBackgroundColor();
  objectLayer->penSize(2);

  // create the bottom layer for showing the ESP32 CAM capatured image
  imageLayer = dumbdisplay.createGraphicalLayer(imageLayerWidth, imageLayerHeight);
  imageLayer->border(10, "blue");
  imageLayer->padding(5);
  imageLayer->backgroundColor("azure");
- objectLayer (overlaid on top) is for showing the object markers
- imageLayer is for showing the captured image
The loop logic flow is basically like
...
    if (captureAndSaveImage(false, true)) {
      imageLayer->drawImageFileFit(imageName);
      ...
          int x = objectDetectResult.left;
          int y = objectDetectResult.top;
          int w = objectDetectResult.right - objectDetectResult.left;
          int h = objectDetectResult.bottom - objectDetectResult.top;
          objectLayer->drawRect(x, y, w, h, "green");
          objectLayer->drawStr(x, y, objectDetectResult.label, "yellow", "a70%darkgreen", 32);
      ...
    }
...
Enjoy!
Hope you will have fun with these demos!
Yes, ESP32 is capable of running TensorFlow Lite. Indeed I would hope to come up with more AI demos running TensorFlow Lite from within ESP32. Until then, enjoy!
Peace be with you. Jesus loves you. May God bless you!