Architectural Perspective Drawing
by SalukiSchau4 in Workshop > Laser Cutting
11480 Views, 35 Favorites, 0 Comments
Architectural Perspective Drawing

Have you ever wondered how Architects can quickly sketch perfectly scaled buildings in 3 dimensional forms?
Check out this beginners guide to understanding basic principles for perspective drawing.
Set-Up
Setting up a work station is important for any type of drawing or drafting project. Ensure that you have a couple pencils with varying hardness. Preliminary drawings are drawn on trace paper. Trace paper is useful in layers, because you will need to set up guide lines and grid lines to ensure accuracy in your drawings. A straight edge is also needed, the length of the straight edge will be determined upon the size of your drawing.
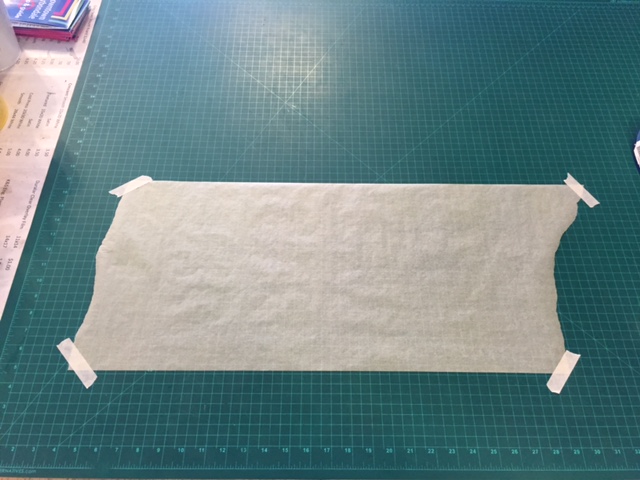
To begin, take a long piece of trace paper, and tape down the corners. This sheet will set up your horizon line.
Step 2: Horizon Line
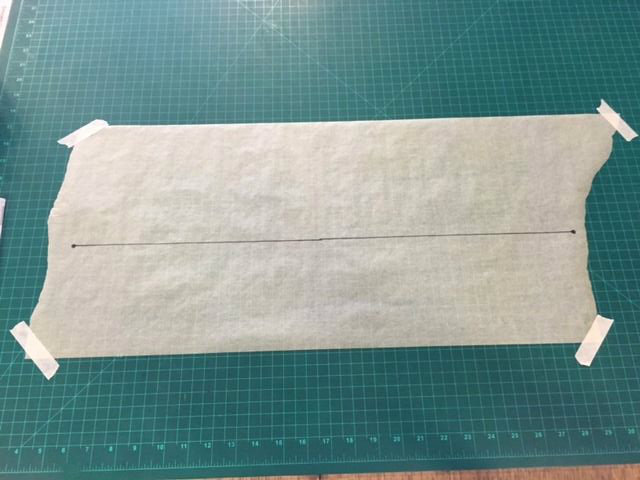
Draw a thick bold dark line horizontally across your trace paper. In your eventual drawing, this line will represent your eye-level. In addition, this line represents a "horizon" as if you were staring out into the ocean, where the sky meets the water.
Place two small circles at the ends of the horizontal line. These circles will be called your right and left "diminishing points". This will become clear as we move forward.
Step 3: Drawing Surface
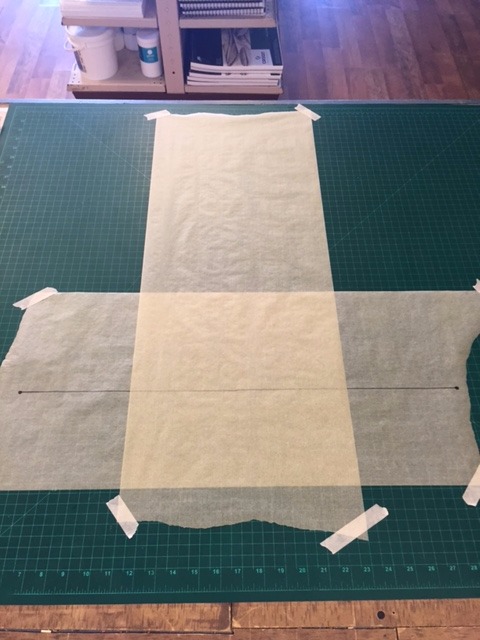
Place trace paper over your horizon line paper. This new sheet will be for guide lines.
Step 4: Guide Lines
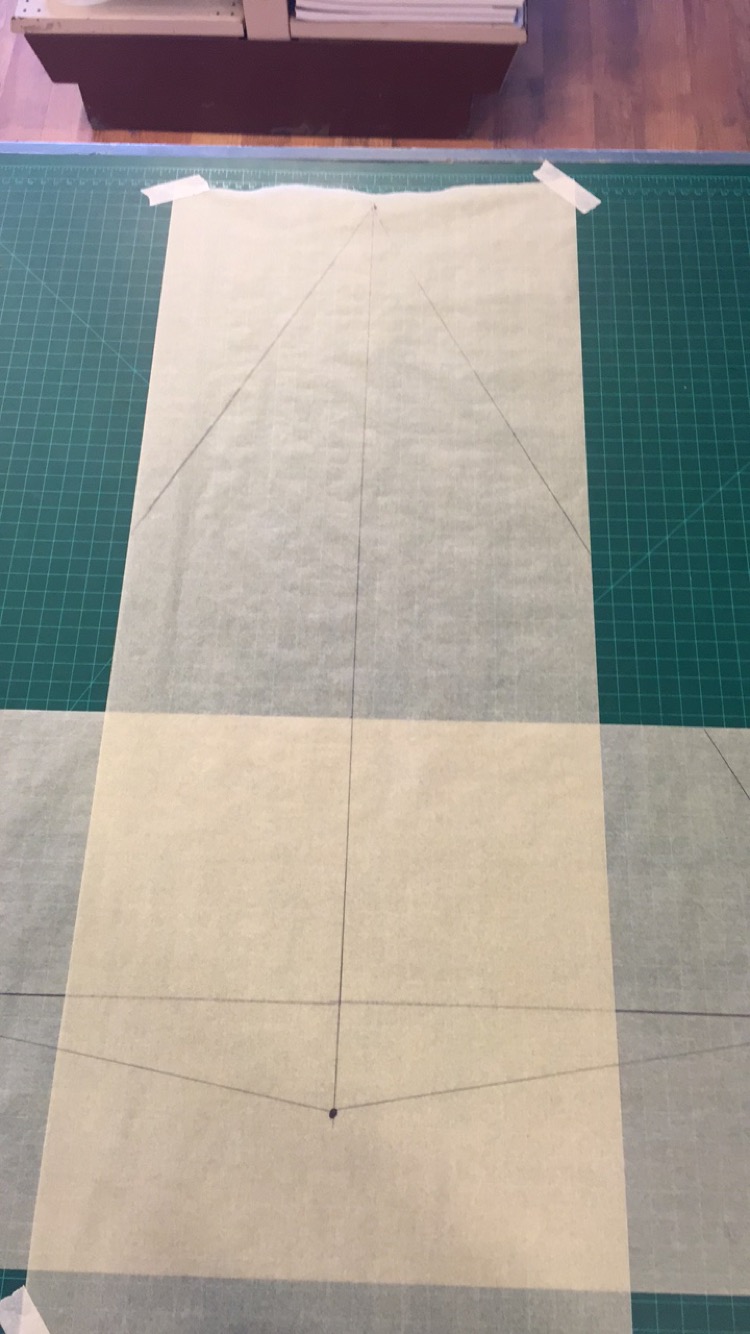
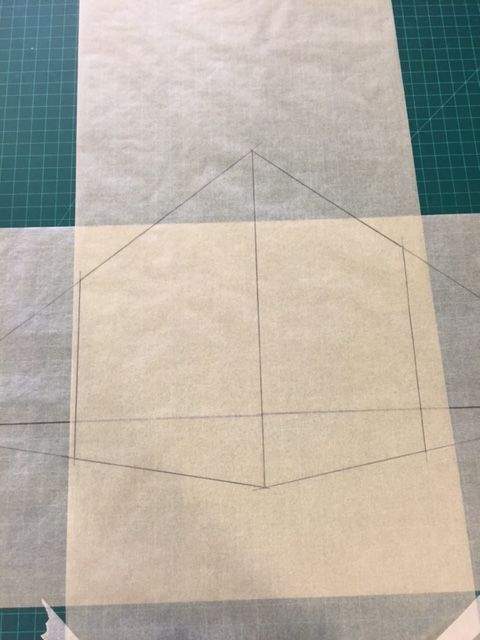
Draw a vertical line on the paper, making it perpendicularly intersect your horizon line.
If you were to look at a building outside, this line represents the corner of the building that nearest to you. Note that the distance of this vertical line below your horizon line is much shorter than above the horizon line. This is because the horizon line is your eye level, and a human is roughly 5-6 feet tall, where the building that you wish draw is much taller than you are.
Note that at the ends of the vertical line, guide lines are drafted back to the diminishing points. Can you start to see the shape of a cube?
Step 5: Shaping Your Building
.JPG)
Take a heavier, bolder, darker writing utinsil, and start forming the shape of your building. Remember to bring all lines back to a diminishing point. Any vertical line should remain perfectly vertical by using a drafting tool called a T-Square.
Hint: You know the horizon line is roughly 5 of 6 feet tall. Use this information to size and locate different building features such as doors and windows.
Step 6: Adding Detail
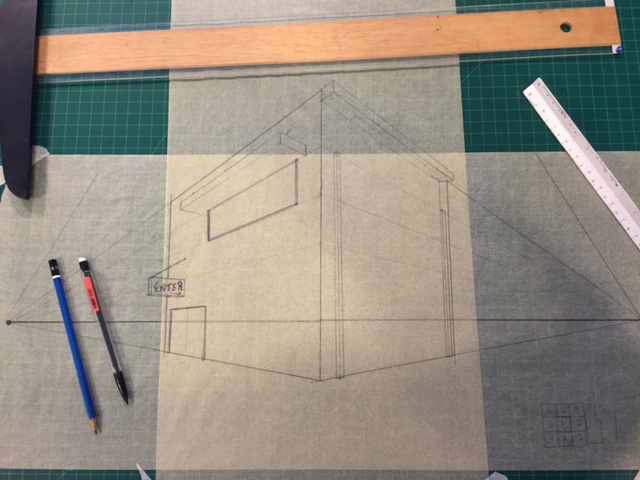
Remember that the details of a building make it look more realistic. Instead of drawing a square to represent a window, try to add a window frame to add depth of your glass inlay. For all detailing, remember that "real-life" horizontal lines should always return to a diminishing point. Use your diminishing points to make objects appear to be 3 dimensional.
Step 7: Utilizing Your Skill
.JPG)
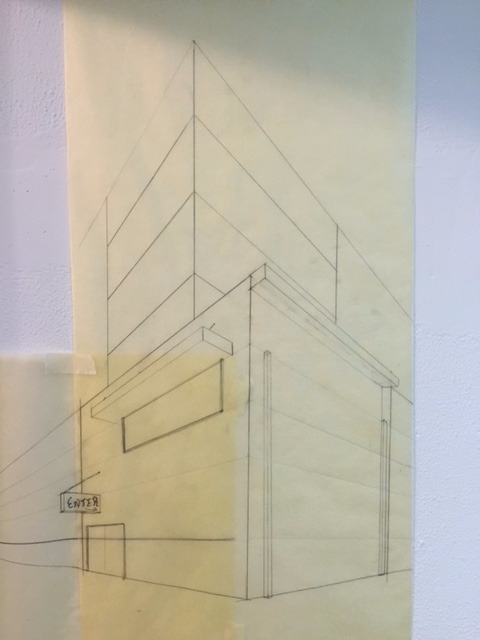
Constant improvement and challenging yourself to create more detailed, visually stimulating drawings., is fun, and a unique skill that is being lost by modern technology and rendering programs.
Master 2-Point Persepctive drawings to help understand space in 3 dimensions. If you like large-scale drawings of high-rise buildings, try to draw a 3-point perspective drawing. Can you guess where to place the 3rd diminishing point?