Aquabit: Smart Aquarium Heater
by bramvuylsteke in Circuits > Raspberry Pi
2148 Views, 17 Favorites, 0 Comments
Aquabit: Smart Aquarium Heater
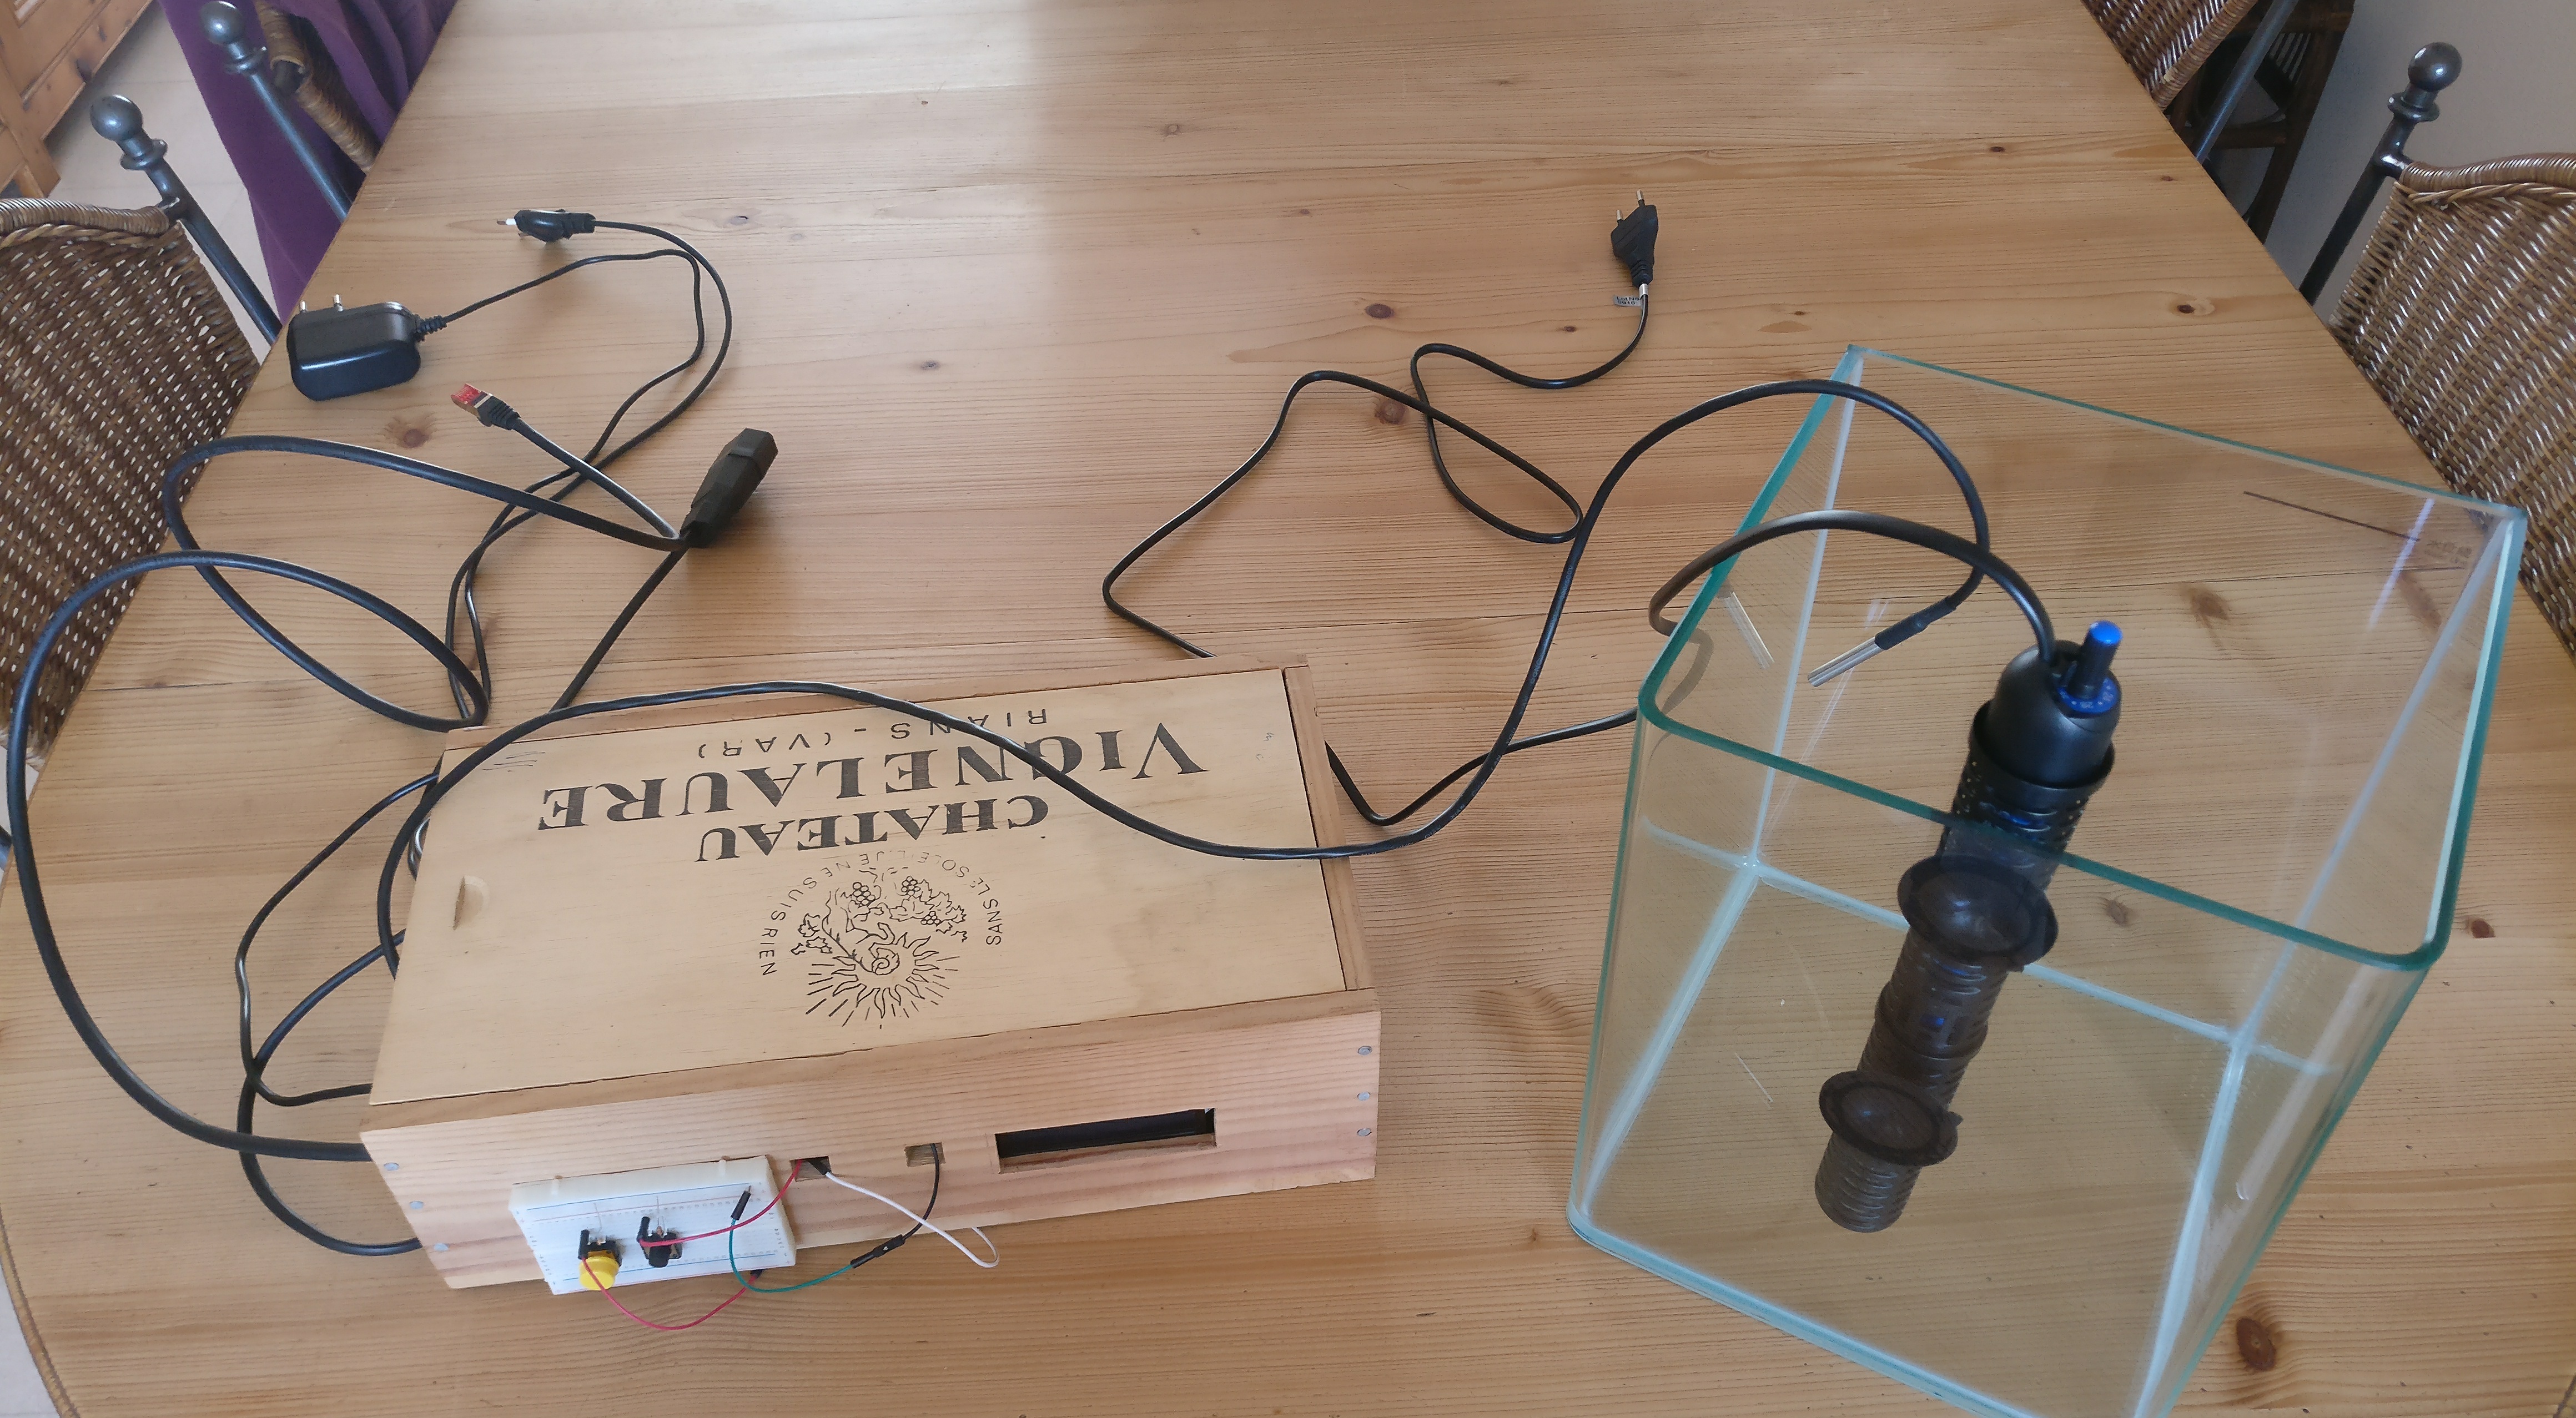
In this instructable I will explain to you how I made a smart aquarium using a Raspberry Pi. You will need some basic knowledge to build this project yourself. I will also give you a list of the required materials for this project. I will explain how to create all of the parts needed.
This is a school project, I'm a student NMCT at Howest Kortrijk.
.
Basic Knowledge
Required knowledge for this project:
-Python knowledge (flask and Raspberry Pi)
-HTML and CSS knowledge
-Knowledge of MySQL and databases
-Knowledge of electrical circuits
-How to solder an electrical circuit
-Setting up flask on a Raspberry PI
-Setting up a database on your Raspberry Pi
-Autorunning scripts on your Raspberry Pi
Materials
Required materials fort his project:
- 1 x Raspberry PI 3 Model B
- 1 x Ethernet cable
- 1 x LCD Display
-1 x Temperature Sensor (water resistant)
- resistors
- buttons
- relays (including diode/transistor otherwise it's really annoying to connect)
Database
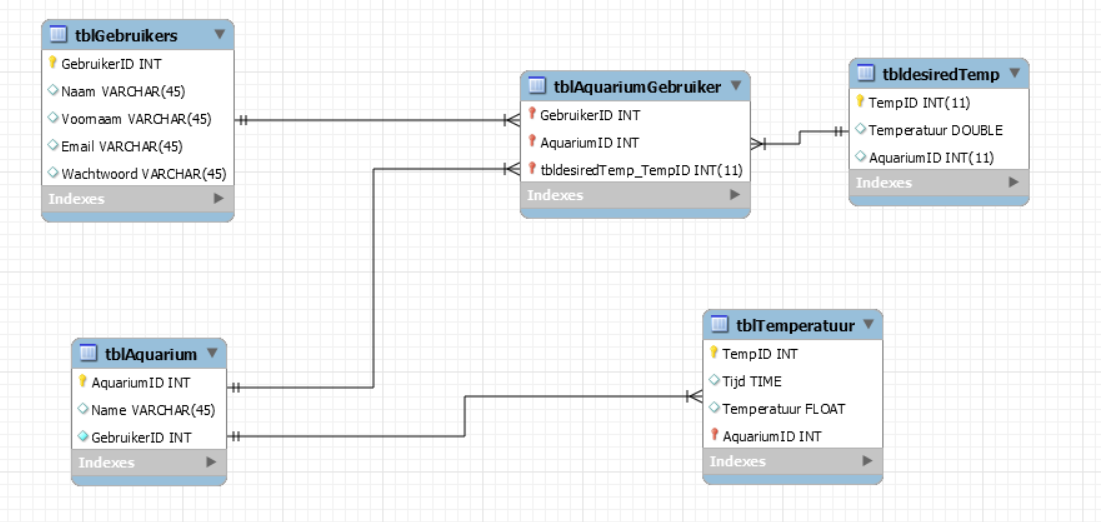
The database exists of 4 tables.
tblGebruikes:
Here you will insert the data of your users.
tblTemperatuur:
Here you will insert all the data of your temperature.
tblAquarium:
This is used for saving all the data of your aquariums.
tblAquariumGebruikers:
This is used to connect tblAquarium and tblGebruikers.
Circuit
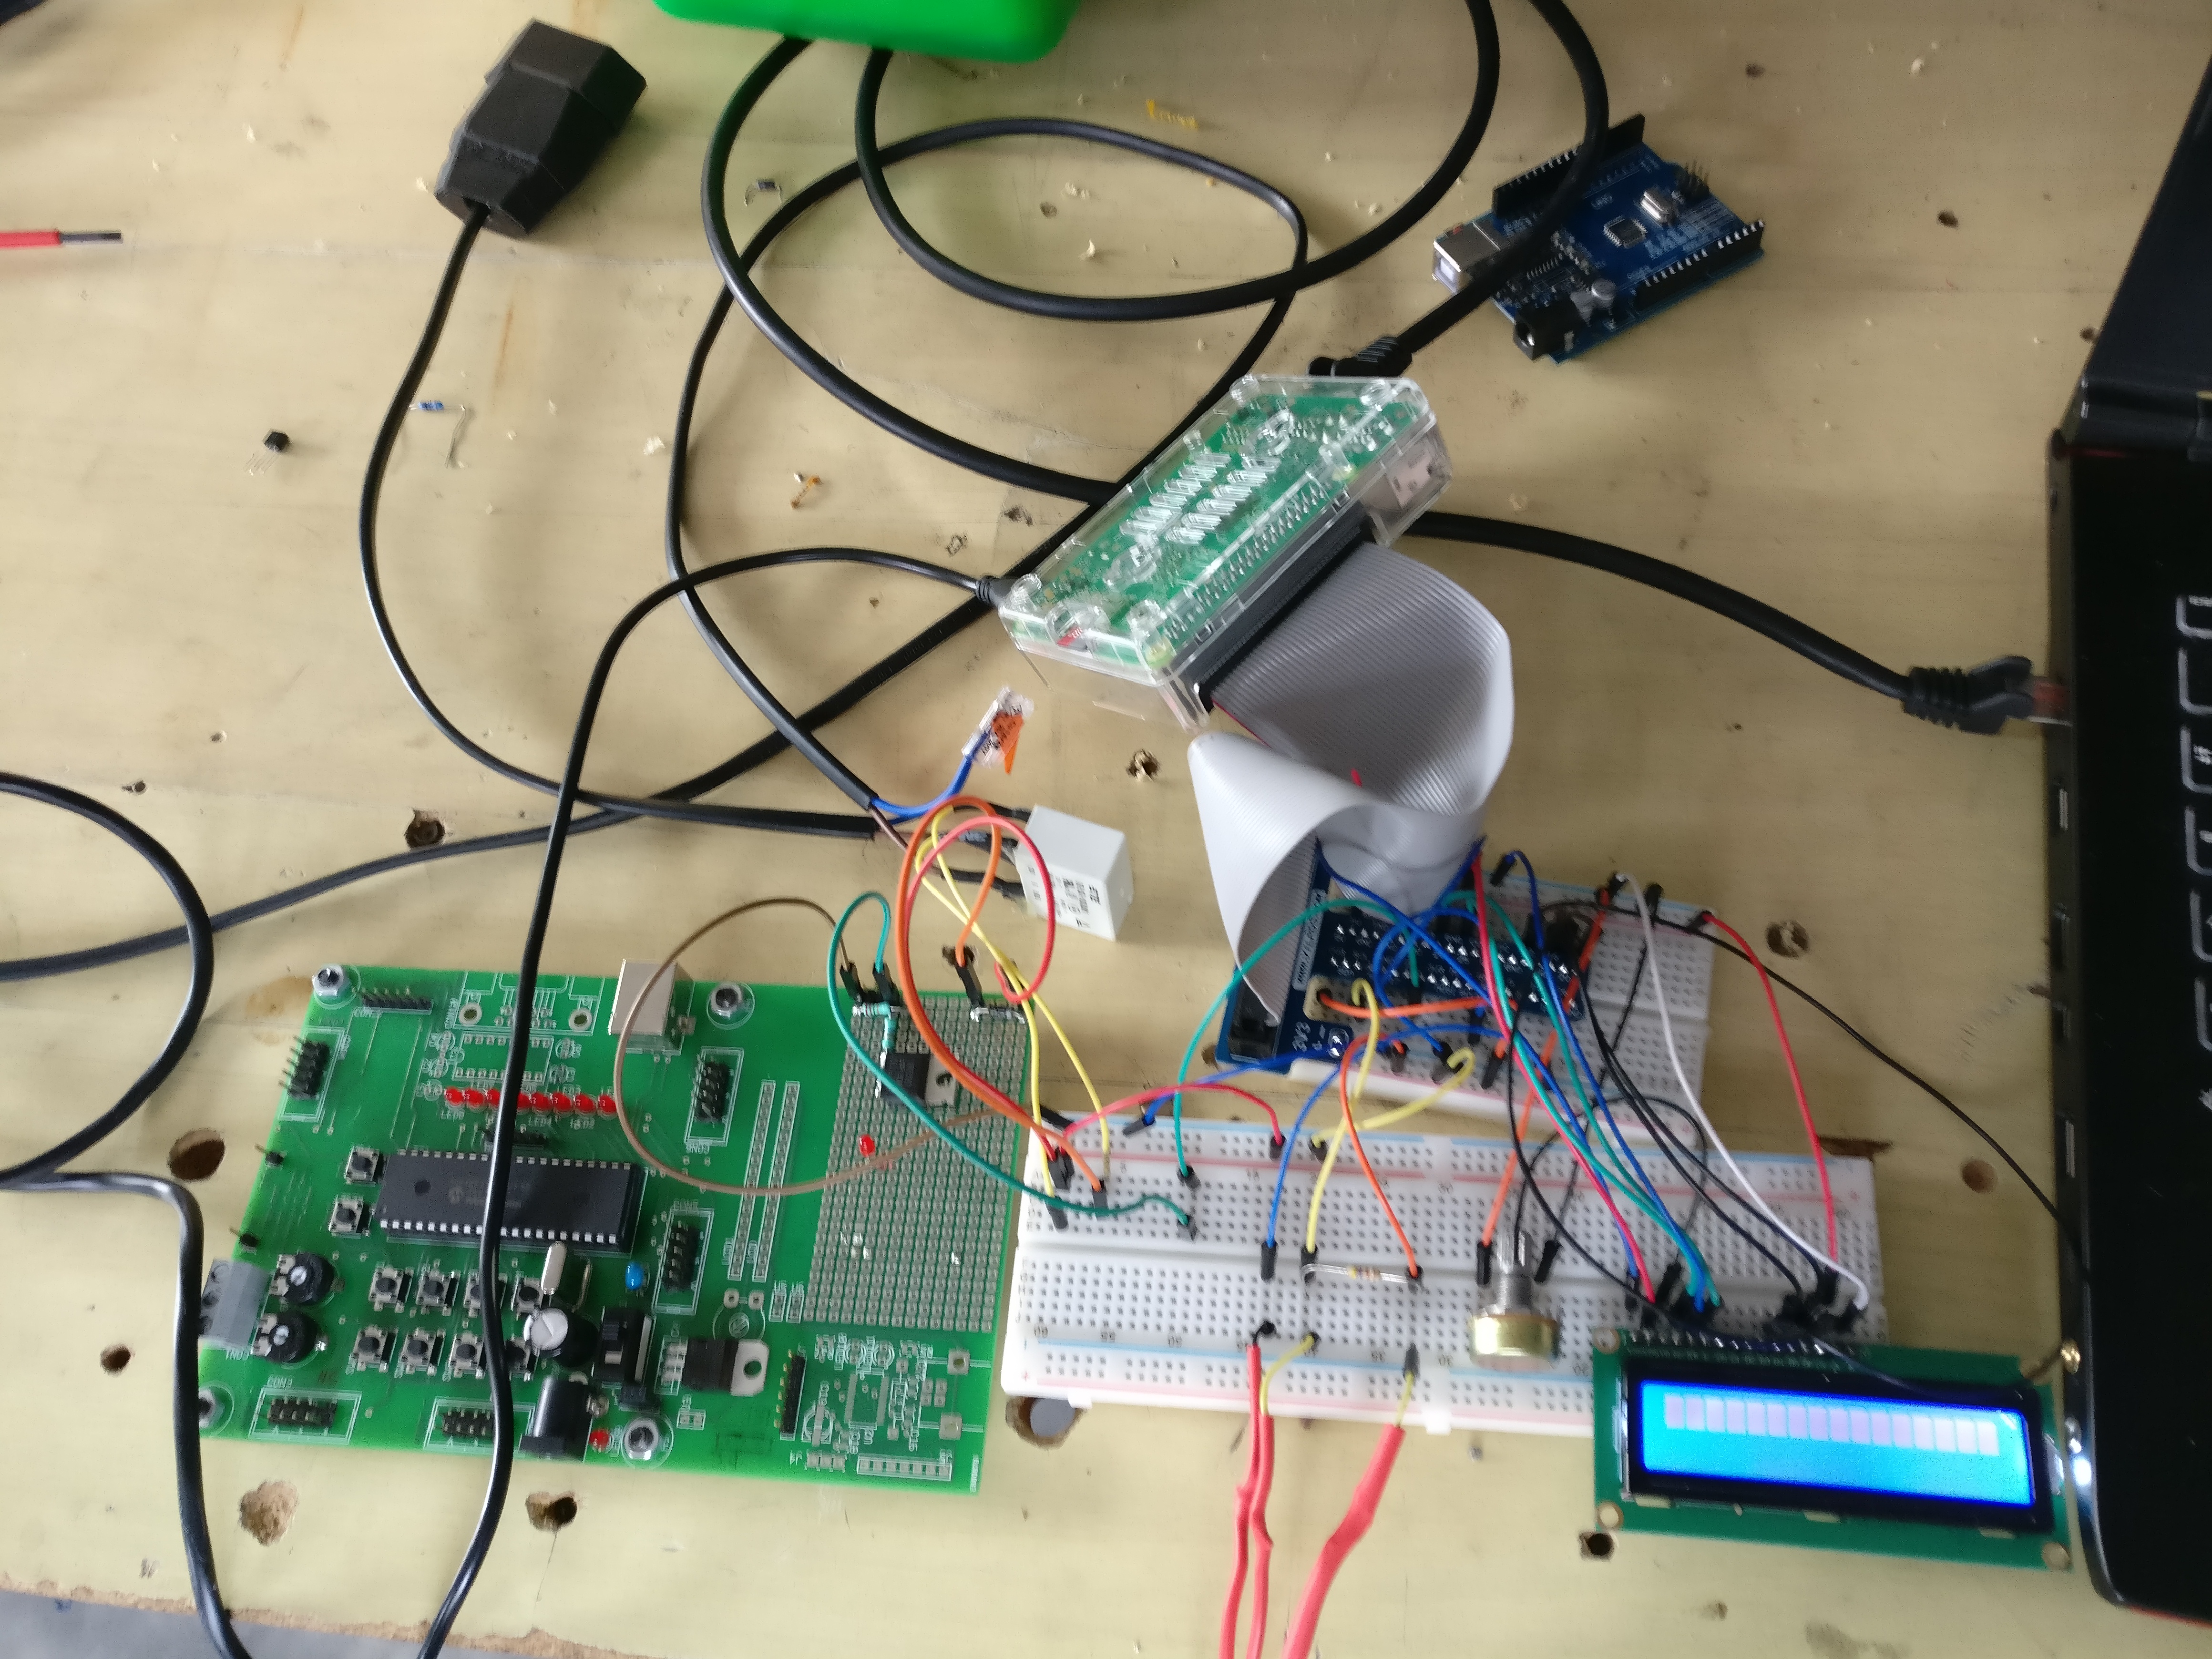
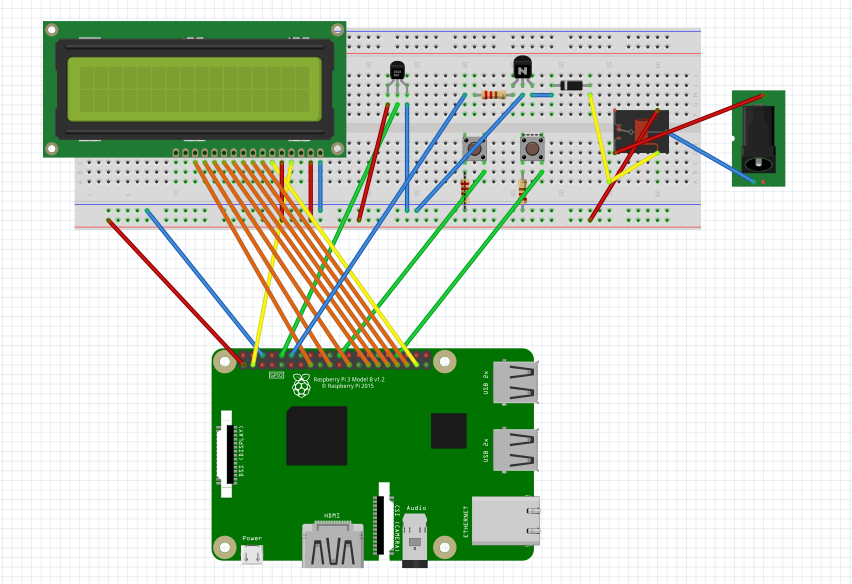
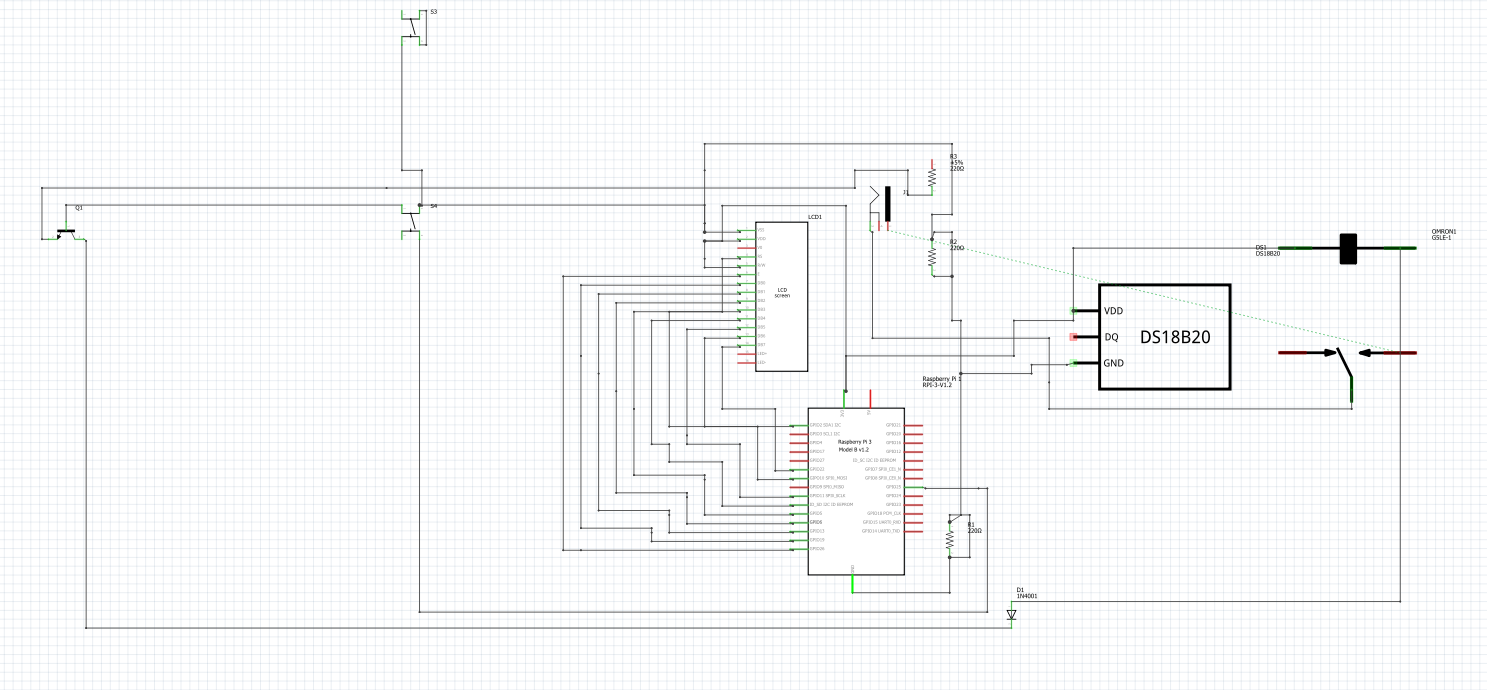
Here you can see how you have to connect the circuit. (The GPIO pins are not the same as those I declared in my python files.)
Downloads
Website
When entering the site you'll see a login screen. Here you can also register
After logging in you get to the homepage of the site where you'll see the current temperature of your aquarium.
In the navigation on top you'll see the history page. Here you can see all the temperature values of your aquarium.
There is also a logout link which will bring you back to the login screen.
Code
https://github.com/BramVuylsteke/project1
This is the link to the code in GitHub.
TEMP.py
In this file there is a class TEMP which i call on in my main file (aquabit_project). This is used to decipher the temperature.
aquabit_project.py
This is the main file. In here you will find the declaration of the GPIO pins, the temperature sensor's values, the loop to continuously read the data and the coding of all the electronics. There is also a part that inserts the data into the database.
DbClass.py
This is the class for all the data storage into the database.
aquabit.py
This is the main file for the website. In here you can find all the functions used for the routing of the site and many more.
In Templates you'll find all the html files with base being the main html file.
In static you'll find the css file.
How Does It Work
It's actually quite simple. The temperature sensor sends it's values to the lcd screen and the database. With the buttons you can increase/decrease the value of your desired warmth by 0.5. When the desired heat is warmer than the current heat the relays will get a HIGH and the heater will start heating. I've also added the ability to set your desired temperature with an input button from the site. I also made a new page with a graph showing the temperature and it's related time.
On the site you will see the values sent from the aquabit_project.py file that were inserted in the database.
Case
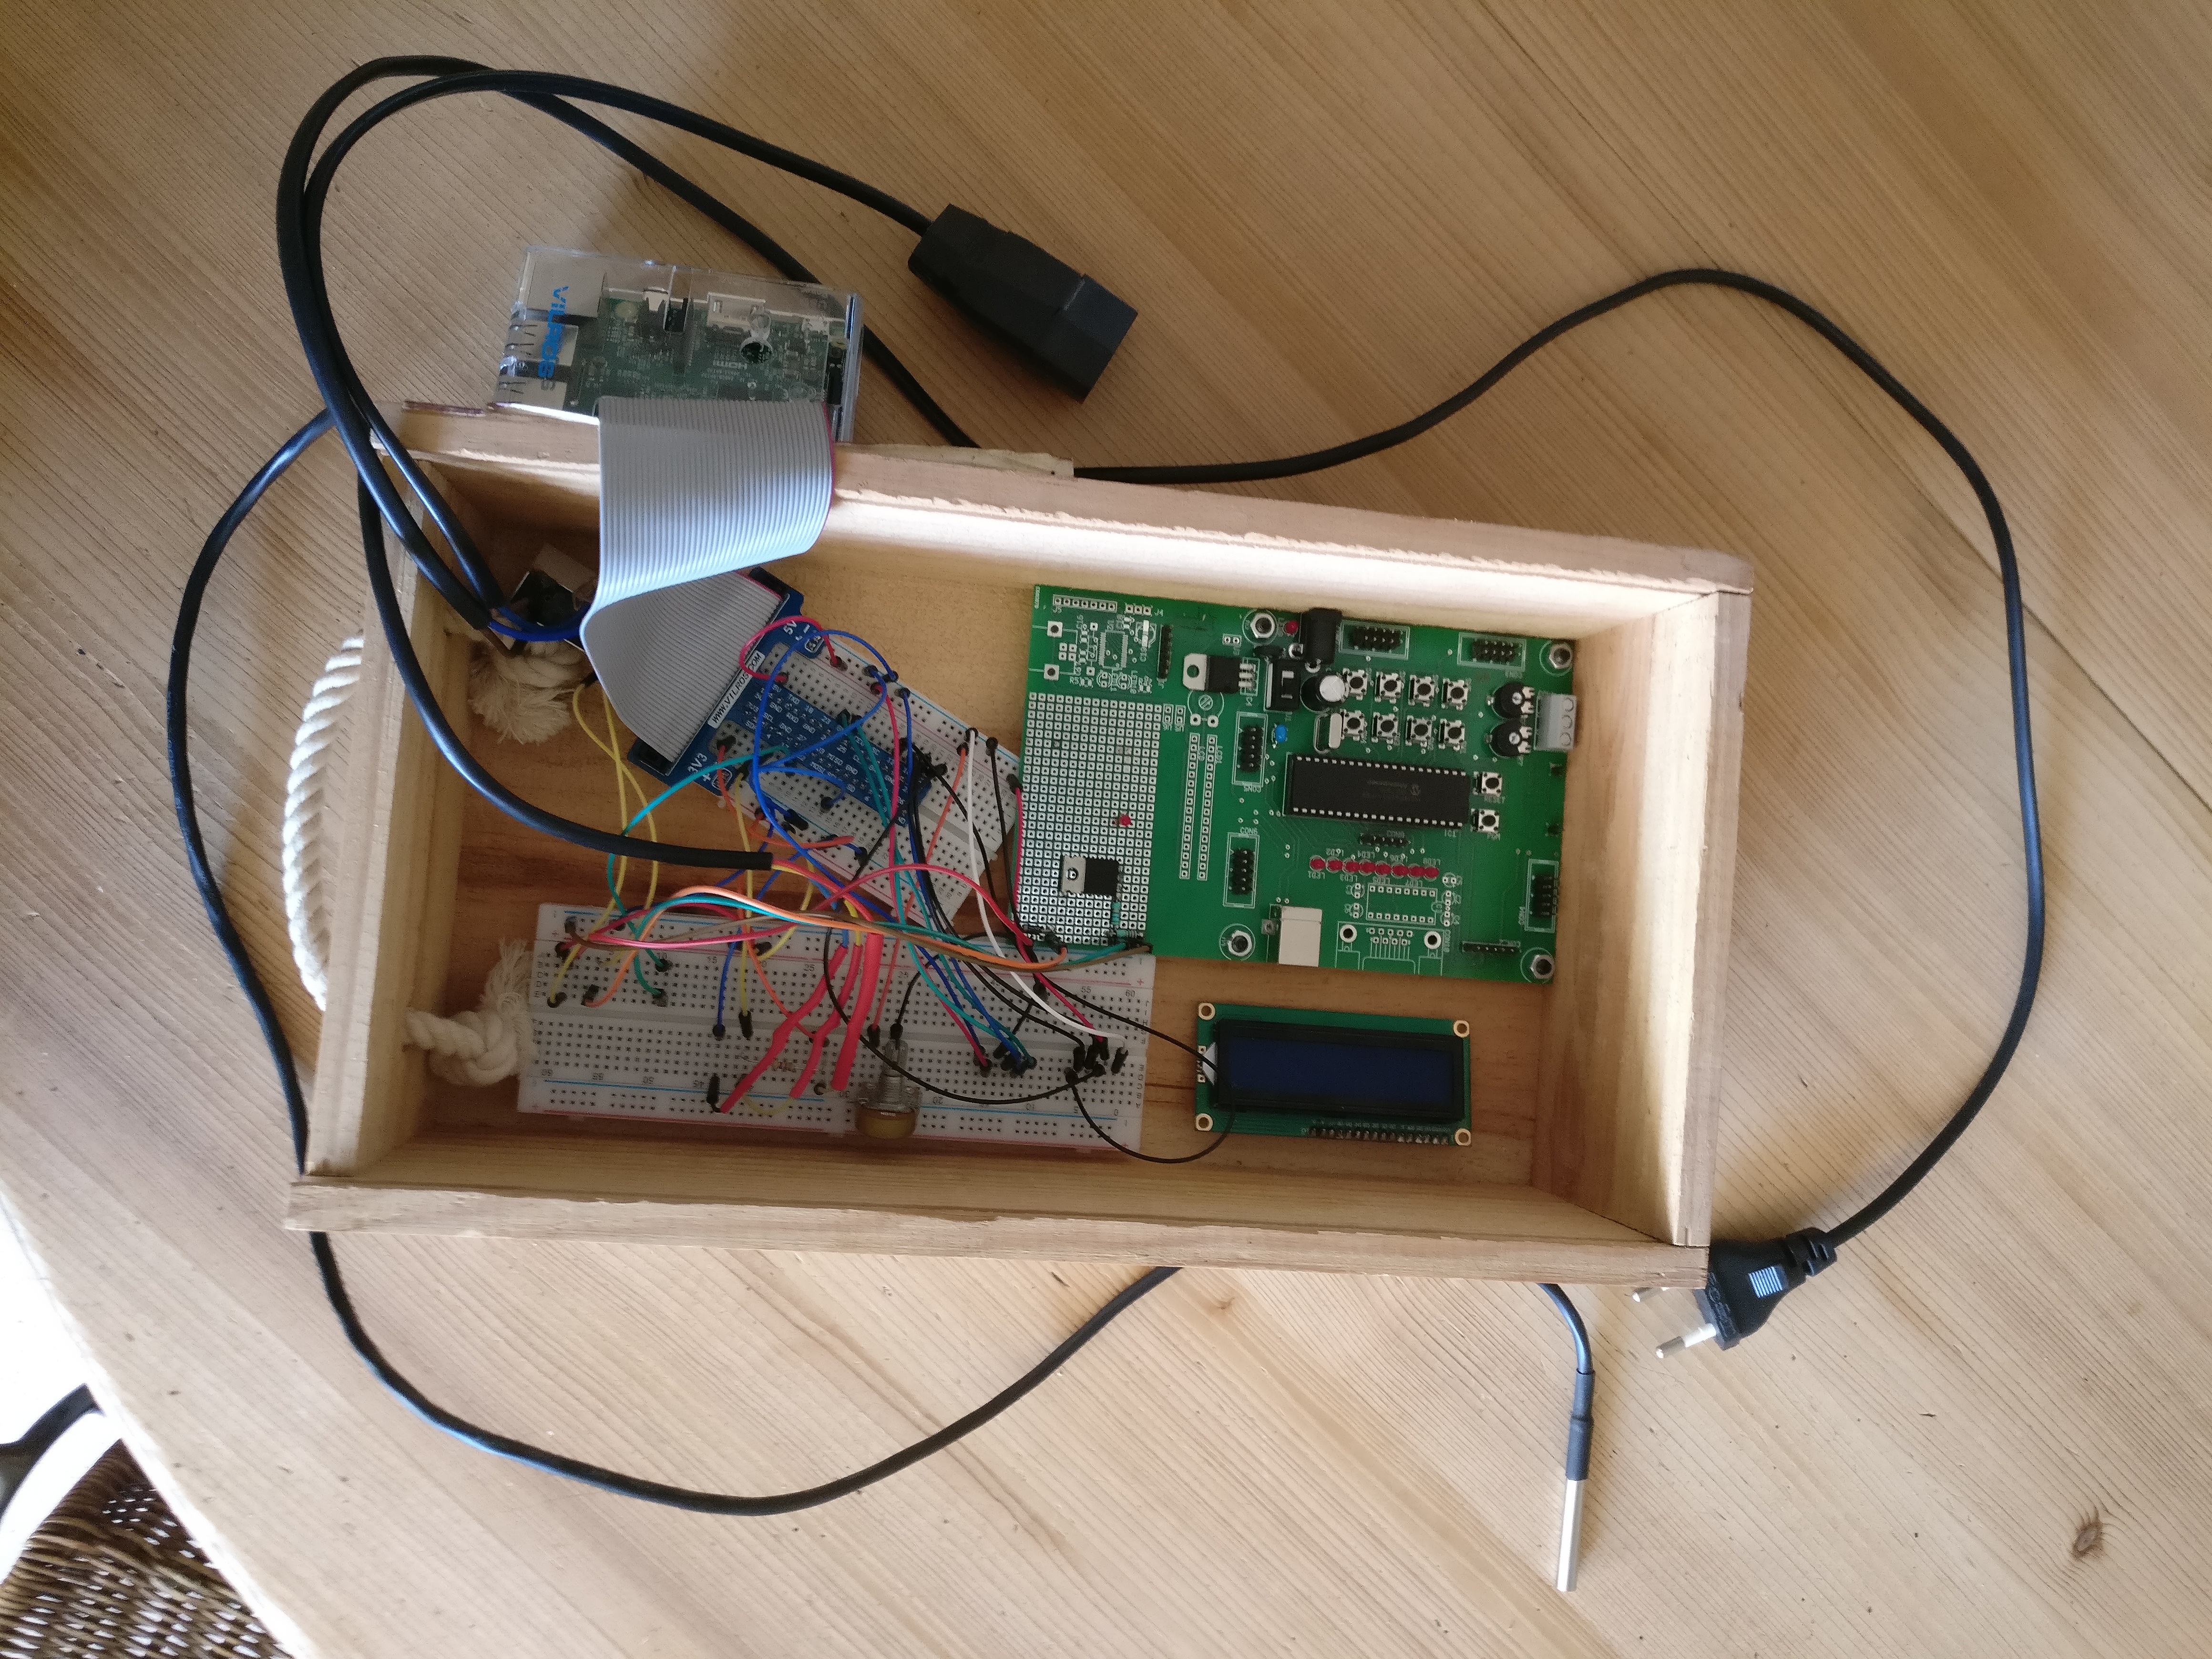
As case I used an old whine box. I cut some wholes in it for my buttons (which I can't use because my soldering was really bad) and a whole for my lcd screen.
Running Python Script at Power On
Here I'll explain how to automatically start your script when you power on your raspberry pi.
Go to the raspberry pi terminal (I used putty for this)
Type sudo nano /etc/rc.local
This is a file. Go to the bottom of the file and type right above 'exit 0' the following:
sudo python3 /(loacition of script on rapi) /aquabit_project.py
If you would also like to run the site when the rapi gets powered on type this next to the previous line:
& sudo python3 /(loacition of script on rapi) /aquabit.py
Now save it (ctrl-x) and reboot your raspberry pi.