AquaScarf! Protection for Waterjugs and Aquaflasks
by SkyMakes in Craft > Printmaking
460 Views, 2 Favorites, 0 Comments
AquaScarf! Protection for Waterjugs and Aquaflasks


The aquascarf is a 3D-printed waterjug sleeve, specifically of 32 oz. Aquaflasks, targeting the upper curved area of the waterjug.
This instructable will cover the how-to process from the 3D modeling to the finished product, so you can customize this project to other water jugs of different brands and sizes! The modeling process mostly uses Tinkercad, an online website and entry-level tool into the world of 3D modeling. Following this instructable, you can also change the length of the product, but the files provided will be for a short-length sleeve for 32oz. Aquaflasks.
Besides, being a waterjug sleeve for protection, it can also hide existing dents and scratches well. Enjoy reading and crafting!
Supplies
Here's what you'll (really) need:
- 3D Printer
- 3D Printing Filament, preferably TPU
- A device that can run modeling and printing software
- Tinkercad *only a browser is required* (or alternative modeling software)
- Cura (or alternative slicers)
Now here are optional things that you might need/want depending on your goal:
- Ruler, protractor, and other measuring tools
- Primer, paints, and a topcoat for your chosen filament
- Paintbrushes
- Cutter / exacto knife / precision knife / pliers
- Sandpaper (80-400 grit)
Getting the Measurements


Before we can even start modeling, first measure your water jug. The necessary measurements here would be the outer diameter, the diameter of the cap, the height of the main cylinder, as well as the curvature of your jug.
First, I'd recommend that you check online for any details about your waterjug since the basic dimensions may be posted online by the producer or resellers. It would be even better if there were an existing 3D model made by the community of your water jug! Just make sure you're referring to the correct size and model.
In the case of a 32 oz. Aquaflask like mine, I was able to use a 3D model made by peeJhey from the grabCAD library. Check it out here! https://grabcad.com/library/aquaflask-vacuum-insulated-bottle-1 as reference and scale it as needed.
Secondly, you can use a 3D scanner on your water jug which can result in a meshform with varying accuracies to the actual jug. If you do this, you may have to clean up certain parts in modeling software like Blender or Tinkercad.
Lastly, if you weren't able to find any details online, feel unsure about certain parts, or 3D scanners didn't produce a usable shape, you can always check your water jug in real life by measuring it with rulers, protractors, and whatever measuring tools you have at home to confirm the details.
Measurements are important, but don't sweat it! There are always drafts in new projects, and you can print bits of the product as you're doing the next step to check your measurements before printing the full-blown Aquascarf!
Modeling
.png)
.png)
.png)
For the modeling, you can use any software you prefer, but the process discussed here will be done through Tinkercad, an entry-level 3D modeling software.
Firstly, upload/import the 3D model of your waterjug into Tinkercad or your software. Otherwise, use your measurements to make a rudimentary shape using cylinders and curved arcs. Note that Tinkercad is limited by its online feature to a small file size, so you may use Blender, other offline 3D modeling software, or 3D Model compression sites to make the file size of the object small enough to be uploadable. Tip: Blender's "Limited Dissolve" function may help for complex meshes with many vertices and faces!
Secondly, scale this model appropriately referring to the measurements you found in the previous step. Accuracy is important so your Aquascarf can fit your water jug like a glove!
Third, duplicate this model and increase its diameter based on the thickness you want for your Aquascarf. Align the models in the center and make the smaller one a "hole" shape. Duplicate the smaller model again for your reference and then merge the bigger model with a small one to create a hollow cylindrical shape.
Lastly, add a rectangle or any "hole" shape and cut the hollow cylinder to the part and length that you want. When using a hole to remove the upper portion, take care to refer to the rims of your actual water jug model you duplicated and make sure that the Aquascarf won't get stuck as you try to remove it or place it. Also, make sure that the length (height) you chose fits in your printer (especially for full-length sleeves)!
You now have a plain Aquascarf form that should fit your Aquaflask or other jug, but what if you want to add layered designs in Tinkercad?
In this case, do the following:
- Duplicate your current Aquascarf twice, and of the three copies, add 0.5mm to the diameter of one and merge this to another. Now you have 2 Aquascarves (one of the correct size, and a slightly thicker version). Keep doing this until you have enough "layers" for the details that you want to add.
- Now align all of your copies at the center.
- Decide what elements or shapes you want in your design and how you want them layered. There are many existing creative designs in Thingiverse! (https://www.thingiverse.com/)
- Add a giant rectangle that covers all the copies and make the Aquascarf layer you want to use a "hole" shape. Merge the rectangle and this layer. Make the resulting shape a "hole," now you have a little pocket wrapped around the main Aquascarf layer you can put designs in.
- Thicken and align your chosen shapes the way you want to have them and merge them with the hole so your shape can have a thin layer wrapped around the Aquascarf
- Rinse and repeat processes D&E with your chosen shapes on the layer/thickness you want them.
- Merge your final design altogether and export the shape as a .STL or .OBJ
Hard to follow? That's okay, refer to the video in this drive (https://drive.google.com/drive/folders/1JLpgaCVutLiuKpqwSMecRMvP6ScPmwvt?usp=drive_link)! You can also check out this file I used in Tinkercad (https://www.tinkercad.com/things/2hJphZbrP4V-copy-of-aquascarf-public-file/edit?sharecode=Fri2gec6SDc8EA22pCCjHY5r46177wTvzFFeOV_z9q0). Make a copy before editing and putting your design, but feel free to add your final model in the file too so others can be inspired (as long as it's safe to see)!
3D Printing

.png)
.png)
.png)


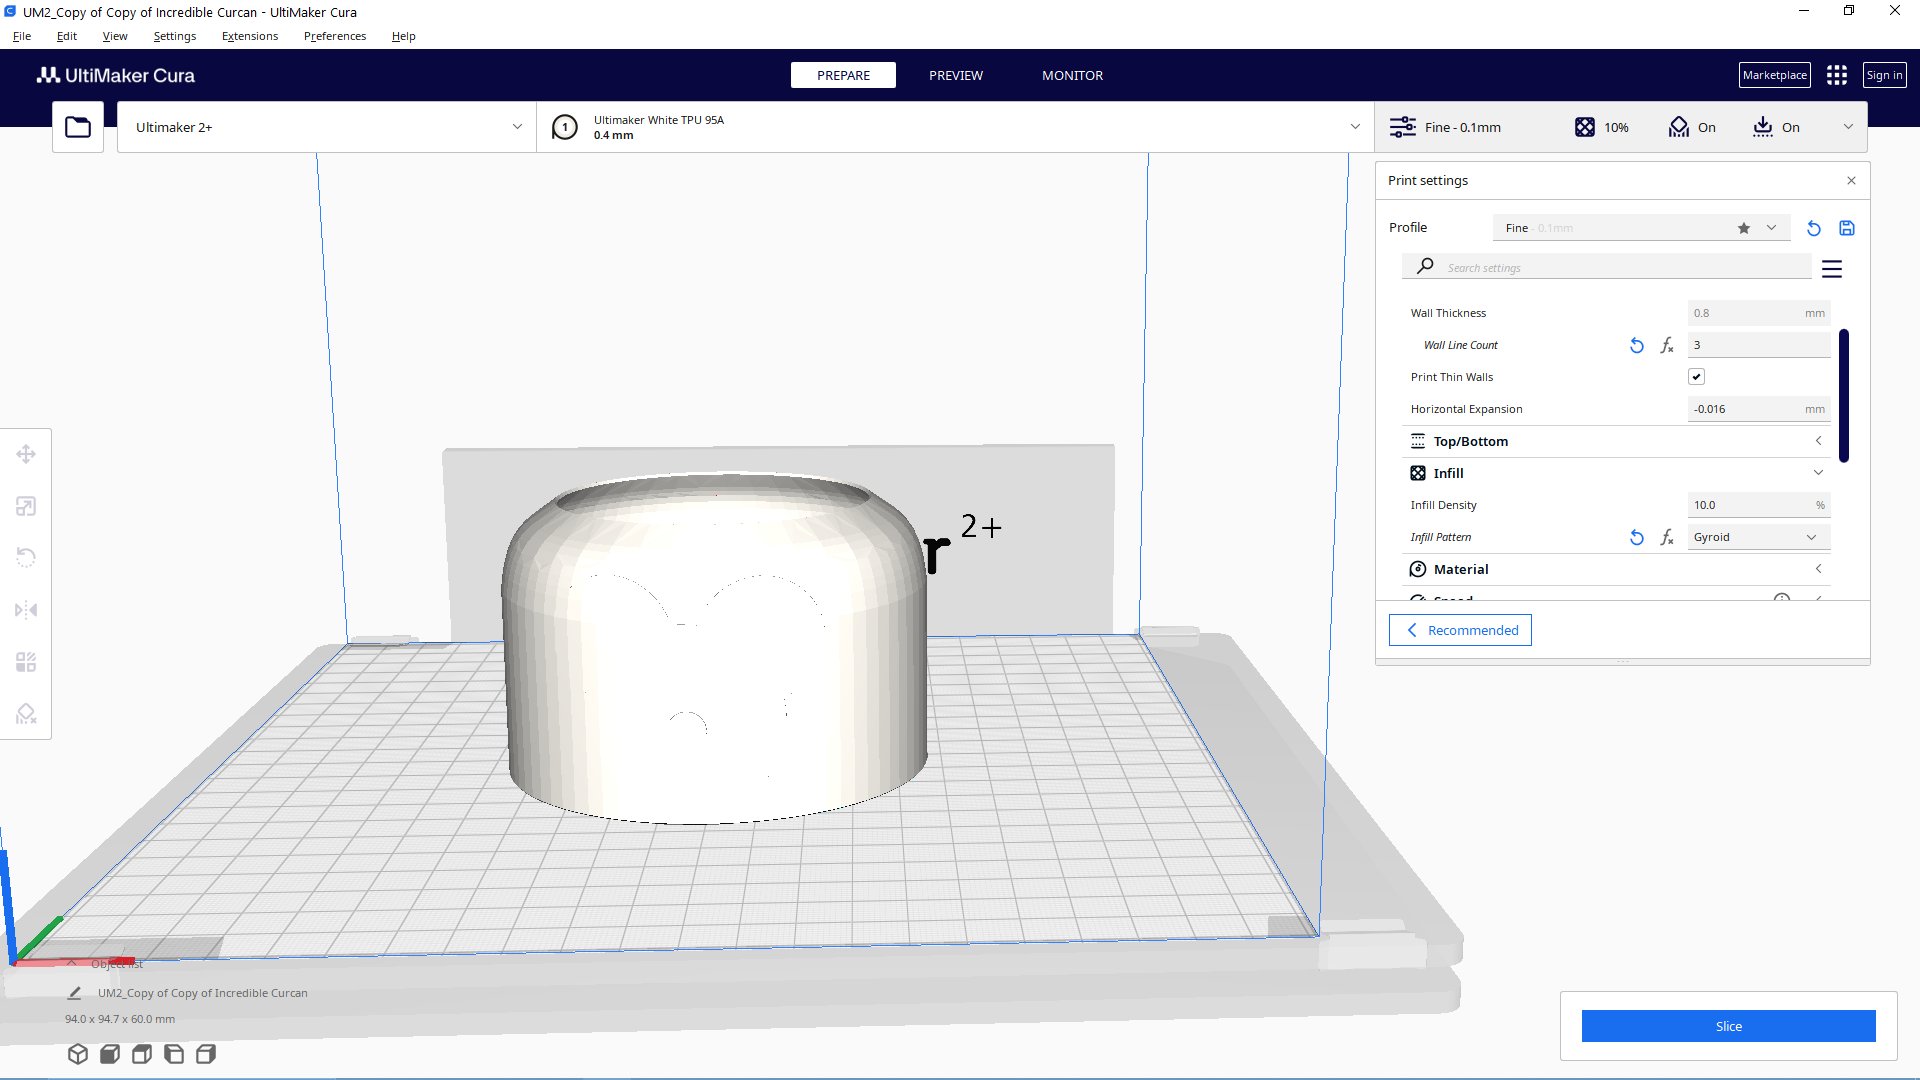
This step can be best explained by different media online, but we'll cover the basics of it here with Ultimaker Cura (though your preferred slicer will do!)
- Import the .STL or .OBJ file you exported from your modeling software
- Make sure the settings are correct for your case! It's important to check the printer model as well as the filament.
Tip: You can remove the internal supports since the shape of the Aquascarf can support itself. Your additional designs are also likely to support themselves if they are thin additions to the Aquascarf. However, if your bottom edge is not flat (such as the cloud scarf shown in the images) and needs support, it's usually better to use tree supports. For TPU, try to use thin layers and a longer time since it is very difficult to post-process after printing. Check the ideal build plate temperature for your filament, too!
- Slice the shape and check how it prints, as well as the grams/meters of filament needed, and be certain you have enough.
- Now export the .GCODE or sliced file that can be read by your 3D printer into a hard drive and connect this to the printer. You can also bluetooth connect it depending on your printer!
- Carefully scrape your print off the build plate once it's done!
Now you have a complete Aquascarf (more or less), but what next?
Post-processing


Post-processing depends on your end goal as well as your chosen filament.
- Remove the supports and raft, if any. For TPU, use a precision knife to remove the supports and the raft. For PLA or similar filaments, pliers are a better option. Do this with care and caution!
- If it is PLA, try using slowly increasing grits of sandpaper to remove the printing lines. For TPU, this can be difficult and it would be better to refer to guides online or focus on improving the print as much during the printing process.
- If it doesn't fit quite right, try sanding off its interior until it fits without forcing it down.
This is already a complete Aquascarf model, but if you want to add further colors and you weren't able to do using dual extruders, you can follow the following steps too:
- Prime the model and paint it thinly and appropriately based on your design using paints suitable for your filament. Also, be sure that the paint you're using will not be reactivated by water since this is for a water jug :)
- Make sure to apply a top coat too, to protect your paint from being easily damaged by bumps as well as water dripping.
Now all that's left is to use your Aquascarf. Squish it on your waterjug and enjoy! Thanks for reading!