Another Pi on the Wall
by engCybernetics in Circuits > Raspberry Pi
4344 Views, 71 Favorites, 0 Comments
Another Pi on the Wall
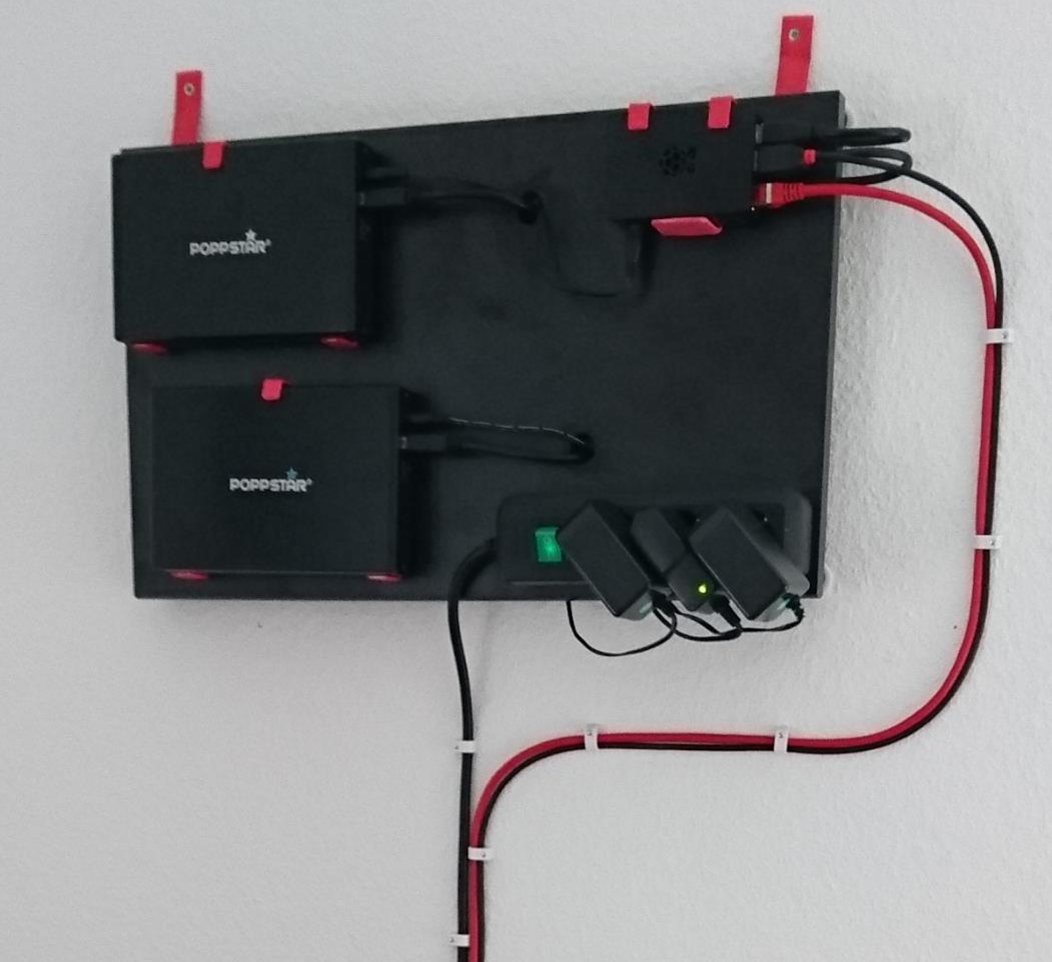
This instrucable tutorial shows you how to build a NAS (Network-Attached Storage) using a Raspberry Pi (RasPi) and two HDDs. This tutorial is supposed to give you detailed intructions on how to
- mount a RasPi, two HDDs, and the whole power supply on a board, which then can be mounted on wall in your home
- programm the RasPi, such that it acts as
- a NAS
- and / or a printer server (if desired)
- deal with Linux and show you some basic commands (if you have not worked with it before (just like it have not)
This tutorial is subdivided into the following 4 chapters:
- HW-Setup
- Debian/Linux Basics
- System and NAS setup
- Making RasPi system backups
- Some hints and tips
Preparations - Hints and Shopping List
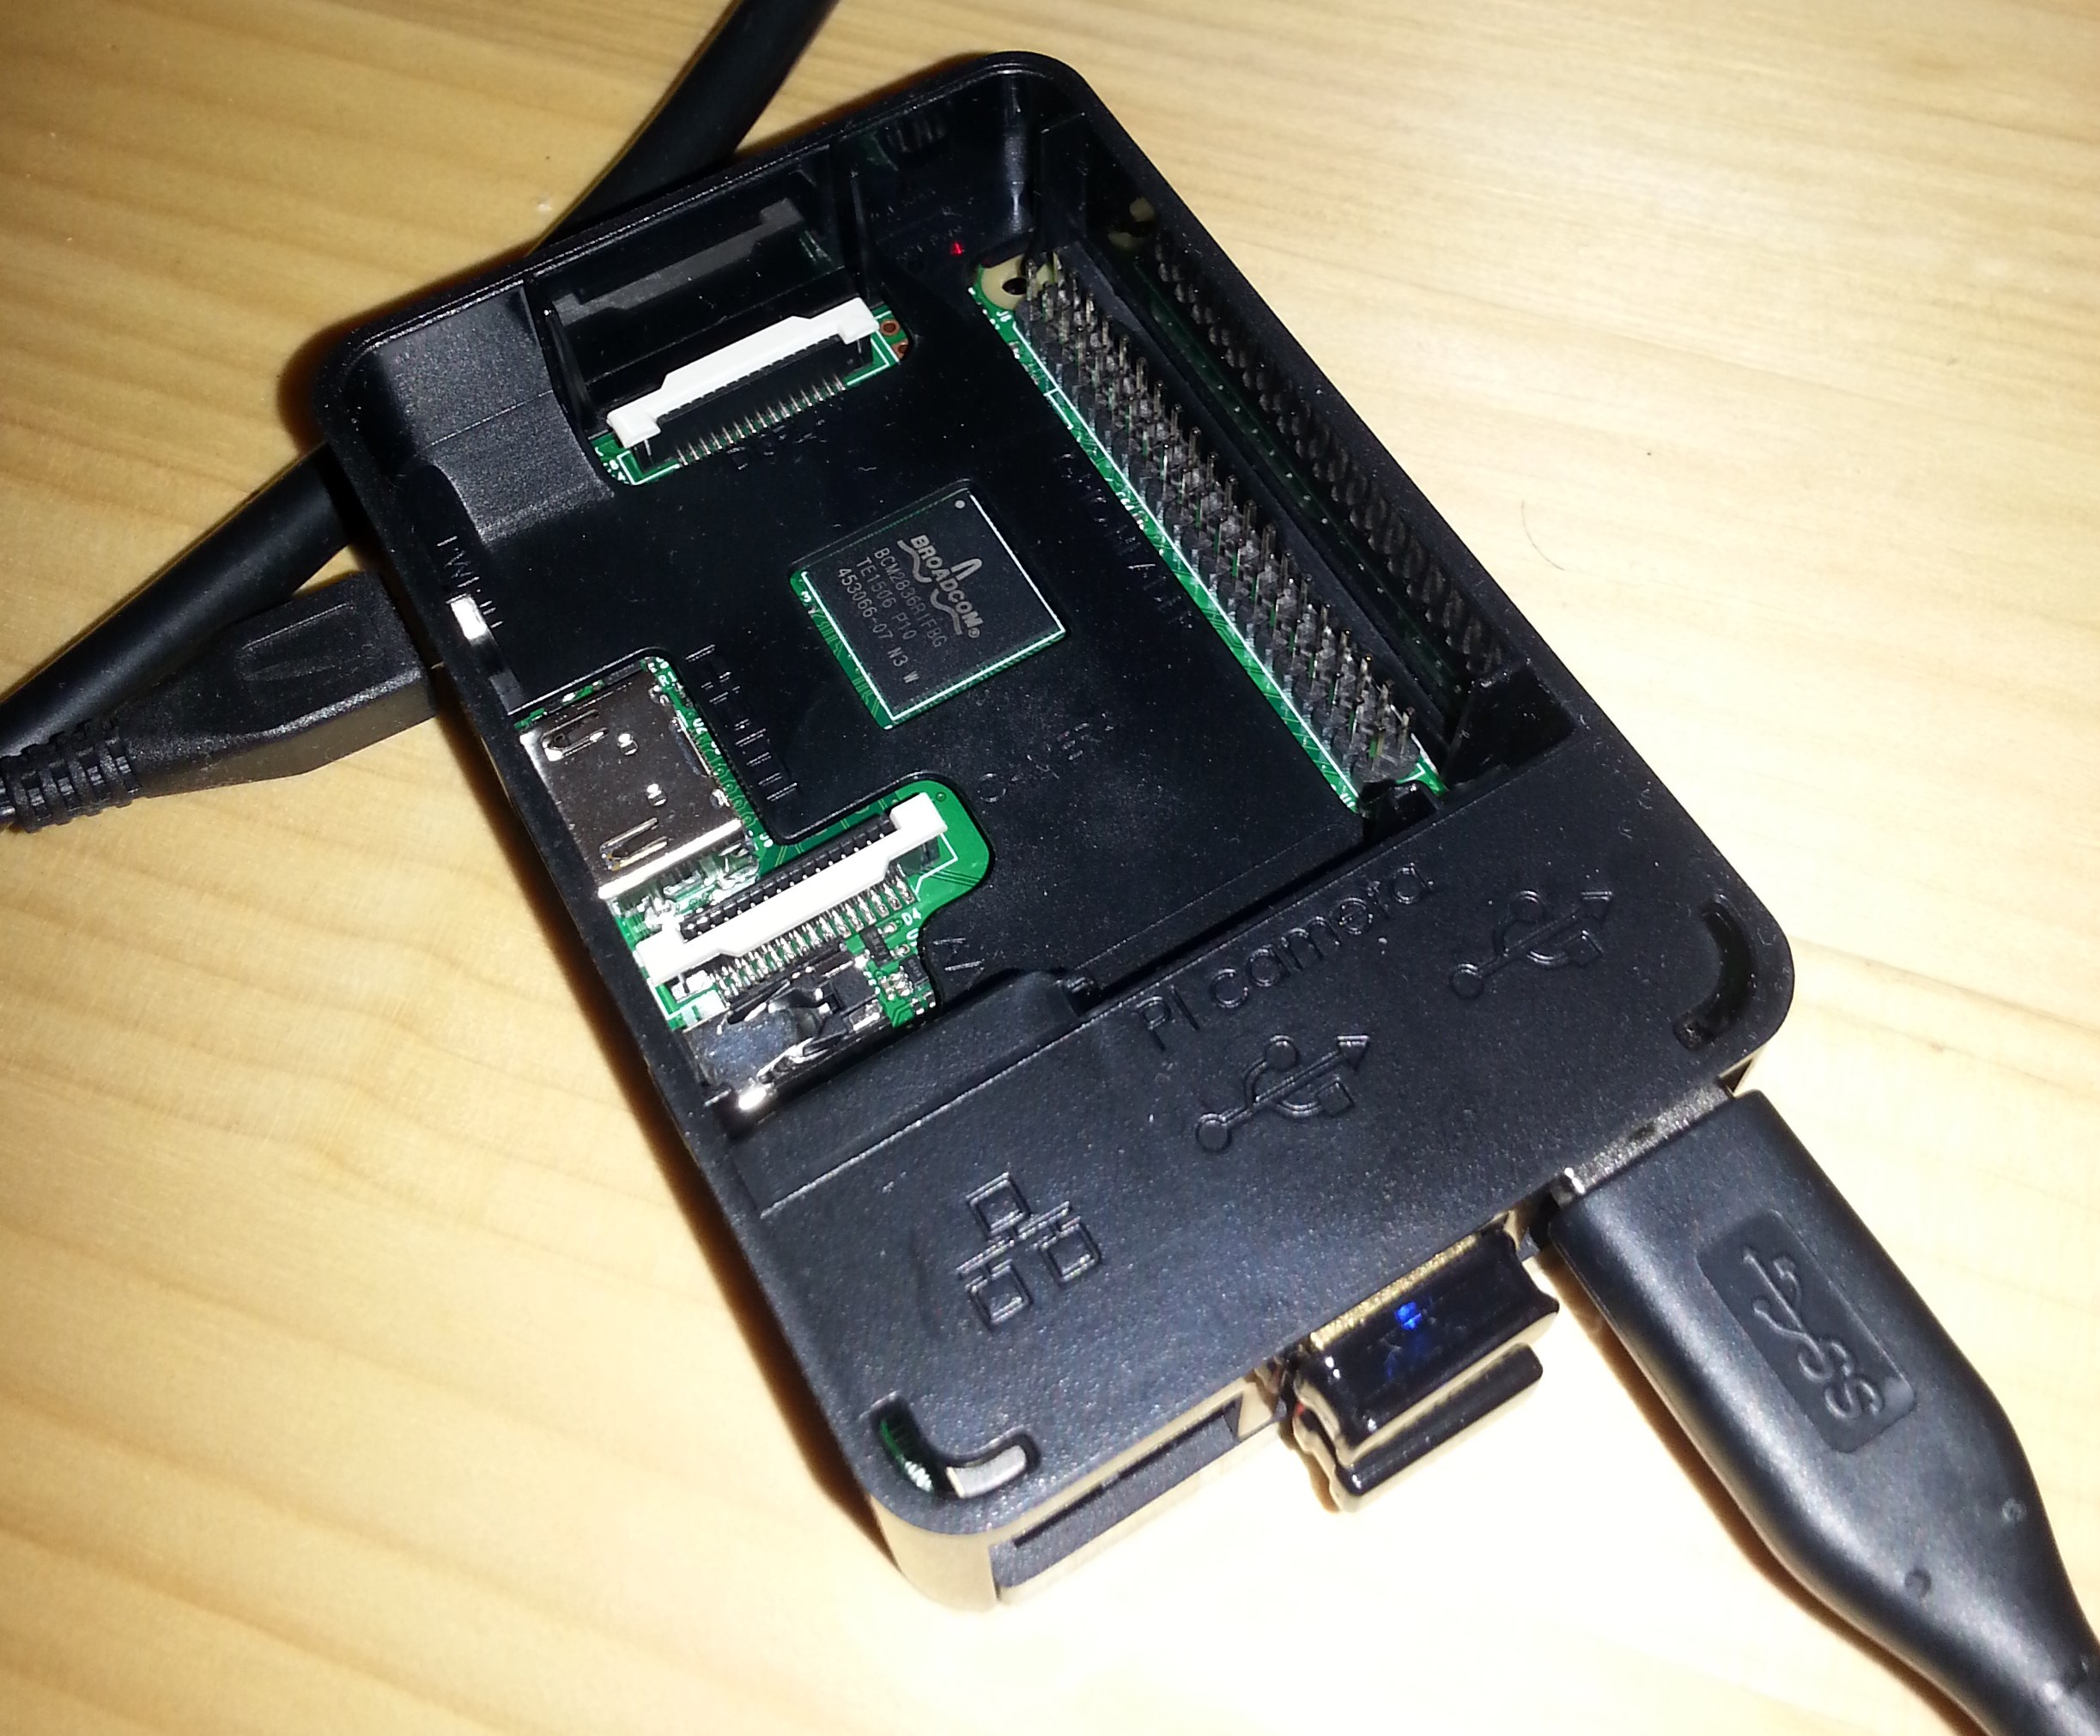
Before we start, some important hints that shall keep you from running into trouble:
- 1st hint: Before you buy an external HDD enclosure with a SATA to USB controller -> check if the controller can handle the amount of storage volume that you want to use!
Why: I used HDDs that sit inside a housing (like an case for using the HDD as an external drive) that has an SATA-to-USB controller. There are many different controllers, where they especially differ in the amount of HDD storage volume they can handle. I used 4TB-HDDs and at first I bought a controller that could handle only up to 2TB, so I had to change it - 2nd hint: Make sure that the power supply with which you want to power your RasPi can at least provide 5VDC and 2A.
Important note: Neither I nor instructables.com are responsible for the content behind the links I have inserted in this instruction.
Next I want to give you a little shopping list for the parts you need:
- a Raspberry Pi (should work with Version 2 or 3, I use a RasPi Version 2)
- an 8 GB SD card with at least class 4 speed
- a housing for the RasPi
- a power supply, 5VDC / 2A, with a micro-USB connector
- 2x external HDDs (or SSDs) with a USB connector
or 2x HDDs (or SSDs) with an SATA connection - 2x housing with an SATA to USB controller (not needed if you have an external HDD with a USB outlet)
- a wooden board of about 50 cm x 30 cm and a thickness of 2 cm, the color is your choice ;)
- a power strip with at least 3 outlets (ideally the power strip has the same color as your board)
- 5 to 6 metal brackets (that you can buy at your local hardware / DIYstore (e.g. like this one)
The brackets should be about a thumb with in width and they should have a screwhole - metal perforated tape (just the thing on the spool here)
- 12 screws that have a length of about 50-80% of the board with (in my case about 1,5 cm)
- 1m of shrinking tube that fits over the brackets and the metal tape
- ethernet (LAN) cable
- 1 bag of Sugru (to cover the edges of the holes and to make it look nice)
- 1 bag with at least 50 cable clamps
- 1 bad of nails with at least 50 pieces, the nails should not be longer than 1,5 cm (!)
- 1 bag of two-component adhesive
- optionally: 10 felt pads (e.g. these)
Also for the Software setup you will need
- a screen that can be connected to HDMI (can also be your TV)
- a USB keybaord
- a USB mouse
Mounting the Brackets
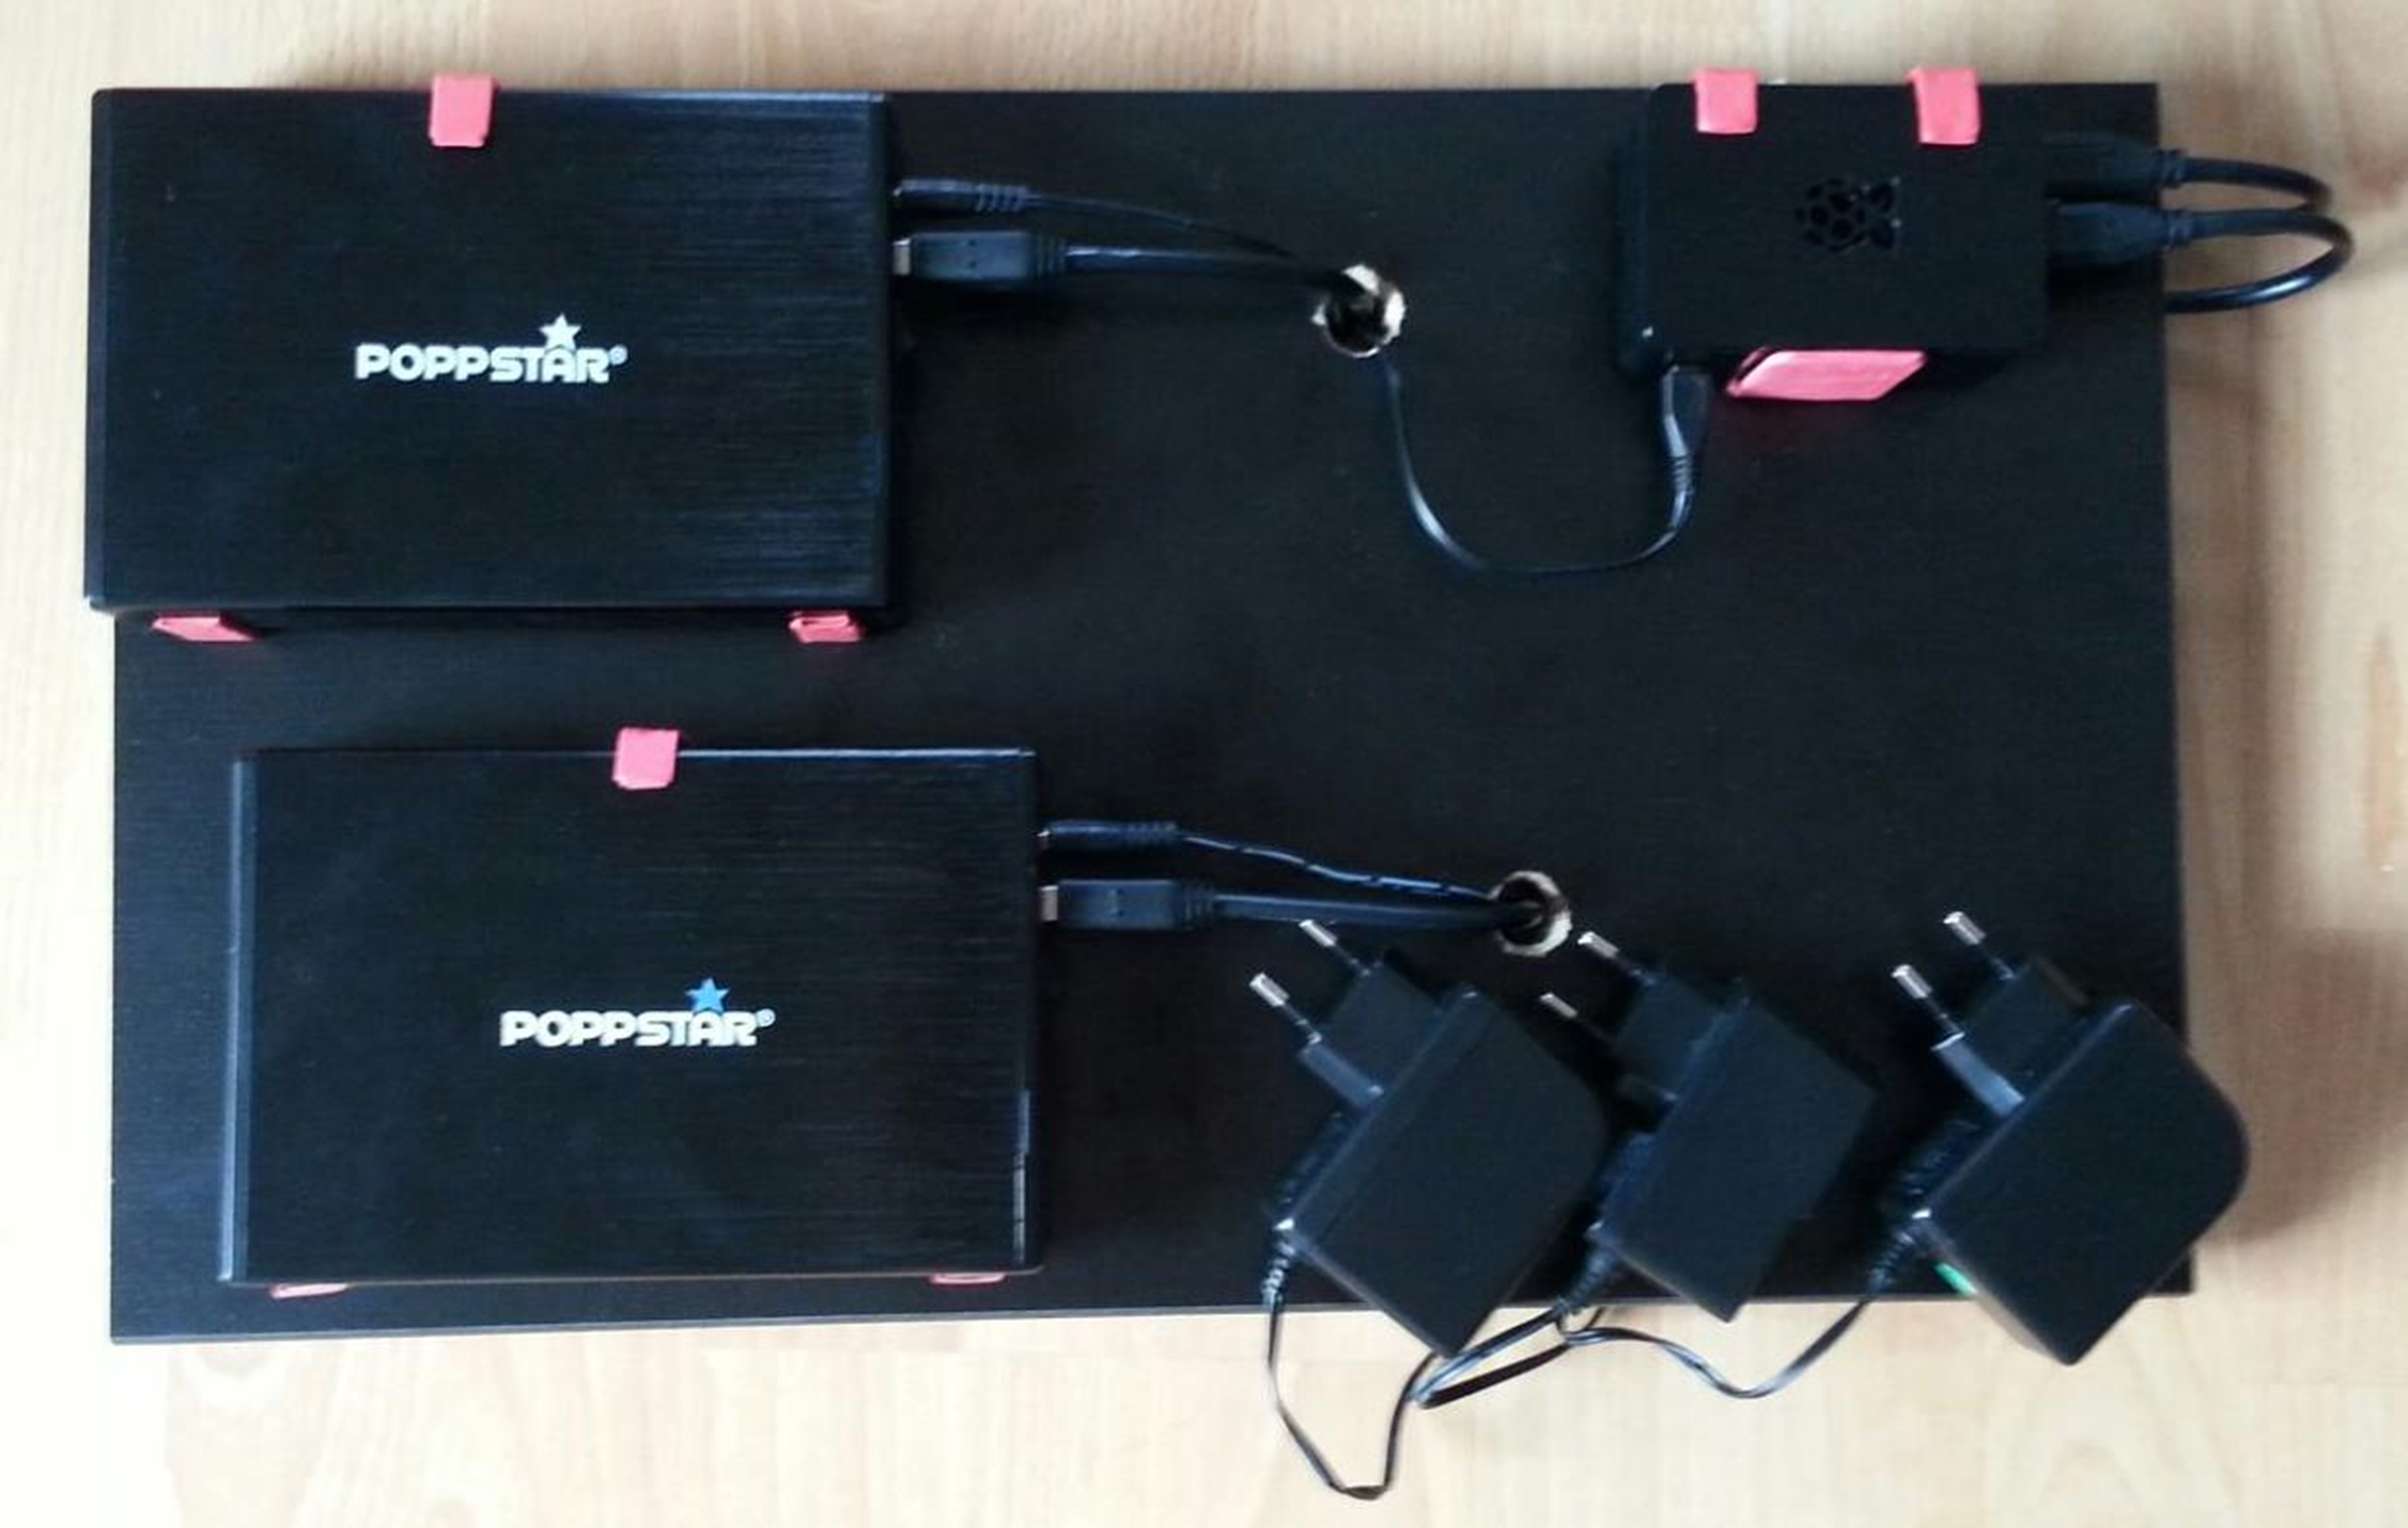
- Cut 4 pieces with each about 8 cm from the metal perforated tape.
- Bend the tape pieces such that one fits around the edge of each HDD case and around the RasPi
- Align the HDD cases on the board as you wish (e.g. like I did on my board) and put the brackets underneath the HDD cases and the RasPi, but only on the lower side (which is the side that will be facing downwards later, when the board is hanging on the wall). The HDD cases and the RasPi will kind of stand on these brackets later.
- Mark the position of the brackets. The tape can be roughly positioned since it can be bent later on quite easily. Then remove the HDD cases and the Pi.
- Put the shrinking tube on the brackets and the metal tape and punch a hole through, where the screw hole is. Be careful to make only small holes, because the holes will widen upon heating the shrinking tube.
- Heat up the shrinking tube with a hot air gun or a lighter.
- Mount the brackets (now covered in shrinking tube) on the board with screws. Now do the same thing for the metal perforated tape.
- Bend the metal perforated tape around the upper edge of the HDD cases and the RasPi
Now you have a board with a RaspBerry Pi and two HDDs mounted on it.
For less scratches on the cases and less rattling noise from the HDDs you can also put some felt pads on top of the screws.
Tie Down Cables
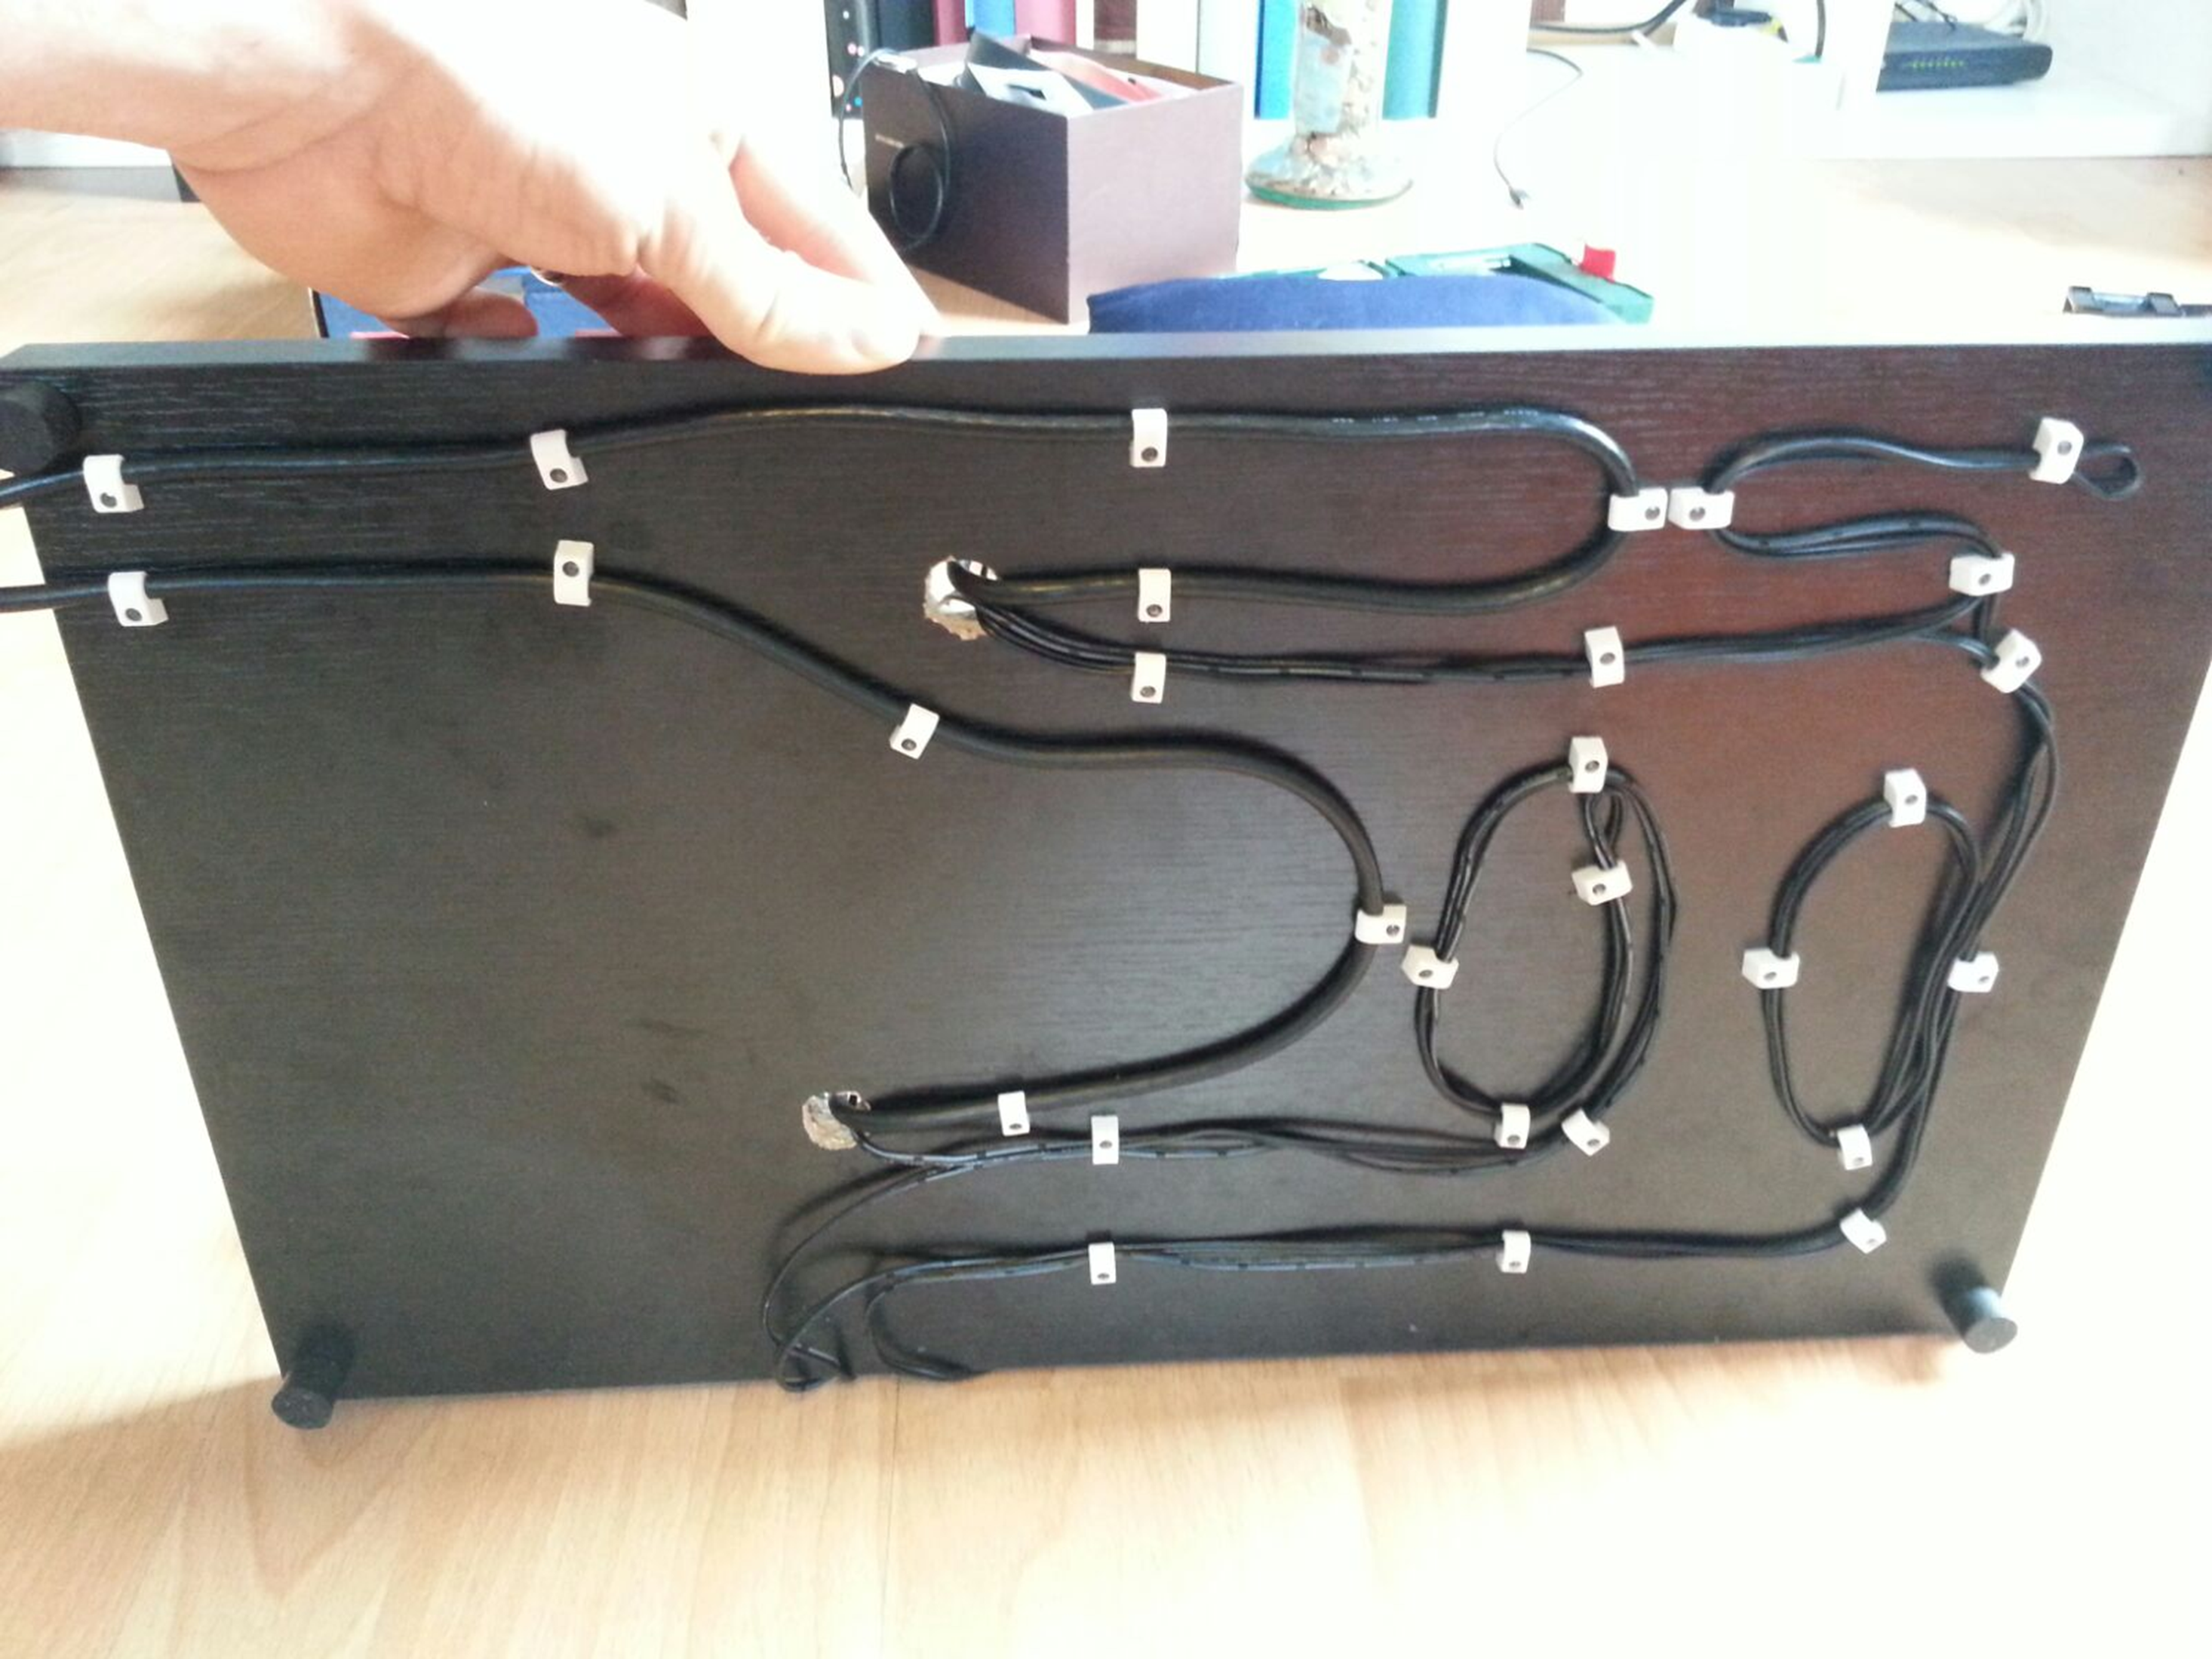
The idea in this step is to have the wiring hidden behind the board.
- Drill 2 holes through the board about 3 - 4 thumb widths from where the USB and power inlet of the HDDs are such that the cables can run through the hole smoothly.
- Make sure that the USB connector and the power connector can go through the hole with a lot of space left (about 3-4 mm on each side)
- Cover the holes with Sugru and while you do that always check if both connectors can still go through the hole easily (later when the Sugru has dried it will be much harder to widen the hole again)
- After the Sugru has dried, put all connectors through
- Now you have to clamp down the remaining cables on the back side. I am sure ou can do a better job than I did in the picture :)
Mounting the Power Strip
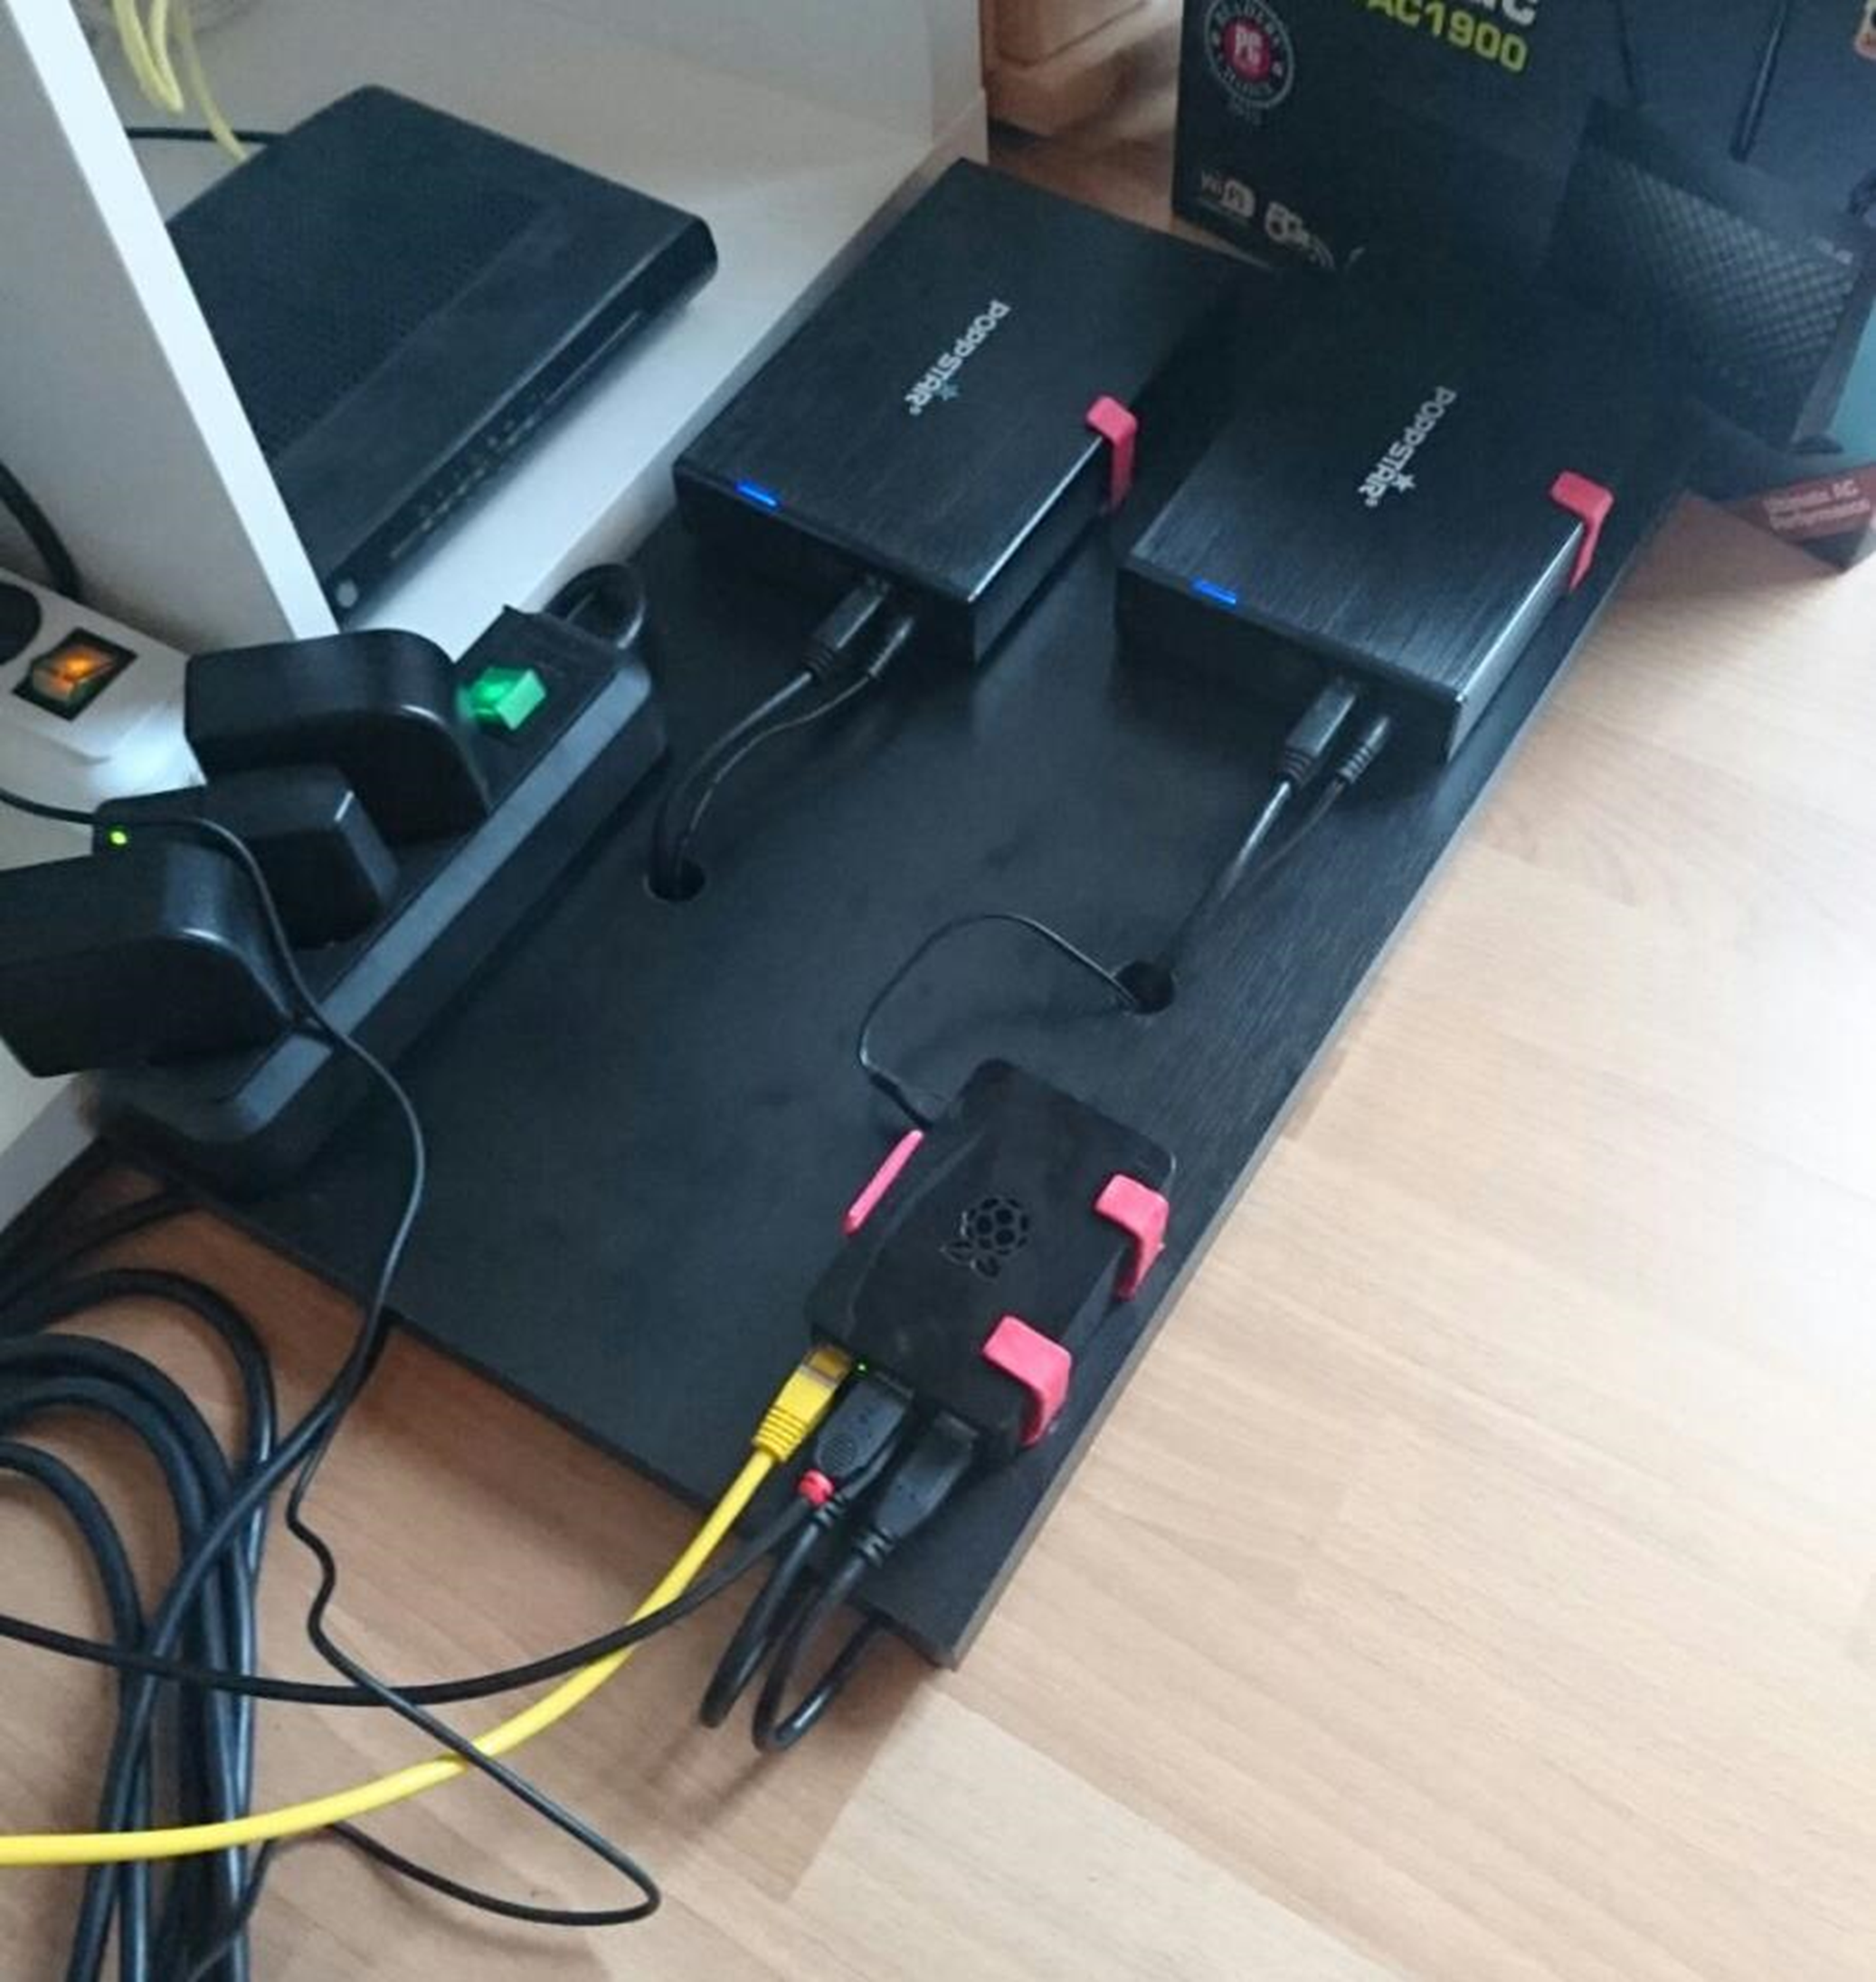
Now mount the power strip with the two-component adhesive on the board. You can roughen the surface of the power strip and the board if you want to.
And yes: You do need two-component adhesive, because otherwise your power strip will fall off all the time ;)
Mounting the Whole Thing on the Wall
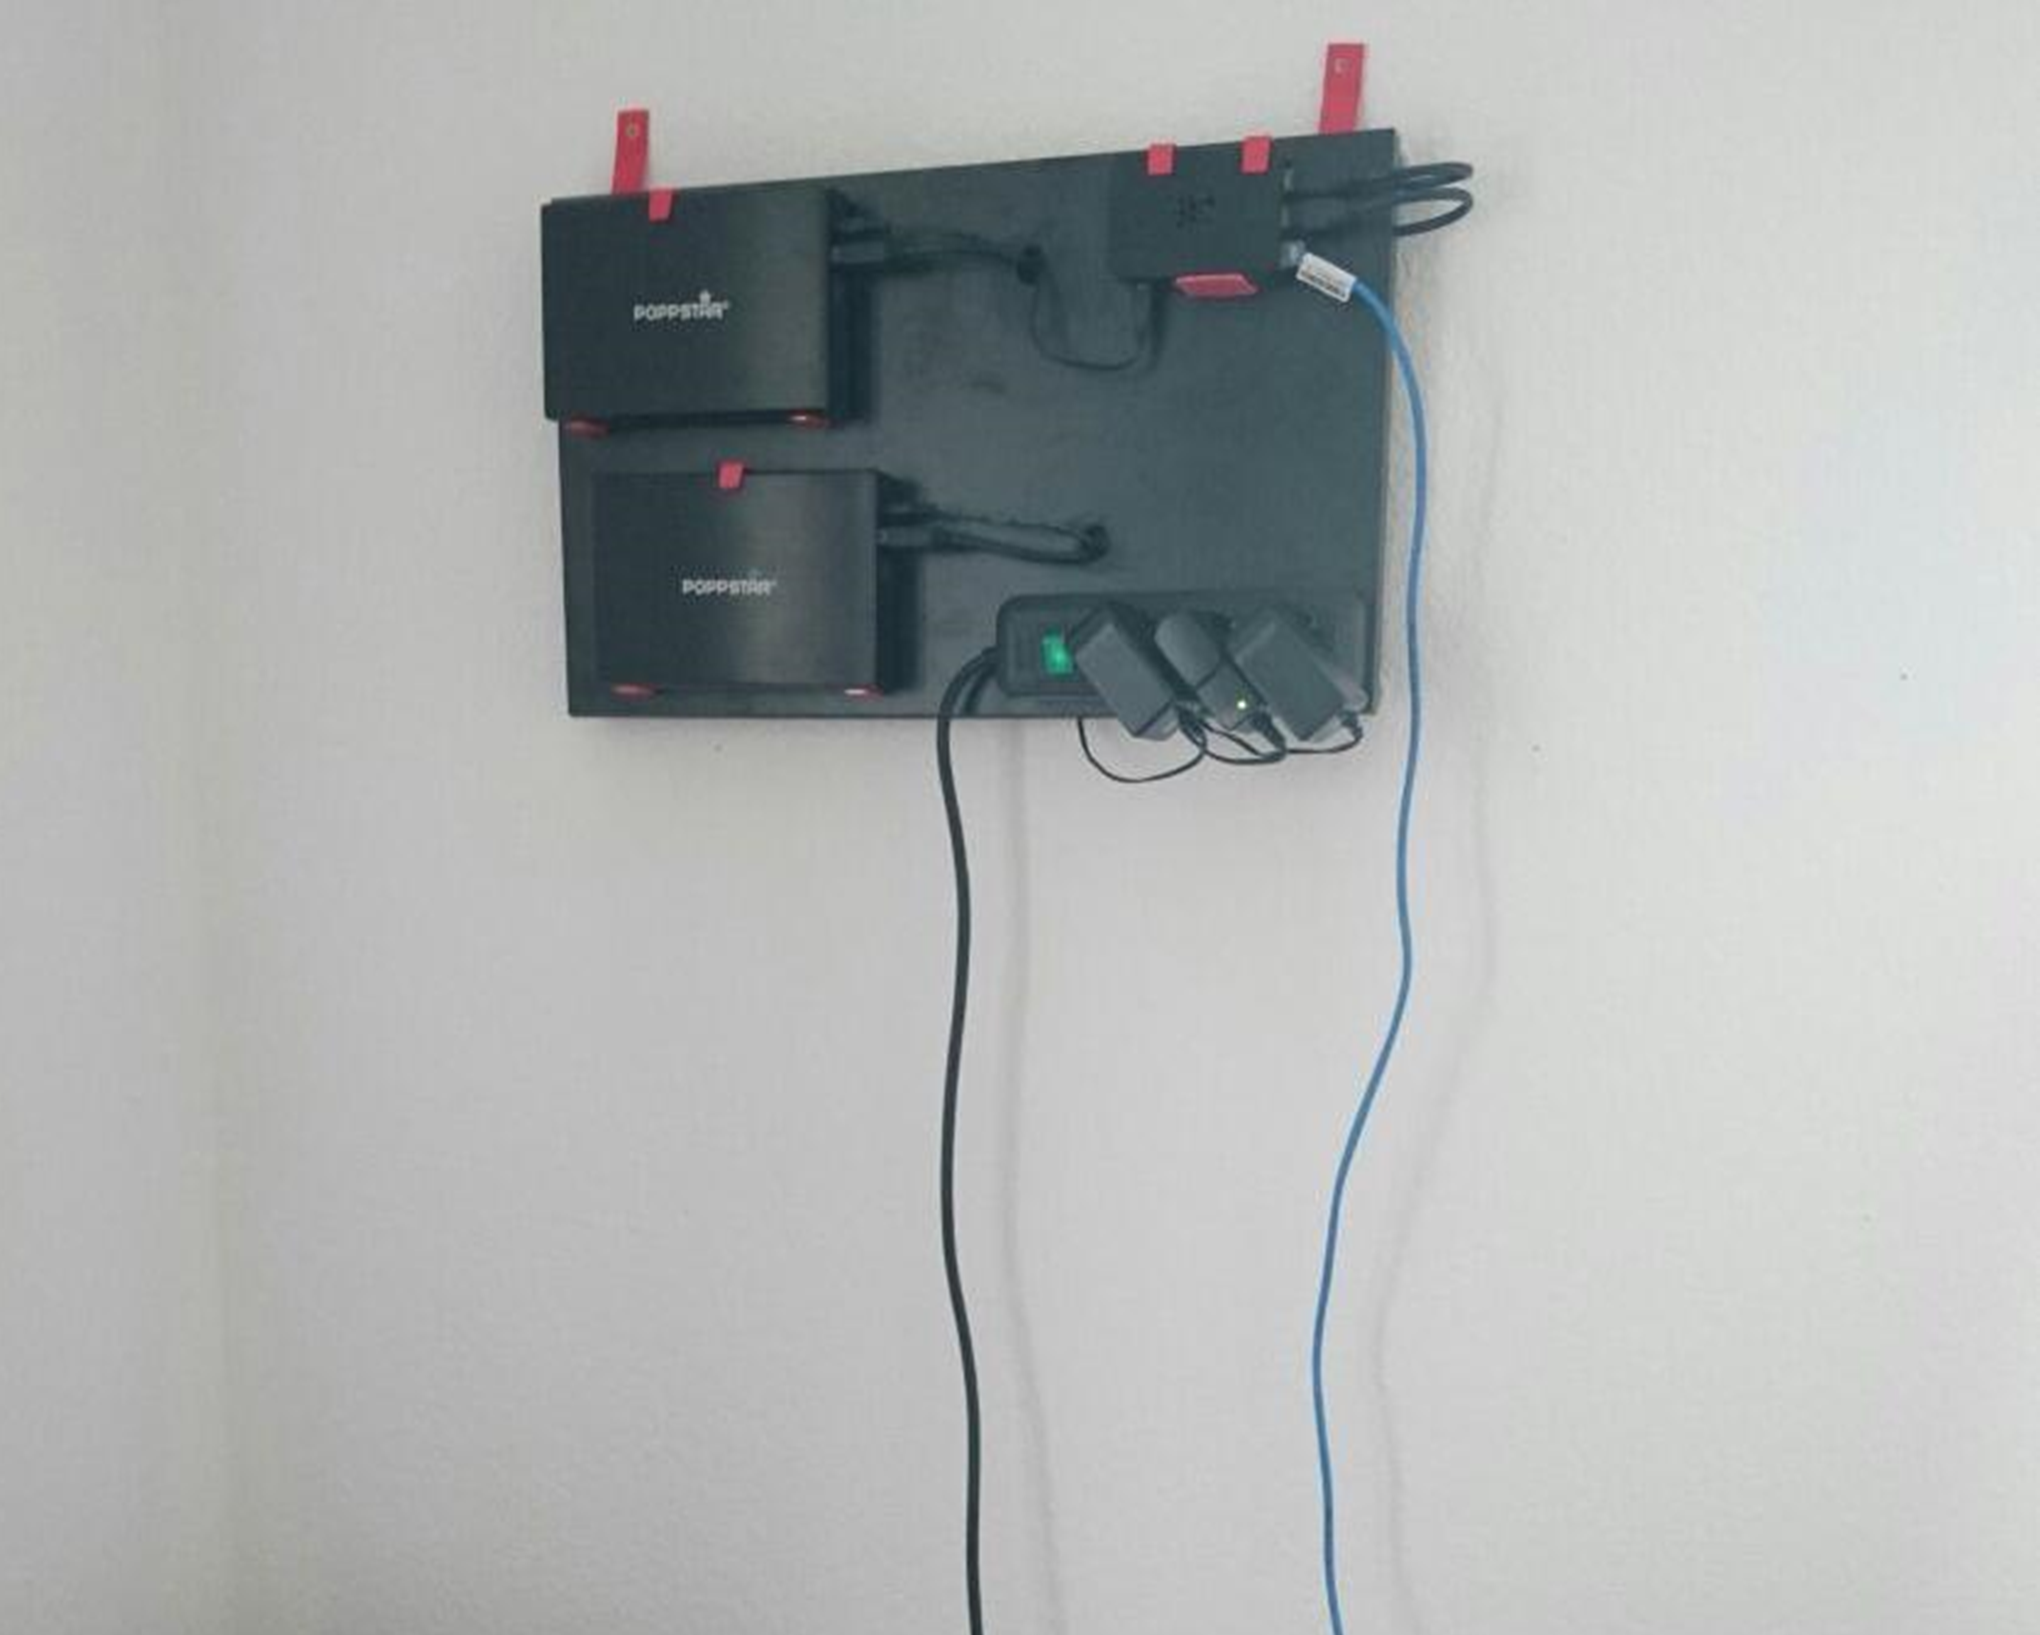
- Now cut another 2 pieces with 10 cm each from the metal perforated tape
- Put some shrinking tube on the tape pieces.
- screw each tape piece on one backside corner of the board (just as in the picture)
- screw the other ends to the wall (for a concrete wall you first have to mount plugs, just like I had to)
Clamping Down the Outgoing Cables
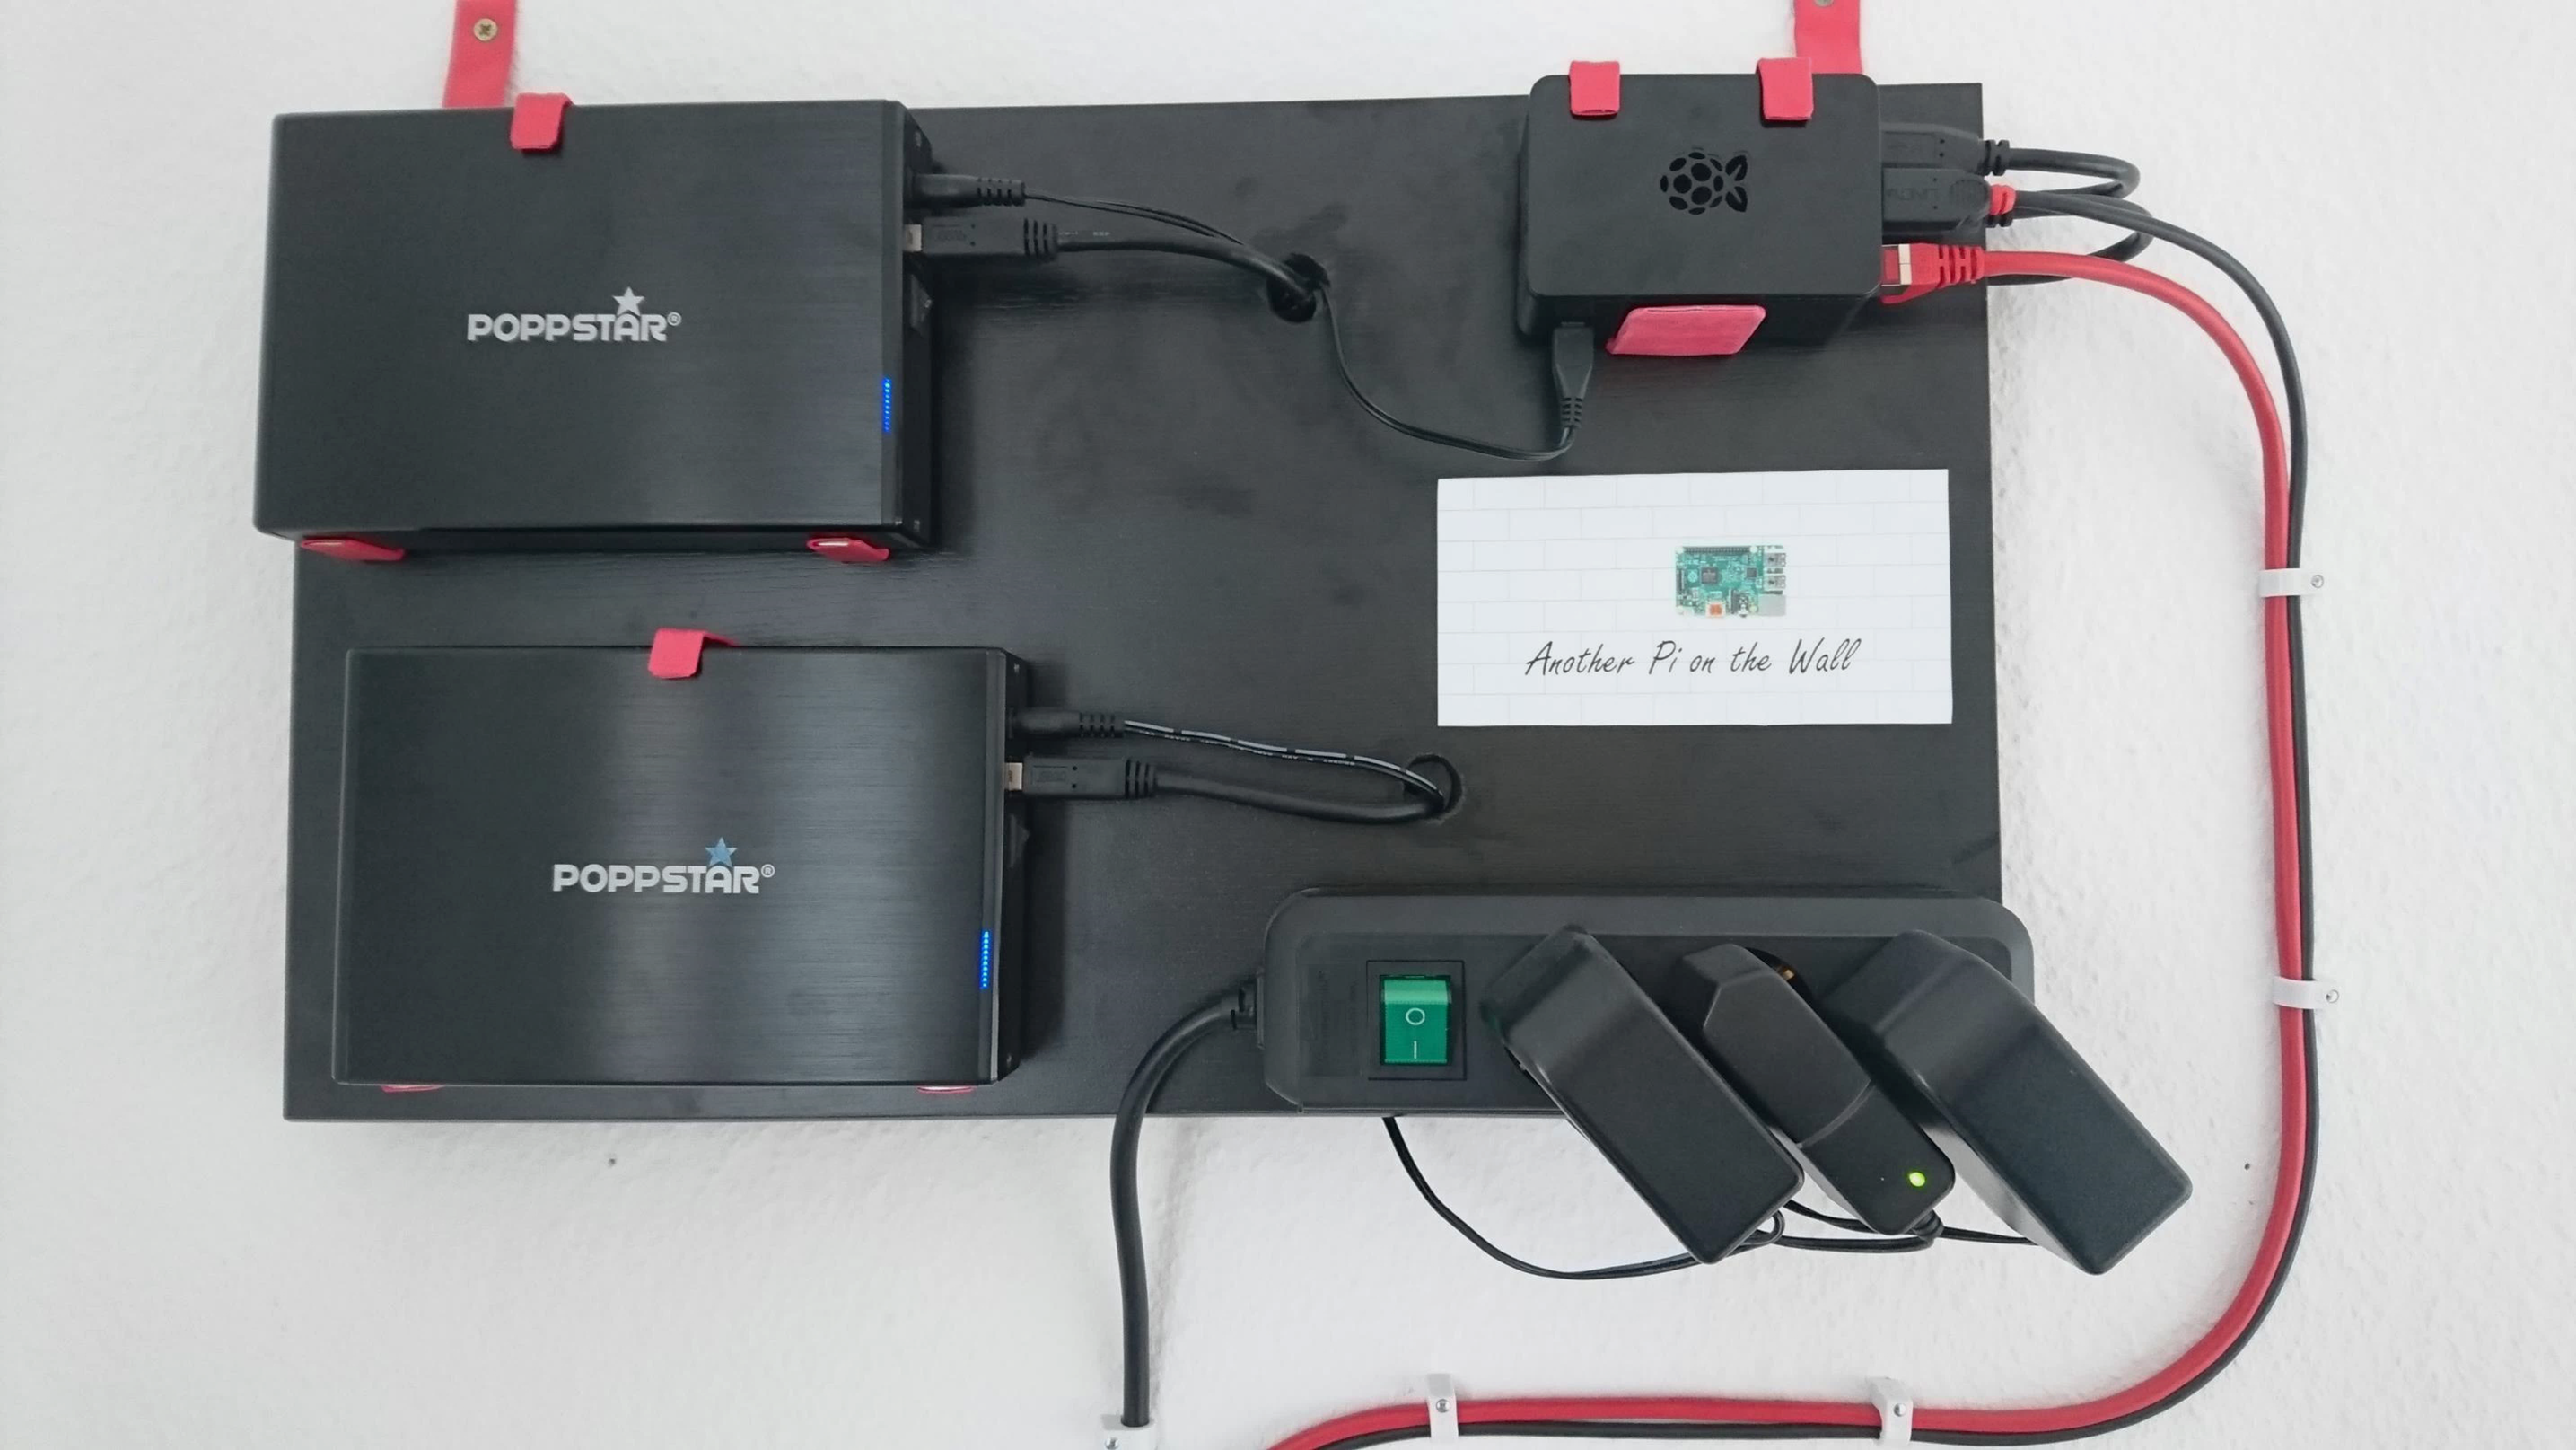
Lastly clamp down the rest of the cables that run from the board to the power outlet and the router/switch.
Installing NOOBS on the Raspberry Pi
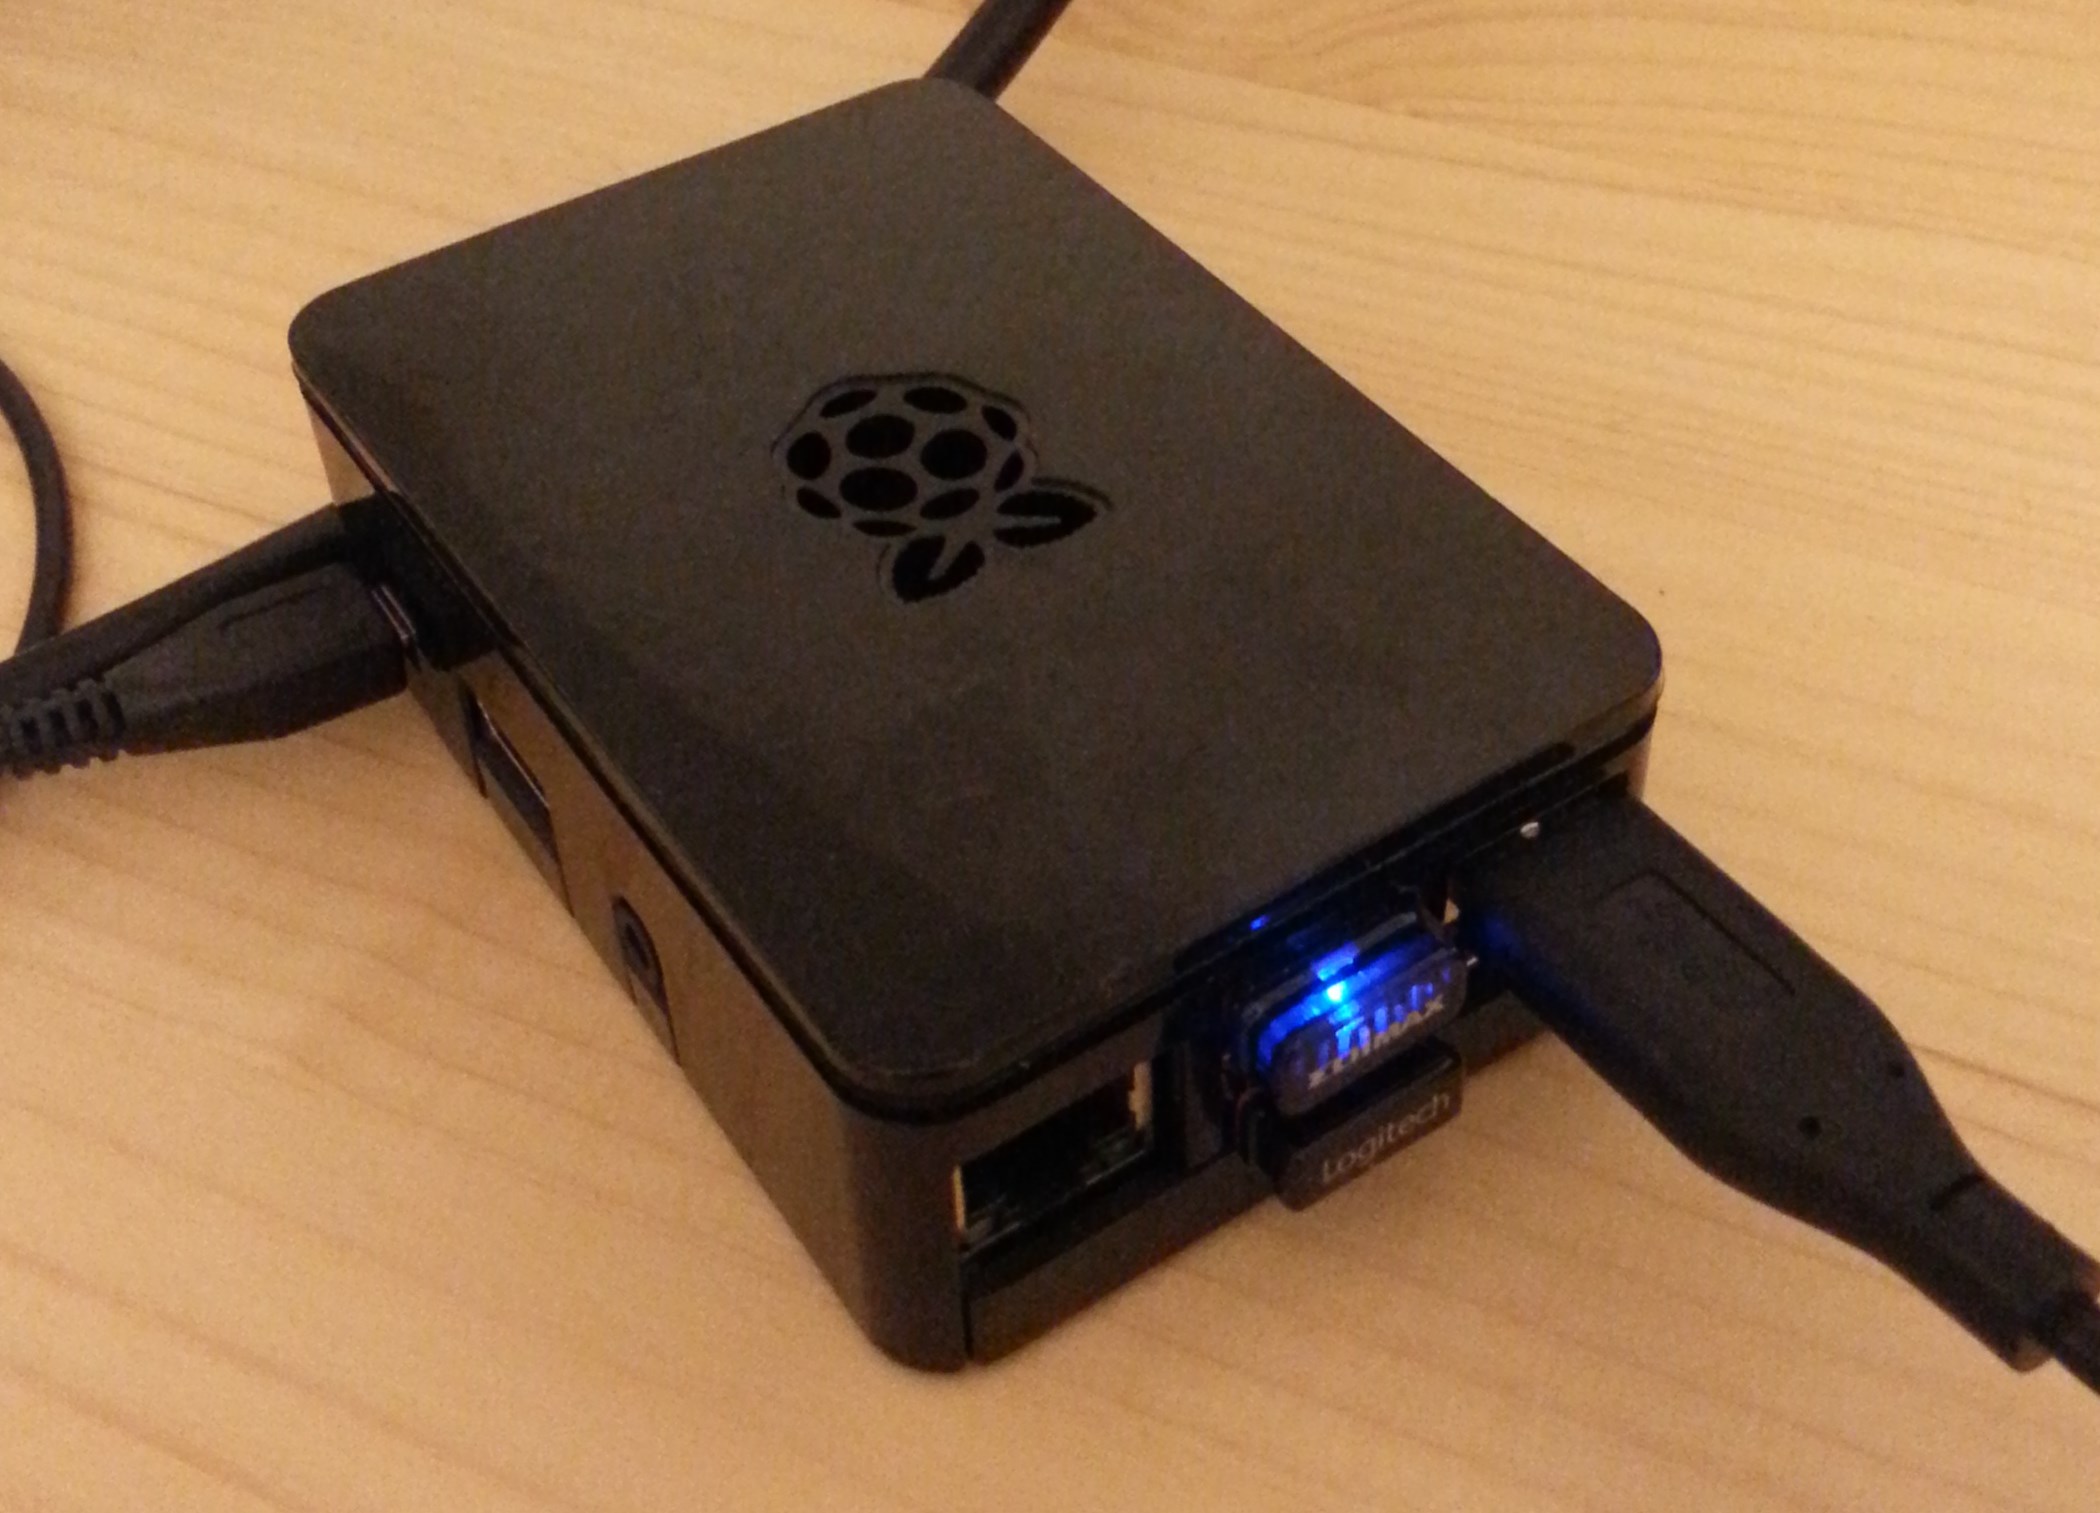
Before we start programming the Raspberry Pi we need to put the operating system (OS) on the SD card that is going to go into the RasPi.
We are going to use a simpler version of Raspbian called "NOOBS". This one if much easier to install because there is going to be a wizard guiding you through the process.
You also might want to read the instruction for the installation here.
- Download the latest version of NOOBS at https://www.raspberrypi.org/downloads/noobs/
I recommend you take the zip version of "Offline and network install" one. - Extract the zip file
- Format the SD card completely
- Copy all extracted files from the zip onto the SD card.
- Put the SD card into the RasPi
- Connect a screen to HDMI port and a keyboard and mouse to the USB ports.
- Power up the Raspi.
After that
- follow the installation instructions.
- choose "Raspbian" and do not forget to choose your country and the keyboard style on the bottom
(it is kind of complicated to change it later on with a wrong keyboard layout)
Setting Up Raspbian - Overview
Before we can start using our RasPi properly we need to set up some things. For example you might not want to use a separate screen all the time. An alternative is a VNC, which allows you to control the RasPi remotely from your PC. The following steps will be:
- Set up the network connetions (LAN/Wifi)
- Set up the VNC *)
- Make the VNC boot automatically
- Format the HDDs to a more efficient linux file system (ext4) and turn off lazy journaling.
- Have the HDDs automatically mounted on startup (connect them software wise to Raspbian)
- Set up the Samba server (a process that allows you to access the HDDs content via remote from a PC)
- Set up file backup system with second/backup HDD.
*) Note: A VNC (Virtual Network Computing) enables you to control to your RasPi via remote from your PC. You will see everything that would be shown if a screen is connected, you have control over the mouse and the keyboard... everthing. Except you are sitting on your PC possibly somewhere completely different.
Since you want your RasPi to be on the wall without a screen, having a VNC is important.
Set Up the Network Connetions (LAN/Wifi)
A good guide on how to set up your LAN / Wifi connection can be found here.
In order to tell Raspbian what kind of connection you want to use you have to write it in a special file. The following settings configure a LAN connection. If you want to set up Wifi use the settings described here.
Open a shell and type in
sudo nano /etc/network/interfaces
Which opens the file "interfaces" in the "nano" text editor. In the editor write the following lines
auto lo
iface lo inet loopback
iface eth0 inet dhcp
hostname "myRasPi"  # "myRasPi" can be exchanged with a name of your choice
allow-hotplug wlan0
iface wlan0 inet dhcp
wpa-conf /etc/wpa_supplicant/wpa_supplicant.conf
iface default inet dhcp
(After every # follows a comment). Then save and exit with "Ctrl + X" and "Enter".
Now we need to put in our credentials for the LAN/Wifi connection. Therefore you need to open
sudo nano /etc/wpa_supplicant/wpa_supplicant.conf
and put in your credentials. Replace "YOURSSID" with the name of your LAN/Wifi network and "YOURPASSWORD" with the corresponding network password. Oh and change the country code if necessary :)
country=DE
ctrl_interface=DIR=/var/run/wpa_supplicant GROUP=netdev
update_config=1

network={
ssid="YOURSSID"
psk="YOURPASSWORD"

# Protocol type can be RSN (for WP2) and WPA (for WPA1)
proto=RSN   # always use RSN

# Key management type
key_mgmt=WPA-PSK

# Pairwise can be CCMP (for WPA2) and TKIP (for WPA1)
pairwise=CCMP

#Authorization option should be OPEN for both WPA1/WPA2
auth_alg=OPEN
<p>}</p>
The rest of the settings should be exactly as described above. Especially "pairwise=CCMP" and "proto=RSN".
Set Up VNC

Other good guides on how to set up a VNC are Guide1, Guide2 and Guide3.
Before you install the VNC software you should probably make an update:
sudo apt-get update && apt-get upgrade
Then download and install the "tightVNCserver" app
sudo apt-get install tightvncserver
After that is done, set a password for this VNC server
vncpasswd
which will later be asked on your PC as you log on to the RasPi via remote.
In order to test whether the VNC server already works, call a tightVNC server session on the RasPi with
tightVNCserver
Now go to your PC and download the tightVNC viewer from here and install it (on installing you can uncheck the "tightVNCserver" option, you will not need it on your PC).
You can either check in Windows or on your router which IP-Address your RasPi has (if you work with DHCP). Then start the TightVNC-Viewer on your PC and type in the IP address of the RasPi then a colon and then the port number which is usually 5901.
For example: The PasPi IP address is 192.168.1.50 then the remote host is 192.168.1.50:5901.
You should be able to see the screen of your RasPi.
Make the VNC Boot Automatically
We have started a VNC but if you reboot the RasPi the session will be gone and you cannot connect to your RasPI via remote from your PC anymore.
In order to make the VNC server session to autostart you need to download a script here, which should show this:
#!/bin/sh
### BEGIN INIT INFO
# Provides:		tightvncserver
# Required-Start:	$local_fs
# Required-Stop:	$local_fs
# Default-Start: 	2 3 4 5
# Default-Stop		0 1 6
# Short-Description:	Start/stop trightvncserver
# END INIT INFO
# More details see:
#  http://www.penguintutor.com/linux/tightvnc

# Customize this entry
# Set the USER variable to the name of the user to start tightvncserver under
export USER='pi'
### End customization required
eval cd ~$USER
case "$1" in
	start)
	  su $USER -c '/usr/bin/tightvncserver :1'
	  echo "Starting TightVNC server for $USER "
	  ;;
	stop)
	  pkill Xtightvnc
	  echo "Tightvncserver stopped"
	  ;;
	*)
	  echo "Usage: /etc/init.d/tightvncserver {start|stop}"
	  exit 1
	  ;;
esac
exit 0
Important is the beginning #!/bin/sh. After download you need to copy the content. Then open a new file with nano
sudo nano /etc/init.d/tightvncserver
and paste the contents in this file. In order for Raspbian to boot this file on startup we need to change the access rights with
sudo chown root:root /etc/init.d/tightvncserver
make the file executable with
sudo chmod 755 /etc/init.d/tightvncserver
and add the file to the default runlevels (such that it will be found and executed by Raspbian)
sudo update-rc.d tightvncserver defaults
And you are all set :)
Now your RasPi should start a tightVNCserver session upon startup. Check if that works. Otherwise go though in detail and compare also to the other guides.
Format HDDs
As soon as you have connected your HDDs to the RasPi their name or index can be found with
sudo fdisk -l
A list will pop up tell you the HDD names which have the form of "/dev/sda" or "/dev/sdb".
In order to first format the HDDs call
sudo mkfs.ext4 -E lazy_itable_init=0,lazy_journal_init=0 /dev/sdX
Where you should replace the X for the HDD index that you have in the fdisk list, e.g. sda.
Now you need to wait quite a while for the HDD to format.
Then do the same thing for the second HDD (the backup HDD)
Note: The lazy journaling option causes the formatting to take quite a long time for a 4TB HDD. However later on, when you start up your RasPi, the HDDs will be booten and mounted much quicker.
Read mode about it here.
Have the HDDs Automatically Mounted on Startup
Booting your hard drives automatically or manually, in both cases you first need to download some apps
sudo apt-get -y install ntfs-3g hfutils hfsprogs exfat-fuse
The ntfs-3g is an app necessary to read the NTFS file system which is very common in Windows. If you for example plug in your HDD on the USB port, you first have to mount the HDD before you can access the data. Lets assume in this example that the HDD has an NTFS file system. Then you mount the HDD with
sudo mount -t ntfs-3g -o utf8,uid=pi,gid=pi,noatime /dev/sda /media/usbstick
After you have executed this code, the HDD will be mounted in /media/usbstick/.
Raspbian nowadays already mounts recently connected devices like USB sticks or HDDs automatically into the /media/ folder. But if you want to make sure that the HDDs are always mounted properly, follow the steps below:
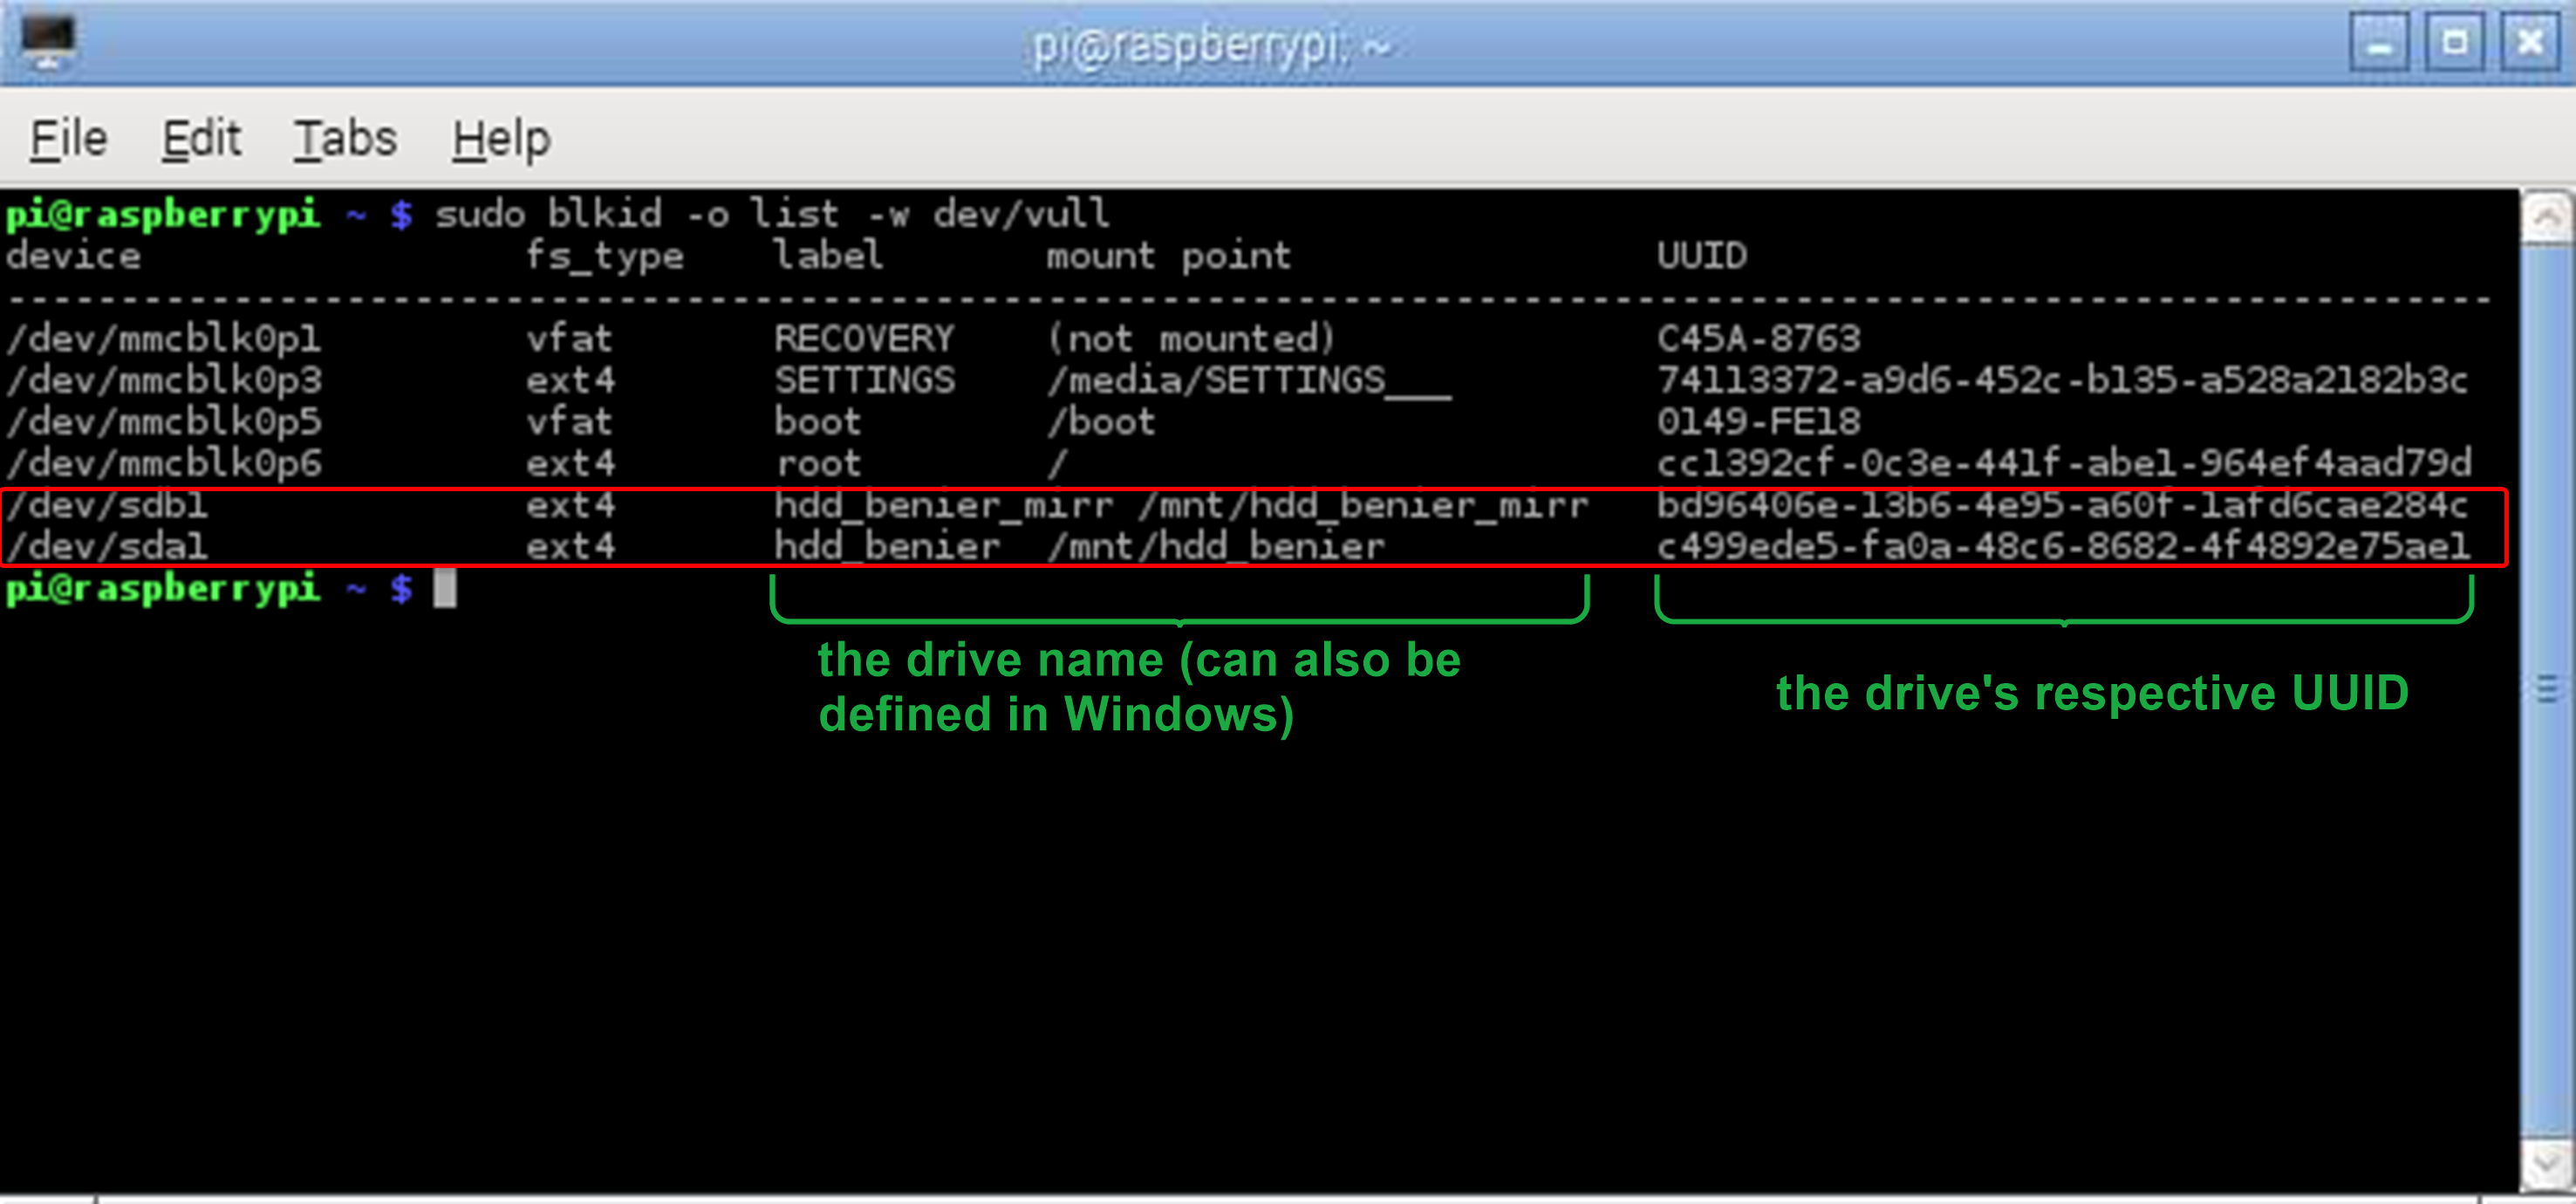
First, find out the UUID (unique device name) of your HDDs by typing
sudo blkid -o list -w /dev/null
Enter the UUIDs of both HDDs in /etc/fstab by calling nano with
sudo nano /etc/fstab/
and add the following lines in the fstab-list:
UUID=xxxxxxxx 	/mnt/myDrive		ext4	defaults	0
UUID=yyyyyyyy	/mnt/myDrive_mirror	ext4	defaults	0
instead of the xxxxxxxx and yyyyyyyy enter the real UUID of your HDDs and also change the "myDrive" to whatever you called your mounting folders.
Caution: Do not delete anything that was already written into this file! Only add new lines.
As an alternative to this tutorial Guide 1, Guide 2 or Guide 3 also tell you how to (automatically or manually) mount drives such that you can have access to their content.
Set Up Samba Server
As already mentioned "Samba provides file and print services for various Microsoft Windows clients[...]" (Link) In our case we create a Samba server to give all computers (i.e. from your Laptop) to access the files that are on the HDD that is connected to the RasPi.
In order to start a Samba server we first need to install it on the RasPi
sudo apt-get install samba samba-common-bin
Then we have to edit the configurations by calling the config file with nano
sudo nano /etc/samba/smb.conf
and in this file in the line
# security = user
remove the preceding "'#". This allows the user to set a Samba server password (which is recommend). THis is the password every user that wants to access the files on the HDD has to know.
Now we define a password by calling
sudo smbpasswd -a pi
and entering a password.
Now we need to tell the Samba server which files he has to give access to
sudo chown -R pi:pi /mnt/myDrive
where you should replace the /mnt/myDrive with the path where your HDD is mounted.
There are some more configurations we need to add to smb.conf. On the bottom of smb.conf add the following lines
[MyNetworkDrive]
path=/mnt/myDrive
writeable=yes
guest ok=no
workgroup=WORKGROUP
browseable=yes
where path shows again where your HDD is mounted, writebale indicates whether users are allowed to change and add files (write access). guest ok=no means that all users who want to access the files on the HDD have to know the password. Behind workgroup you have to add the name of your Windows workgroup that you are using (the default is most likely "WORKGROUP"). Browseable=yes speeds things up a little if you for example go through a lot of pictures very quickly.
After you are done with changing the config file restart the Samba server with
sudo /etc/init.d/samba restart
and test from your Windows PC if you have access to your files.
Guide 1 gives you an alternative tutorial on how to set all this up.
Set Up File Backup System
Now we have two HDDs on a Raspberry Pi on a board on the wall... but so far we have only used one HDD. Well, because we are going to use the second HDD as a backup drive that is going to be synchronized with the first one by the RasPi on a regular basis. This means that, for example, every day all changes that you have made on your first HDD will be mirrored/copied onto the second HDD.
In order to do that we need to install the app rsync by typing
sudo apt-get update
sudo apt-get install hdparm
sudo hdparm -C /dev/sda
Now we first test the whole process on one dummy file. For this we create a dummy file with
sudo nano /mnt/myDrive/TestFile.txt
and type in something arbitrary. Then close the nano with "Strg+x" and now lets make rsync directly synchronize both HDDs
rsync -av --delete /mnt/myDrive /mnt/myDrive_mirror
If everything goes well, we should find TestFile.txt on the second HDD (mean in /mnt/myDrive_mirror). In the following I will call /mnt/myDrive the "source" and /mnt/myDrive_mirror the "target".
The option -av consists of the commands
- -v which shows you in the shell what he is copying/synchronizing
- -a which does all of the following commands
- -r copies all sub directories
- -l copies symbolic links
- -p keeps access rights of the source files
- -t keeps time stamps of the source files
- -g keeps the group access rights of the source files
- --delete which compares the files on both source and target and deletes files on the target if they are not present anymore on source.
Now we have successfully synchronized our source and target drive. Now we want rsync to do that on a regular basis. For that we need to create a crontab
sudo crontab -e
This command opens a rsync config file in nano (careful to use the "sudo" command. Otherwise Raspbian will access the wrong file!). The crontab contains the same command as we used before to synchronize our source and target. However in crontab there is a prefix that tells rsync when he has to synchronize our data. The prefix consists of the following numbers
Minutes Hours DayInTheMonth Month DayOfTheWeek rsync-Command
The following crontab example should clear things up
00 05 * * * rsync -av --delete /mnt/myDrive /mnt/myDrive_mirror
which means that your RasPi synchronizes source and target every day at 05:00 am.
Nice to Know About Handling Linux
Something about Linux (what I have learned):
- on the RasPi we run a special version of Linux called "Raspbian" which is again a special version of "Debian" which is based on the Linux kernel
- Raspbian is open source and comes with a variety of pre-installed programs:
- a web browser: IceWeasel (a stripped down version of Firefox)
- Python 2 & 3
- Minecraft
- LibreOffice
- Wolfram & Mathematica
- PDF-Viewer
- Java IDE
- nano (a simple editor)
- Linux or Raspbian is mostly operated by commands you type into the command window (called "shell")
- if you are an admin (or in linux "super user") then you are allowed to change and alter al lot of things, provided you write "sudo" before every command ("sudo" = "super user do")
Example: sudo nano path/myfile --> super used calls editor nano to open "myfile" in the folder "path"
Other important calls for Raspbian:
sudo apt-get update && apt-get upgrade
--> call for updates (internet connection required)
sudo apt-get install XYZ
--> download and install package XYZ (just an example) on the RasPi
If you want to backup your Linux OS on your RasPi follow these steps:
- Download Win32DisImager
- Shut down your RasPi and take out the SD card and put it in your PC and run Win32DiskImager.
- Choose a location (with the folder button) where your want to put your backup file (he is going to generate an image of the whole SD card and put it in form of an img-file on the hard drive of your PC.
- Create a backup image by pressing "Read". (This might take a while)
- Done.