Animaker: Creating a Video
While it is becoming more and more important for museums to have an online presence, especially when it comes to social media platforms, it can be difficult to create quality content.
Animaker is a free online animation video maker with cloud-based software that facilitates the creation of social media content through pre-built characters and templates. It is created with non-designers in mind, making it easy to use and allowing for quality museum content to be shared with a wider audience.
Museums will be able to create engaging videos for social media which grab the attention of a wider audience, convey information more quickly through visuals than captions, and allow for a more interactive presence online to promote their collections, events, and exhibitions.
This instructional outlines the steps to create a short video intended for social media, such as Instagram.
Supplies
A computer with Internet access.
That's it!
Create an Account
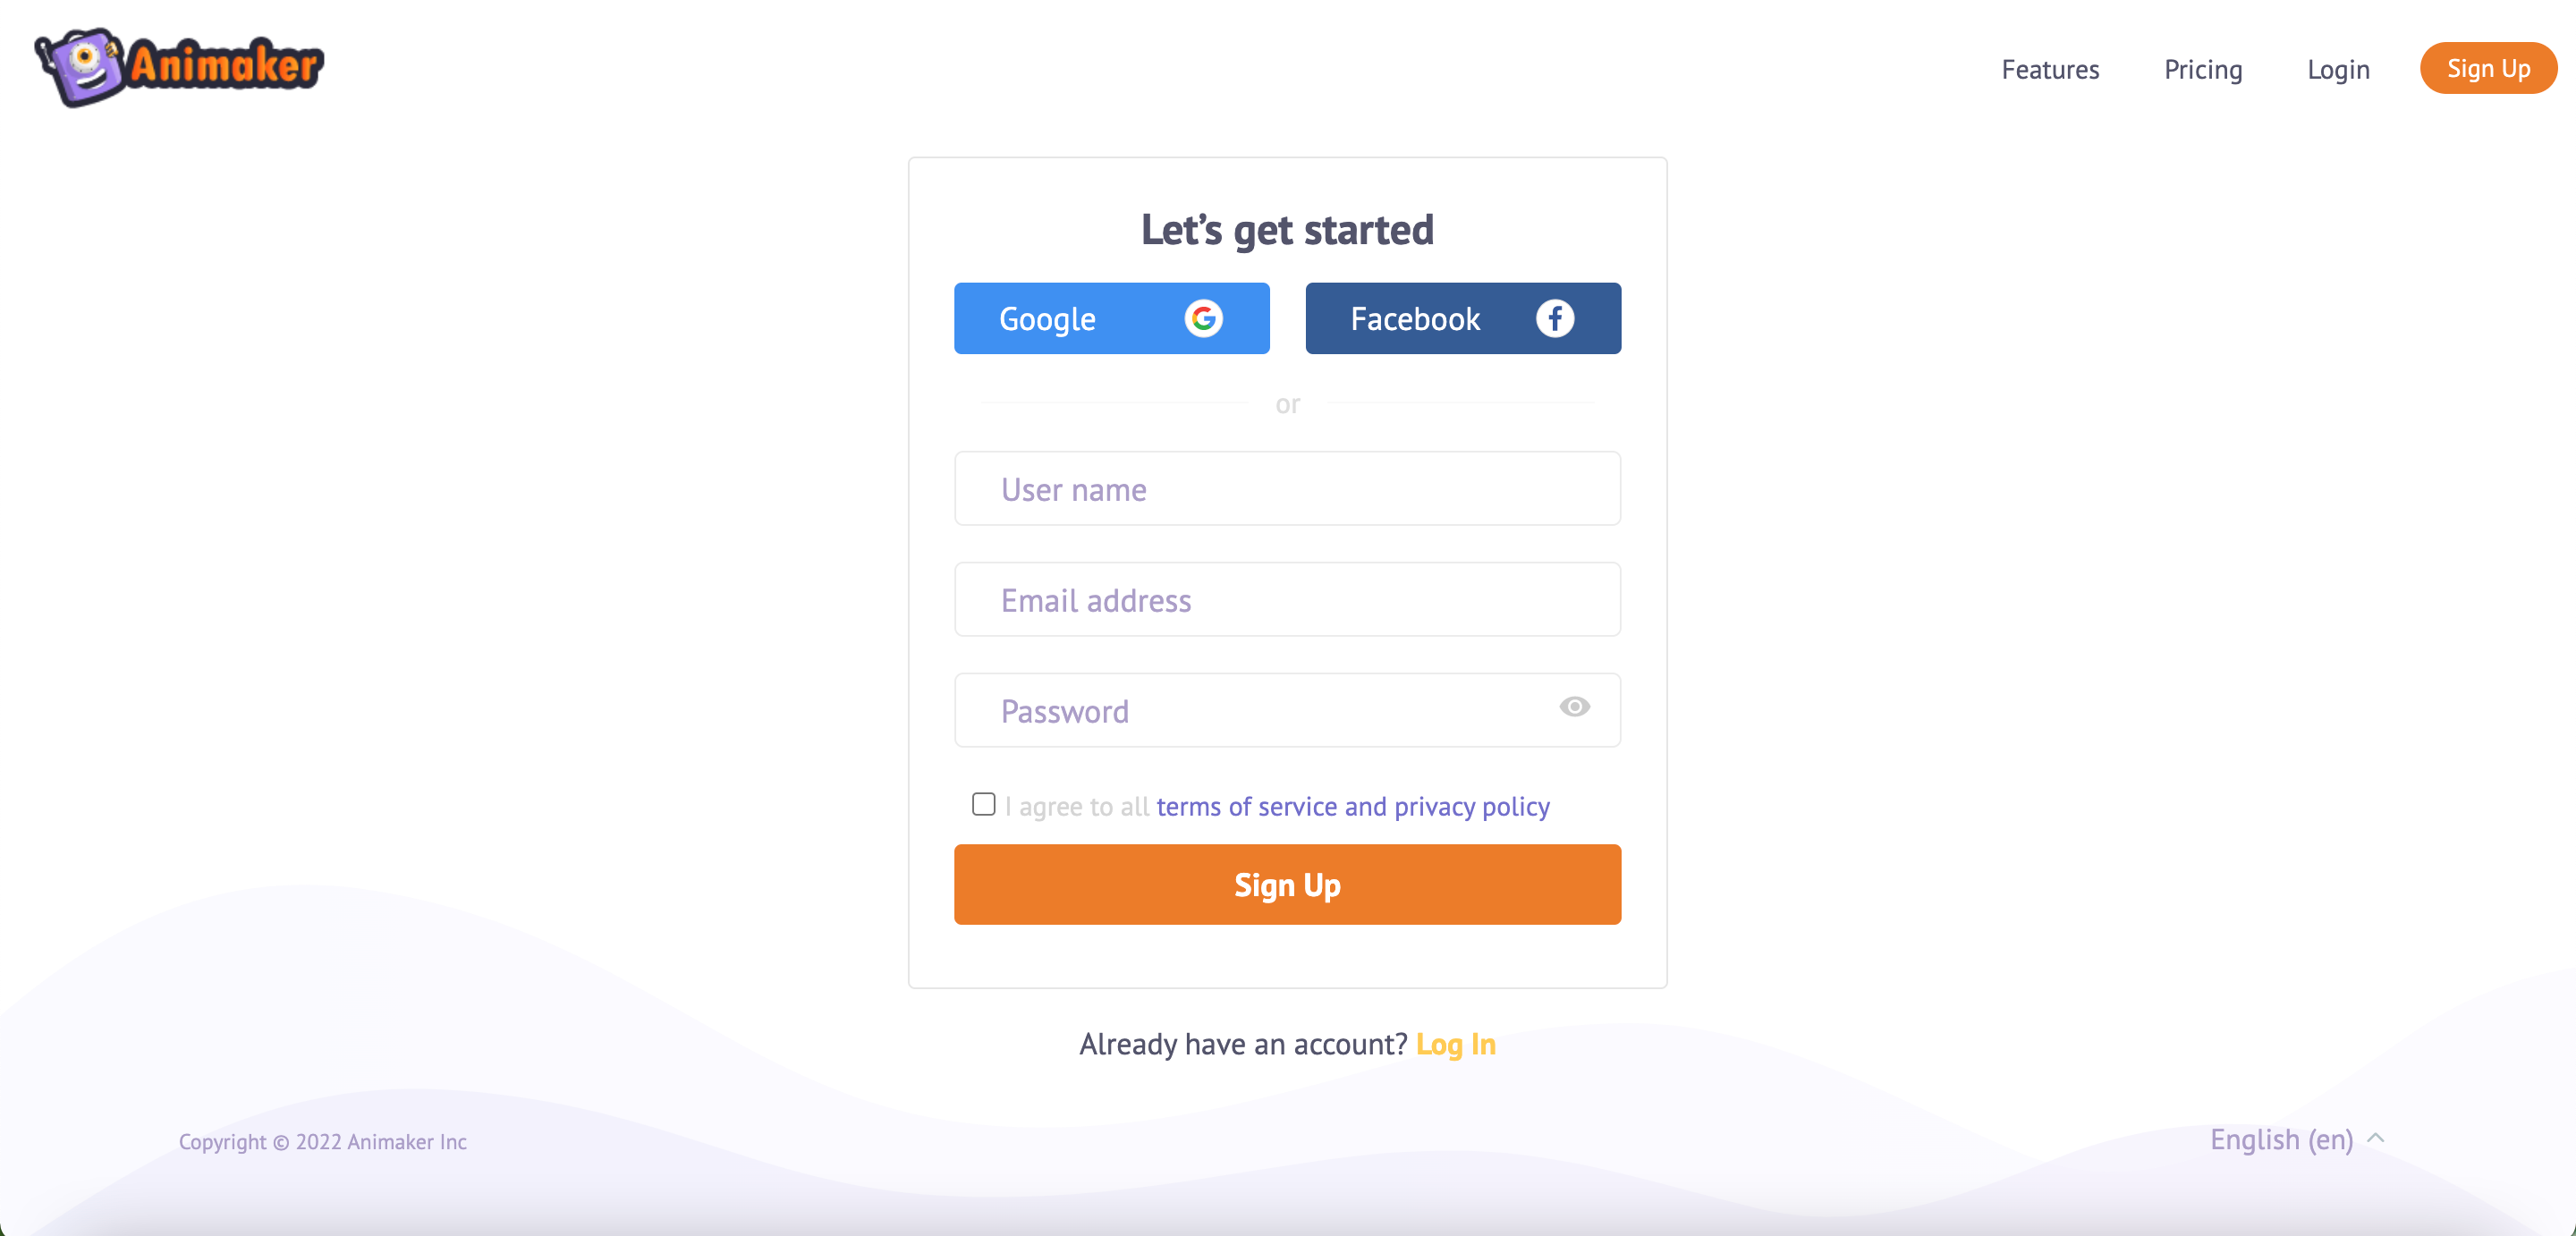
There are three ways to sign up for Animaker. Through a Google Account, a Facebook Account, or by creating a separate login for the website.
This instructional uses the free version of Animaker, museums may wish to upgrade to one of the premium versions to receive more customizations and higher quality videos.
Dashboard
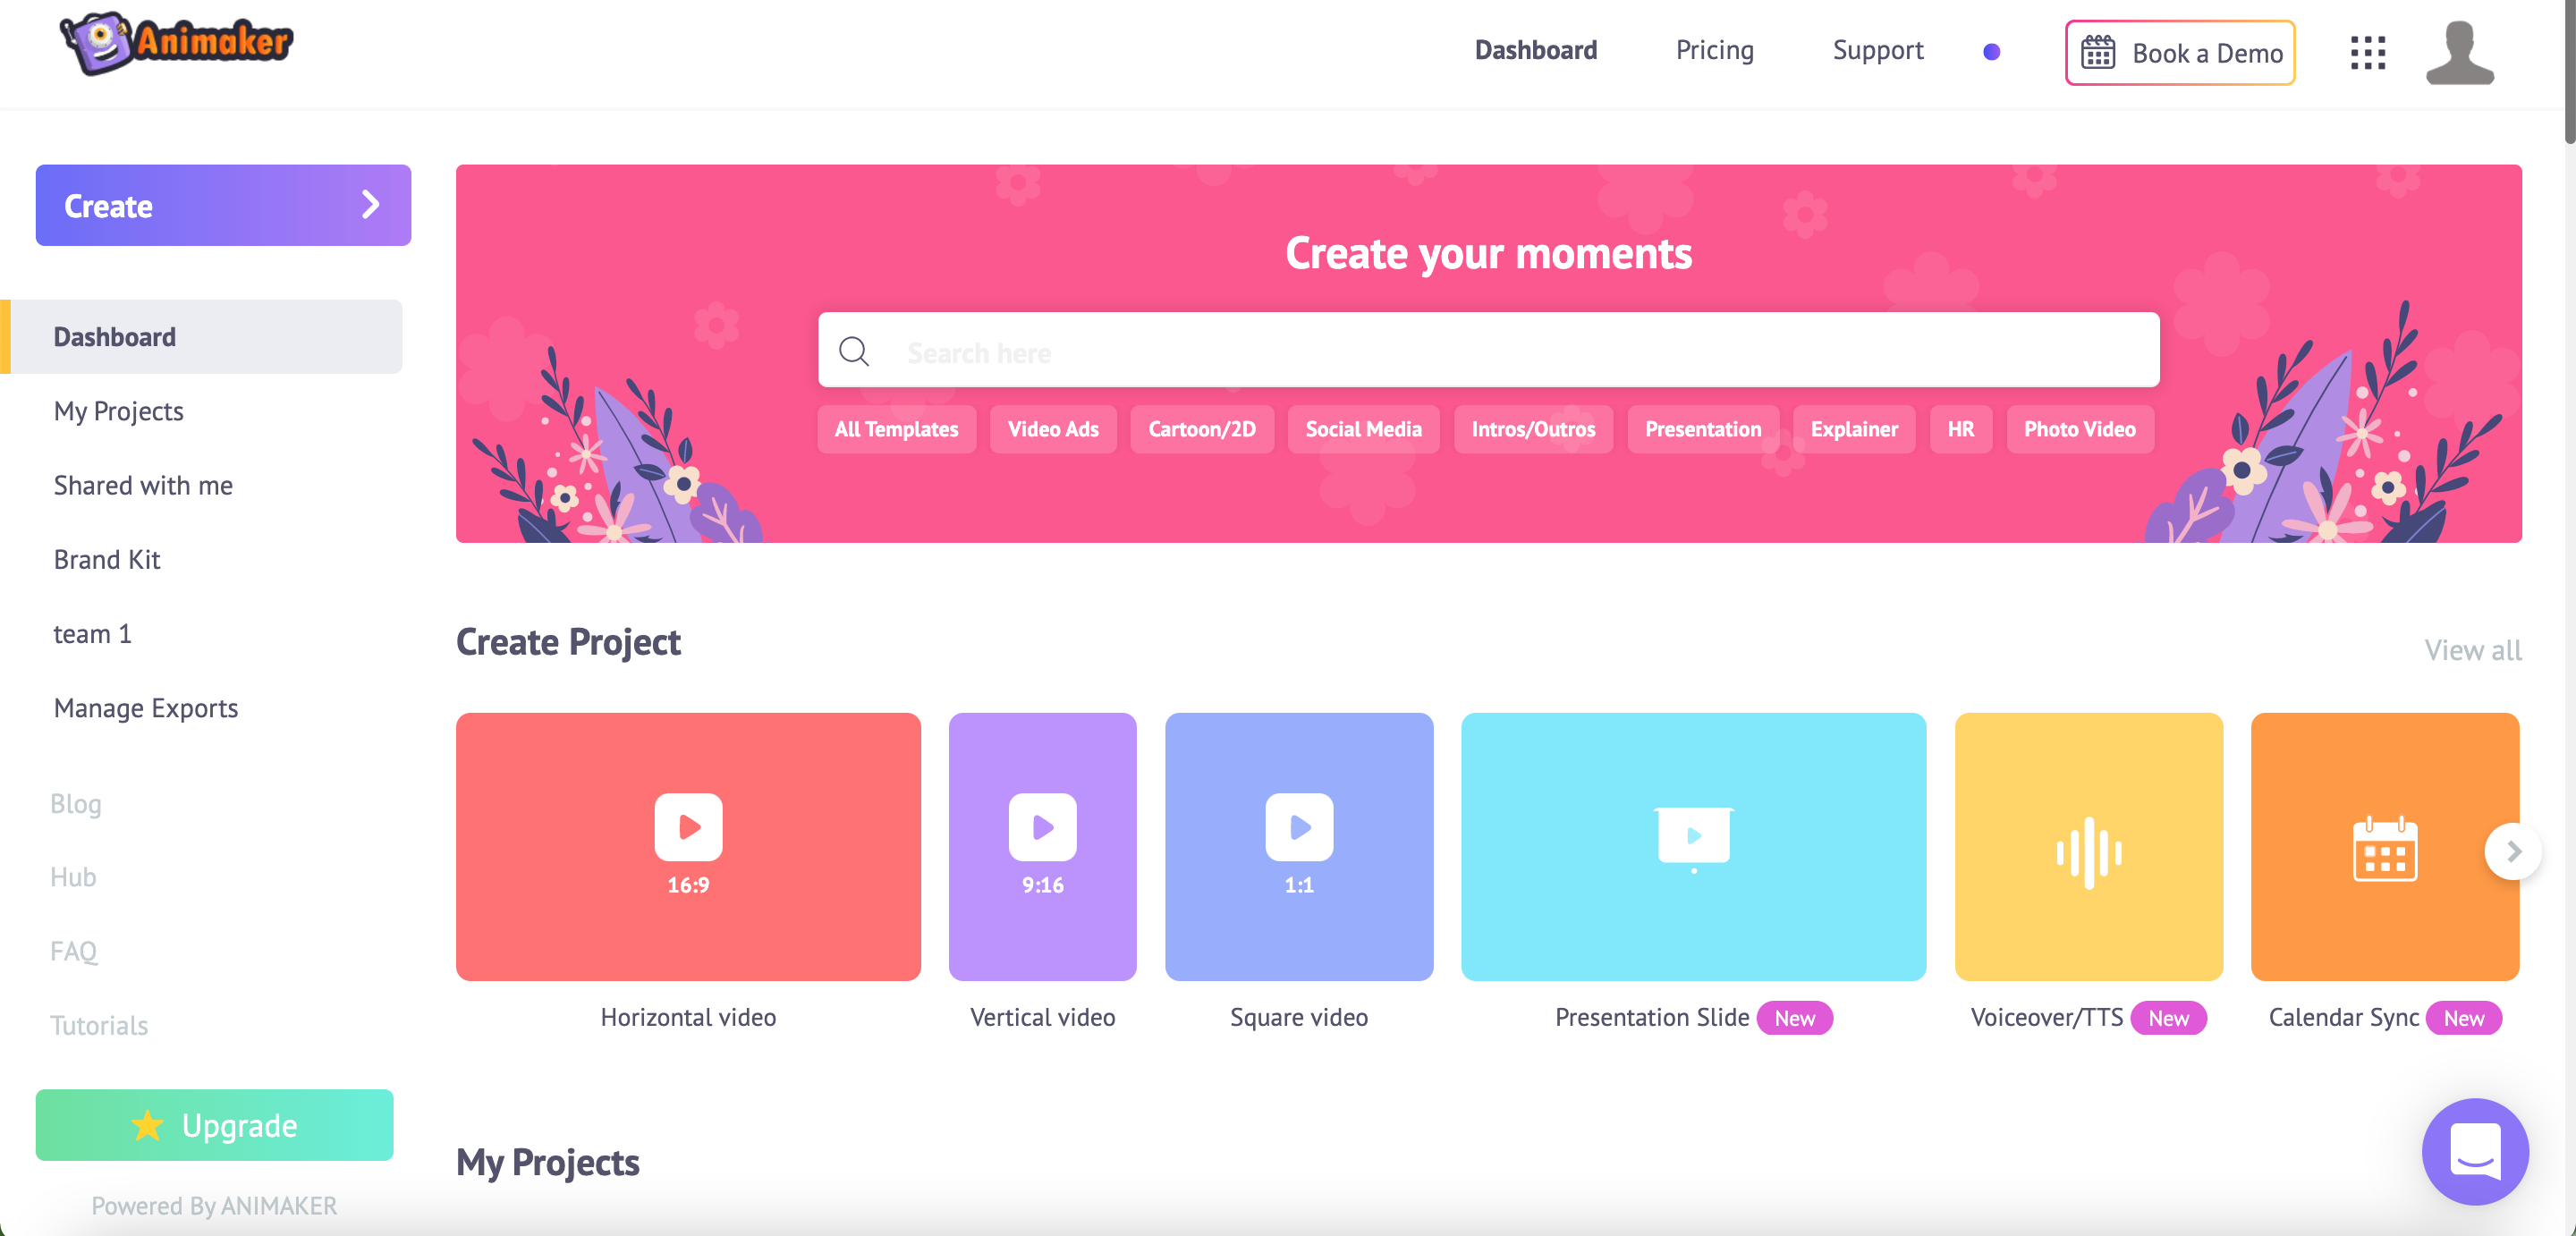
Once you have made your account, you will be brought to your main dashboard.
Animaker has several functions which allow for the creation of videos, gifs, characters, presentations, voices, and recordings. These can be found in the sidebar on the left of the dashboard.
There is also a feature to create a "Team", which is a space for multiple people to work on a project together. This can be done by selecting the figure icon in the top right corner of the screen. Teams will appear on the left sidebar for easy access.
The dashboard includes templates that can be selected based on size and dimension, allowing for social media content to be more tailored. It also displays your projects for easy access.
Start a Project
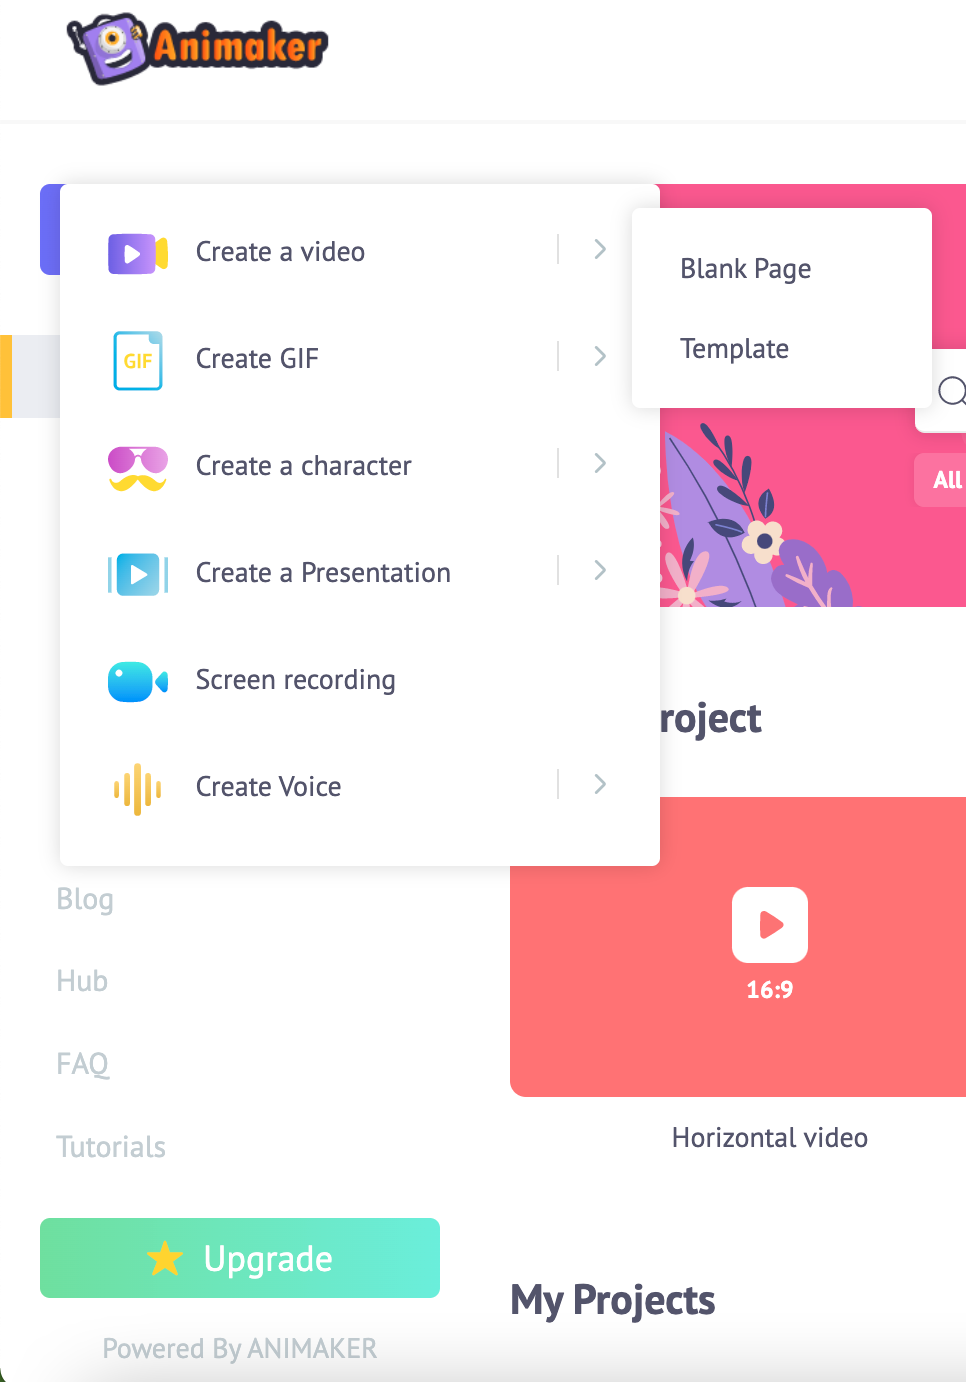
To start a new project select the purple "Create" button on the left side of the screen. It will give you options for the type of project you want to create.
Select "Create a video" and choose between the "Blank Page" and "Template" options based on your needs.
Choose a Template
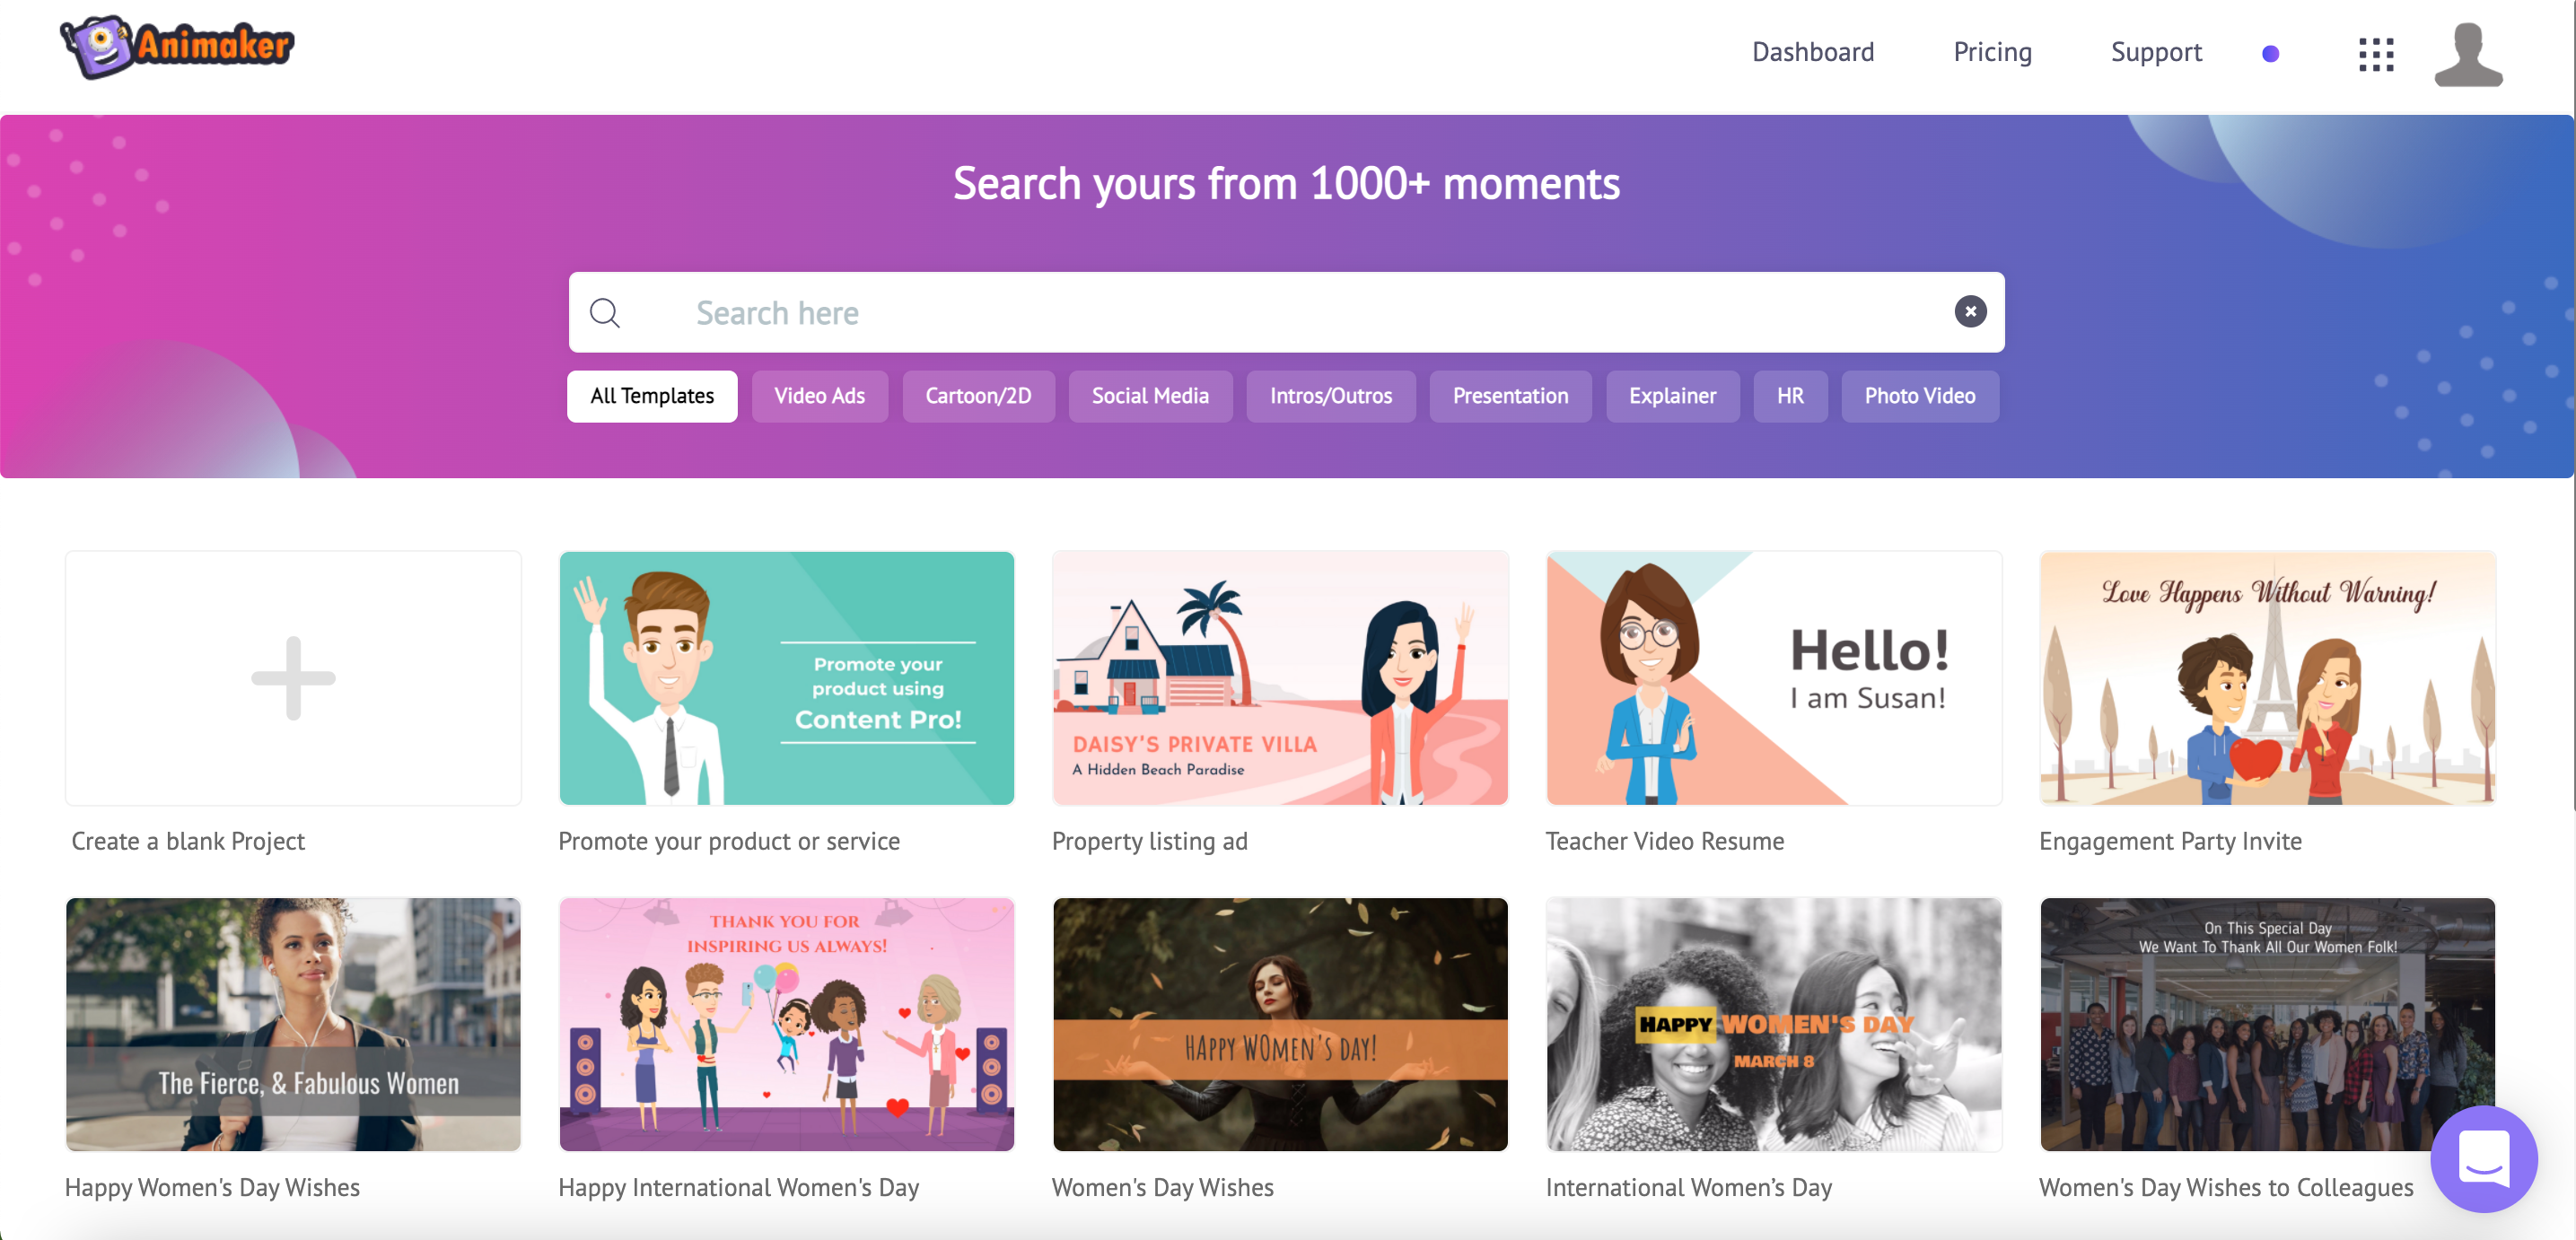
Selecting "Blank Page" will bring you to the video editor.
Selecting "Template" will allow you to search for a template that fits your project from the Animaker database. Once you chose a template you will be brought to the video editor.
You can select the social media category to see templates that align with the project or start from a blank page to create something more unique.
Start Creating
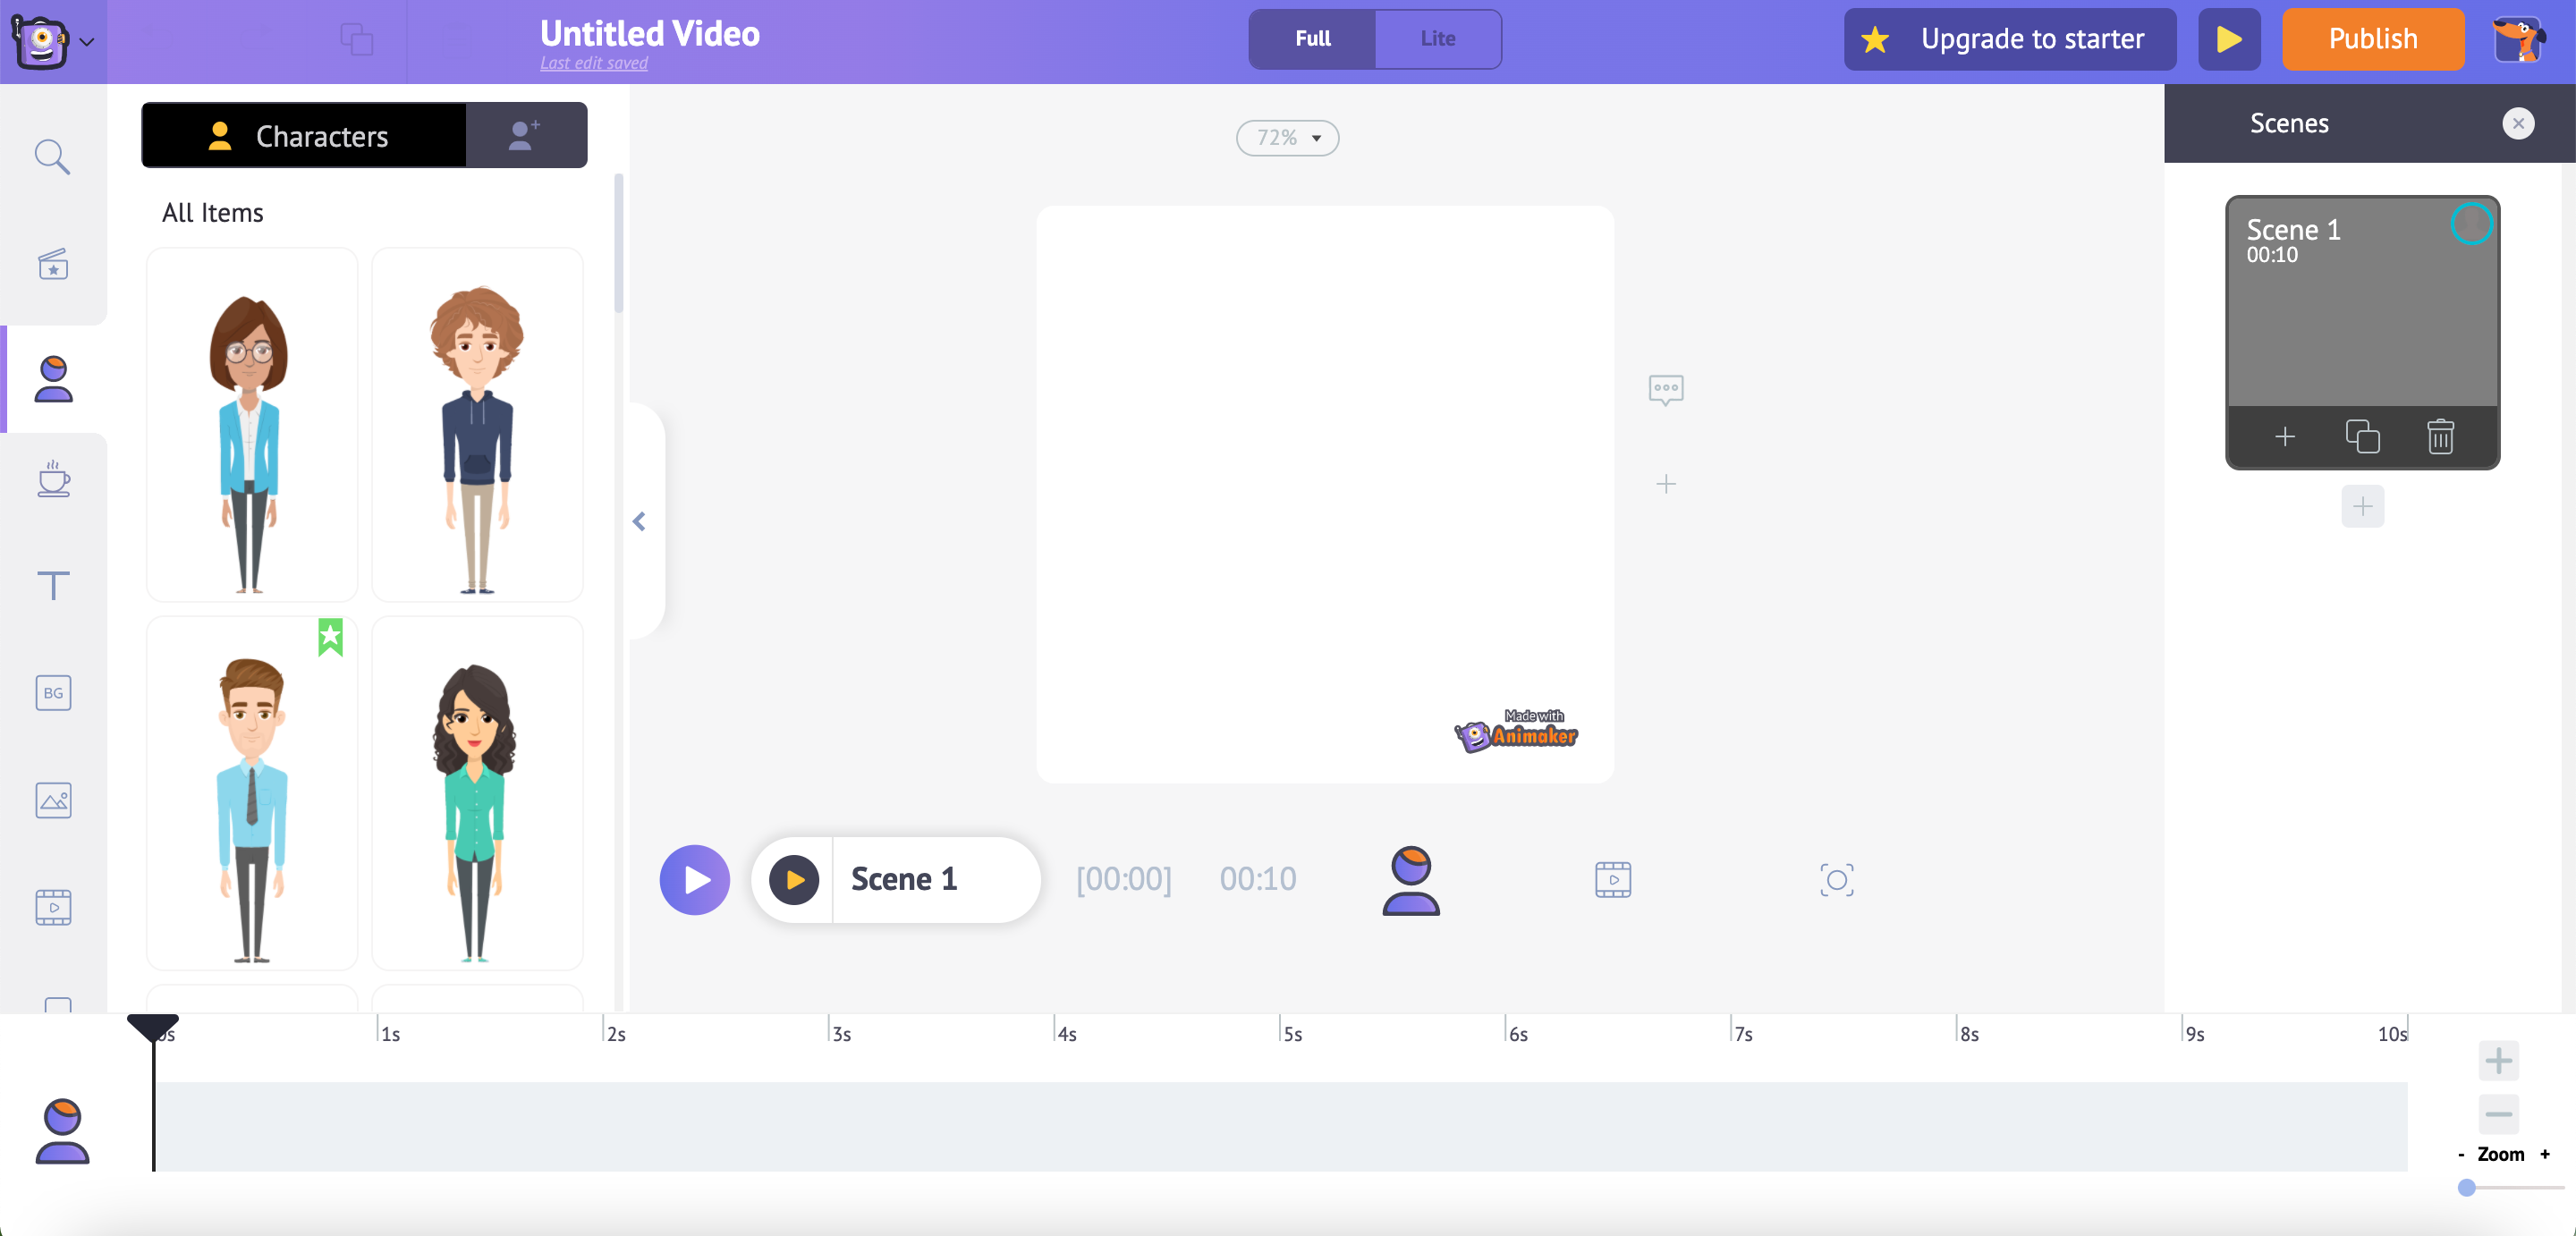
The video editor has many features which facilitate the creation of your video.
The left side of the editor has different sections with the media and content you can add to your video.
From top to bottom it has: Search, Characters, Properties, Text, Backgrounds, Images, Videos, Music, Special Effects, Uploads, and Apps (which allow you to import from other apps).
Some of this content is restricted to premium users, but there is a large amount available when using the free account.
The right side of the editor shows the scenes (sections) in the video, allowing for the narrative to be easily tracked and changed. It also has buttons to add, duplicate, and delete scenes from the video.
The bottom of the editor shows the camera, video, and animation timelines with the different features that have been added. It allows for the editing of video clips, transitions, text, and music. This feature provides an easy way to see all the components of the video and determine how best to combine them.
The top of the editor includes a menu to navigate the website, copy and undo functions, a place to input the title of the video, a play/pause button, the ability to publish the video, and a searchable help function to assist users.
The editor automatically saves any changes made while using it.
Insert Video
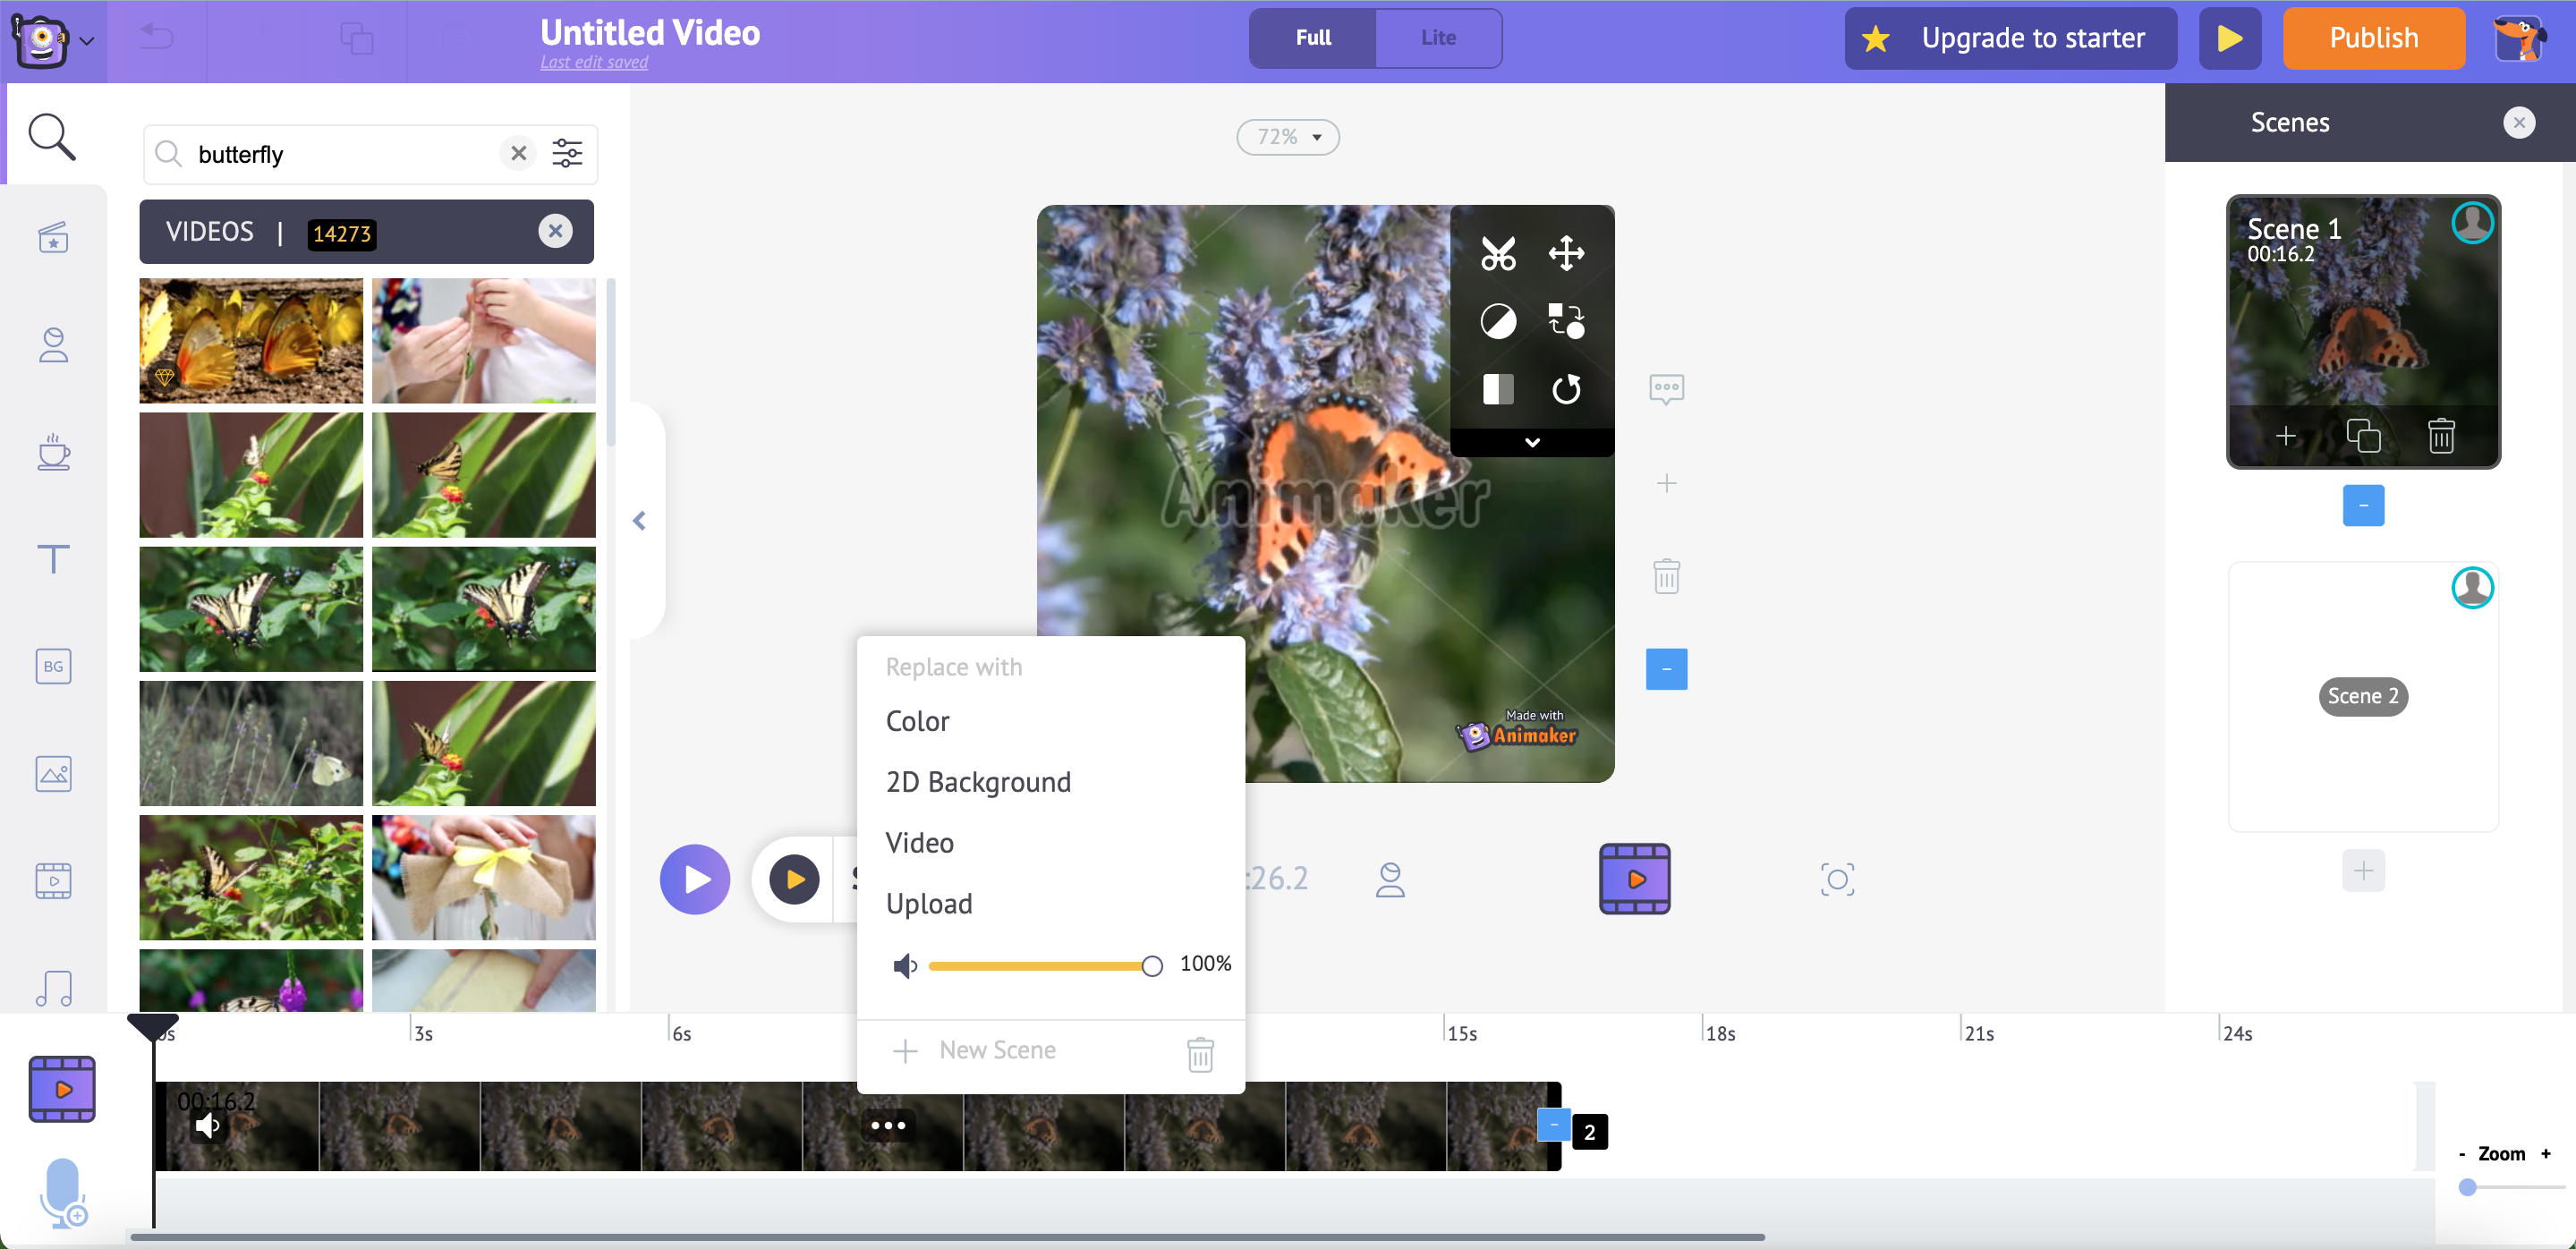
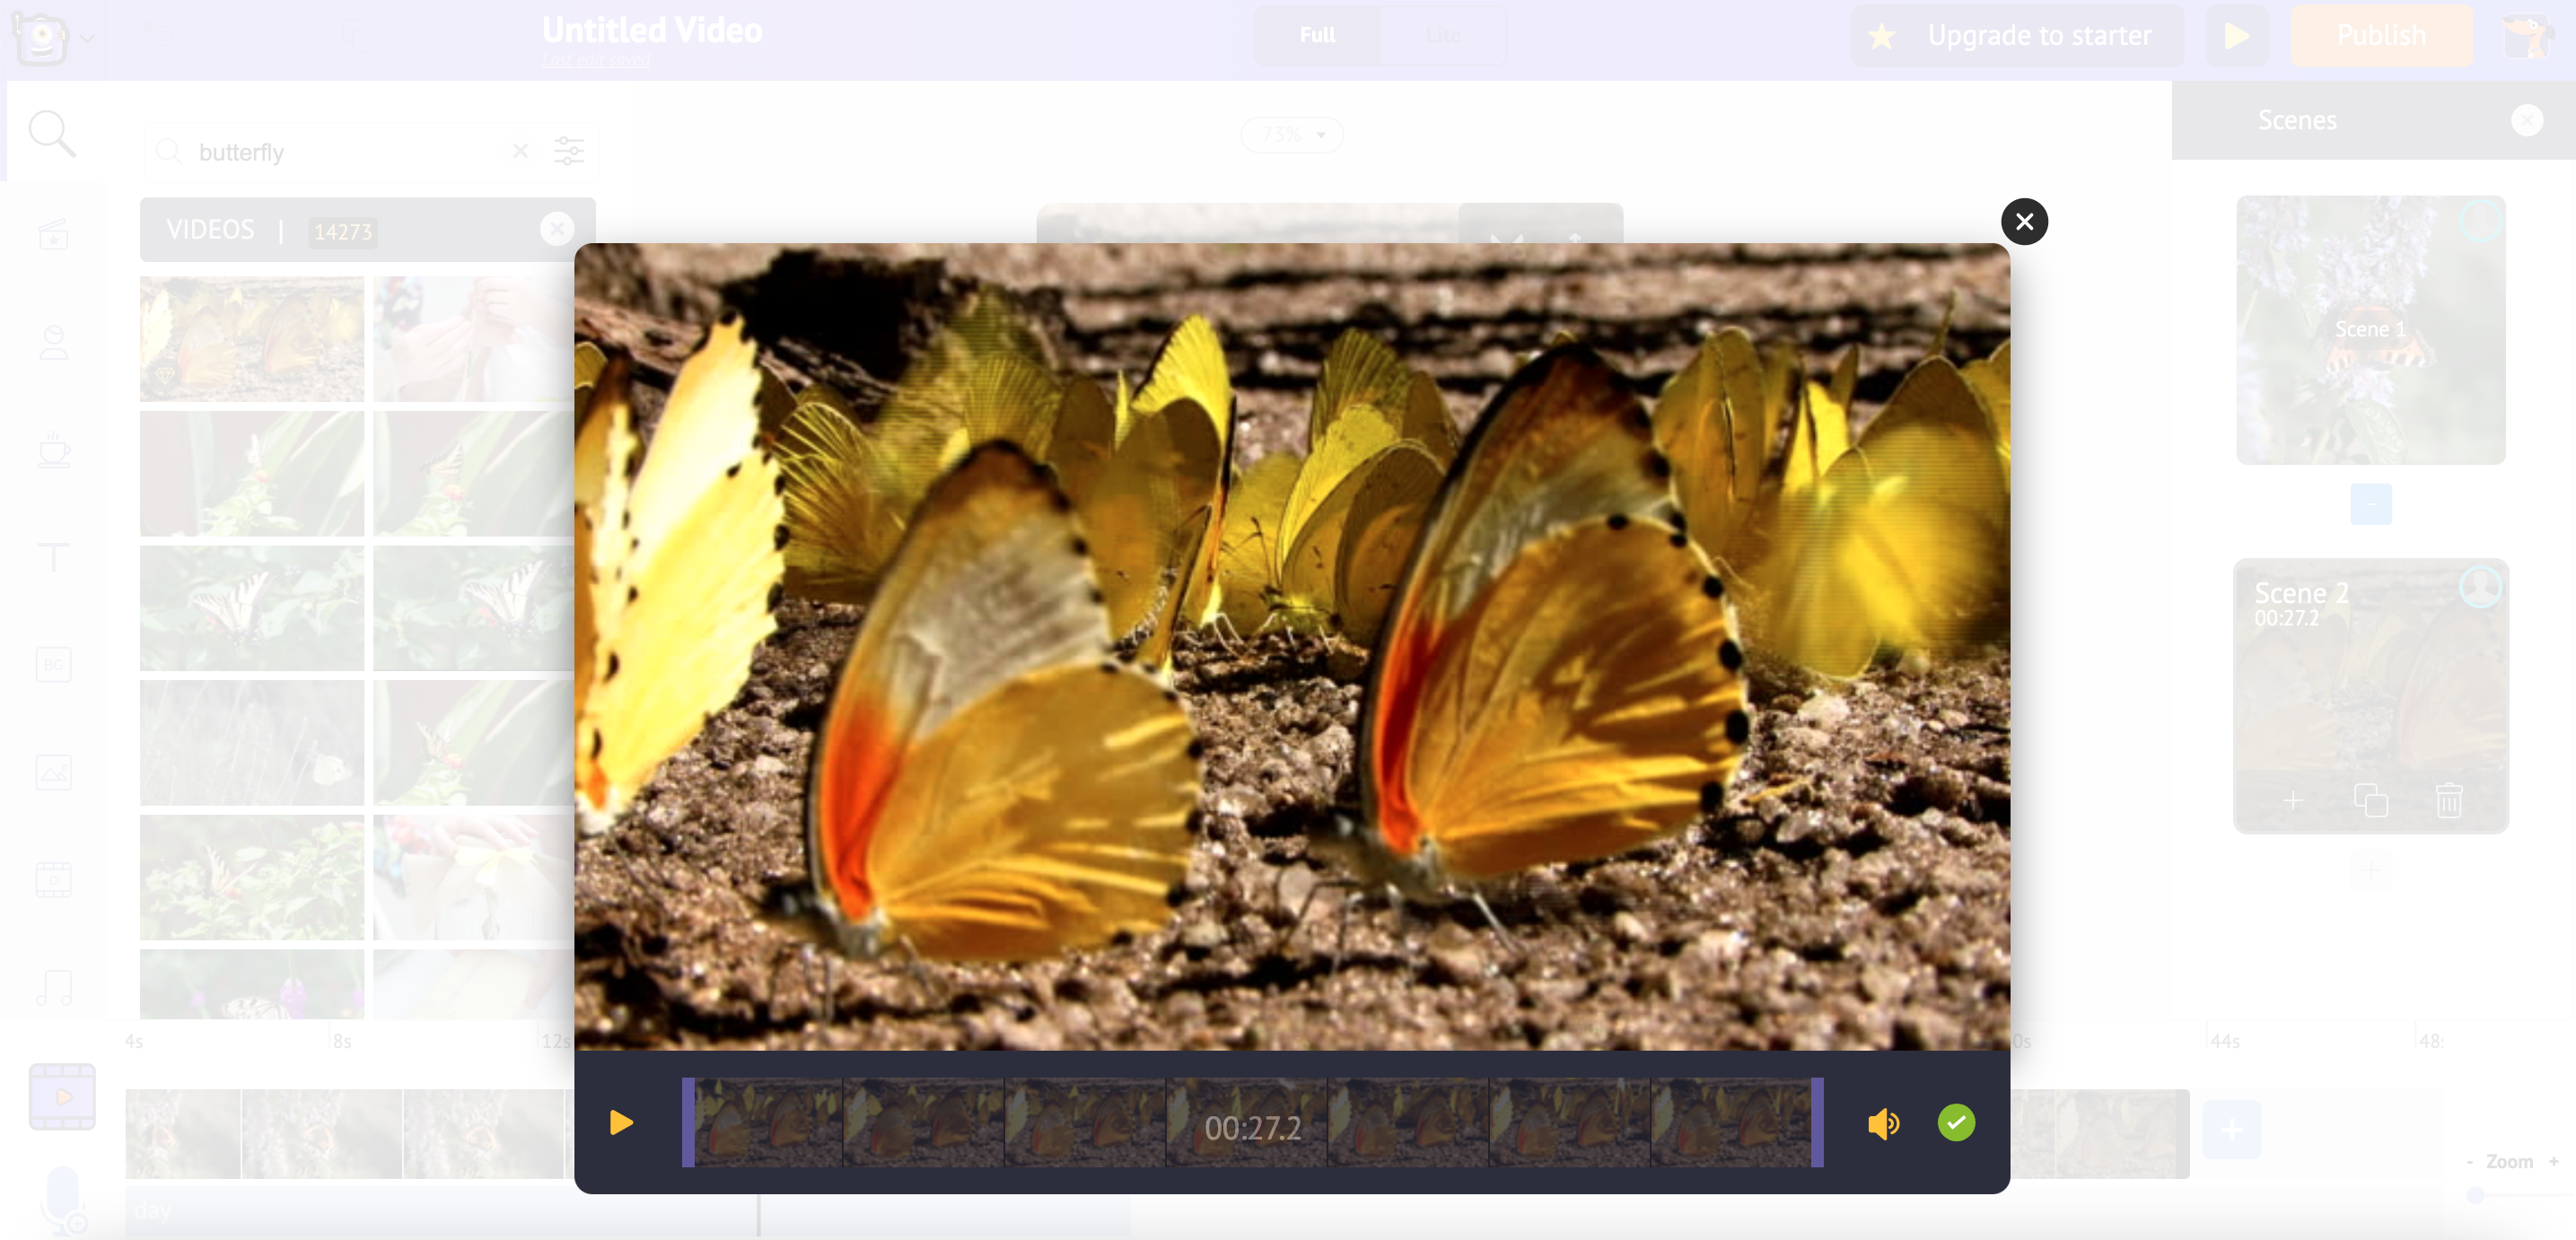
Select the Video icon on the left side of the editor to view the different video clips available or upload videos. You can also search for a specific topic to better navigate the options.
When you select a video clip to use, the clip in its entirety will appear in the center of the editor. The icons which appear on top of the central image allow for the video clip to be trimmed to the desired length by selecting the scissor icon or to edit its dimensions.
The video clip will also appear in the bottom panel of the editor and can also be changed by selecting the ellipsis over top of it.
Multiple video clips can be edited together by creating separate scenes. The scenes can be connected by transitions which are added by selecting the blue square button where they meet in the bottom panel.
Insert Audio
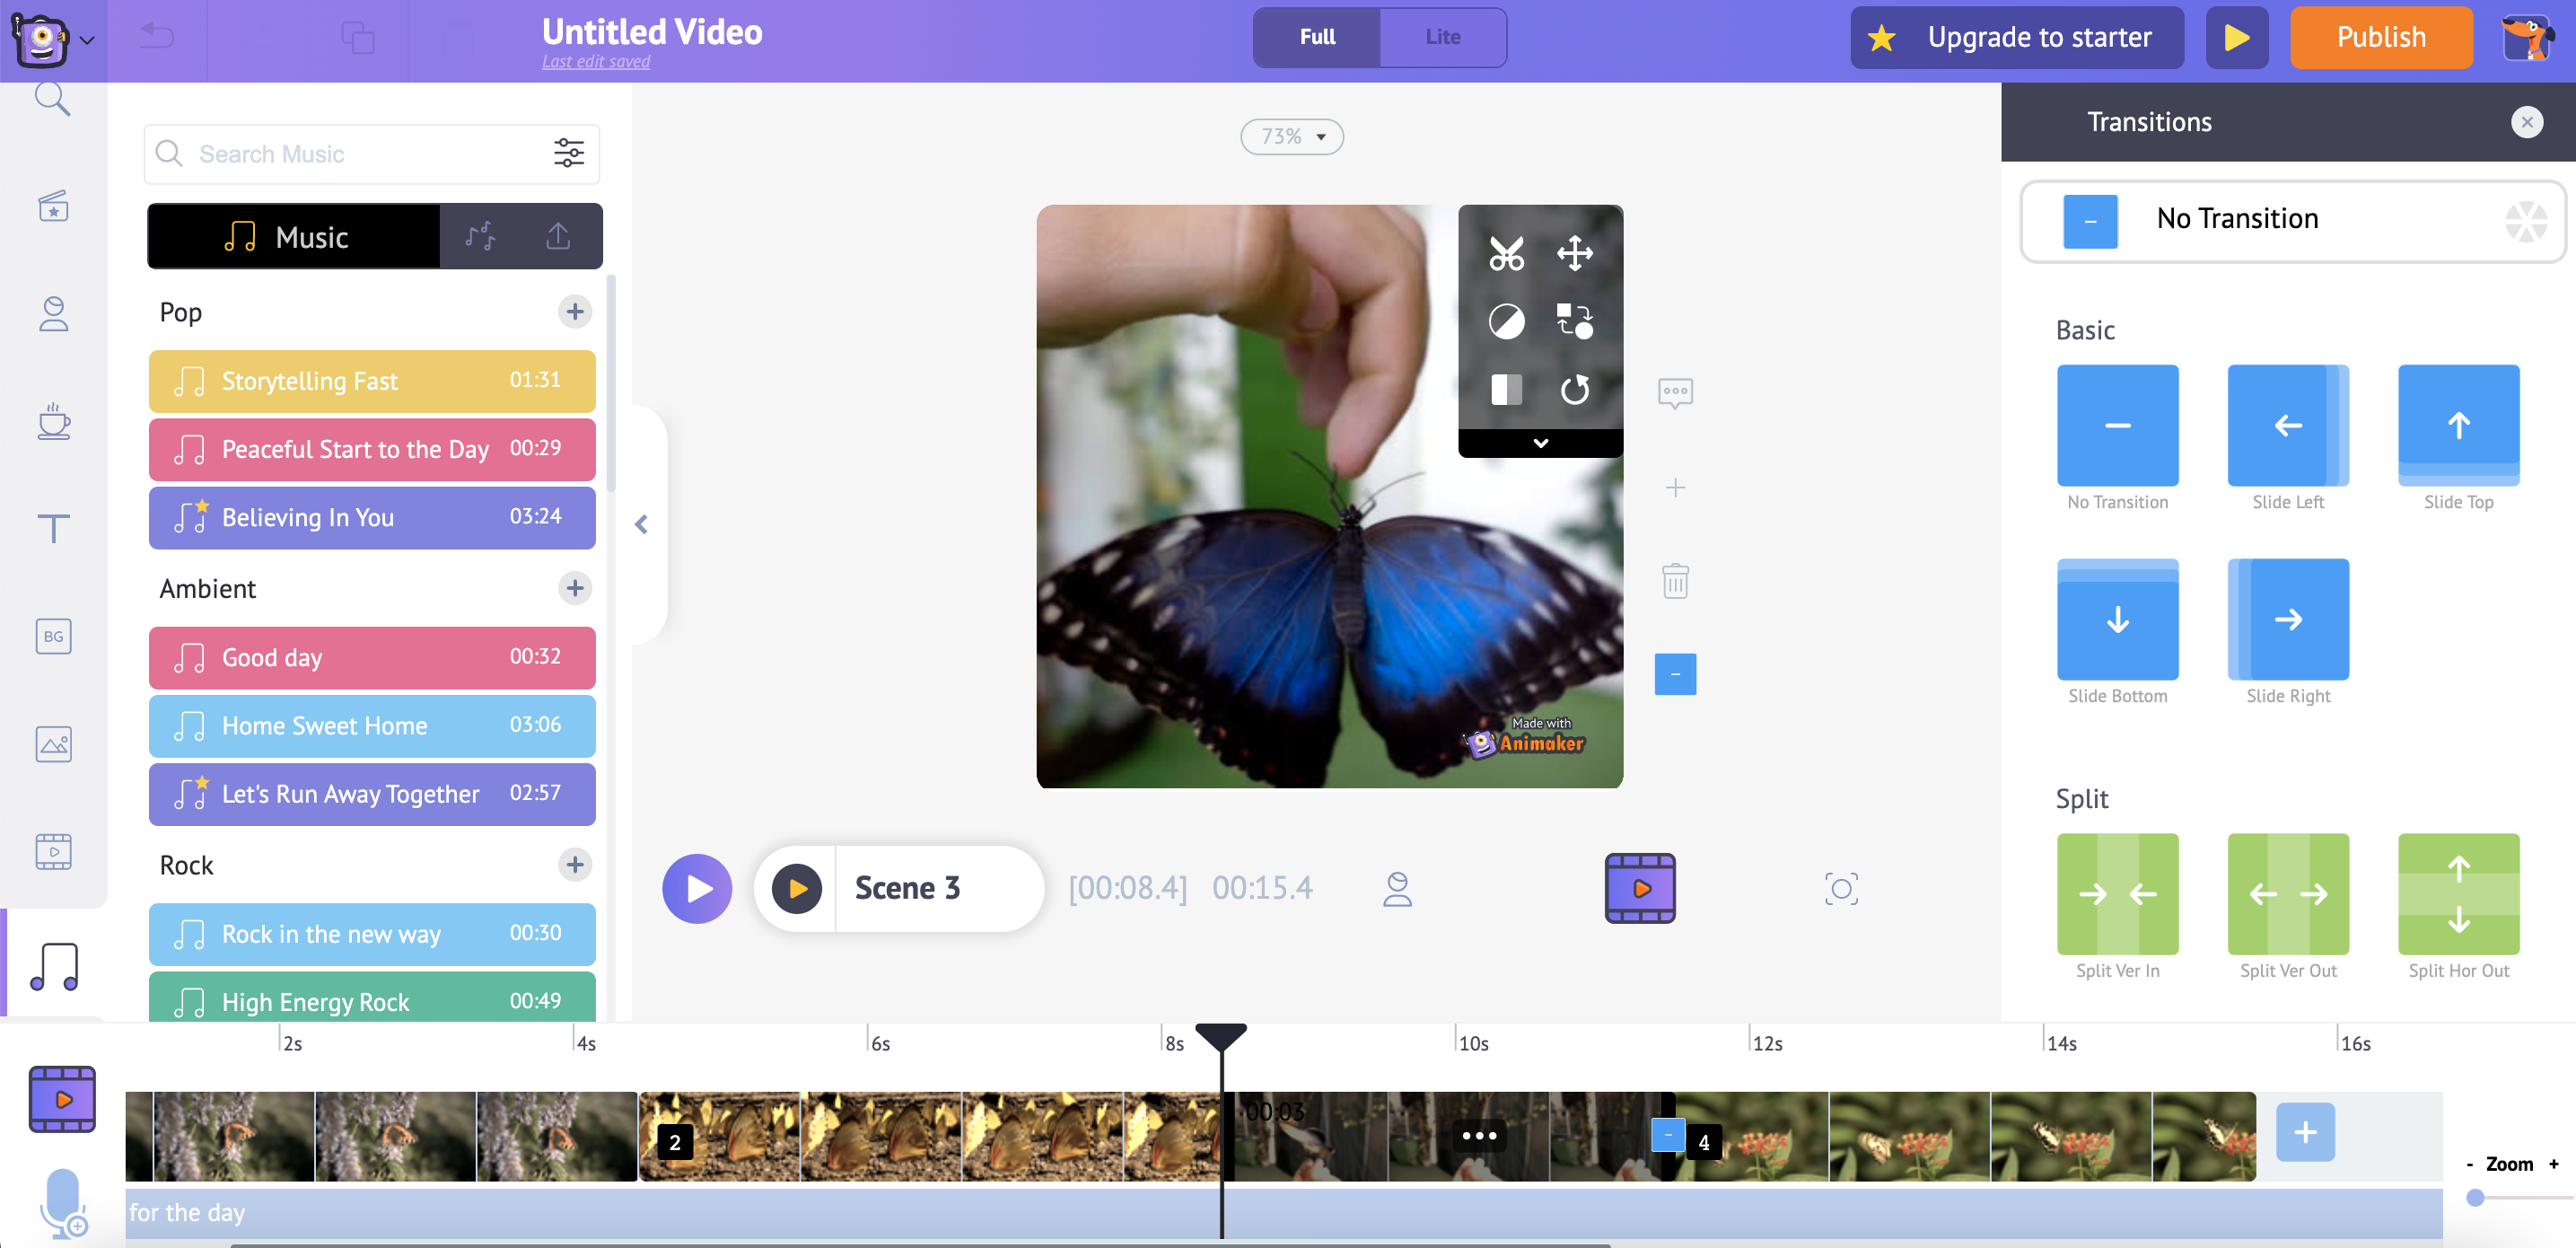
Select the Music icon on the left side of the editor. You can search or scroll through the different music options and sound effects provided or upload your own audio.
Once a sound is selected it will appear in the bottom panel of the editor, allowing for it to be moved to the desired location within the video. Clicking the audio clip in the timeline provides the option to preview it, edit the volume level, trim, duplicate, or delete it.
Insert Text
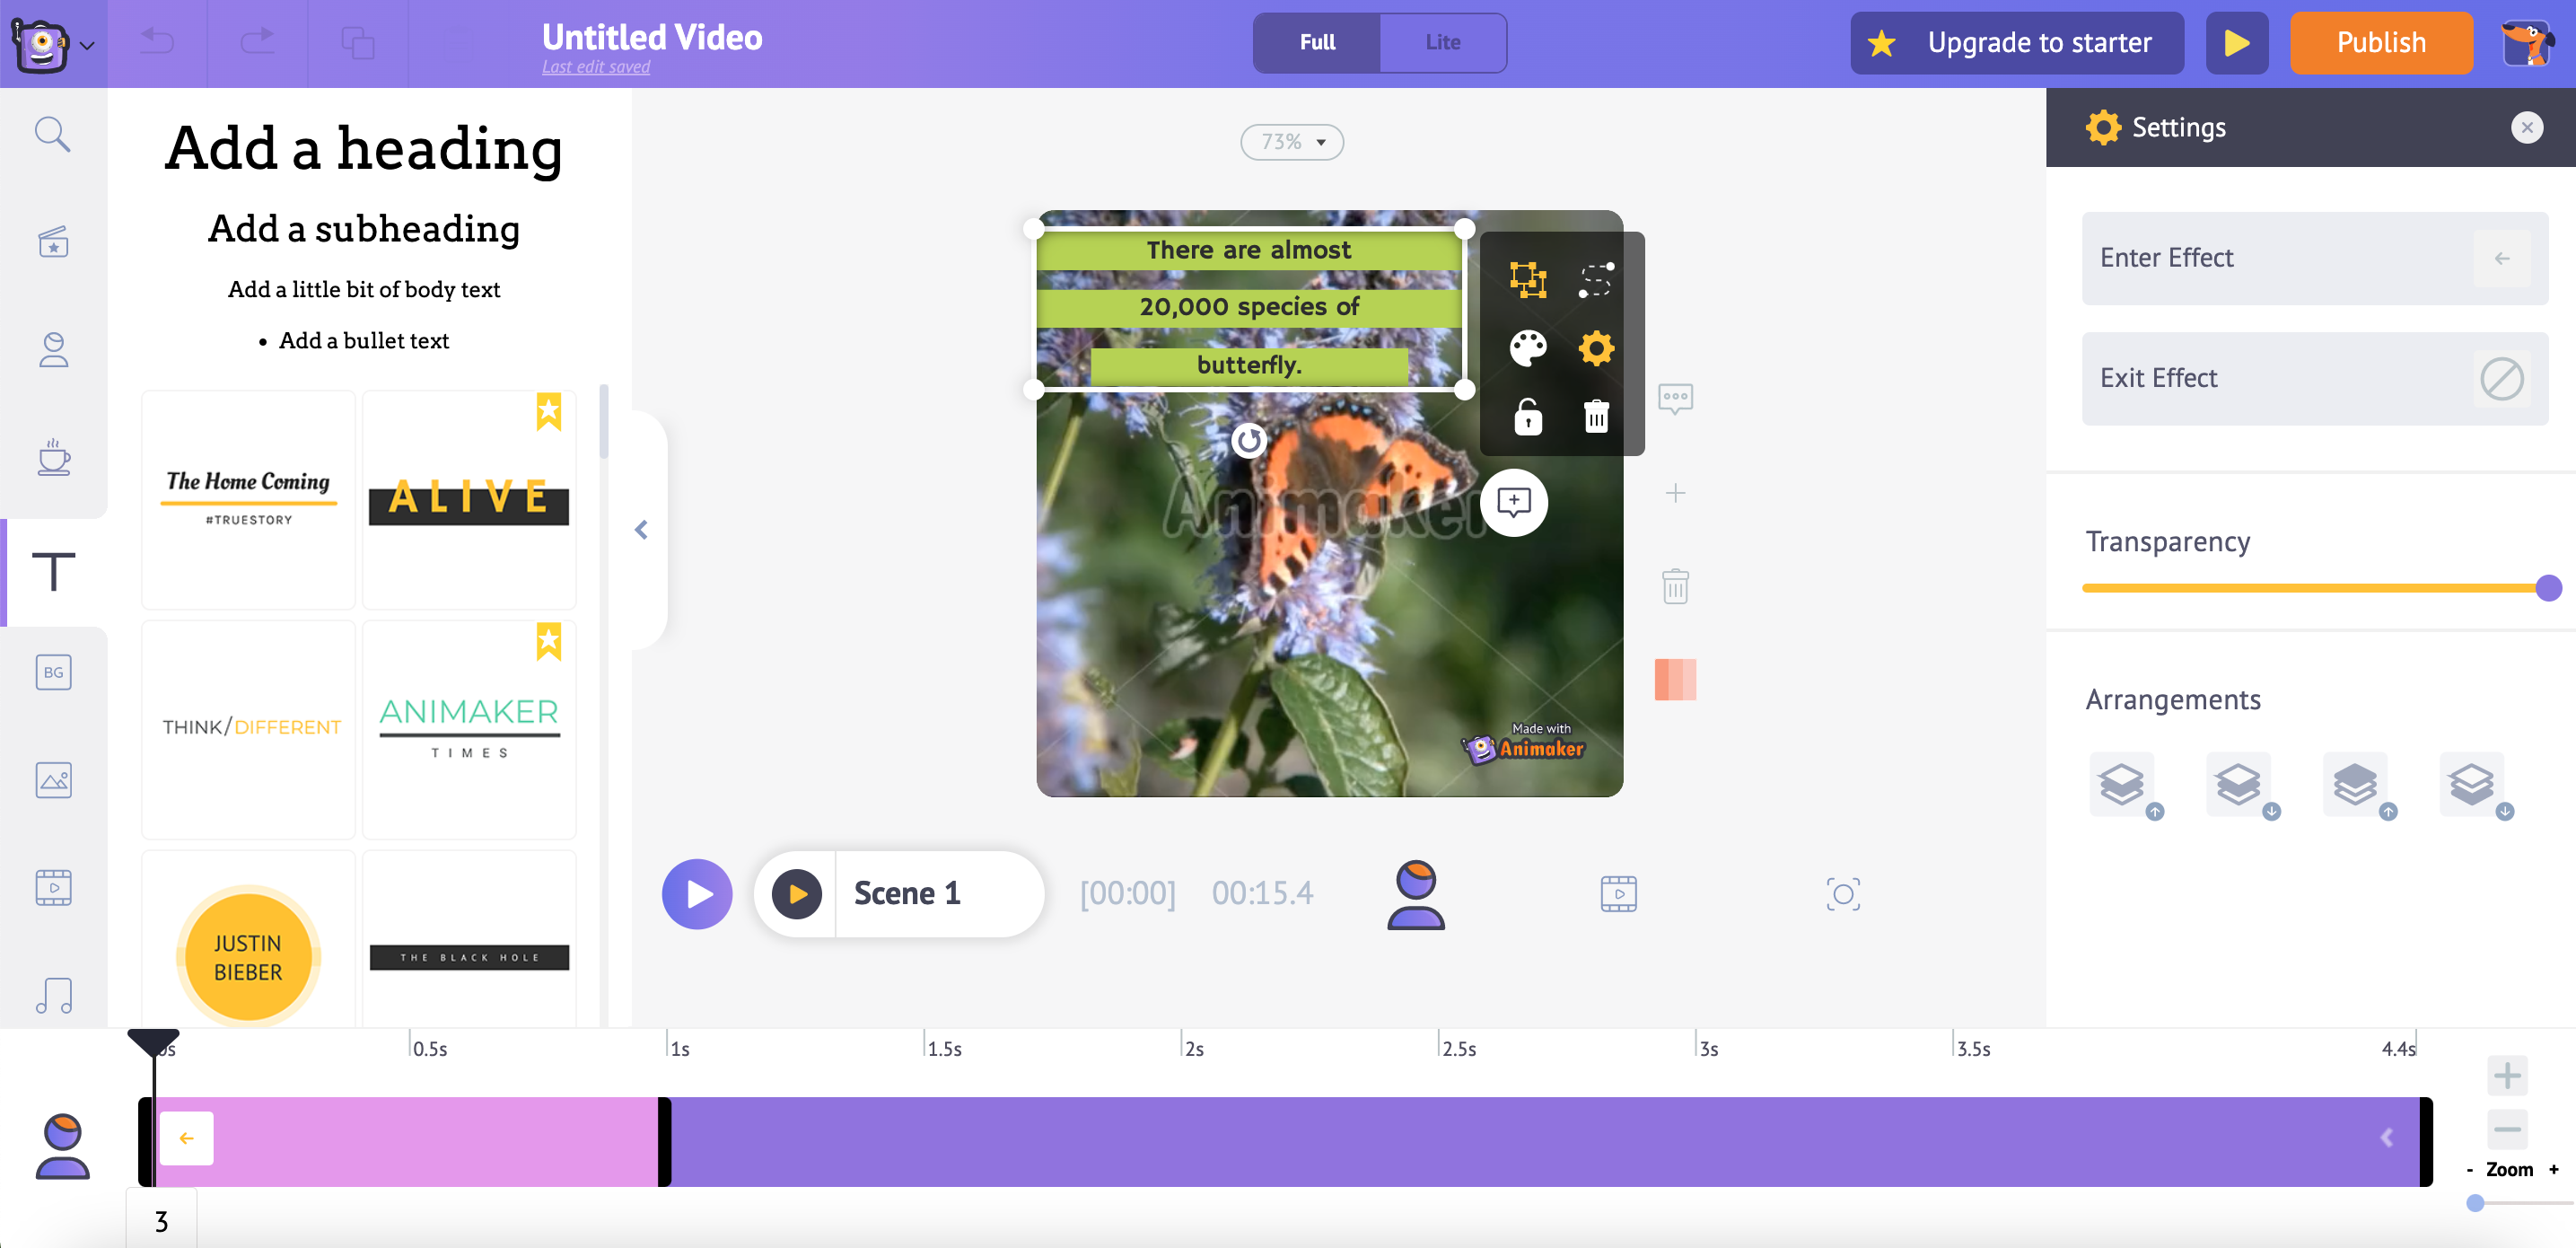
Select the Text icon on the left side of the editor. You can choose from a number of formats and templates or input a text box.
Once the text is selected it will appear over top of the video in the center of the editor. You can edit the colour, font, spacing, transparency, and effects of the text with the icons that appear beside it.
It is also shown in the bottom panel, allowing you to decide when in the video the text will appear and for how long.
Special Effects and Final Edits
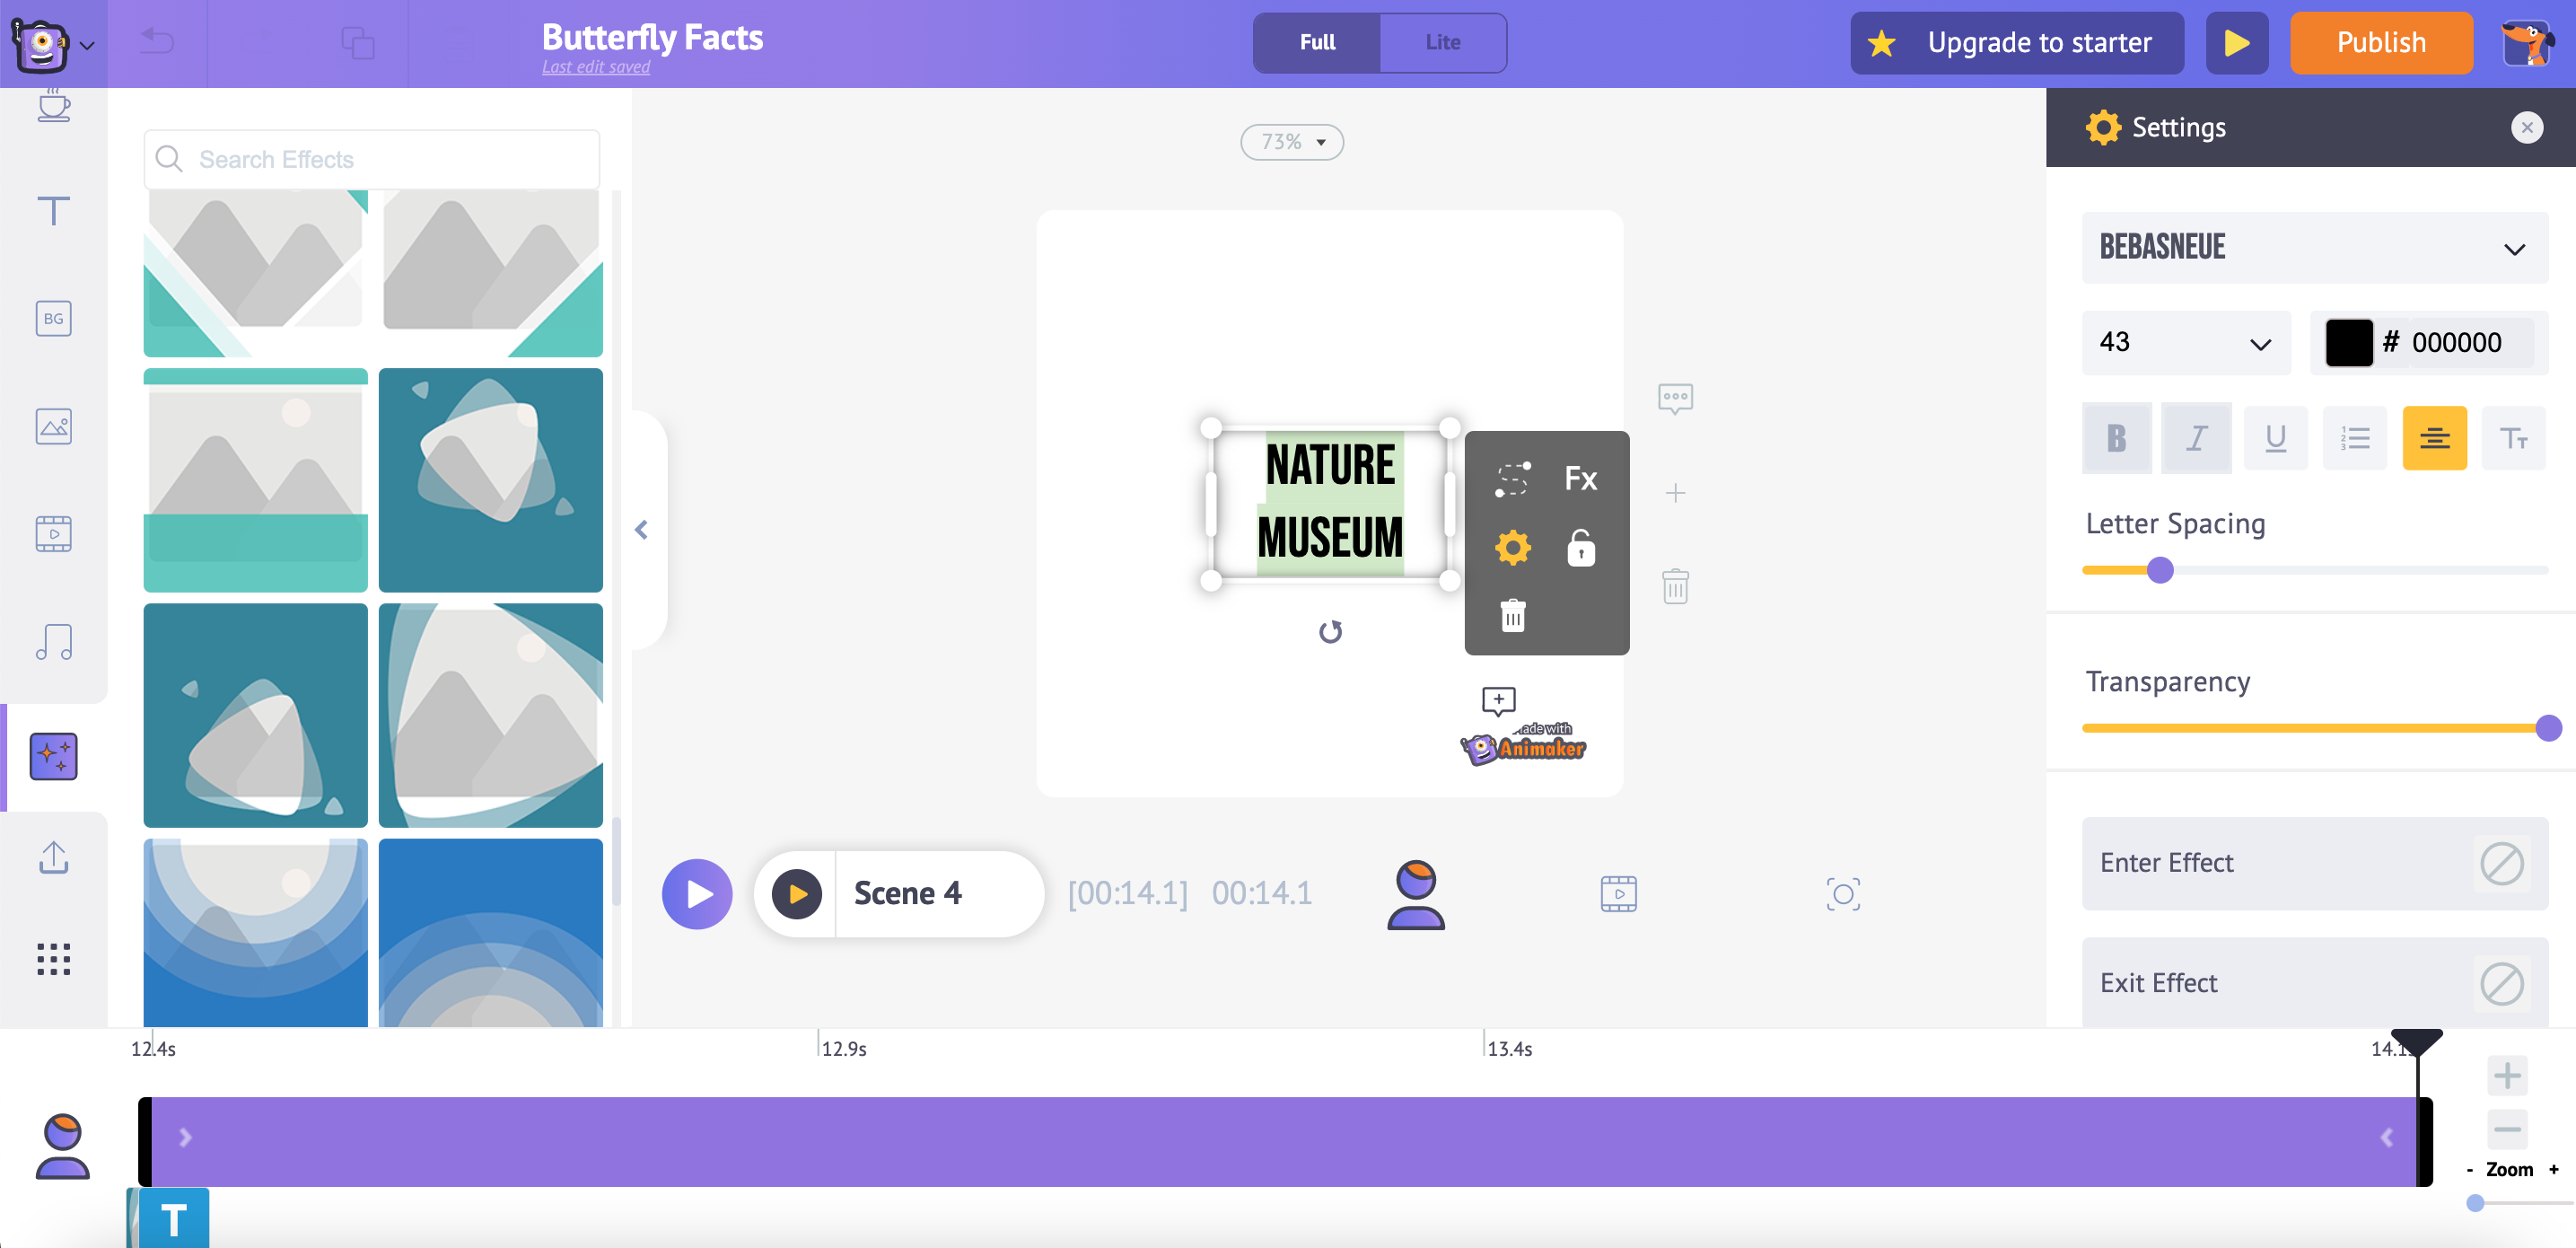
After adding all the video, audio, and text you can also add special effects.
Select the Special Effects icon on the left side of the editor. There are a limited amount of effects to choose from, if you want to add them they will appear in the bottom panel of the editor and can be moved and trimmed to create the desired effect.
Press the round purple Play button in the center section of the editor to play the entire video in order.
Make sure to check the video for any errors before finishing. Ensure that the audio, video, and text timing matches and that any transitions or effects used are working.
Publish the Finished Video
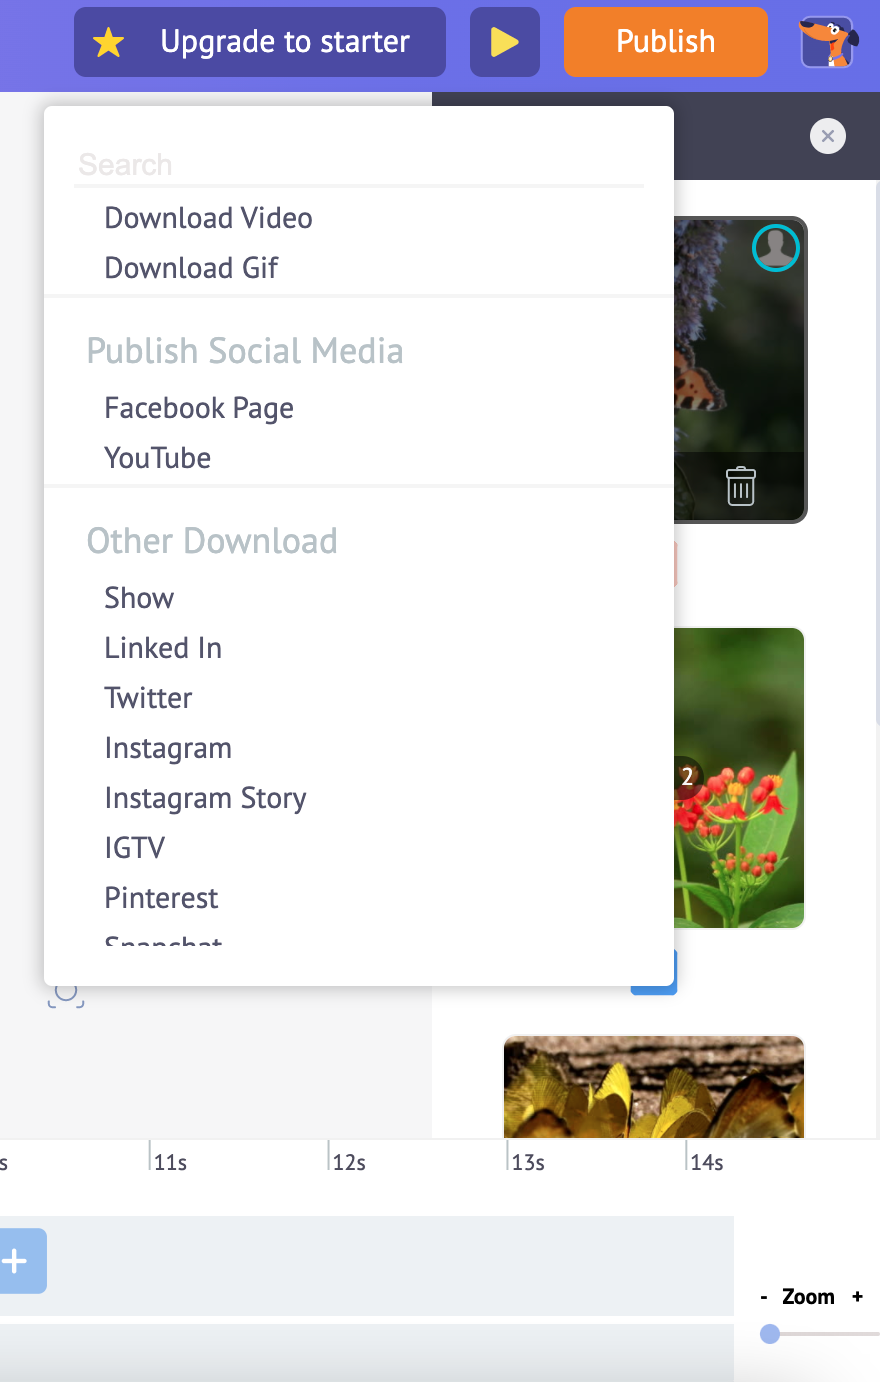
When your video is complete you can select the orange "Publish" button at the top right of the editor.
It will give many options of how to publish the video including:
Download as video or gif.
Publish to Social Media through Facebook or Youtube.
Other Download for a number of other platforms including Instagram, TikTok, Vimeo, Twitter, Snapchat, and many more.
Select the video quality and file type. The free version only allows for HD 600p and mp4, while the upgrade versions have higher quality and more file options.
Once you have published the video, you are ready to upload it to your social media platform of choice!