Ambigram Welcome-Goodbye Mat
by cal2014elh in Living > Decorating
2833 Views, 2 Favorites, 0 Comments
Ambigram Welcome-Goodbye Mat
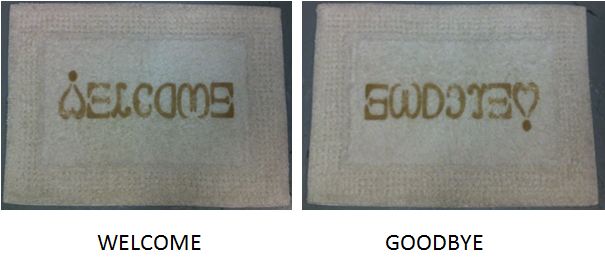
This is a welcome mat I designed and made at the TechShop (http://techshop.ws). Starting from a plain 100% cotton (or any natural fiber) rug, I designed my Welcome-Goodbye ambigram in CorelDRAW (see file attached), and etched it into the rug using a laser. You will need access to a CNC laser to engrave your image. I used an Epilog 45-Watt Helix laser with a 24''x18'' bed. (This limits the size of the welcome mat. Hence, I used a 24''x17'' rug.)
Design Your Welcome Mat
I used CorelDRAW to design my welcome mat ambigram which reads "WELCOME" one direction and "GOODBYE!" the other direction. (See file below.) Feel free to design your own.
Downloads
Set Up Your Laser
You should be familiar with the laser you are using. Make sure it is clean and ready for use for best results.
Place Your Rug
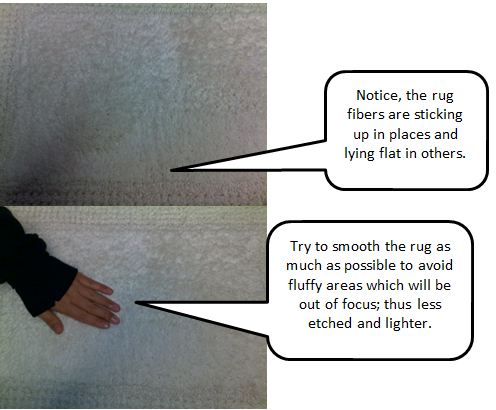
When placing your rug/mat in the laser, make sure it is as straight as possible. If it is not in-line with the rulers around the edge of the laser bed, your image will be etched crooked. Also, for shaggier mats, it is important to get the fibers to lay as flat as possible so that the focus of the laser is accurate. I found that areas that were fluffed up did not etch as well; they were visibly lighter with less defined edges.
Align Your Laser
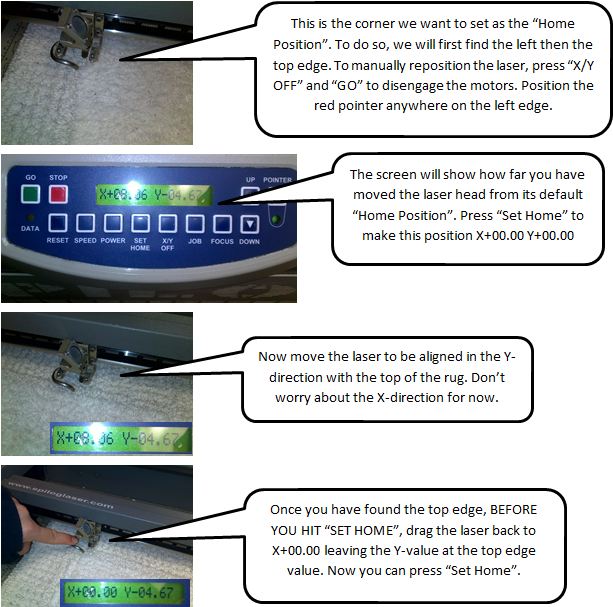
We are going to align the laser at the top left corner. Instead of eye-balling it, we will first align the laser on the left edge zeroing it. Then we will allign it on the top edge without zeroing it. Finally, dragging it back to the corner to set the "Home Position".
Measure Your Piece
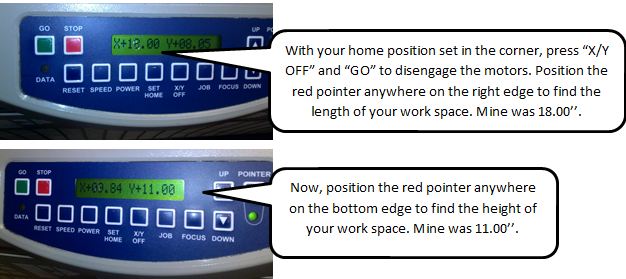
We can use the laser to accurately measure the length and height of our workspace using the "X/Y OFF" mode.
Resize Your File's Page Size
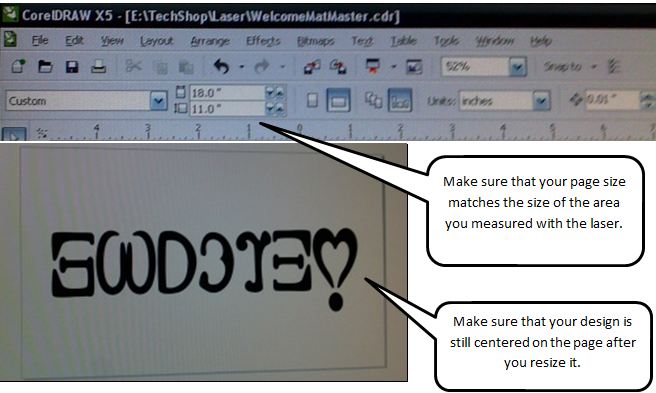
In order for your design to be etched in the center of the area or mat you have just measured, you must resize your CorellDraw file (or whatever design program you are using) to have a page size that matches this area.
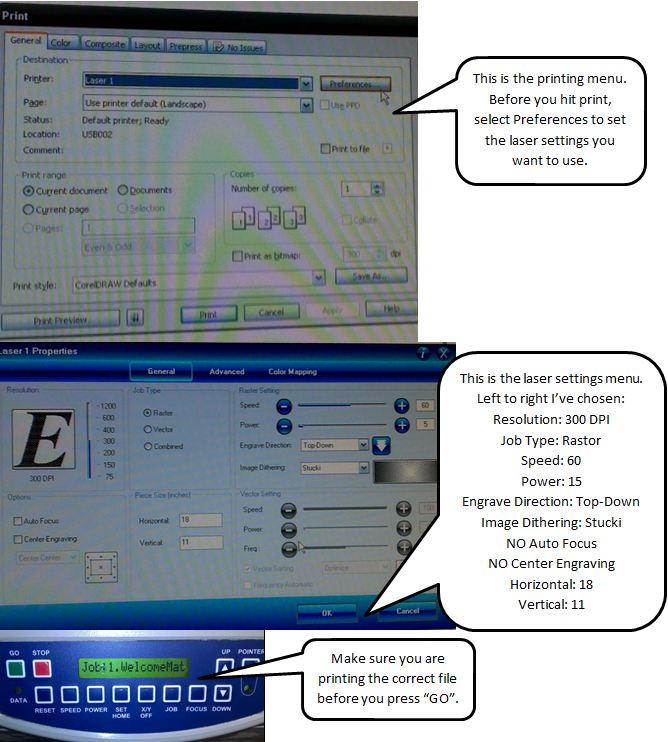
Print your file to send it to the laser. It won't start until you press "GO" on the laser. When chosing your print settings, you should start with a very low power and as high a speed as is recomended for the size image you are engraving. I started with a power level of 5% and speed of 60% (the max speed recommended for images 0-6'' wide since the dot on the exclamation for example is quite small). I found that no image appeared until I stepped up the power to 15%.
Remember: Keep your hand near the lid so you can open the laser in case your rug catches on fire.
Remember: Keep your hand near the lid so you can open the laser in case your rug catches on fire.
Repeat Etching
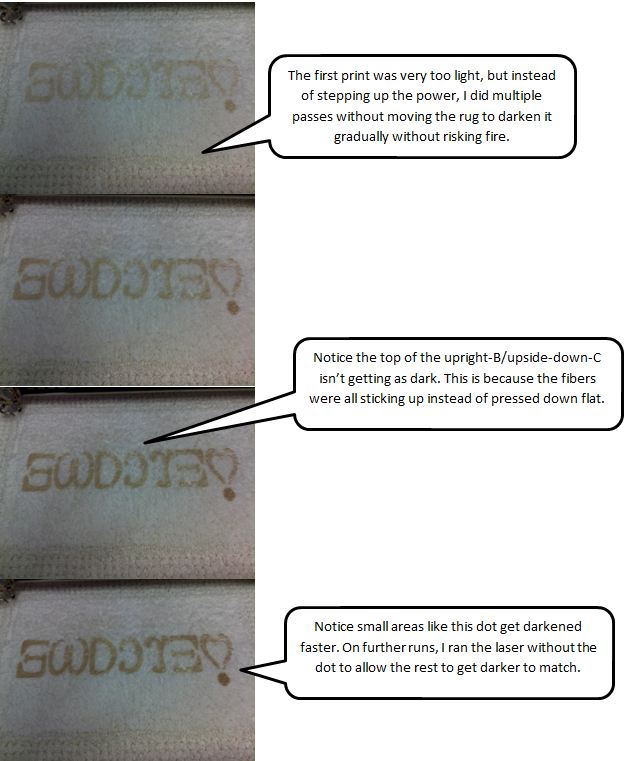
Since we are using low power to avoid lighting the mat on fire, repeated passes of the laser are needed. Make sure not to move the mat/rug inbetween passes. Do as many passes as you need. I show 4 below, but ended up doing 9.