Alpha Pattern Macrame Bracelet: Spiral Tie Dye
by evahghg in Craft > Fiber Arts
2757 Views, 27 Favorites, 0 Comments
Alpha Pattern Macrame Bracelet: Spiral Tie Dye


Hello! I'll try to explain how to read this pattern to make this bracelet, really is not as difficult as it seems. With this type of pattern you can make any bracelet, with names or the design that you like. (Sorry for my mistakes in the text, I'm doing the best that I can).
Hola! voy a intentar explicar como leer este patrón para hacer esta pulsera, realmente no es tan difícil como parece. Con este tipo de patrón puedes hacer cualquier pulsera, con nombres o con el diseño que te guste.
Supplies
For making this pattern:
- Approximately 2 meters of red, orange, yellow, green, drak green, blue, dark blue, light purple and pink string (1-2 mm thick).
- 6 orange string of 80 cm.
- 1 orange string of 1 meter.
- Cardboard.
- Stationery clamp.
- Your hands.
- Grid, colors, pen, pencil, scissor, liquid glue or lighter.
Para hacer este patrón:
- Aproximadamente 2 metros de hilo rojo, naranja, verde, verde oscuro, azul, azul oscuro, lila claro y rosa (de 1-2 mm de grosor).
- 6 hilos naranjas de 80 cm.
- 1 hijo naranja de 1 metro.
- Cartón.
- Pinza de papelería.
- Tus manos.
- Cuadrícula, colores, bolígrafo, lápiz, tijeras, pegamento liquido o mechero.
Draw Your Pattern

I was inspired by tie dye spirals, because I love all colors and it's a funny shape. You will need a grid, my grid have 14x65 squares. With my measures my bracelet measures 13,5x3 cm (28 cm with the braids and eyelet), given that the string is 1-2 mm. At first, I drew with pencil the approximate shape, after I marked the squares with pen, then, I painted it.
Me he inspirado en las espirales de ropa teñida, porque me encantan todos los colores y es una forma divertida. Necesitarás una cuadrícula de 14x65 cuadrados. Con esta medida mi pulsera mide 13,5x3 cm (28 cm con las trenzas y el ojal), teniendo en cuenta que el hilo mida 1-2 mm de grosor. Primero, dibujé con lápiz la forma aproximada, después marqué los cuadrados con bolígrafo, entonces lo pinté.
Match the Colors

I assigned each color that I used in the pattern with one color string. Depends on the color you will need more or less string. In this case, I think you will need less than 2 metres per color. Anyway, I use more string rolled.
Asigné cada color que usé en el patrón con un color de hilo. Depende del color necesitarás más o menos hilo. En este caso necesitarás menos de 2 metros por color. De todos modos, usé más hilo enrollado.
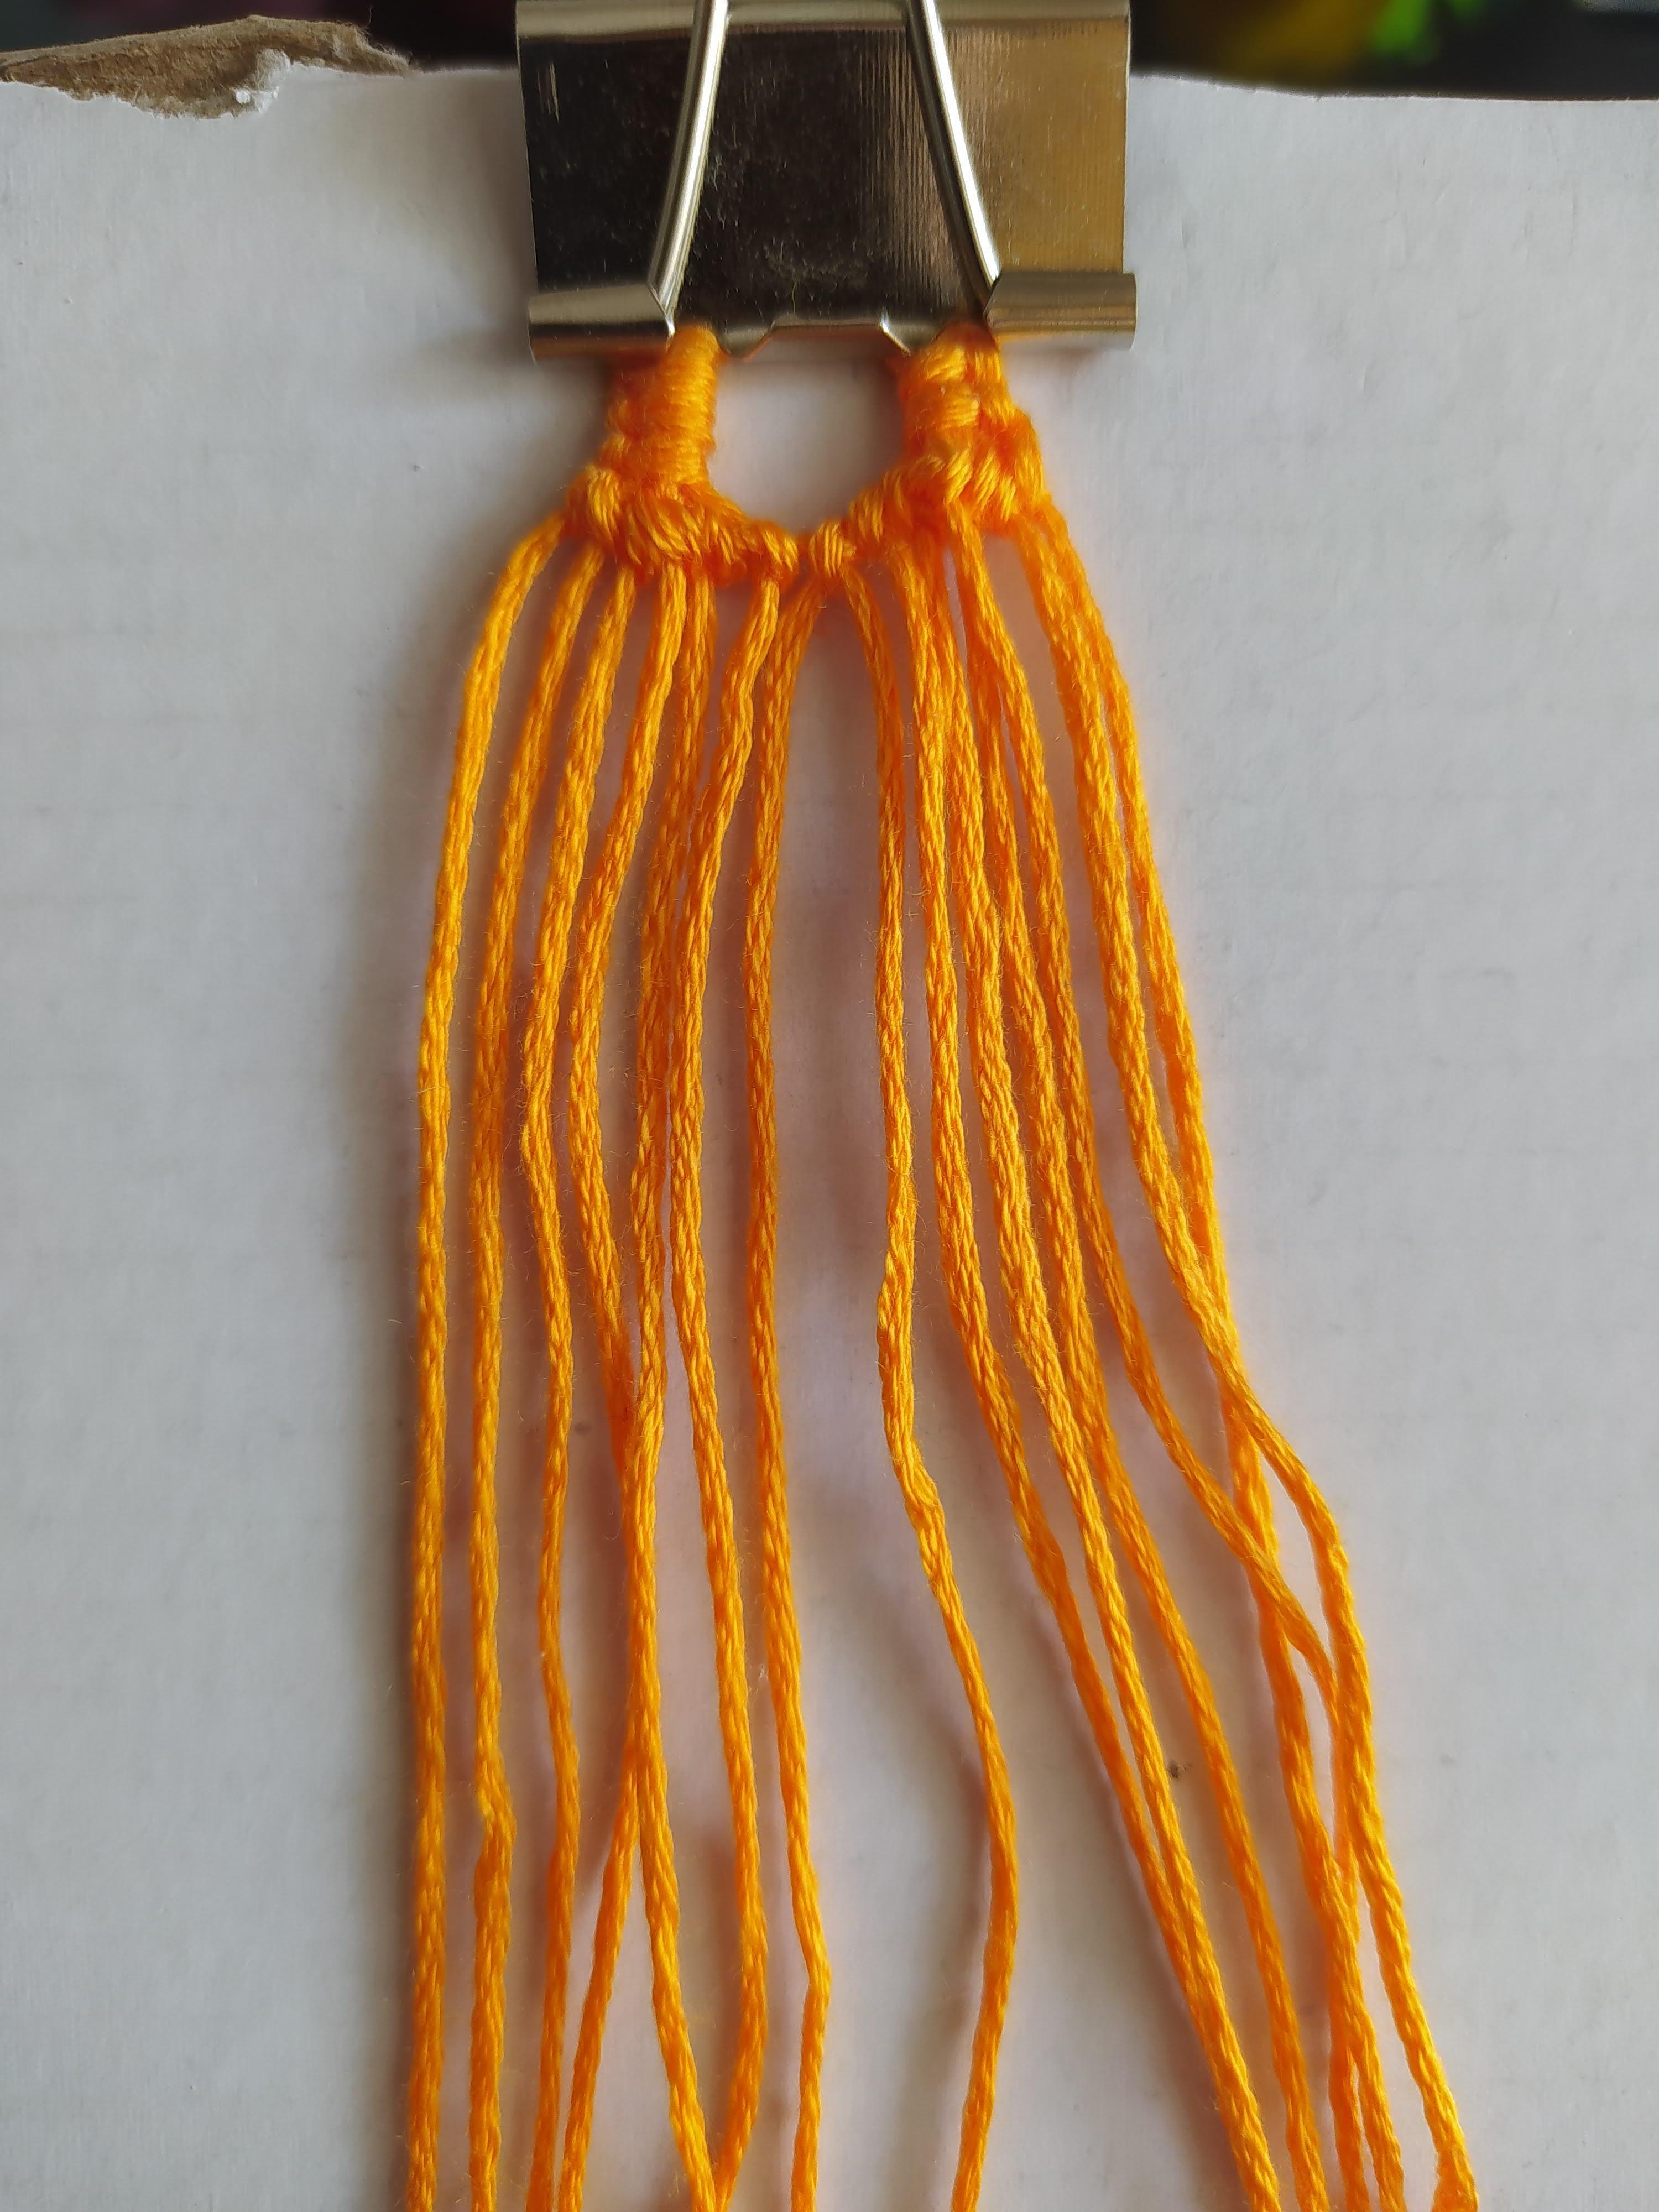
Prepare the String

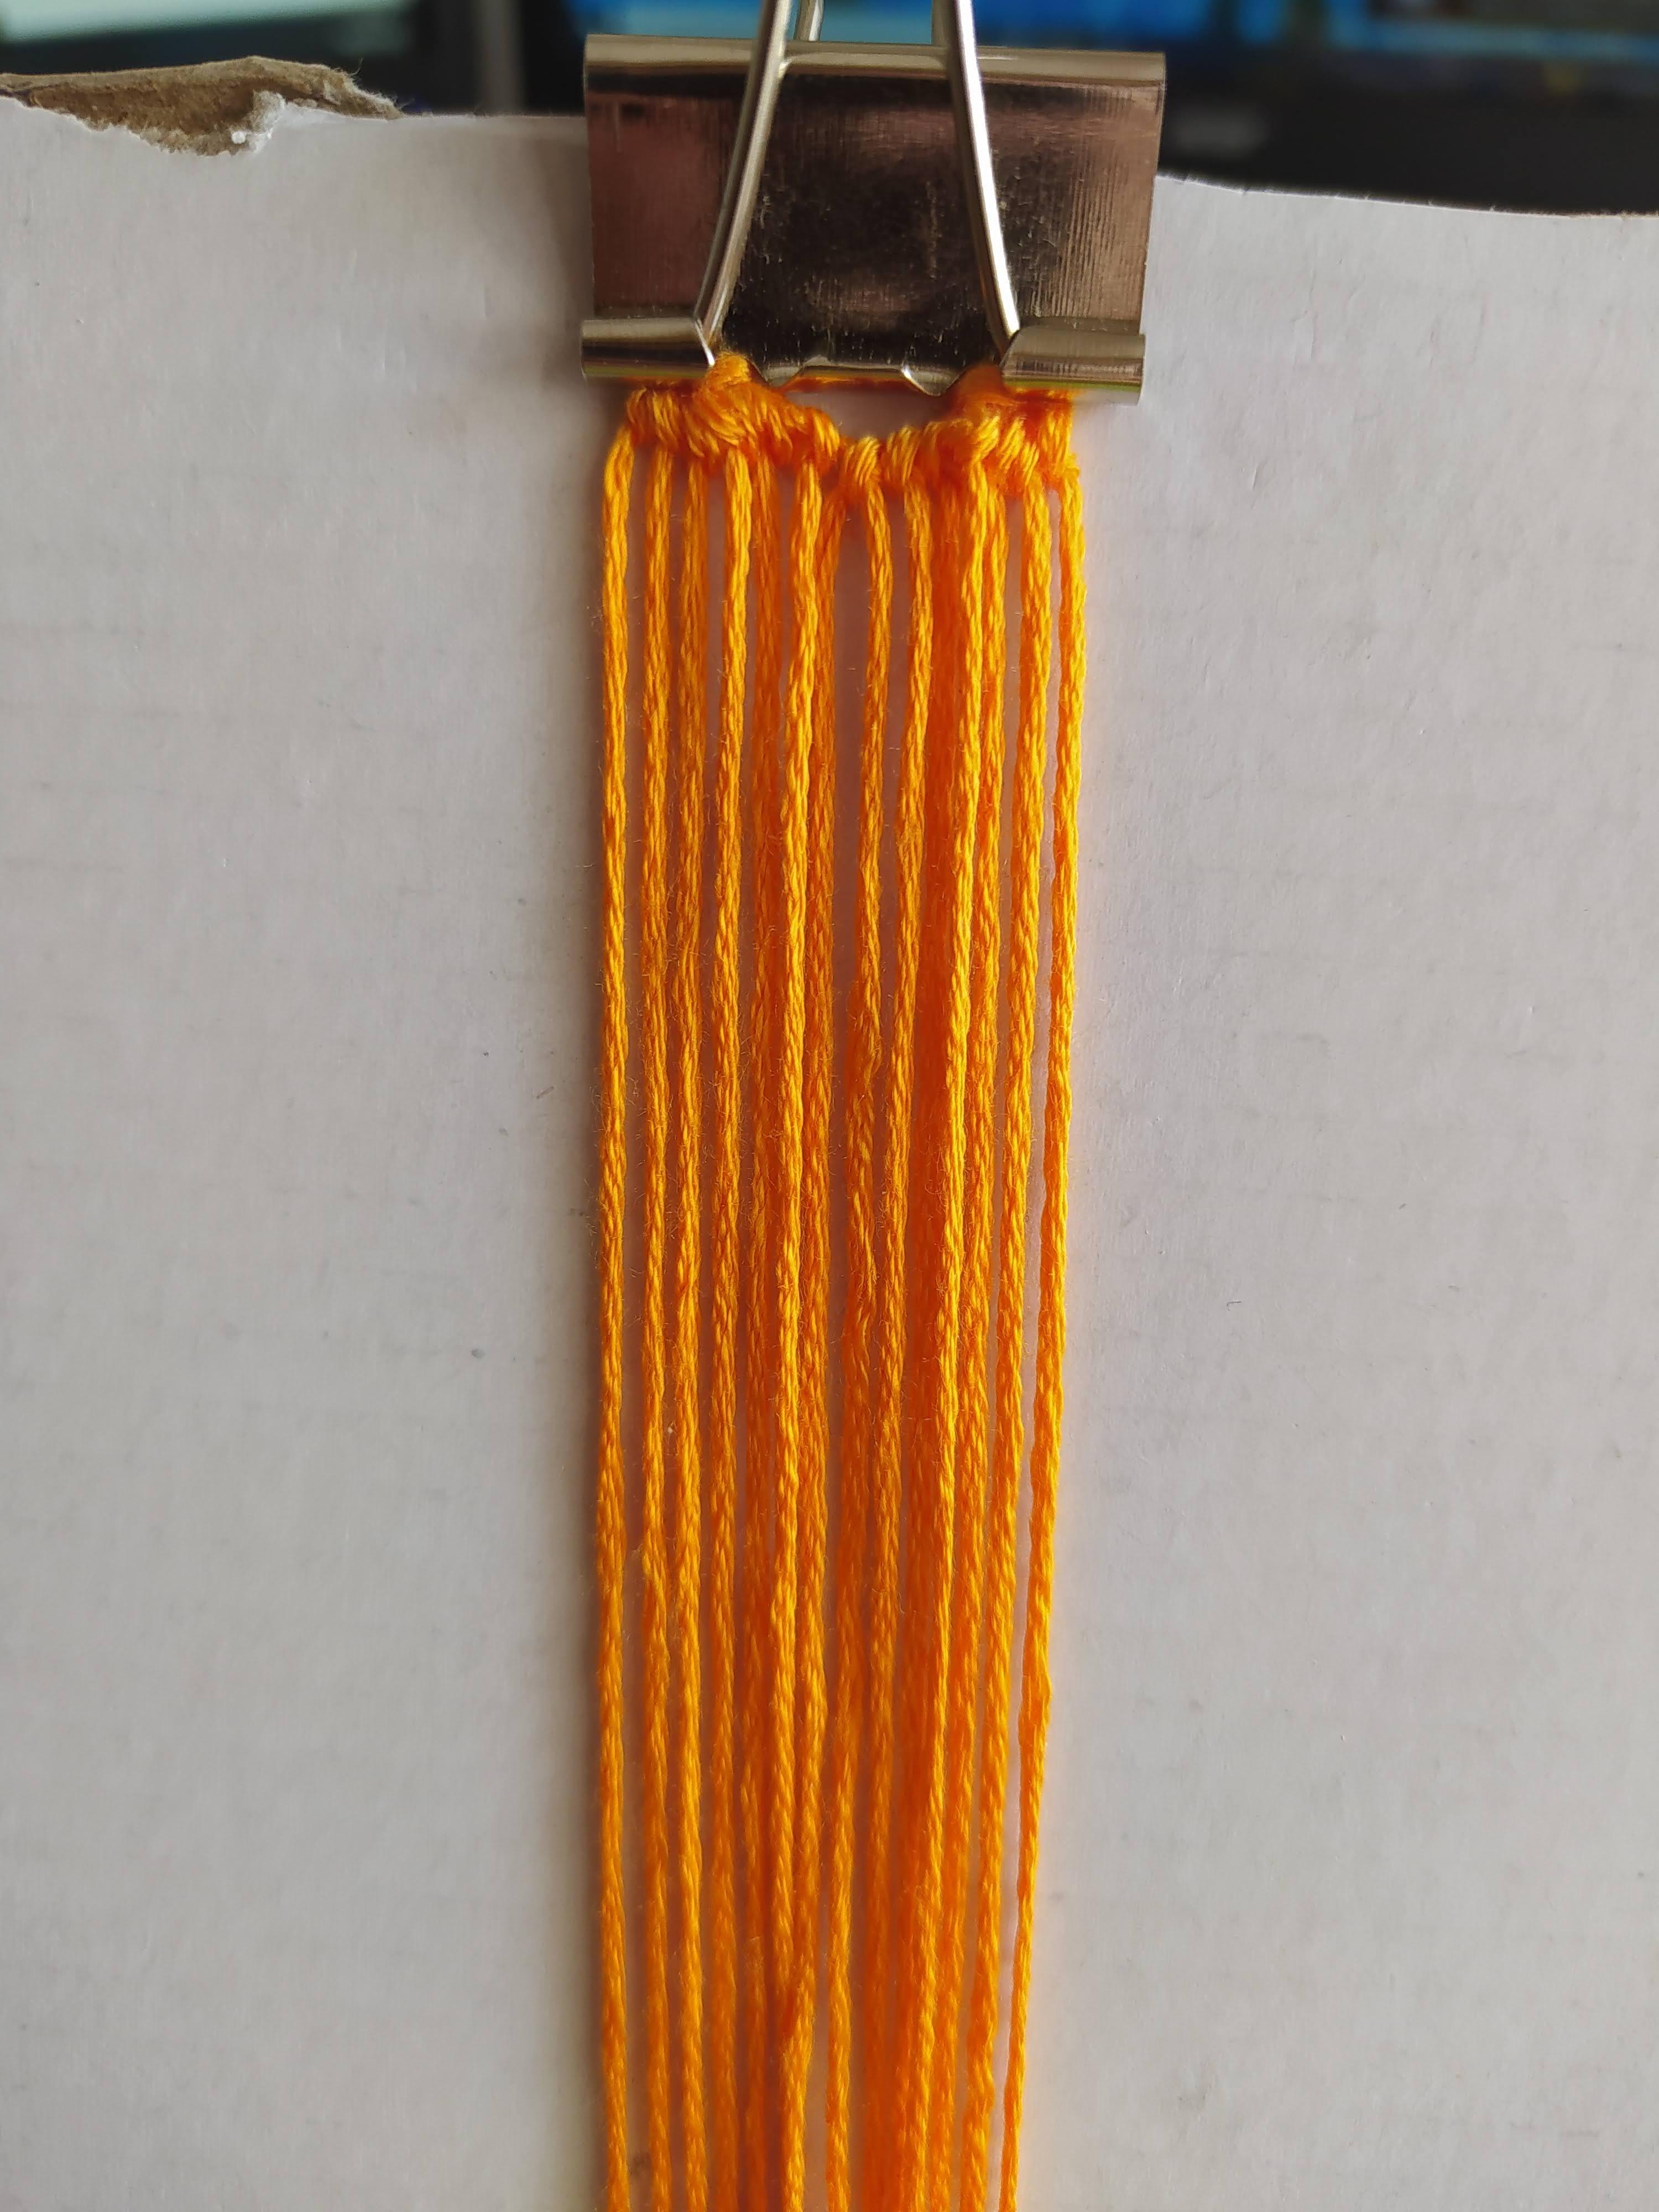
In this picture you can see the base string, usually this color is white or black, but I used orange. And as I have 14 columns in my pattern, I will need 14 strings. So, I have six strings which measure 80 cm and one of 1 meter (for the eyelet). Seven strings in total fold them in half.
En esta imagen puedes ver los hilos base, normalmente son de color blanco o negro, pero yo usé naranja. Y como tengo 14 columnas en mi patrón, necesitaré 14 hilos. Por lo tanto, tengo seis hilos que miden 80 cm y un hilo que mide 1 metro (para el ojal). Siete hilos en total doblados por la mitad.
The Eyelet

Only follow the picture, take the long string and make that knot, right in the middle, on the strings.
Sigue la imagen, coge el hilo largo y haz ese nudo, justo en el medio, encima de los hilos.
Eyelet Knots
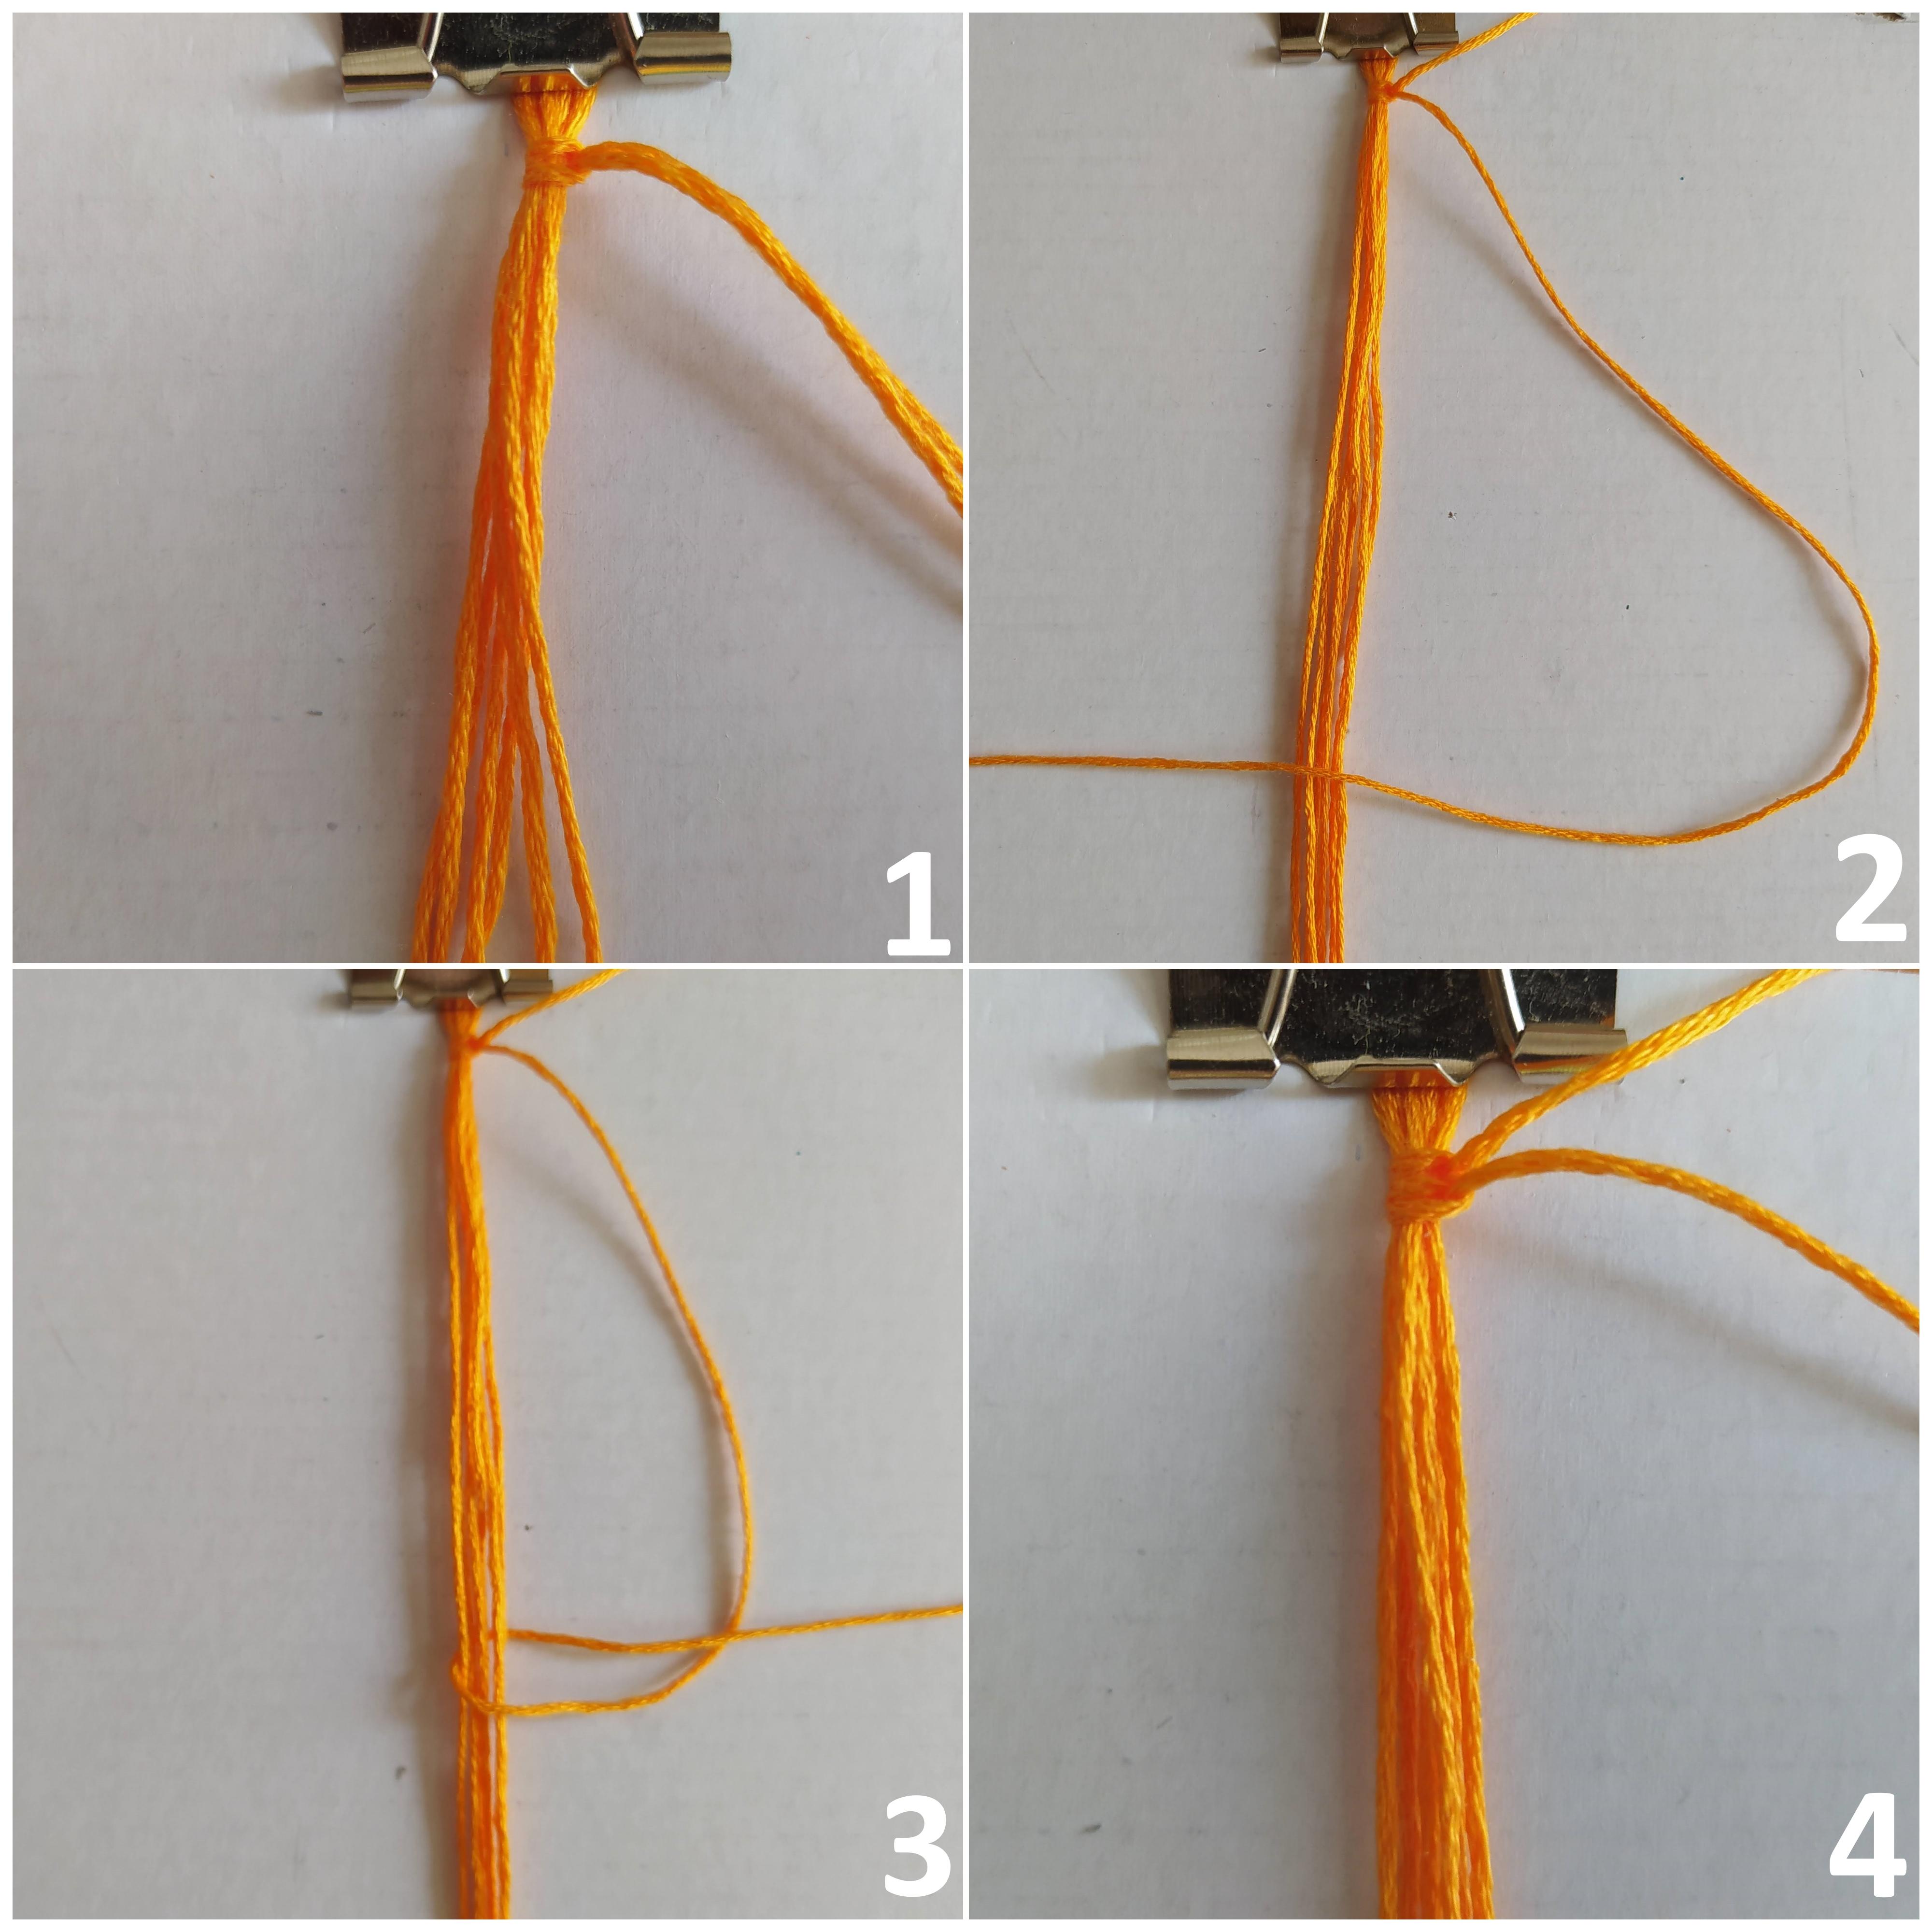

Put the long string at right, do the first knot (first picture) and after the second (second picture). The diference is that in the first you have to place the string ABOVE the others. In the second the string is placed UNDER the others. Repeat this six or seven times.
Pon el hilo más largo a la derecha, haz el primer nudo (primera imagen) y después el segundo (segunda imagen). La diferencia es que el en el primero tienes que colocar el hilo ENCIMA de los otros. En el segundo tienes que colocar el hilo por DEBAJO de los otros. Repite esto seis o siete veces.
Eyelet Knots


Change the position, now the long string is at left, do the same but reversed. First the knot above the other strings, secondly under the other strings. Repeat this six or seven times. And you'll get the eyelet.
Cambia la posición, ahora el hilo largo está en la izquierda, haz lo mismo pero al revés. Primero encima de los otros hilos, después por debajo de los otros hilos. Repite esto seis o siete veces. Y obtendrás el ojal.
Know the Knots
.jpeg)
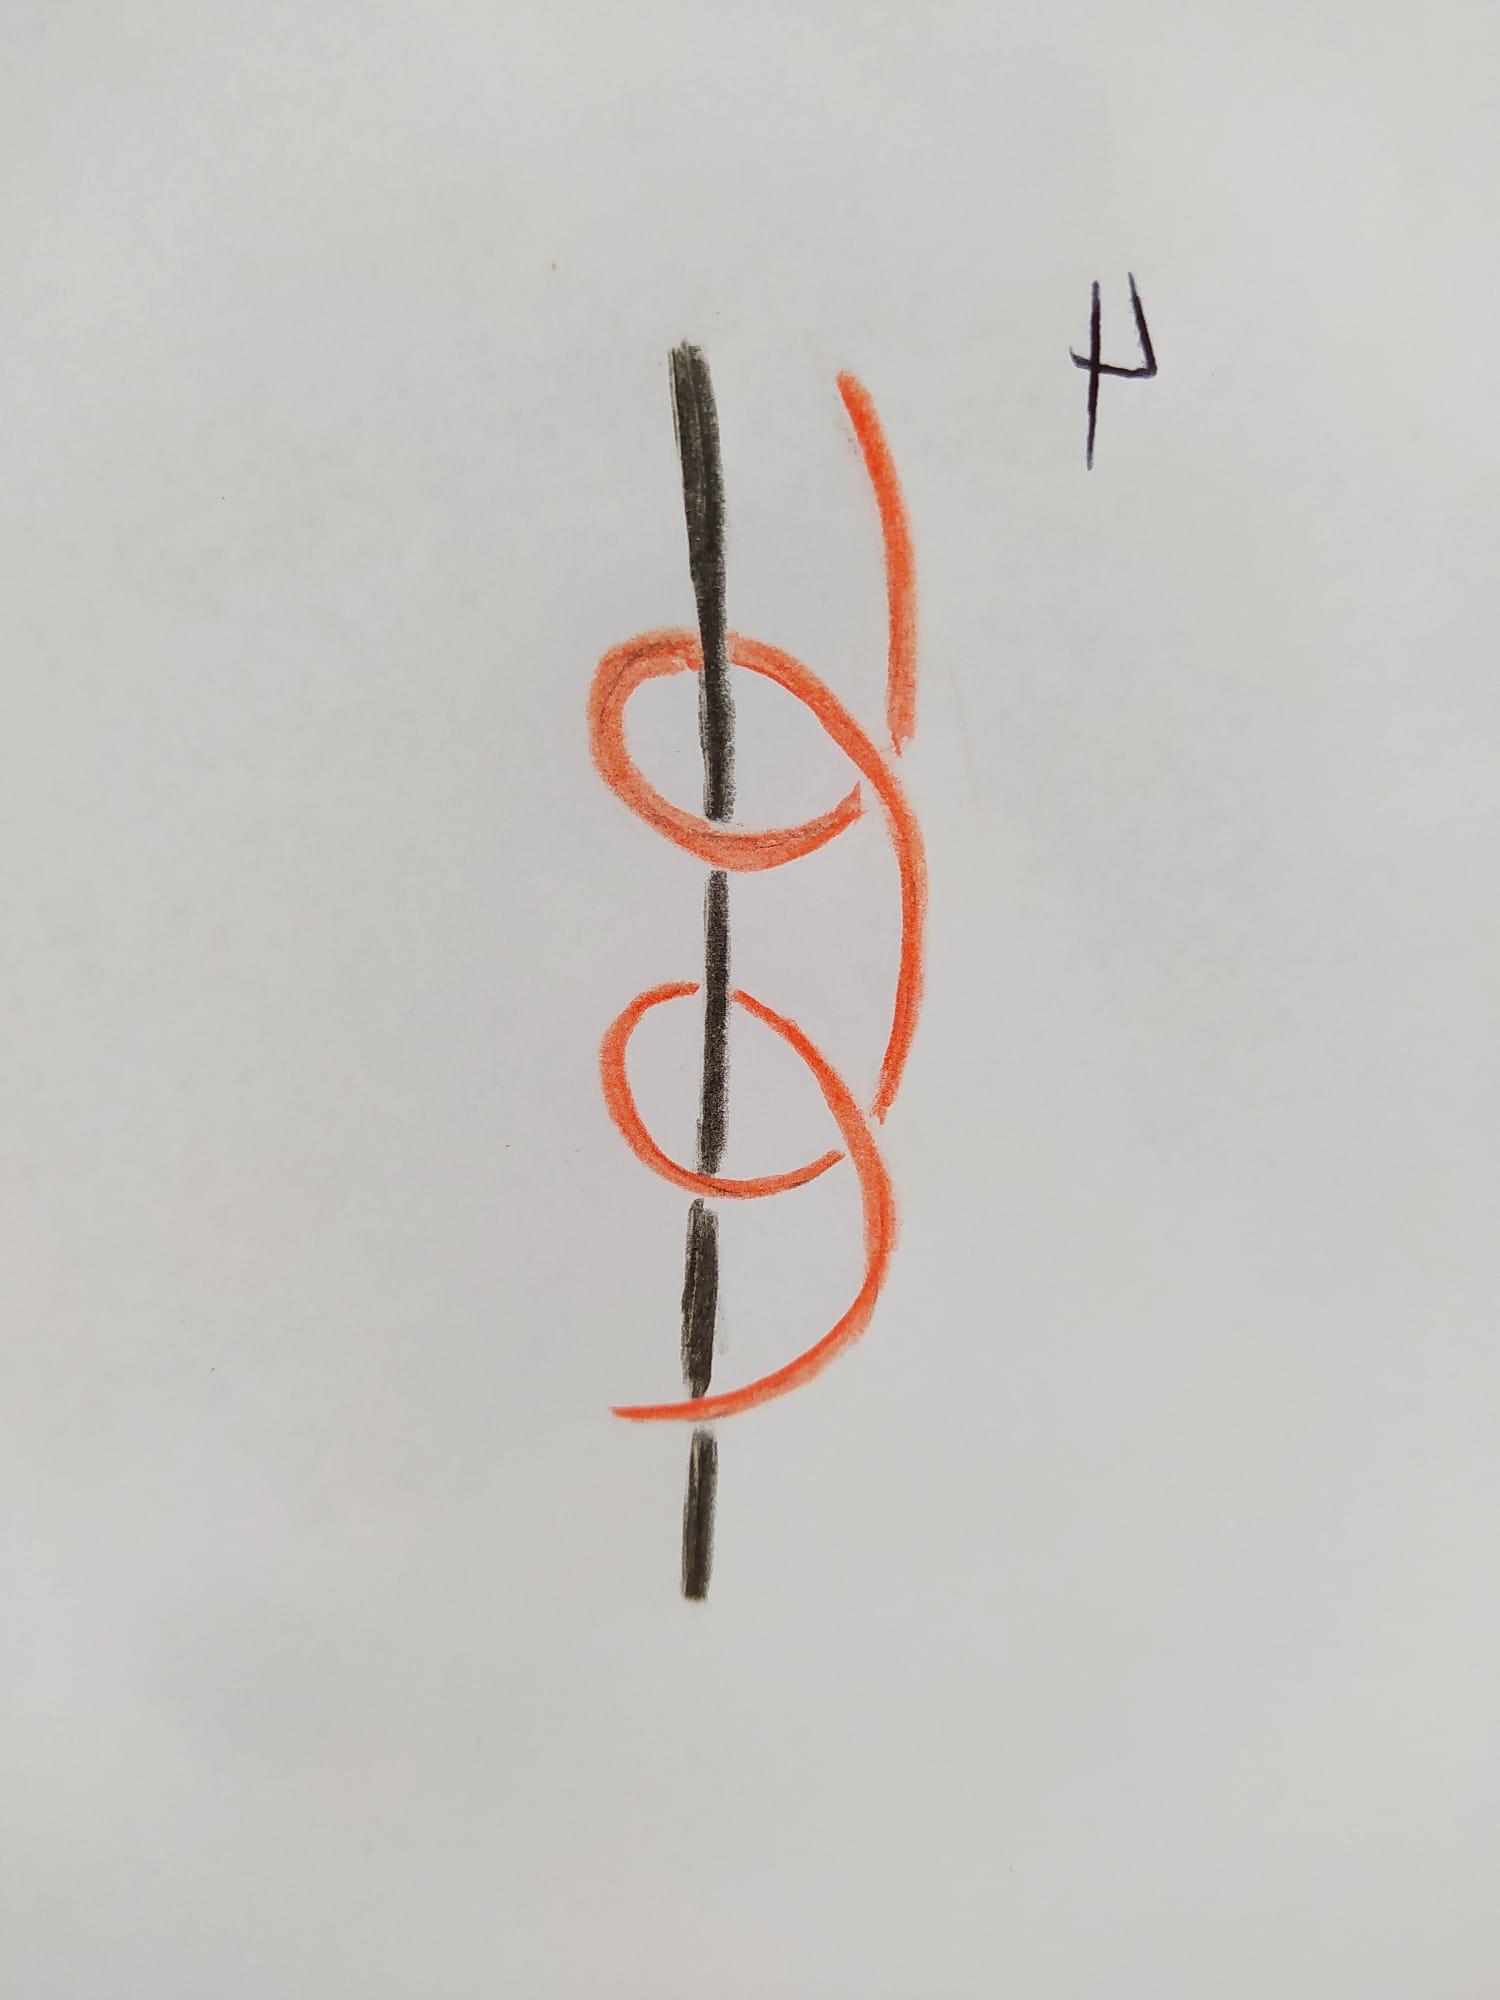
From here you have to know this knots, the "4" and the "P".
When you go from left to right you'll use the "4". First make one knot, tighten it and make the other knot.
When you go from right to left you'll use the "P". First make one knot, tighten it and make the other knot.
A partir de aquí tienes que conocer este nudo, el "4" y la "P".
Cuando vas de izquierda a derecha, usarás el "4". Primero haz un nudo, apriétalo y haz el otro nudo.
Cuando vas de derecha a izquierda, usarás la "P". Primero haz un nudo, apriétalo y haz el otro nudo.
Close the Eyelet


Use the "P" knot, you know, two times. Apply on each right strings.
Usa el nudo "P", ya sabes dos veces. Hazlo con todos los hilos de la derecha.
Close the Eyelet


Use the "4" knot, two times. Apply in left strings.
Usa el nudo "4", dos veces. Hazlo en los hilos de la izquierda.
Close the Eyelet


To close, make a "4" knot with the two middle strings.
Para cerrar, haz un nudo "4" con los dos hilos de en medio.
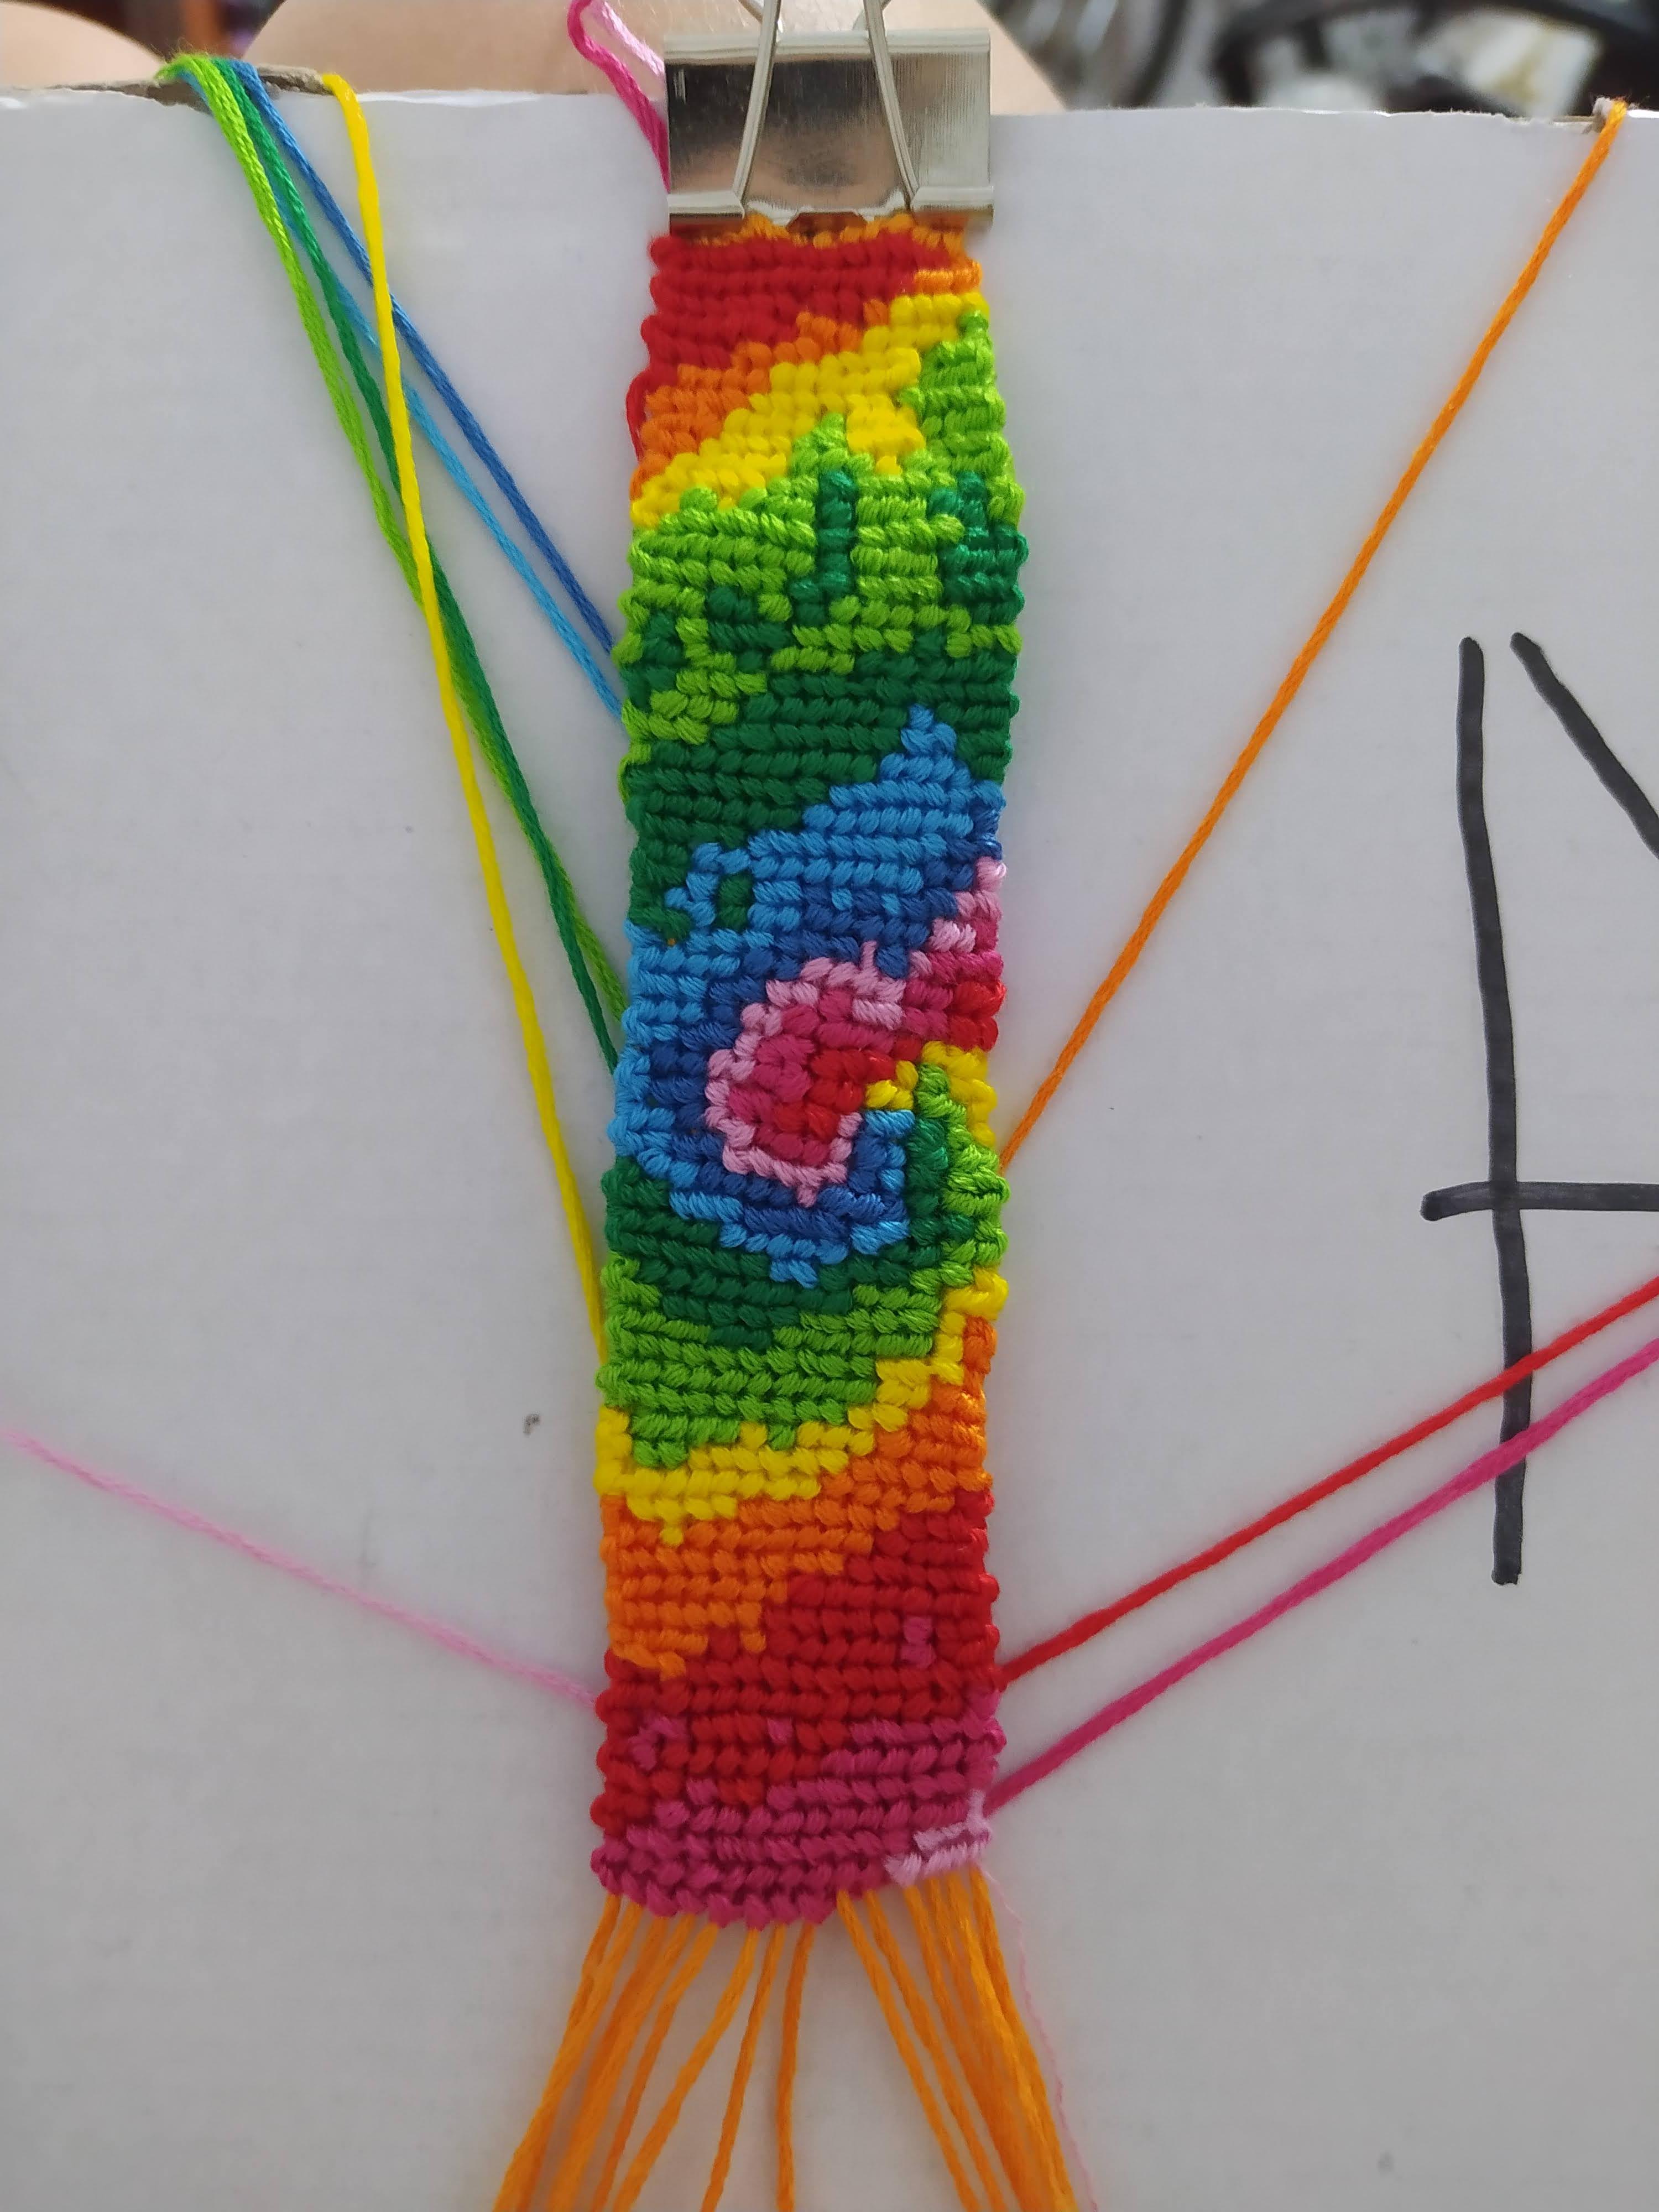
Start the Pattern


Place the first color at left. As you go from left to right apply the "4" knot.
Coloca el primer color a la izquierda. Como vamos de izquierda a derecha usa el nudo "4".
Change Color


Add a new color on the right, this must go under the base strings but above the last string.
Añade un nuevo color por la derecha, debe ir por debajo de los hilos base pero por encima del anterior hilo.
Keep Working


Each "4" or "P" knot is a square of the pattern.
Cada nudo "4" o "P" es un cuadrado del patrón.
Color Changes


The previous string must been placed like in the picture.
El hilo anterior debe colocarse como en la imagen.
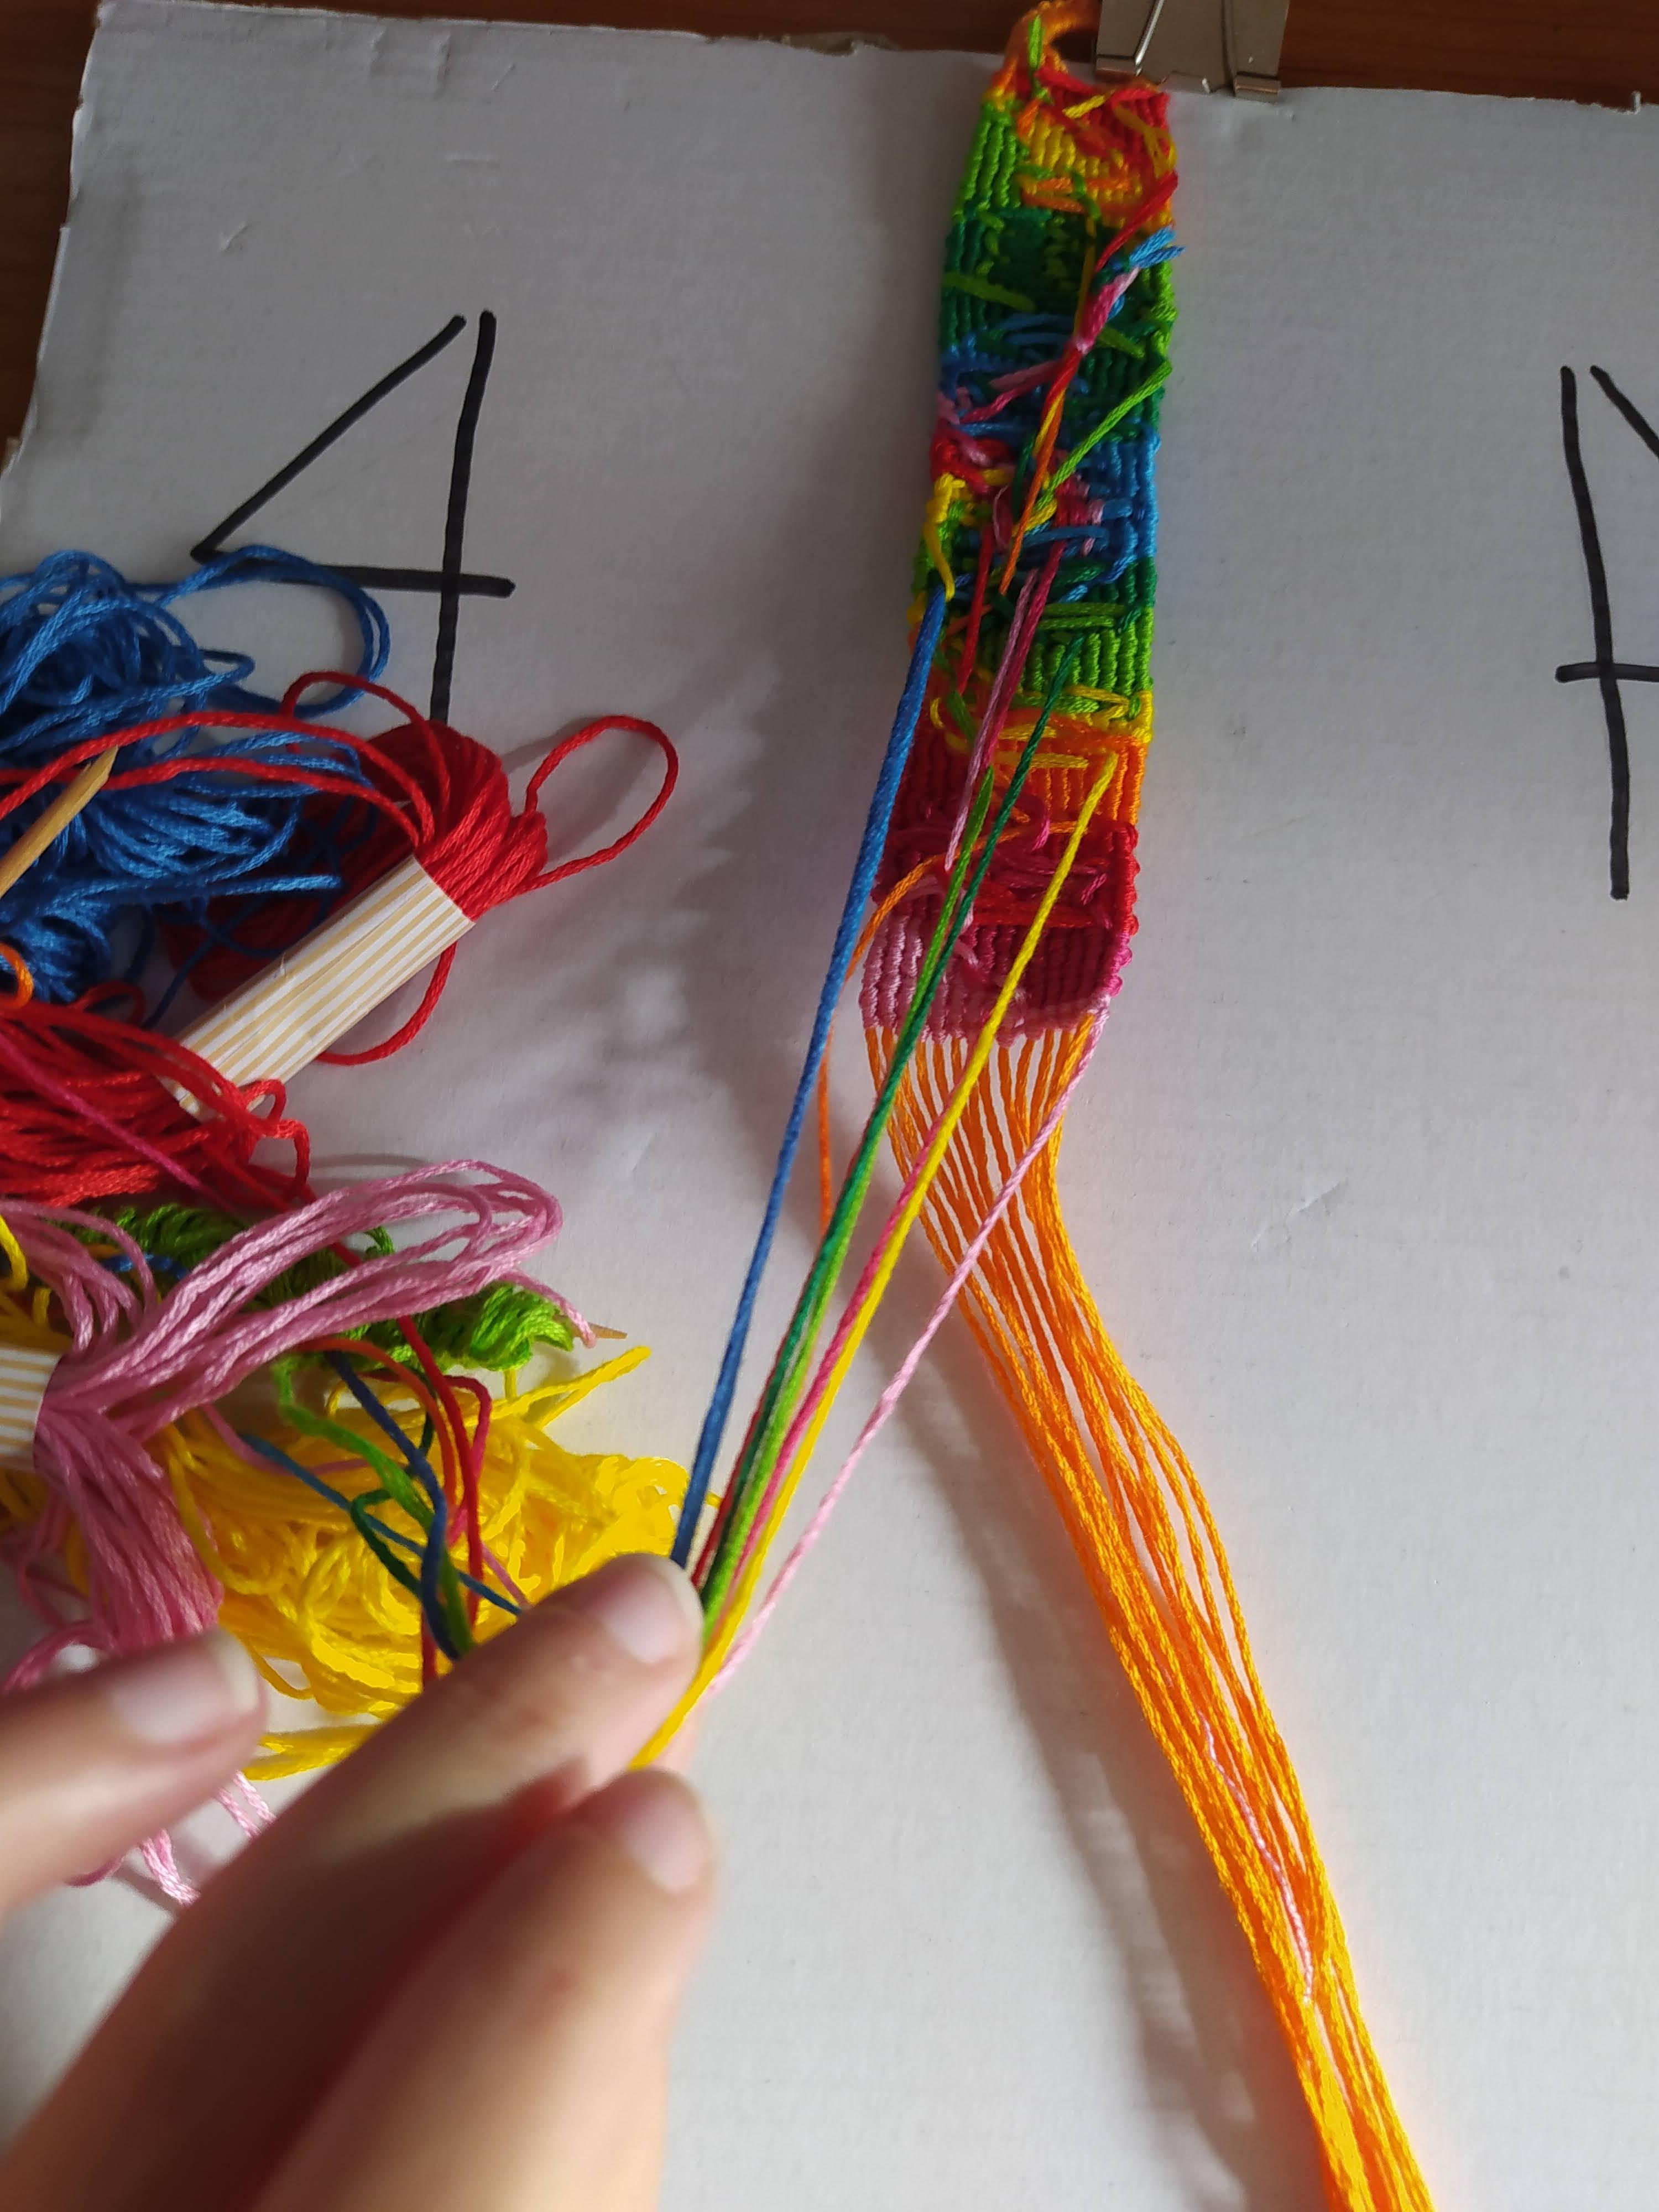
The Process


Normal Knots


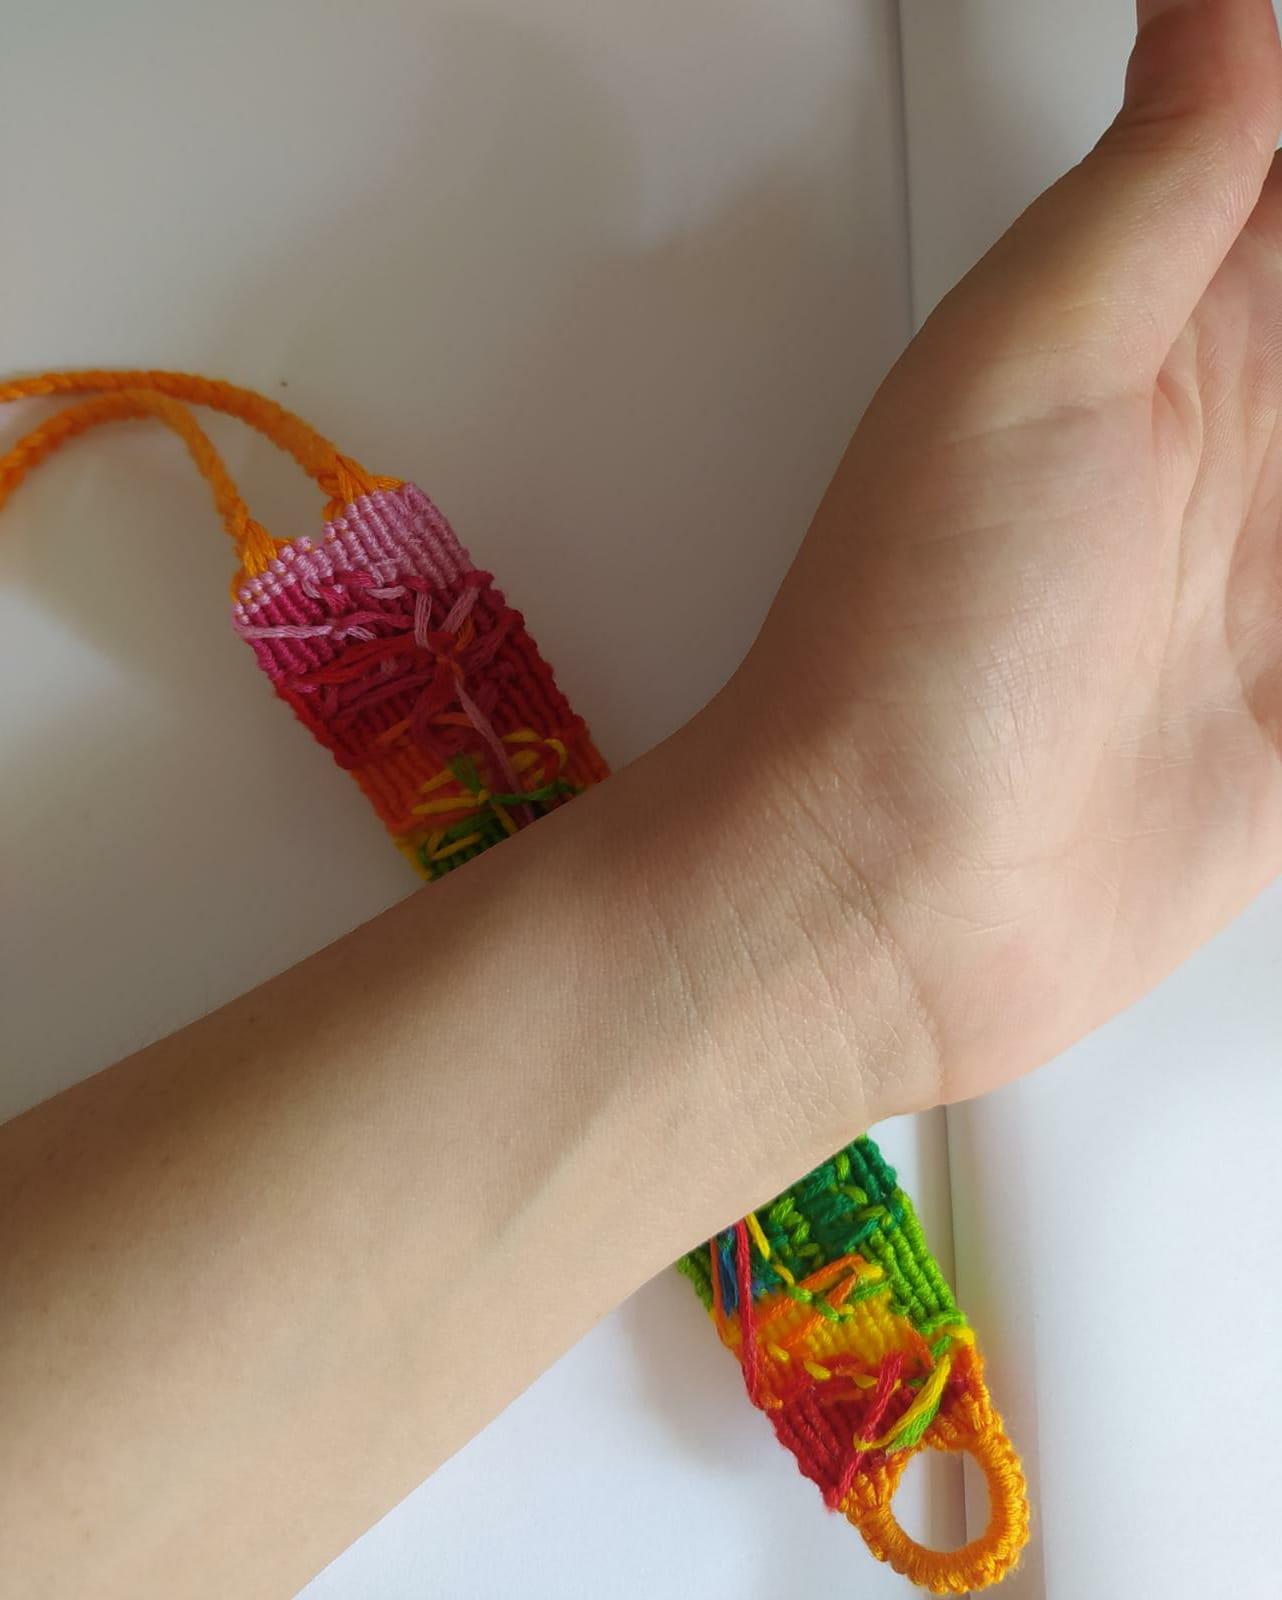
When you finish the bracelet do normal knots to close. I add a little drop of liquid glue in each knot, if you use waxed string, you will use a lighter carefully.
Cuando termines la pulsera haz nudos normales para cerrarla. Yo puse una gotita de pegamento liquido en cada nudo, si usas hilo encerado usarás un mechero con cuidado.
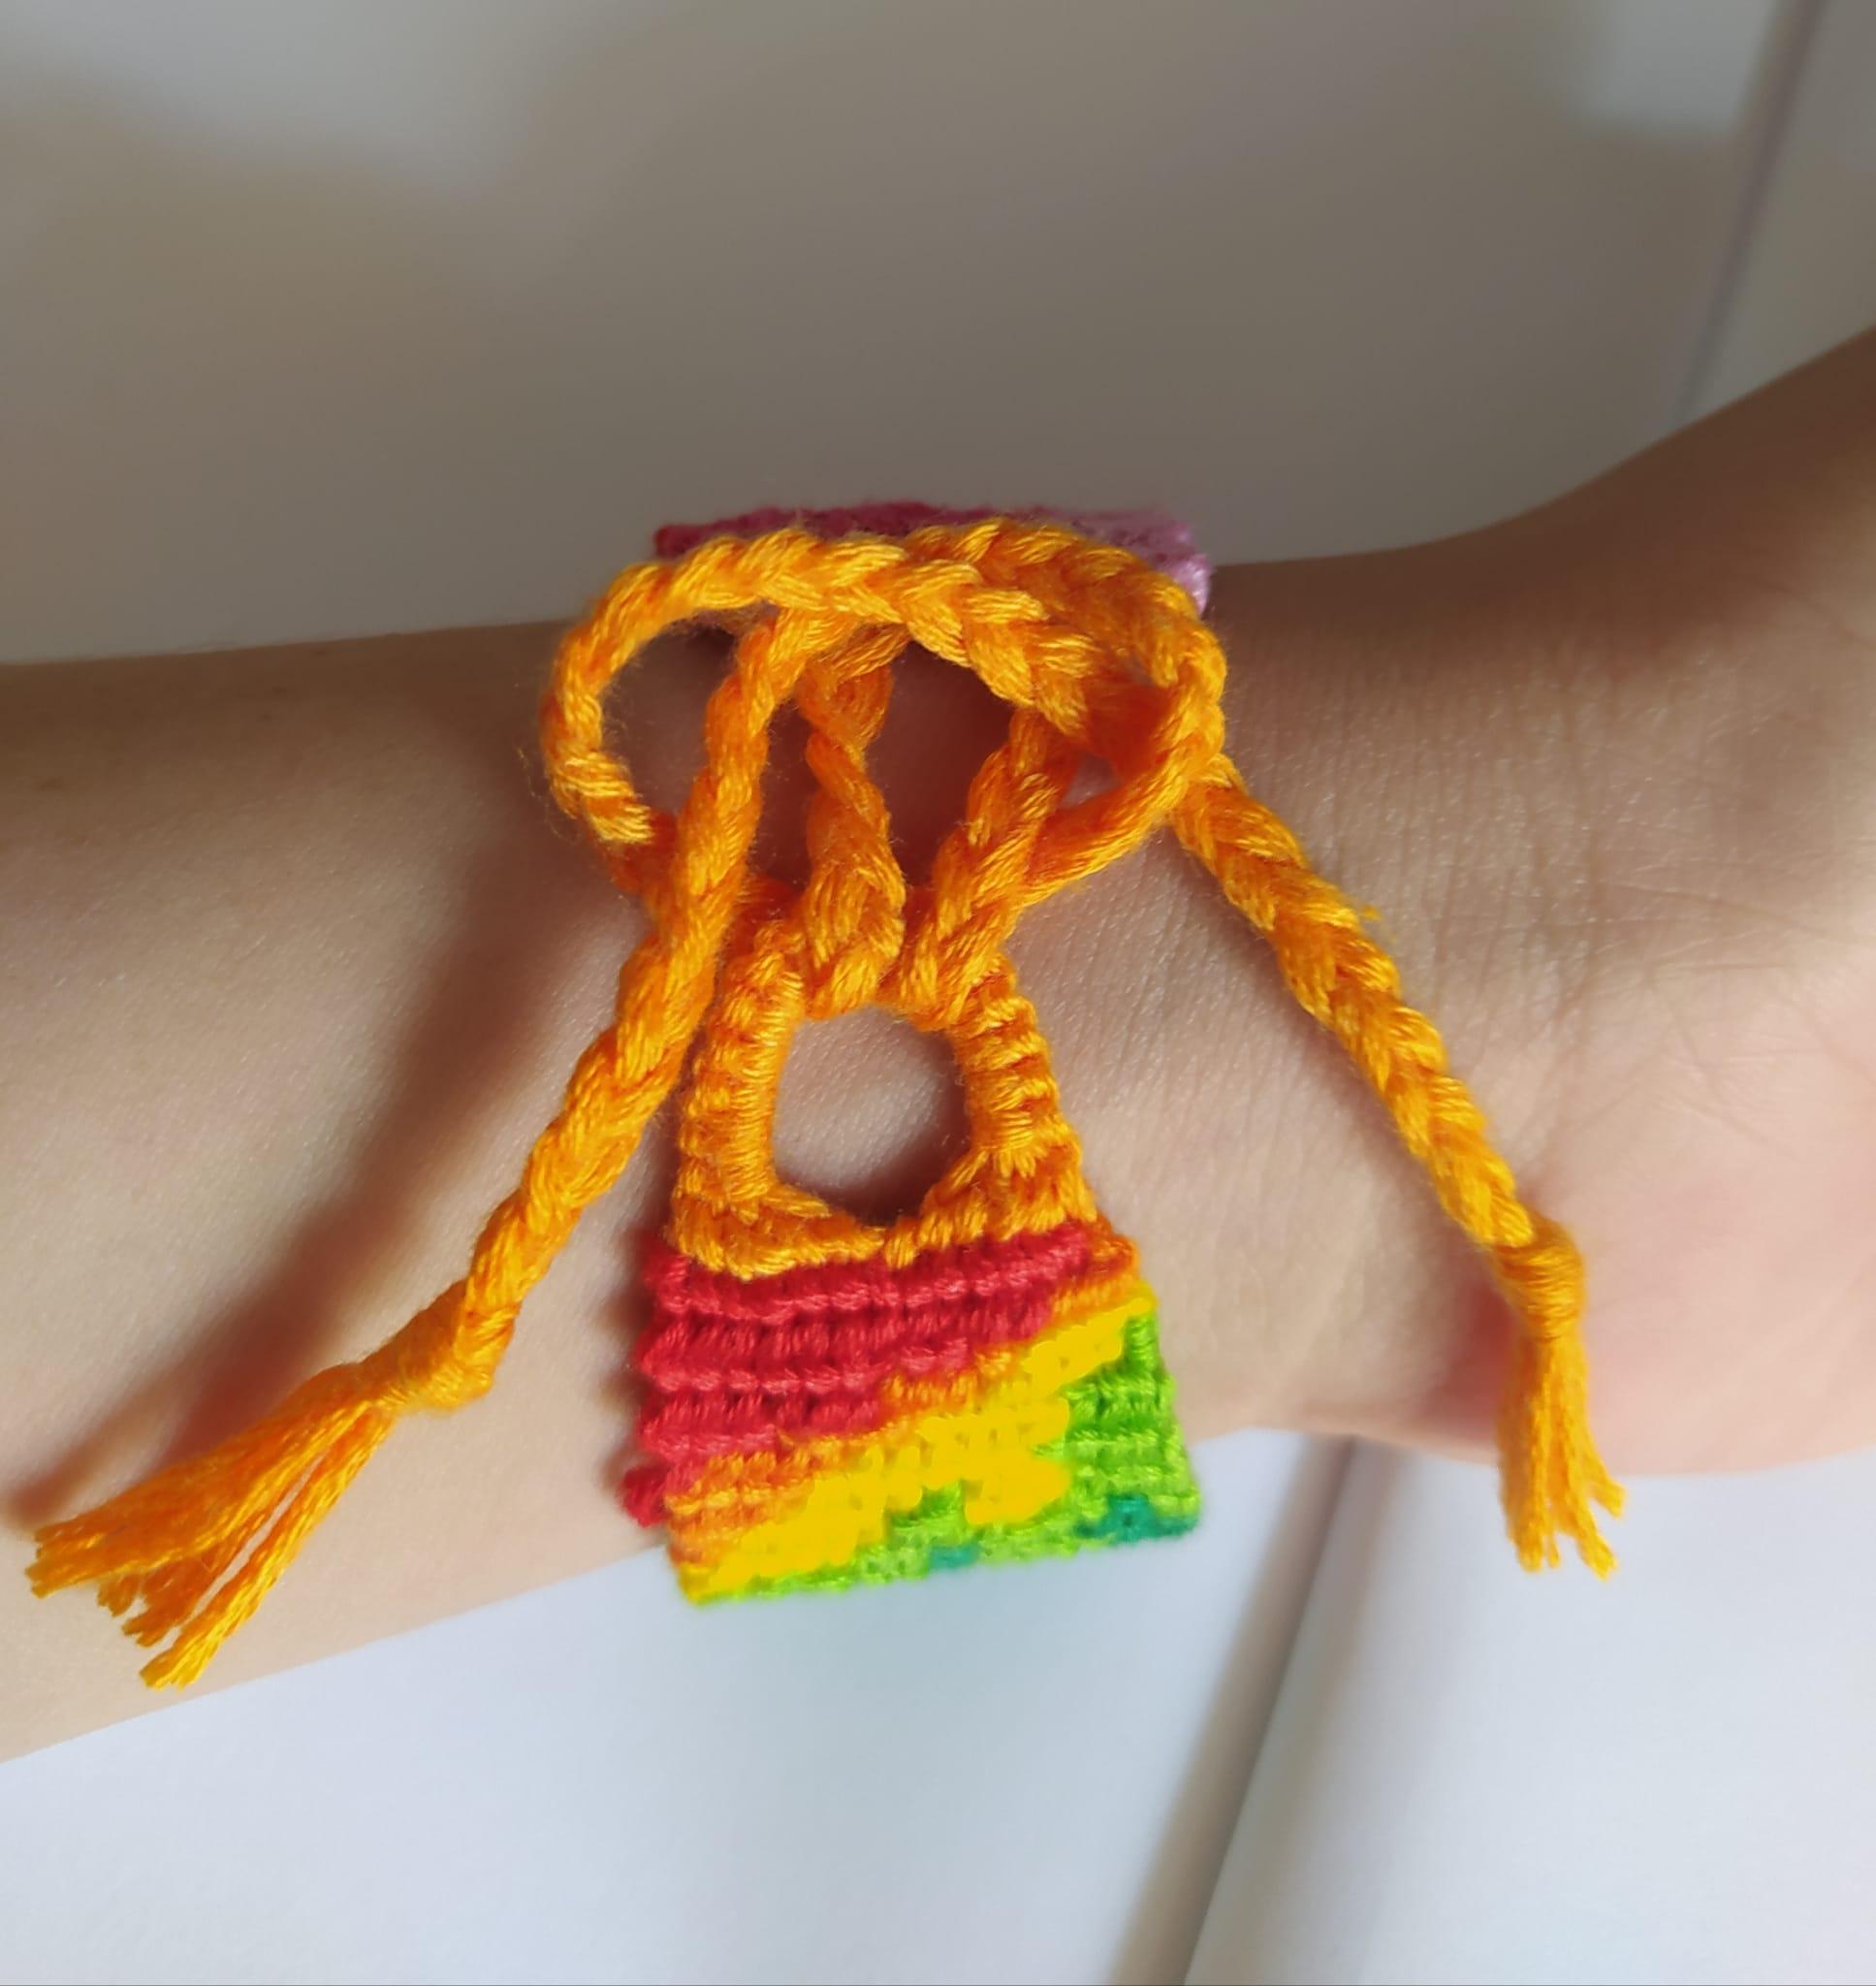
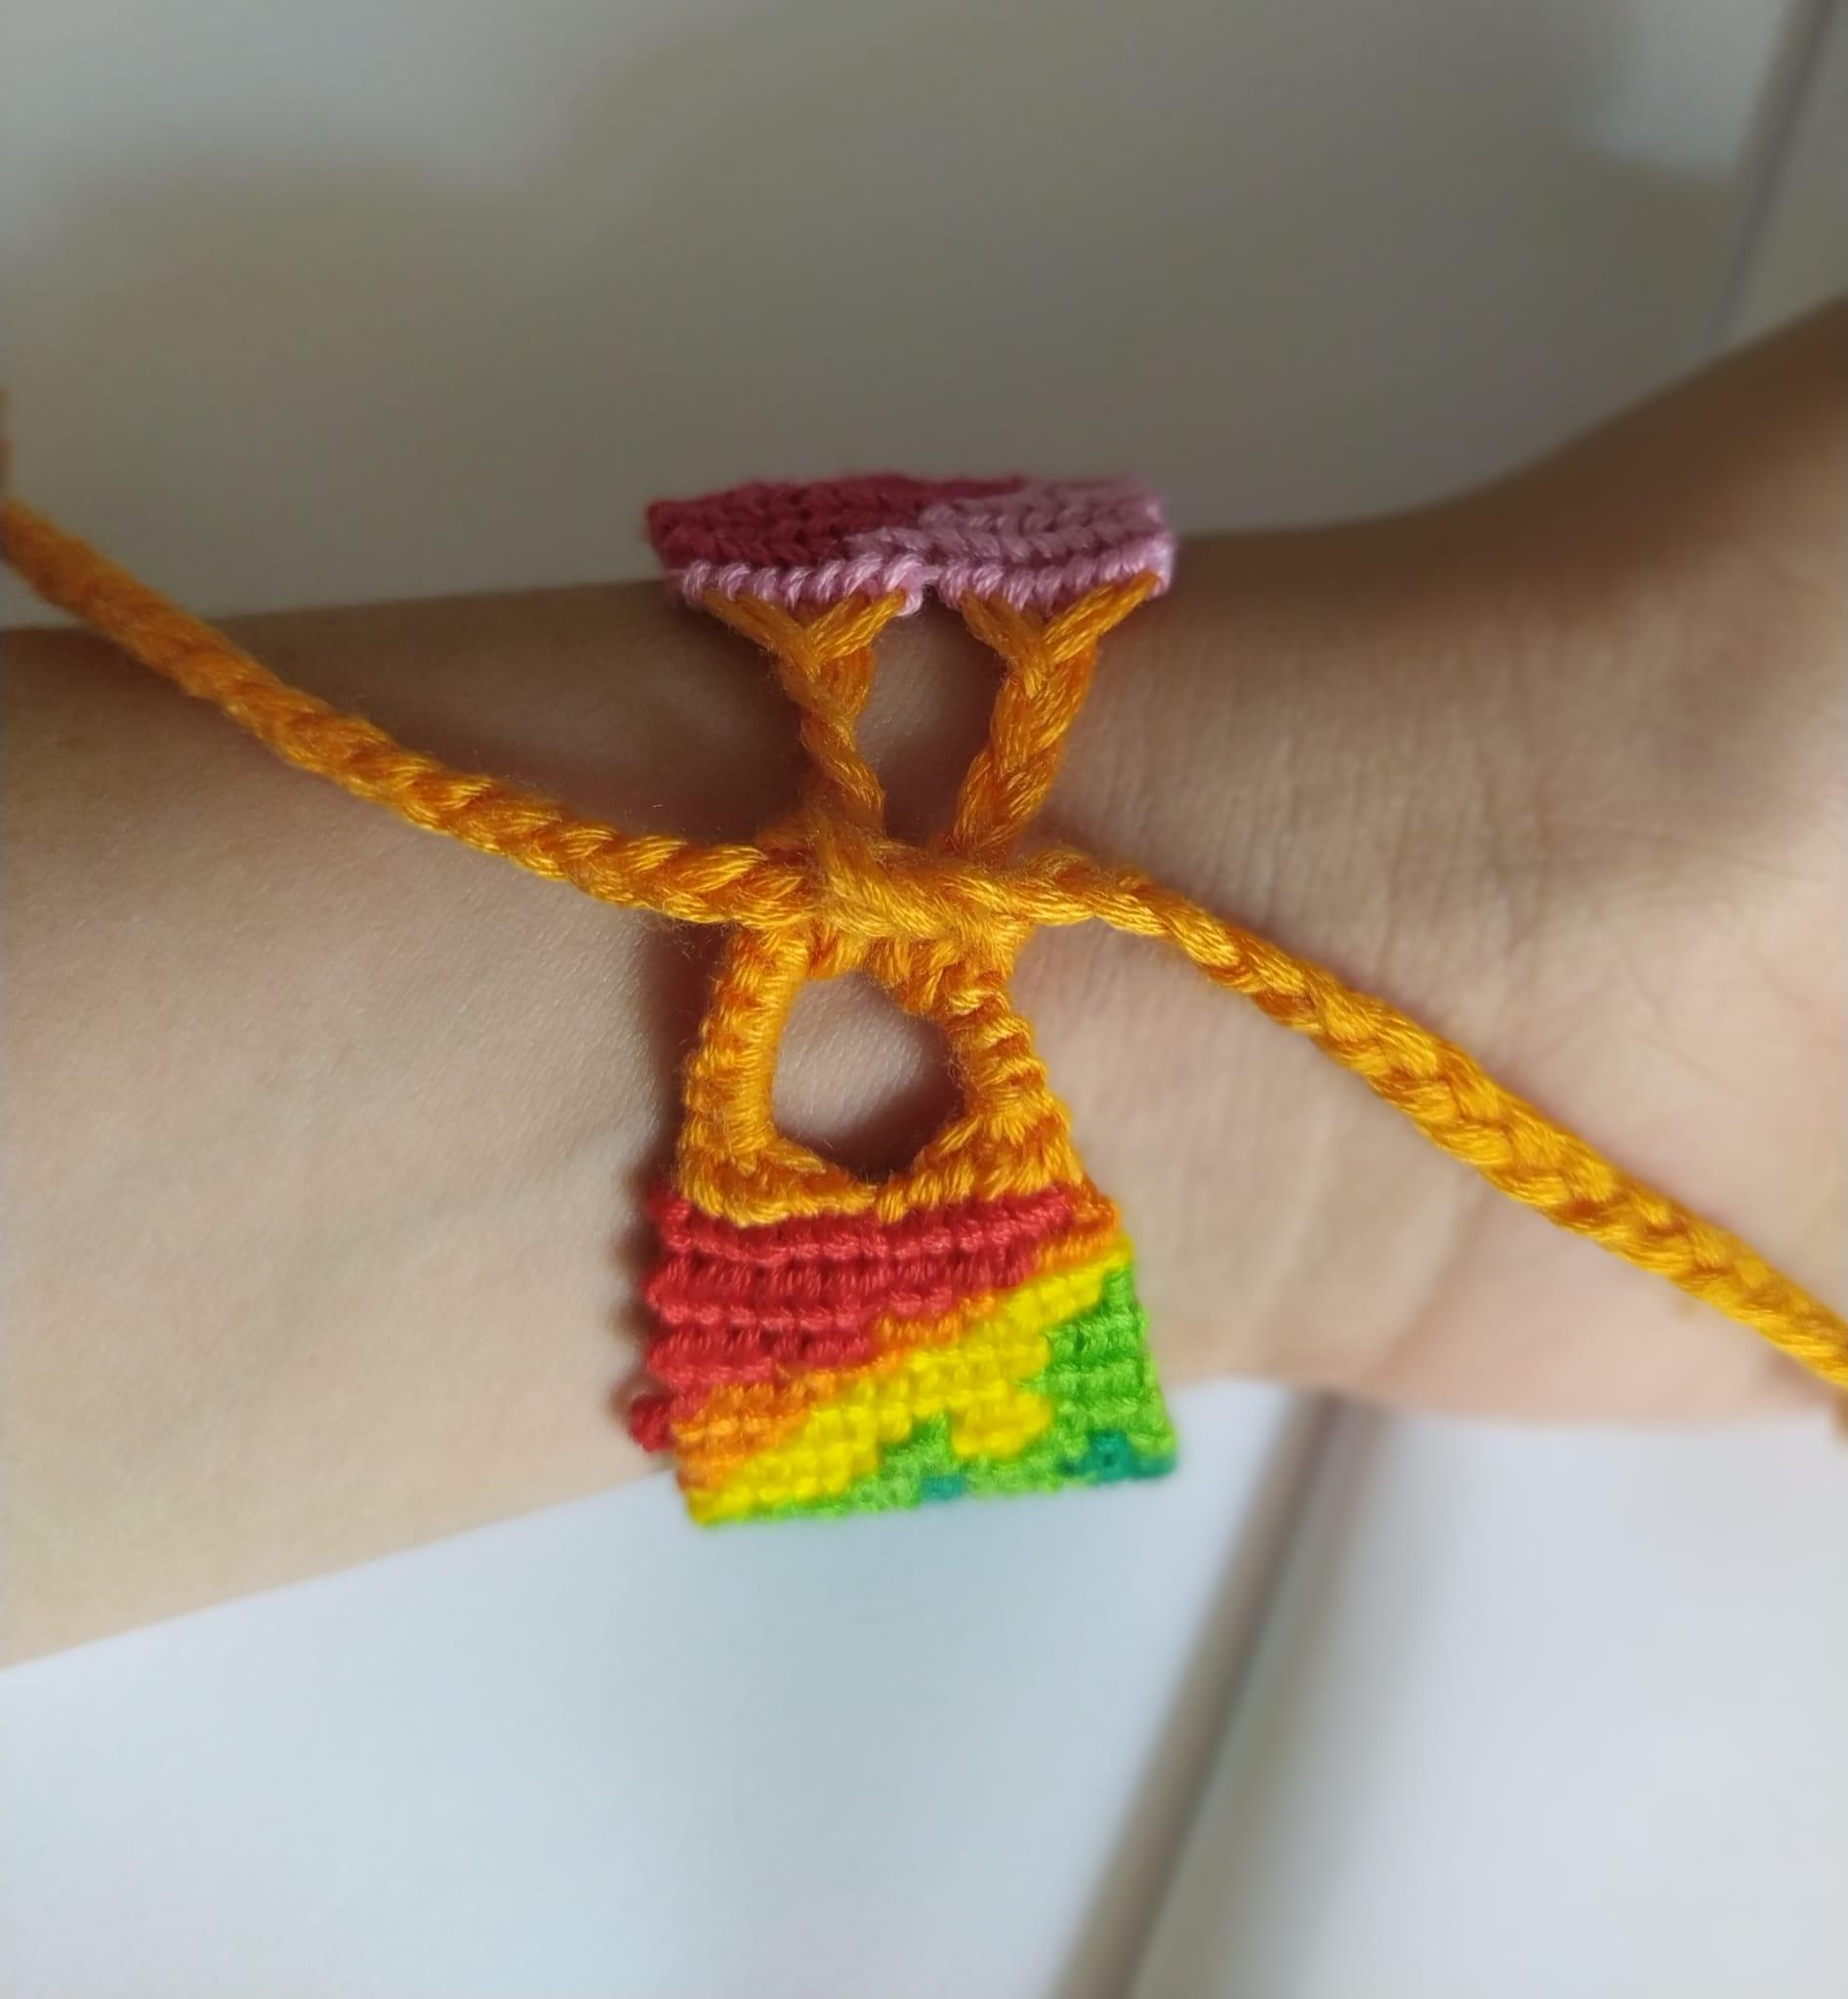
Braids


Finish!
.jpeg)
.jpeg)
.jpeg)
.jpeg)
.jpeg)
.jpeg)
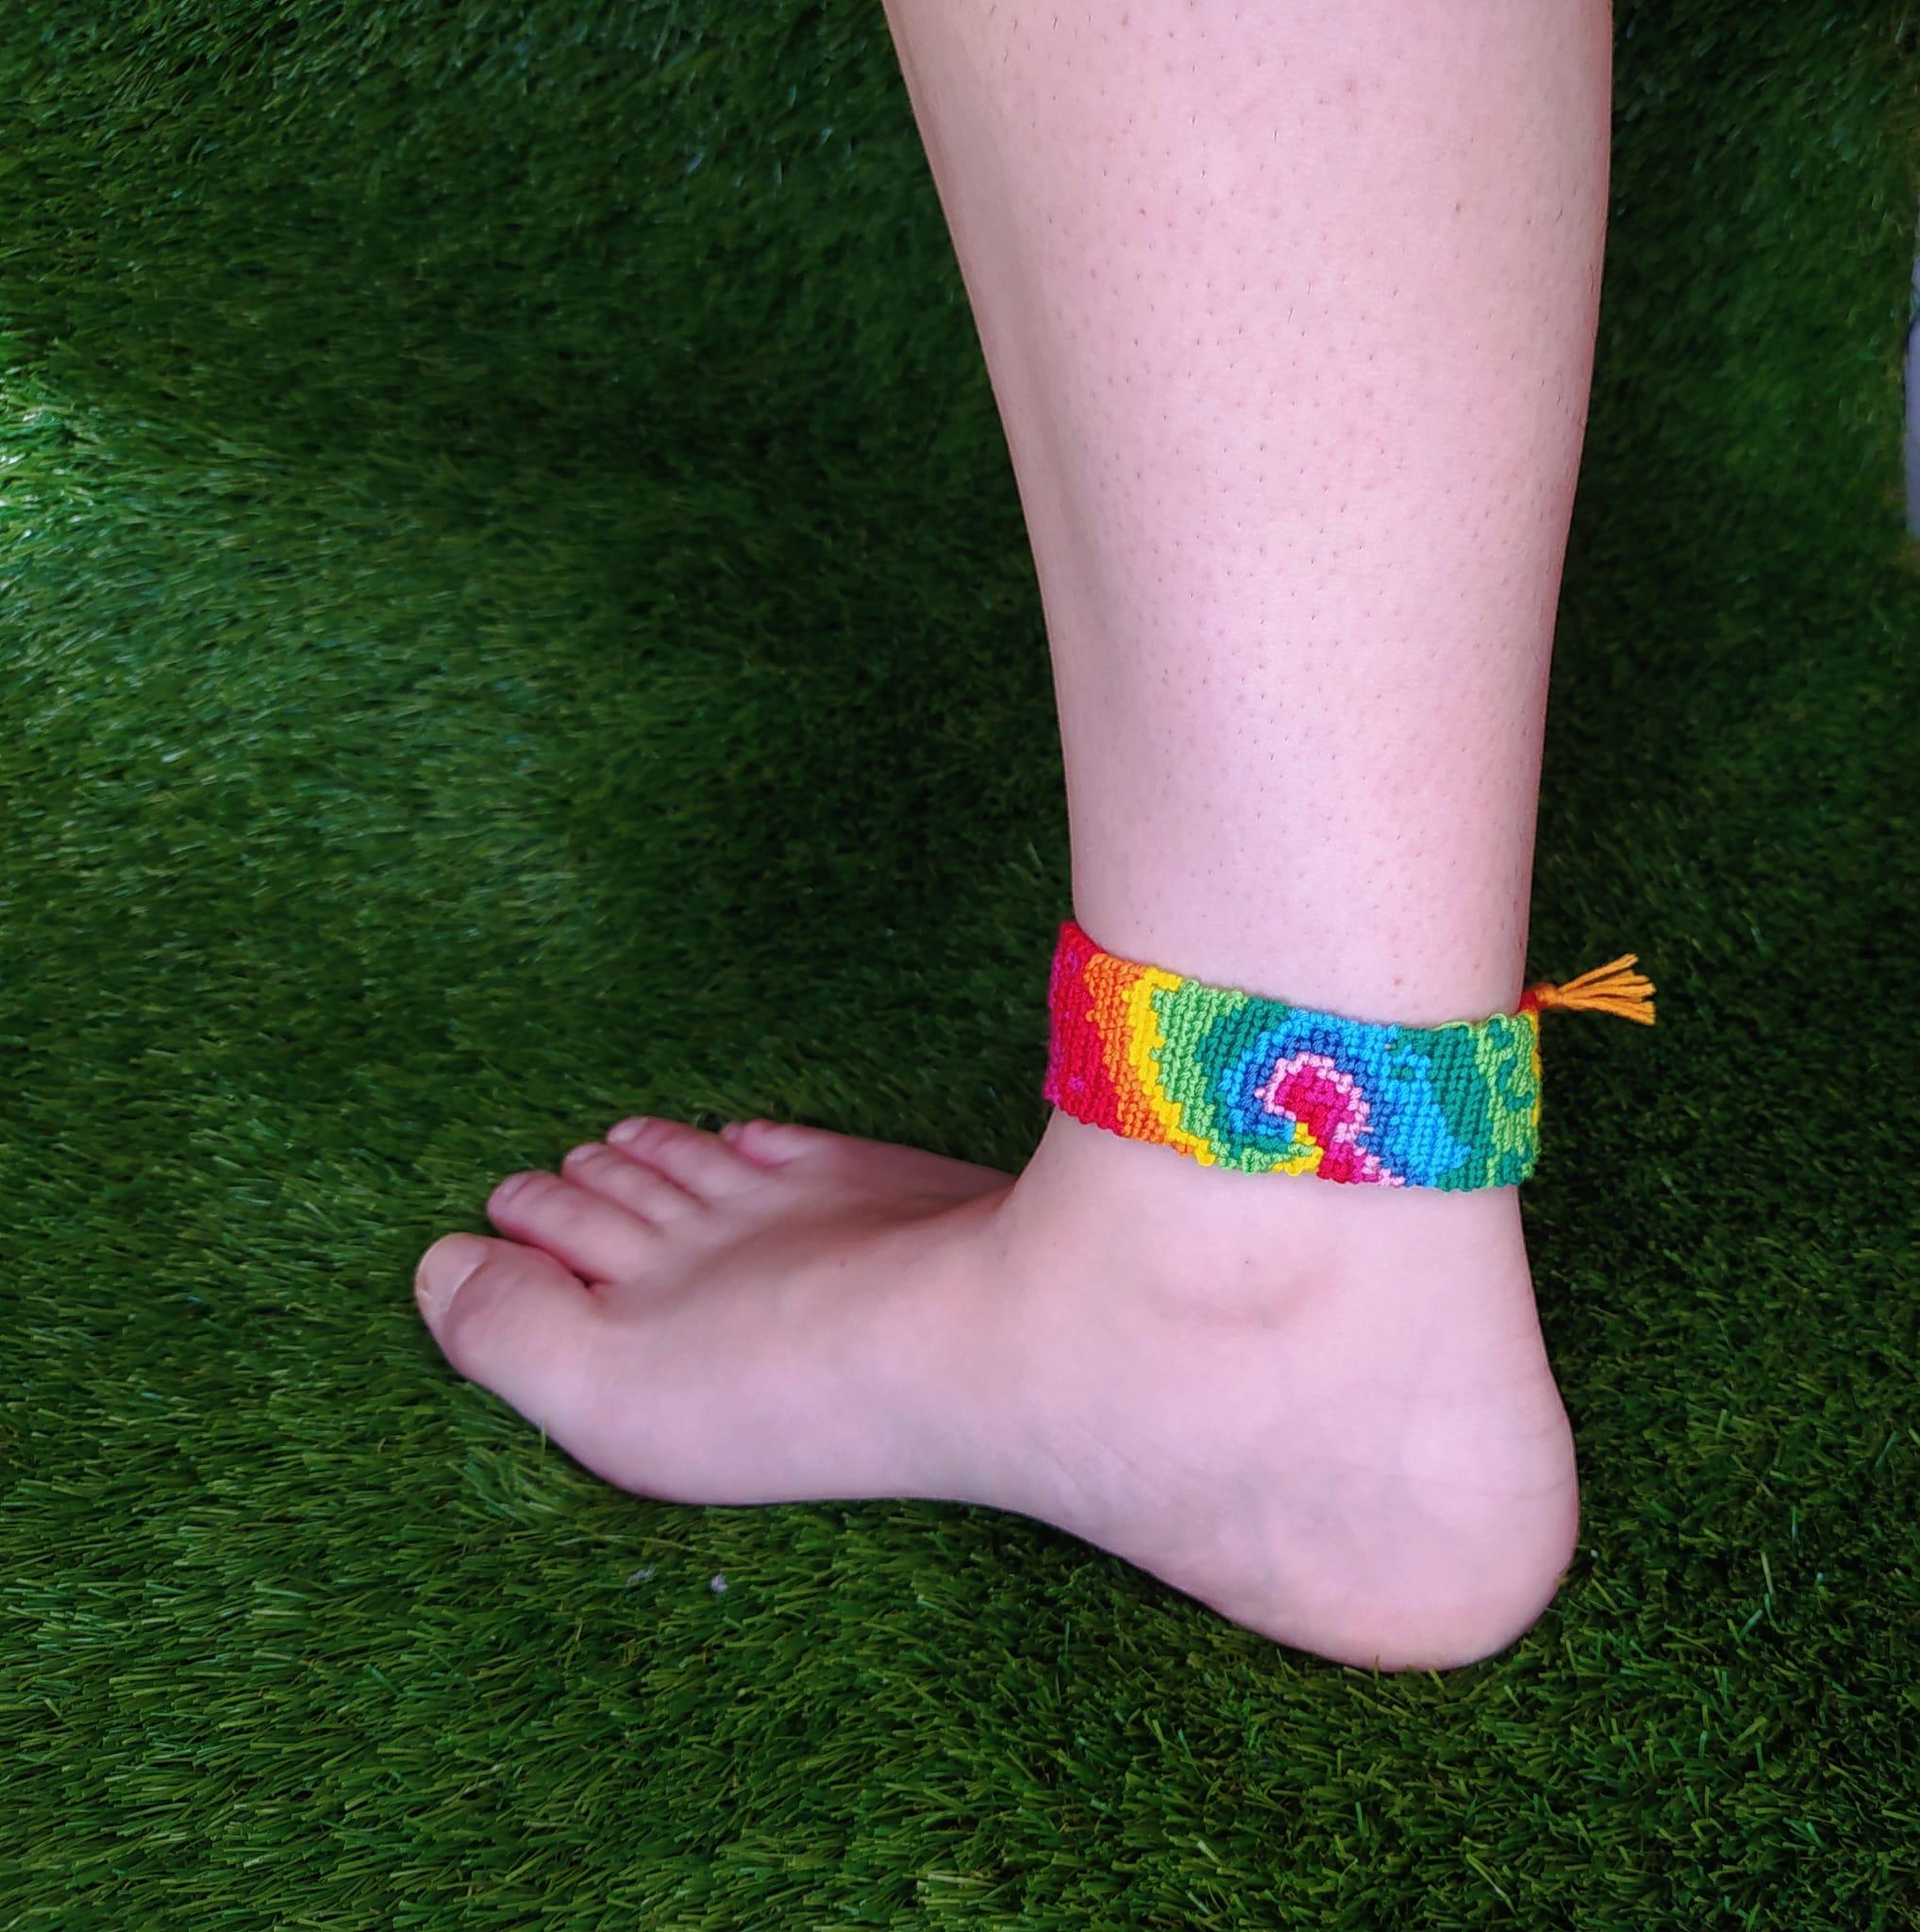
This is how I close the bracelet. I use in my wrist and in my ankle, also like a bookmark.
I hope you like!
Esta es la manera en la que cierro la pulsera. La uso en mi muñeca y en mi tobillo, también como marcapáginas.
Espero que te guste!