All-In-One Multipurpose Tool (Tinkercad Proof of Concept)
by CMFDesign in Workshop > Tools
1364 Views, 6 Favorites, 0 Comments
All-In-One Multipurpose Tool (Tinkercad Proof of Concept)
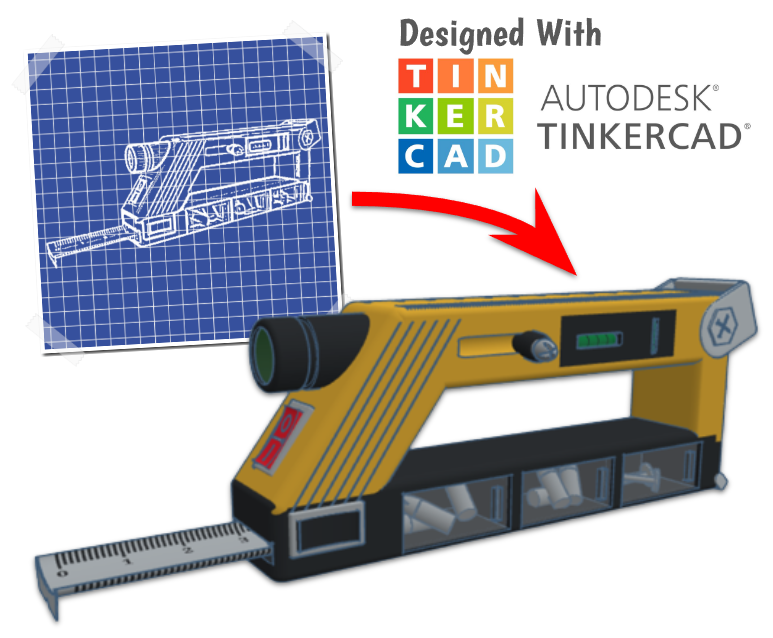
Around this time last summer, I had an idea for a tool that would fit most of your everyday household repairing needs. It would need to be something that is easy to handle and anyone could be able to figure out how to use it, either visually or through trial and error. With all the factors taken into account, I wanted to make a proof of concept that would show that making a tool like this would not only be possible, but also be really simple to create as well. I knew Tinkercad would be the easiest thing to use, because it has a vast array of shapes at your disposal that you can use to fit together a design. This tutorial will walk you through my step-by-step process of creating this "super-tool" and show you how you could potentially design something like this yourself!
The final product of my endeavor can be accessed here: https://www.tinkercad.com/things/ebzjwUvWblZ
Supplies
You'll need
- A Tinkercad account, which you can make for free using an email, Apple, Microsoft, or Facebook account
- A place to sketch a base idea of some sorts. This could be a piece of paper, a webpainting application, or even Tinkercad's scribble tool (located under the "Basic Shapes" tab)
Creating the Concept
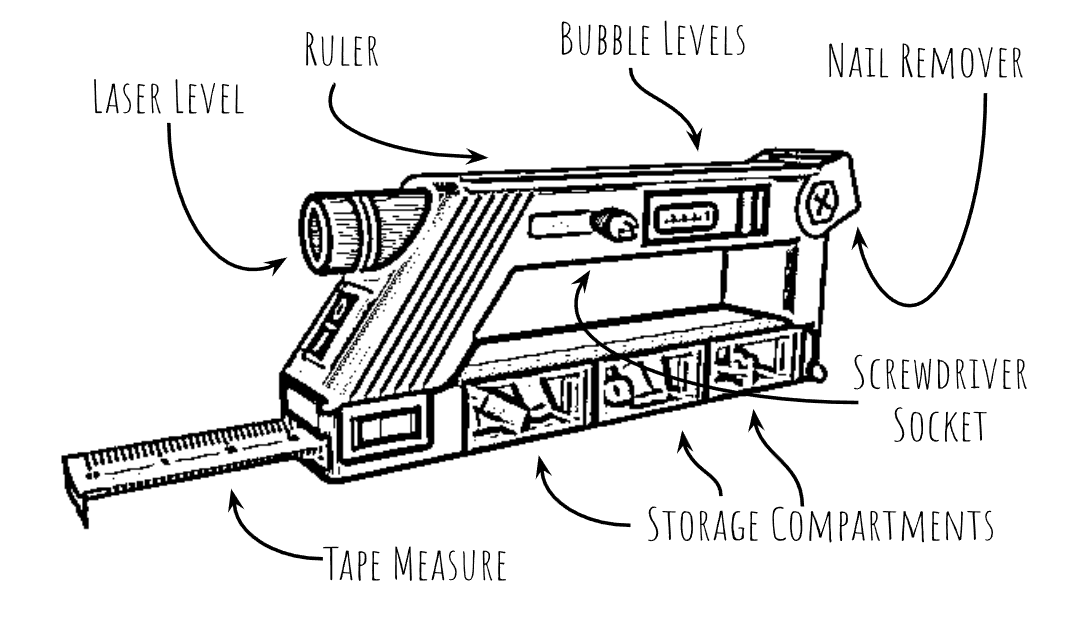
To start off, I wanted to get a quick sketch of the idea I had in mind for my tool. It would have to include commonly used tools, such as a tape measure or a laser level. I also wanted to make sure to get the best use of the space on the tool, so I would use the top for a built-in ruler and space on the handle as a way to store screwdriver heads or excess parts like nails or bolts. You don't have to have an intricately detailed sketch of your concept, you just need it to a point where you can identify the key features of it and a relative idea of where they'll go on the tool itself.
Making the Base
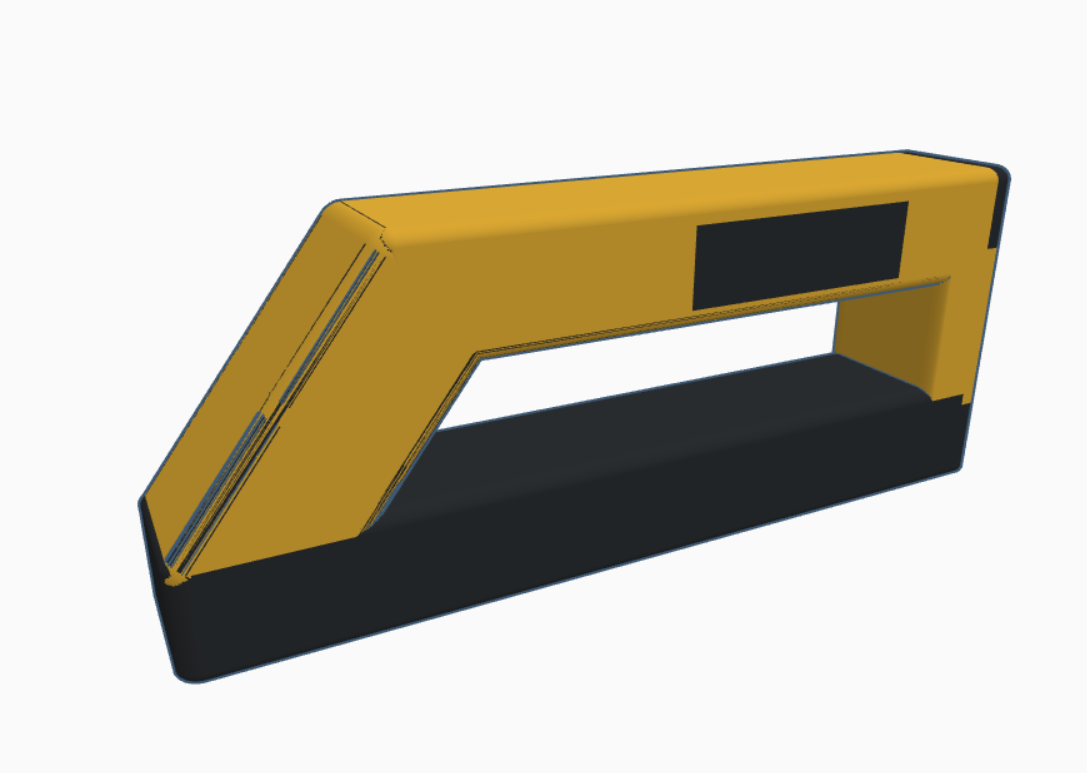
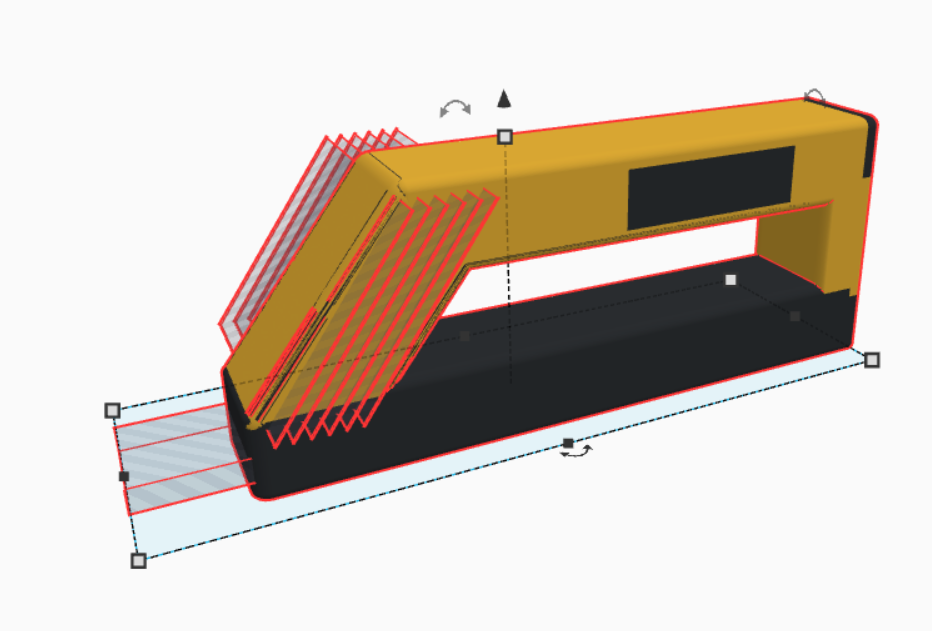
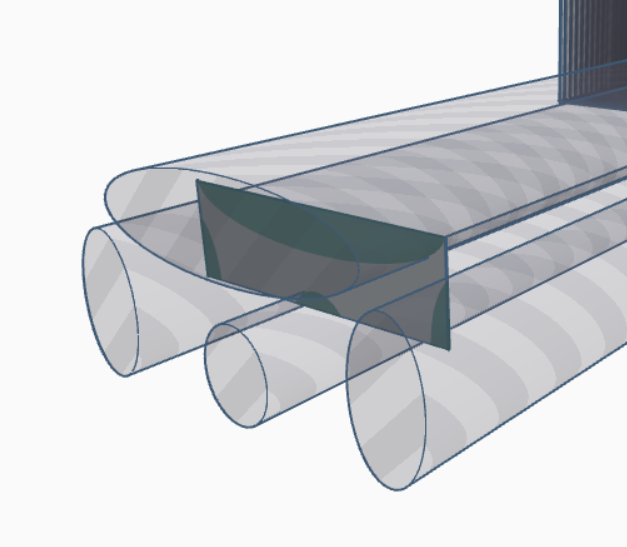
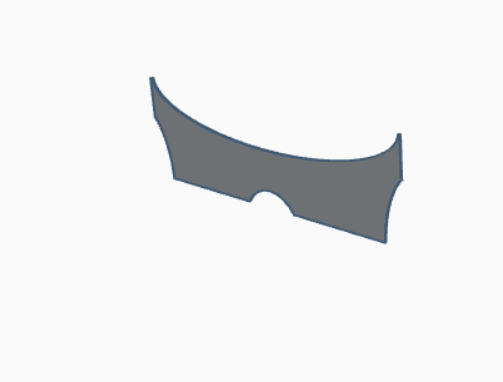
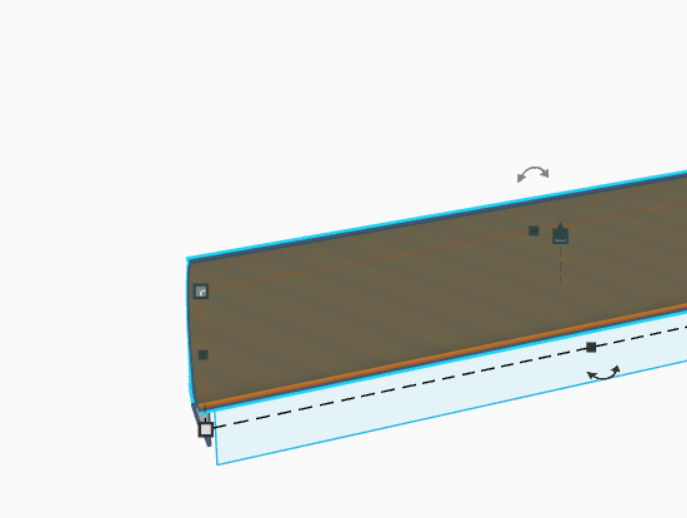
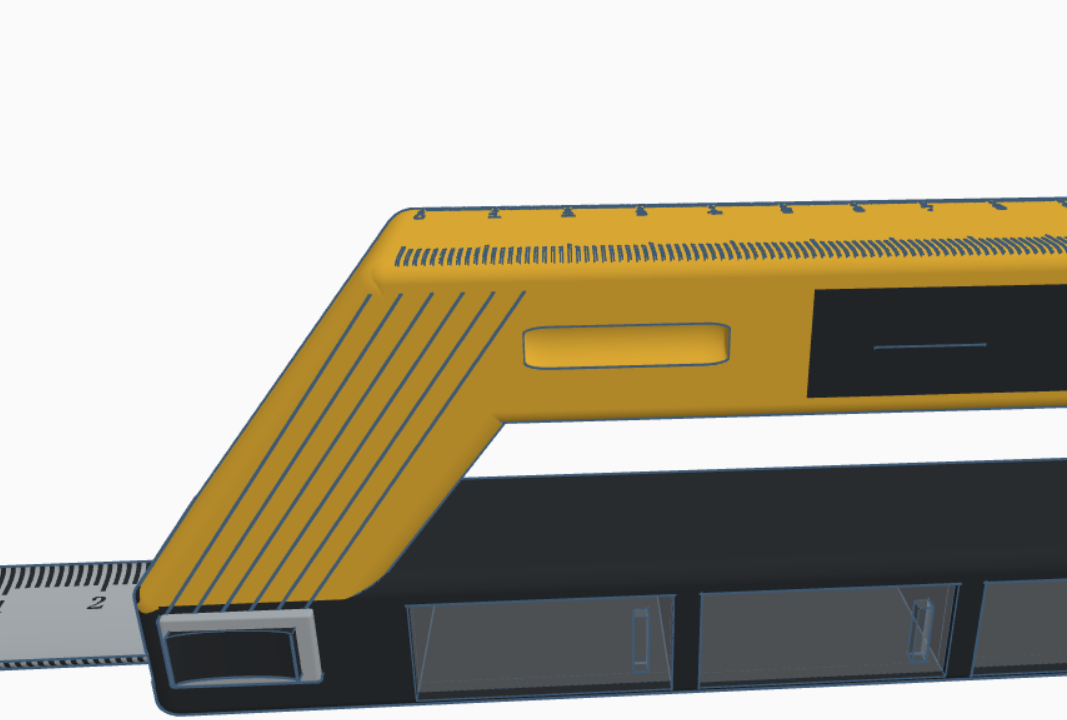
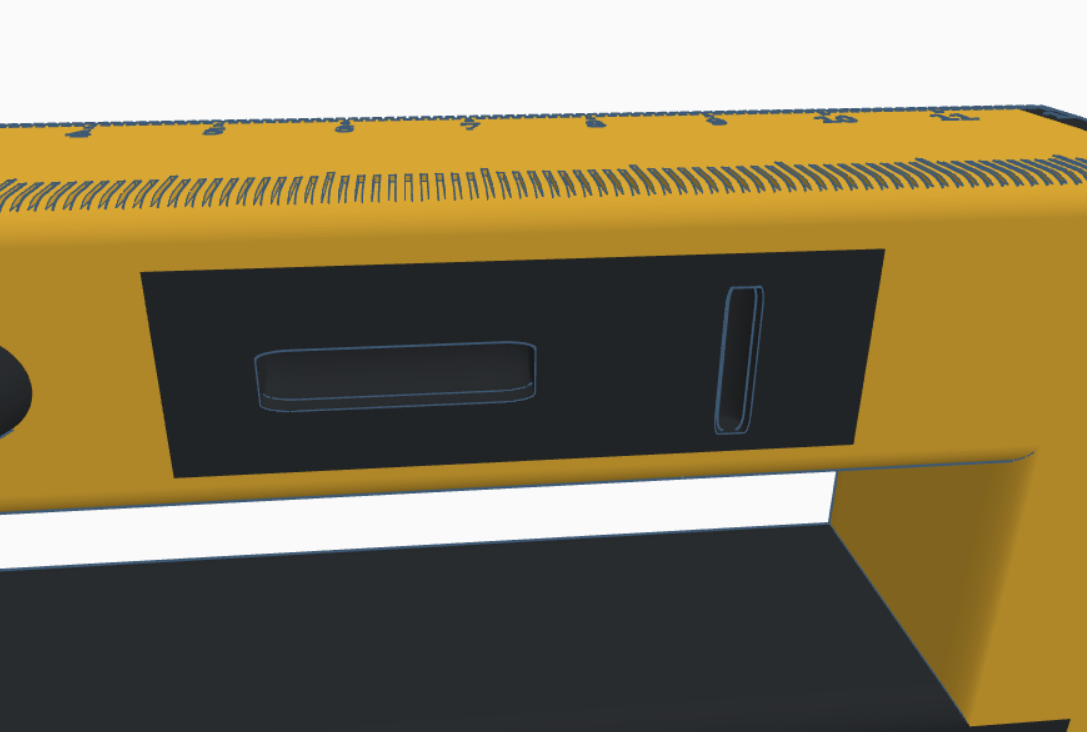
I wanted to make a base that had an easy to handle and blunt grip. To do so, I rounded the edges of a box shape using the "Radius" slider and duplicated it into the shape of the handle I had chosen. To get the angle, I turned the selected box 45 degrees vertically. Afterwards, I placed a box to cut out where I wanted the tape measure to go as well as colored the base a mix between yellow and black and added some cool diagonal line patterns for detail. Notice I didn't color a black rectangular area at the top of the design. This will be where the bubble levels will go, and you'll learn how to make those later up in the tutorial.
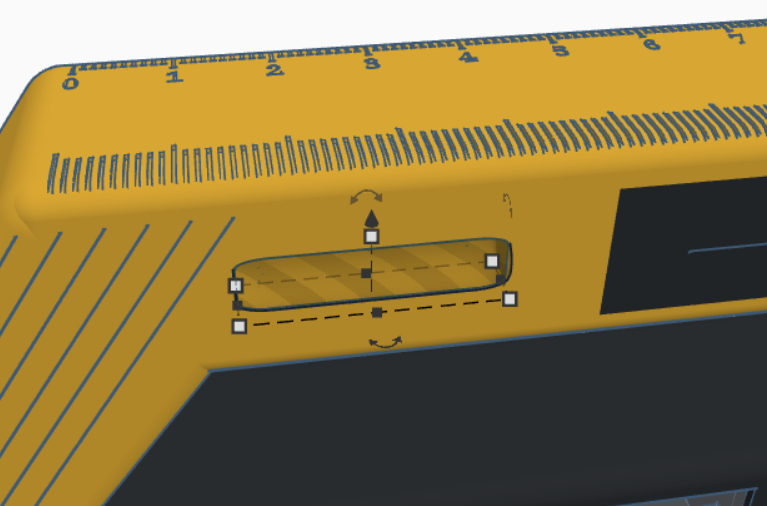
Etching the Ruler In
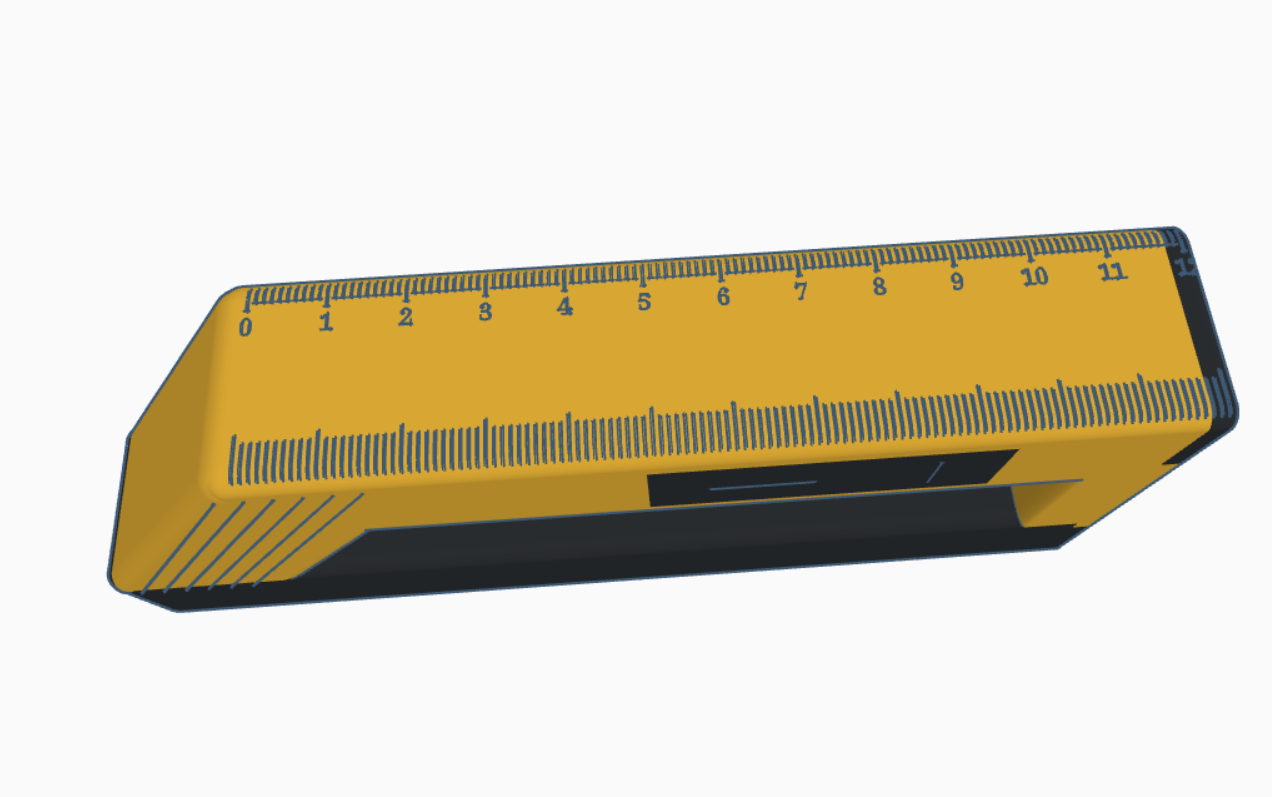
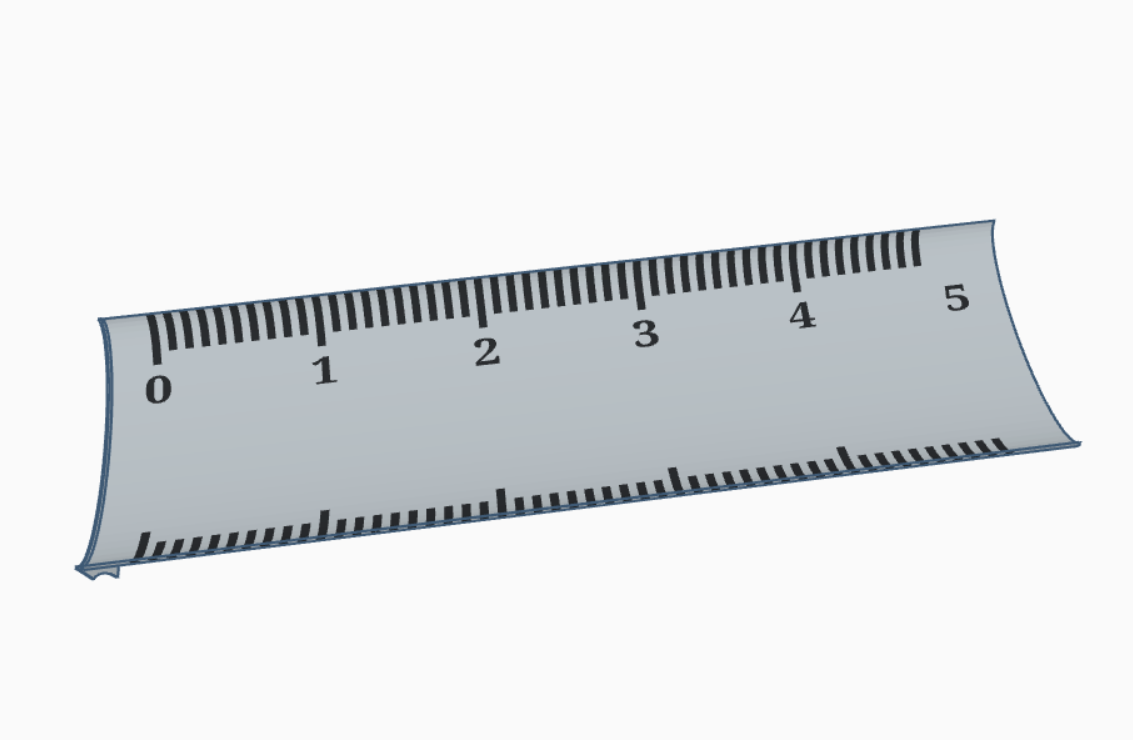
I decided for my tool that I didn't want to waste all the space at the top by adding nothing but also didn't want to add a protrusion of some sorts (like a screwdriver head). Hence, I decided to build in a ruler you can use for simple tasks where you don't need to extend the tape measure, which we'll make later. All I did to make it was start with a simple rectangle, duplicating it and moving it, changing the length to be longer or shorter where needed. Then, I simply added the numbers 0-12 to mimic a real-life ruler. I aligned all of the rectangles and numbers with the top of the base and made sure they went down about 1mm so they could still be seen. Finally, I grouped the base with the stencil to get the final result.
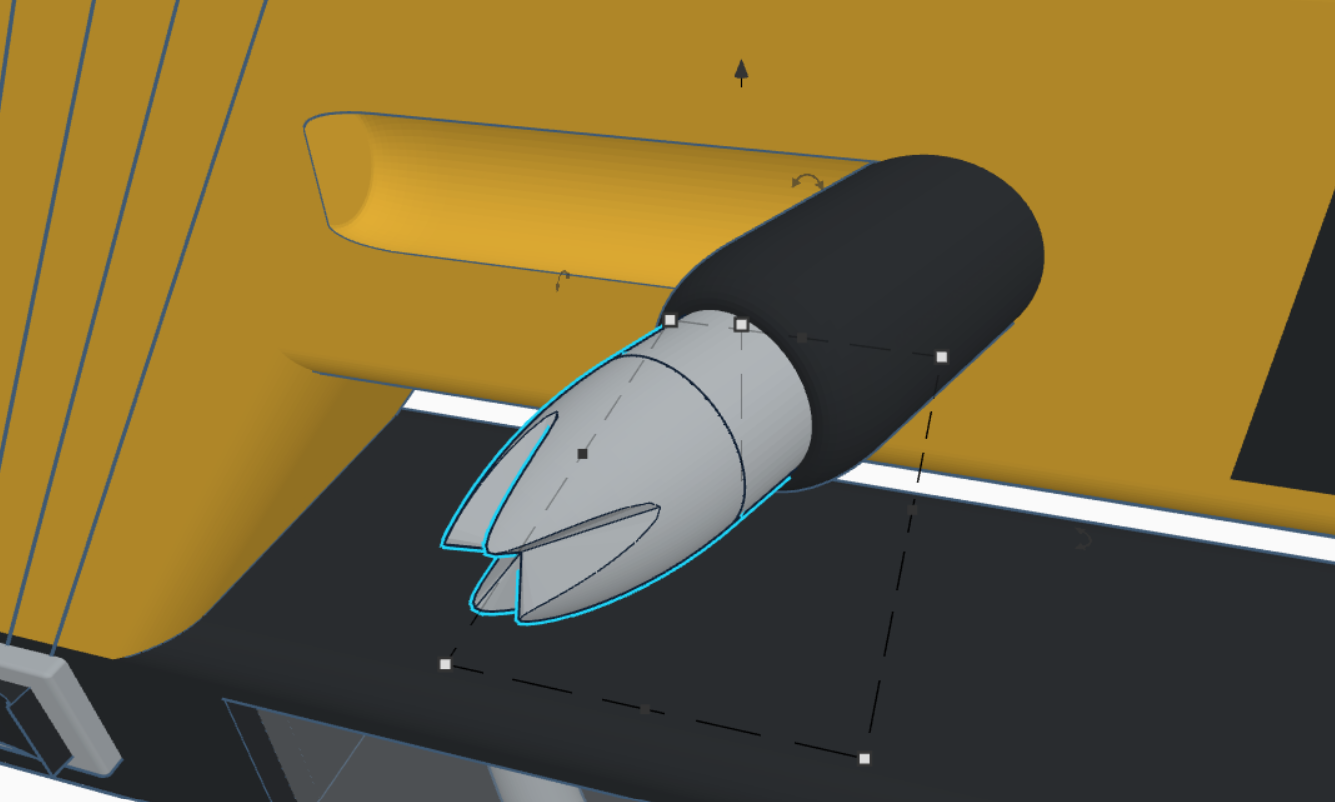
Making the Hook
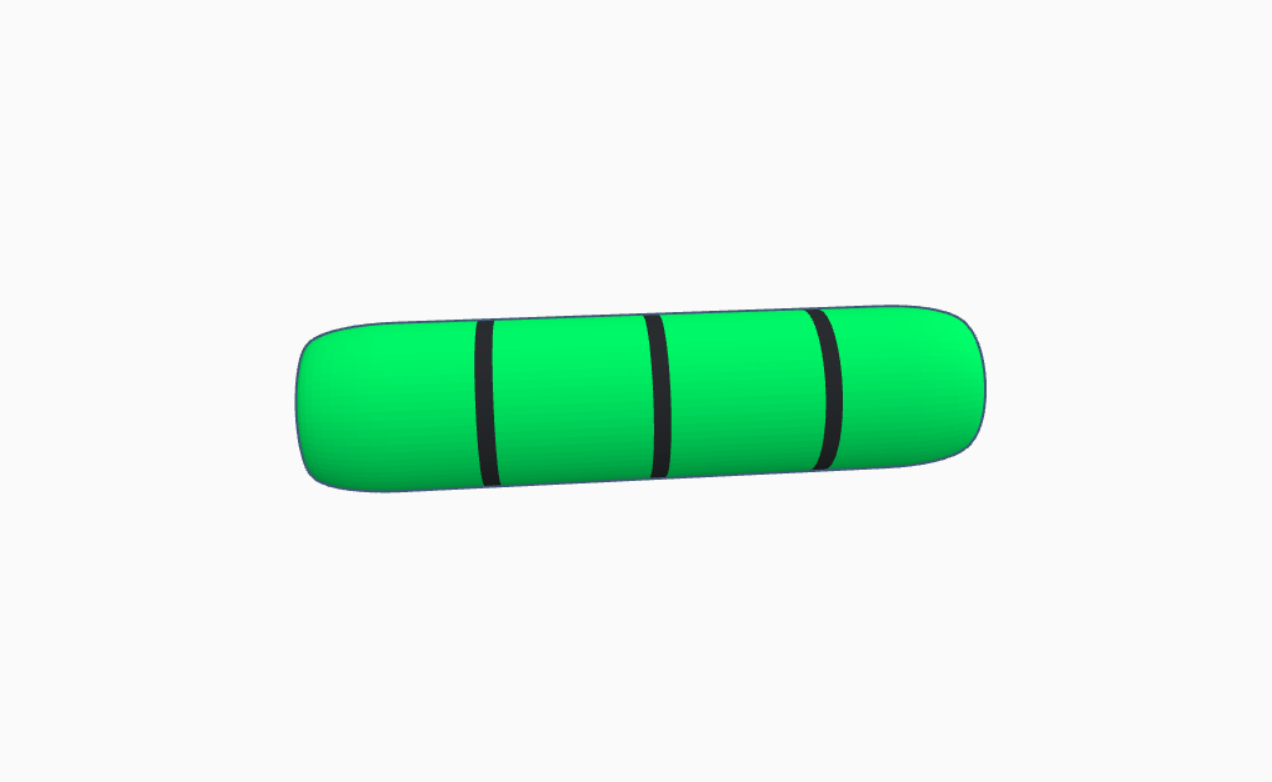
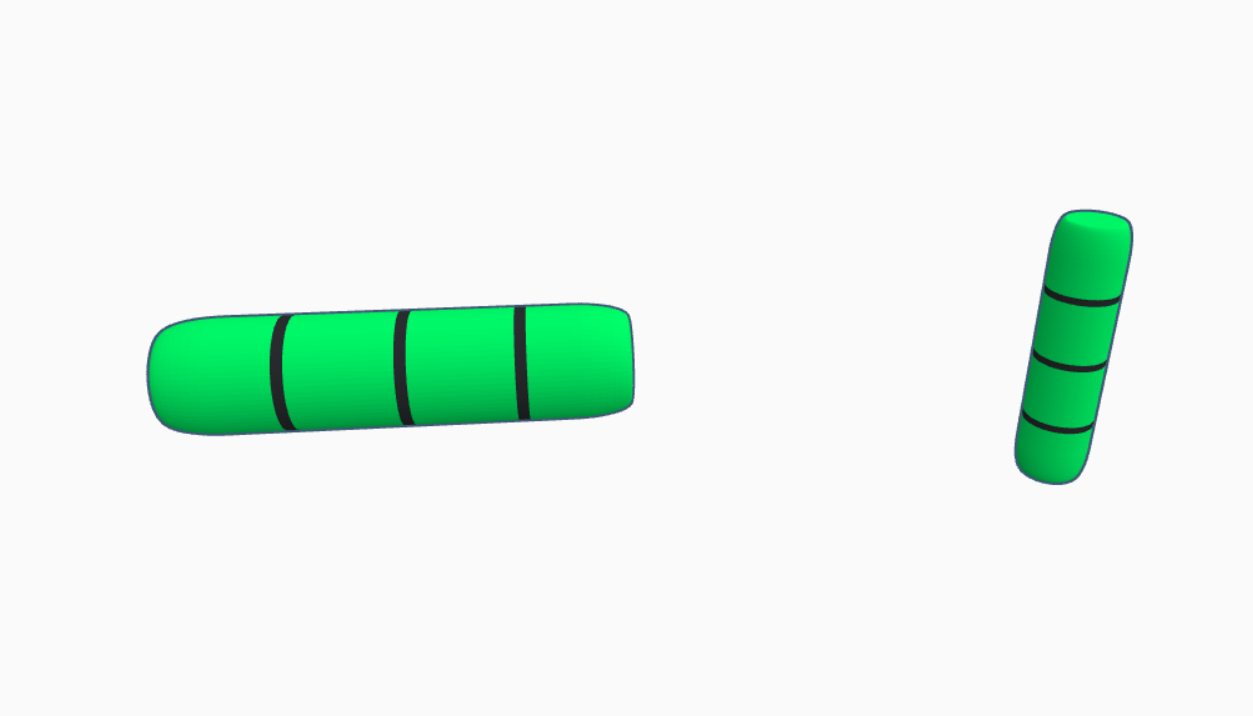
To make the hook of the tape measure, I simply took a rectangle, added a few cylinders to make the cuts, and grouped it. The top cylinder was used to make the hook align with the tape itself and the bottom middle cylinder is used to hook on nails or screws where necessary.
Making the Tape
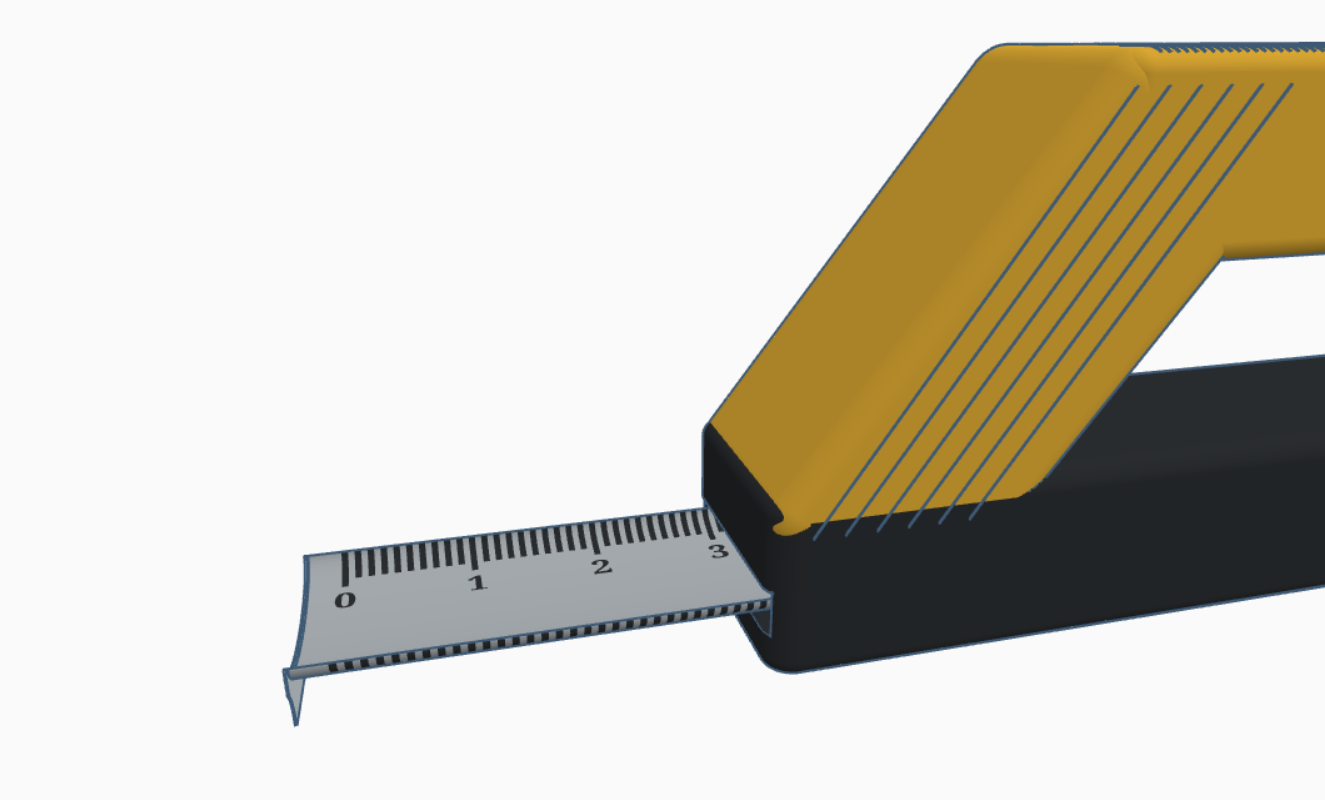
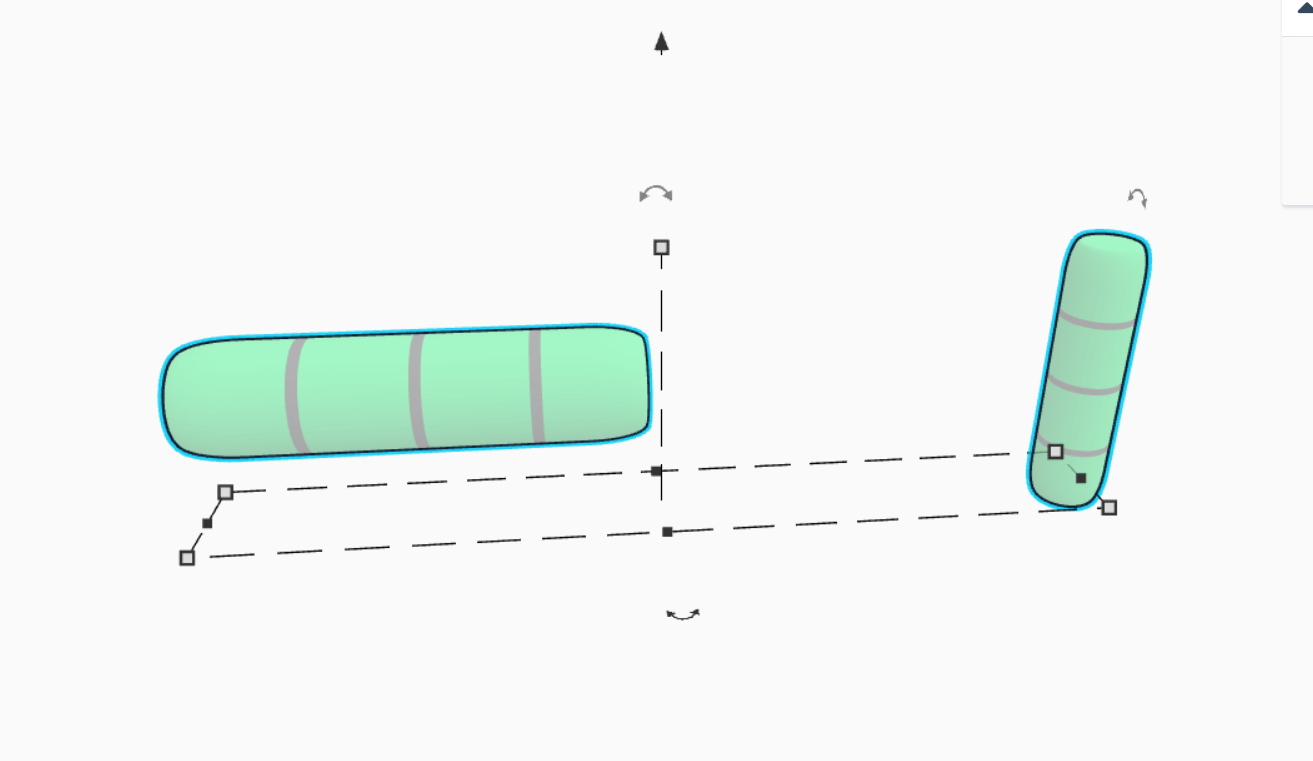
To make the tape, I took the top cylinder I used to cut out the shape of the hook and duplicated it. I then duplicated that cylinder and nudged it up about 0.1mm, turned the duplicated one into a hole and grouped the two. I then duplicated the ruler template from the base and grouped it into the tape to mimic the measurement part. Finally, I grouped the hook and the tape and inserted the combination into the slot in the base I had made earlier for it.
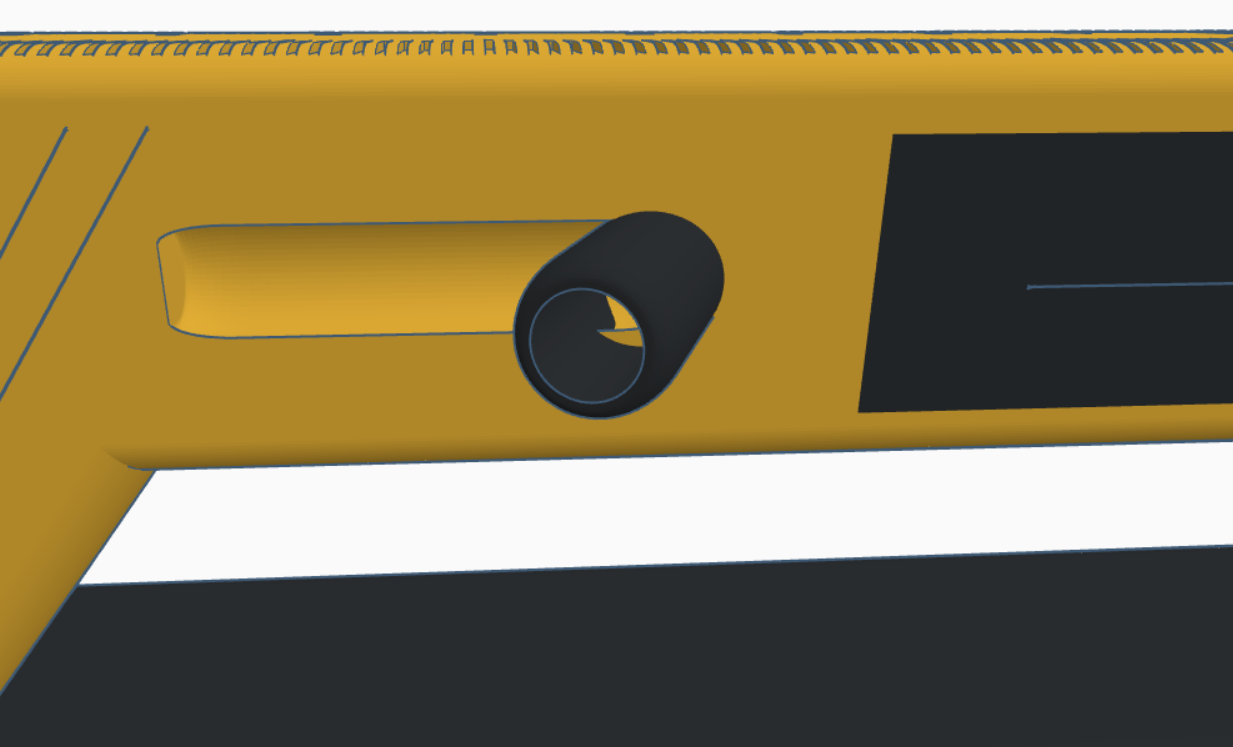
Adding a Thumb Lock
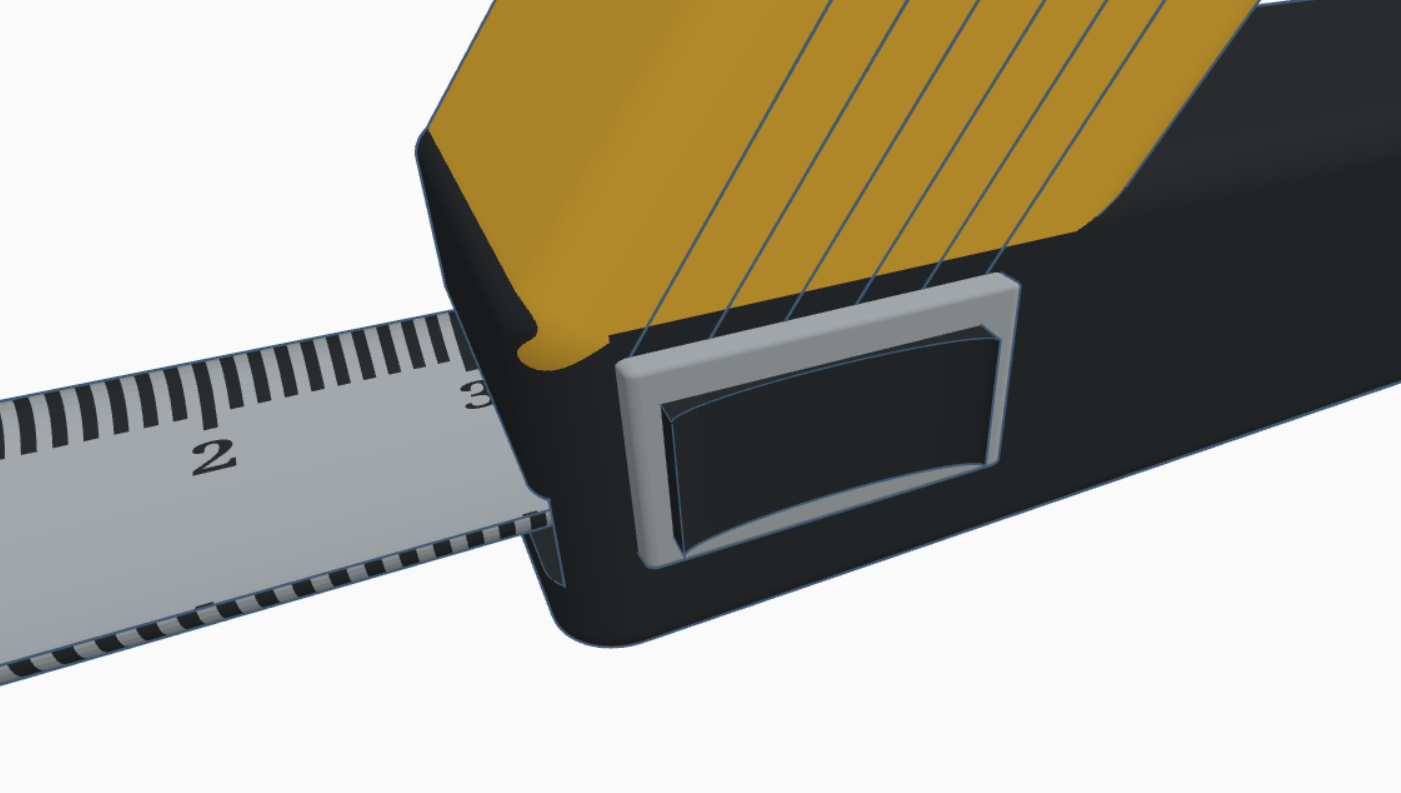
To make the tape measure even better, I added a thumb lock that will hold it in place if you so chose to press it. To do this I just placed a grey rectangle with another smaller black rectangle that had a sliver cut out by a cylinder shape.
Making the Storage Compartments
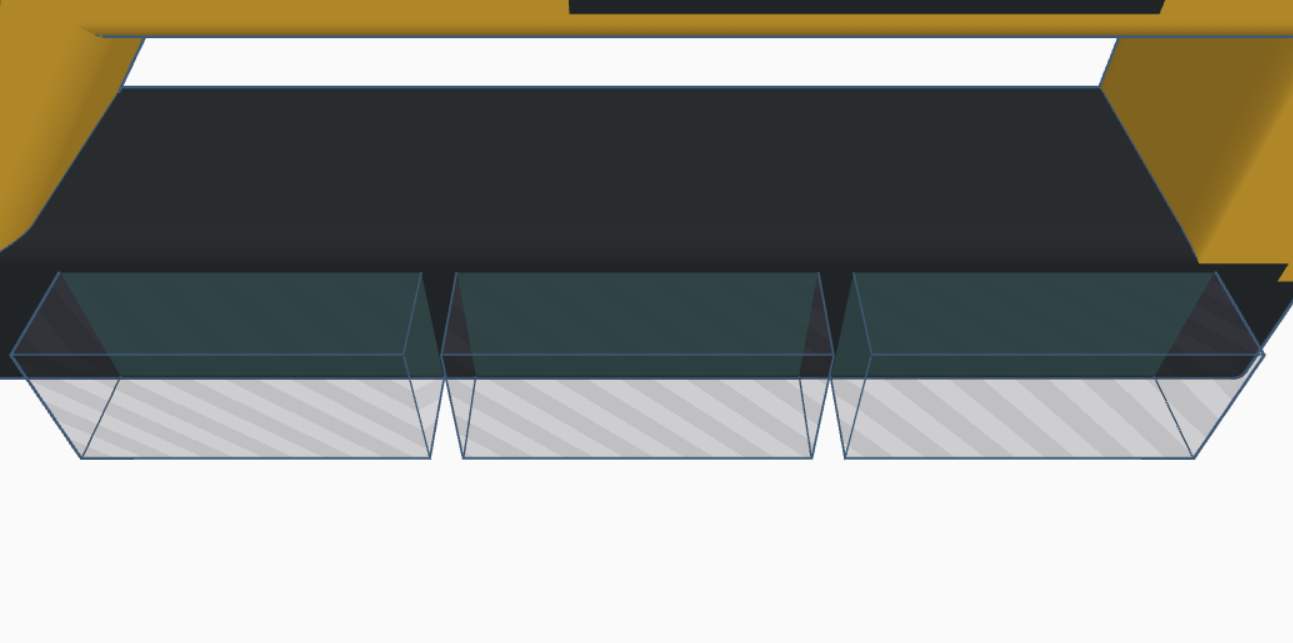
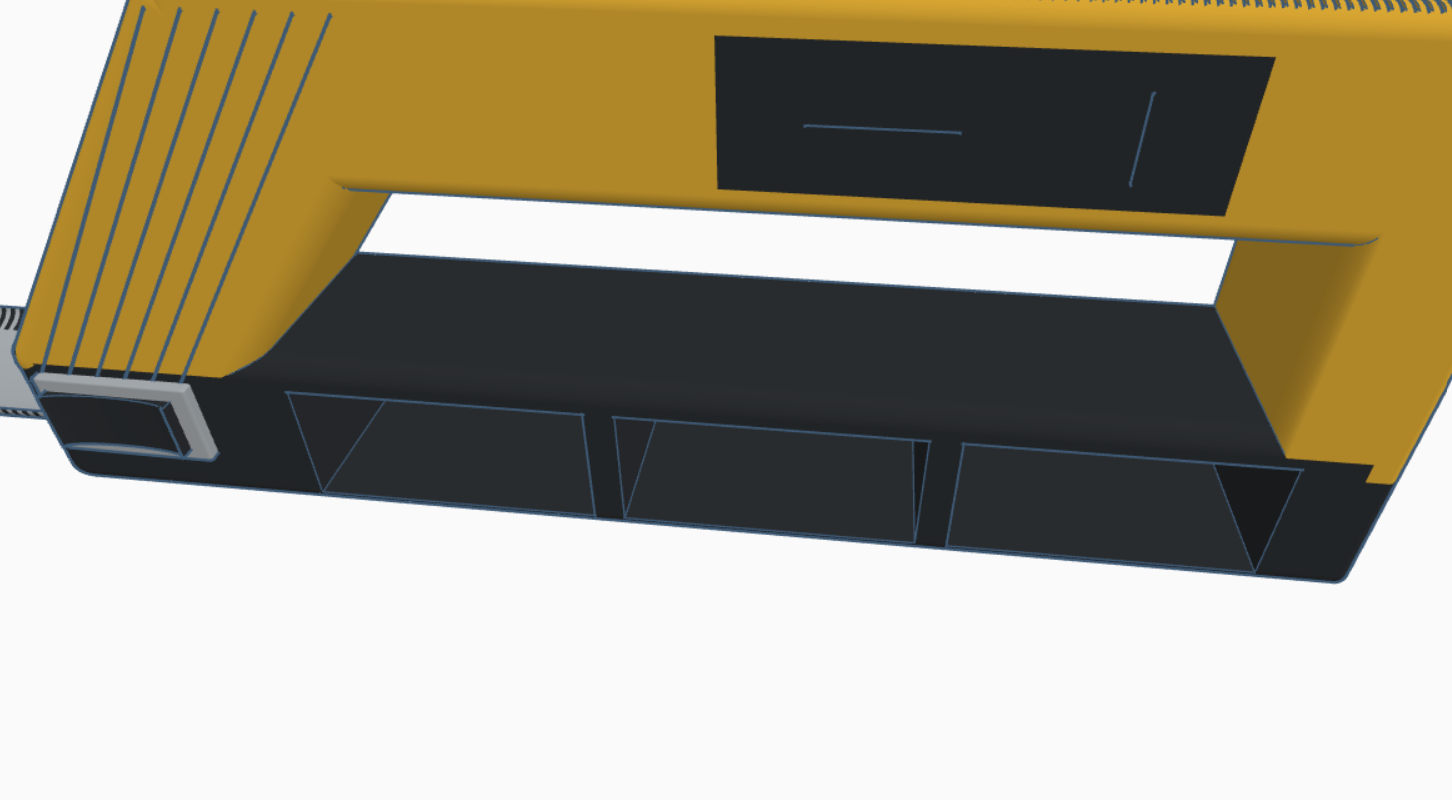
Making space for the storage compartments was one of the easiest parts of assembling this tool. I simply took three box shapes and grouped them into the handle of the base.
Adding Doors to the Storage Compartments
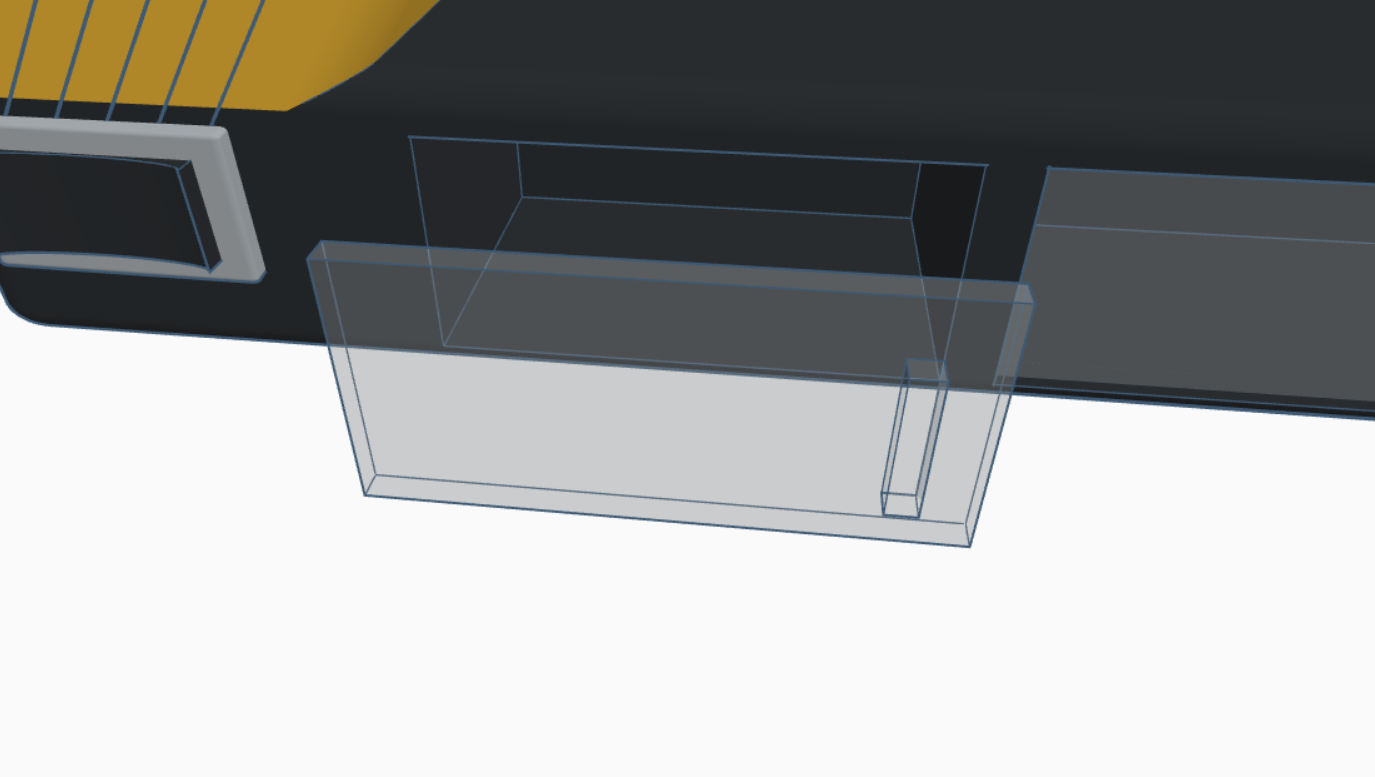
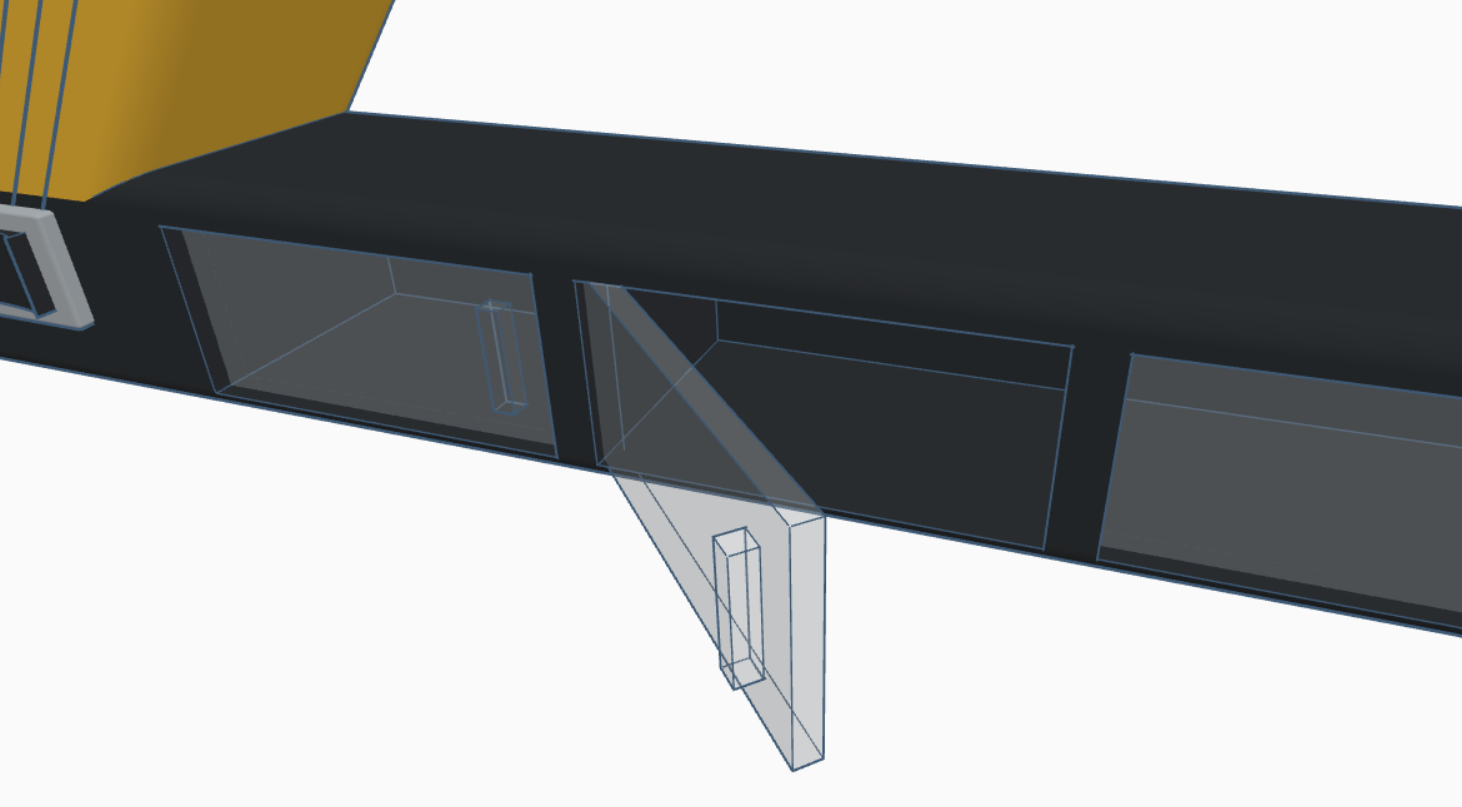
Doors were another easy step. All I had to do was duplicate the holes for the storage compartments, decrease their length, add a handle using another rectangle, group the two shapes, make it transparent, and cover up each hole with a door.
Making a Shank for the Interchangeable Screwdriver
The shank is essentially where you place the screwdriver heads and turn the tool to tighten the screw. I wanted it to be on the side of the base so that the user could pop it out of it's socket, turn the tool on it's side, and screw/unscrew while using the whole base as the handle. For this part, I took a beveled cylinder and cut into the base to make a slot to insert the shank. Then, using a beveled tube, I created the shank and angled it about 45 degrees vertically.
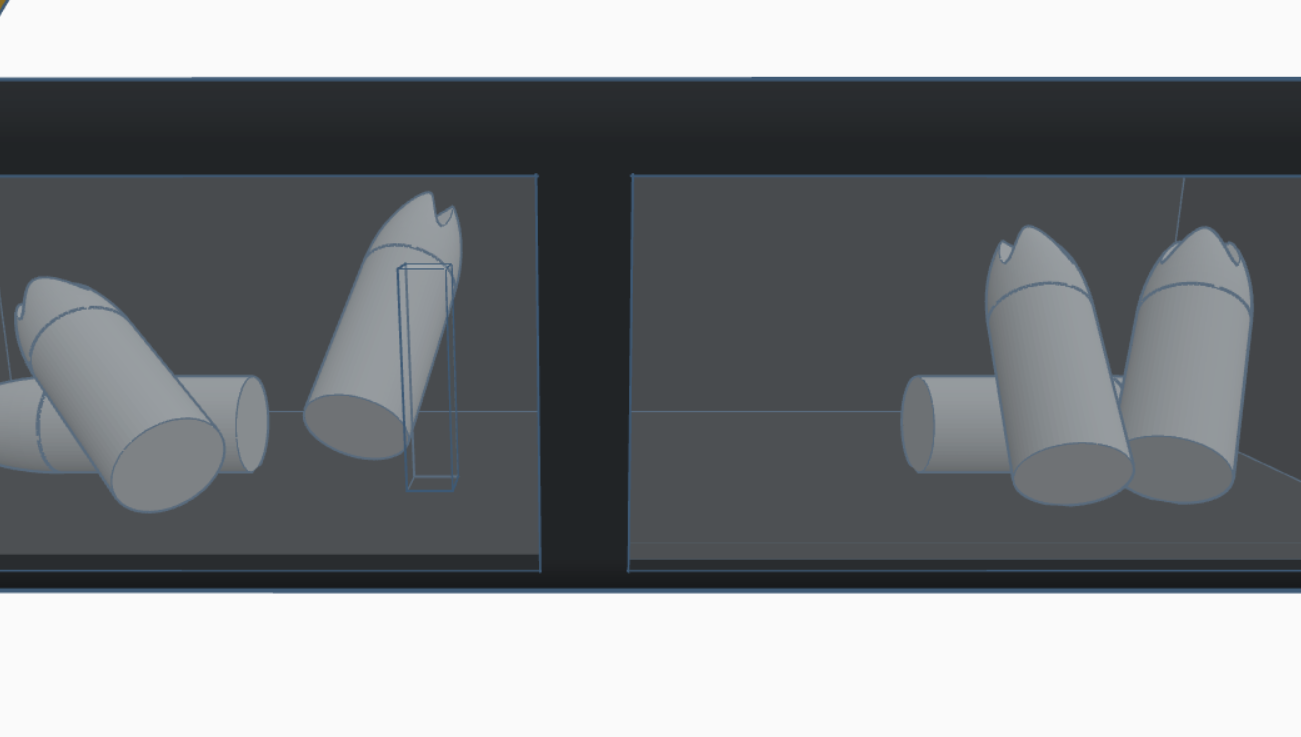
Making a Simple Screwdriver Head
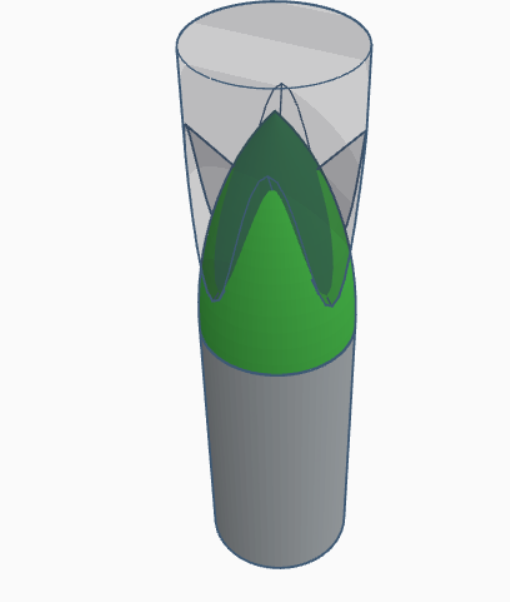
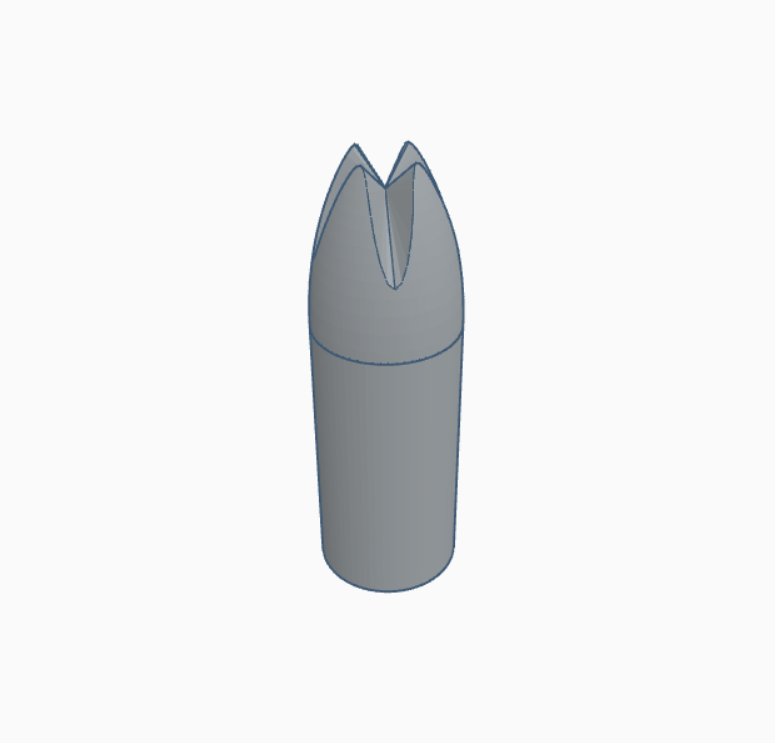
To make an example screwdriver head, I placed a cylinder with a tangent ogive shape on top as the base. To cut out the screw portion, I used a wavy-topped cylinder turned upside-down, turned it into a hole, and grouped the three shapes together.
Adding Screwdriver Heads and Filling the Storage Compartments
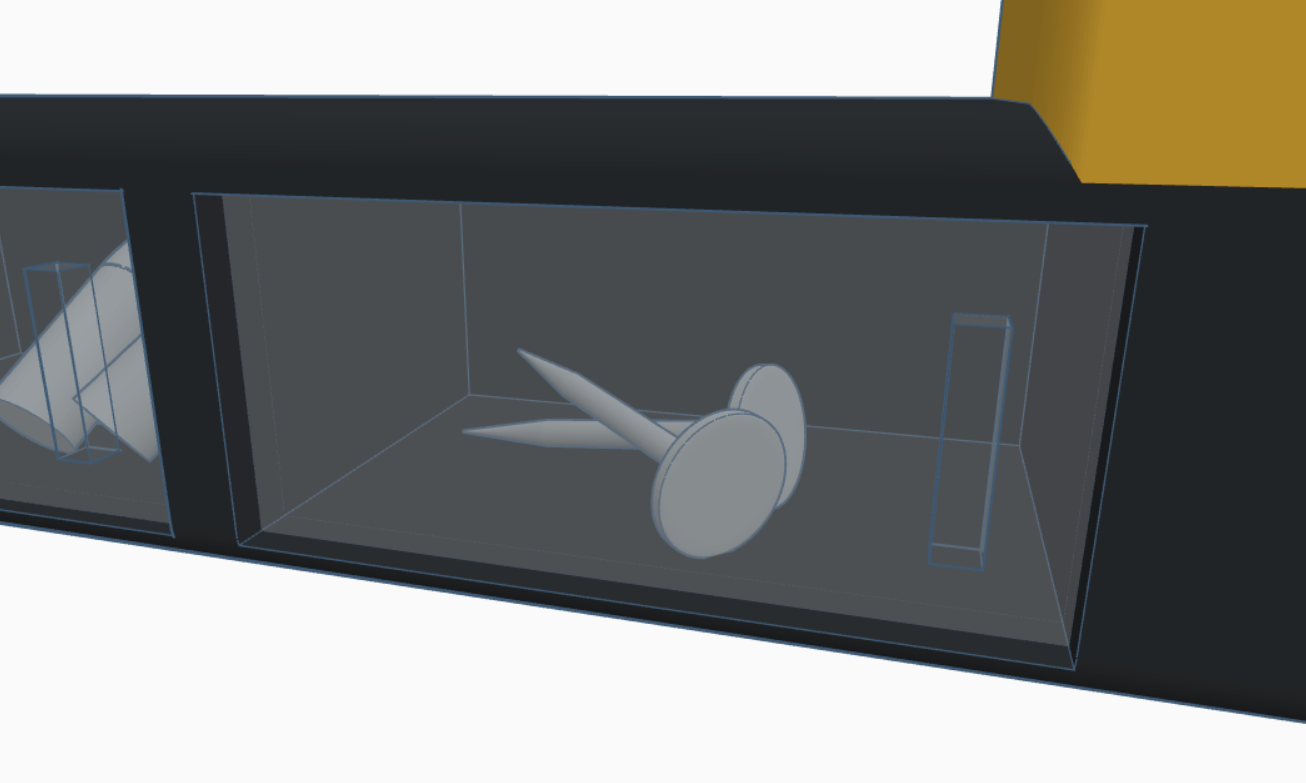
For this step, I just added a screwdriver head into the shank, a few in the compartments, and made some nails using cylinders and cones to fill the last compartment.
Making the Bubble Levels
To make the bubble levels, I took a beveled cylinder and placed three evenly spaced out box shaped holes on it. I then grouped the four, duplicated it, turned the duplicate 90 degrees, and made both of them transparent to mimic a real bubble level.
Adding the Bubble Levels

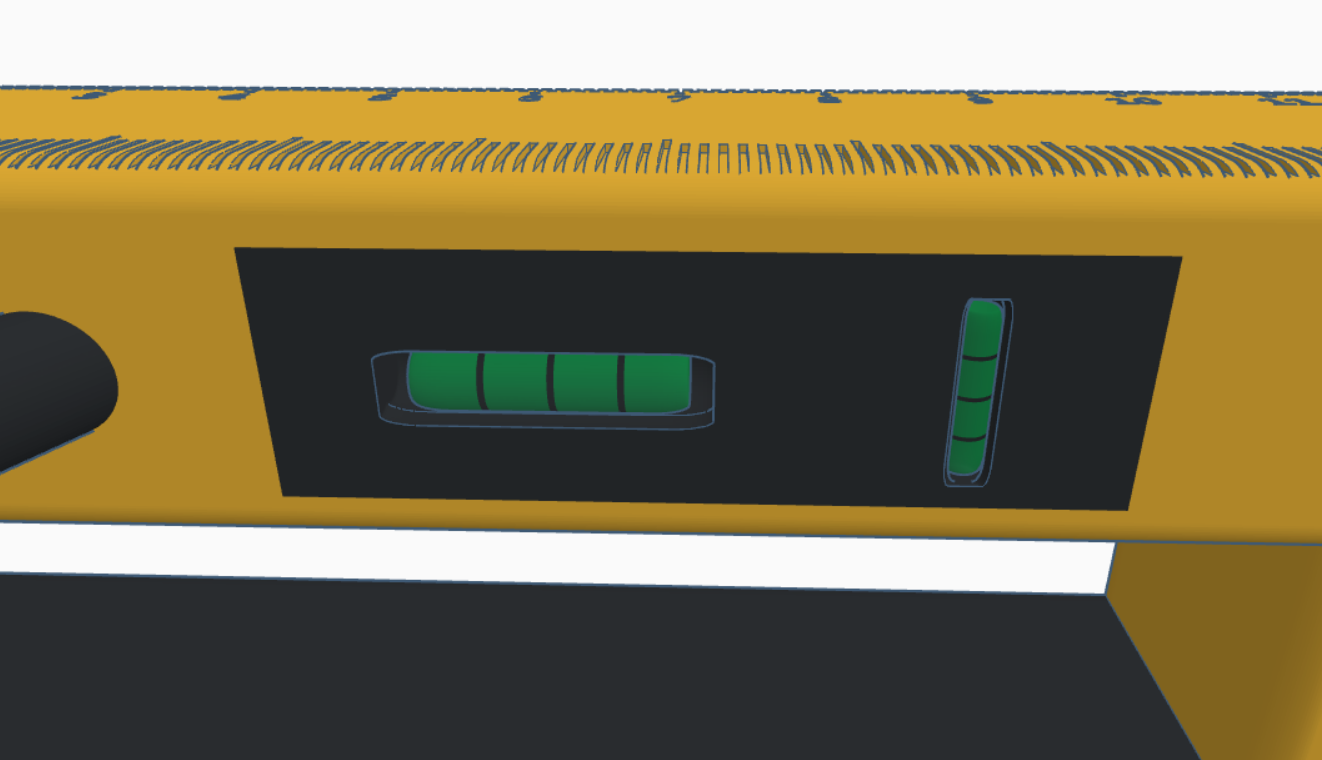
To add the bubble levels, I duplicated the existing ones, turned them into hole objects, placed them in the black rectangle I left from earlier, grouped them with the base, and fitted the transparent bubble levels into the holed out areas.
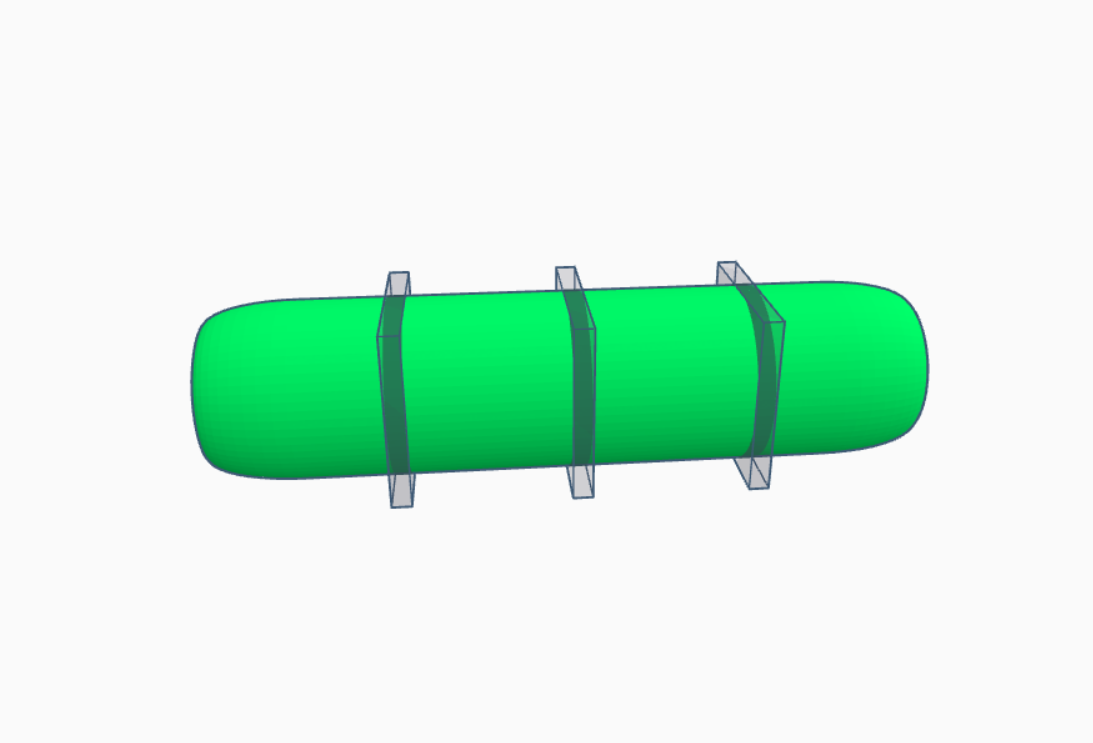
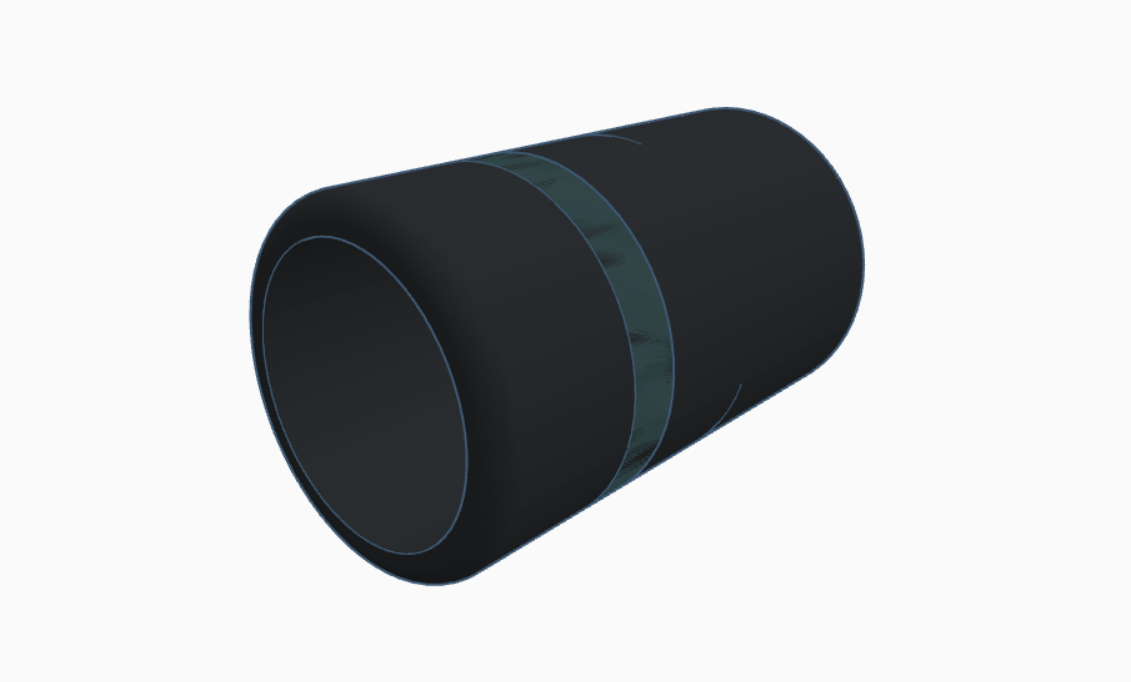
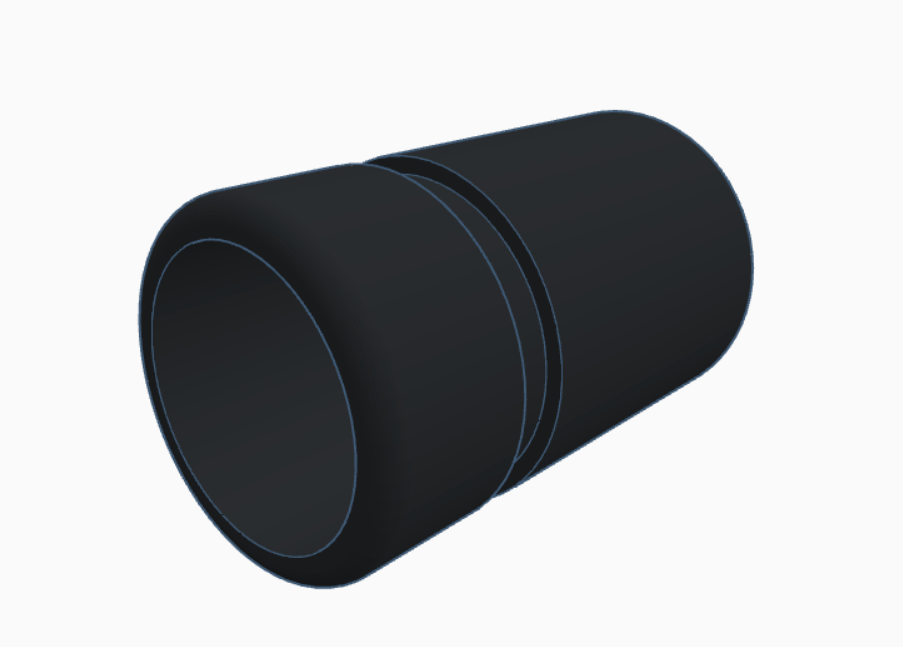
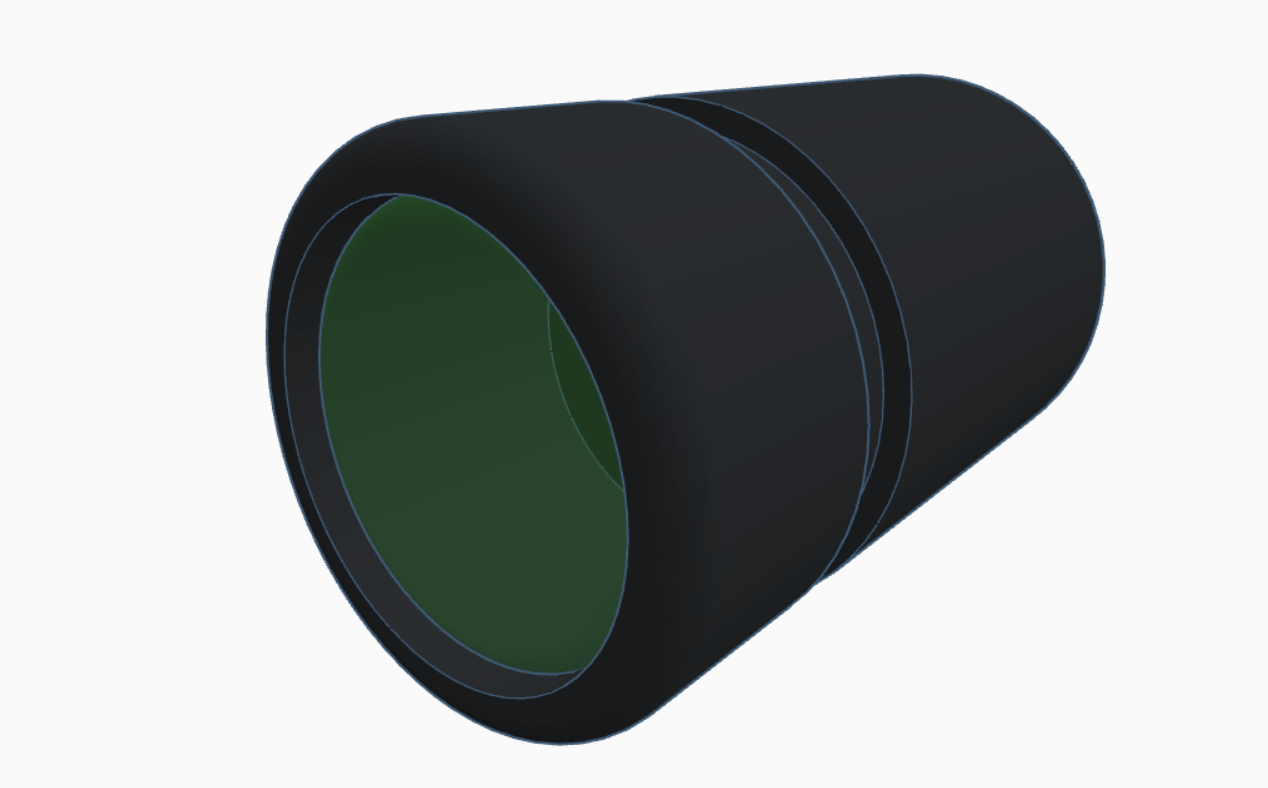
Making a Laser Level
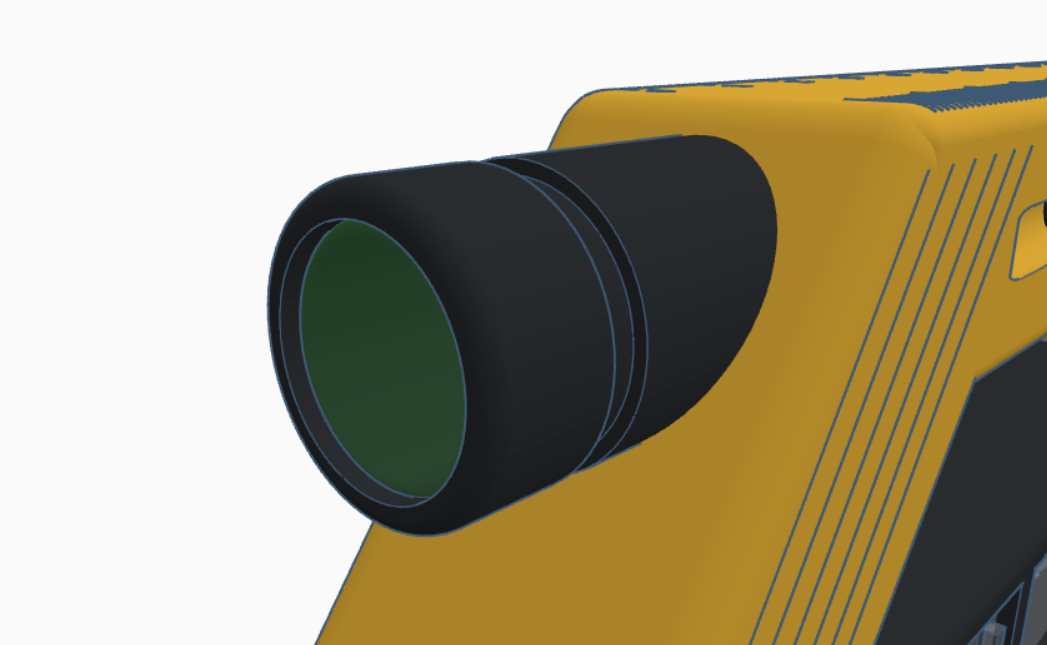
The laser level was just a simple beveled tube with a cut detail that was made from a duplicated, shortened version of the base tube. After grouping the hole and it's base, I added a transparent green cylinder to mimic the laser light found on most laser levels. Finally, I moved the duo into position using the arrow keys and alignment shortcuts.
Making a On/off Switch for the Laser Level
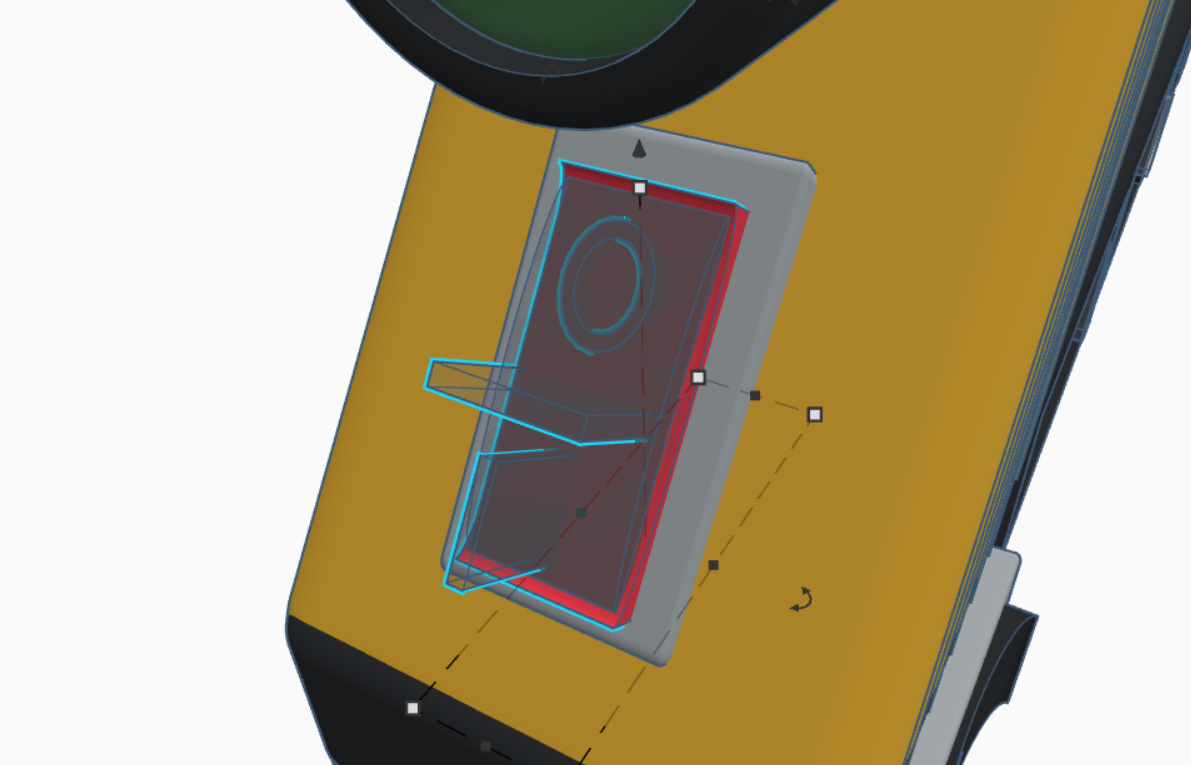
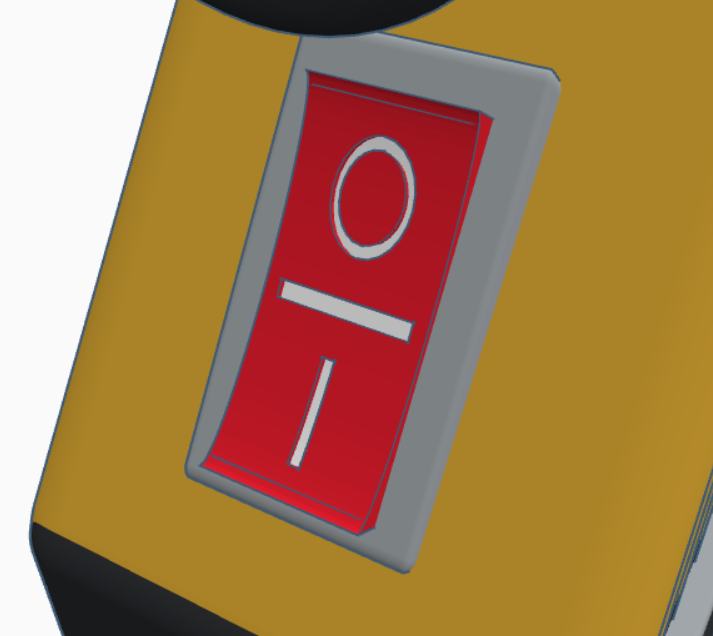
To make the on/off switch for the laser level, I duplicated the thumb lock from the tape measure, cut out a circle to represent off an a line to represent on. I then colored the base red, added a white box underneath to contrast the grey background, angled it 45 degrees vertically, and moved it into position underneath the laser level itself.
Adding a Nail Remover
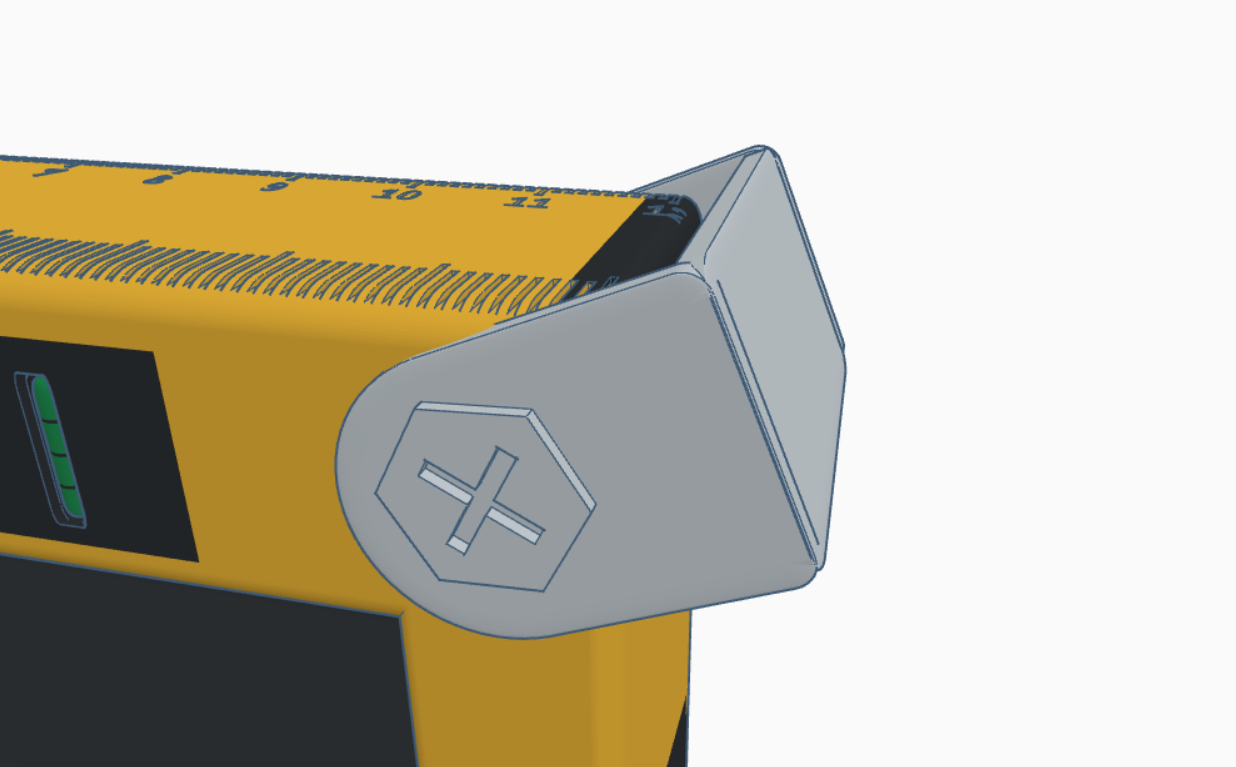
There were essentially two parts to building the nail remover. First step was the remover itself. For this, I just grouped a cylinder with a box that intersected about halfway through each other, grouped them, moved them apart and filled in the gap with another box. To make the screws that would allow the remover to pivot, I used the polygon shape and grouped it with two boxes that formed an "X" shape. I then angled it and placed it at the back of the tool.
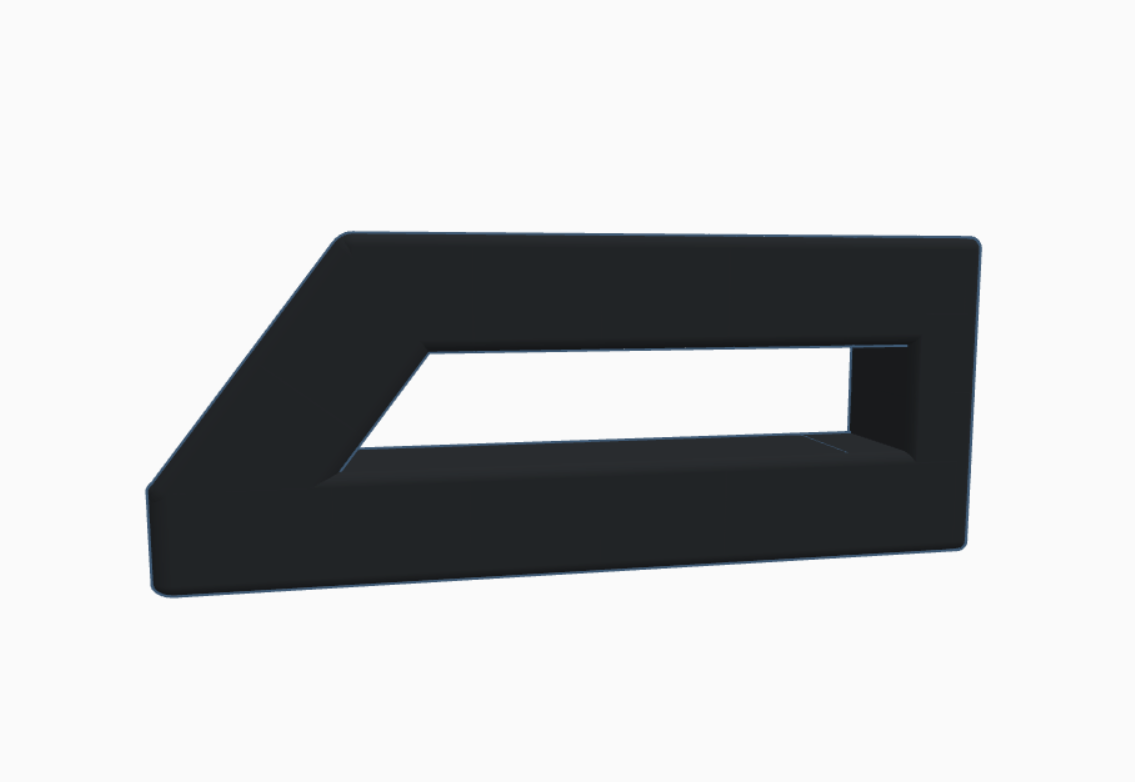
Adding an Angling Stand
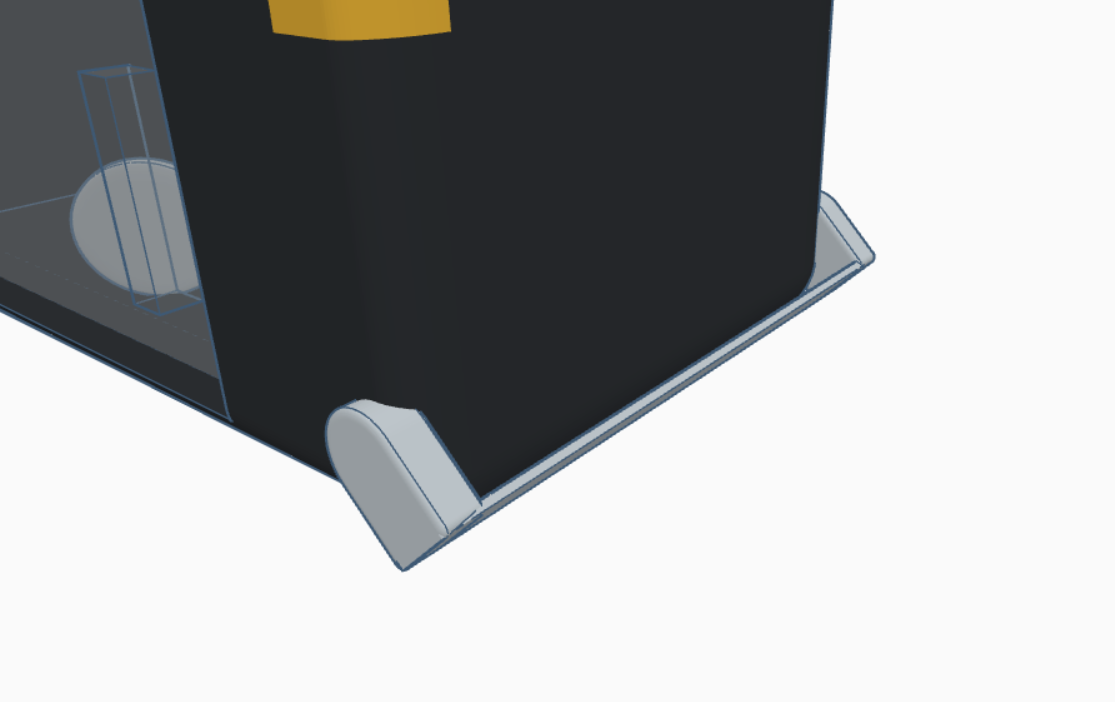
As a final touch, I decided to add an angling stand, for which I just duplicated the nail remover, mirrored it vertically, shortened it, and placed it right under the remover.
You're Done!
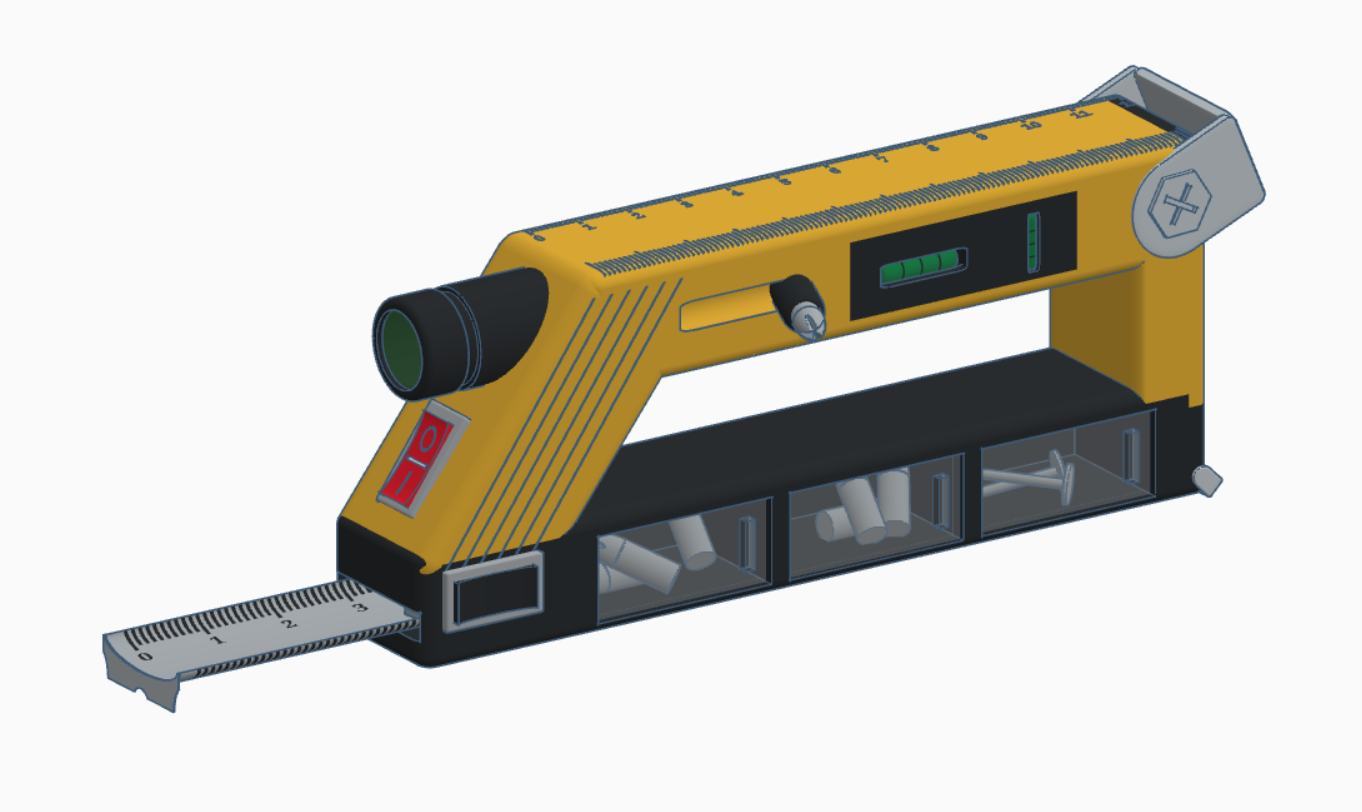
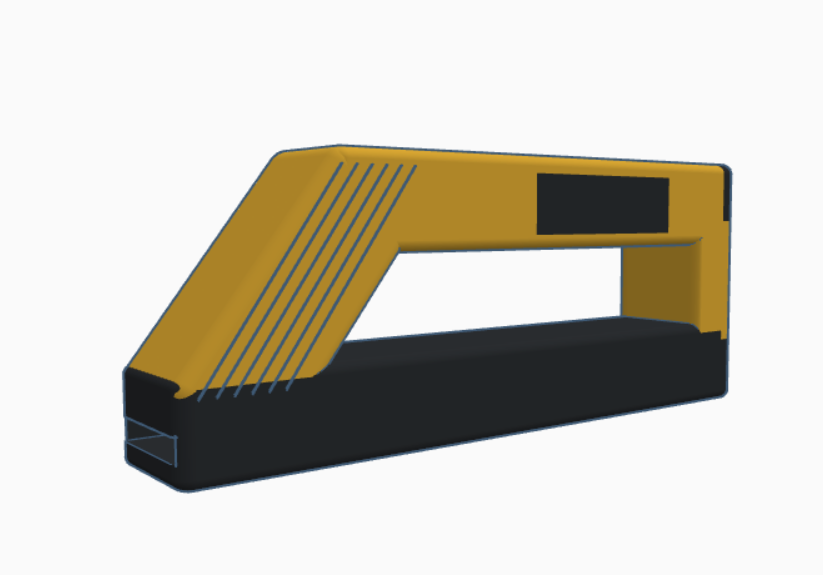
The tool is complete! Packed with a ton of useful features, this tool would be super useful to carry around for just about any repairing need! Thanks for taking the time to read through my step-by-step process of creating this multi-purpose tool, I hope you found something helpful in this tutorial that you can use while designing in the future!